Give your friends $10 off their first order!
Refer a FRIEND


WHAT YOU WILL NEED:
Pink card blank 8 x 5 3/4"
Black card 7 1/2 x 5 1/4"
white card 7 1/4 x 5"
White card A4
Vellum
Francesca Stamp, Die and Stencil Collection
WOW Blooms Stamp and Die Collection
Saying Hello Stamp and Die Collection
Creative Watercolour 6 x 6" paper pack
SBM Hybrid Ink Pad: Midnight
SBM Premium Dye Ink Pad: Magenta, Indigo, Hedgerow, Tiffany
HIMI Oil Pencils
Water spray bottle
Sequins: Mermaid Lagoon
Pick up gem and pokey tool
Eureka 101 Watercolour Tablet
SBM Magnetic glass mat
Paper Trimmer
Perfect Together Glue
Double sided adhesive tape
Foam pads
Die Cutting machine
[click image to enlarge] 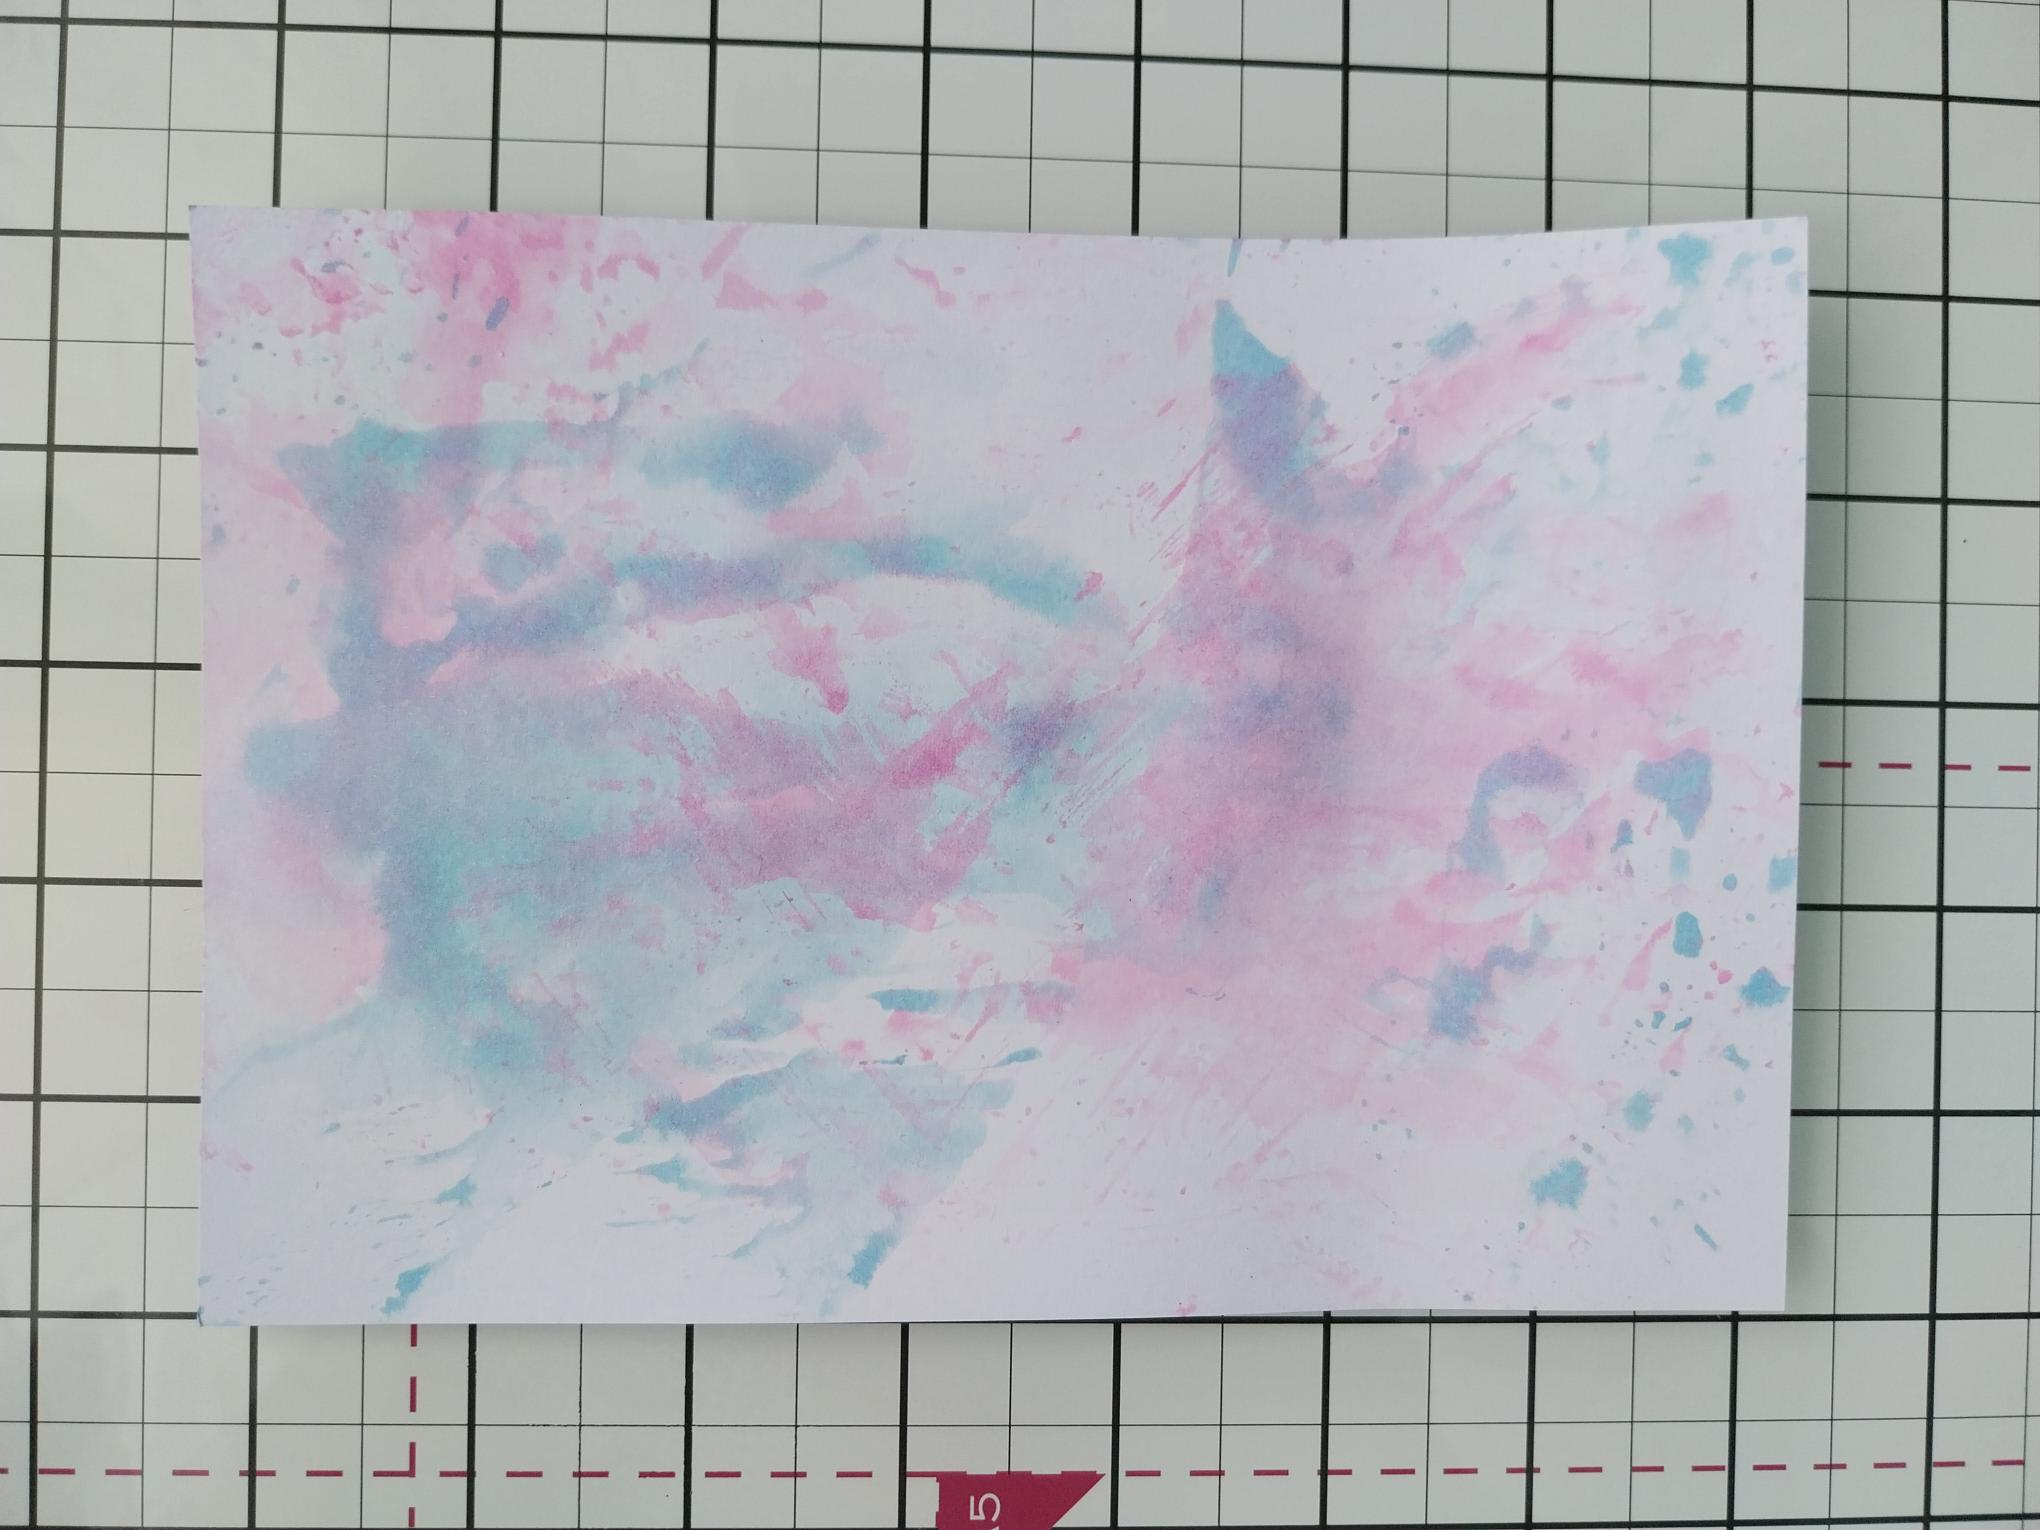
|
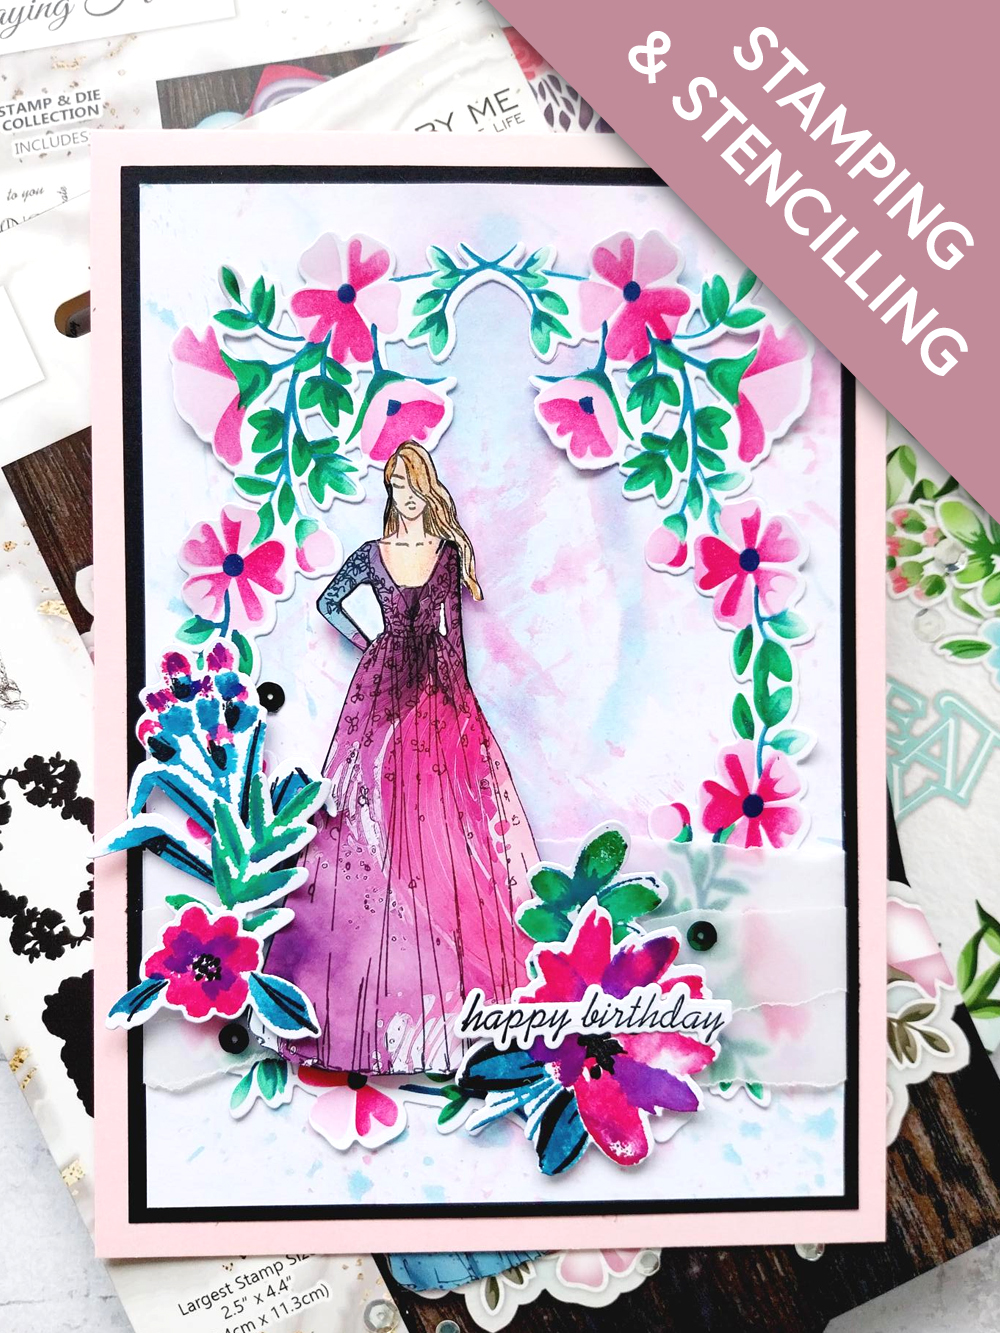
Apply a little of the Magenta and Indigo ink on to your glass mat and spritz with water. Smoosh the white card, cut to 7 1/4 x 5", through the ink to create your background. Set to one side to dry. |
|
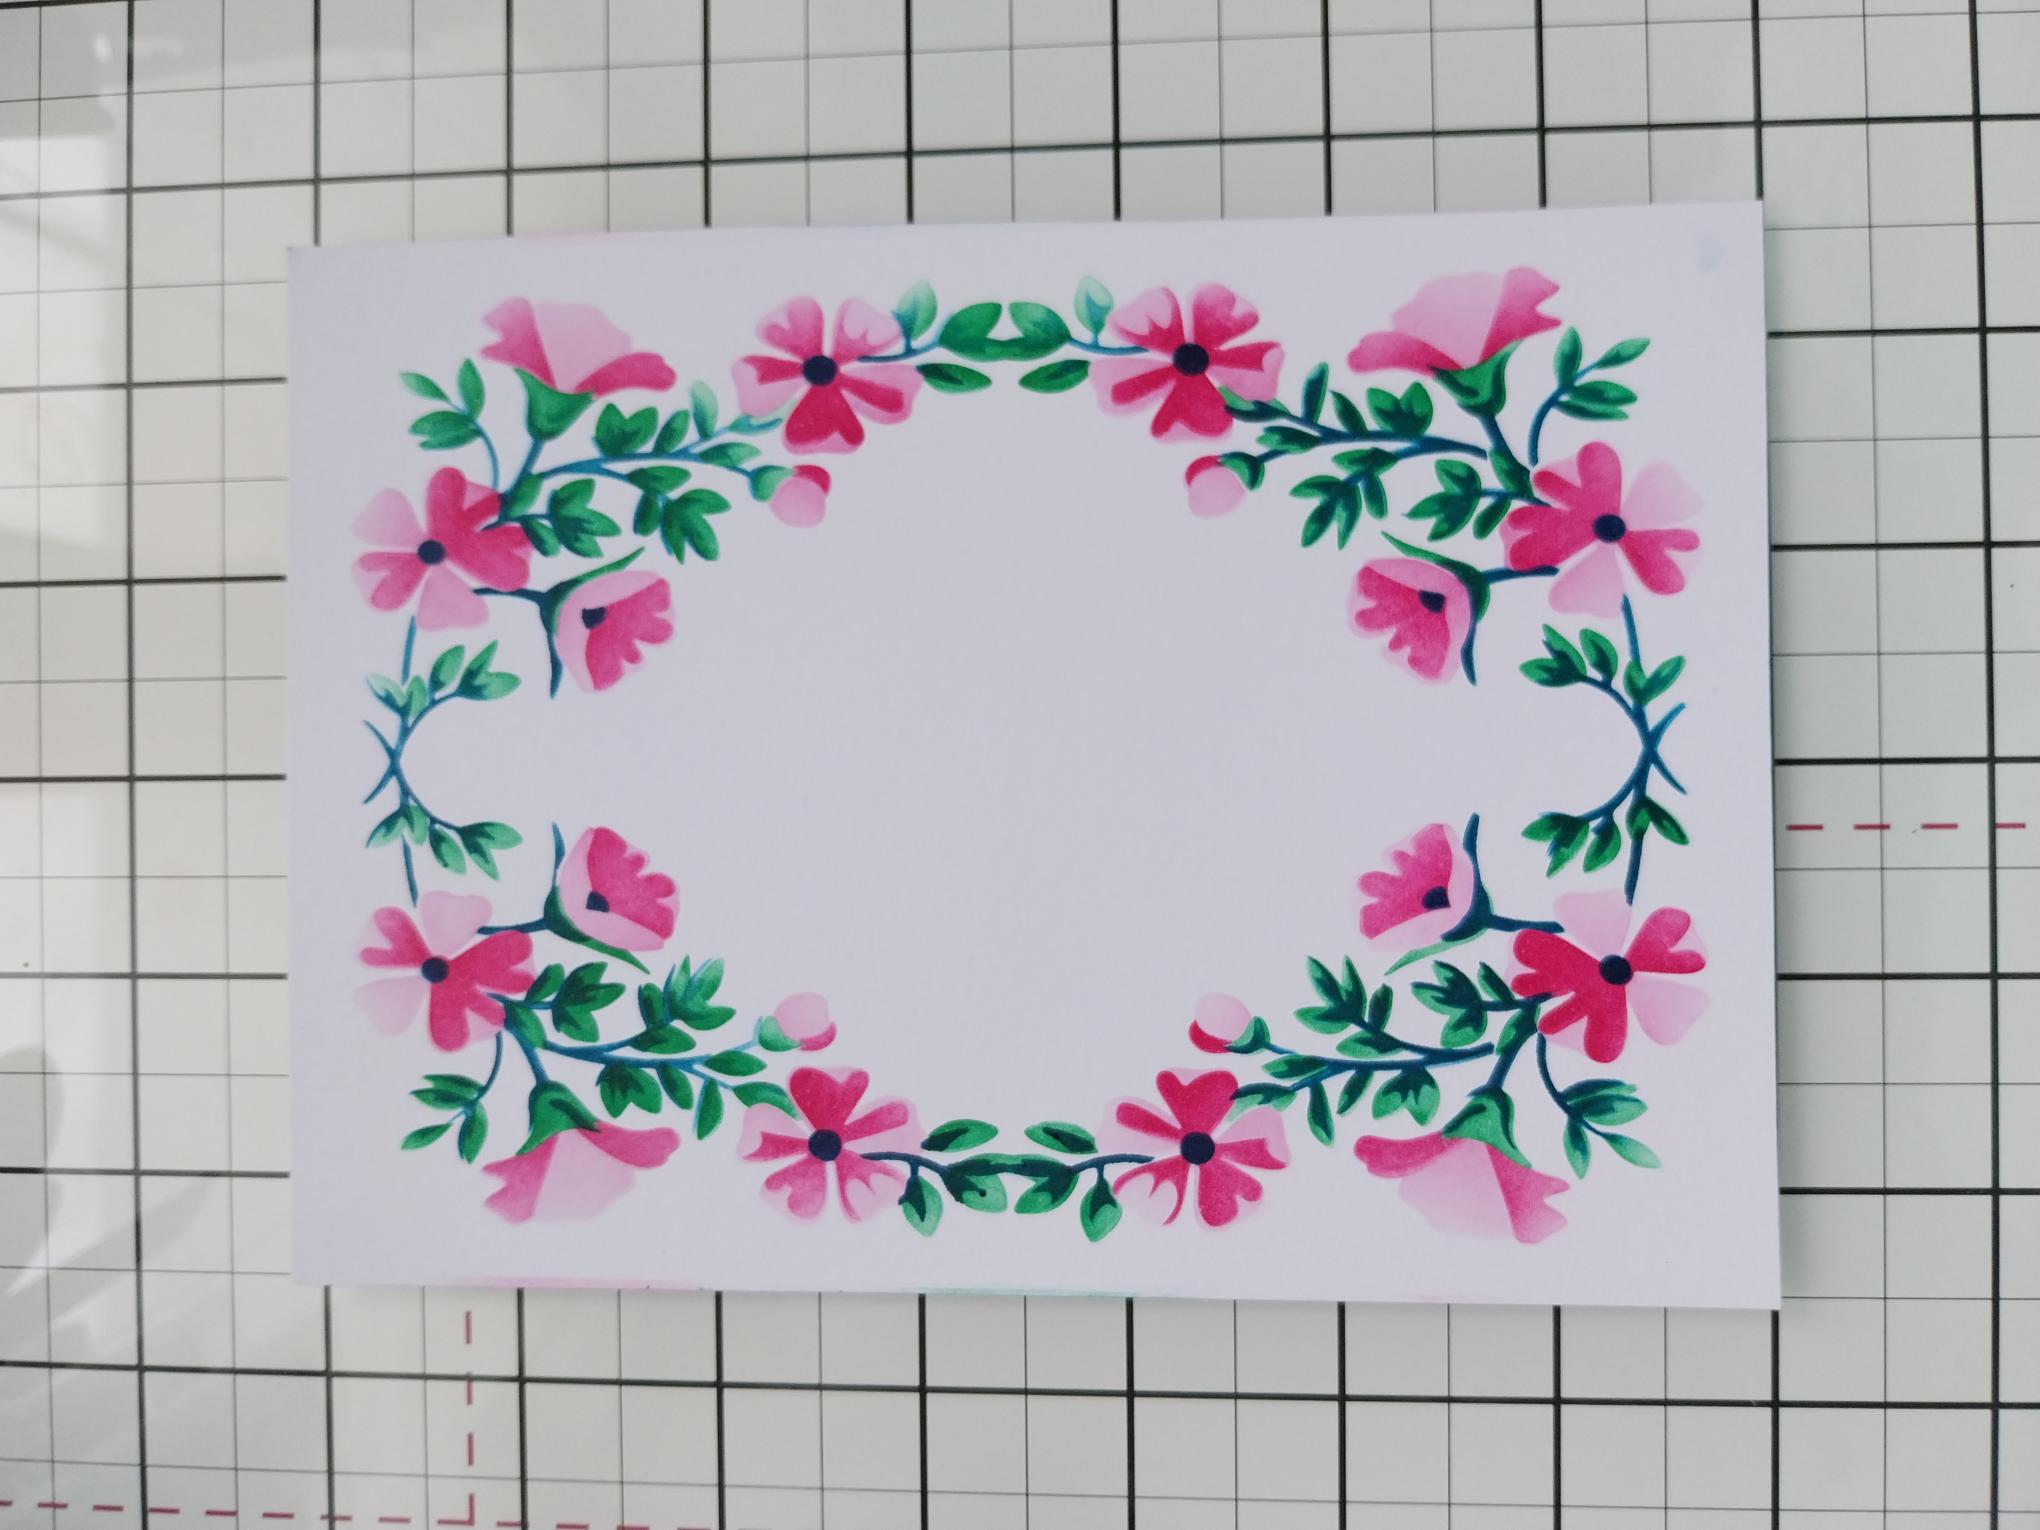
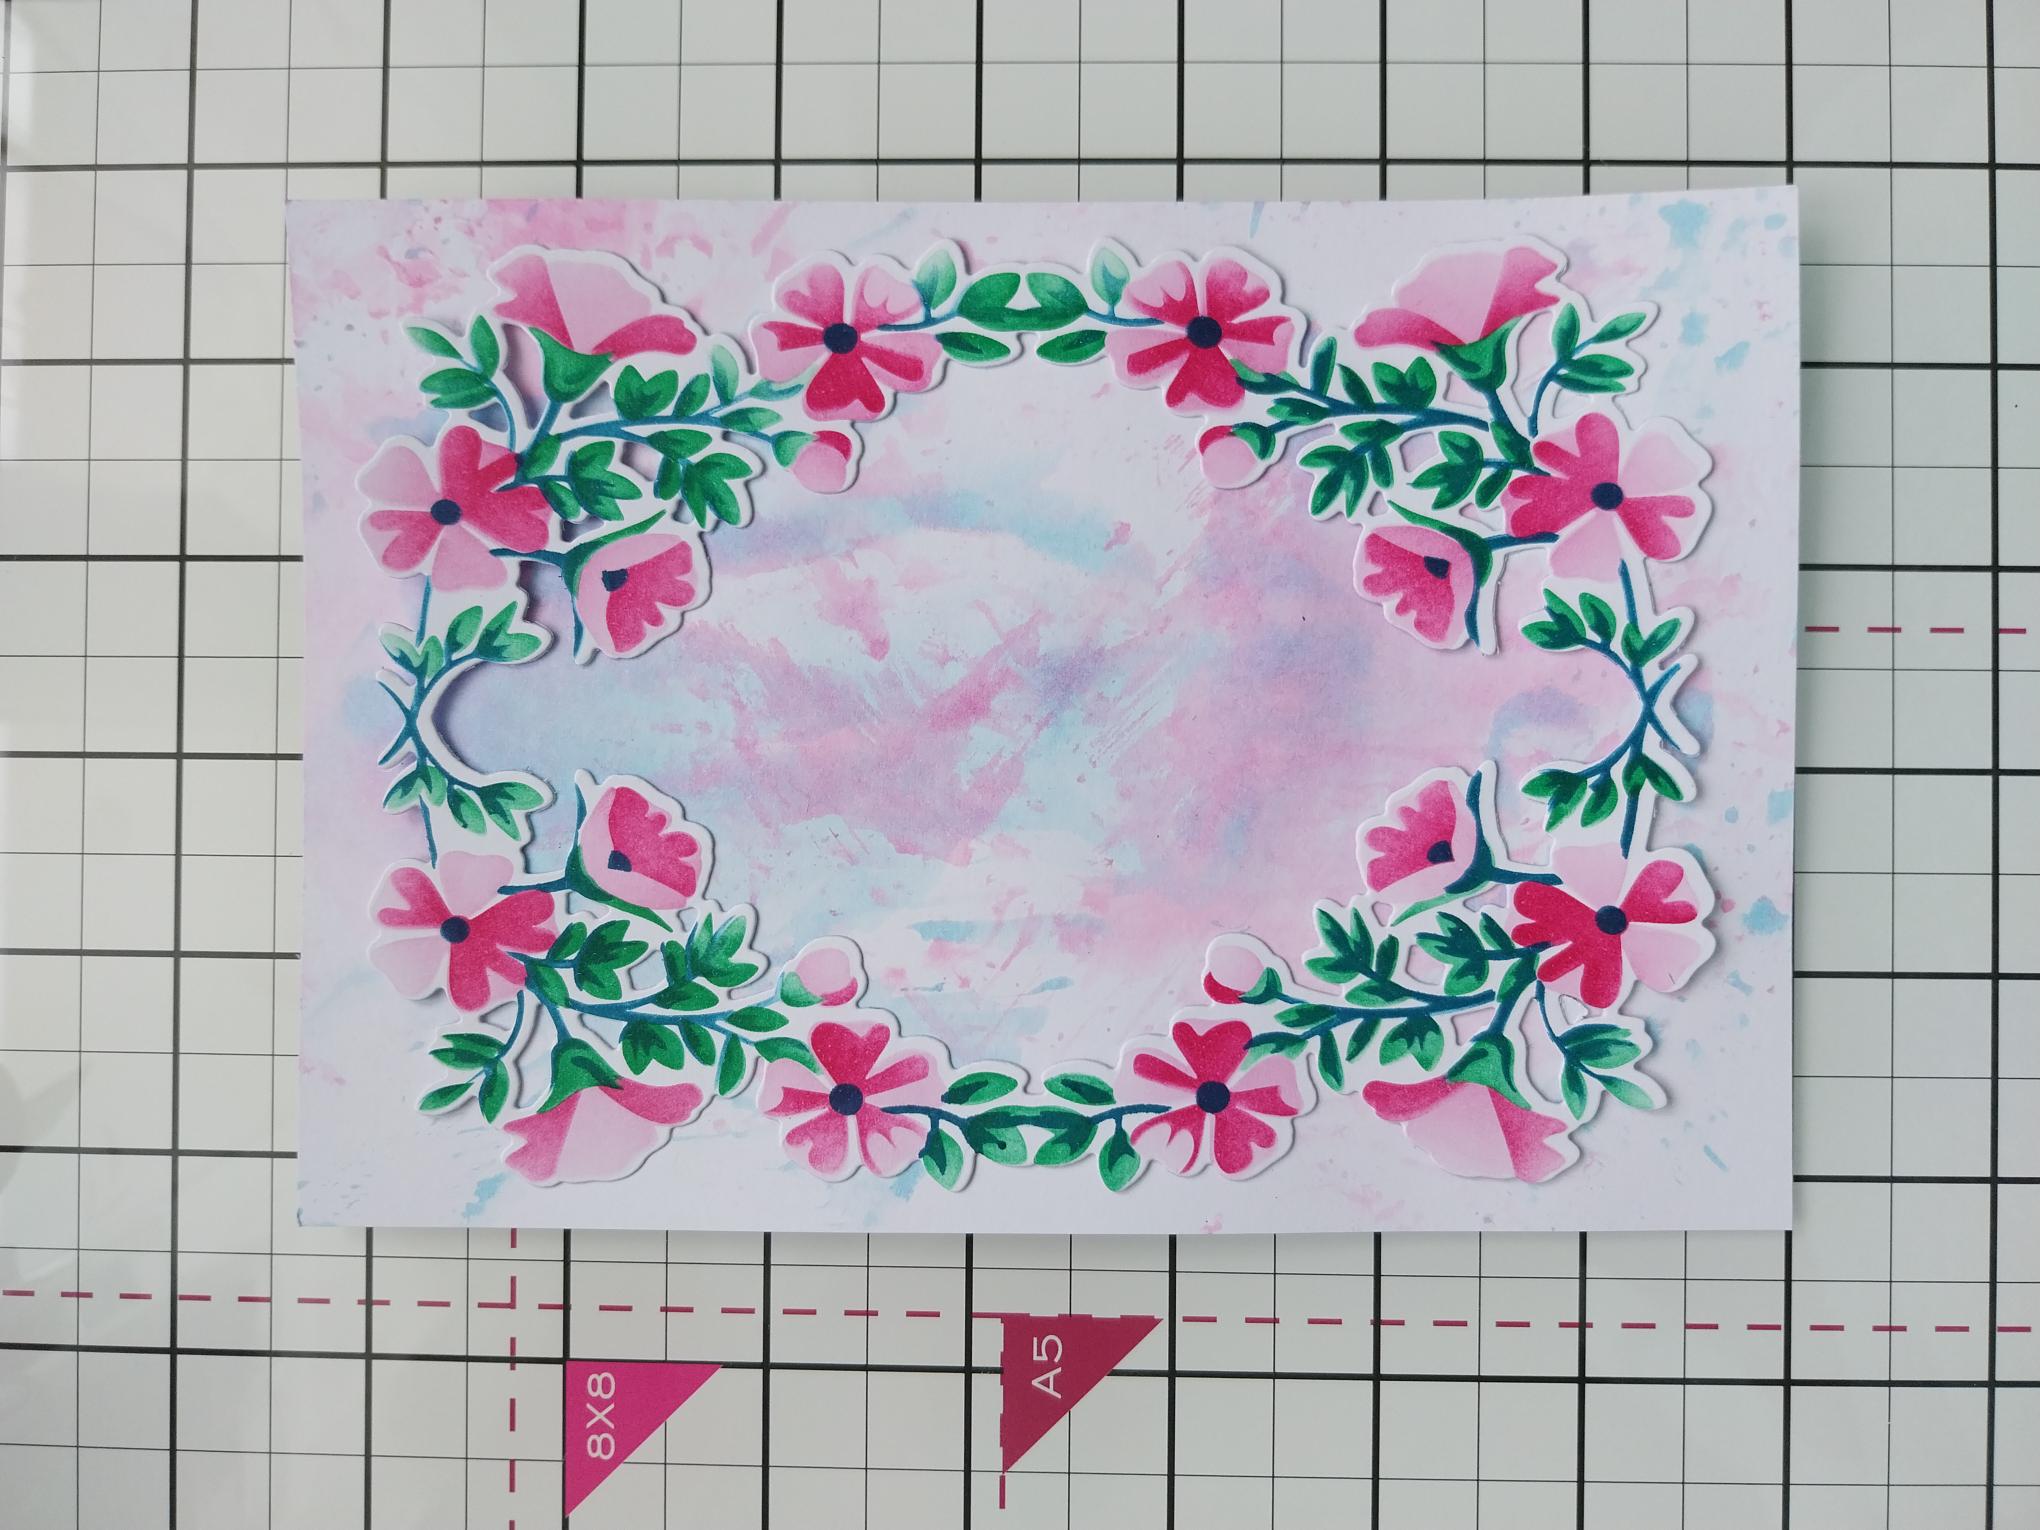
Cut a piece of white card slightly bigger than the stencils, found in the Francesca Collection. Place stencil 1 on to the card and use a blending tool to lightly apply the Magenta. Line up stencil 2, over your stencilled design and apply the Magenta with more pressure this time, thus creating a more intense tone. Having lined up stencil 3, apply the Hedgerow and then finish your frame, by blending Tiffany through stencil 4. |
|
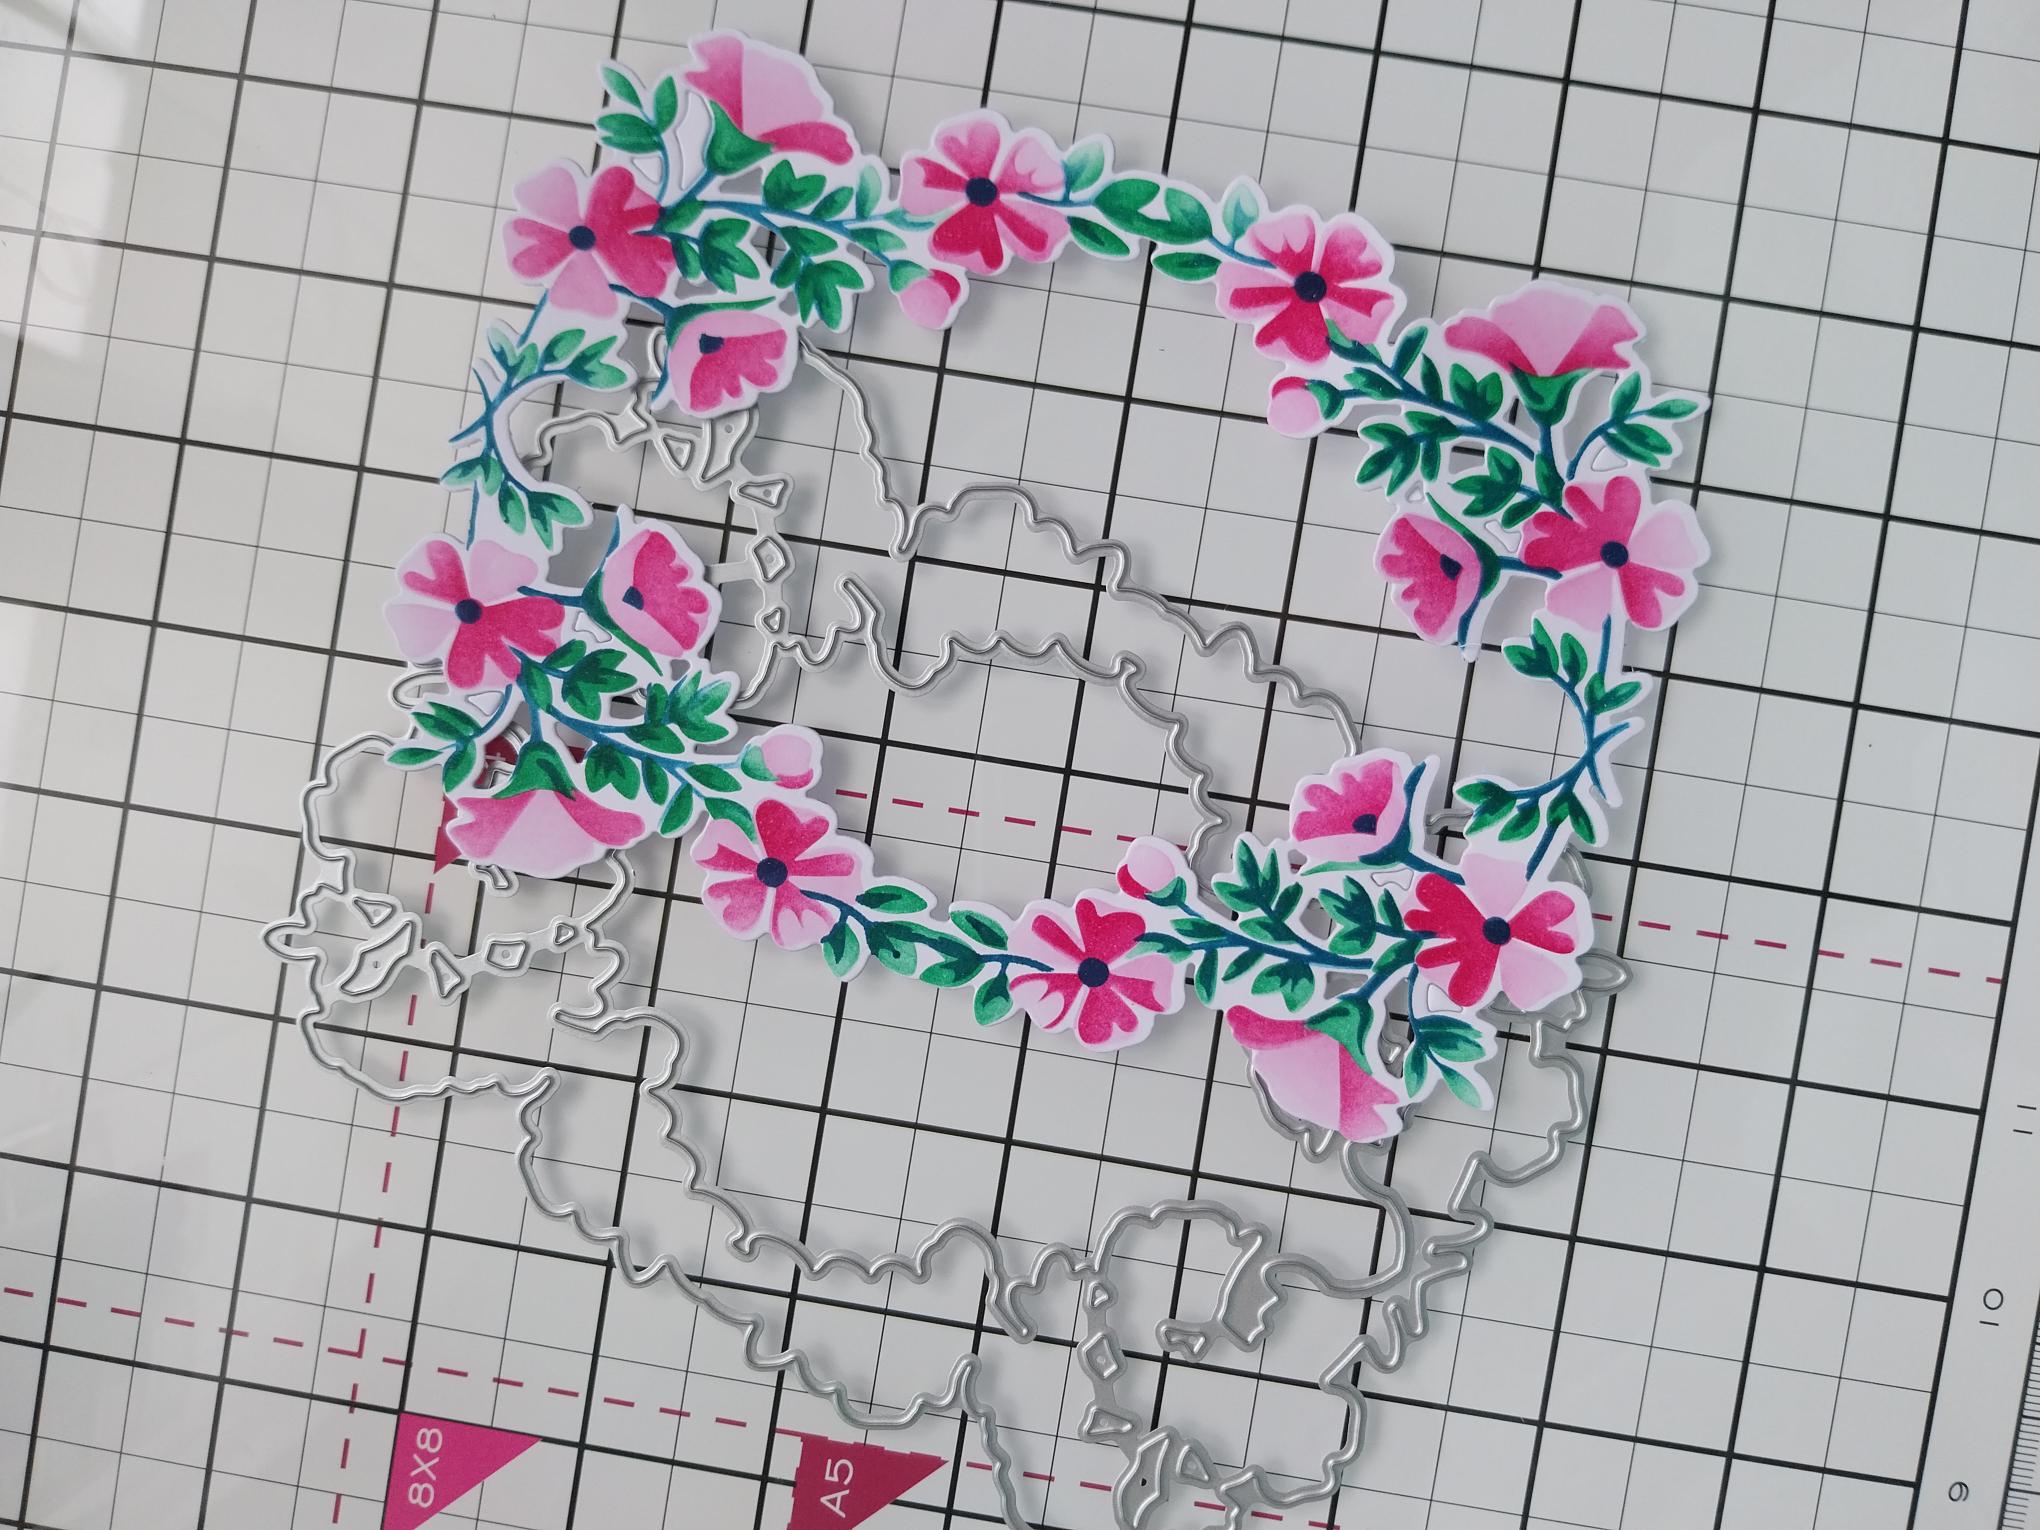
Use the corresponging detailed die to cut out the frame. |
|
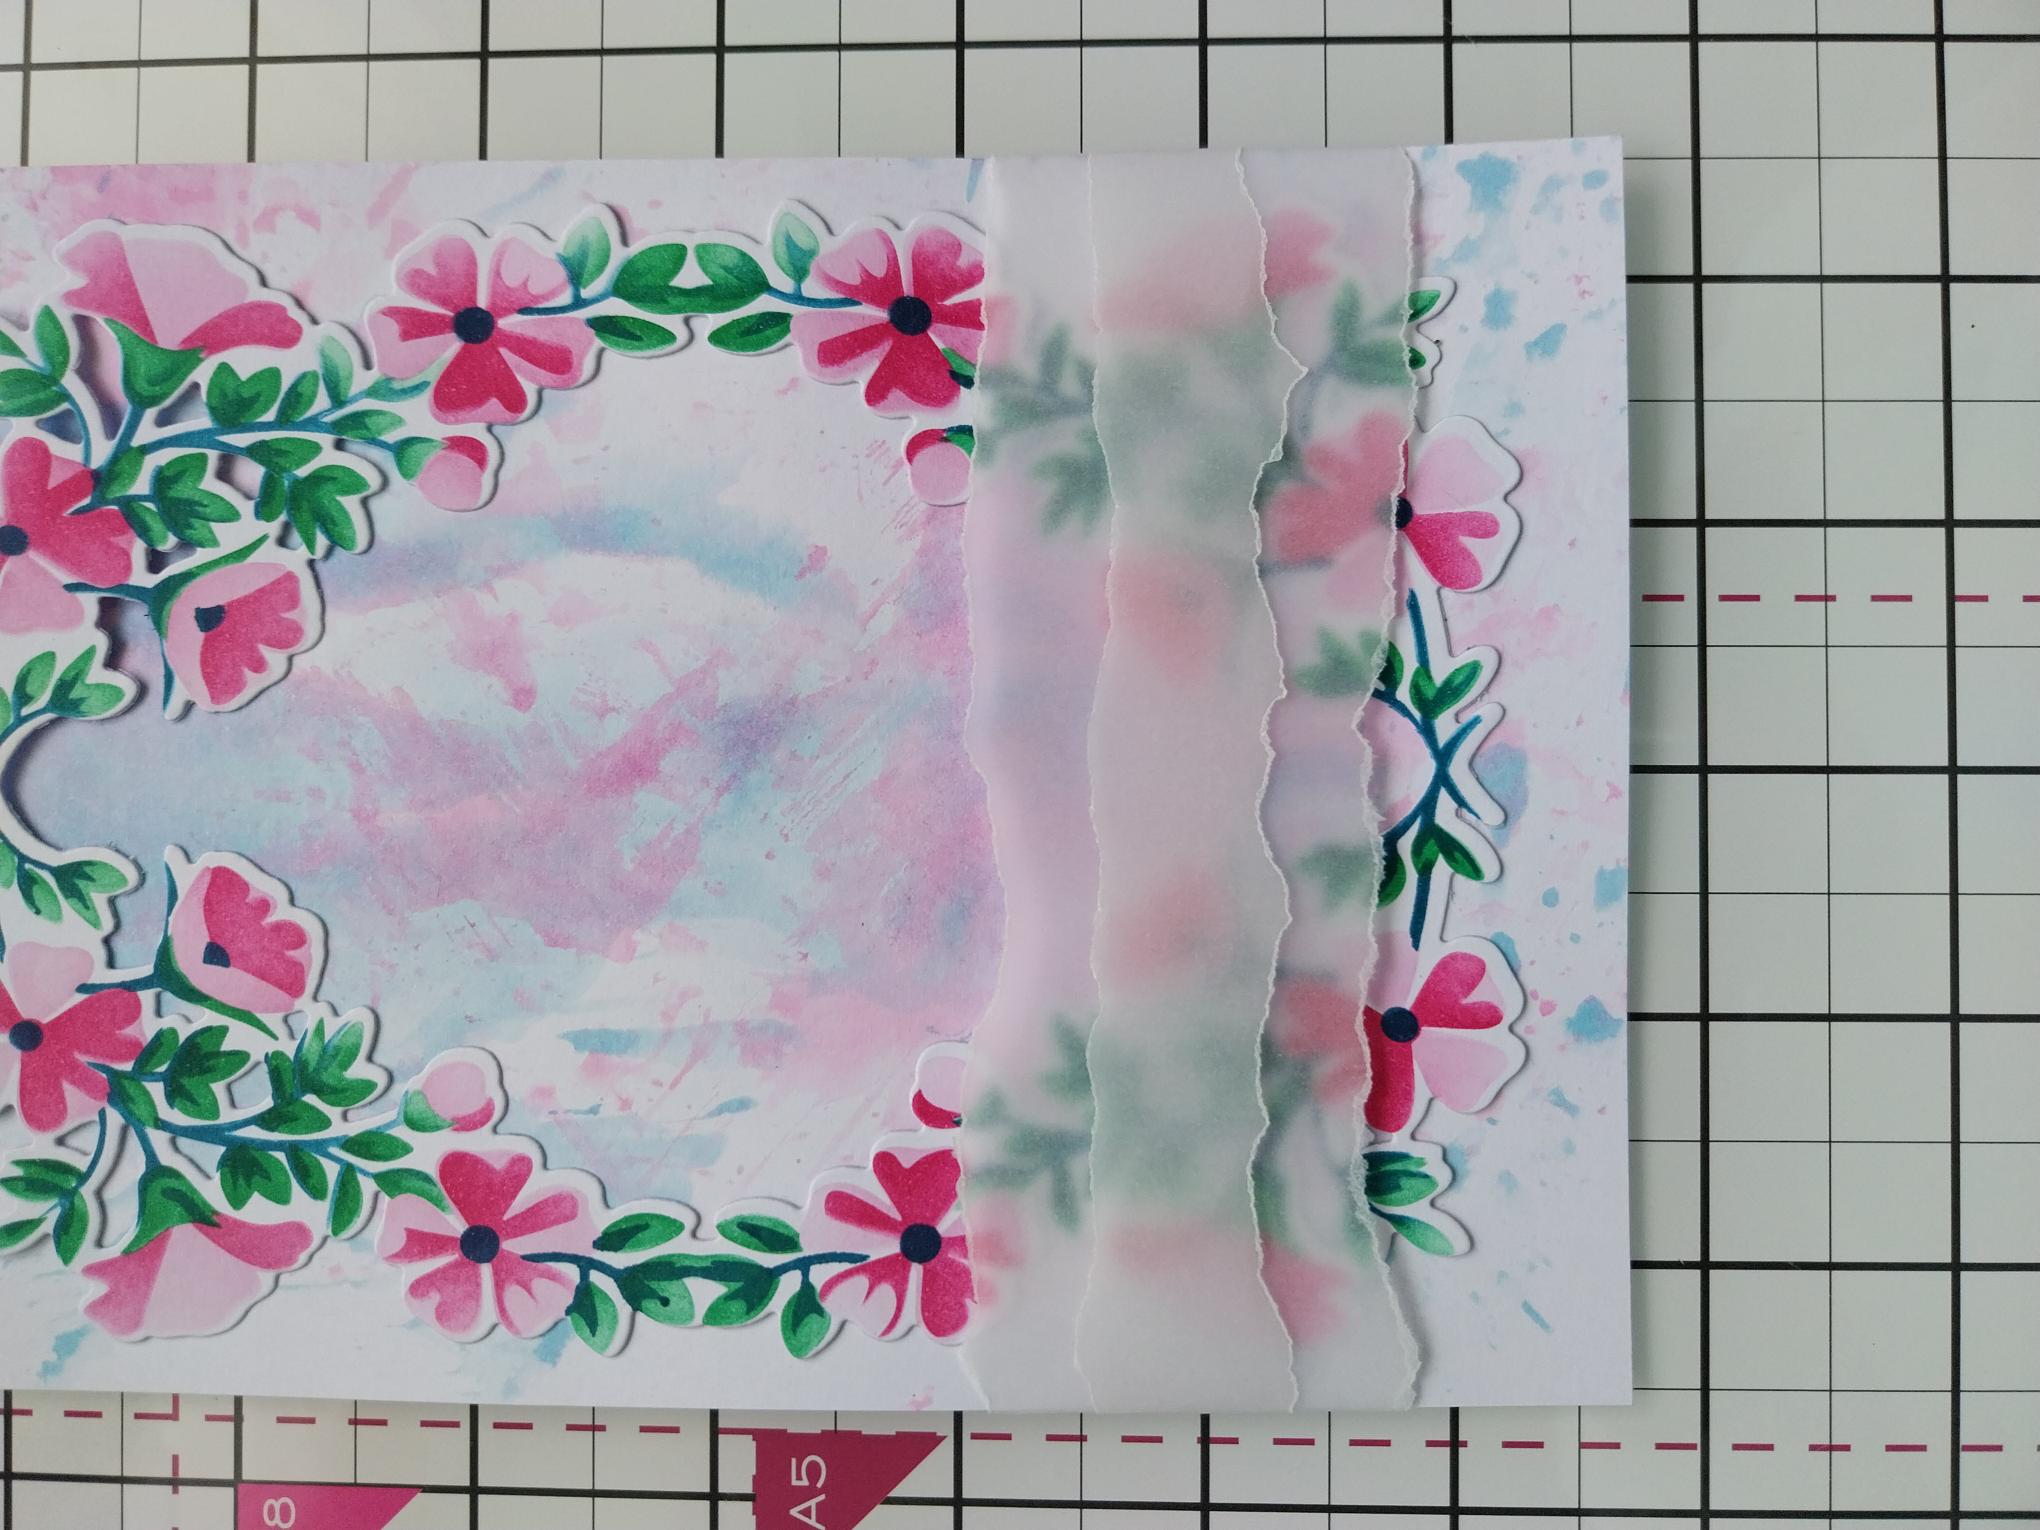
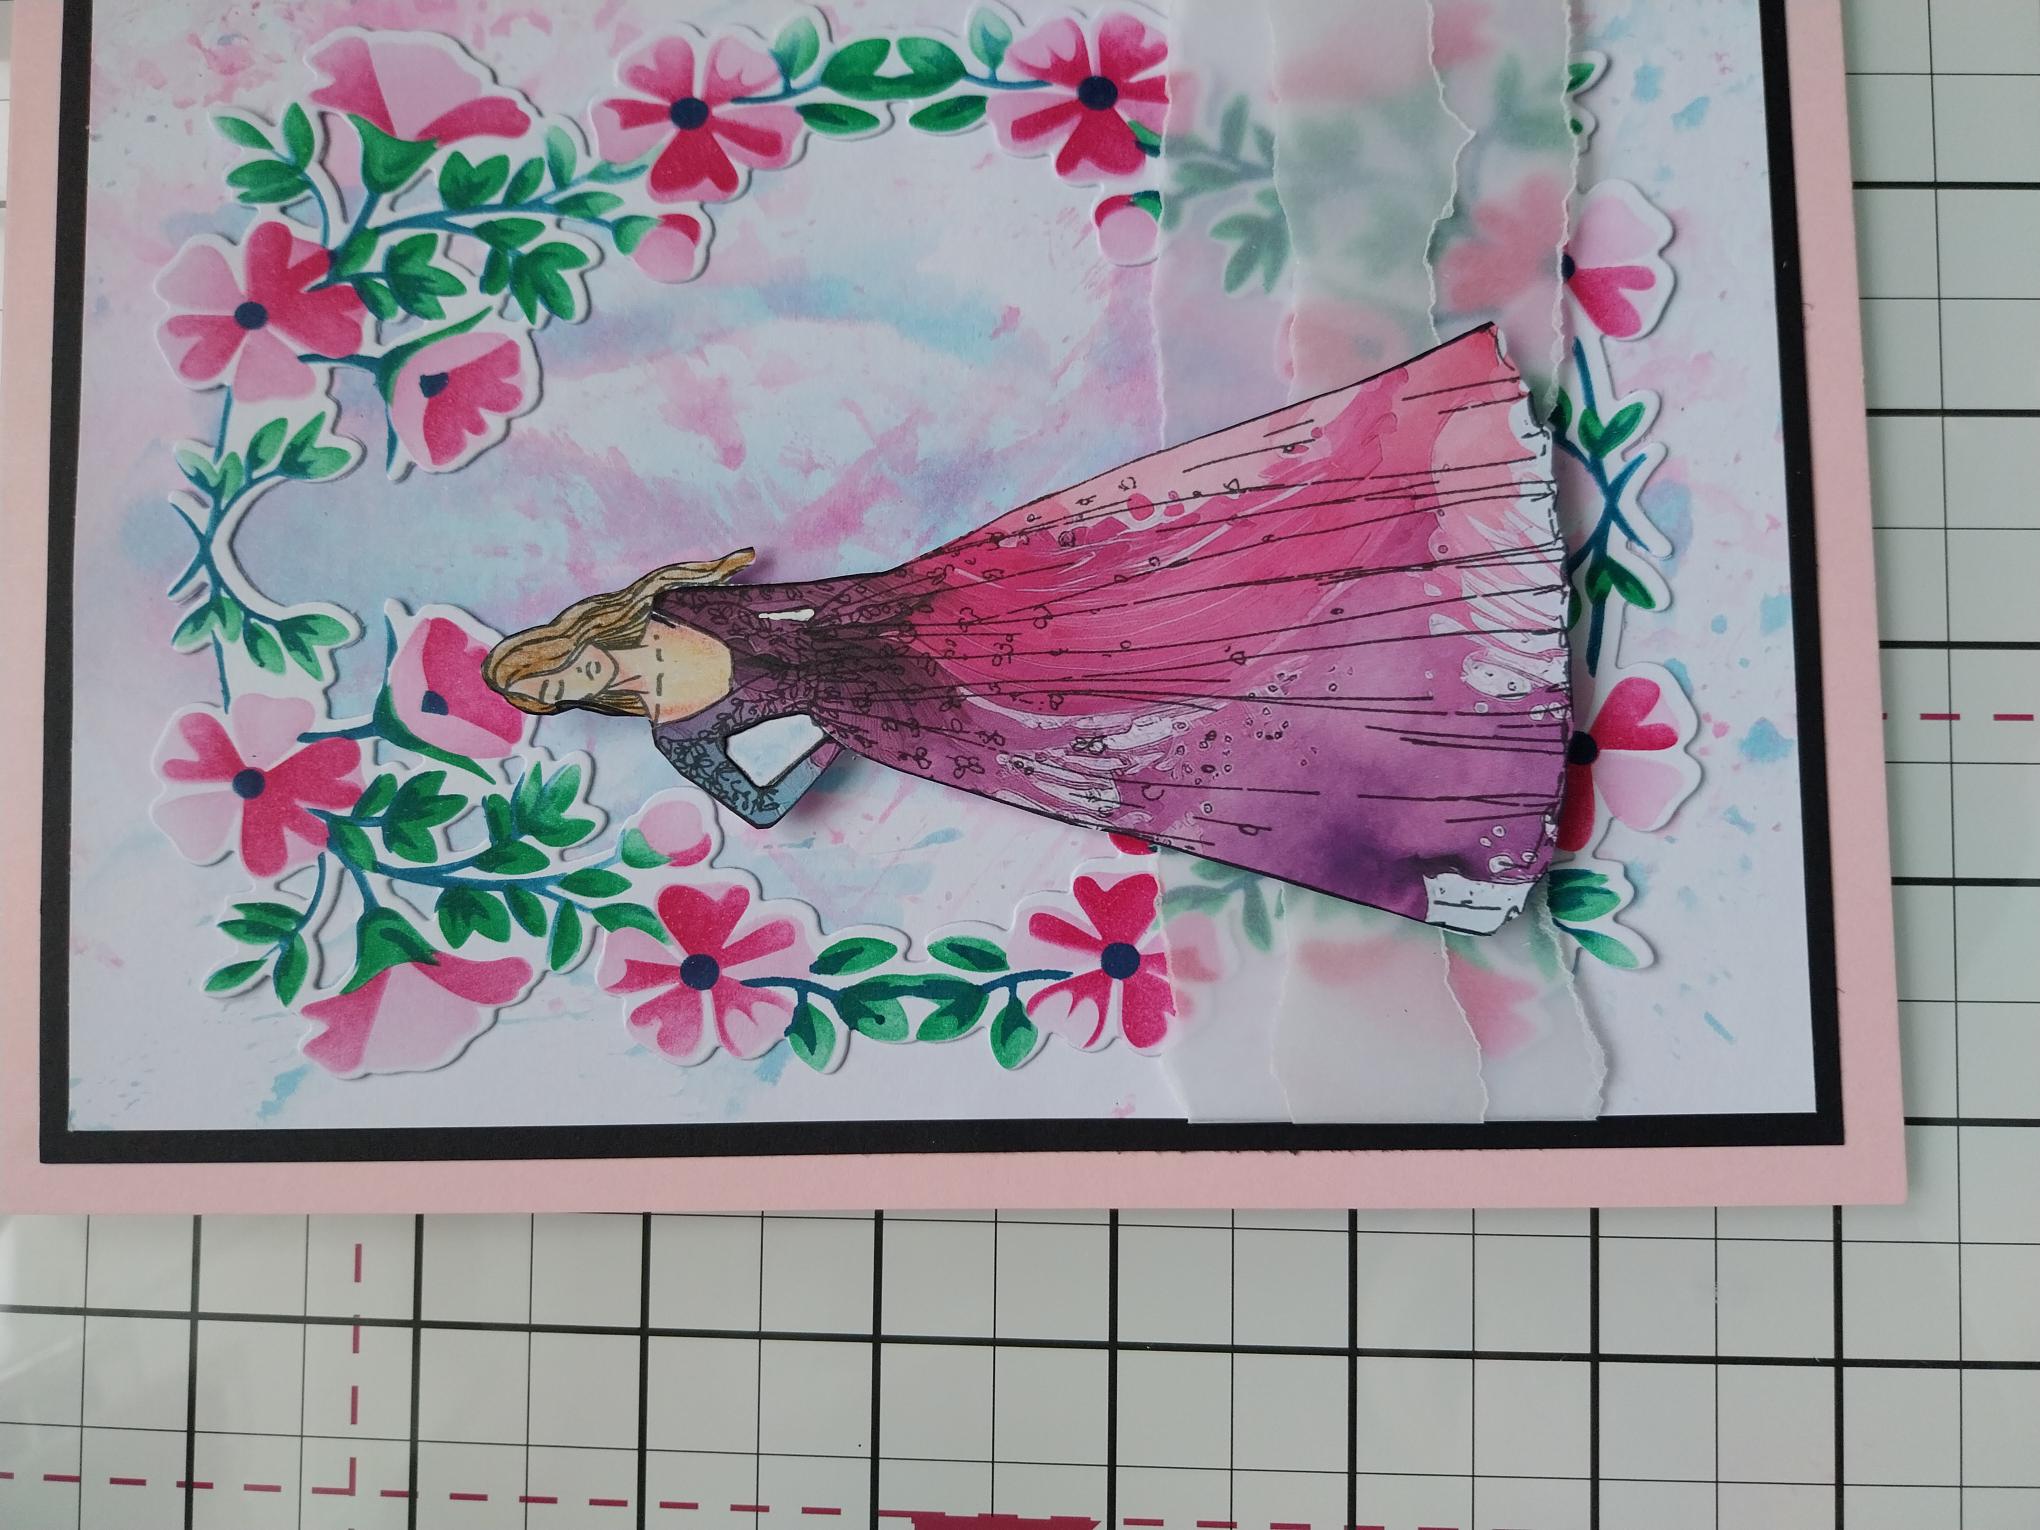
Adhere your die cut frame, with foam pads, on to your inky background and pop to one side. |
|
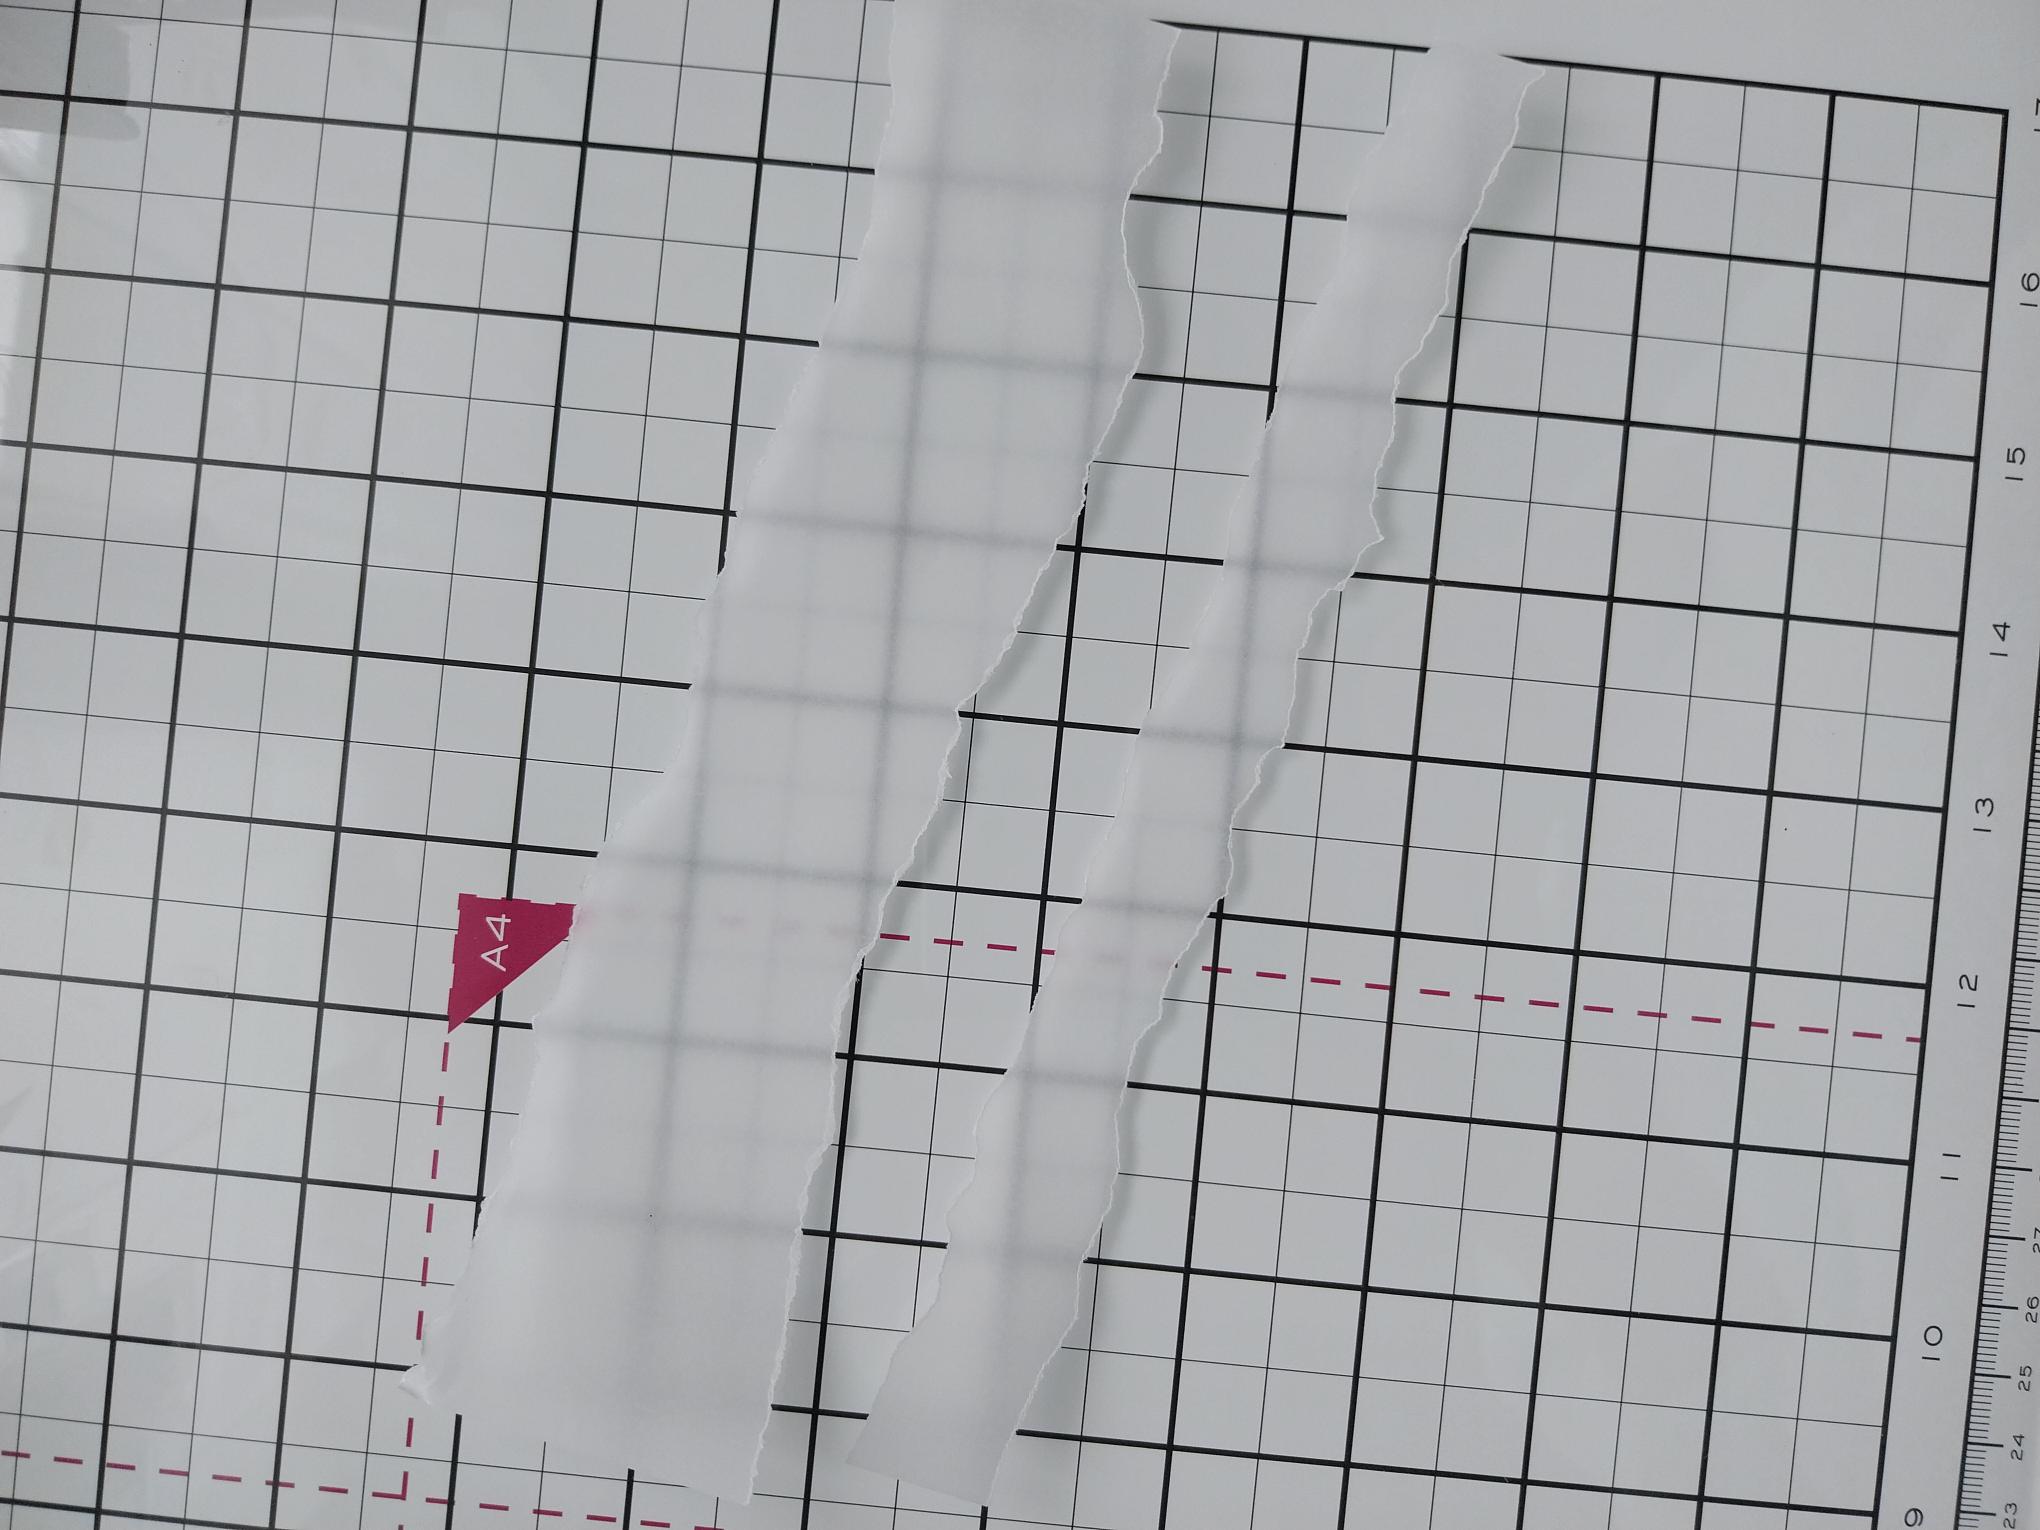
Tear 2 strips of vellum, one narrower than the other and both longer than the width of your stencilled card. |
|
Adhere the widest vellum panel across the bottom third of your artwork, tucking both ends over the edges and securing on the reverse, with double sided tape. Place the narrower vellum panel across the first, again securing on the reverse. |
|
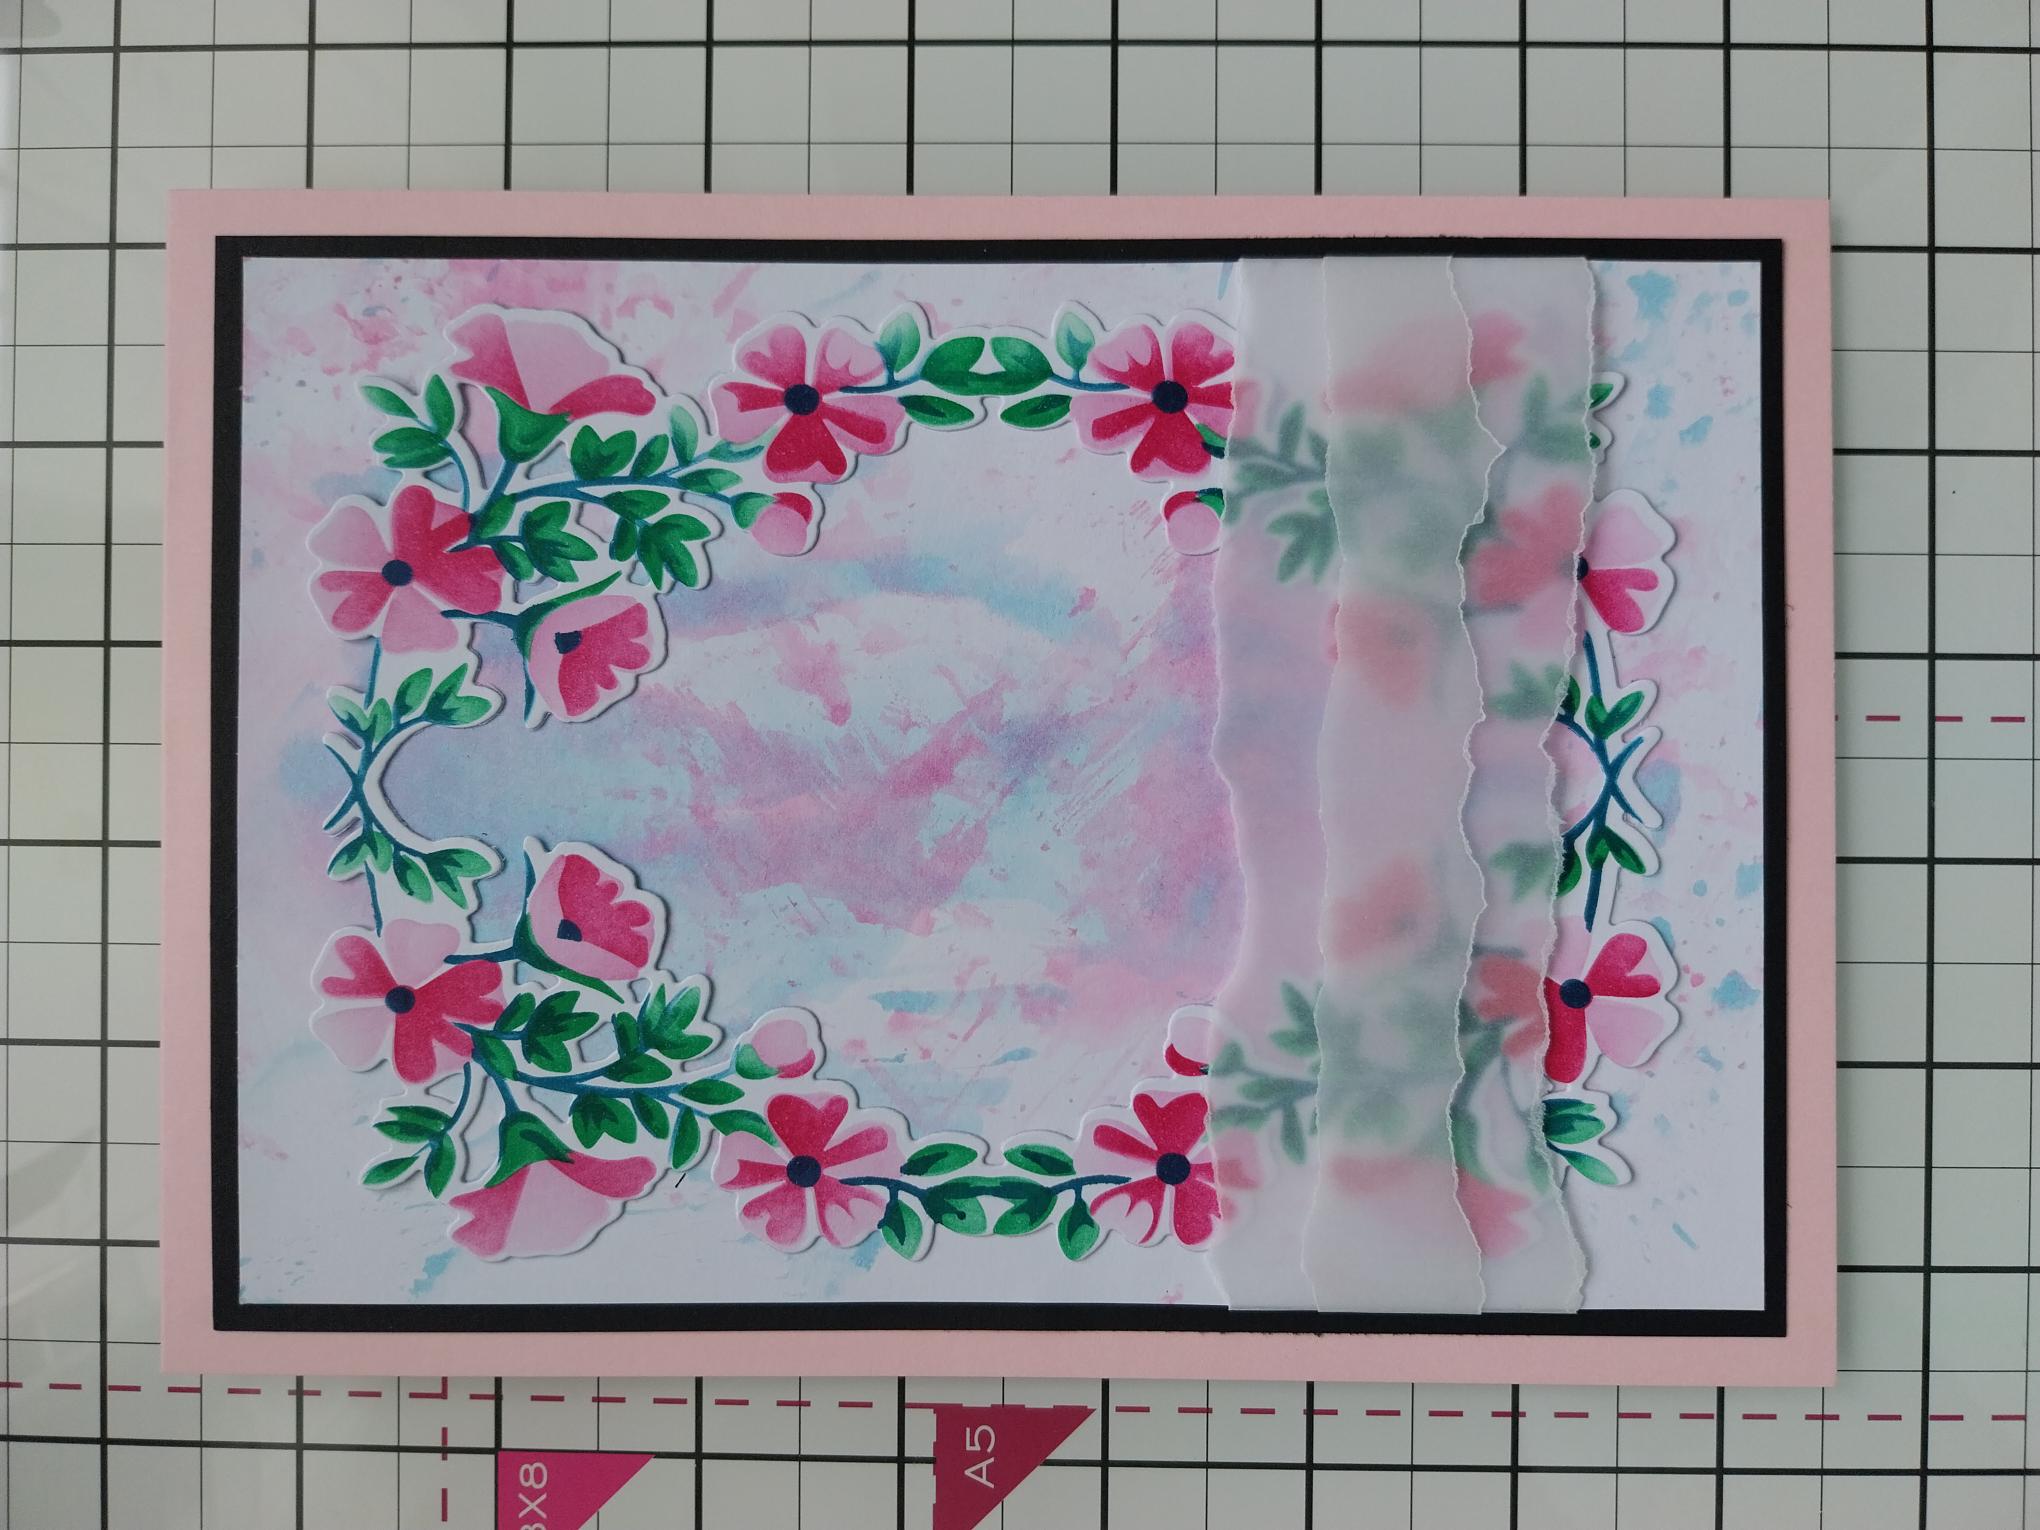
Adhere your artwork on to the black card, cut to 7 1/2 x 5 1/4" and then on to the front of your pink card blank. Pop your card to one side. |
|
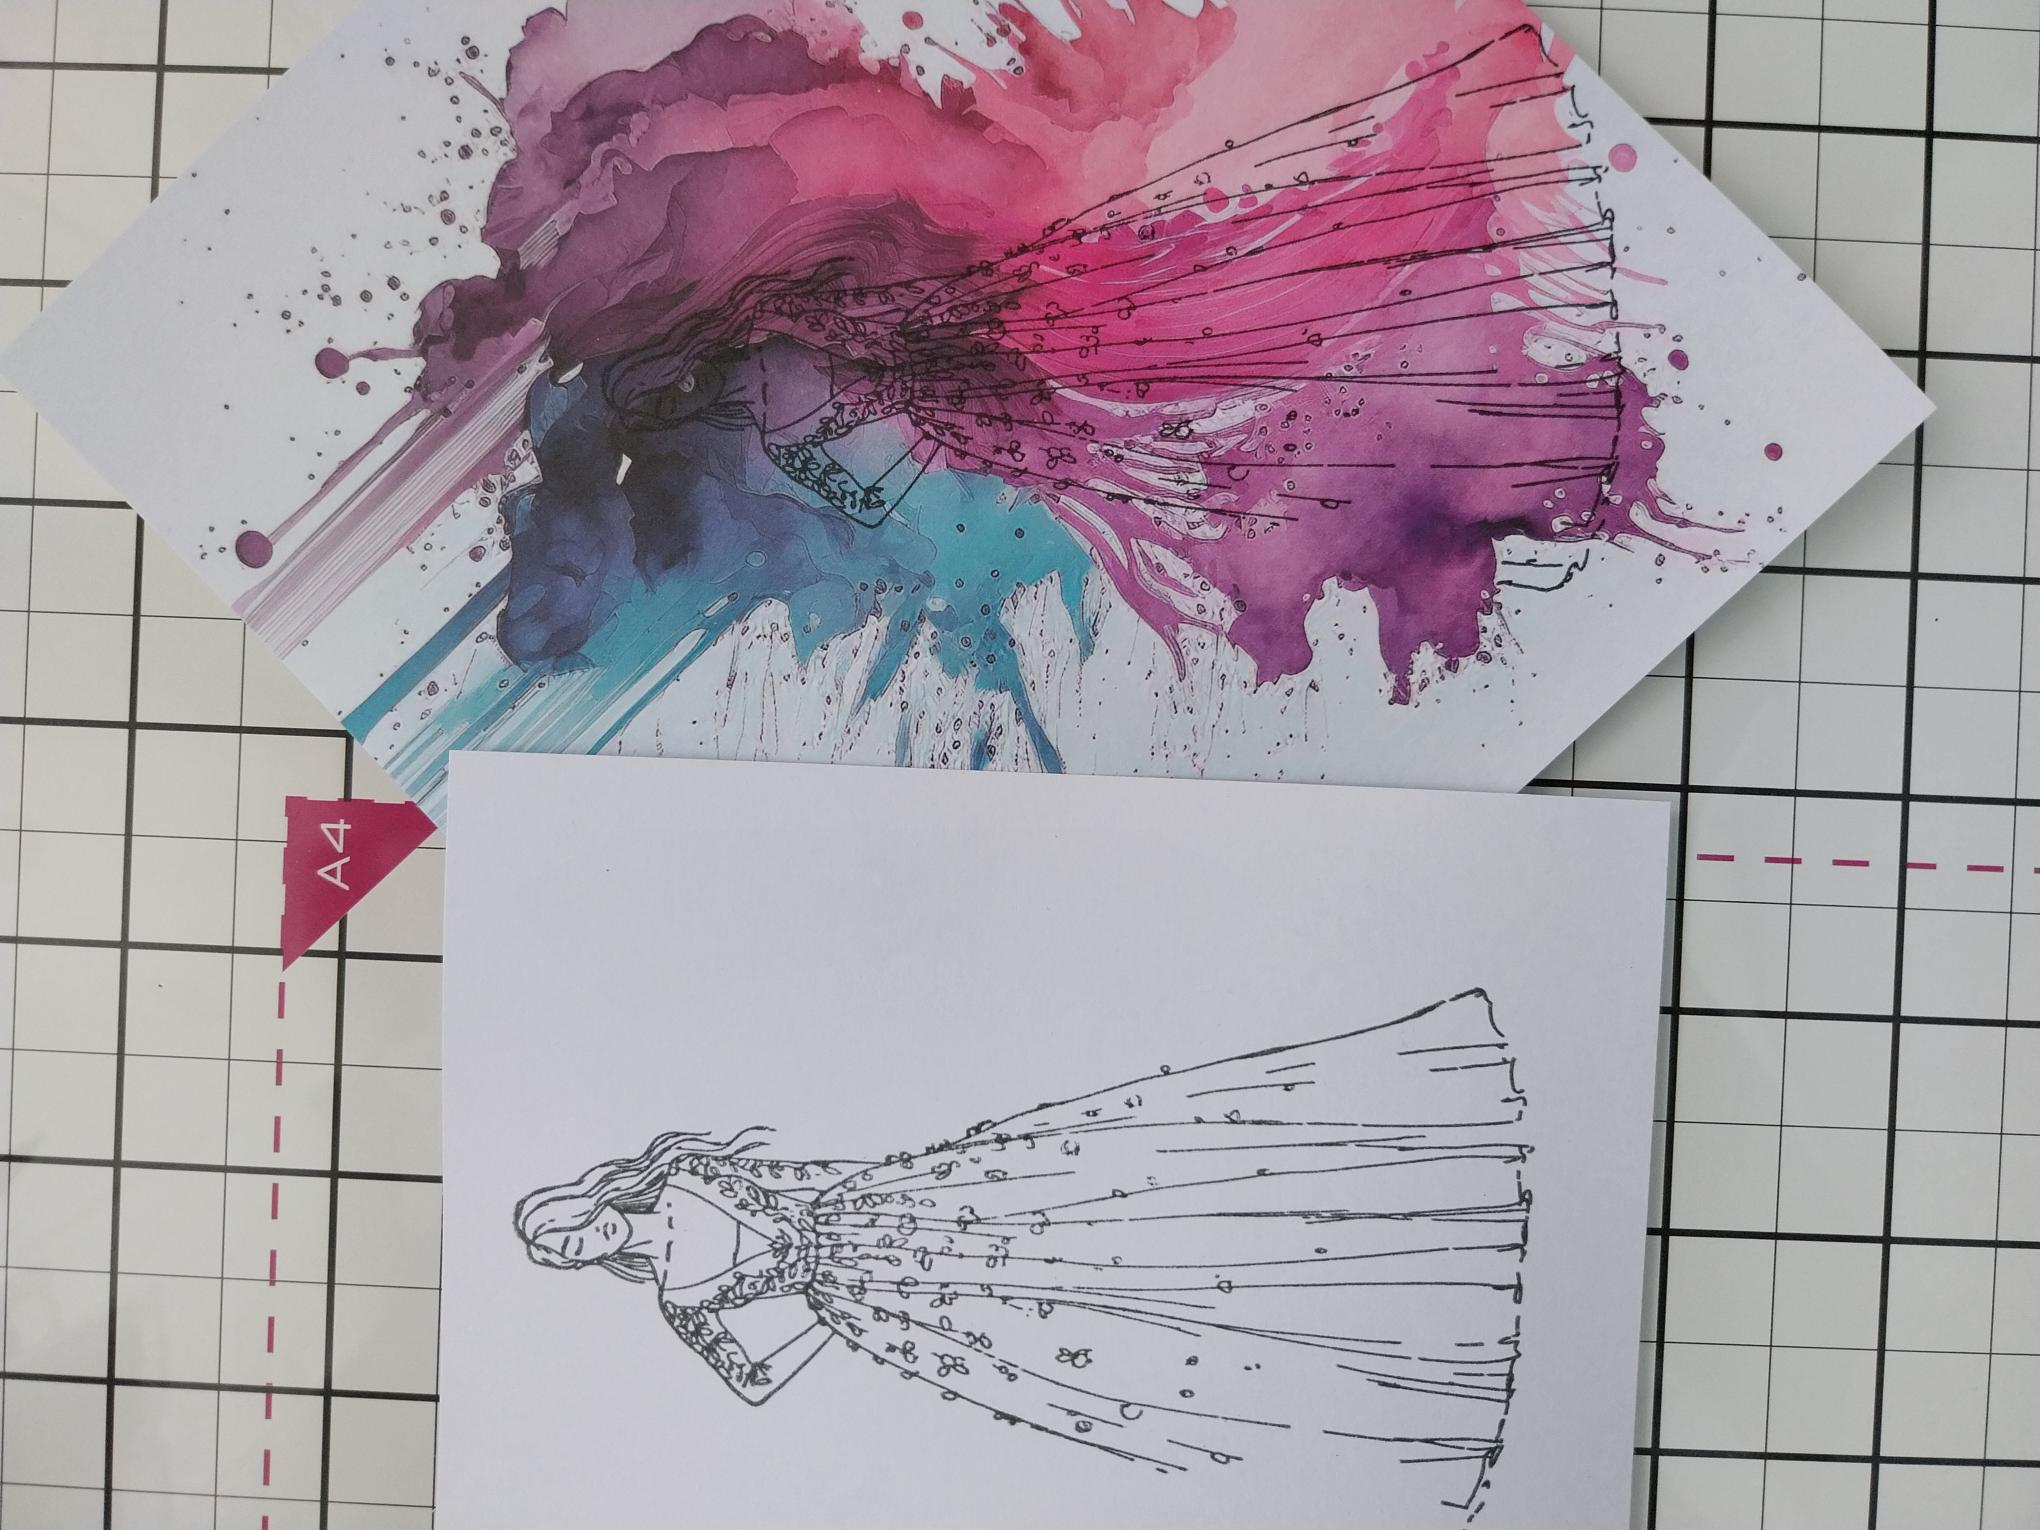
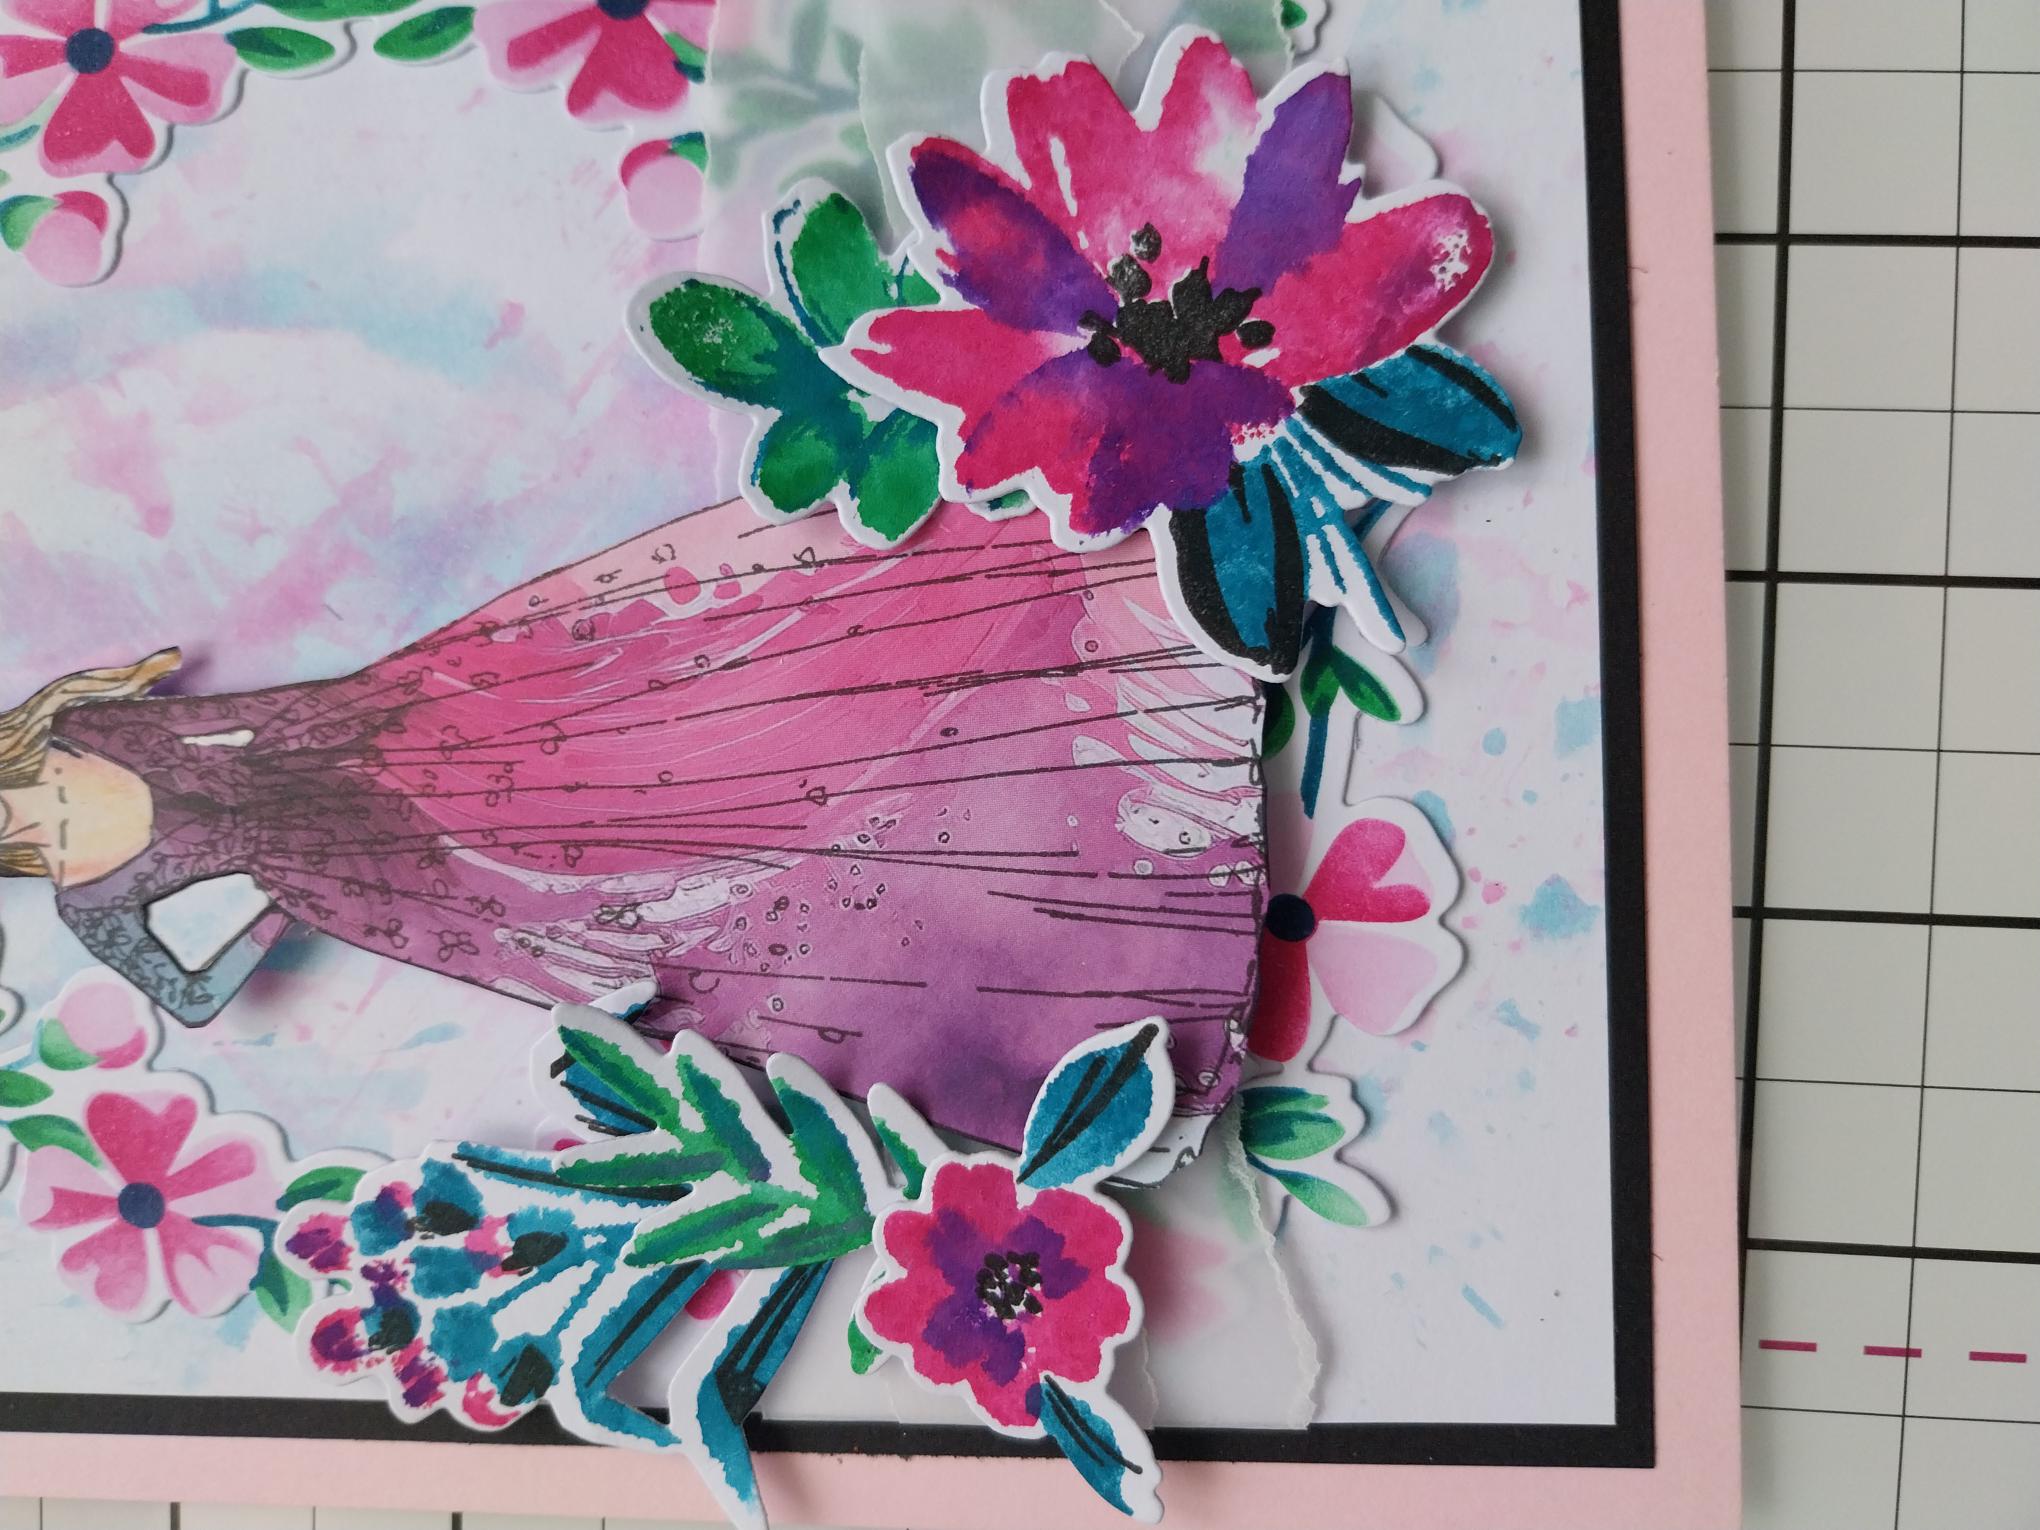
Ink up our lovely Francesca with the Midnight hybrid ink and stamp her on to a piece of white card. Re-ink and stamp on to a decorative sheet, from the Creative Watercolours paper pack. Choose a design that compliments the colours in your floral frame, as you will be using the gown element only, from this stamped image. |
|
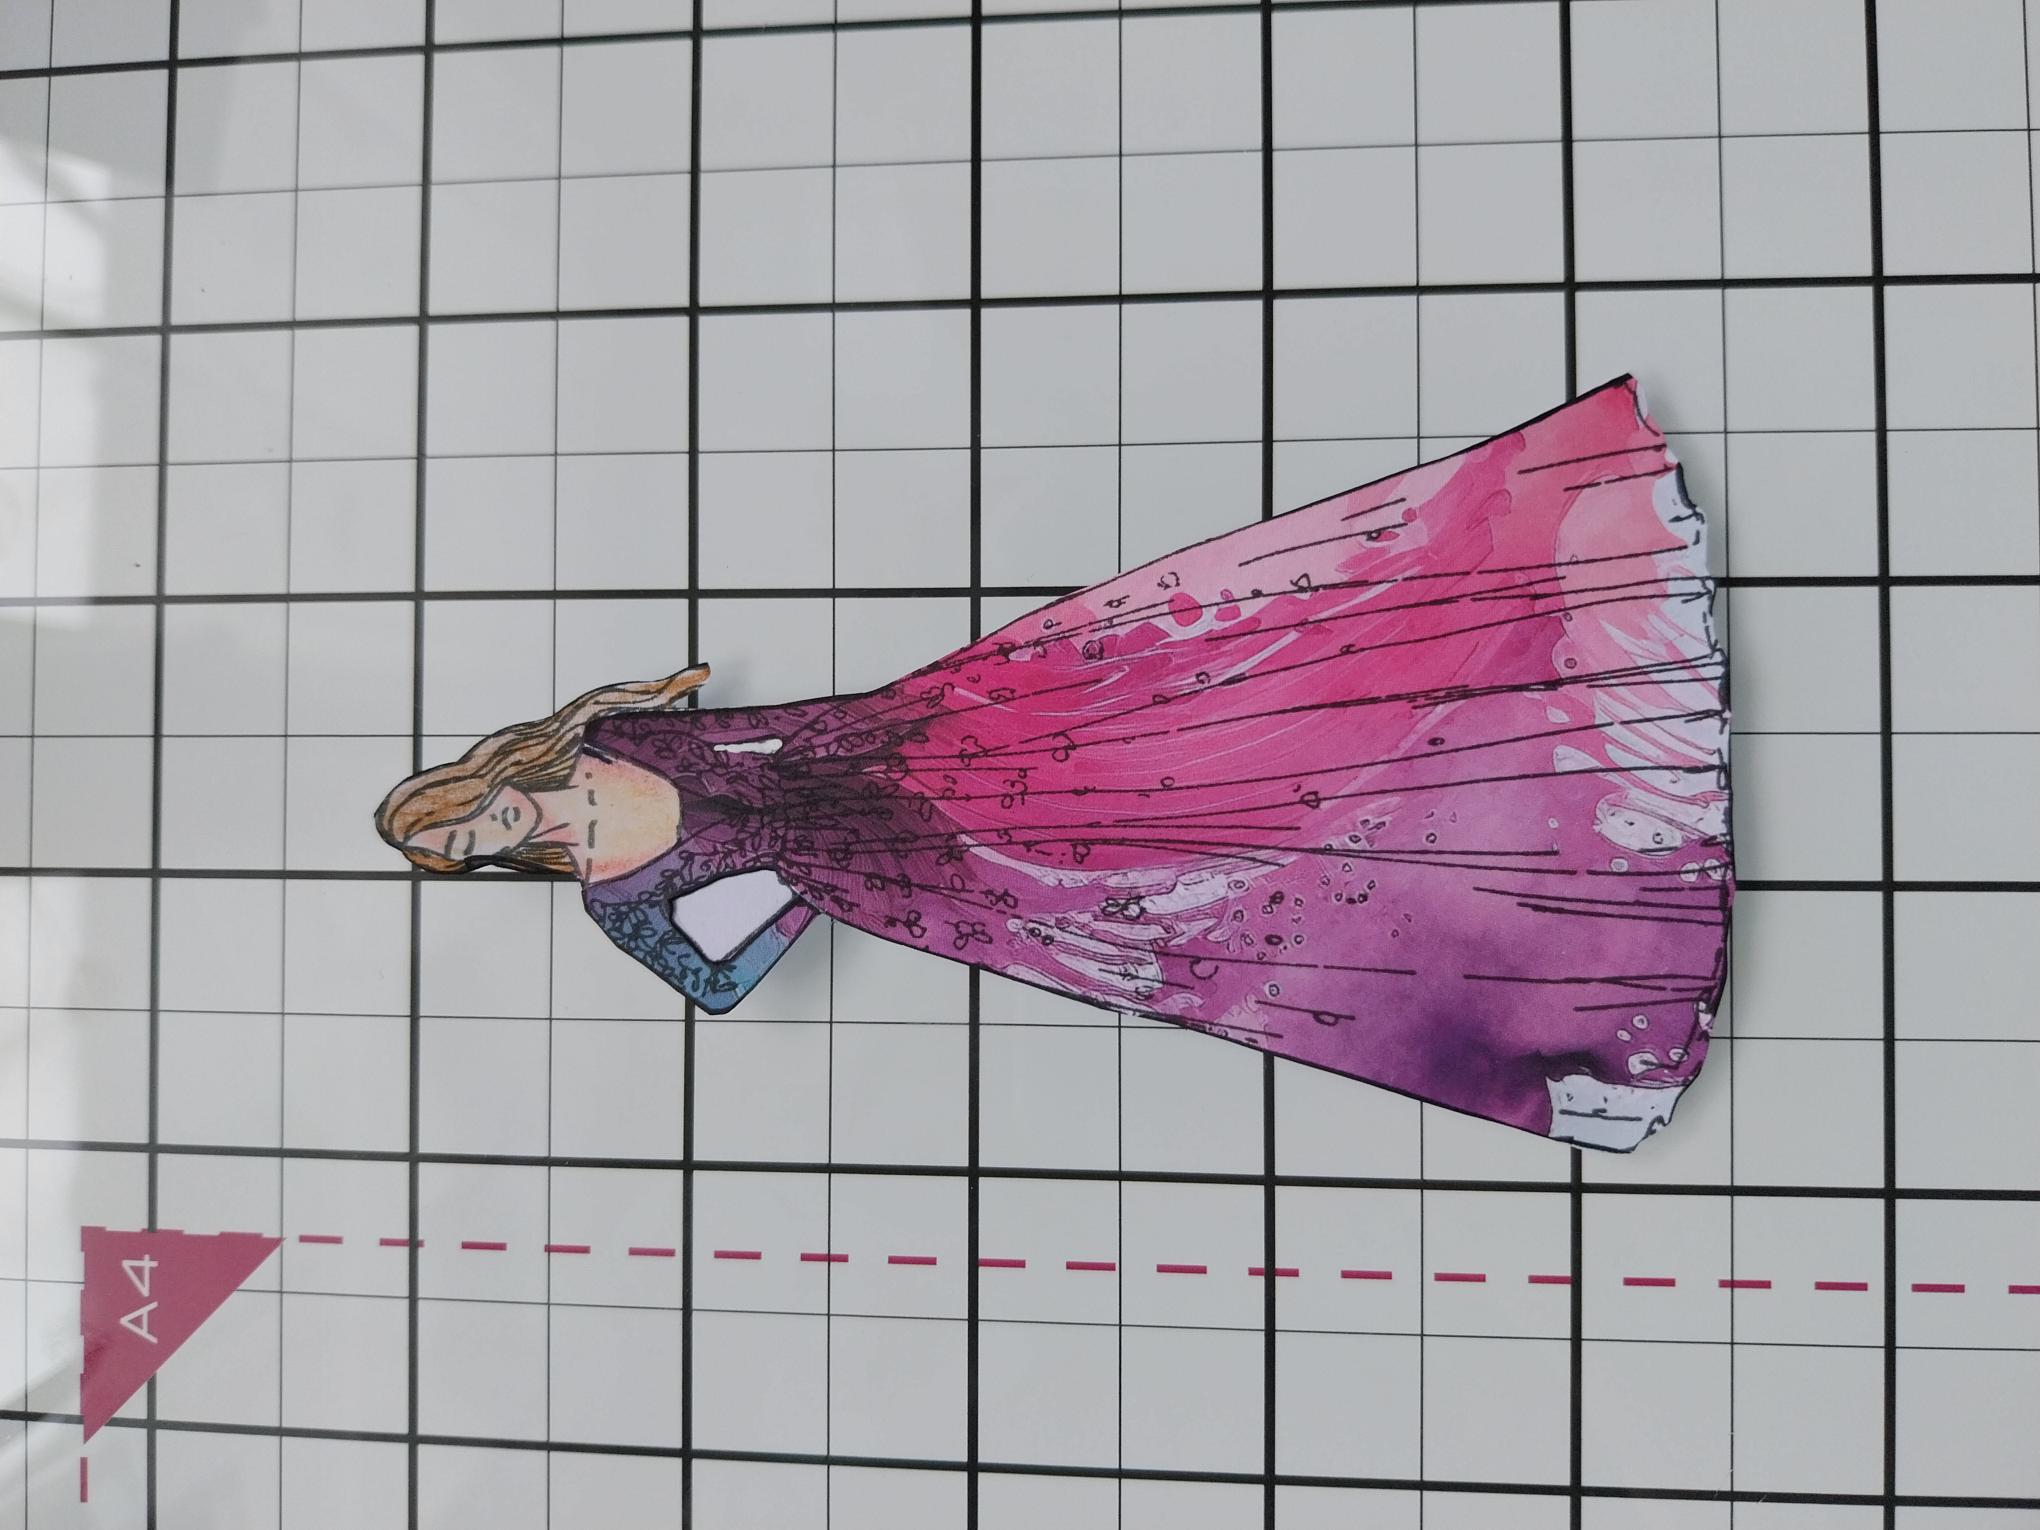
Fussy cut both Francesca and the gown only, from the stamped image on the decorative paper. Use your HIMI oil pencils to colour in Francesca's skin and hair, before adhering the paper gown in place. |
|
Use foam pads to adhere Francesca slightly to the left, of your floral frame. |

|
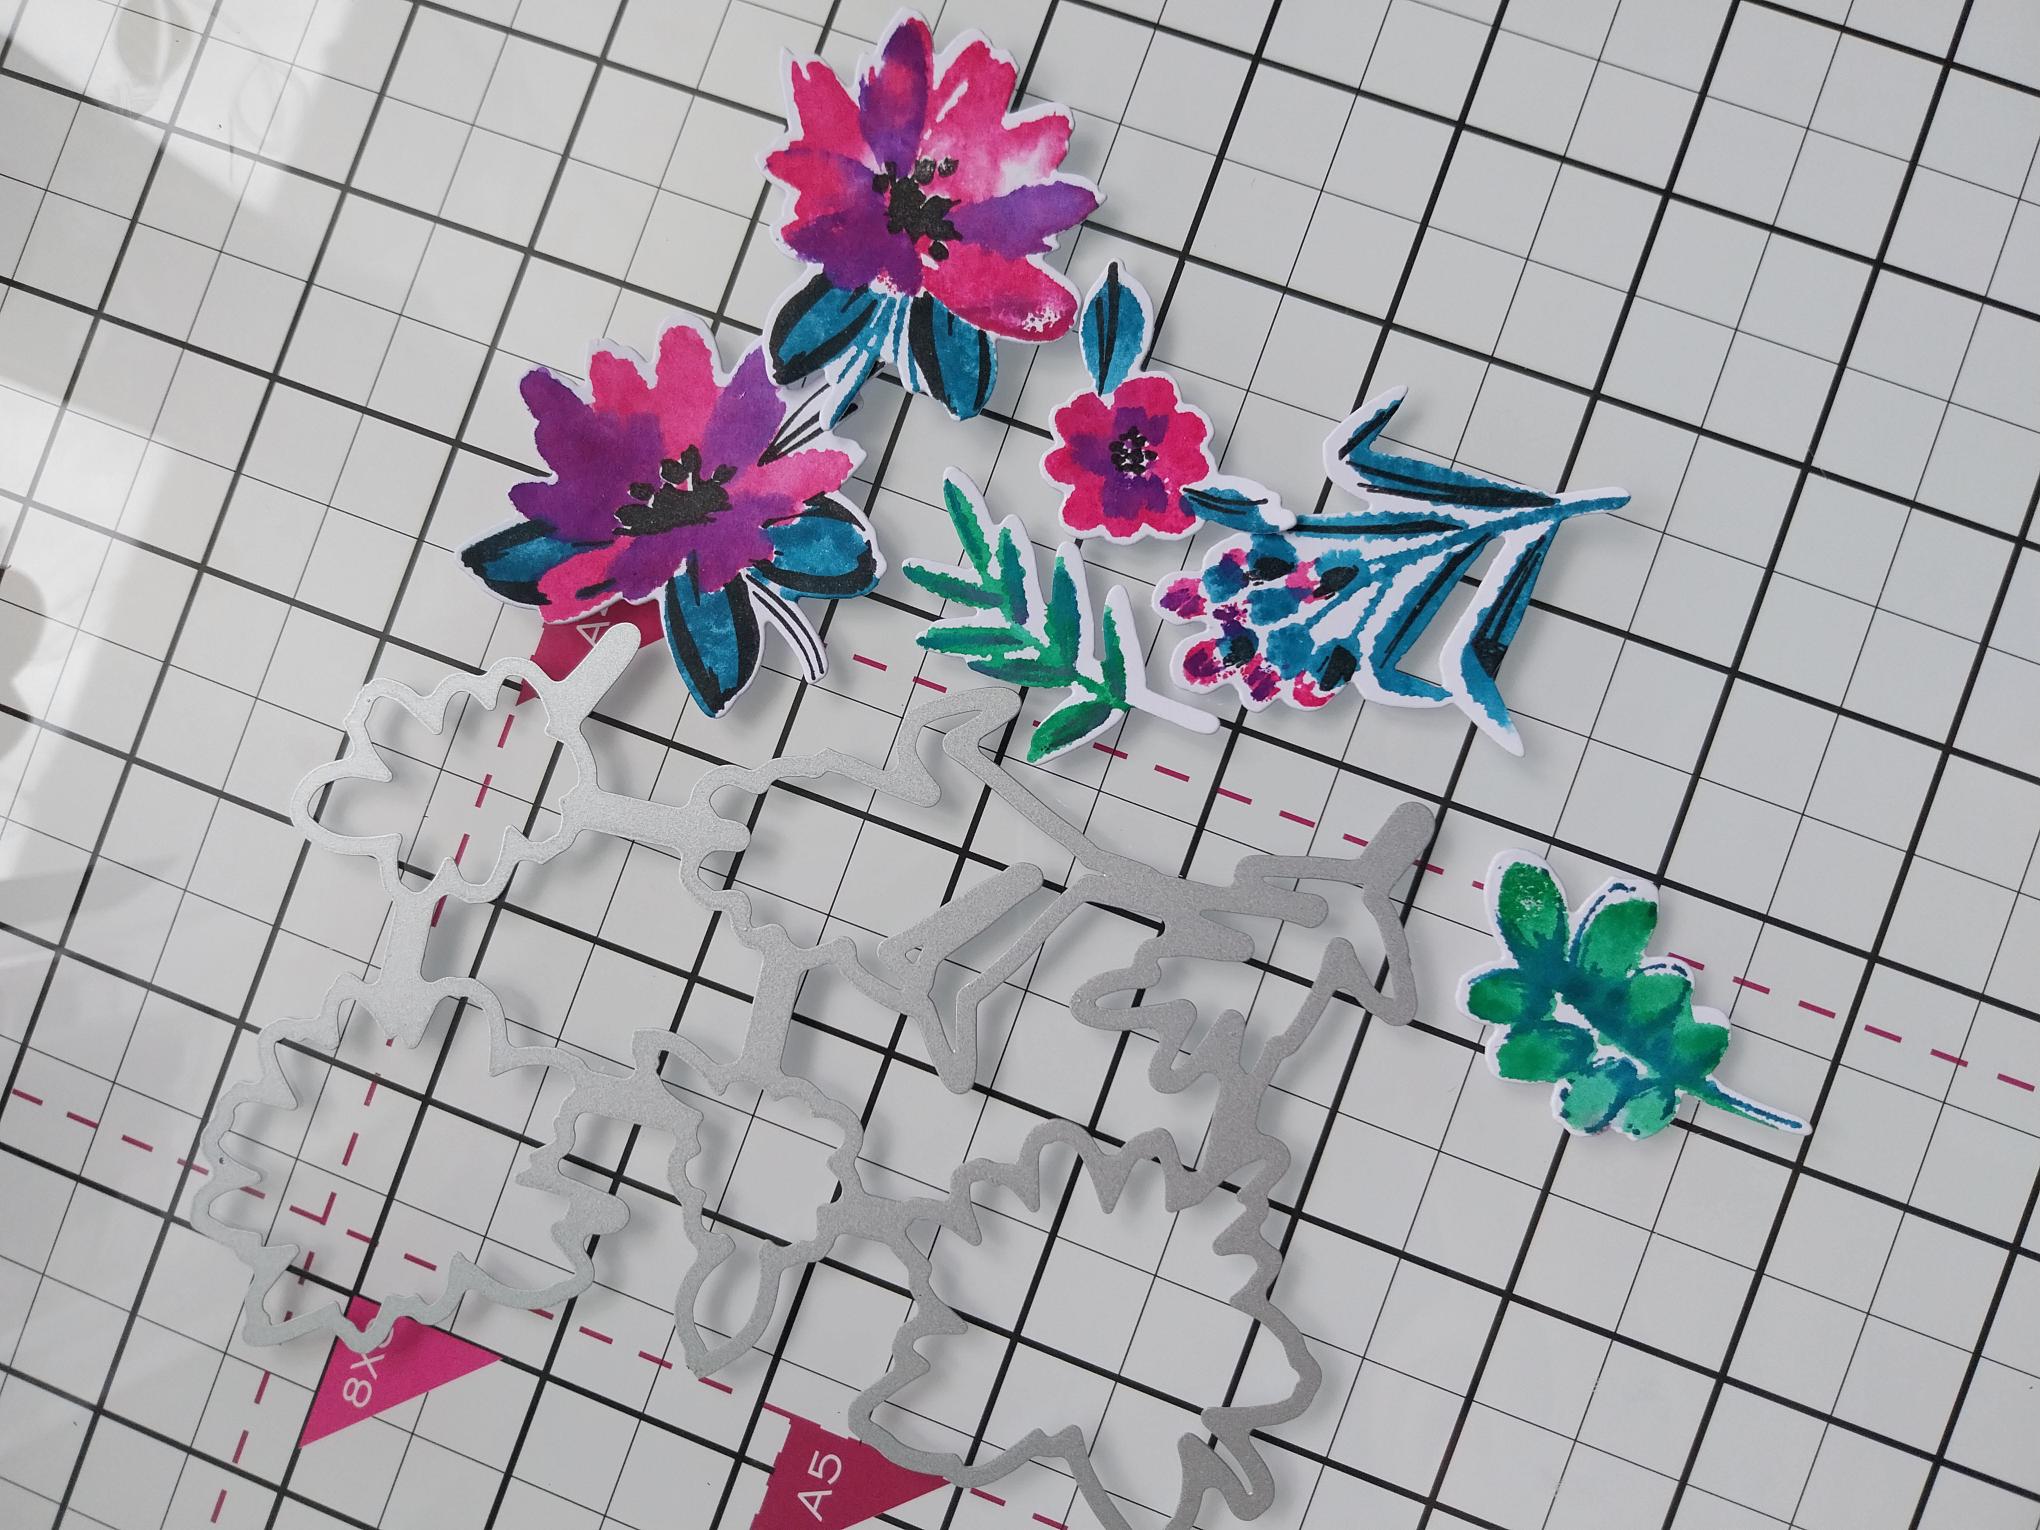
Cut a piece of white card, bigger than the die plate, from the WOW Blooms Collection. Ink up stamp 1, from the same set, with the Magenta (florals) and Hedgerow (foliage), spritz with water and stamp on to the card. NB: When stamping with these layering stamps, line up the "heart" on each layer and the rest will line up automatically. The heart will not be an element but merely a lining-up tool, to make stamping easier for you. Ink up stamp 2 with the Indigo (florals) and Tiffany (foliage), spritz and stamp over the top of the first image. Ink stamp 3 with Tiffany, spritz and stamp in place and finally ink up stamp 4, with the Midnight hybrid ink and stamp. |
|
Use the coordinating die plate to cut them all out, in 1 pass! |
|
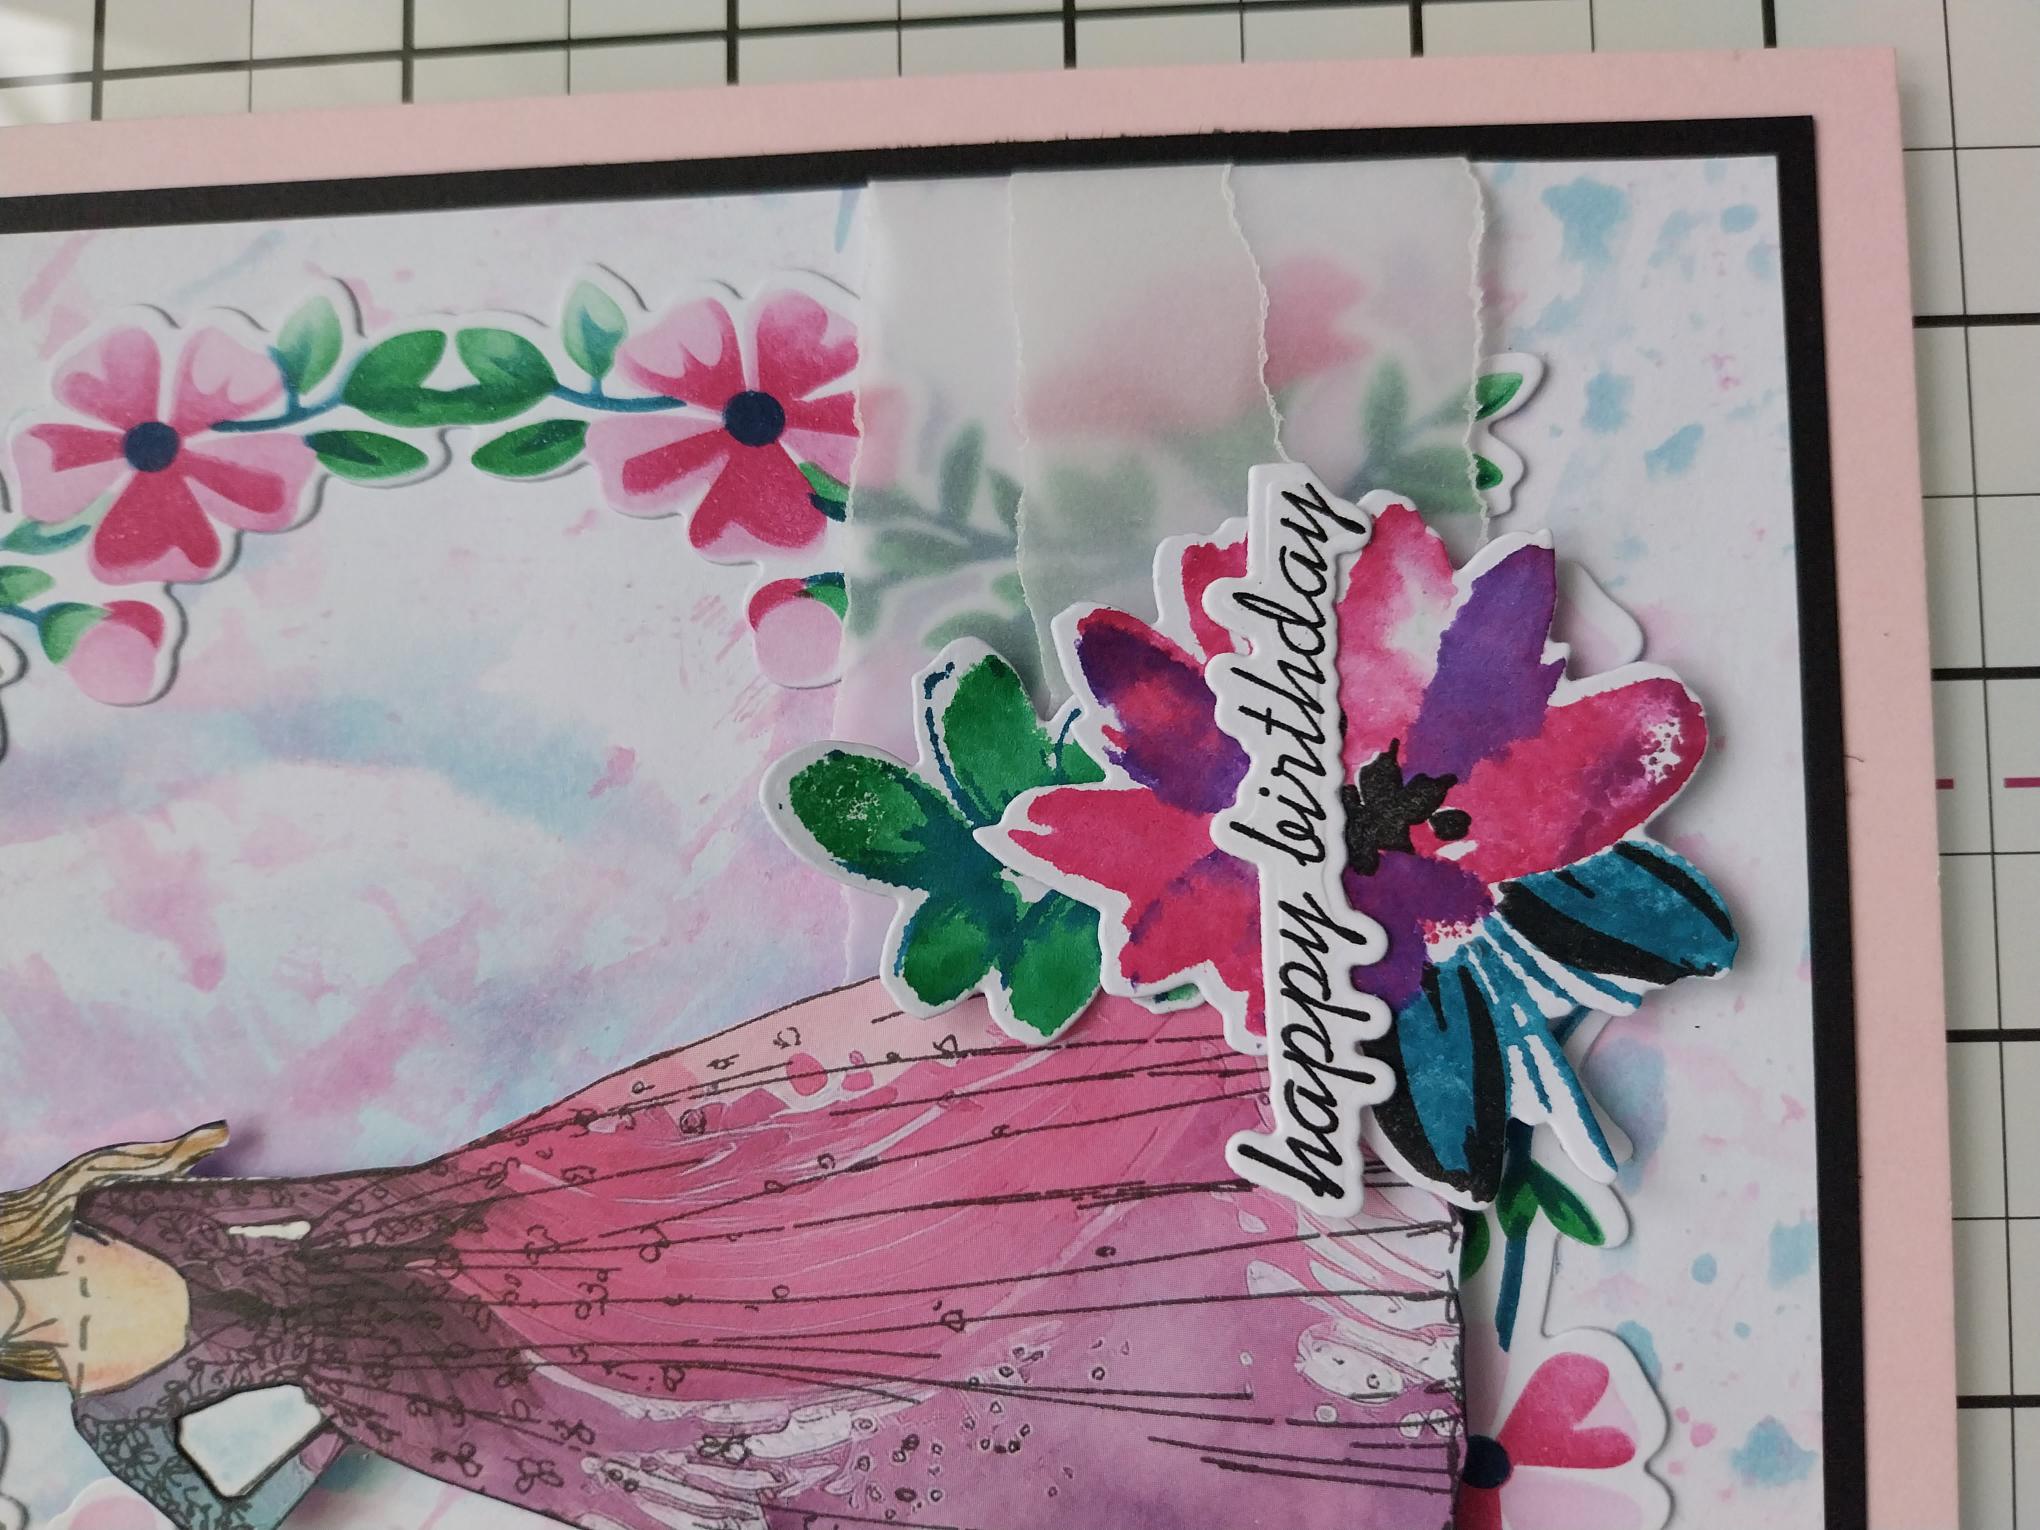
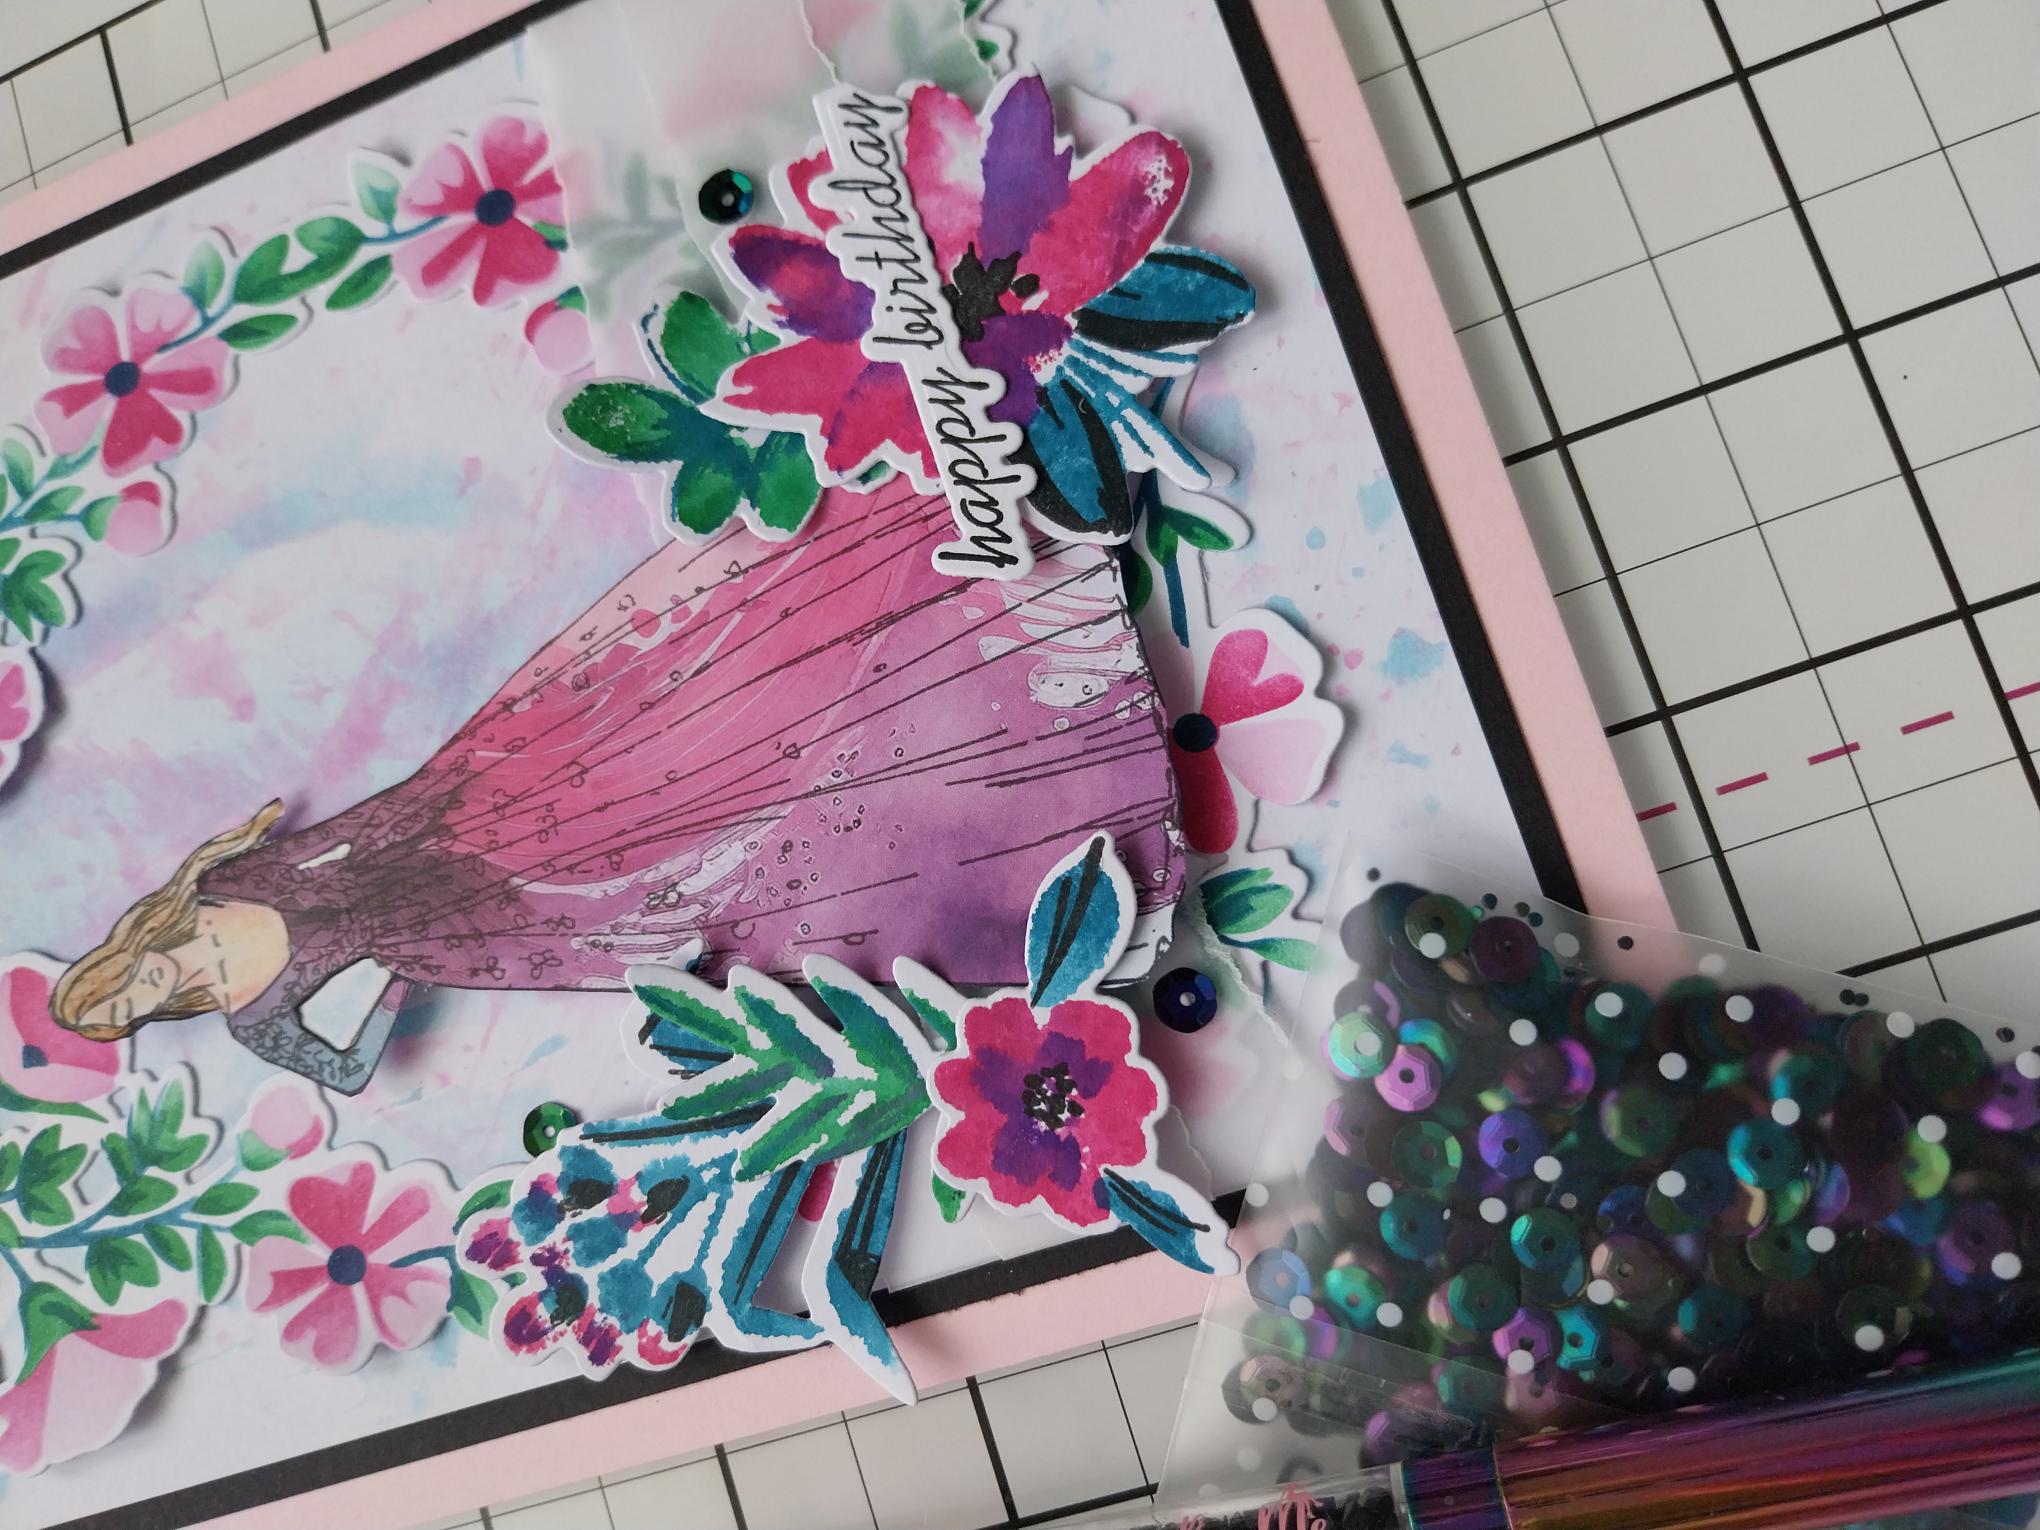
Use both wet glue and foam pads, to adhere your die cut elements around Francesca, as desired. |
|
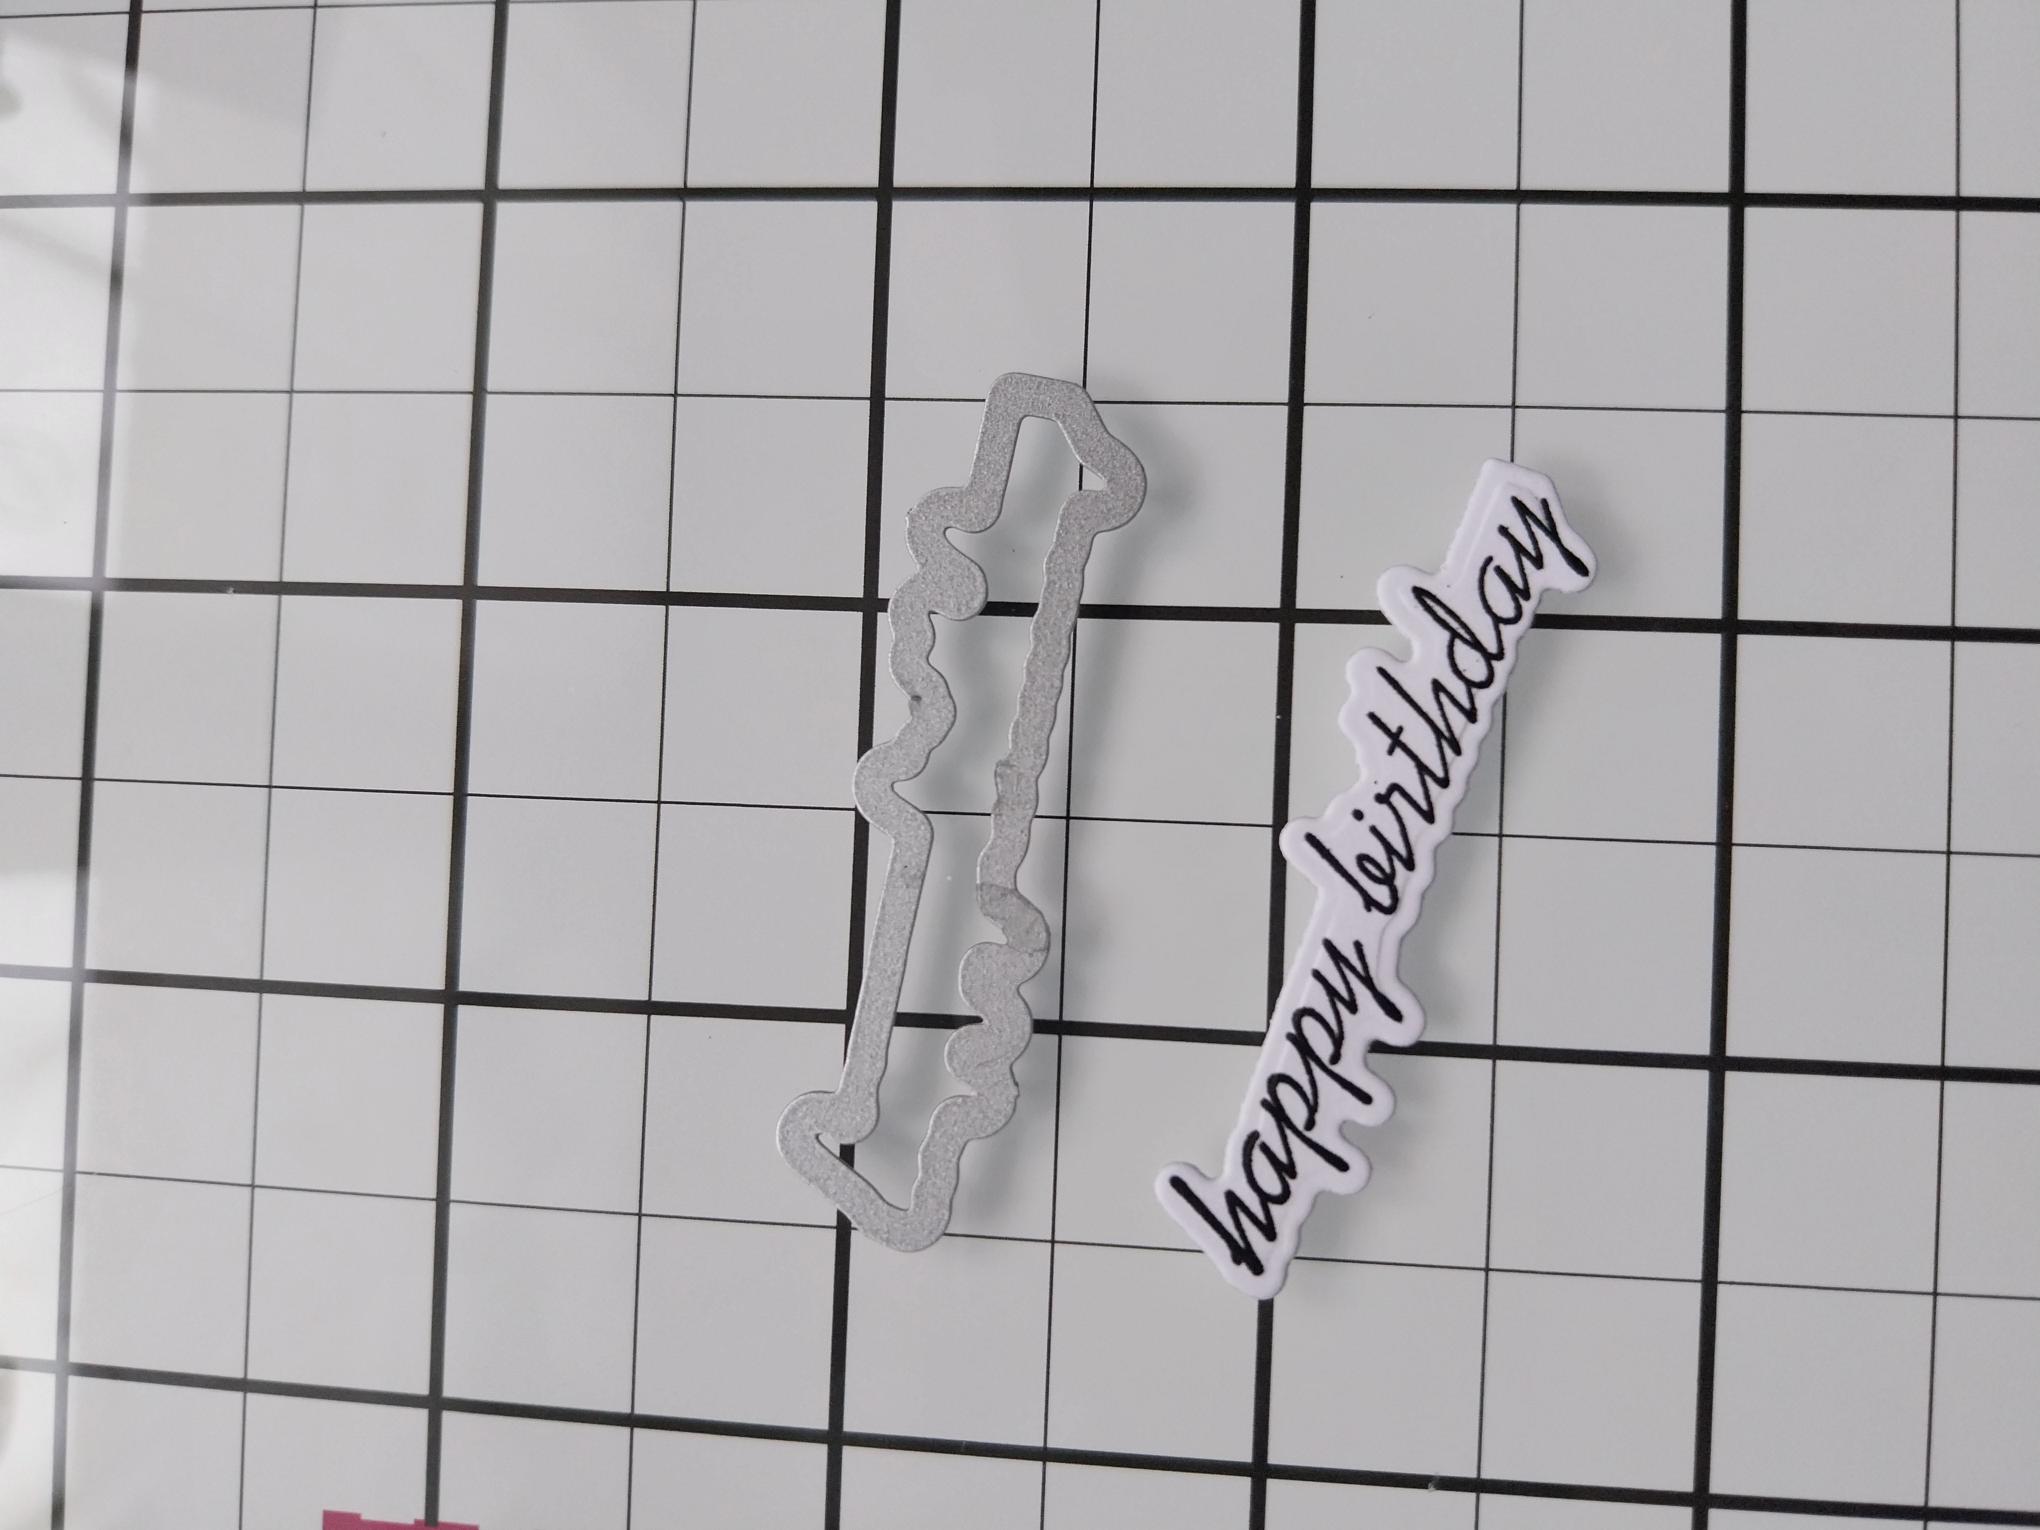
Stamp the "happy birthday", from the Saying Hello Collection, in Midnight, on to a scrap piece of white card. Use the coordinating die to cut it out. |
|
Adhere your die cut sentiment across your 3D florals. |
|
Add a touch of sparkle by adding sequins on, around and tucked just under, your artwork. |