Give your friends $10 off their first order!
Refer a FRIEND


WHAT YOU WILL NEED:
White card blank 7 x 5"
White card
Gold mirri card
Alice Stamp, Die and Stencil Collection
Tied With Love Die Collection
Saying Hello Stamp and Die Collection
SBM No-line Ink Pad
SBM Premium Dye Ink pad: Sherbet, Bittersweet, Heather, Limeade, Hedgerow, Tiffany
Blending tool
WOW embossing ink pad
WOW heat tool
WOW Gold embossing powder
Anti-static bag
Distress Ink/Oxide: Tattered Rose
Paint brush
Sequins: Down The Bay
Pick up gem and pokey tool
Eureka 101 Watercolour Tablet
SBM Magnetic glass mat
Paper Trimmer
Perfect Together Glue
Fom pads
Die Cutting machine
[click image to enlarge] 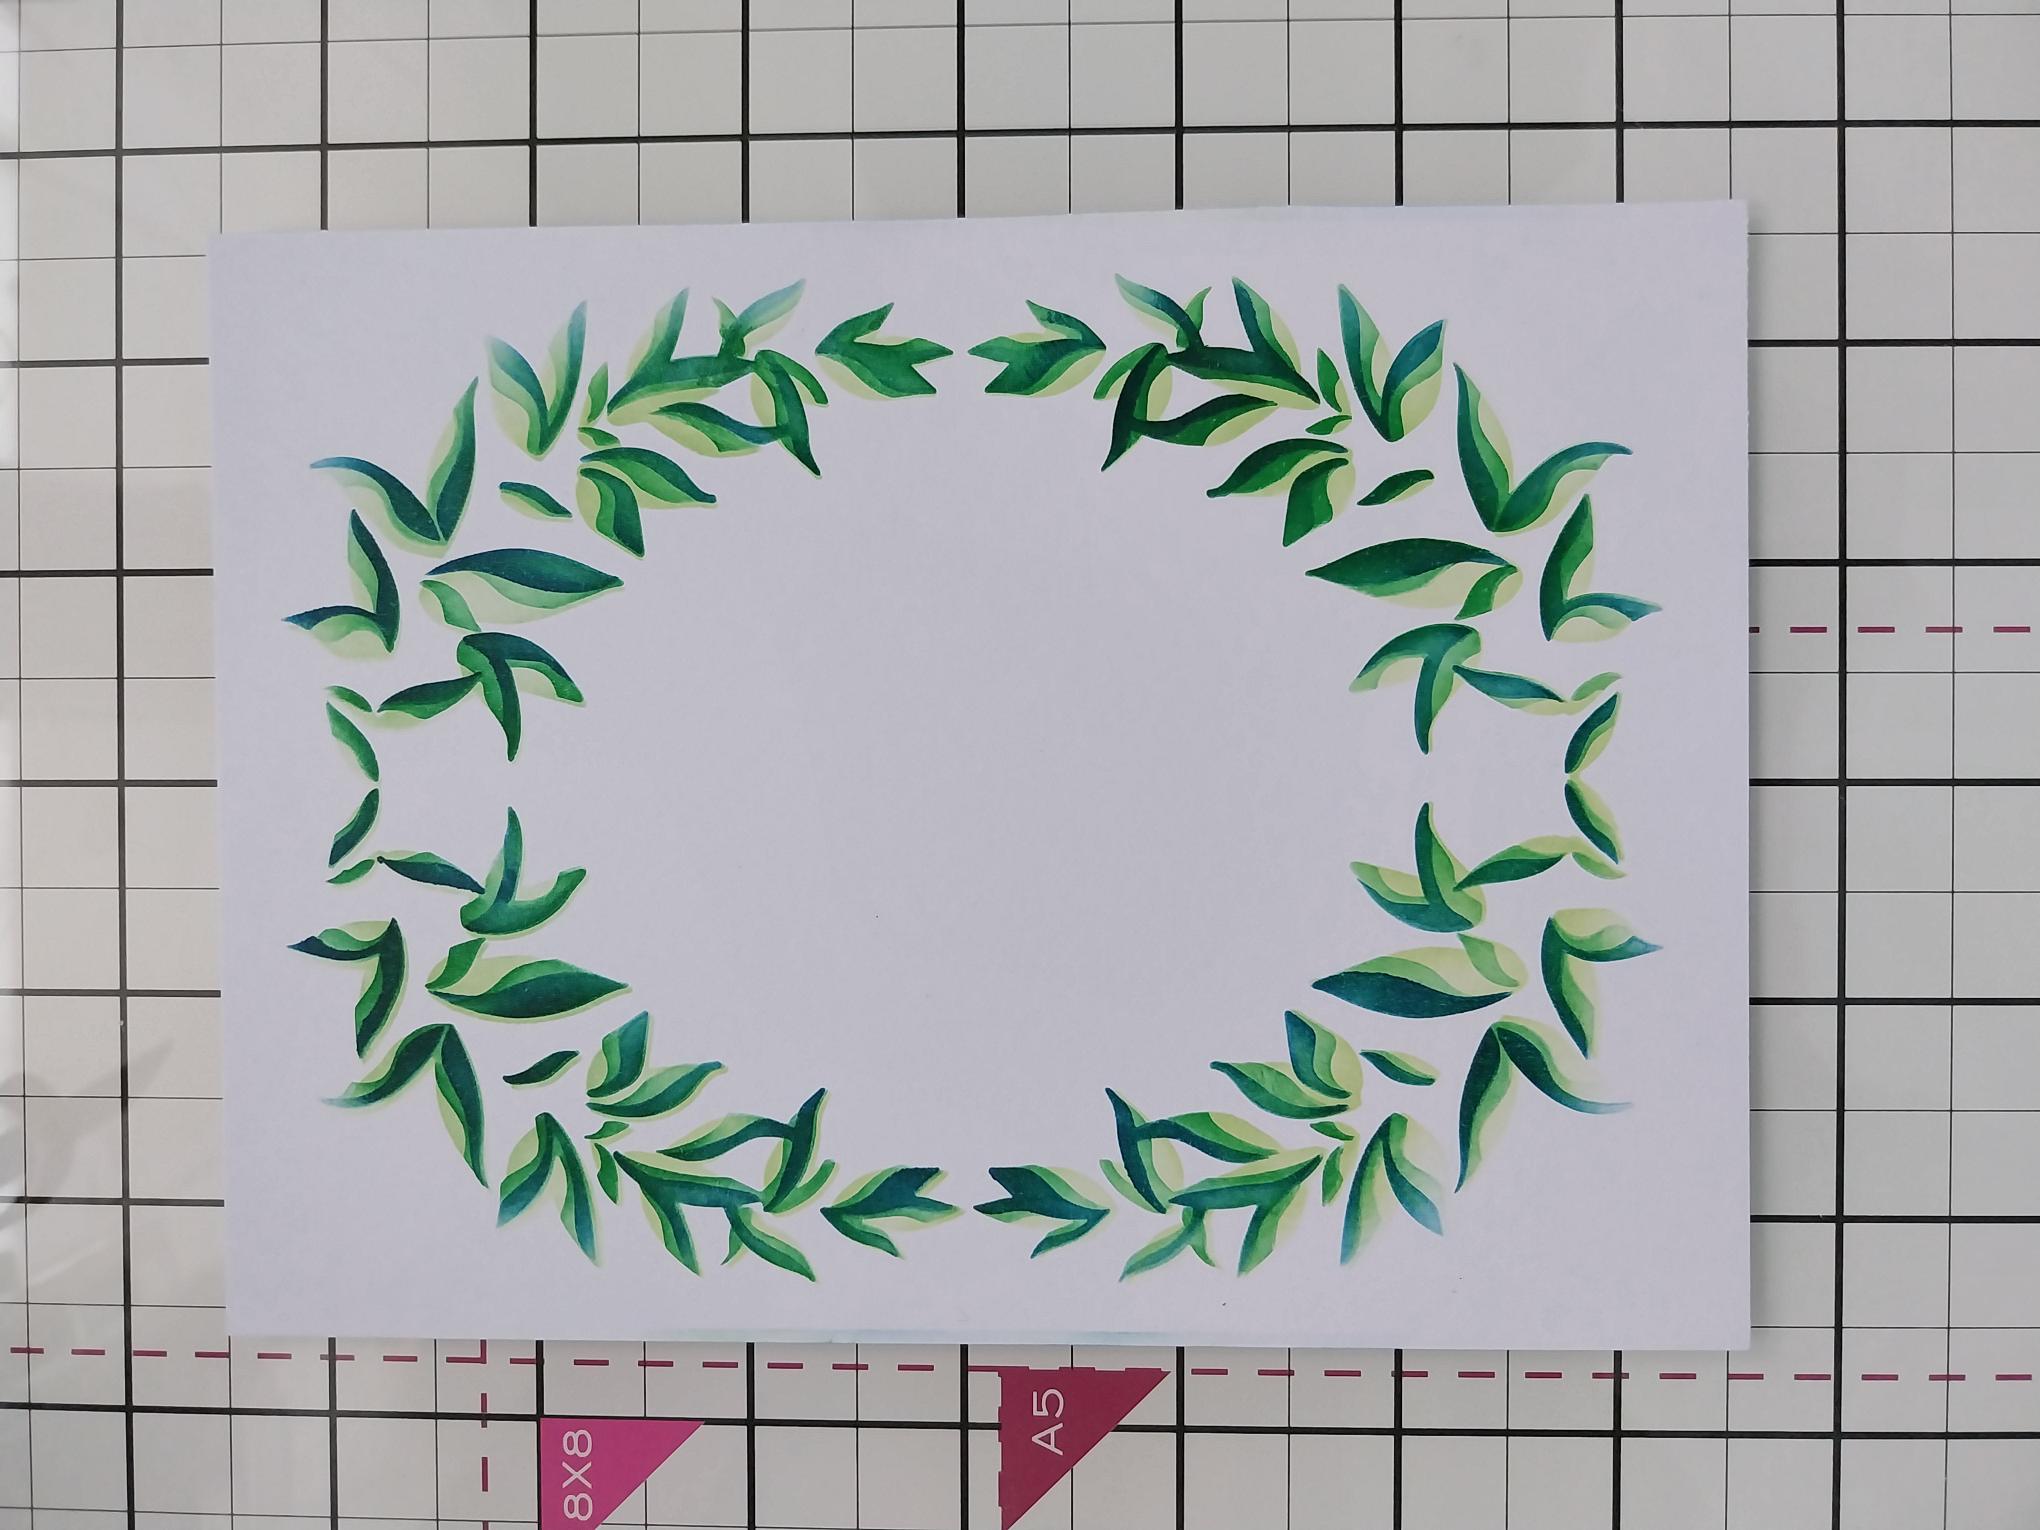
|
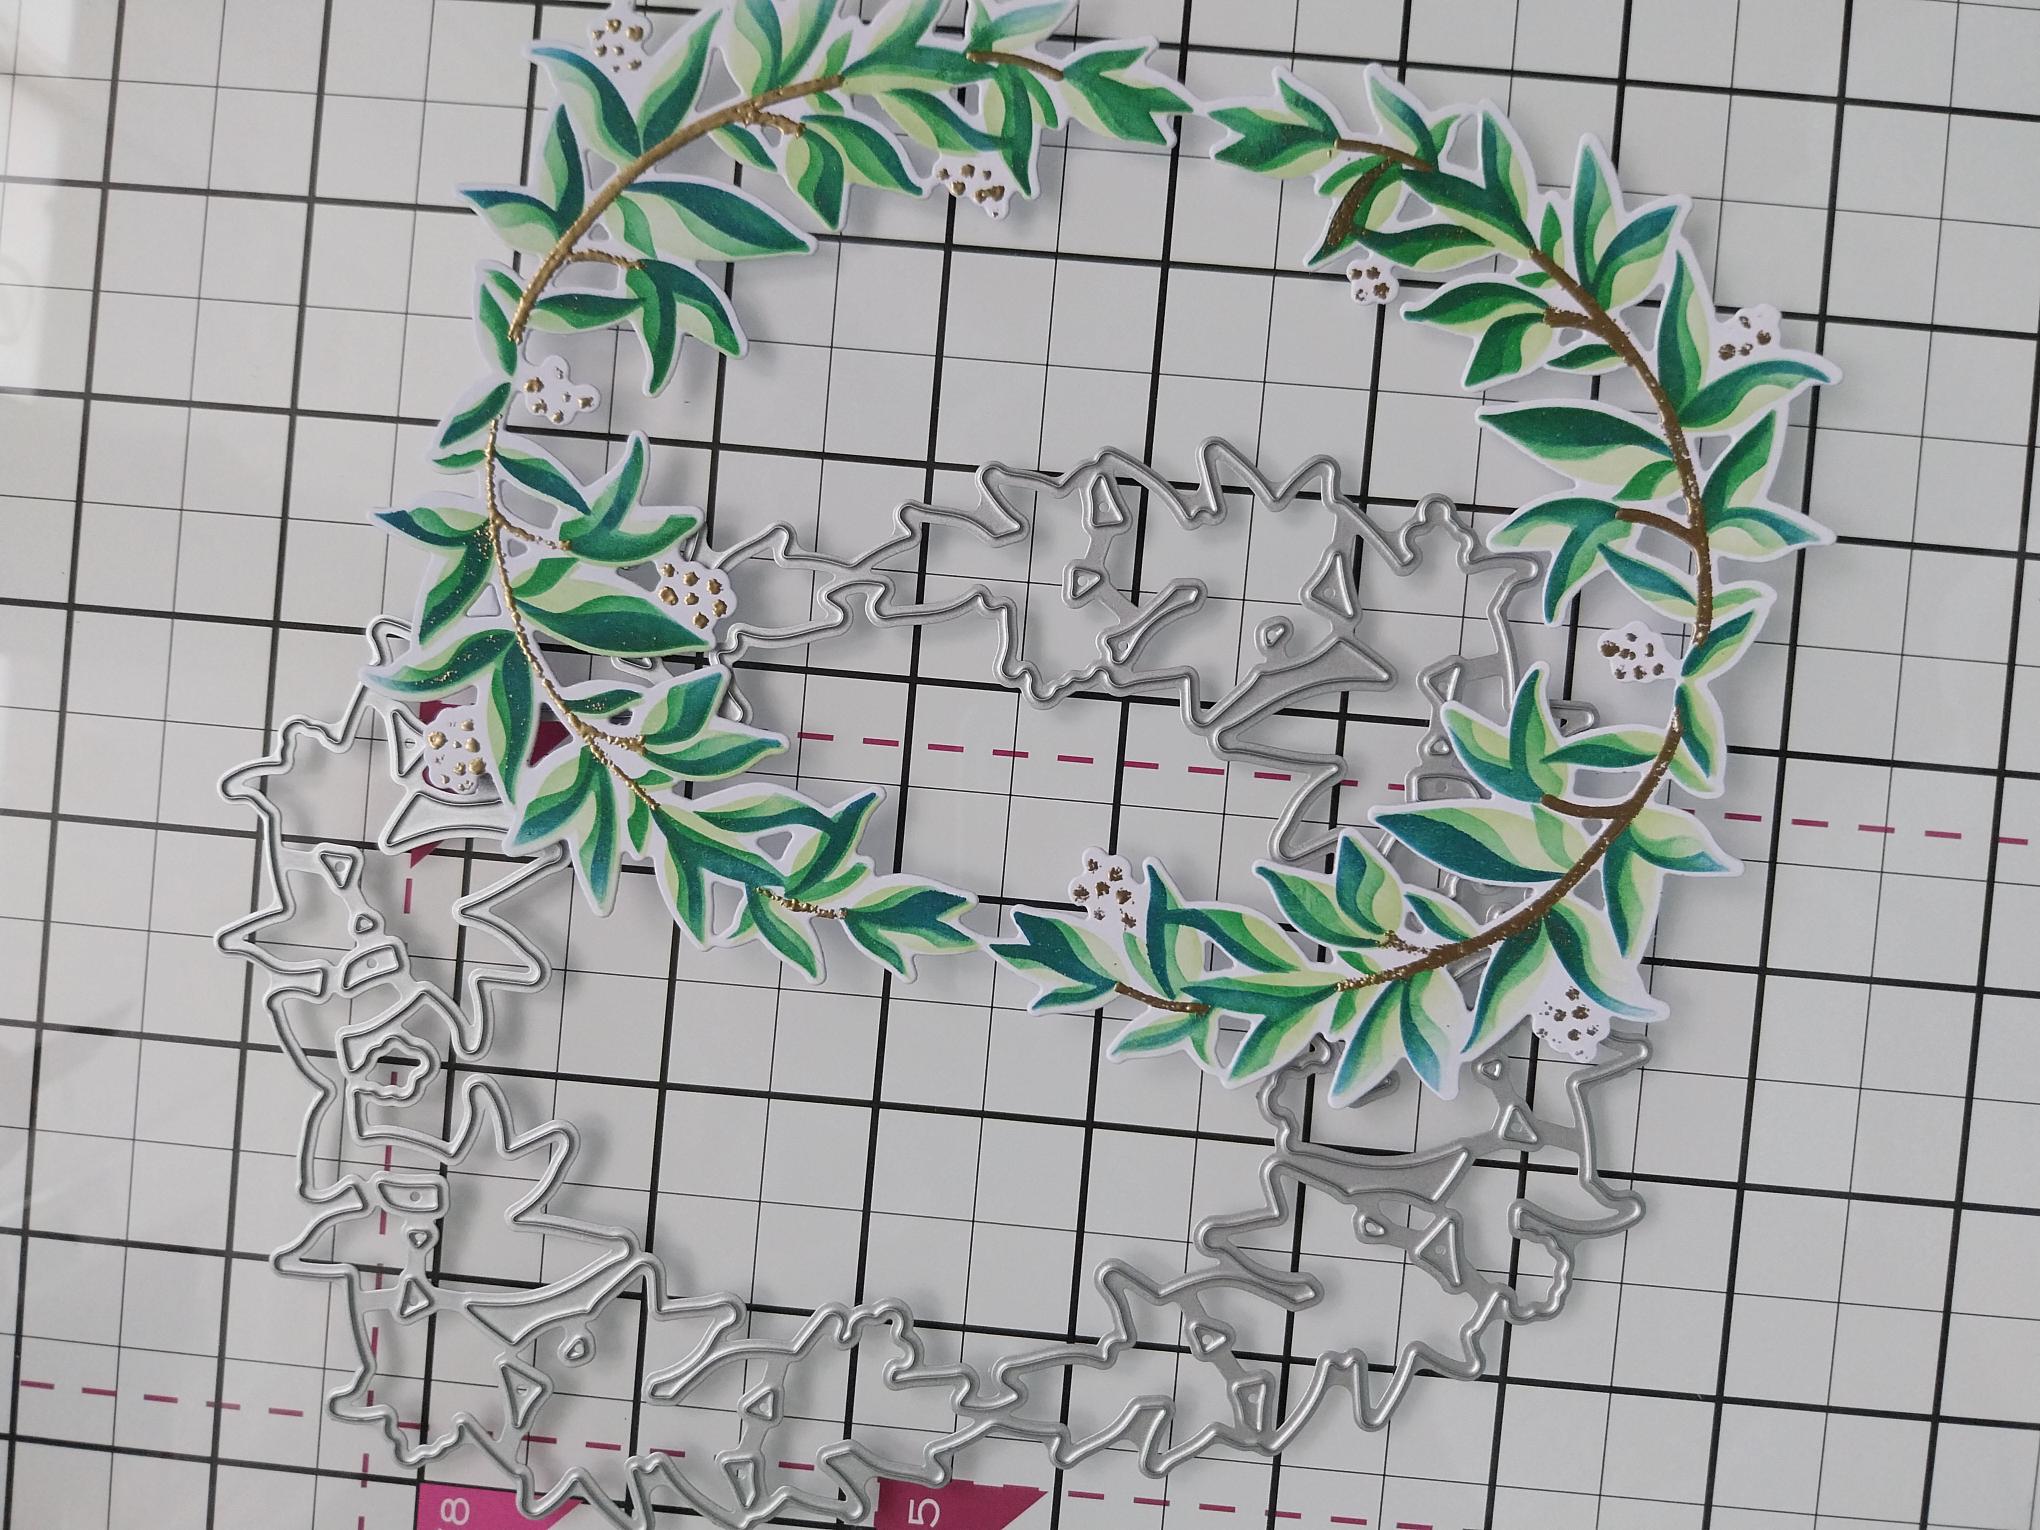
Cut a piece of white card slightly bigger than the stencils in the Alice collection. Place stencil 1 on the card and use a blending tool to apply the Limeade ink. Position stencil 2 over your stencilled image and blend with the Hedgerow and finally blend Tiffany through stencil 3. Ensure the ink is thoroughly dry before moving to the next step. |
|
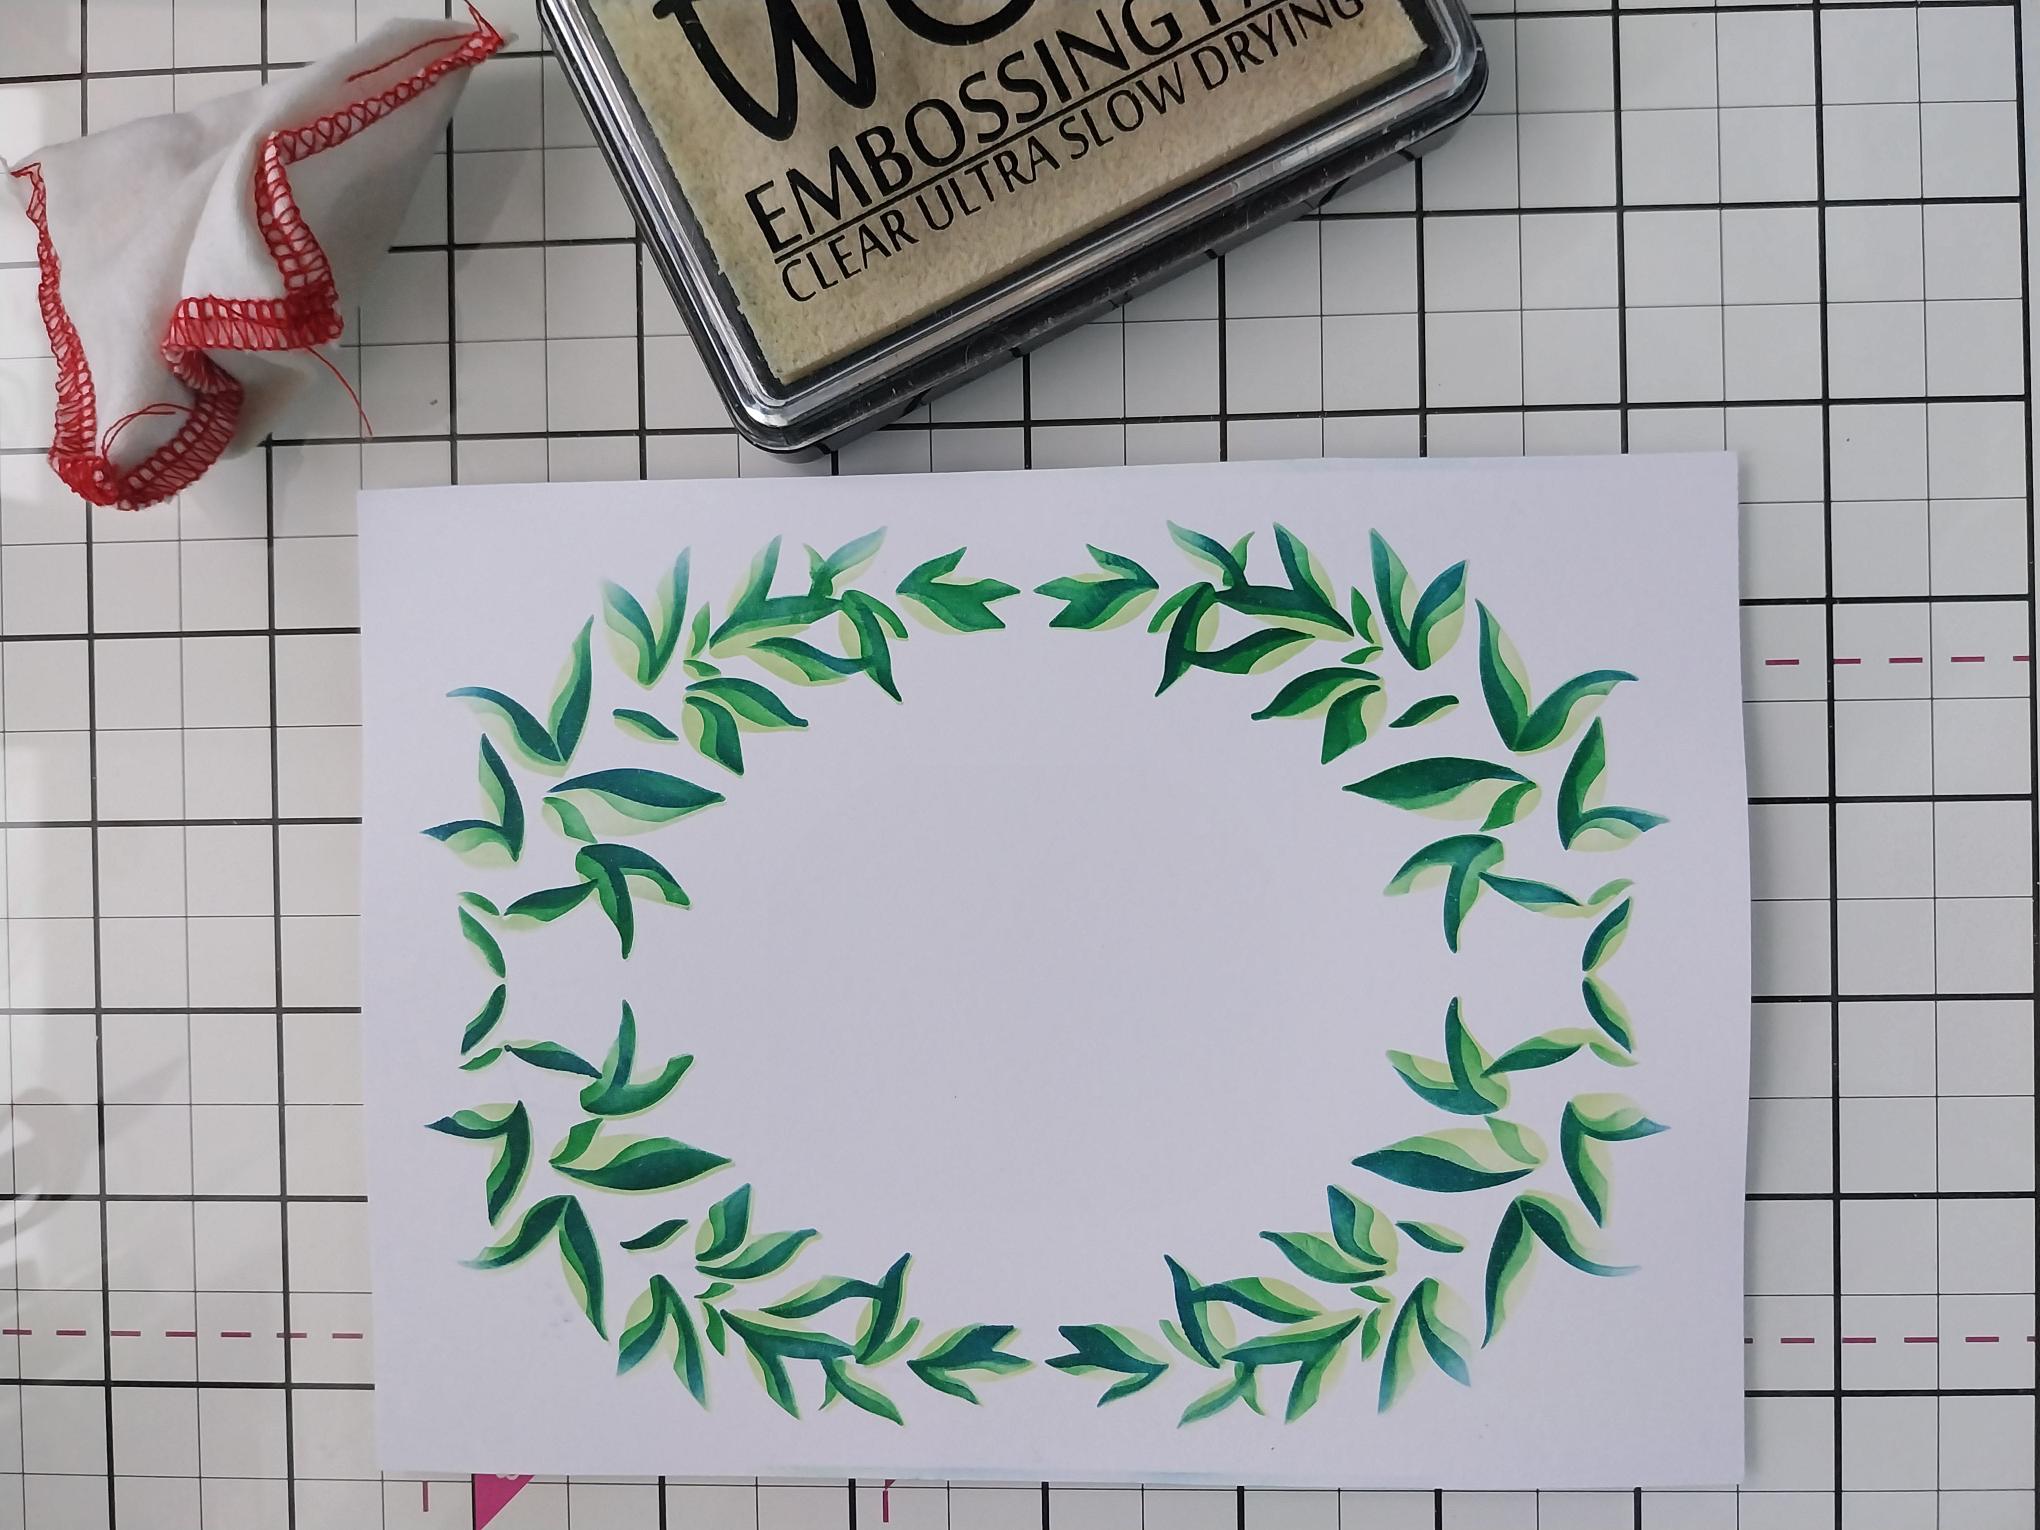
Wipe all over your stencilled card with an anti-static bag, ensuring there is no moisture left. Place stencil 4 in position, over your stencilled frame and ink through the stencil with your WOW sticky embossing ink pad. |
|
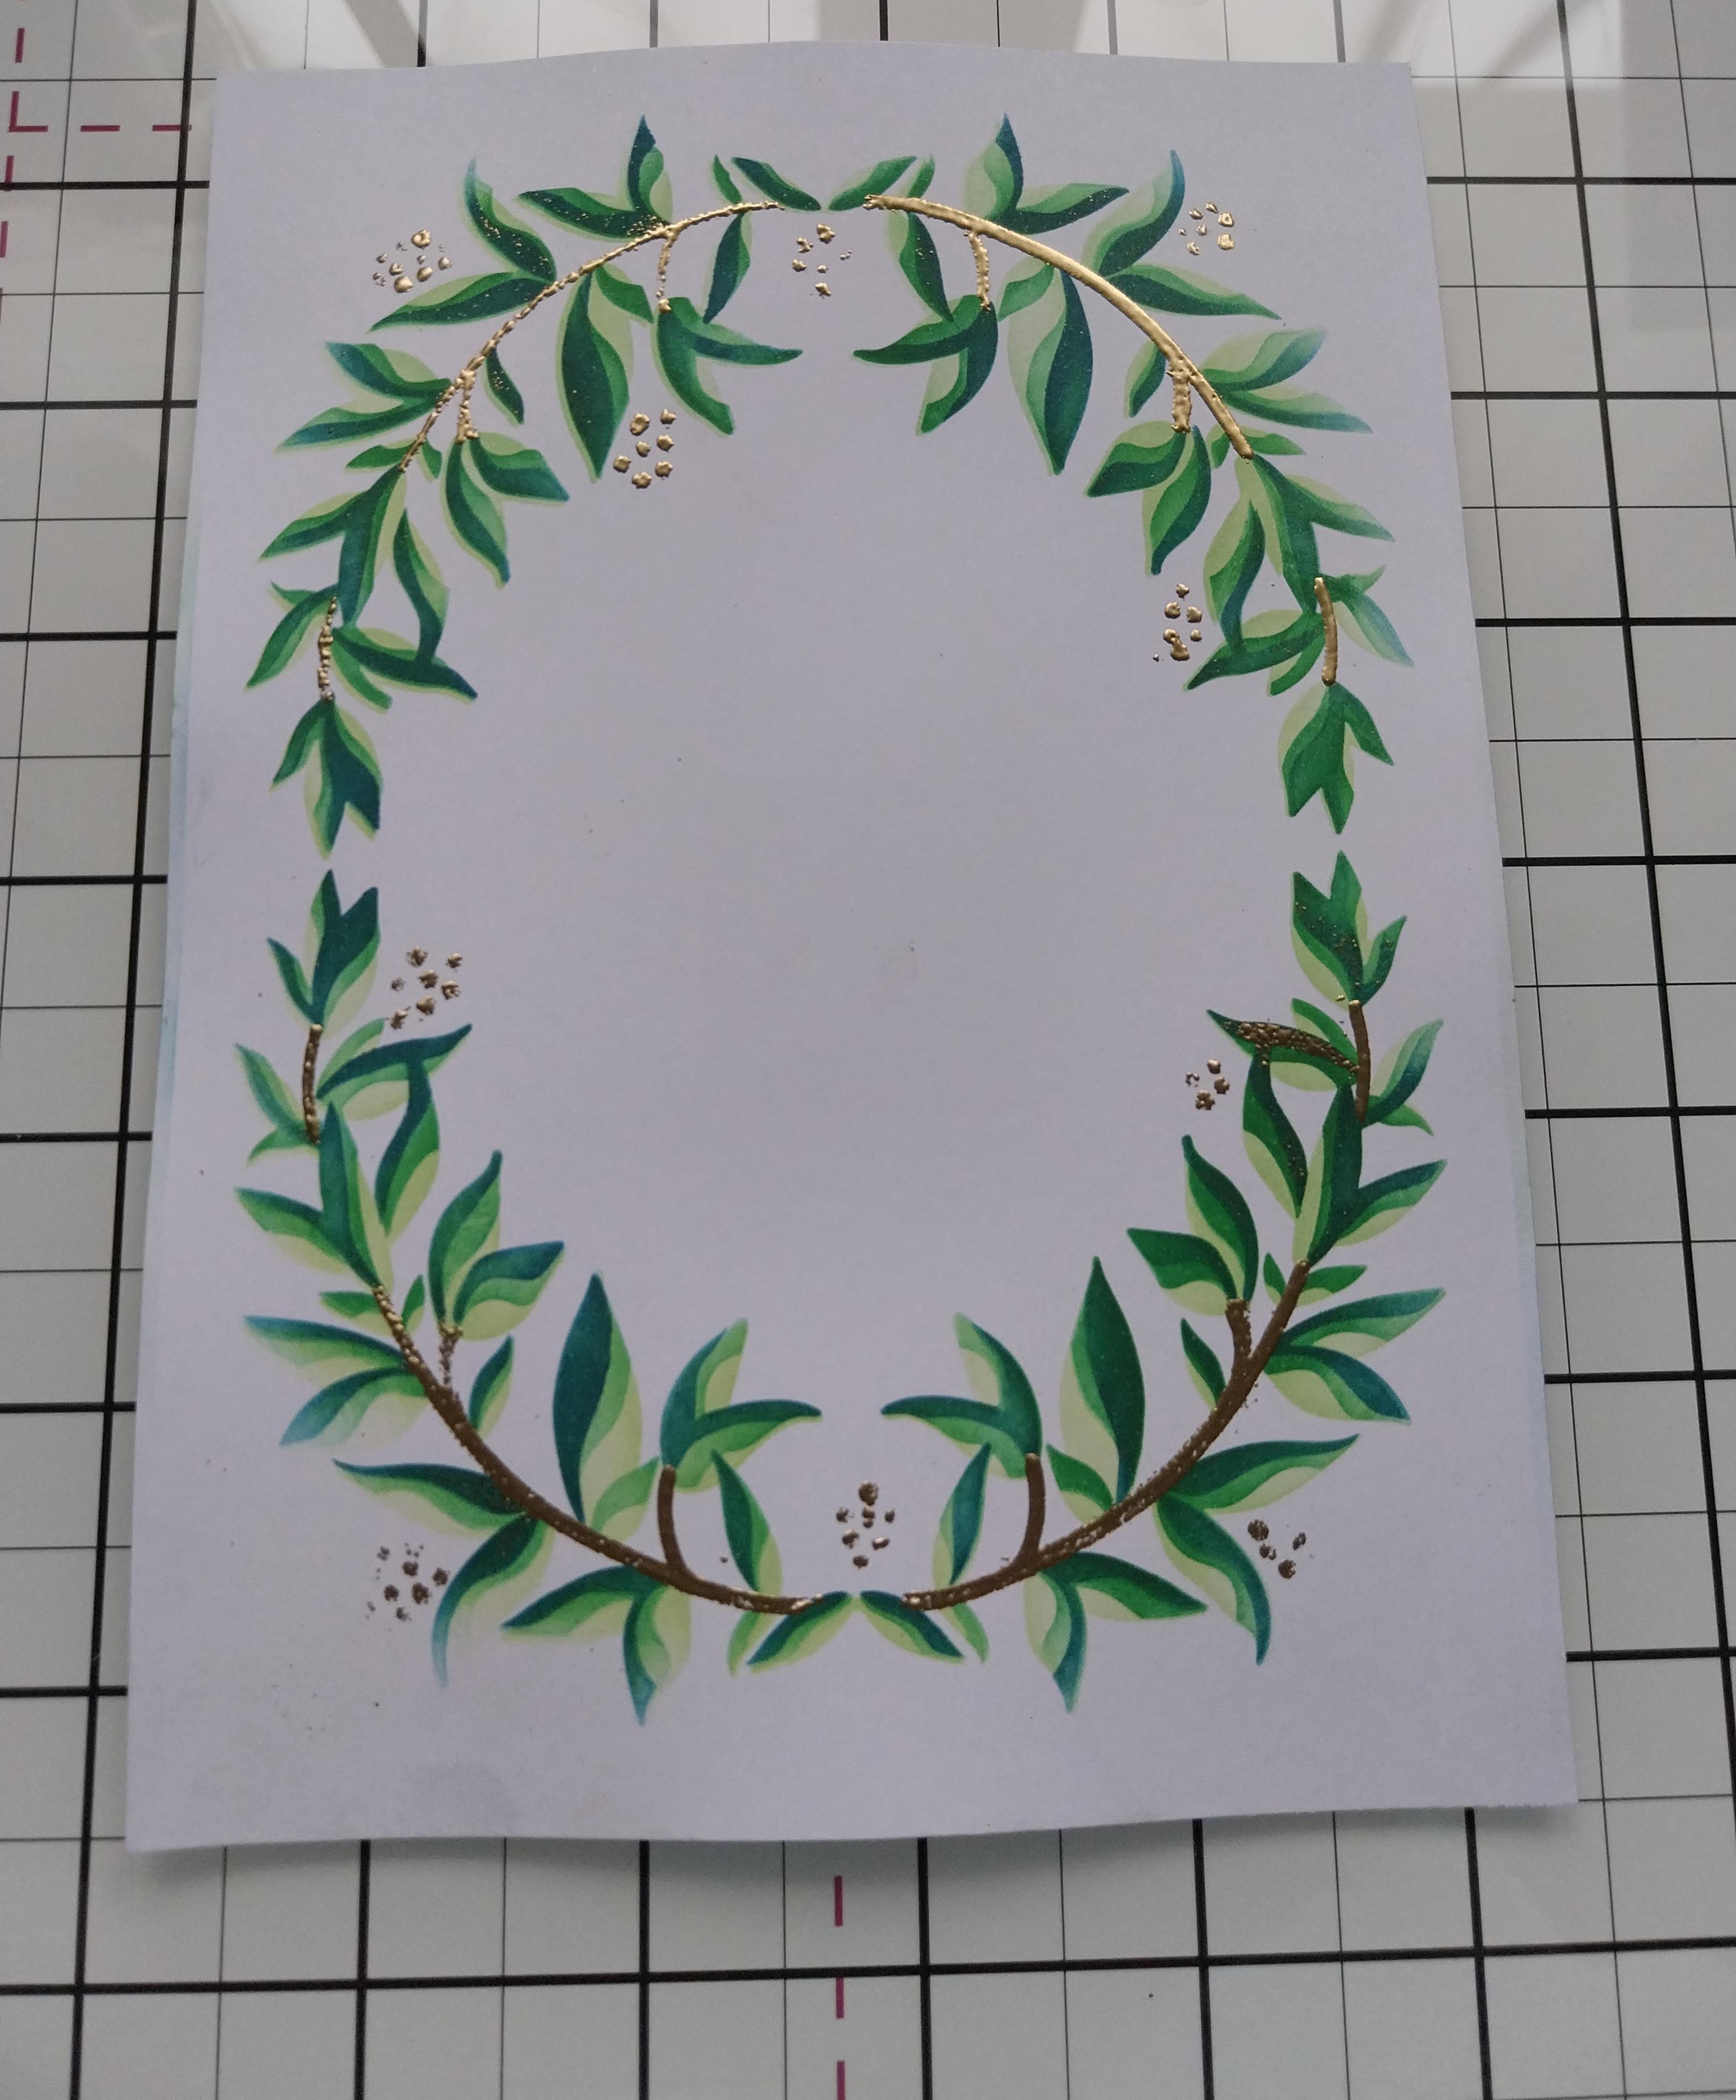
Apply Gold embossing powder over your sticky image, tipping any excess powder back in the pot. Get your heat tool nice and hot, before heat setting the powder. Ensure you move your heat tool as soon as the powder turns, as this will help minimise the warping of your card. |
|
Place the coordinating die over your stencilled frame and run it through your die cutting machine. Set your die cut frame to one side. |
|
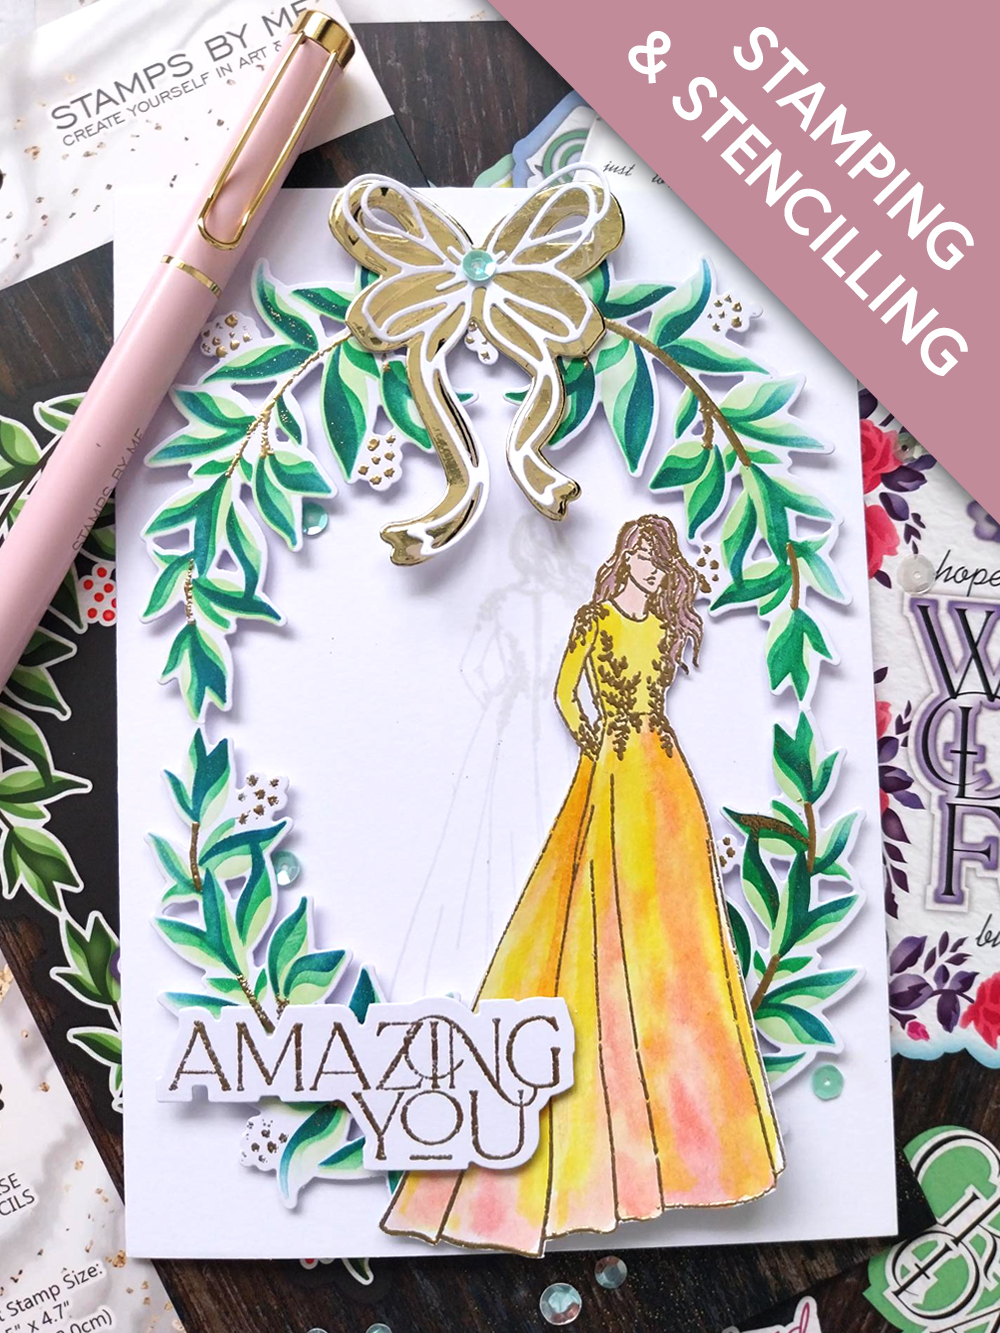
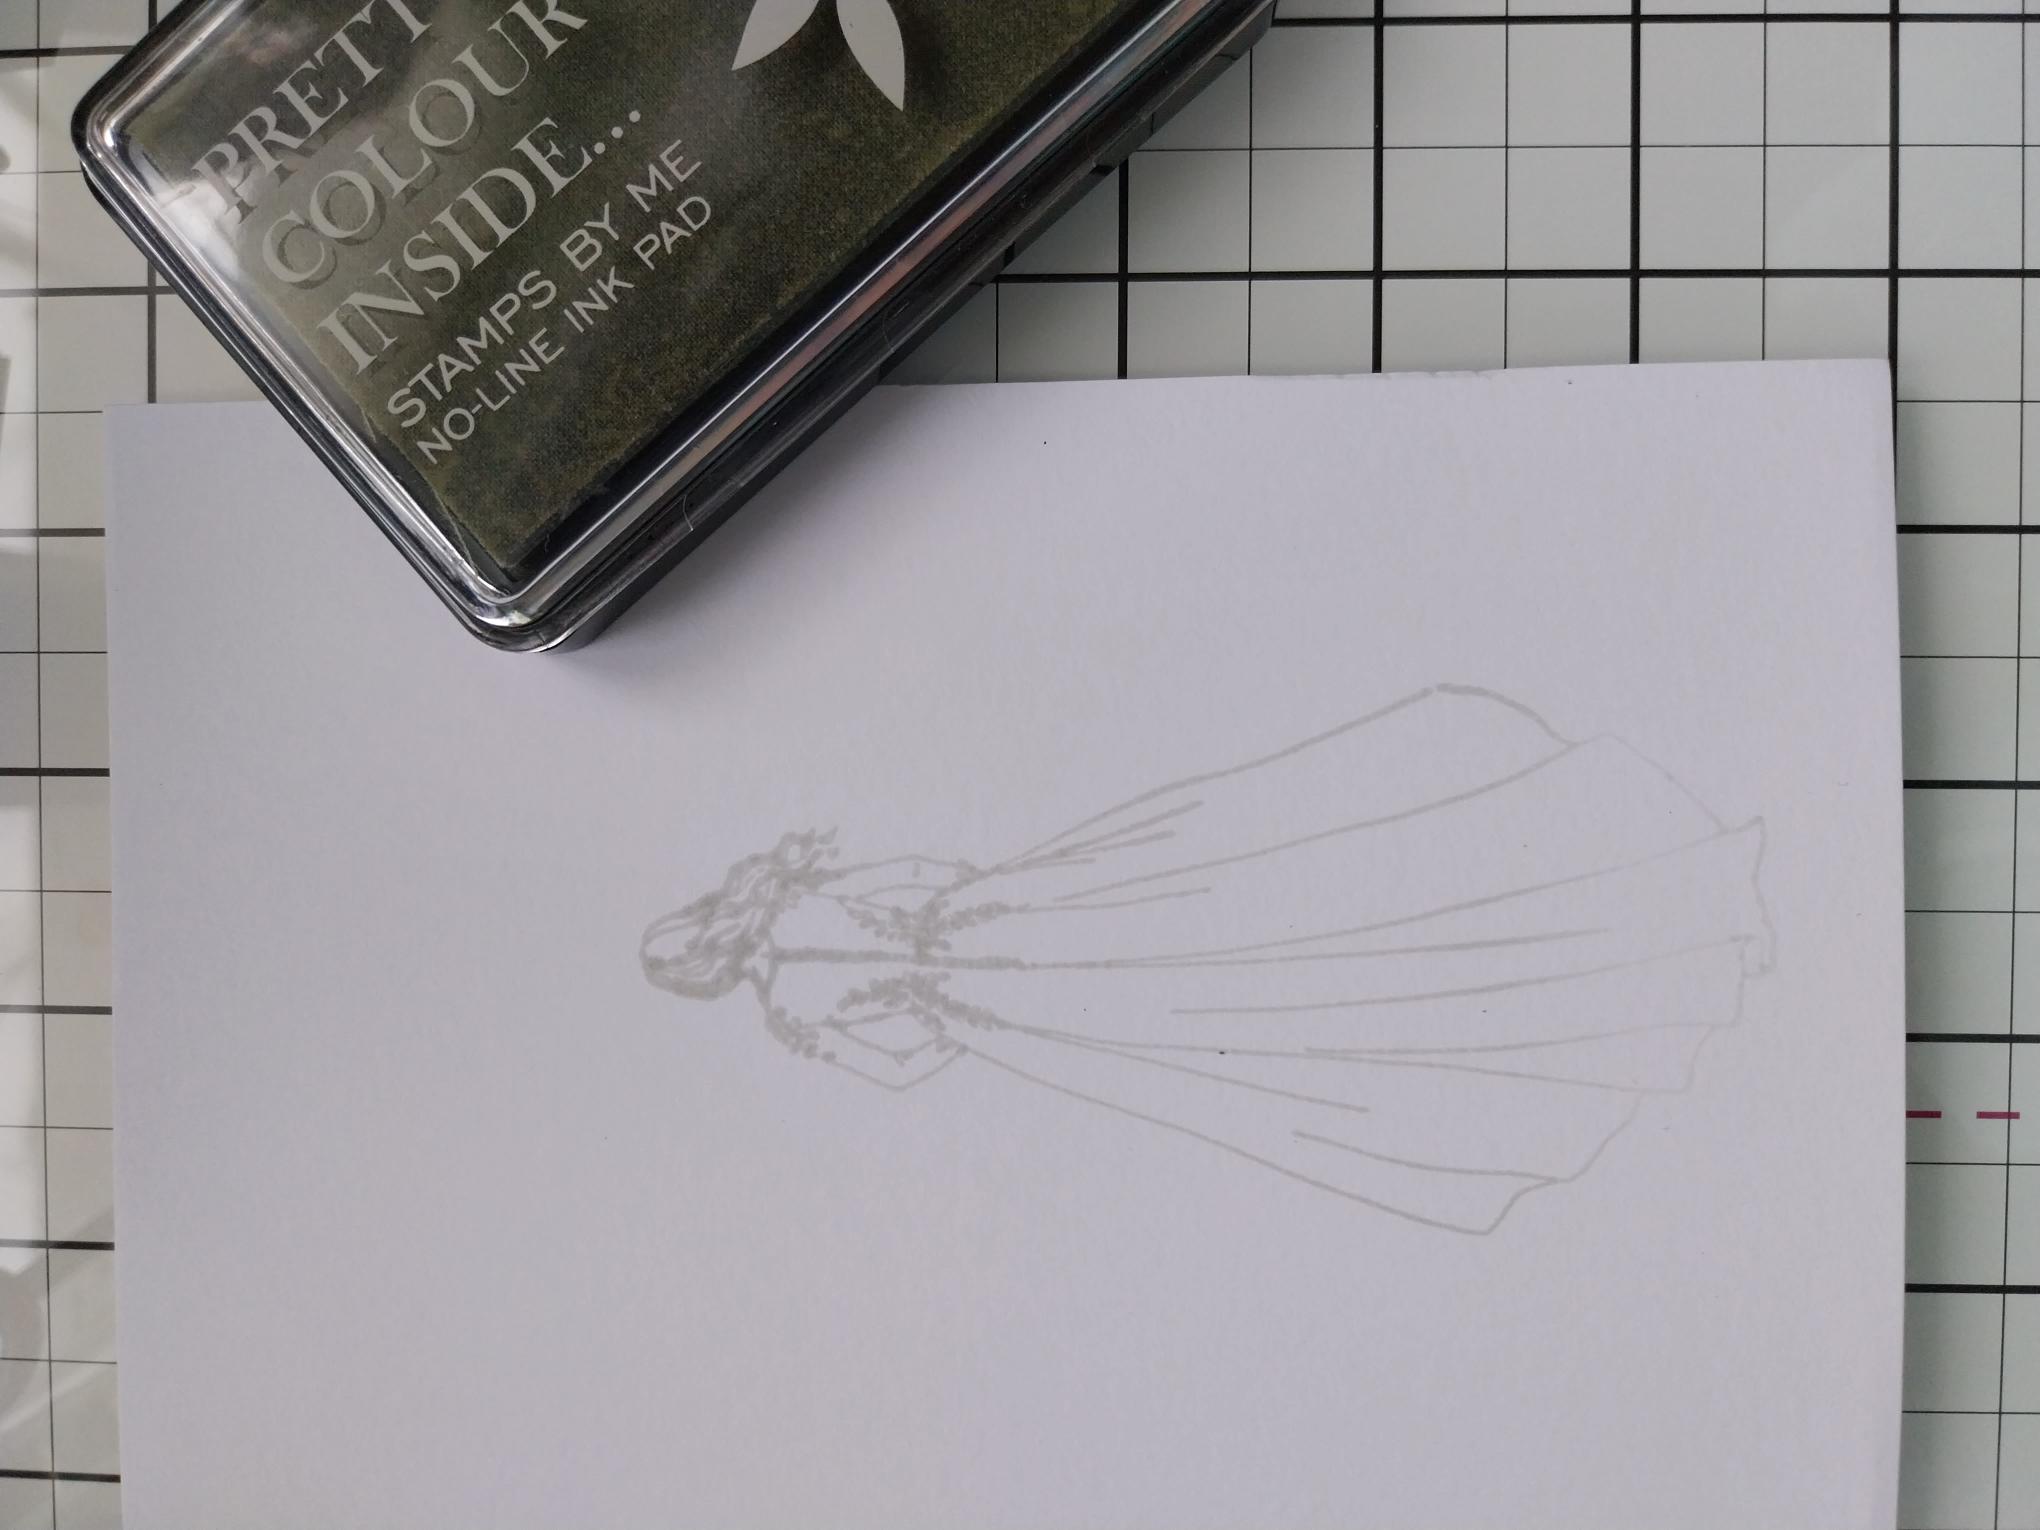
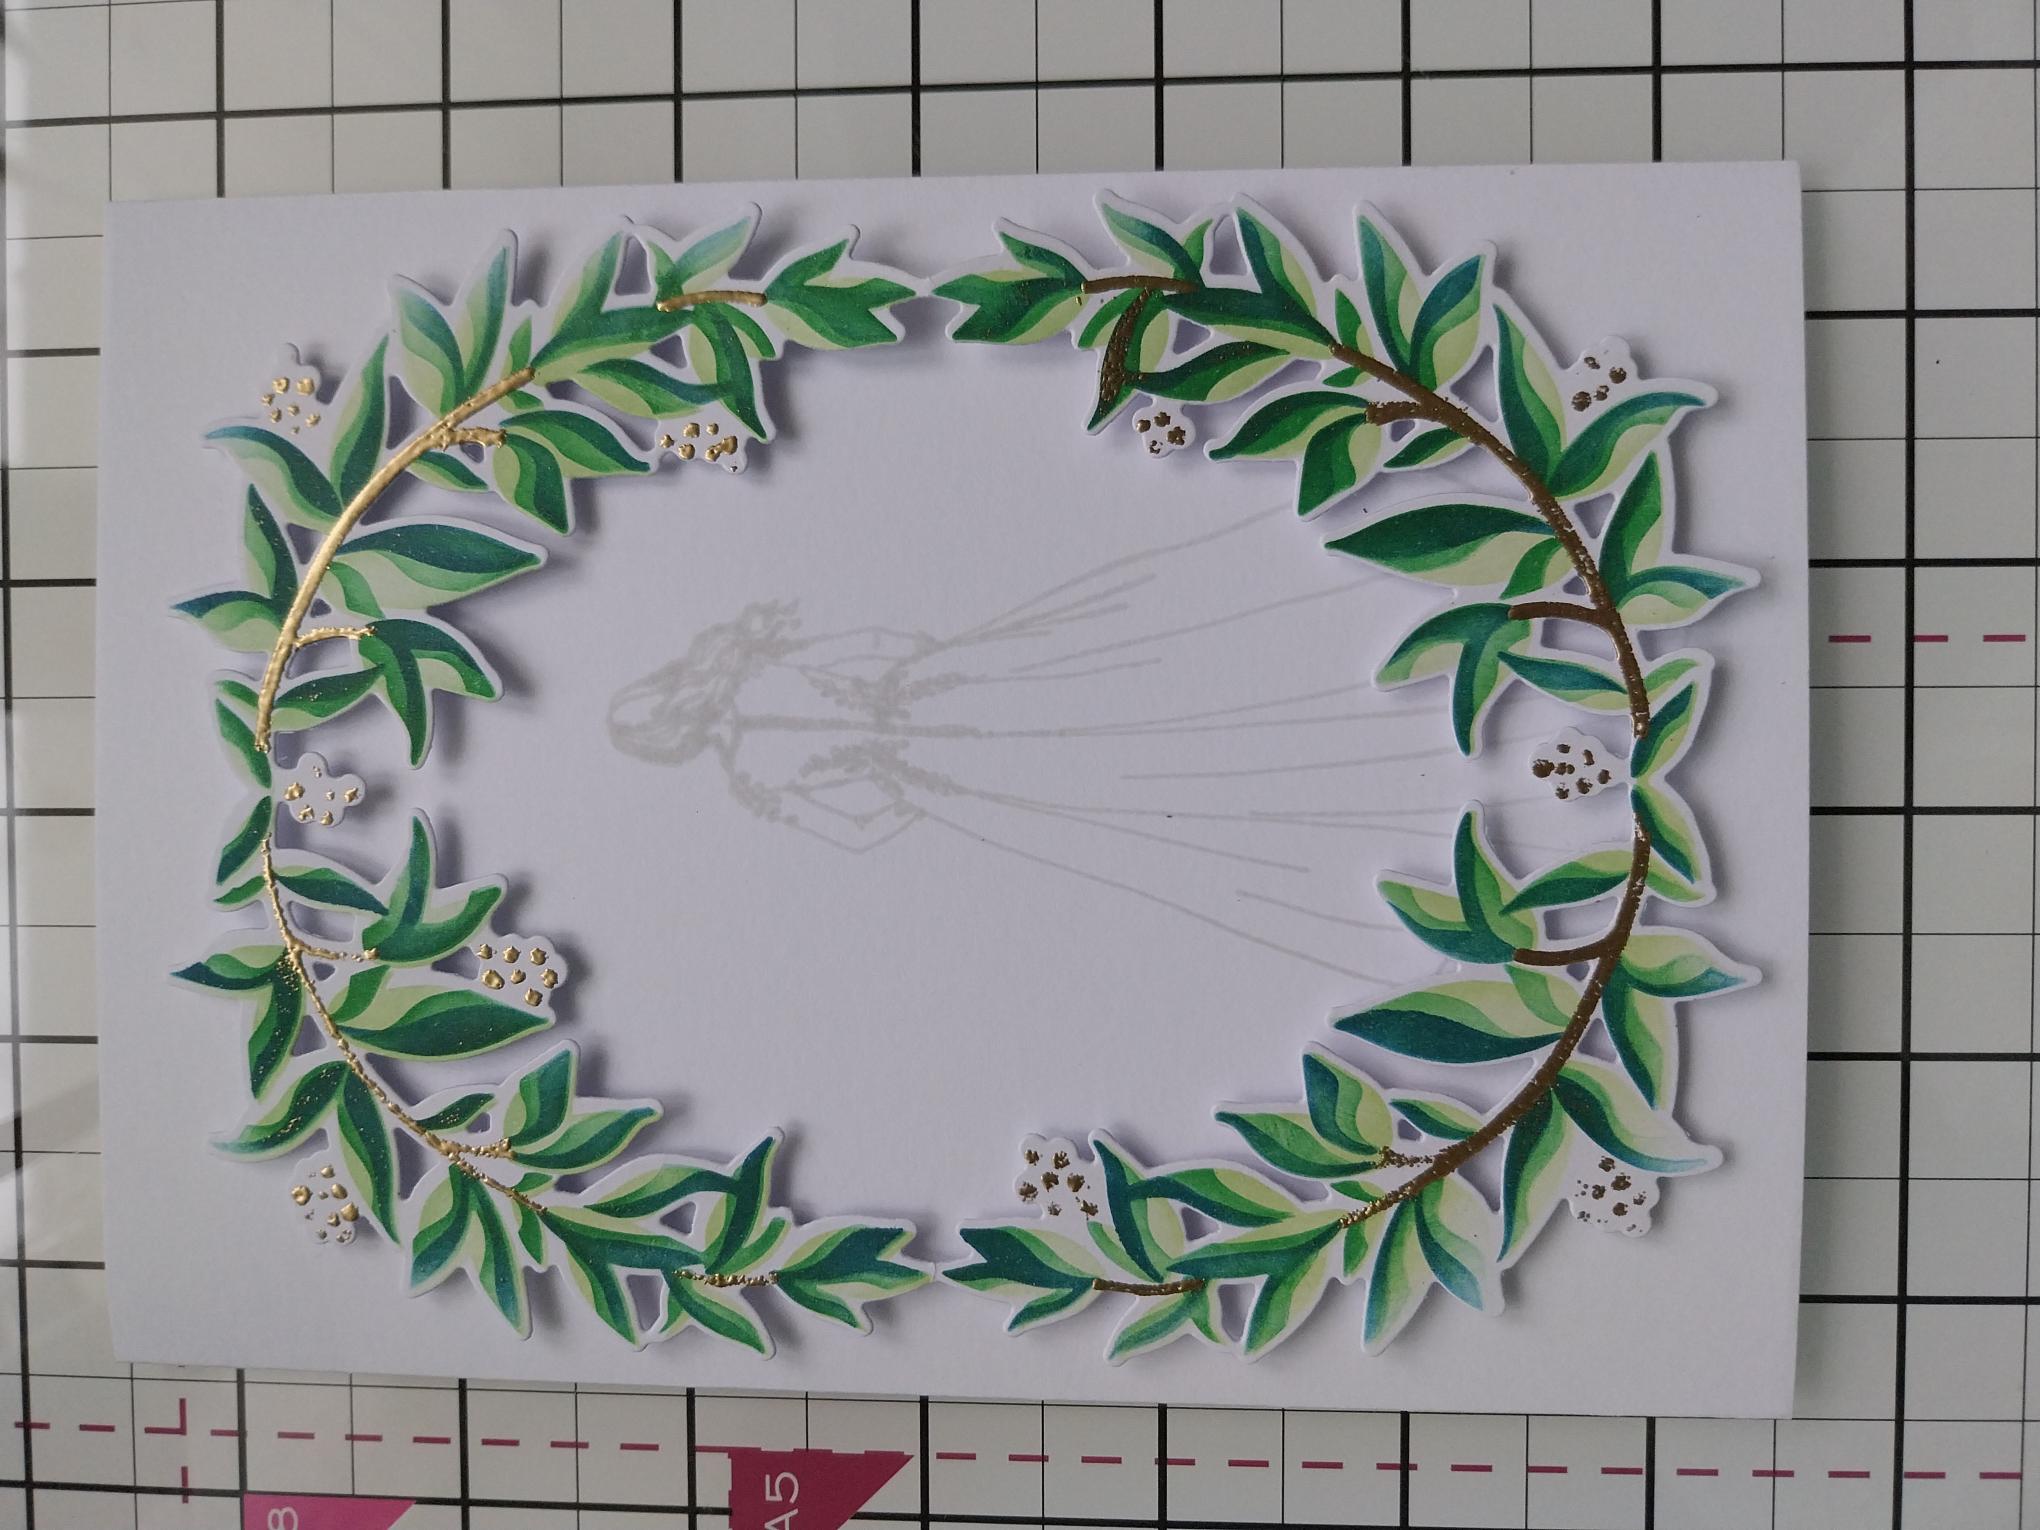
Ink the back of the gown Alice stamp, with your no-line ink pad. Using your die cut frame as a guide, stamp so she will sit slightly right, of the centre of the frame, on the front of your white card blank. |
|
Adhere the frame over your stamped reflection flat, with wet glue and set your card to one side. |
|
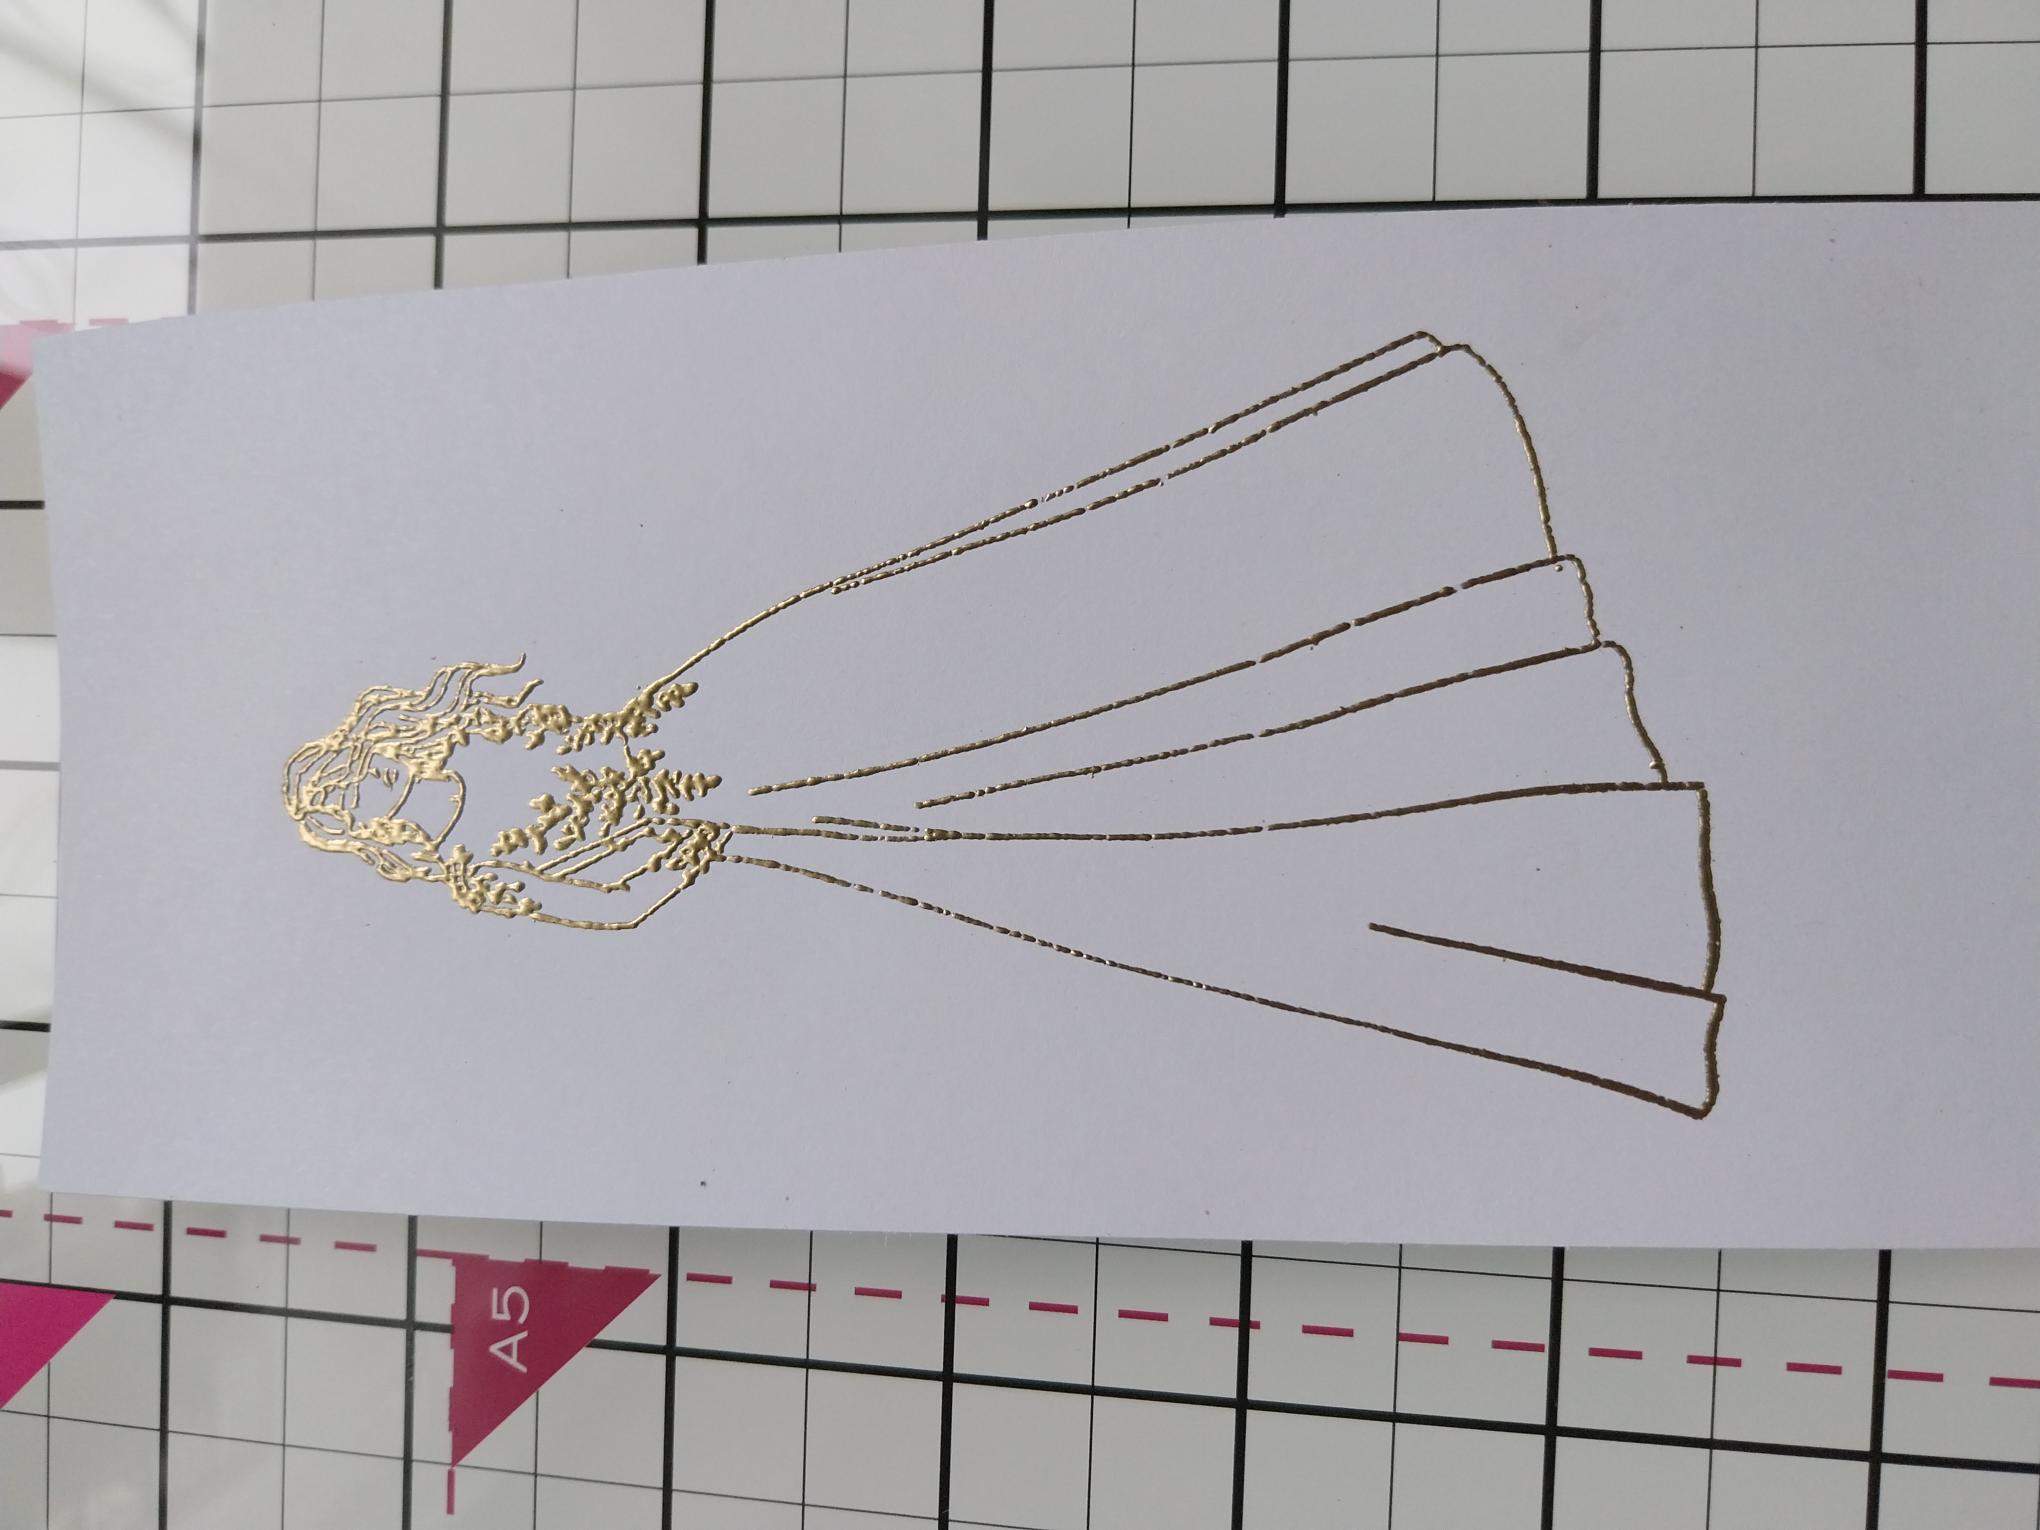
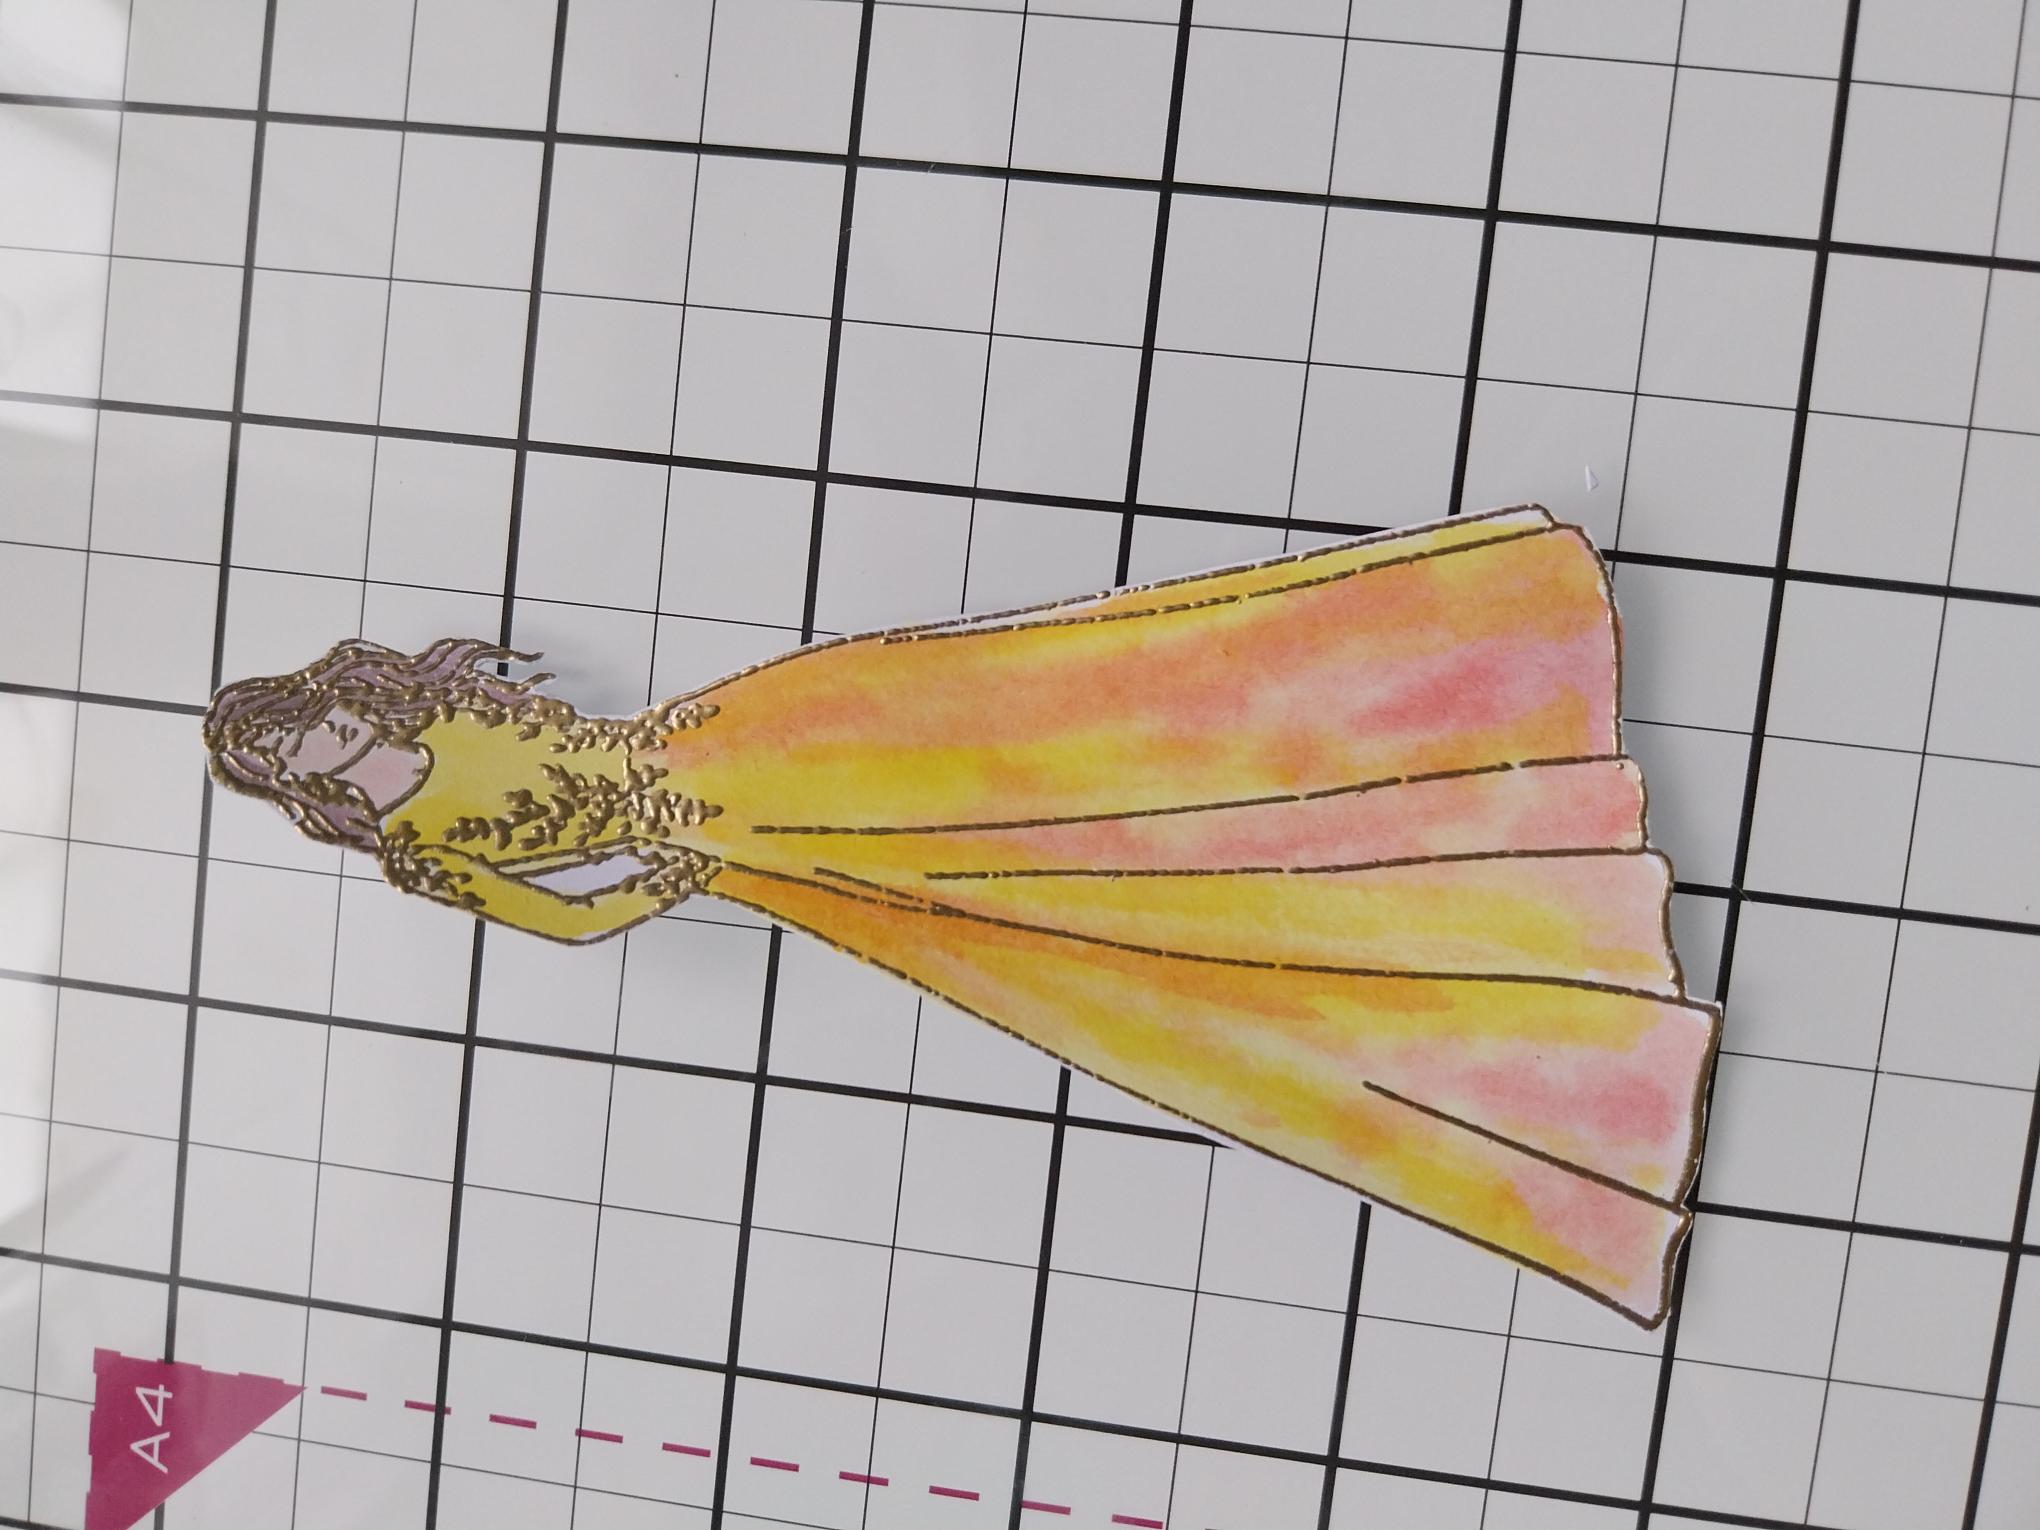
Cut a piece of white card bigger than your Alice stamp and wipe over with your anti-static bag. Ink the Alice stamp with the WOW sticky embossing ink and stamp on to the card. Apply the Gold embossing powder and heat set, as before. |
|
Paint your embossed image with your inks and a paint brush. I used Tattered Rose for the skin, Heather for the hair and Sherbet and Bittersweet for the gown. Pop to one side to dry. |
|
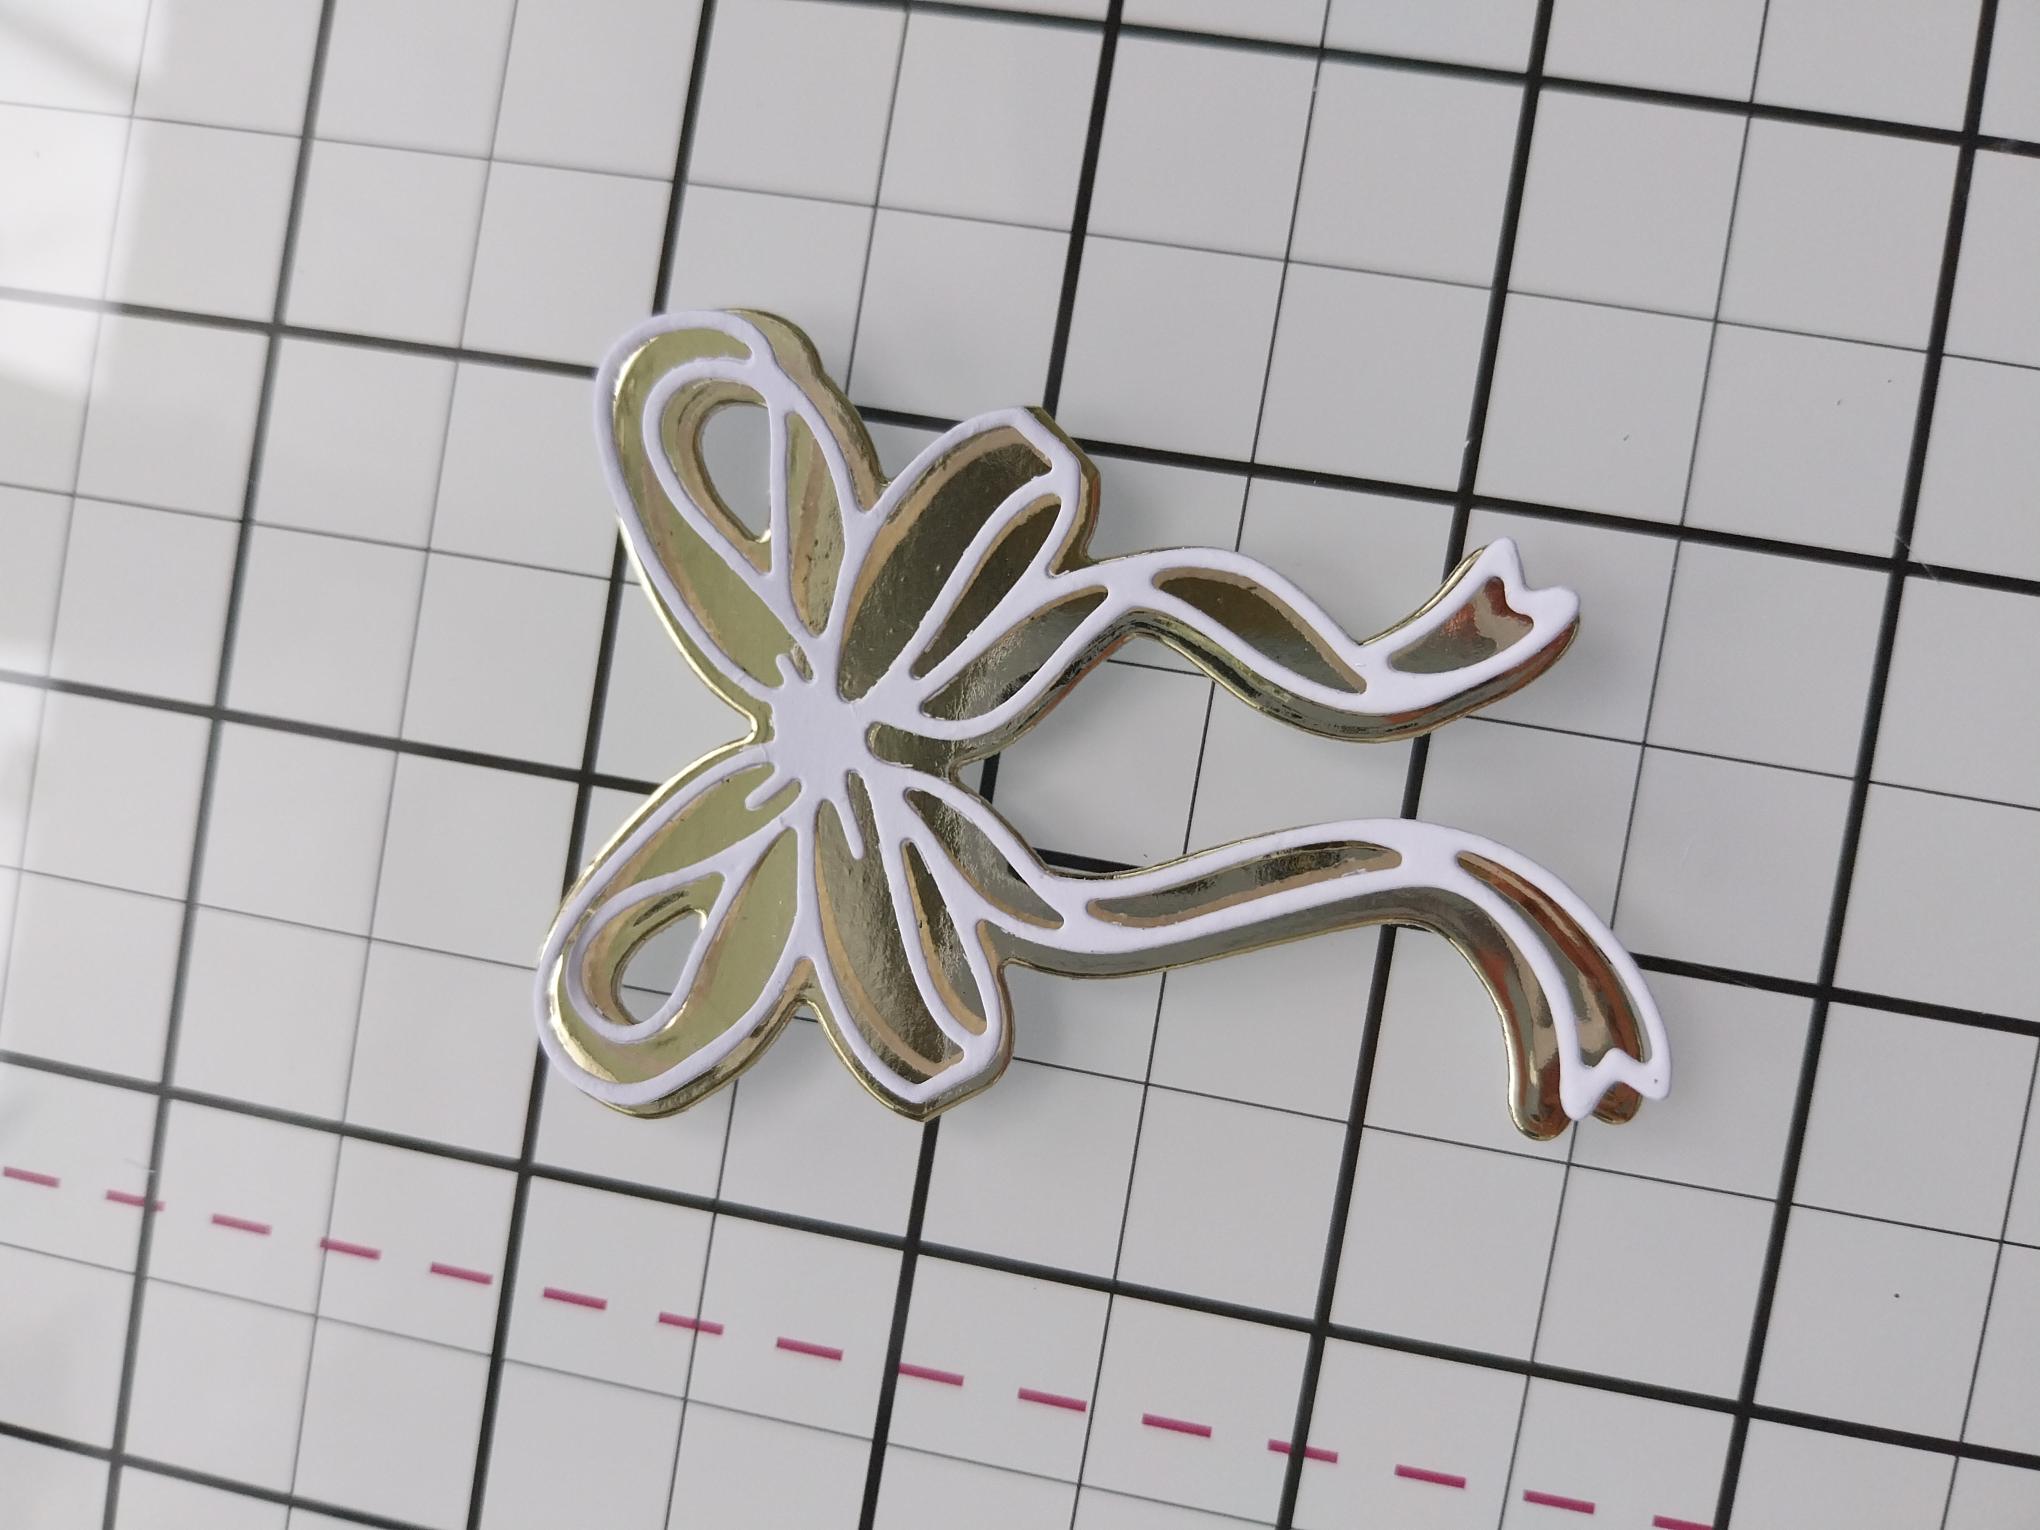
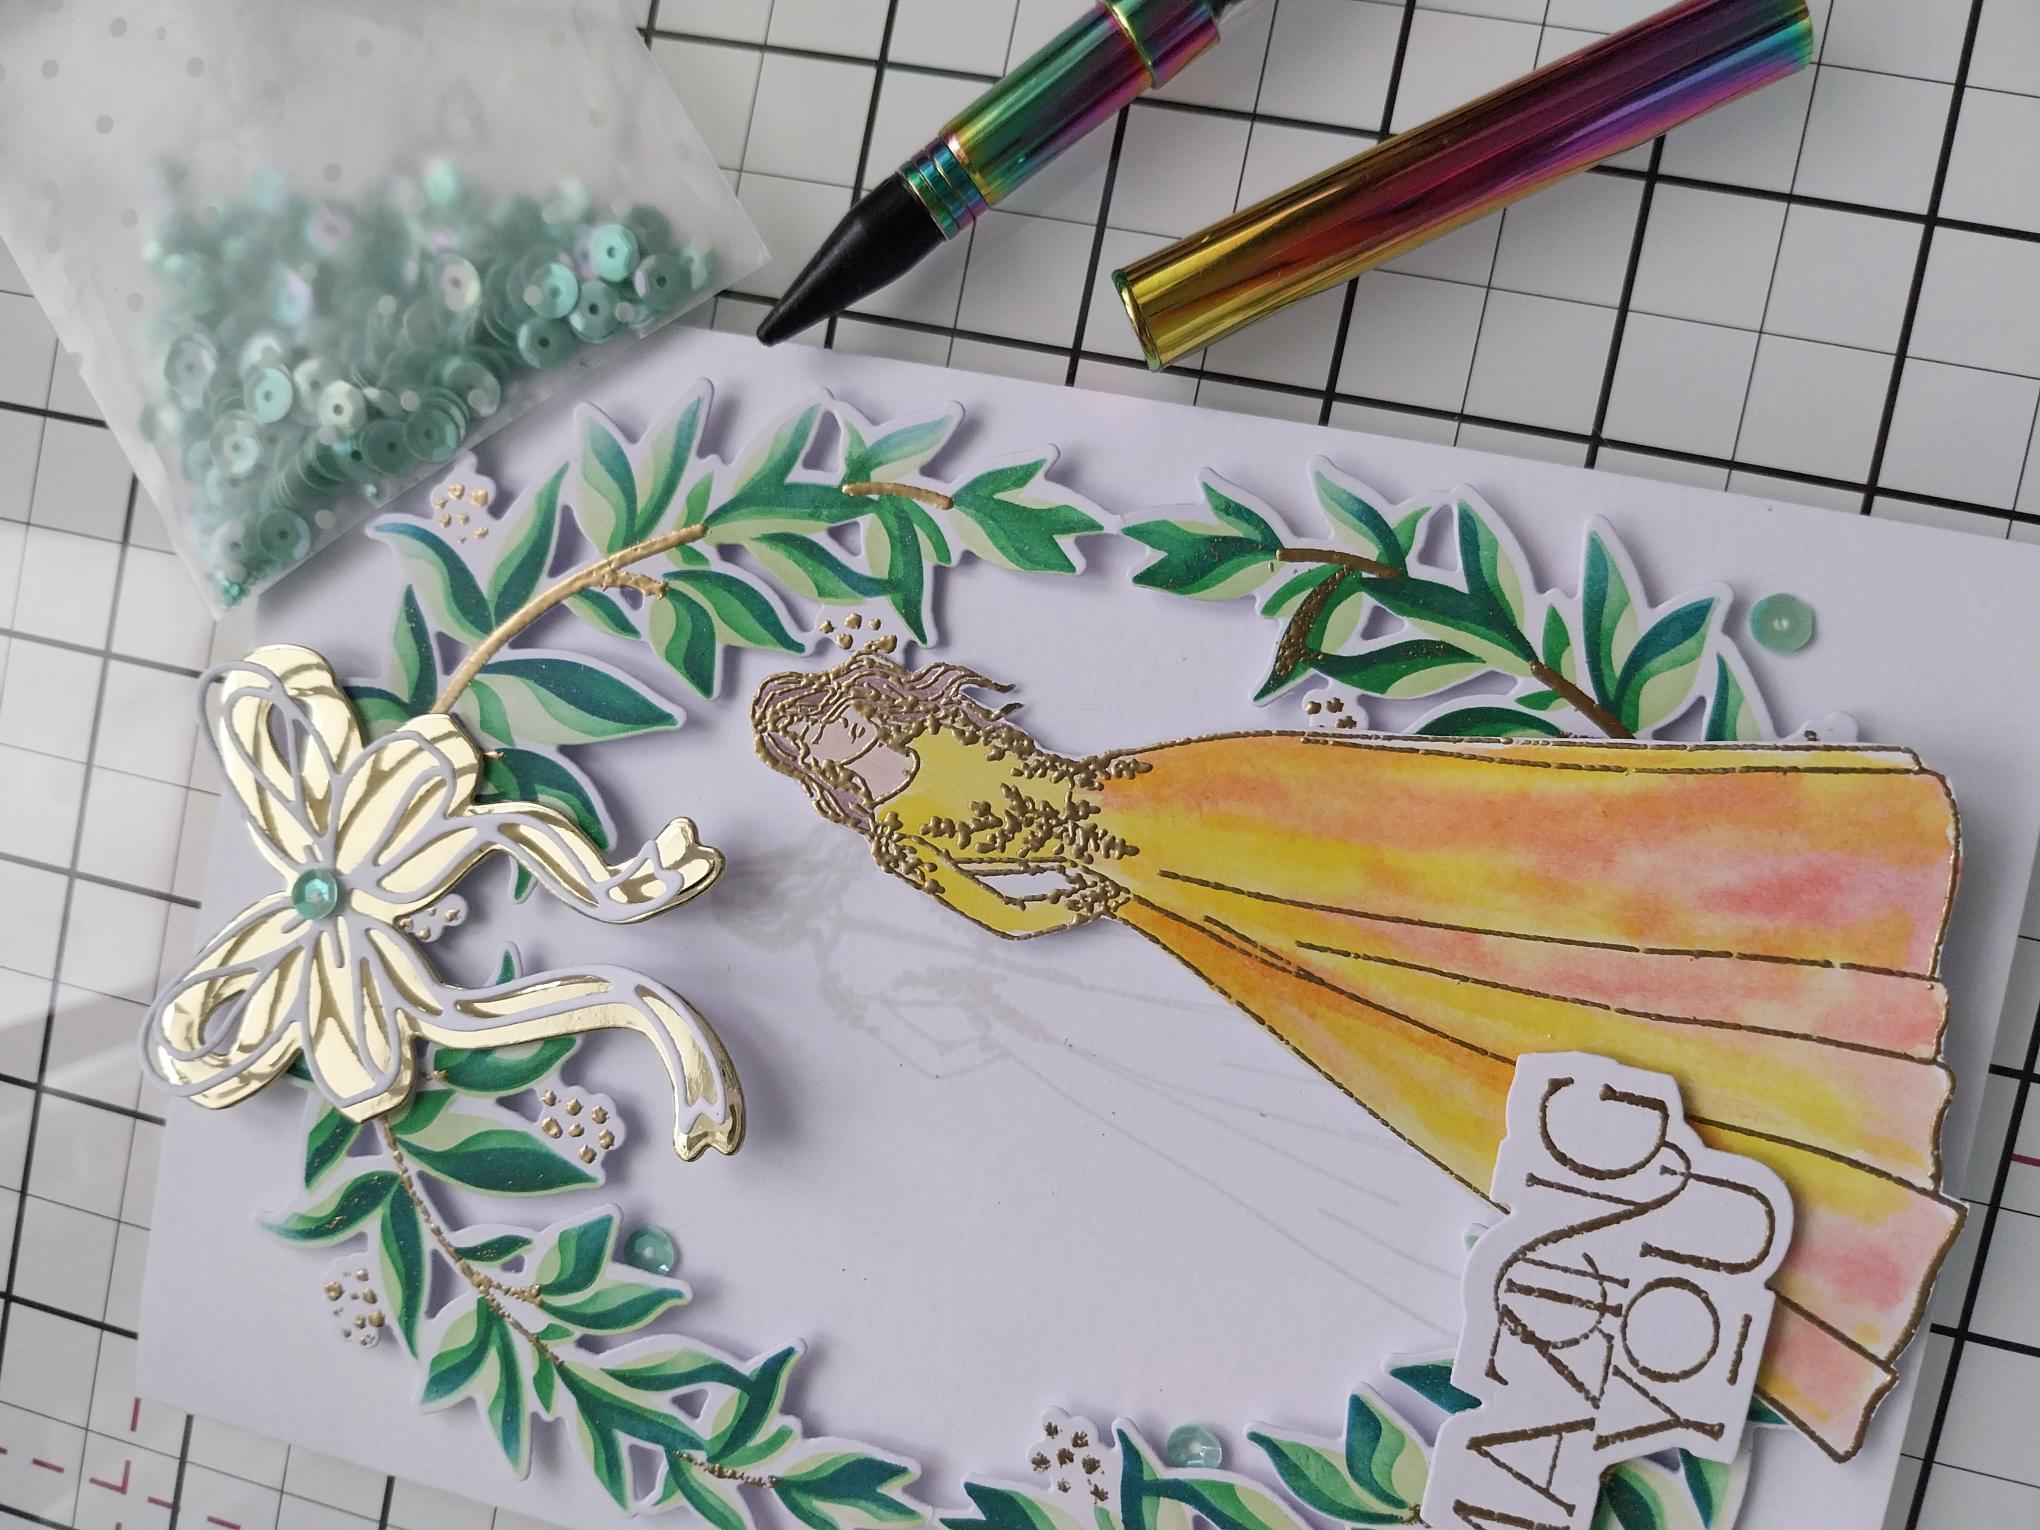
Using these dies from the Tied With Love Die Collection, cut the detailed bow in white card and the bow "mat" in Gold mirri card. Adhere the detailed bow on top of the mat, applying wet glue to the centre of the bow only, allowing for movement of the bow loops and tails. |
|
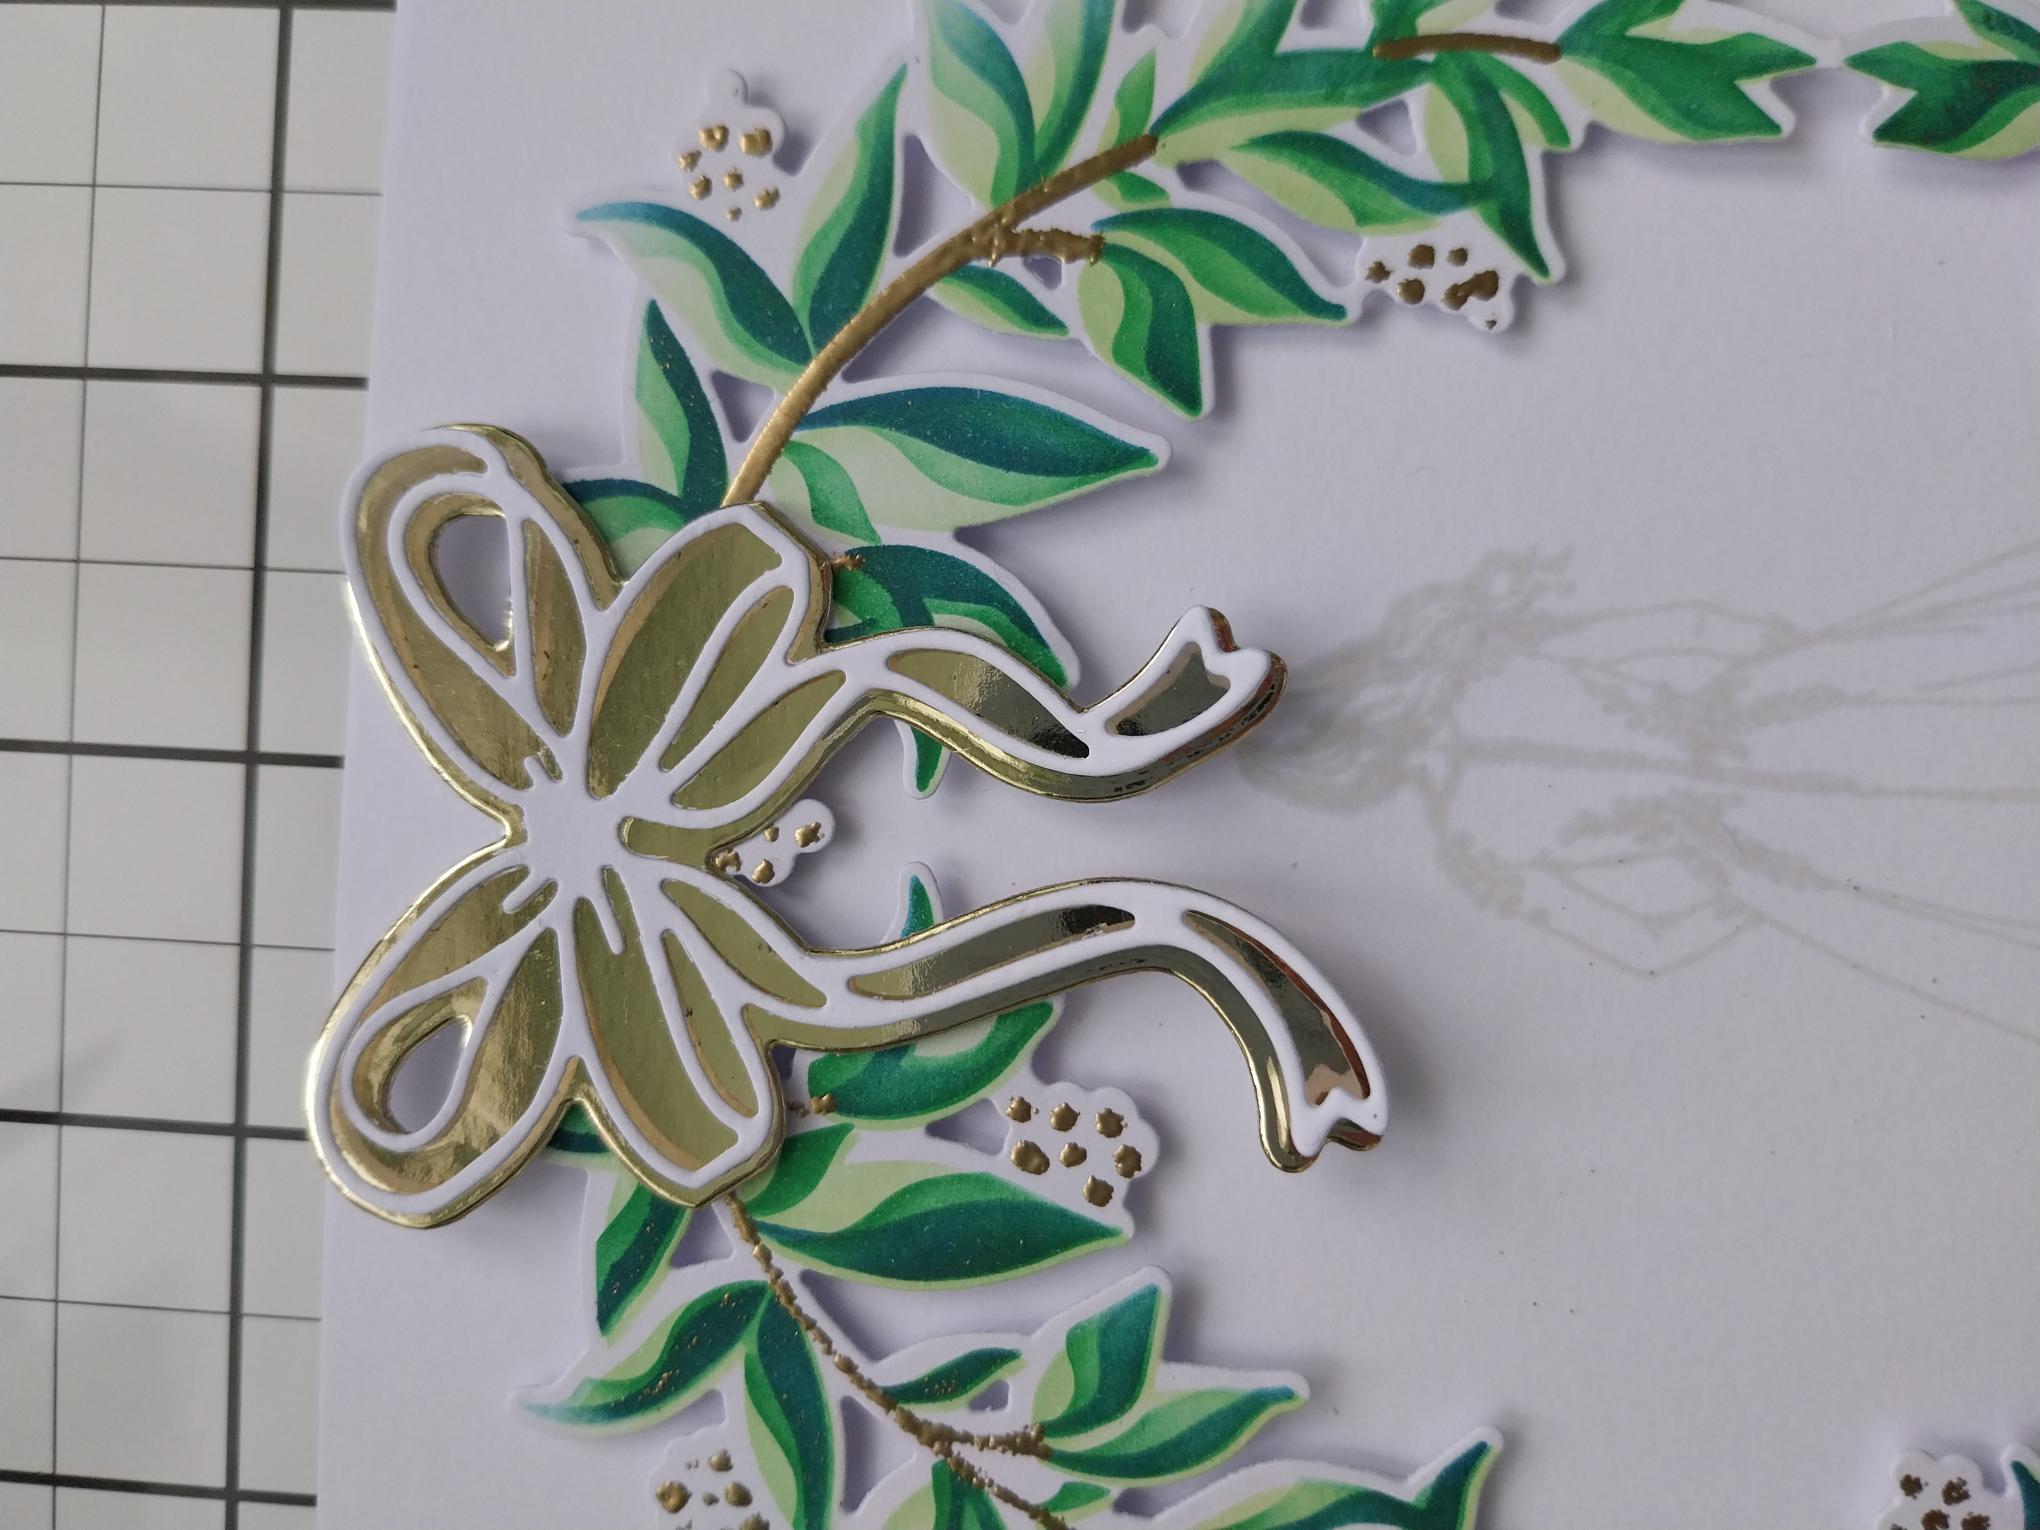
Adhere to the top centre of the frame, with a little foam pad just in the centre of the bow. |
|
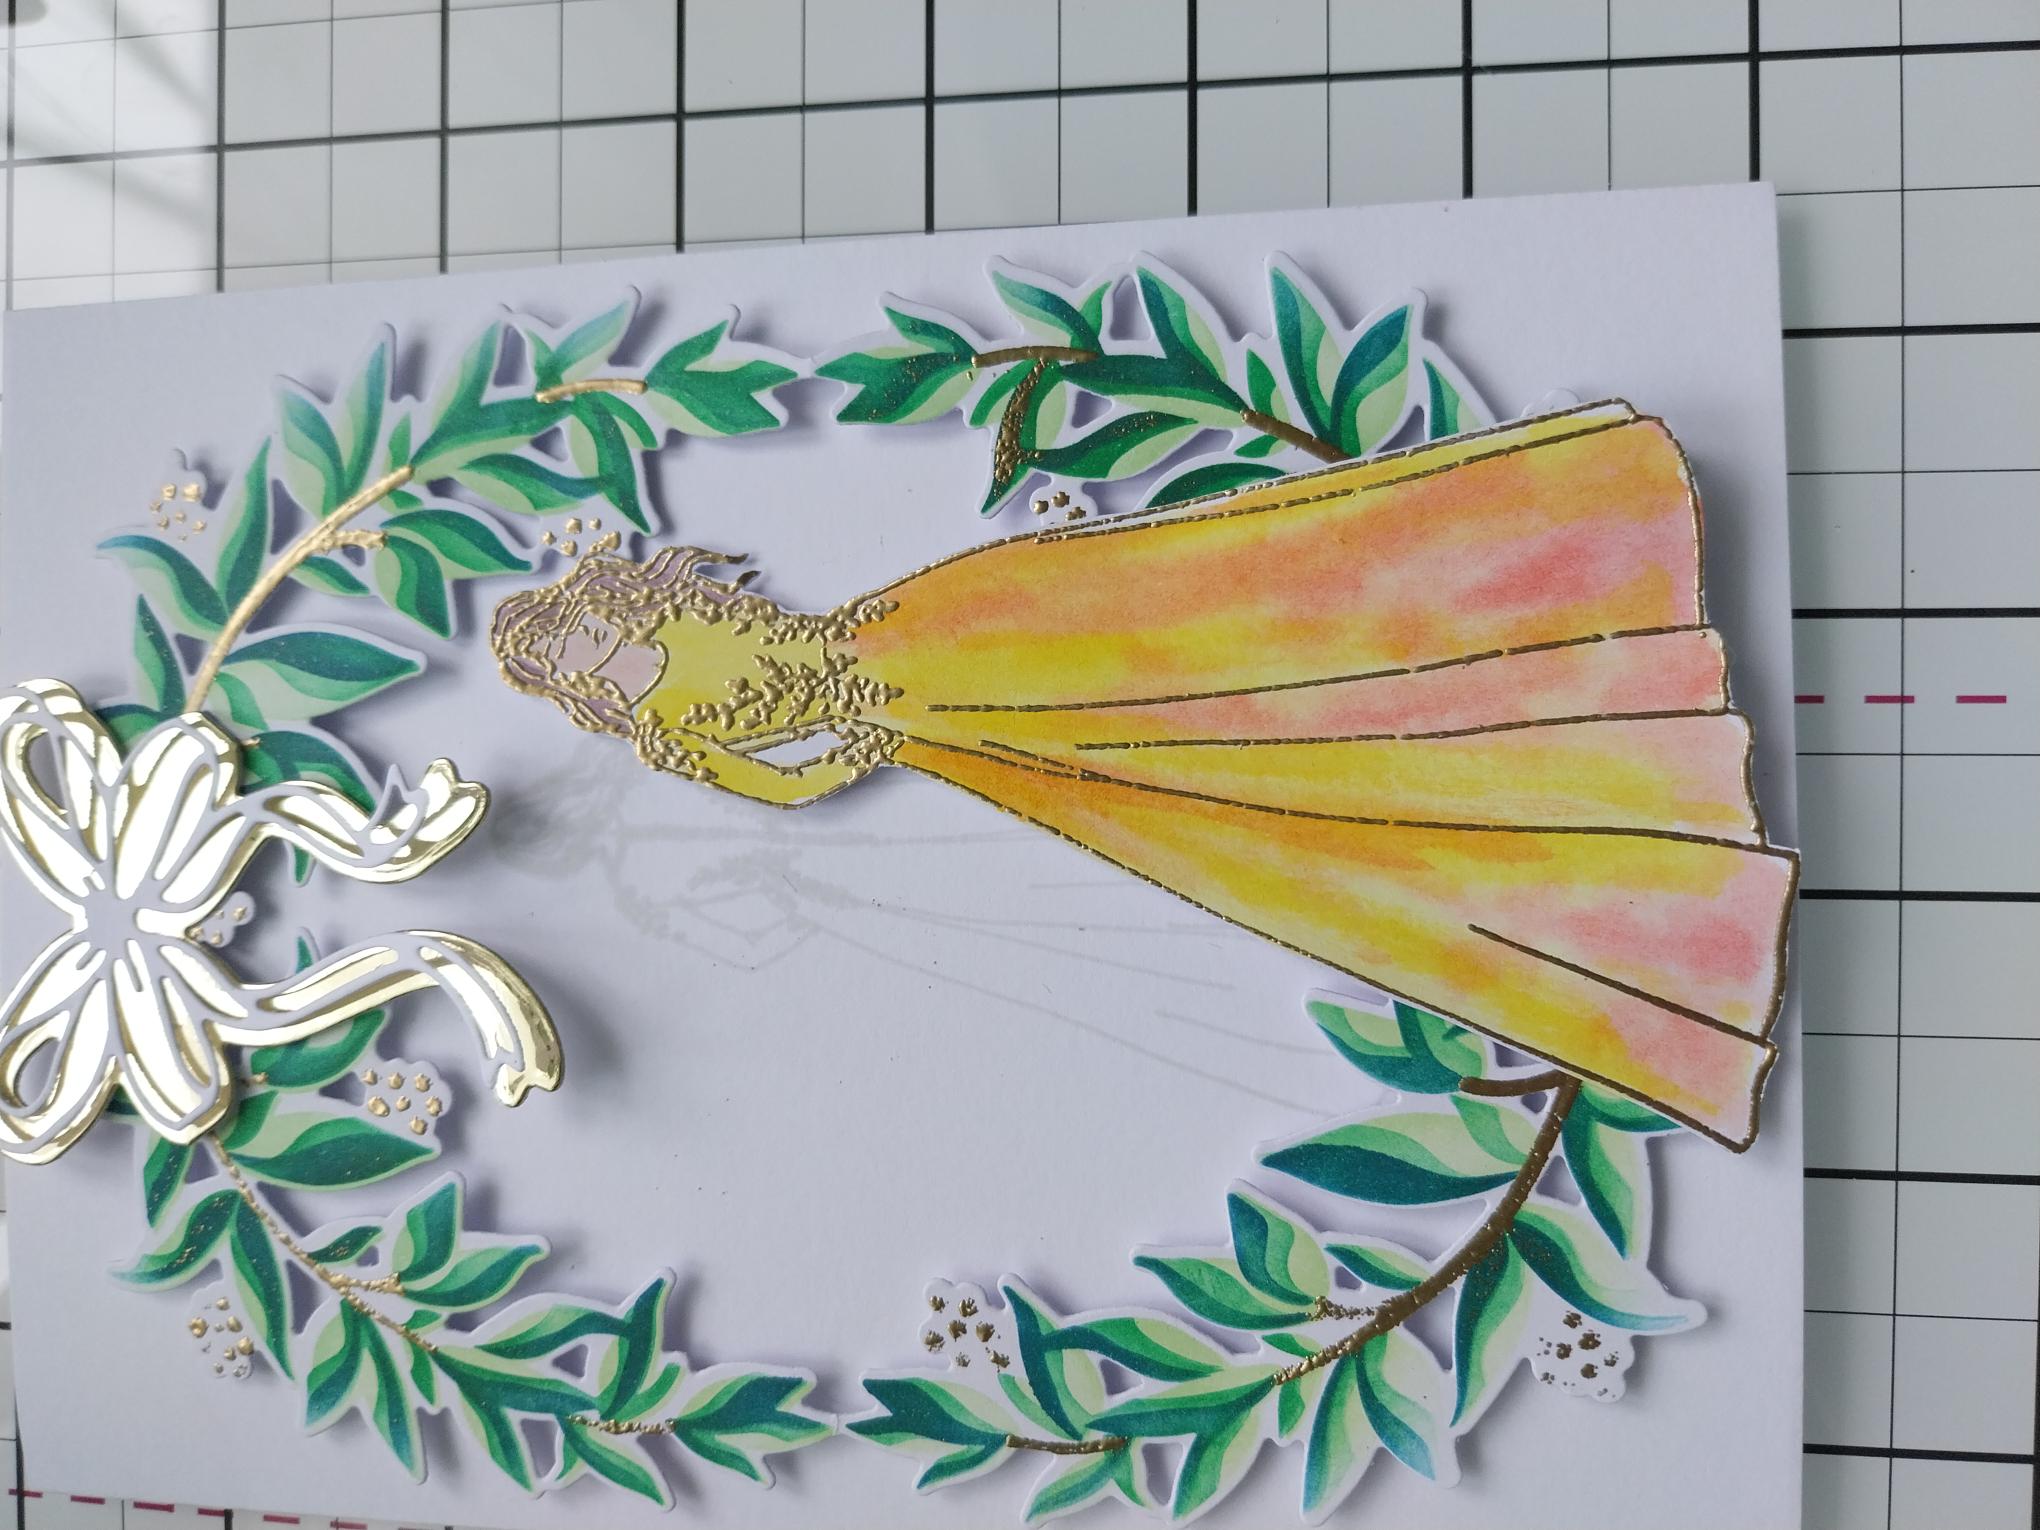
Use foam pads to adhere Alice to the right of her reflection, as seen here. |

|
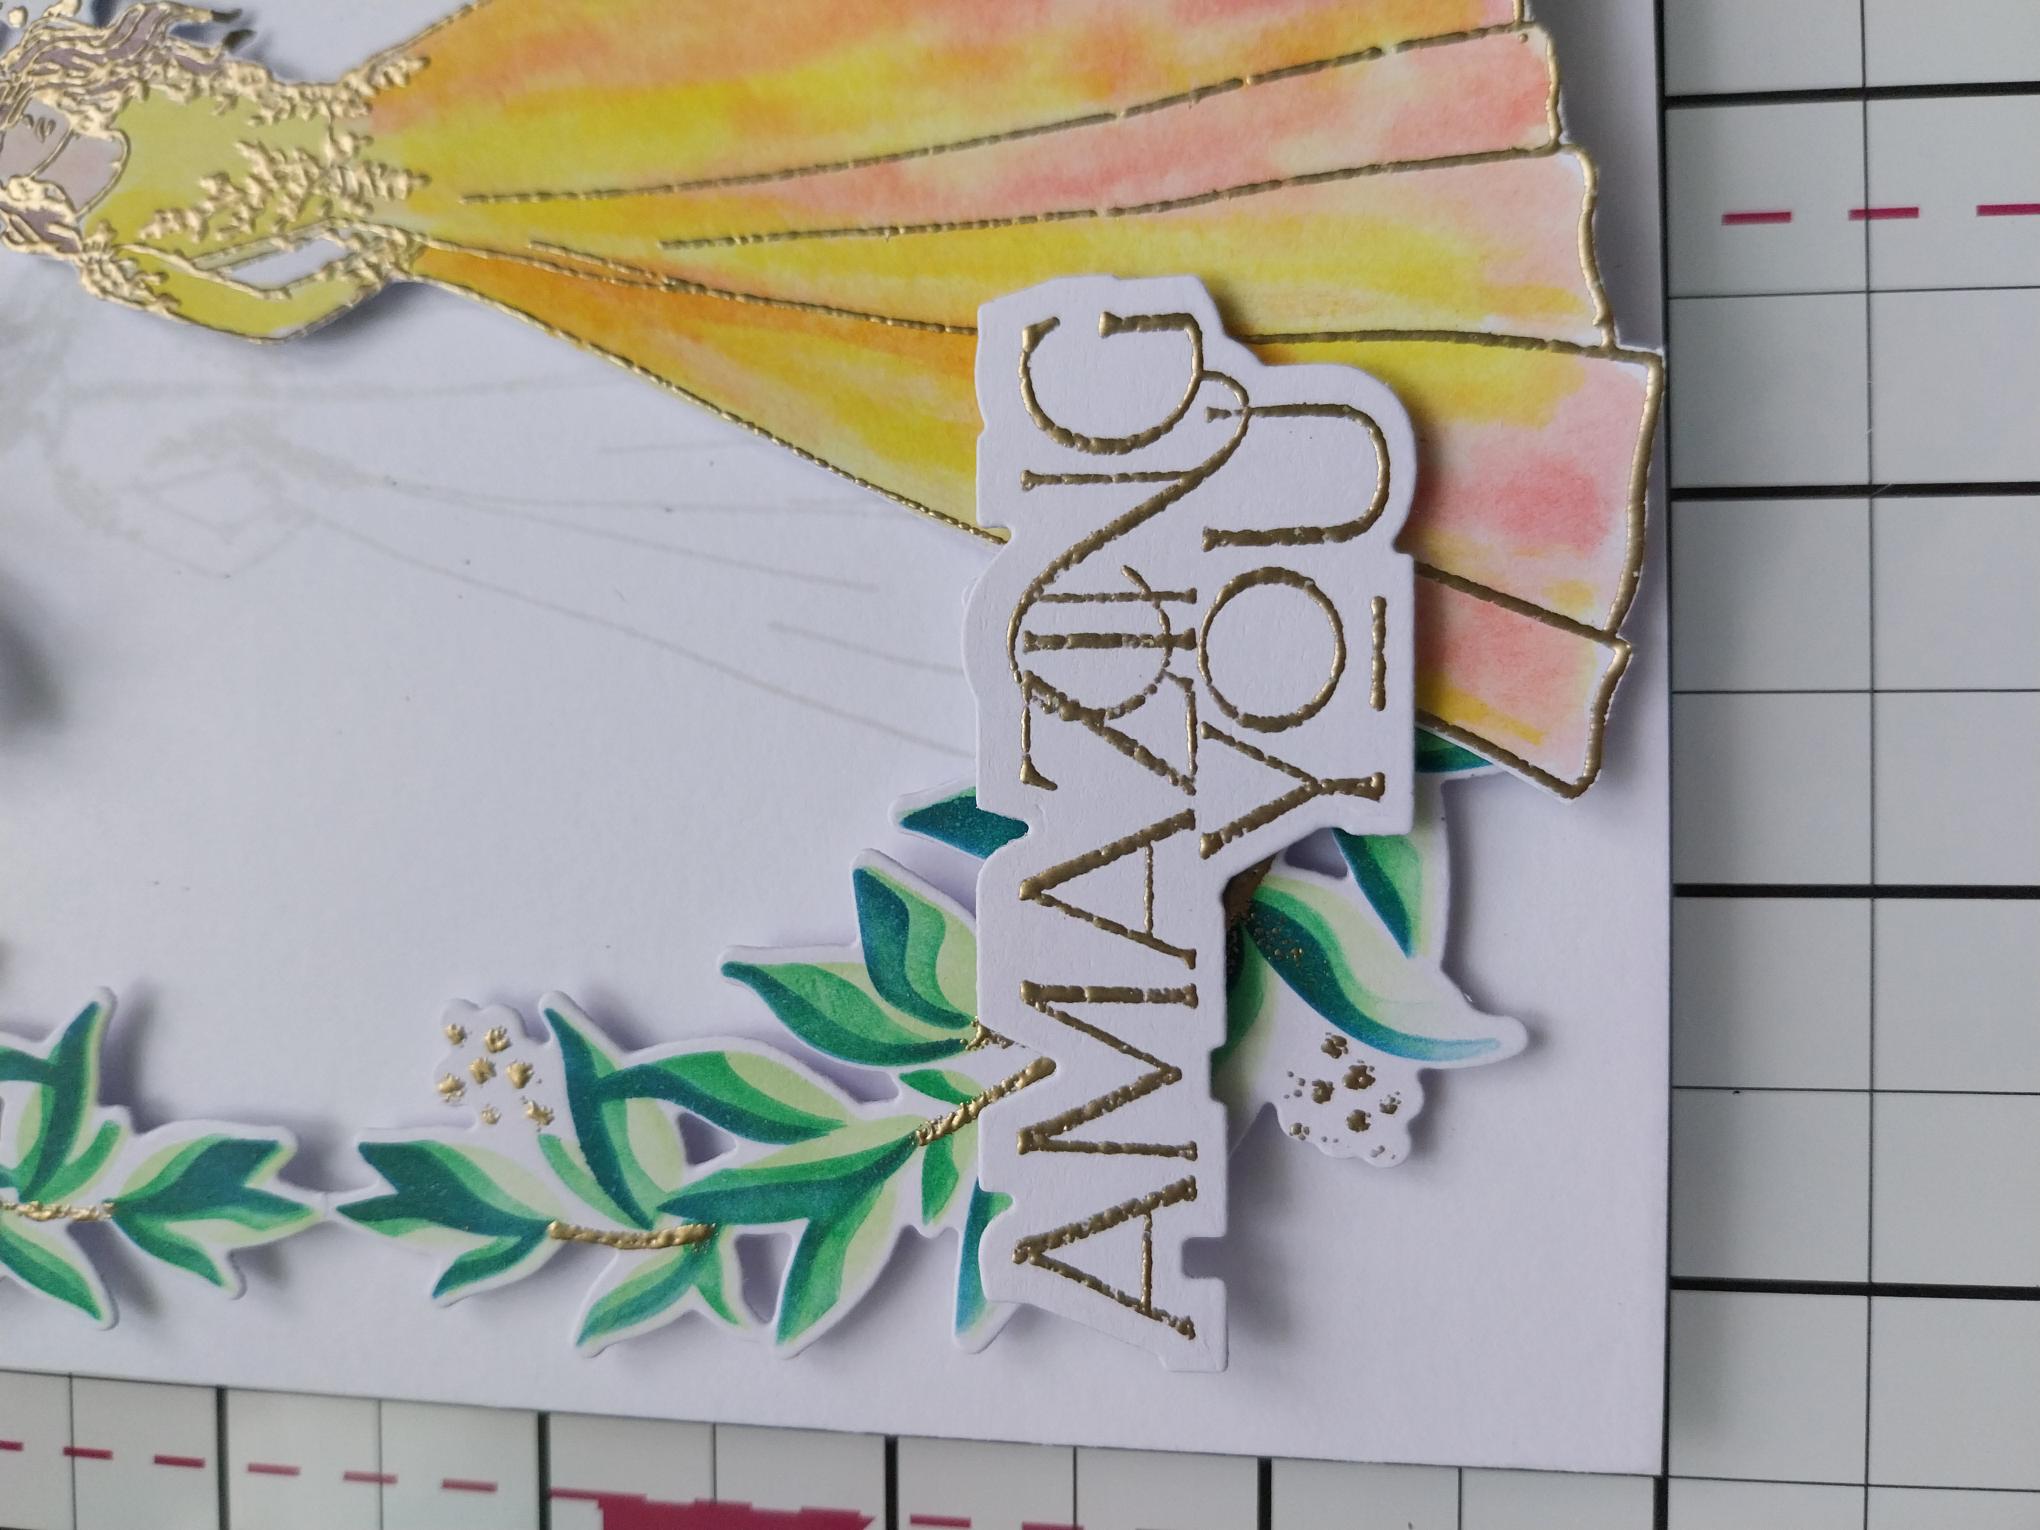
Cut a piece of card bigger than the "Amazing You" stamp and die, from the Saying Hello Collection. Wipe the card with your anti-static bag, before inking and stamping the sentiment with the WOW sticky embossing ink. Cover with the Gold embossing powder and heat set. Use the coordinating "mat" solid die, to cut it out. |
|
Adhere your die cut sentiment to the left of Alice, with foam pads. |
|
To finish your card, add sequins where required. |