Give your friends $10 off their first order!
Refer a FRIEND


WHAT YOU WILL NEED:
White card blank 7 1/2 x 5 1/2"
White card 7 x 5"
White card 6 x 4"
Black card
Sadie Stamp, Die and Stencil Collection
Saying Hello Stamp and Die Collection
Sunshine In My Pocket 8 x 8" Textured Paper Pack
Watercolour 3D Sunflower Embossing Folder
SBM Hybrid Ink Pad: Midnight
SBM Premium Dye Ink Pad: Sherbet, Bittersweet, Hedgerow, Limeade
Blending tool
HIMI Oil Pencils
Ranger Stickles: Diamond
Eureka 101 Watercolour Tablet
SBM Magnetic glass mat
Paper Trimmer
Perfect Together Glue
Foam pads
Die Cutting machine
[click image to enlarge] 
|
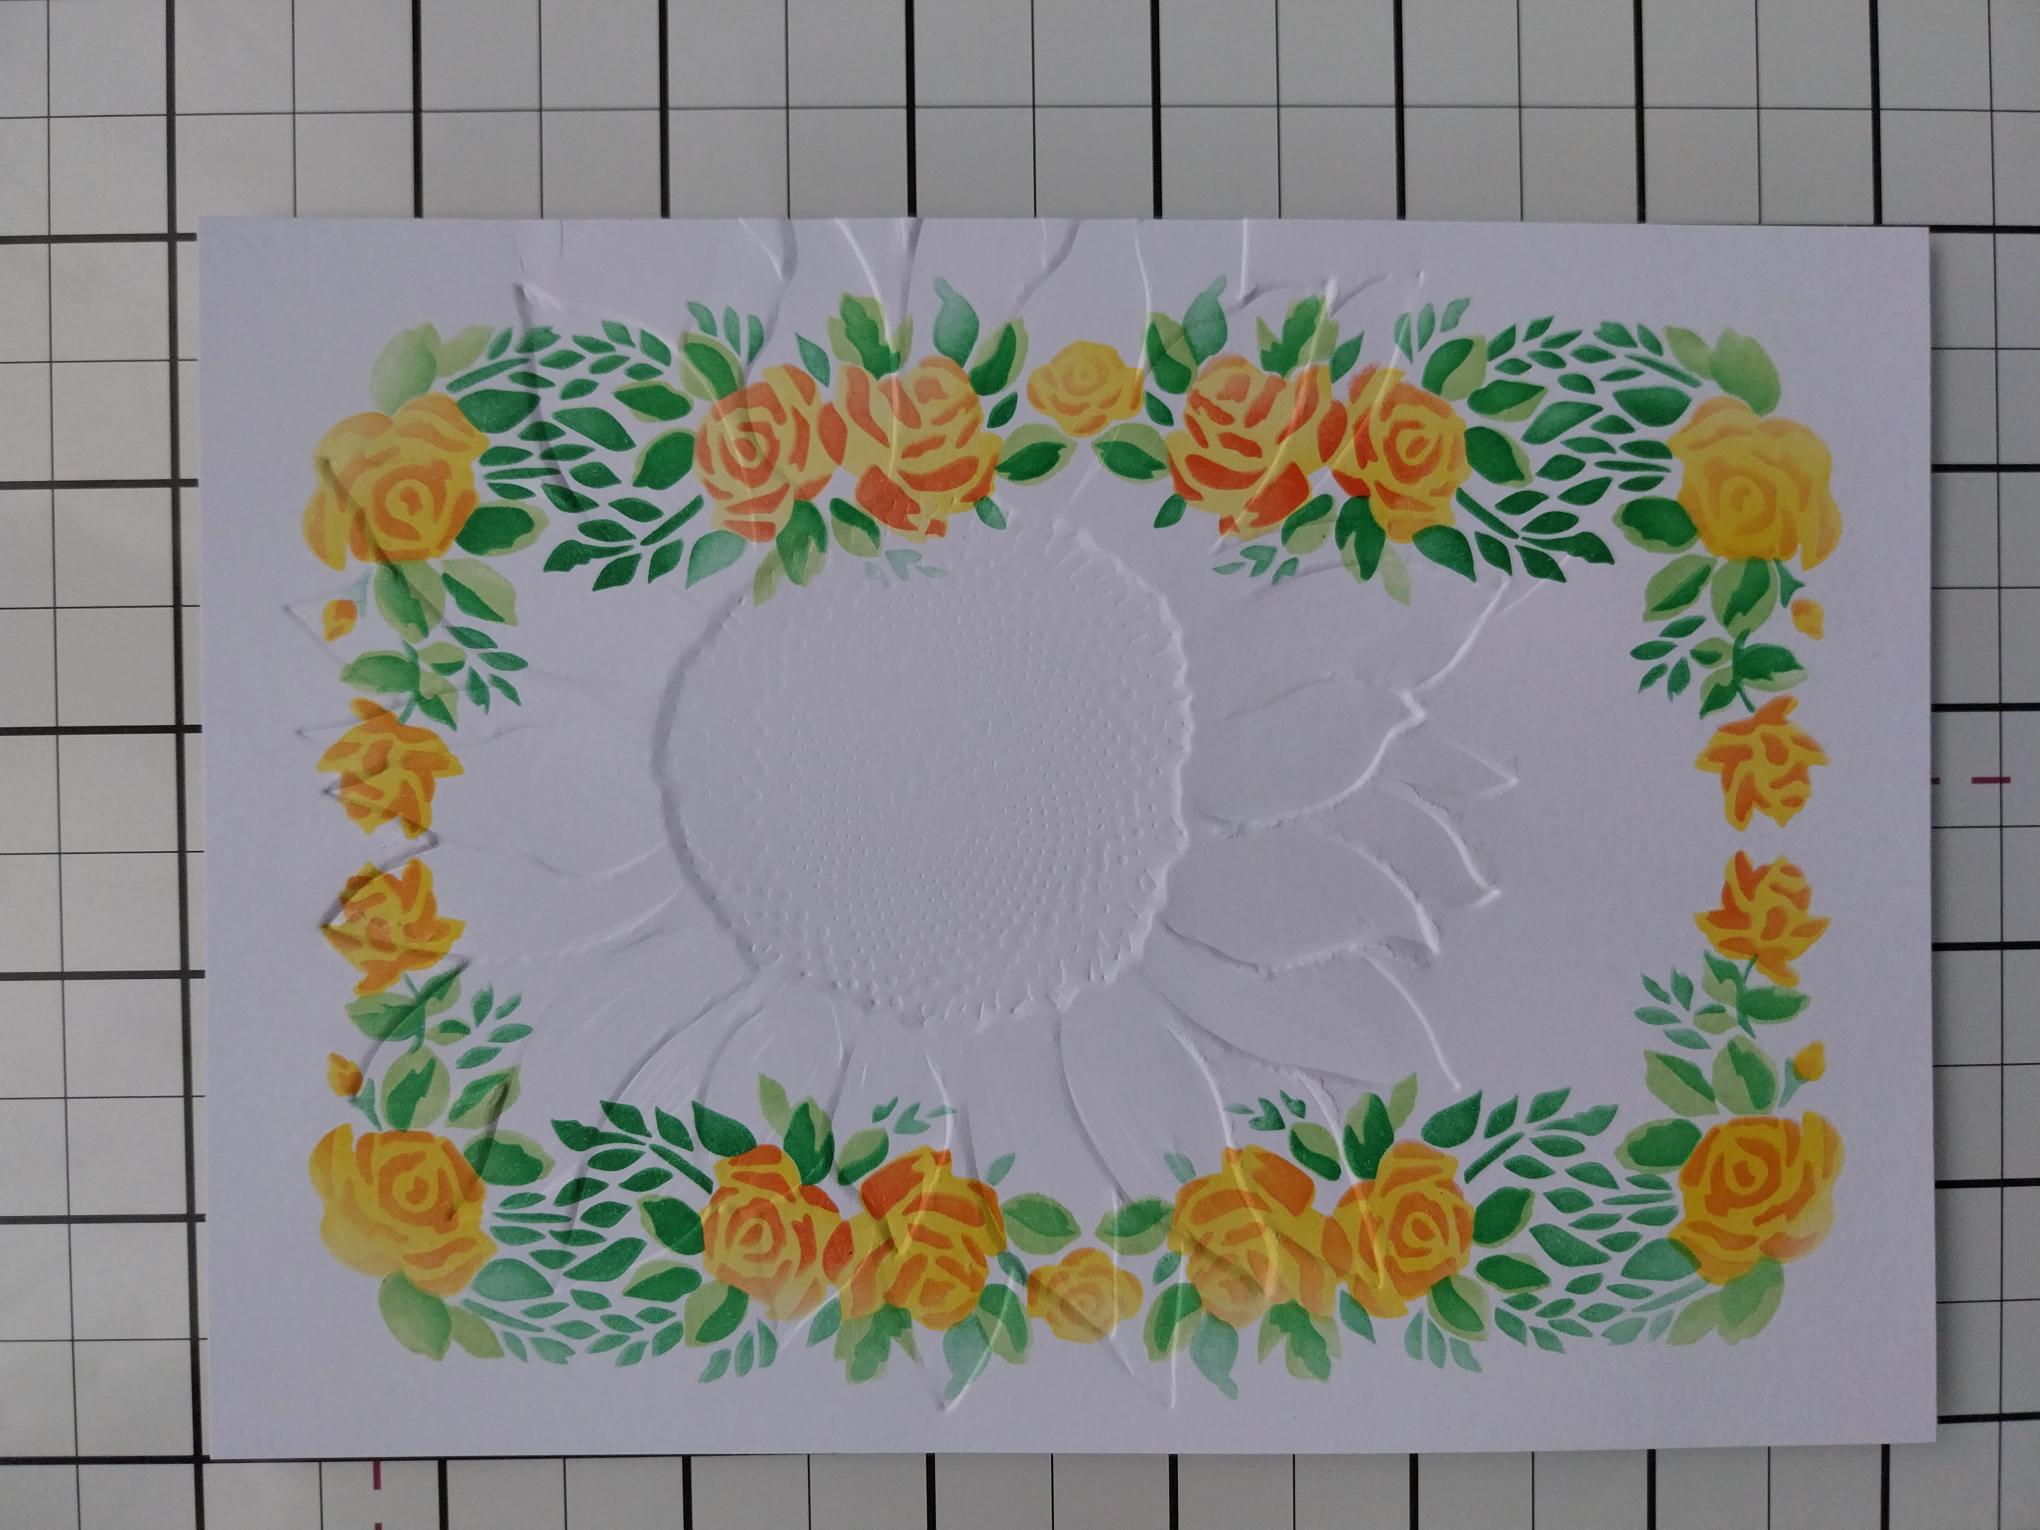
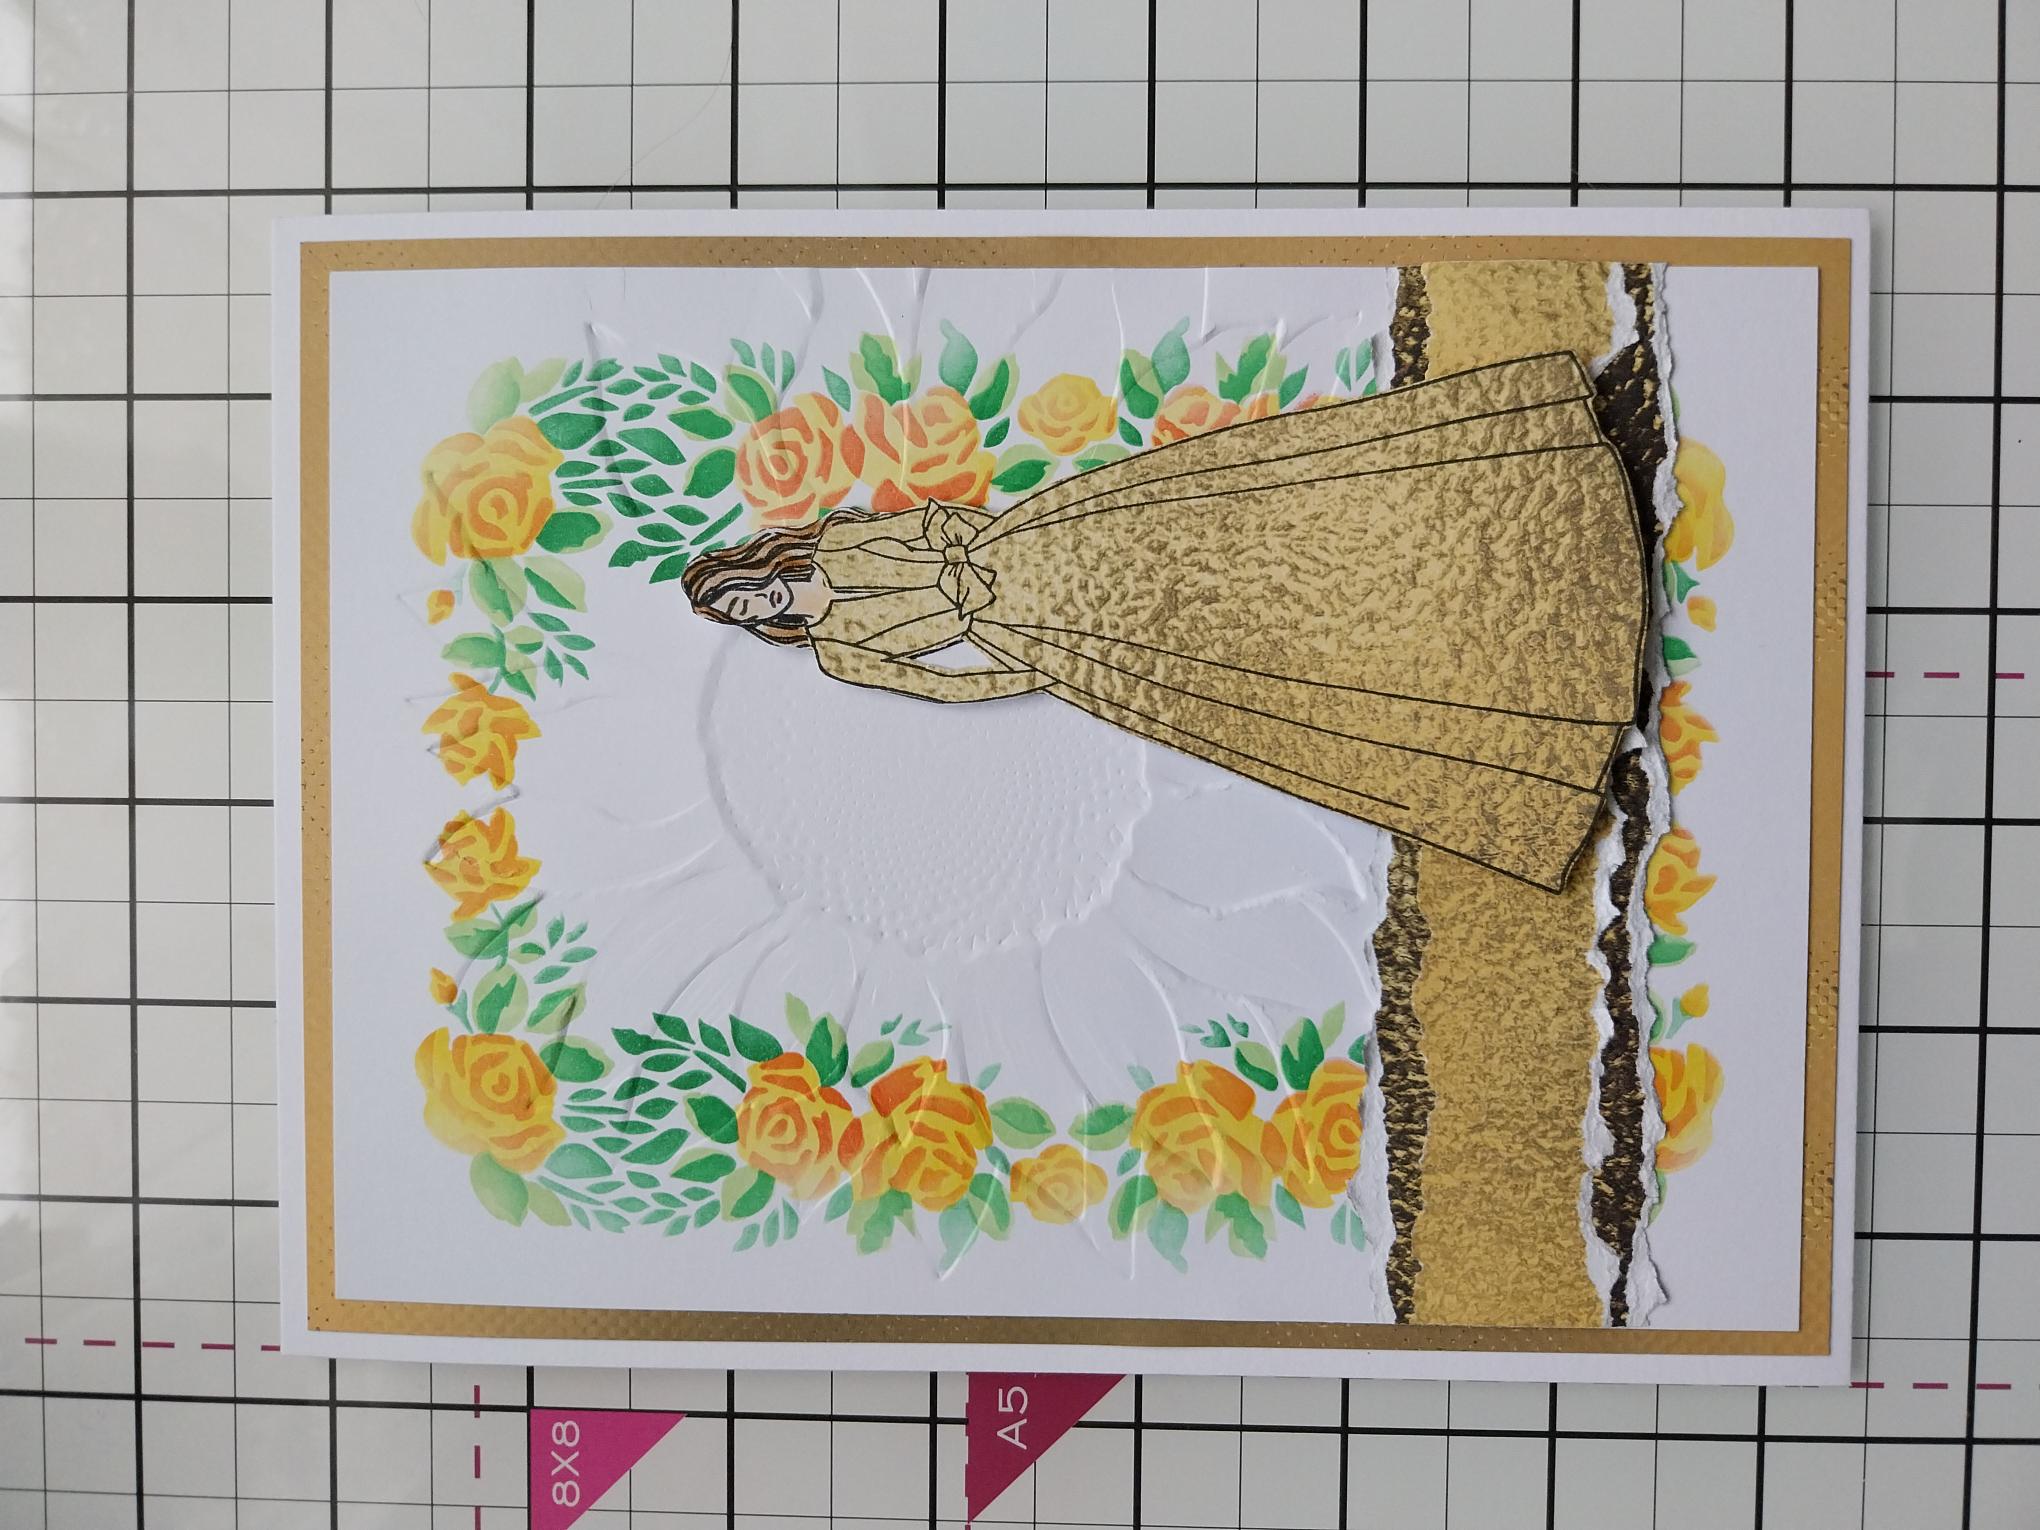
Place stencil 1, from your Sadie Collection on to the white card cut to 7 x 5". Use your blending tool to apply Sherbet through the stencil. Line up stencil 2 and blend through with Bittersweet. Having lined up stencil 3, blend with Limeade and finally, apply Hedgerow through stencil 4. |
|
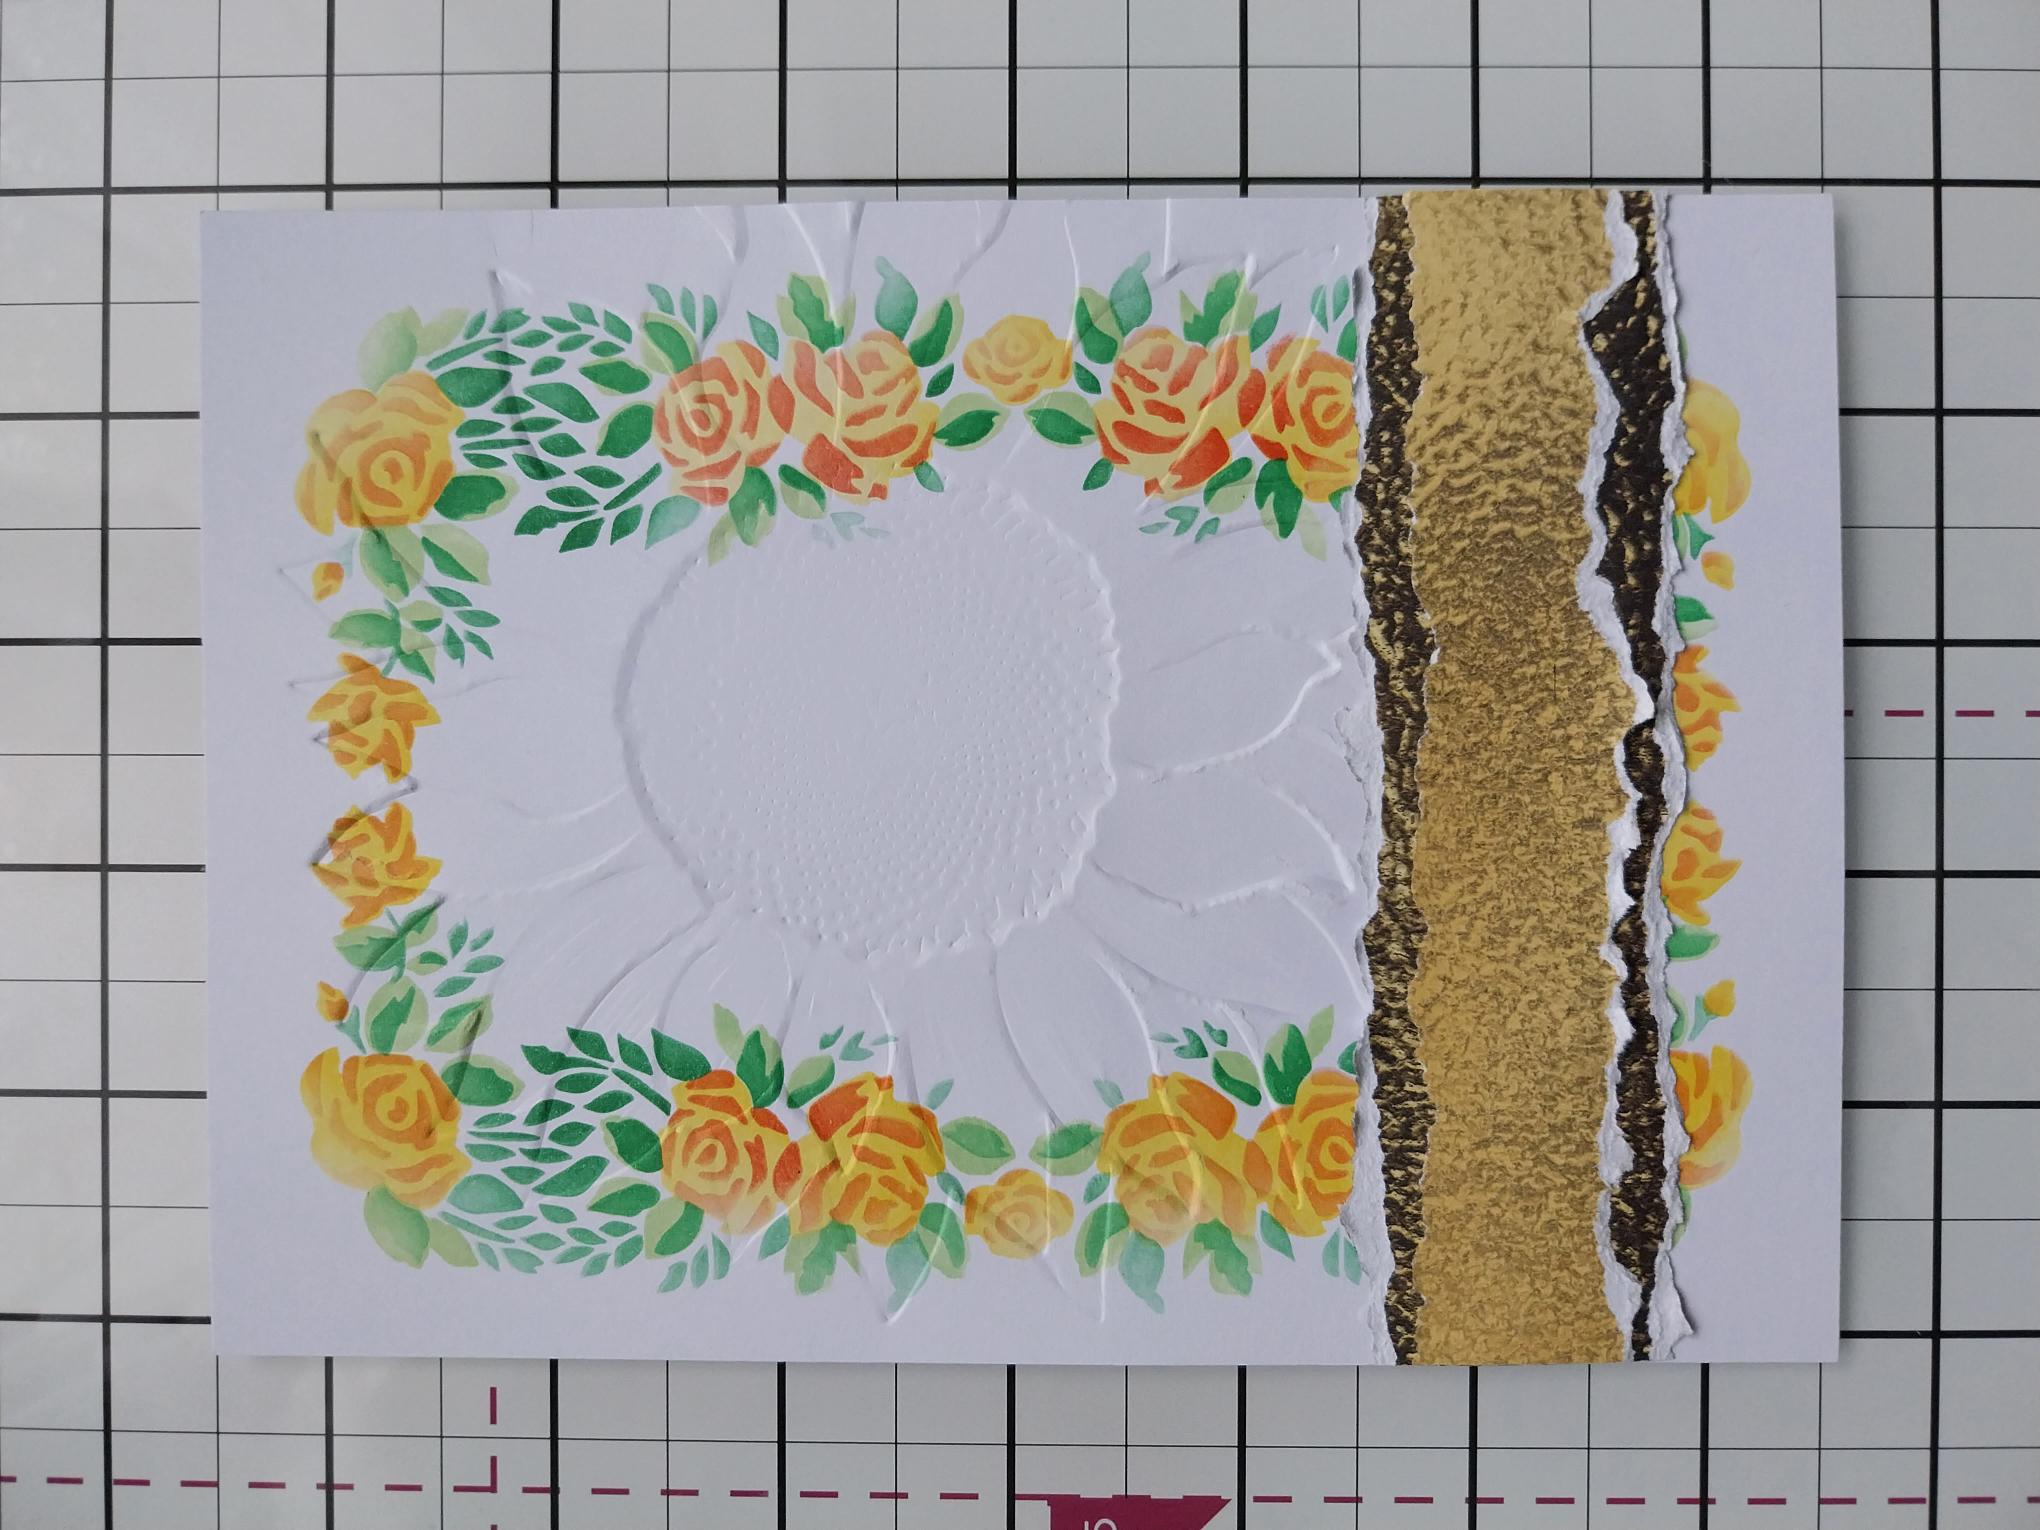
Place your stencilled card inside the Sunflower embossing folder, so the Sunflower is positioned just off the right edge of the card. Position the long edge of the folder, where it sits directly on to the card, just over the edge of your embossing plates and run it through your machine. By hanging this over the edge, you wont get an imprinted line, from the folder, down your artwork. Pop this to one side. |
|
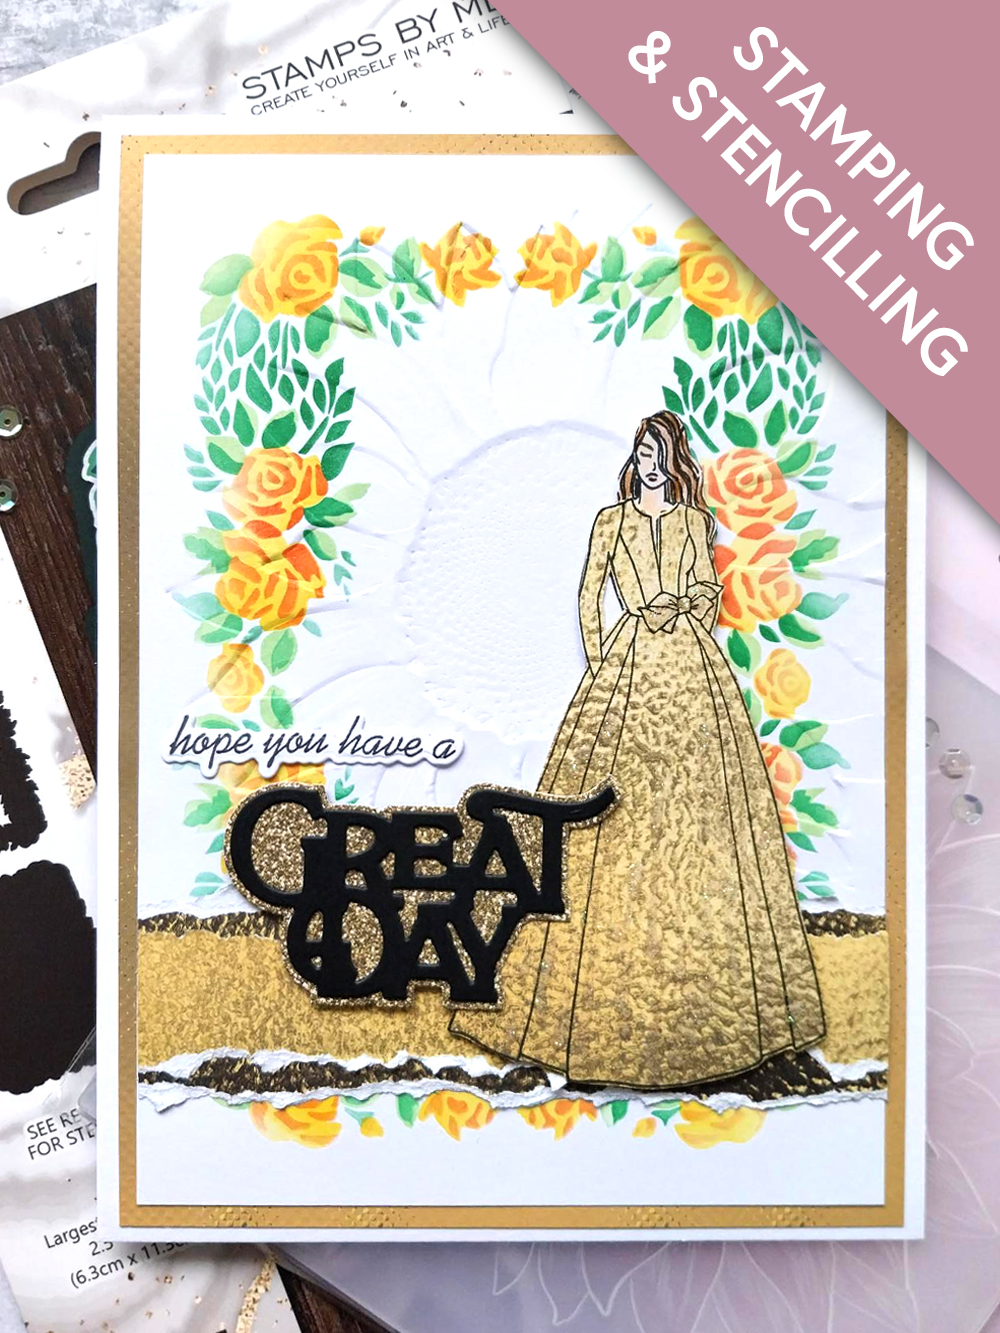
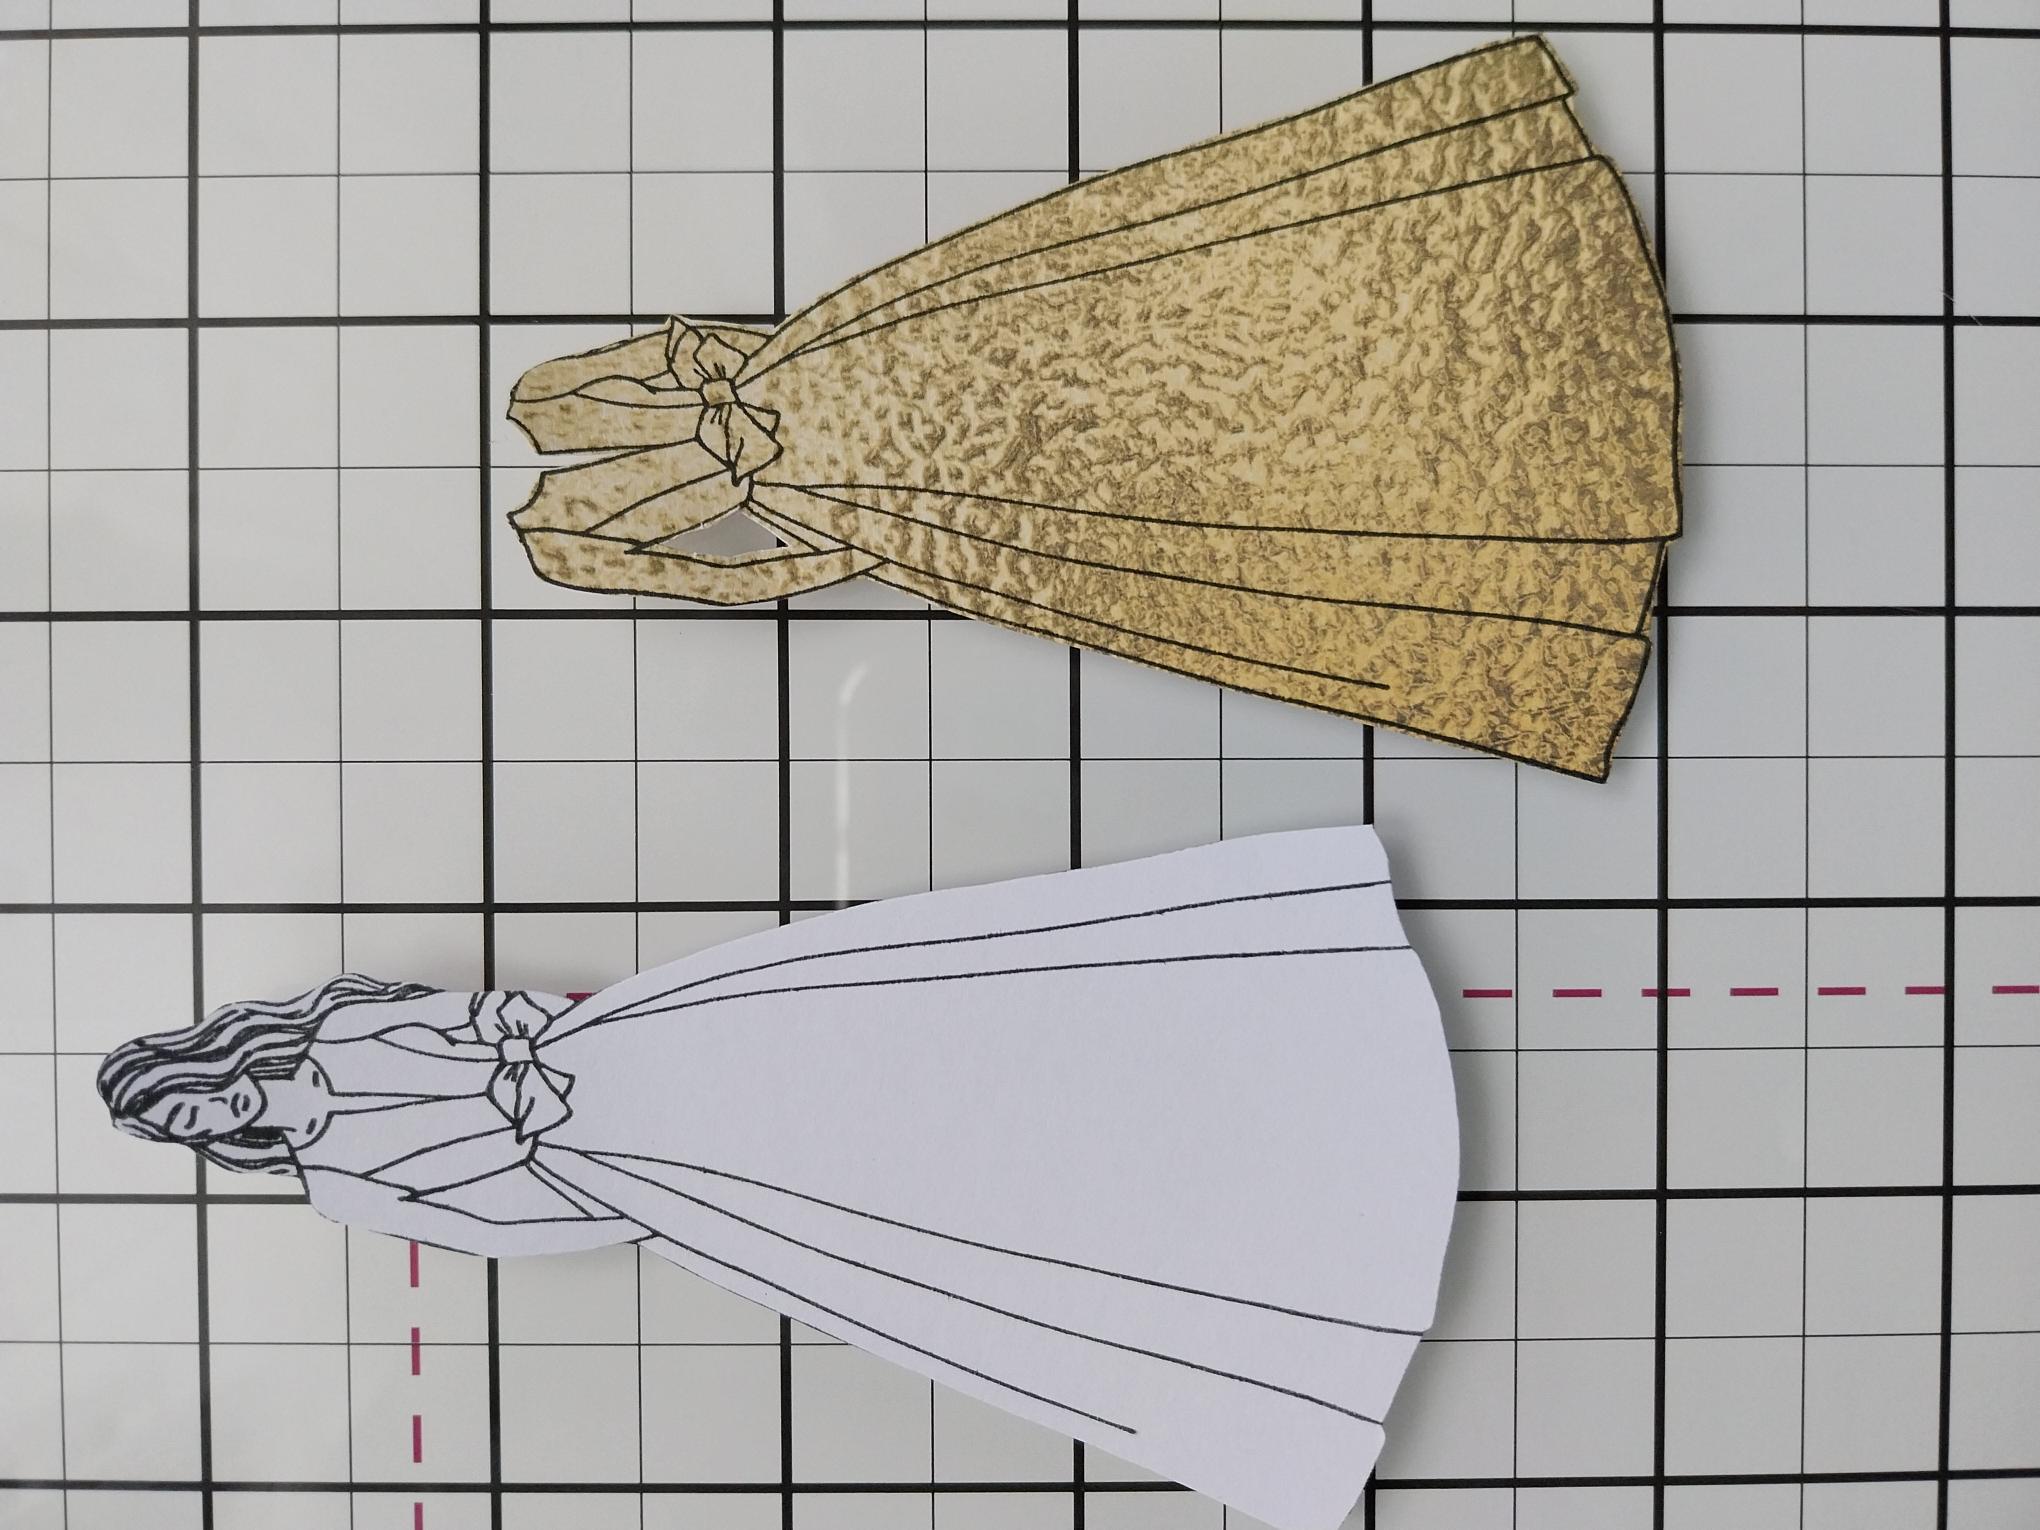
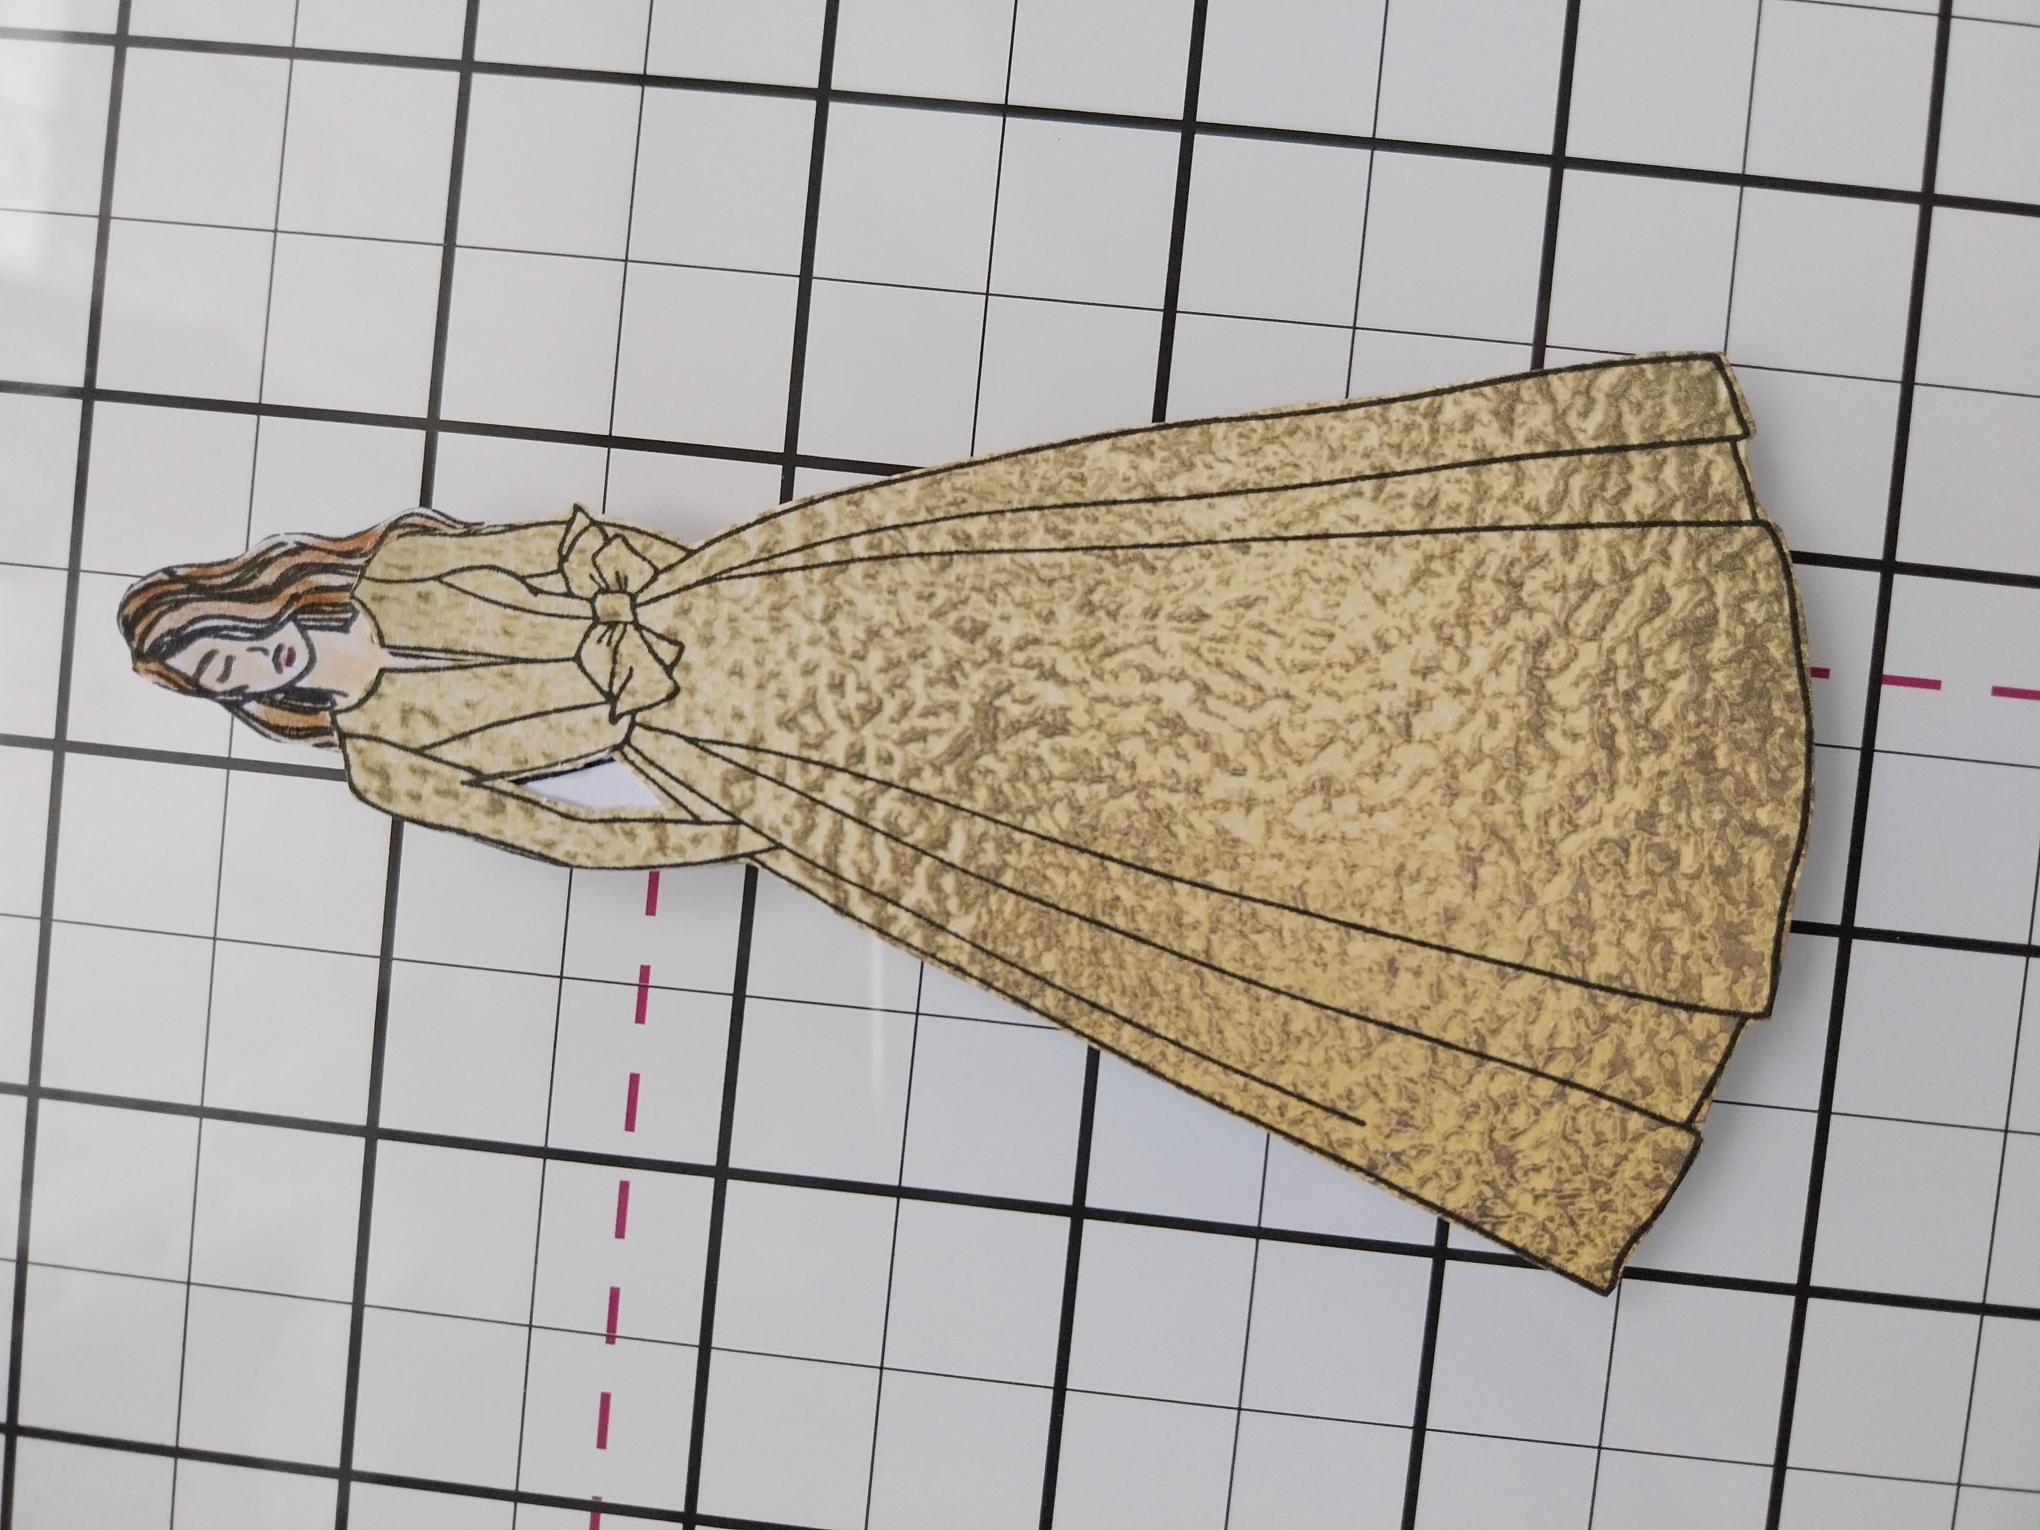
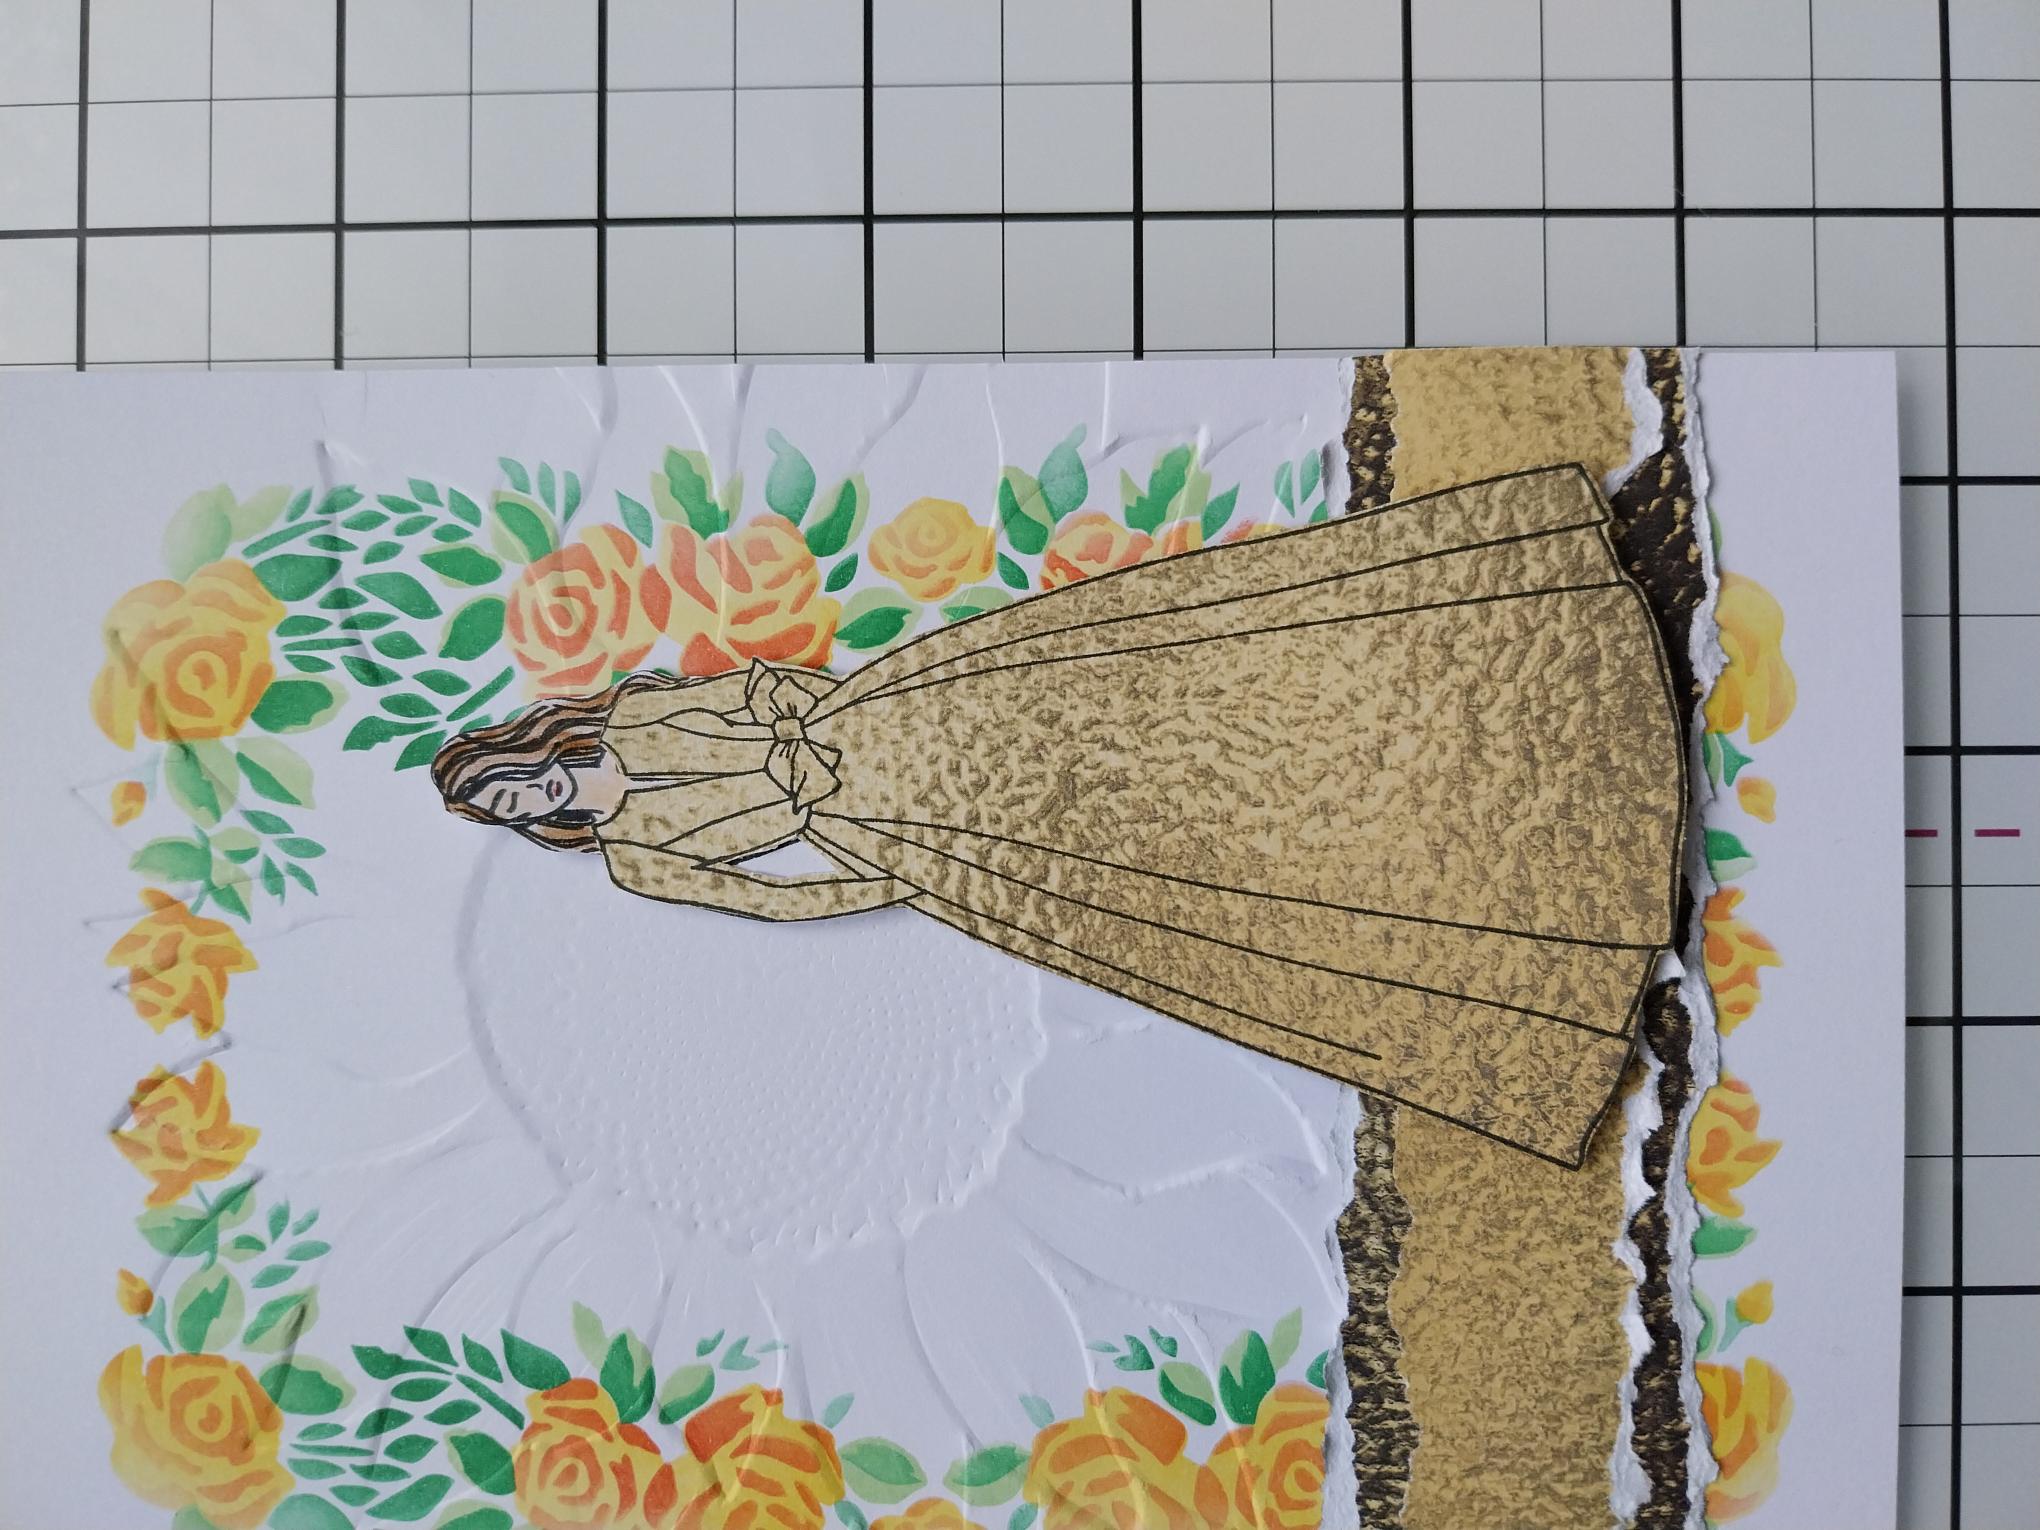
Stamp our lovely Sadie in Midnight, on to the white card cut to 7 x 5" and fussy cut. Choose one of the metallic textured sheets, from the Sunshine In My Pocket Textured paper pack and stamp Sadie on to one corner. Fussy cut her gown only. With this design you can have the gown with, or without sleeves. I chose to create a gown with long sleeves but the choice is yours. Set the remaining paper to one side. |
|
Use the HIMI oil pencils to colour in her hair and face, then adhere the paper gown in place. Set Sadie to one side. |
|
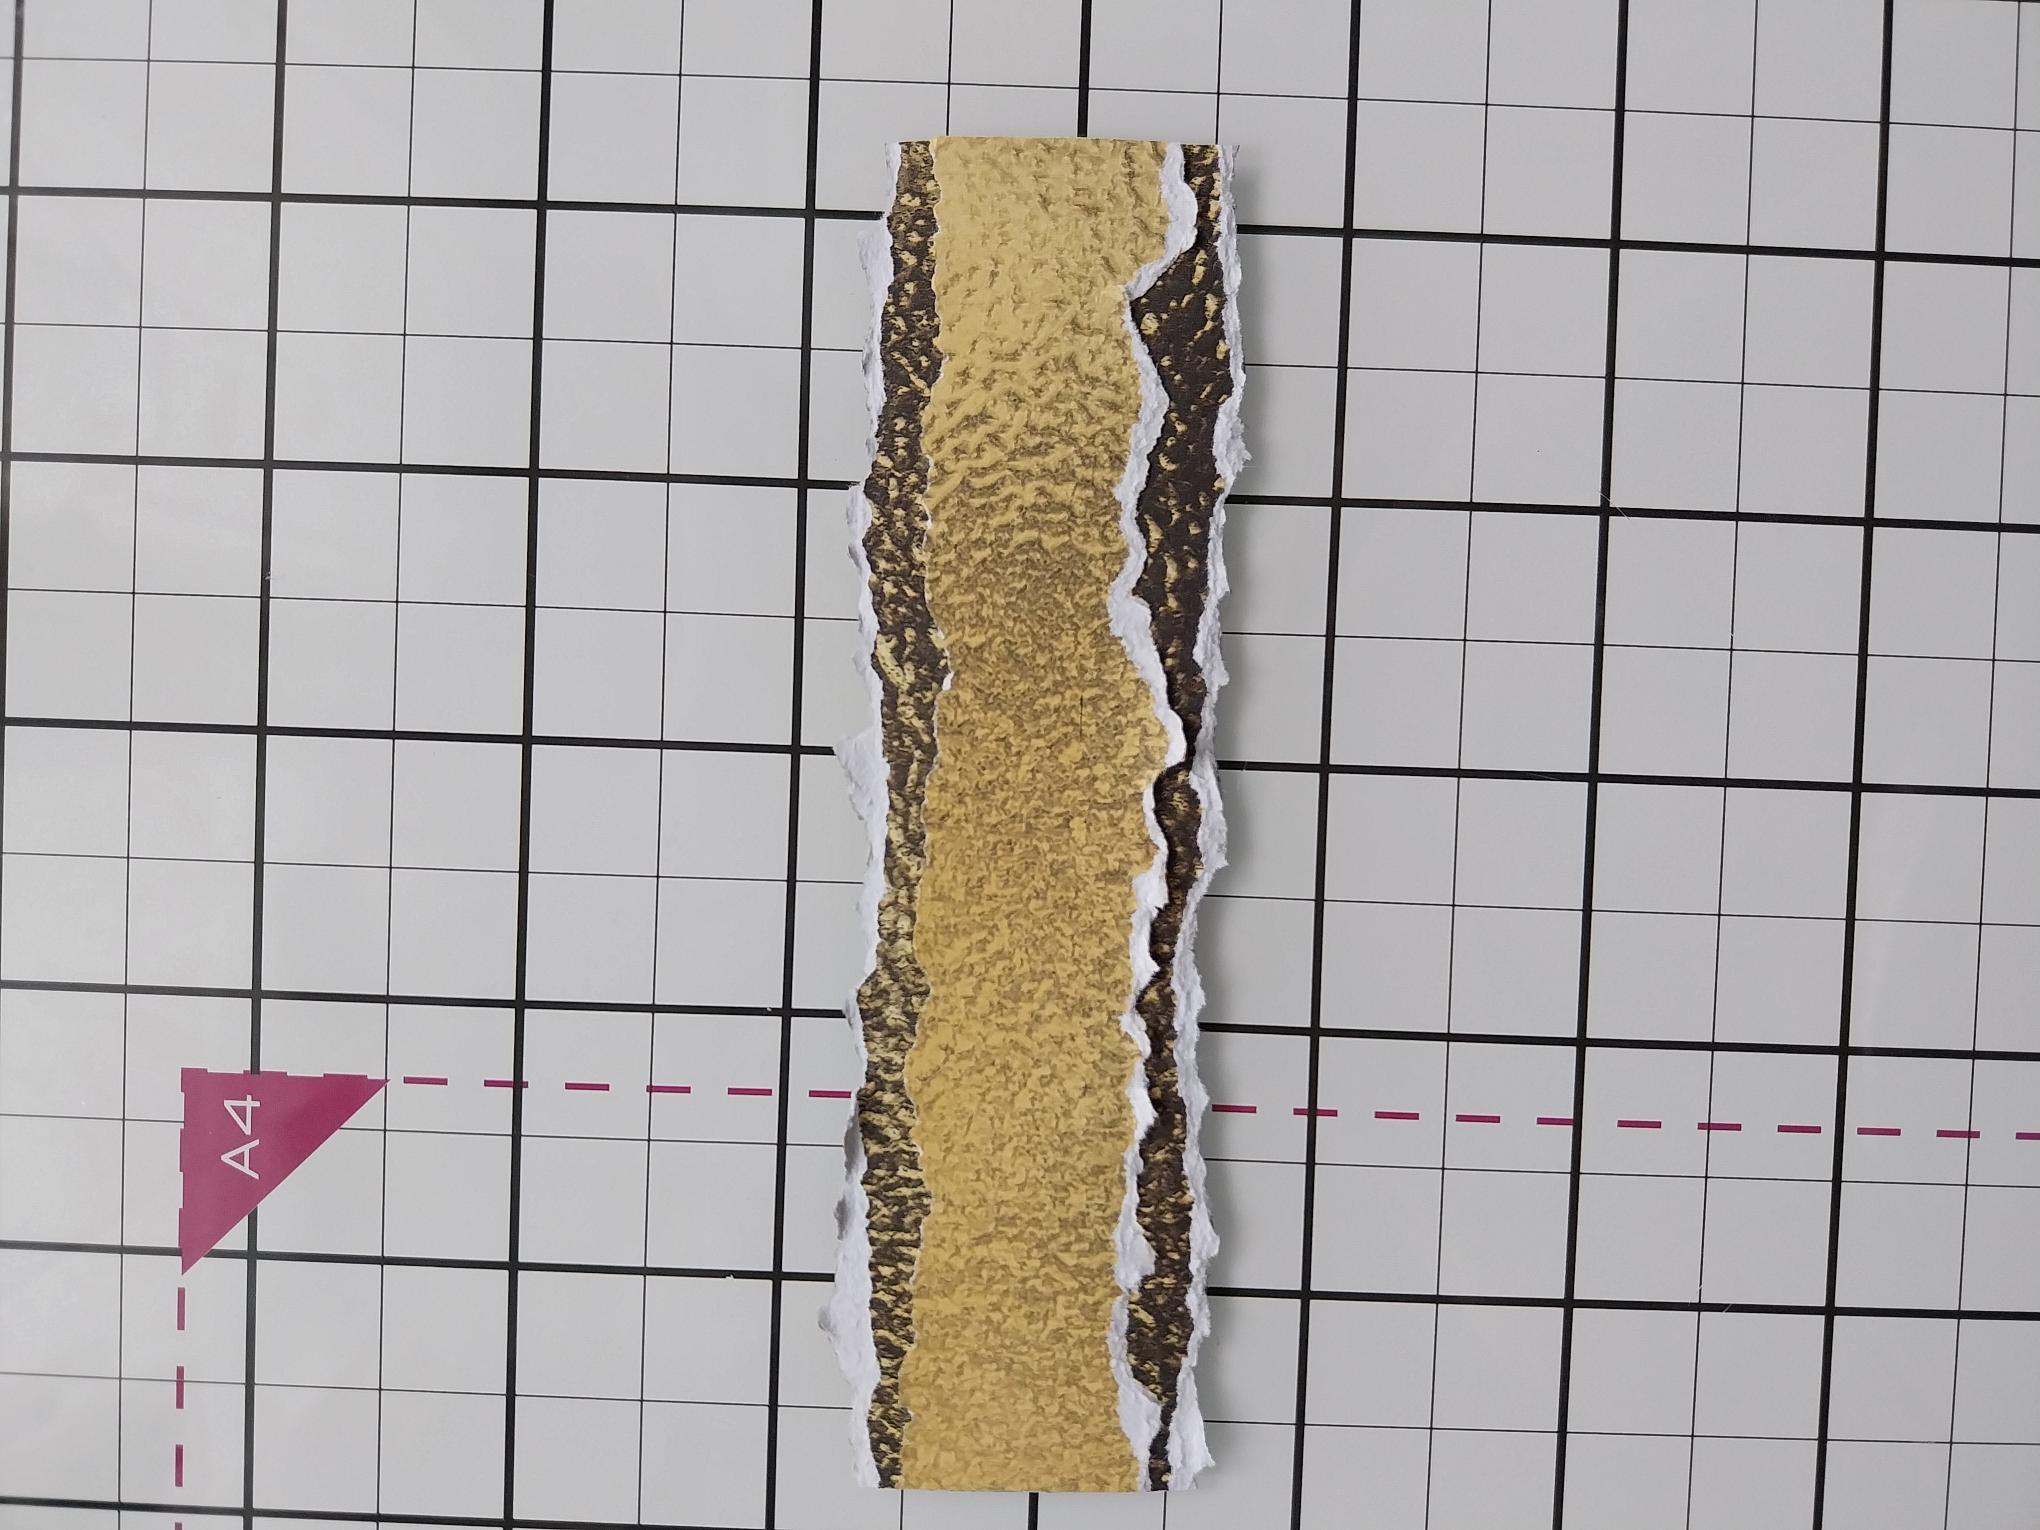
Tear a panel from the paper you set aside earlier, trimming it to 5" (the same width as your stencilled background). Tear a wider panel, from one of the coordinating papers, then adhere the first panel on top, as seen here. Scrunch the edges of the paper, to add effect. |
|
Adhere across the bottom third of your background. |
|
Adhere Sadie, with foam pads, to the right of your artwork. |
|
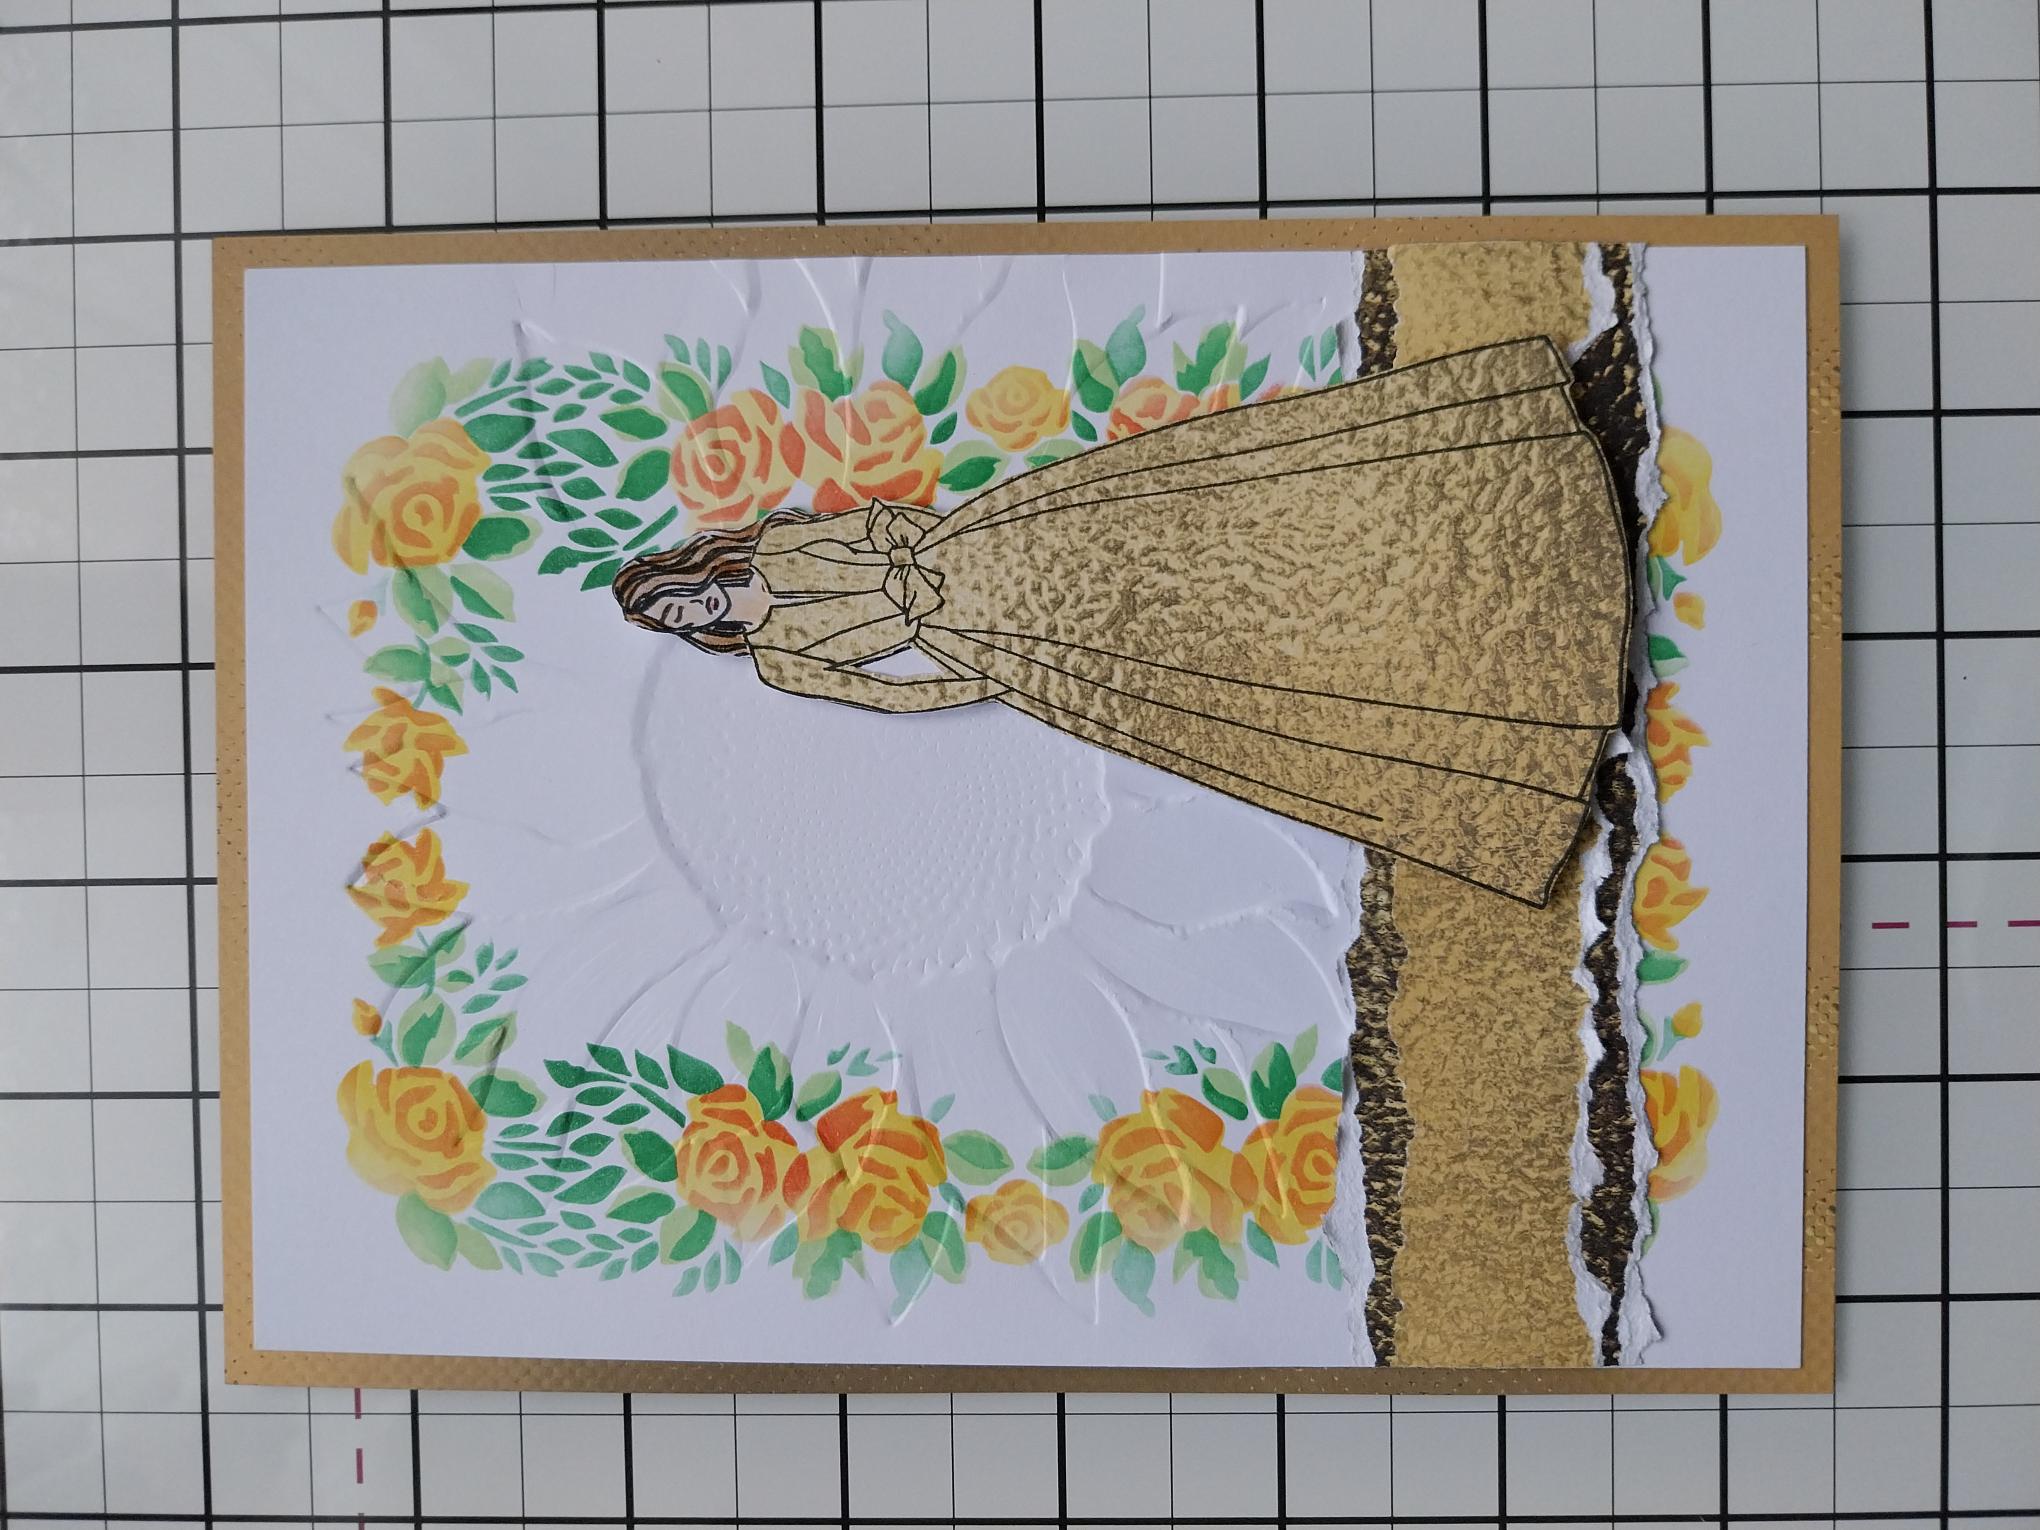
Choose another coordinating paper, cut to 7 1/4 x 5 1/4" and adhere your artwork on top. |
|
Adhere this to the front of your white card blank and set to one side. |
|
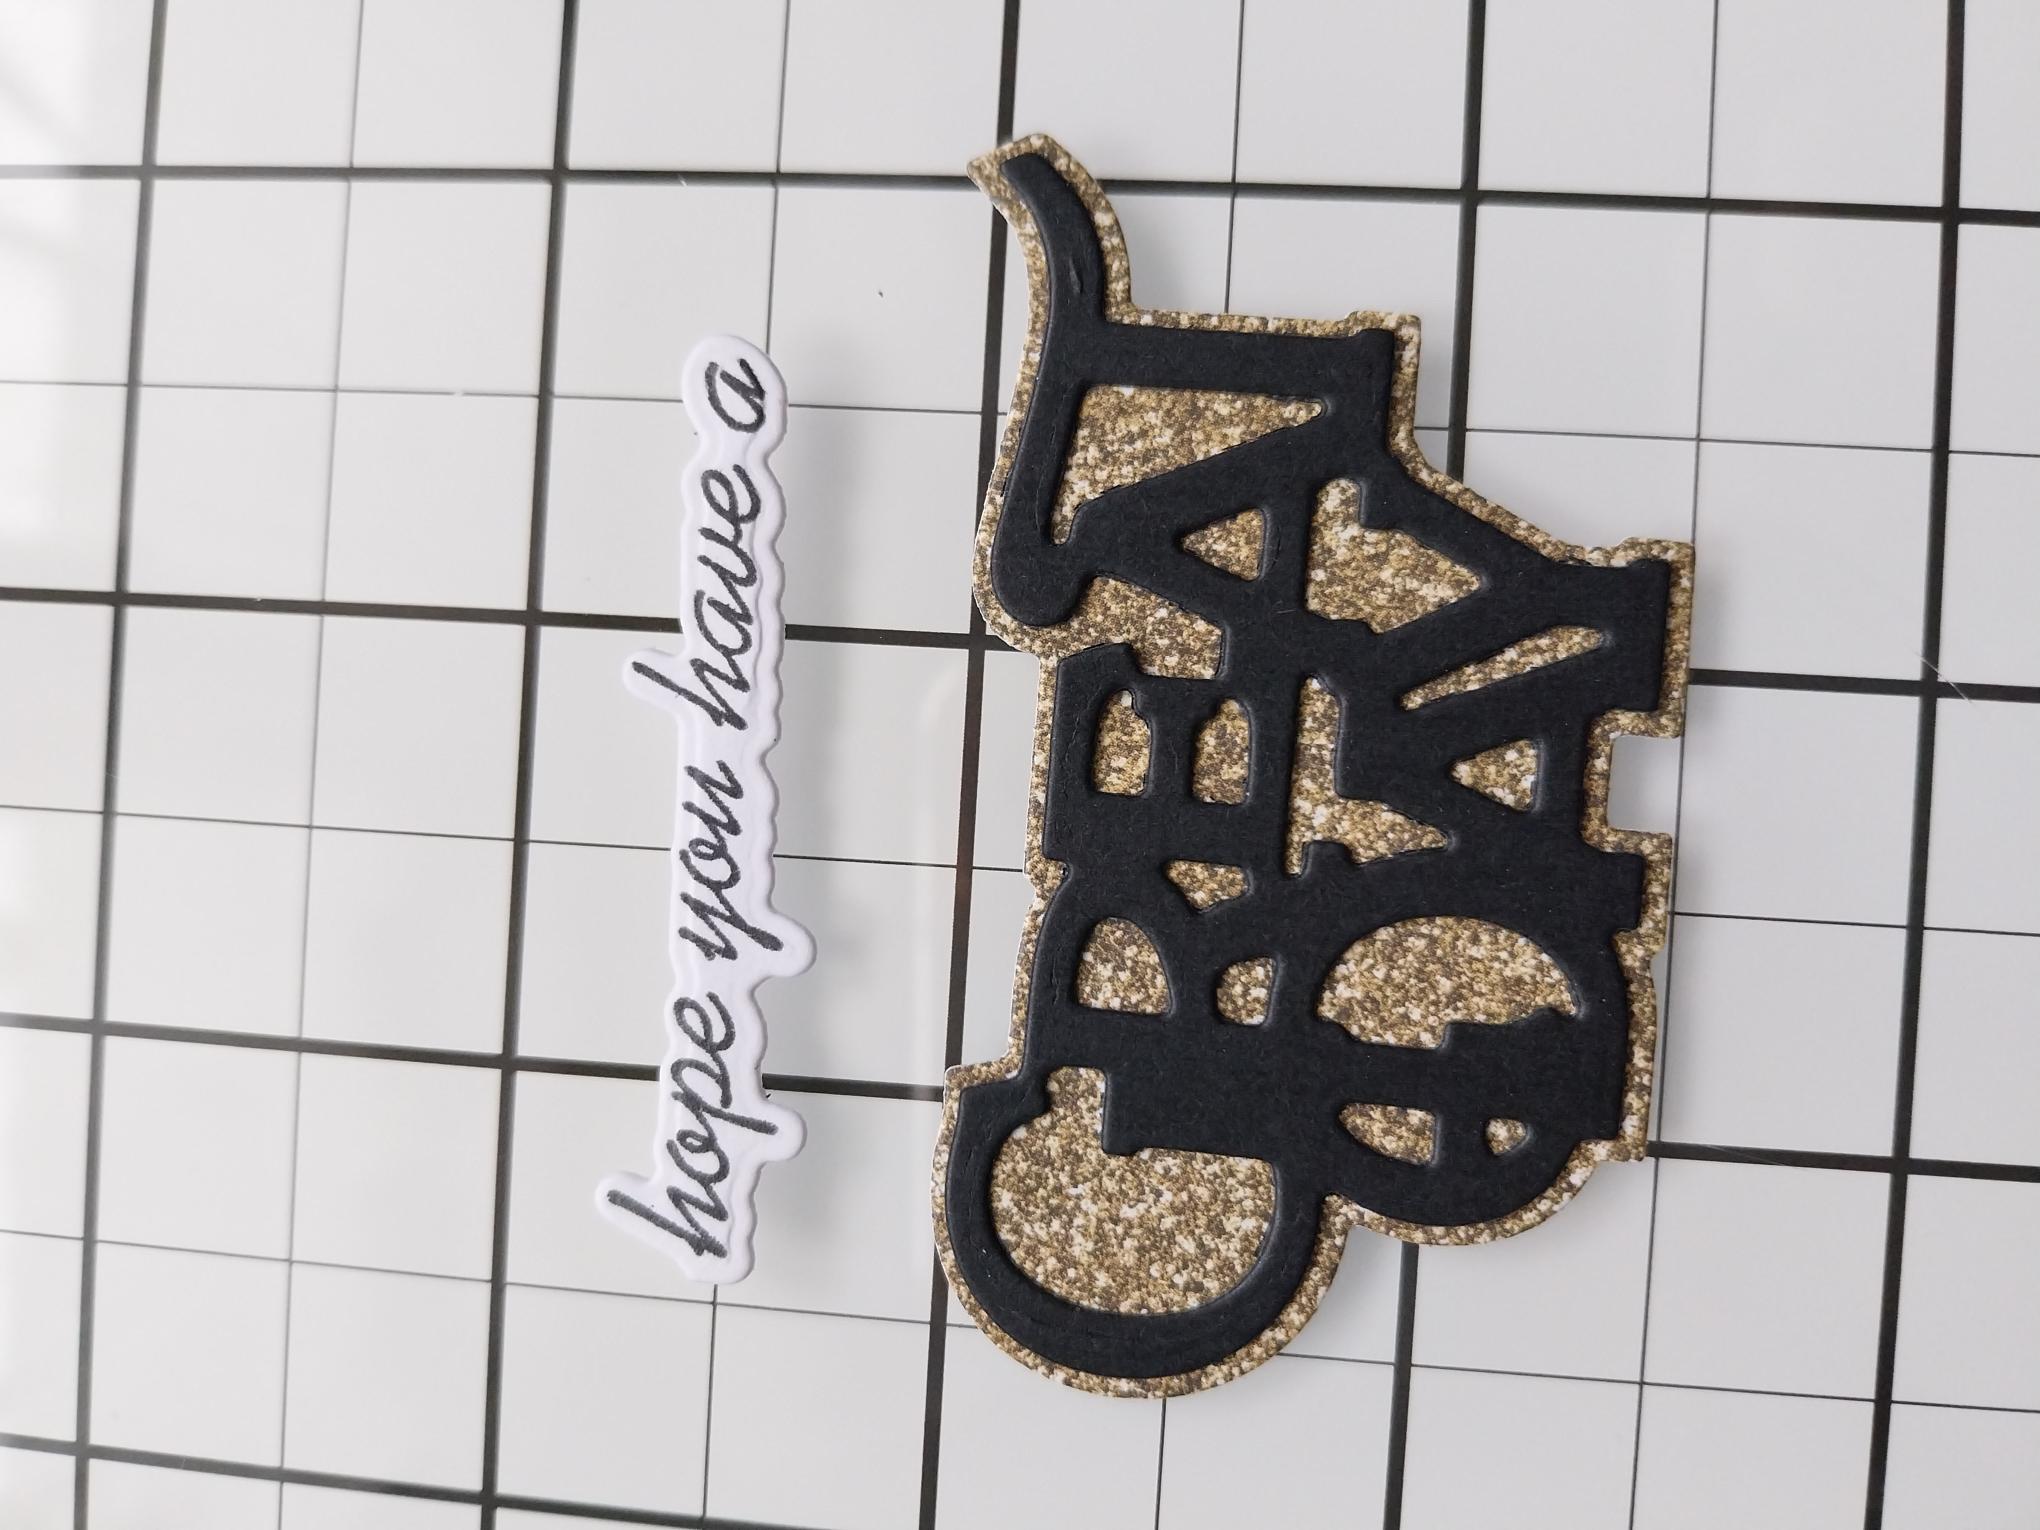
Place the detailed GREAT DAY die, from the Saying Hello Collection, on to a piece of black card and the solid mat die, on to a scrap from one of the coordinating papers you used in your card and run both through your die cutting machine. Adhere the black die cut sentiment on top of the paper mat. Stamp the "hope you have a " in Midnight, on to a piece of white scrap card and use the coordinating die to cut it out. |

|
Adhere to the left of Sadie, using wet glue and/or foam pads. |
|
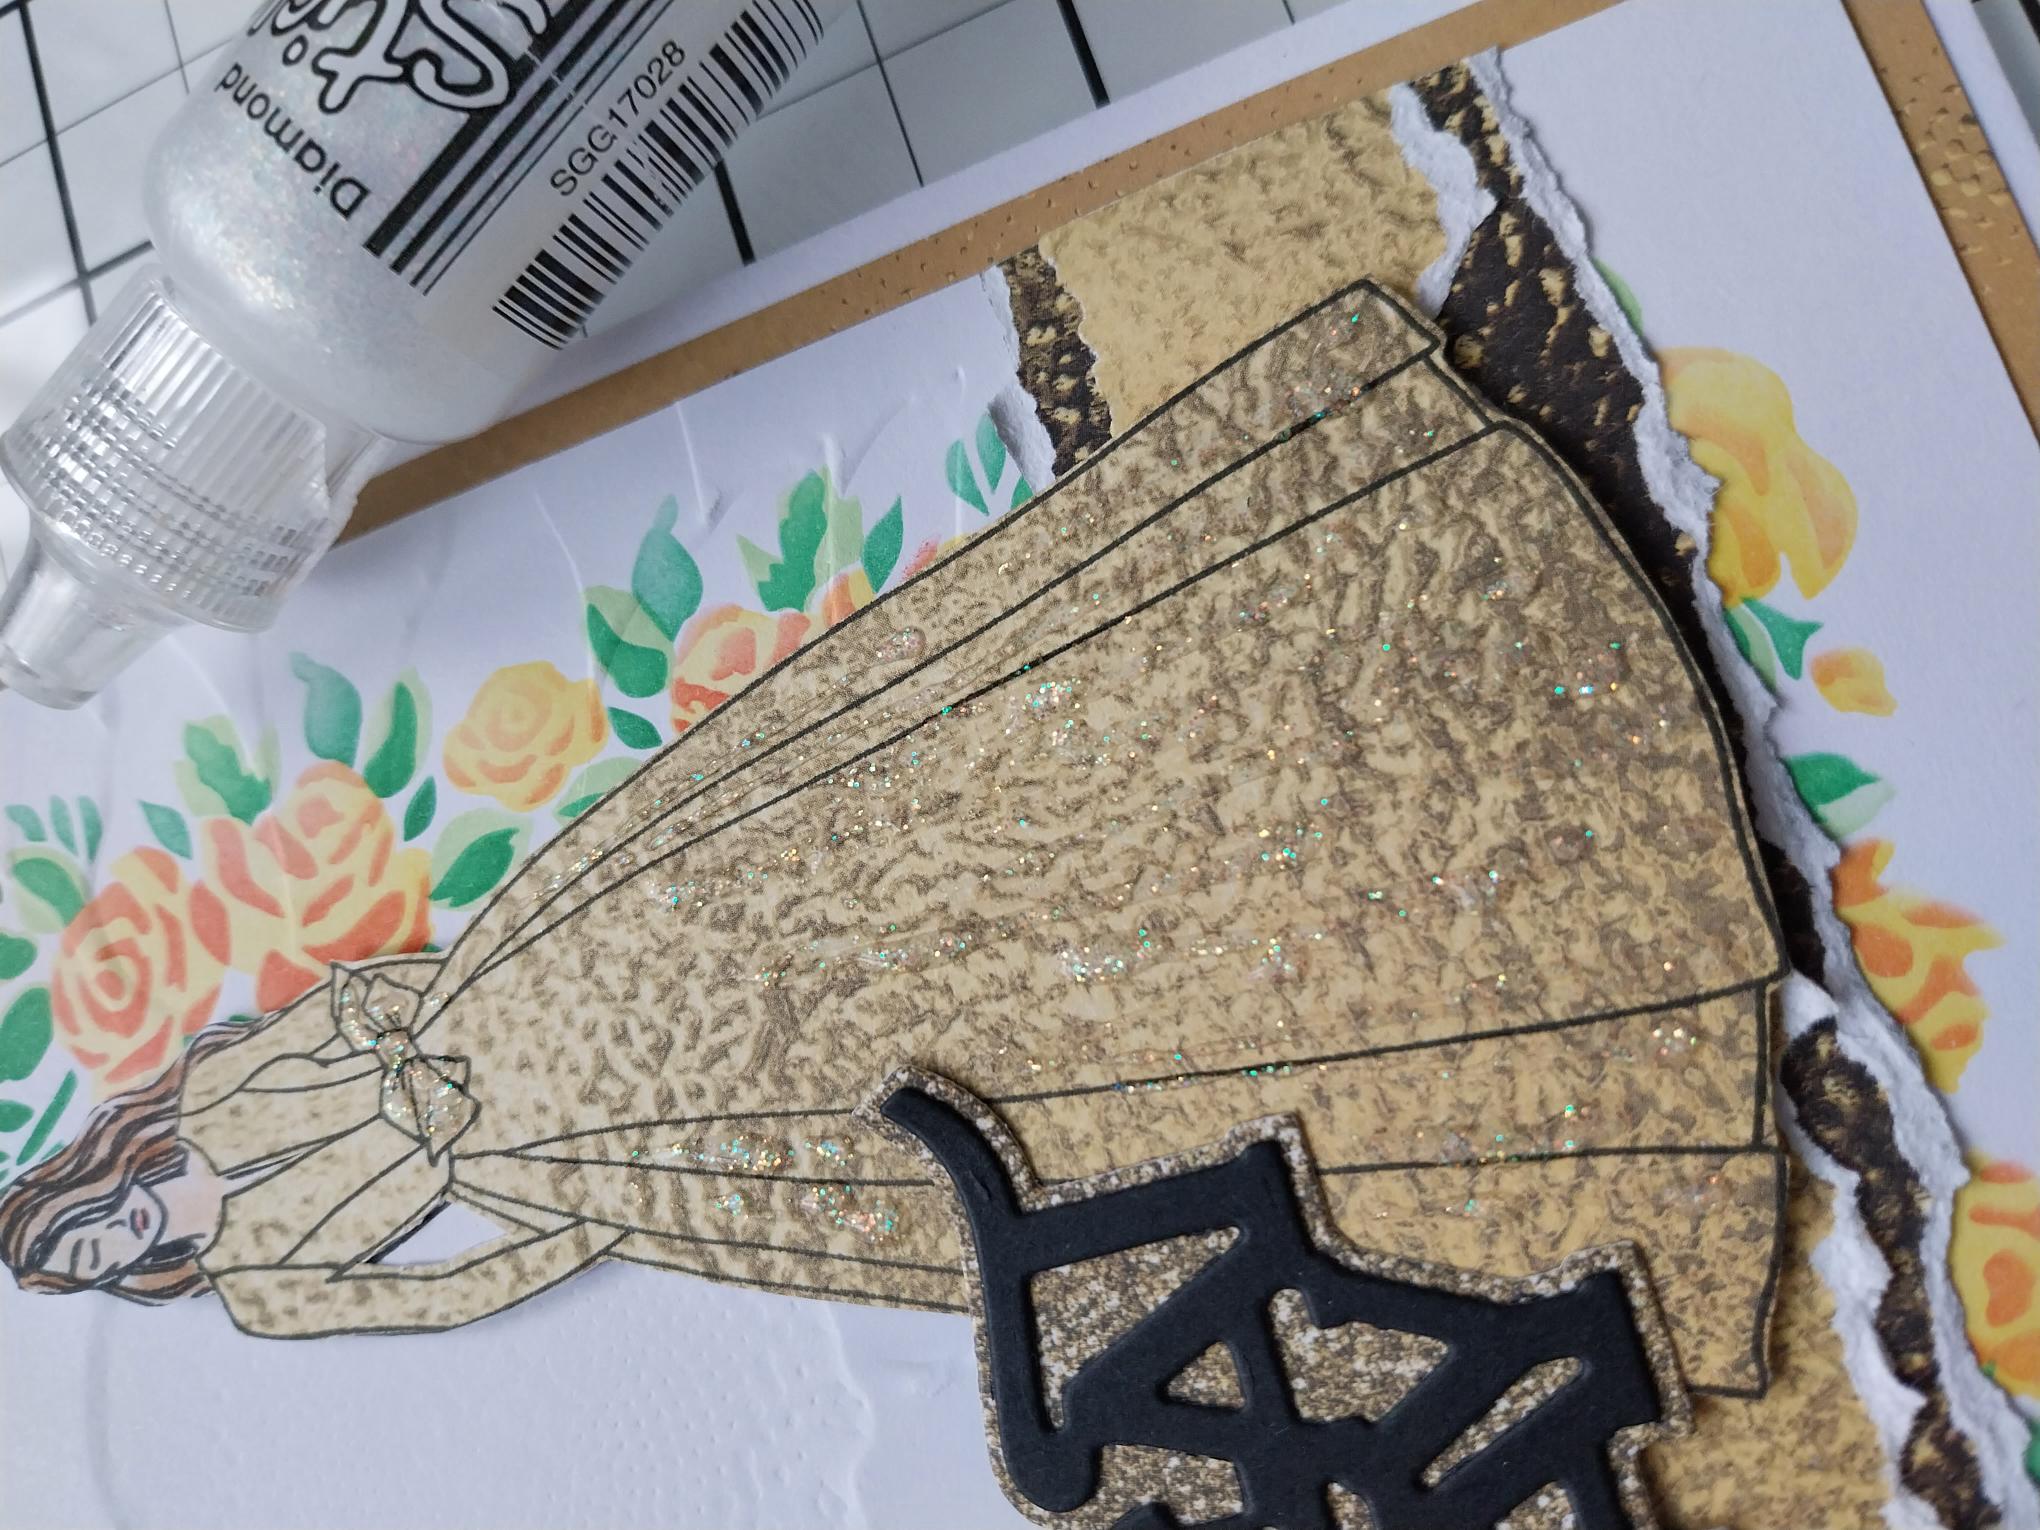
To finish your card, add a touch of Stickles sparkle to the centres of the flowers and down the folds of Sadie's gown. |