Give your friends $10 off their first order!
Refer a FRIEND


WHAT YOU WILL NEED:
White card blank 6 1/2" square
Black card 5 3/4" square
Black/white card for sentiment
White card
Imala Modern Script Embossing Folder
Imala With The Boys Stamp Collection
Creative Watercolours 6 x 6" Paper Pad
SBM Hybrid Ink Pad: Midnight
Paint brush
Premium Dye Ink Pad: Limeade, Tiffany
Distress Ink/Oxide Ink Pad: Black Soot, Walnut Stain, Vintage Photo, Fossilized Amber, Tattered Rose
WOW heat tool
Gilding Wax: Gold
Imala white gel pen
Eureka 101 Watercolour Tablet
SBM Magnetic glass mat
Paper Trimmer
Perfect Together Glue
Foam pads
Die Cutting machine
[click image to enlarge] 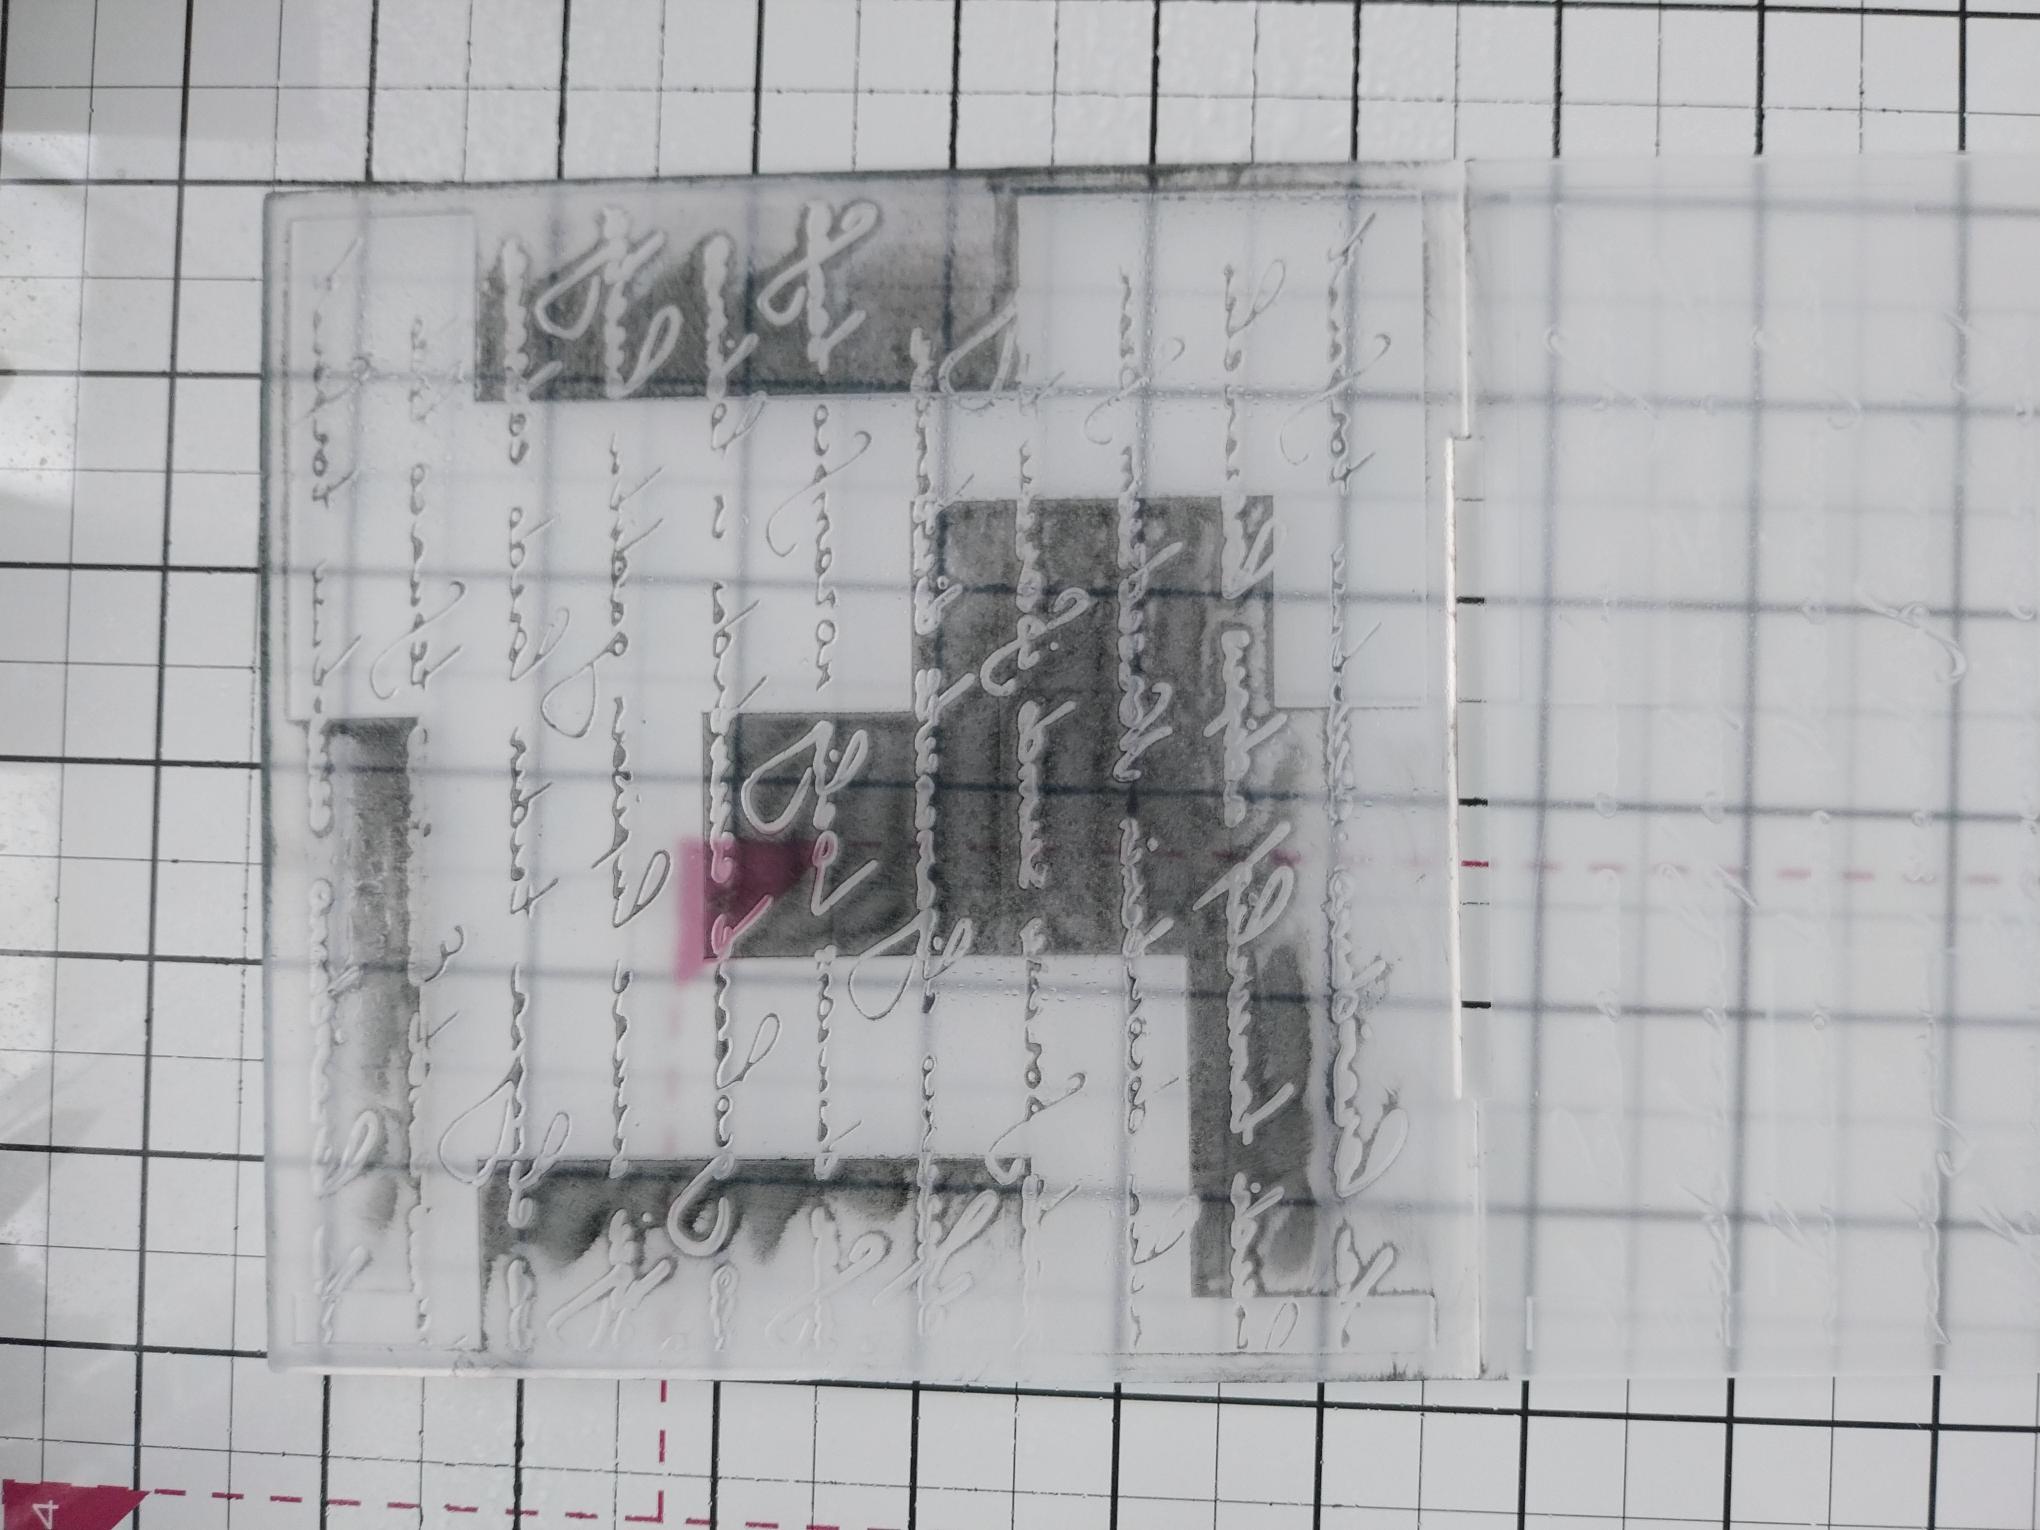
|
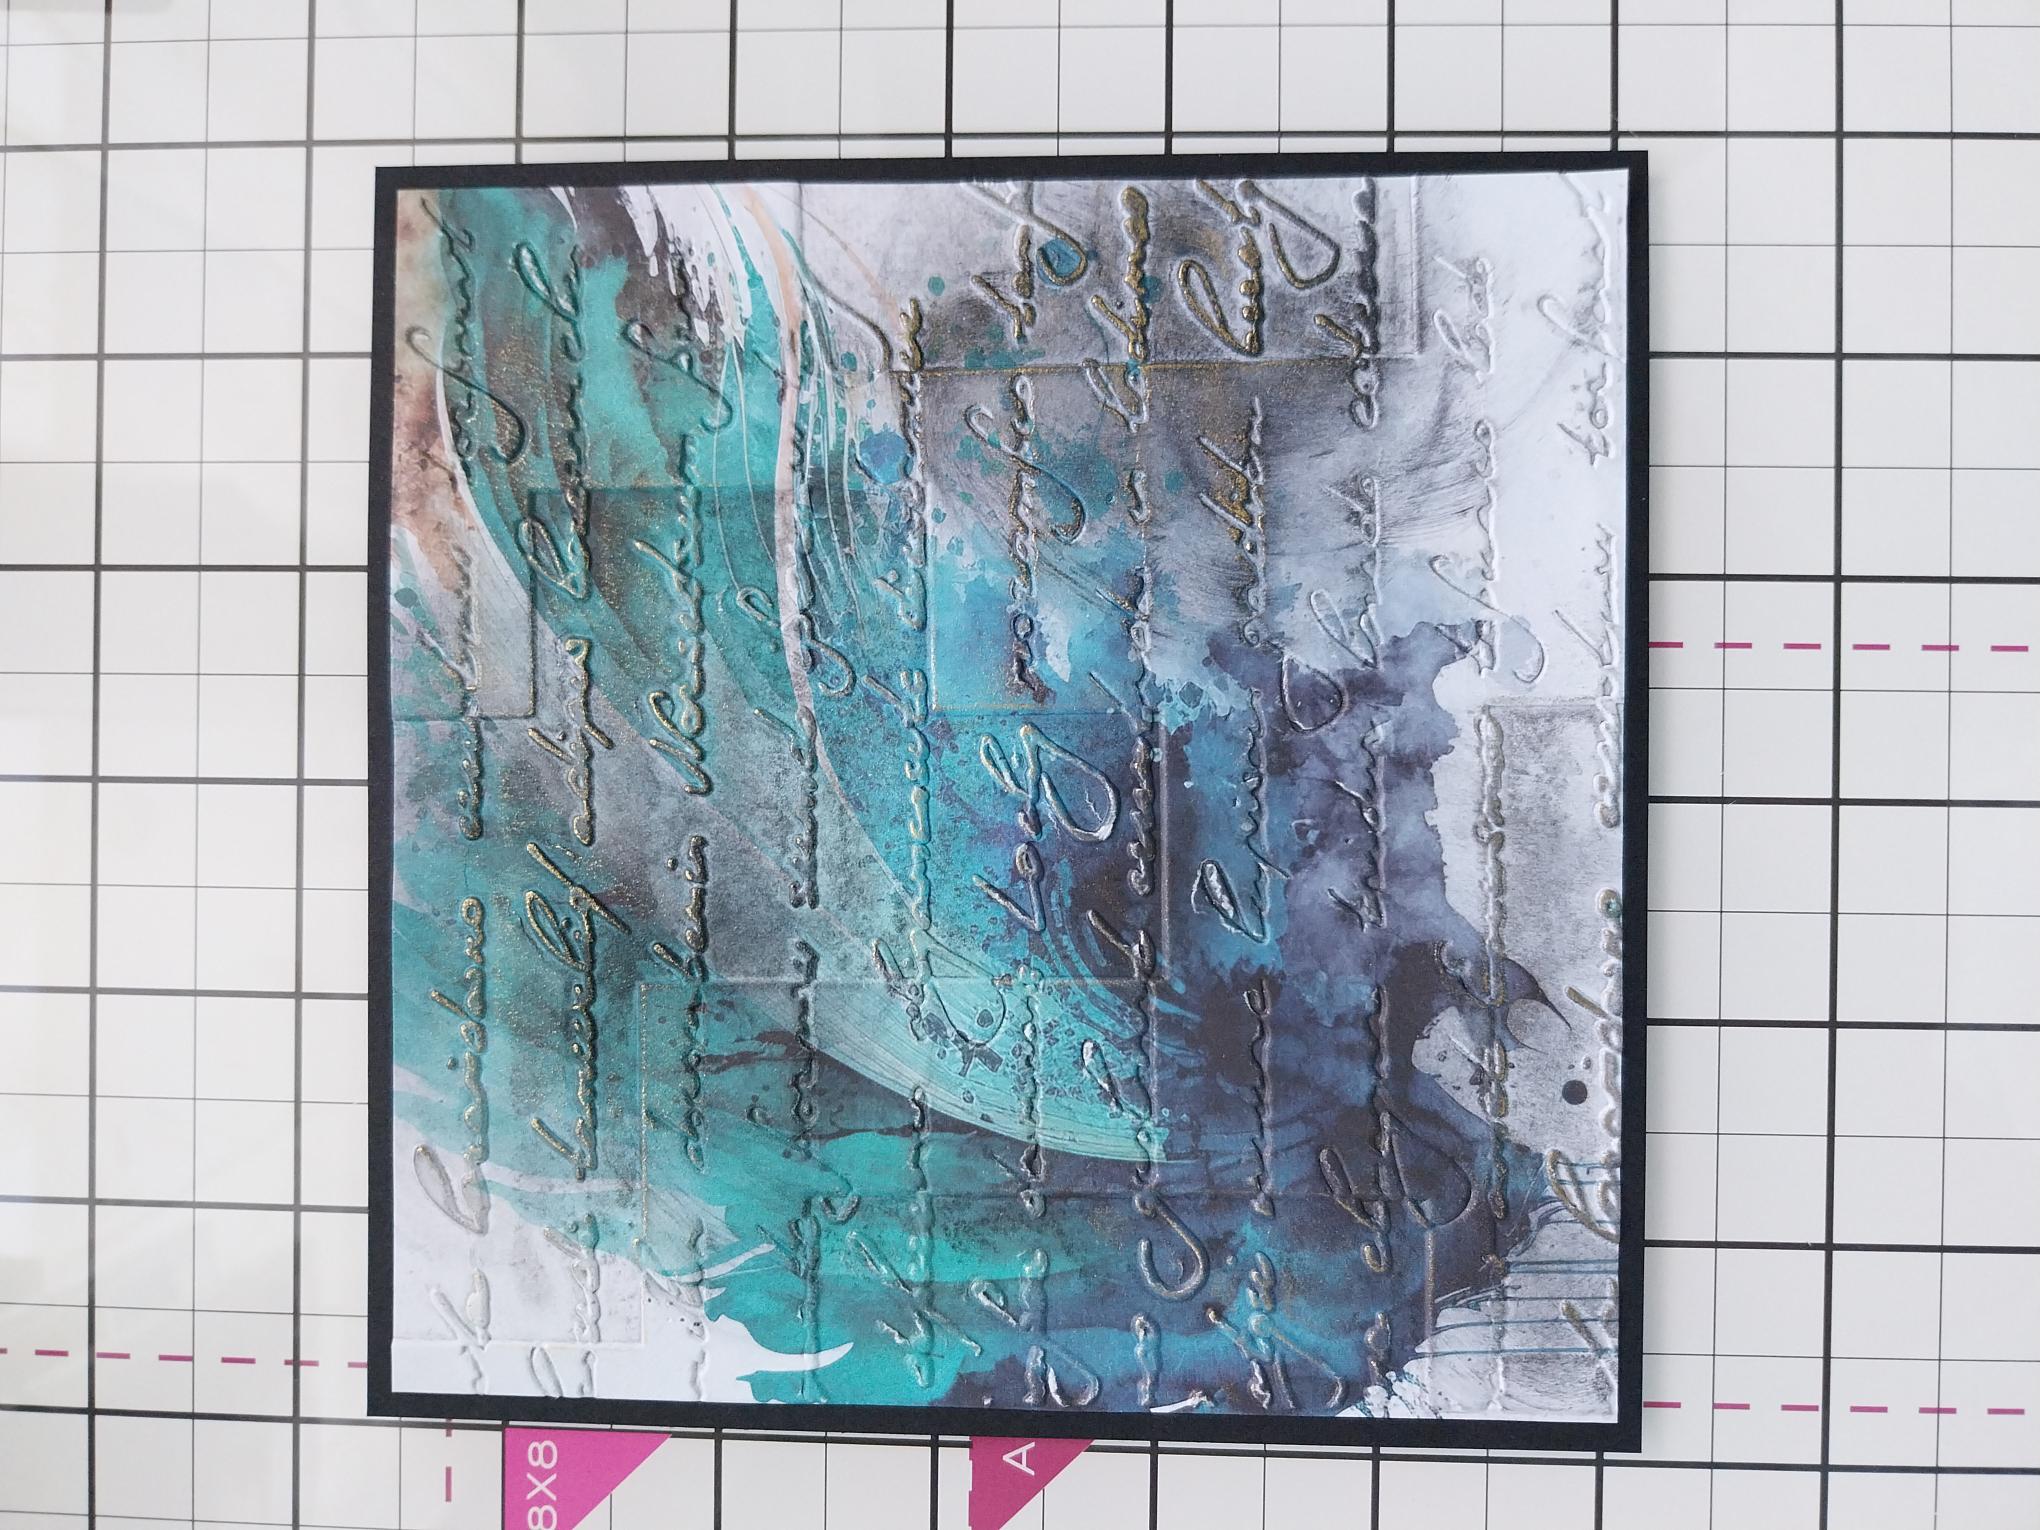
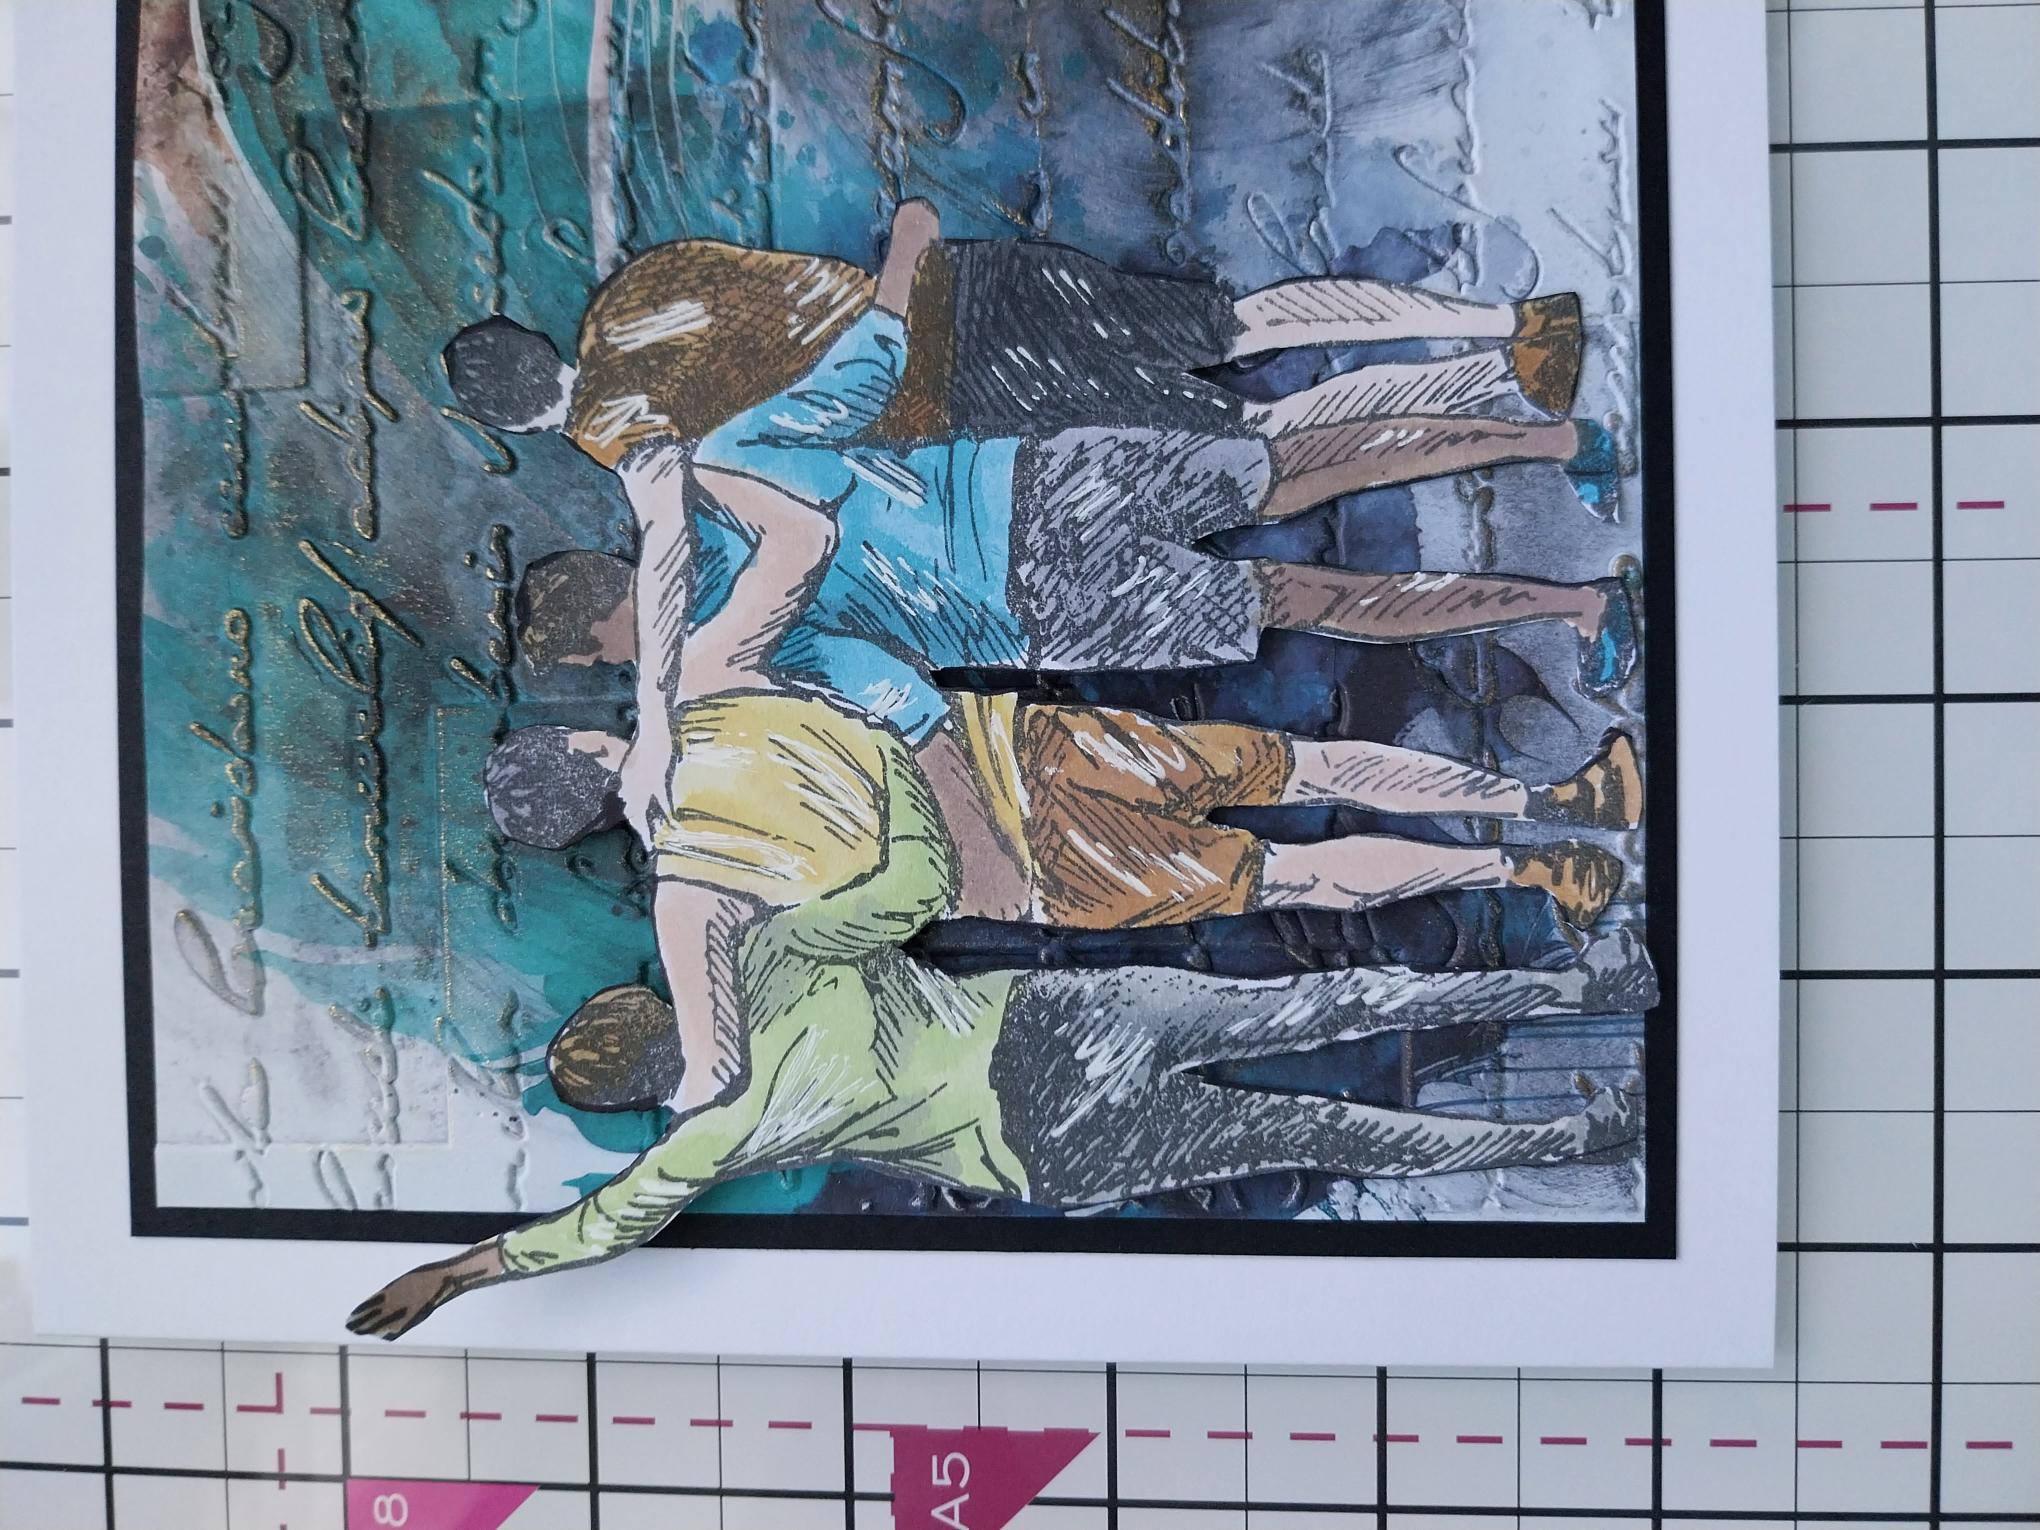
Ensuring the embossed script is on the bottom, ink up the top side of the folder with the Black Soot Ink/Oxide and spritz with a little water. |
|
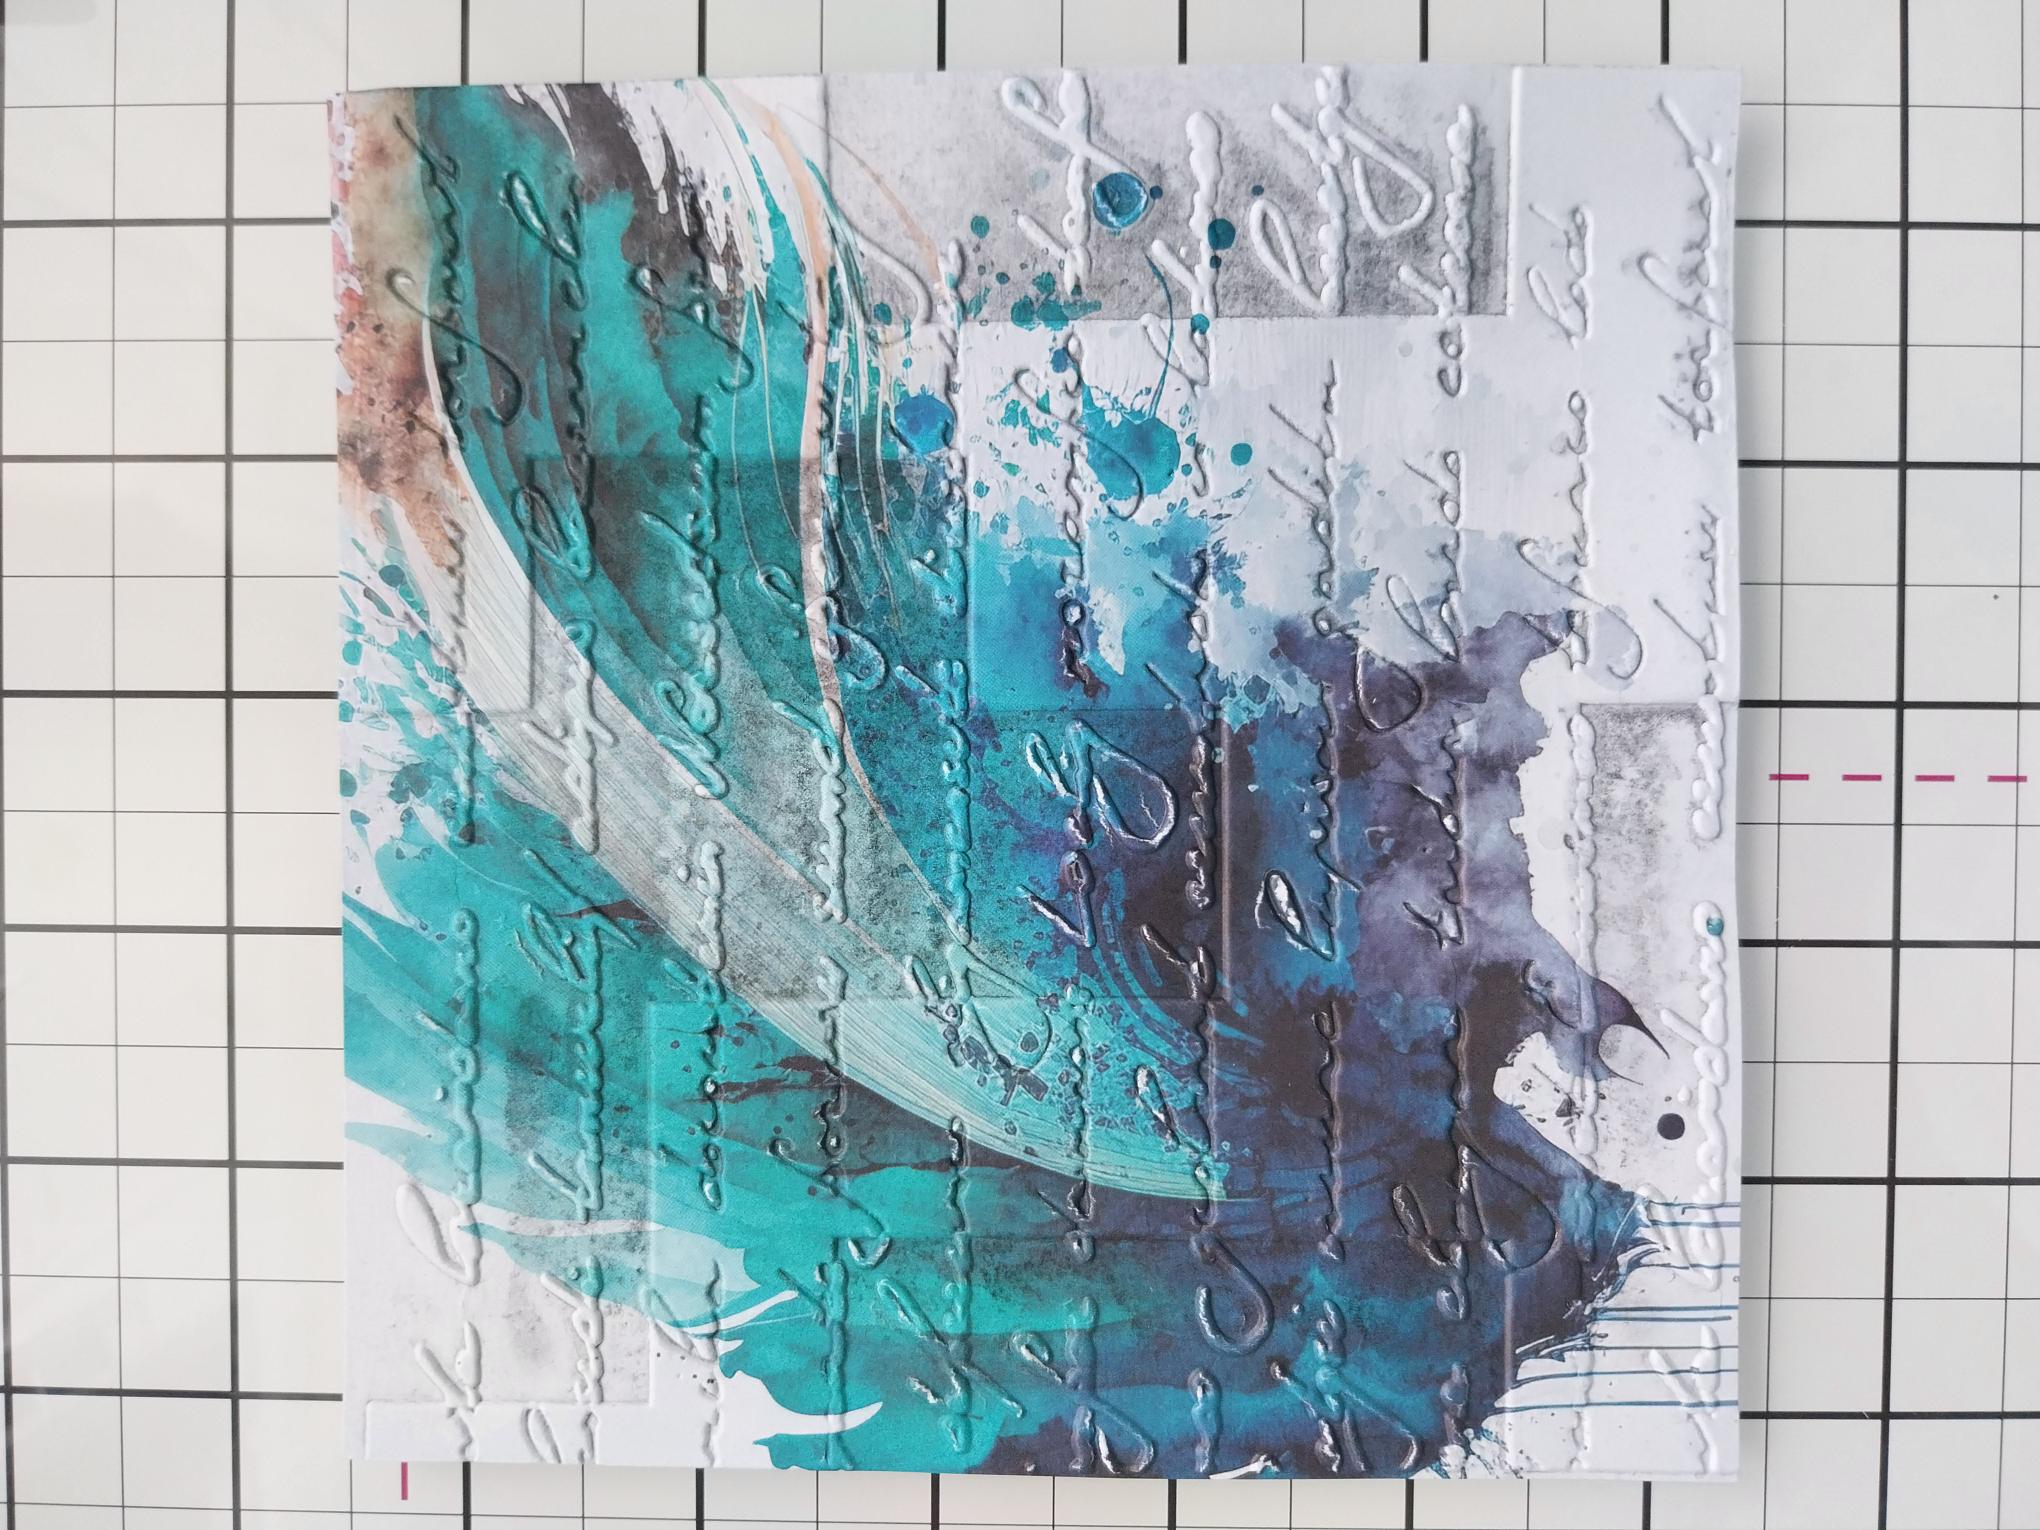
Trim this decorative sheet, from the Creative Watercolour paper pack, to 5 1/2" square. Place inside the inked folder and run it through your embossing machine. |
|
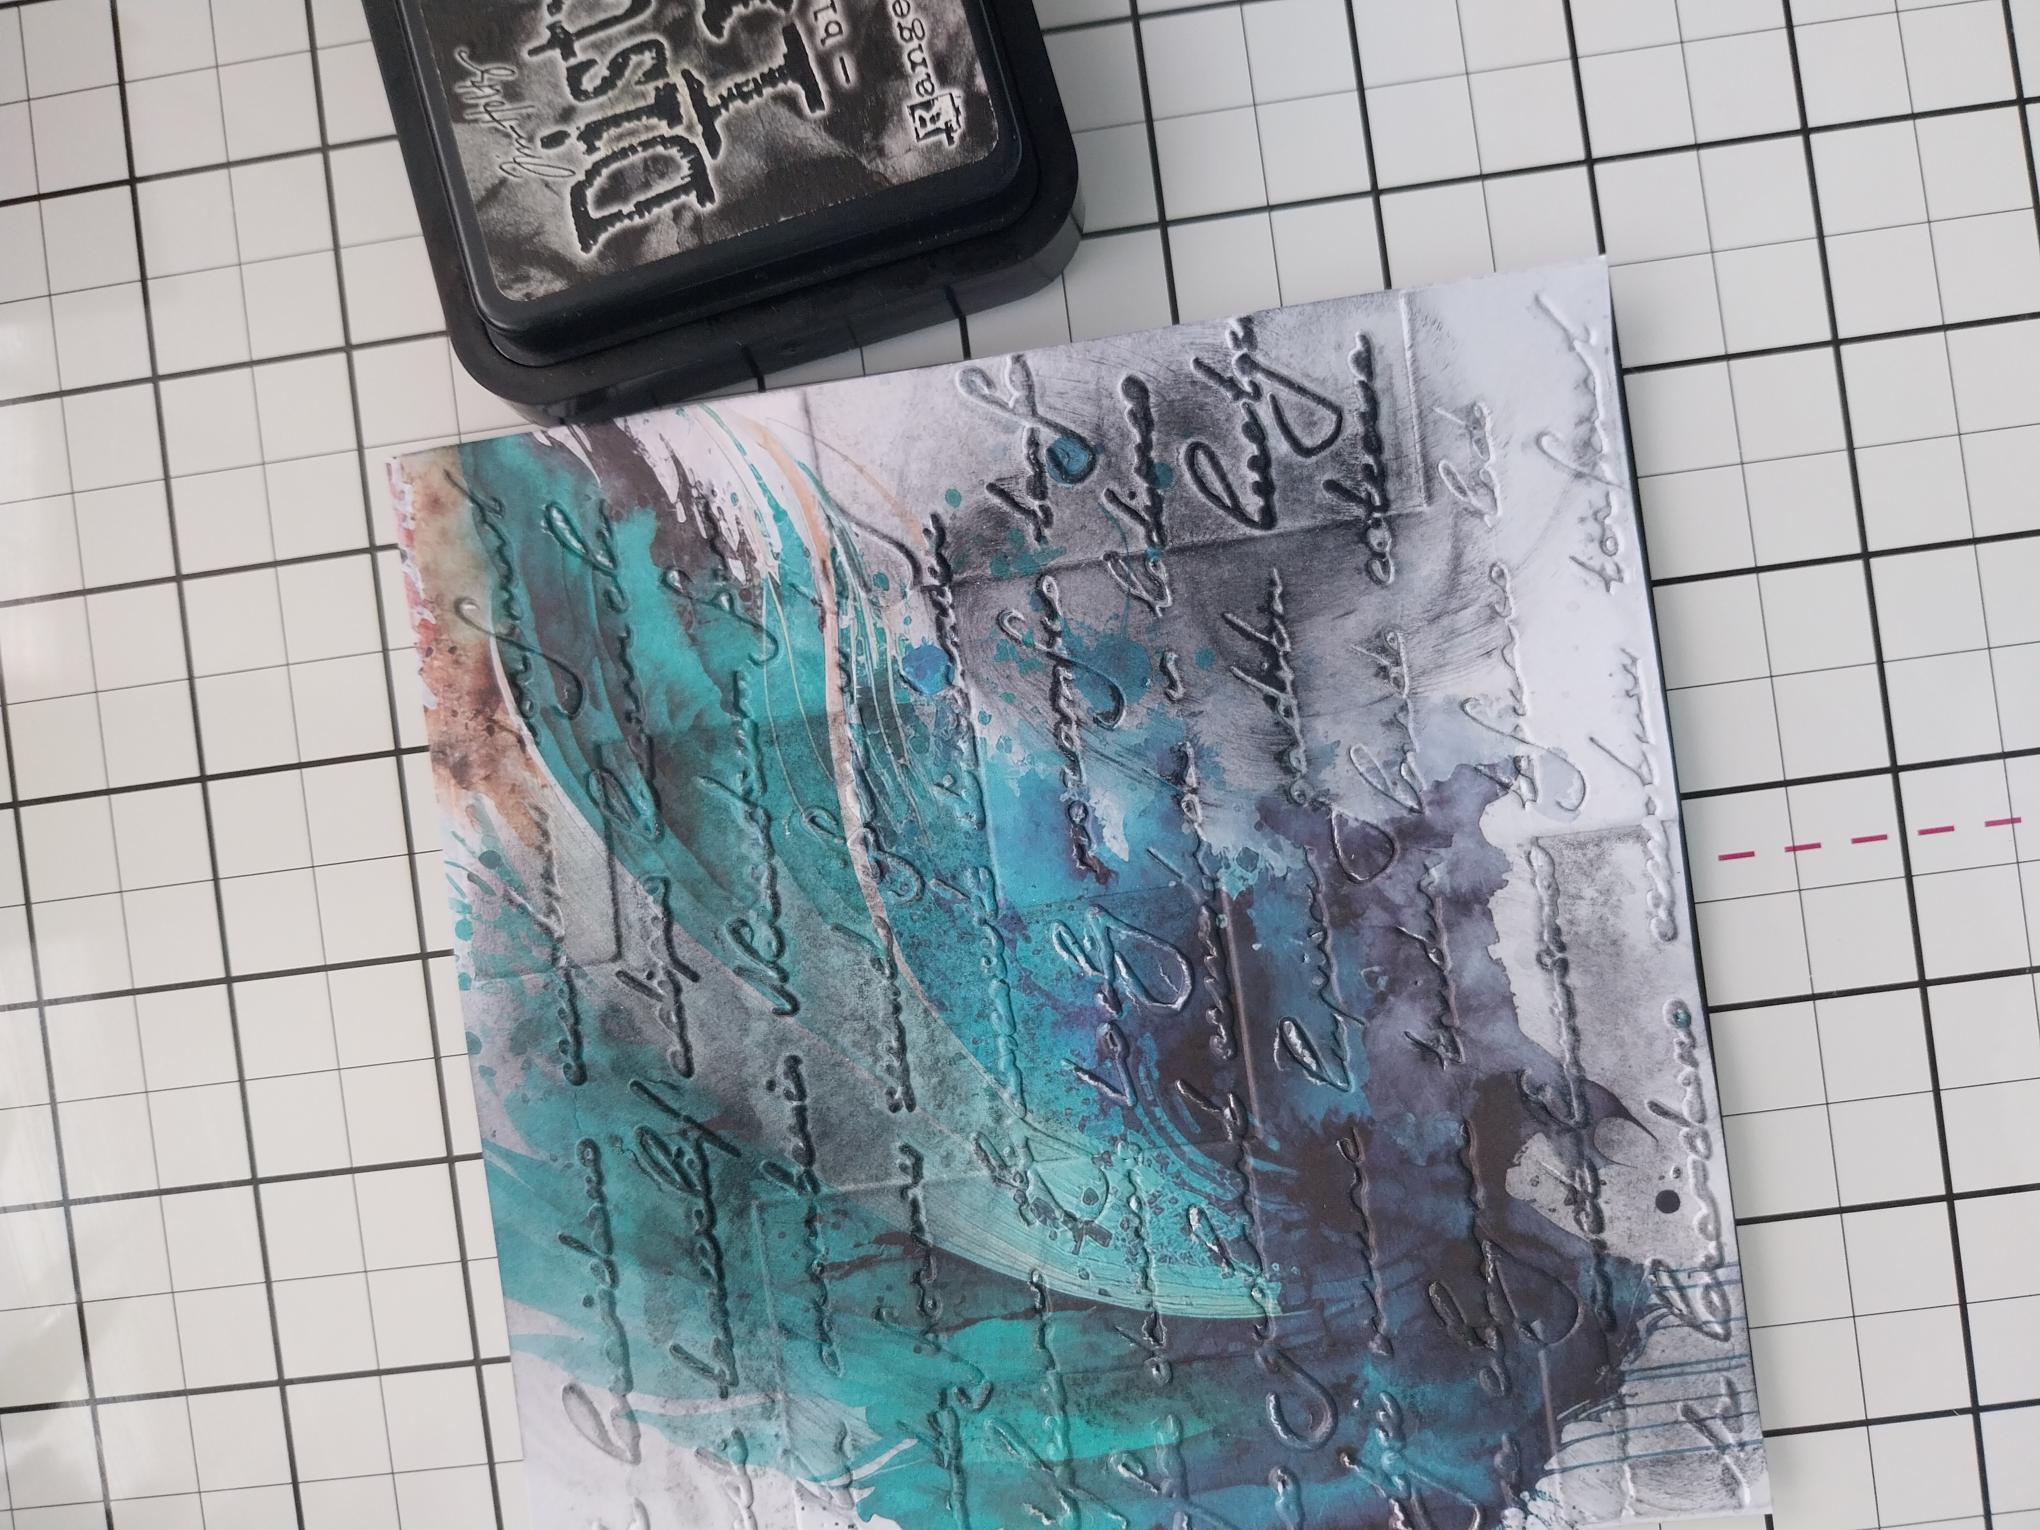
Gently rub the Black Soot ink pad over random embossed areas of the paper. Give it a quick blast with your heat tool, to dry the ink. |
|
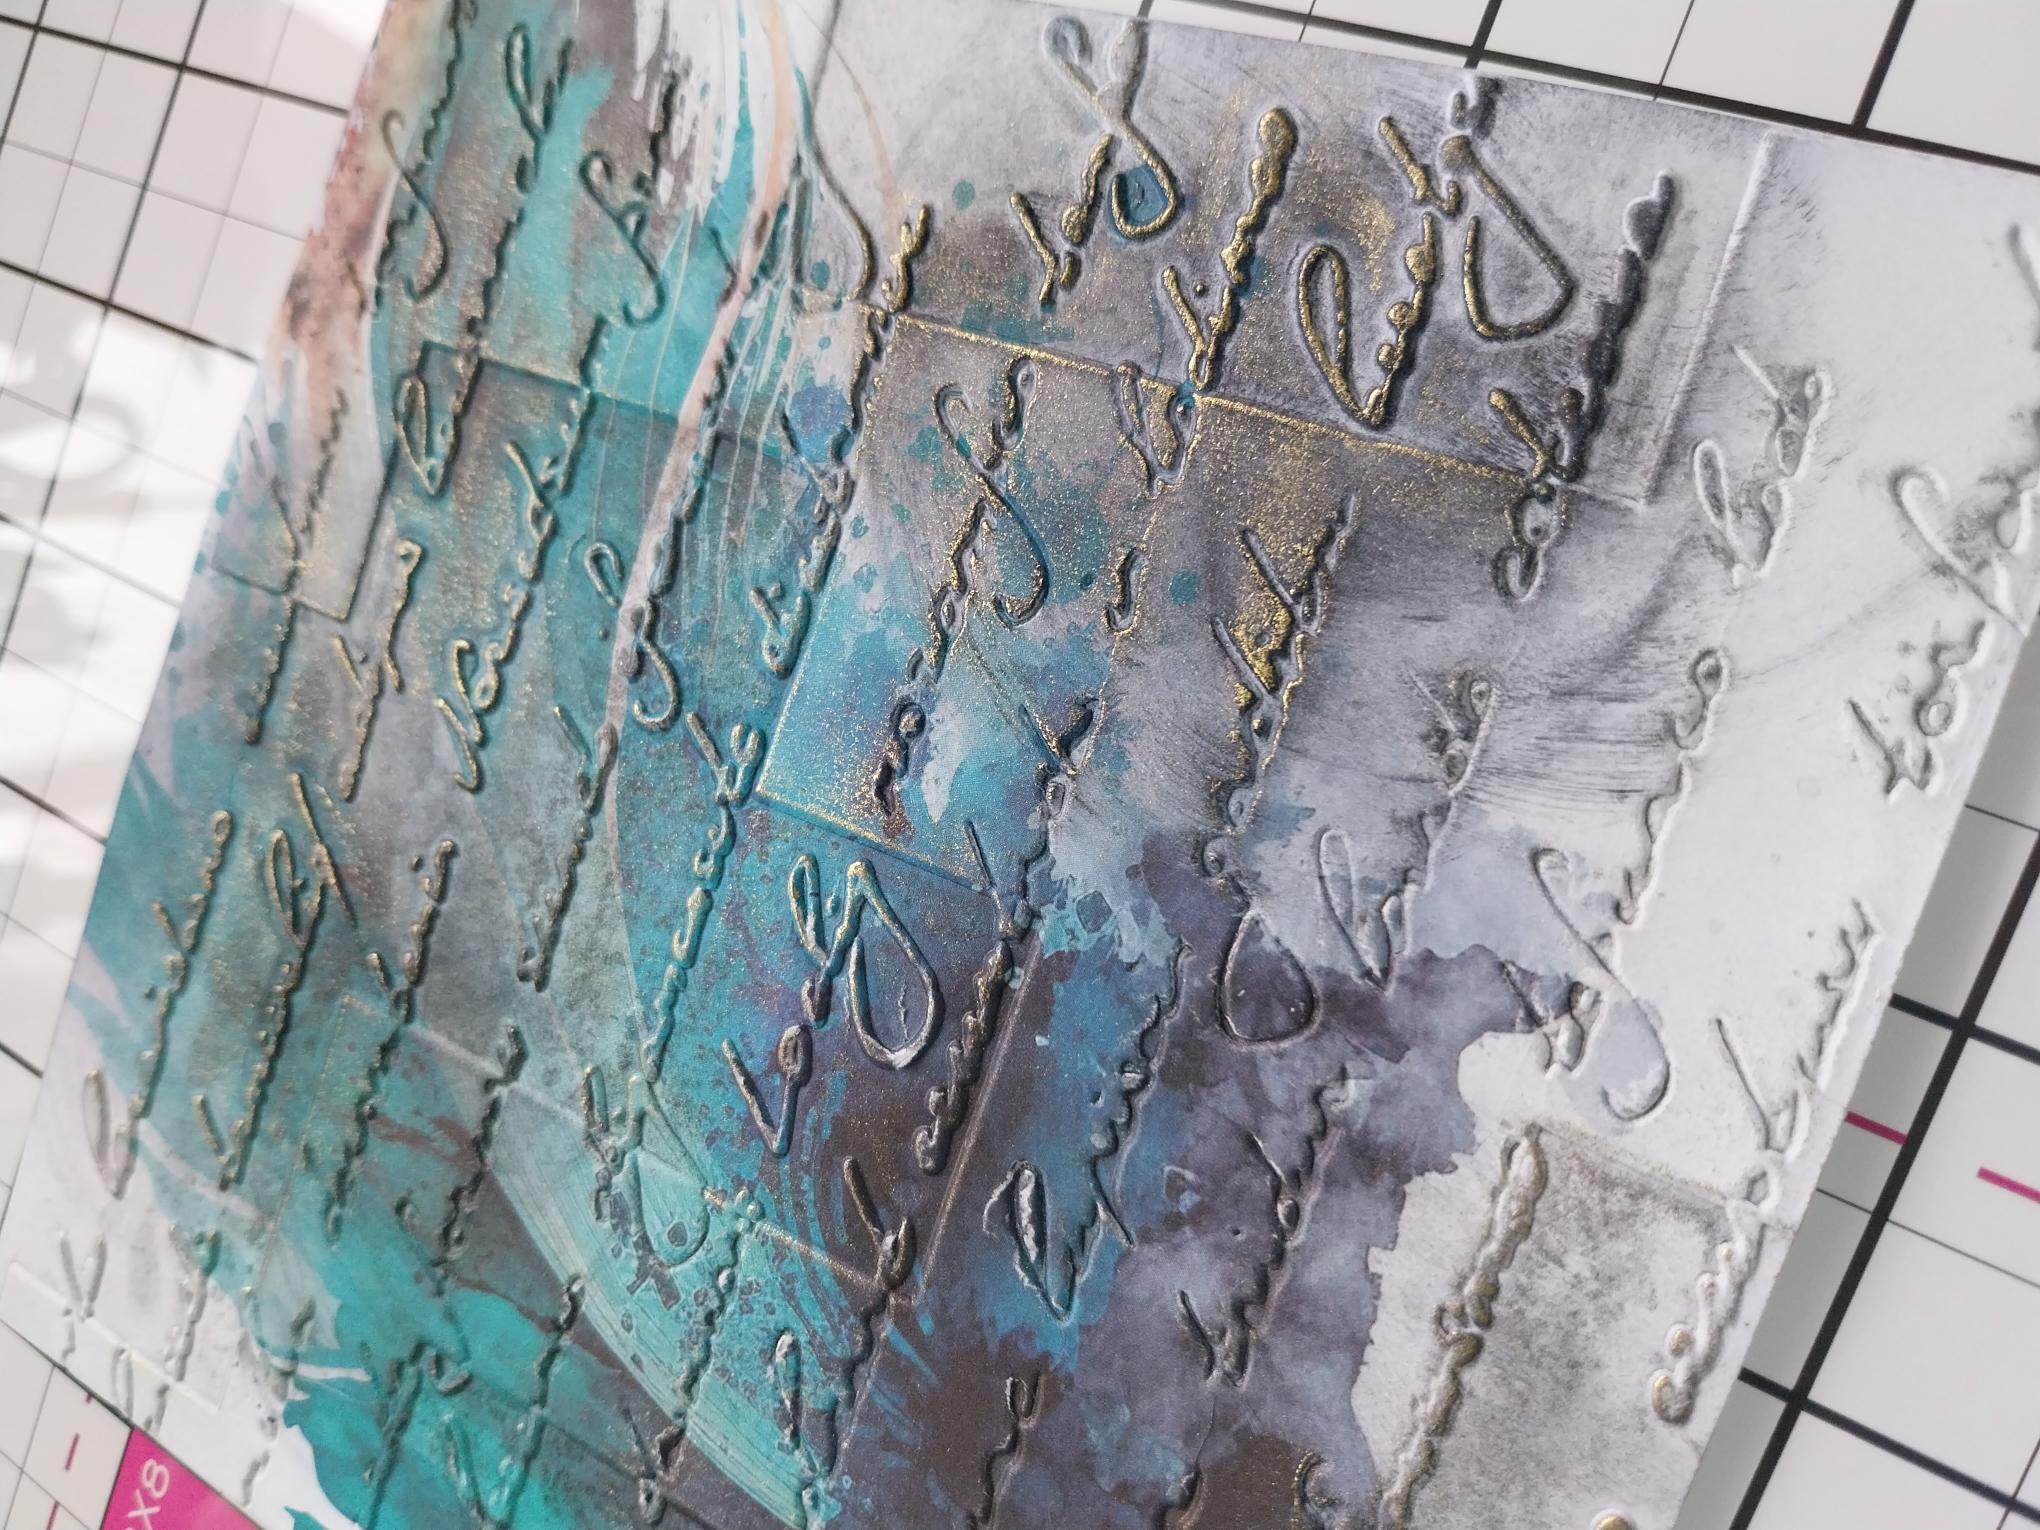
Use the pad of your finger to lightly apply Gold Gilding Wax to random, embossed elements of your design. It is always best to start off lightly and then add more wax if needed, as it is very difficult to remove it!! Buff the wax with a soft, dry cloth to enhance the shine. |
|
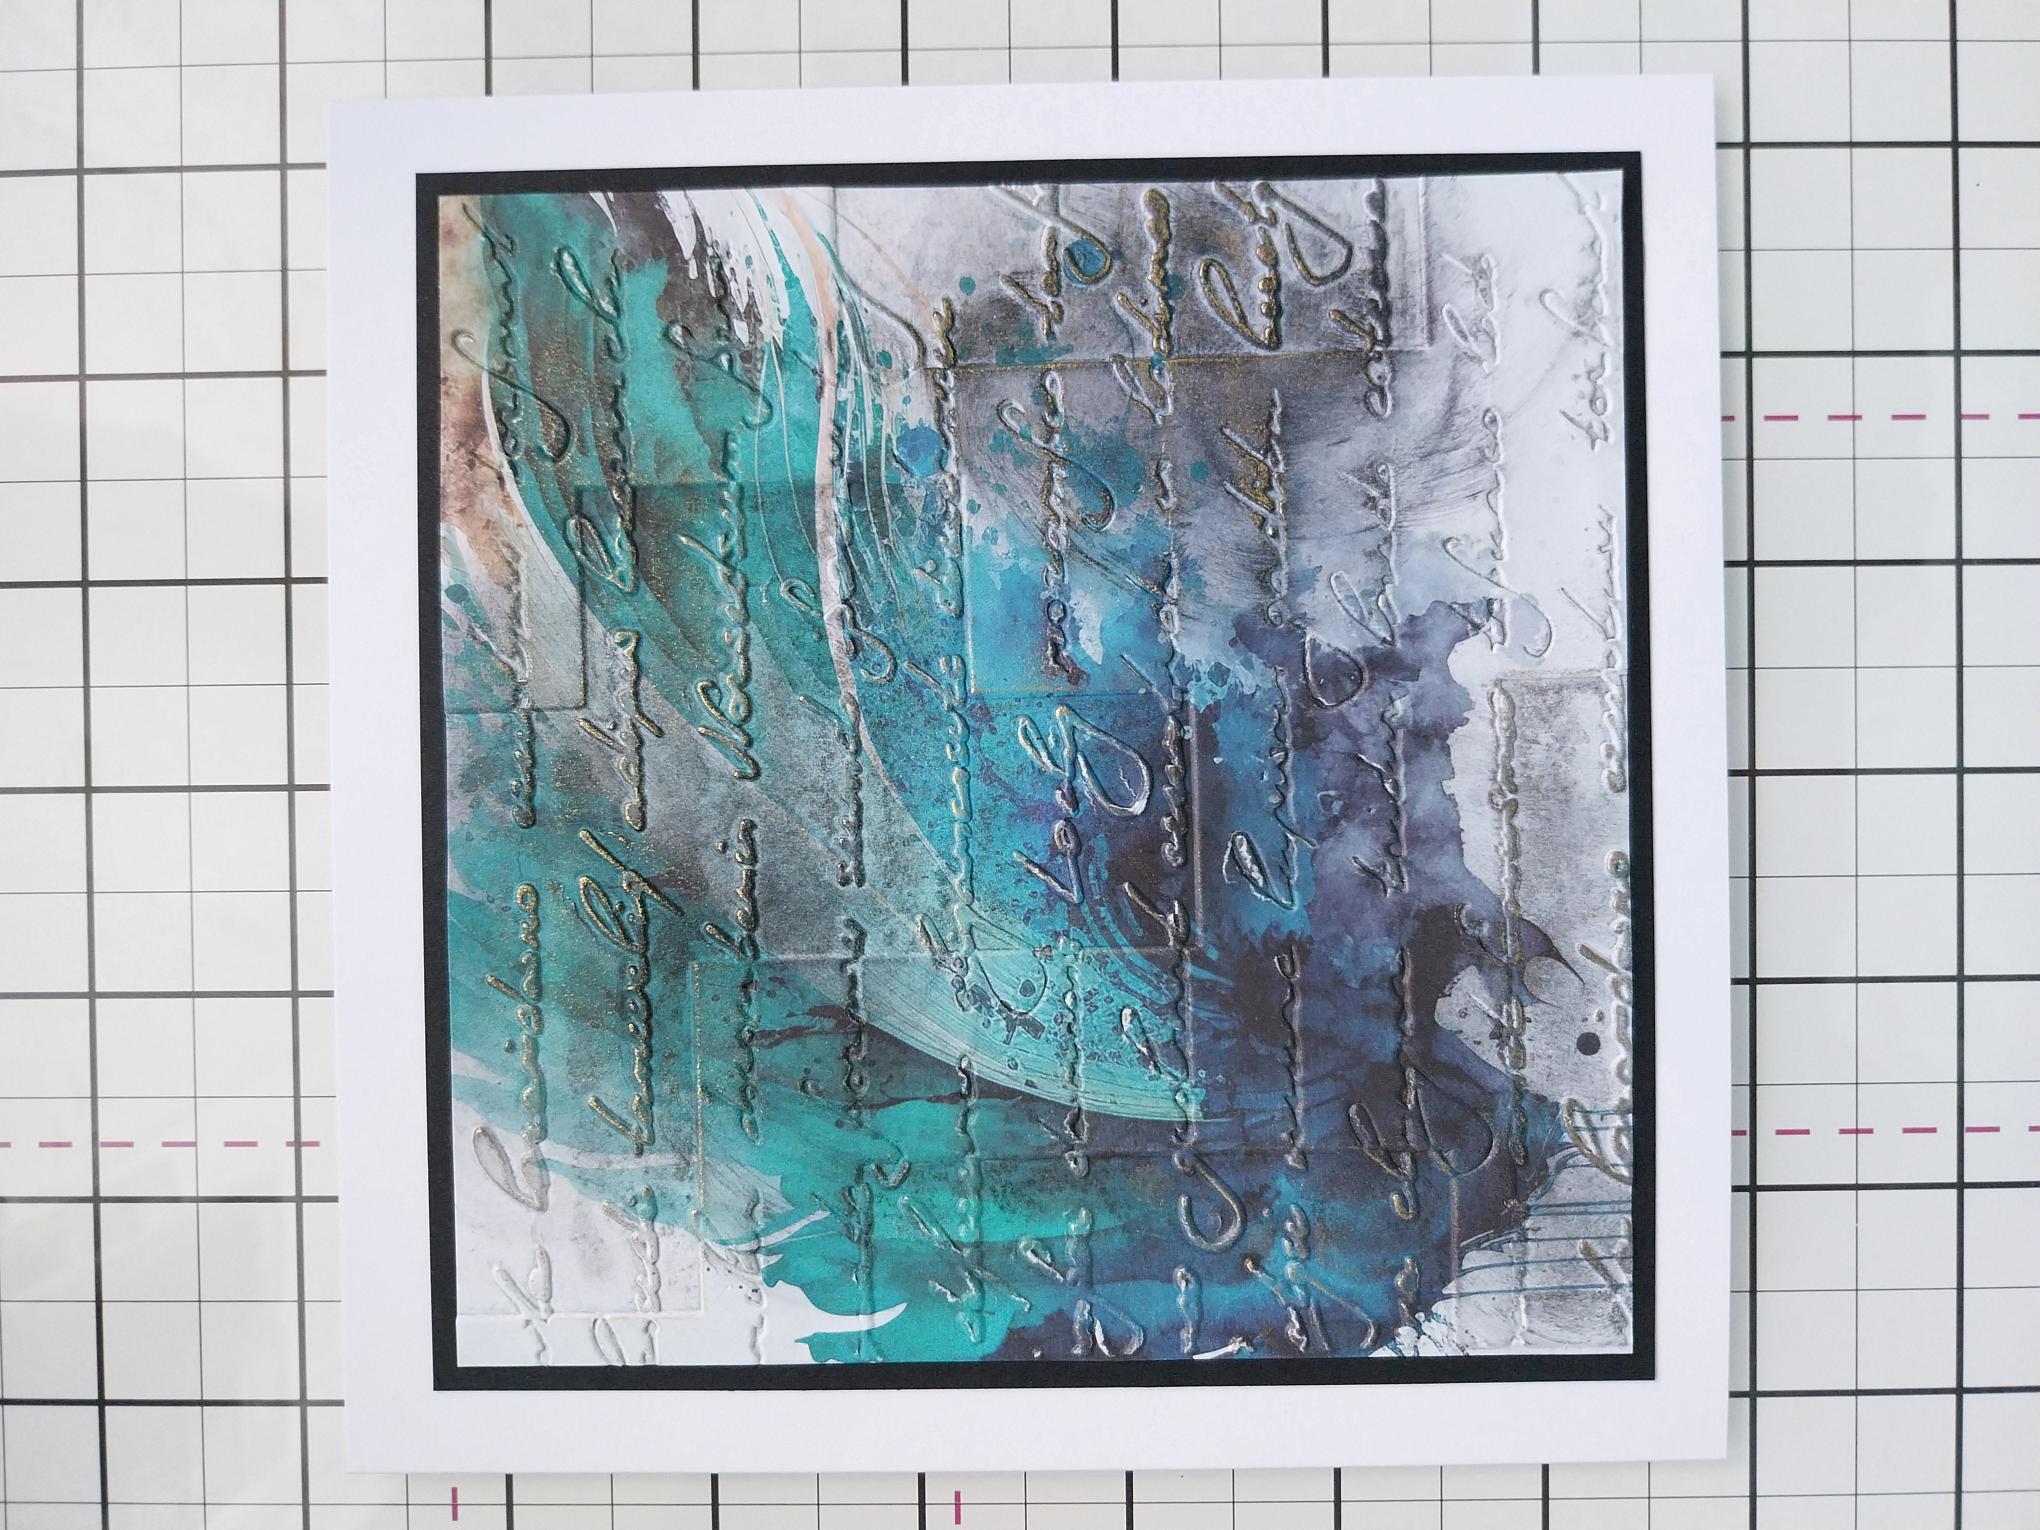
Adhere your background on to the black card, cut to 5 3/4" square. |
|
Adhere this on to the front of your white card blank, then set to one side. |
|
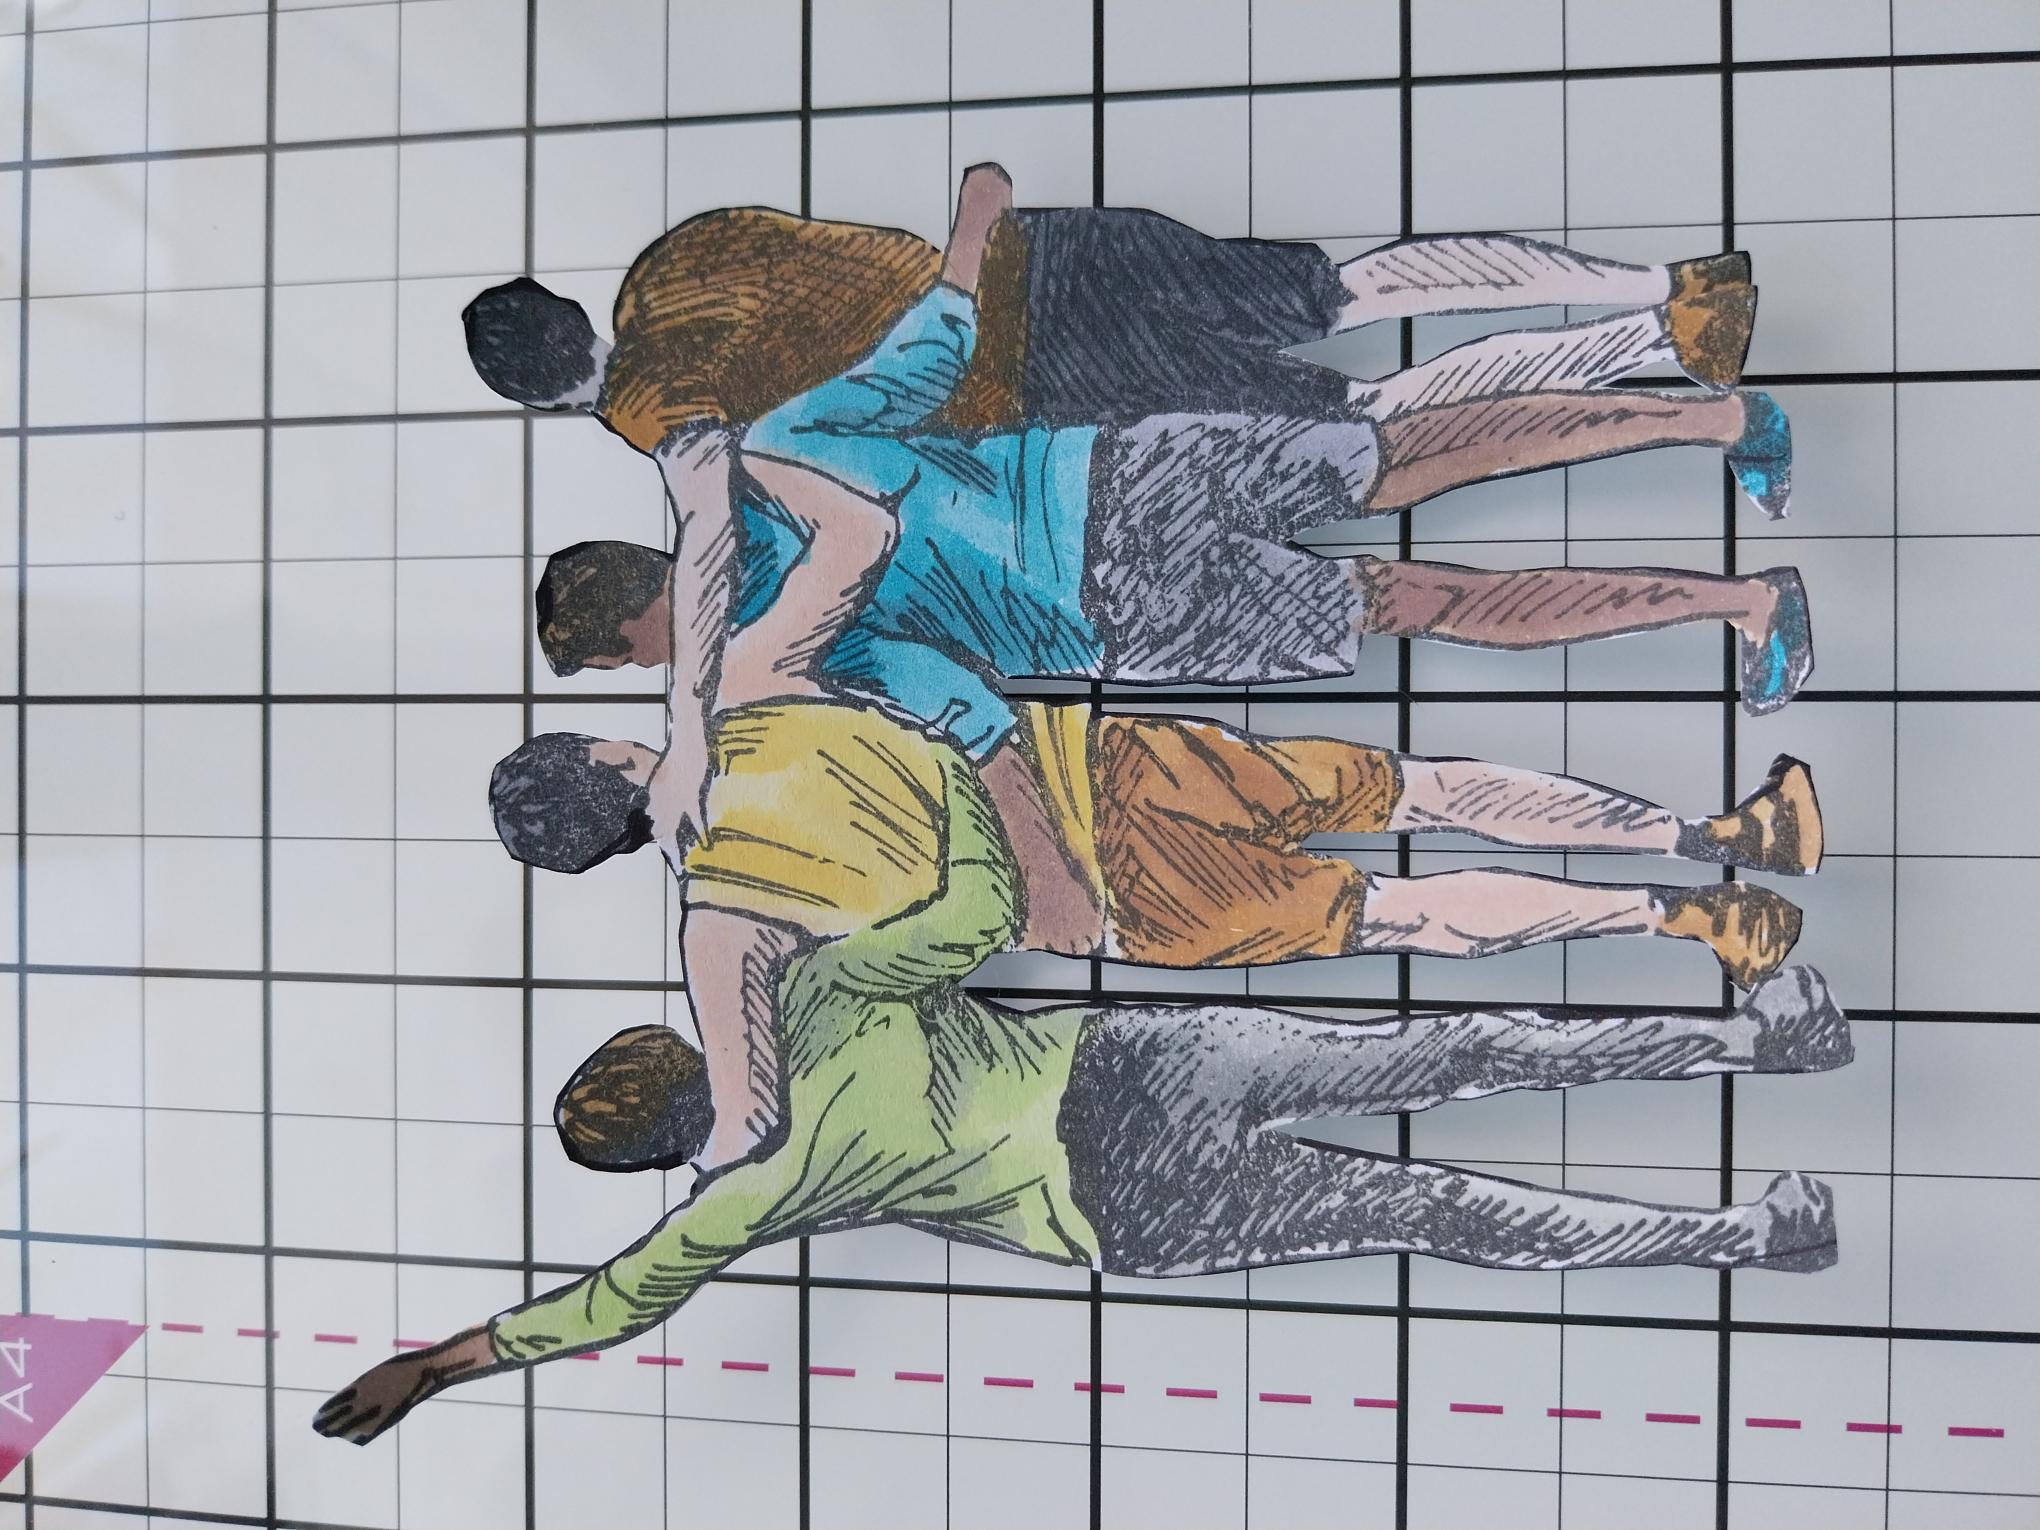
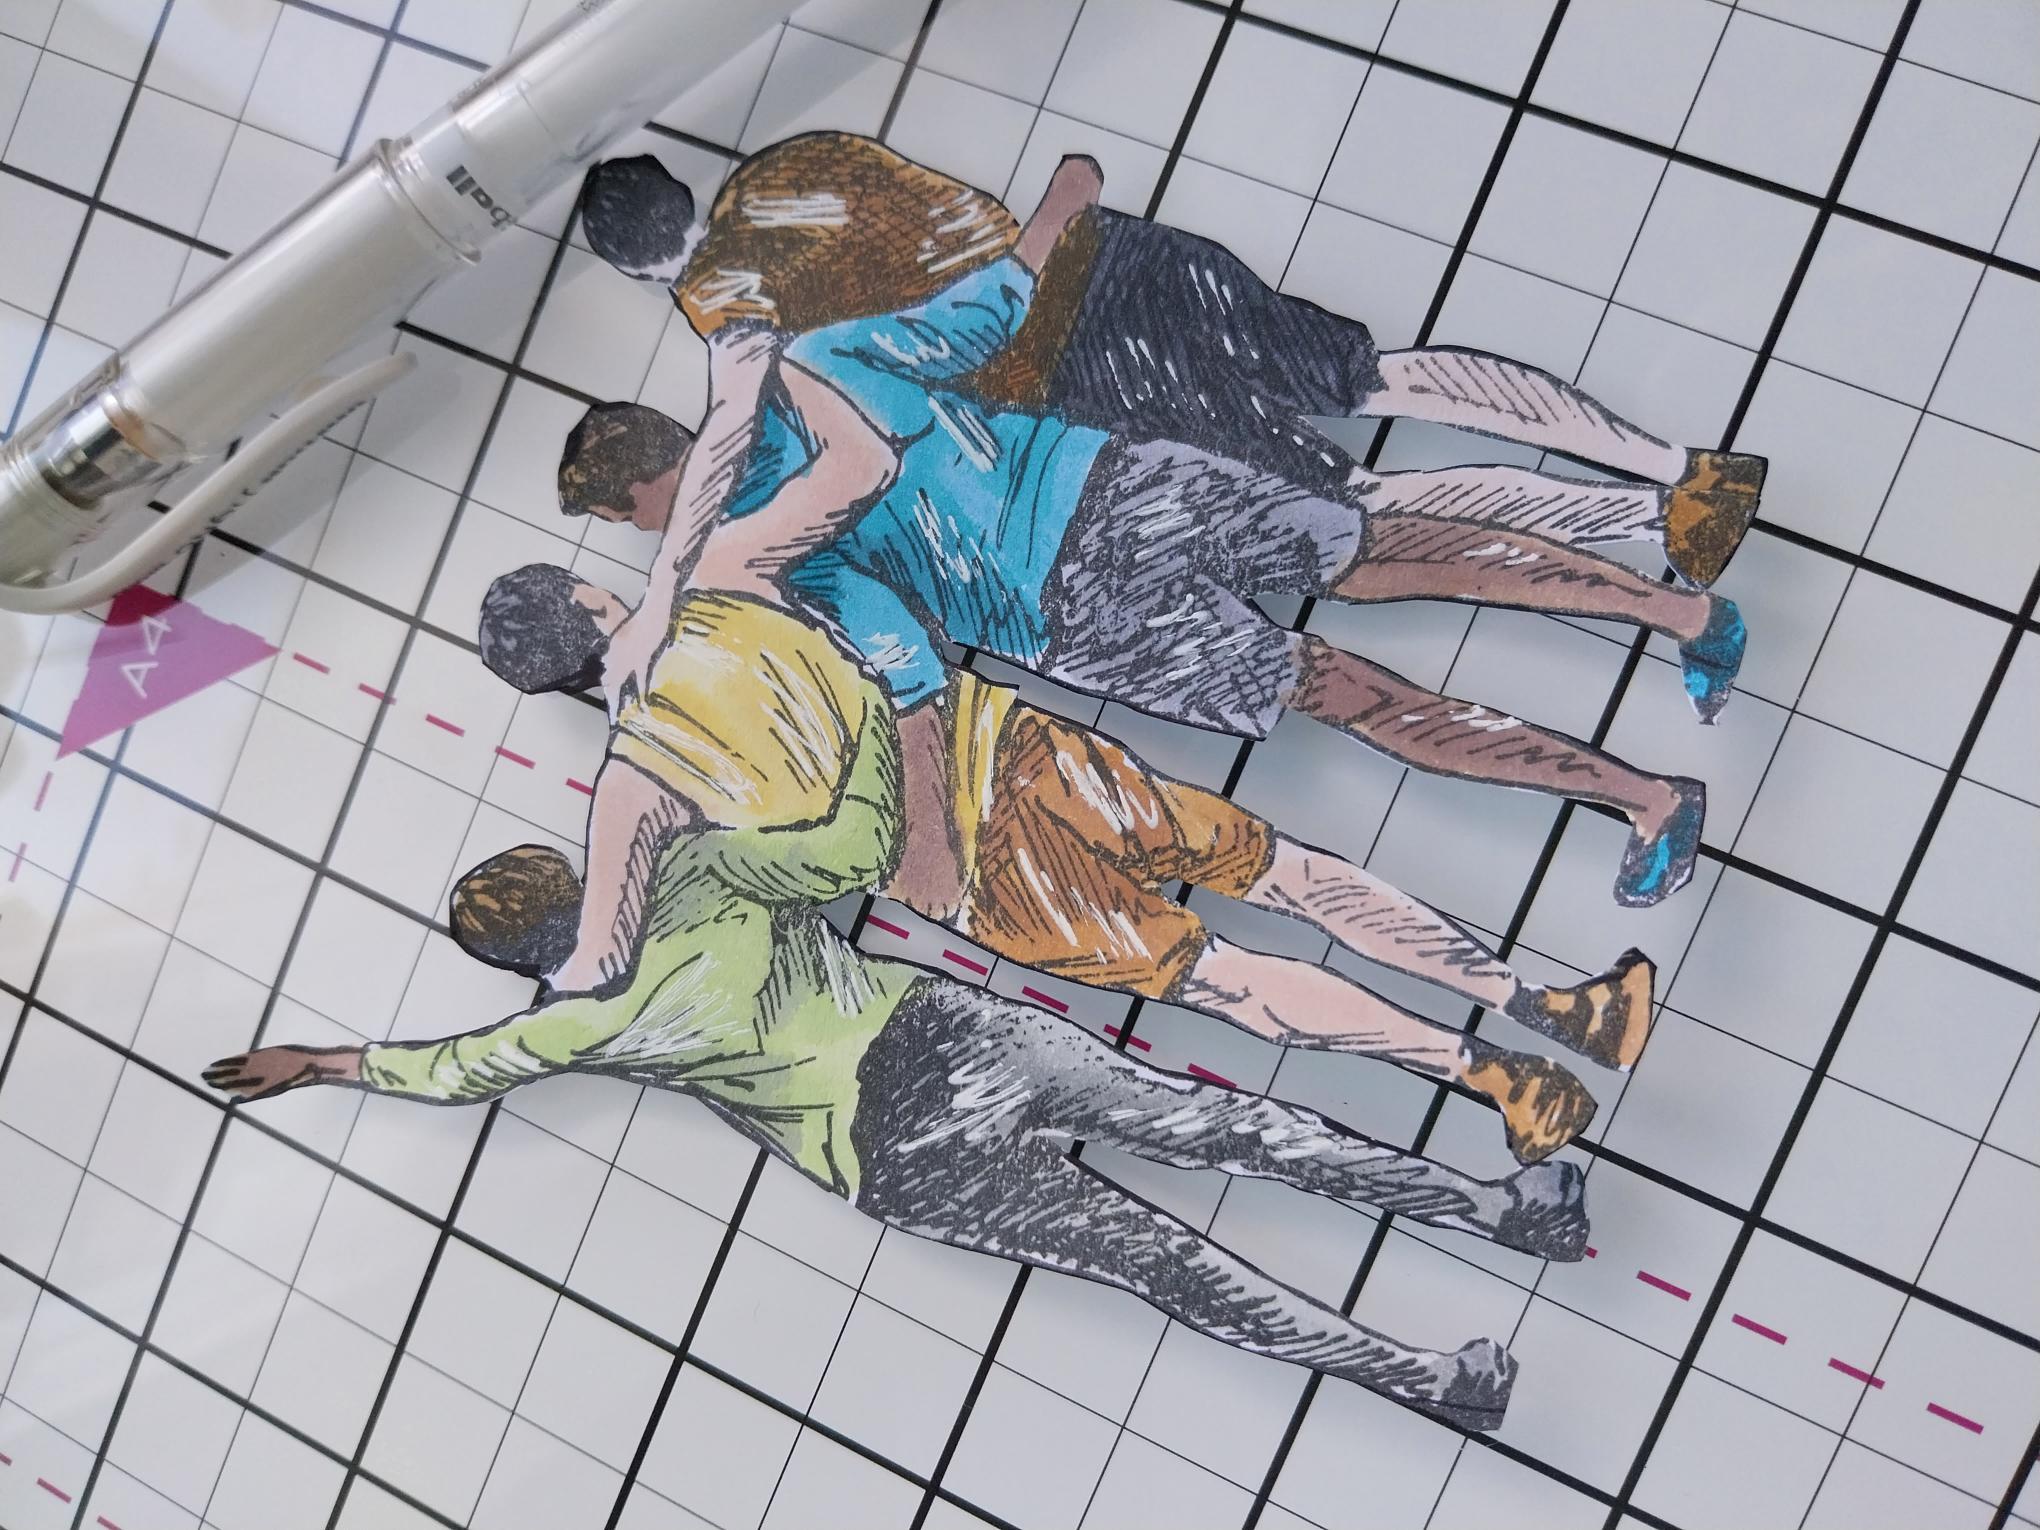
Use the Midnight hybrid to ink up this stamp, from Imala With The Boys. Using your Premium dye inks, Distress Oxides/Inks, a paint brush and a little water, paint your stamped image. I used the Tattered Rose, both on its own and mixed with Vintage Photo, to make my skin tones. Once the ink is dry, fussy cut. |
|
Use the Imala white gel pen to add accents and highlights, to your 3D element. |
|
Adhere to the left of your prepped card, with foam pads and set aside. |
|
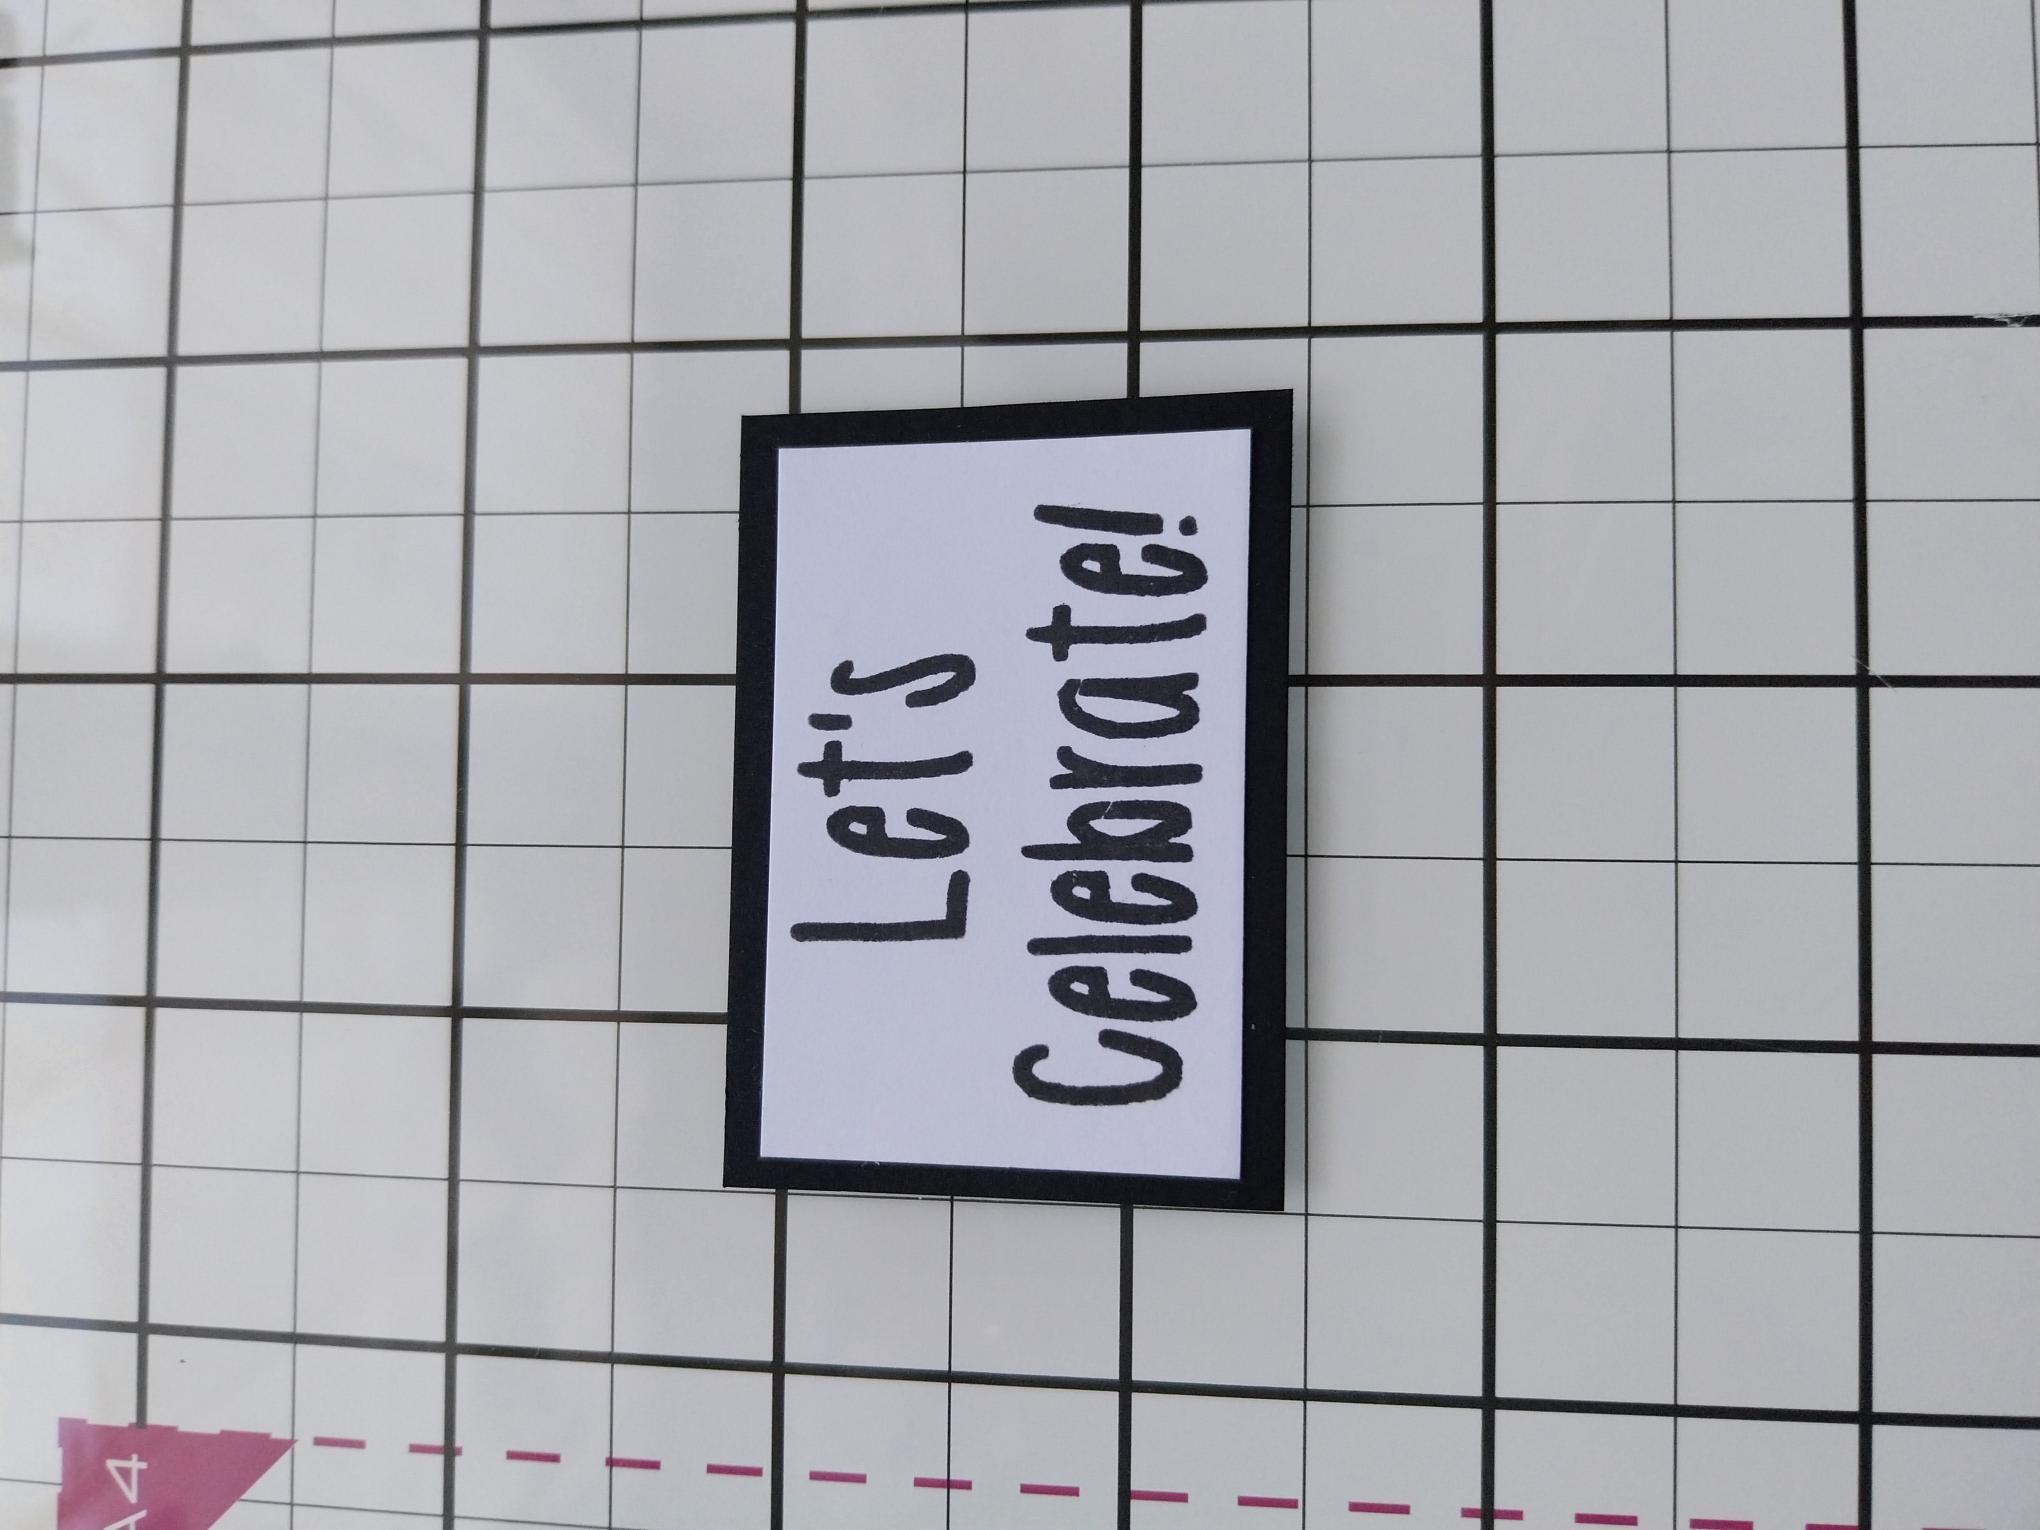
Use Midnight to ink the sentiment stamp. Stamp on to white card and cut to size. Adhere on to black card and cut to size, to create a mat. |
|
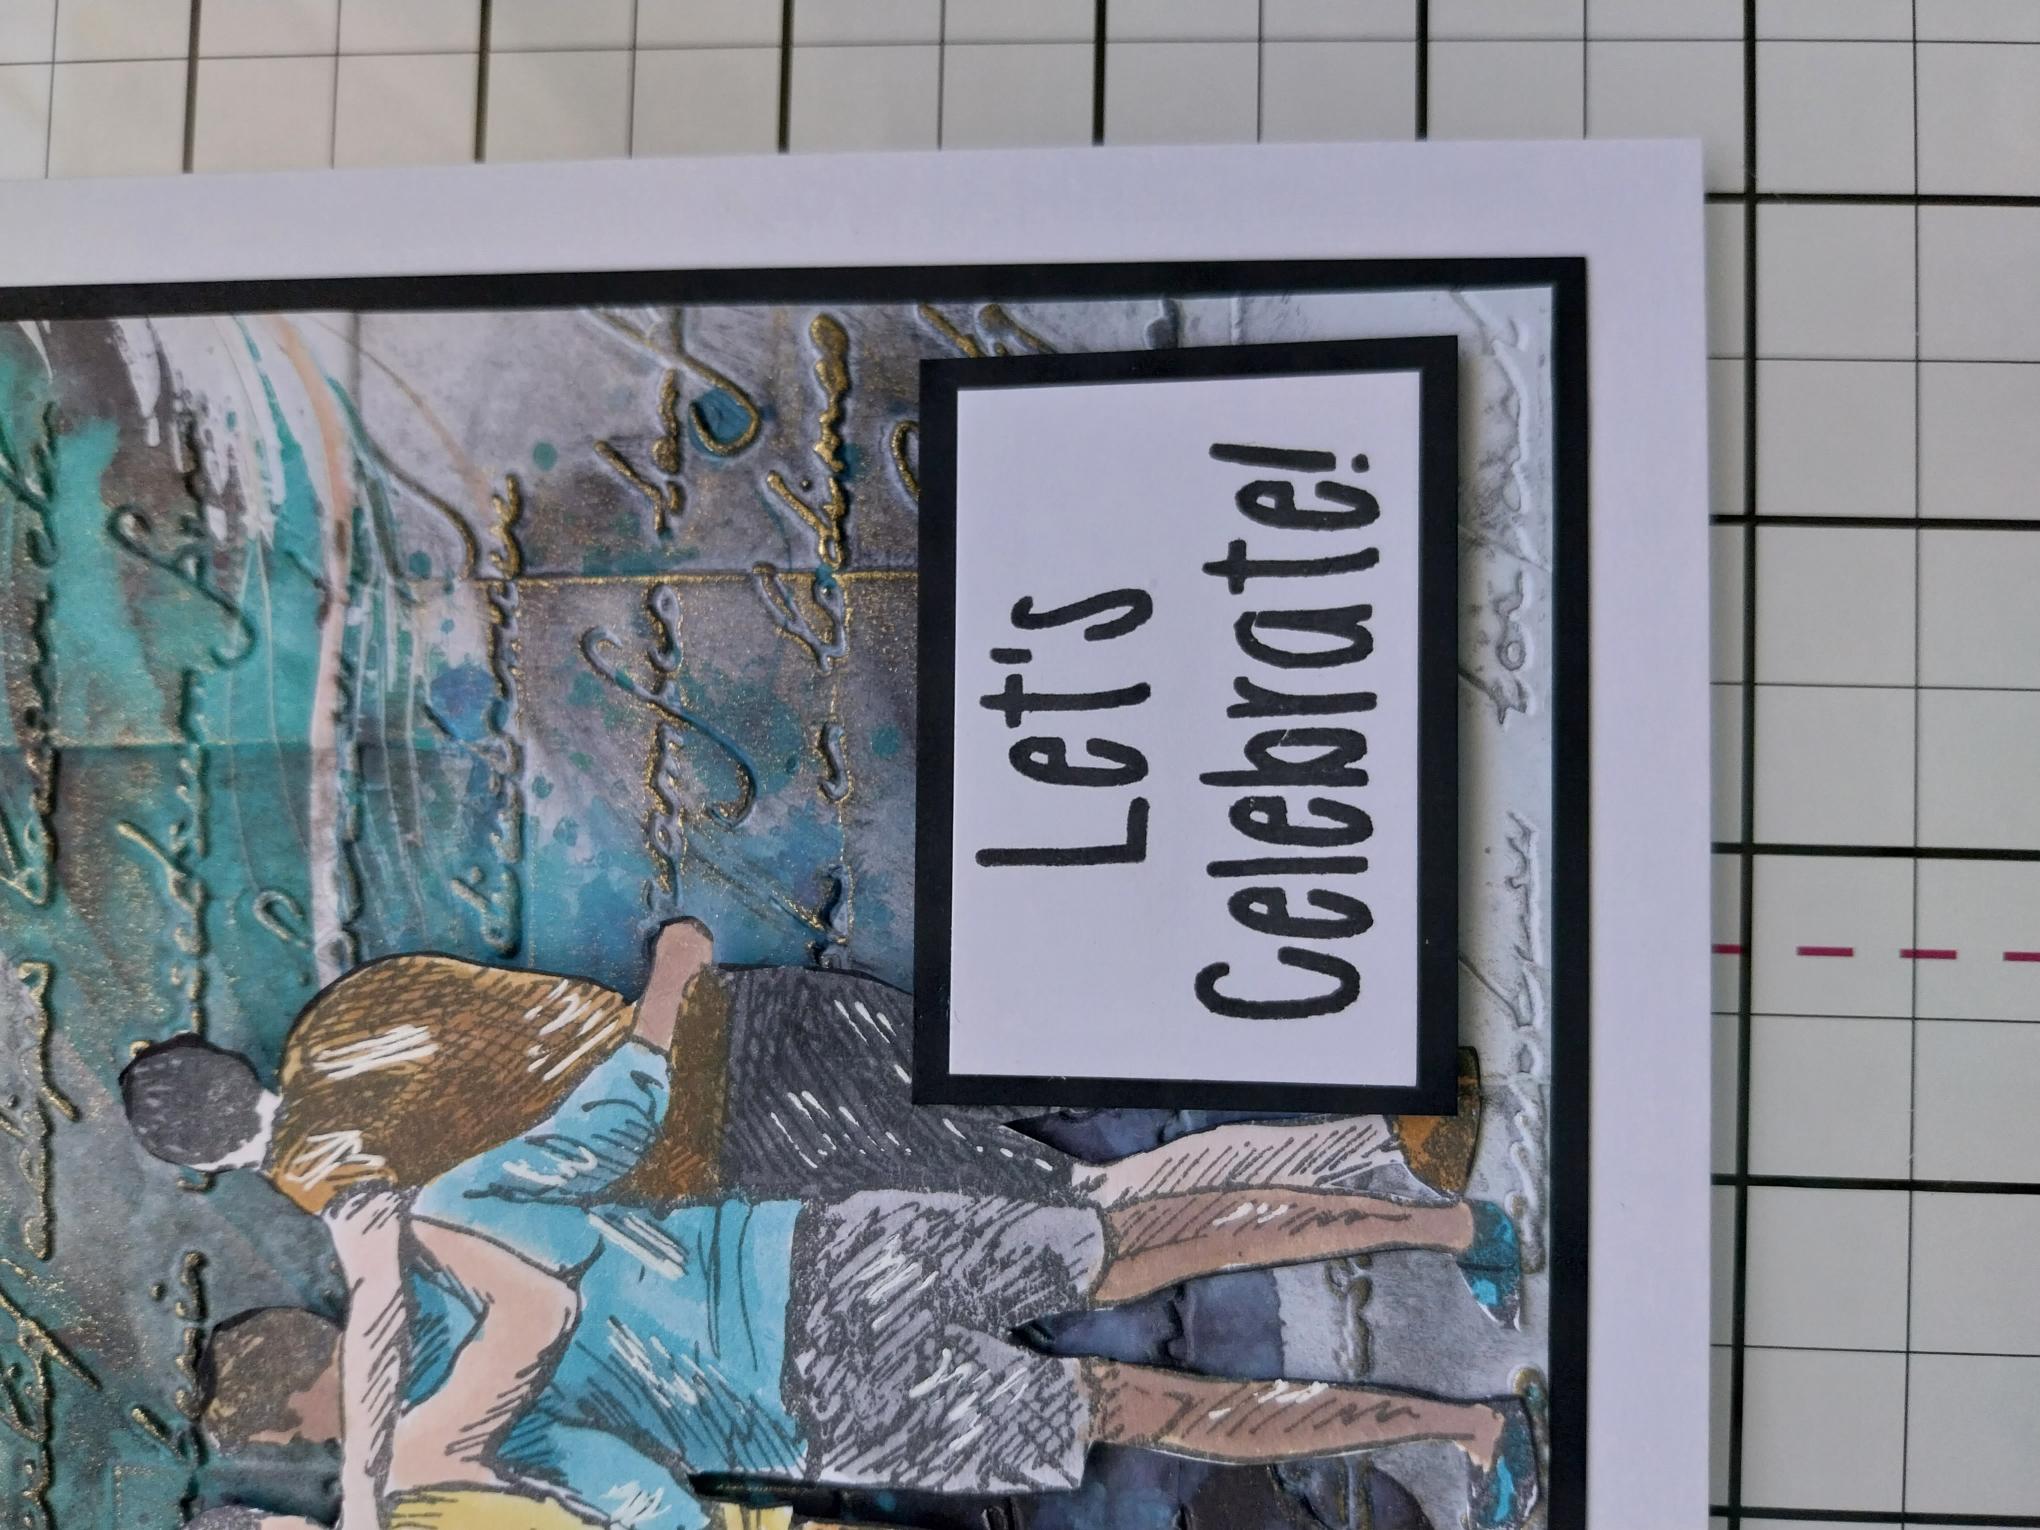
To complete your card, adhere the sentiment, with foam pads, to the bottom right of your artwork. |