Give your friends $10 off their first order!
Refer a FRIEND


WHAT YOU WILL NEED:
White card blank (7 x 7")
White cardstock (5 x 5")
Stamps from Soulful Pencil Sketch Stamp Collection
Stamps from Soulful Pencil Sketch Elements Stamp Collection
Sentiment from Celebrate And Create Lamination Stamp Collection
Imala Quintessential Nautical Paper Pad 12 x 12"
Thirsty Brush Abstract Mask 1
Izink Diamond Glitter Paint: Argente
Izink Dye Ink Pad: Reglisse
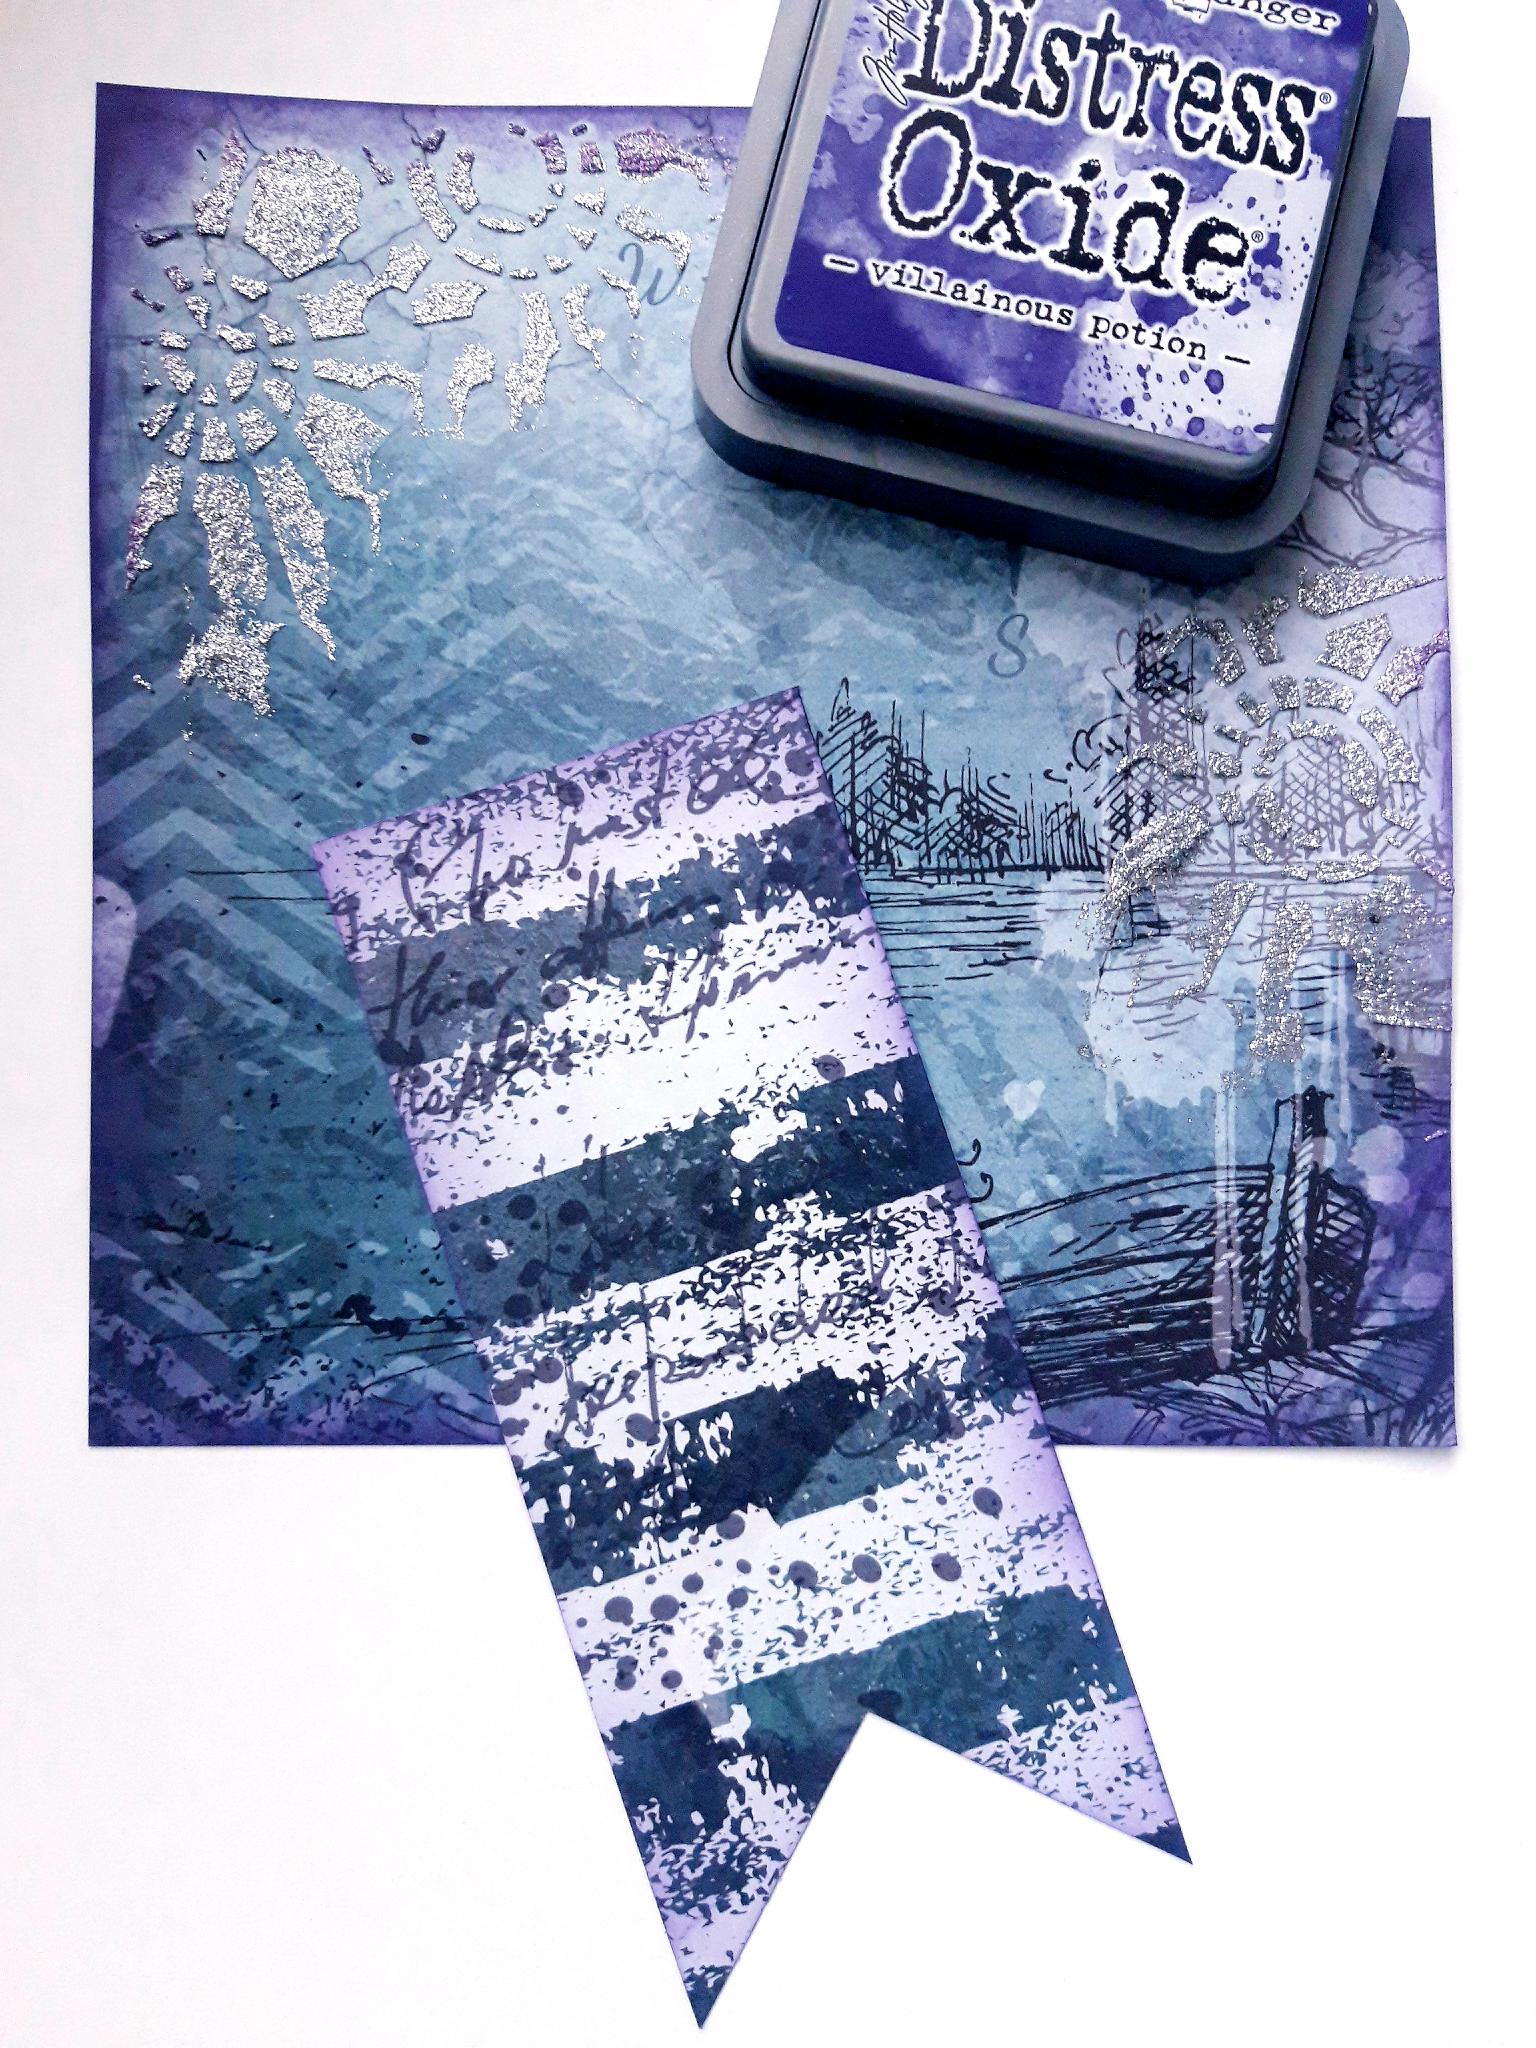
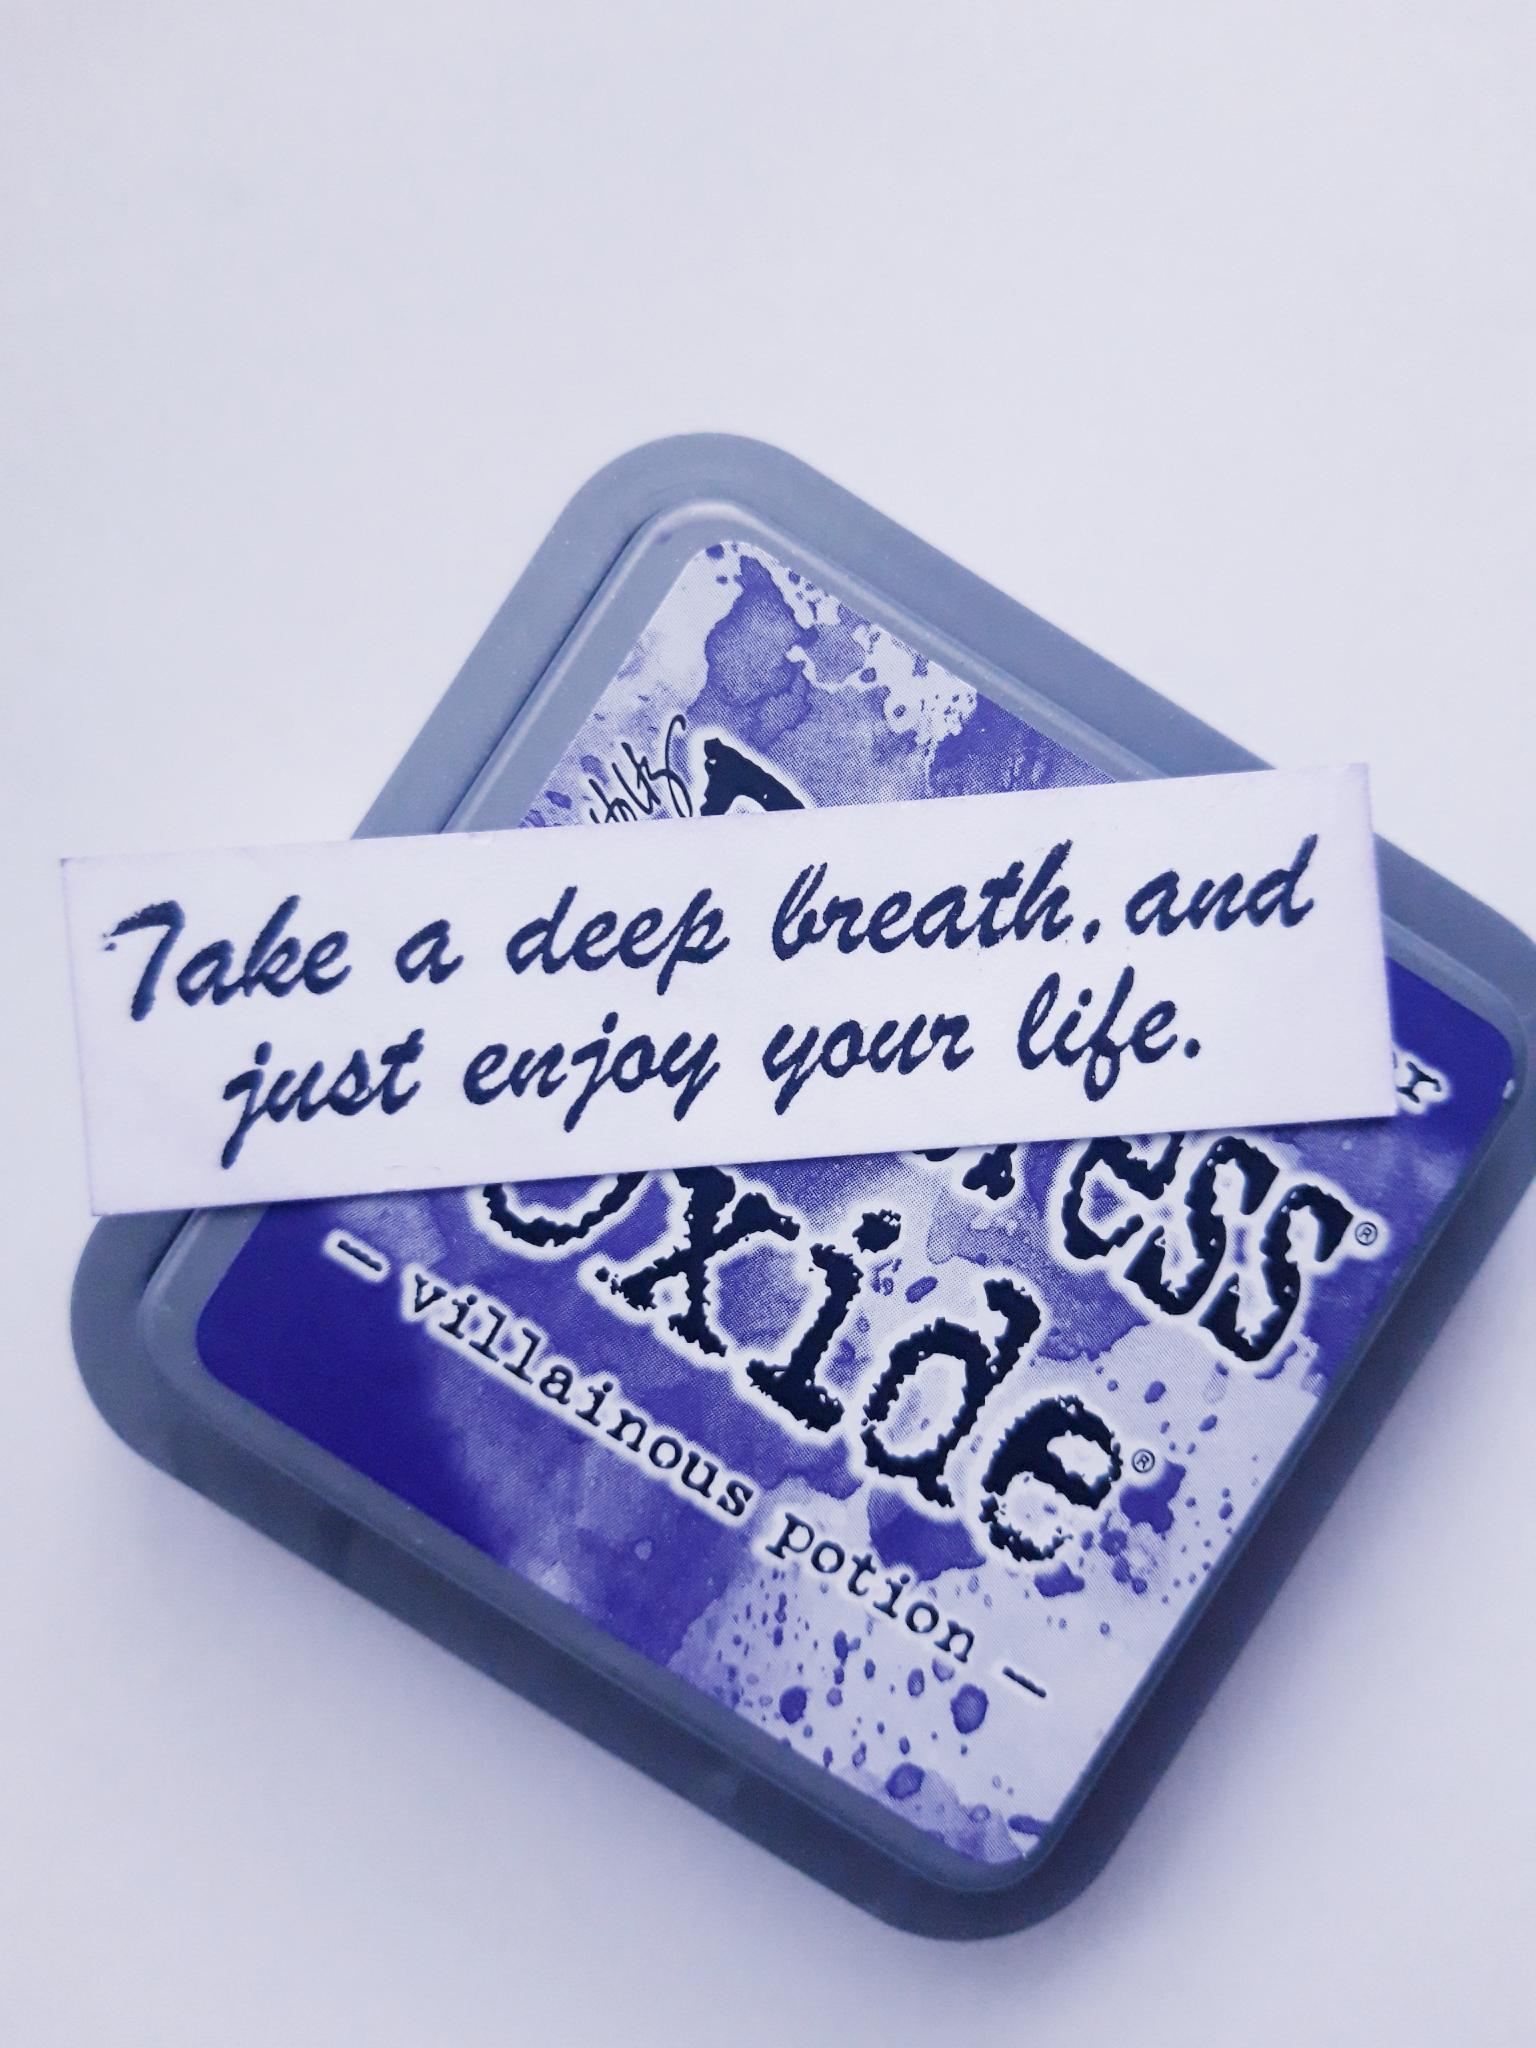
Distress Oxide: Villianous Potion
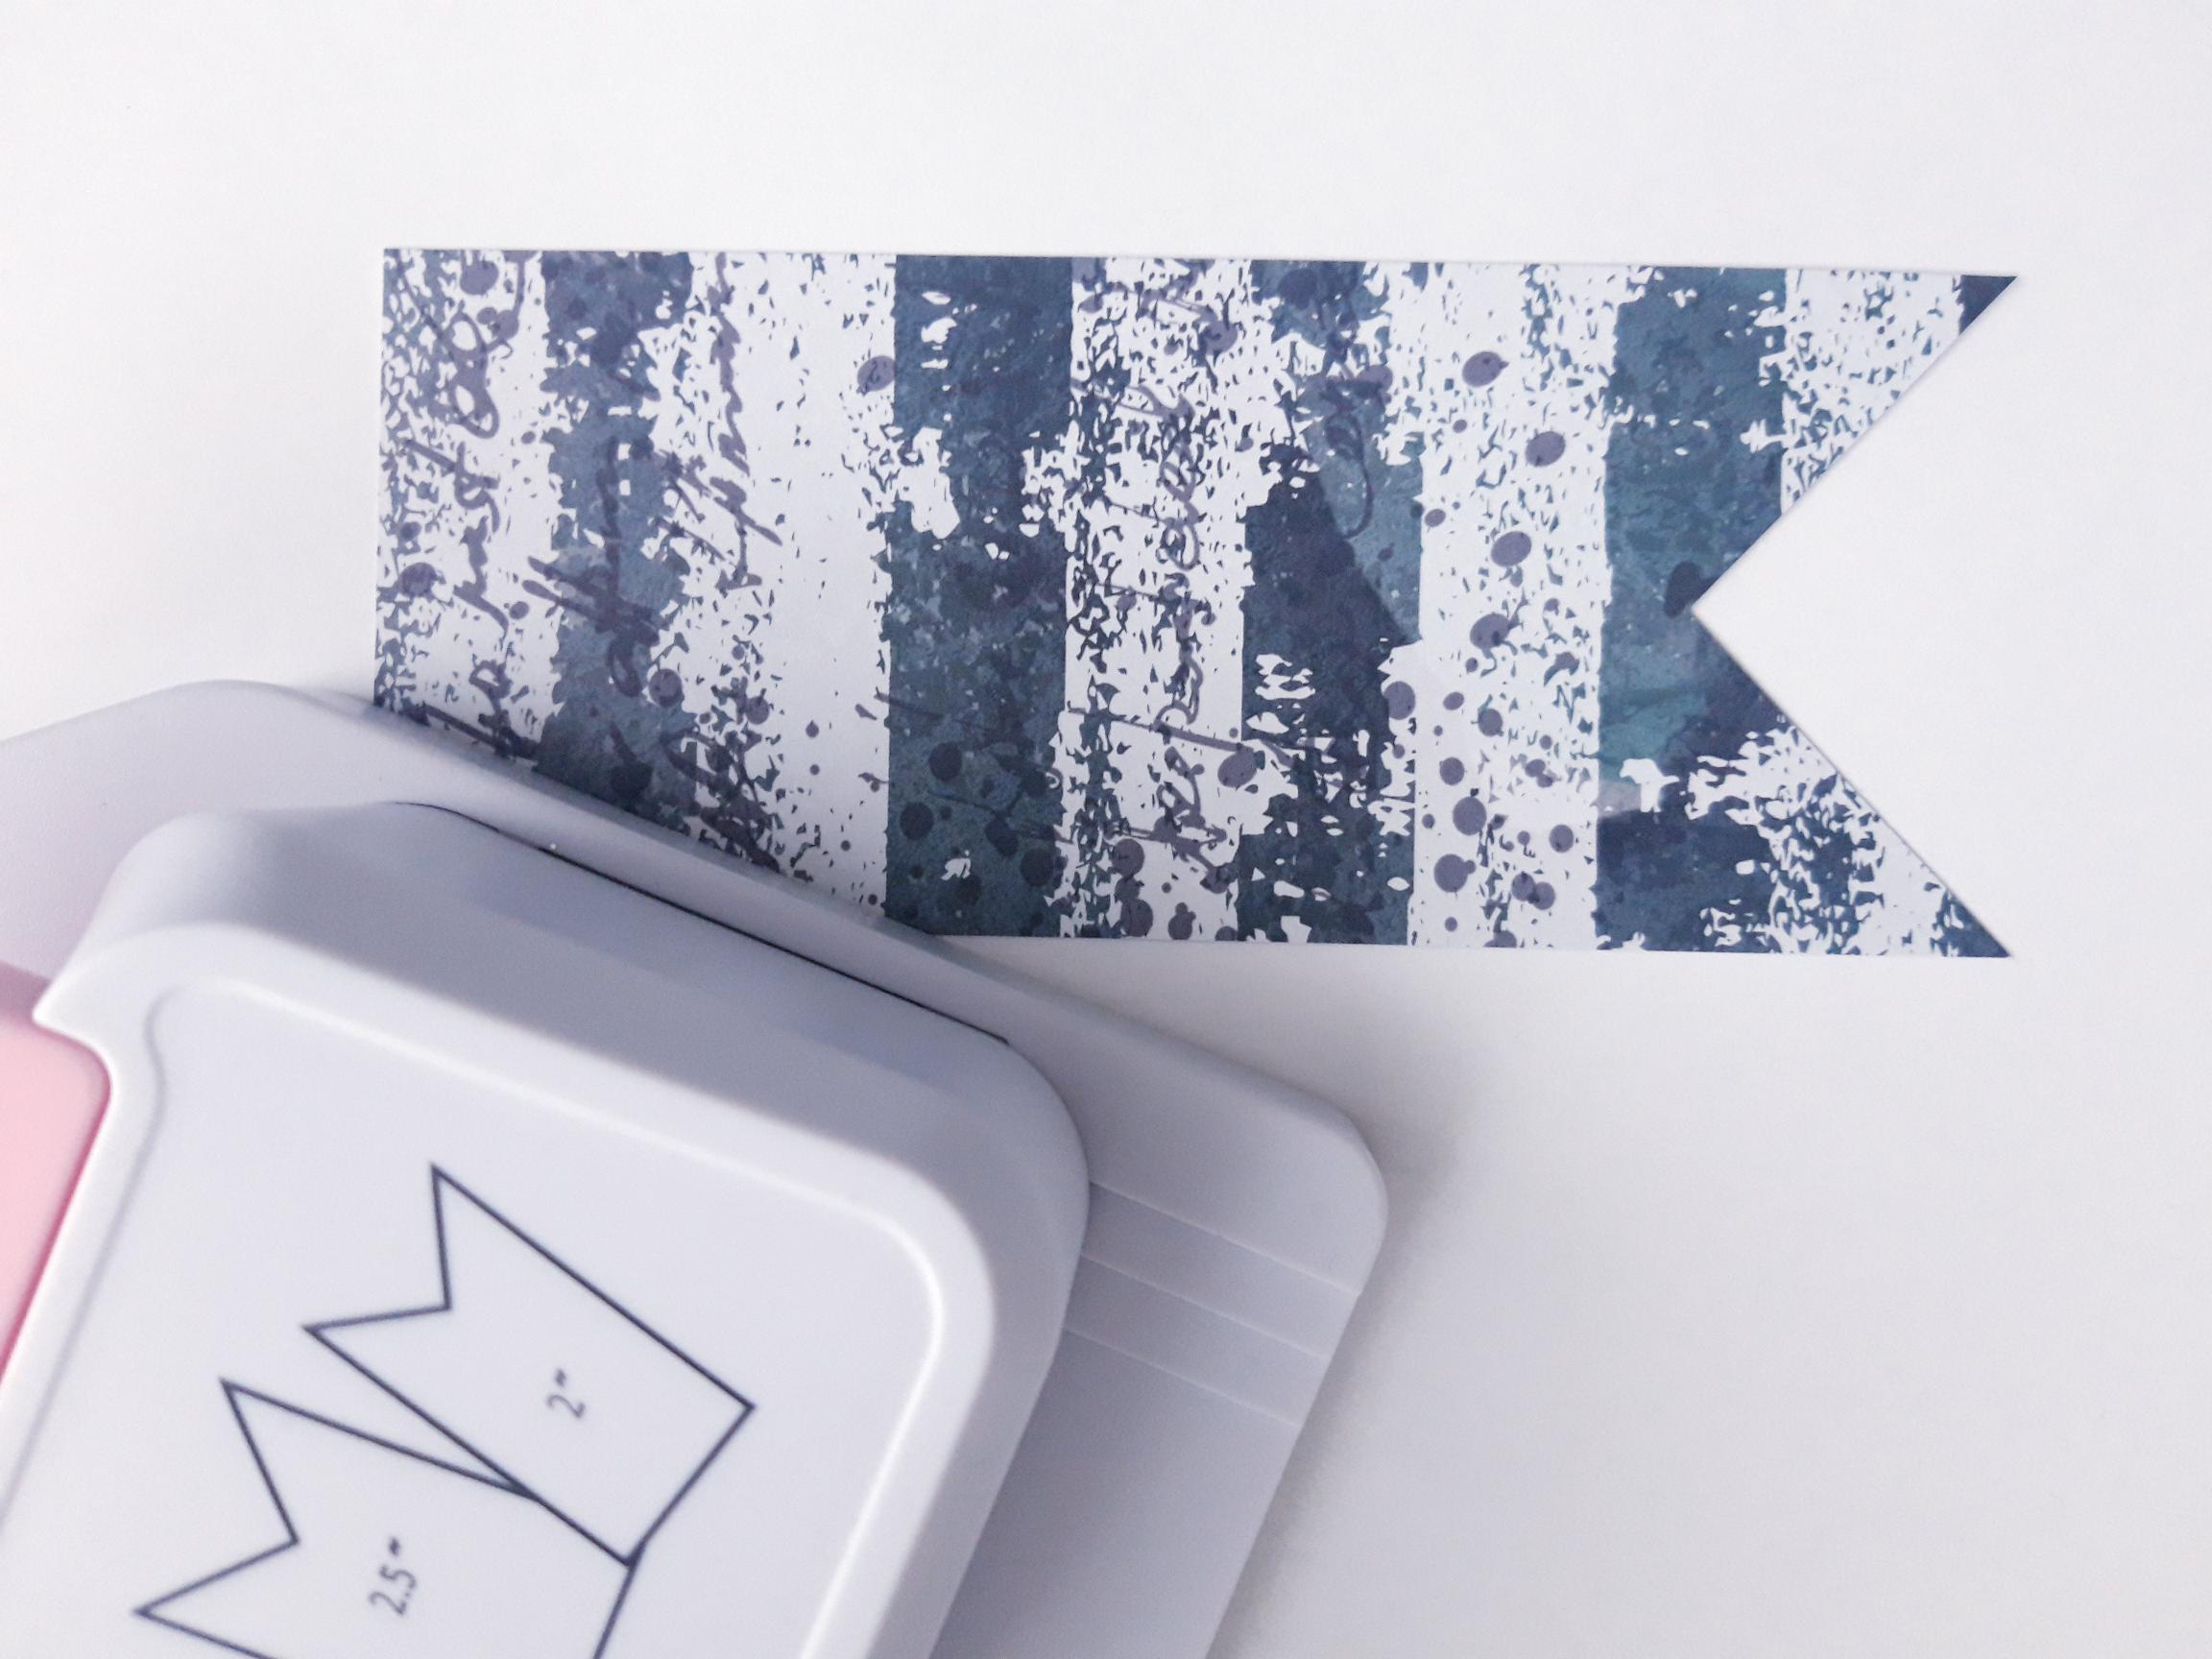
Banner tag punch
Versafine Ink Pad: Onyx Black
Palette knife
Paint brush
Heat Gun
Eureka 101
Foam Pads
Perfect Together Glue
Paper Trimmer
[click image to enlarge] 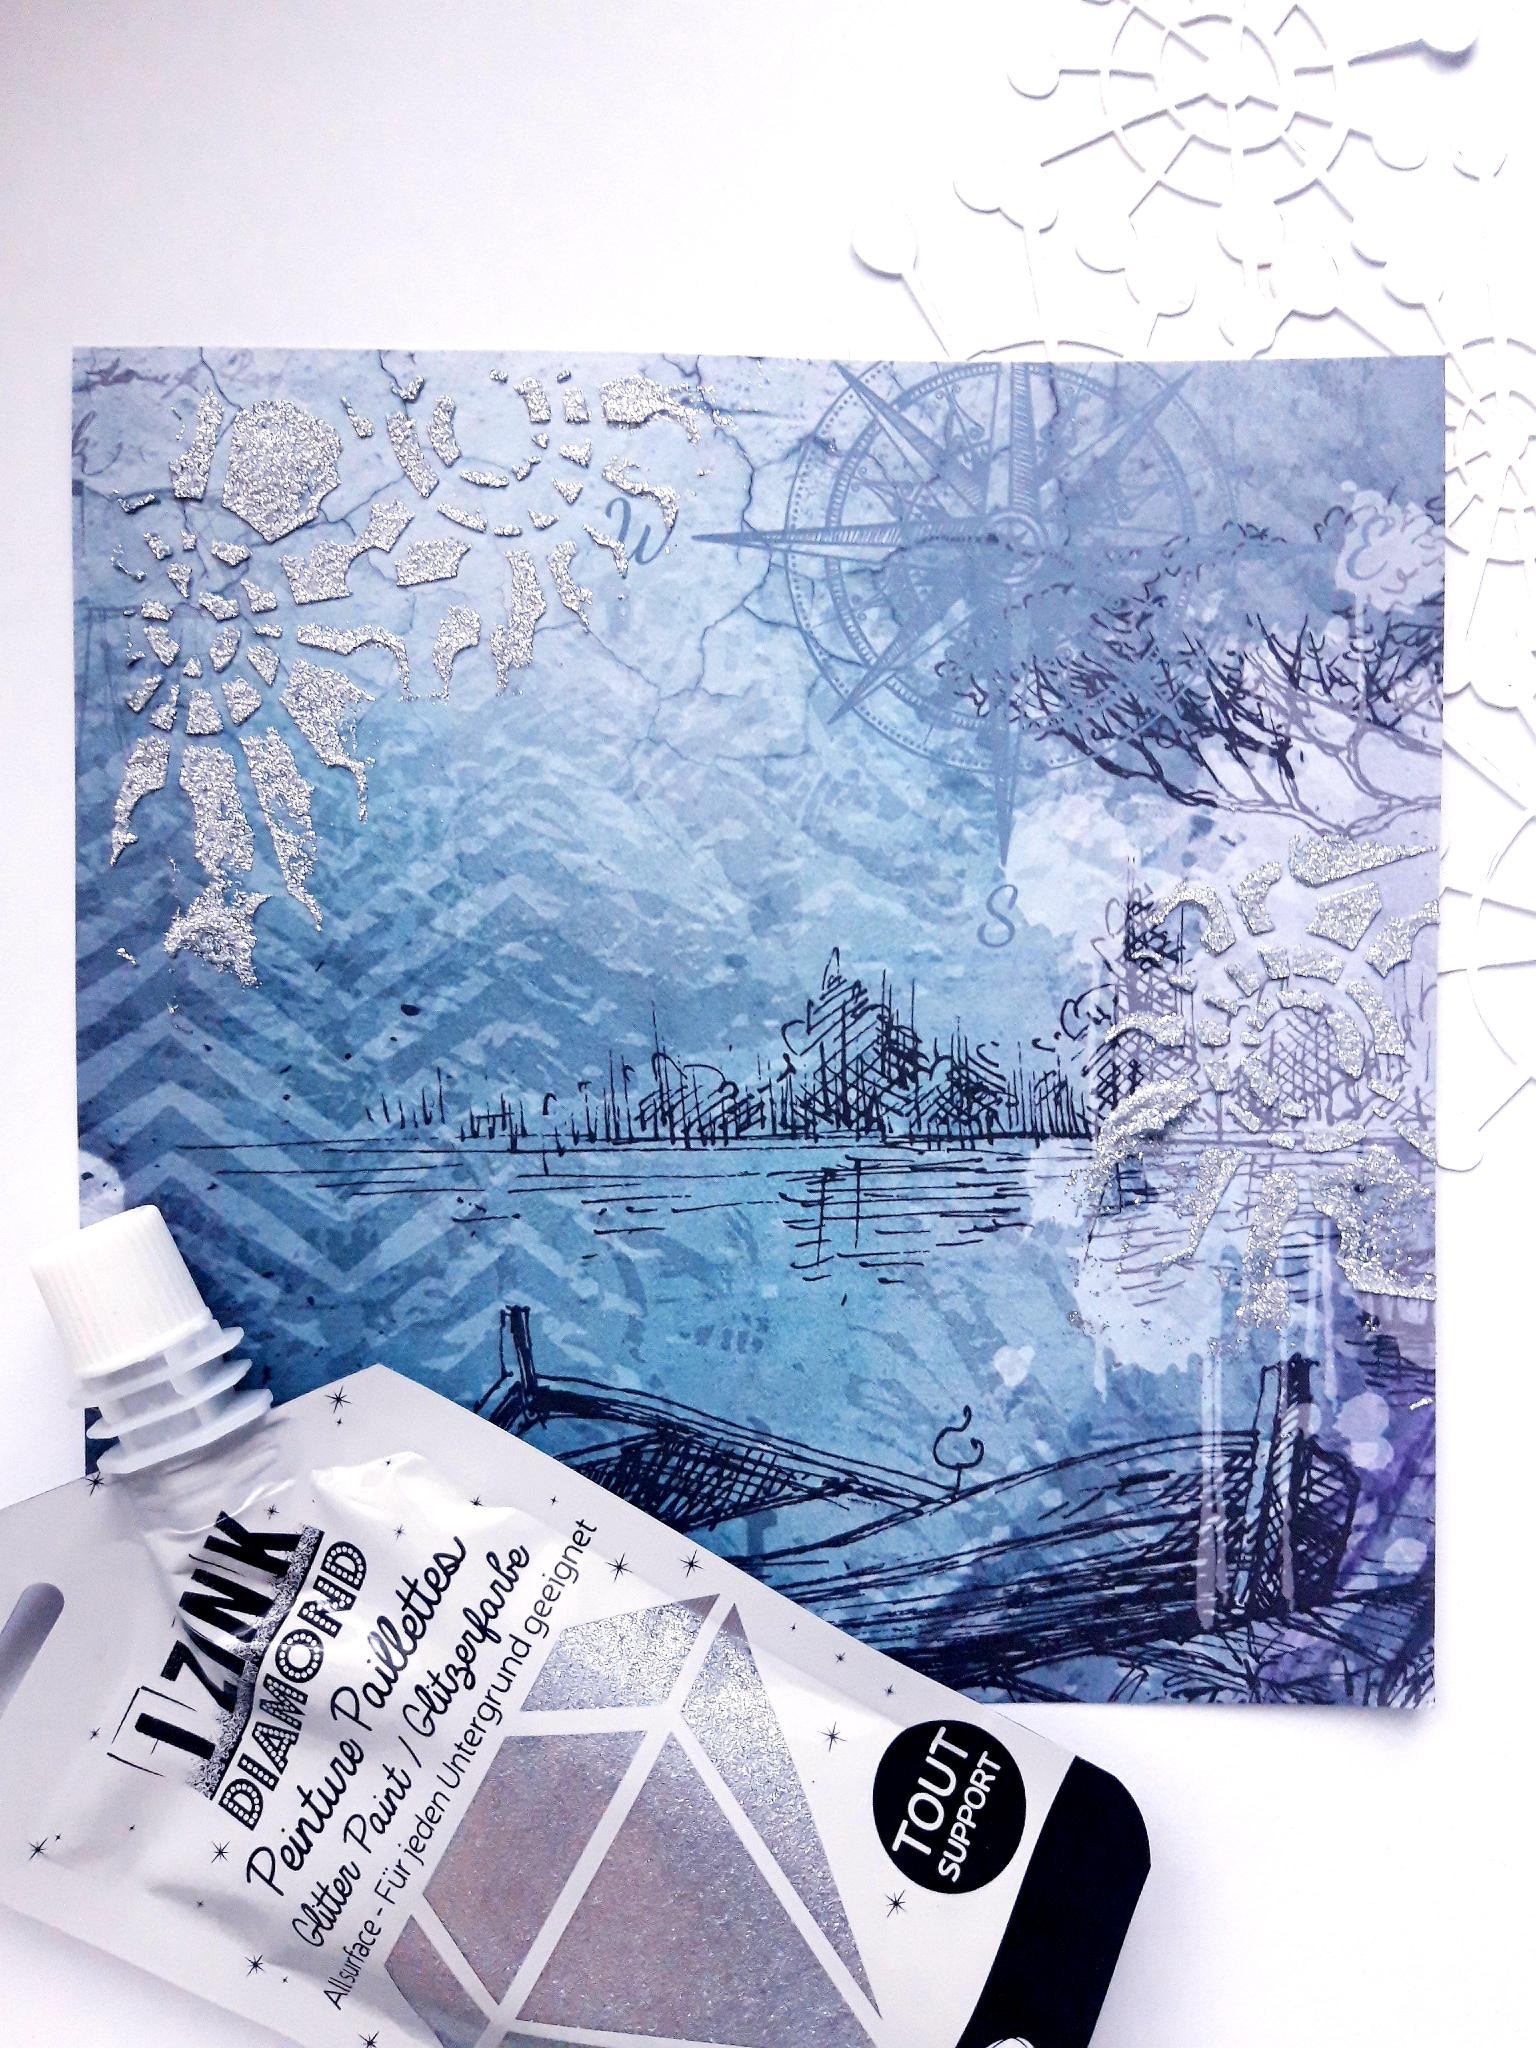
|
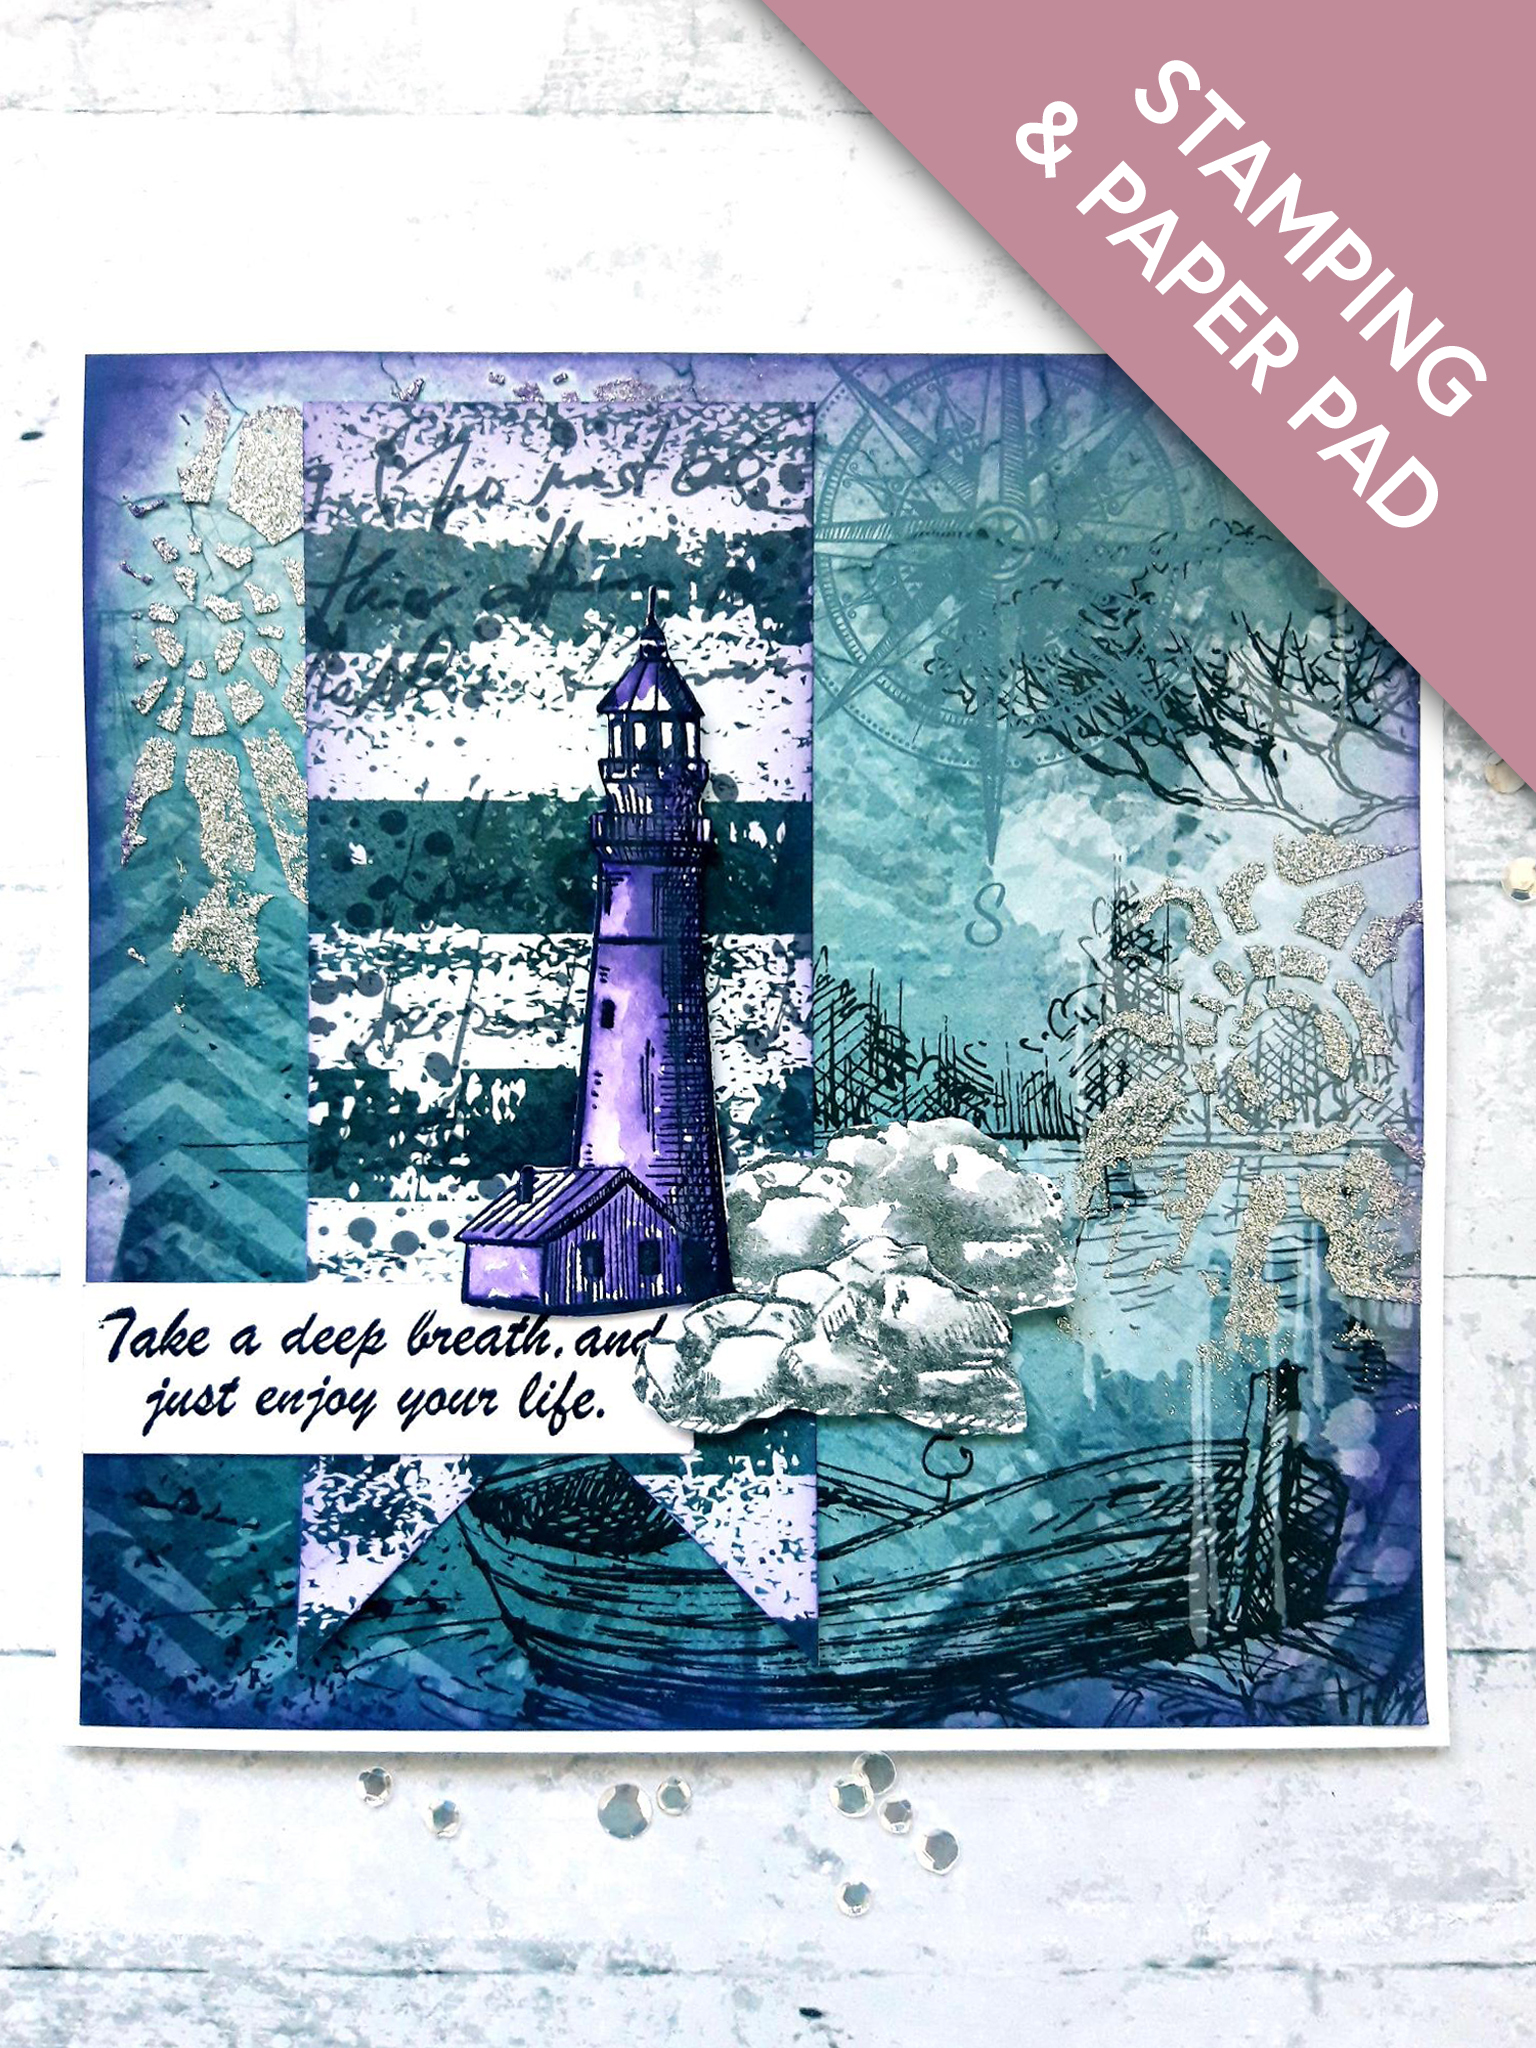
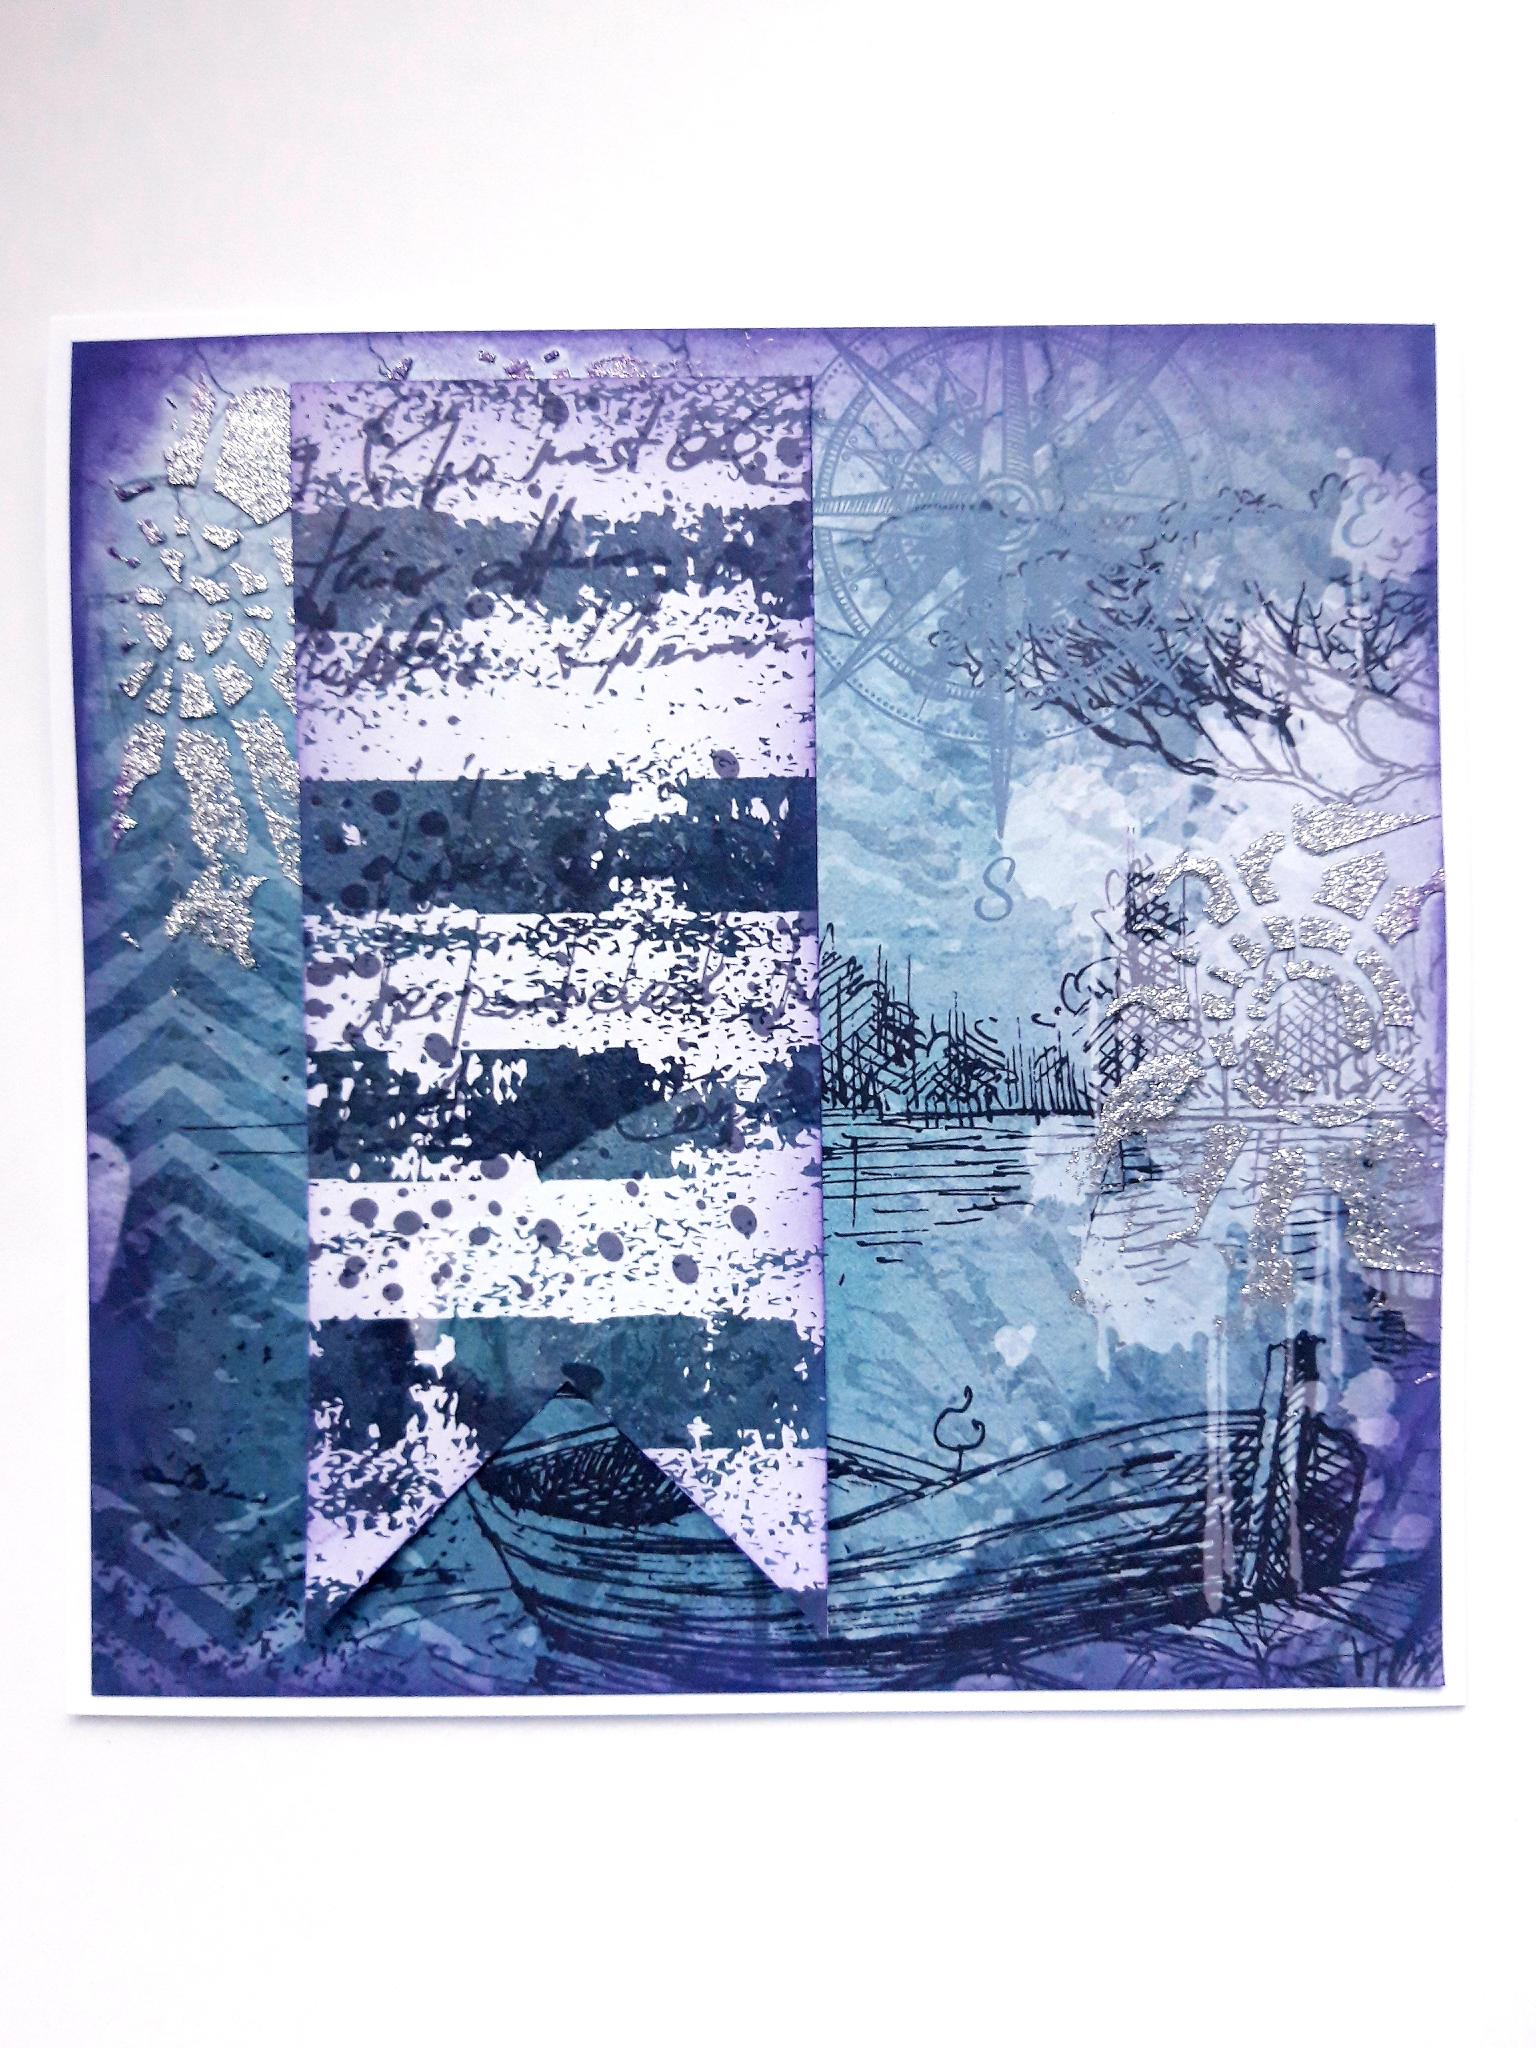
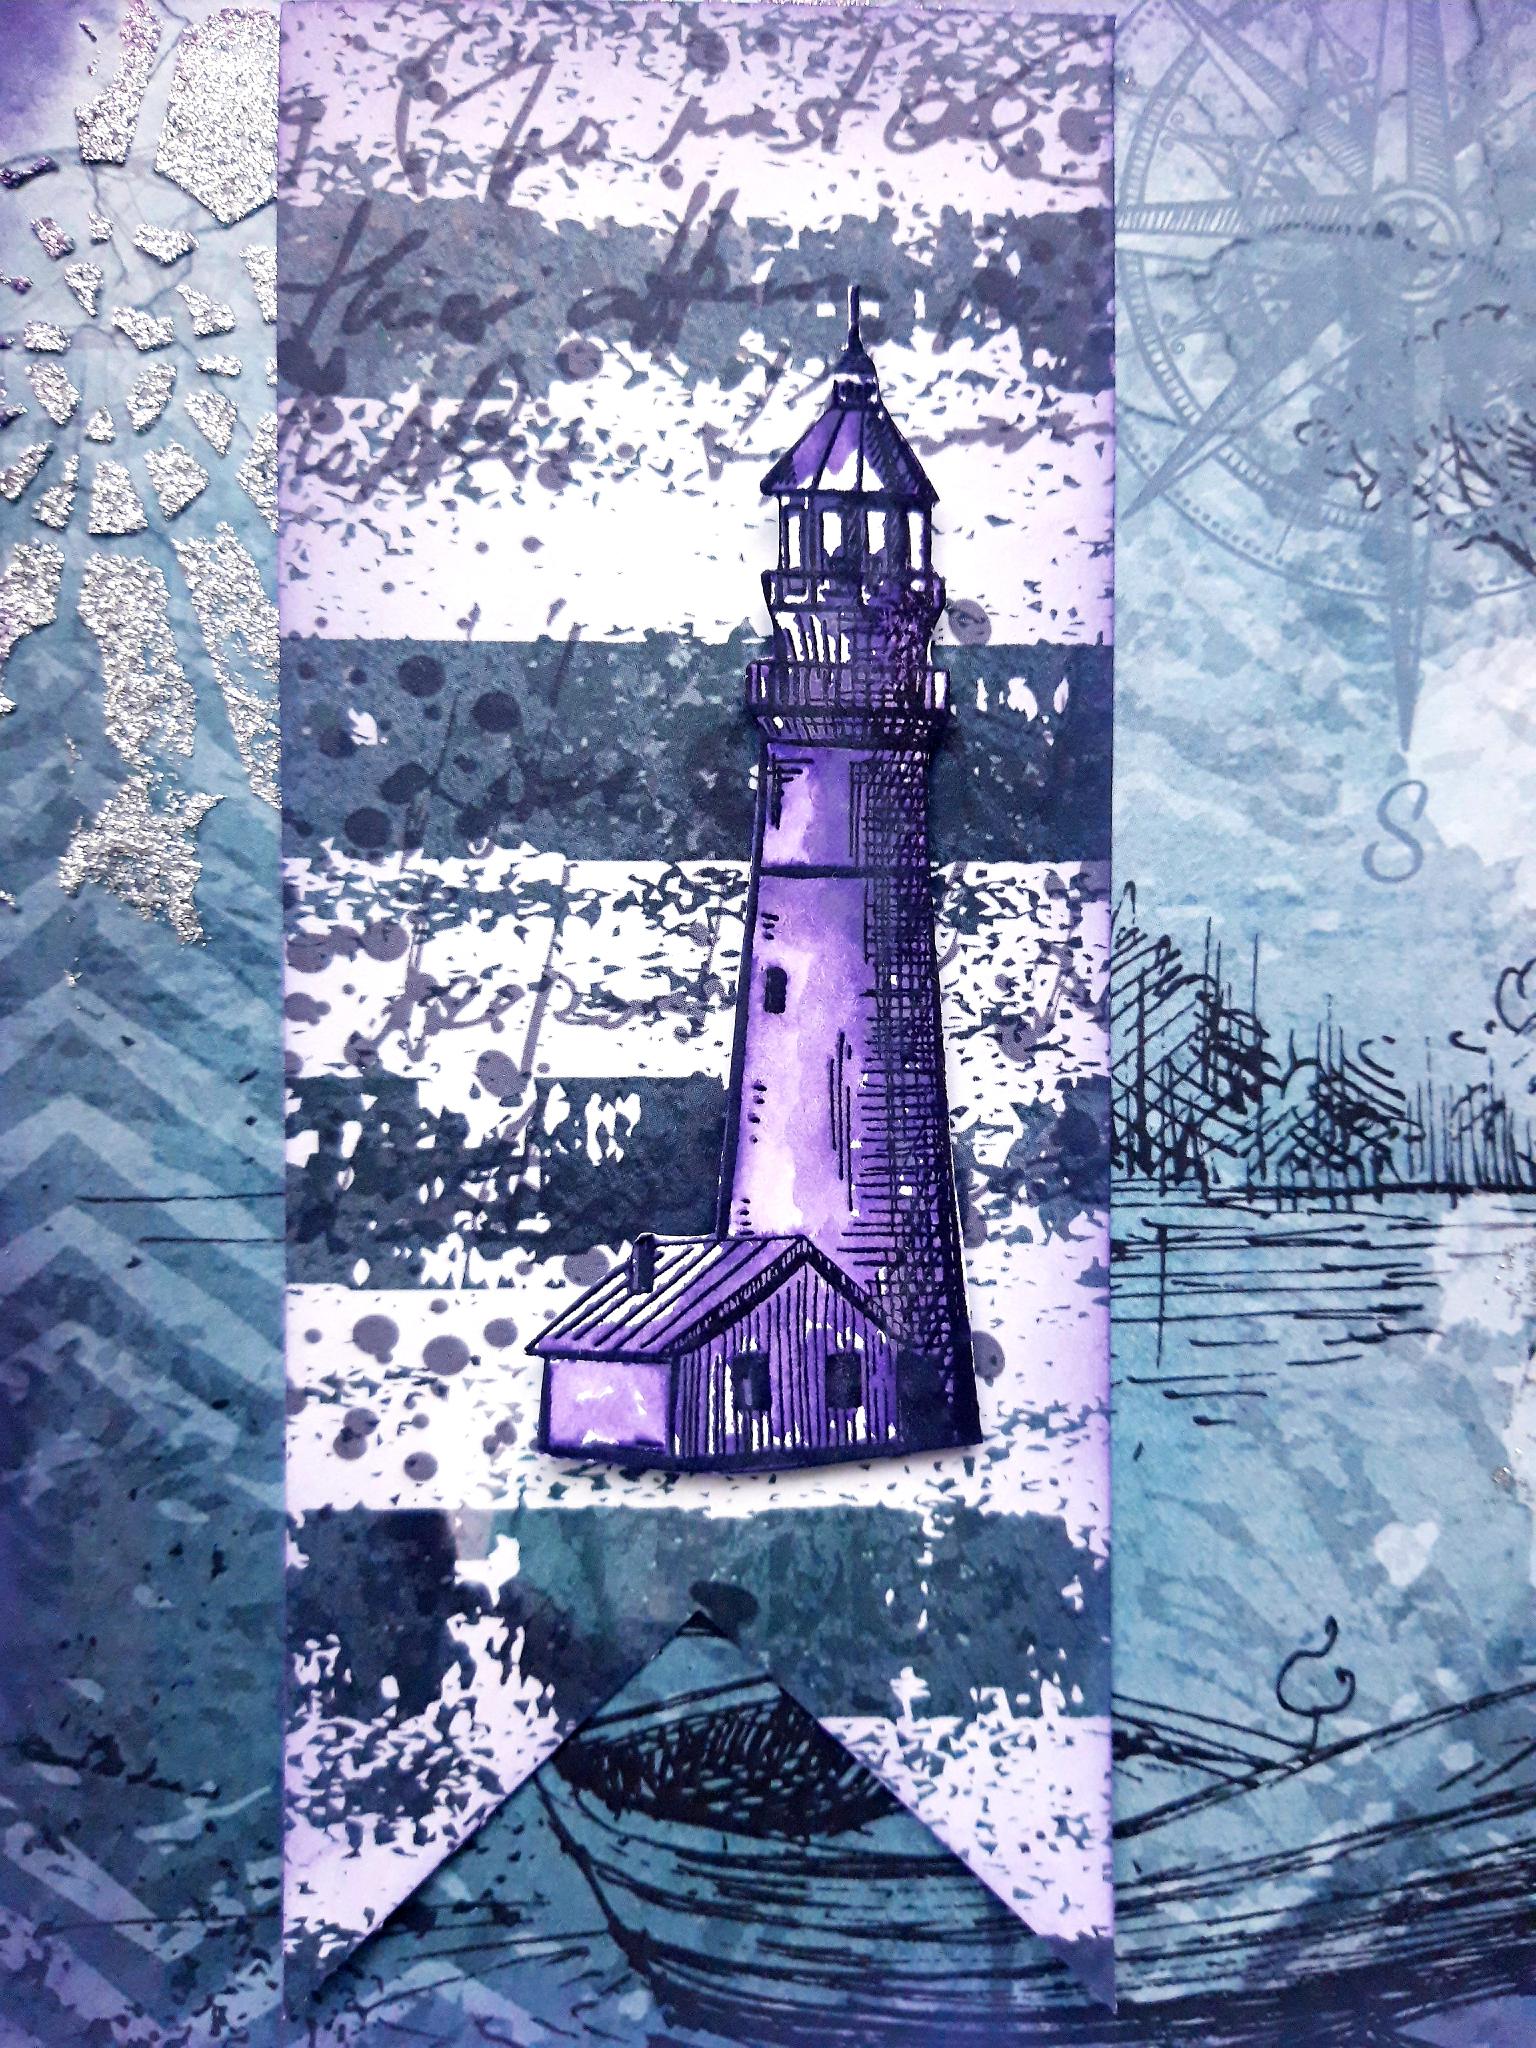
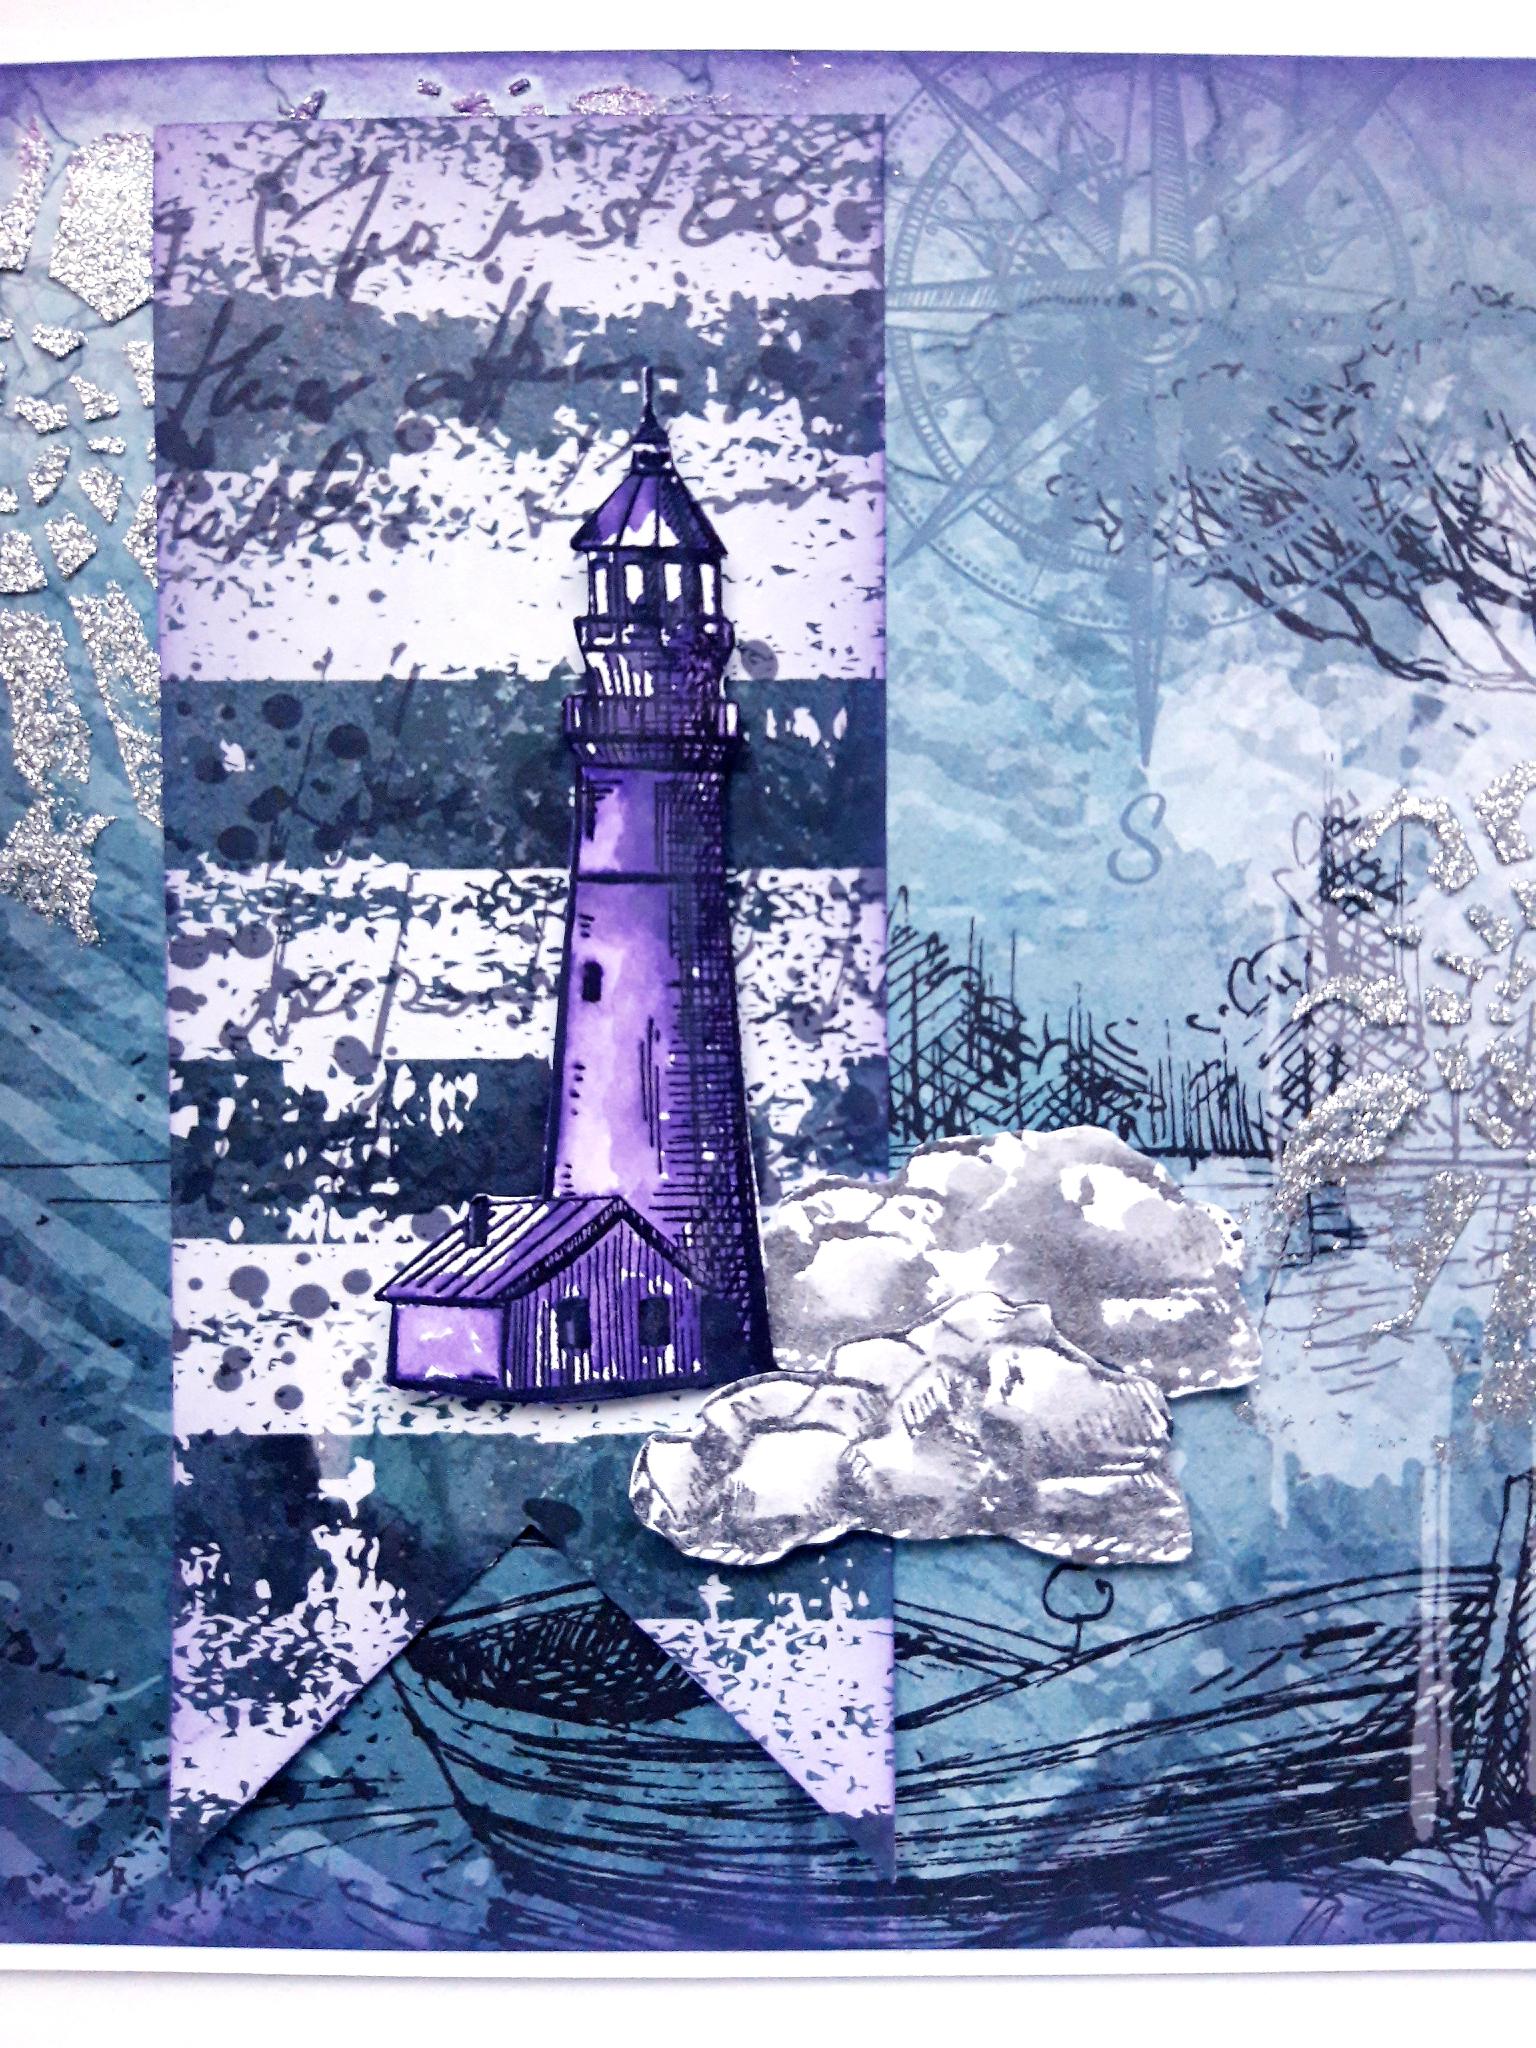
Choose a sheet of paper from the Imala Nautical Paper Pad, and cut to 6 1\2 x 6 1/2". Lay the Abstract Mask off the right hand edge, and blend the Izink Glitter Paint randomly through it, with a palette knife. Lay the mask off the top left corner and blend the Glitter Paint through it. Put to one side and allow the paint to dry thoroughly. If impatient like me, you can dry it with a heat gun! |
|
Tear out another sheet of coordinating paper, from the Nautical Paper Pad, and cut to 6 x 2 1/2". Use the Banner Punch to create a tag at one end.
|
|
Ink around the edges of your stencilled paper, and tag, with the Villainous Potion Distress Oxide. |

|
Mat the stencilled paper on to the front of your card blank. |
|
Adhere the tag to the left side of the stencilled paper, applying glue to the top half of the tag only, allowing it to hang loosely. Set your card to one side. |
|
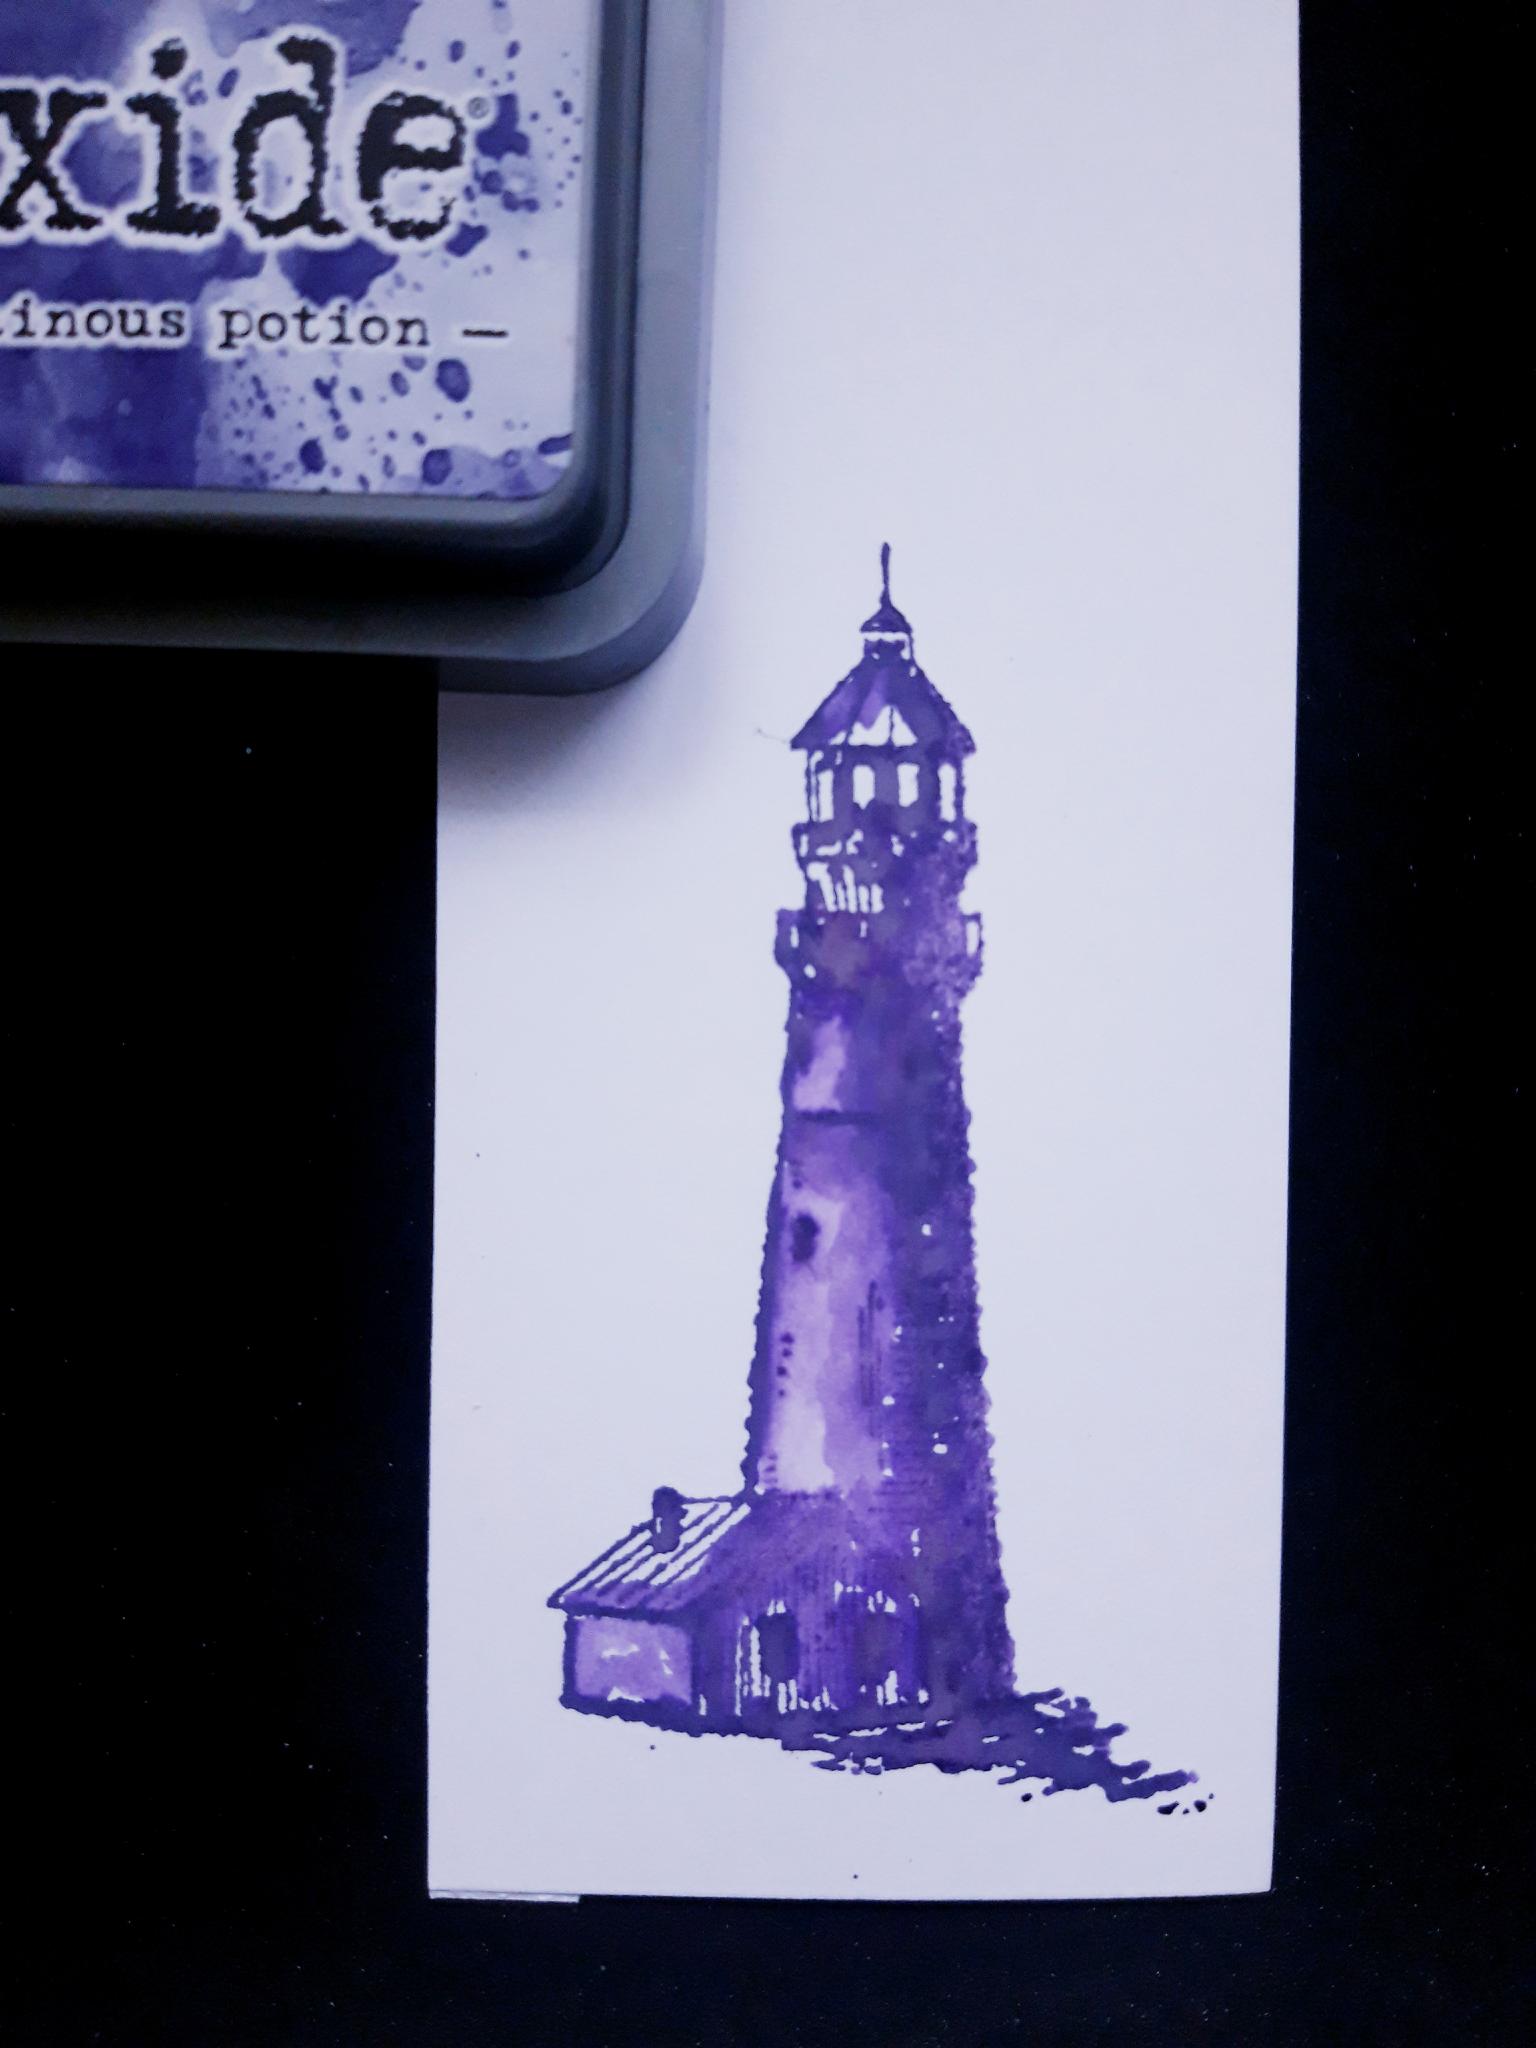
Ink up the solid Lighthouse stamp, from the Soulful Pencil Sketch Lamination Collection, in the Villainous Potion Distress Oxide. Spritz with water and stamp on to one side of the white cardstock (you will be stamping other images, and the sentiment, on to the remaining cardstock). Use a paintbrush to pull out the wet ink, to colour in your image, as desired. You can spray the stamped image if you want a looser watercolour effect, or apply more ink and stamp again, if you want a deeper effect. Dry the stamped image thoroughly. |
|
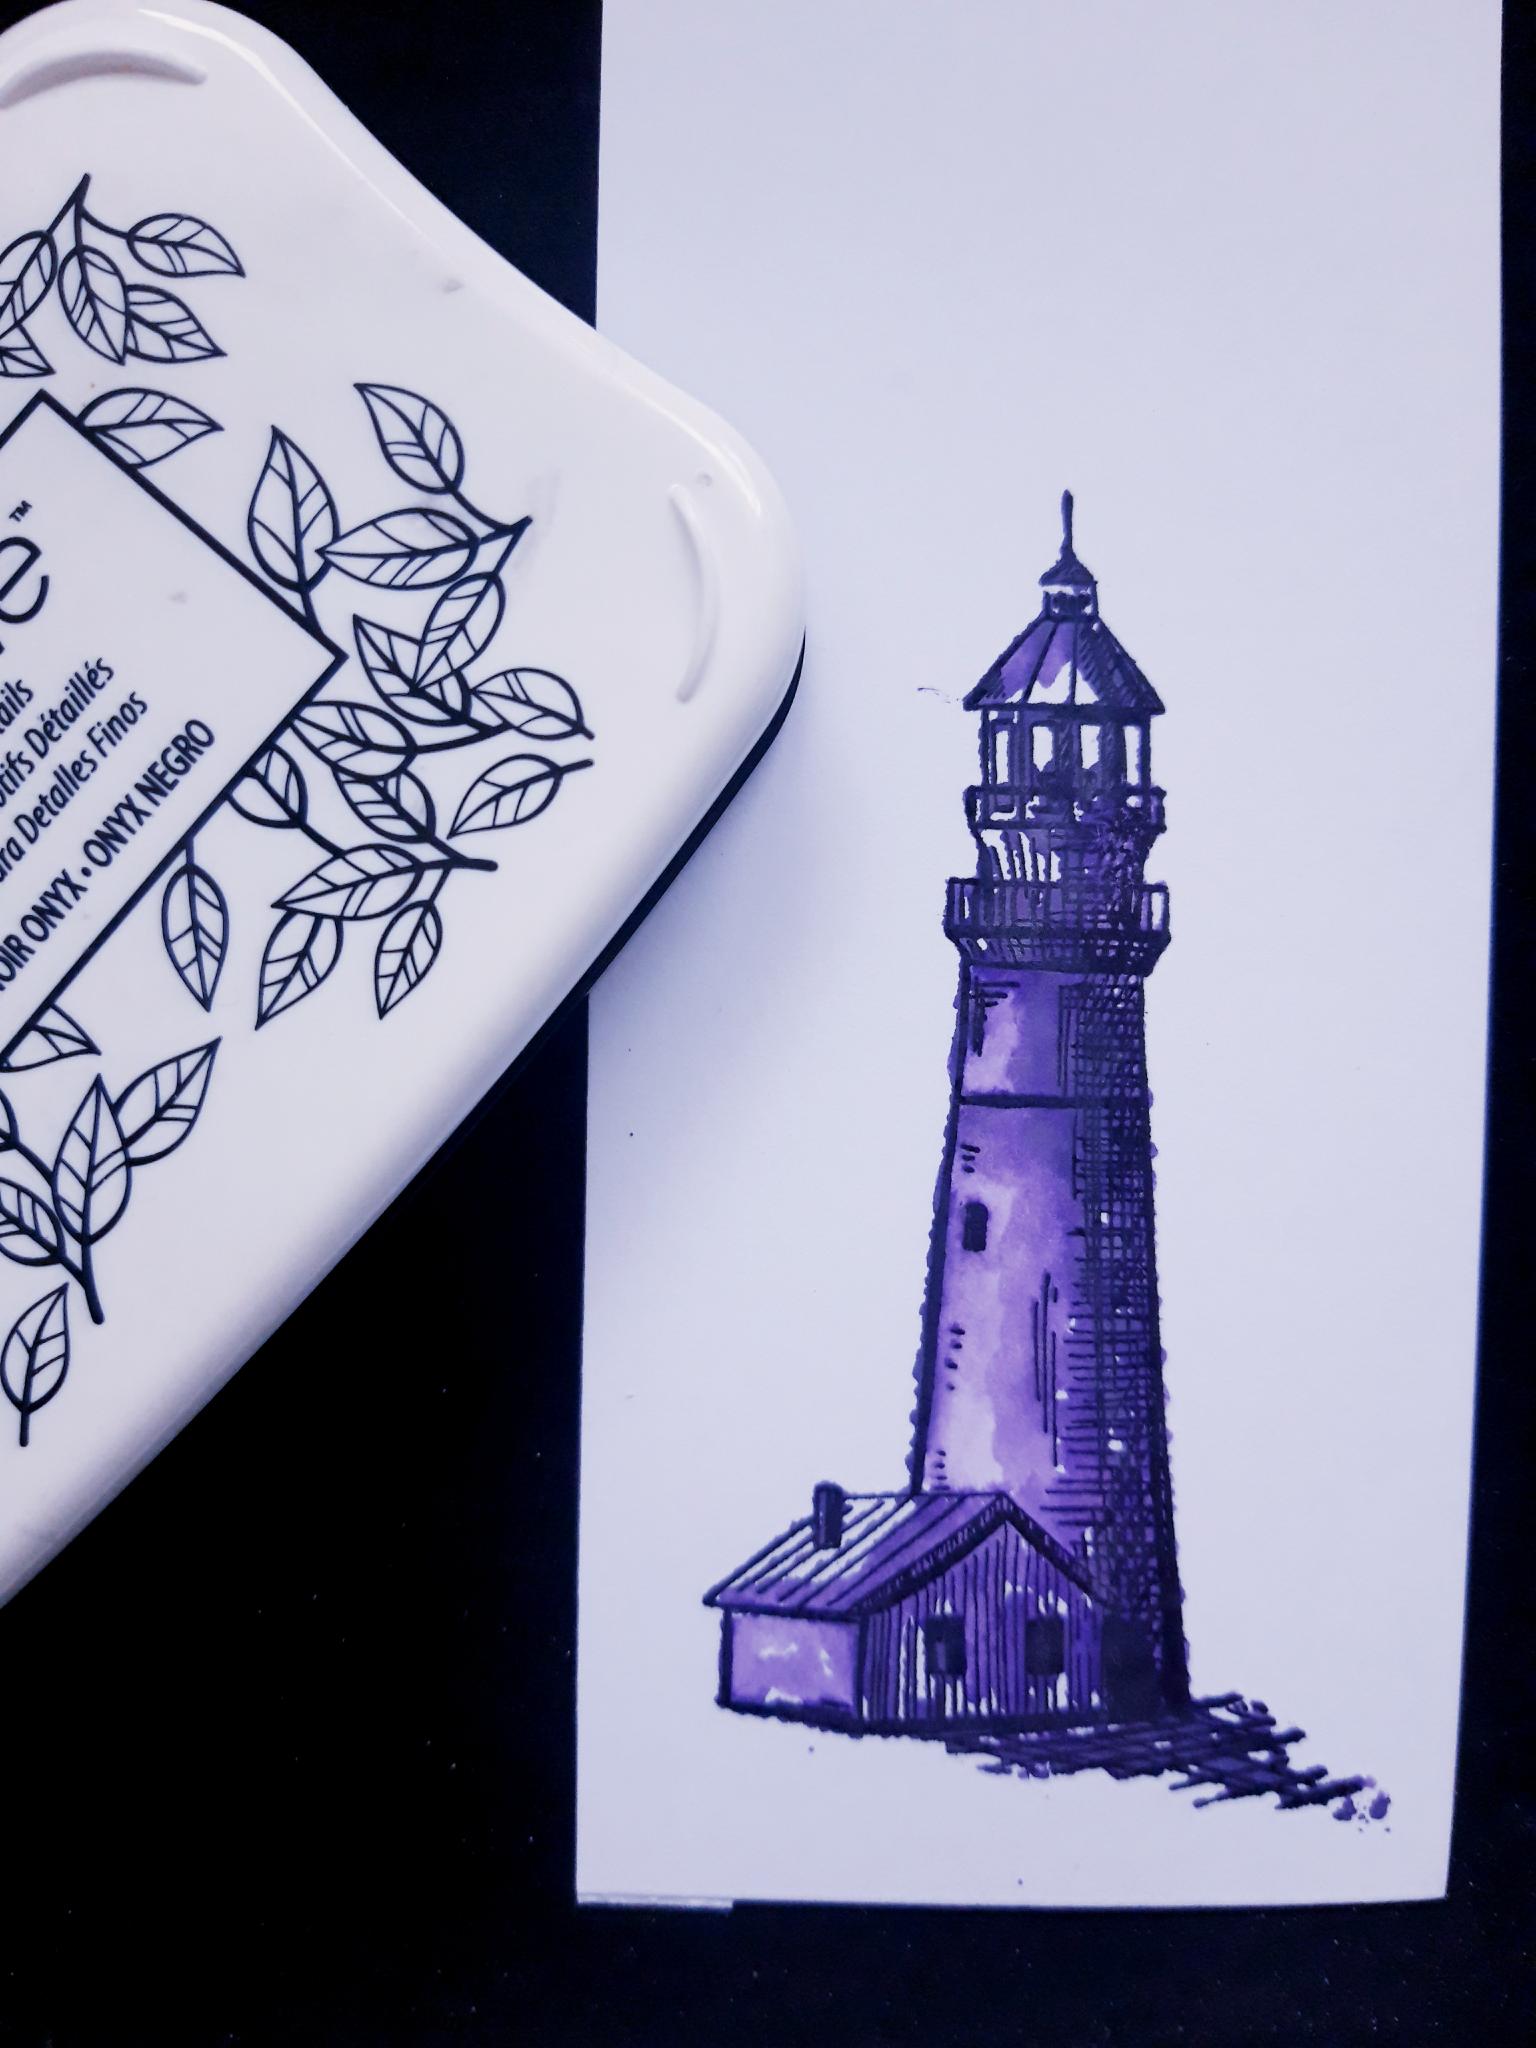
Ink up the detailed, outline Lighthouse stamp, in the Onyx Black Versafine. Line up and stamp in place over your solid stamped image. |

|
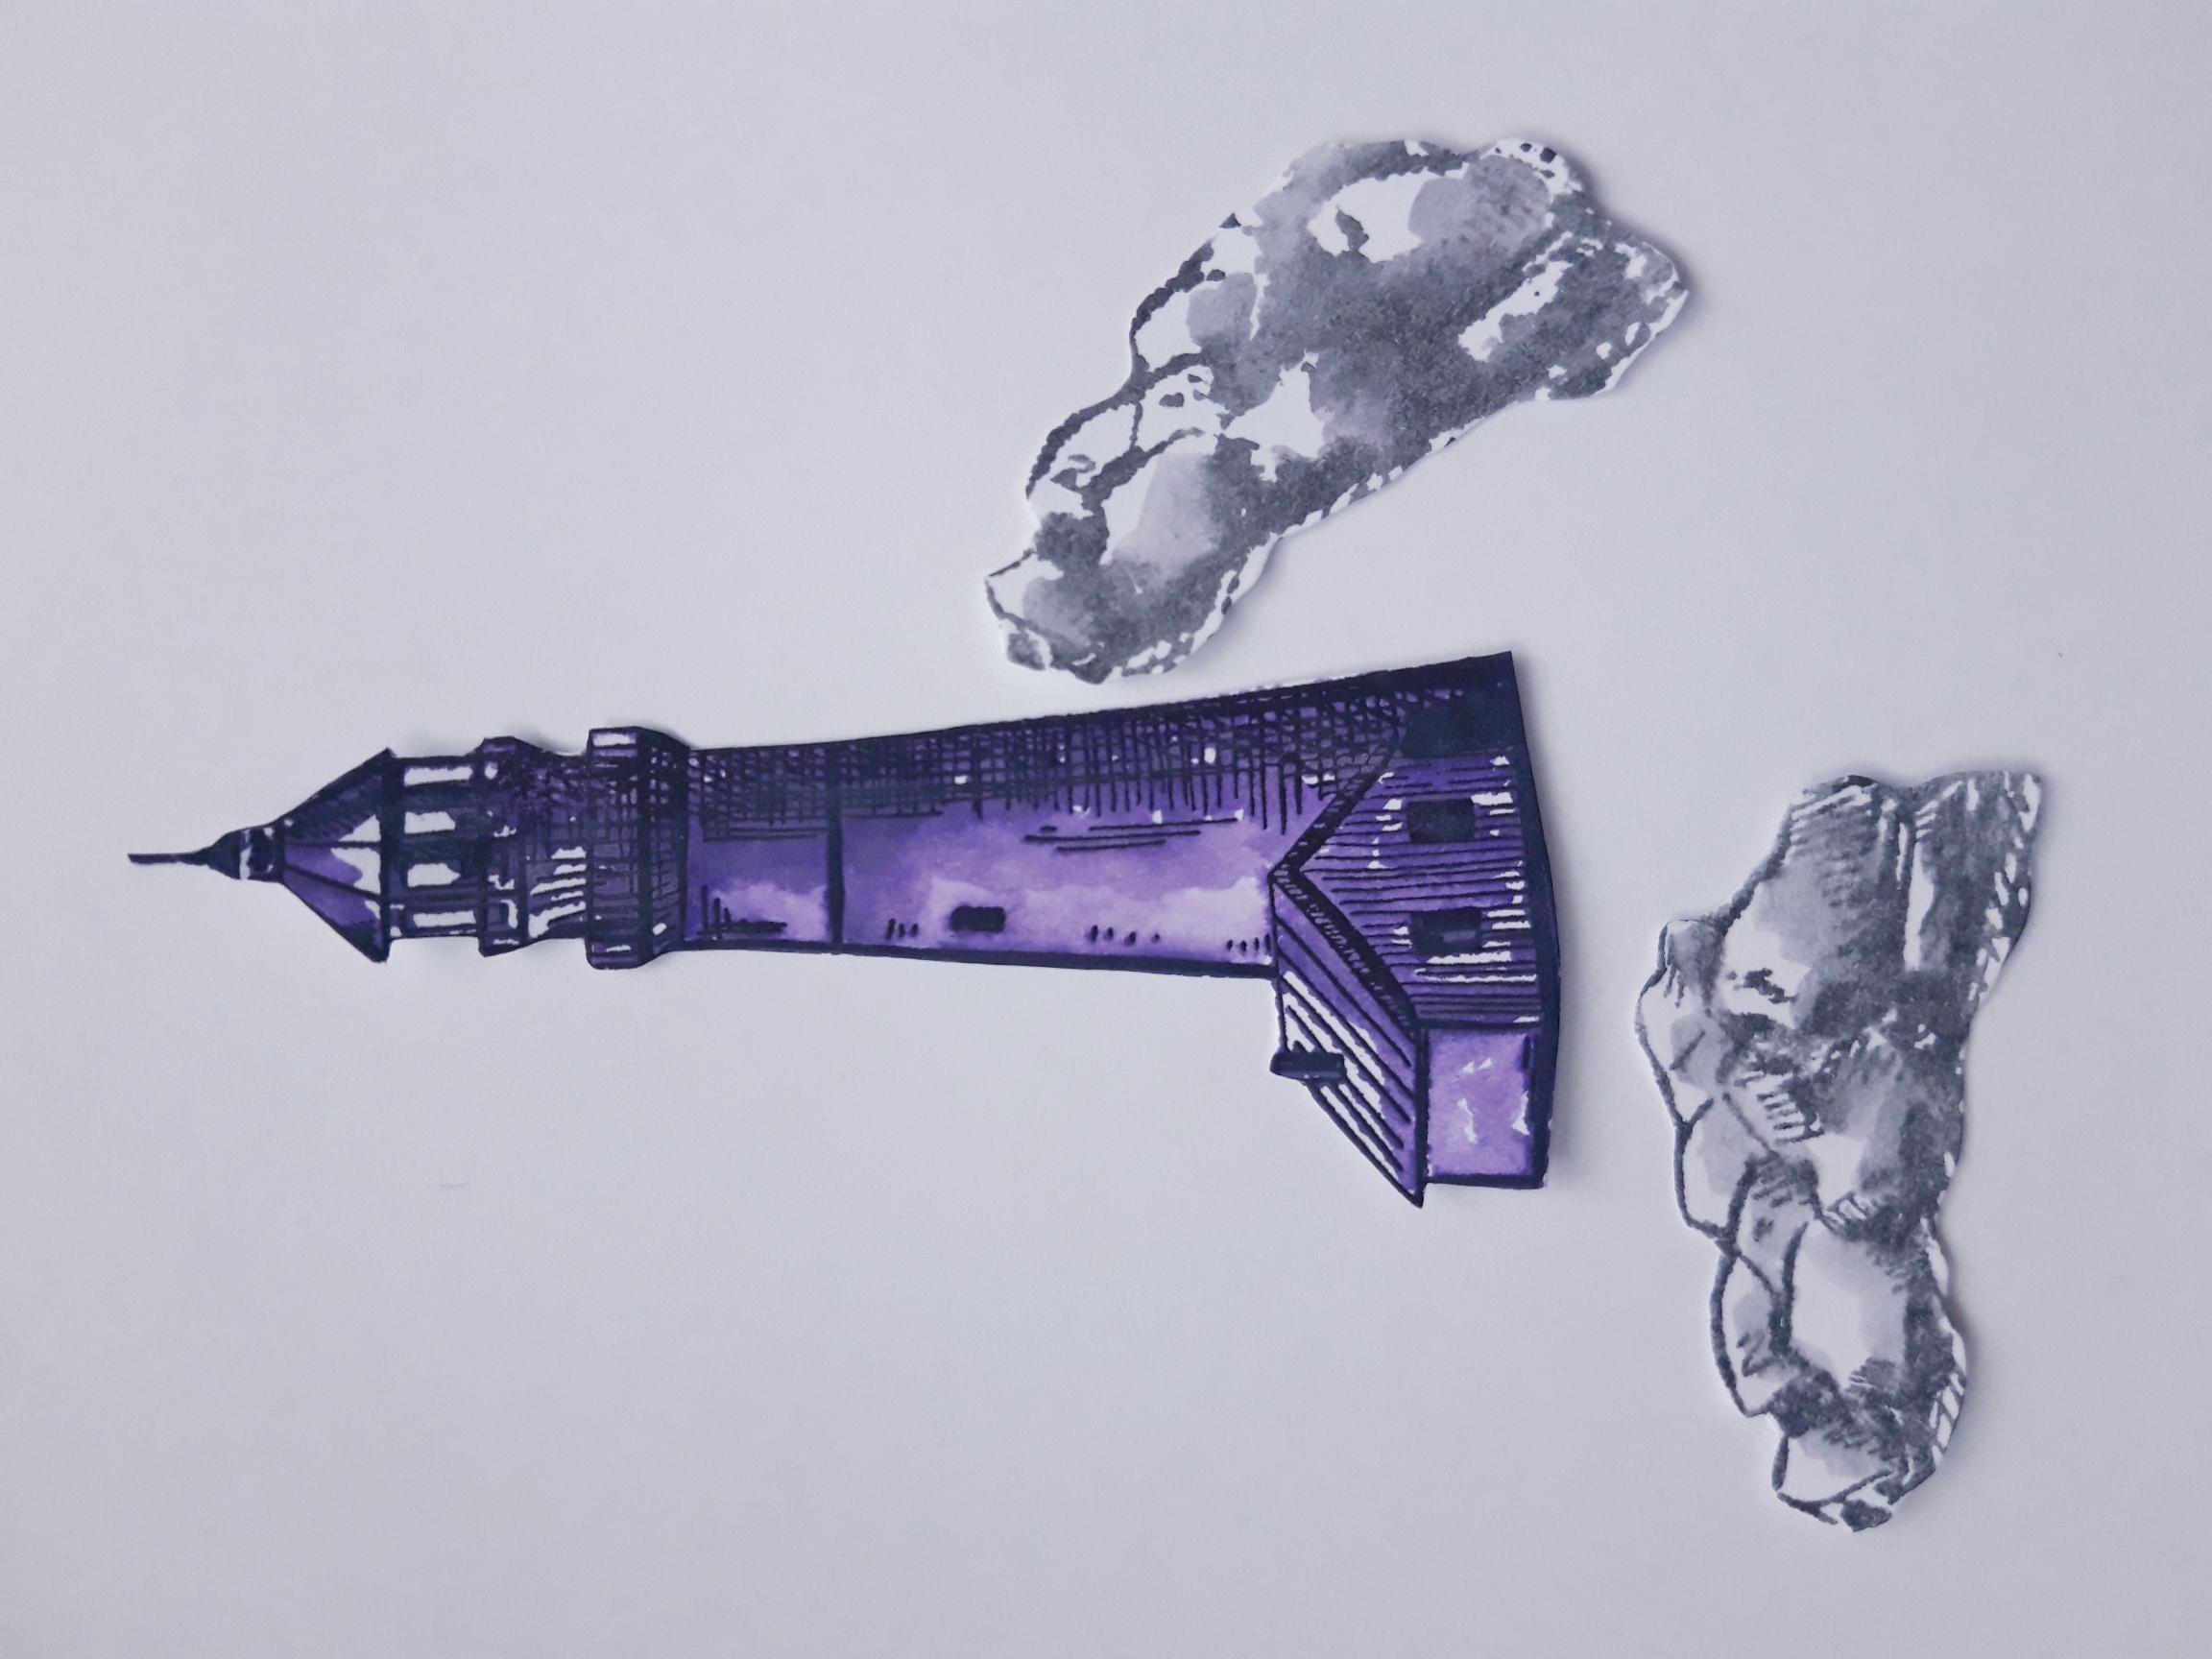
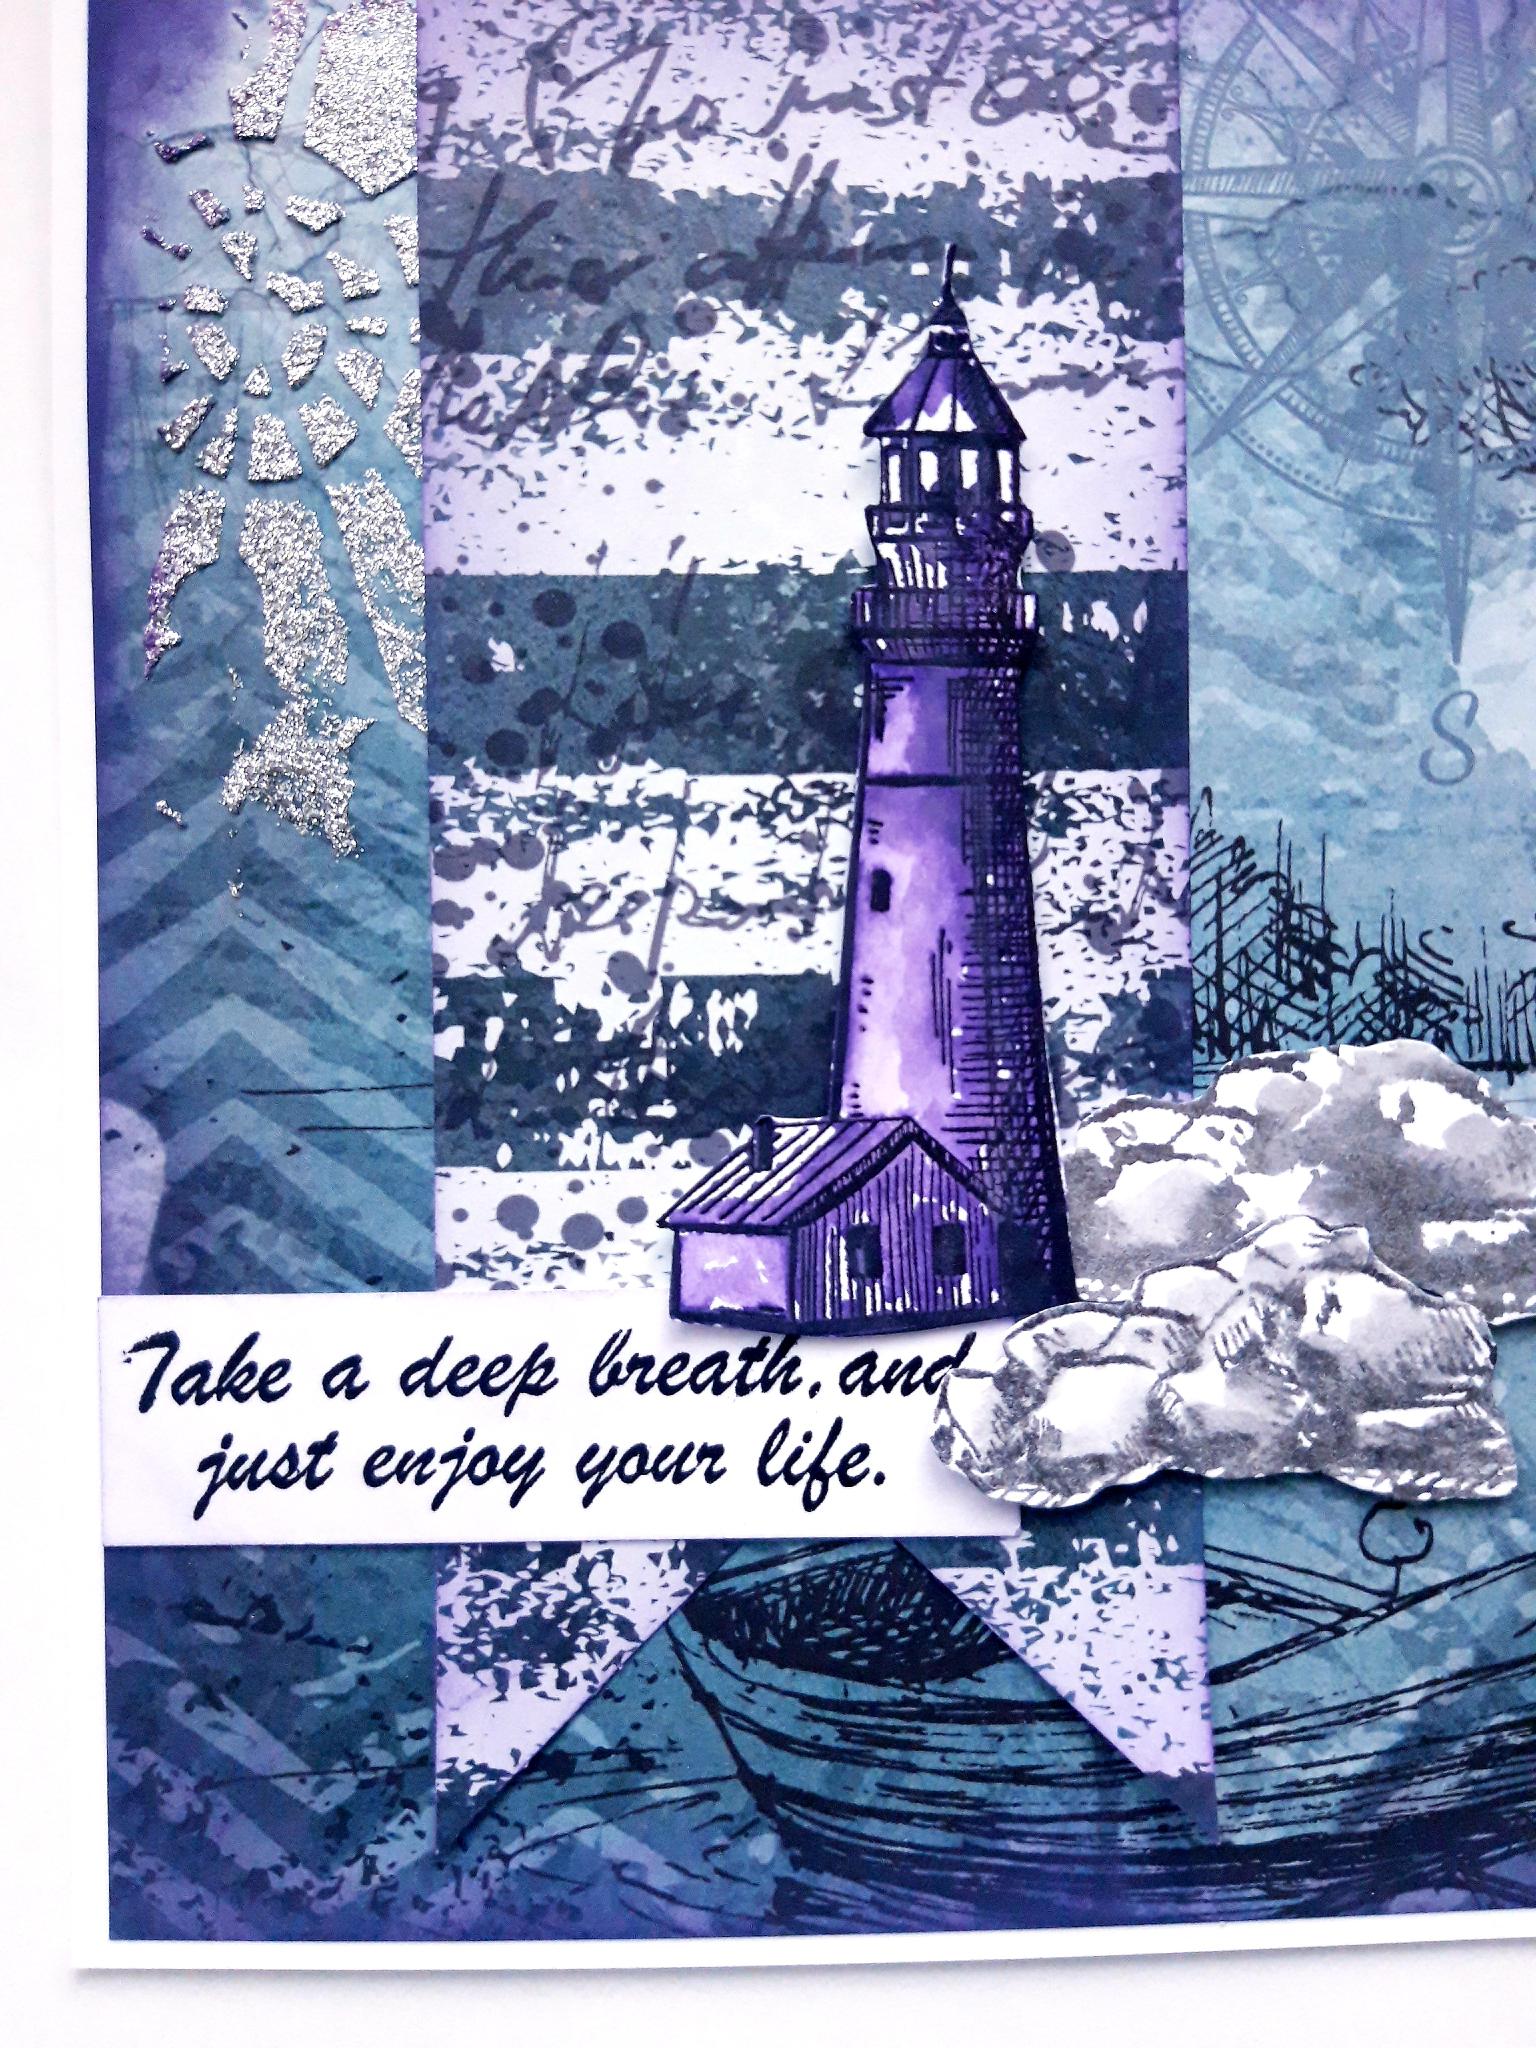
Ink up the rocks stamp, from the Soulful Sketch Elements Lamination Stamp Collection, in the Izink Reglisse ink. Spritz with water and stamp on the remaining white cardstock. Repeat a second time. Dry thoroughly. |
|
Cut out the Lighthouse and rocks. Set remaining white cardstock to one side. |
|
Adhere the Lighthouse on to the inked tag, on your card blank, using foam pads, or 3D glue gel. |
|
Glue one of the cut out rocks, so its tucked just behind the right hand side of the Lighthouse. Glue the remaining stamped rocks in front of the other, slightly to the left, with foam pads to add dimension. |
|
Ink up the sentiment stamp, from the Celebrate And Create Lamination Stamp Collection, in the Onyx Black Versafine ink. Stamp on the remaining white cardstock, and cut to size. Ink around the edges of the card with the Villainous Potion ink pad. |
|
Glue the sentiment, with wet glue, so it sits flush with the left hand side of the inked paper, and tucked just under the bottom of the Lighthouse and the rocks. |