Give your friends $10 off their first order!
Refer a FRIEND


WHAT YOU WILL NEED:
White card blank 7 x 7"
Black card 6 3/4" square
White card 6 1/2" square
Black card 5 3/4" square
White card (bigger than the embossing folder)
Vellum (tear to approx 6 3/4 x 2")
HD3D Watercolour Loving Feeling Embossing Folder
Faith Stamp and Die Collection
SBM Hybrid Ink Pad: Midnight
SBM Pigment Ink pad: Cotton
SBM Premium Ink Pad: Heather
Water spray bottle
Paint brush
Anti-static bag
WOW clear embossing powder
WOW heat tool
Eureka 101 Watercolour Tablet
SBM Magnetic glass mat
Paper Trimmer
Perfect Together Glue
Double sided adhesive tape
Die Cutting machine
[click image to enlarge] 
|
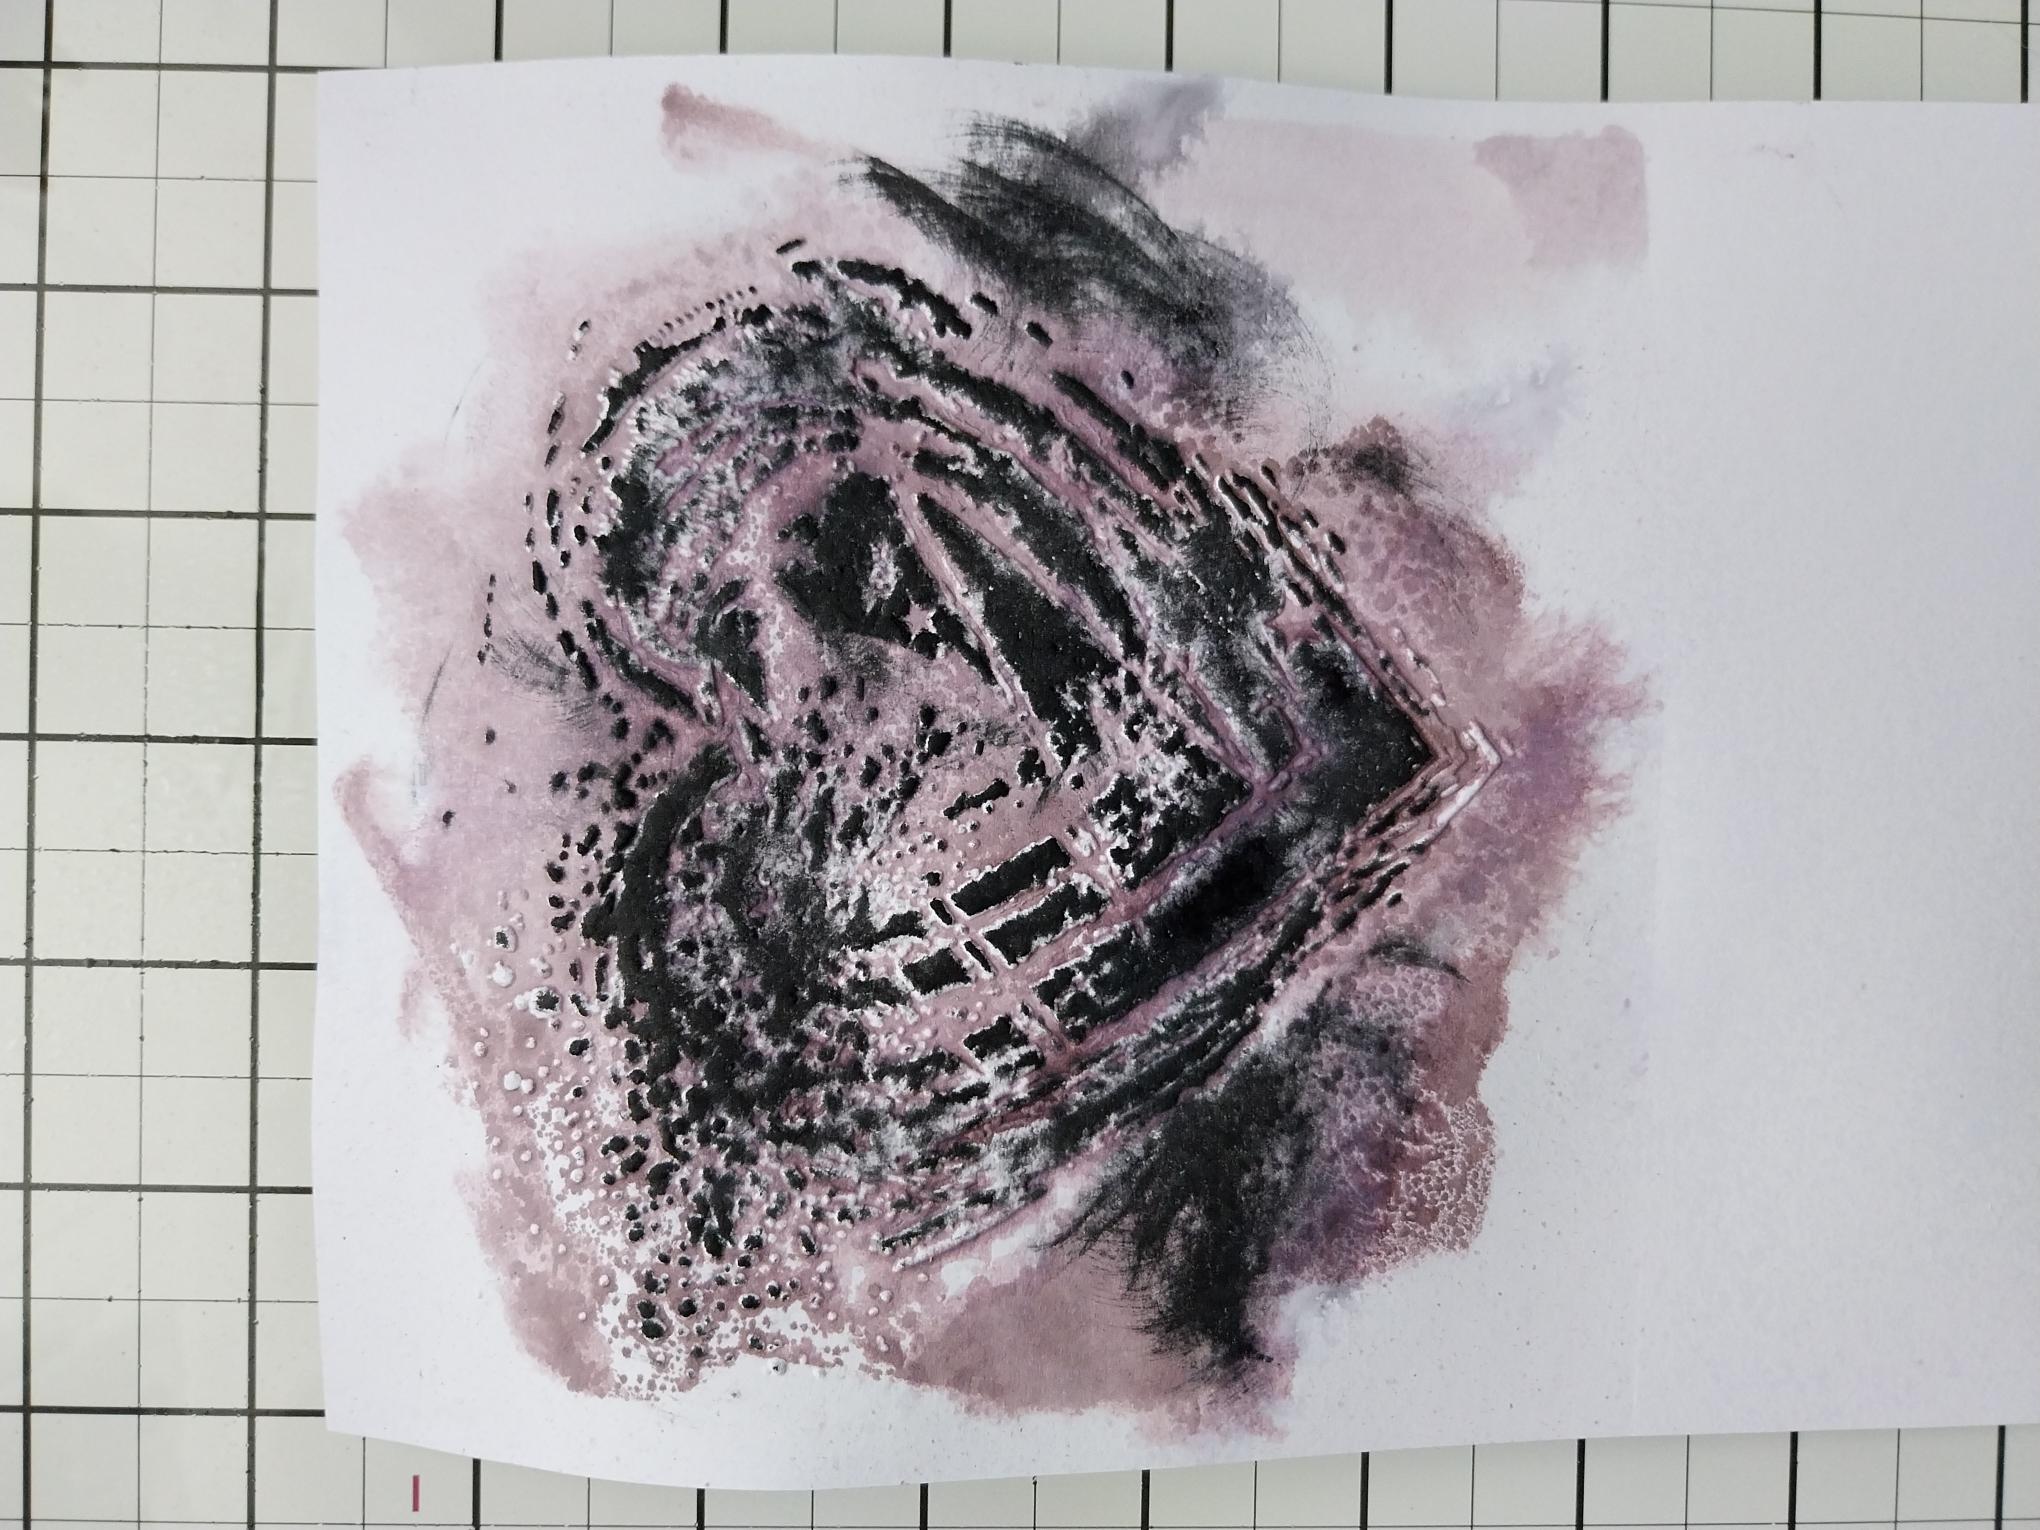
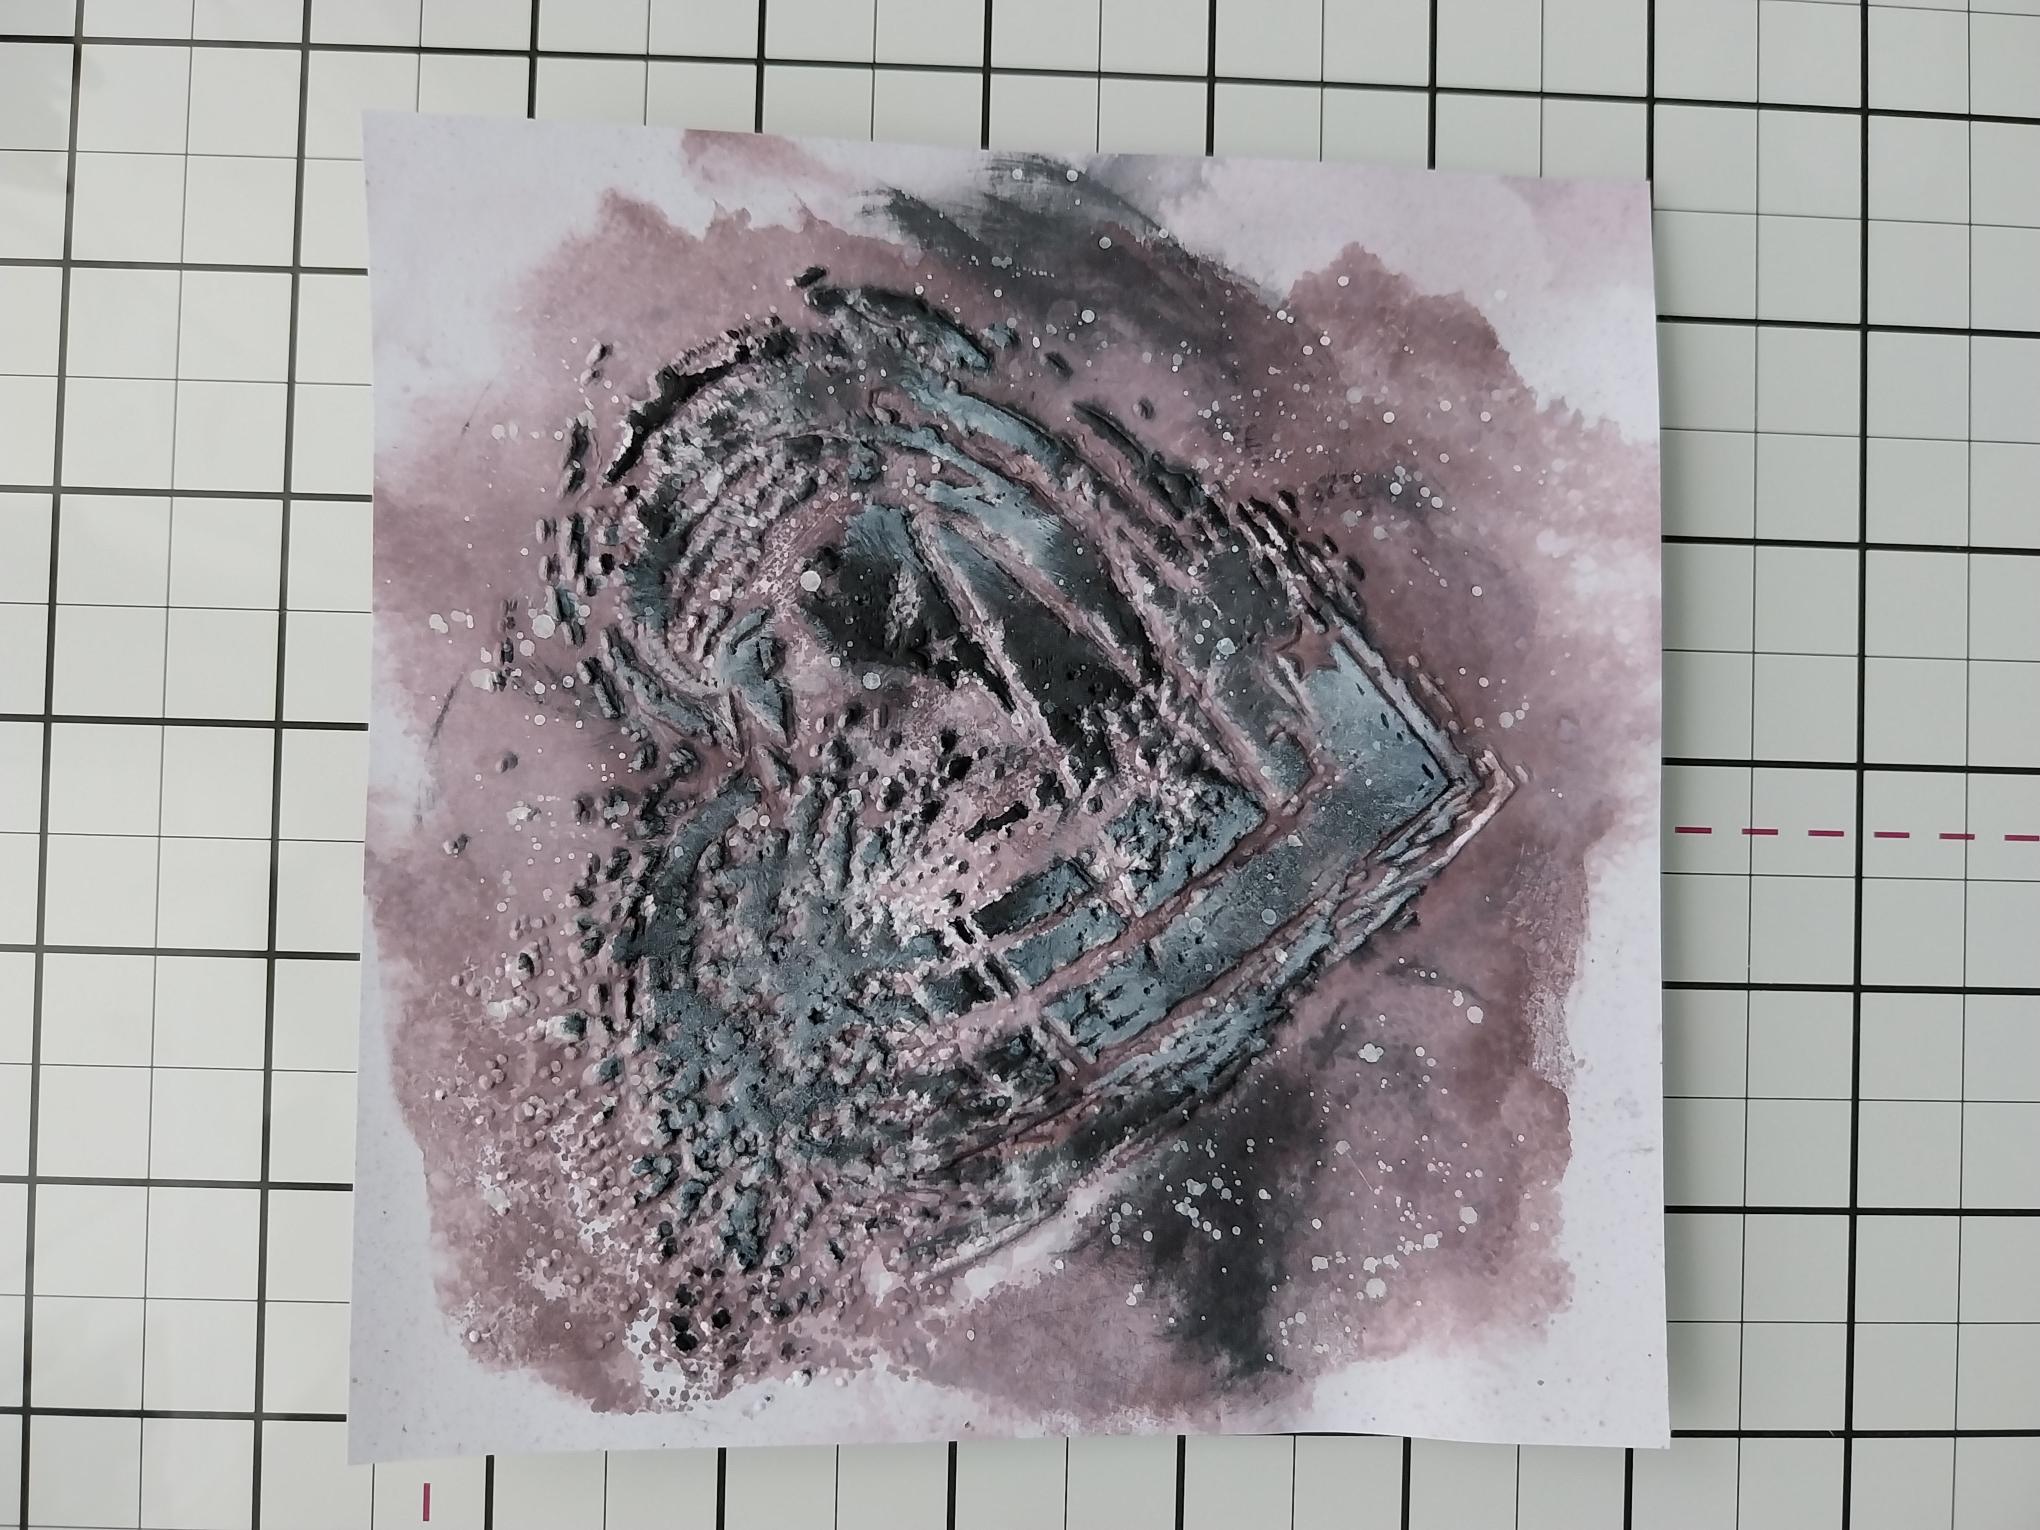
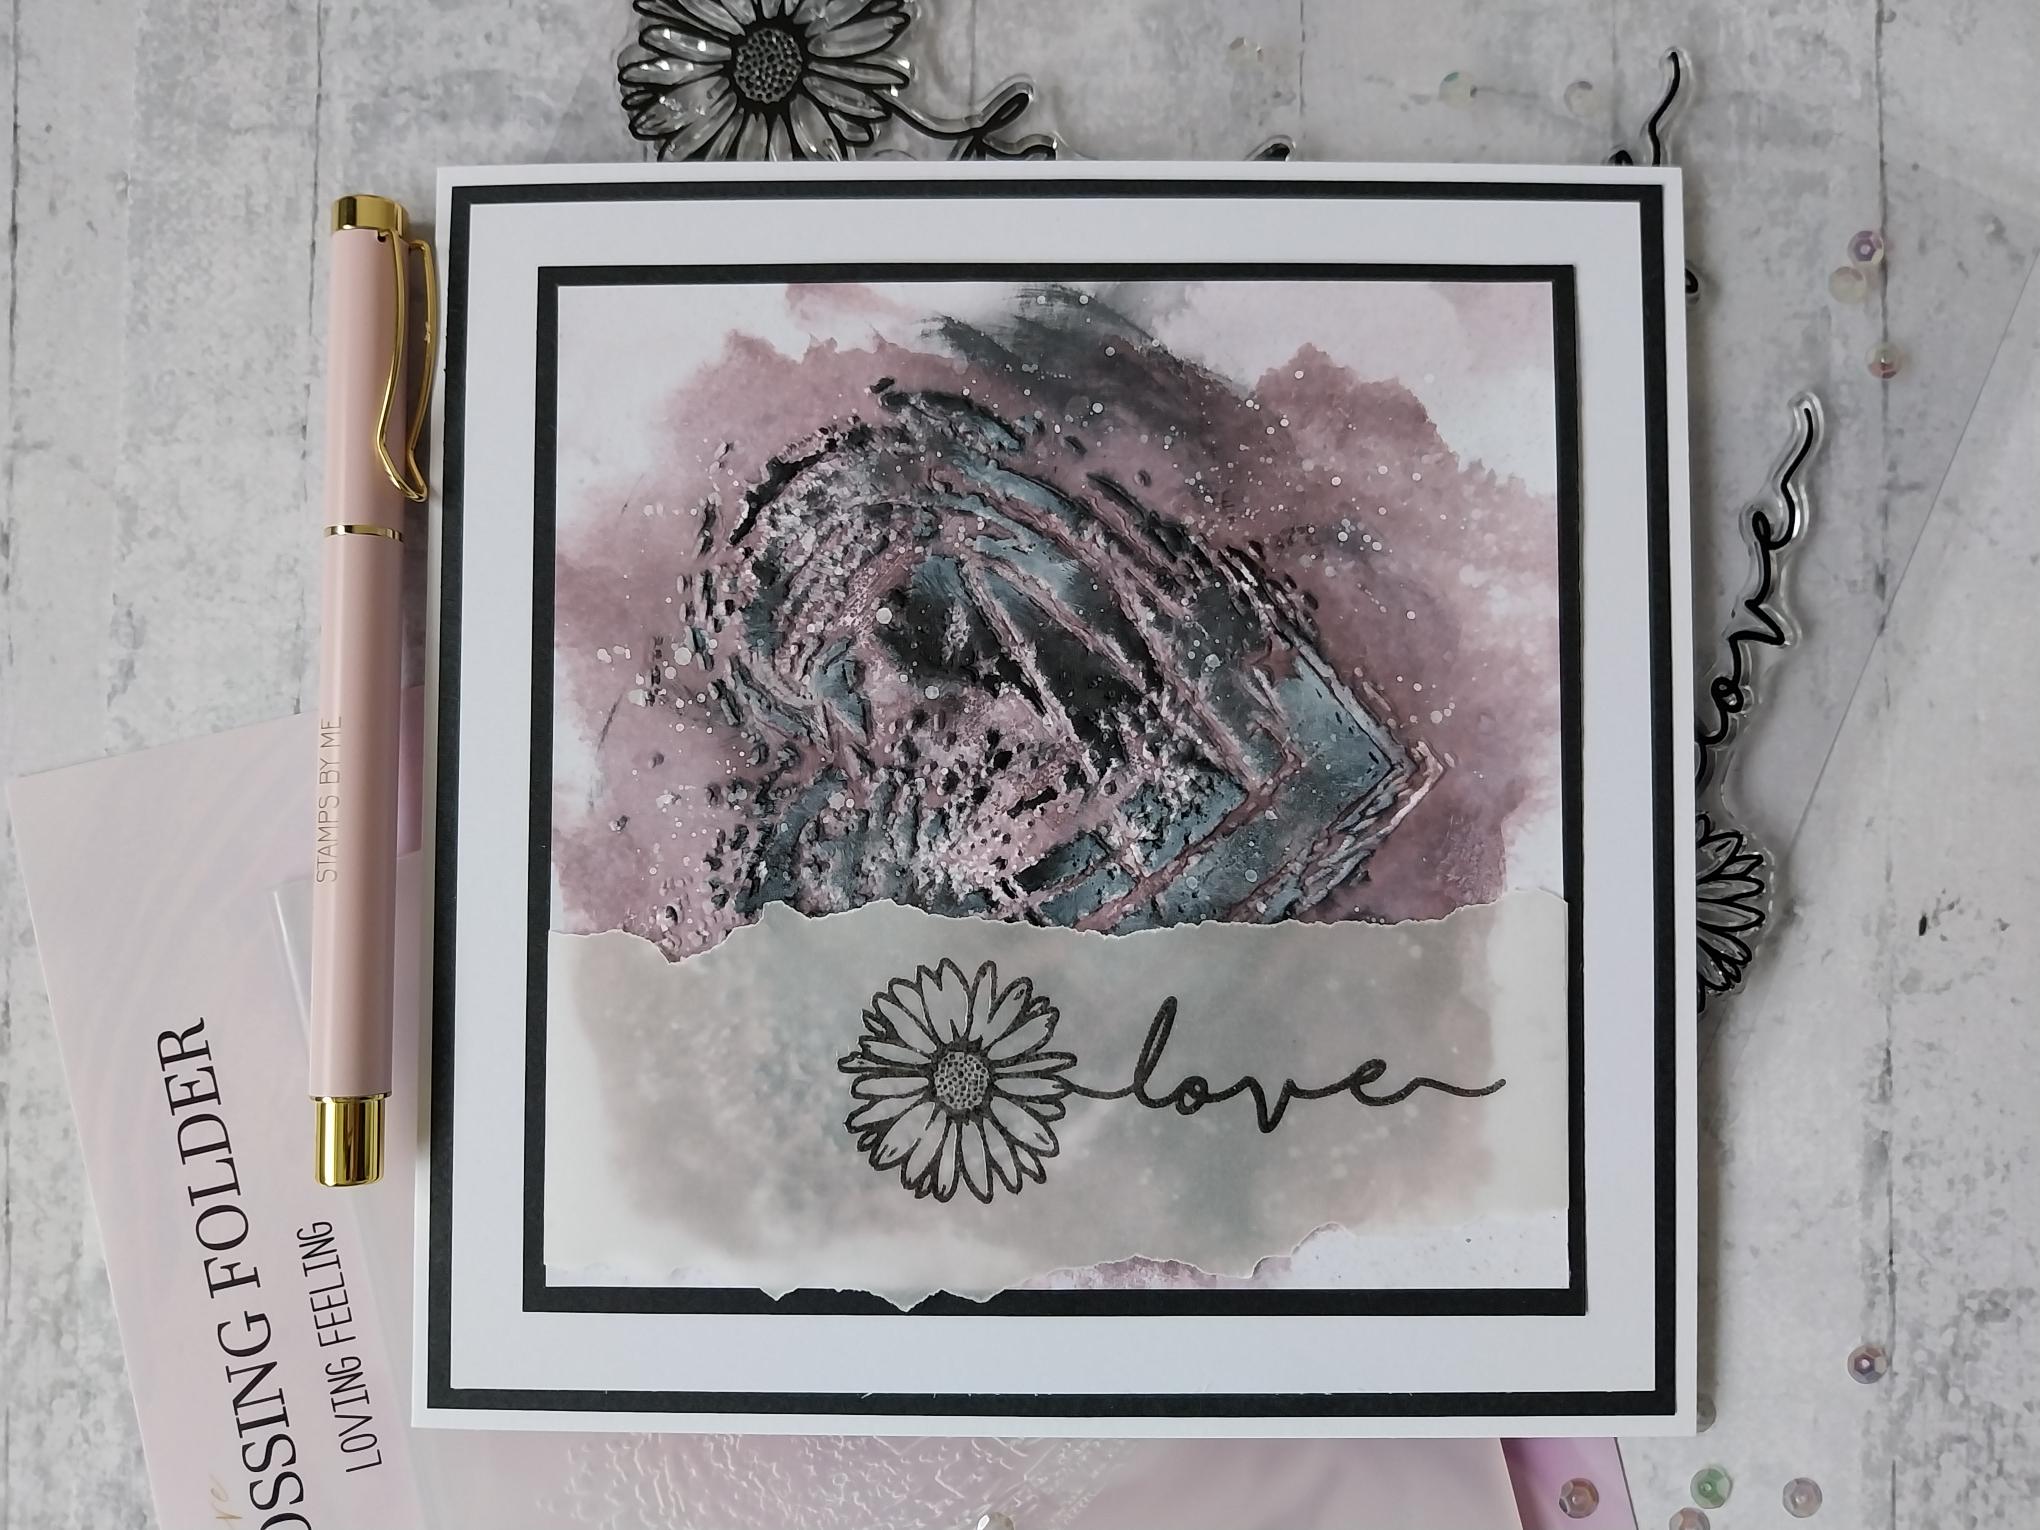
Randomly apply the Heather ink to BOTH sides of the Loving Feeling embossing folder and spritz lightly with water. Place a piece of white card, bigger than the folder, inside and run it through your machine. You now have TWO beautiful embossed/debossed inked designs, to choose from!! I chose the side with the raised, embossed heart, but the debossed heart is equally as beautiful. |
|
Take your Midnight hybrid ink and start gently swiping it over the embossed areas of your design. You can keep adding more ink, until happy with the effect. Tip: It's easier to start off lightly and gradually add more ink, than it is to go in heavy and then it can be more difficult to "pull it" back. |
|
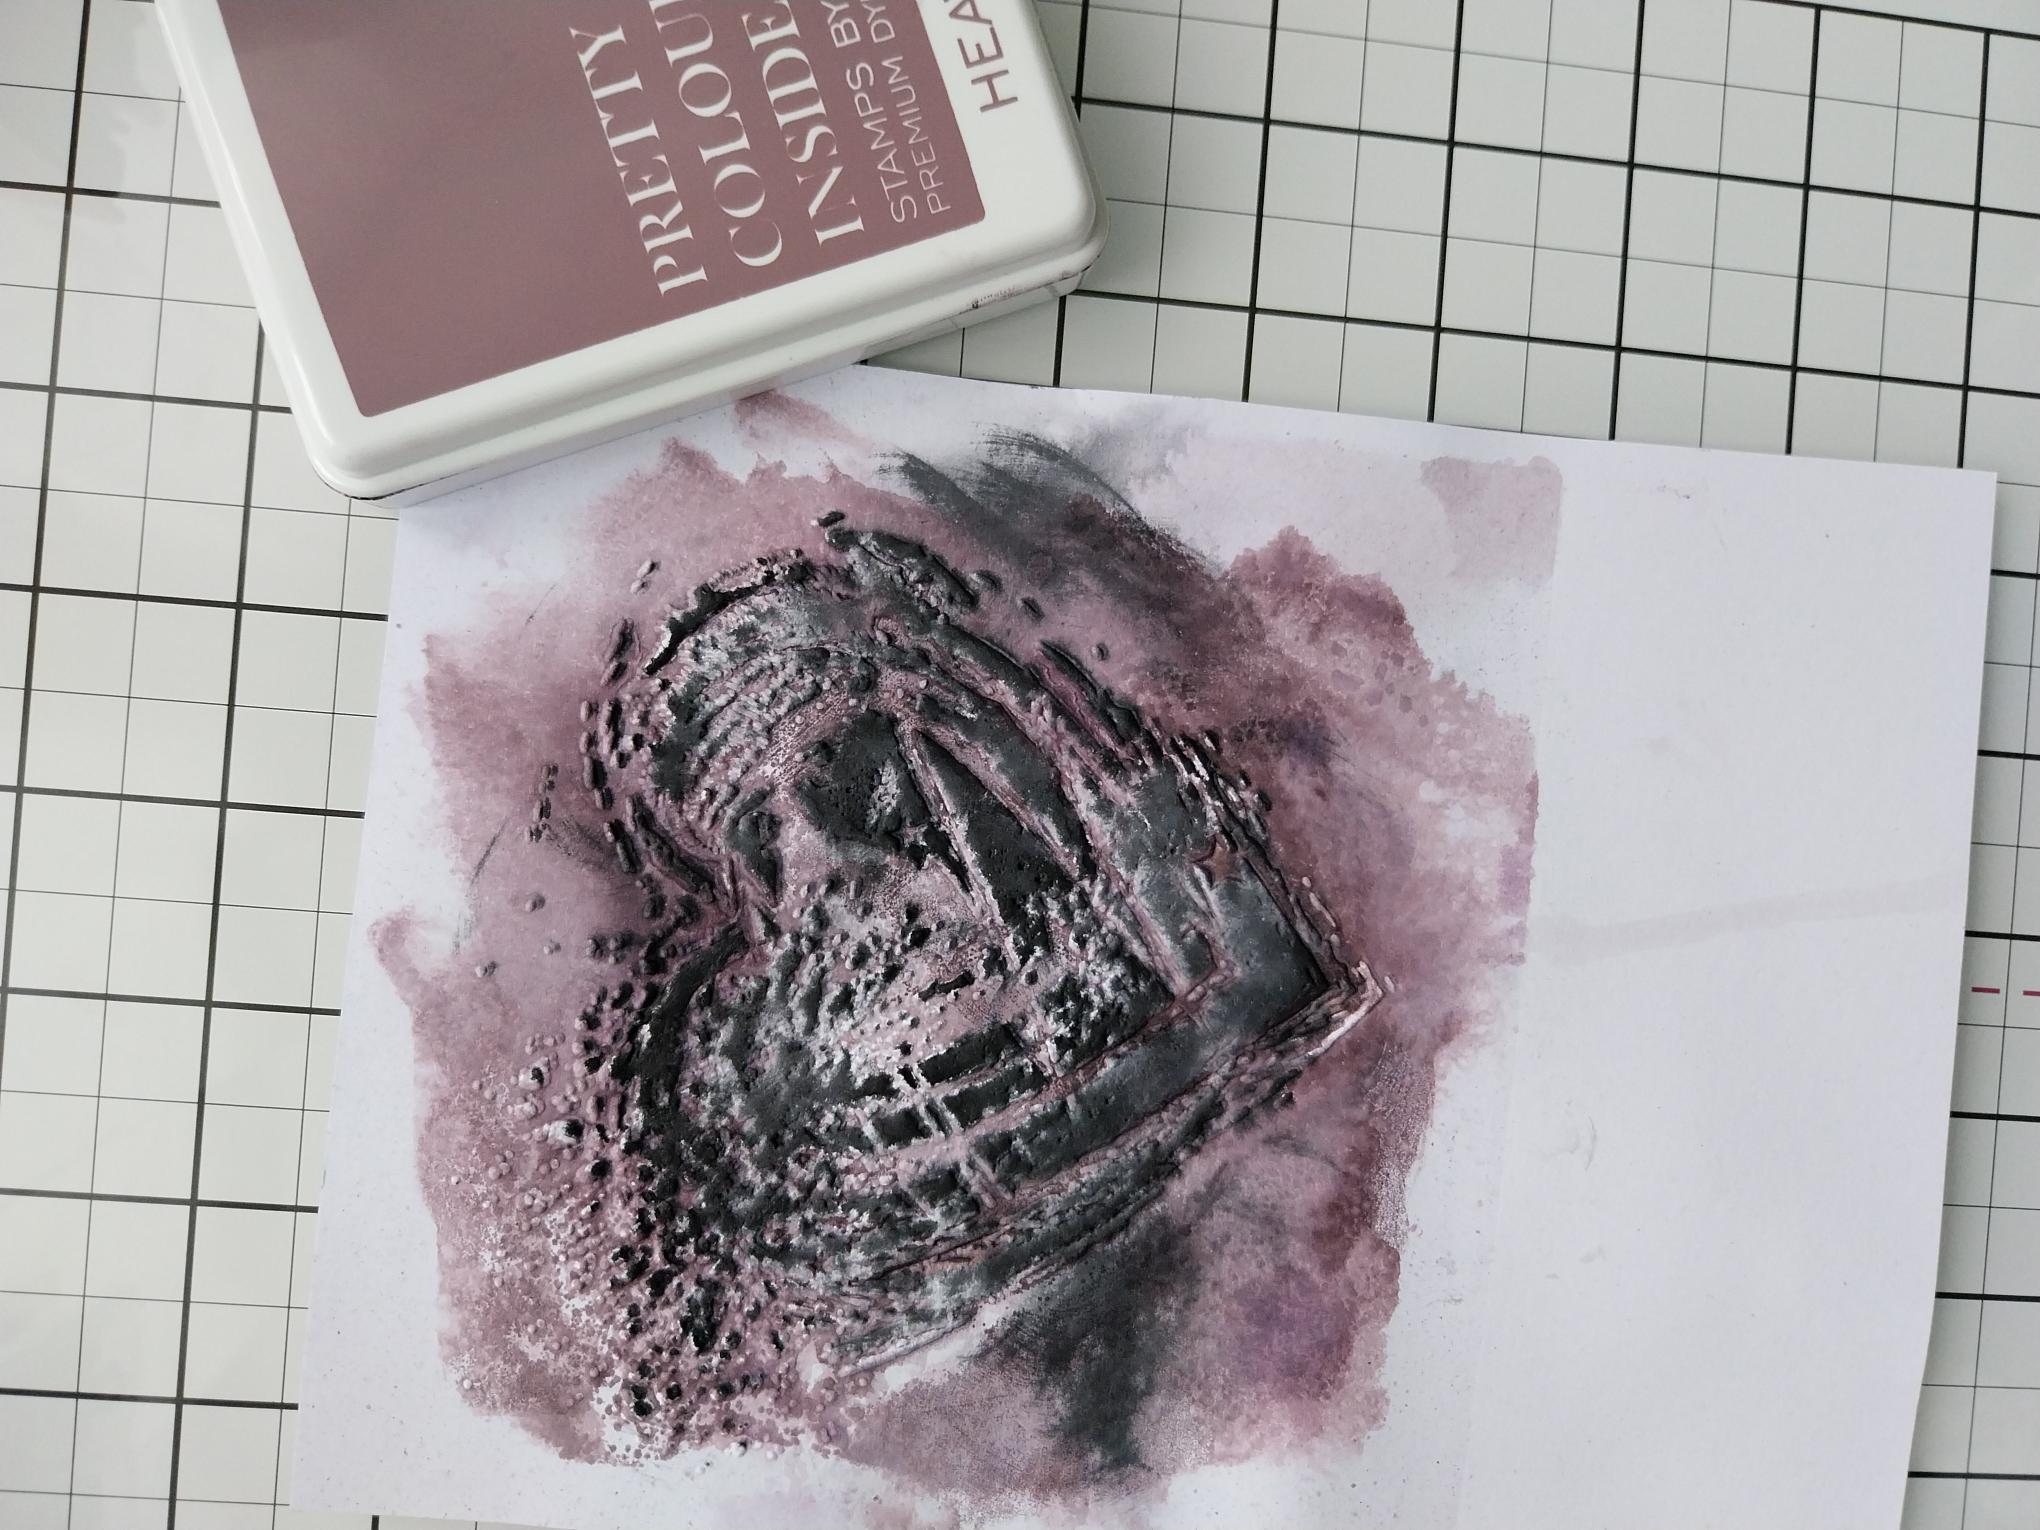
You now have TWO options for the next step. We want to add more Heather to our design. So, you can either swipe the ink pad directly over the embossed design or you can reapply the Heather directly to the folder again. Spritz with water, line up your embossed design back in the folder and run it through your machine. You can of course use both techniques, adding more black and/or Heather ink, until you are happy with the effect achieved. The choice is yours and the fun is in the playing and experimenting!! We now need to completely dry our artwork with a heat tool, before moving to the next step. |
|
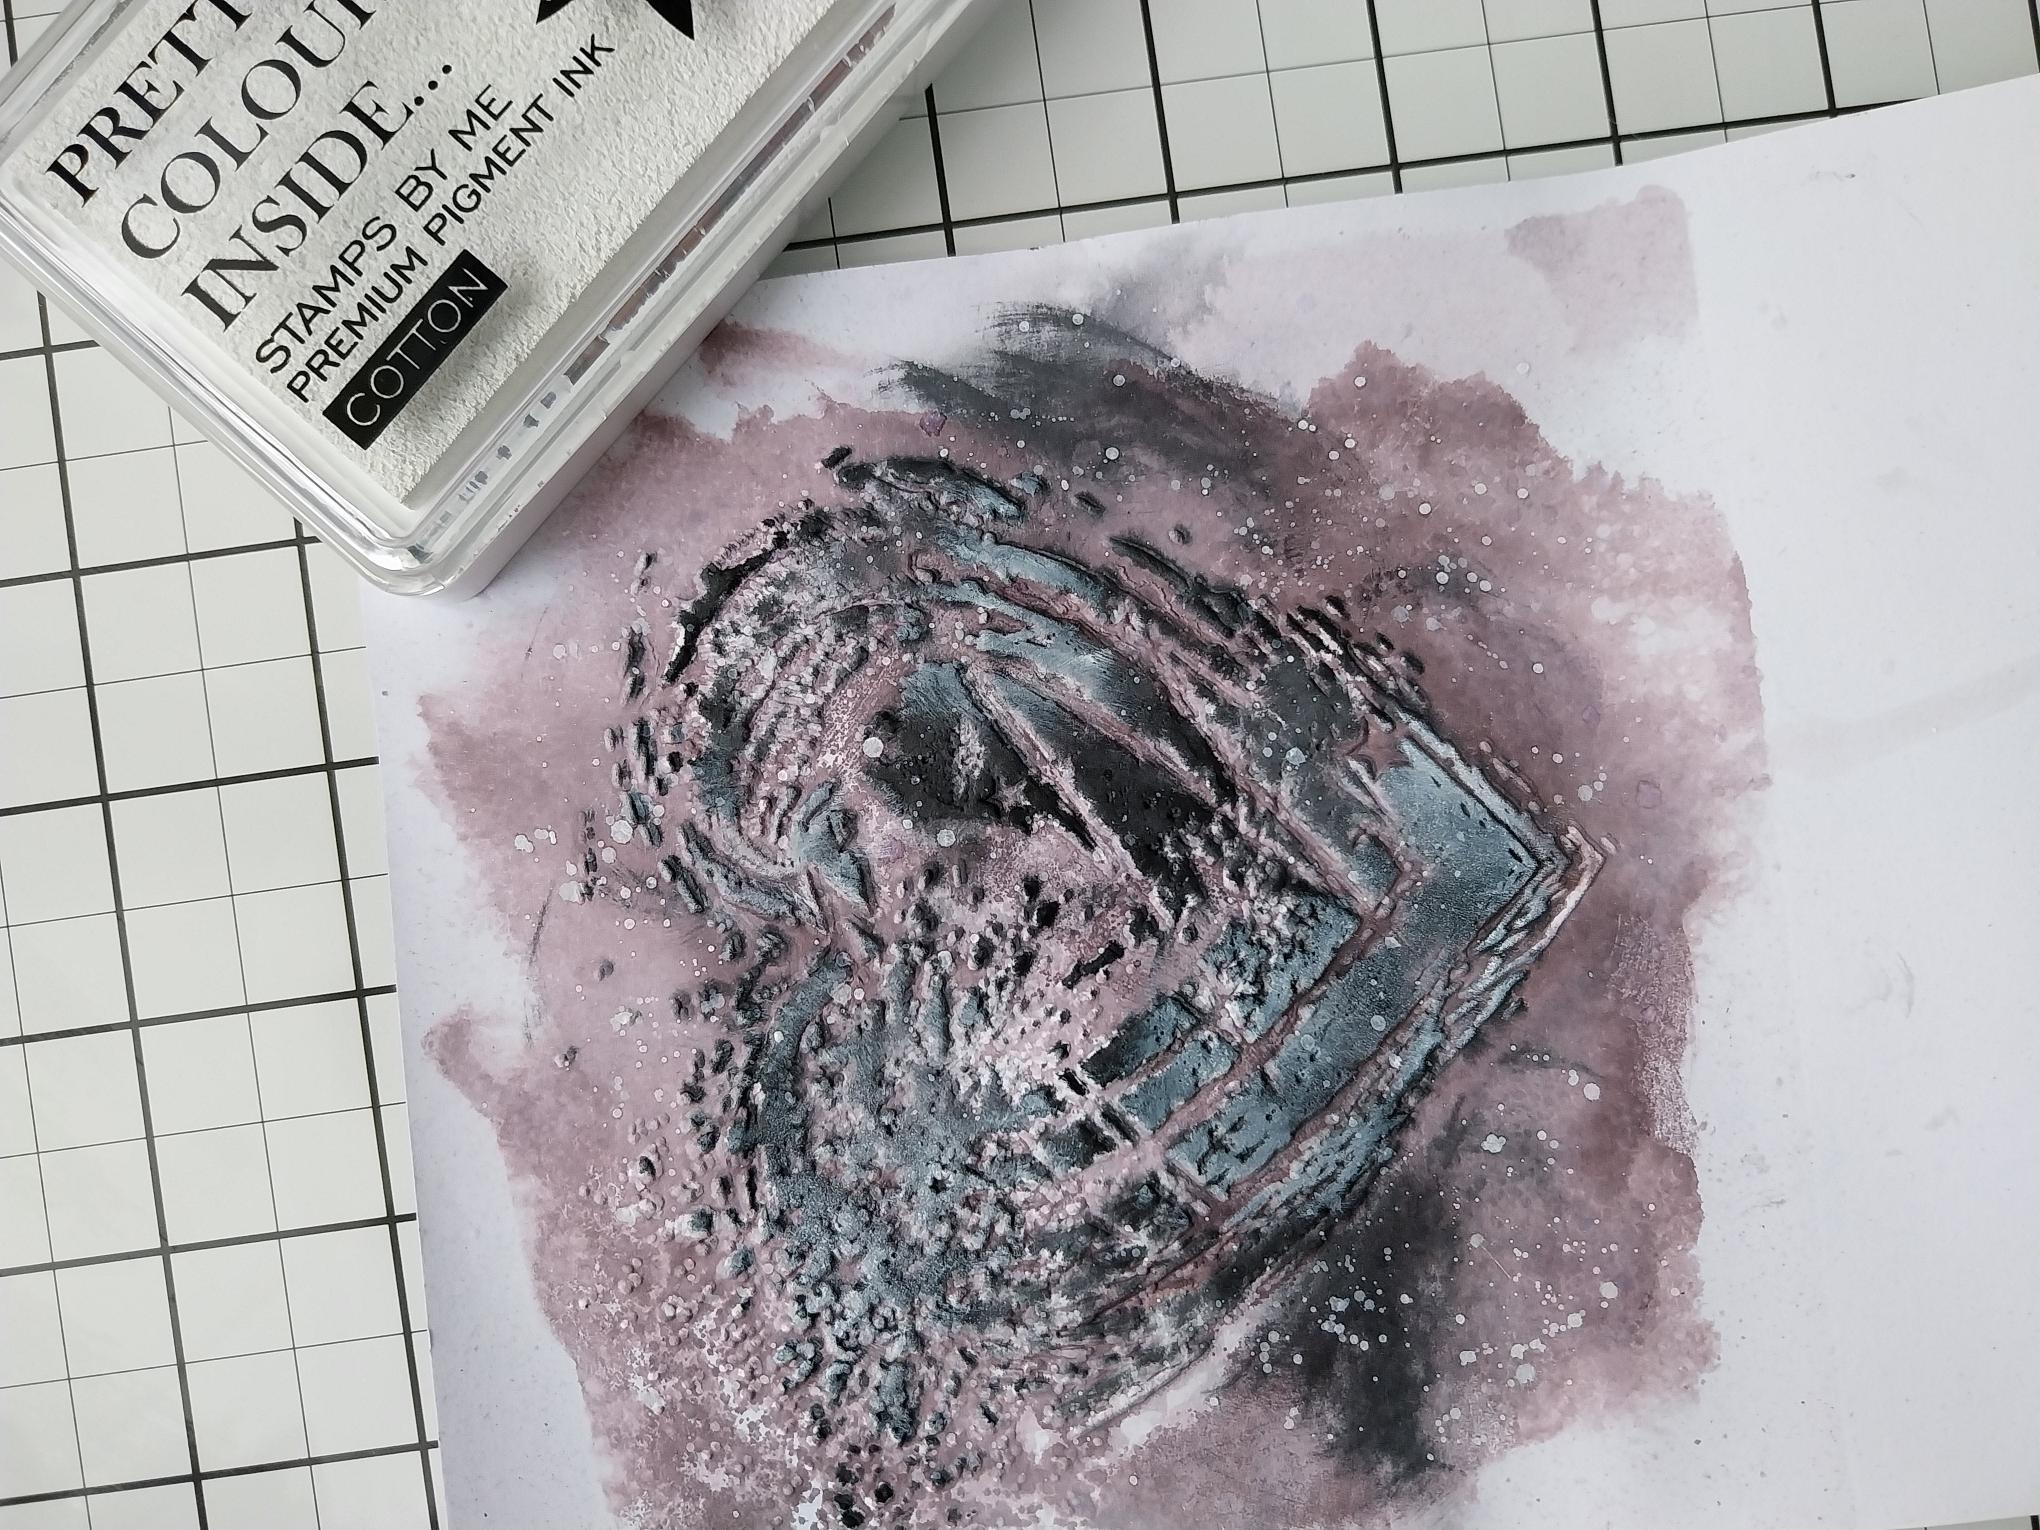
Lightly swipe your white, Cotton ink pad over random areas of the embossed design. Pop some of the ink on your glass mat, add water and get splattering!! I love lots and lots of splats...but the choice is yours. Once again, make sure your artwork is completely dry. |
|
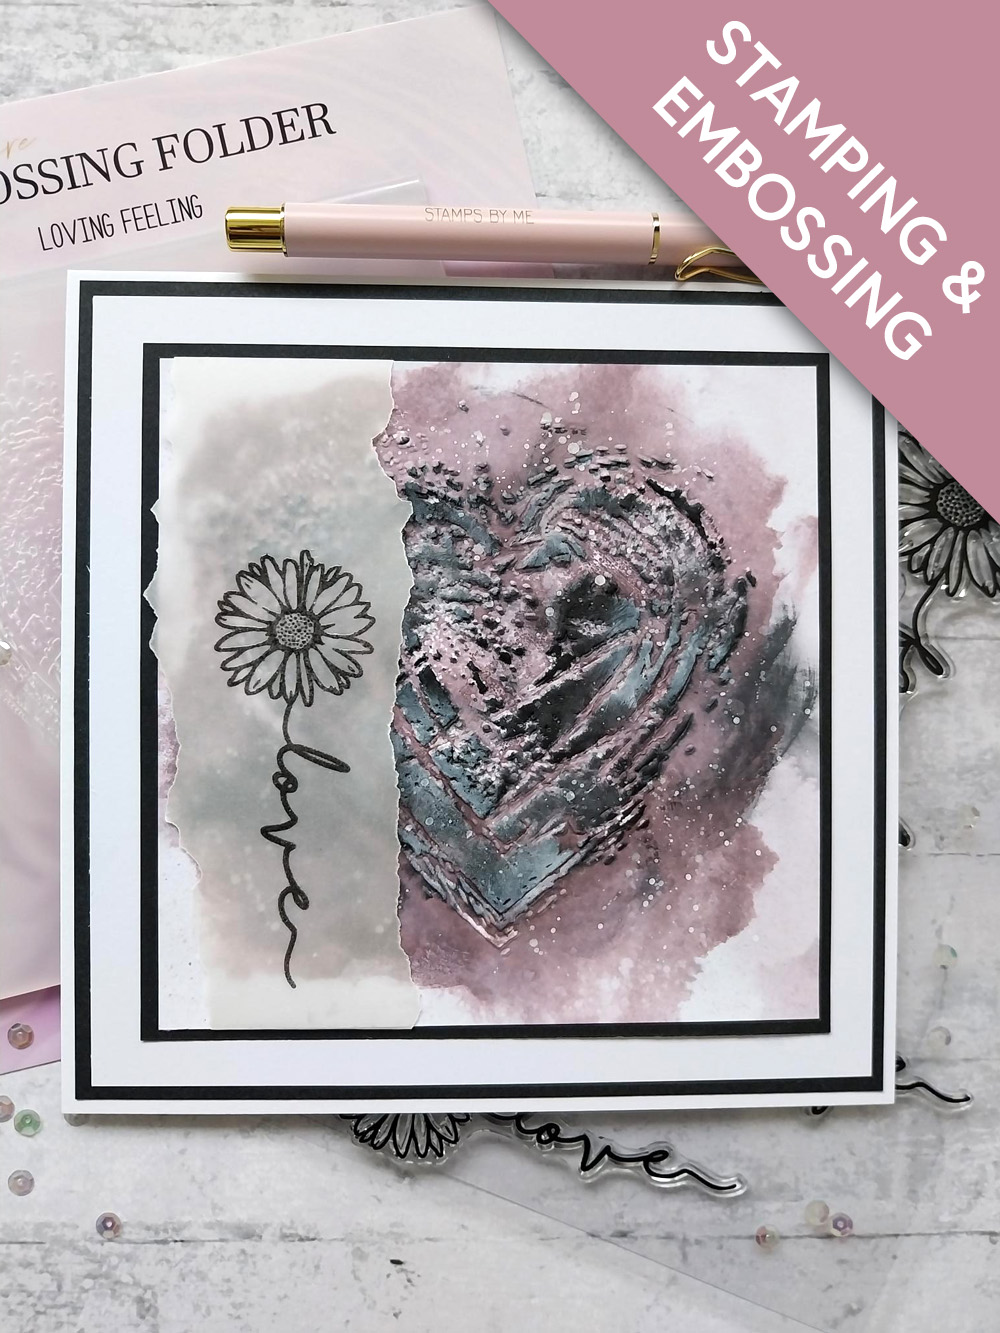
Trim down your embossed artwork to 5 1/2" square, then set aside. |
|
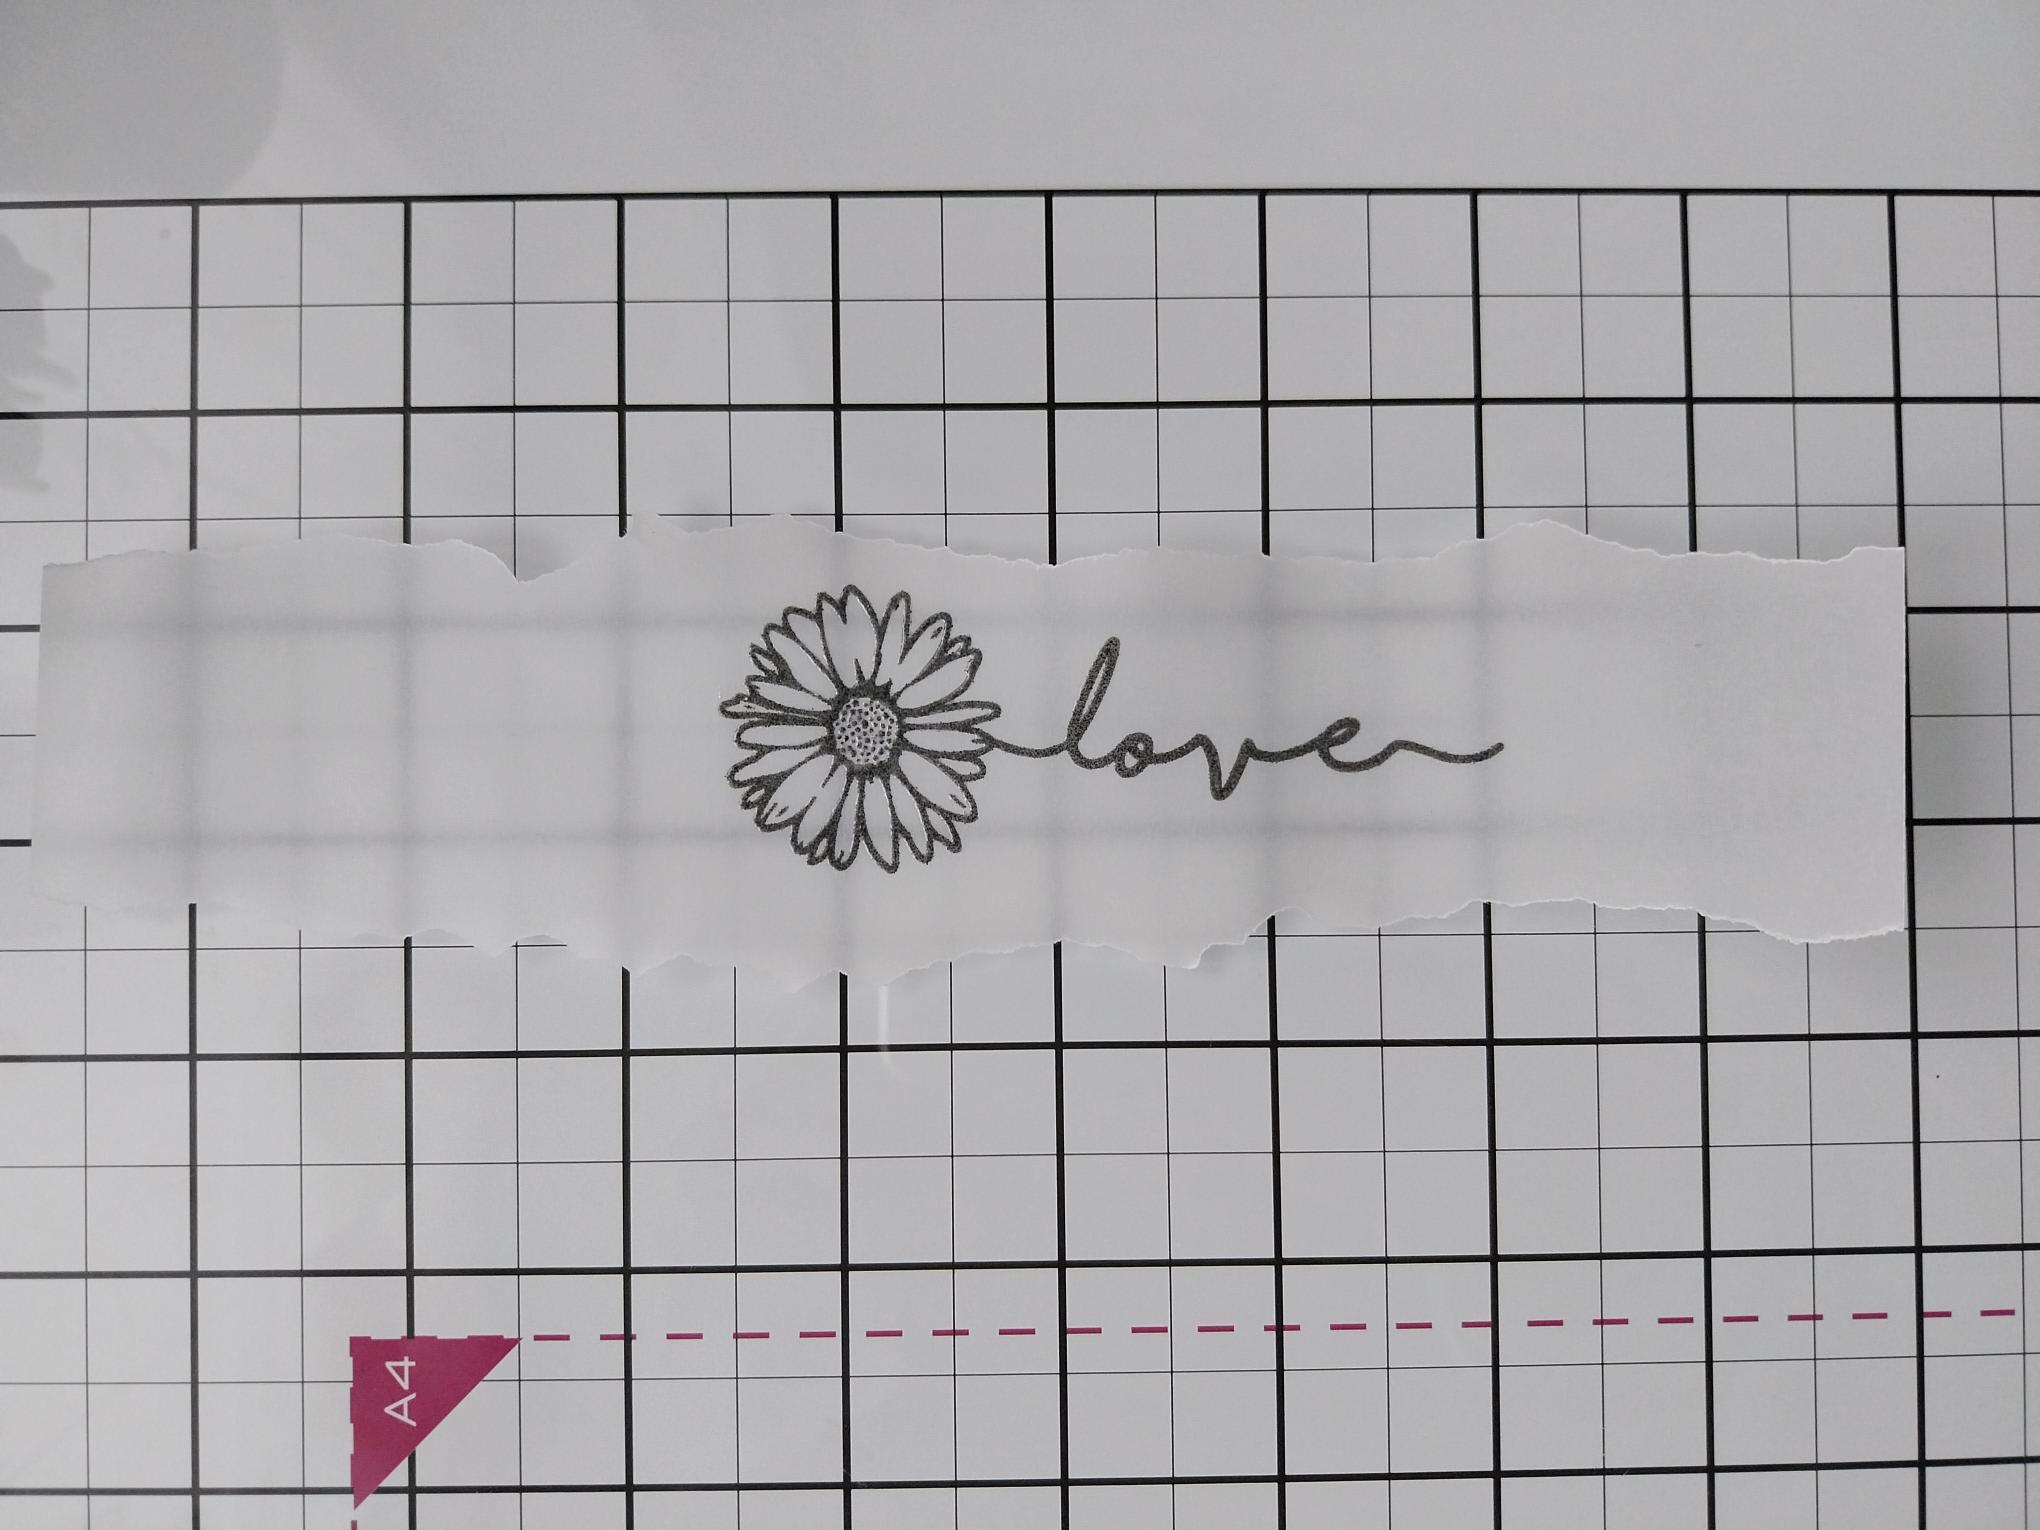
Wipe over your torn, vellum panel with an anti-static bag. You can of course stamp first and then tear your panel to size. Ink up the "Love" Daisy stamp, from the Faith Stamp And Die Collection, with the Midnight ink pad and stamp down the centre of your vellum. Apply clear embossing powder over the sticky image, decanting the leftover powder back in the pot. Get your heat tool nice and hot, then heat set the powder, moving the heat tool as soon as the powder starts to turn. This helps minimise warping the vellum or burning the powder. |
|
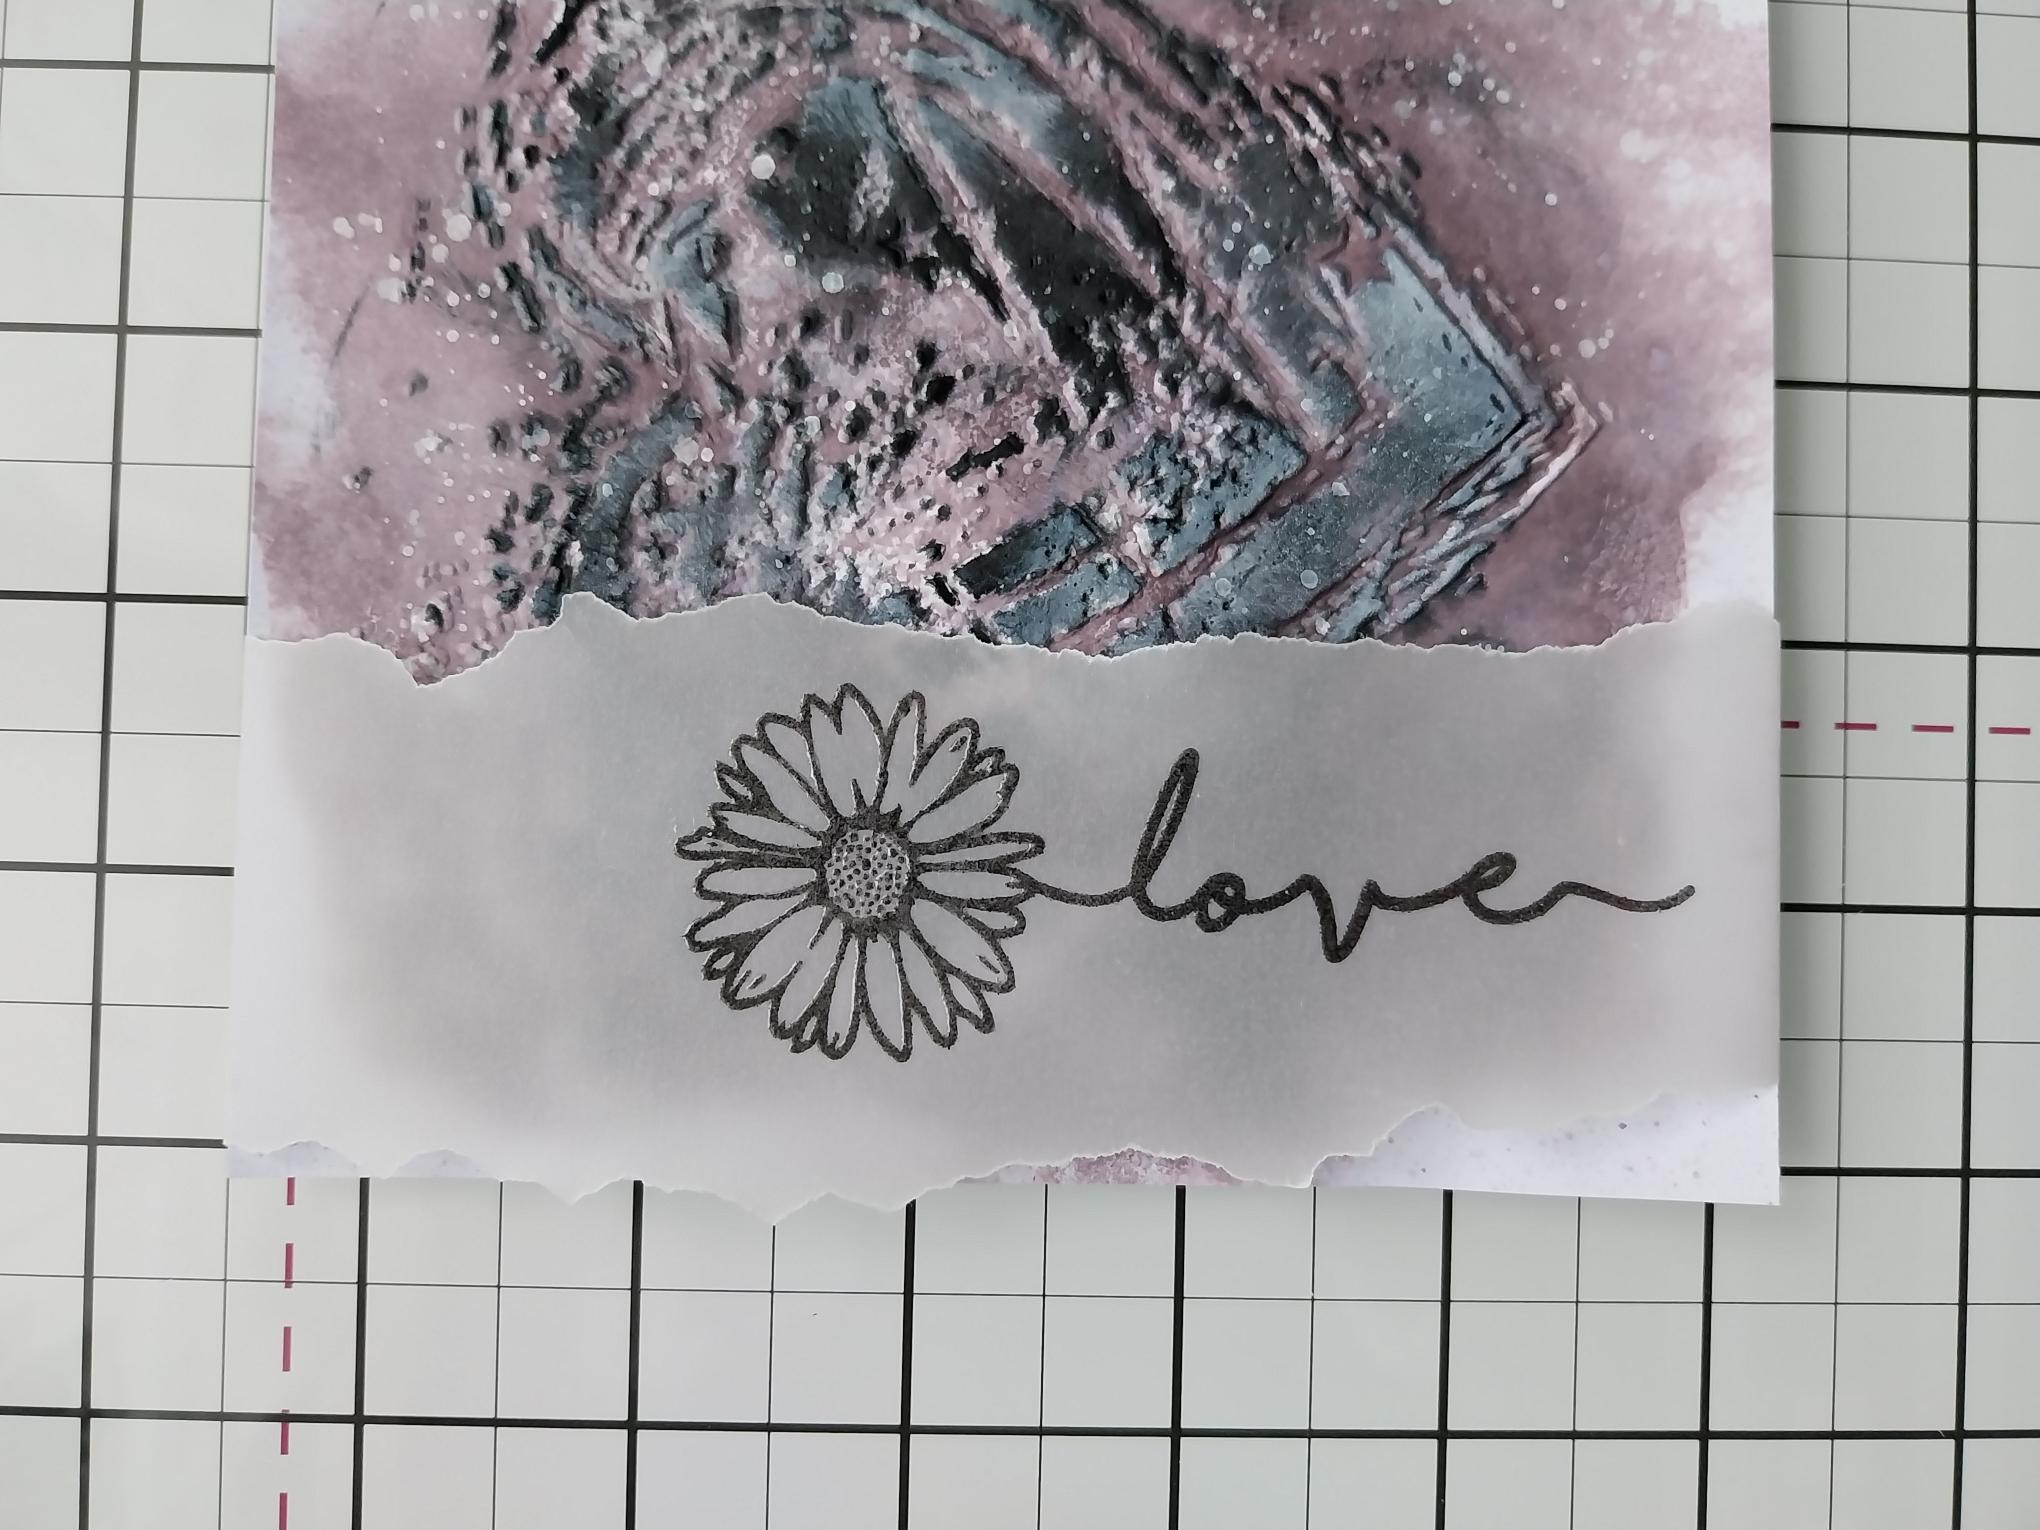
Lay the stamped vellum down the left side, of your embossed background. Tuck the overhang over the top and bottom of the embossed card and adhere on the reverse, with double sided tape. |
|
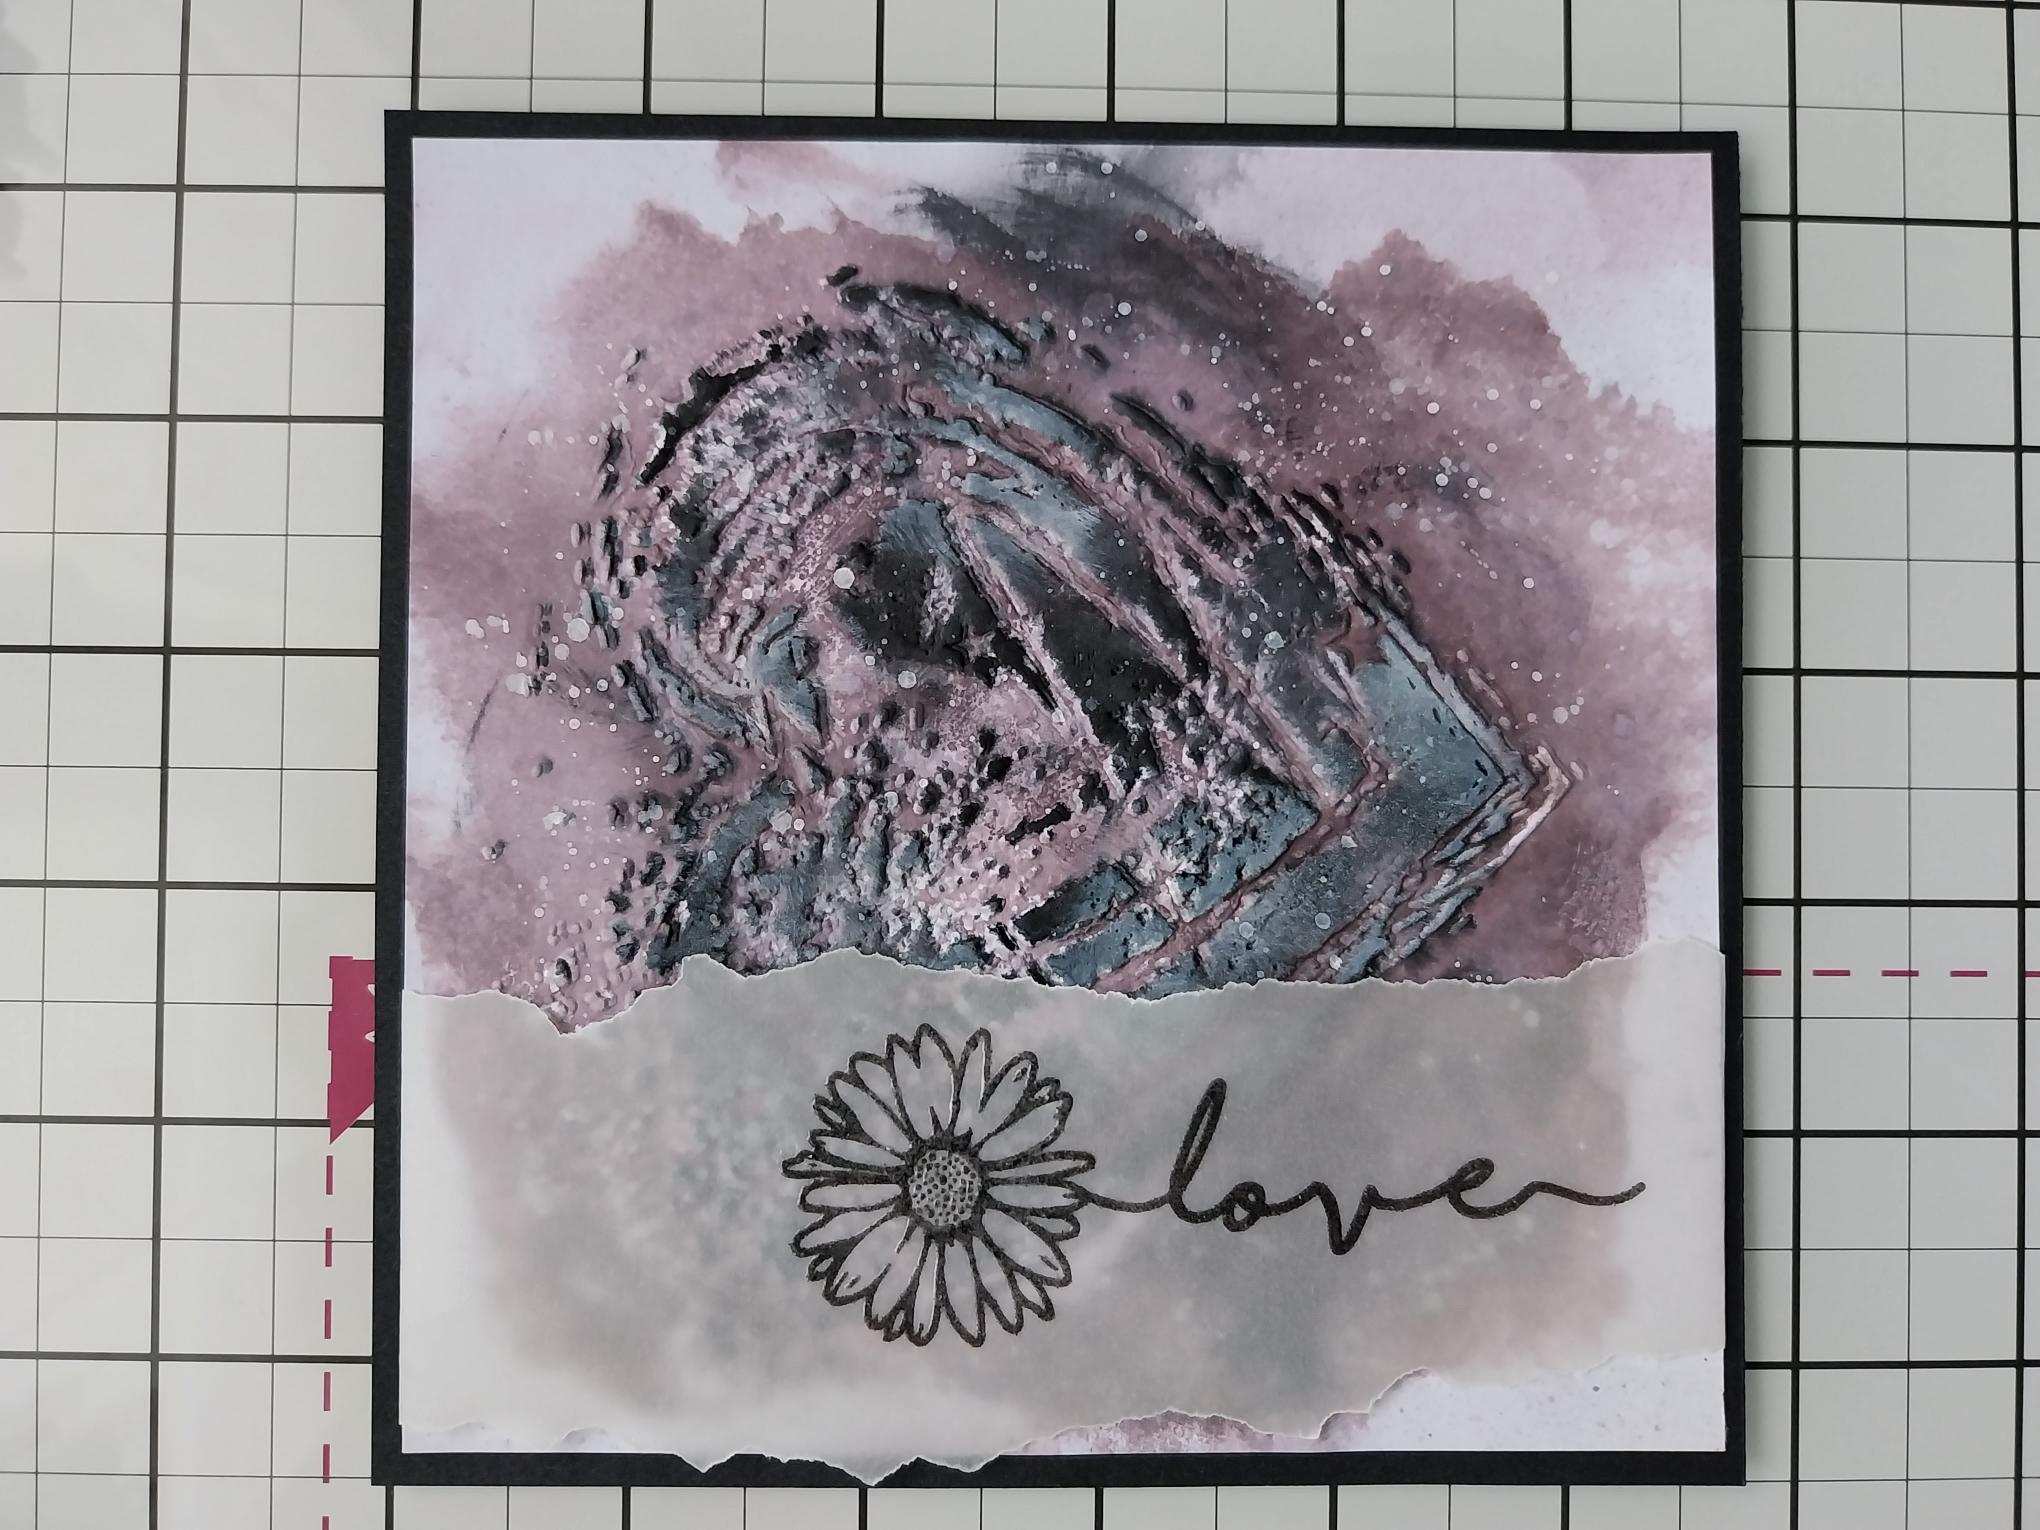
Adhere your artwork on the black card, cut to 5 3/4" square. |

|
Adhere the white card cut to 6 1/2" square, on to the black card cut to 6 3/4" square. Adhere this on to the front of your 7 x 7" white, card blank. |
|
Adhere your artwork on to your layered card blank, to finish. |