Give your friends $10 off their first order!
Refer a FRIEND


WHAT YOU WILL NEED:
Pink card blank 7 x 5"
Black card 6 3/4 x 4 3/4"
Pretty Things Inside Secret Forest A5 Vellum Paper Pack
Pretty Things Inside Secret Forest 8 x 8" Paper Pack
Pretty Things Inside Maple And Lime Die Collection
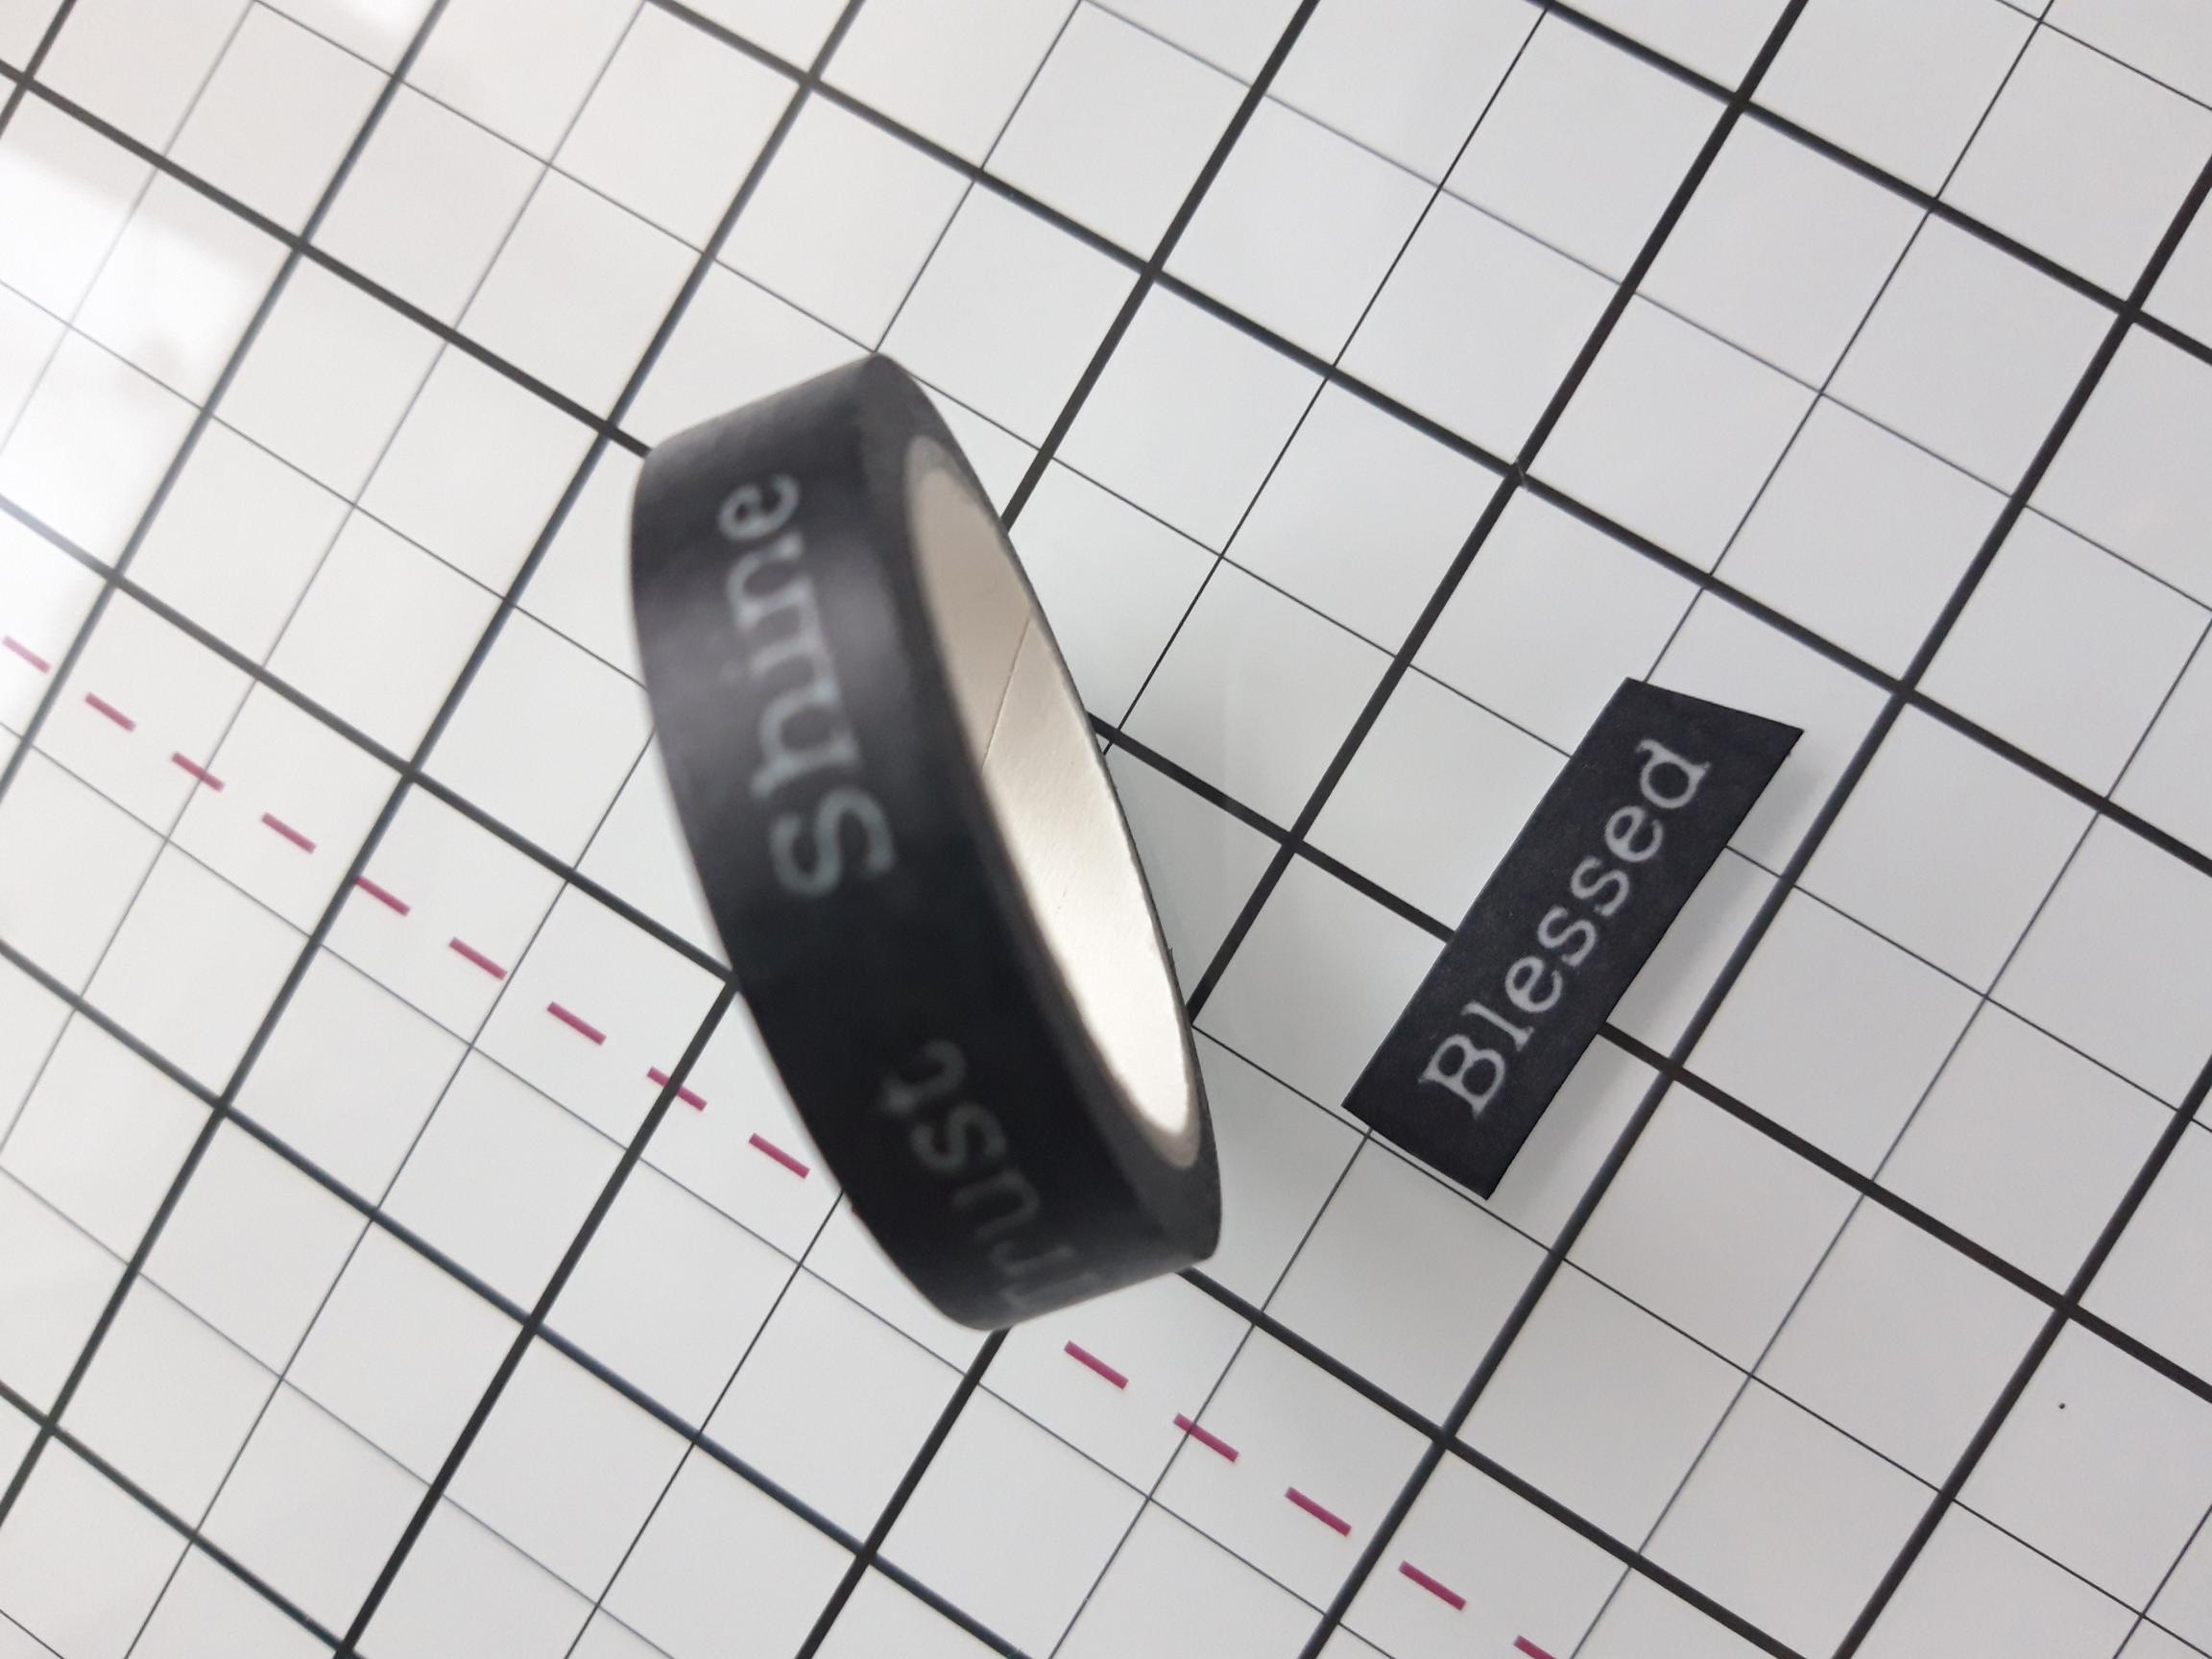
Funky Fossil Sentiment Washi Tape
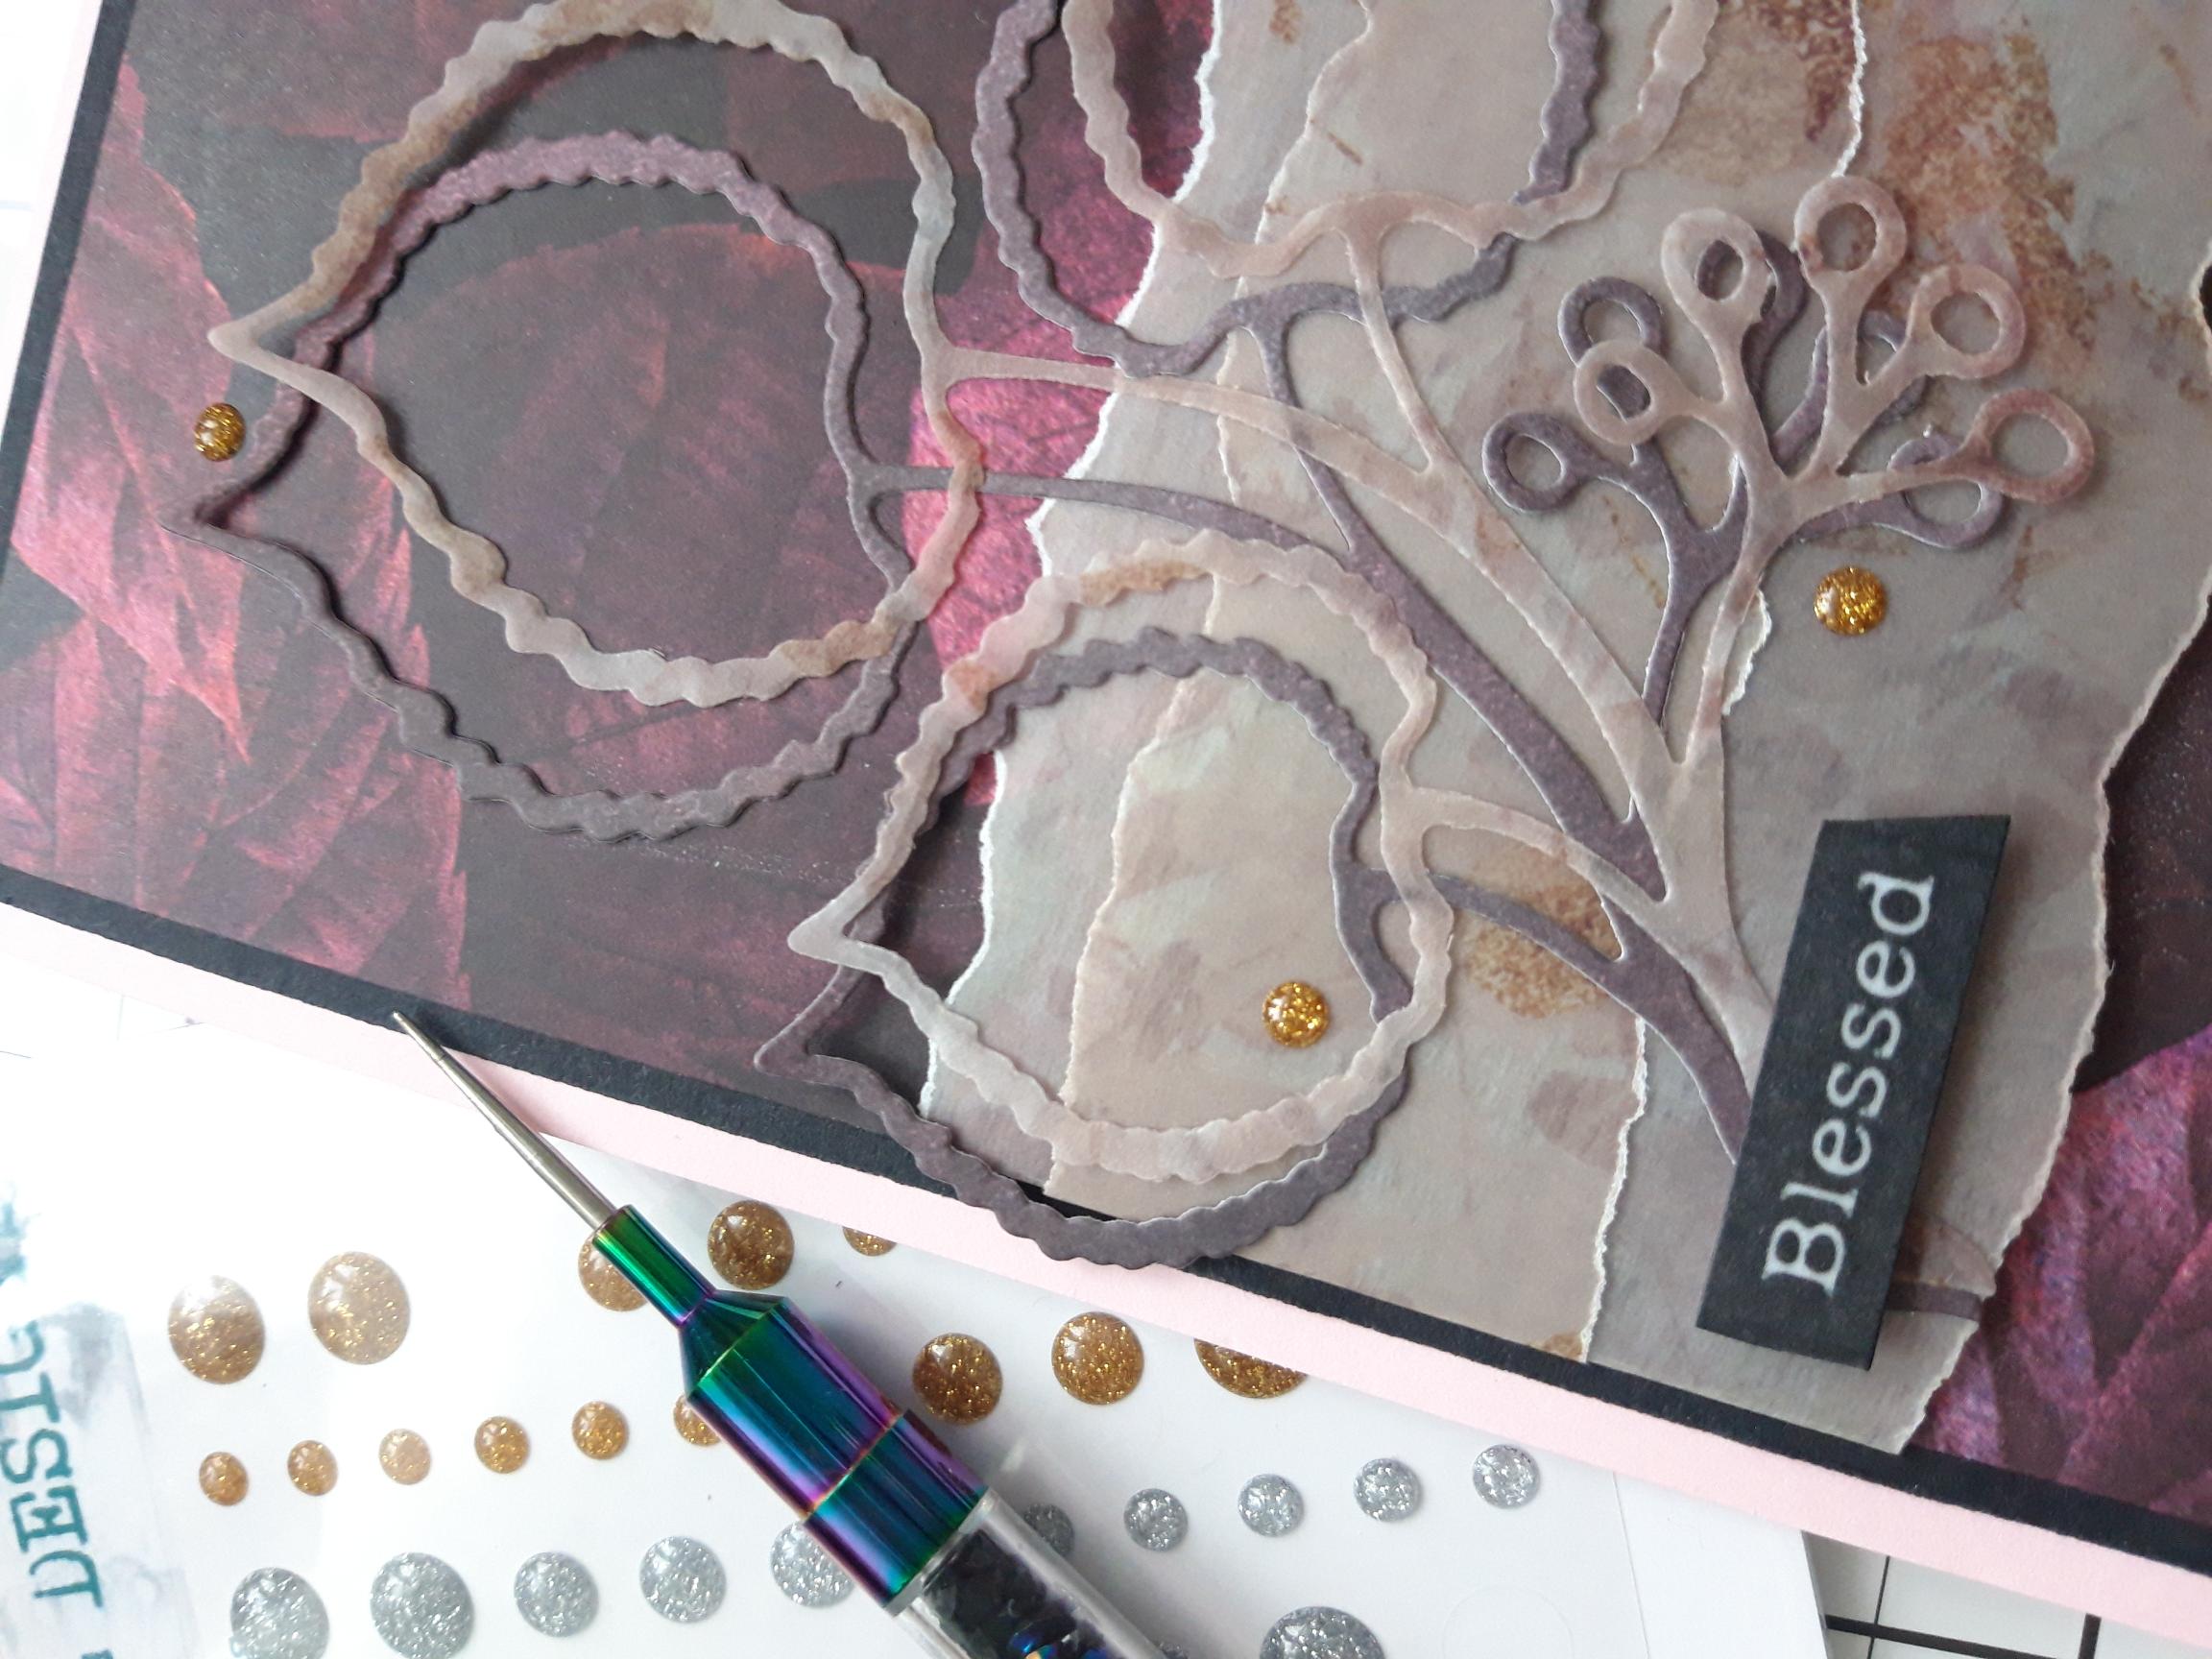
Funky Fossil Enamel Dots
Paper Trimmer
Perfect Together Glue
Double sided adhesive tape
Foam pads
Die Cutting machine
[click image to enlarge] 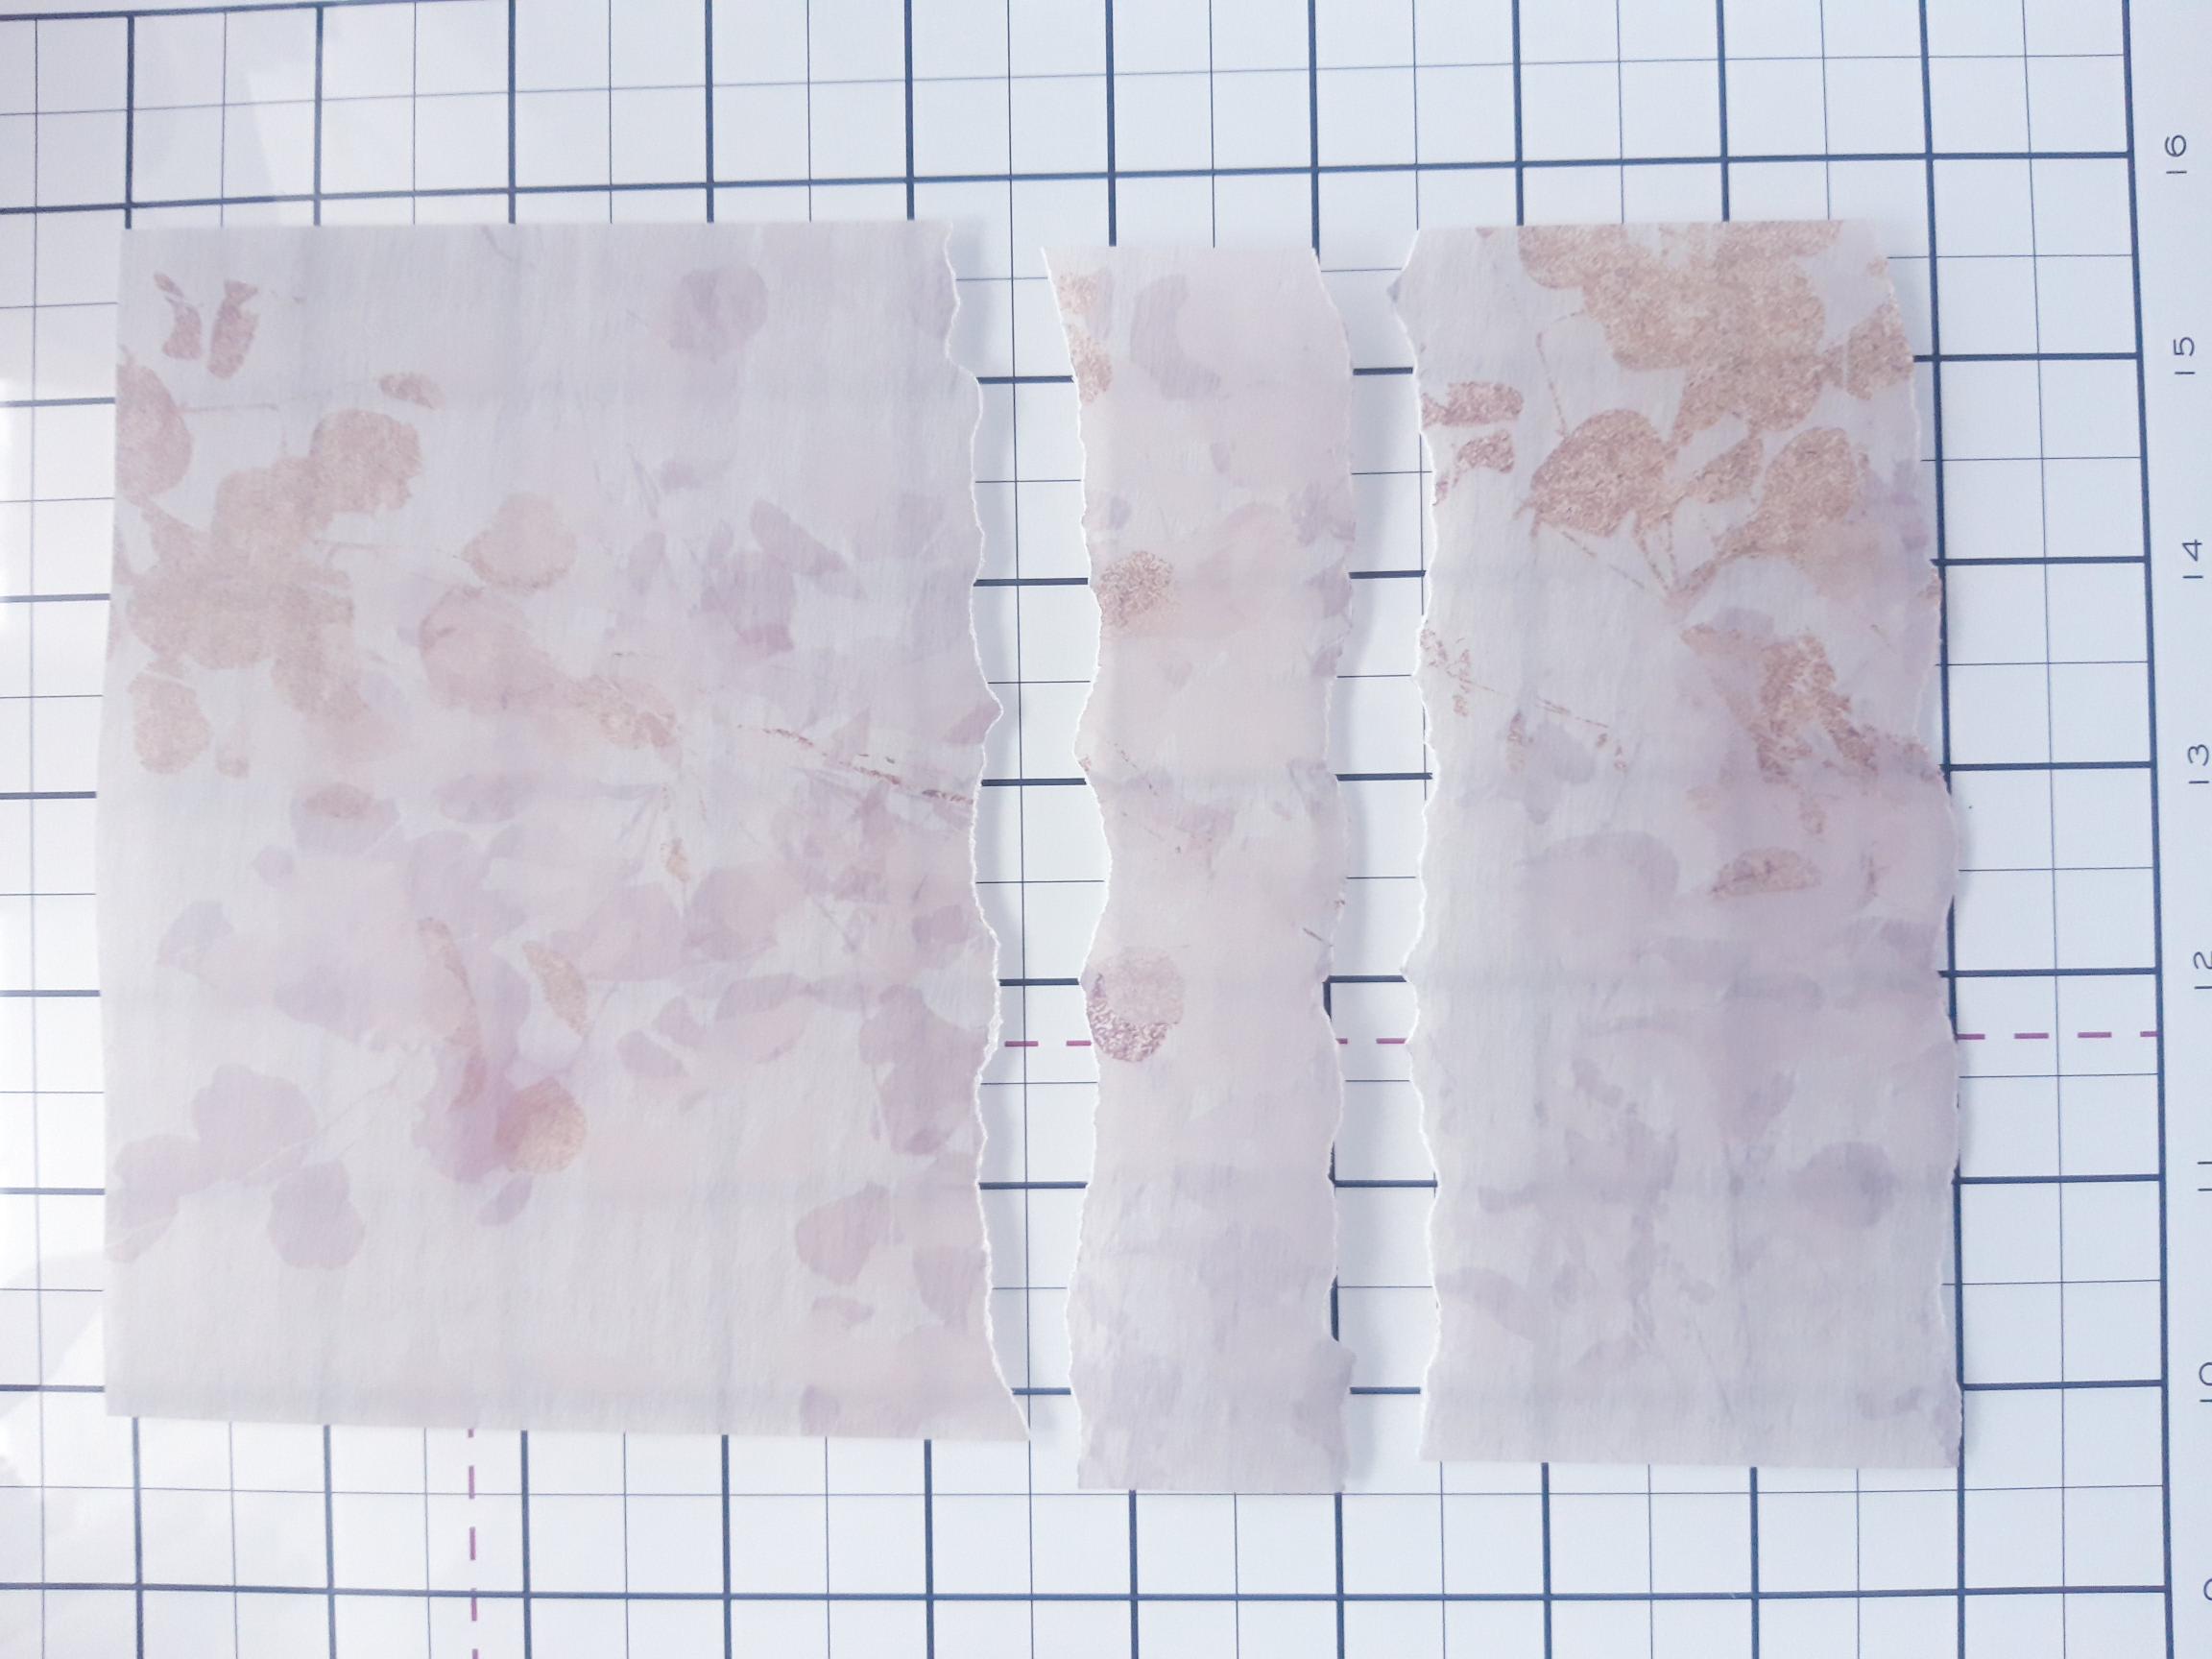
|
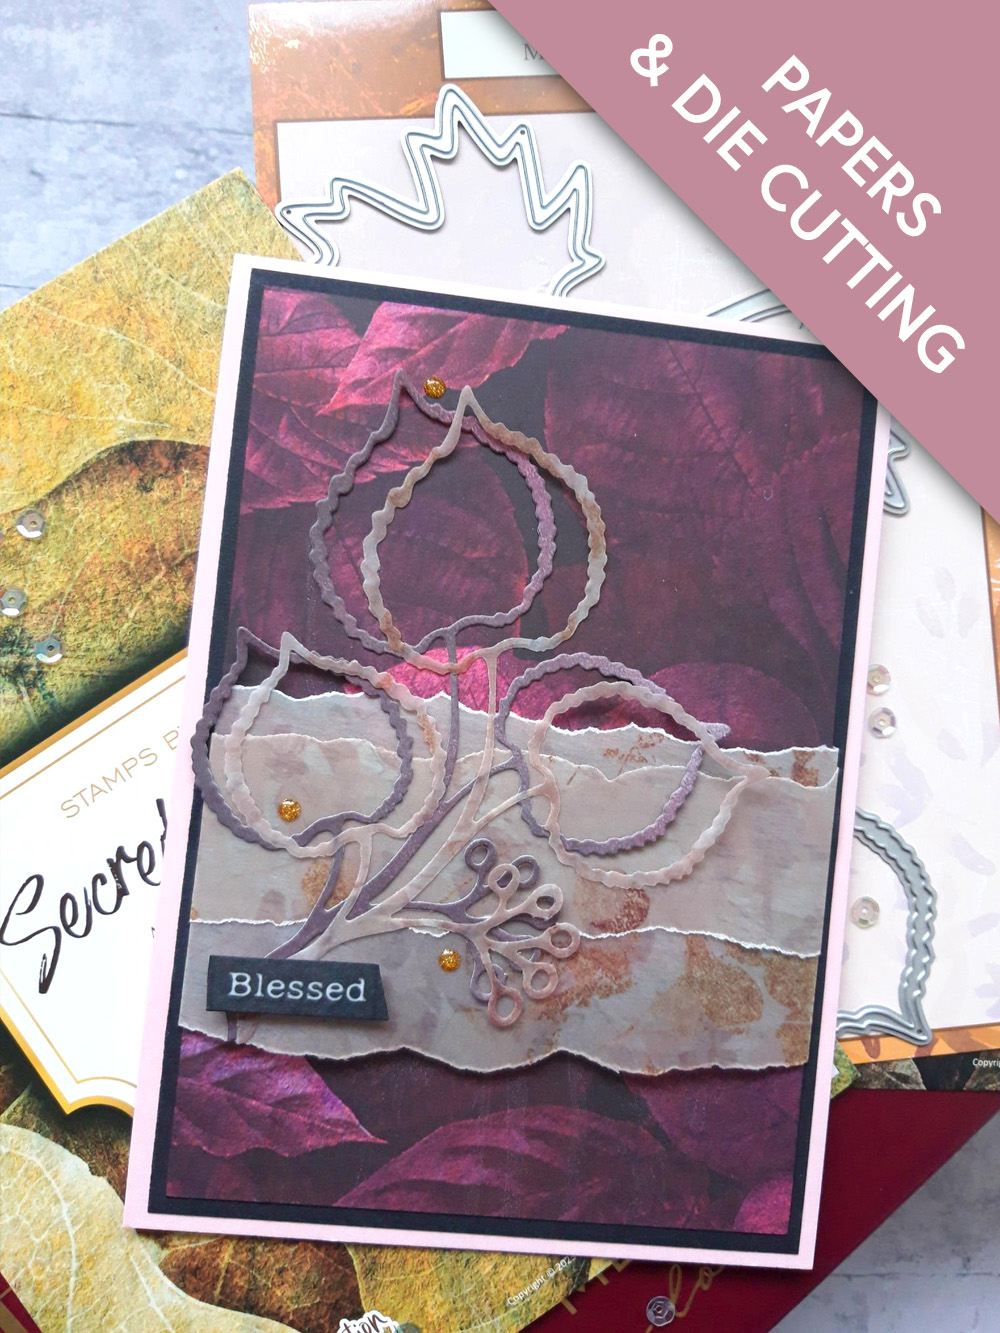
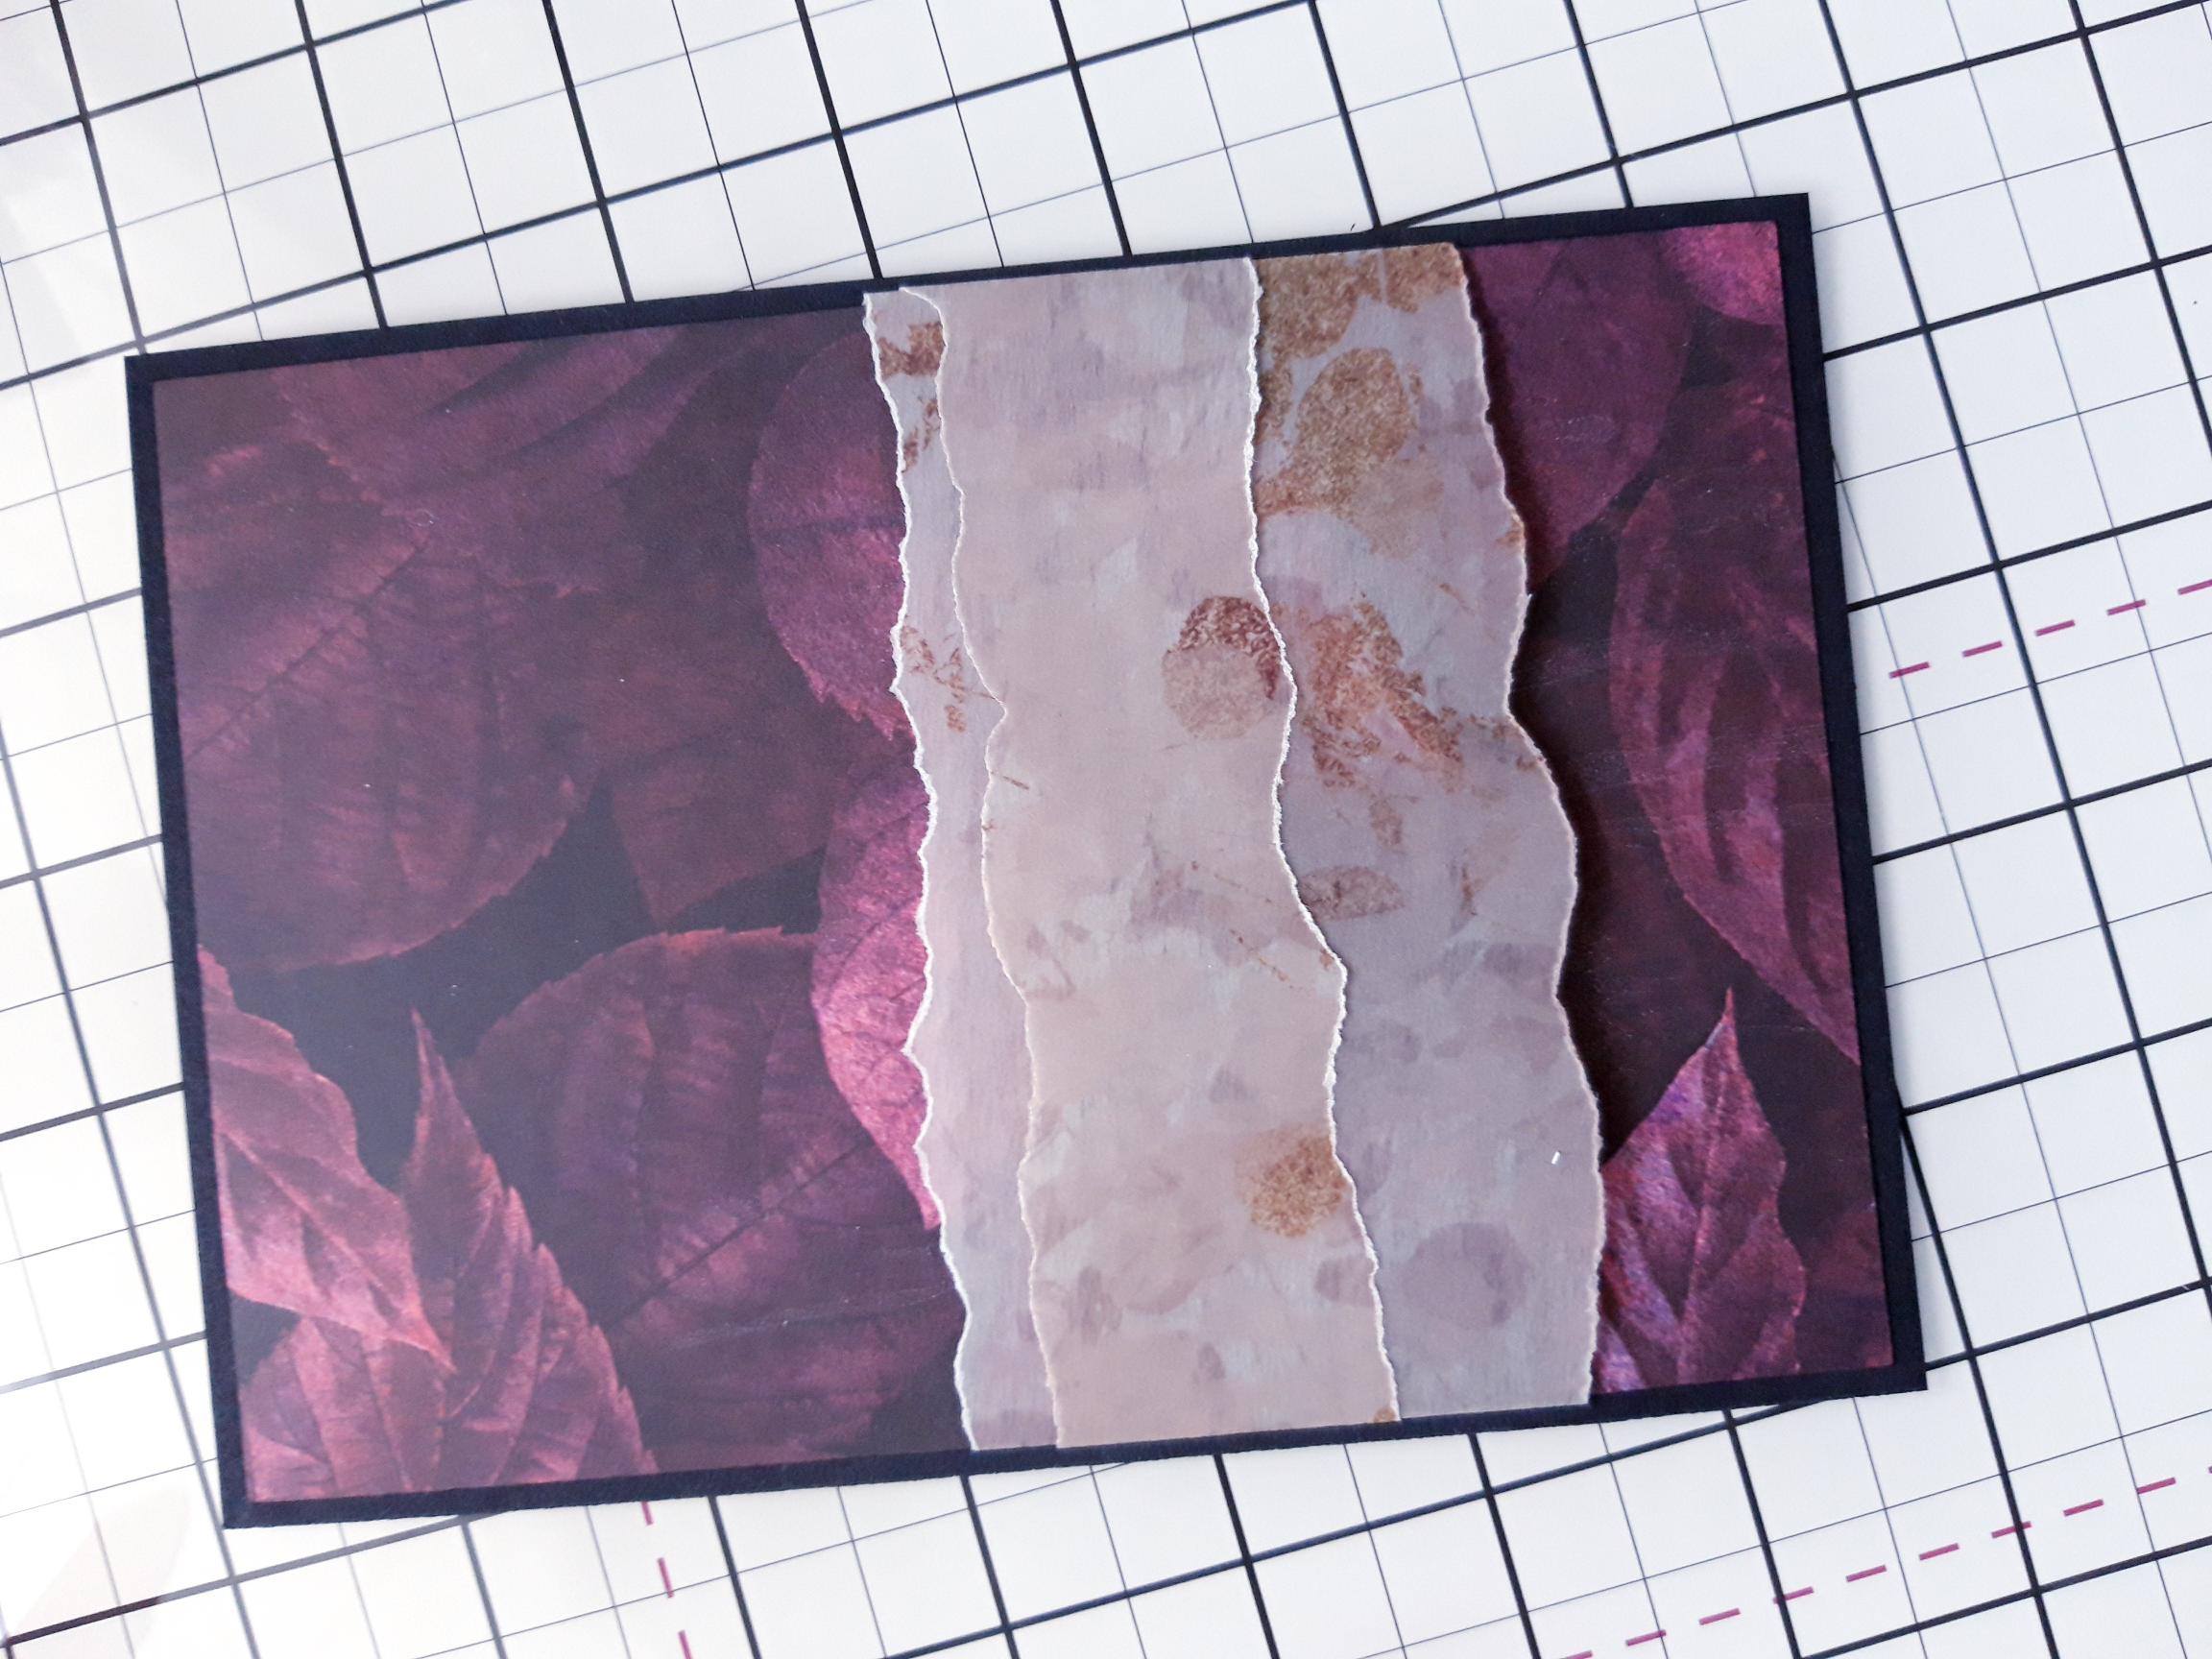
Tear two strips from one of the Vellum sheets, in the Secret Forest Vellum pack, one wider than the other. |
|
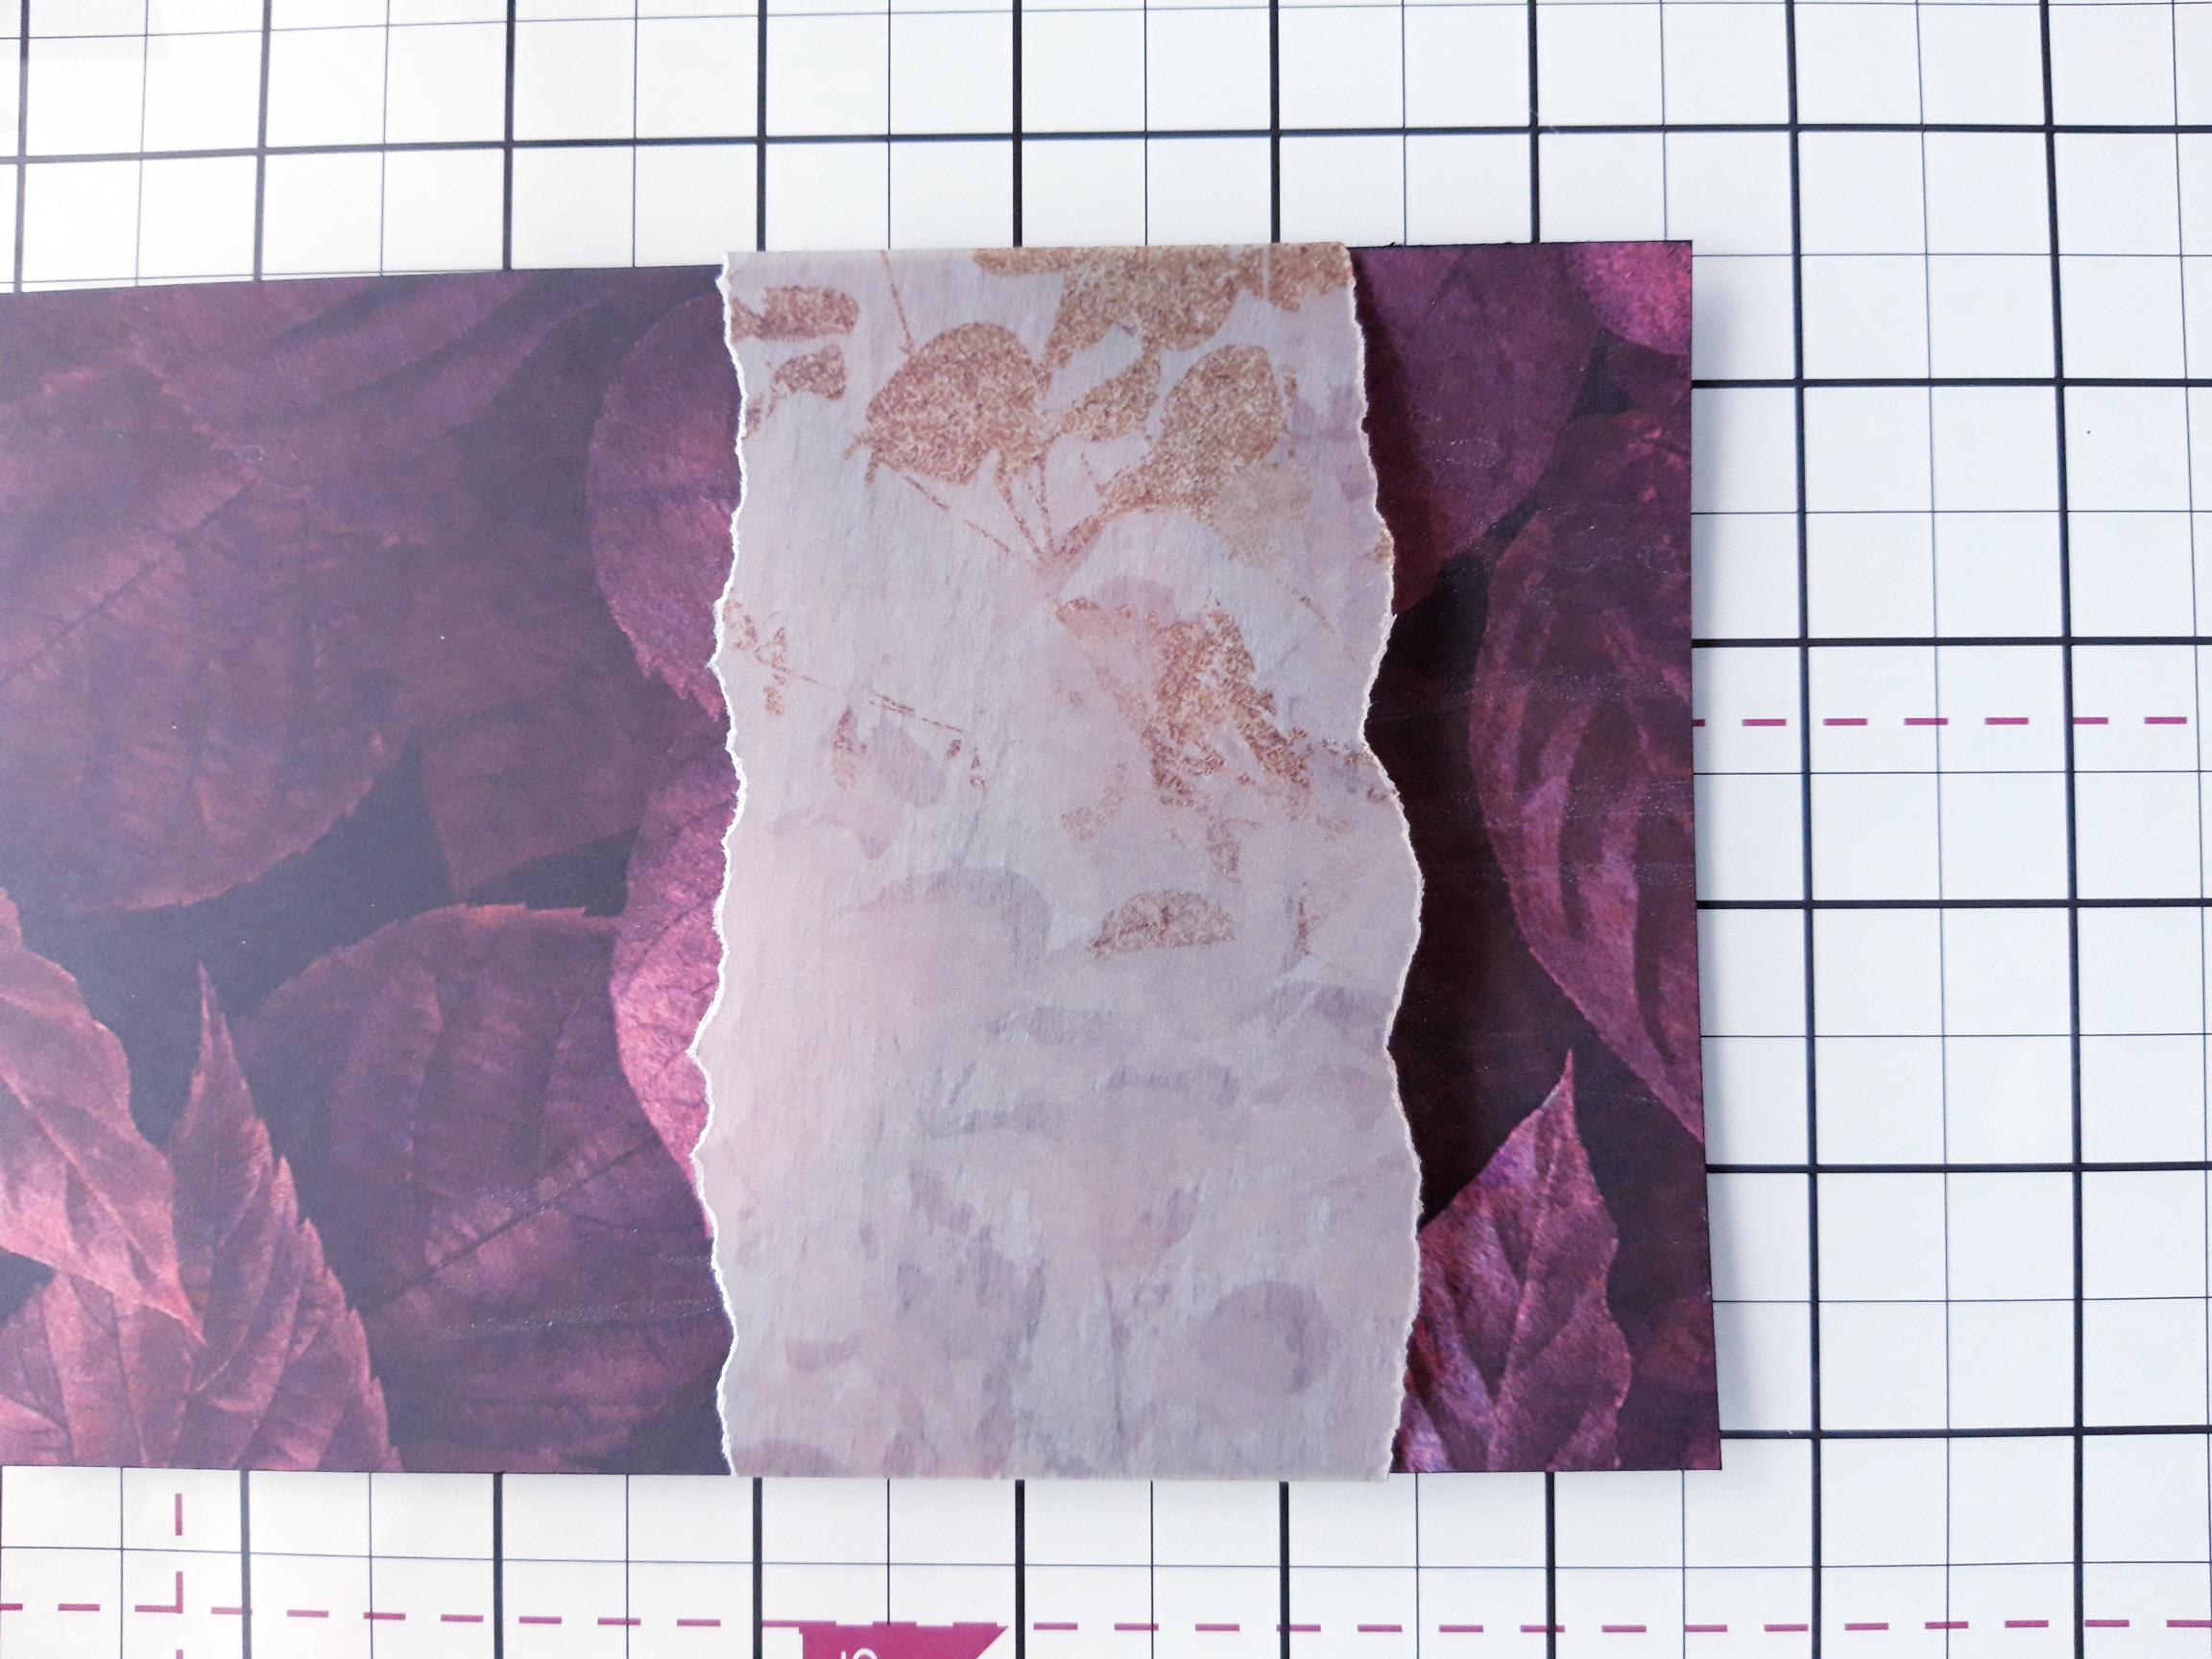
Trim this decorative paper, from the Secret Forest paper pack, to 6 1/2 x 4 1/2". Place the wider of the two vellum strips across the lower half of the paper, fold the sides over and secure on the reverse, with double sided adhesive tape. |
|
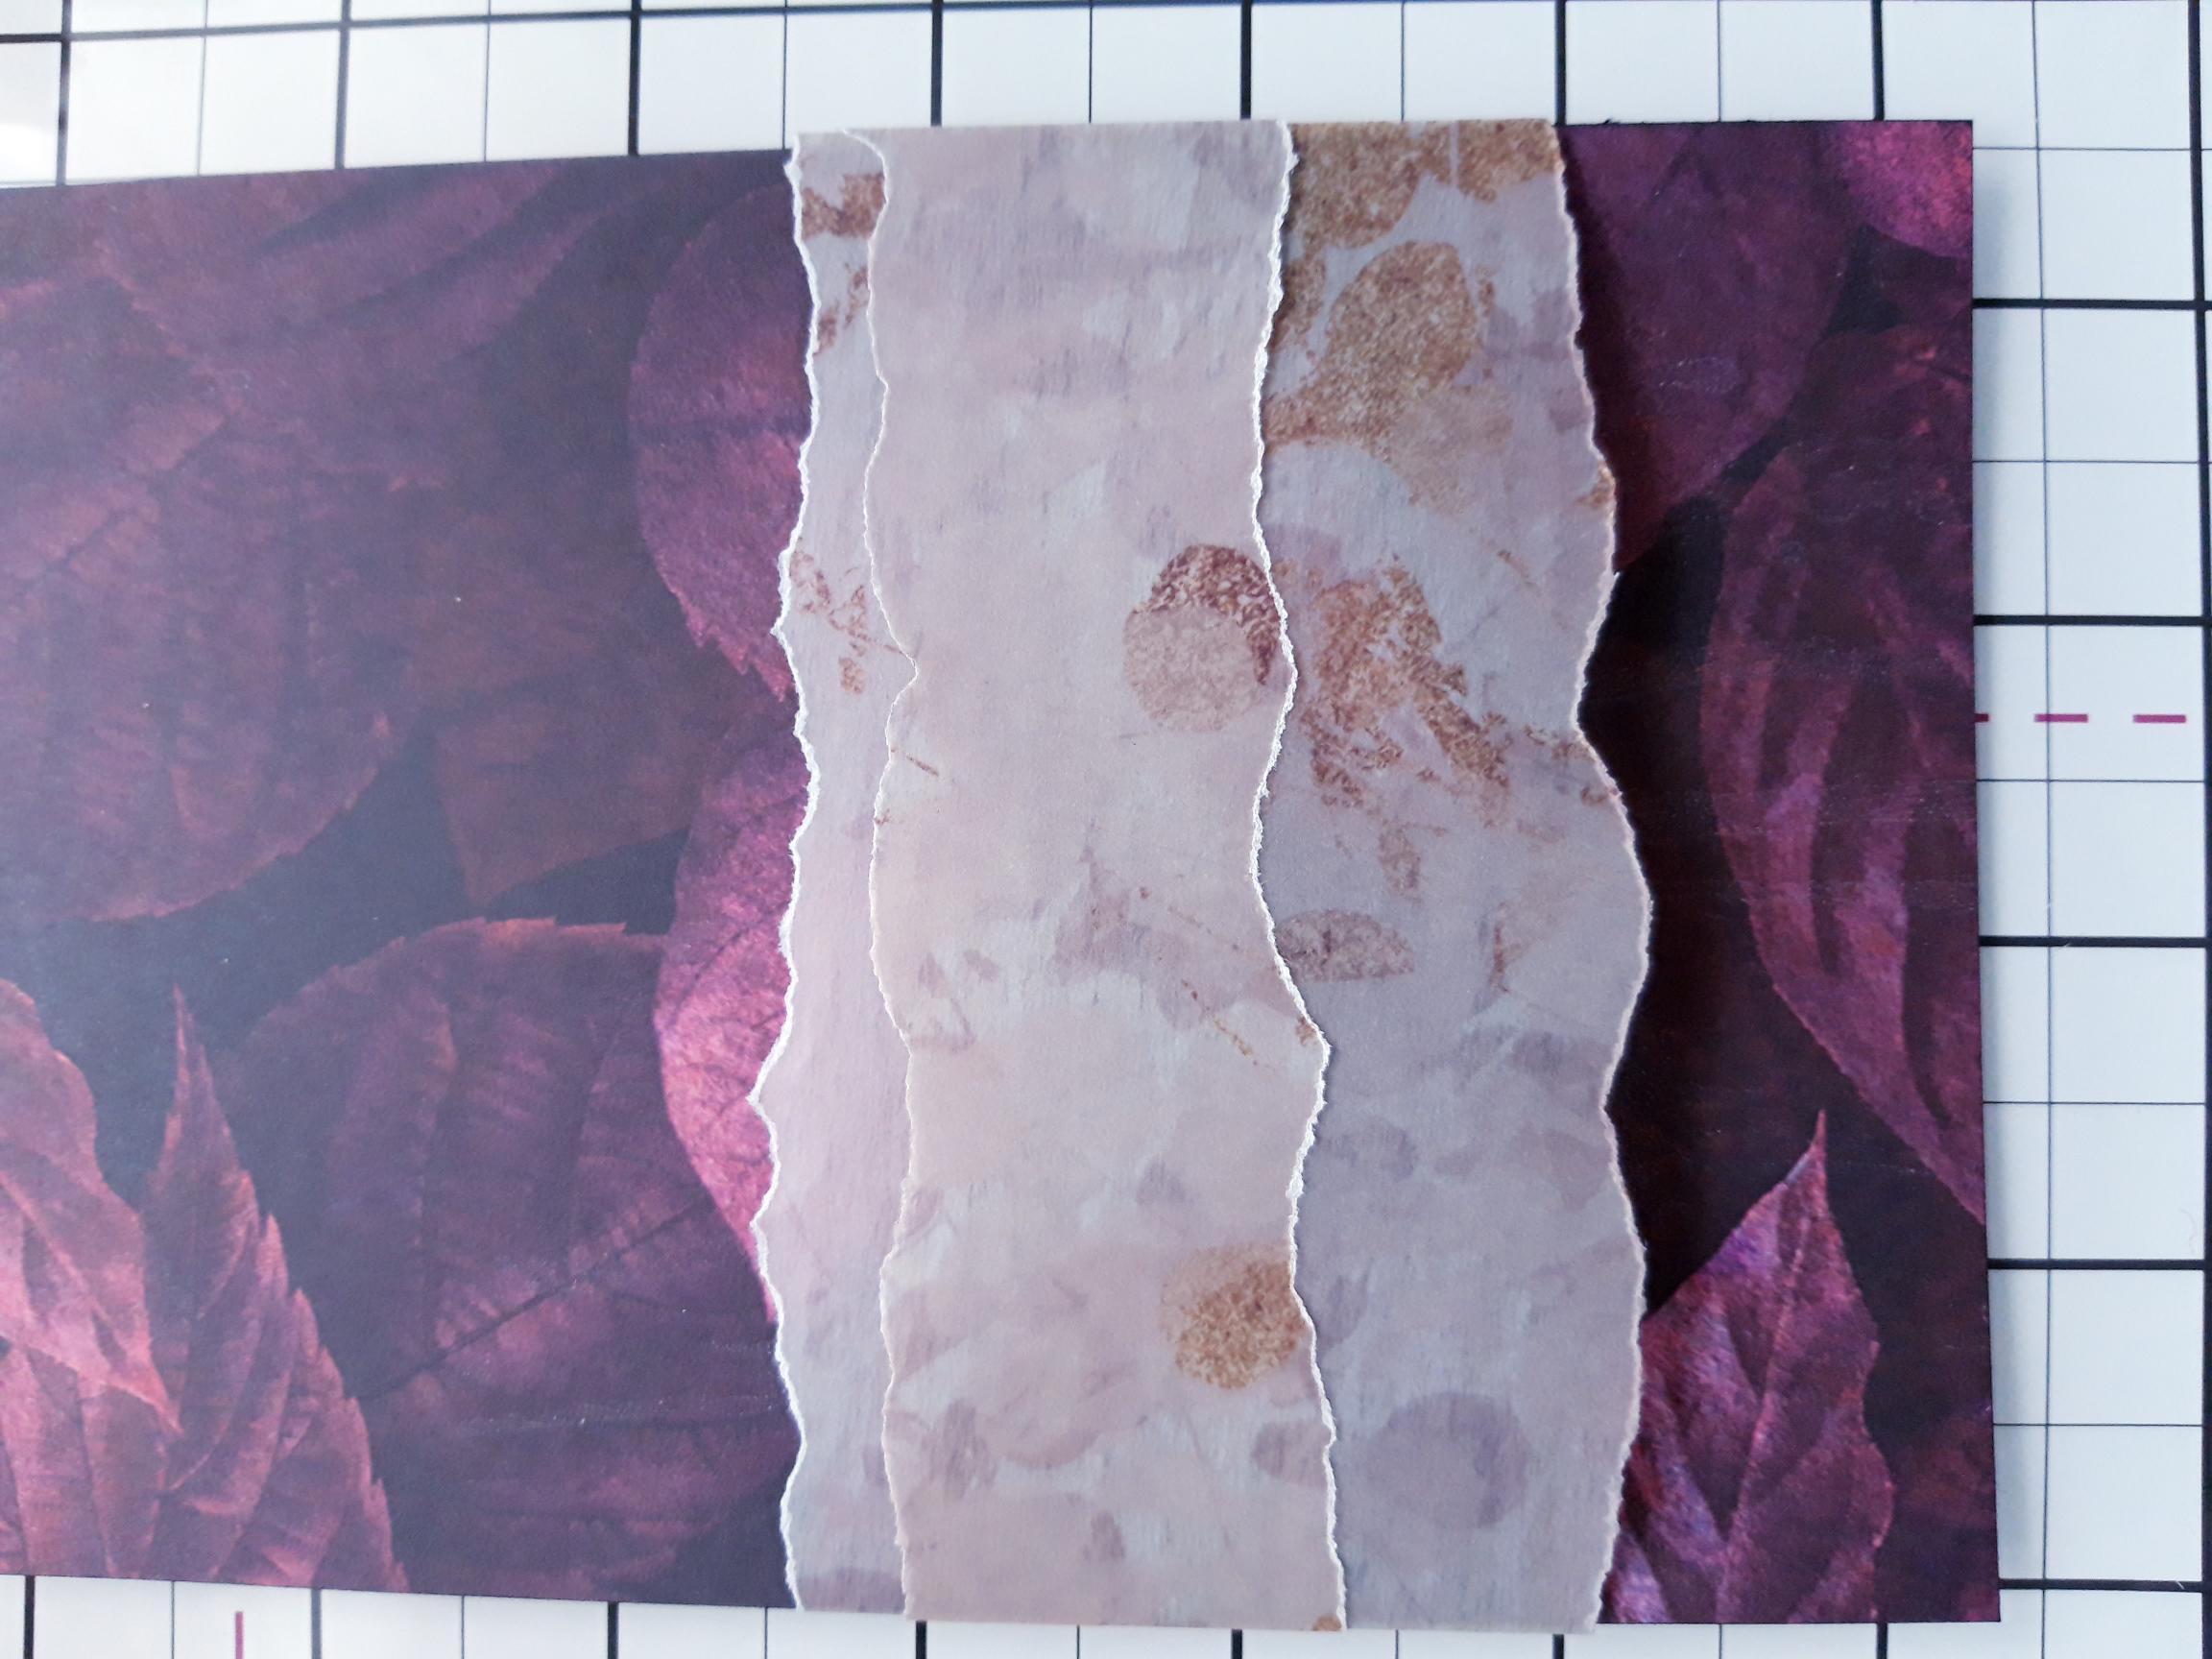
Wrap the narrower strip of vellum across the top of the first and secure on the reverse, as before. |
|
Adhere this to the black card, trimmed to 6 3/4 x 4 3/4". |
|
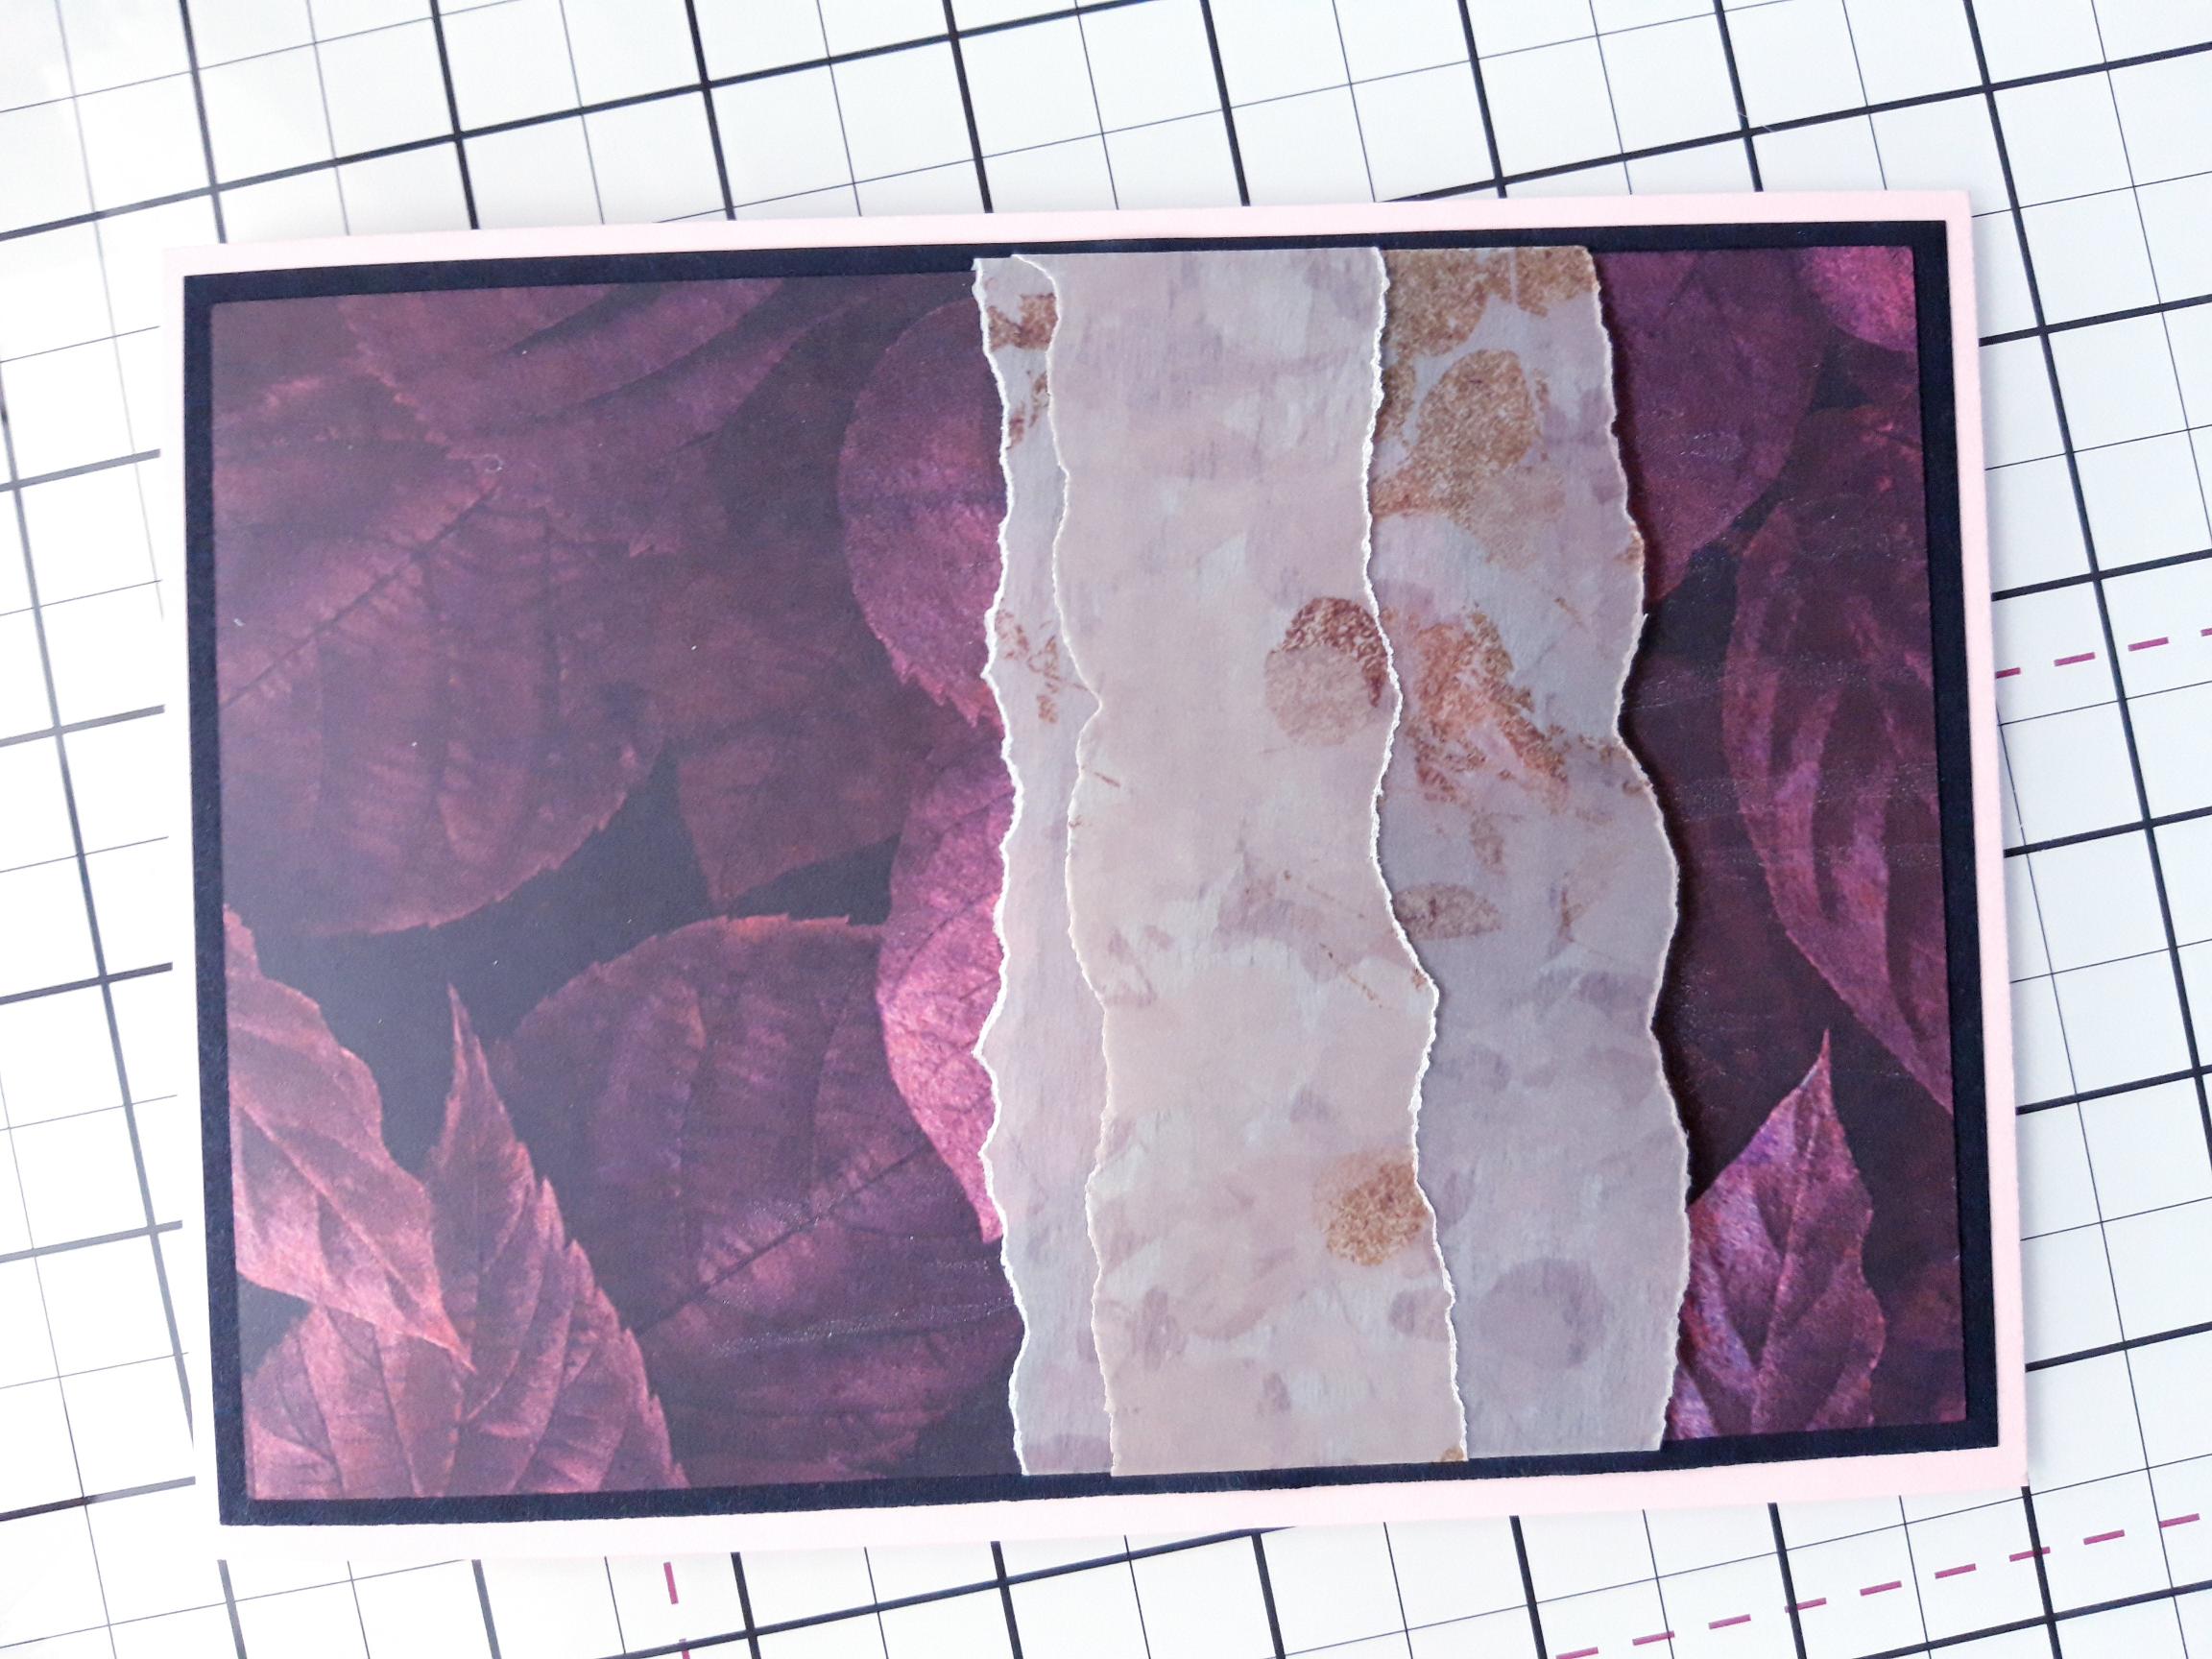
Adhere to the front of your pink card blank and set to one side. |
|
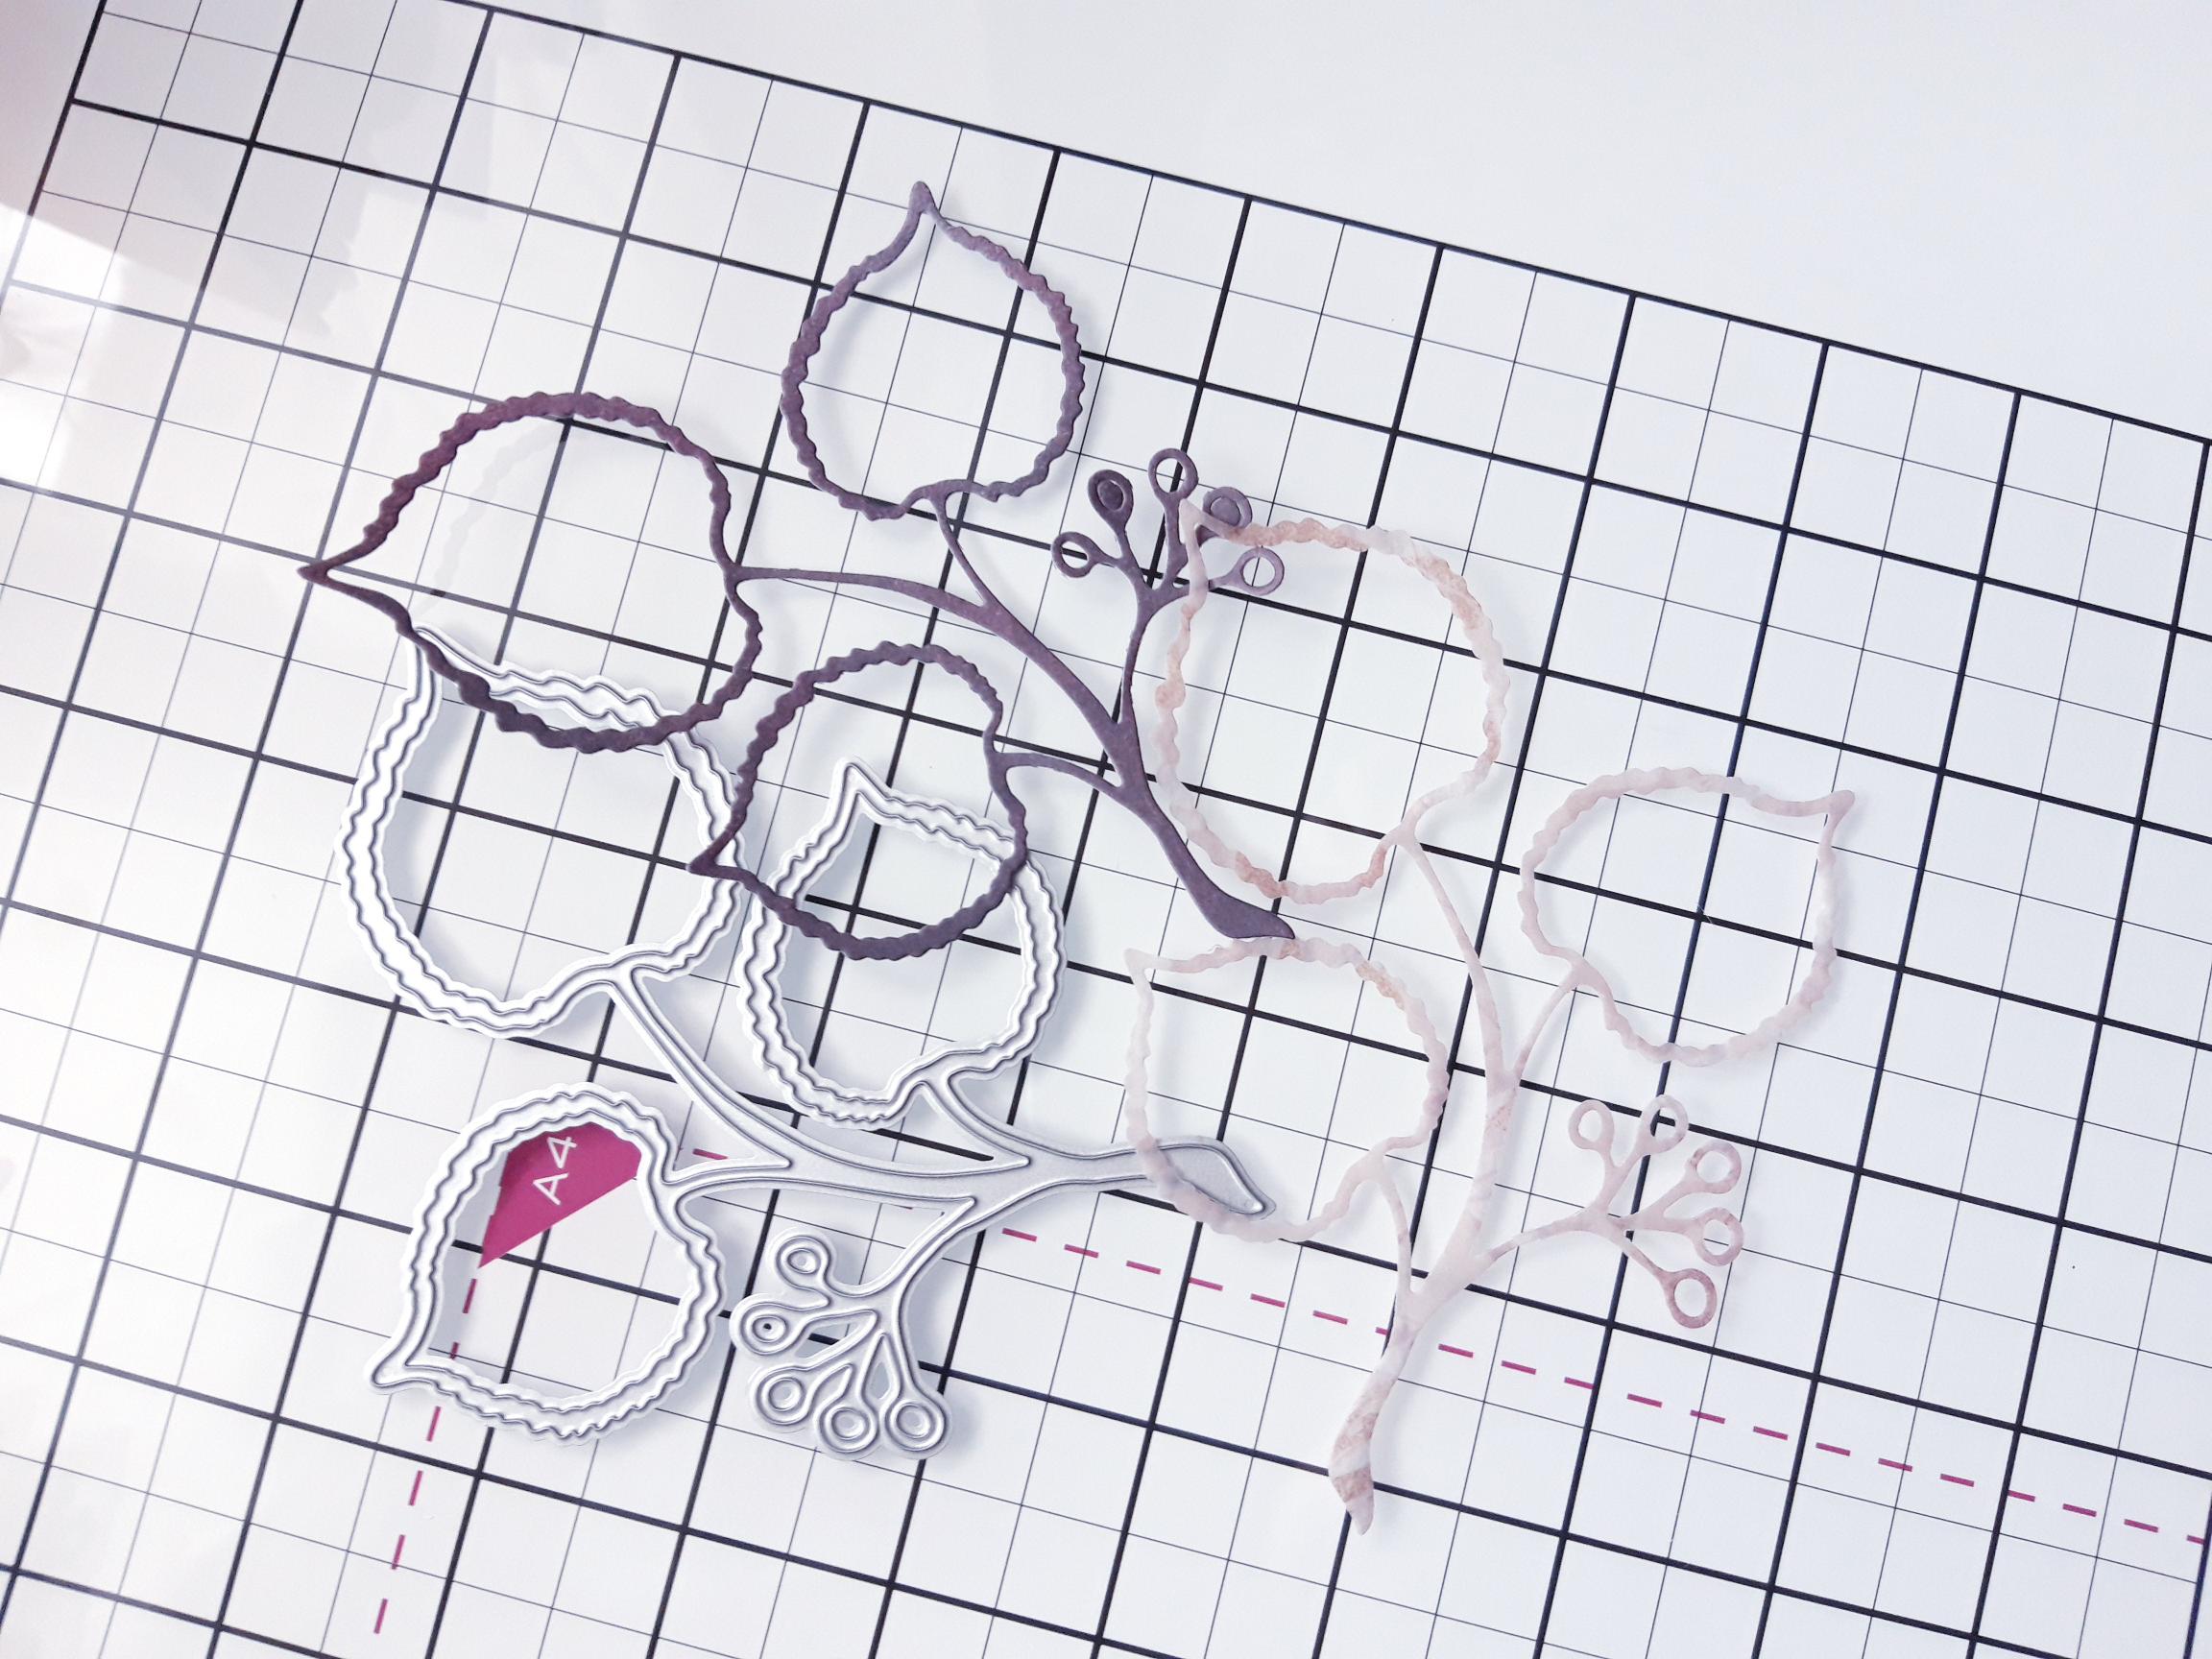
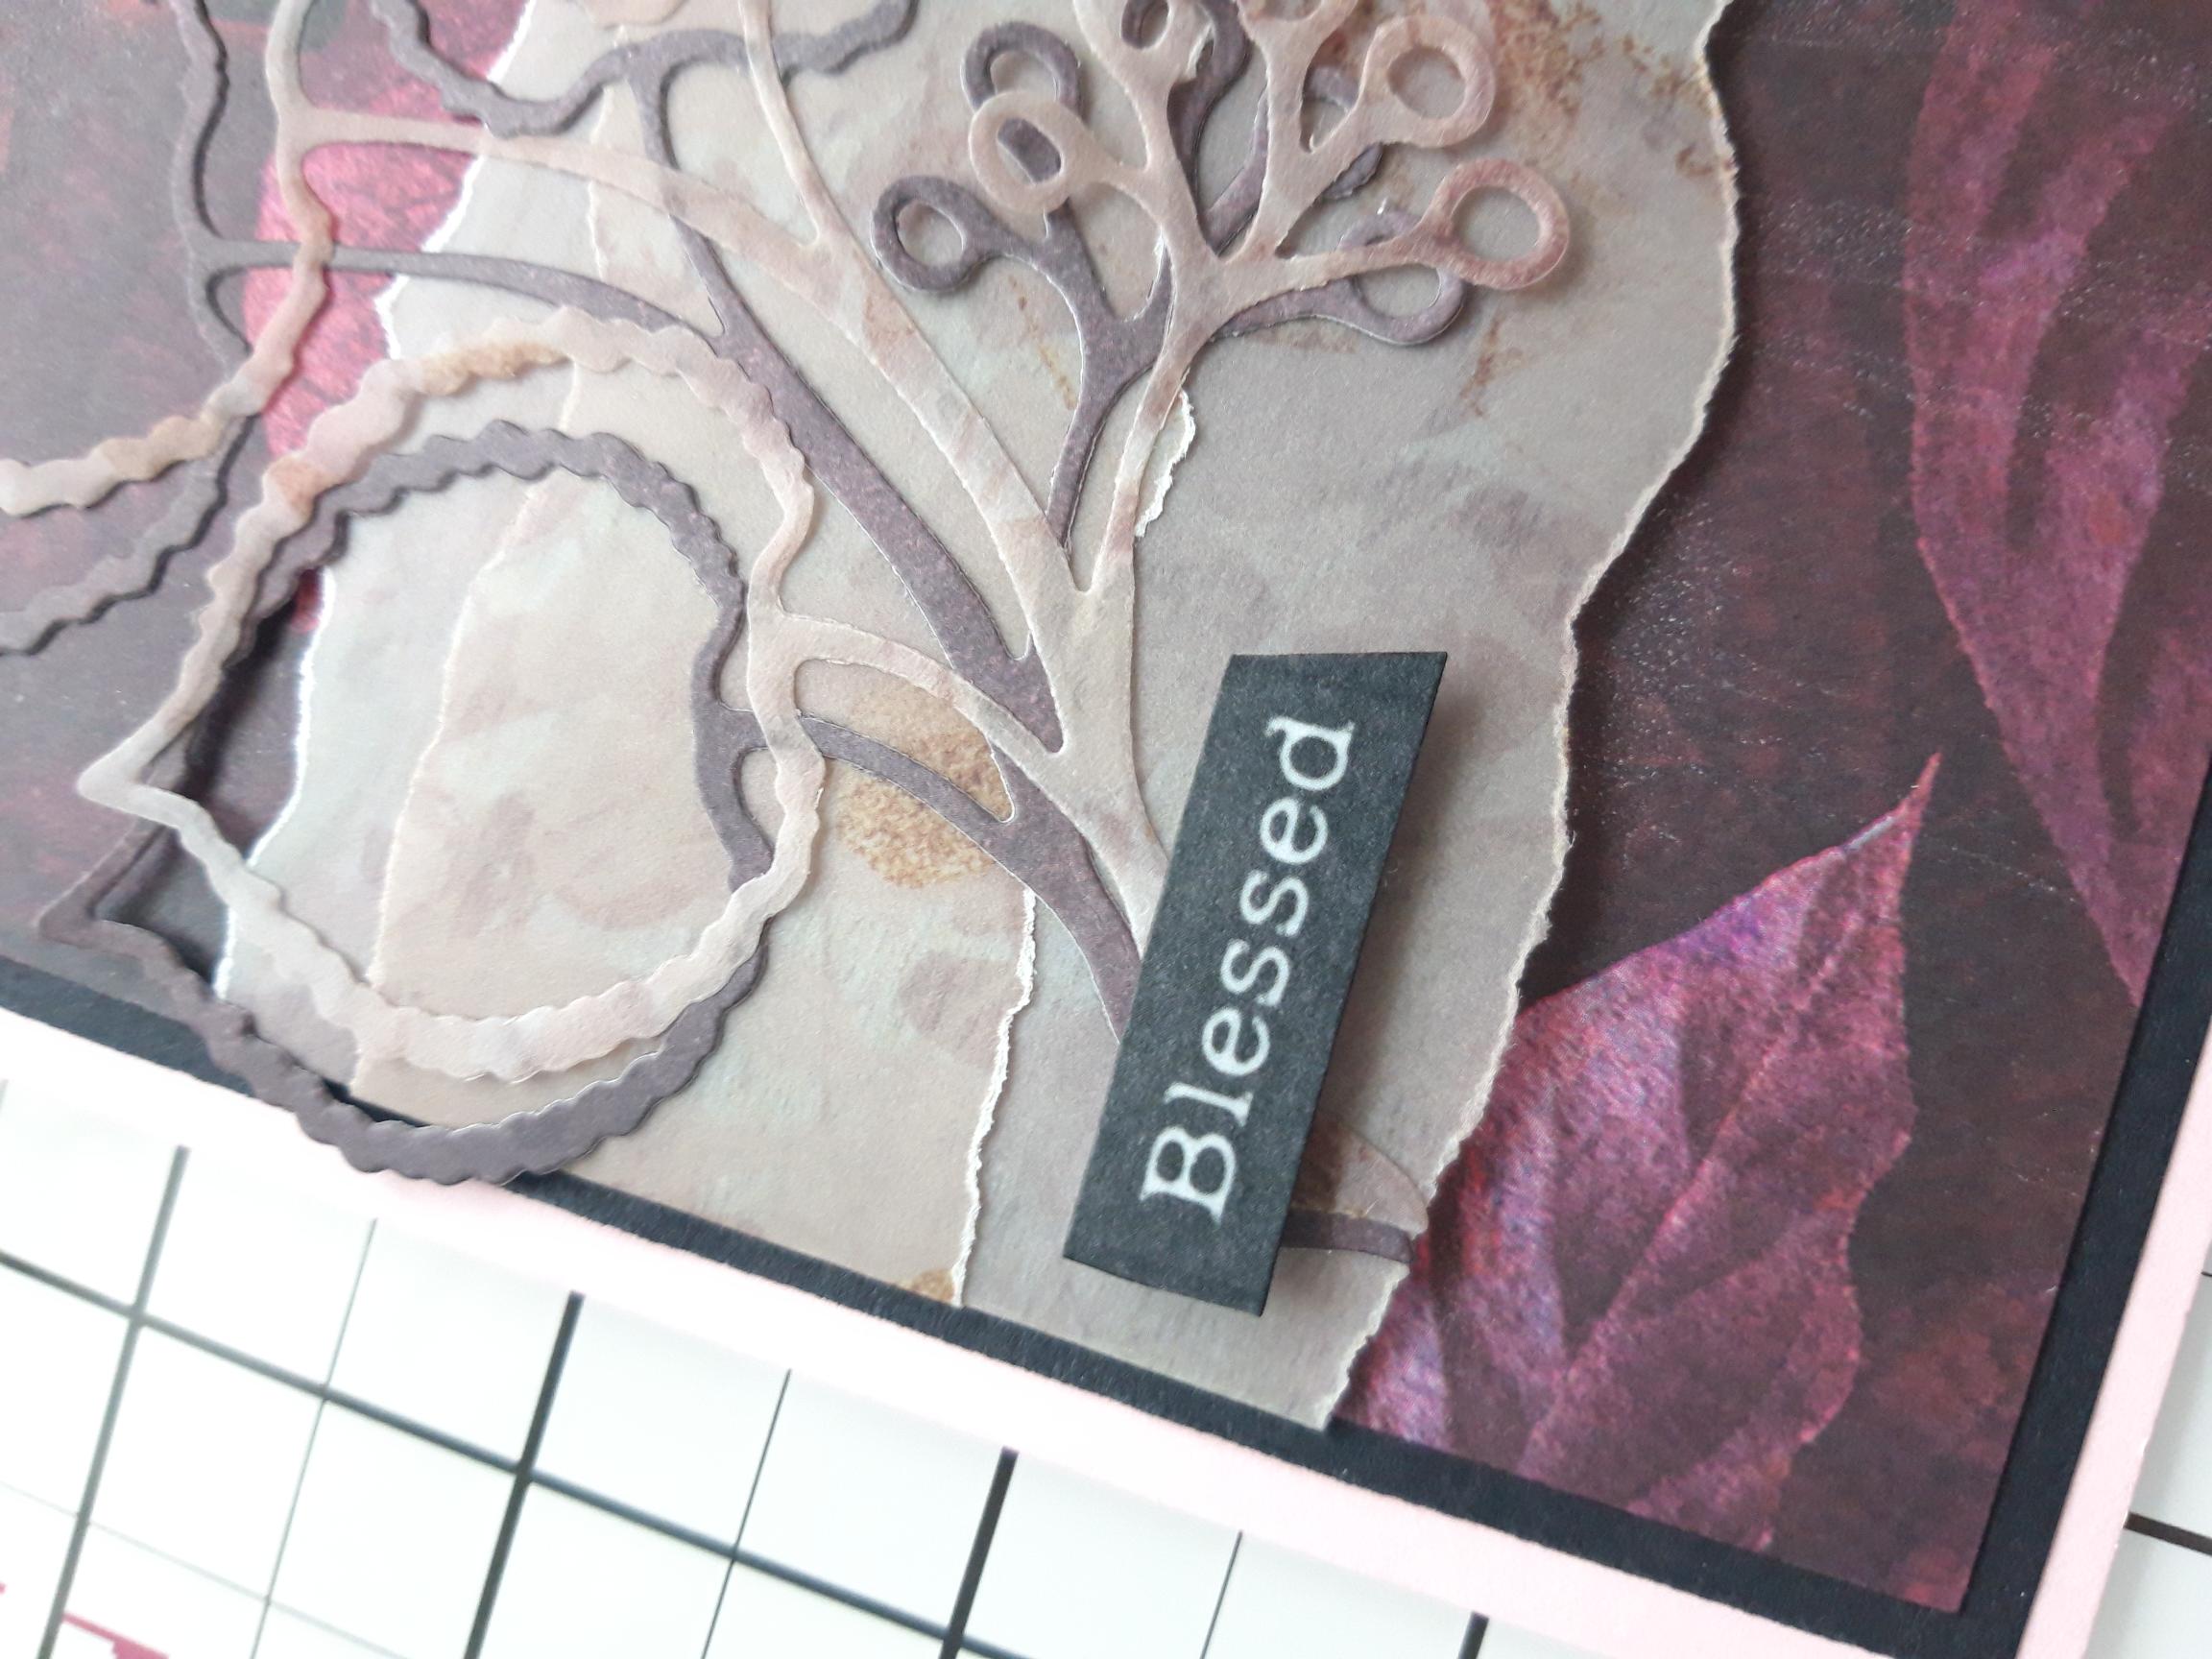
Using the Lime die, cut one from a decorative paper and one from vellum. |
|
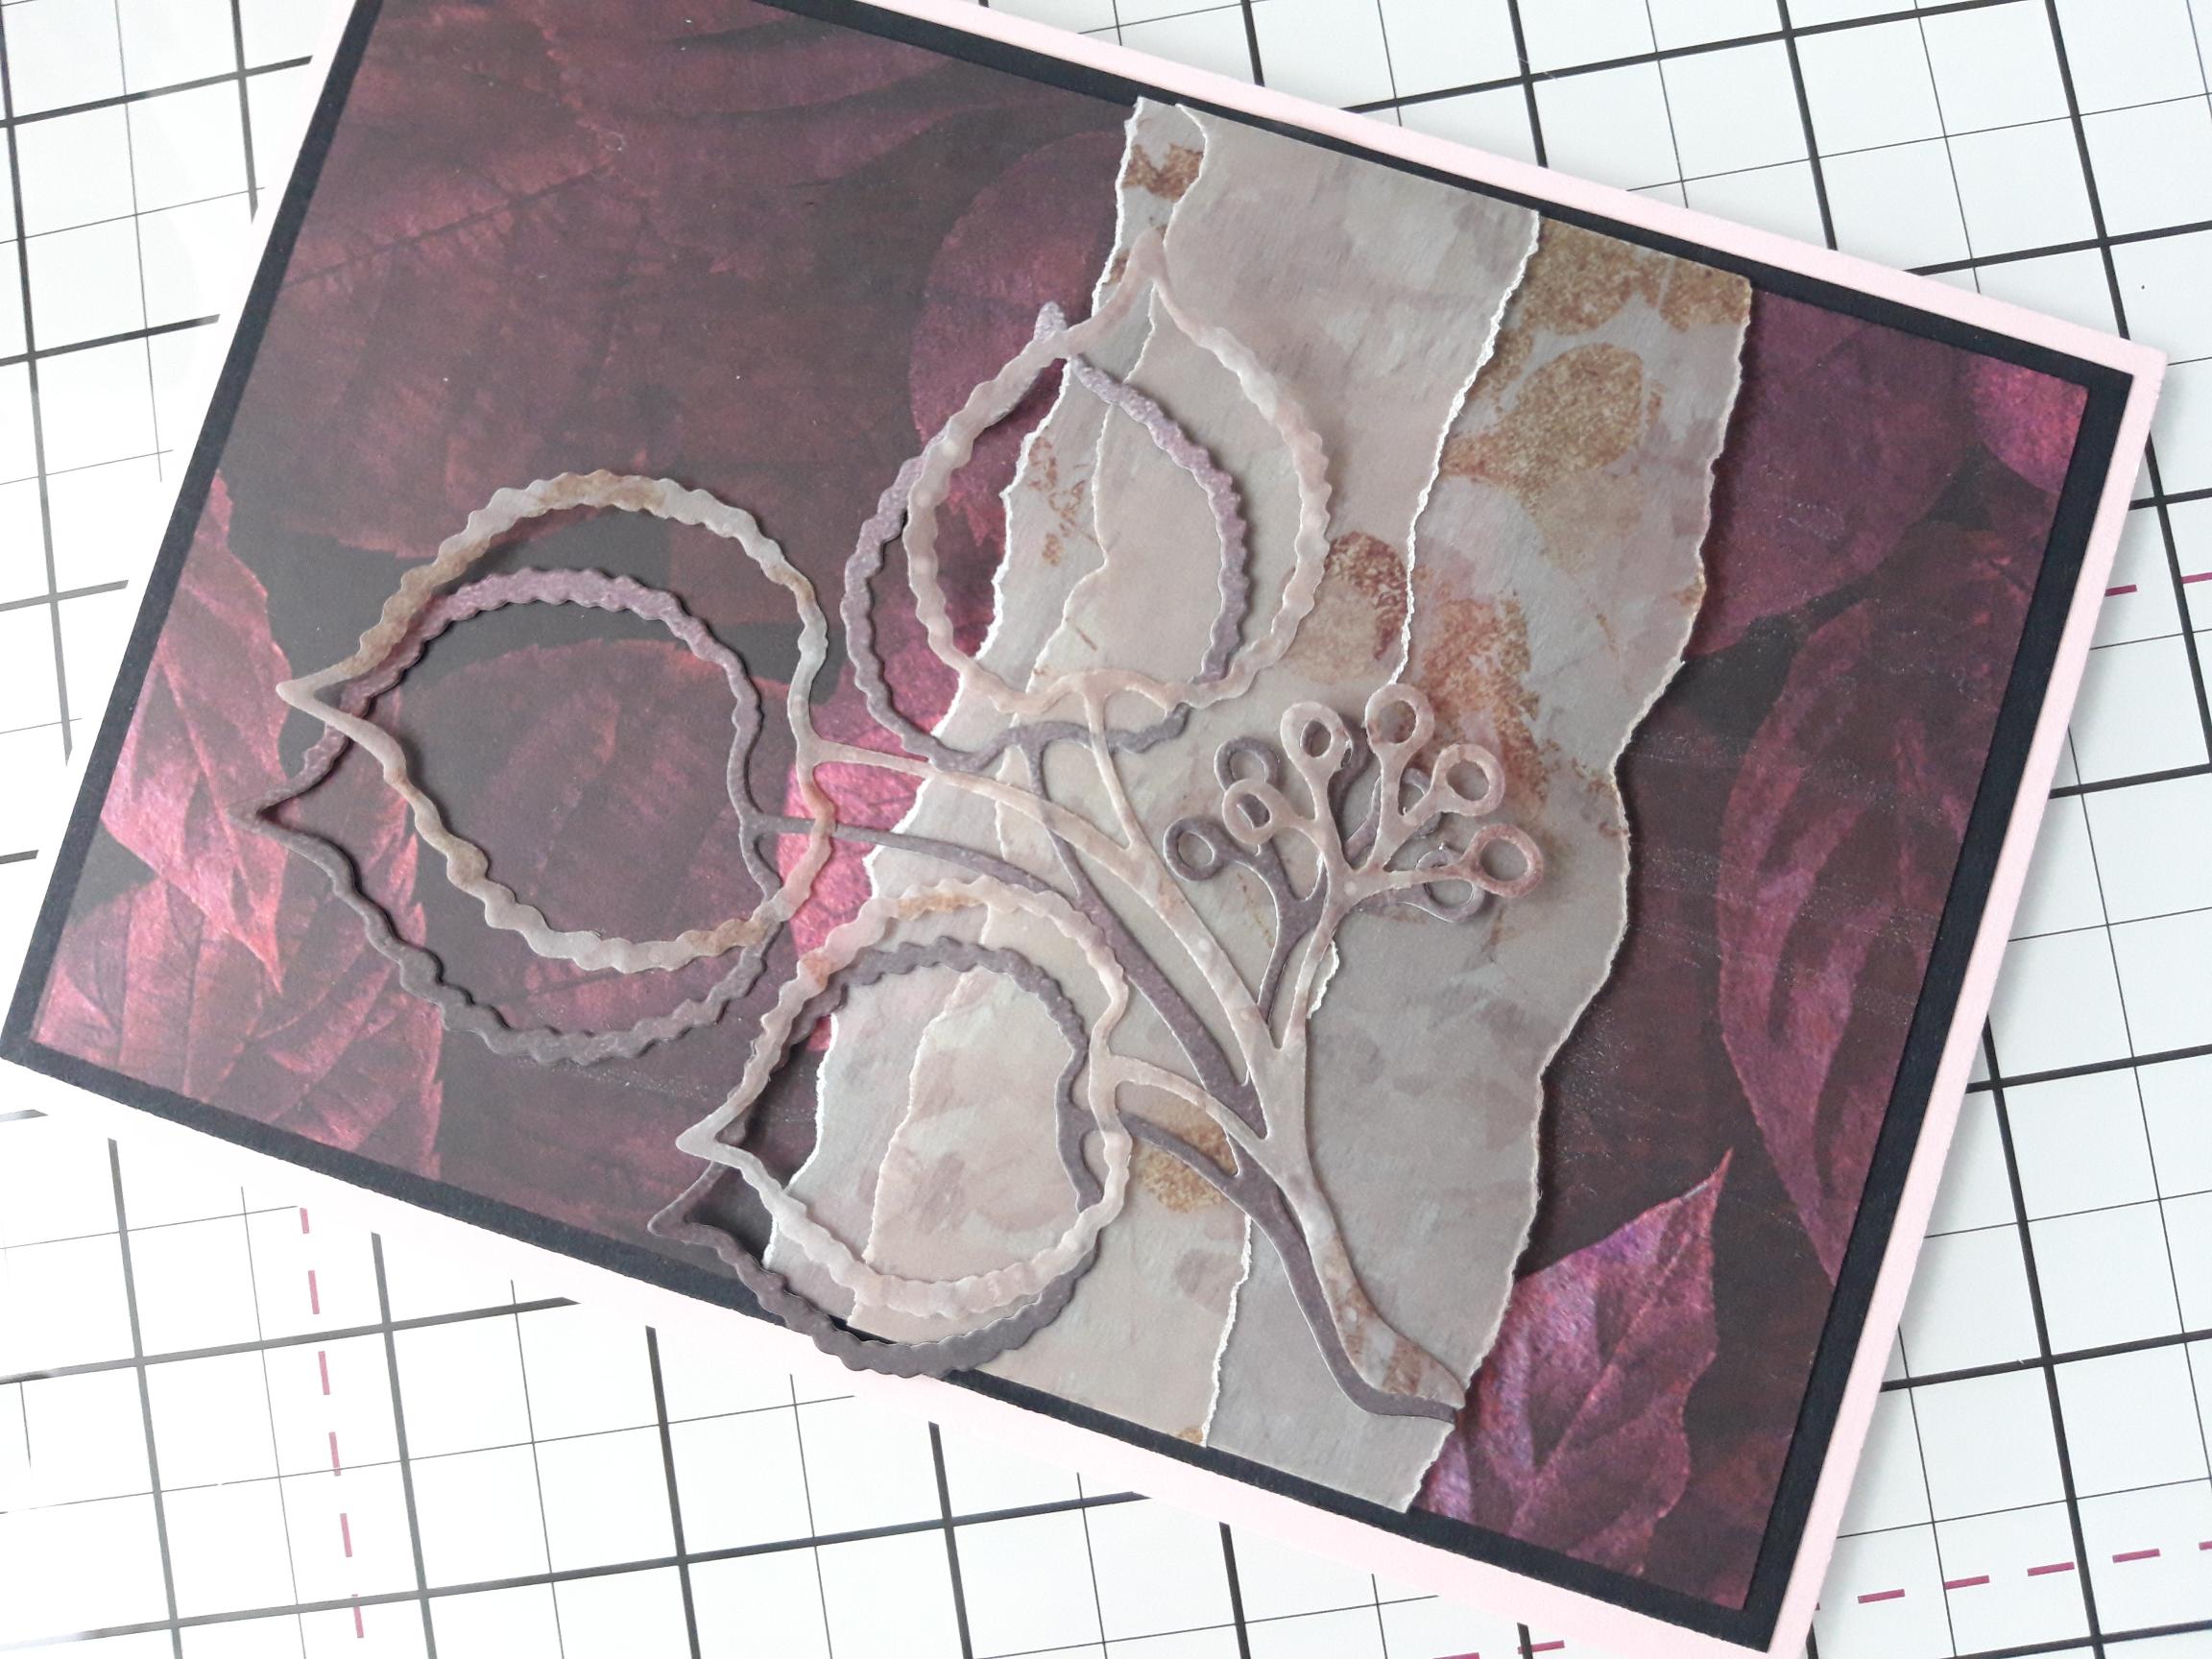
Adhere the Lime paper die cut across your vellum panels and then the vellum die cut on top, slightly offset. |
|
Cut a sentiment from the Funky Fossil washi tape and adhere to a scrap piece of white card, before trimming around it. |
|
Adhere across the stem of your 3D elements, with a foam pad. |
|
To finish, add a few Funky Fossil gold enamel dots, around your 3D elements. |