Give your friends $10 off their first order!
Refer a FRIEND


WHAT YOU WILL NEED:
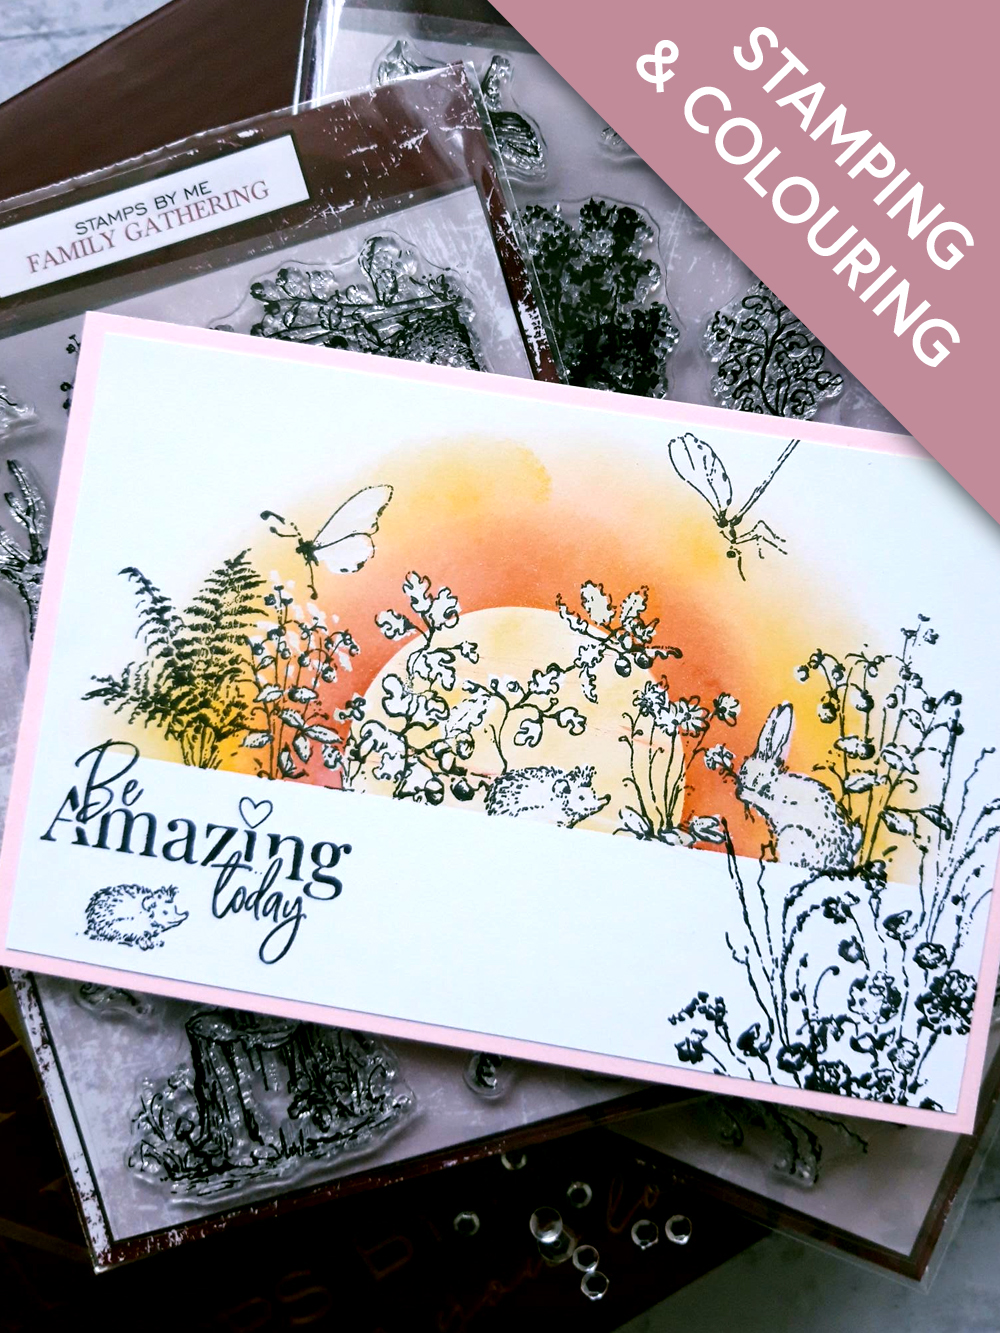
Pink landscape card blank 6 x 4"
White card 5 3/4 x 3 3/4"
Pretty Things Inside Family Gathering A6 stamp set
Pretty Things Inside Under The Tree A6 stamp set
Pretty Things Inside Say It With Love A6 stamp set
Pretty Things Inside Love & Hope A5 stamp set
SBM Hybrid Ink Pad: Midnight
SBM Premium Dye Ink Pad: Sherbet, Bittersweet, Redwood
Blending tool
Masking tape
Circle mask (approx 2" diameter)
Paint brush
Eureka 101 Watercolour Tablet
SBM Magnetic glass mat
Paper Trimmer
Perfect Together Glue
Low tack tape
[click image to enlarge] 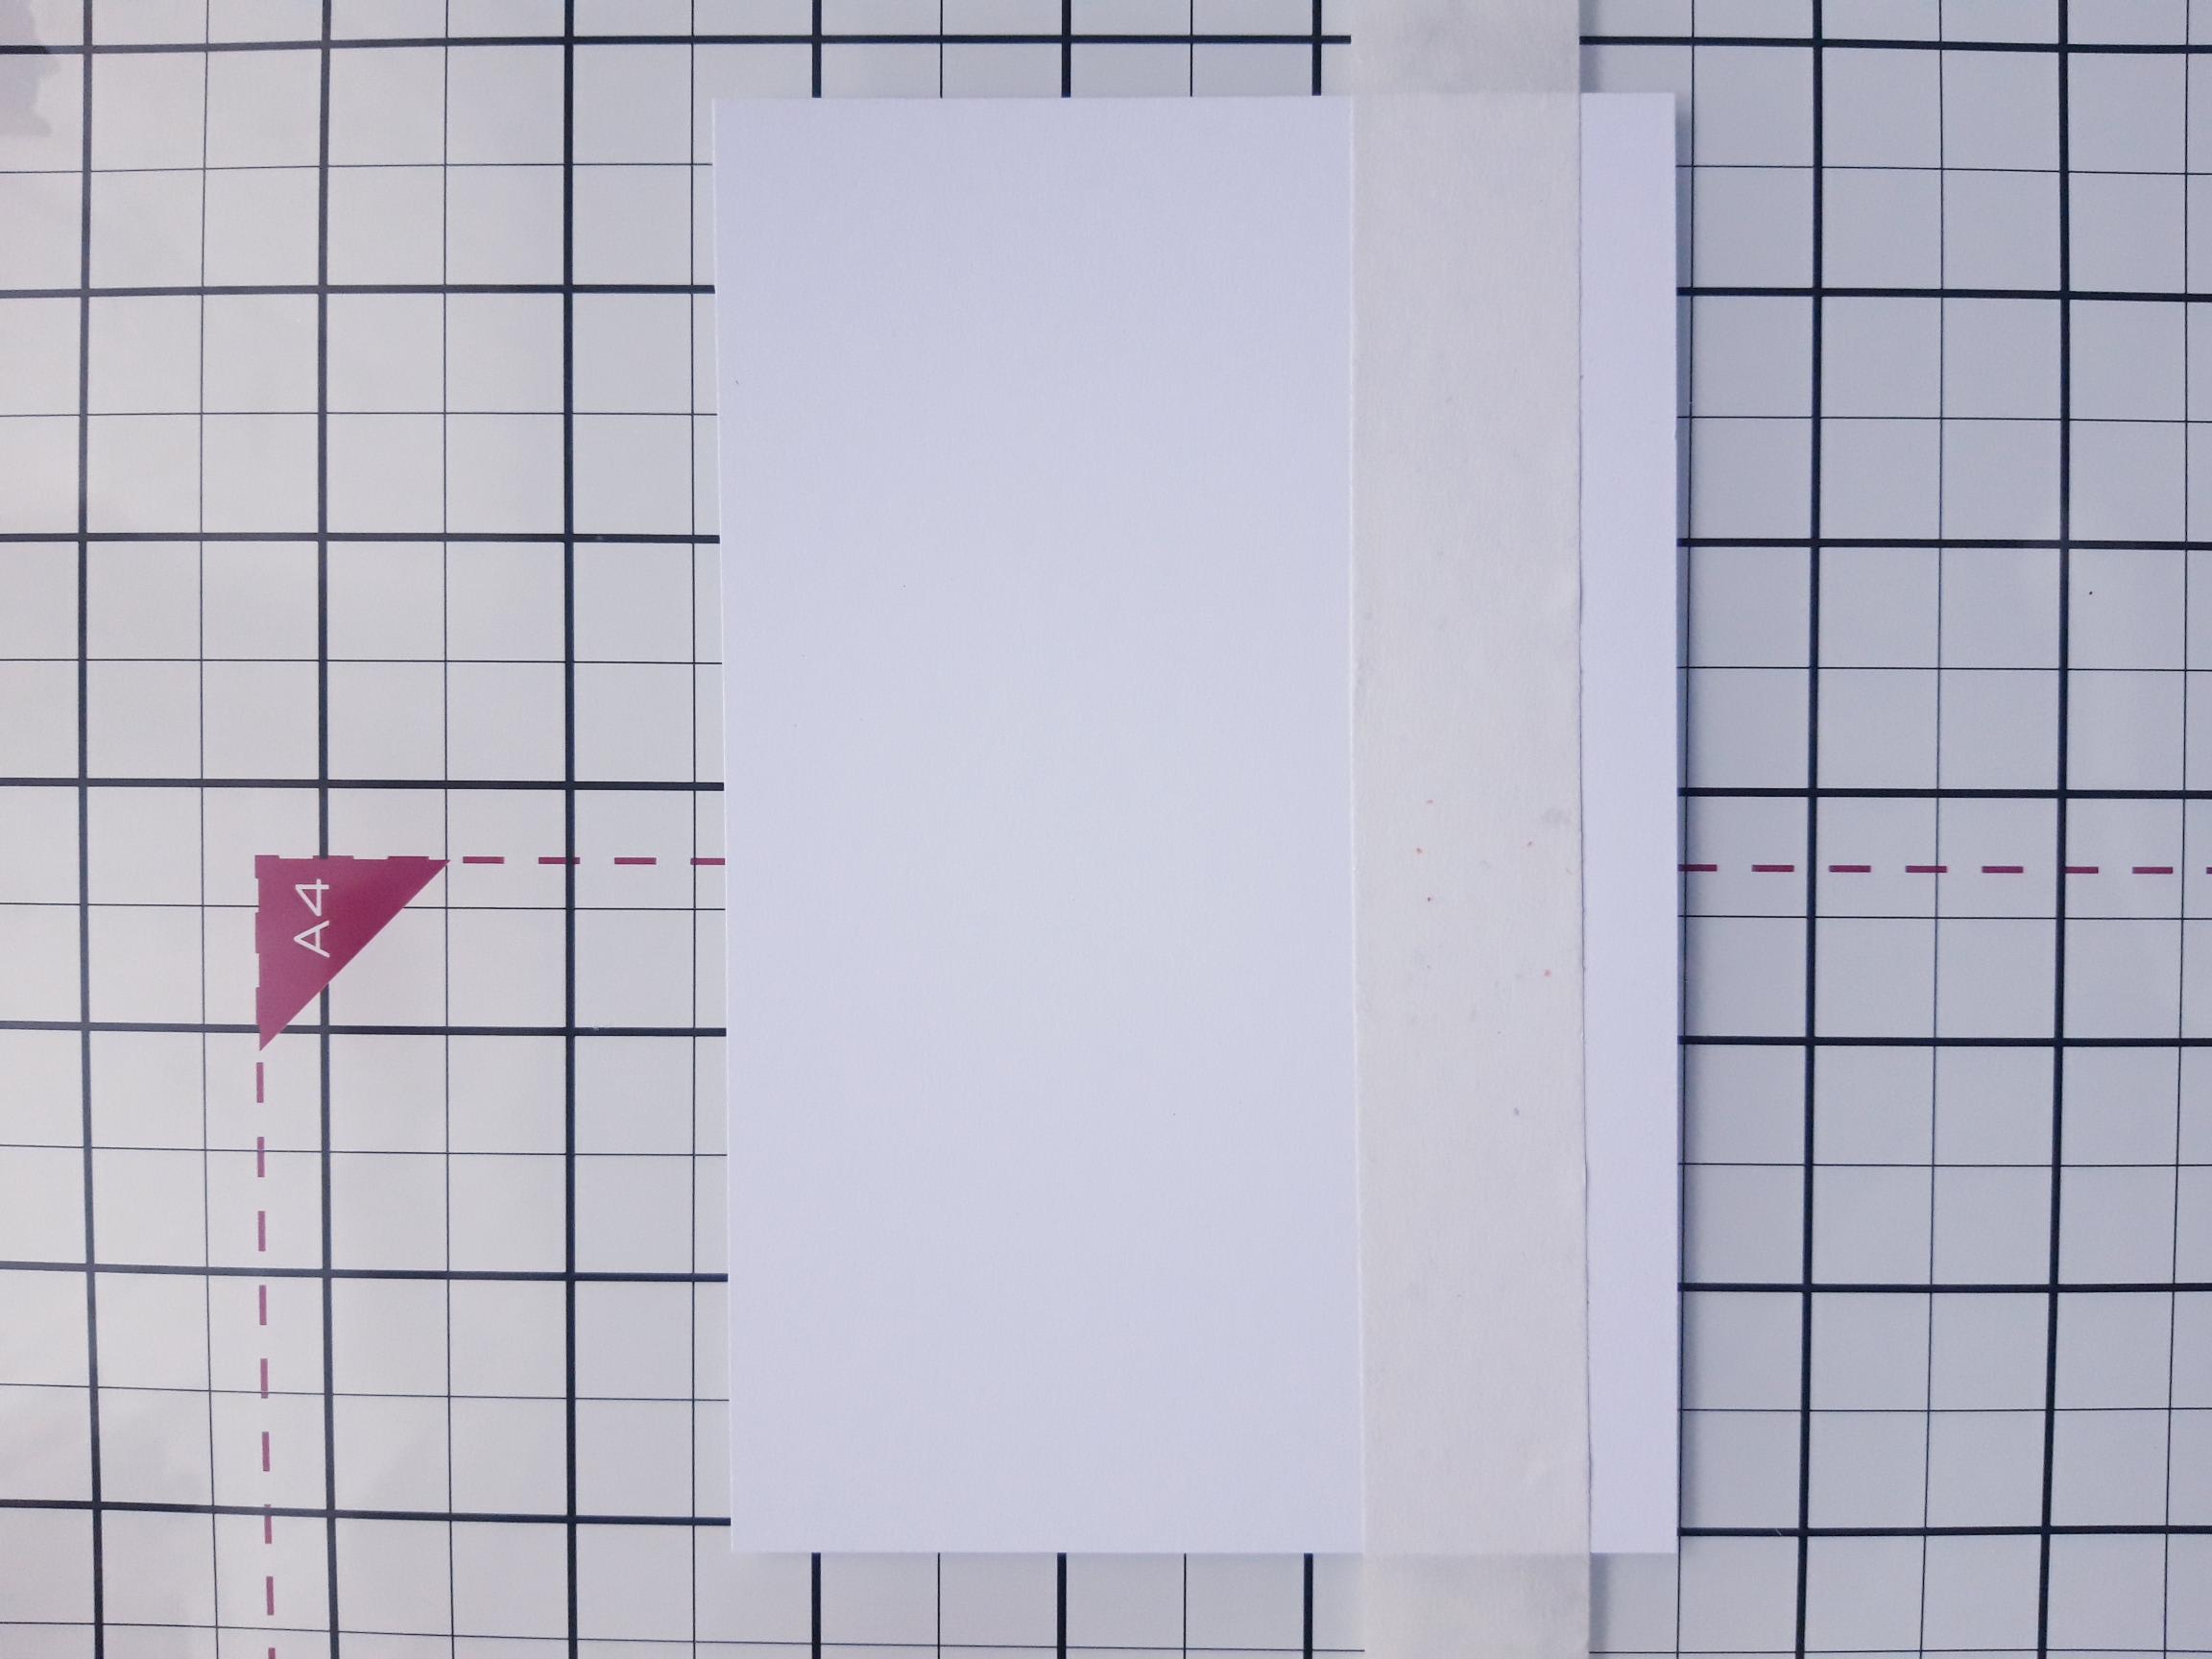
|
Apply a strip of masking tape across the lower third of the card (cut to 5 3/4 x 3 3/4"). If you don't have masking tape, use the edge of a sheet of copy paper, secured on your glass mat with the magnets. |
|
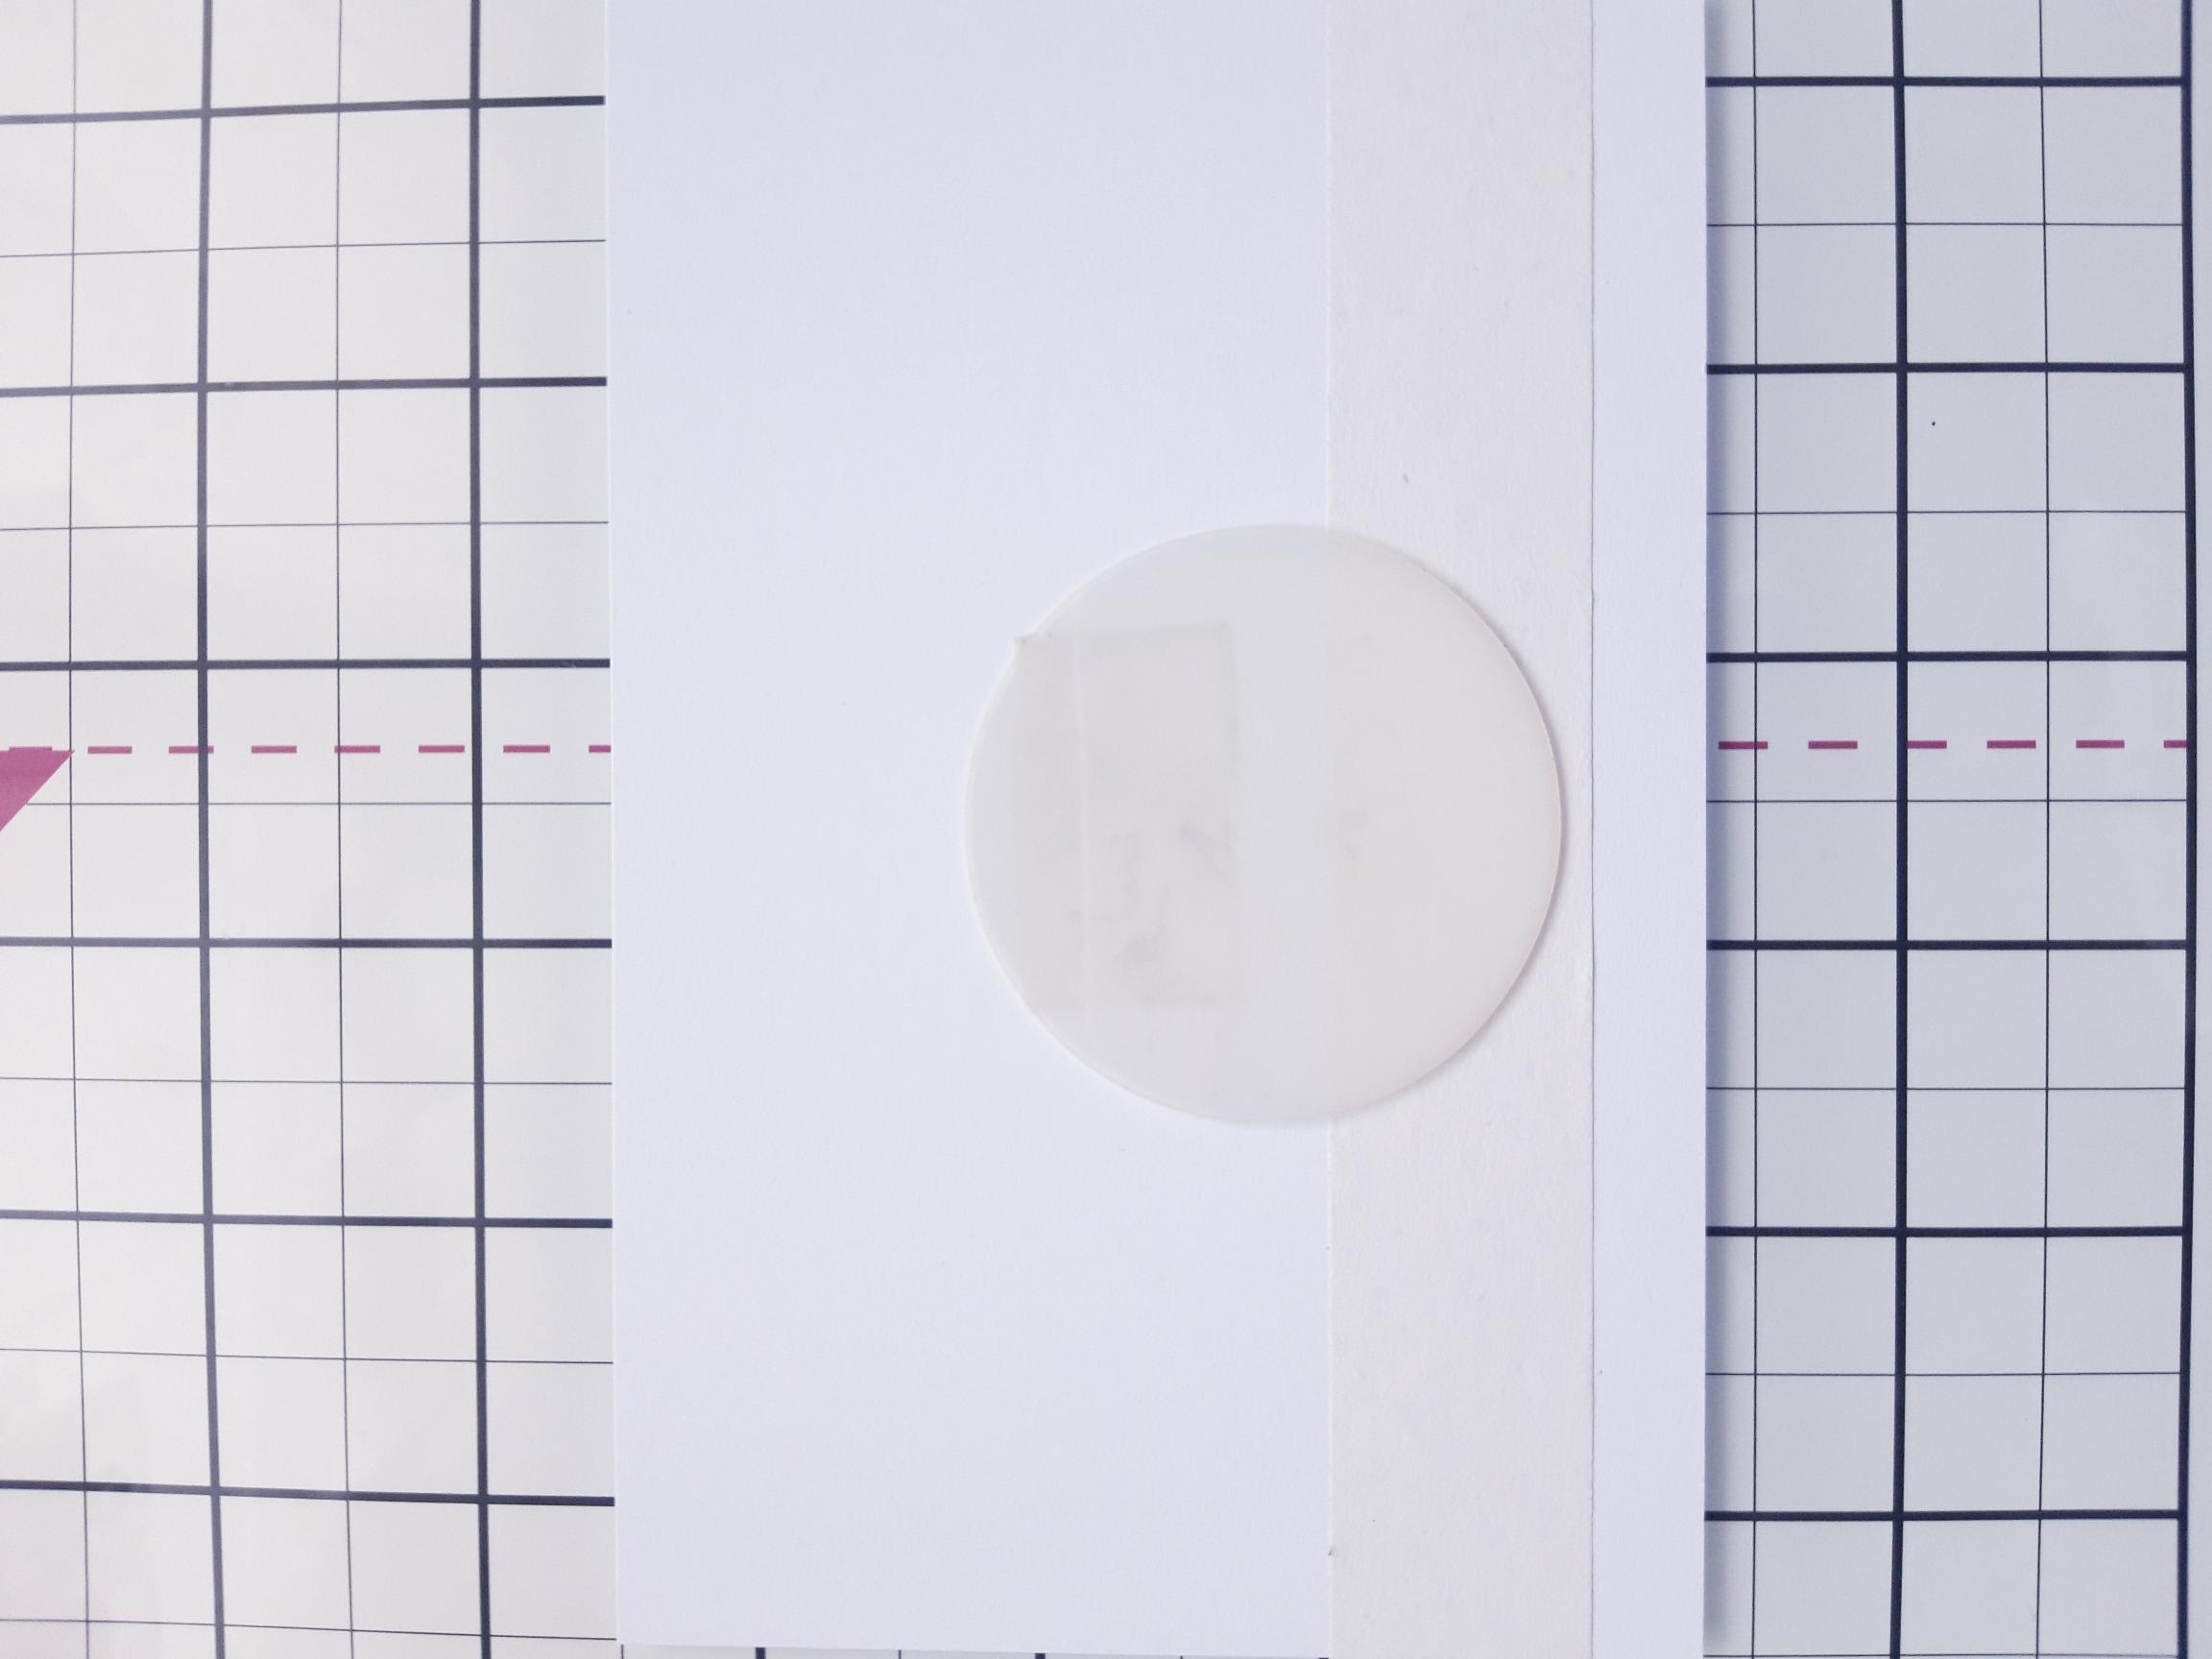
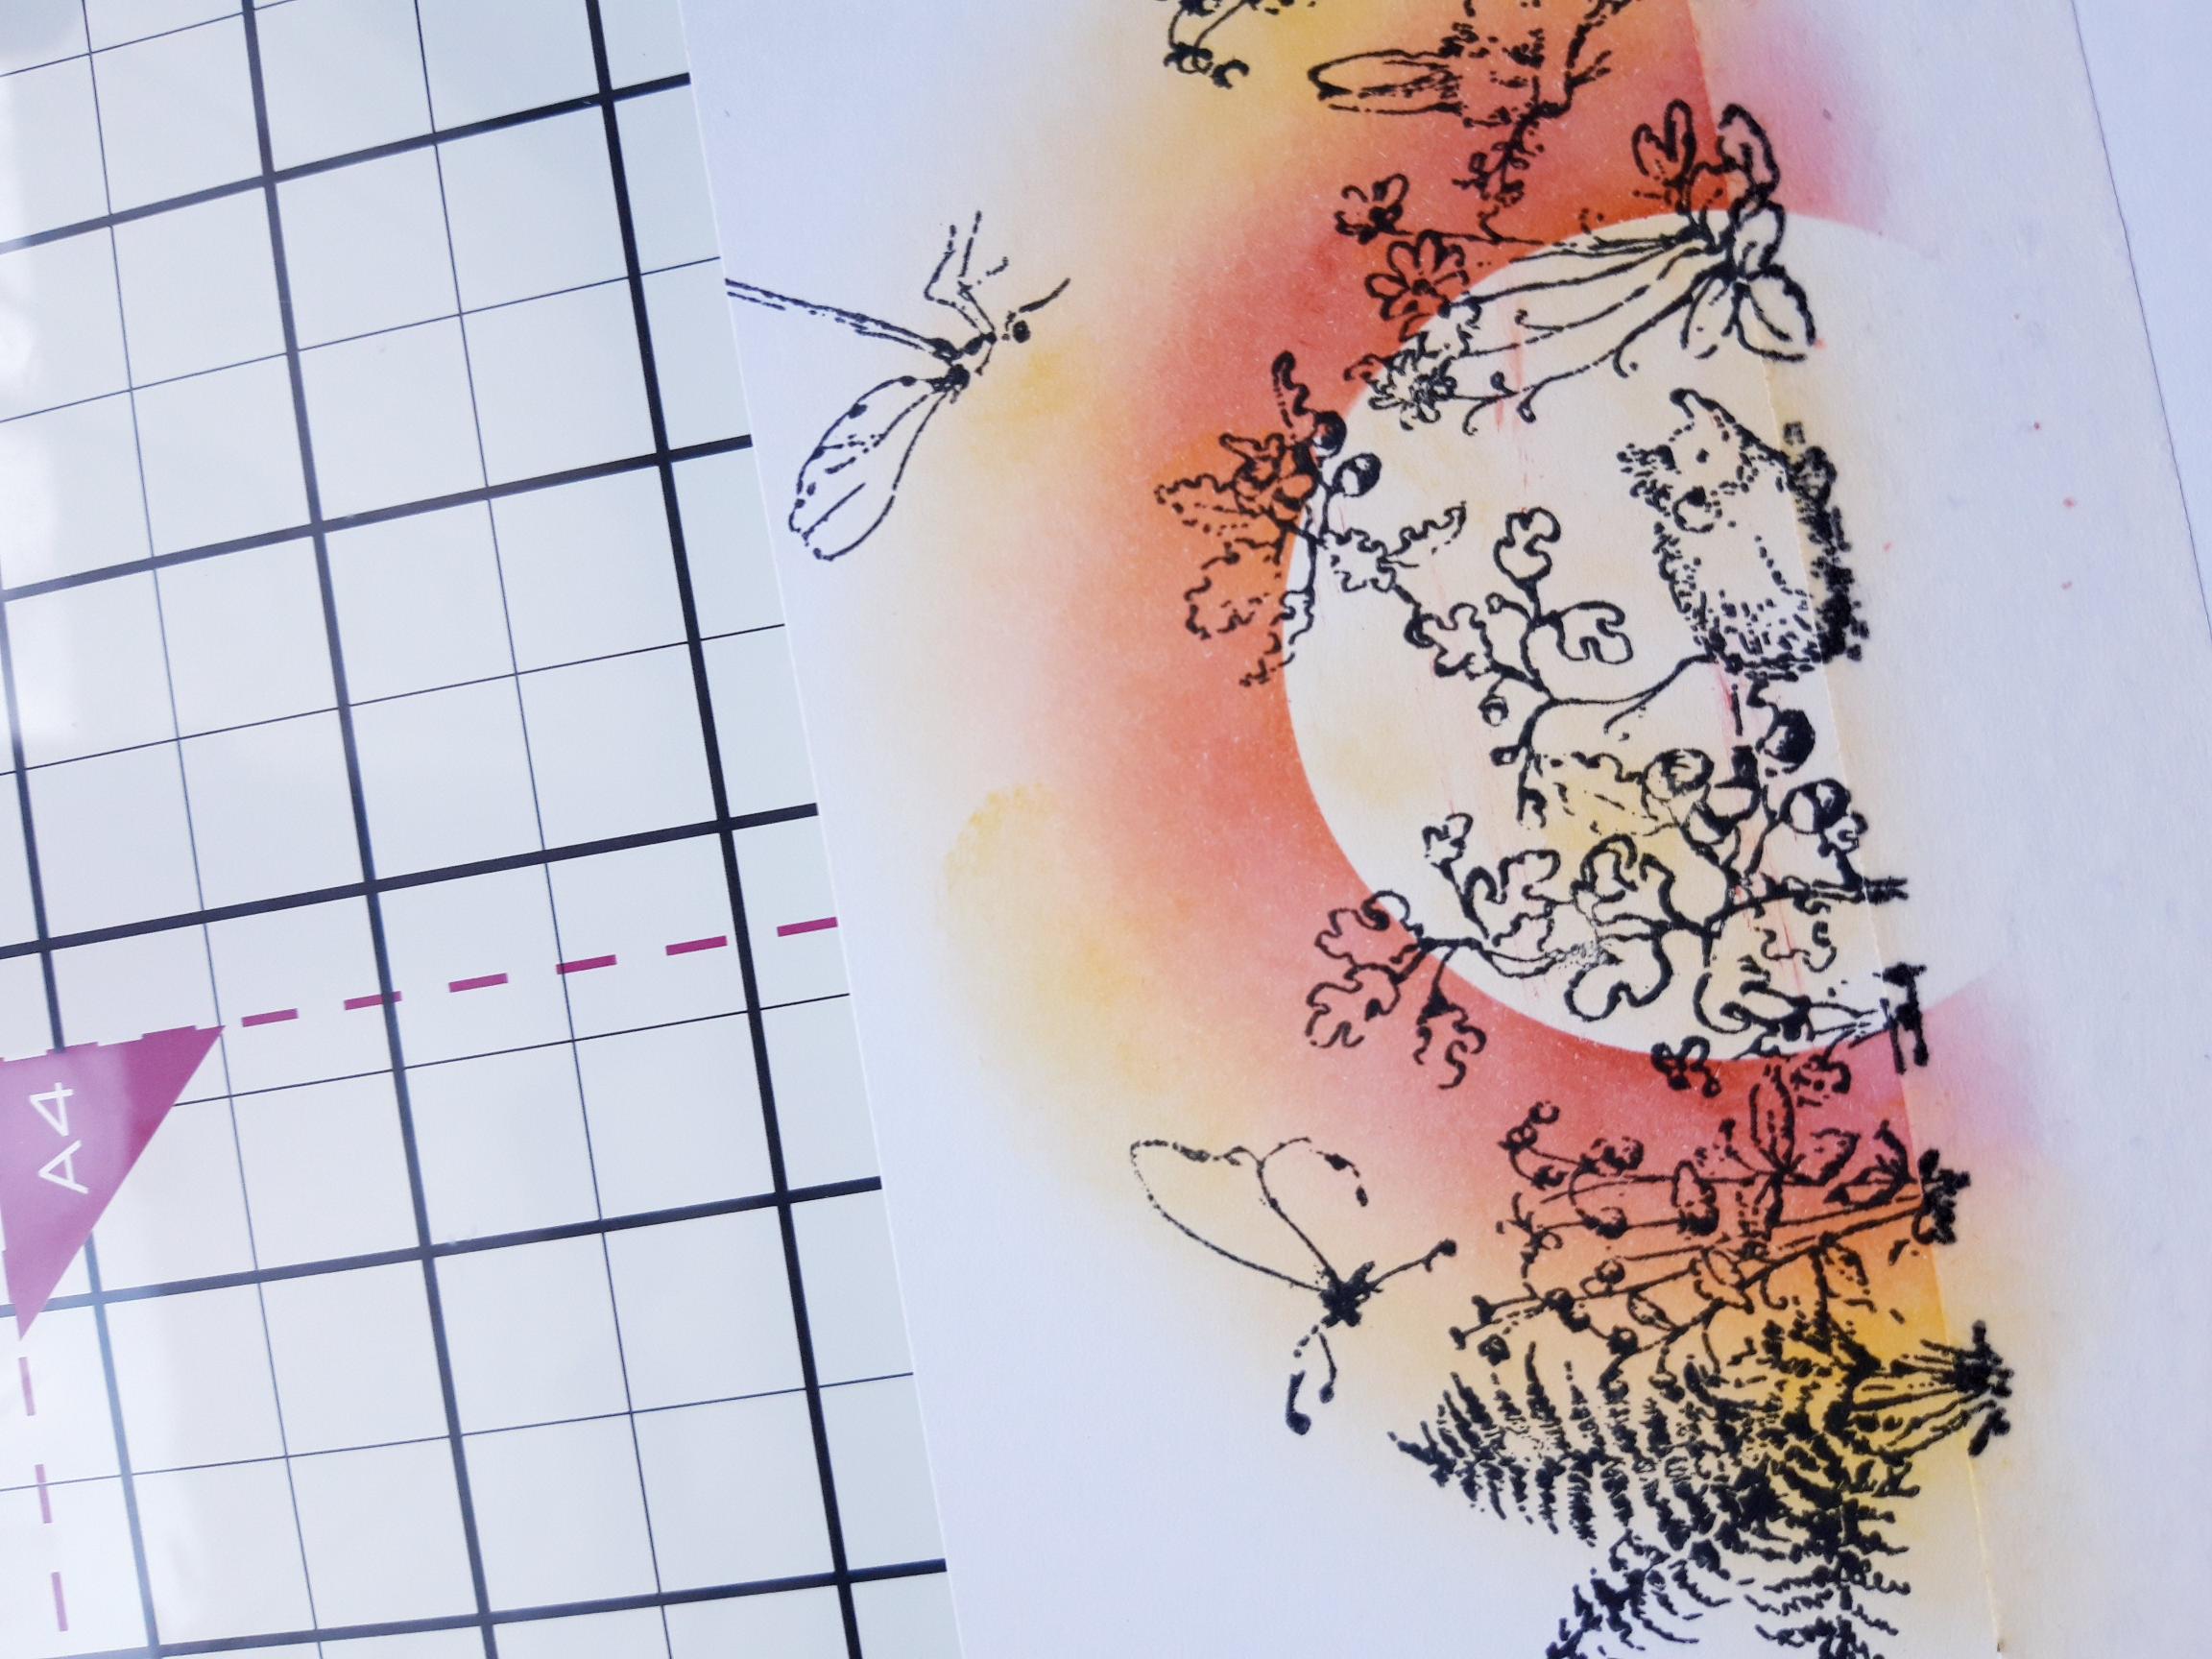
Secure the circle mask in the centre of the card, so it's just peeking up from the edge of the masking tape...this will be your Sun rising in the morning! If you don't have a circle mask, cut a circle from copy paper, or mask off a circle with masking fluid. There's always a way round everything! |

|
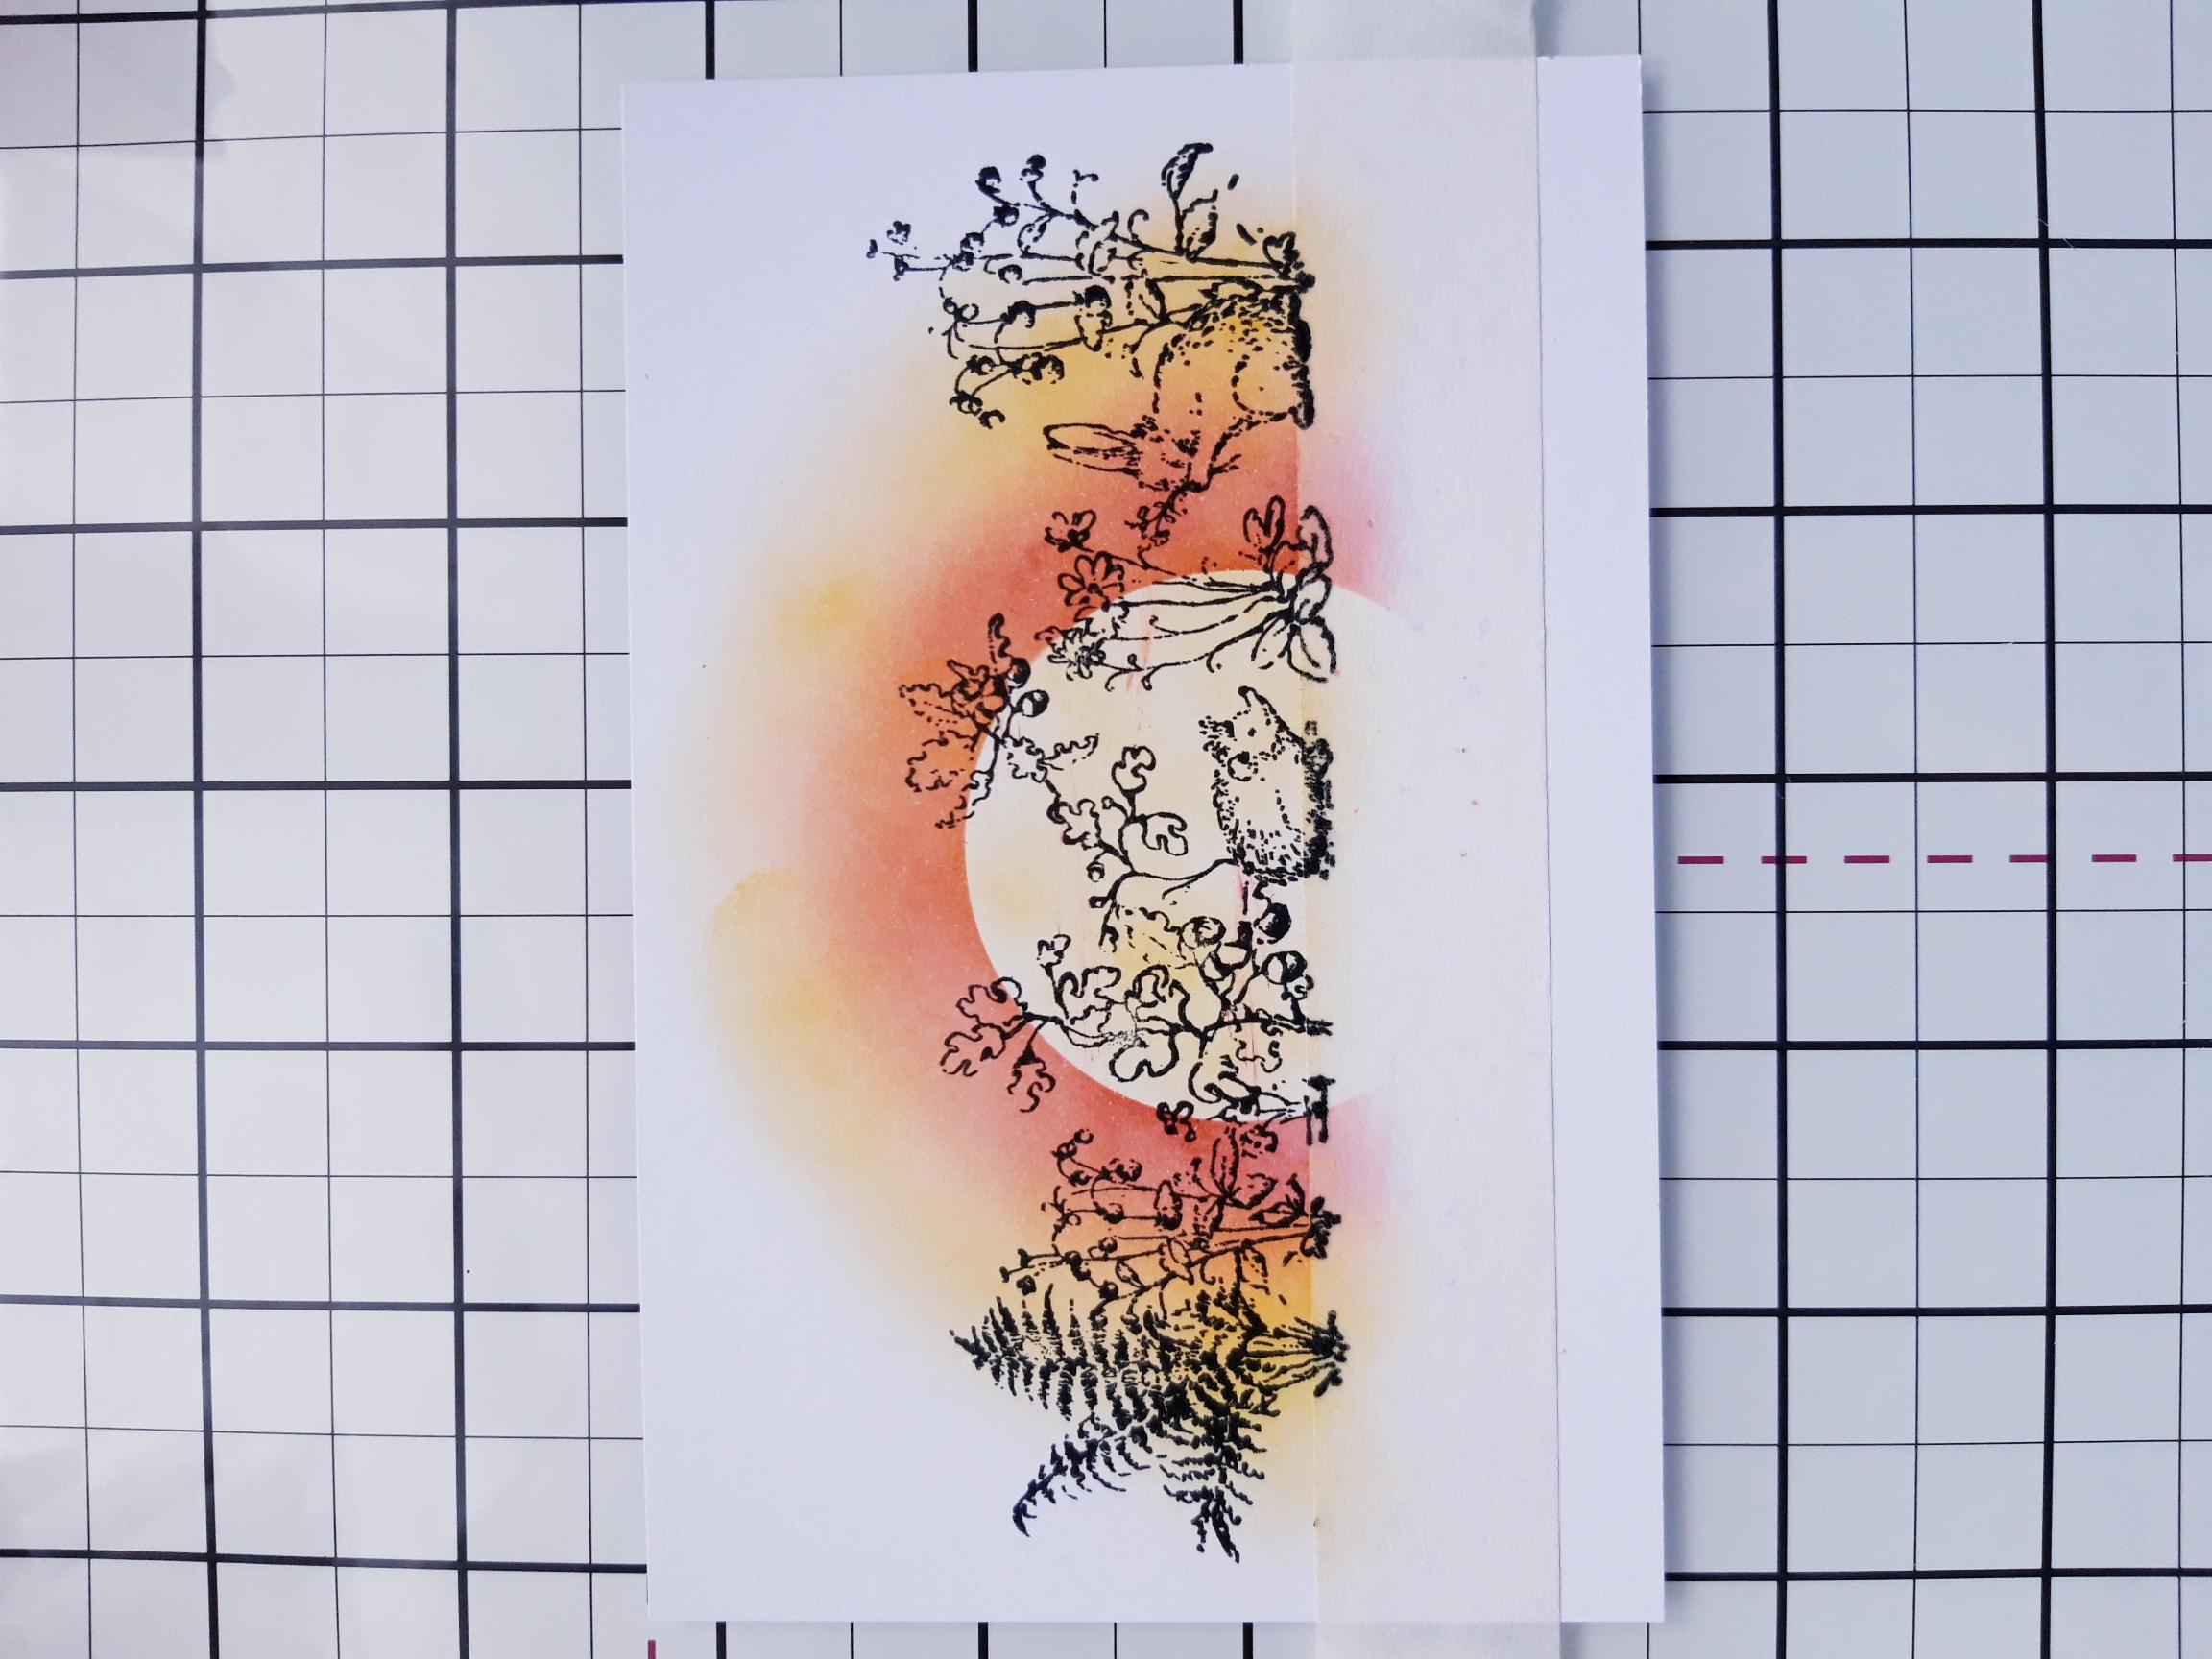
Using your blending tool and your Premium dye inks, blend outwards from your masked off Sun. I like to start with the darkest and fade out to nothing, using the lightest of the colours. As these ink pads are incredibly juicy and vibrant, I find it easier to achieve a subtle blend if I pop a little of the ink on to my craft mat and water it down. |

|
Remove the circle mask and go back in with the Sherbet, to take away the harsh white within your Sun. Using the edge of a blending tool, drag a little of the Bittersweet across the Sun, thus depicting wispy clouds floating by! |
|
Ink up the large border stamp, from the Family Gathering set, with the Midnight hybrid ink. Stamp across your Sun, so the bottom edge of the stamp slightly overlaps the masking tape. |
|
Ink up a selection of Butterflies and Dragonflies, from the Under The Tree set, with the Midnight and stamp randomly on to your scene. |

|
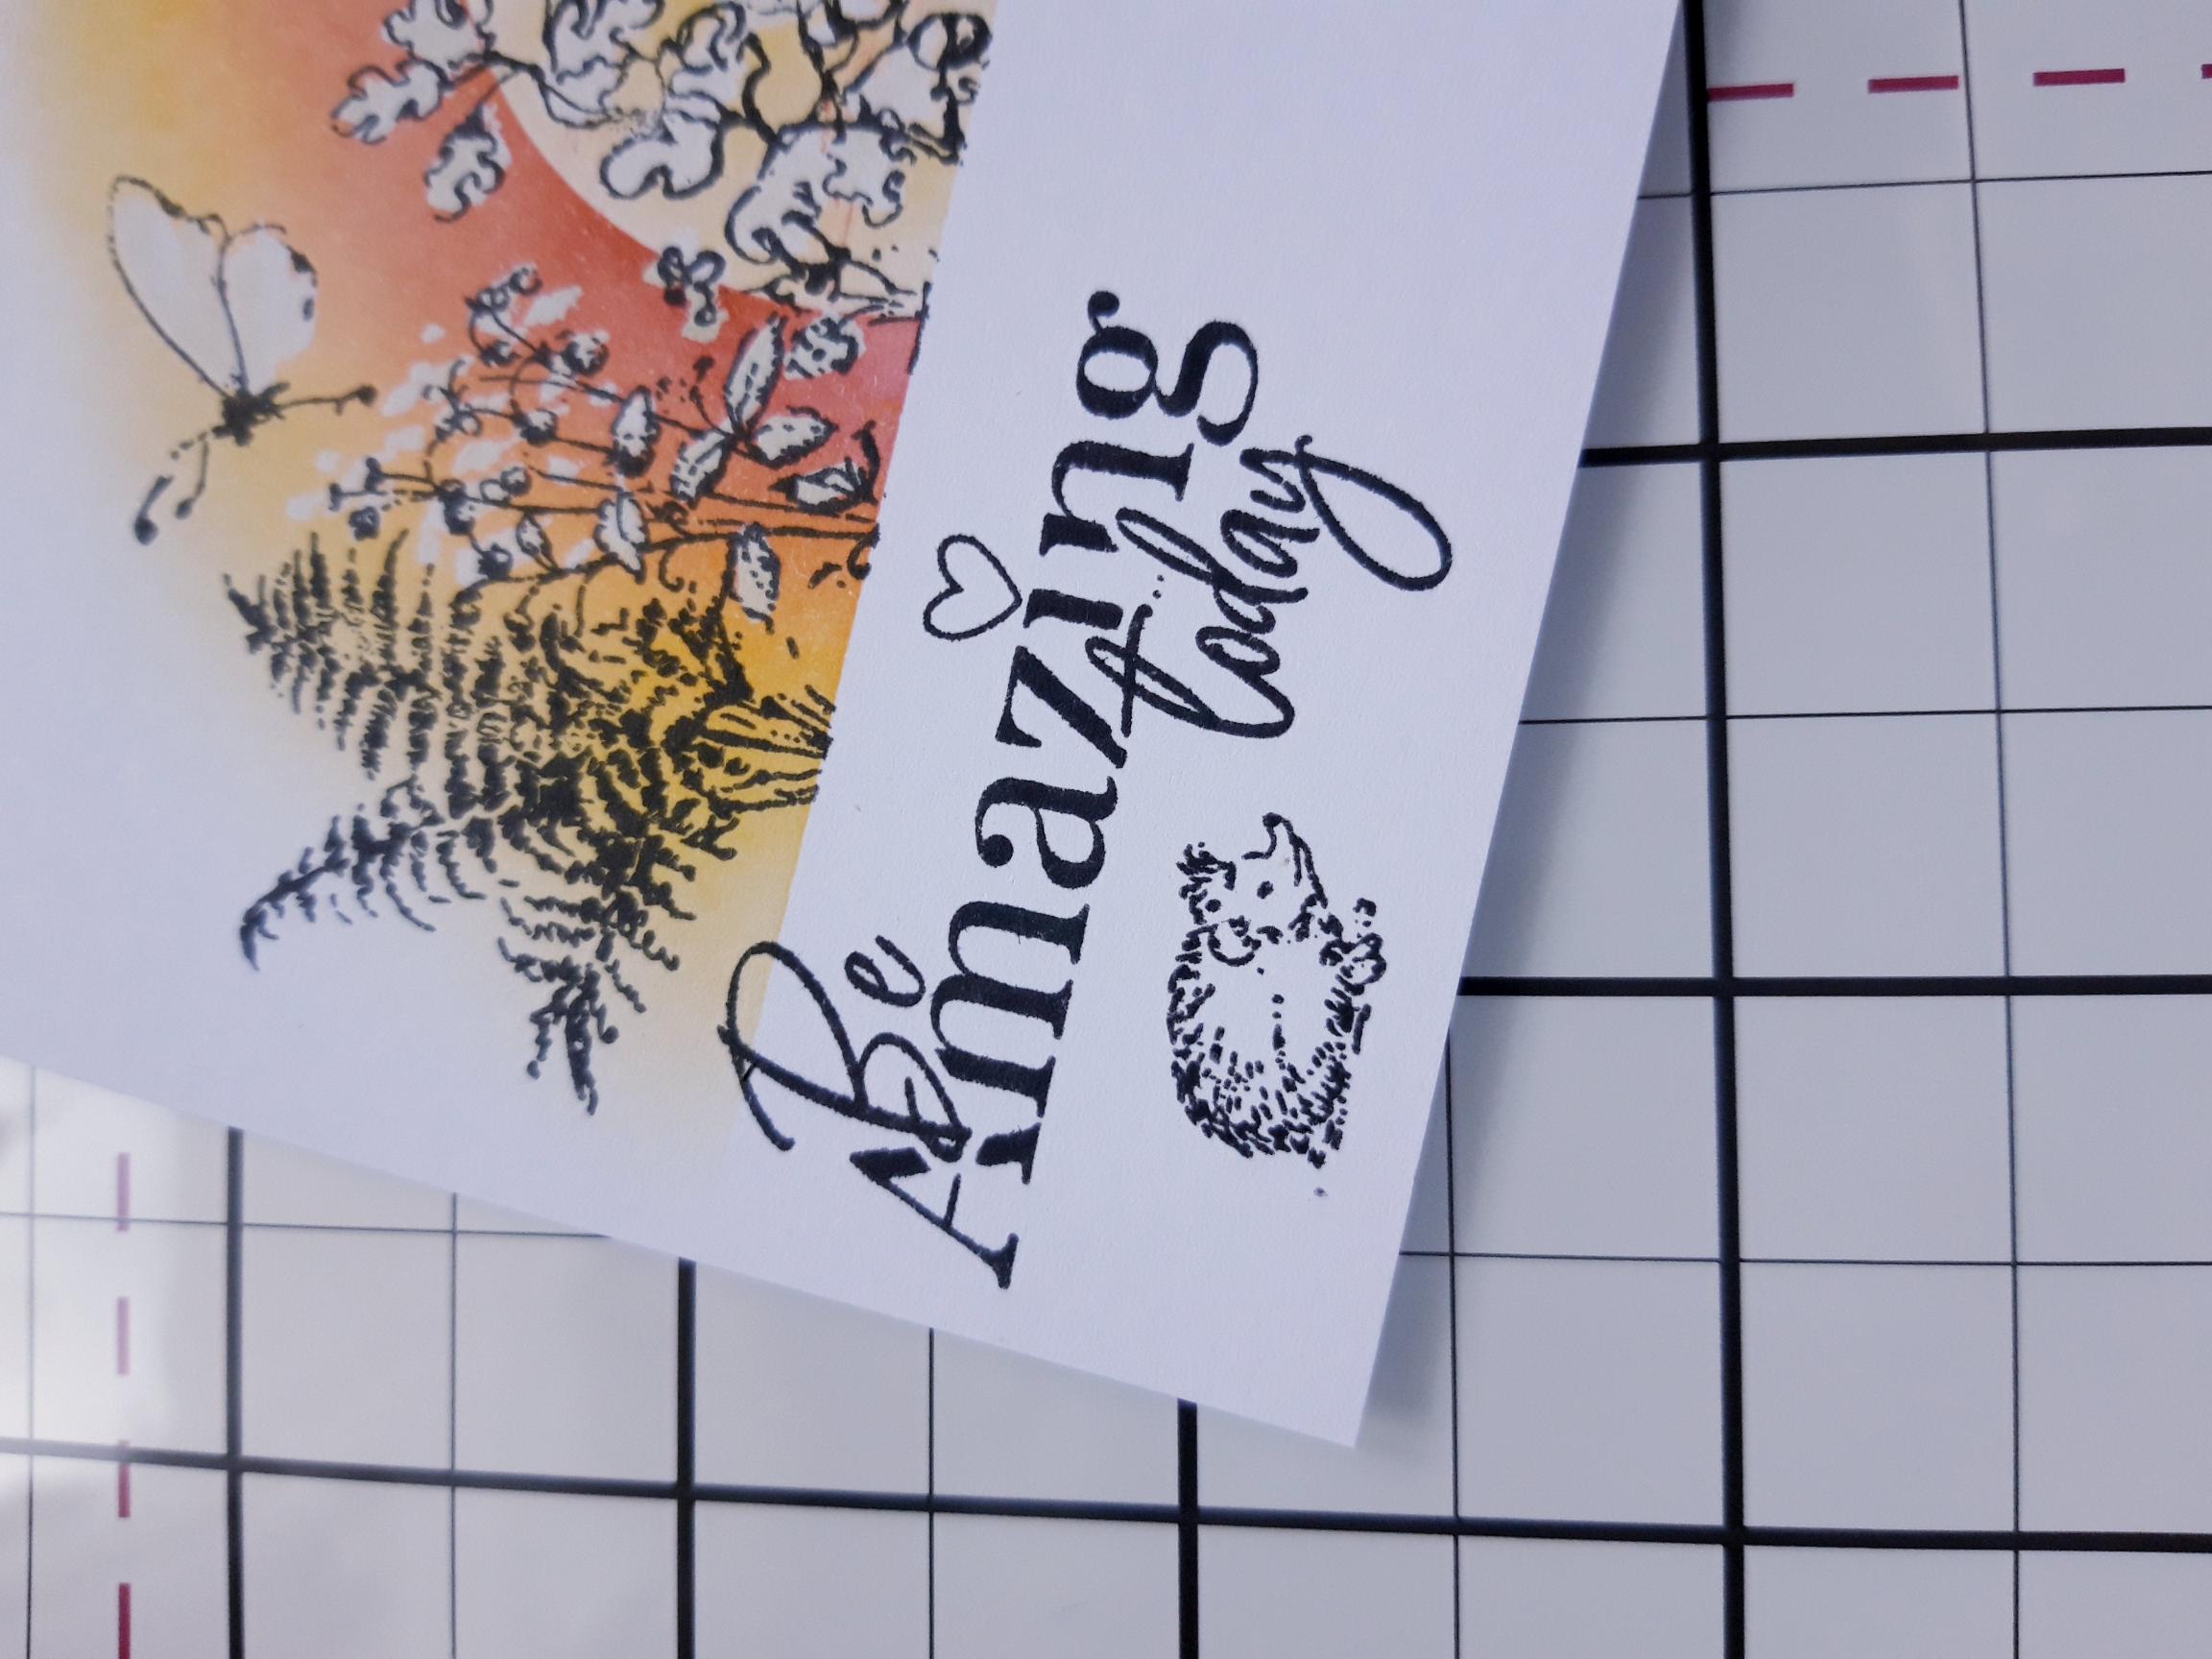
Ensure your artwork is completely dry before carefully removing the masking tape, to reveal your beautiful scene. |

|
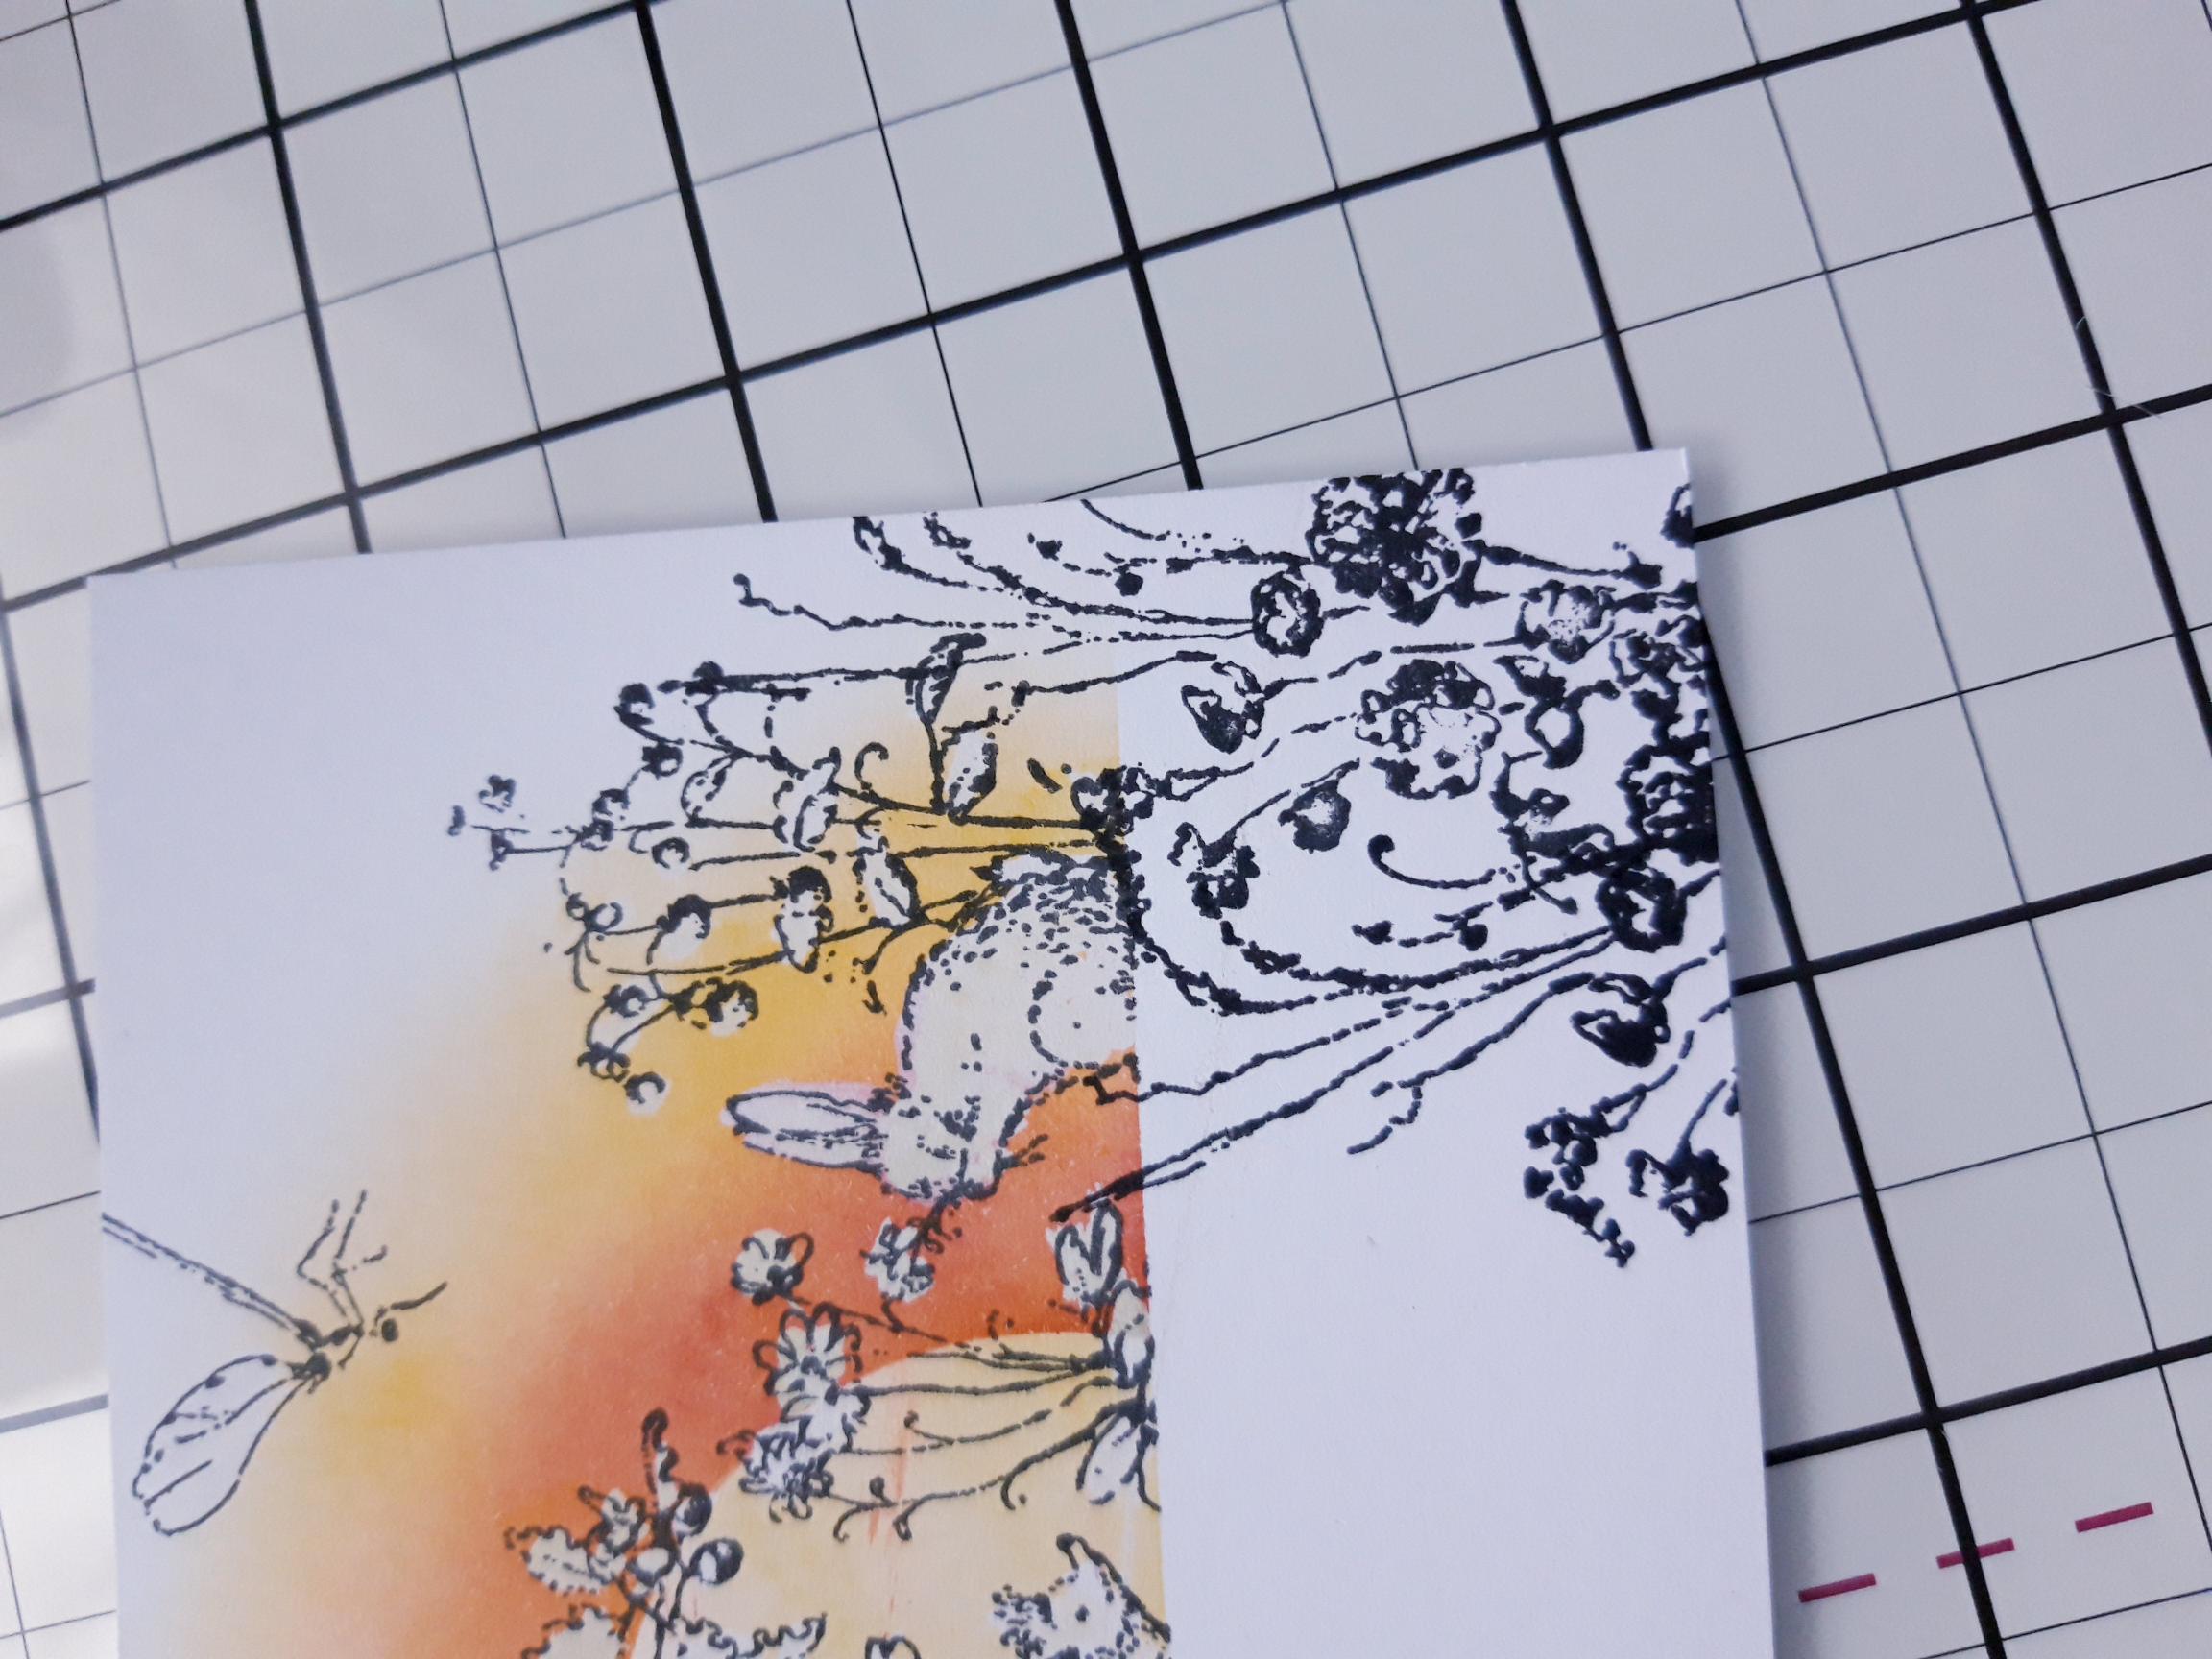
We are now going to use the Faux Bleaching technique, to make elements of our artwork pop! Using a paint brush and a paper towel, add a little water to the flower heads, animals, butterflies...wait a few seconds for the water to activate the ink, then lift out the colour with your paper towel. You can also use diluted household bleach...this will give a more intense bleaching effect, so be careful if using this method.
|
|
Ink up the sentiment stamp from the Love & Hope set, with the Midnight and stamp bottom left of the card. Ink up our cute Hedgehog, from the Family Gathering set and stamp just below your sentiment. |
|
Ink up this beautiful floral stamp, from Say It With Love and stamp coming up from the bottom right corner. Use the faux bleaching technique to lift out any ink within the flower heads and leaves, allowing it to blend it with the rest of the artwork. |
|
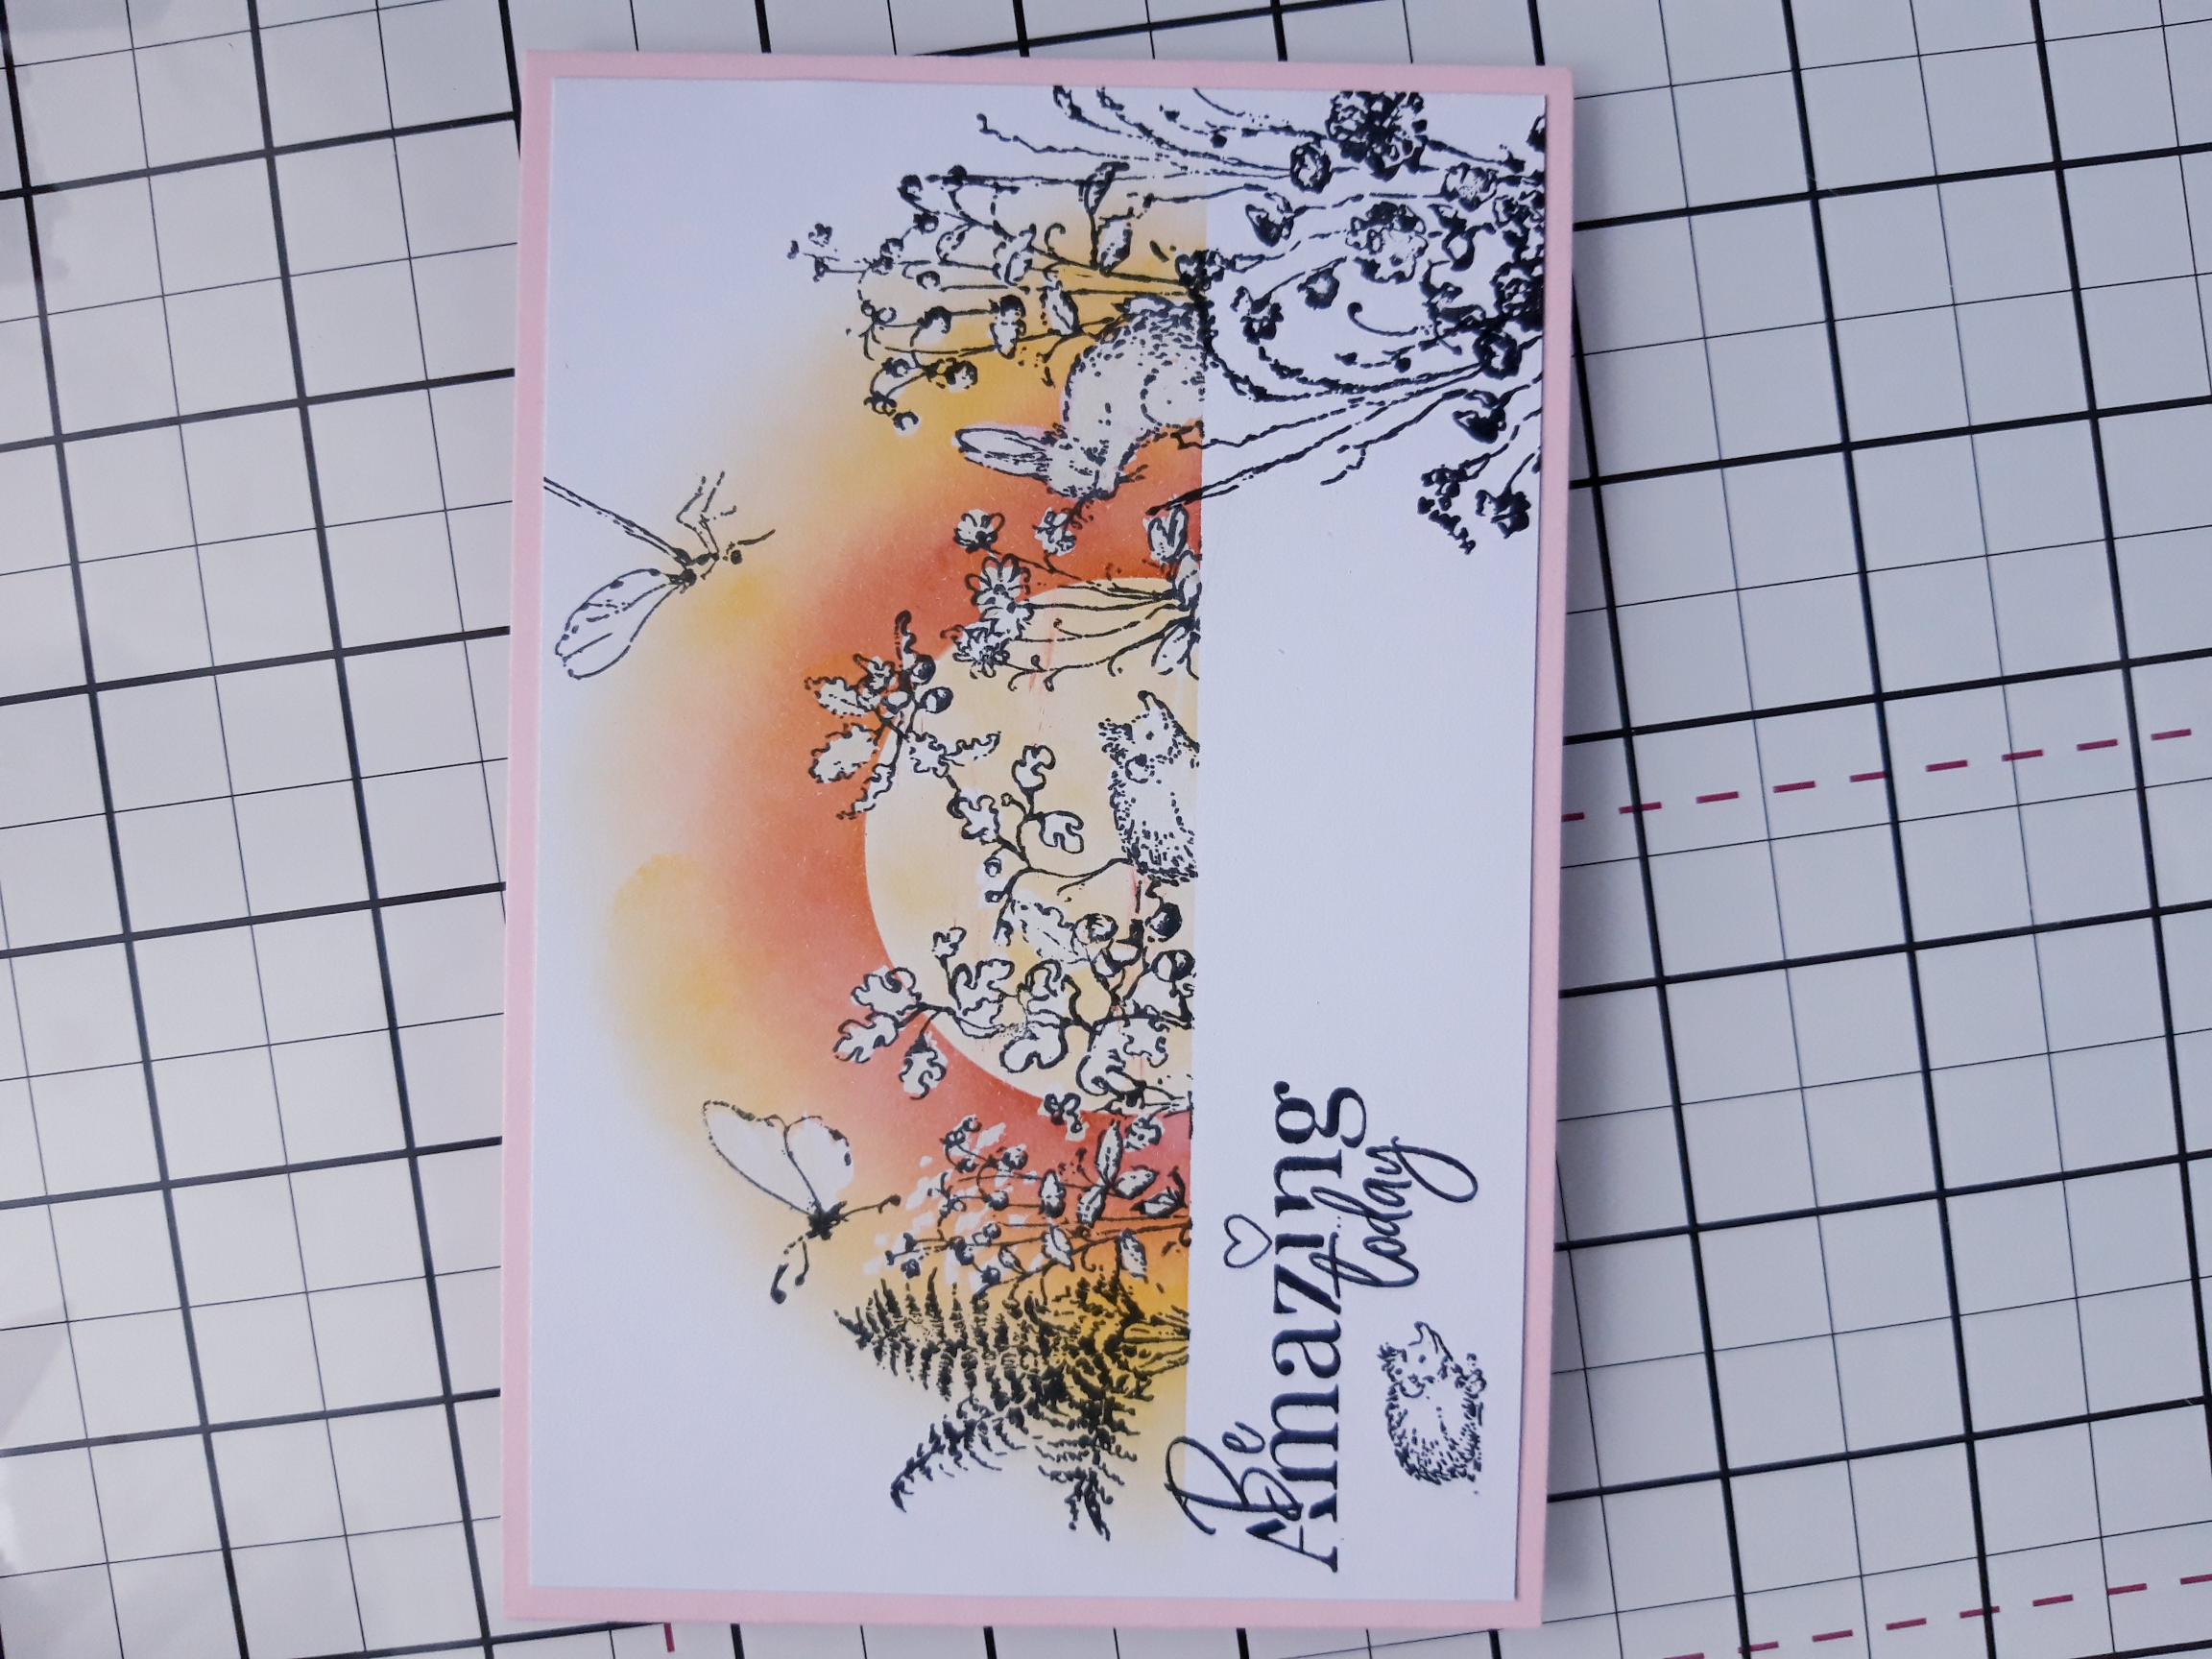
To finish, adhere to the front of your pink, landscape 6 x 4" card blank. |