Give your friends $10 off their first order!
Refer a FRIEND


WHAT YOU WILL NEED:
Pink card blank 8 1/4 x 5 3/4"
Black card 8 x 5 1/2"
White card 7 3/4 x 5 1/4"
White card A4
Copy paper
Prestige Frame Two Die Collection
Your Only Limit Is You Stamp Collection
Every New Day Stamp Collection
Keep Exploring Lamination Stamp Collection
Circle mask/die to create a circle "sun/moon" mask (copy paper)
SBM Hybrid Ink Pad: Midnight
SBM Premium Hybrid Dye Ink Pad: Sherbet, Magenta, Bittersweet
Blending tool
Paint brush
WOW heat tool
Scoreboard and score tool
Eureka 101 Watercolour Tablet
SBM Magnetic glass mat
Paper Trimmer
Perfect Together Glue
Die Cutting machine
[click image to enlarge] 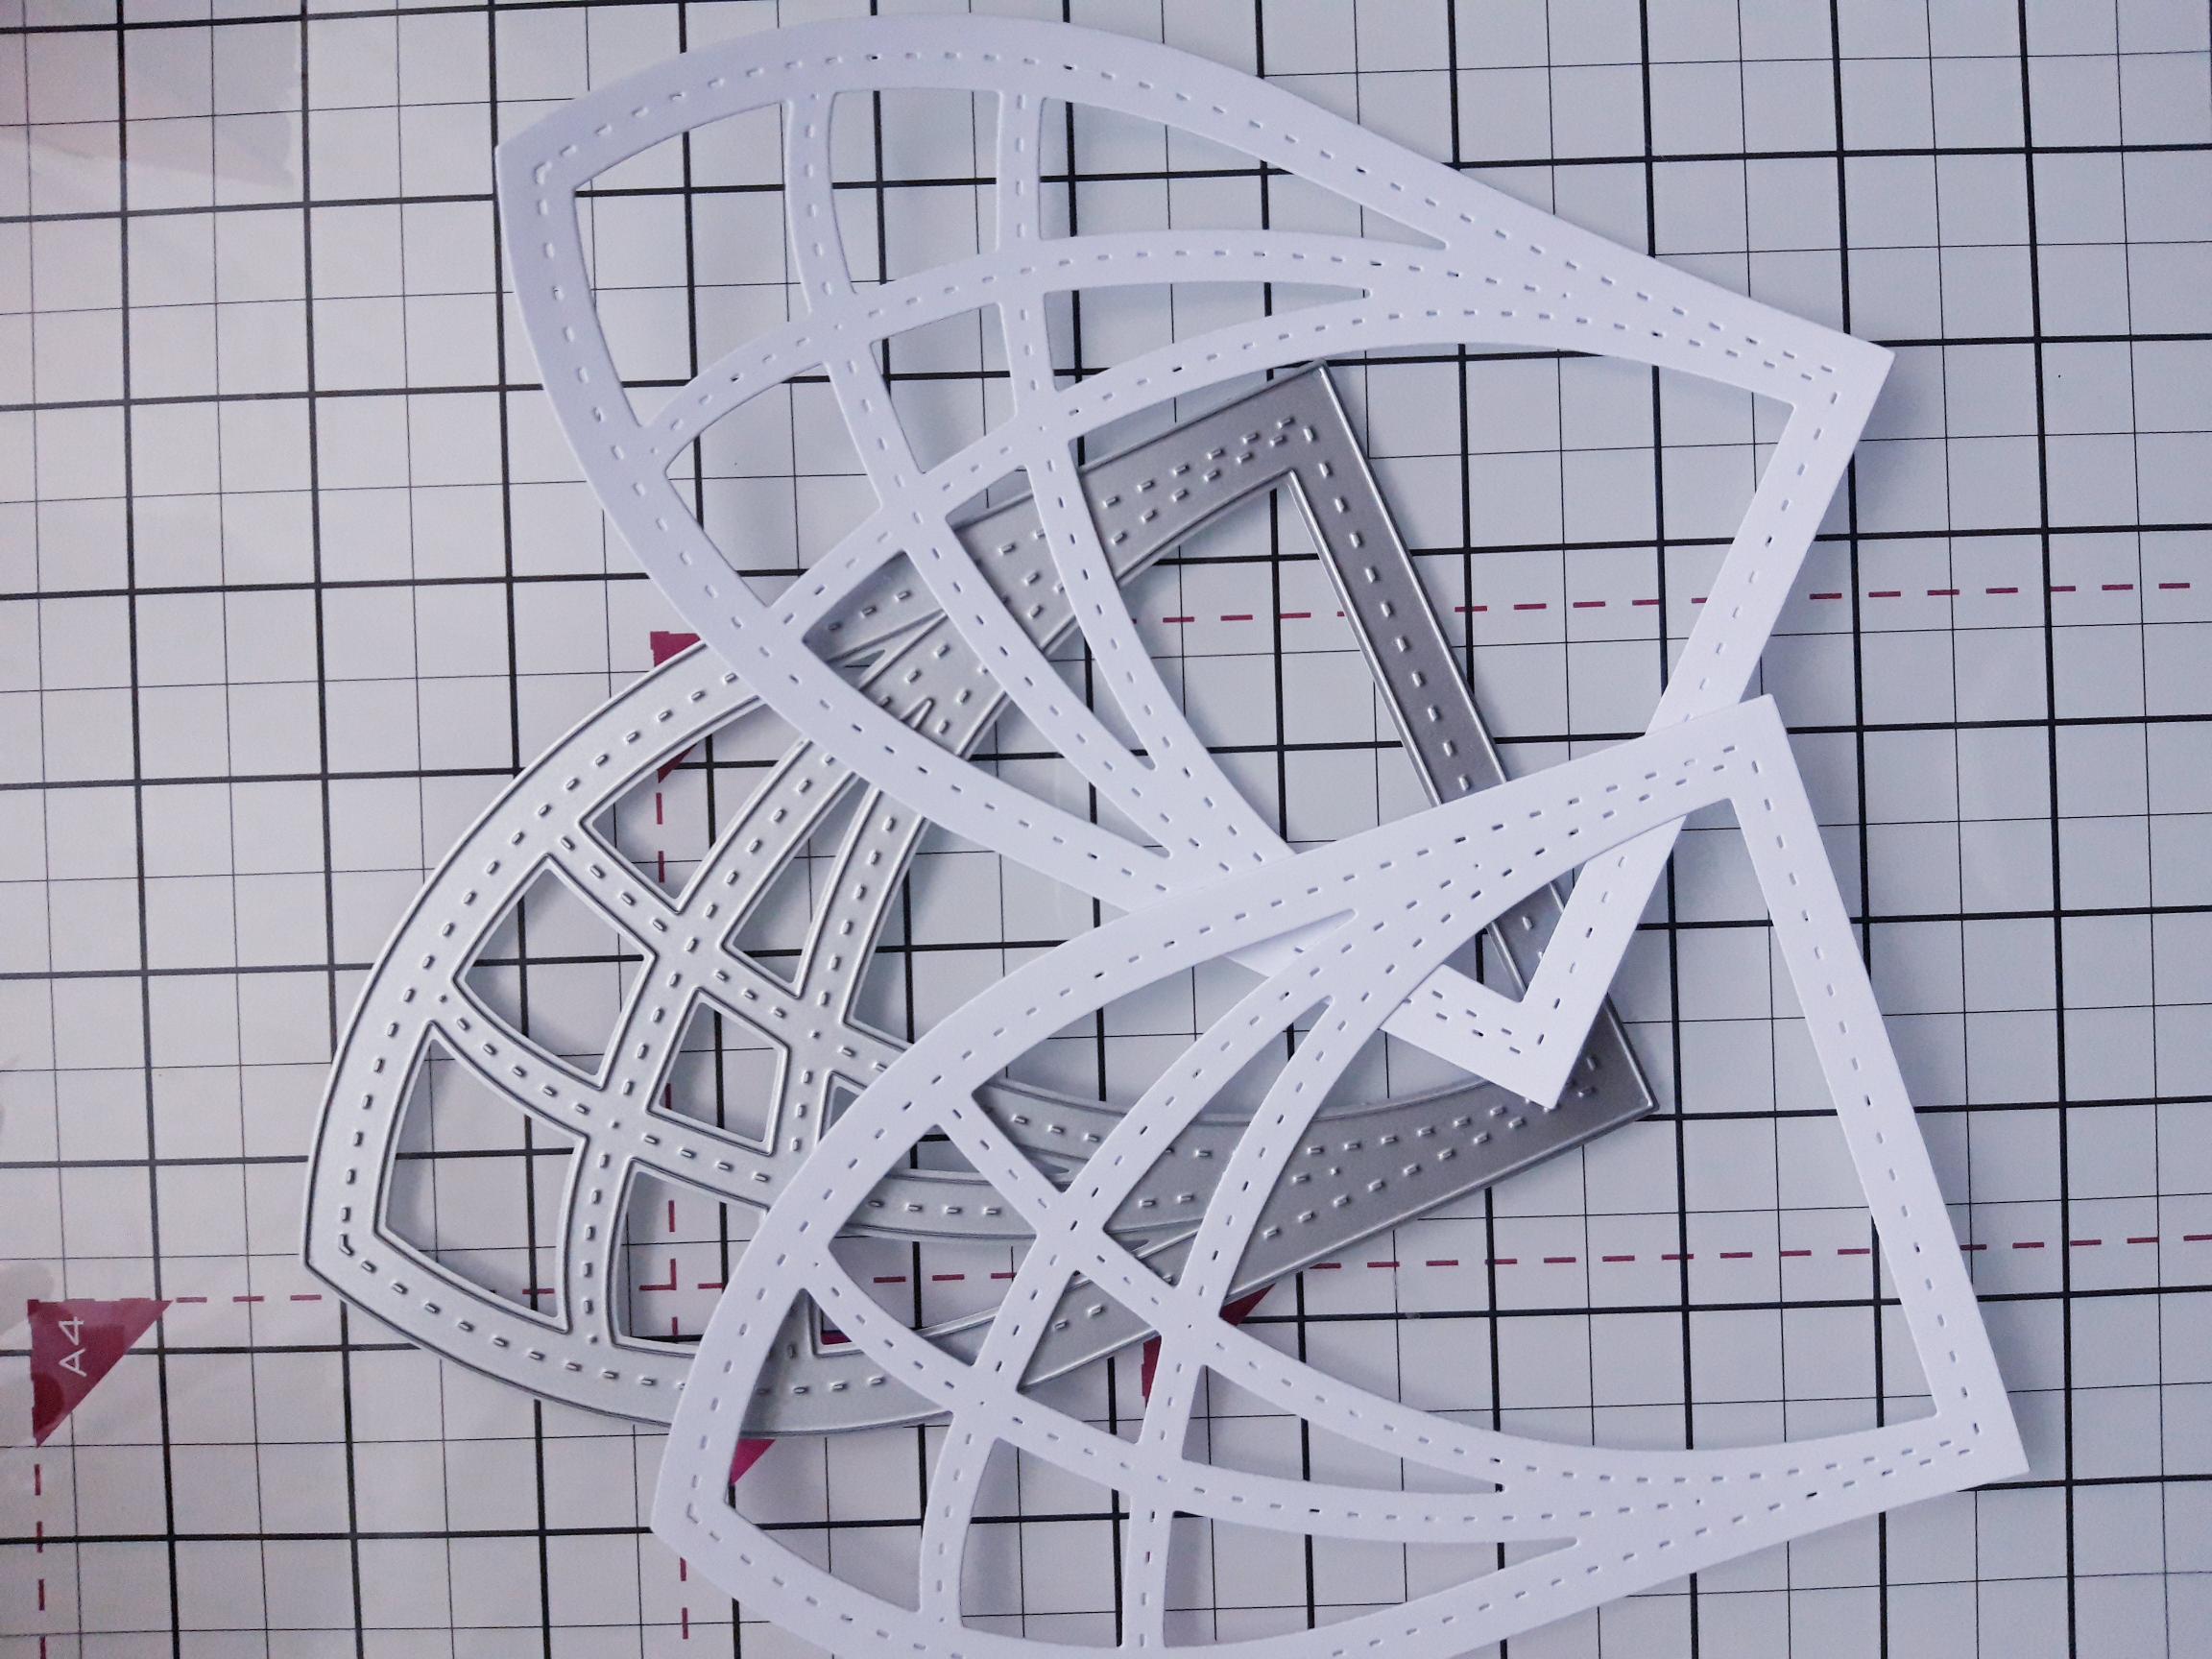
|
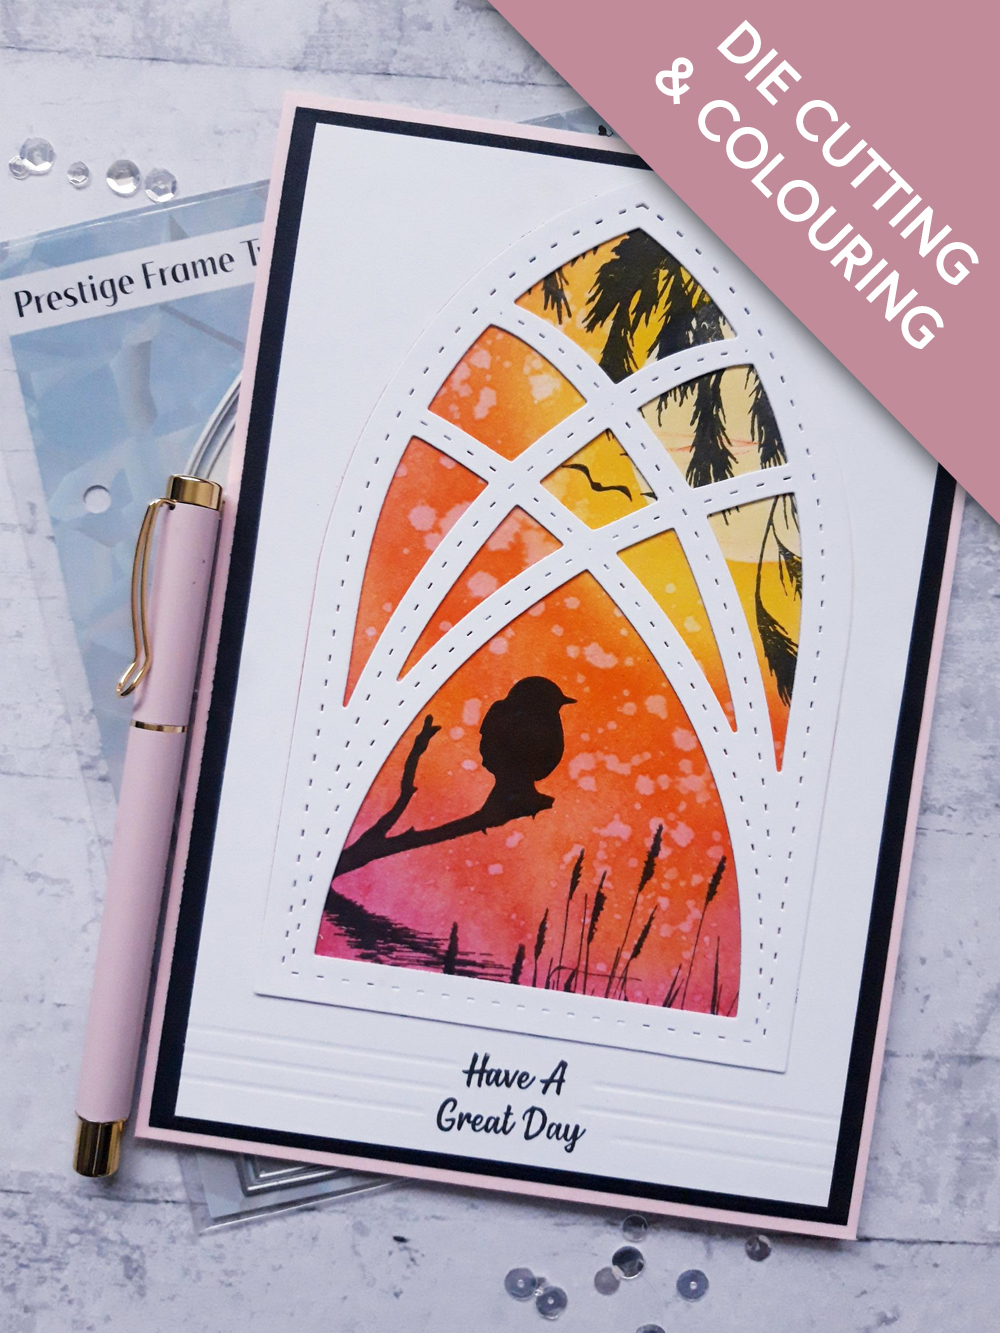
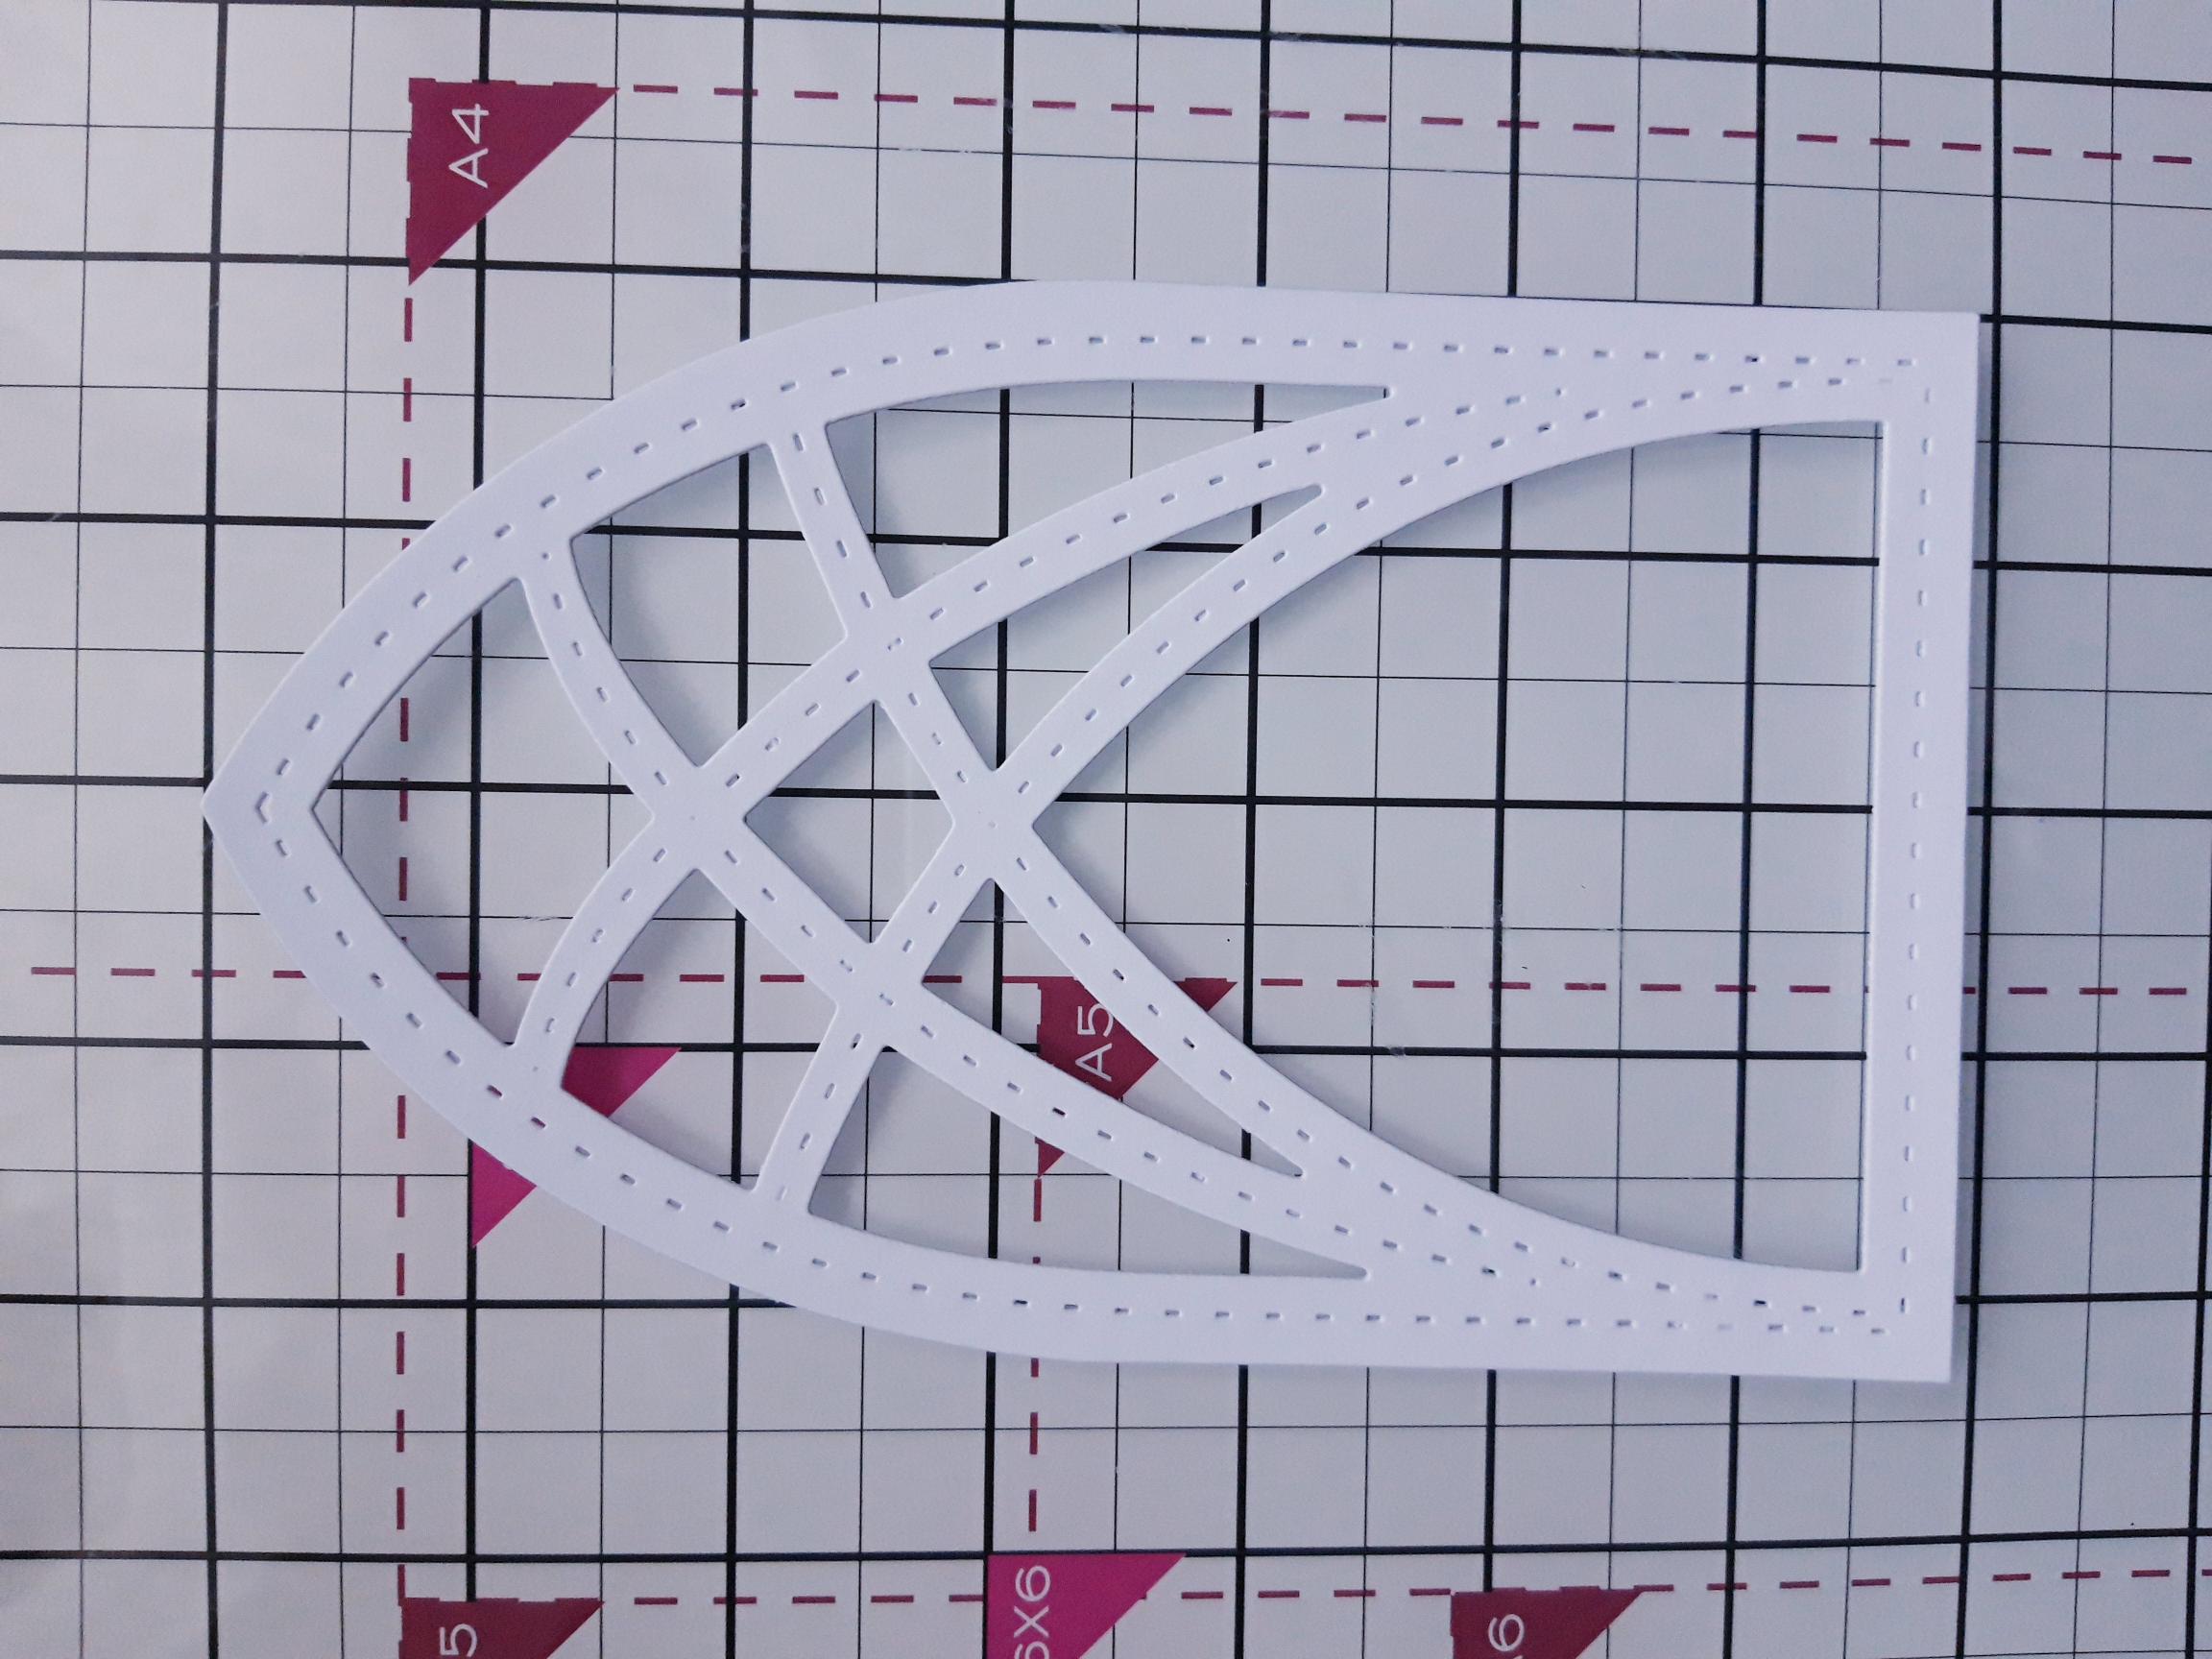
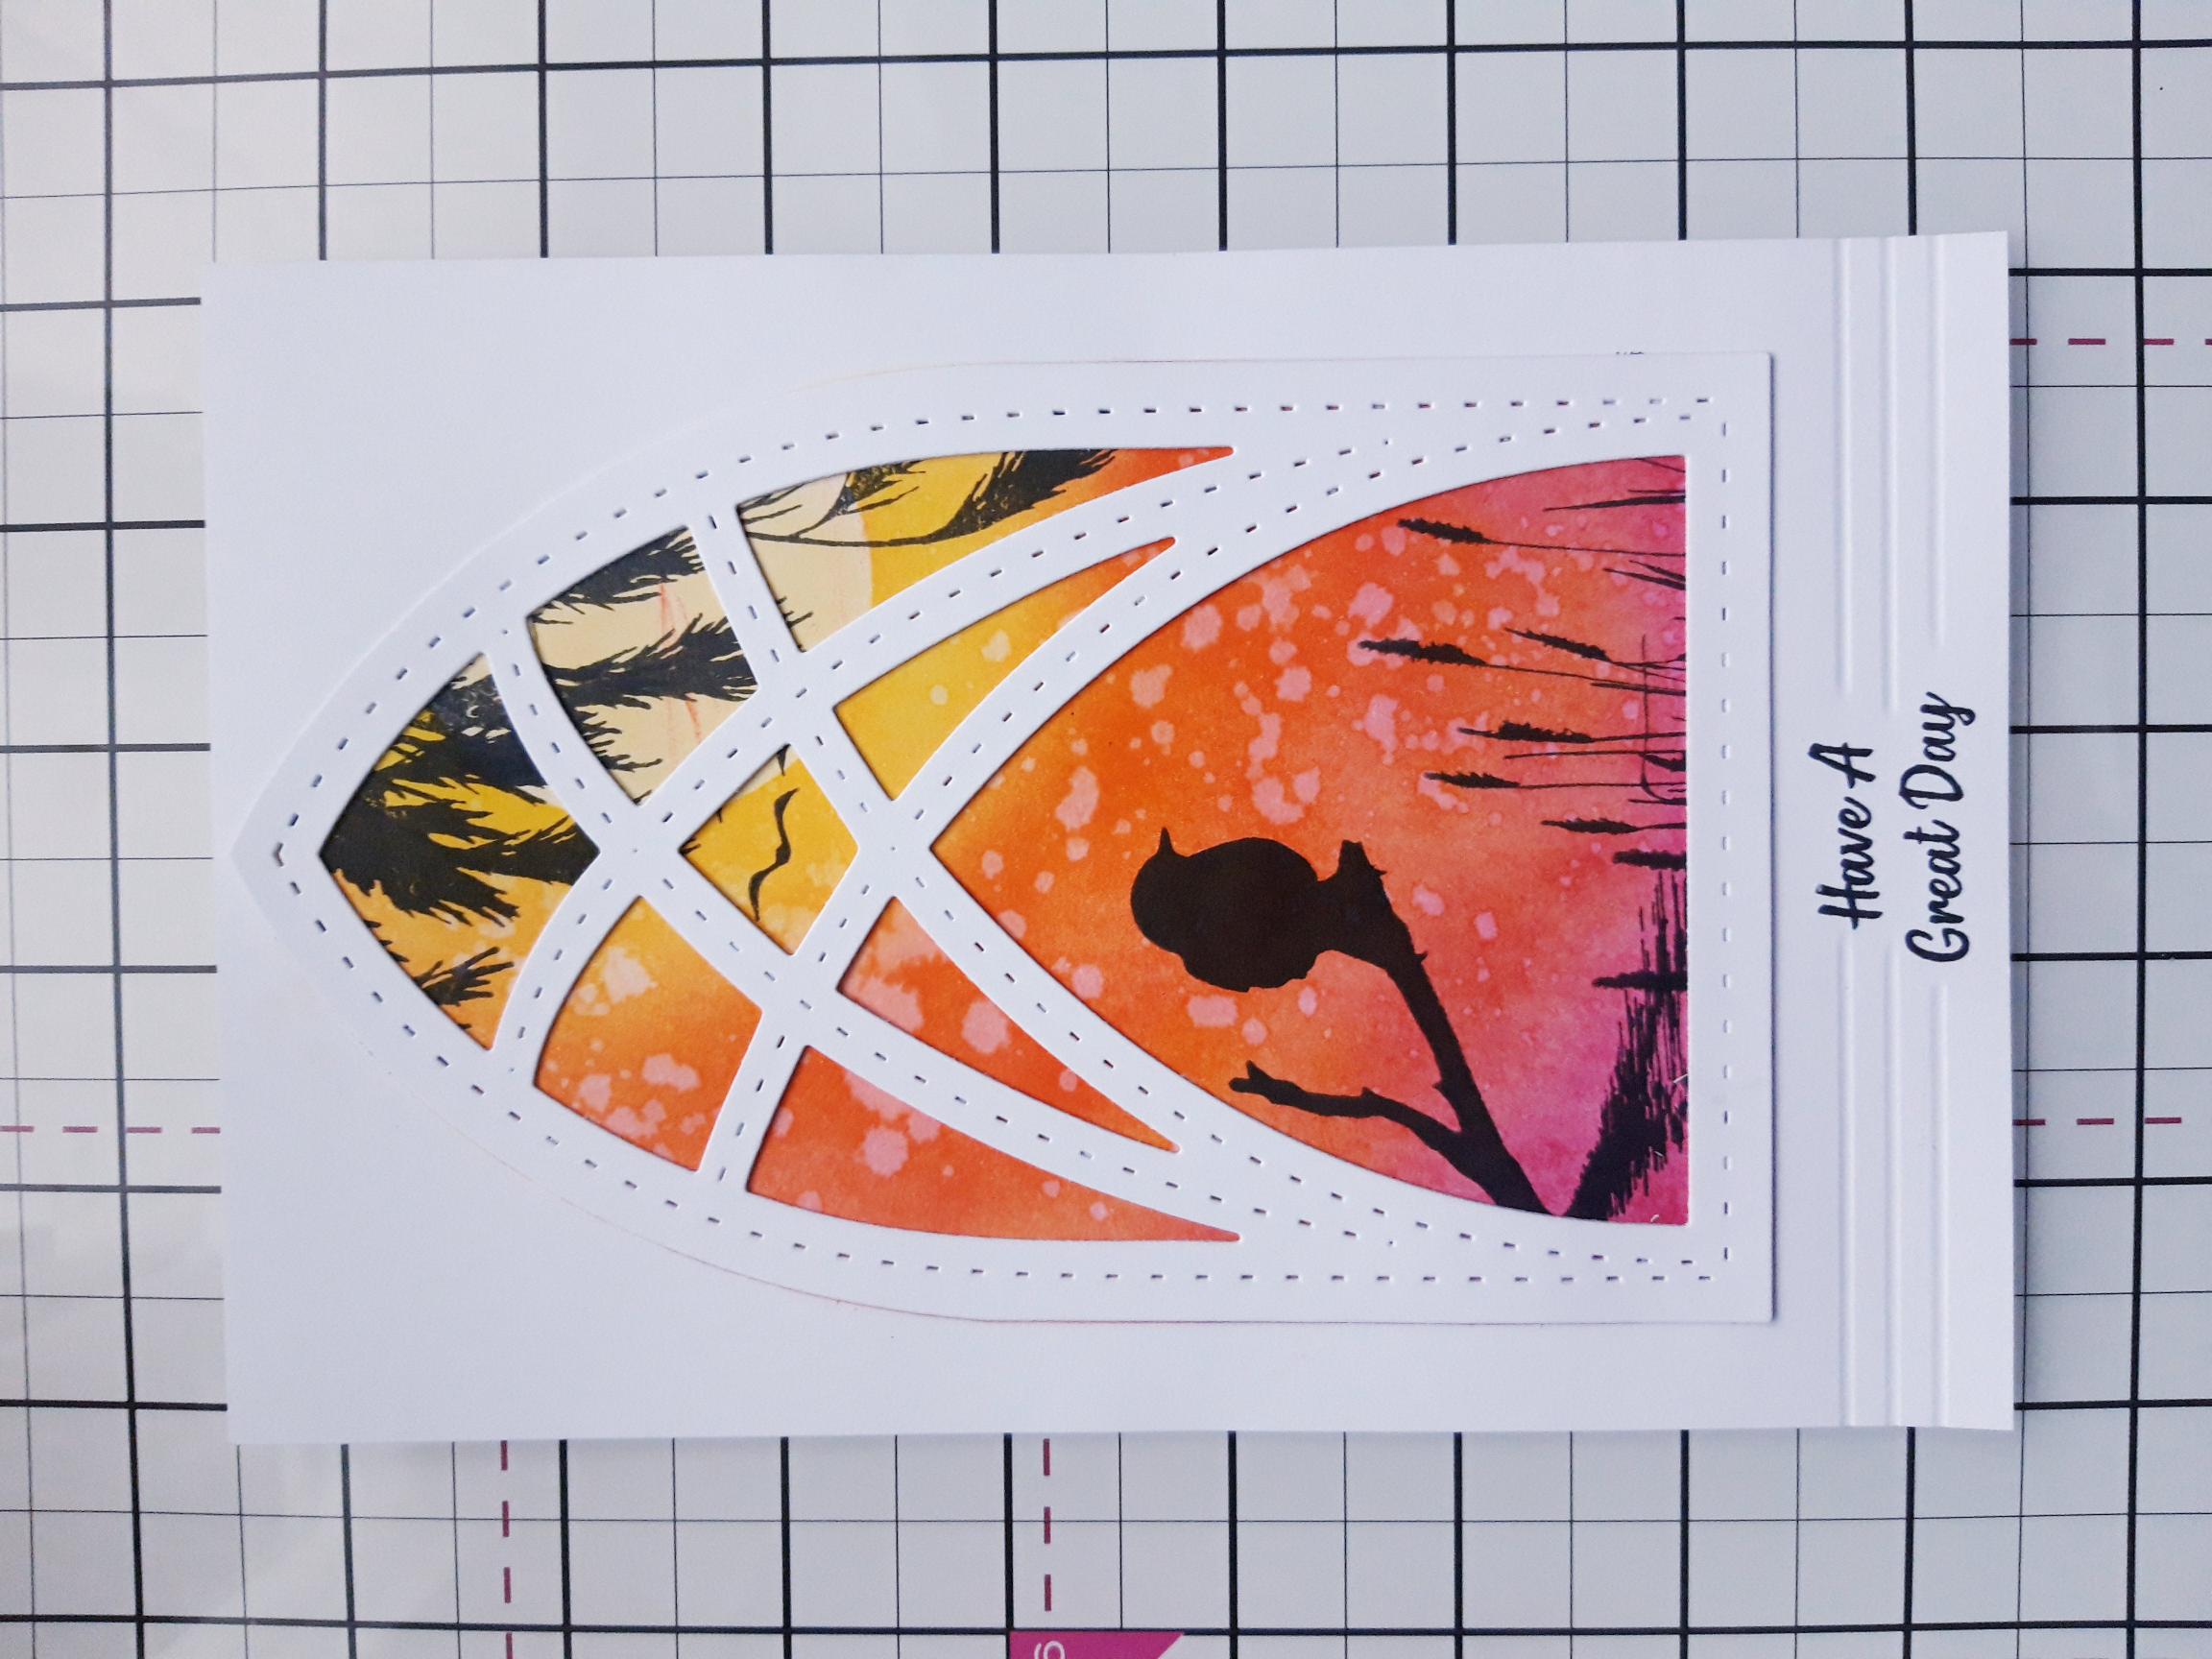
Using the detailed Prestige Frame die, cut out TWO windows from the A4 cardstock. |
|
Adhere the die cut windows together, to create your 3D element. You can die cut more than two, to make it more substantial...the choice is yours. Set to one side. |
|
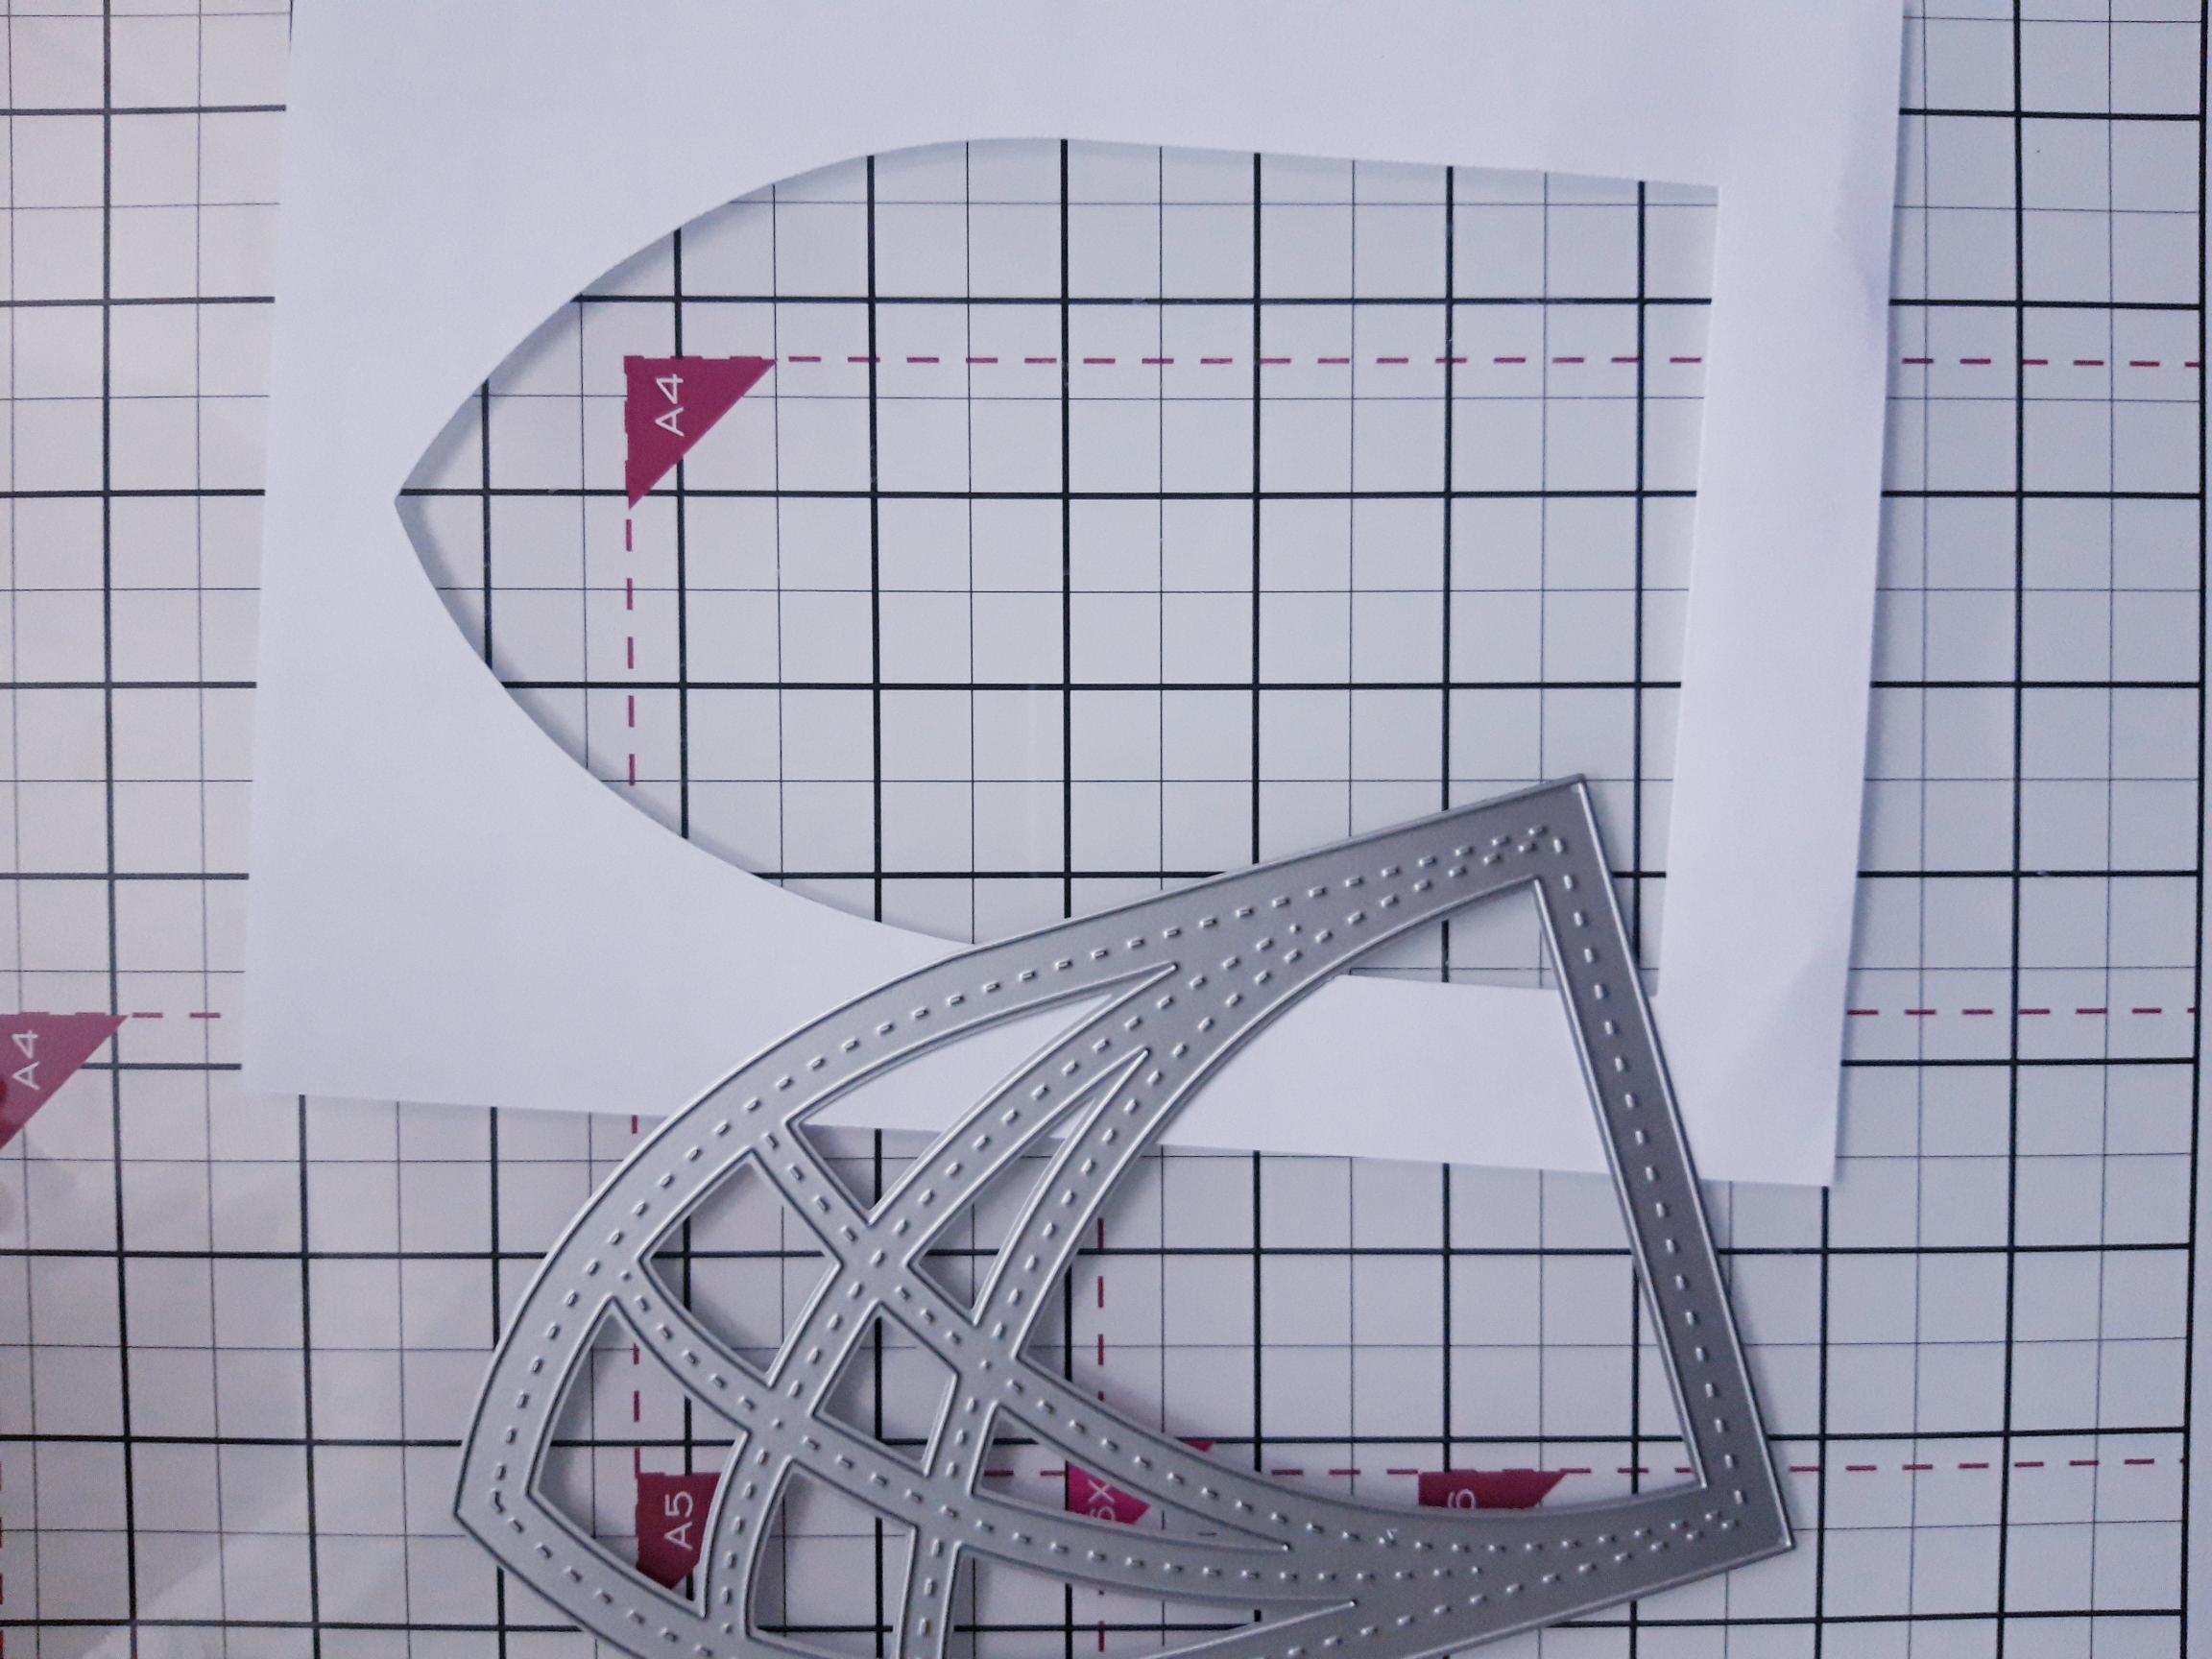
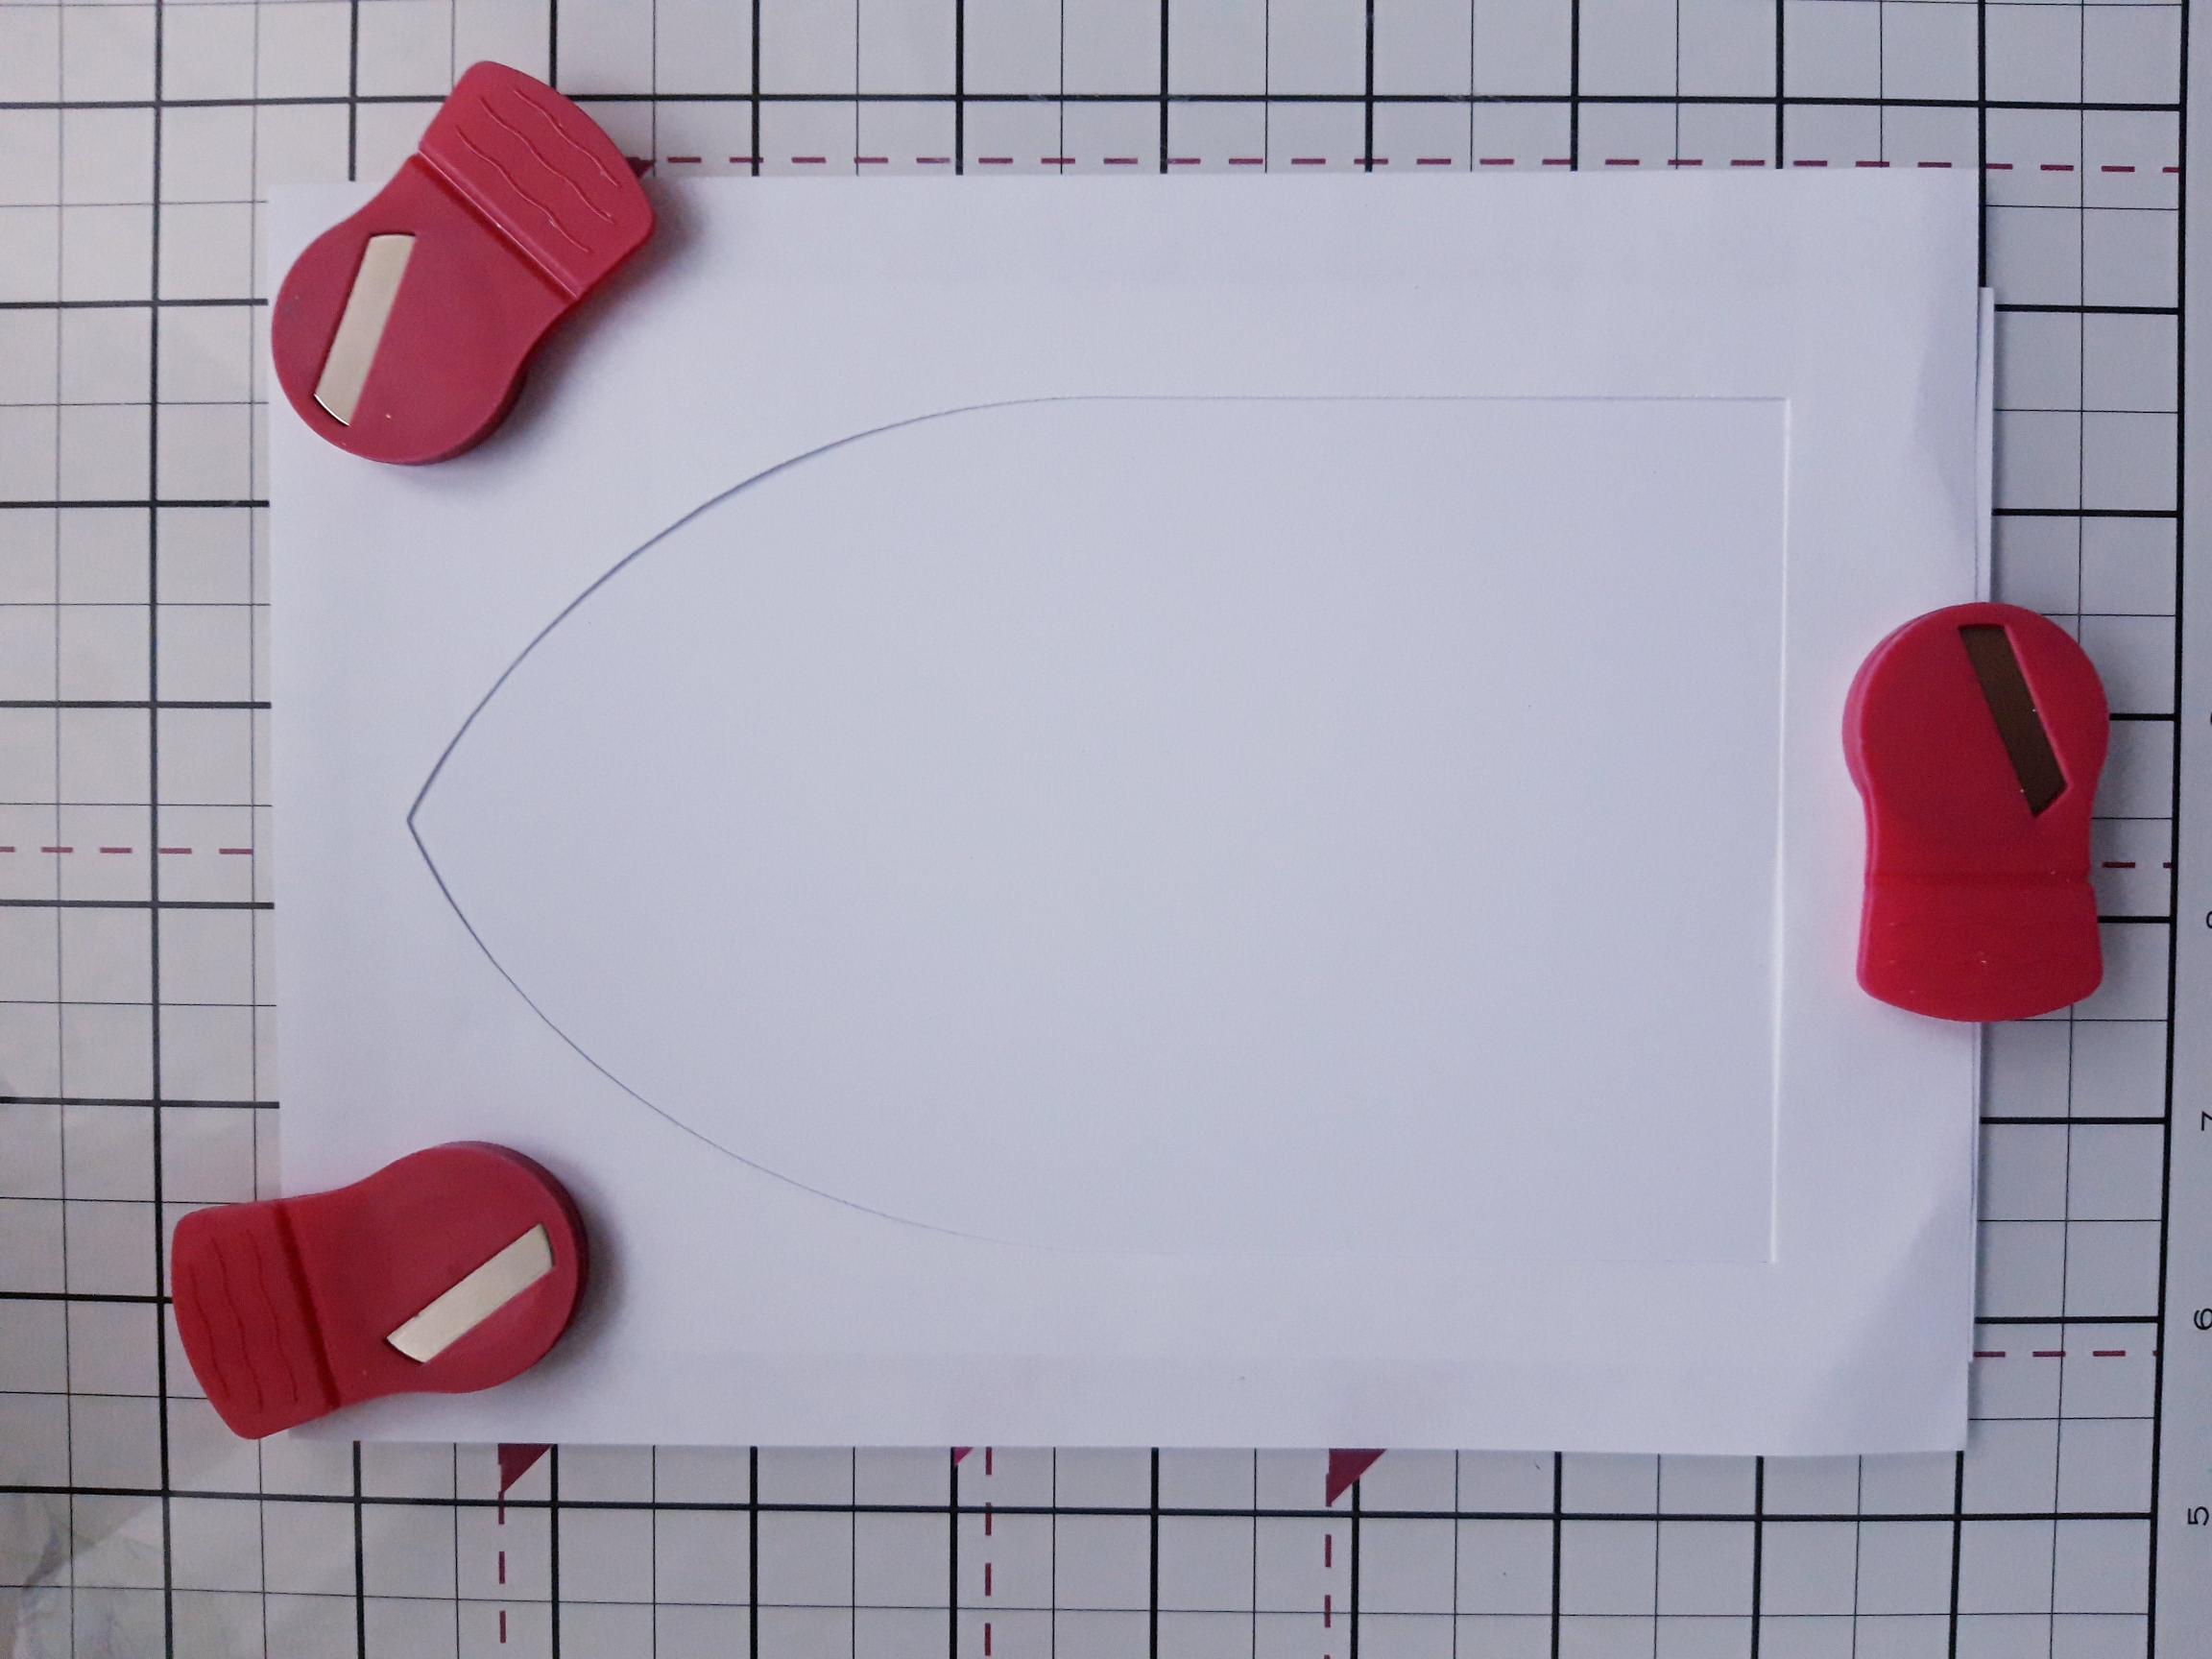
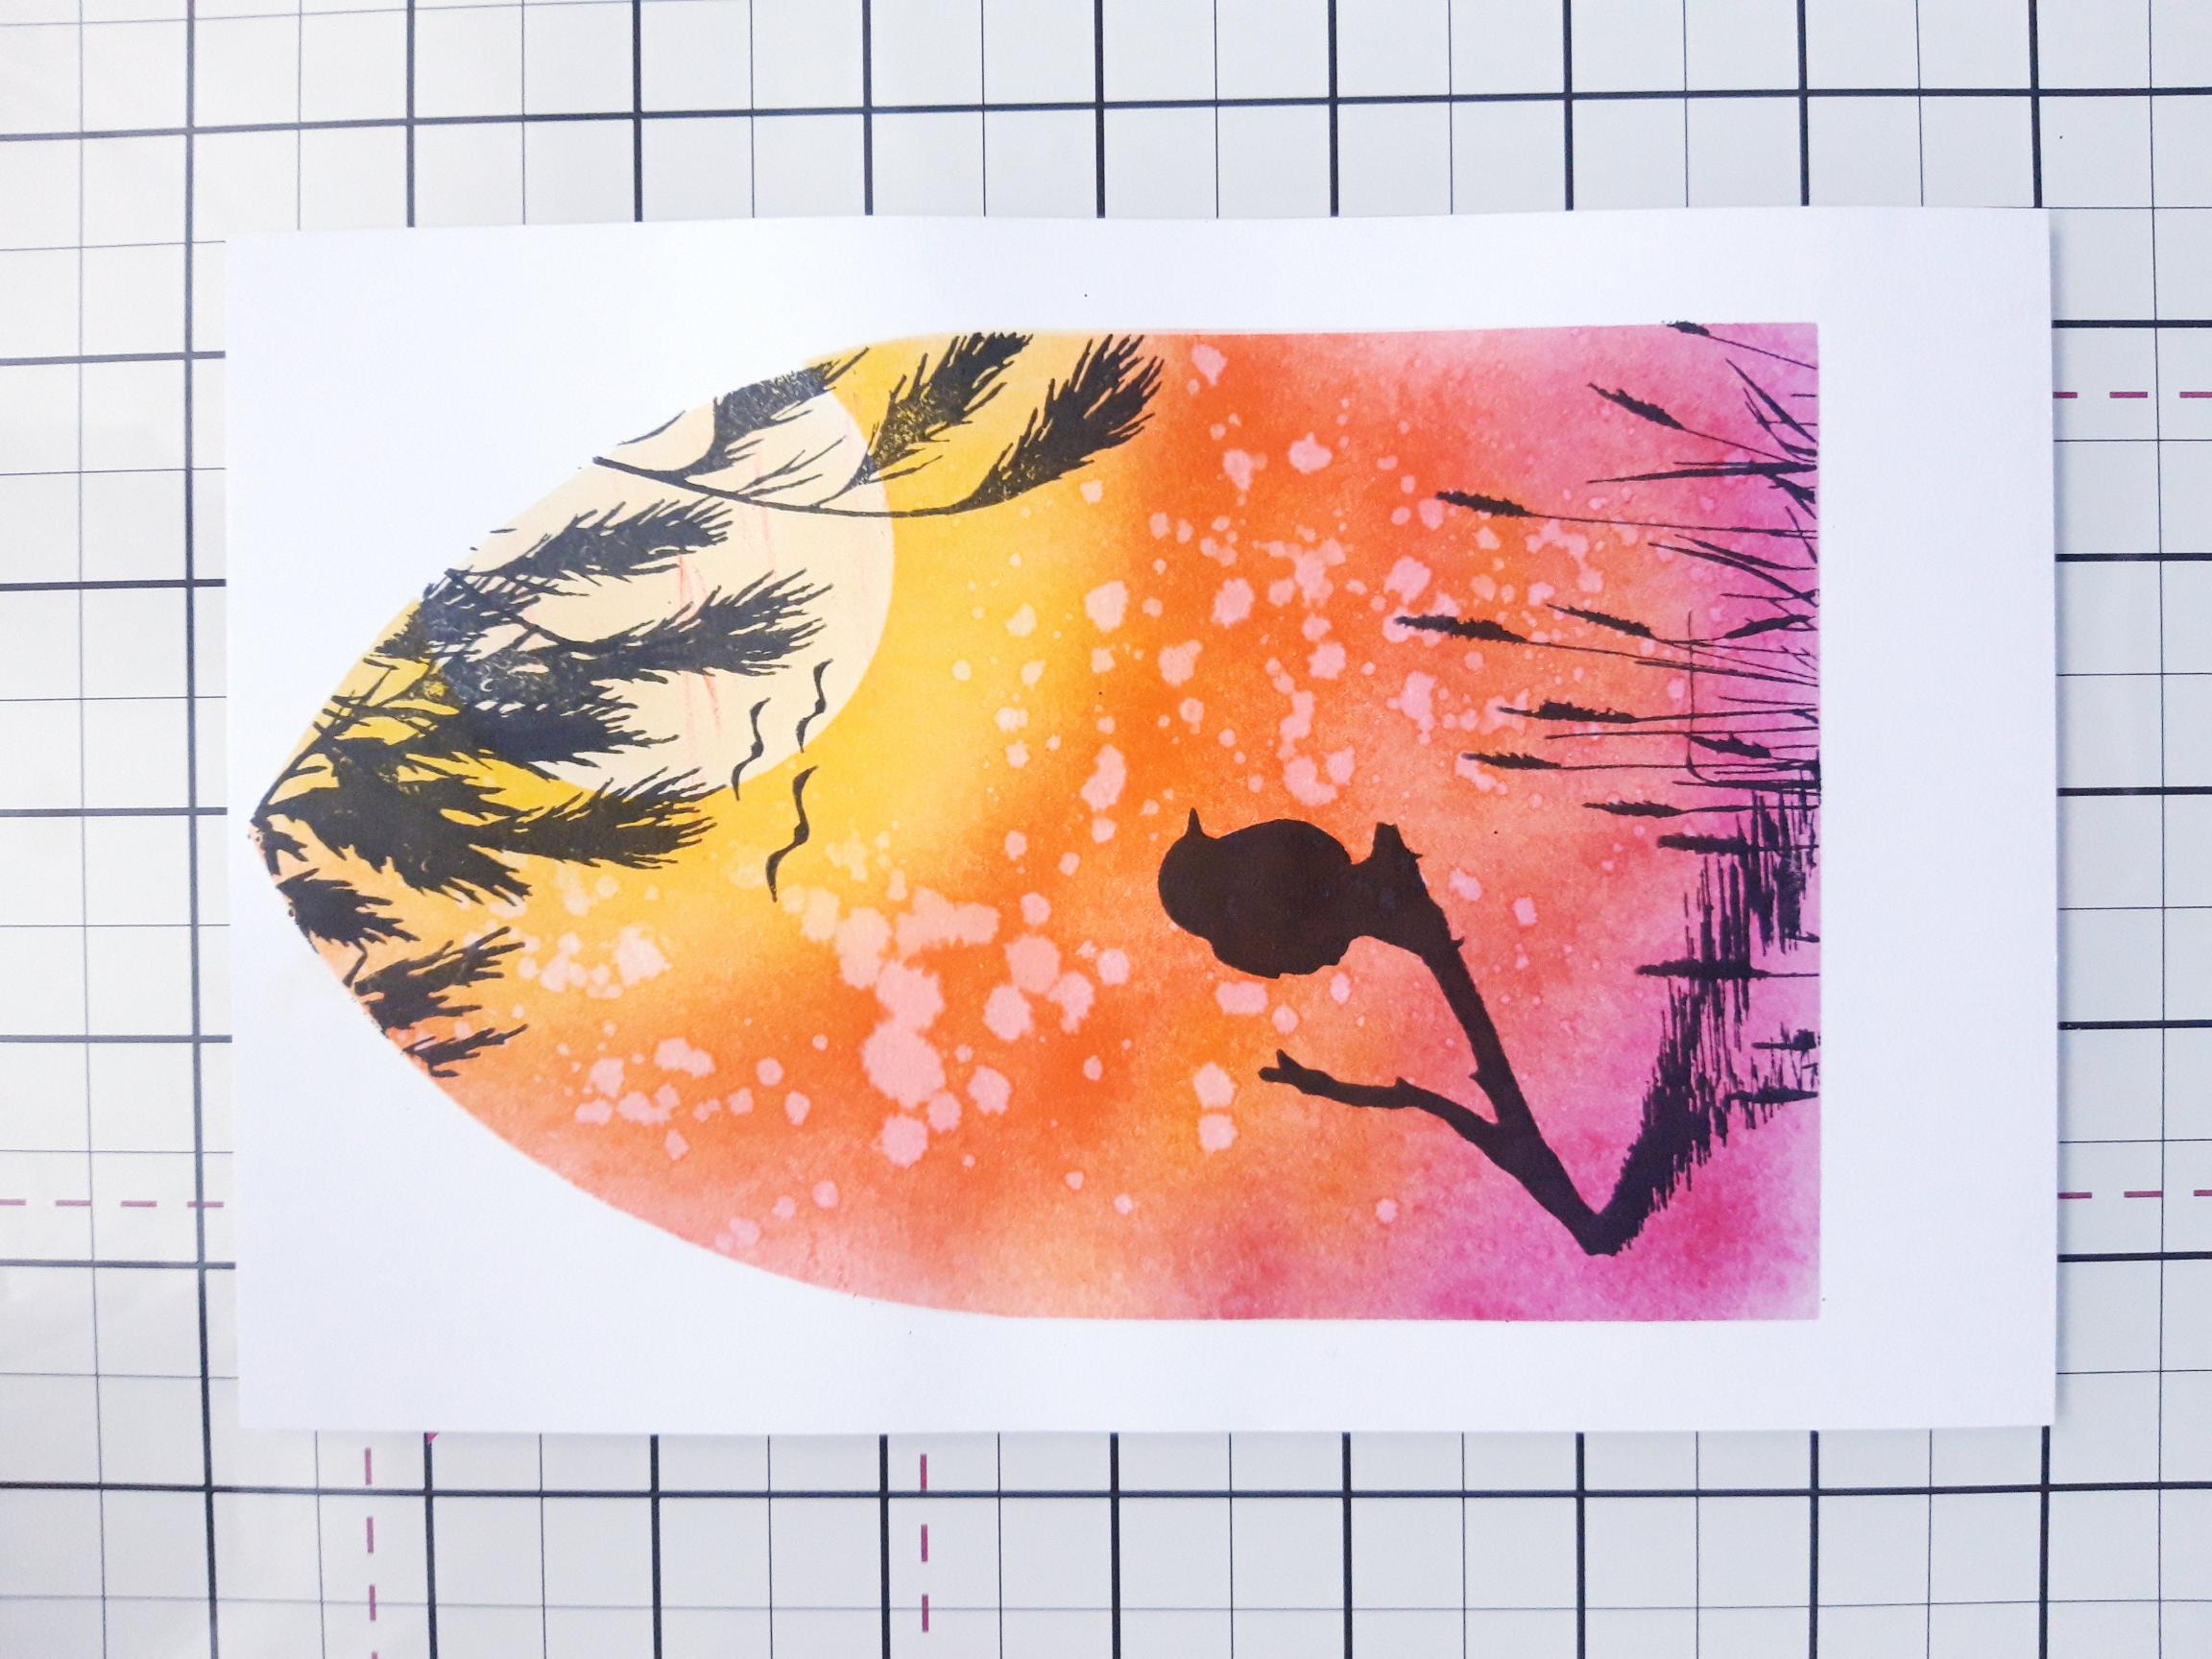
Use the same die to cut an arch window aperture stencil, in the copy paper. |
|
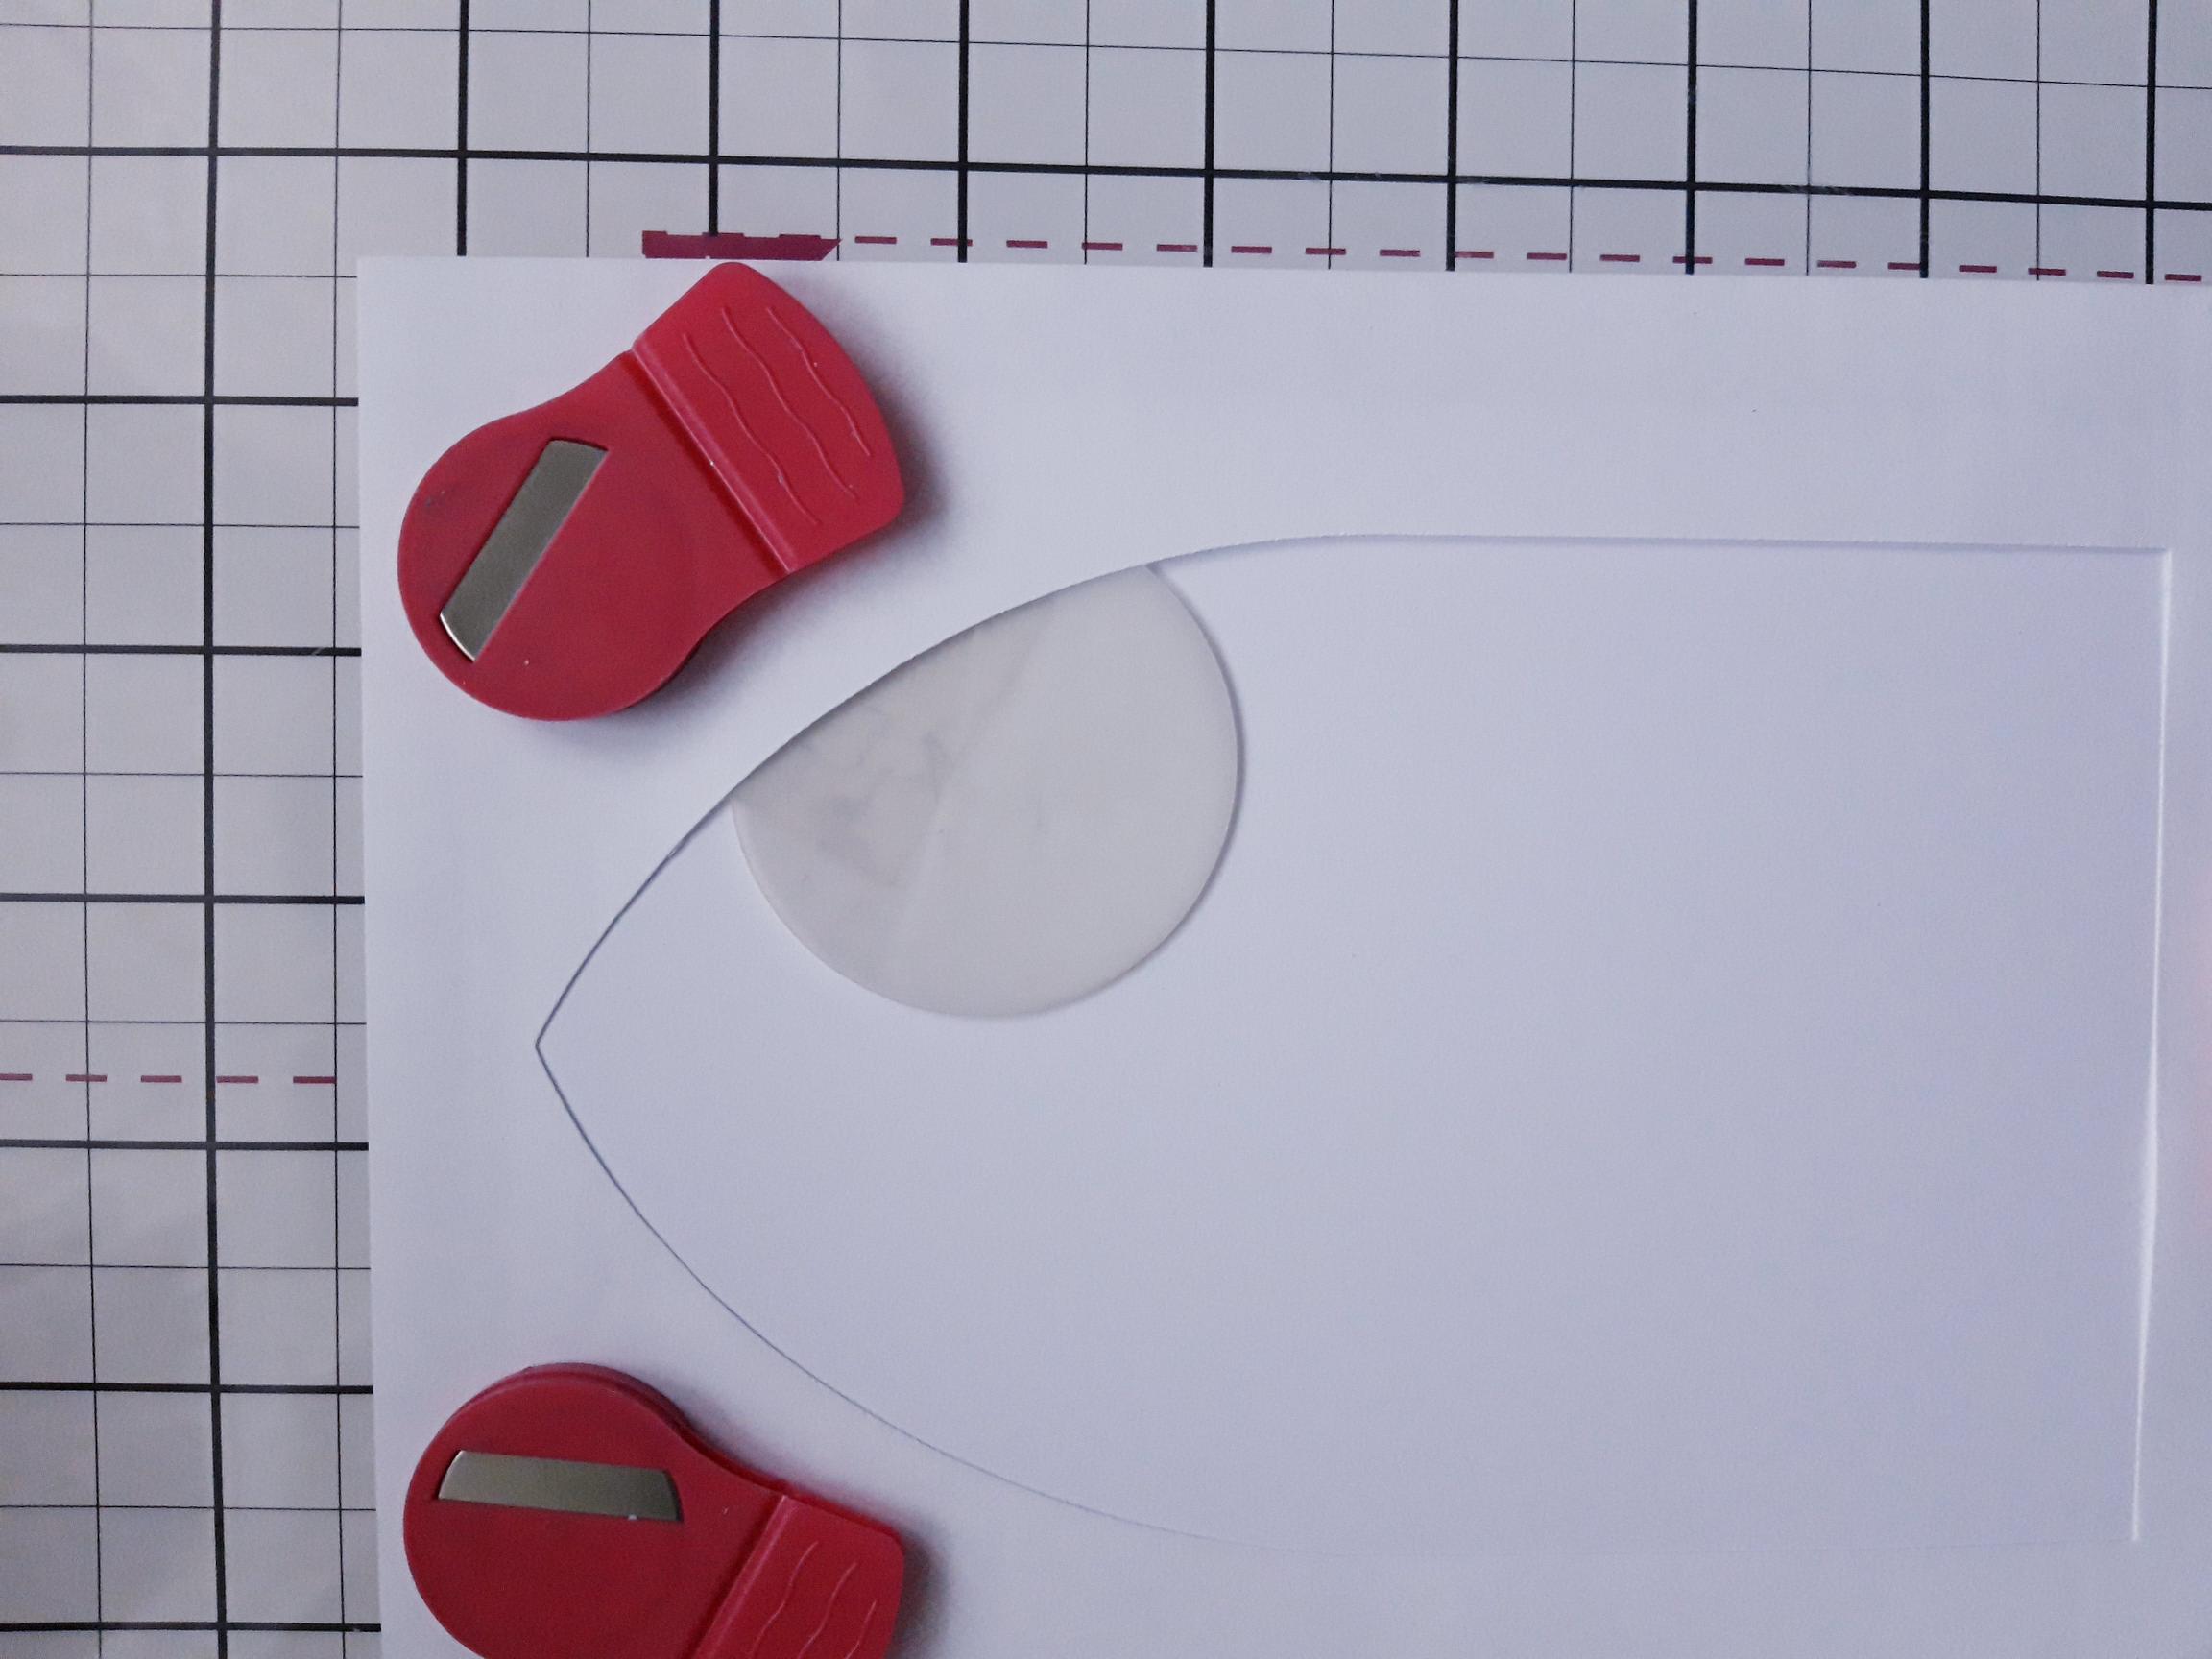
Secure your window aperture stencil in place, with your glass mat magnets, on the white card cut to 7 3/4 x 5 1/4". |
|
Place your circle mask top right of the aperture, securing in place with a magnet or low tack tape on the reverse. |
|
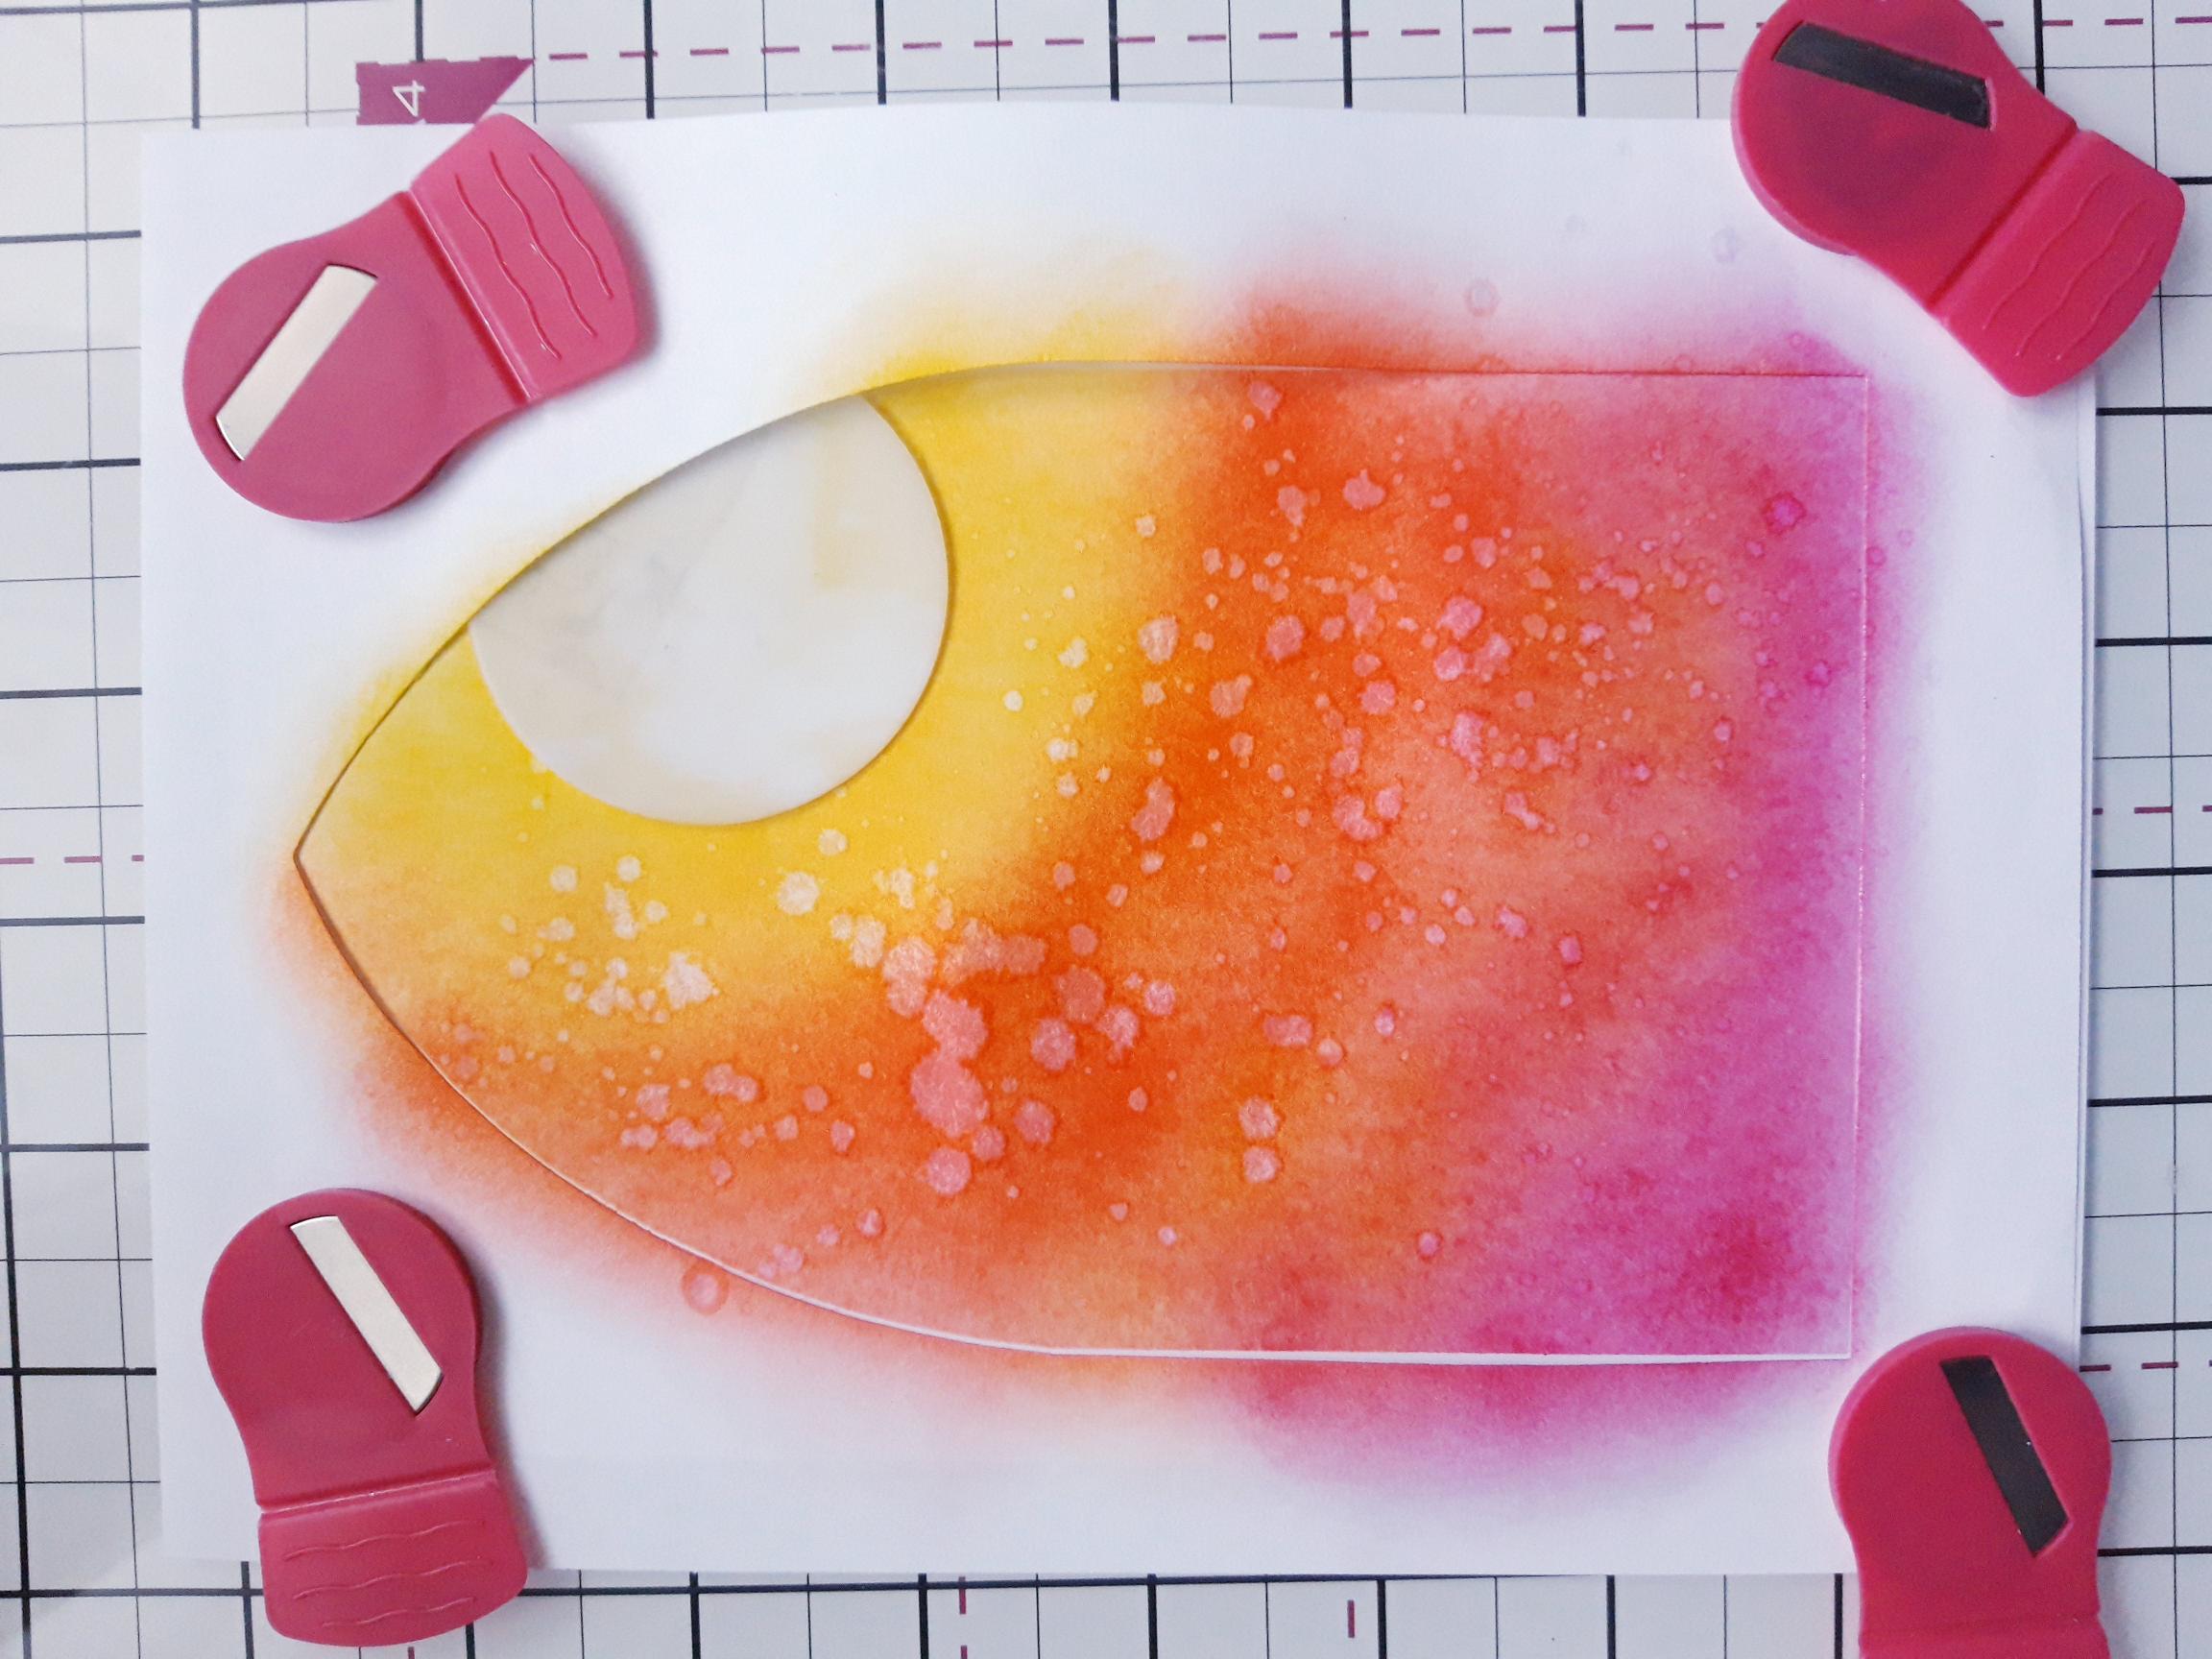
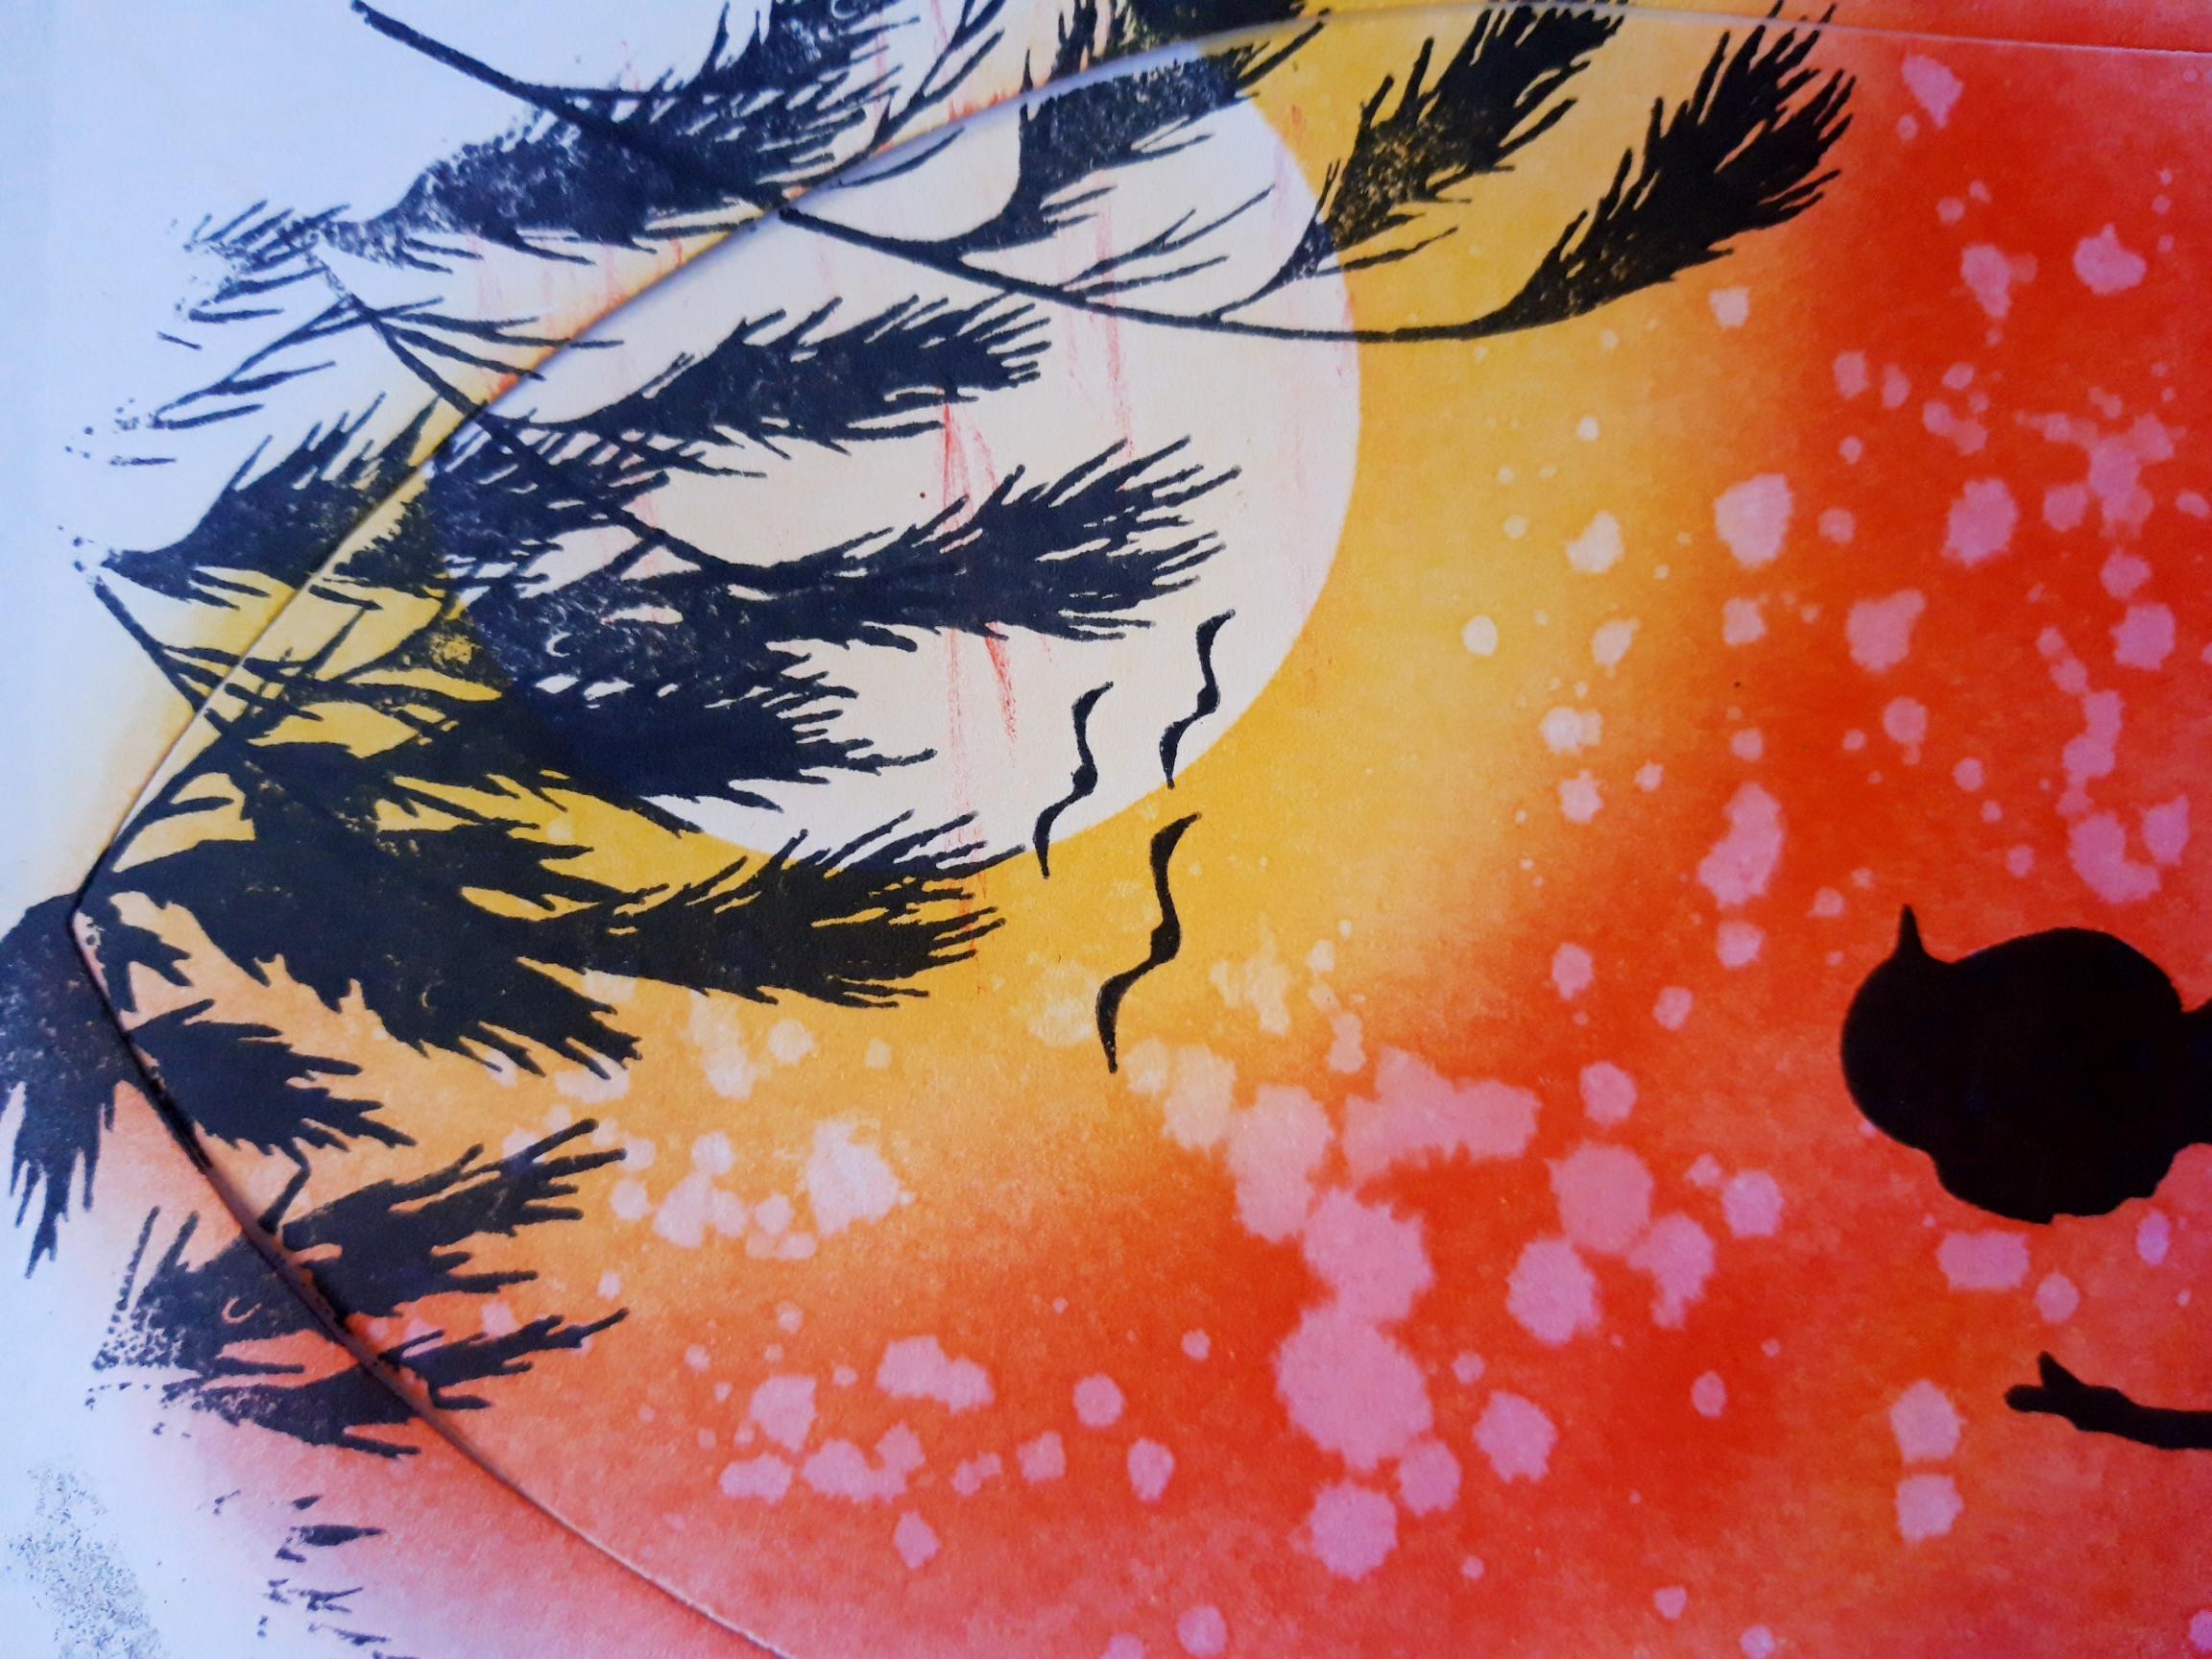
Using a blending tool and your Premium Dye inks, create your inky background. Once happy with the blend, splatter water all over, wait a few seconds then mop up the excess with a paper towel. |
|
Remove the circle mask and lightly blend with Sherbet, then drag Bittersweet across your Sun, with the edge of your blending tool, to create the appearance of wispy clouds floating by! |

|
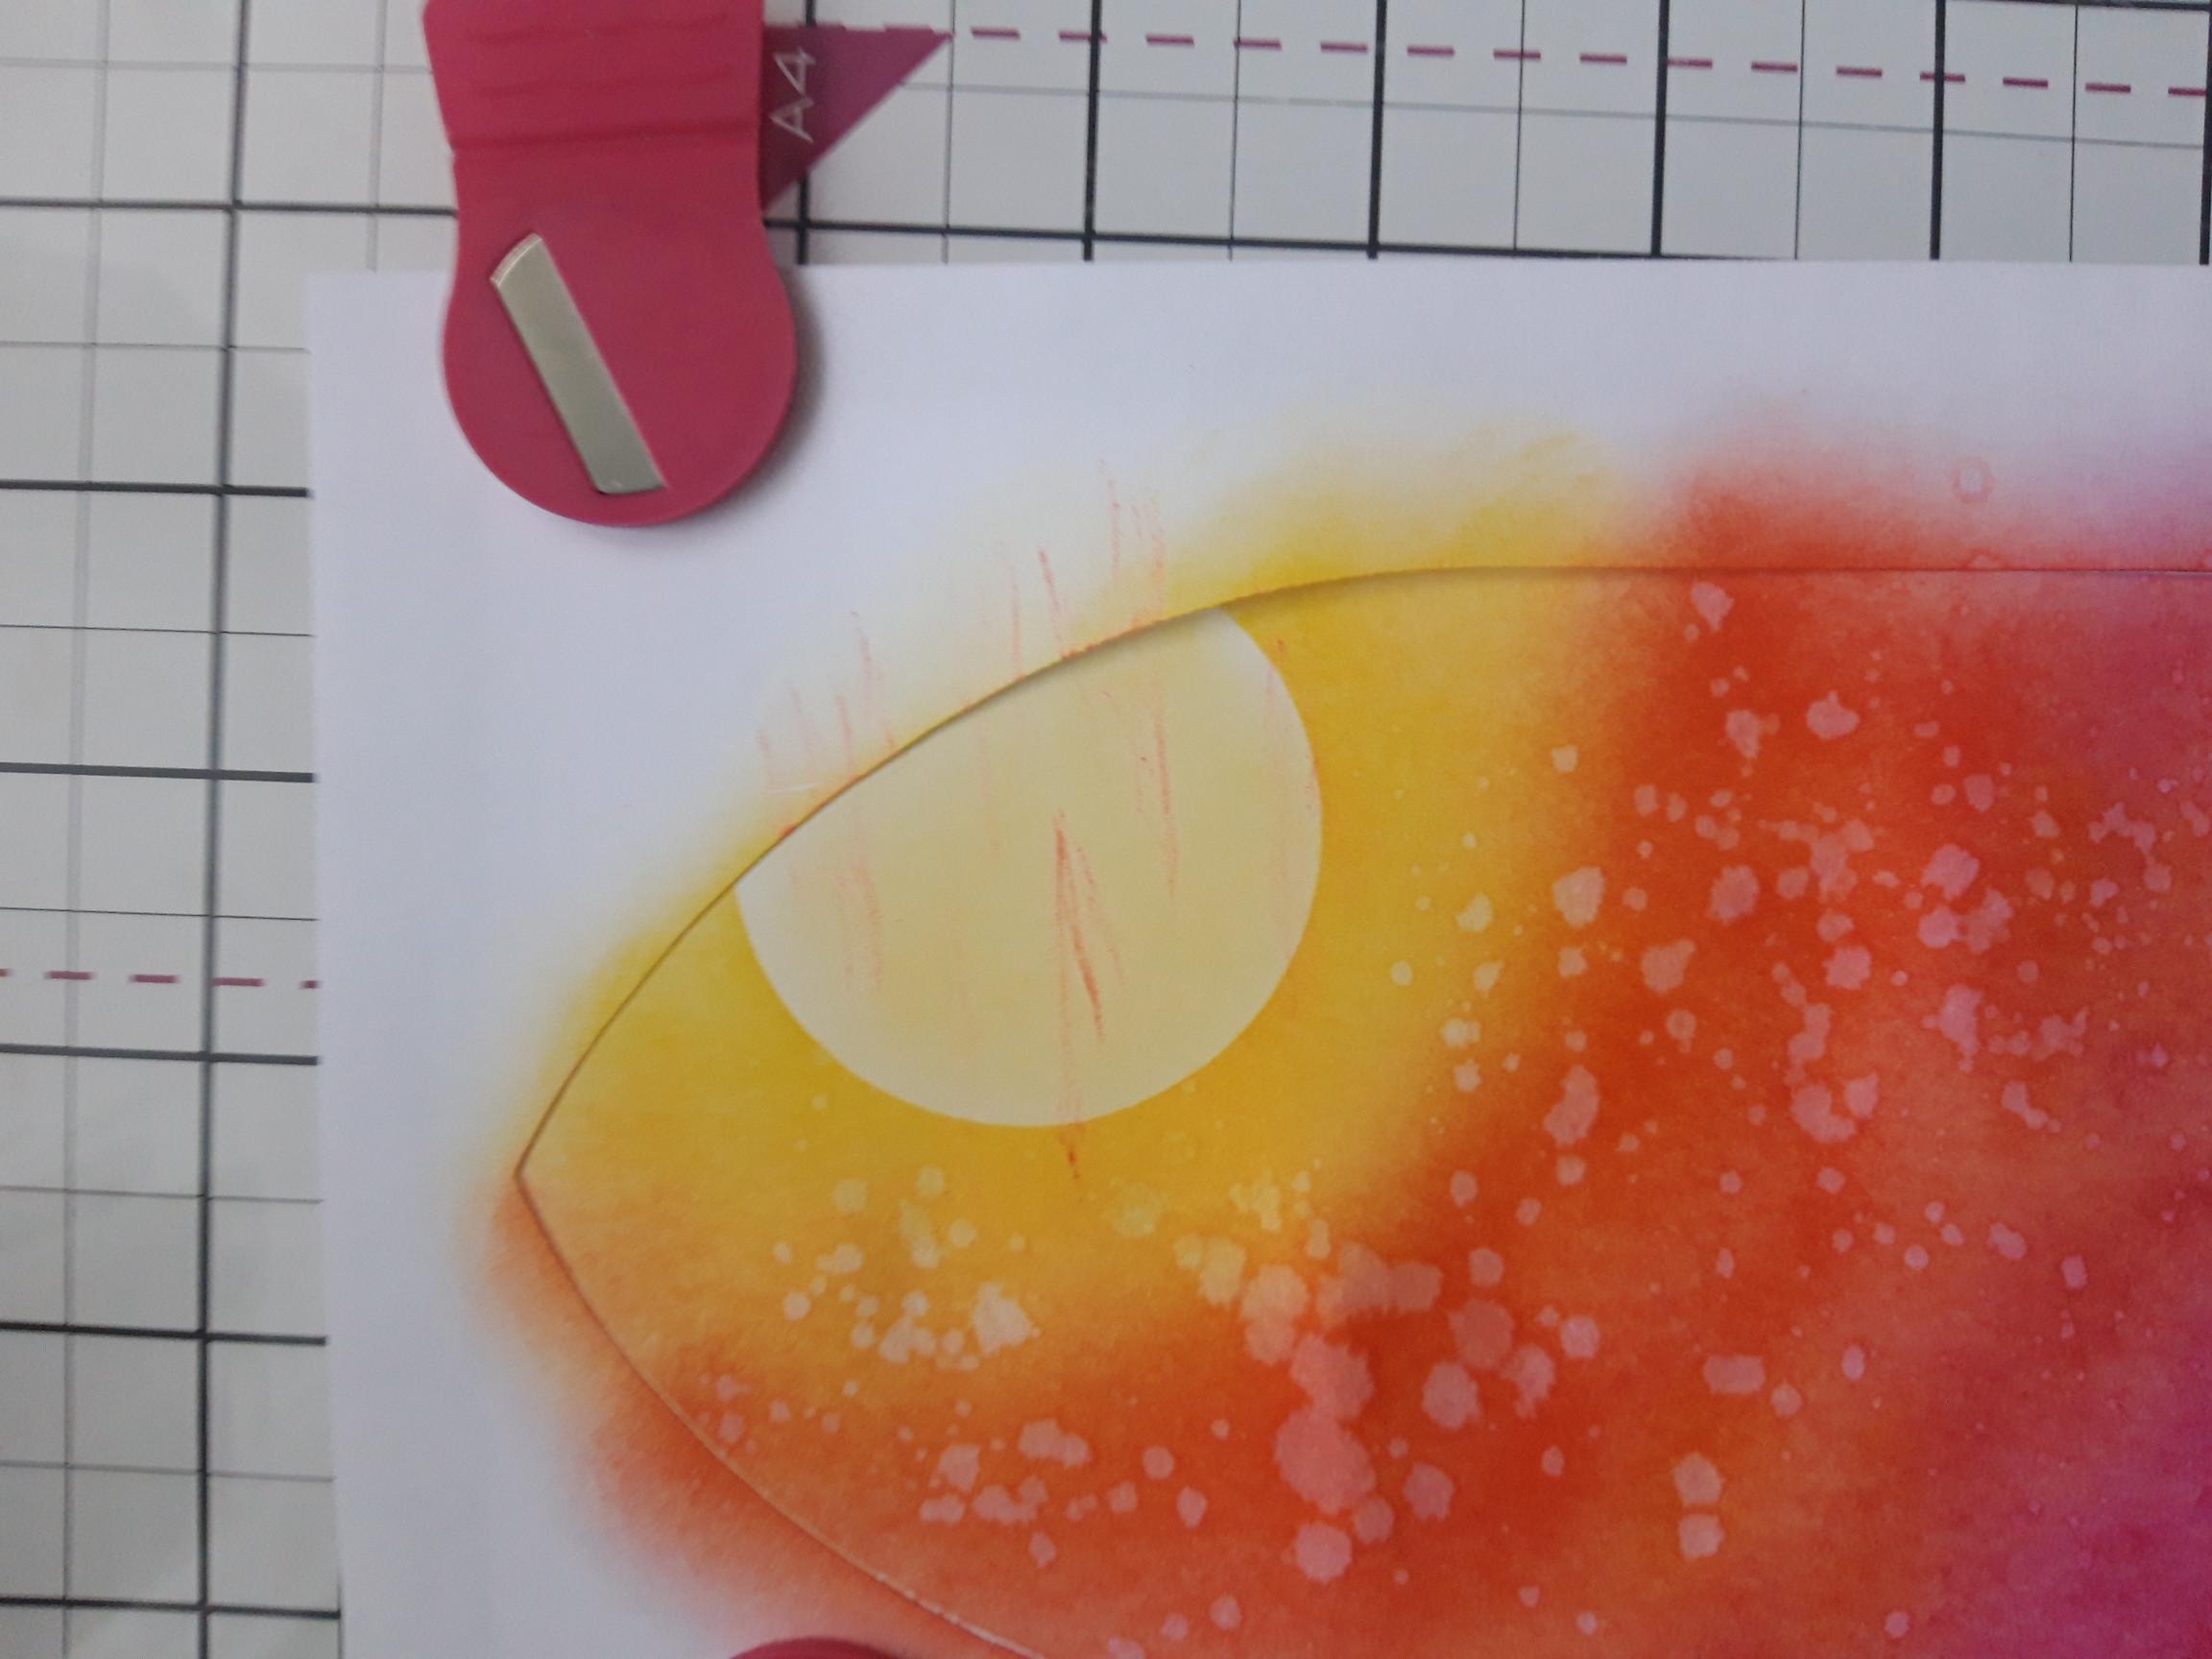
Ink up this gorgeous bird on a branch stamp, from Your Only Limit is You Stamp Collection, with the Midnight hybrid and stamp in the bottom left corner, of your window aperture. Ink up the rushes and stamp first and second generation, coming up from the bottom. First and second generation means after stamping the image once, you DO NOT re-ink it but immediately stamp it again, to create a fainter image, thus giving perspective to your artwork. |
|
Ink up these leafy stamps with the Midnight and stamp coming down from the top right, across your Sun. Again, stamp first and second generation, to create perspective. Ink up the flock of birds stamp, from the Every New Day Stamp Collection and stamp flying across your Sun.
|
|
Dry thoroughly and remove the window mask, to reveal your beautiful artwork. |
|
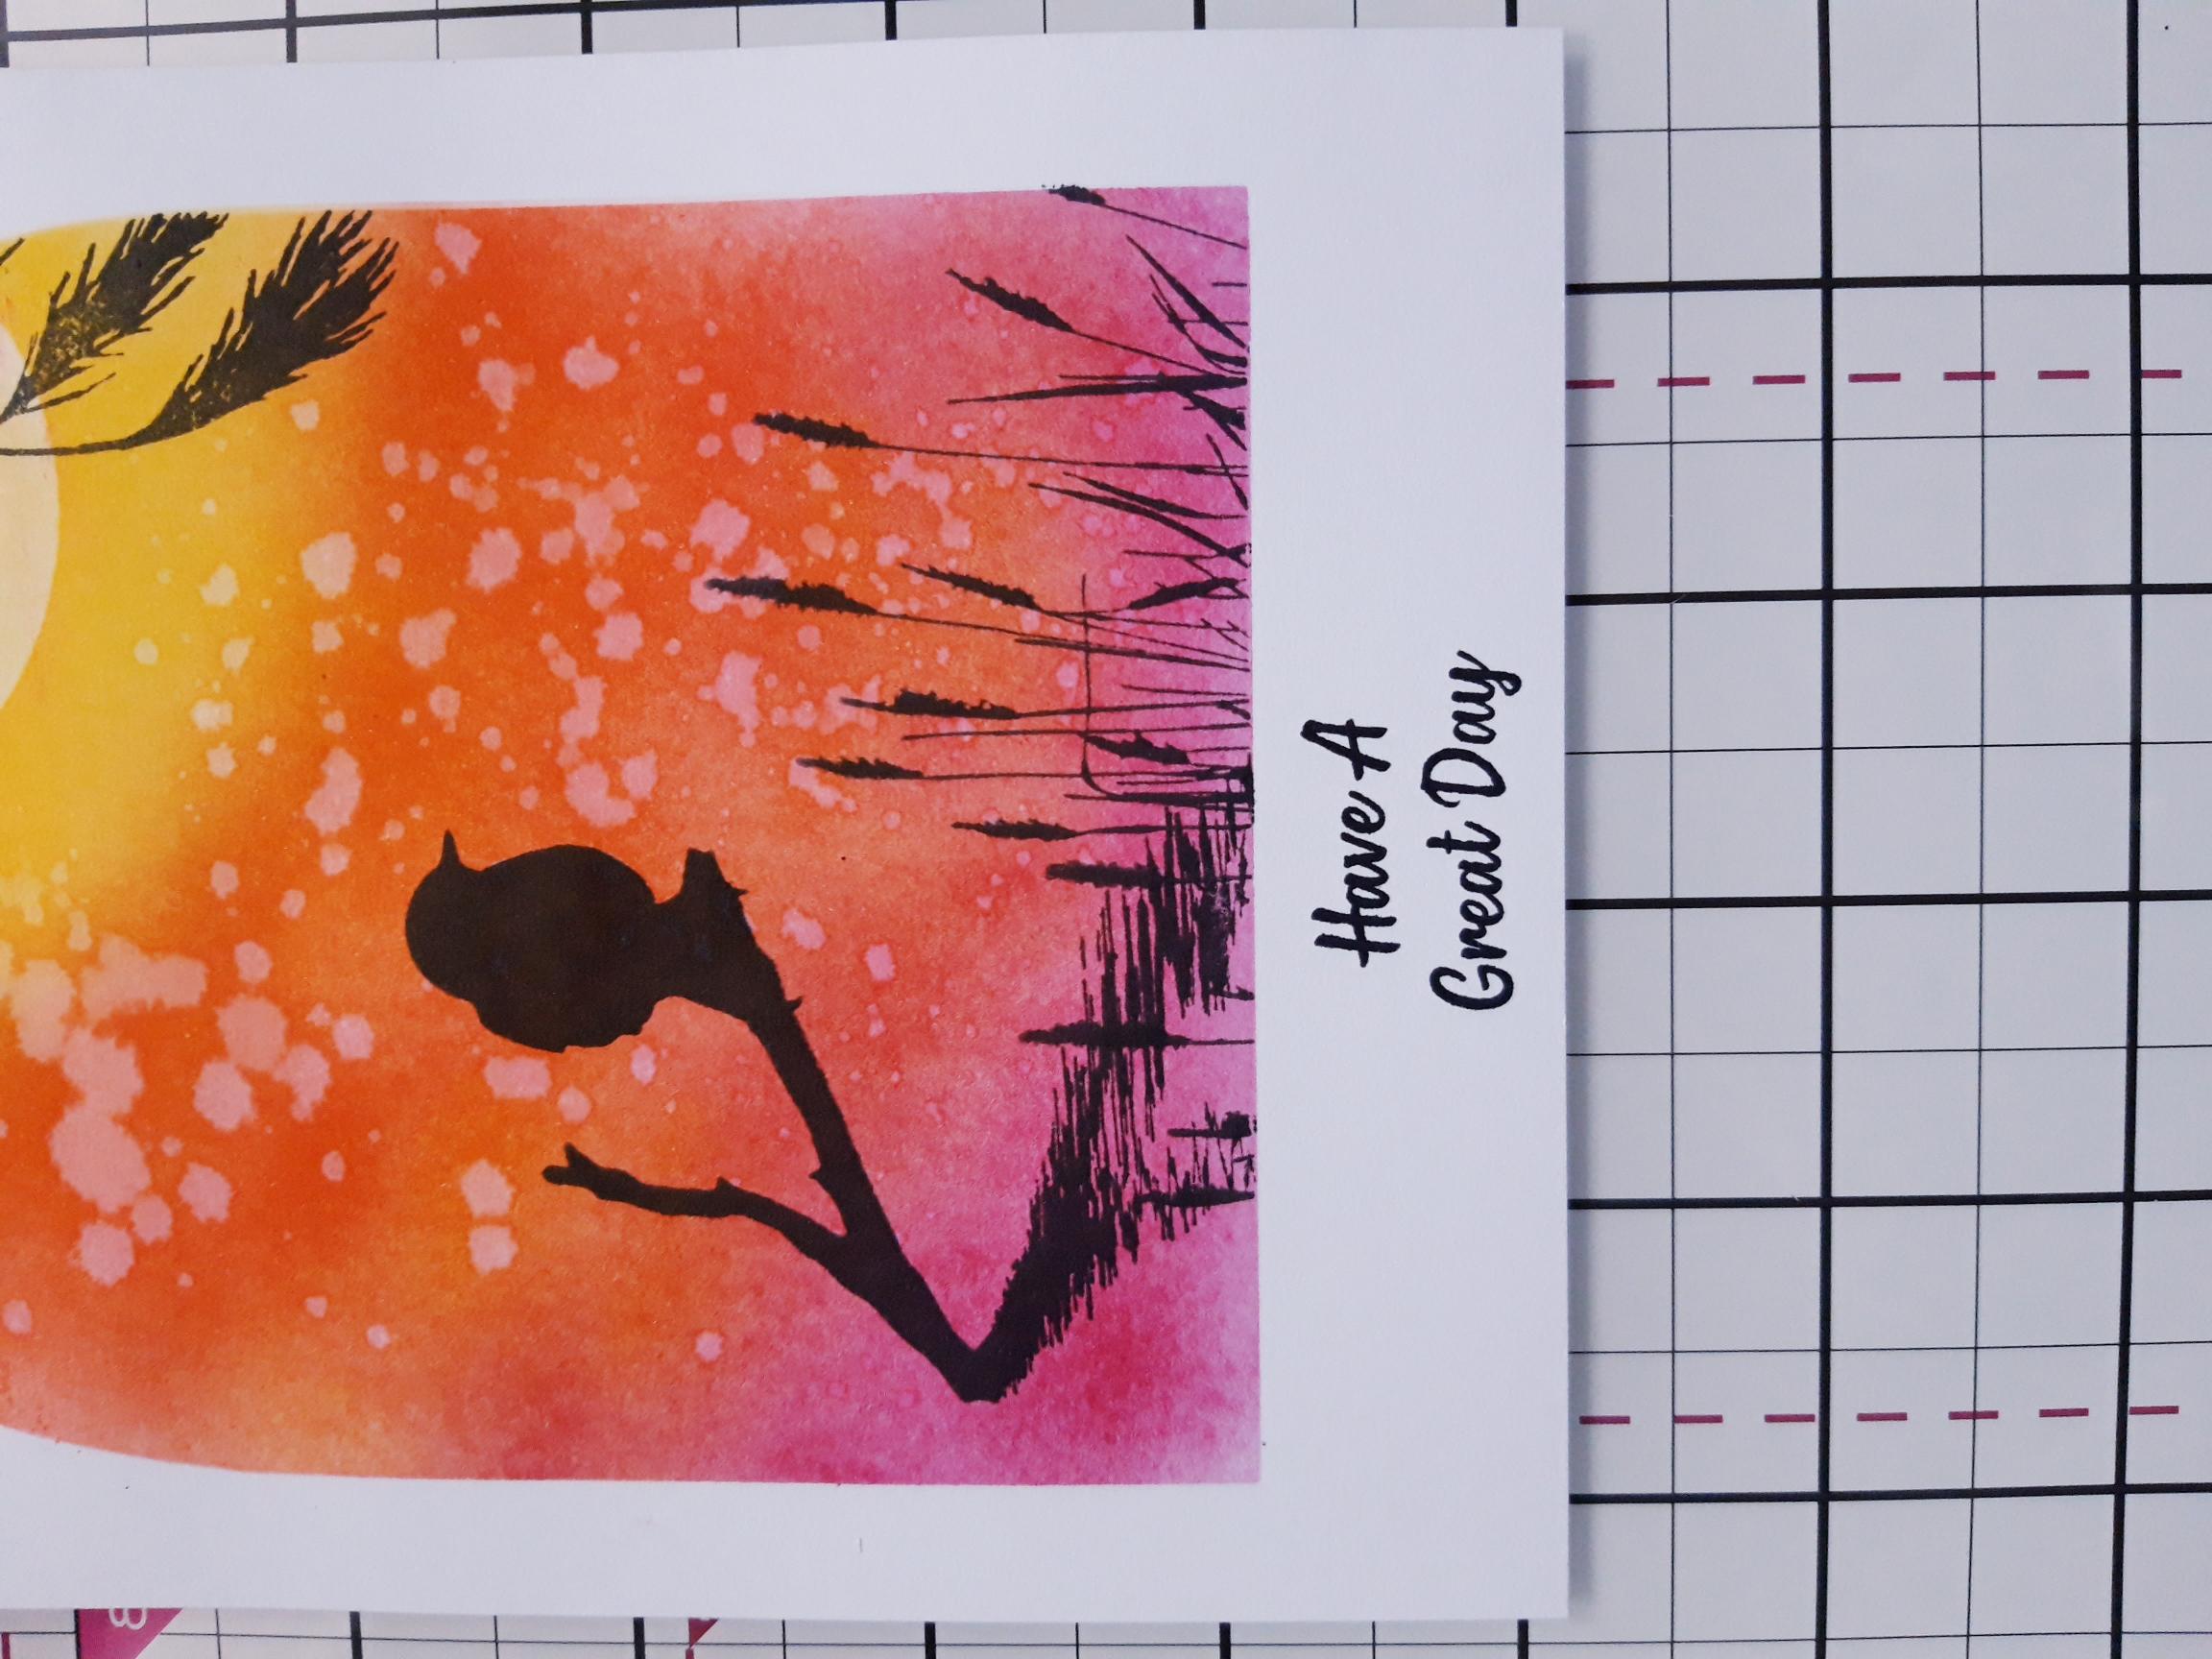
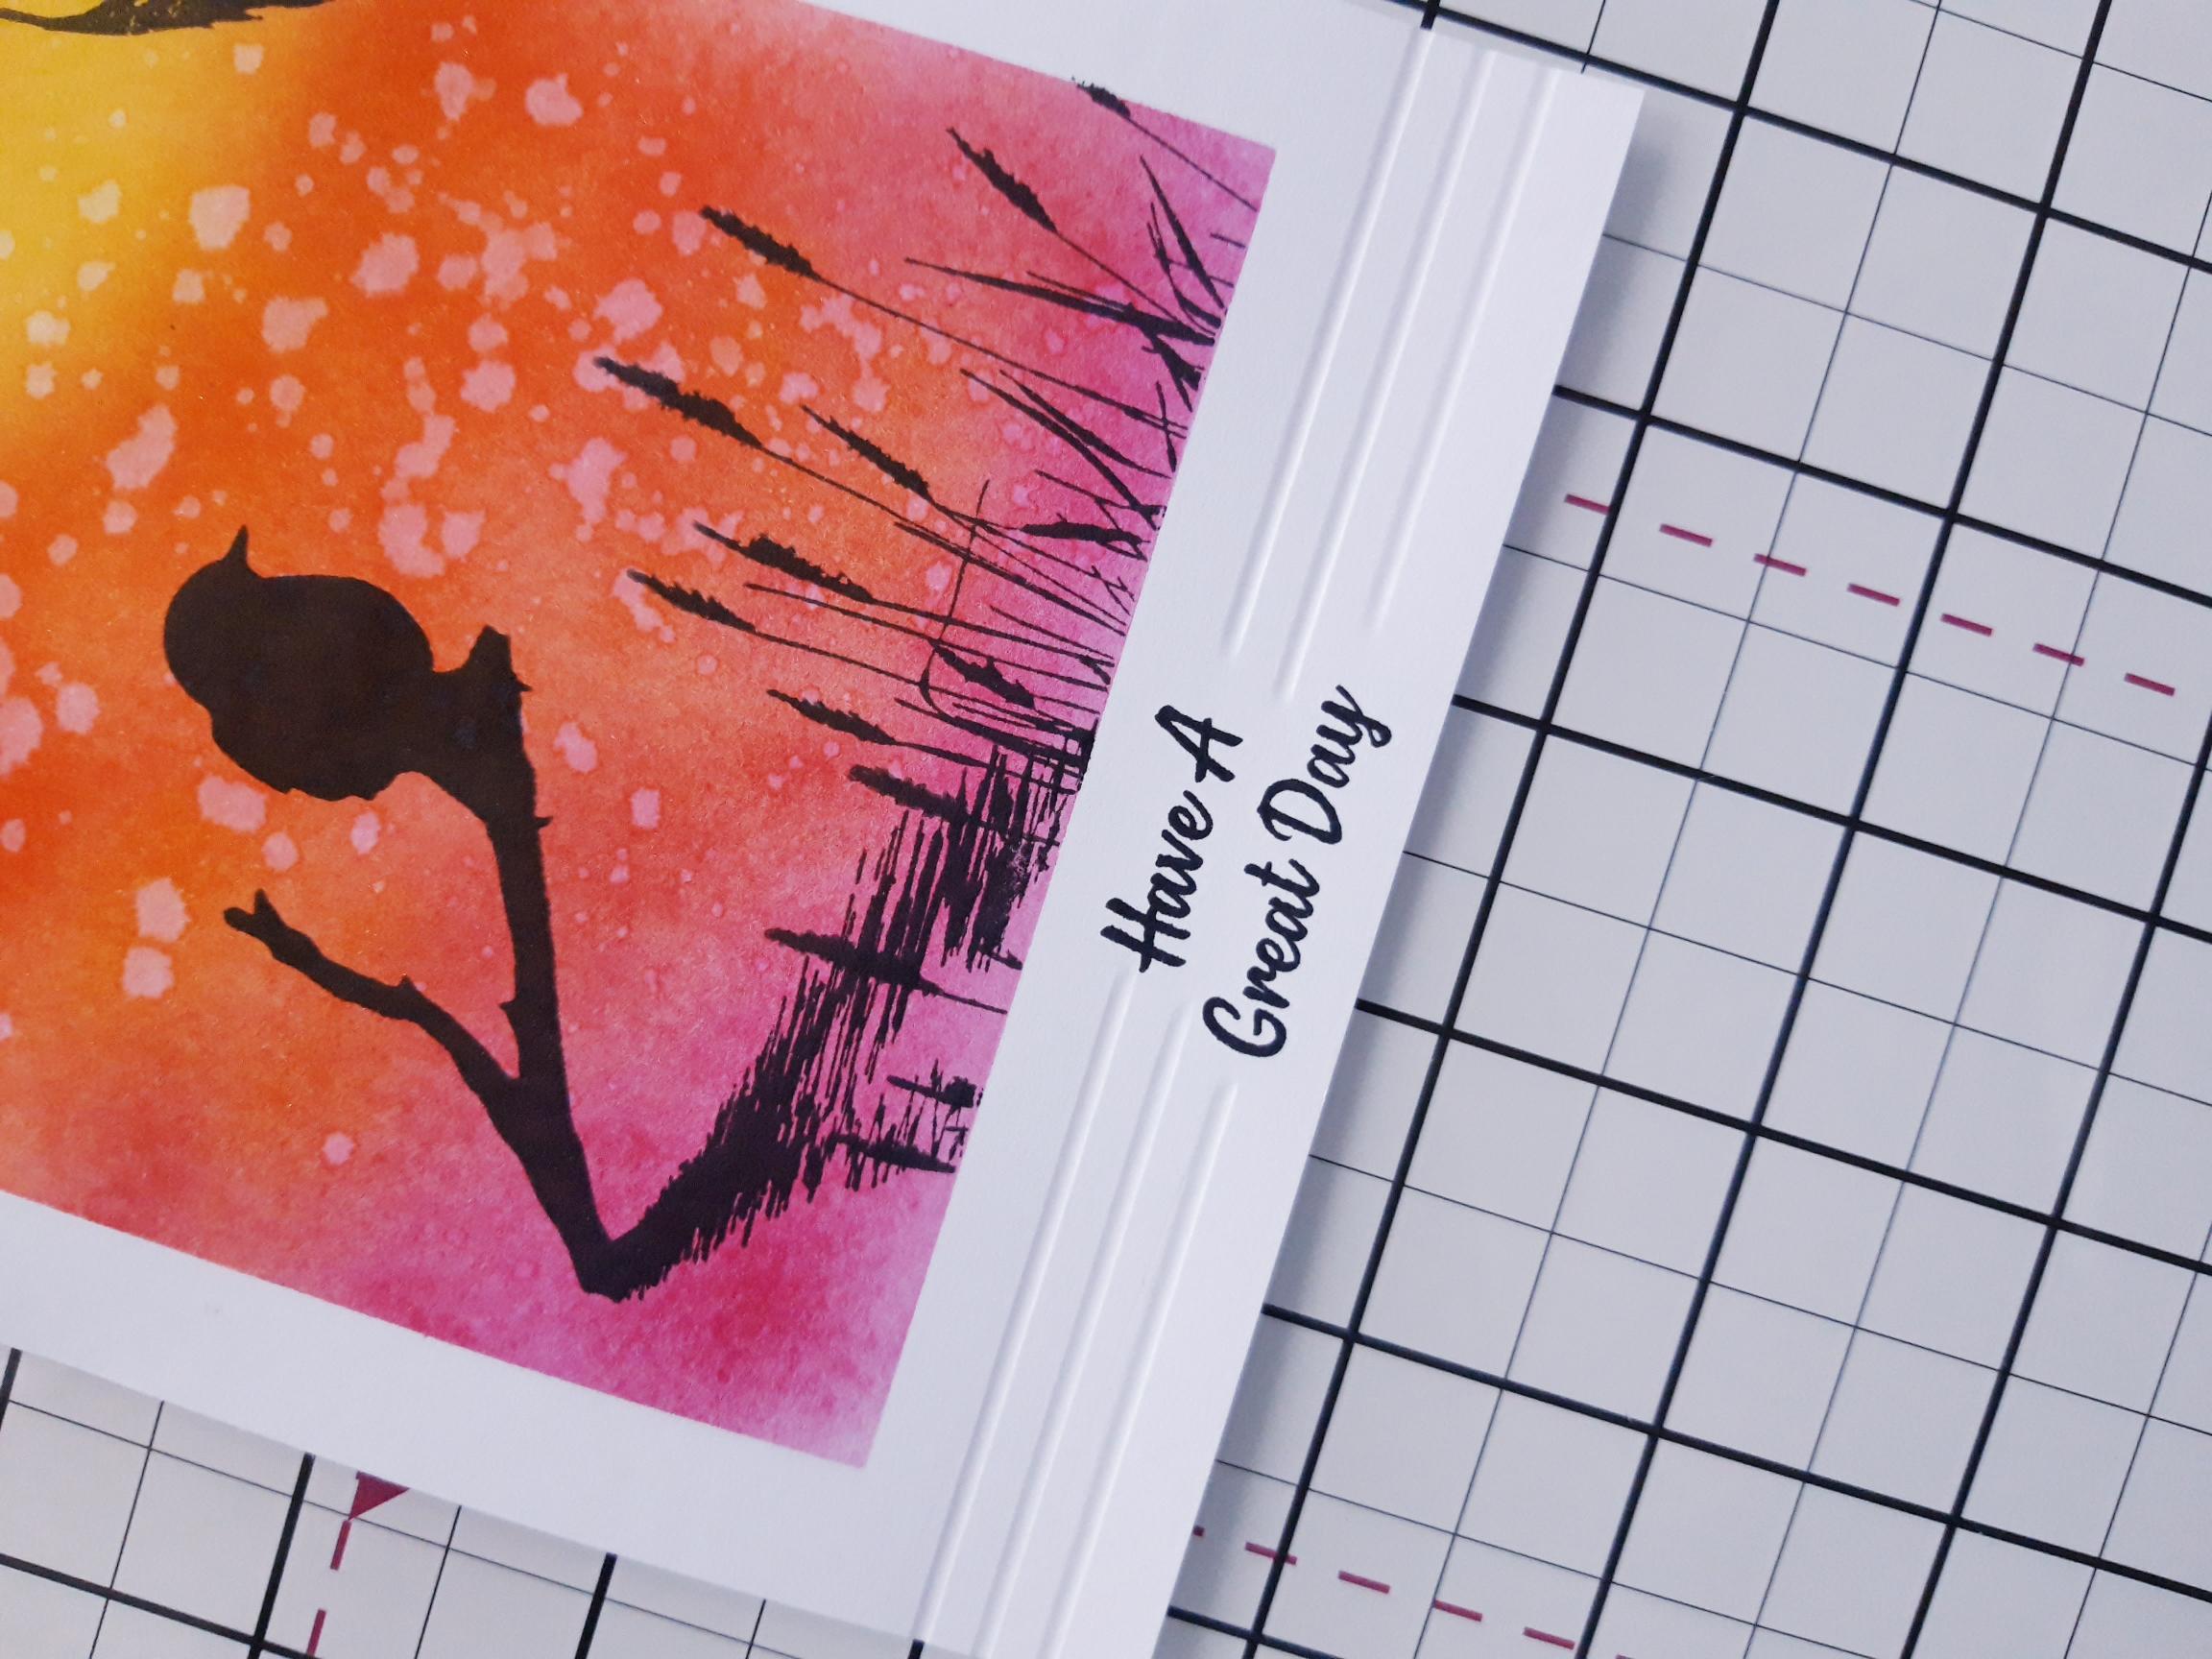
Ink up your sentiment stamp, from the Keep Exploring Lamination Stamp Collection, with Midnight and stamp in the centre, under your arch window. |
|
Score 2 horizontal lines, either side of your sentiment, using your scoreboard and score tool. This adds a touch of interest and elegance to your make. |
|
Adhere your die cut 3D arch window frame in place, over your artwork. |
|
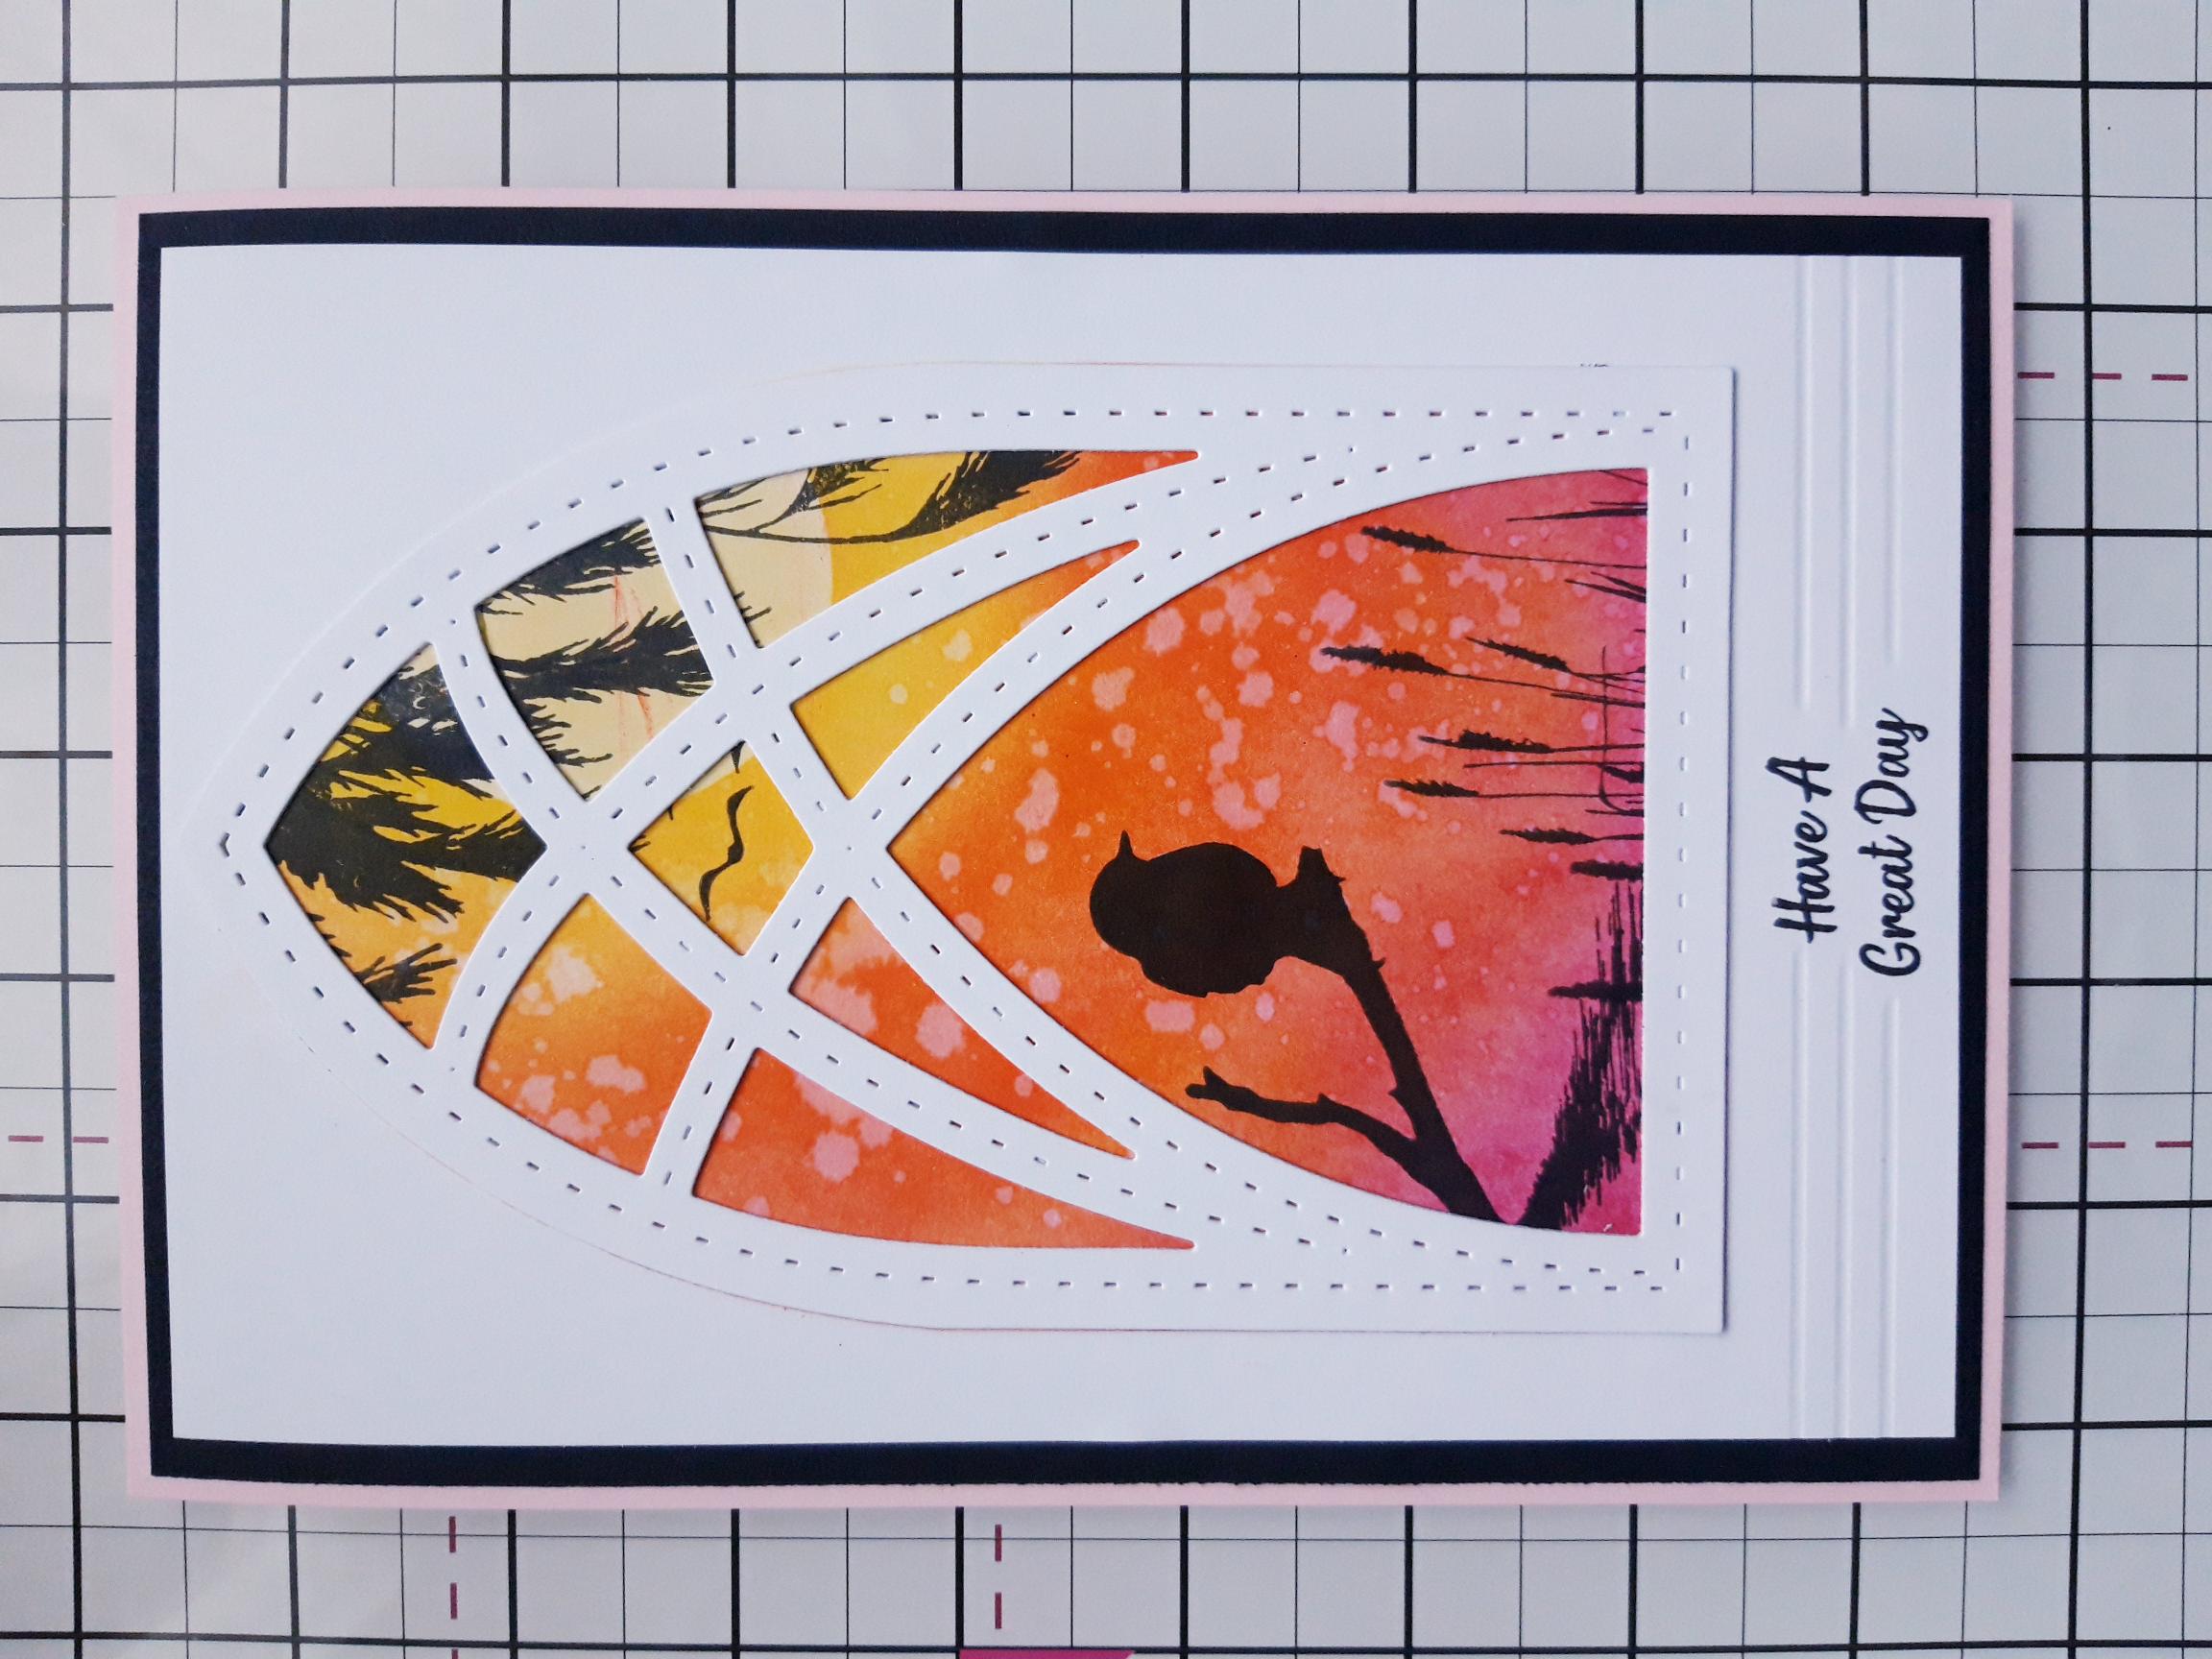
To finish, adhere on to the black card and then on to your pink card blank. |