Give your friends $10 off their first order!
Refer a FRIEND


WHAT YOU WILL NEED:
Kraft card blank 7 x 5"
Premium A4 Cardstock Blush Collection: Blush mirri card 6 1/2 x 4 1/2"
White card 6 1/4 x 4 1/4"
Copy paper
Imala Adventure Stamp Collection
SBM Hybrid Ink Pad: Midnight
SBM Premium Dye Ink Pad: Limeade
Blending tool
Heart nesting dies (optional)
Clear adhesive water drops
Twine
Eureka 101 Watercolour Tablet
SBM Magnetic glass mat
Paper Trimmer
Perfect Together Glue
Foam pads
Die cutting machine (optional)
[click image to enlarge] 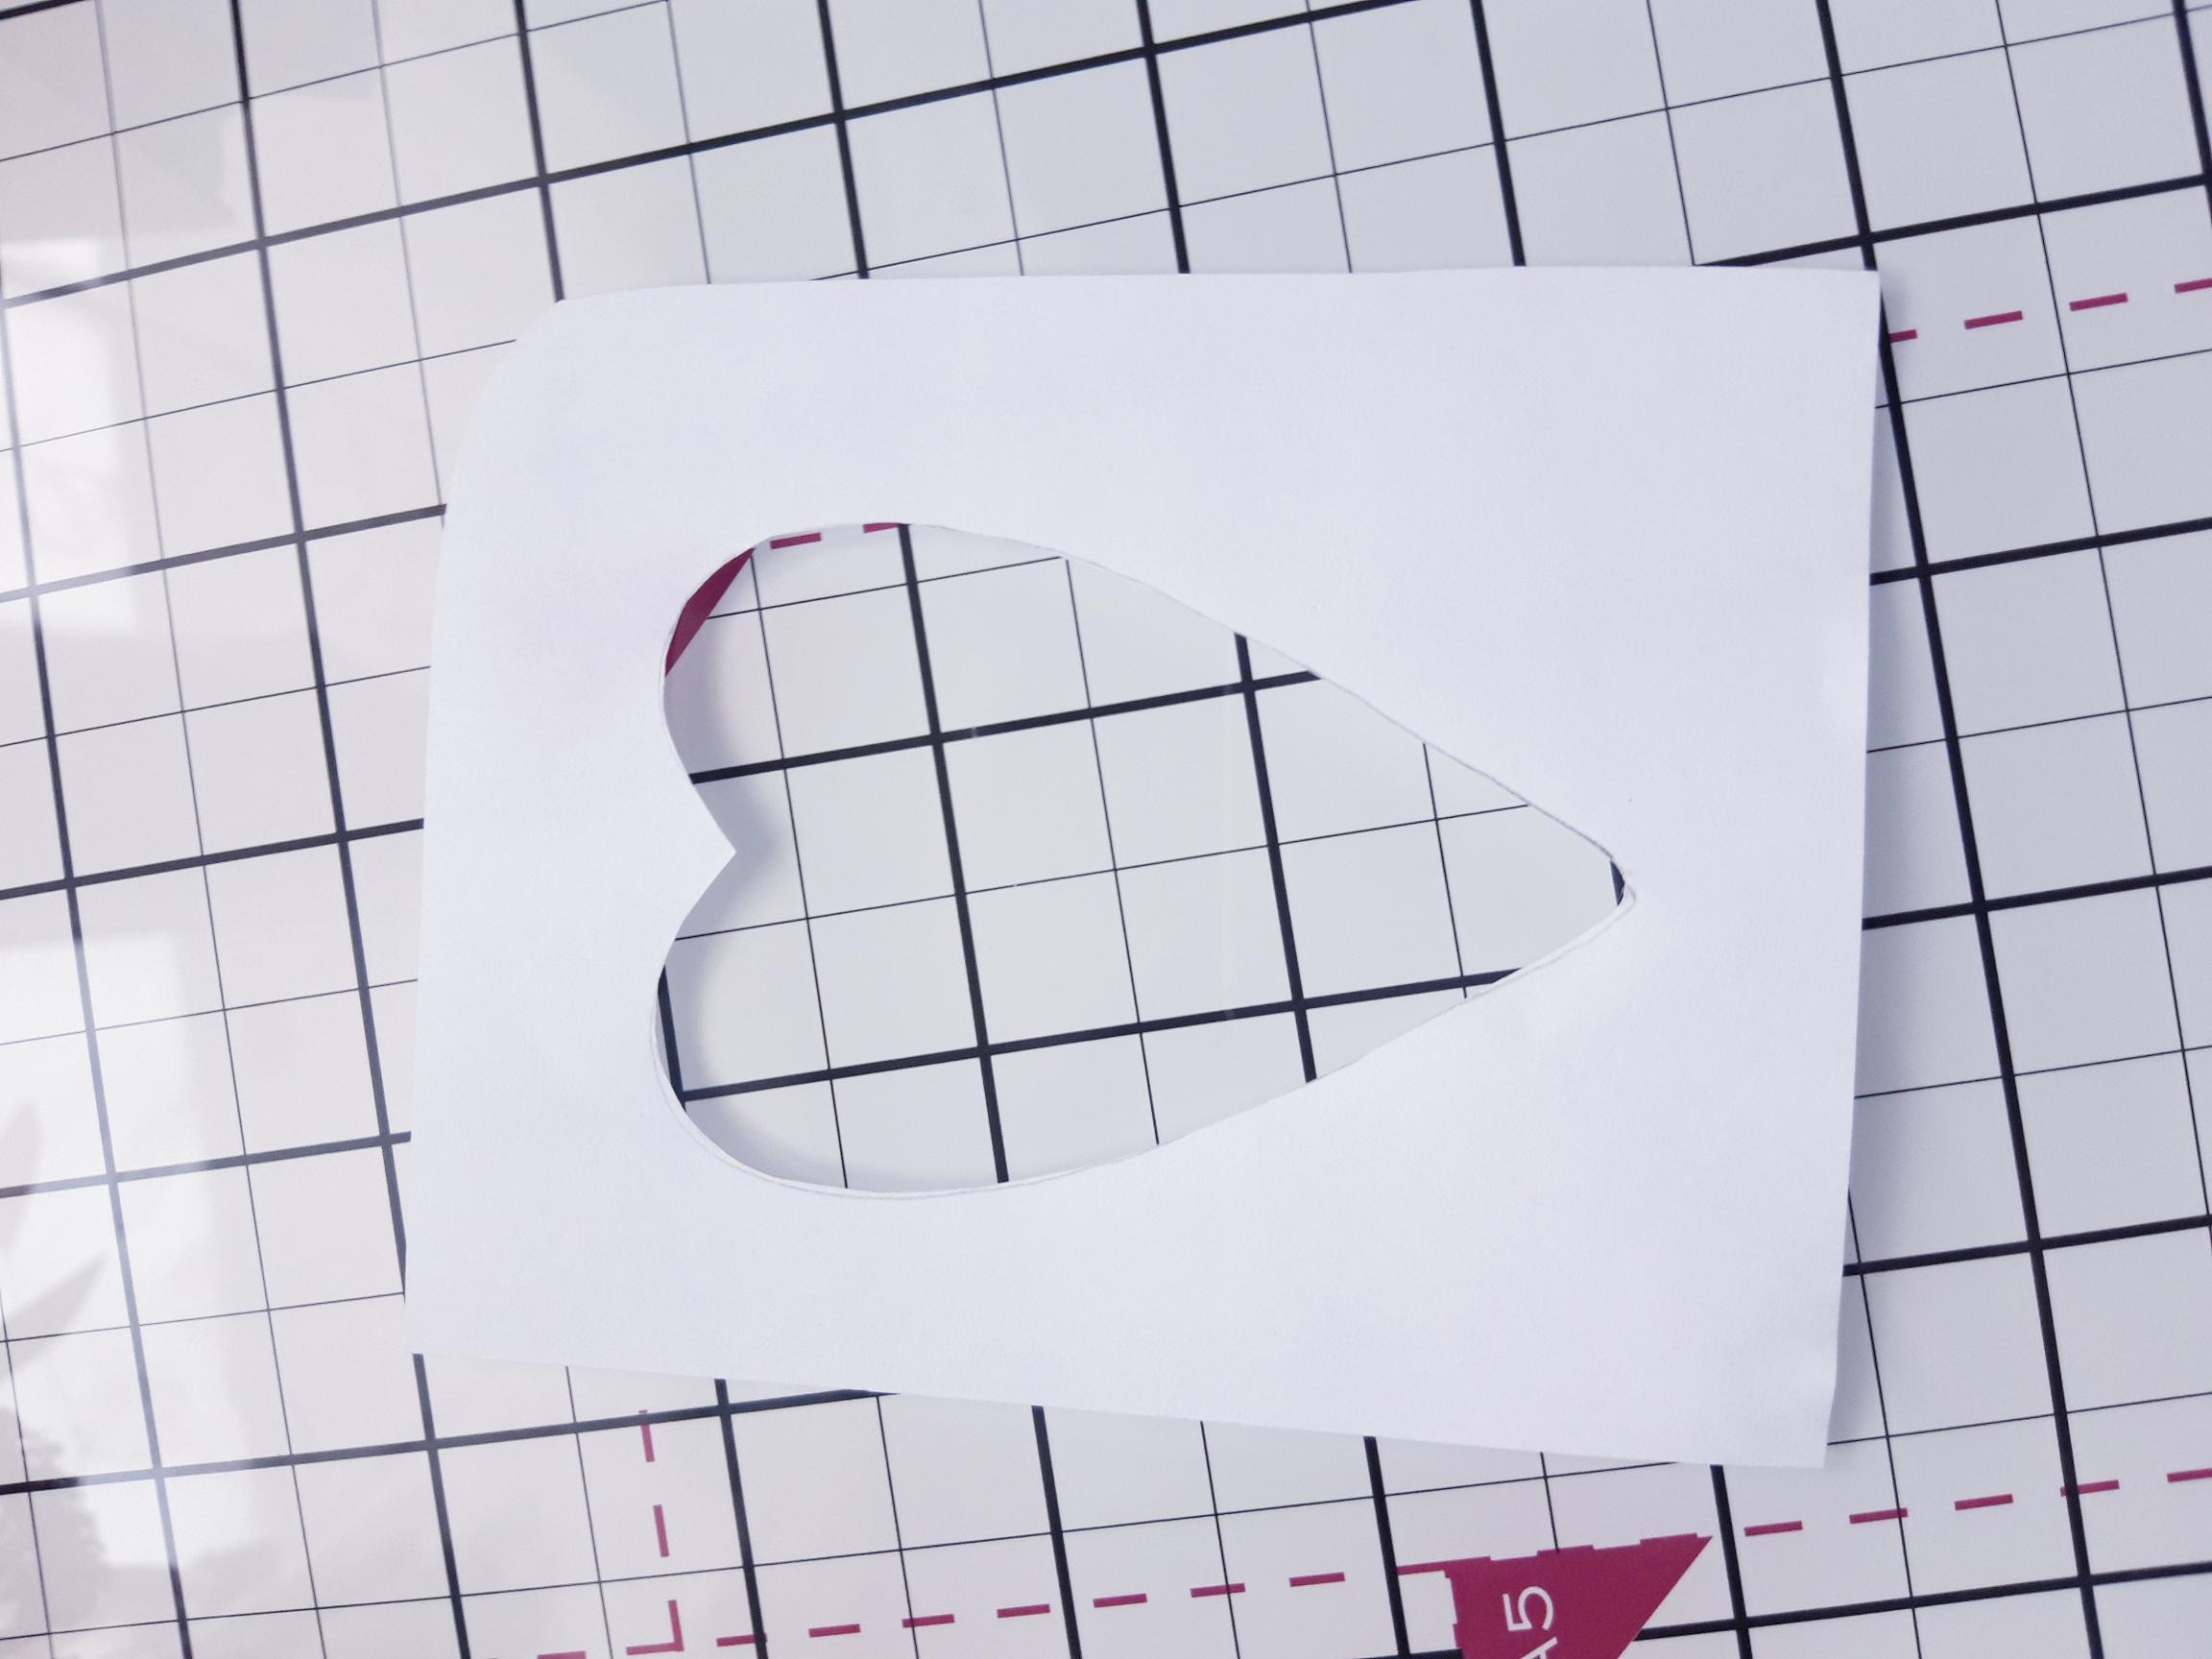
|
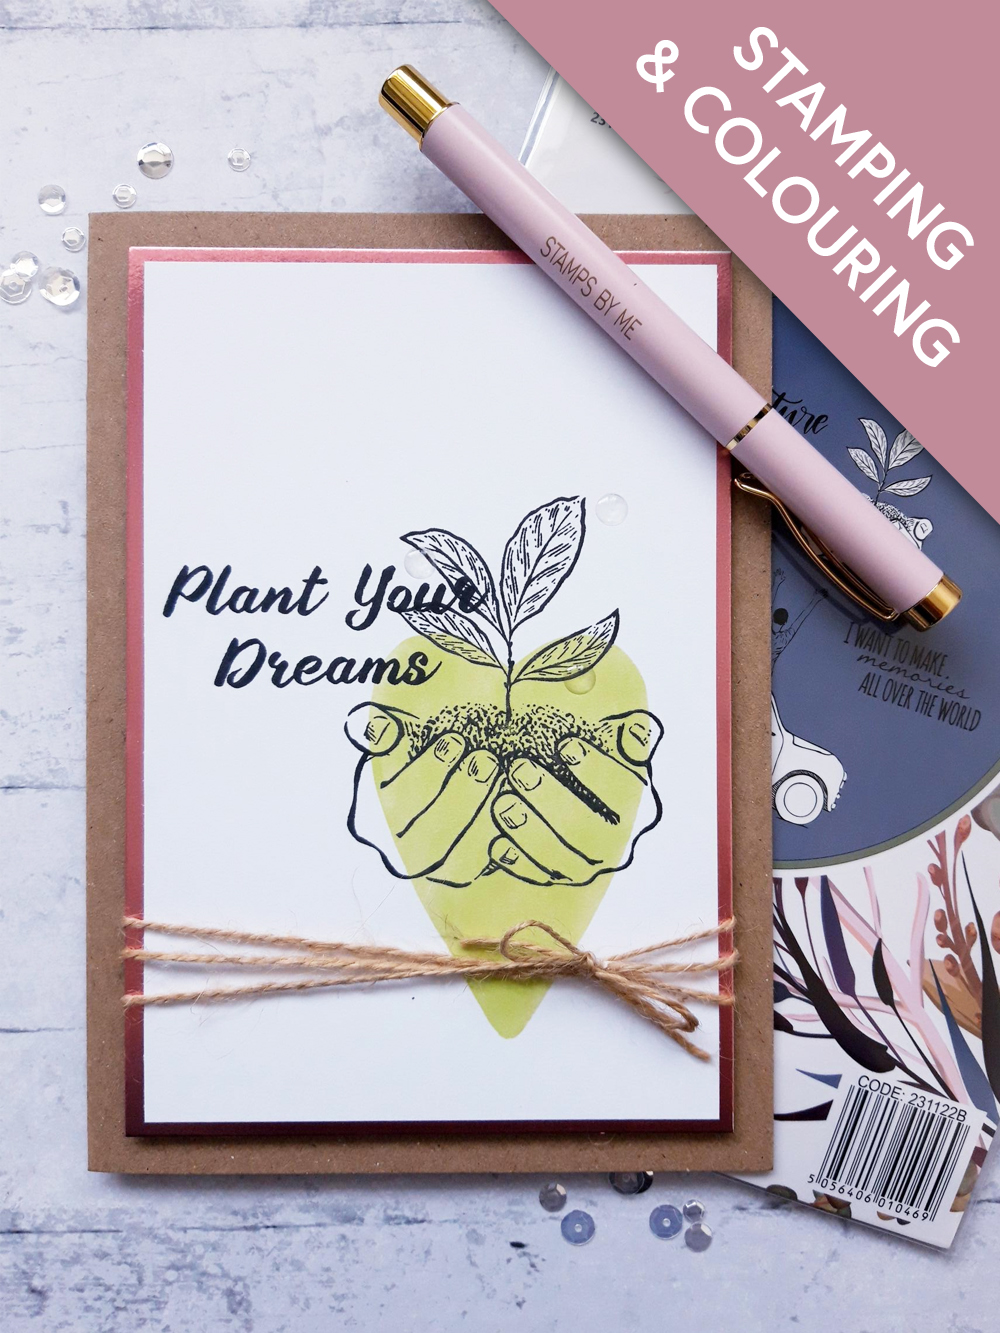
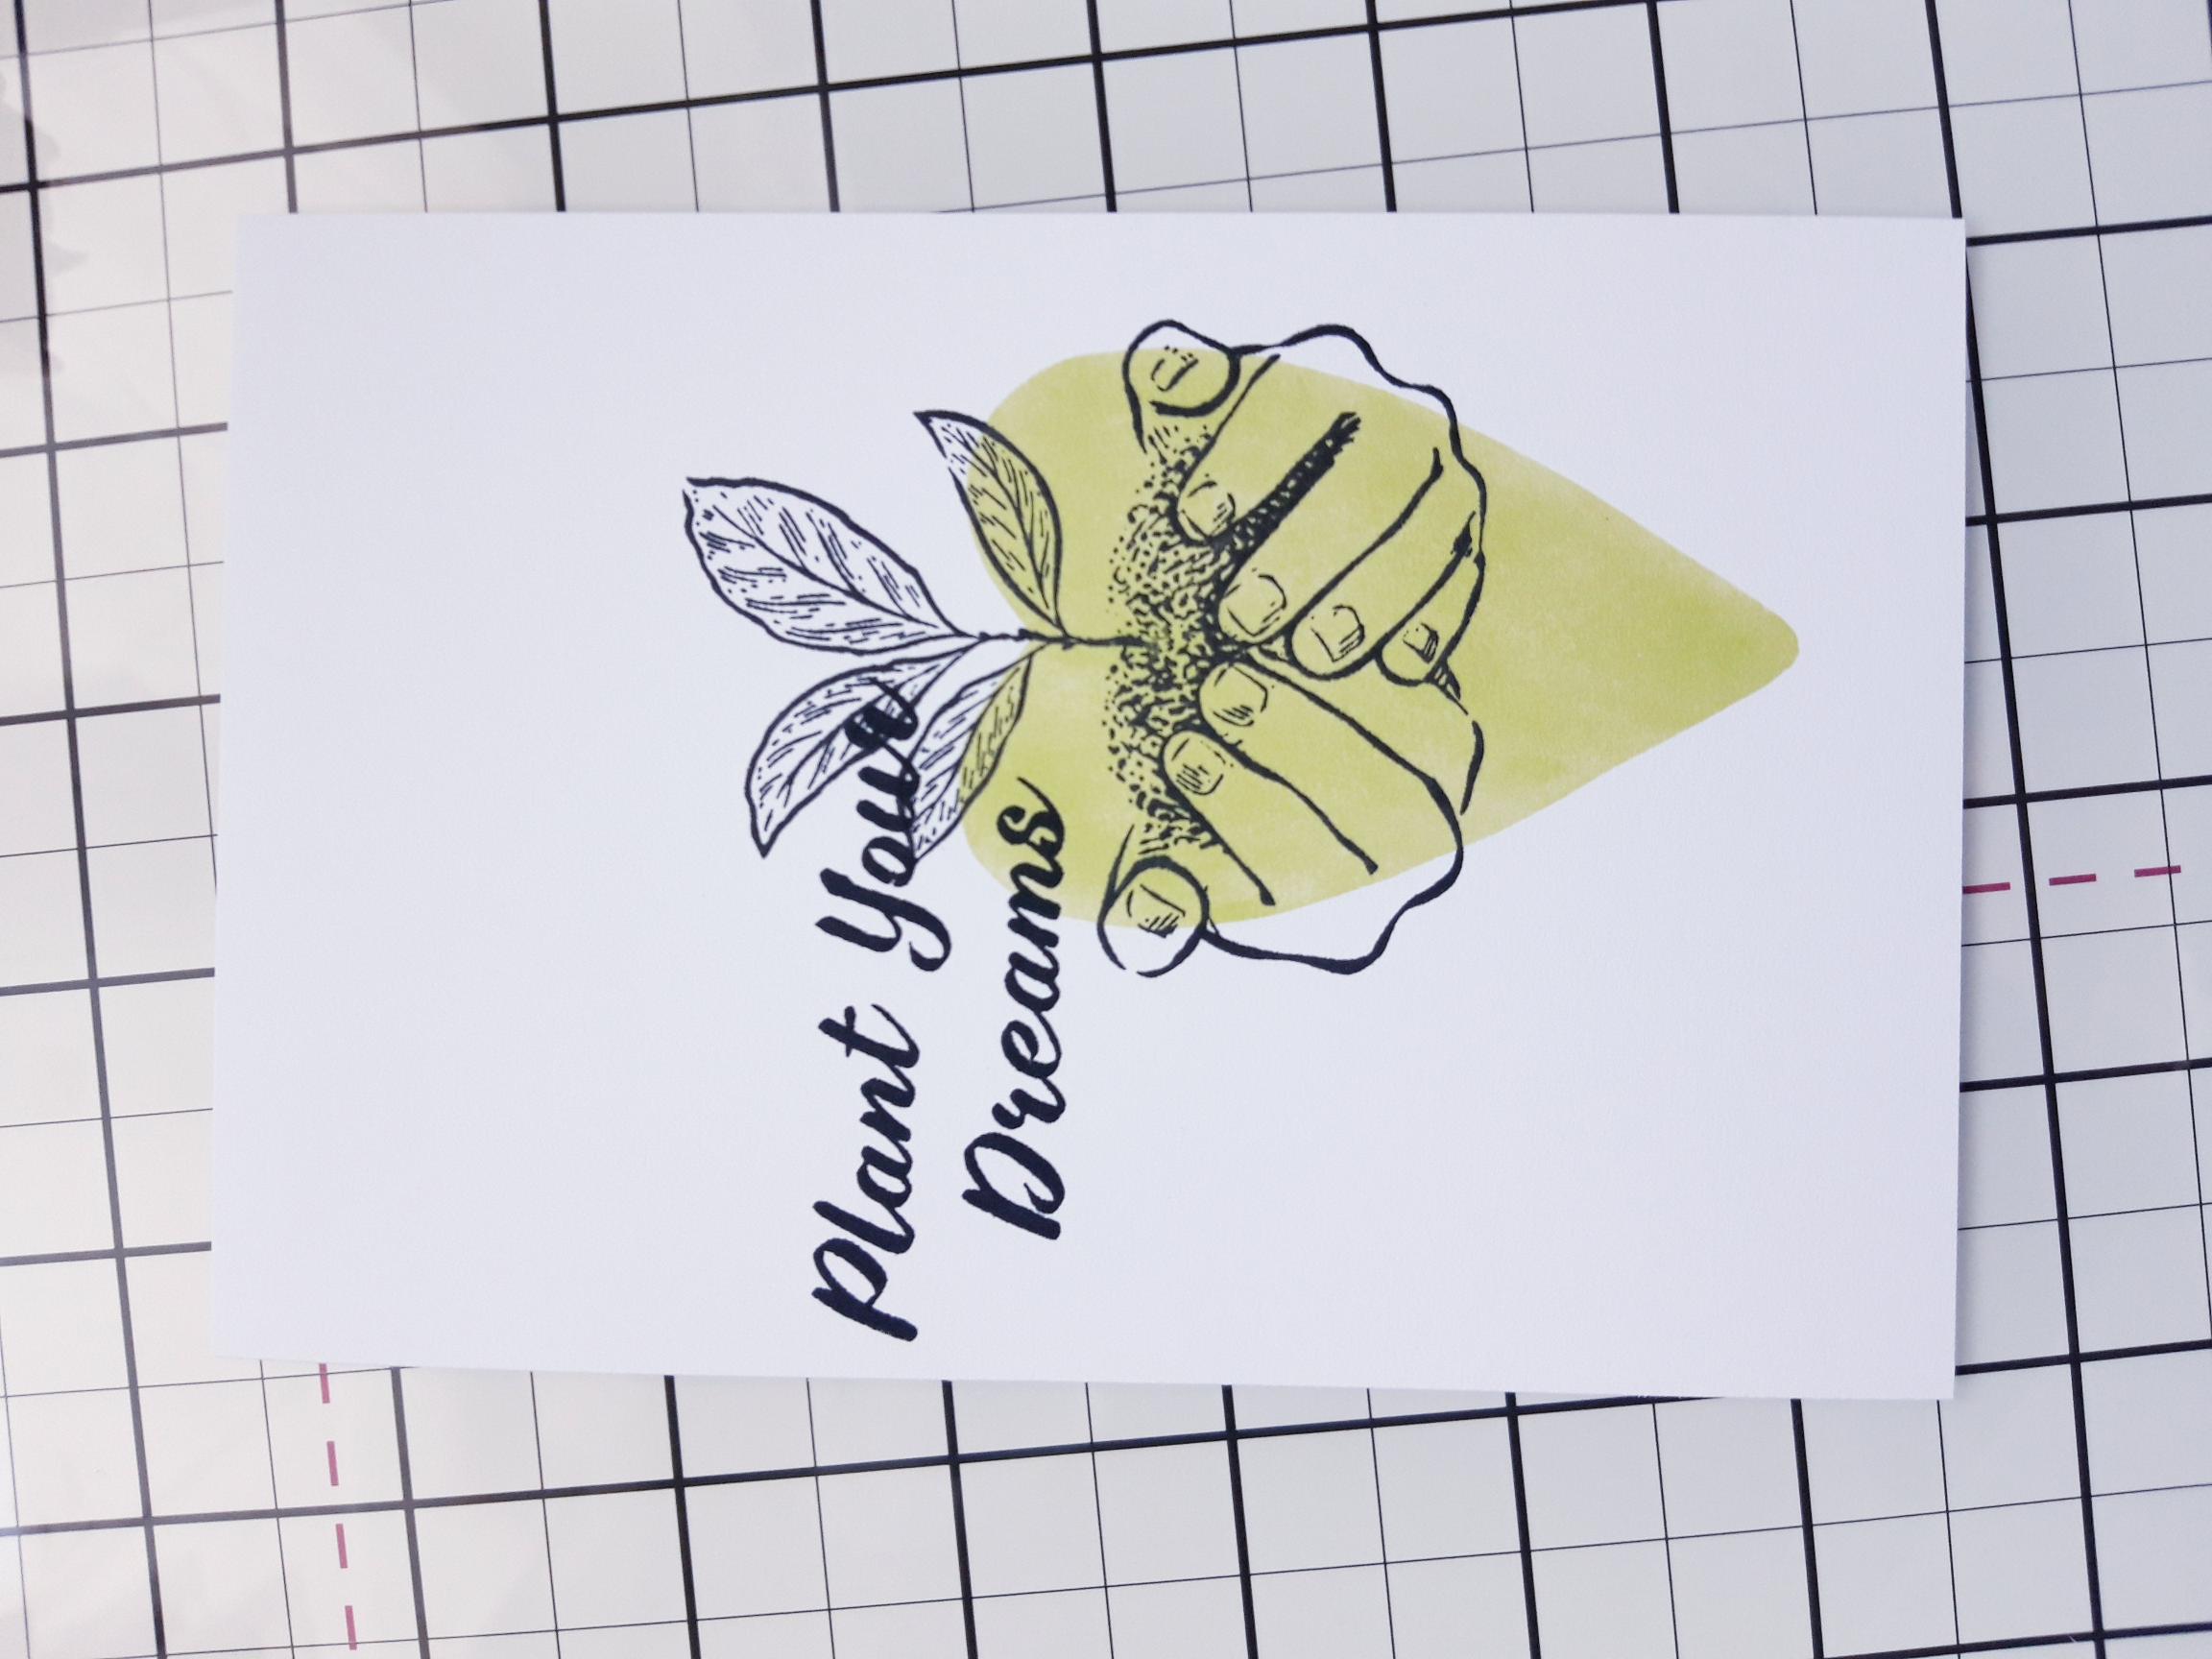
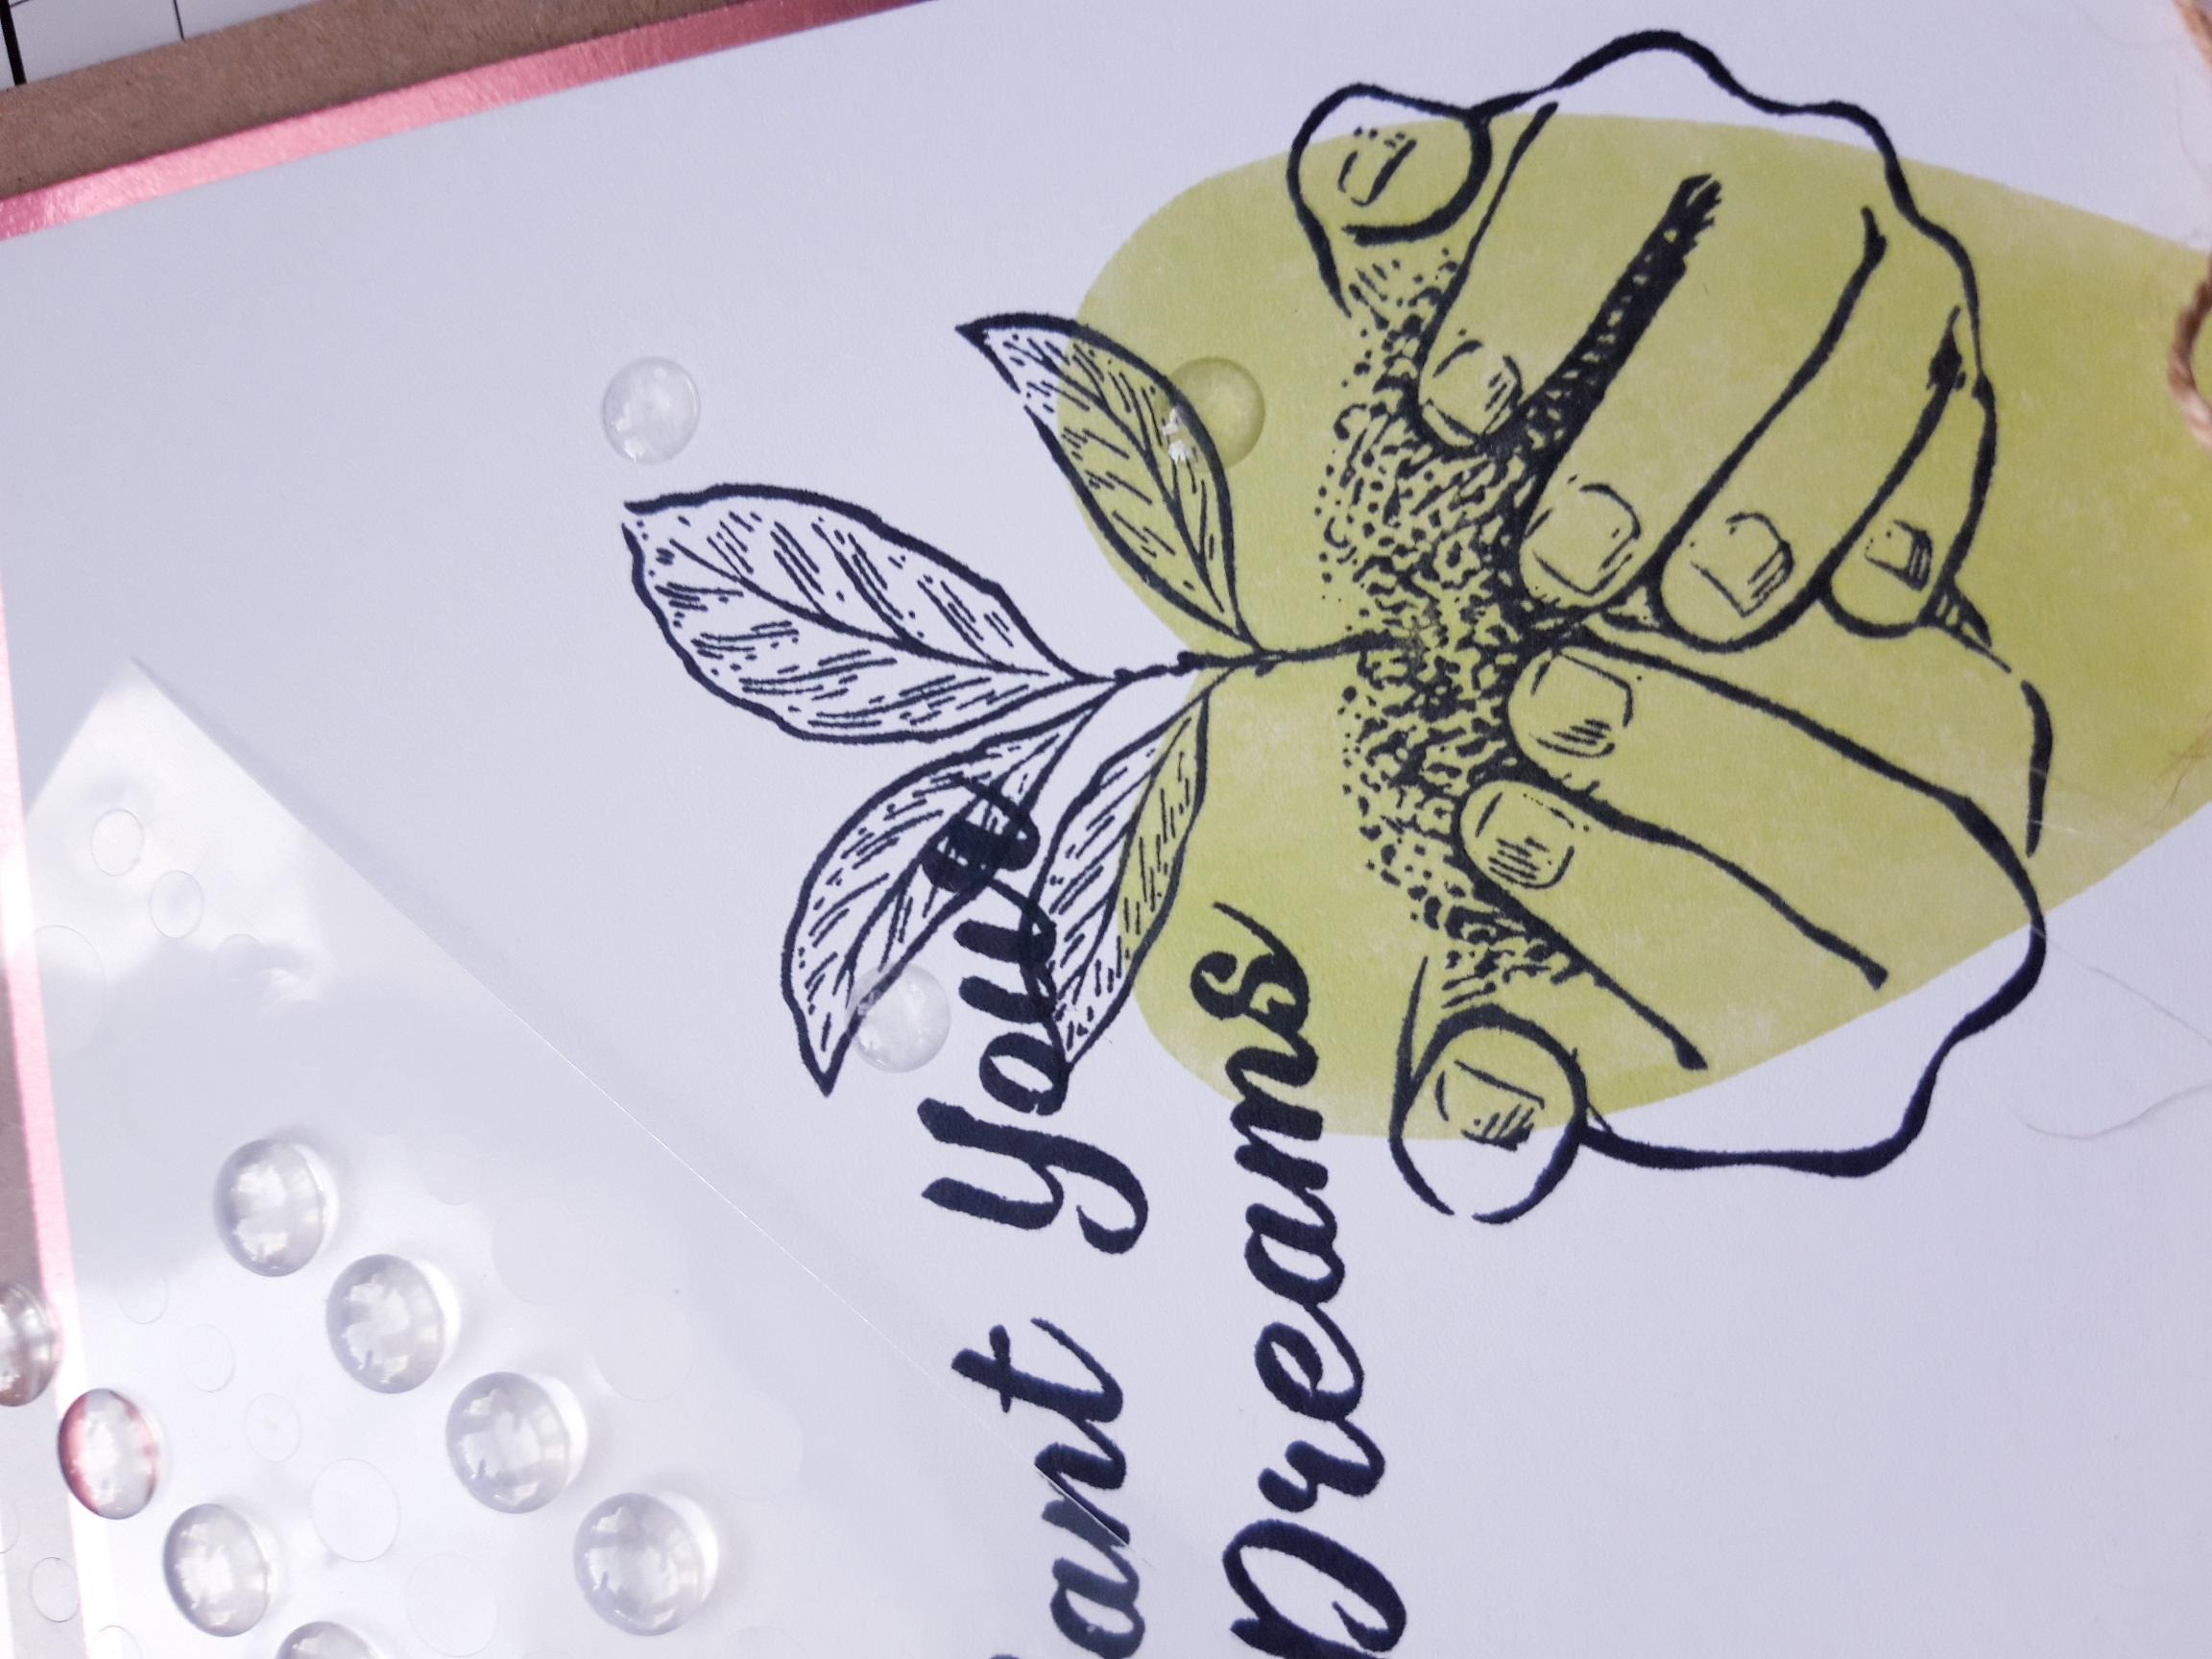
You need to create a heart aperture stencil, out of the copy paper, that will fit in the lower right corner of your card, as seen in the finished design. You can either use a nesting heart die or, like me, you can go for a more "organic" look and draw your own heart freehand, then cut it out!! Go on...be brave. |
|
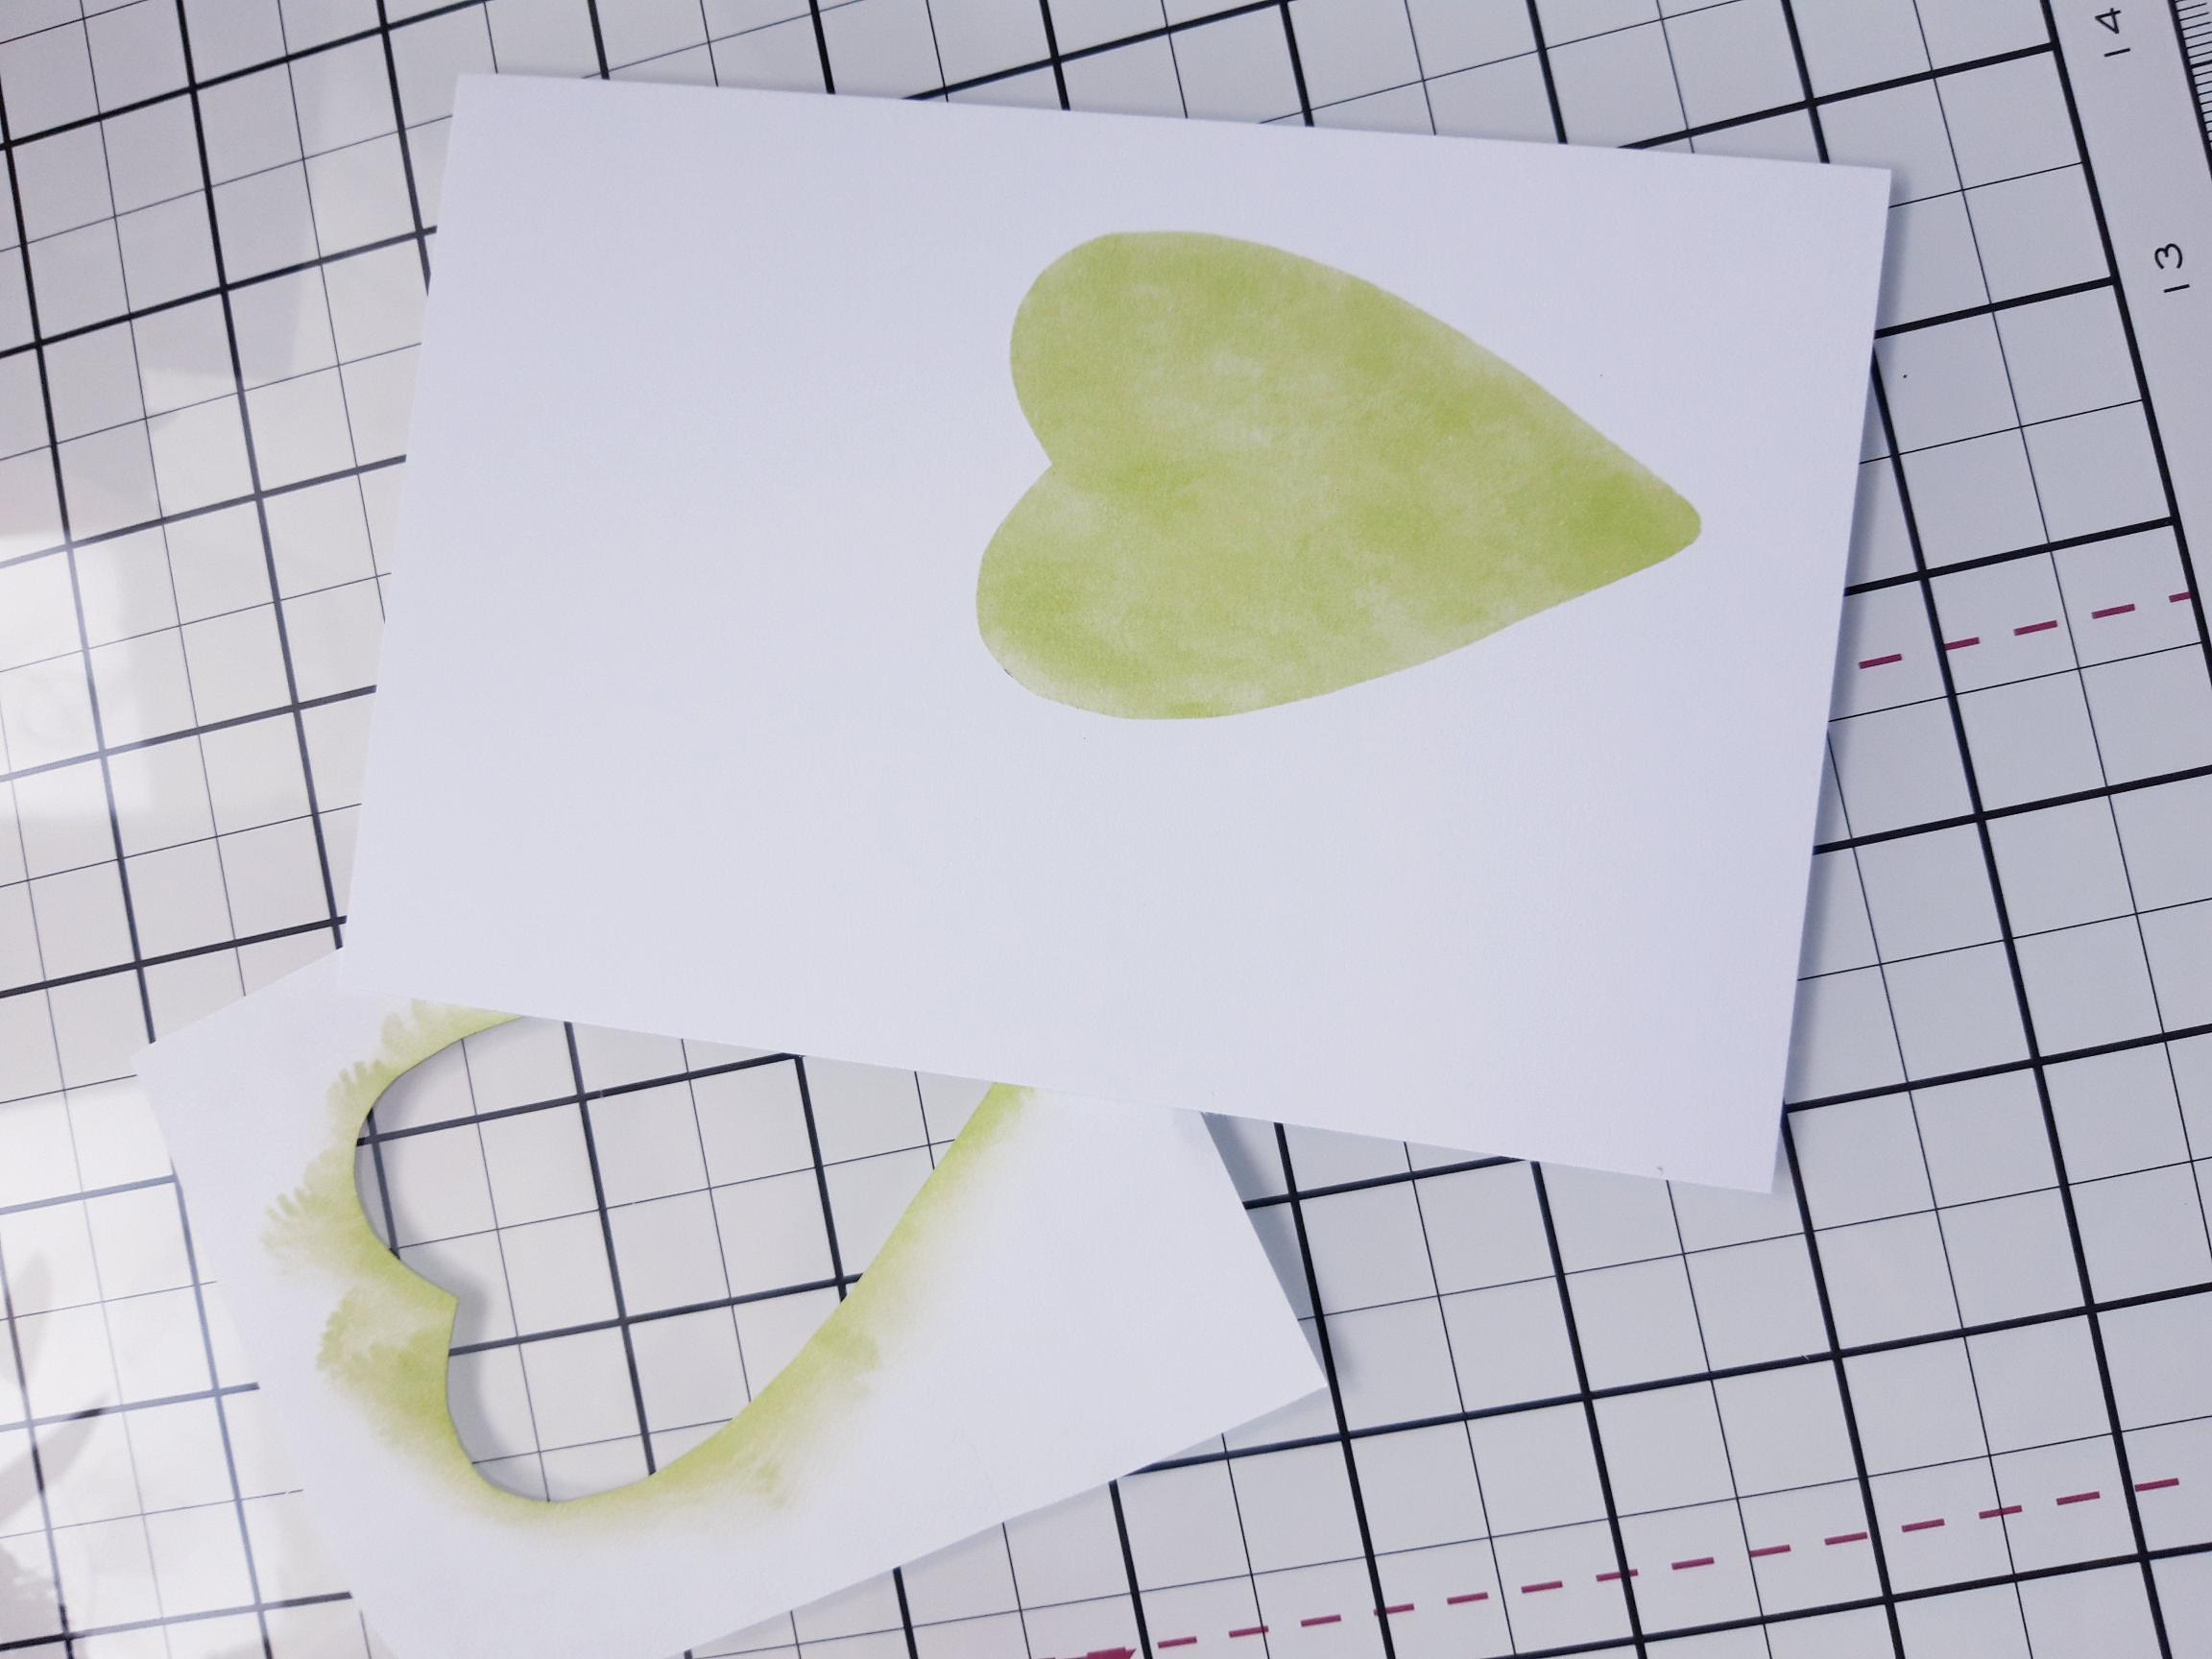
Postion your heart stencil towards the lower right corner of the white card, cut to 6 1/4 x 4 1/4" and using your blending tool, apply the Limeade ink within. |
|
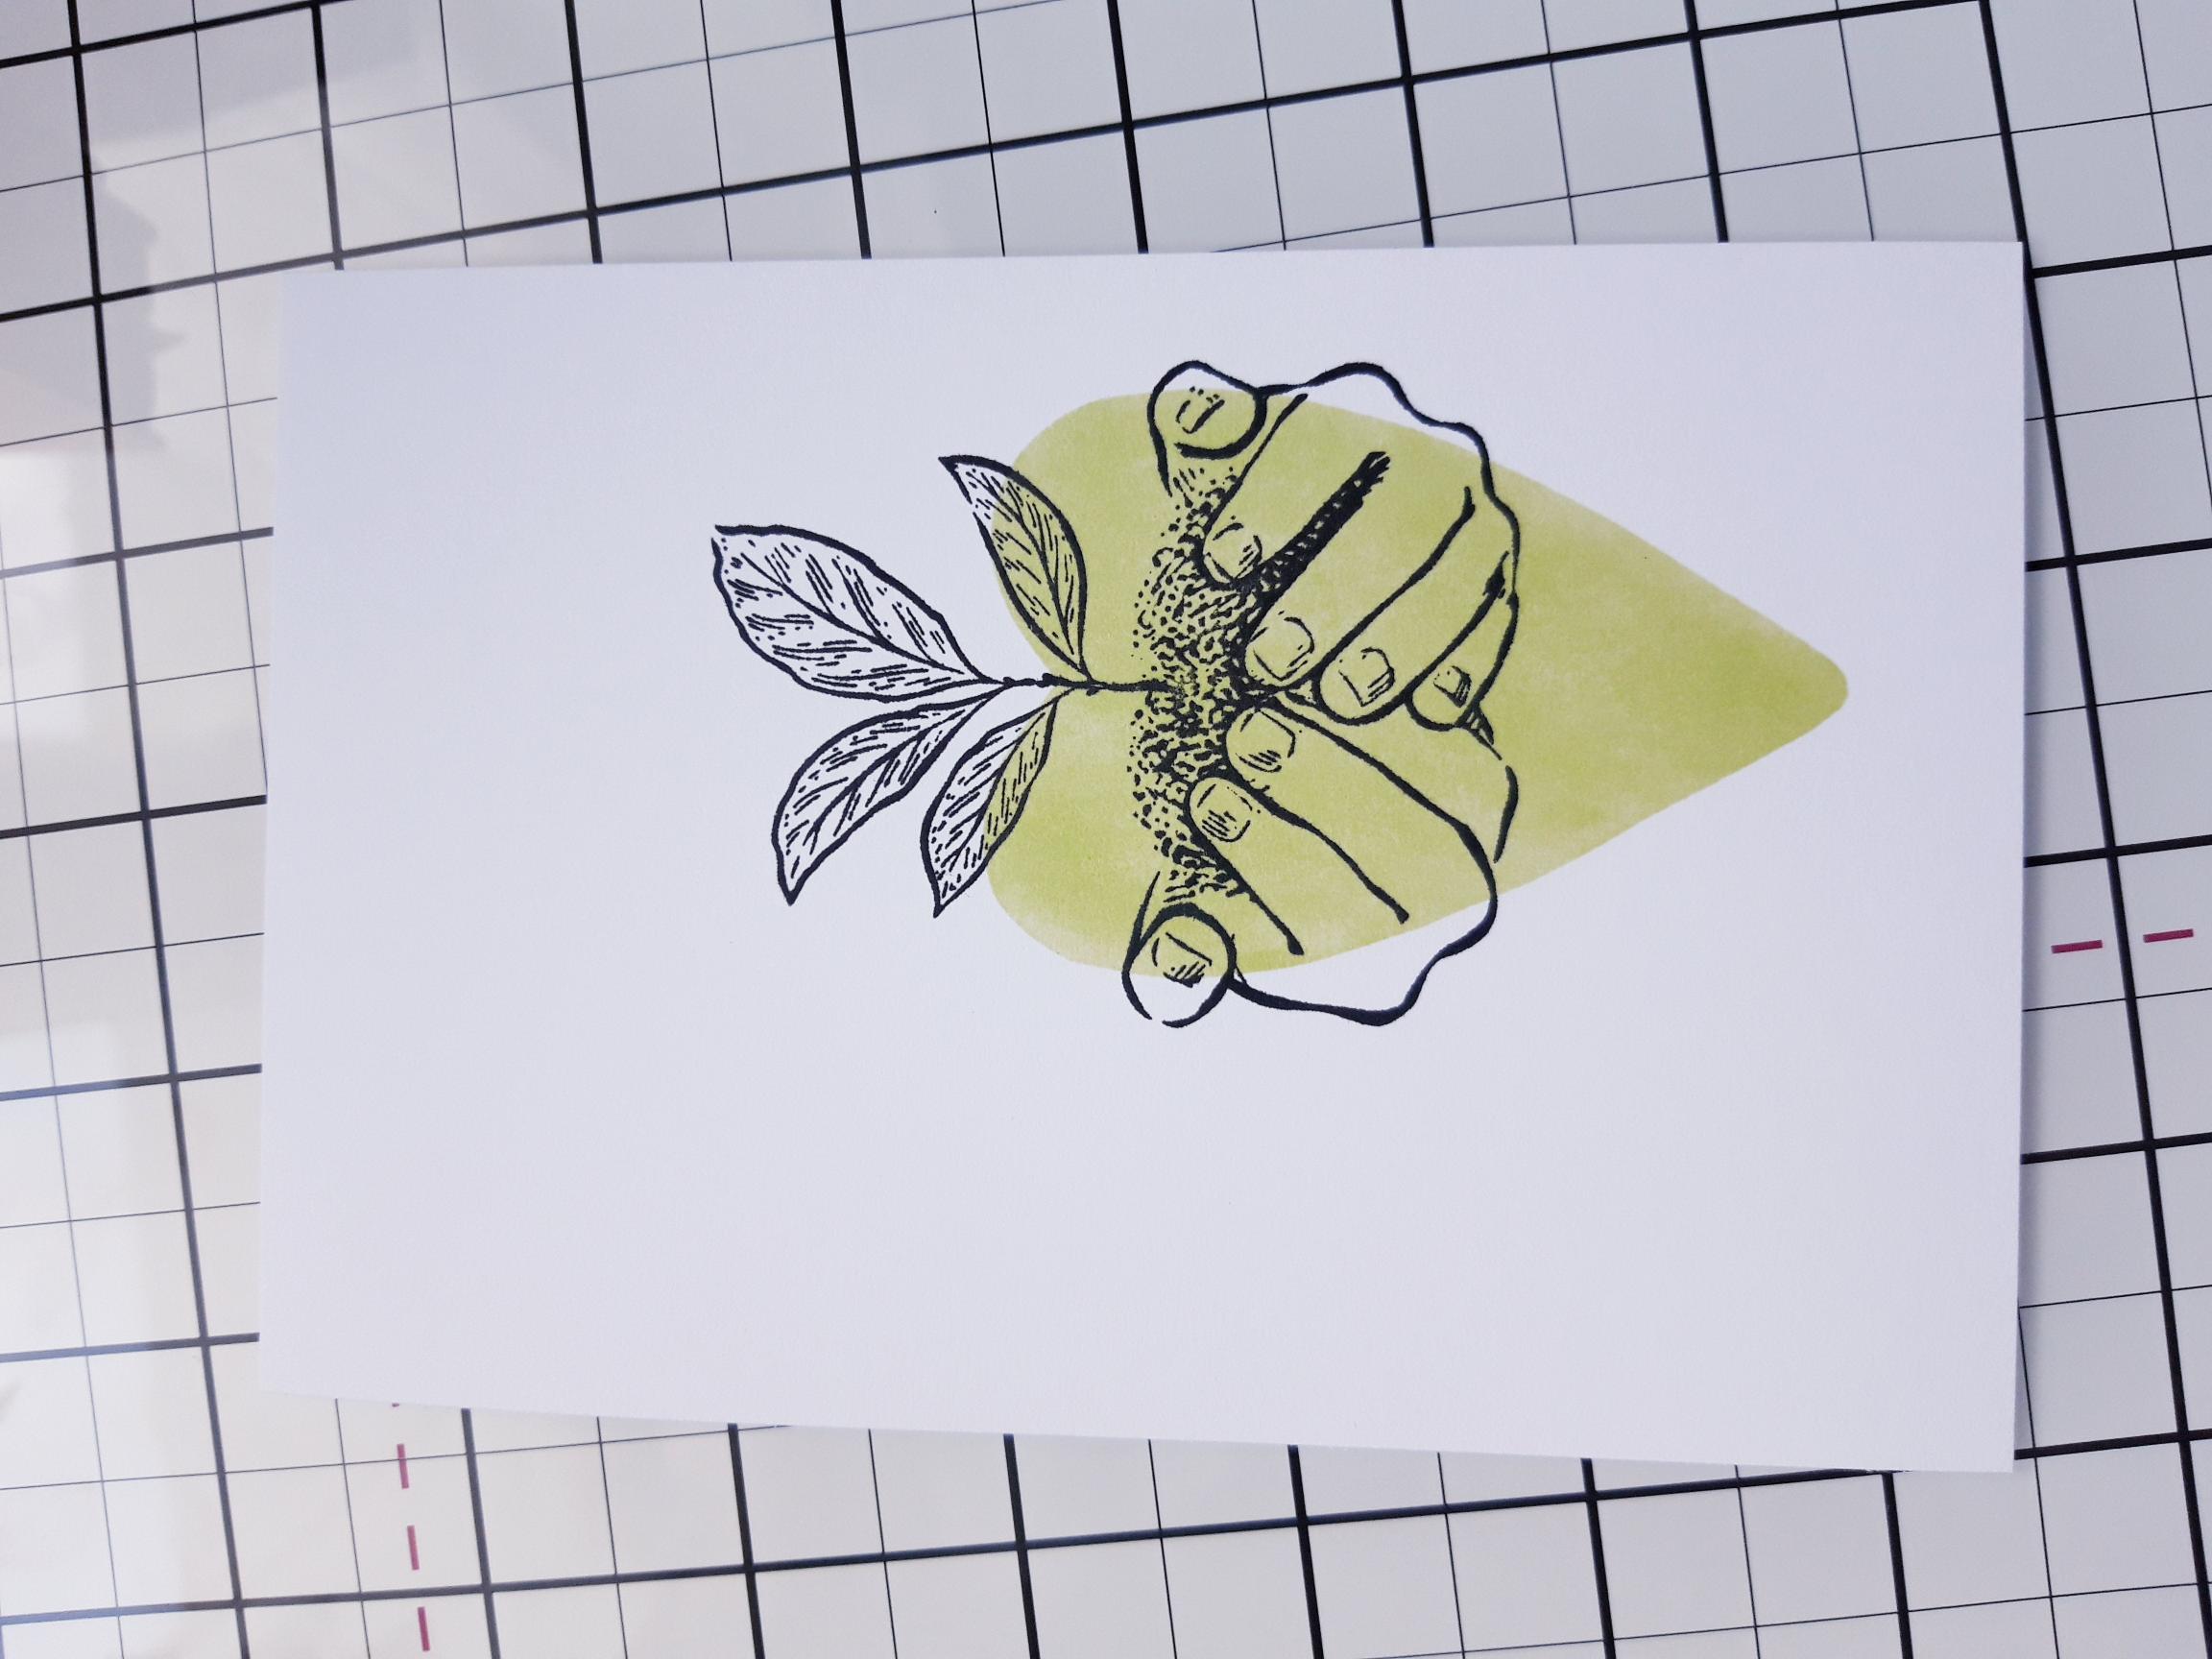
Ink up this very beautiful stamp, from the Imala Adventure set, with the Midnight hybrid ink and stamp on to your inked heart. I wanted the plant stem to grow up through the centre of the heart, but you can stamp yours wherever you want. |
|
Ink up the sentiment stamp with Midnight and stamp to the left of your image, but so they are connected, rather than having a floating sentiment. |
|
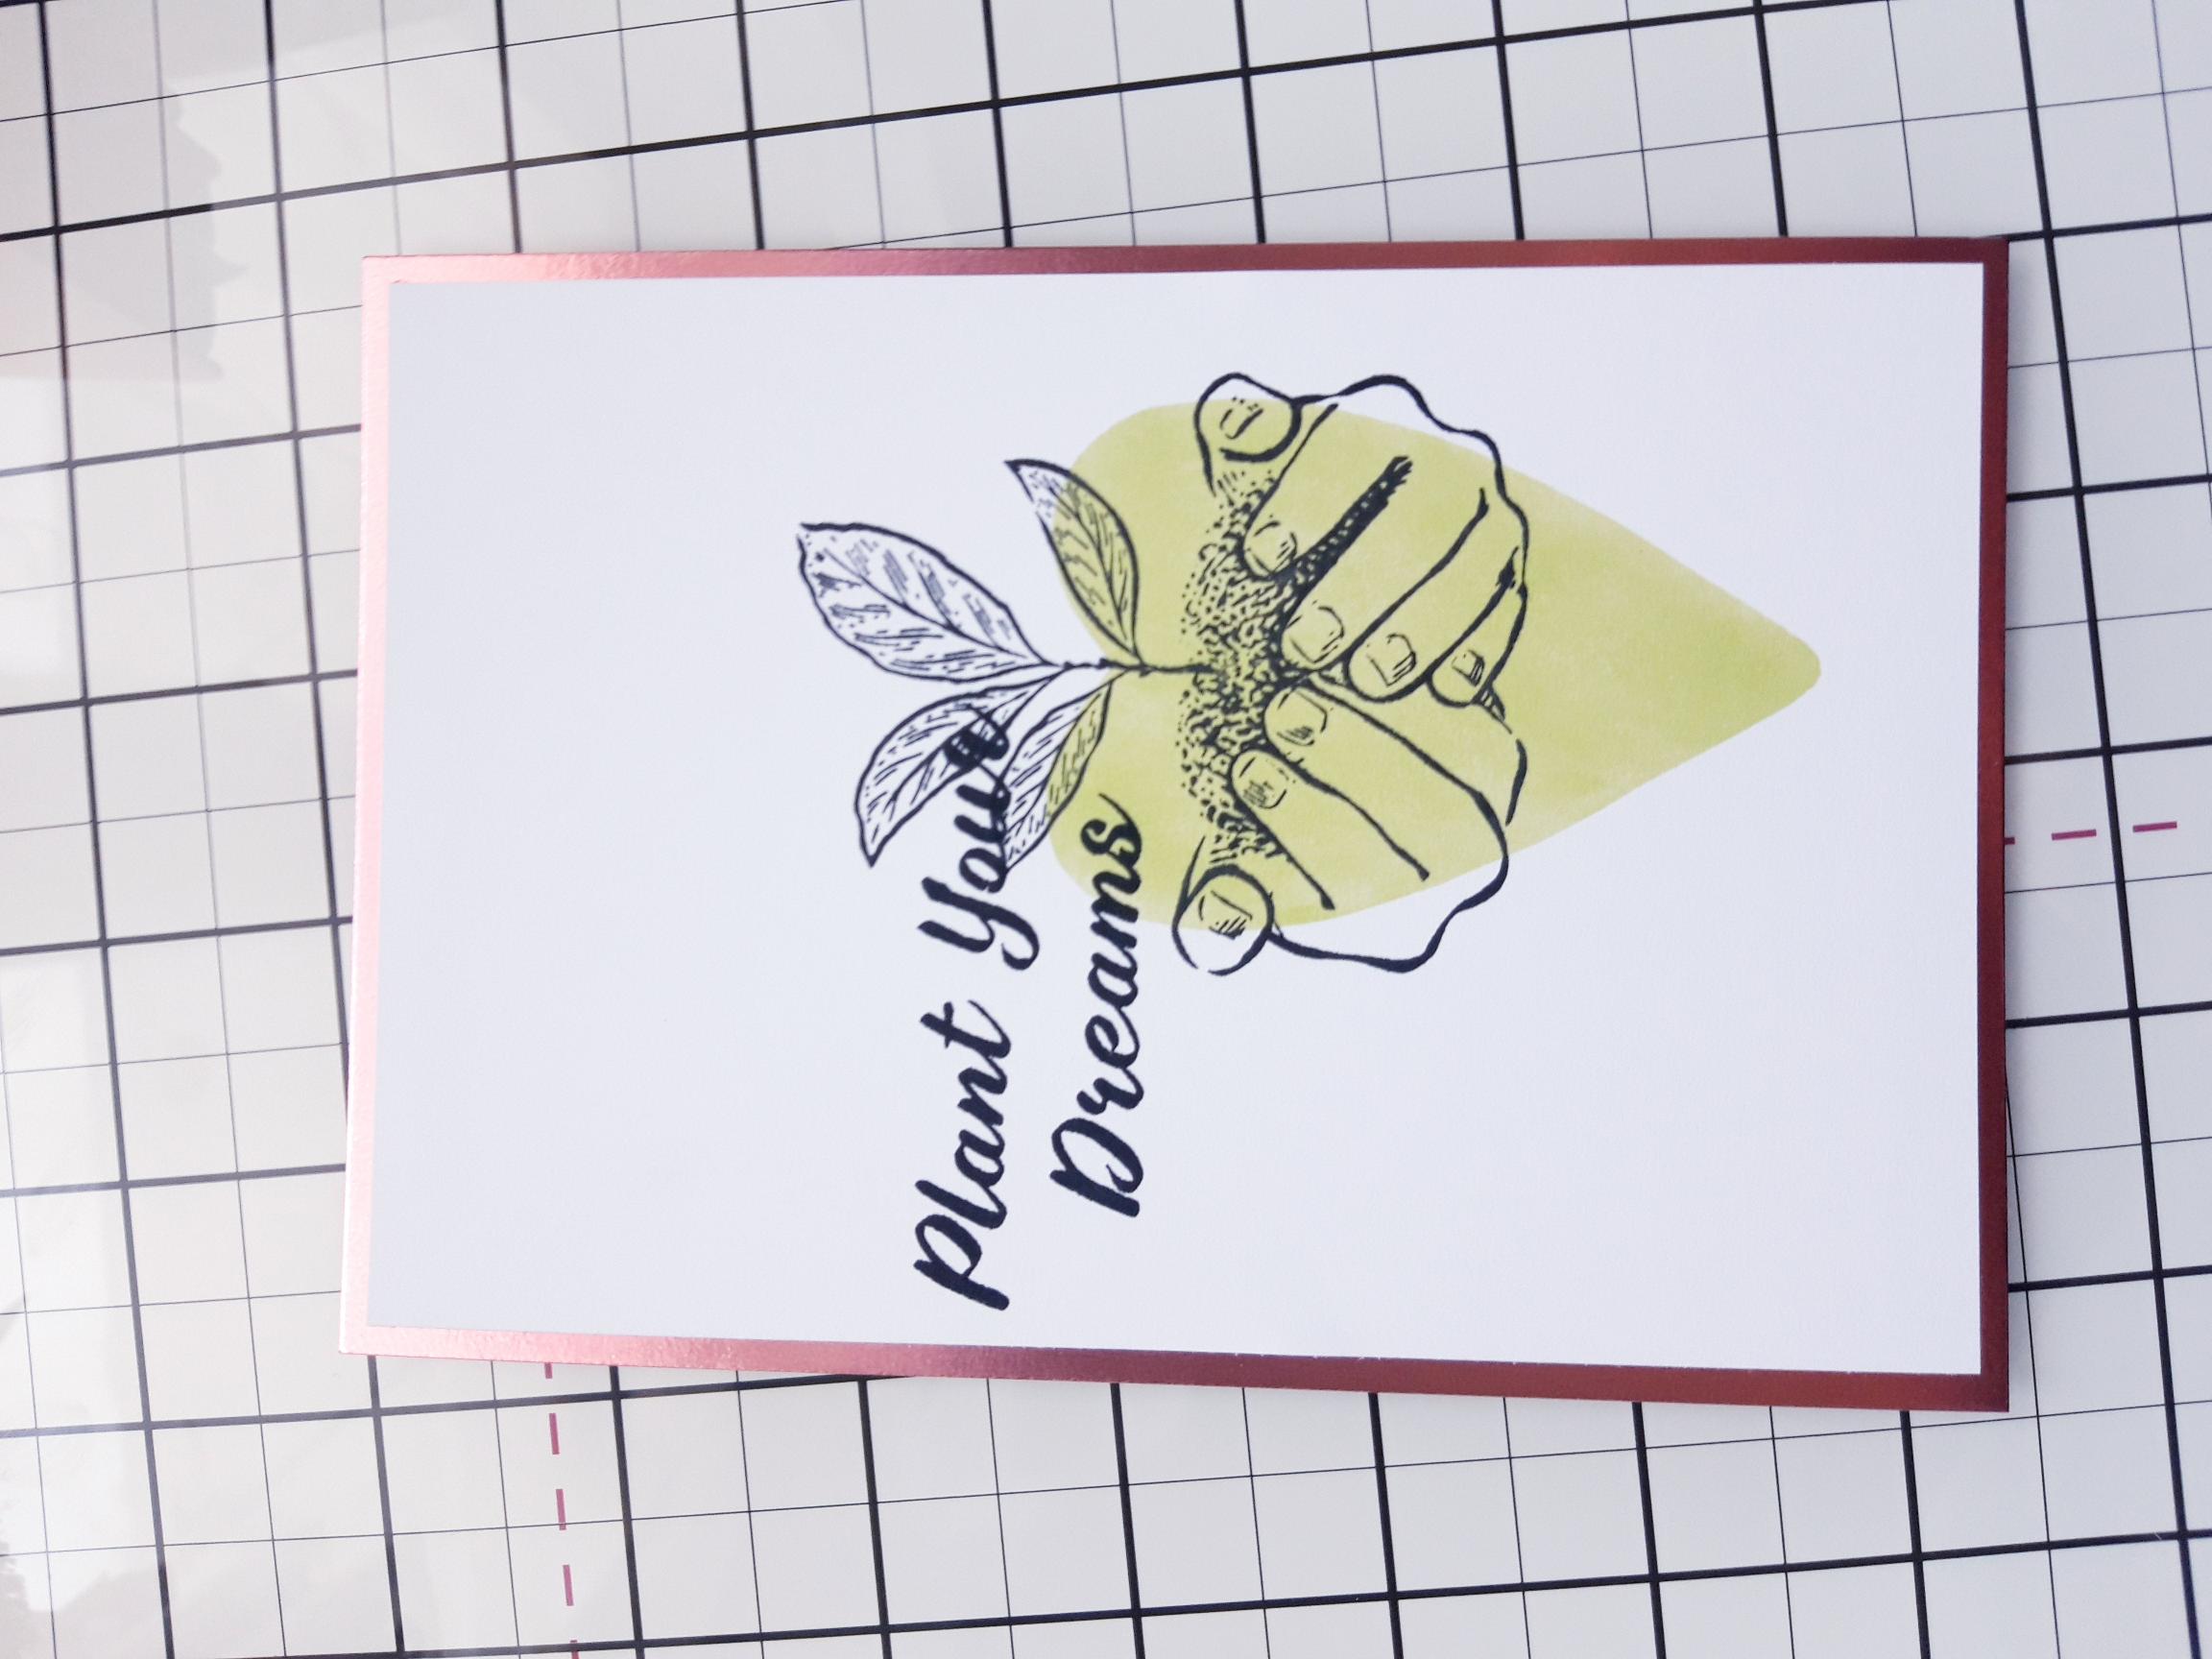
Adhere your artwork on to the Blush mirri card. |
|
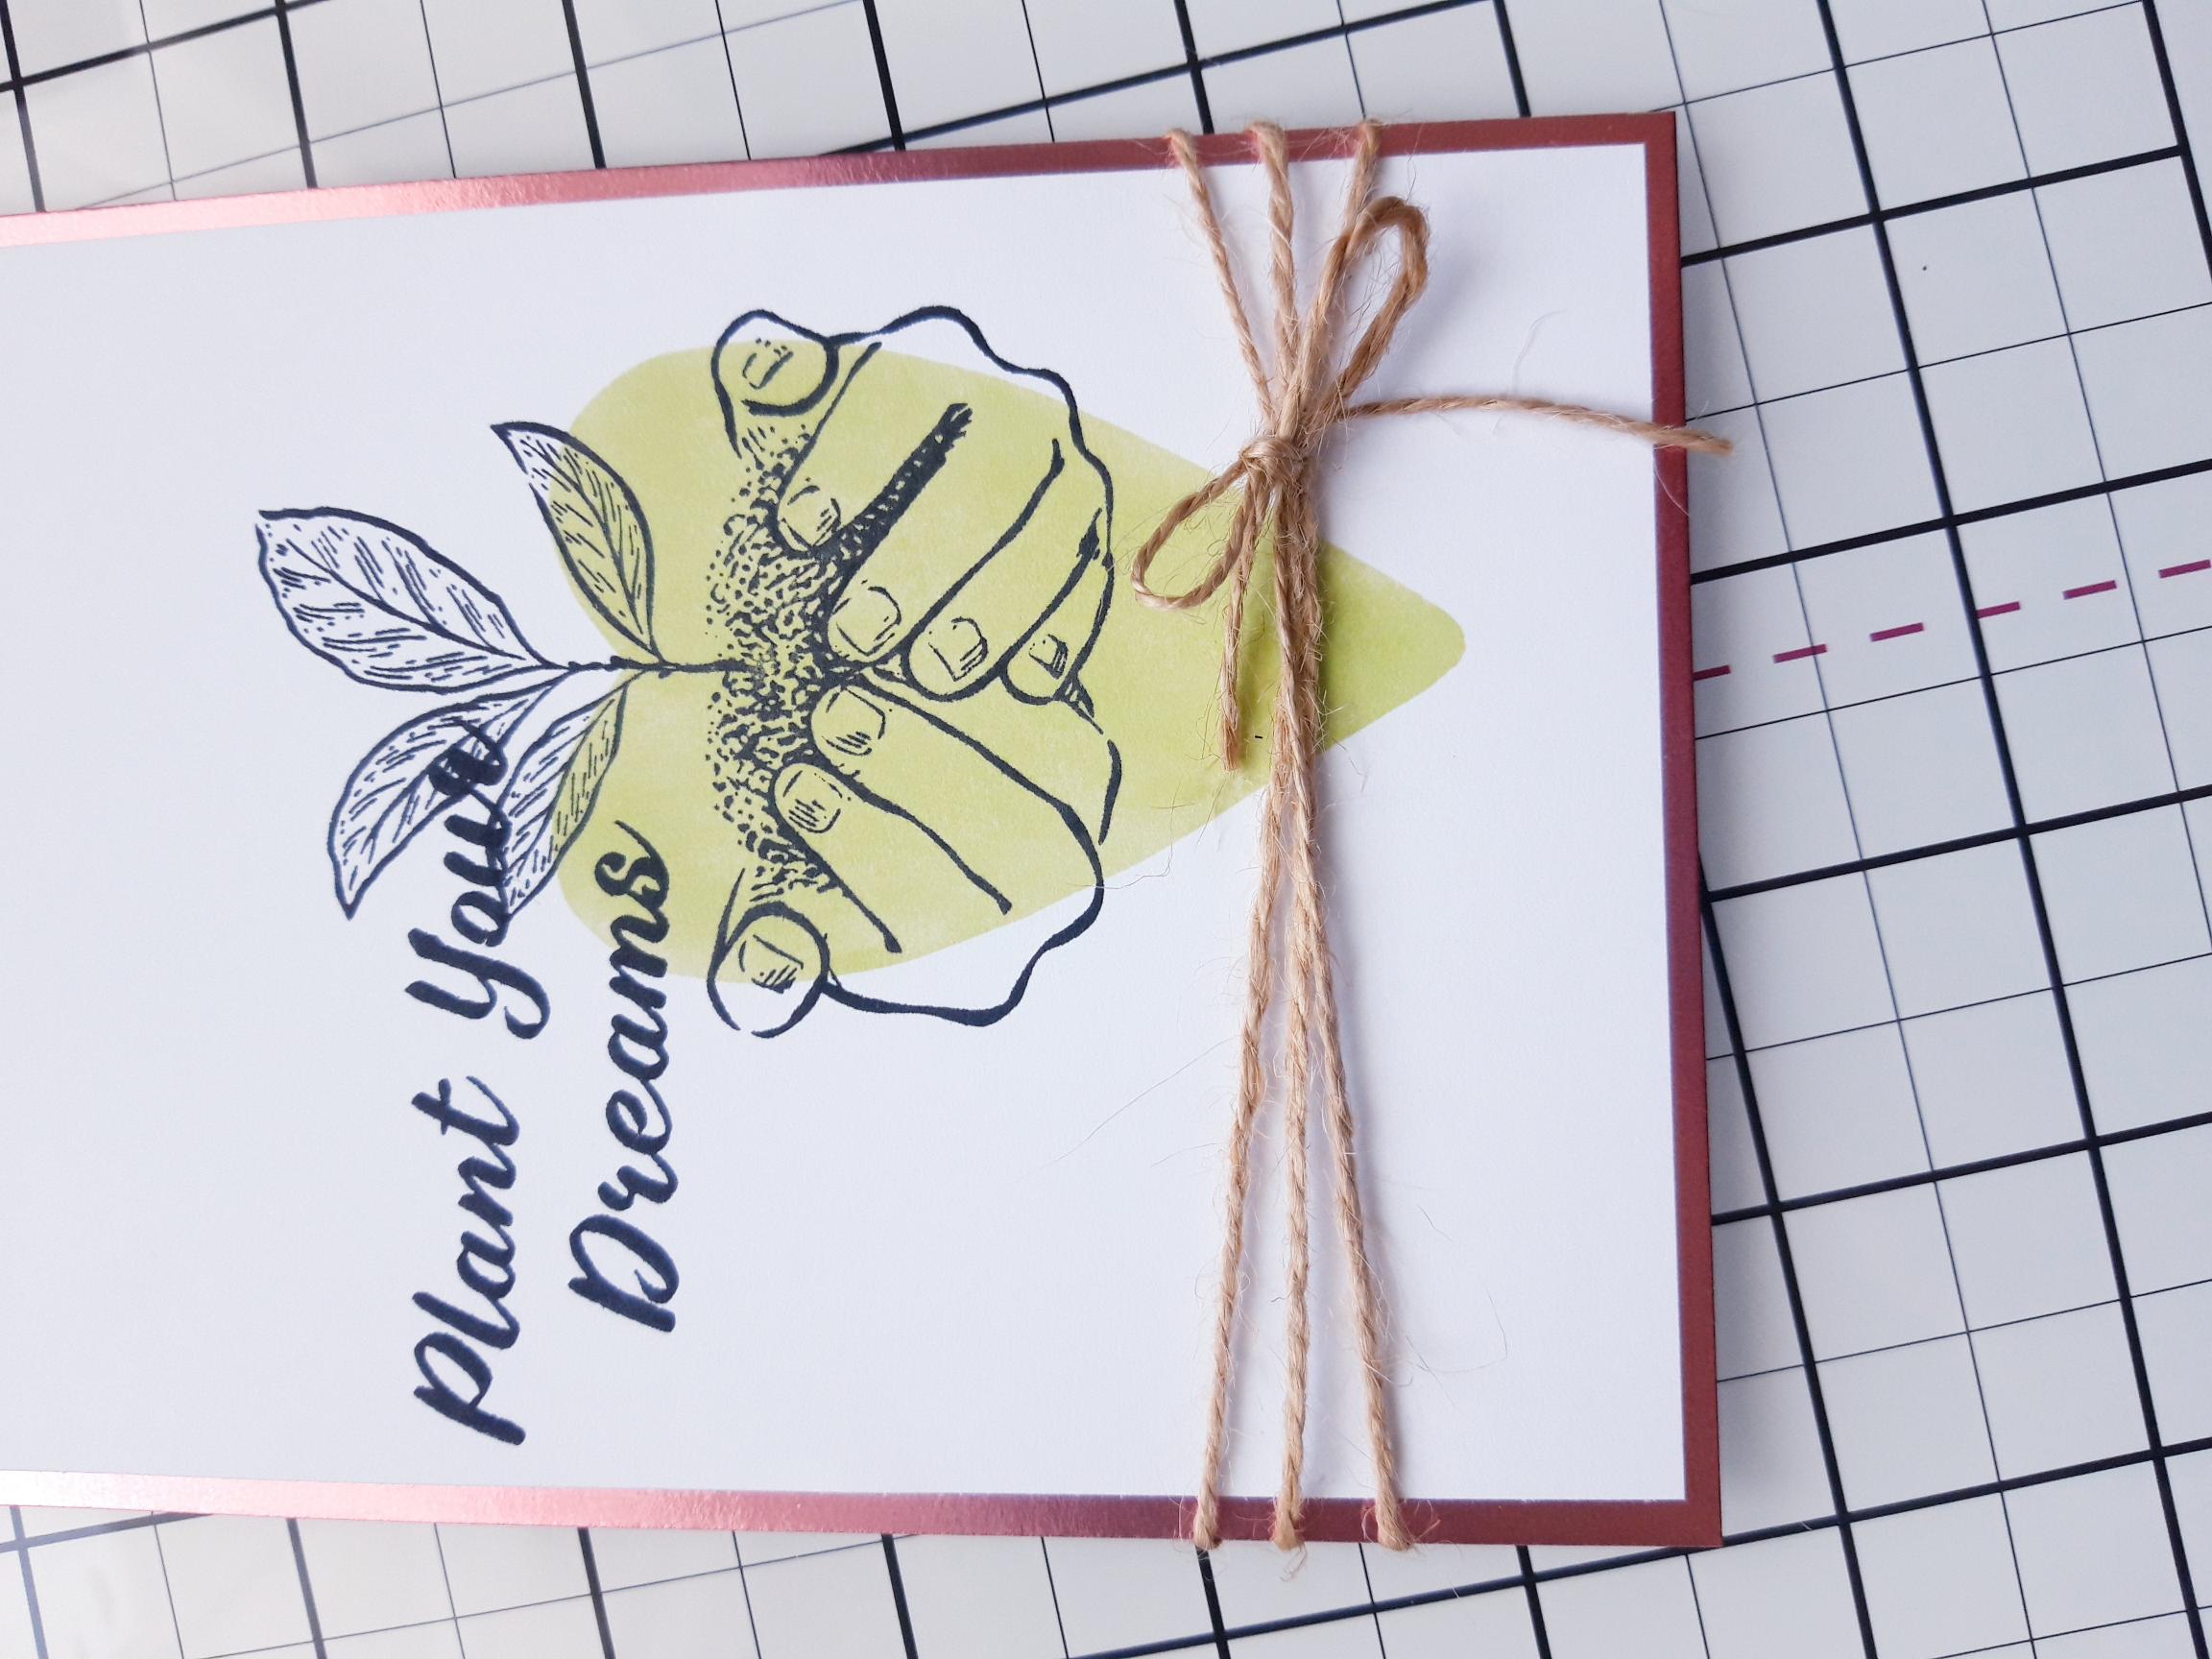
Wrap some twine around your card three times, then tie in a bow and trim off any excess. |
|
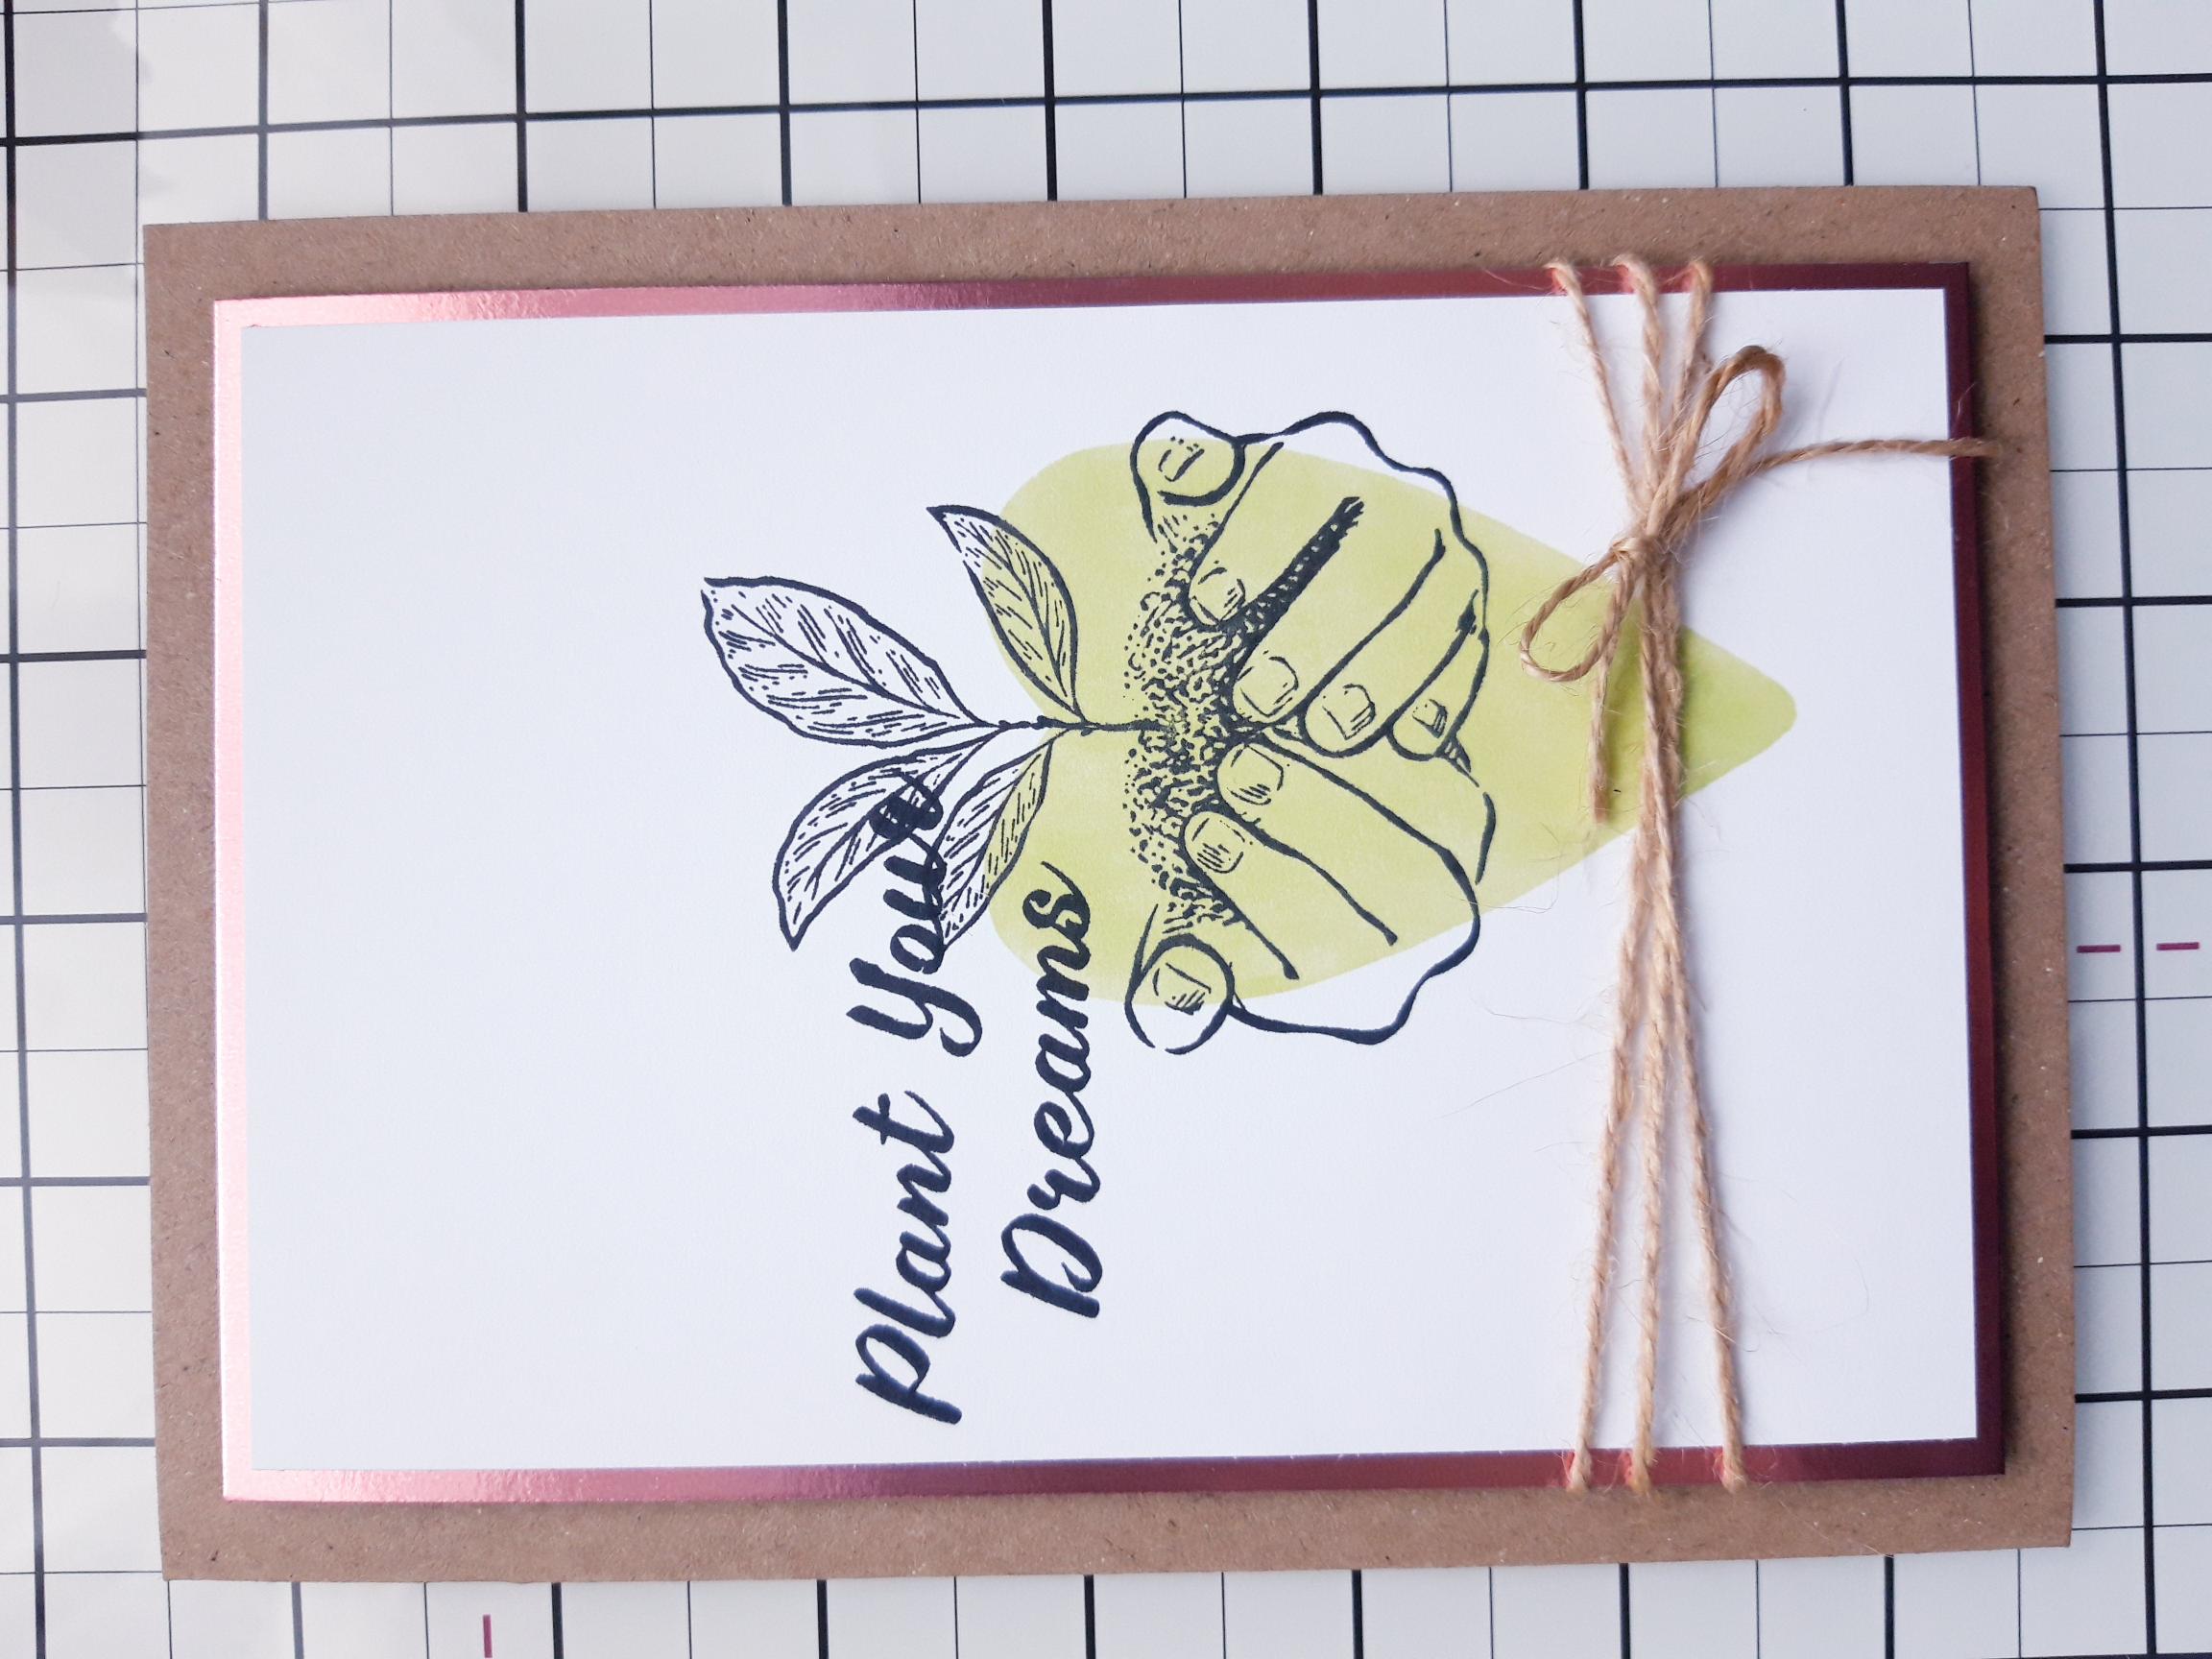
Adhere on to your kraft card blank with foam pads. |
|
To finish, add clear adhesive water drops to your artwork. |