Give your friends $10 off their first order!
Refer a FRIEND


WHAT YOU WILL NEED:
Black top folding card blank 8 1/4 x 5 3/4"
White card 7 3/4 x 5 1/4"
Black card 7 1/2 x 5"
Black/white card for sentiment
Copy paper or a hill/mountain stencil
Imala Hello Baby Stamp Collection
Reach For The Stars Stamp Collection
SBM Hybrid Ink Pad: Midnight
SBM Pigment Ink Pad:Cotton
Paint brush
WOW heat tool
Blending tool
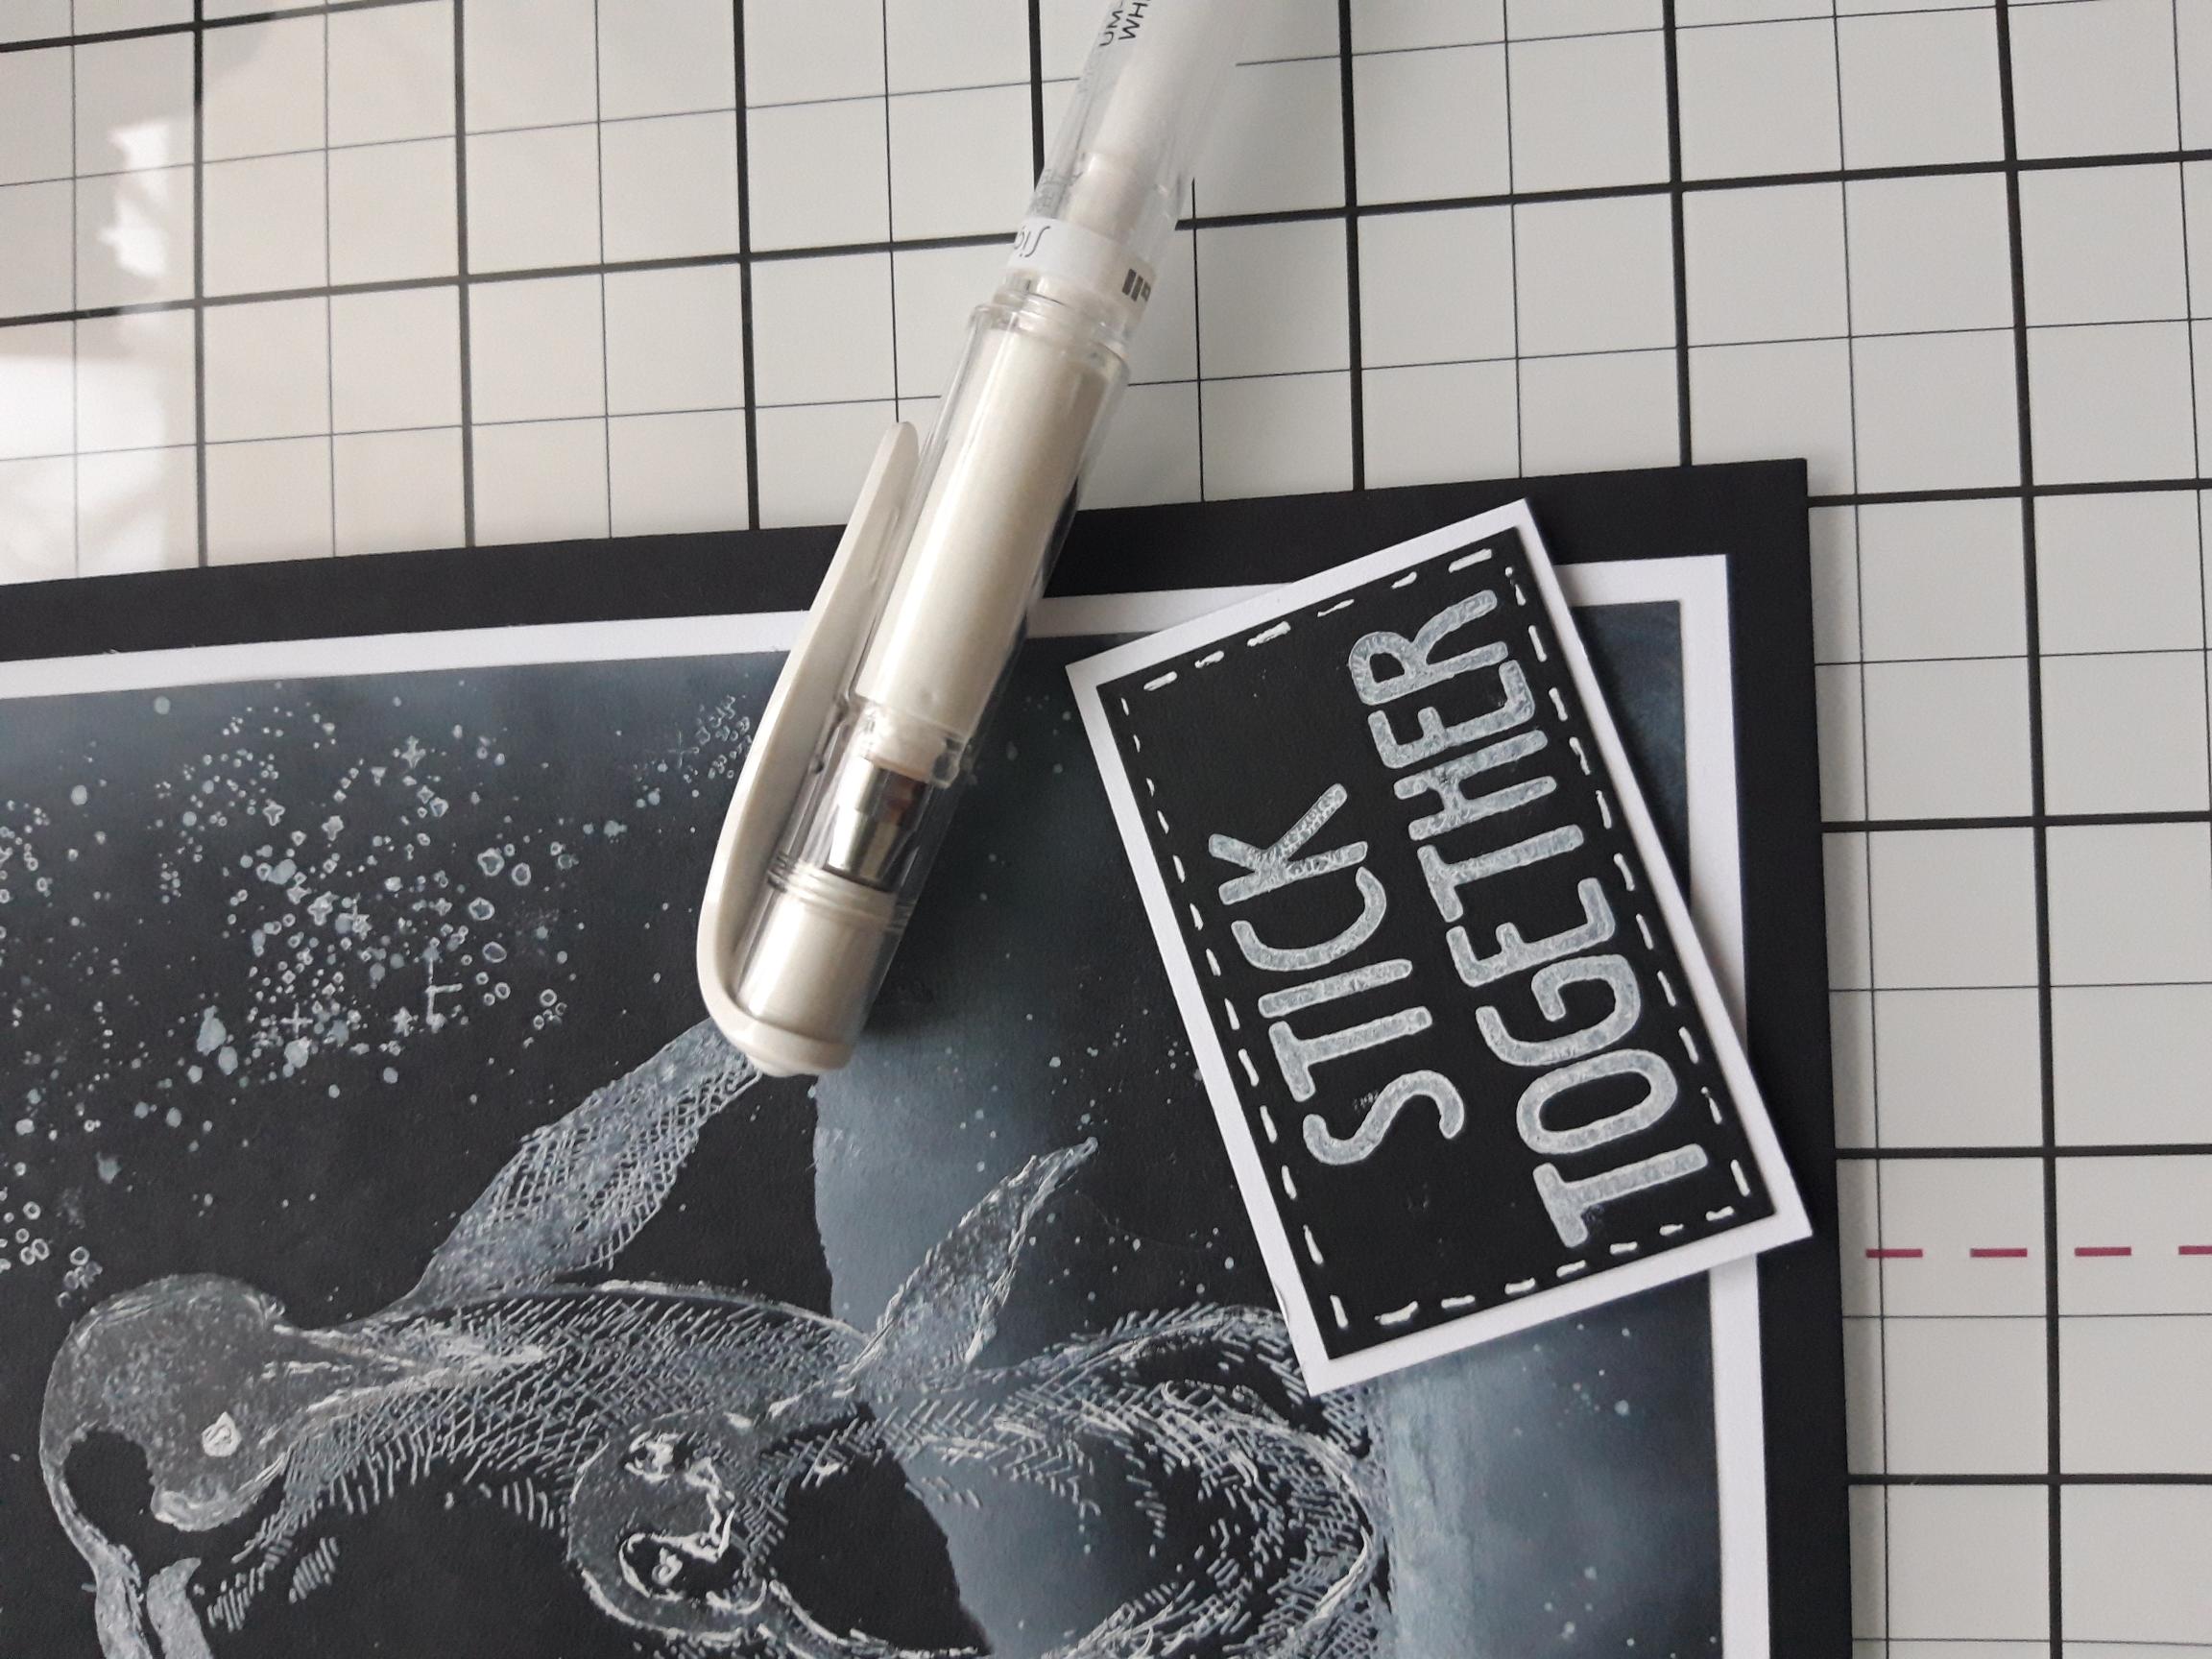
White gel pen
Eureka 101 Watercolour Tablet
Magnetic glass mat
Paper Trimmer
Perfect Together Glue
[click image to enlarge] 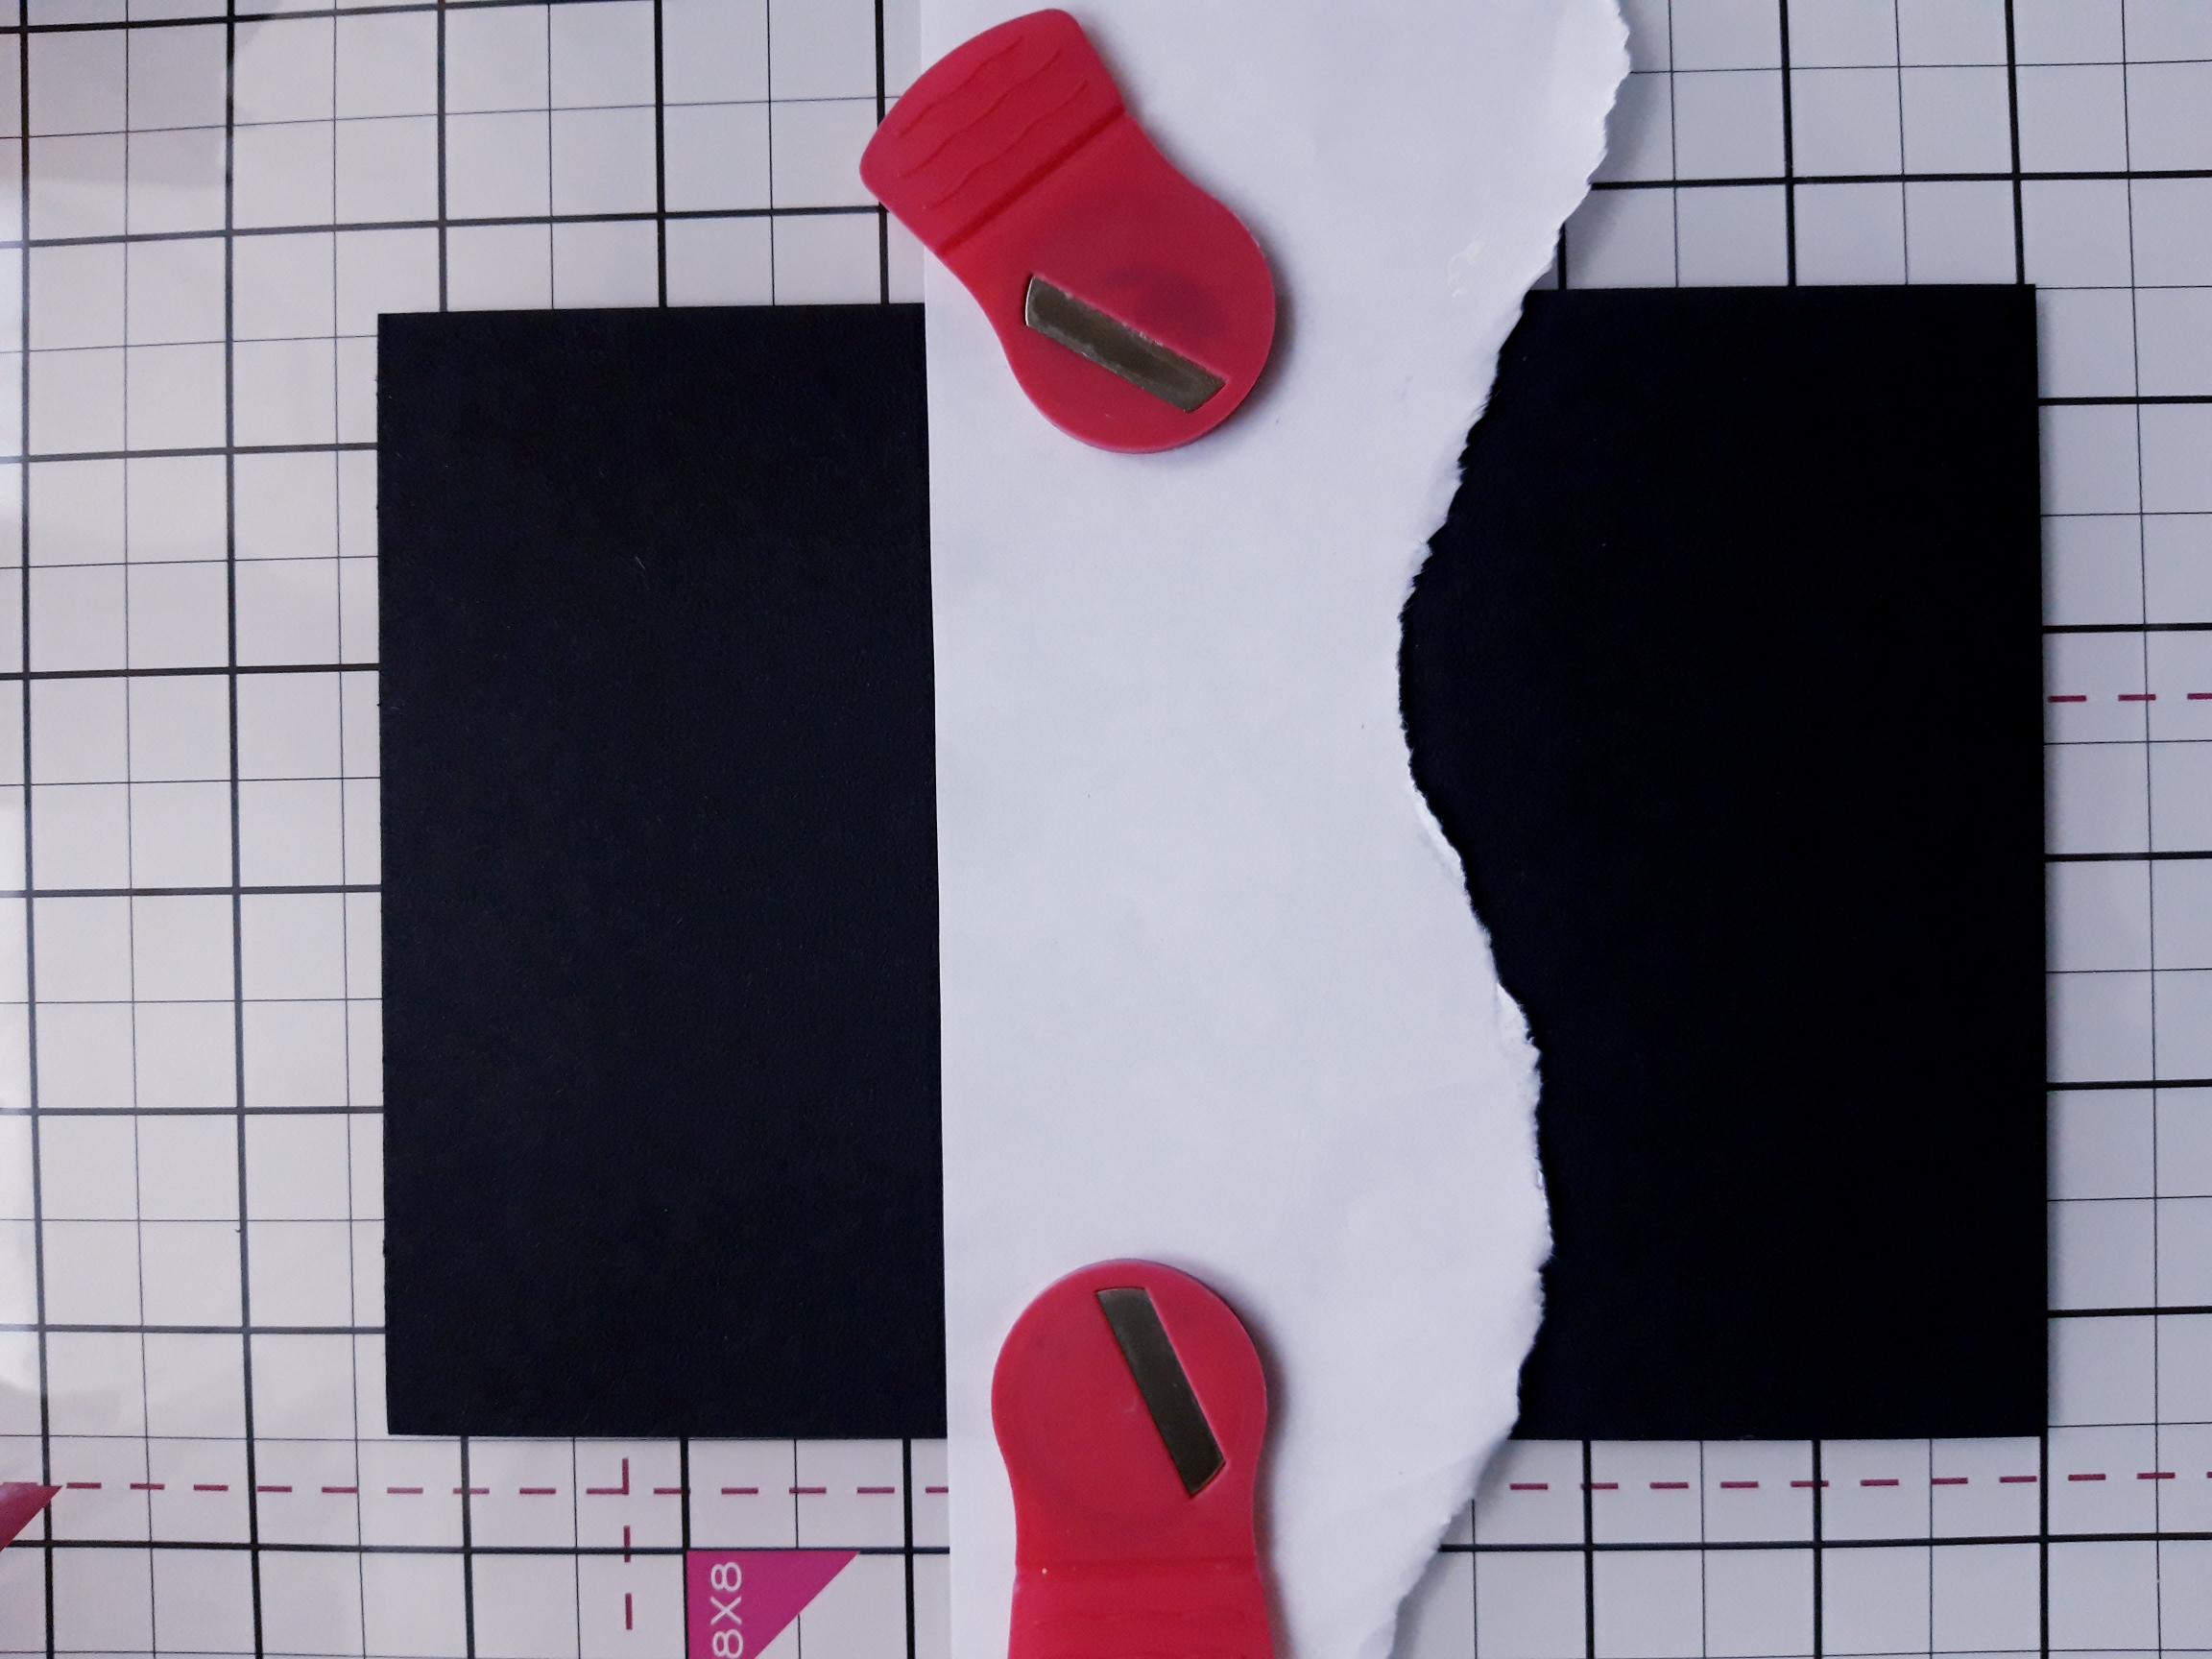
|
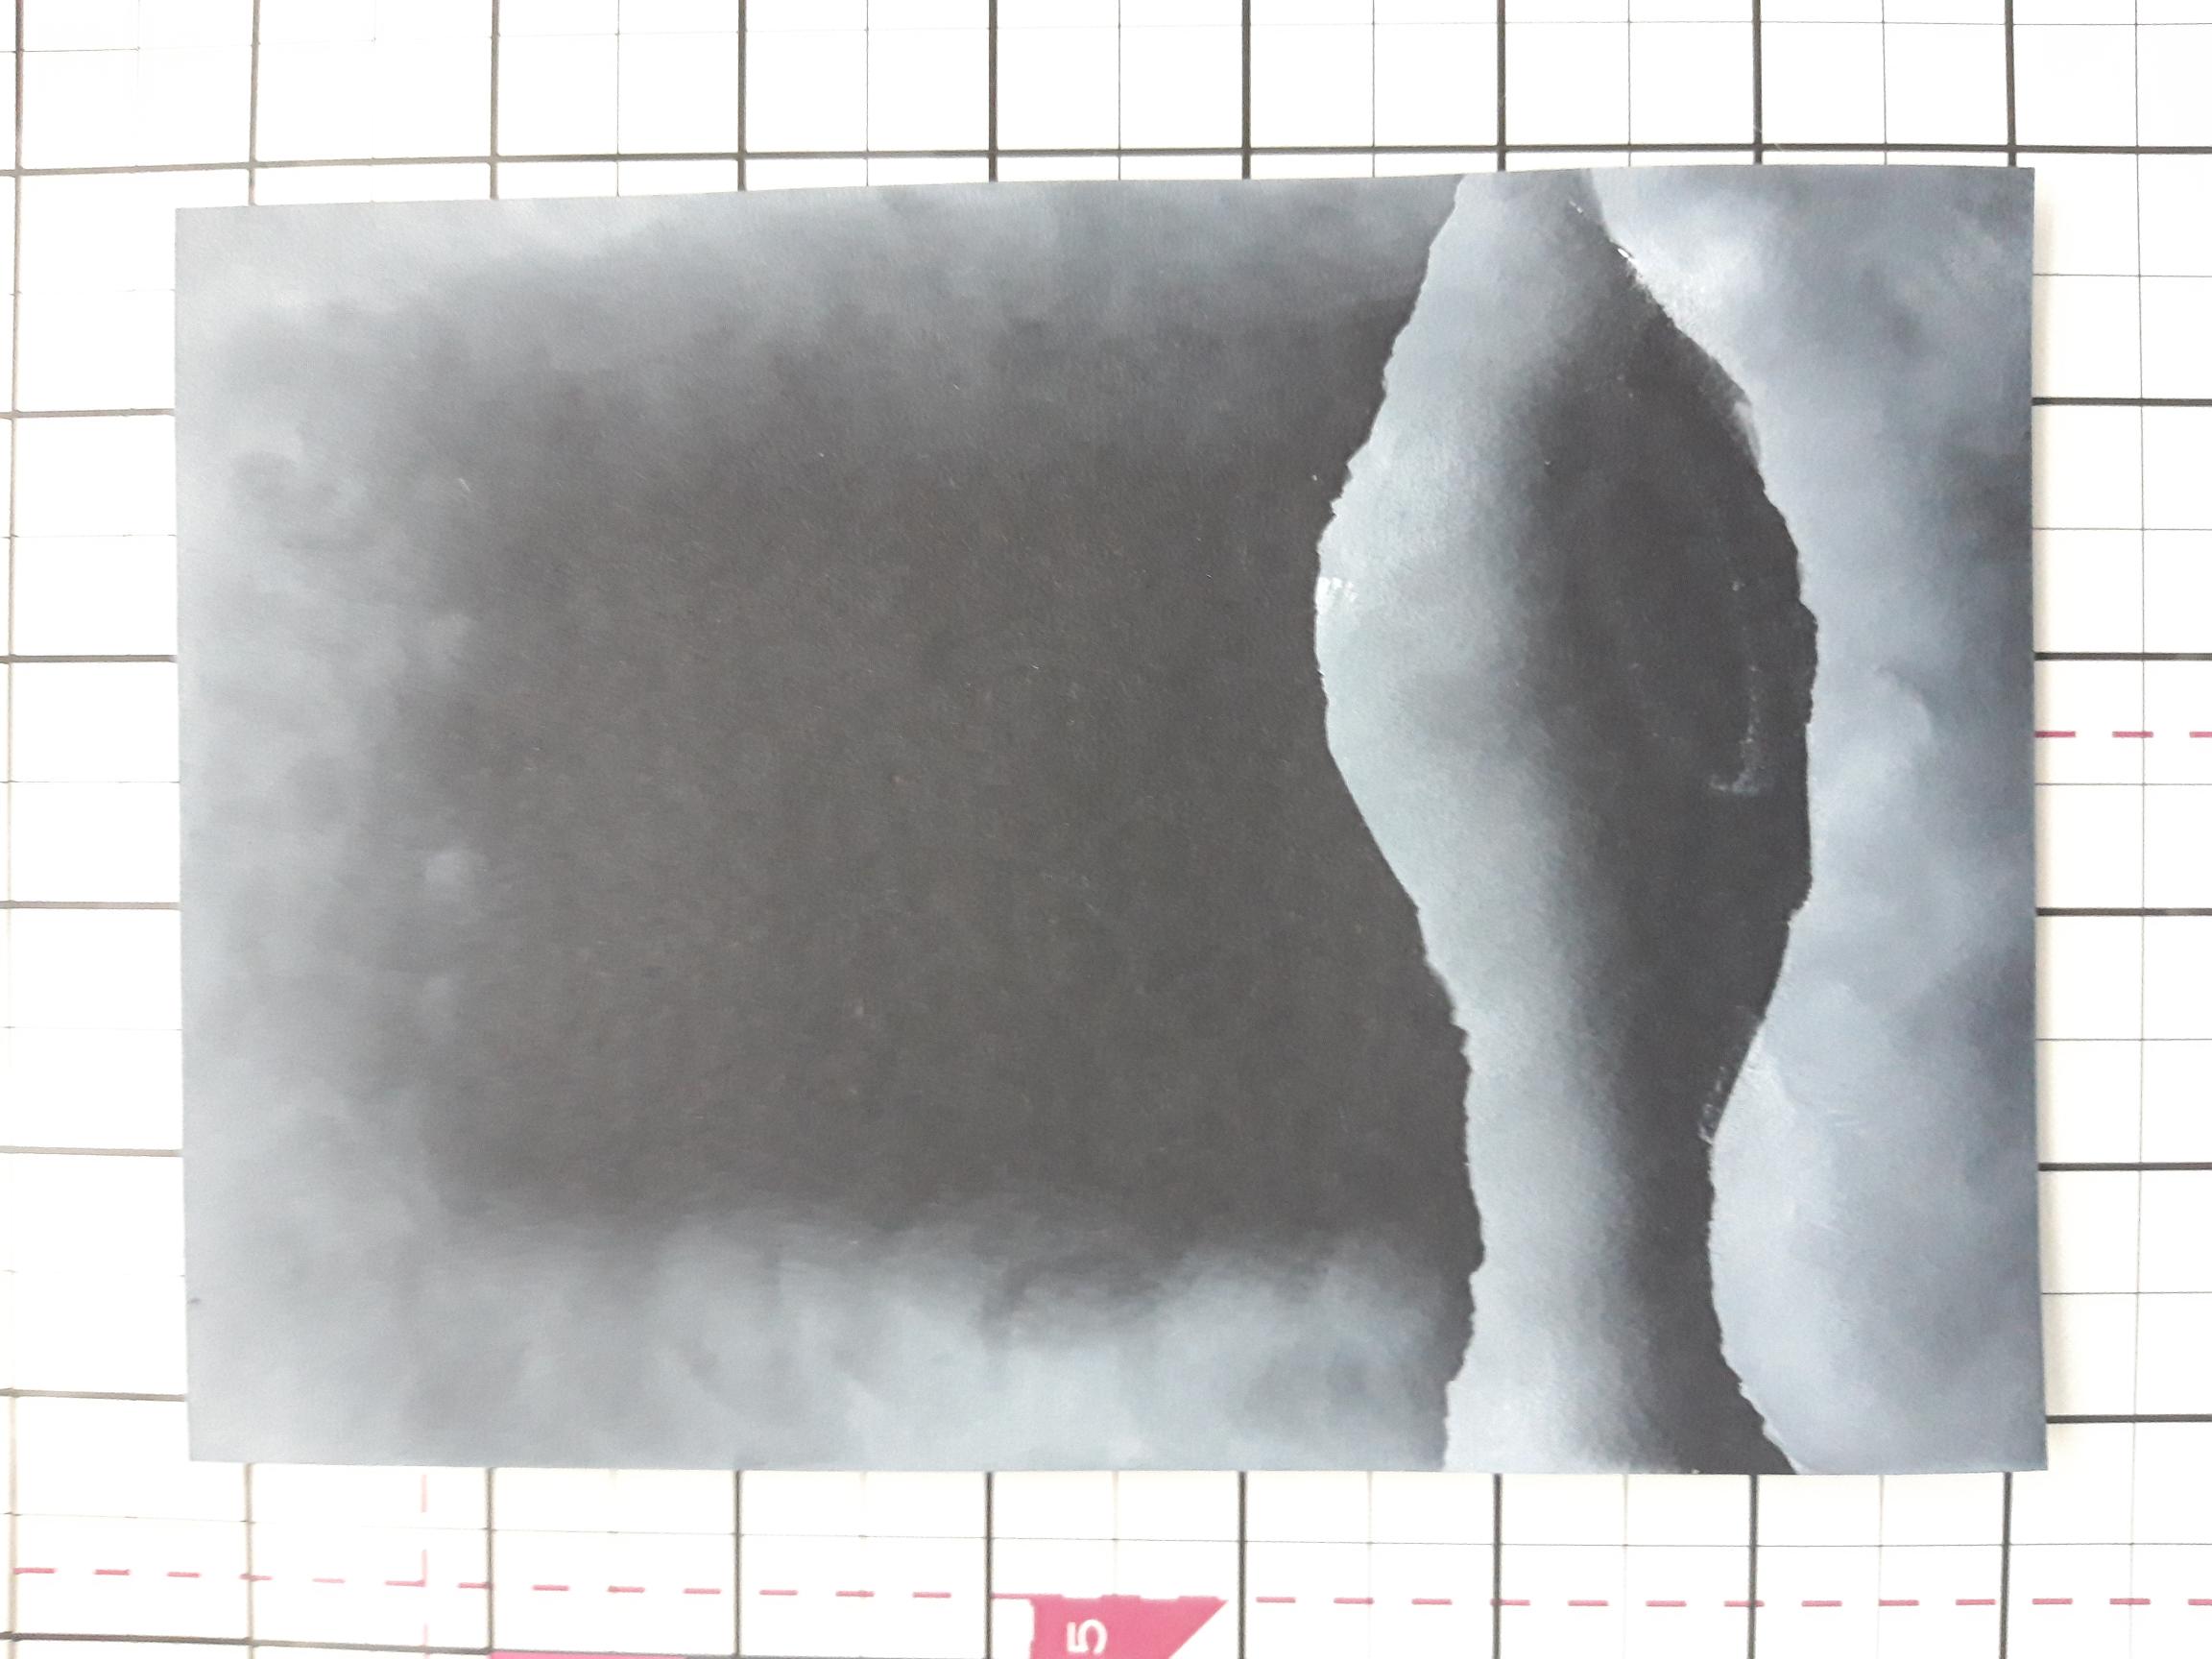
Tear "hills/mountains" from copy paper (or you can use a stencil), and place just over half way down the black card, as shown here. |
|
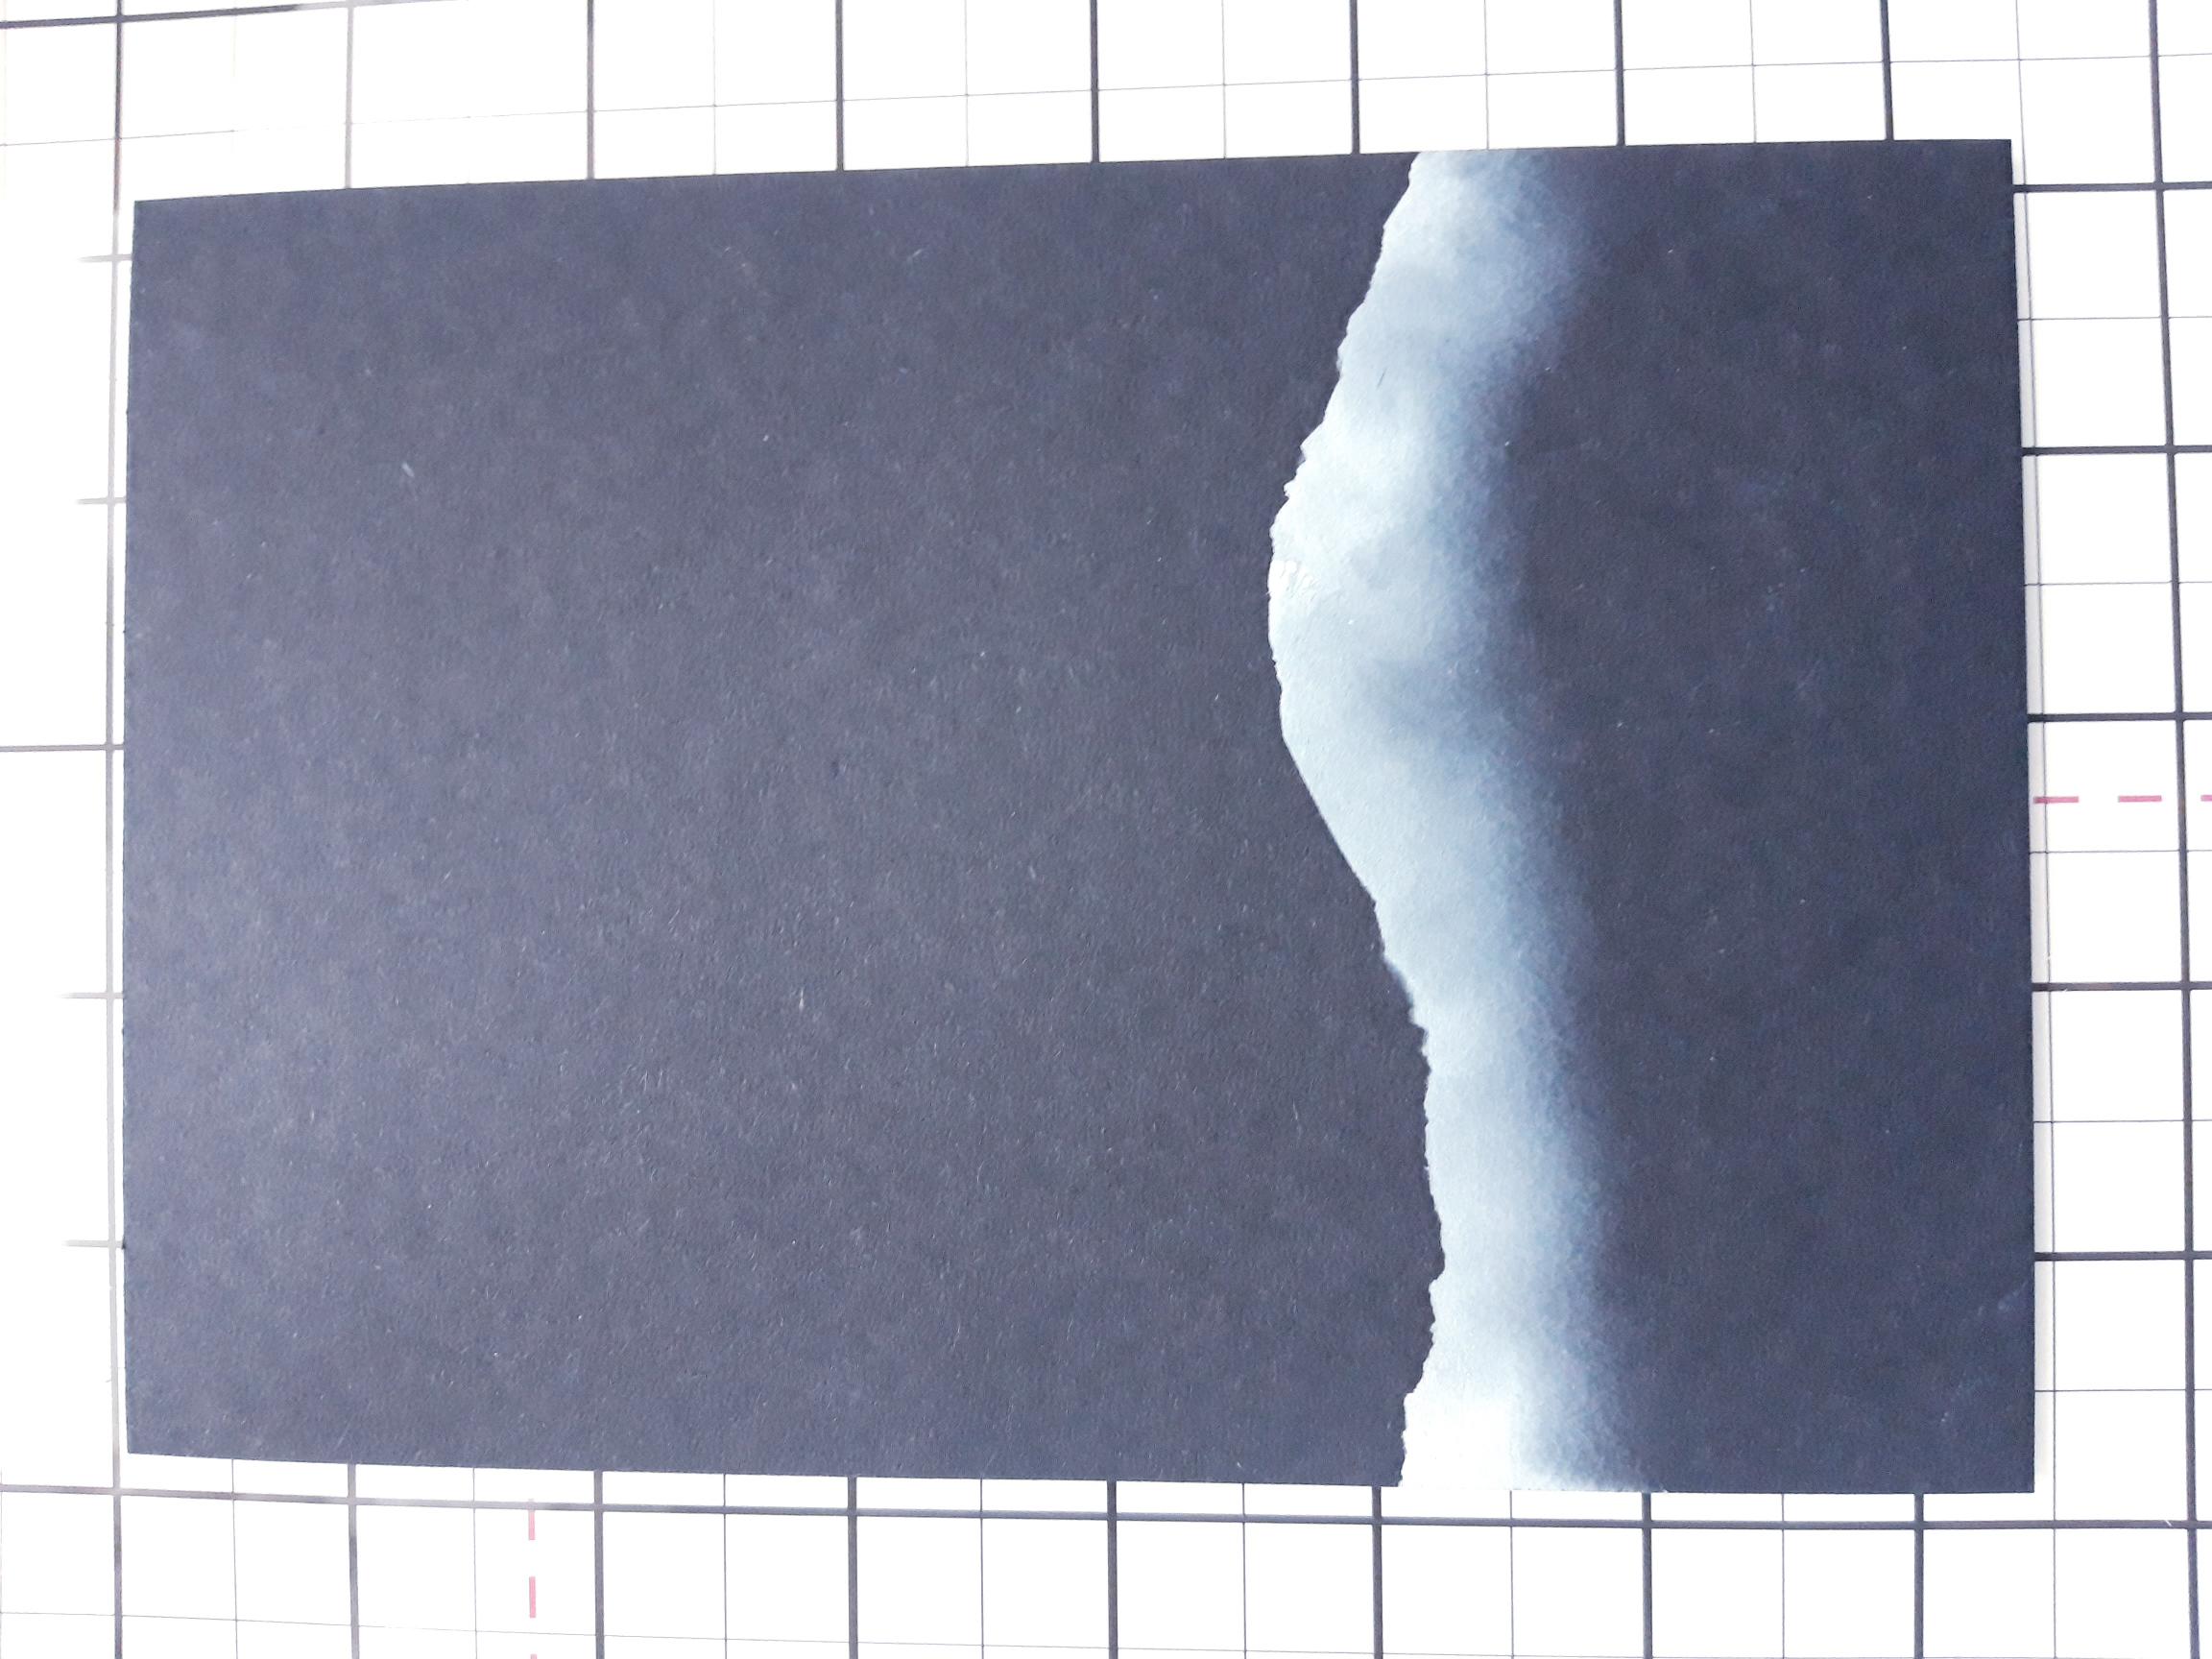
Using a blending tool, apply the Cotton Pigment ink to create your first layer of snowy "hills". NB:Pigment ink is very slow drying, so blast the ink with your heat tool, to avoid smudging it!! |
|
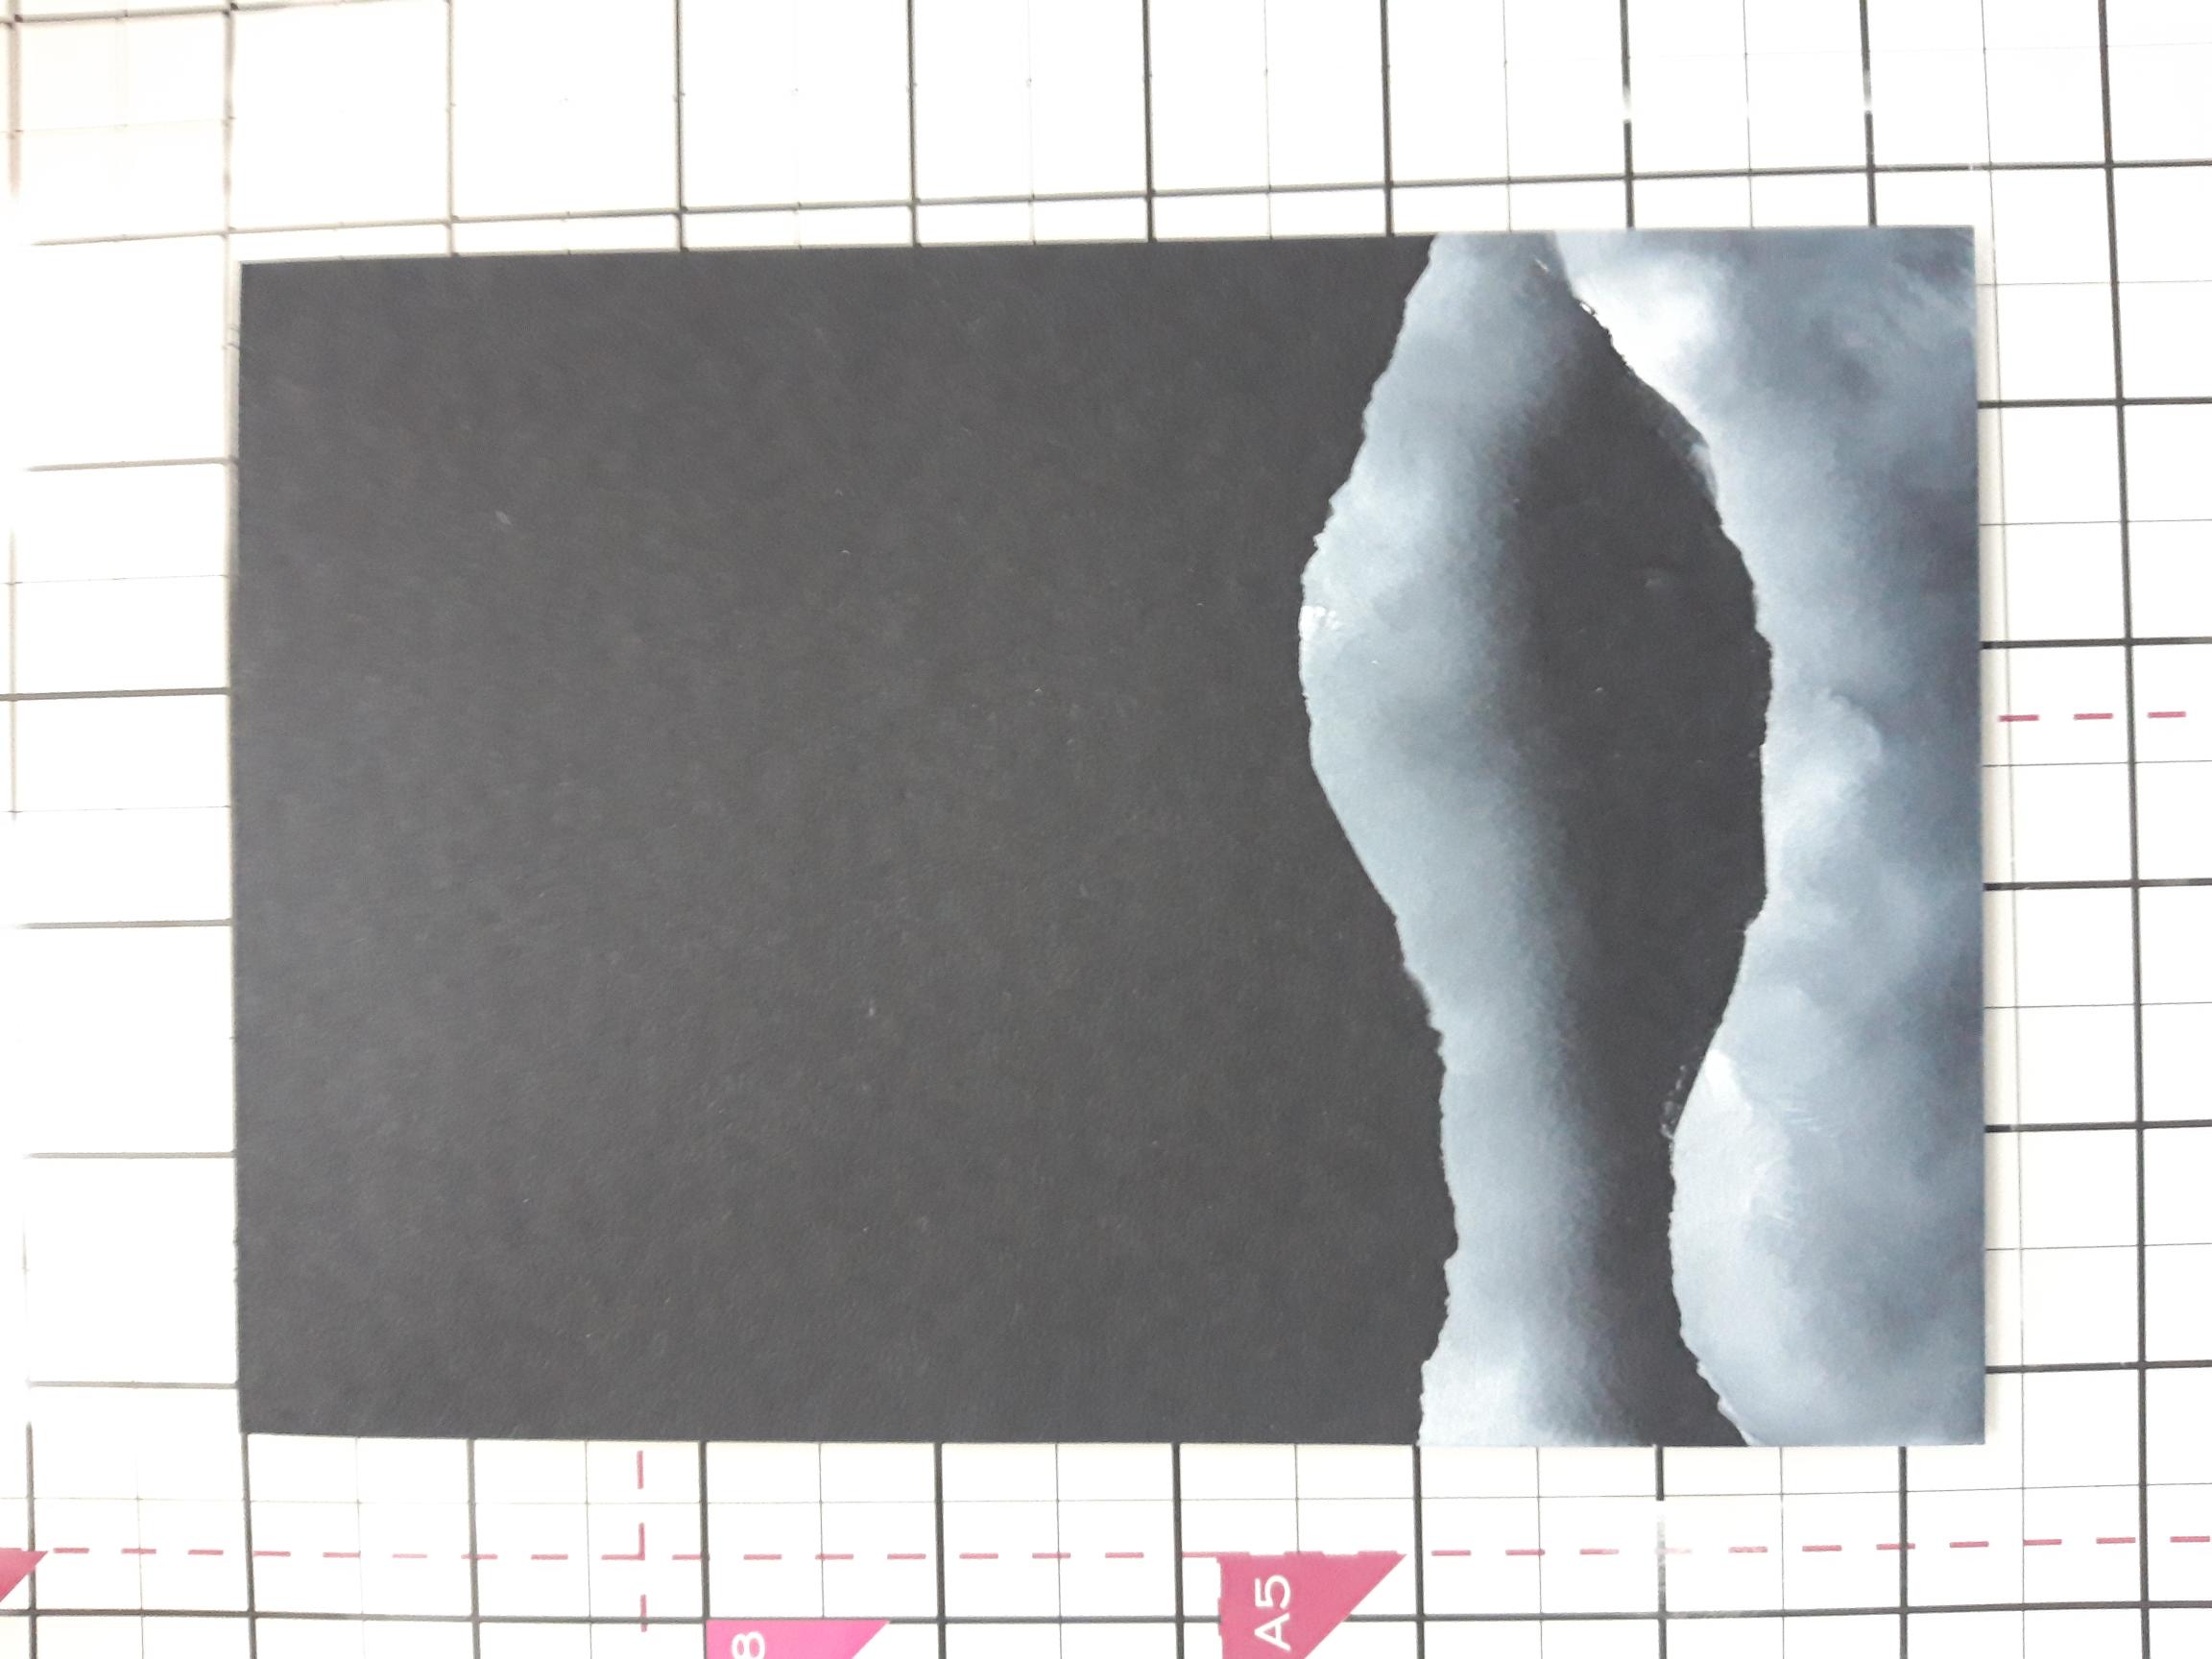
Place your "torn" paper hills in a different position, below the first layer and blend with the Cotton ink. You can repeat this process until you are happy with the snowy landscape you have created. When creating your hills, think about the placement of your Penguins, so when stamped, they are grounded. Remember to blast the ink with your heat tool, after each application! |
|
Blend the Cotton ink with your blending tool, around the edges of the card, fading it out as you move inwards. Blast dry with your heat tool. |
|
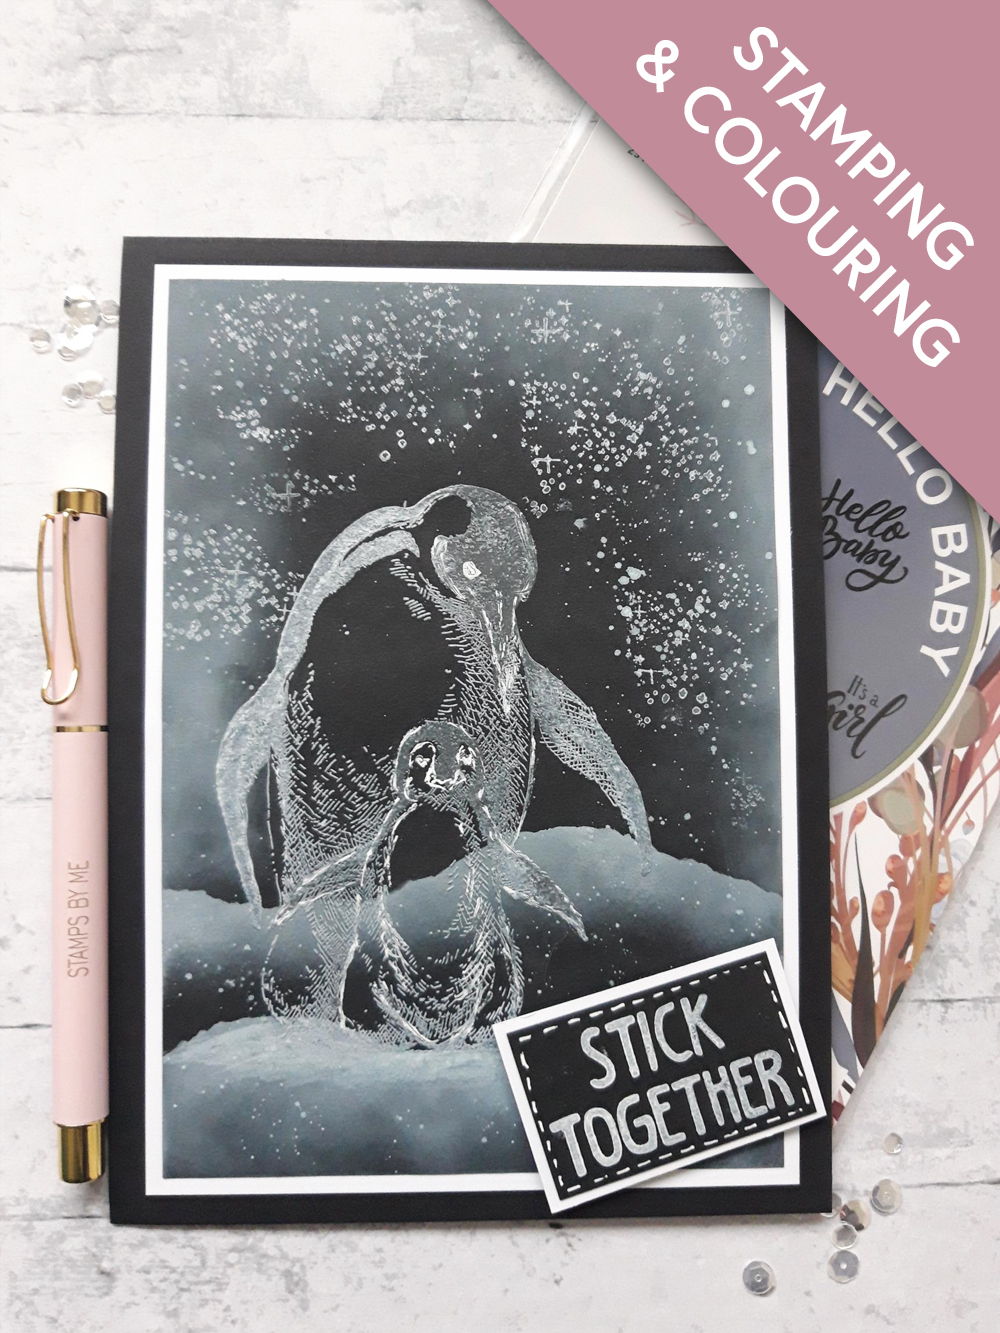
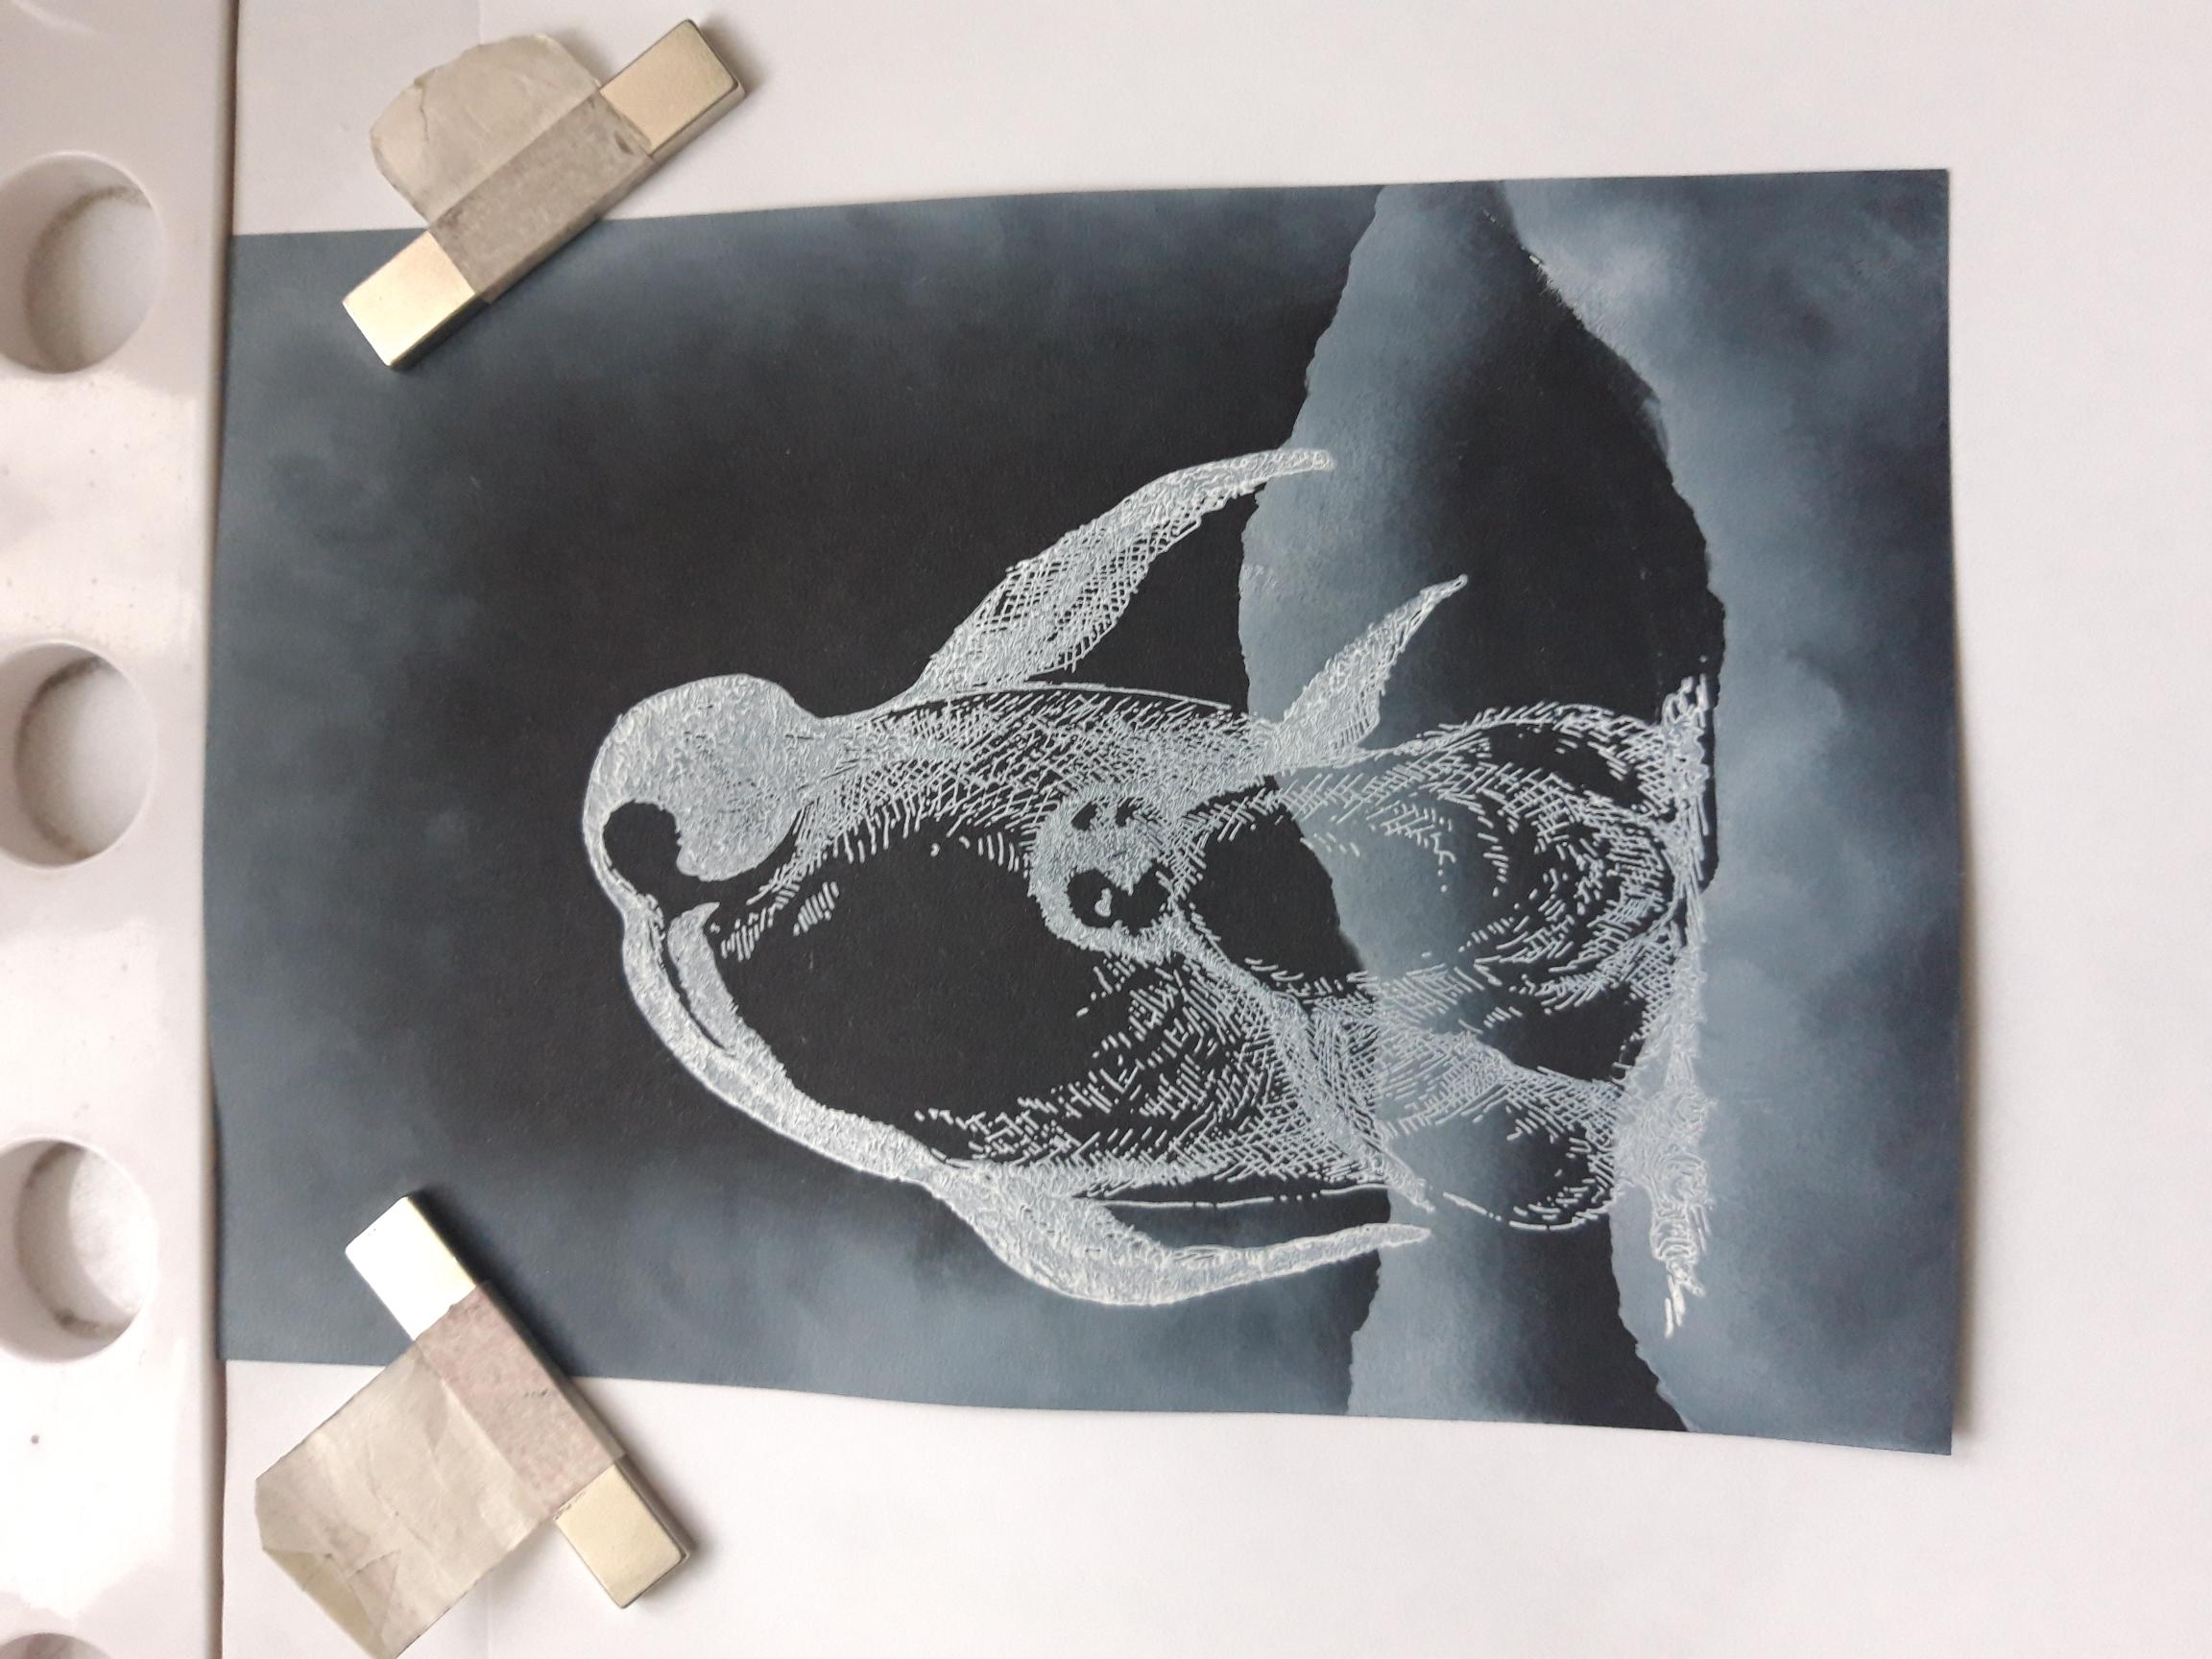
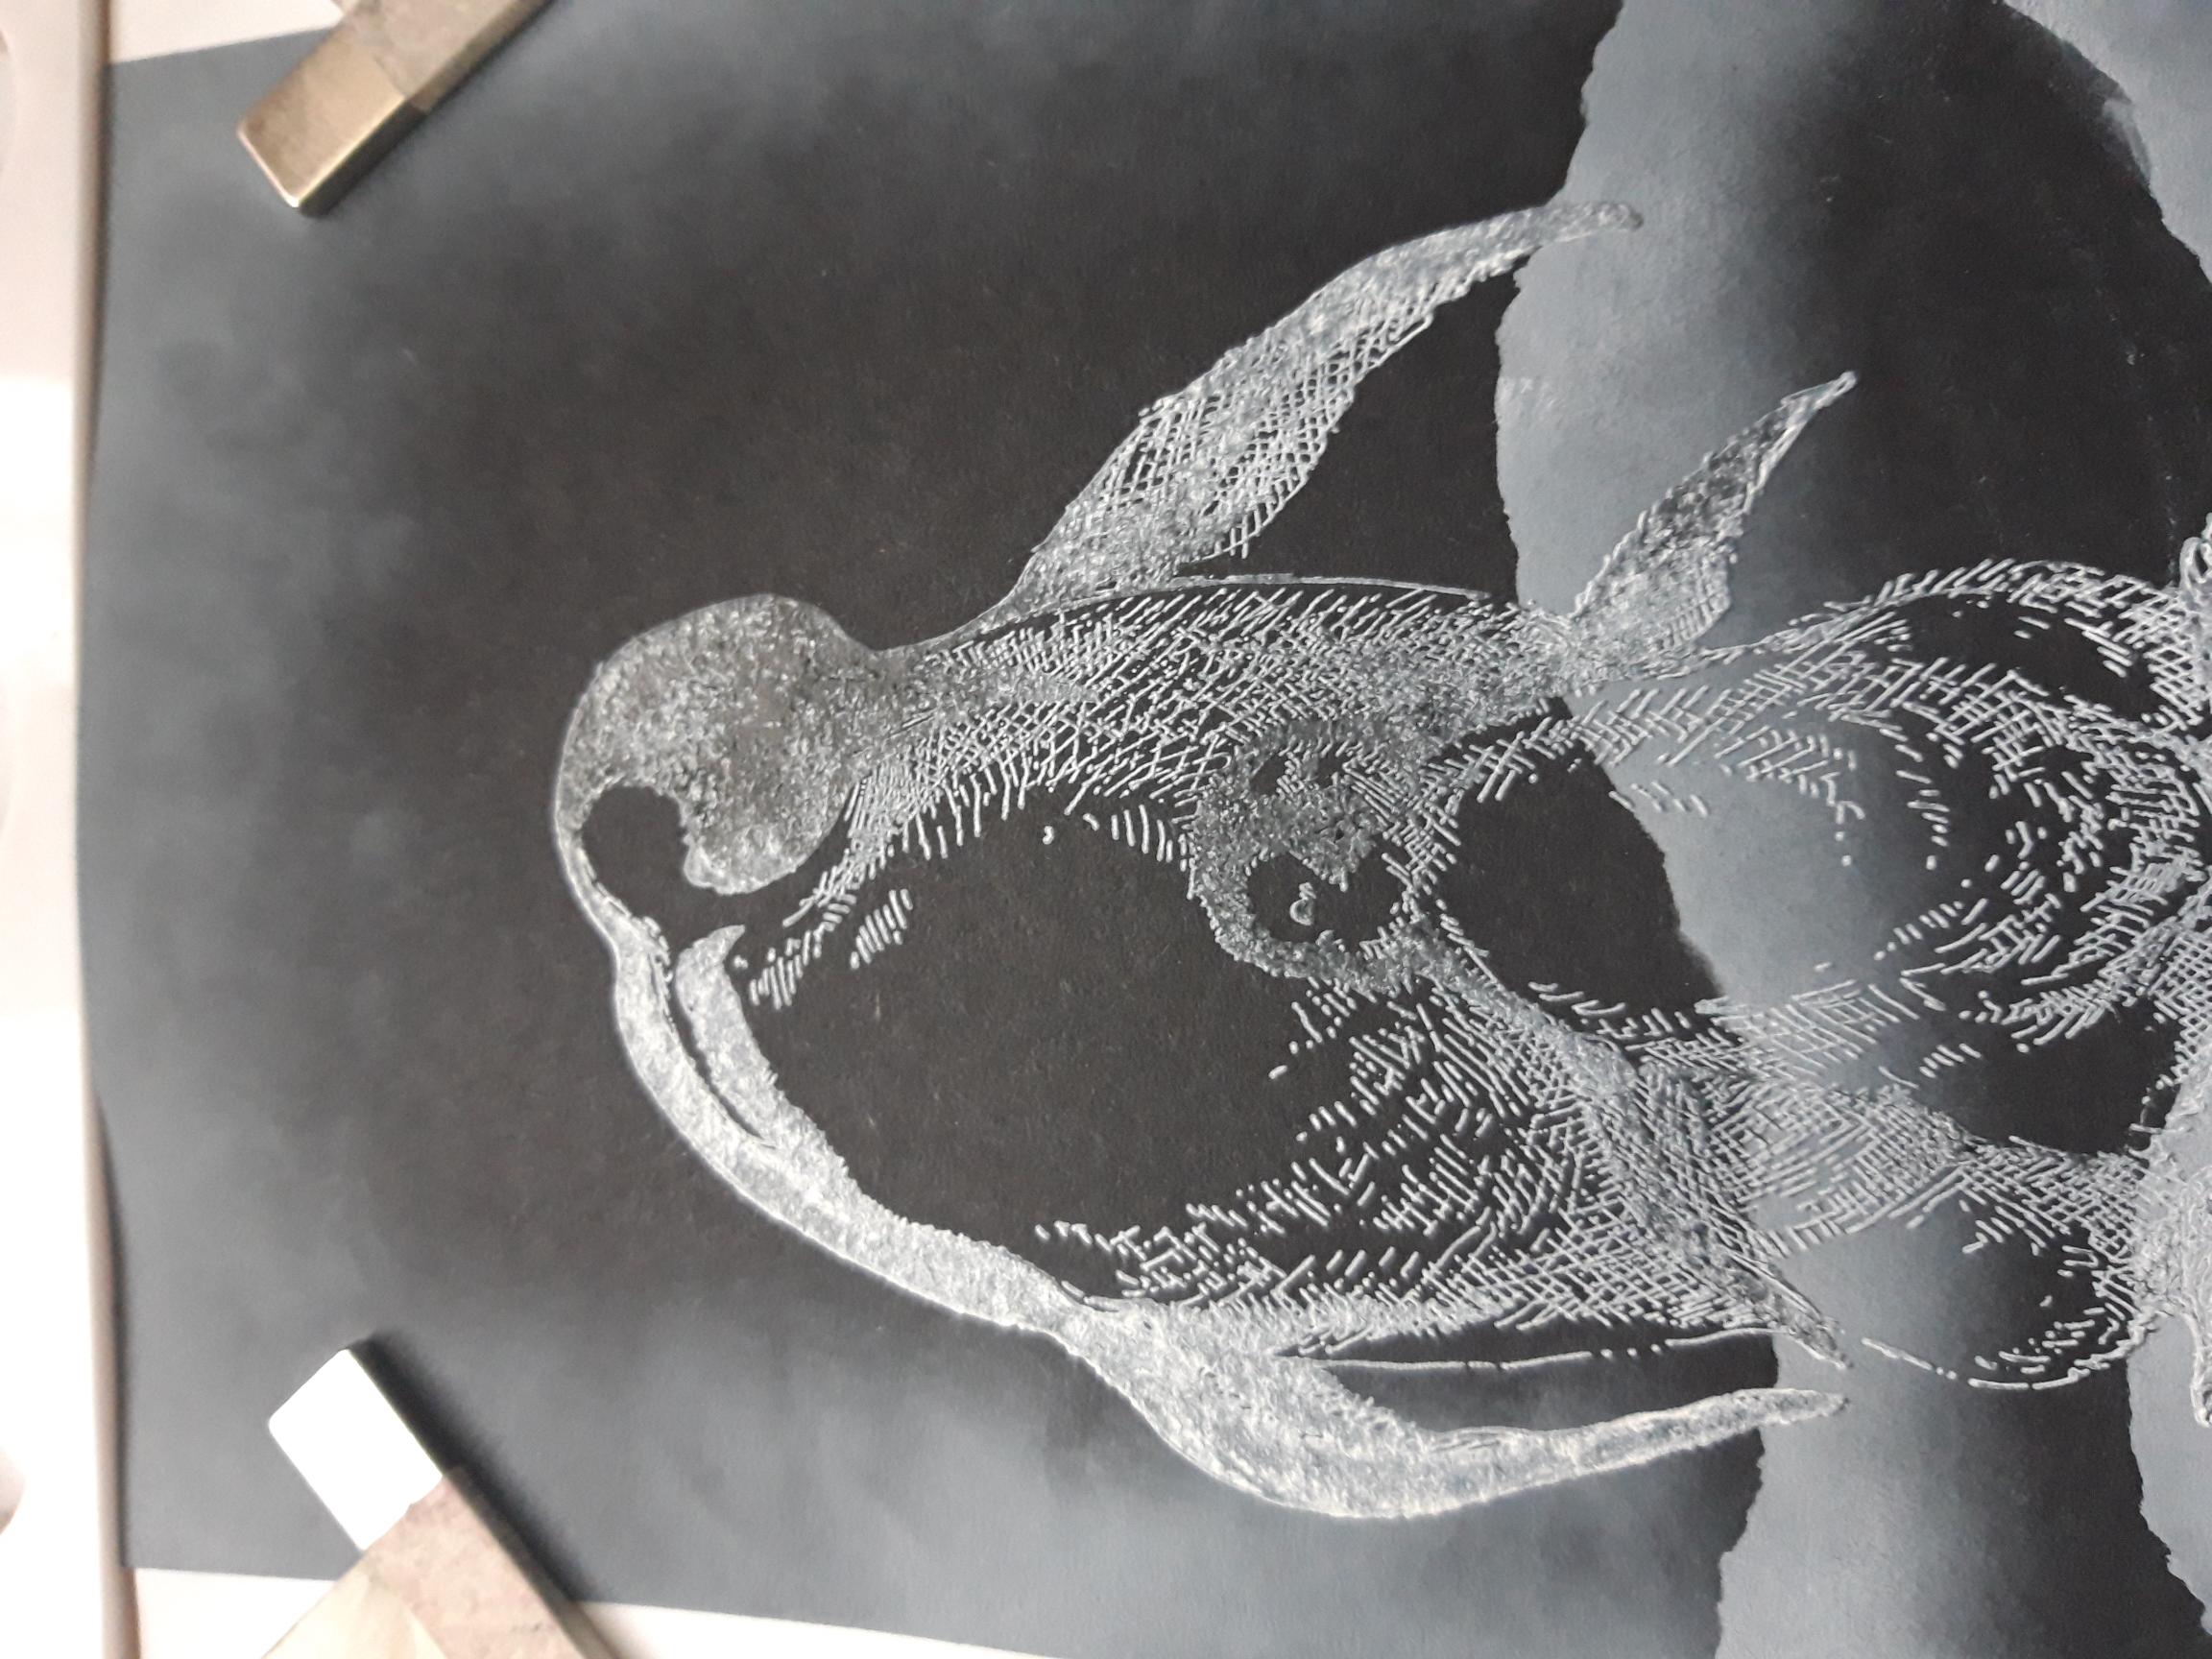
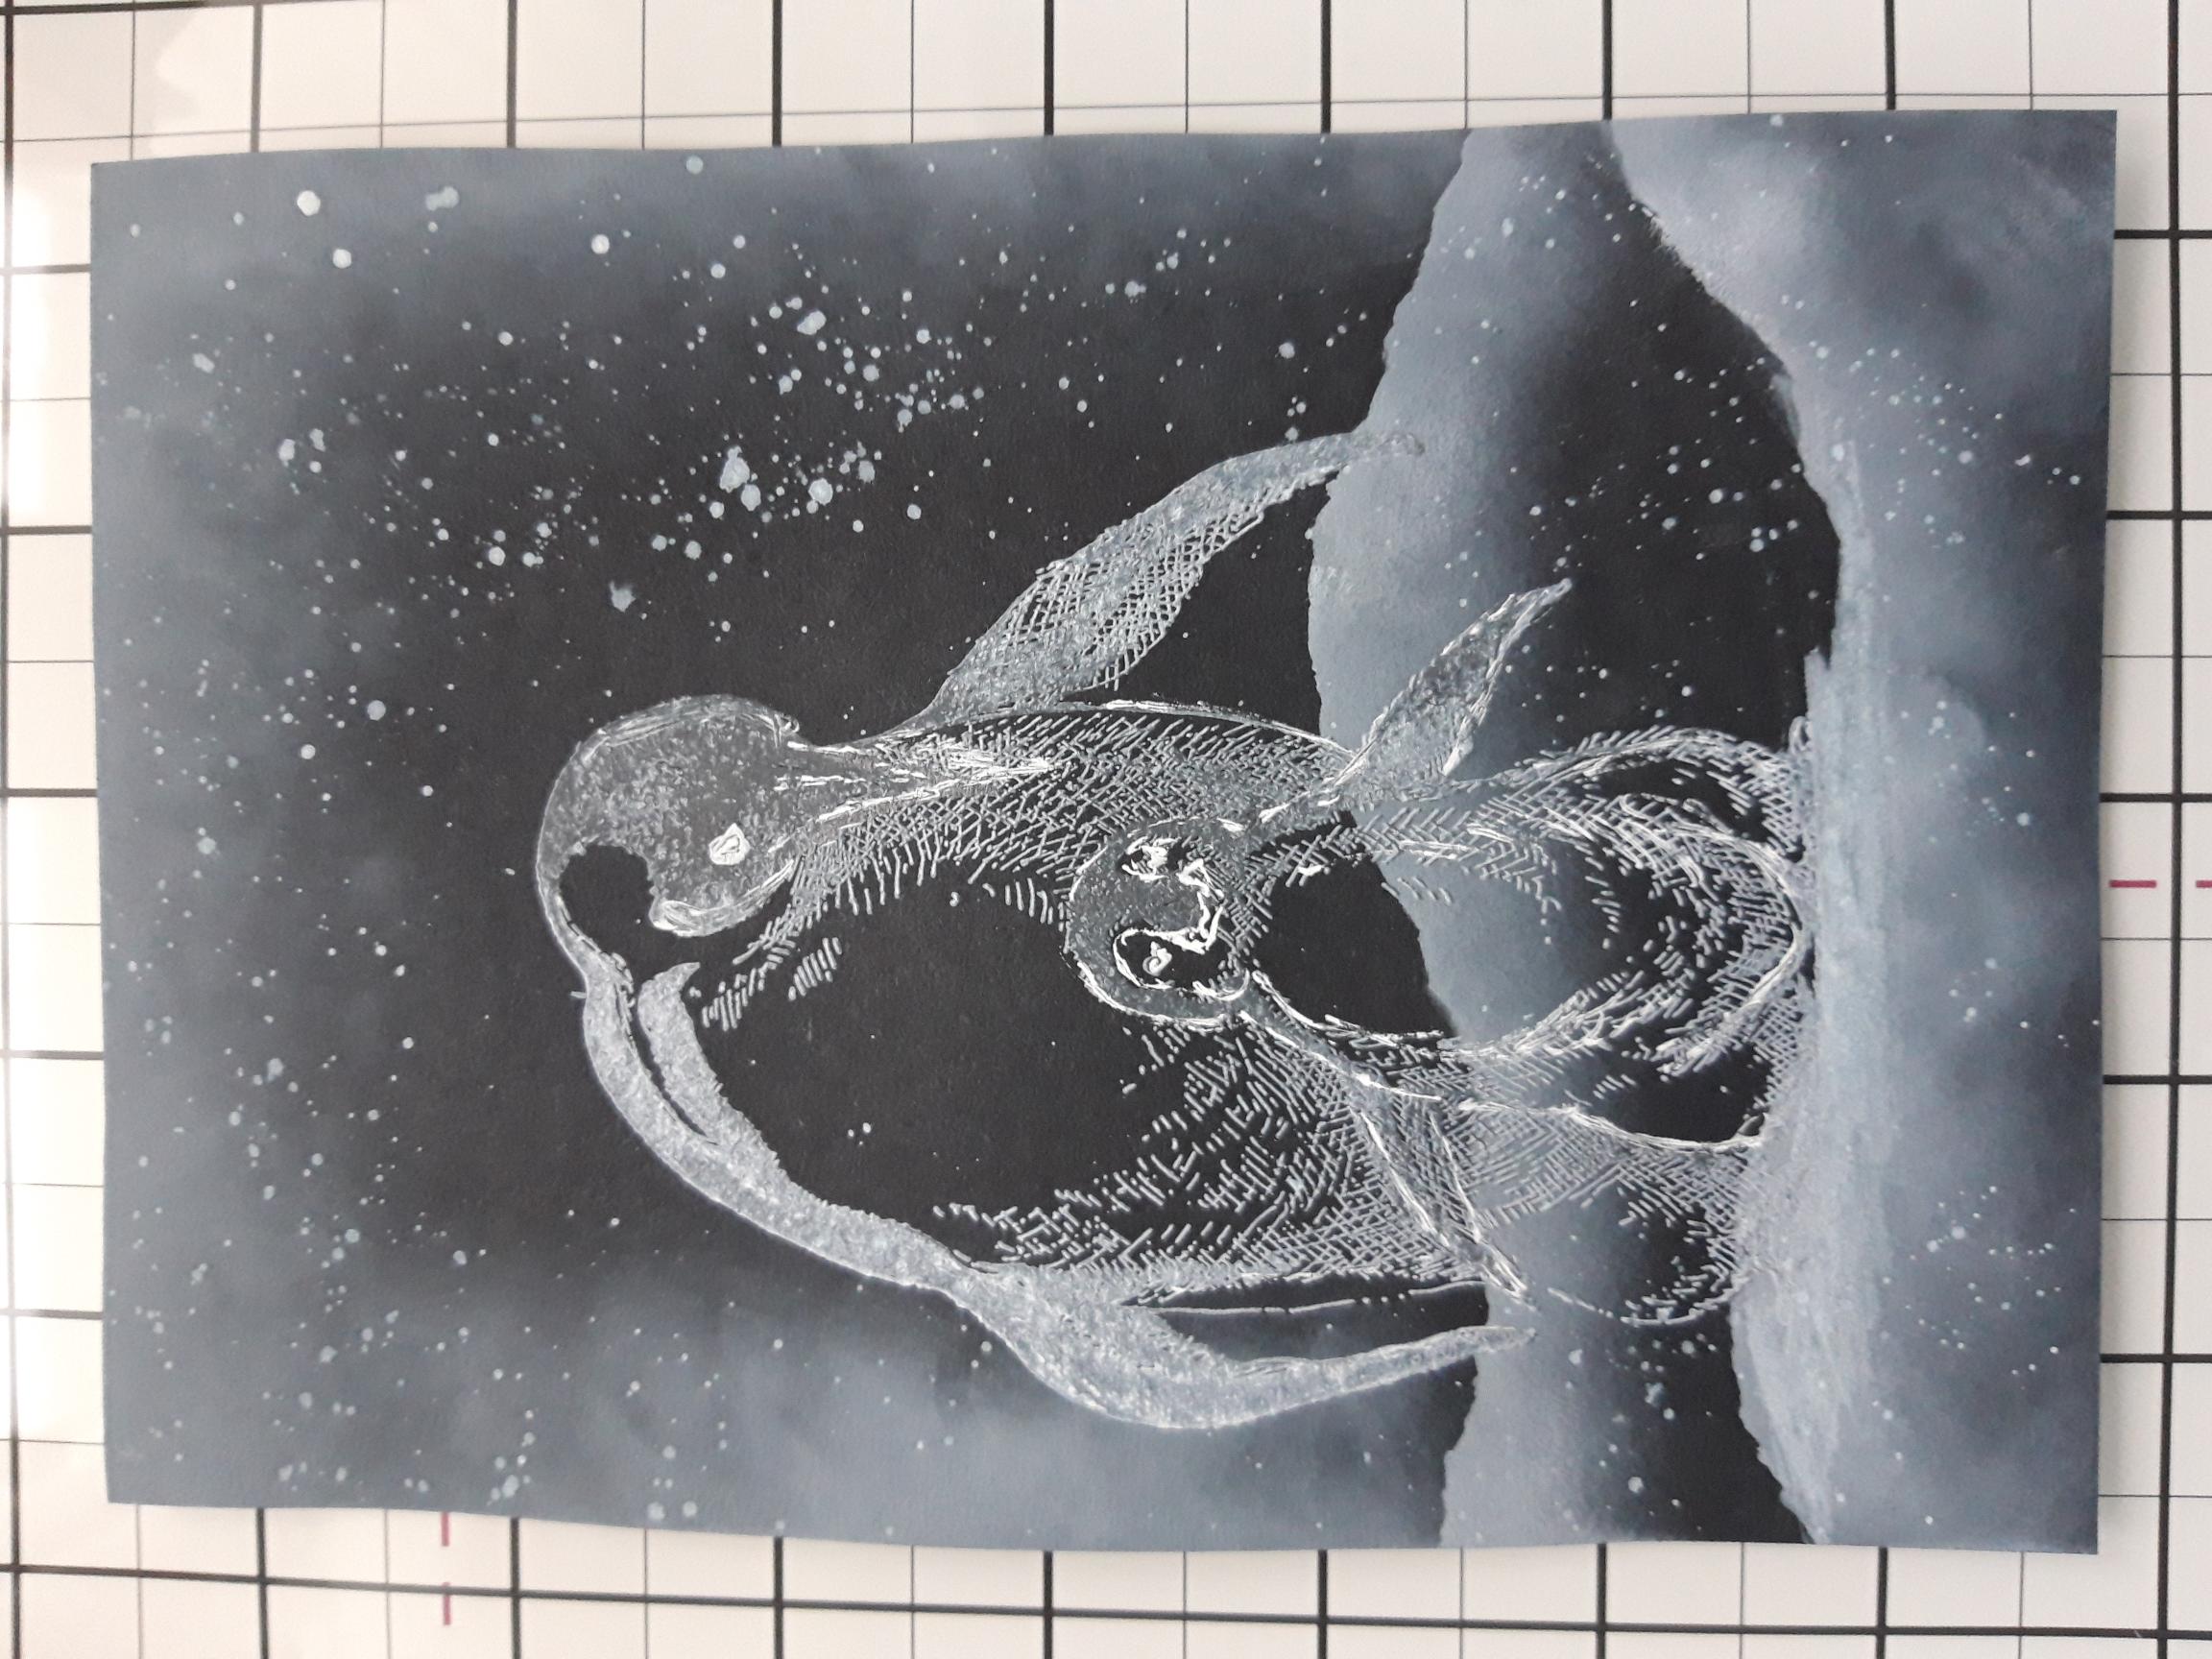
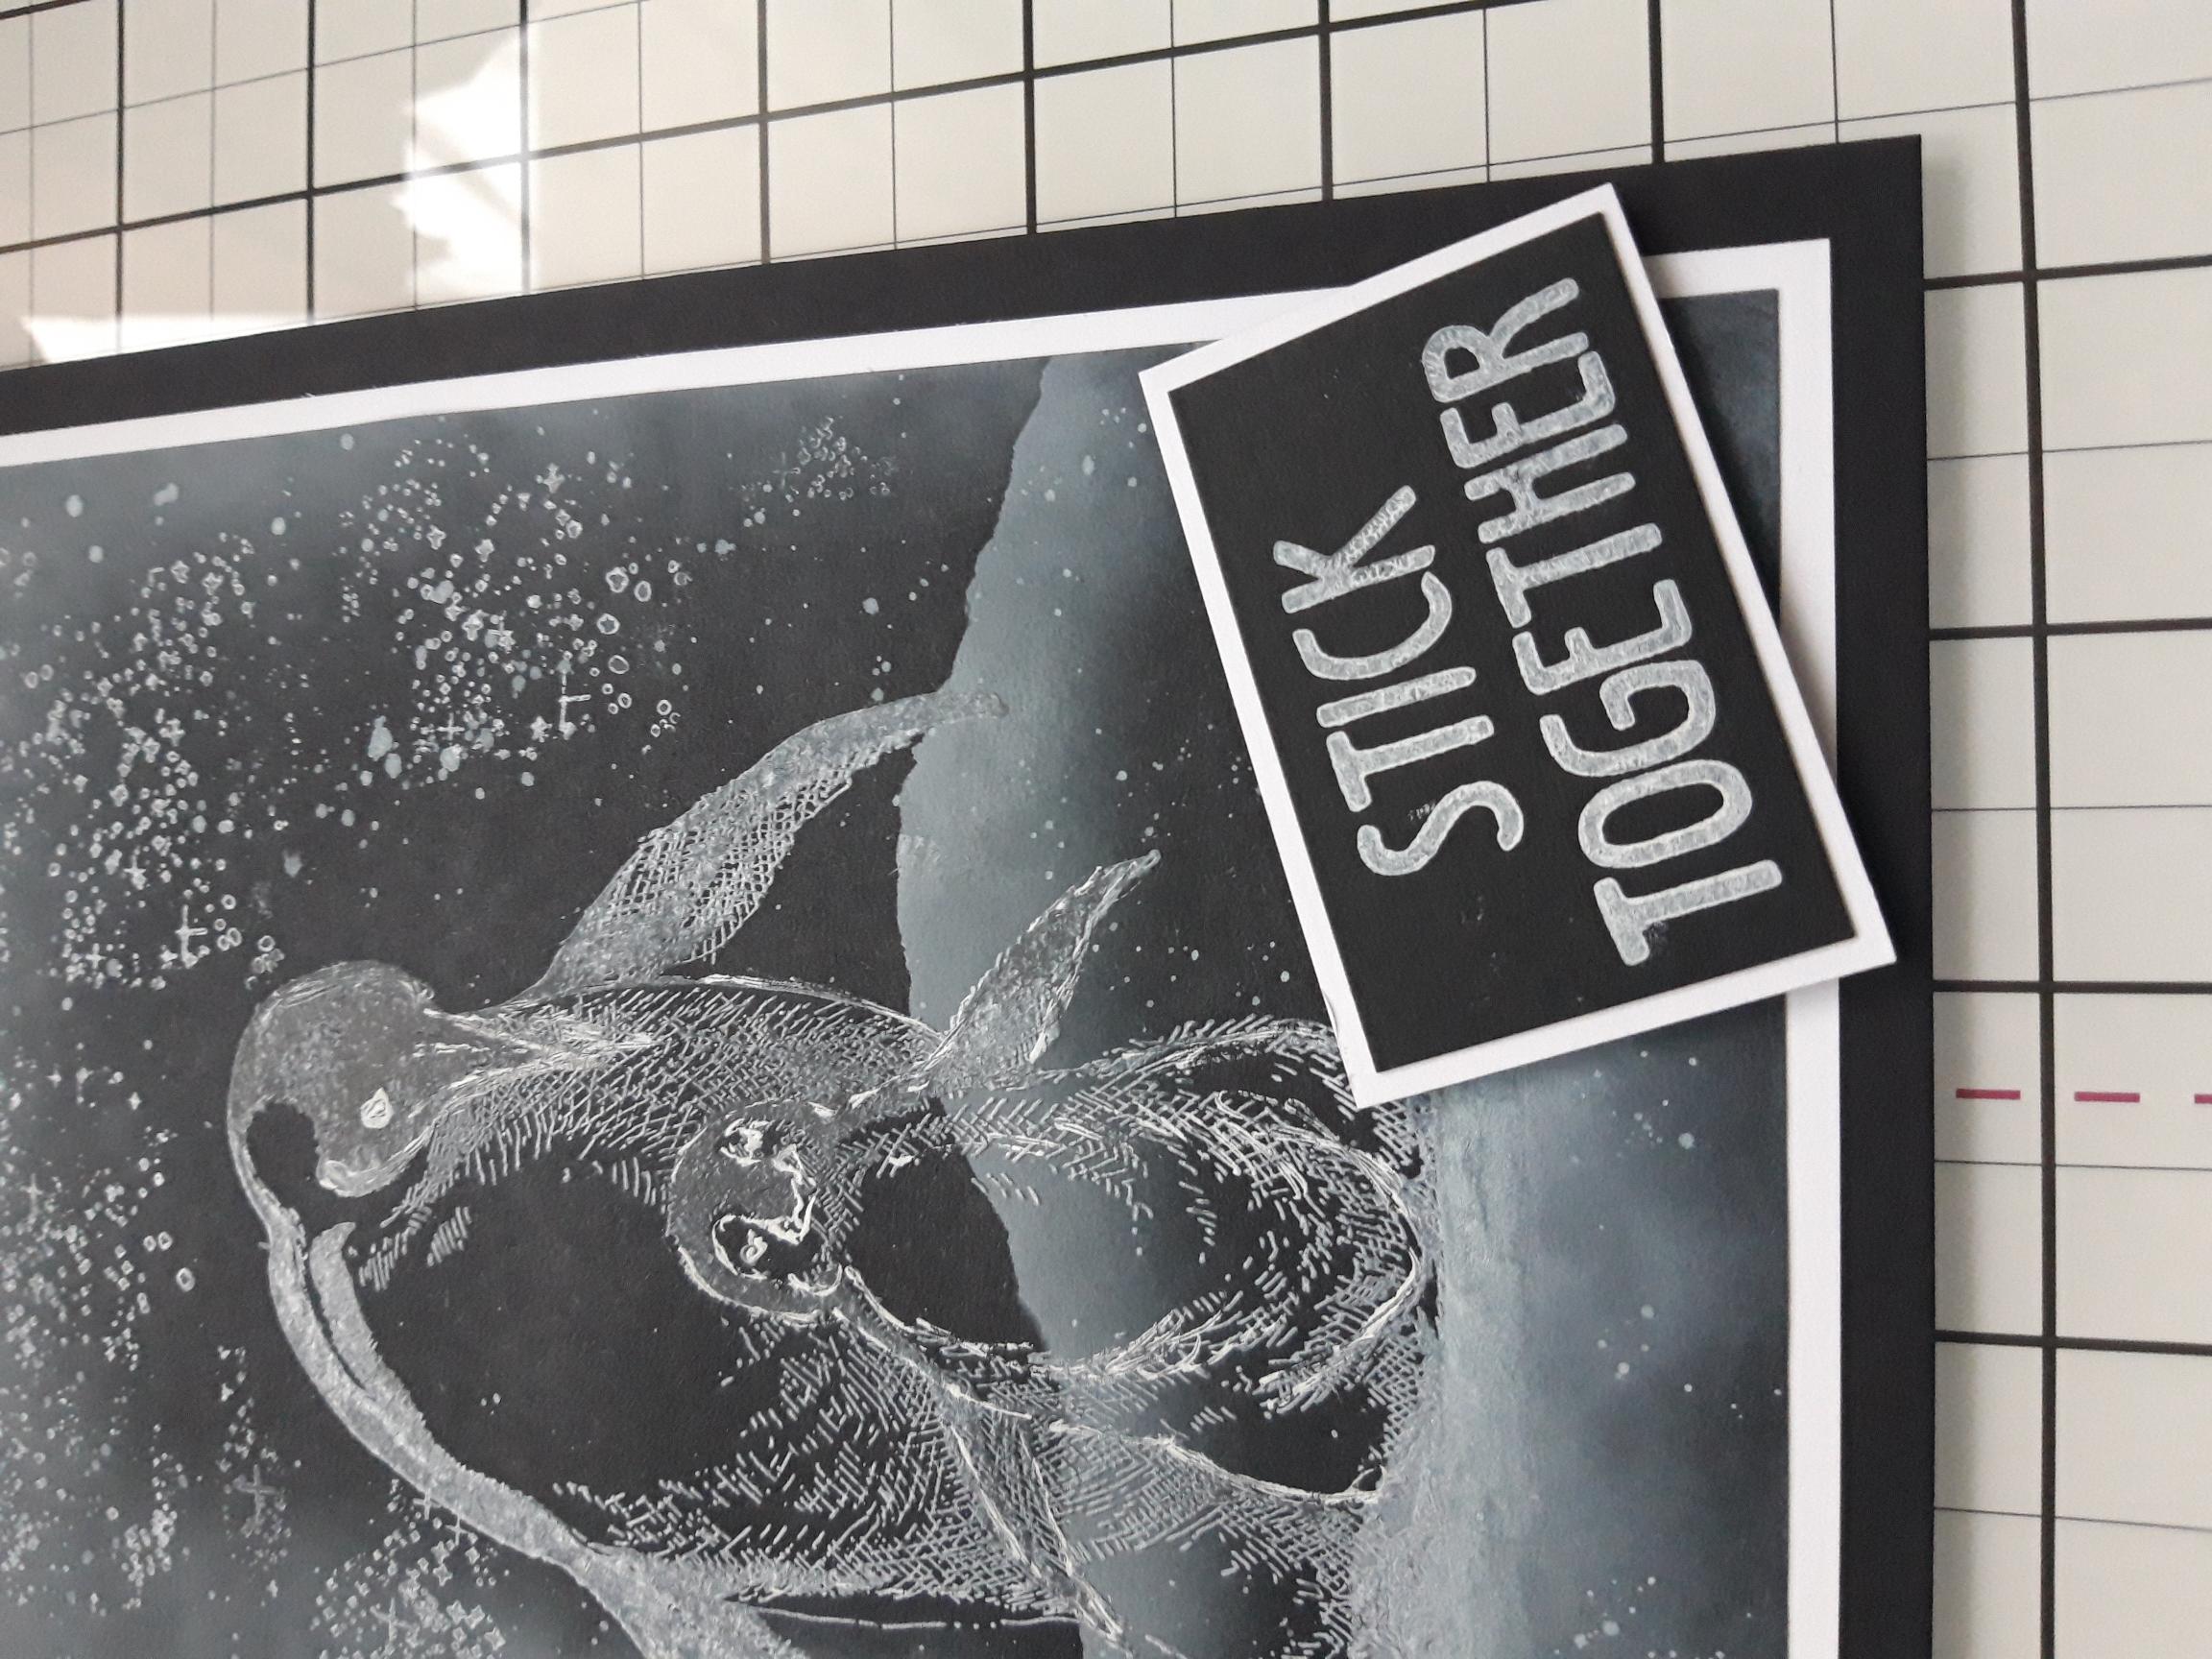
Ink up the ever soo cute Penguins, with the Cotton and stamp slightly to the left of your background. You now have a choice...Whilst the ink is wet you can use a paint brush to "move" some of the ink around, to create a little more shadow/depth to the image. Alternatively, you can use the Cotton ink to add a lot more "colour" to your Penguins. I chose to leave mine uncoloured, with only a hint of a blend, as I felt it gave a more ghostly, misty, ethereal effect...but the choice is yours!! Whatever you decide, blast off the ink with your heat tool, when you've finished. |
|
Reink the Penguins with the Midnight ink, but not heavily and only in random areas, then stamp over your stamped image. This gives a little definition and shadow to your artwork. You can of course miss out this step. |
|
I went in with a white gel pen and accentuated some of the detail in my artwork, specifically around their faces, wings, belly fur etc. I also smudged a little of the Cotton ink under their feet, so it blended in with the snow. |
|
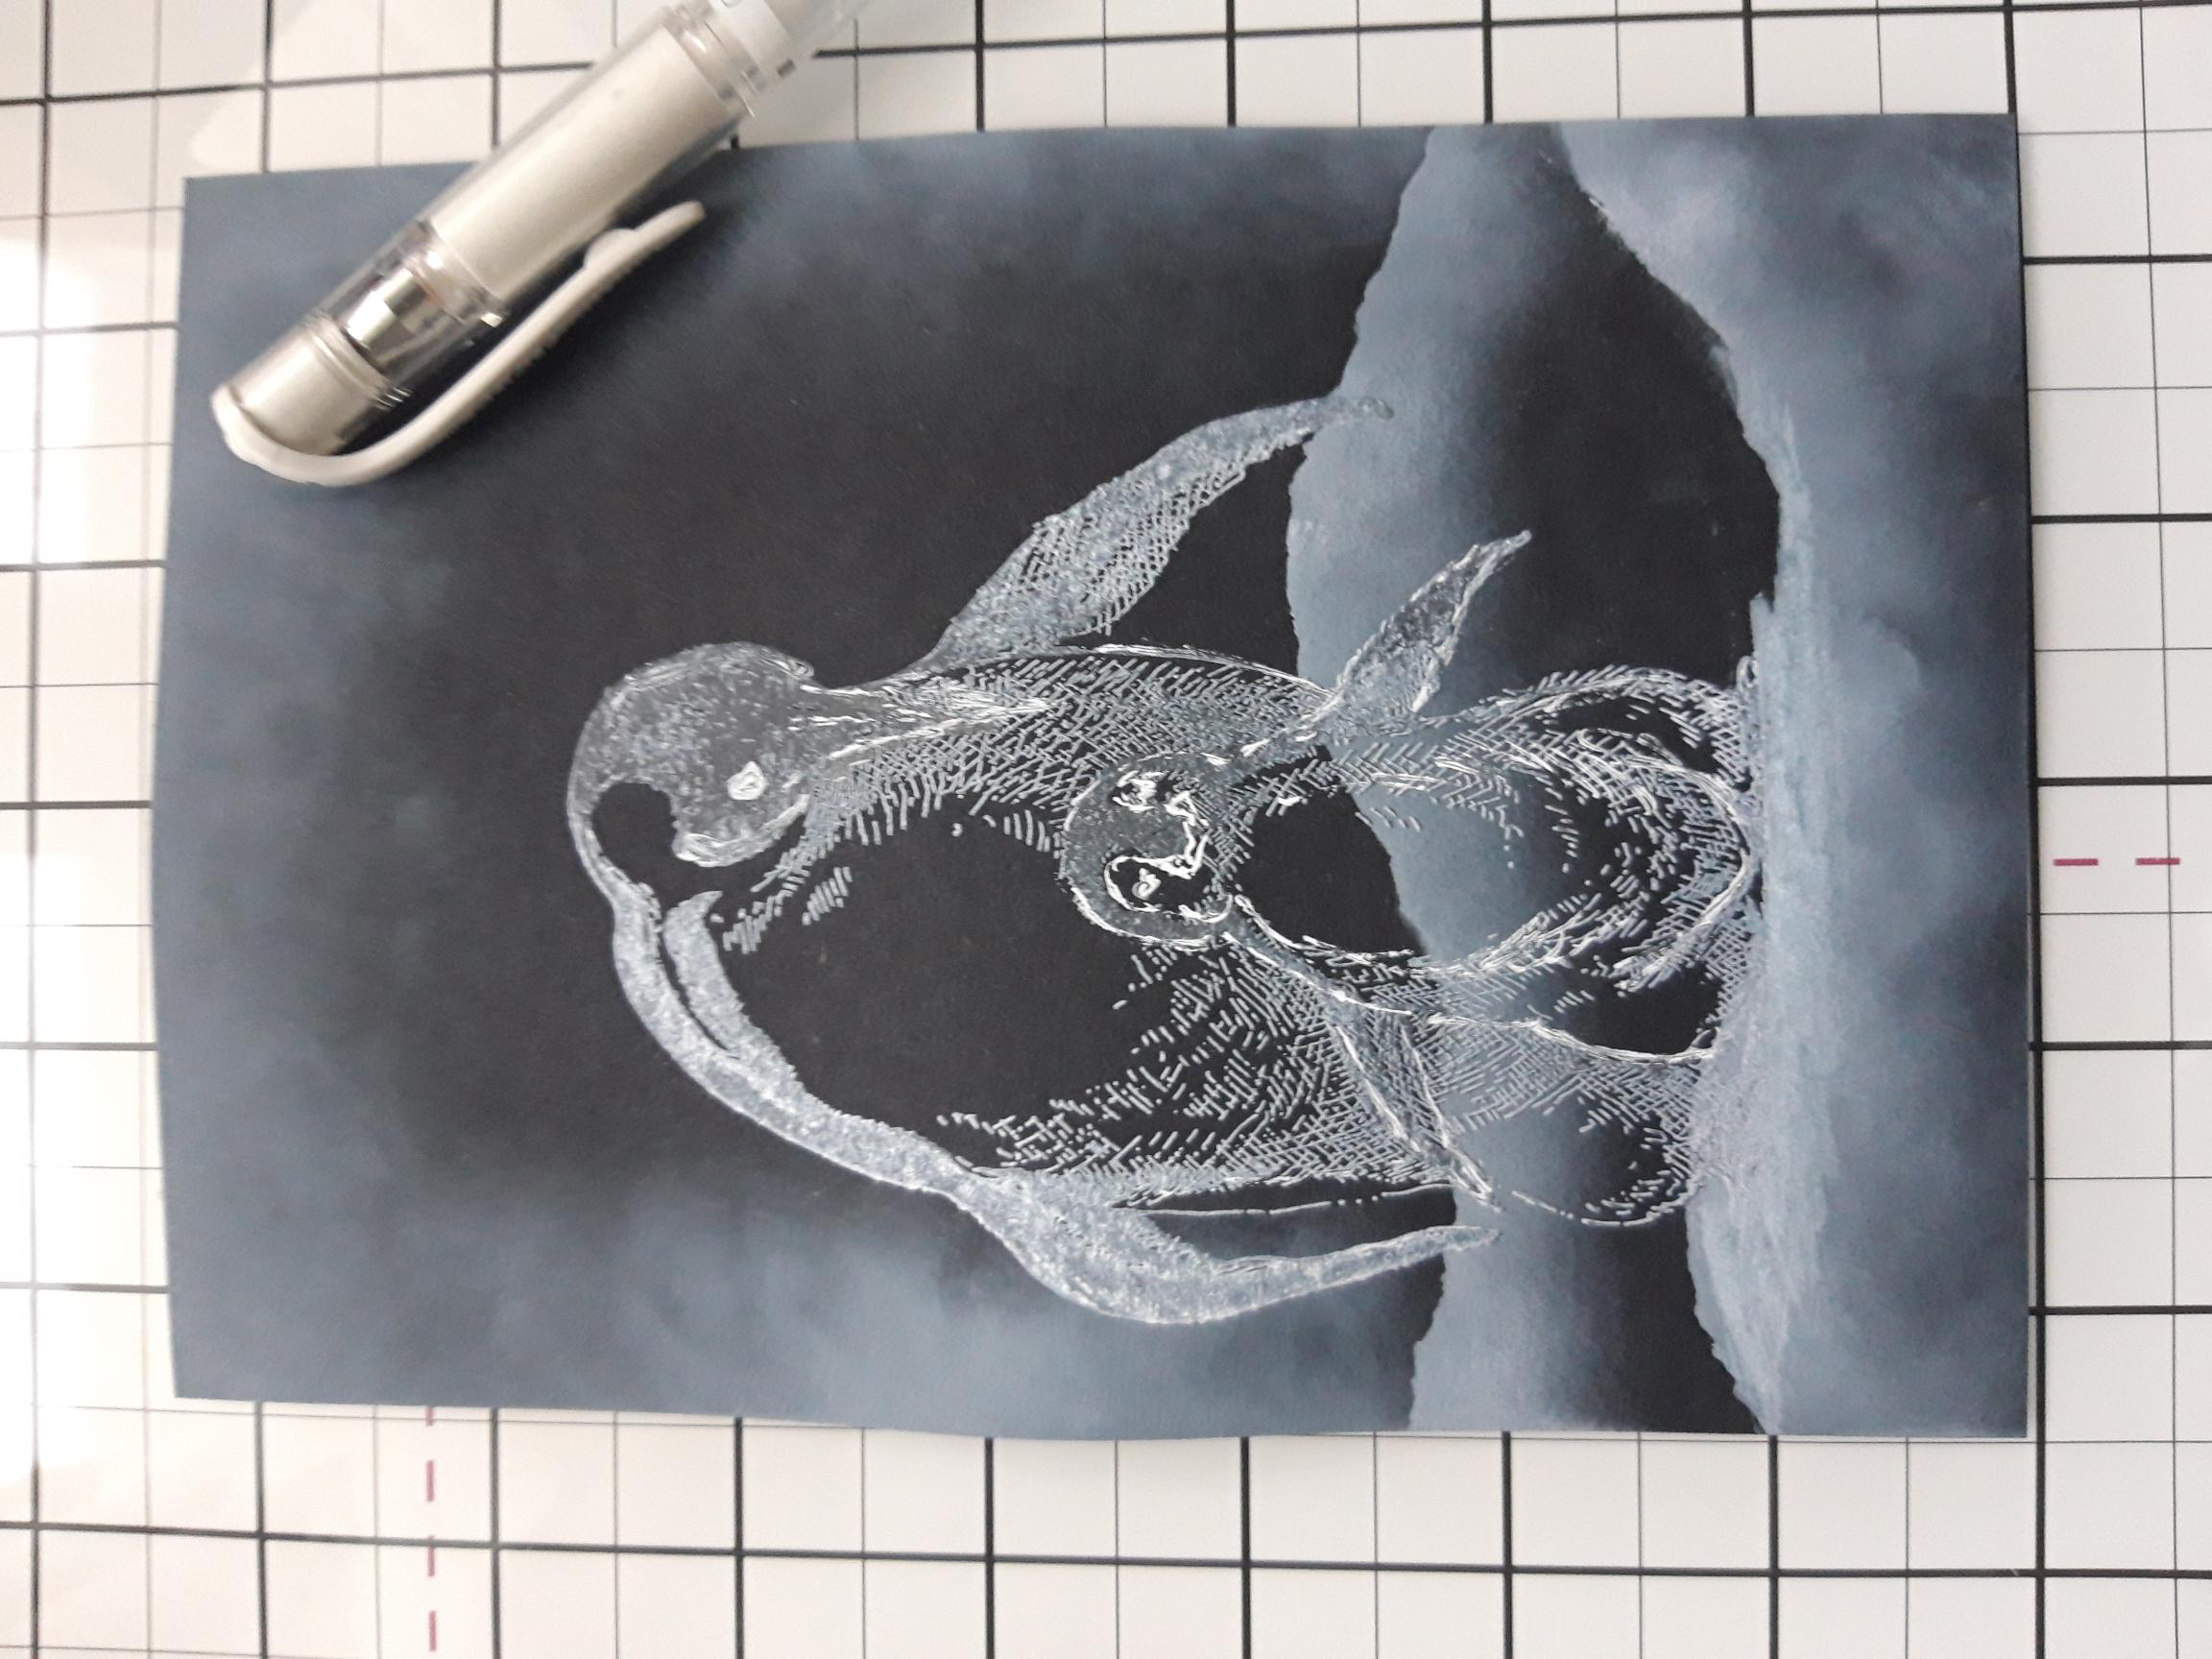
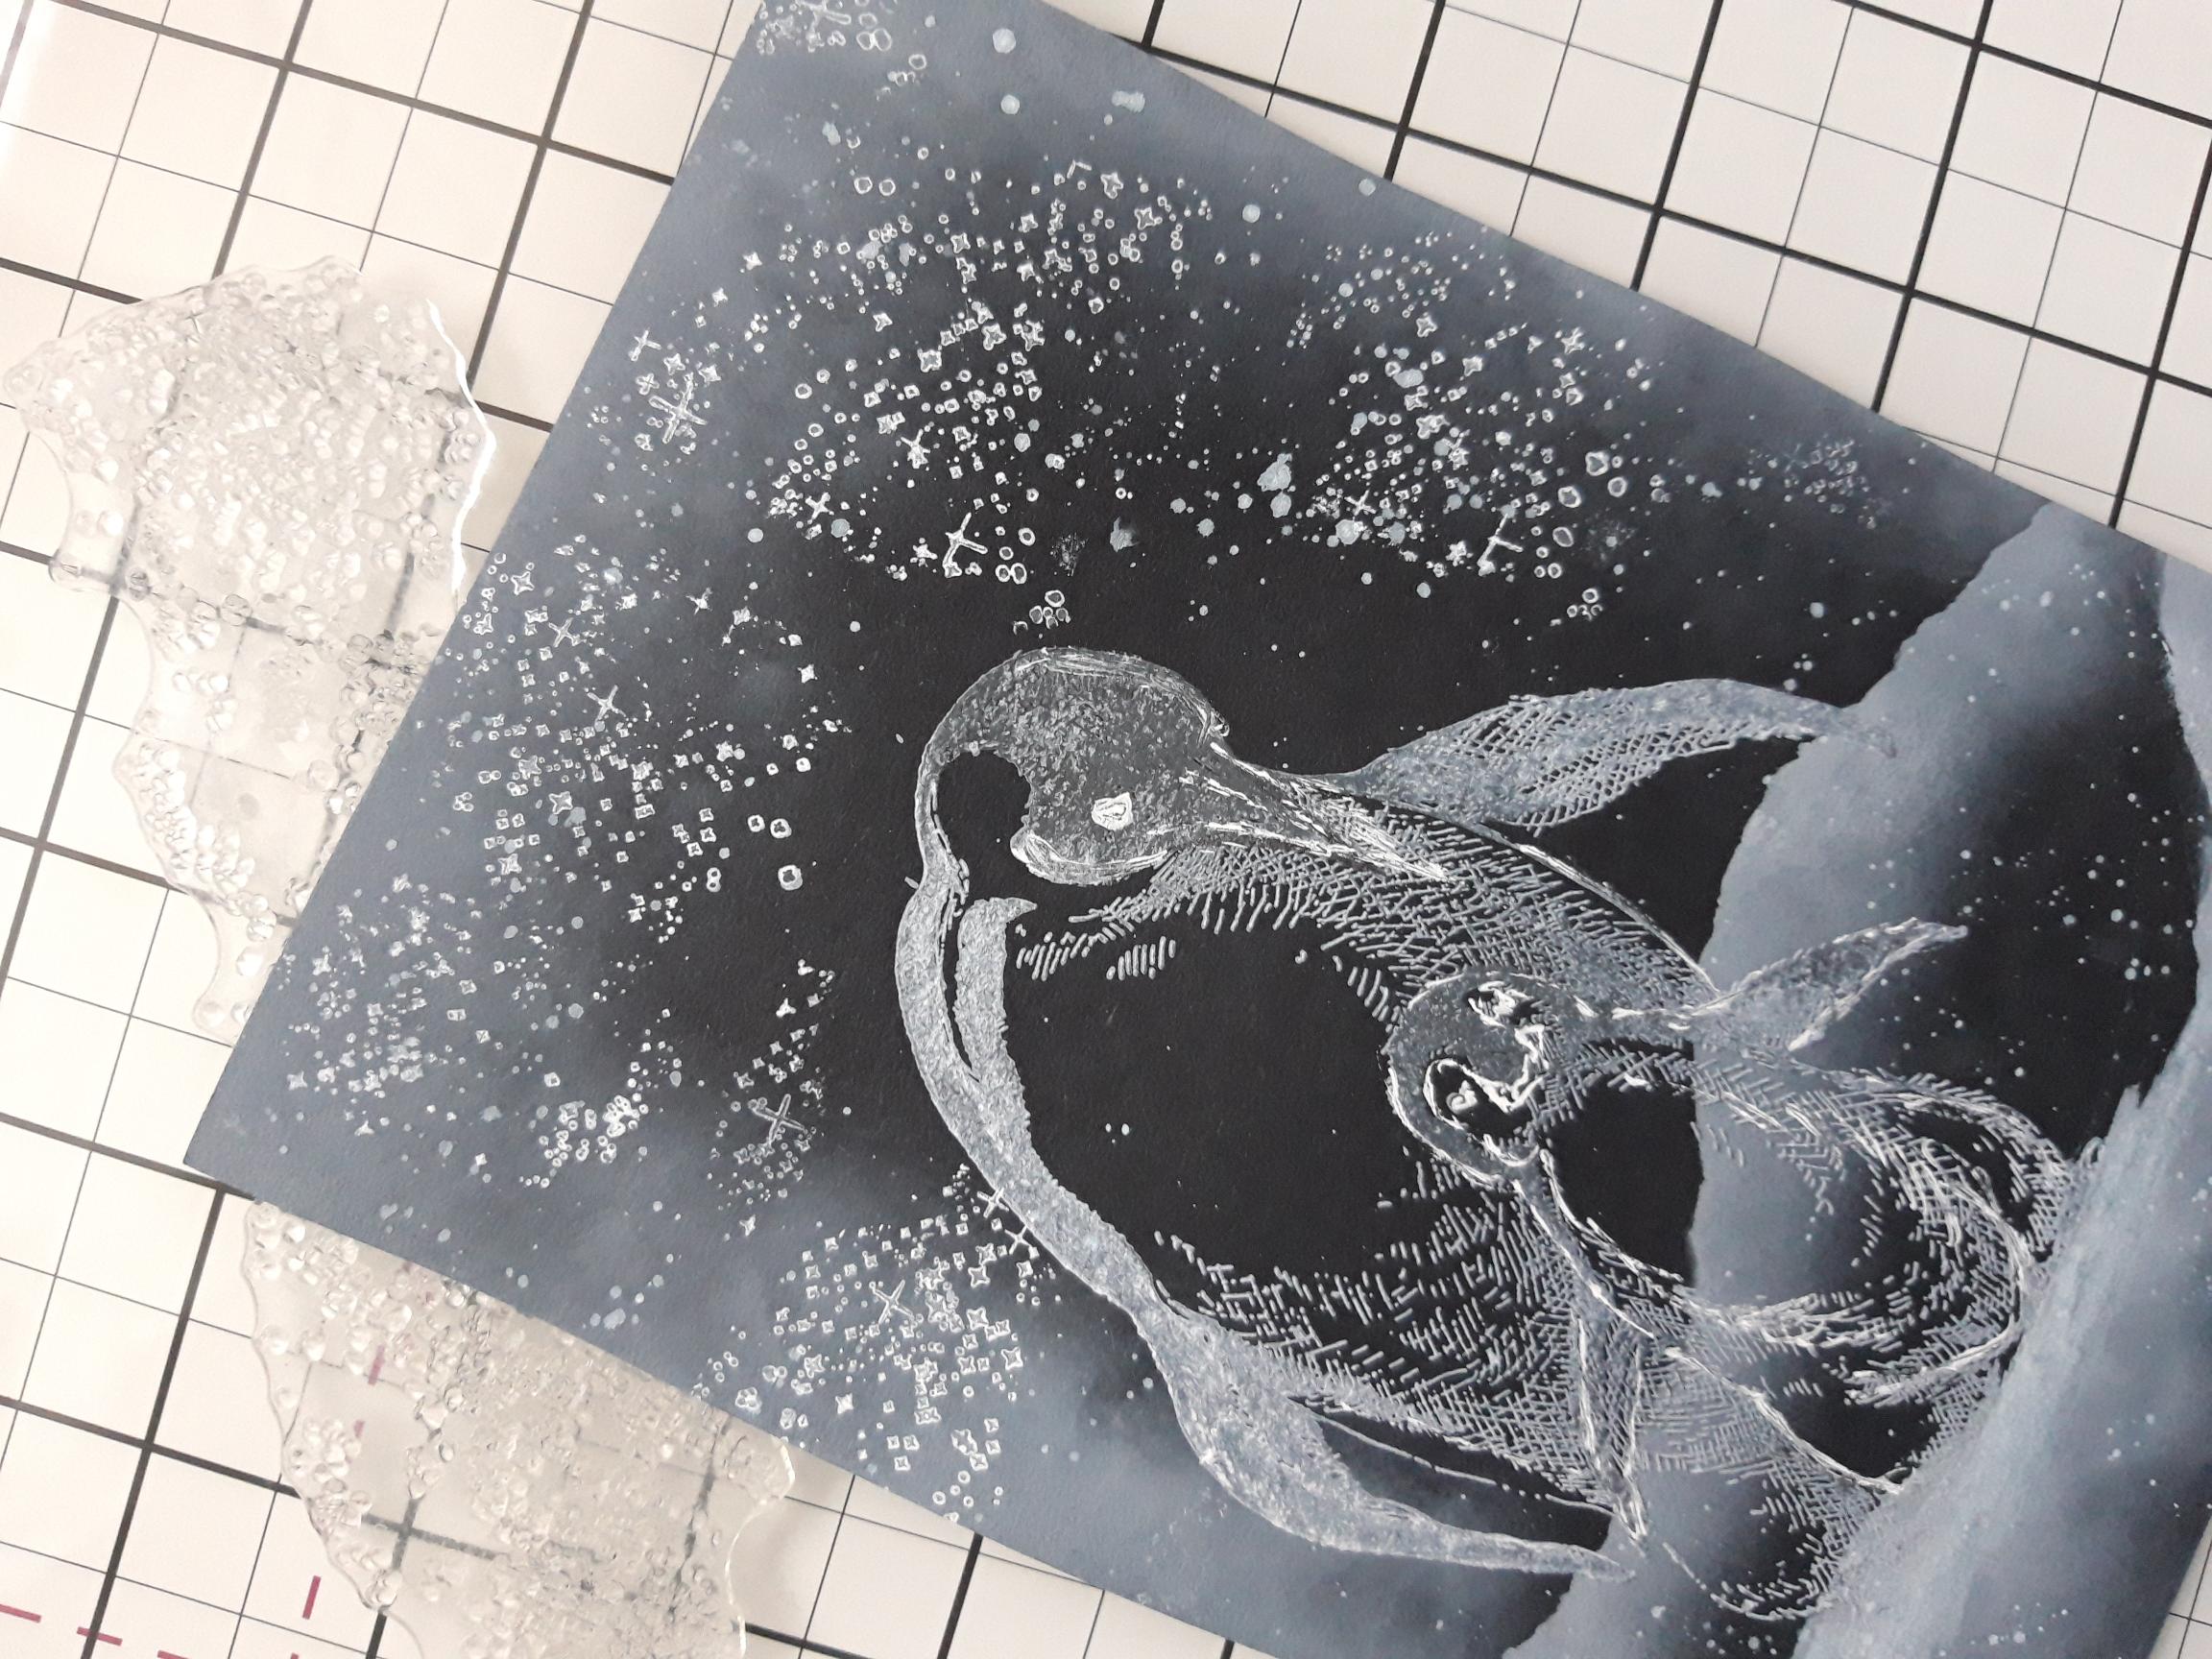
Apply the Cotton ink to your glass mat, add water and splatter all over your artwork, to create your falling snow! You can make it as snowy as you want, remembering that the white ink does dry slightly lighter. |
|
Ink up the sparkling stars stamp, from the Reach For The Stars Stamp Collection, with the Cotton ink and randomly stamp on to your snowy sky. Blast your artwork with a heat tool, until it is completely dry!! |
|
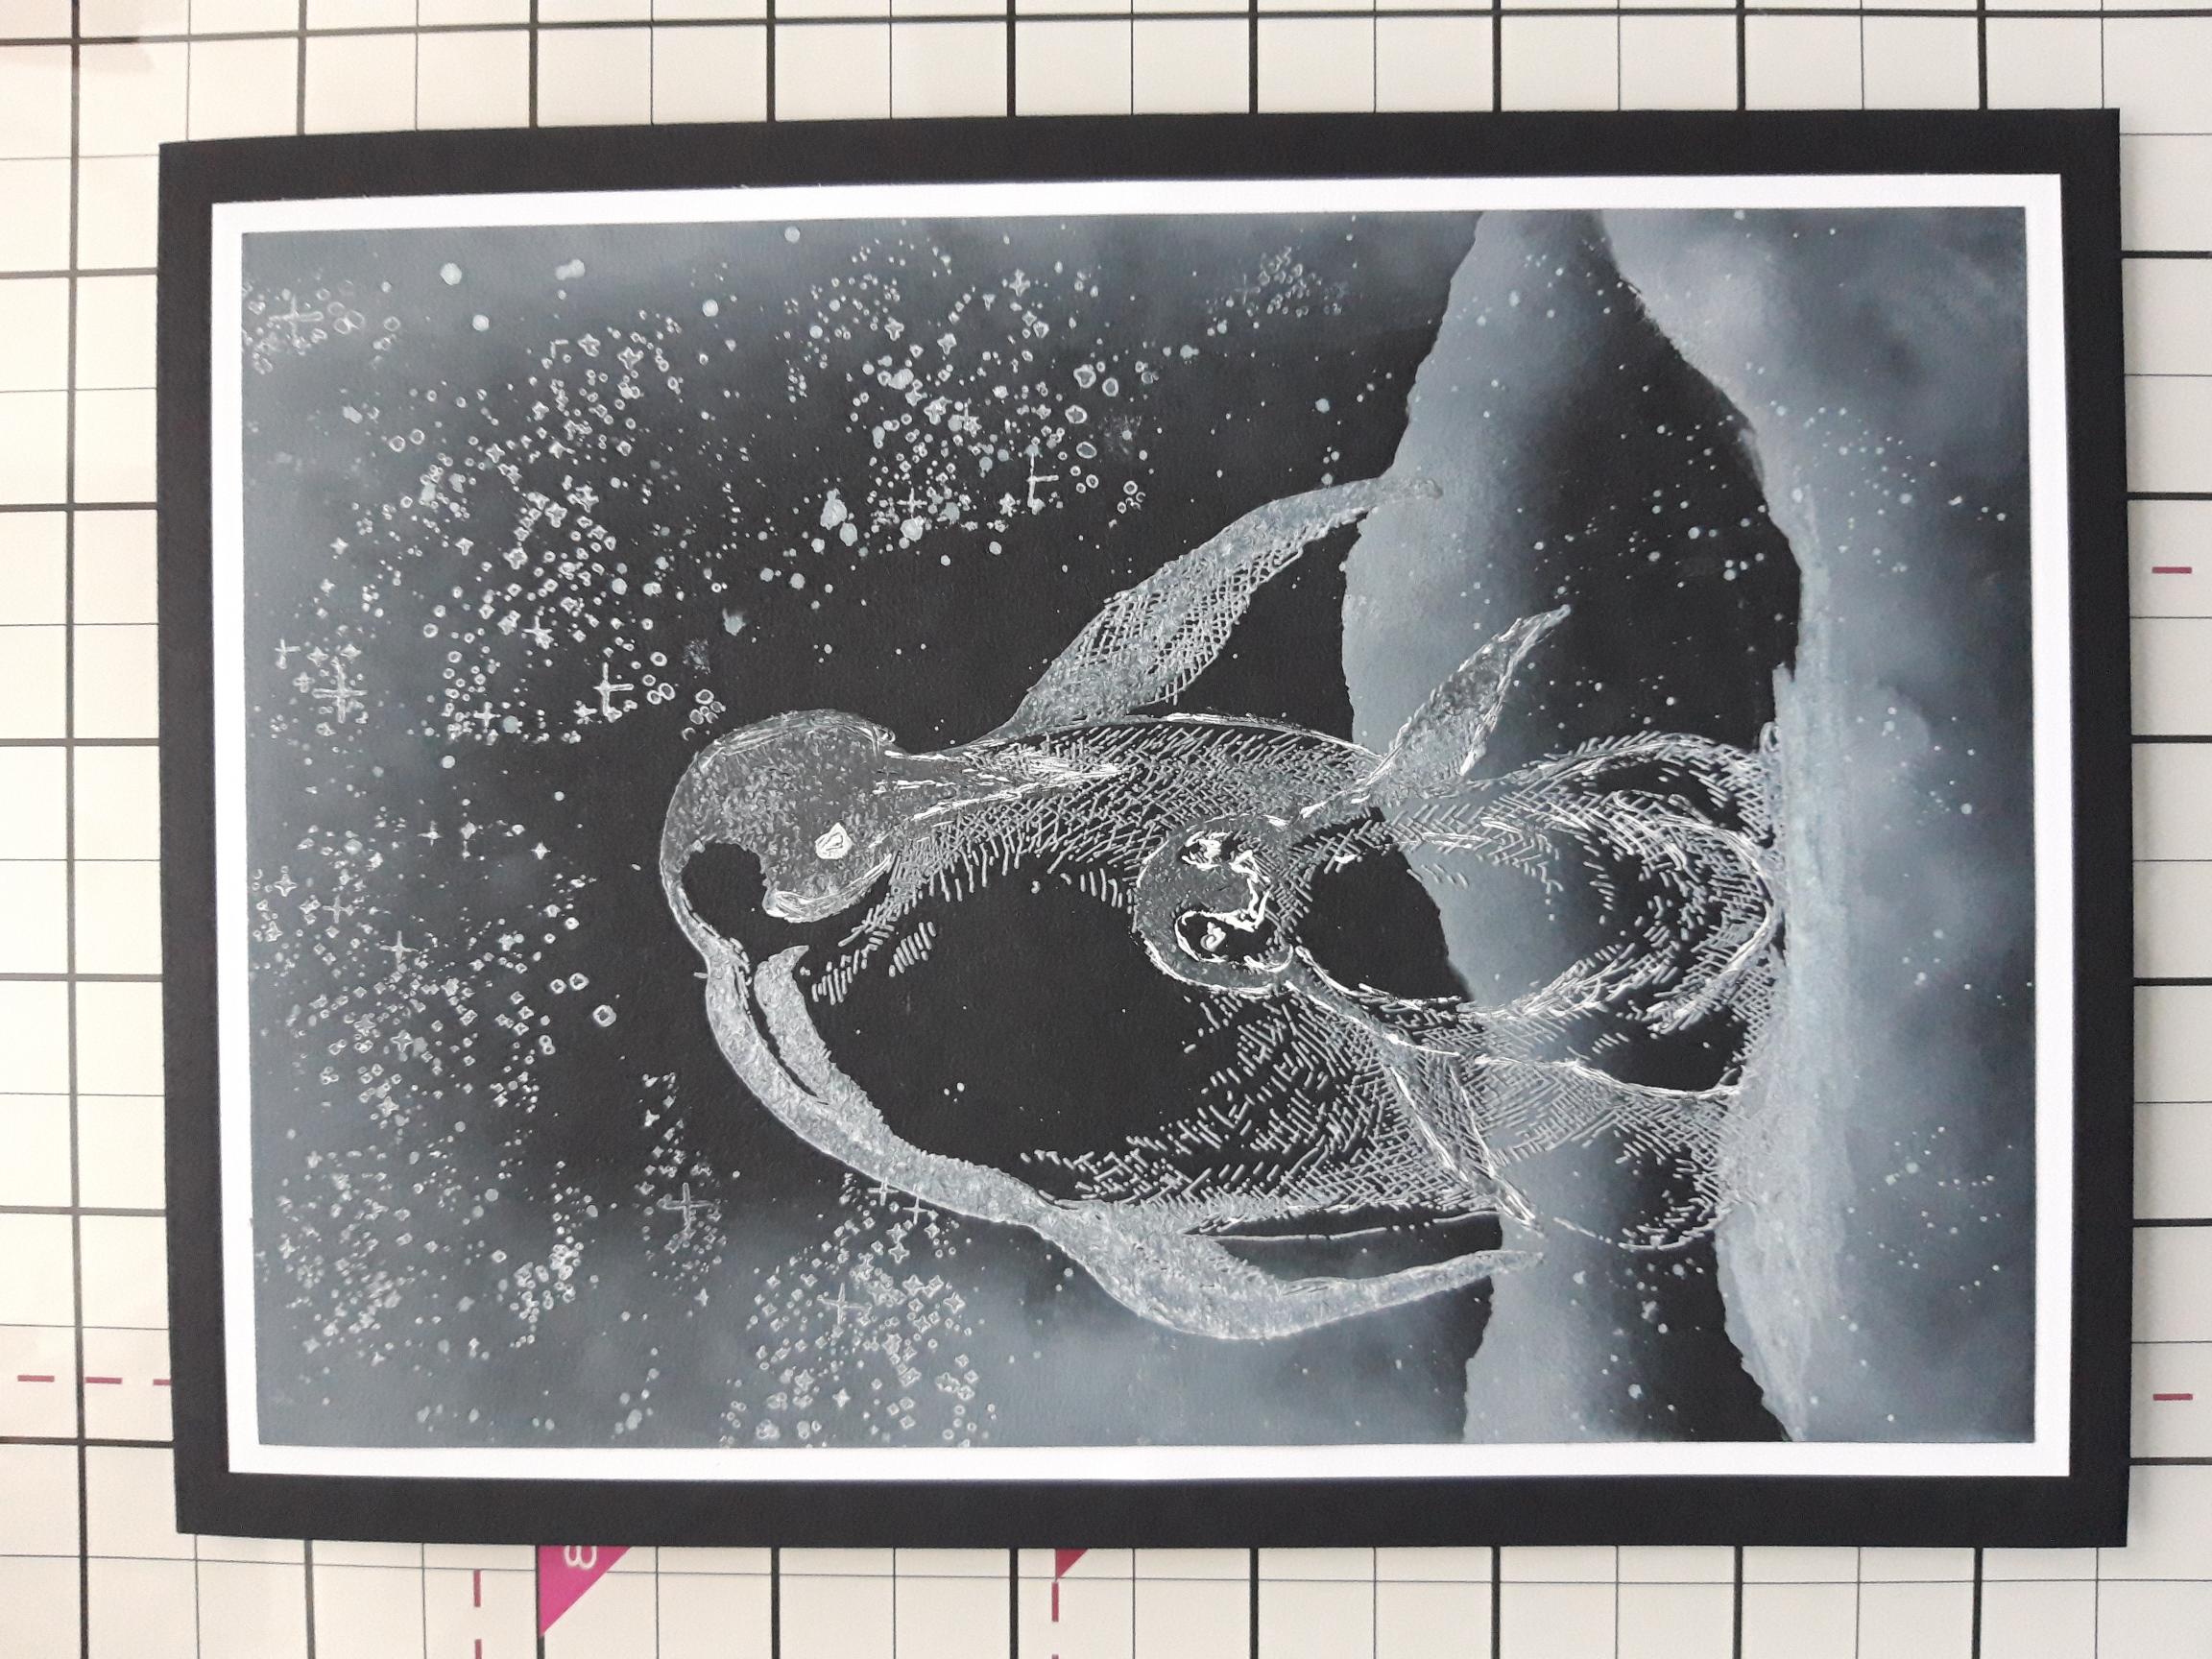
Adhere your artwork on to the white card and then on to the front of your black card blank. Set to one side. |
|
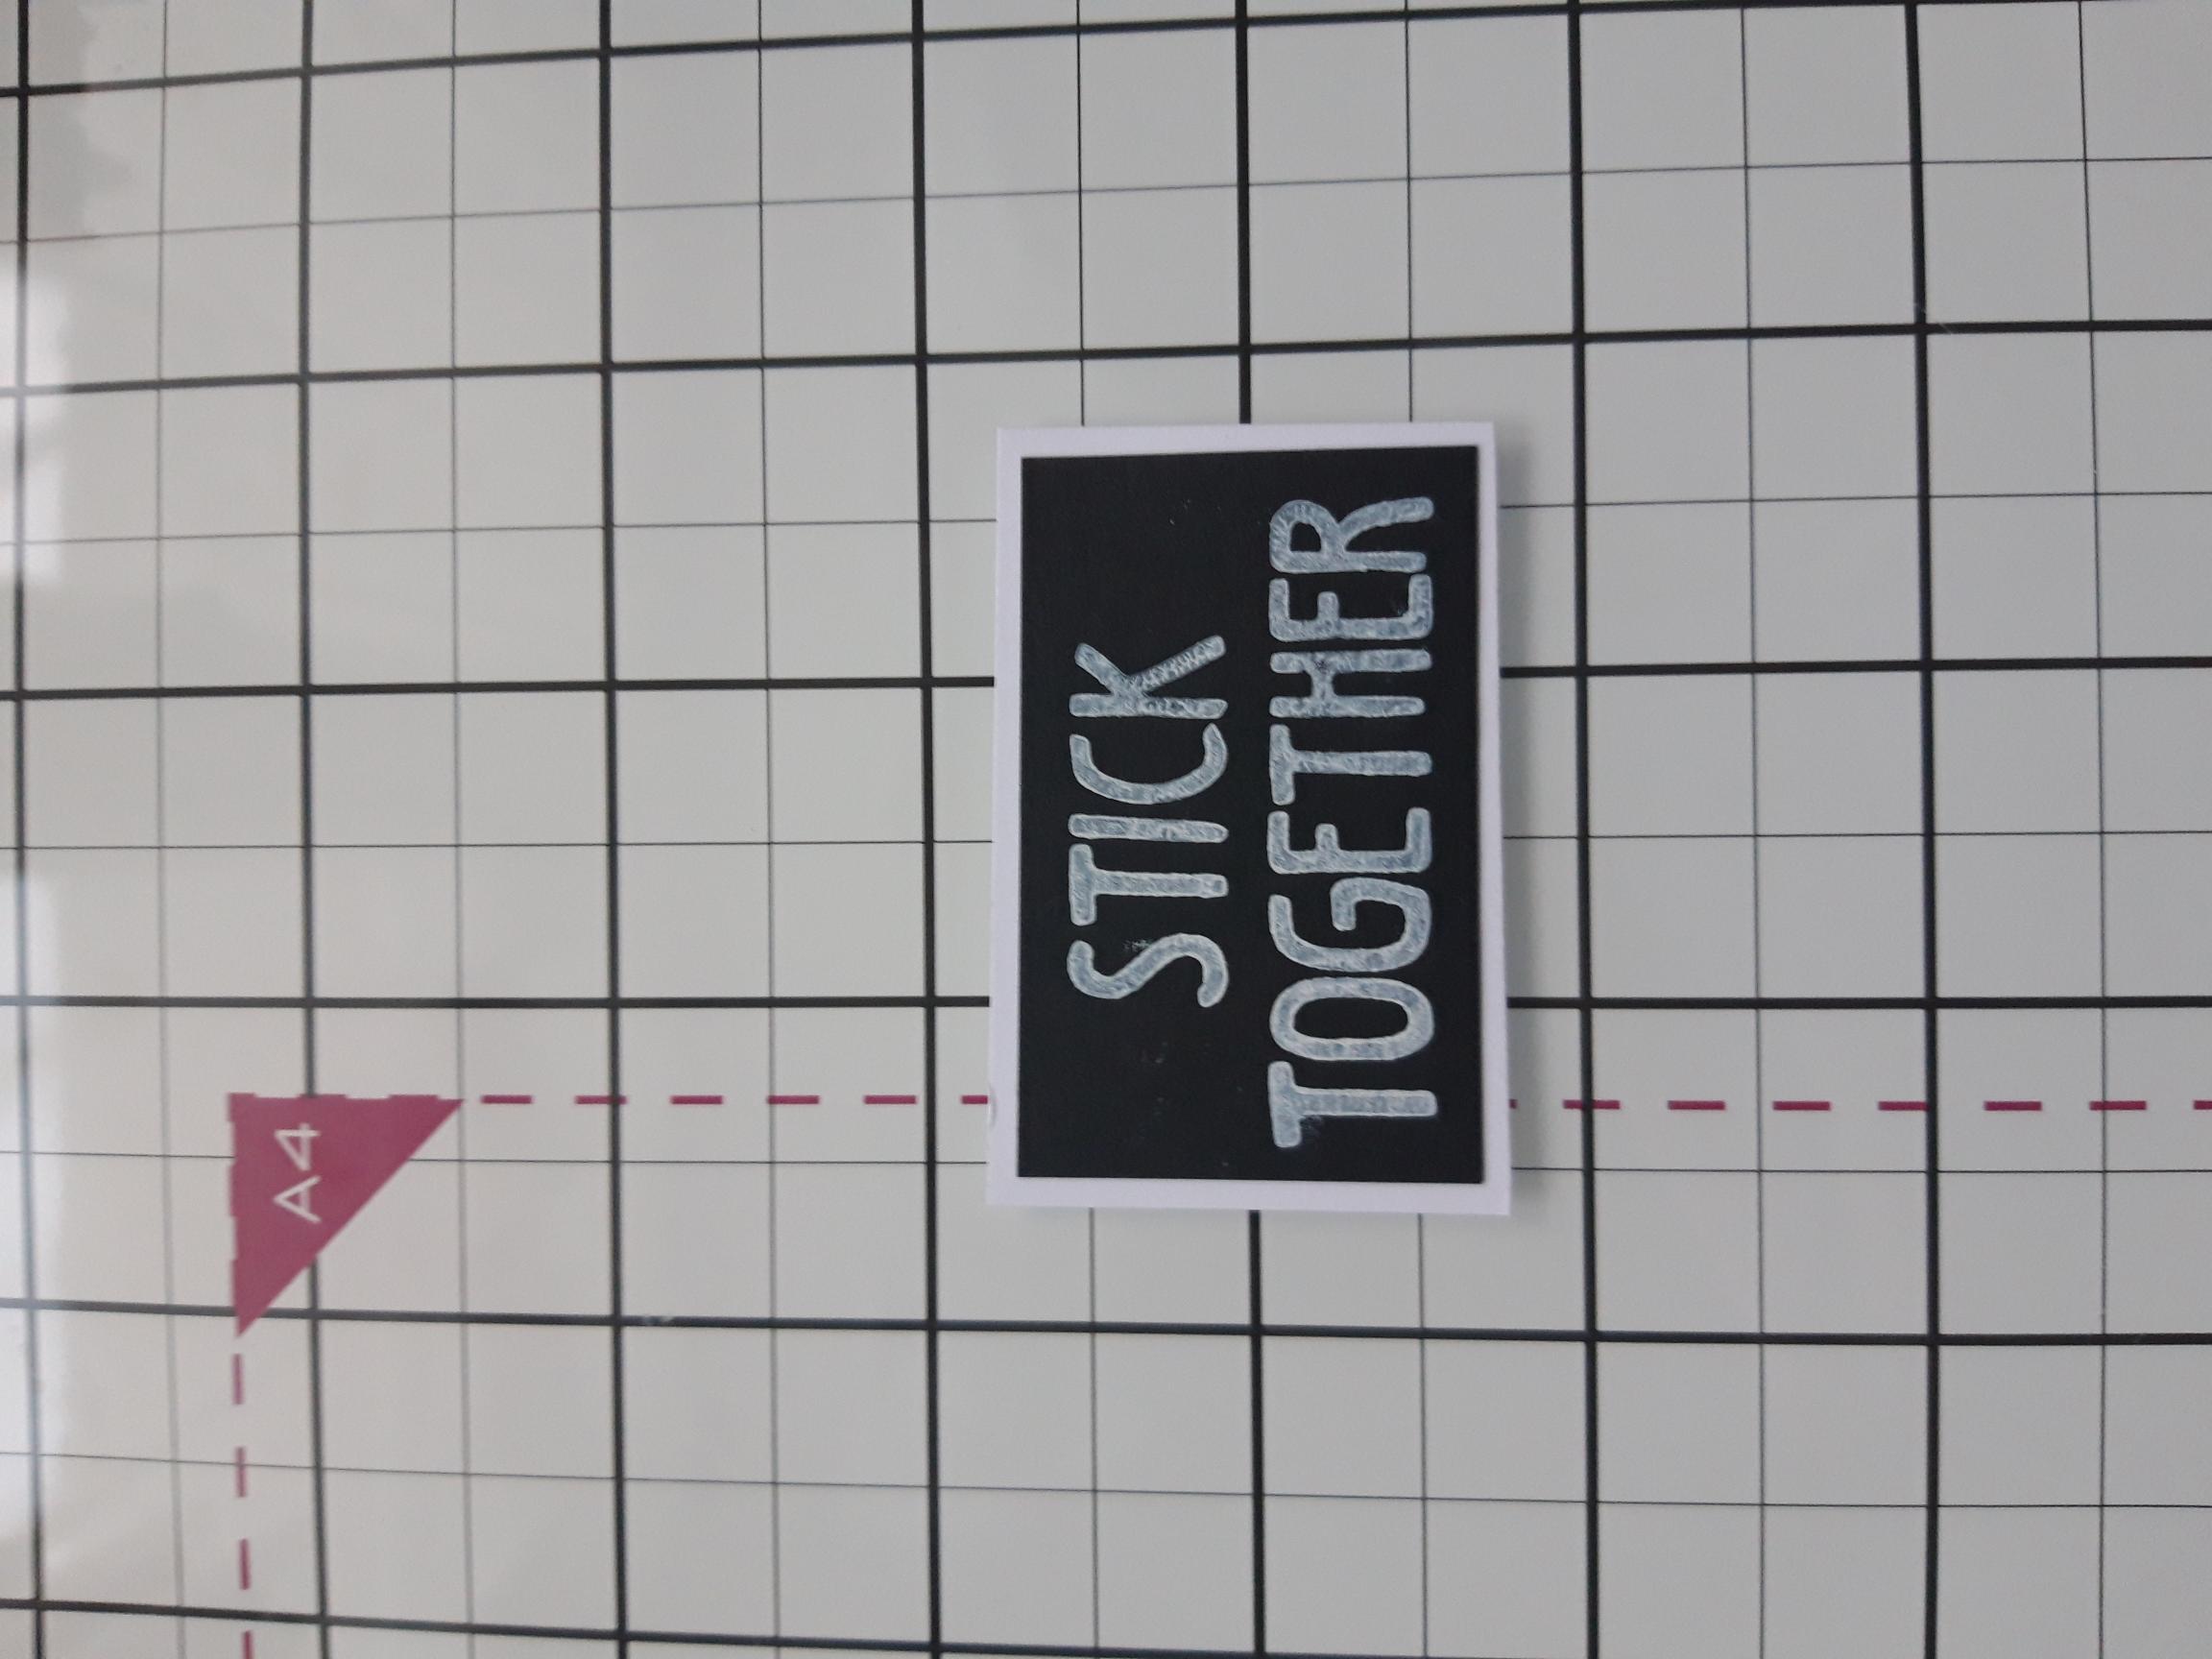
Ink the sentiment stamp with the Cotton ink and stamp on to black card. Blast dry with your heat tool, before trimming around it. Adhere this on to white card and trim to create a mat. |
|
Adhere to the bottom right of your card. You can of course adhere yours straight, but I liked the jaunty angle! LOL. |
|
To finish, I drew a stitched frame around my sentiment, which draws the eye in to the words. |