Give your friends $10 off their first order!
Refer a FRIEND


WHAT YOU WILL NEED:
White DL card blank 8 1/4 x 4"
Black card 8 x 3 3/4"
Magical Frame Stamp Collection
Keep Exploring Lamination Stamp Collection
SBM Premium Pigment Ink Pad: Cotton
Anti-static bag
WOW You Got This powder collection by Toni: Over It!
WOW heat tool
Confetti ink: Aubergine
Paint brush
White gel pen
Eureka 101 Watercolour tablet
Magnetic glass mat
Paper Trimmer
Perfect Together Glue
[click image to enlarge] 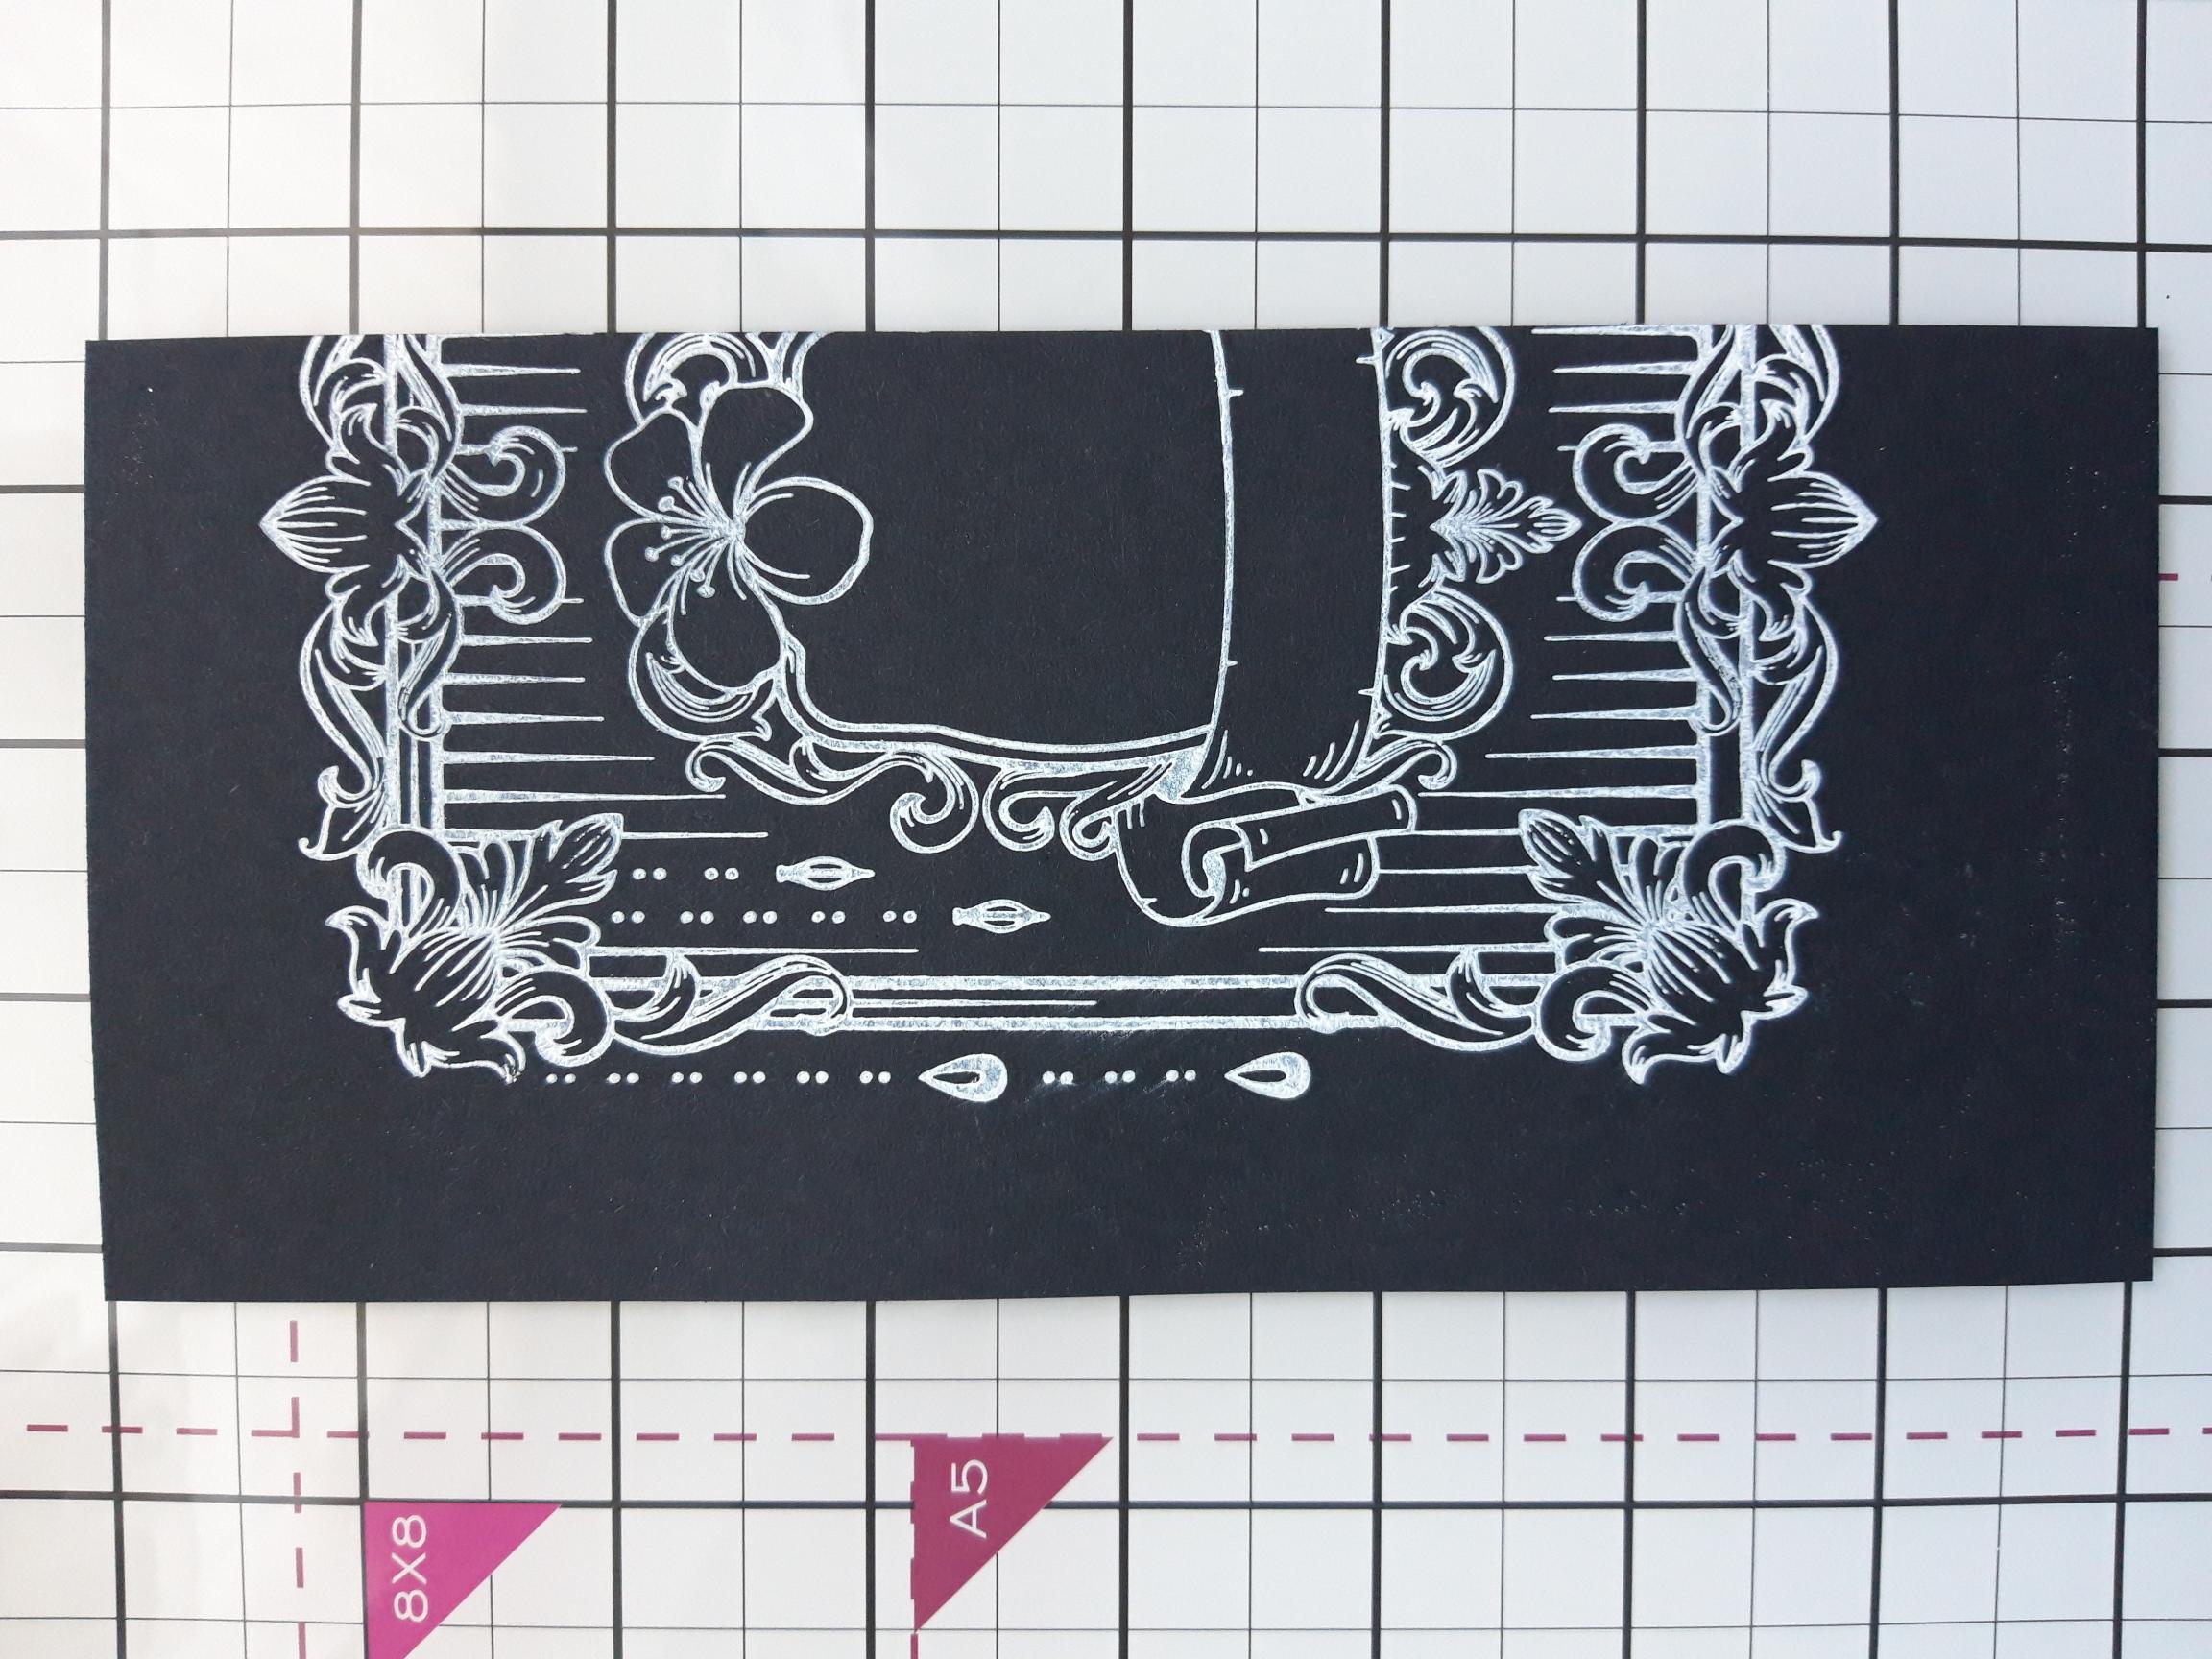
|
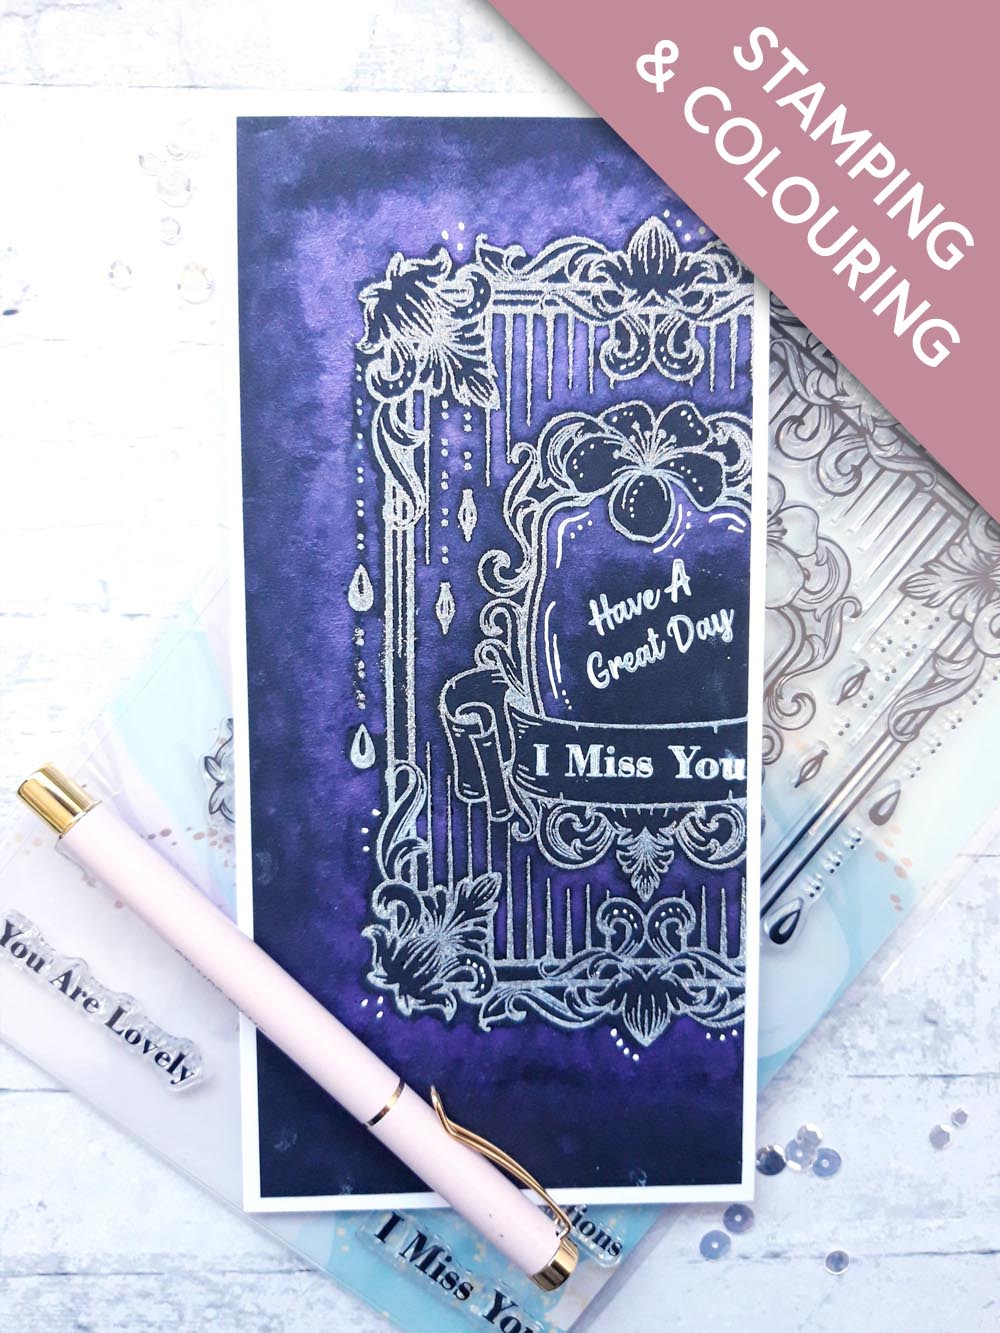
Wipe over the black card with your anti-static bag. Ink up the Magical frame stamp with your Cotton pigment ink and stamp off the right hand edge.
|
|
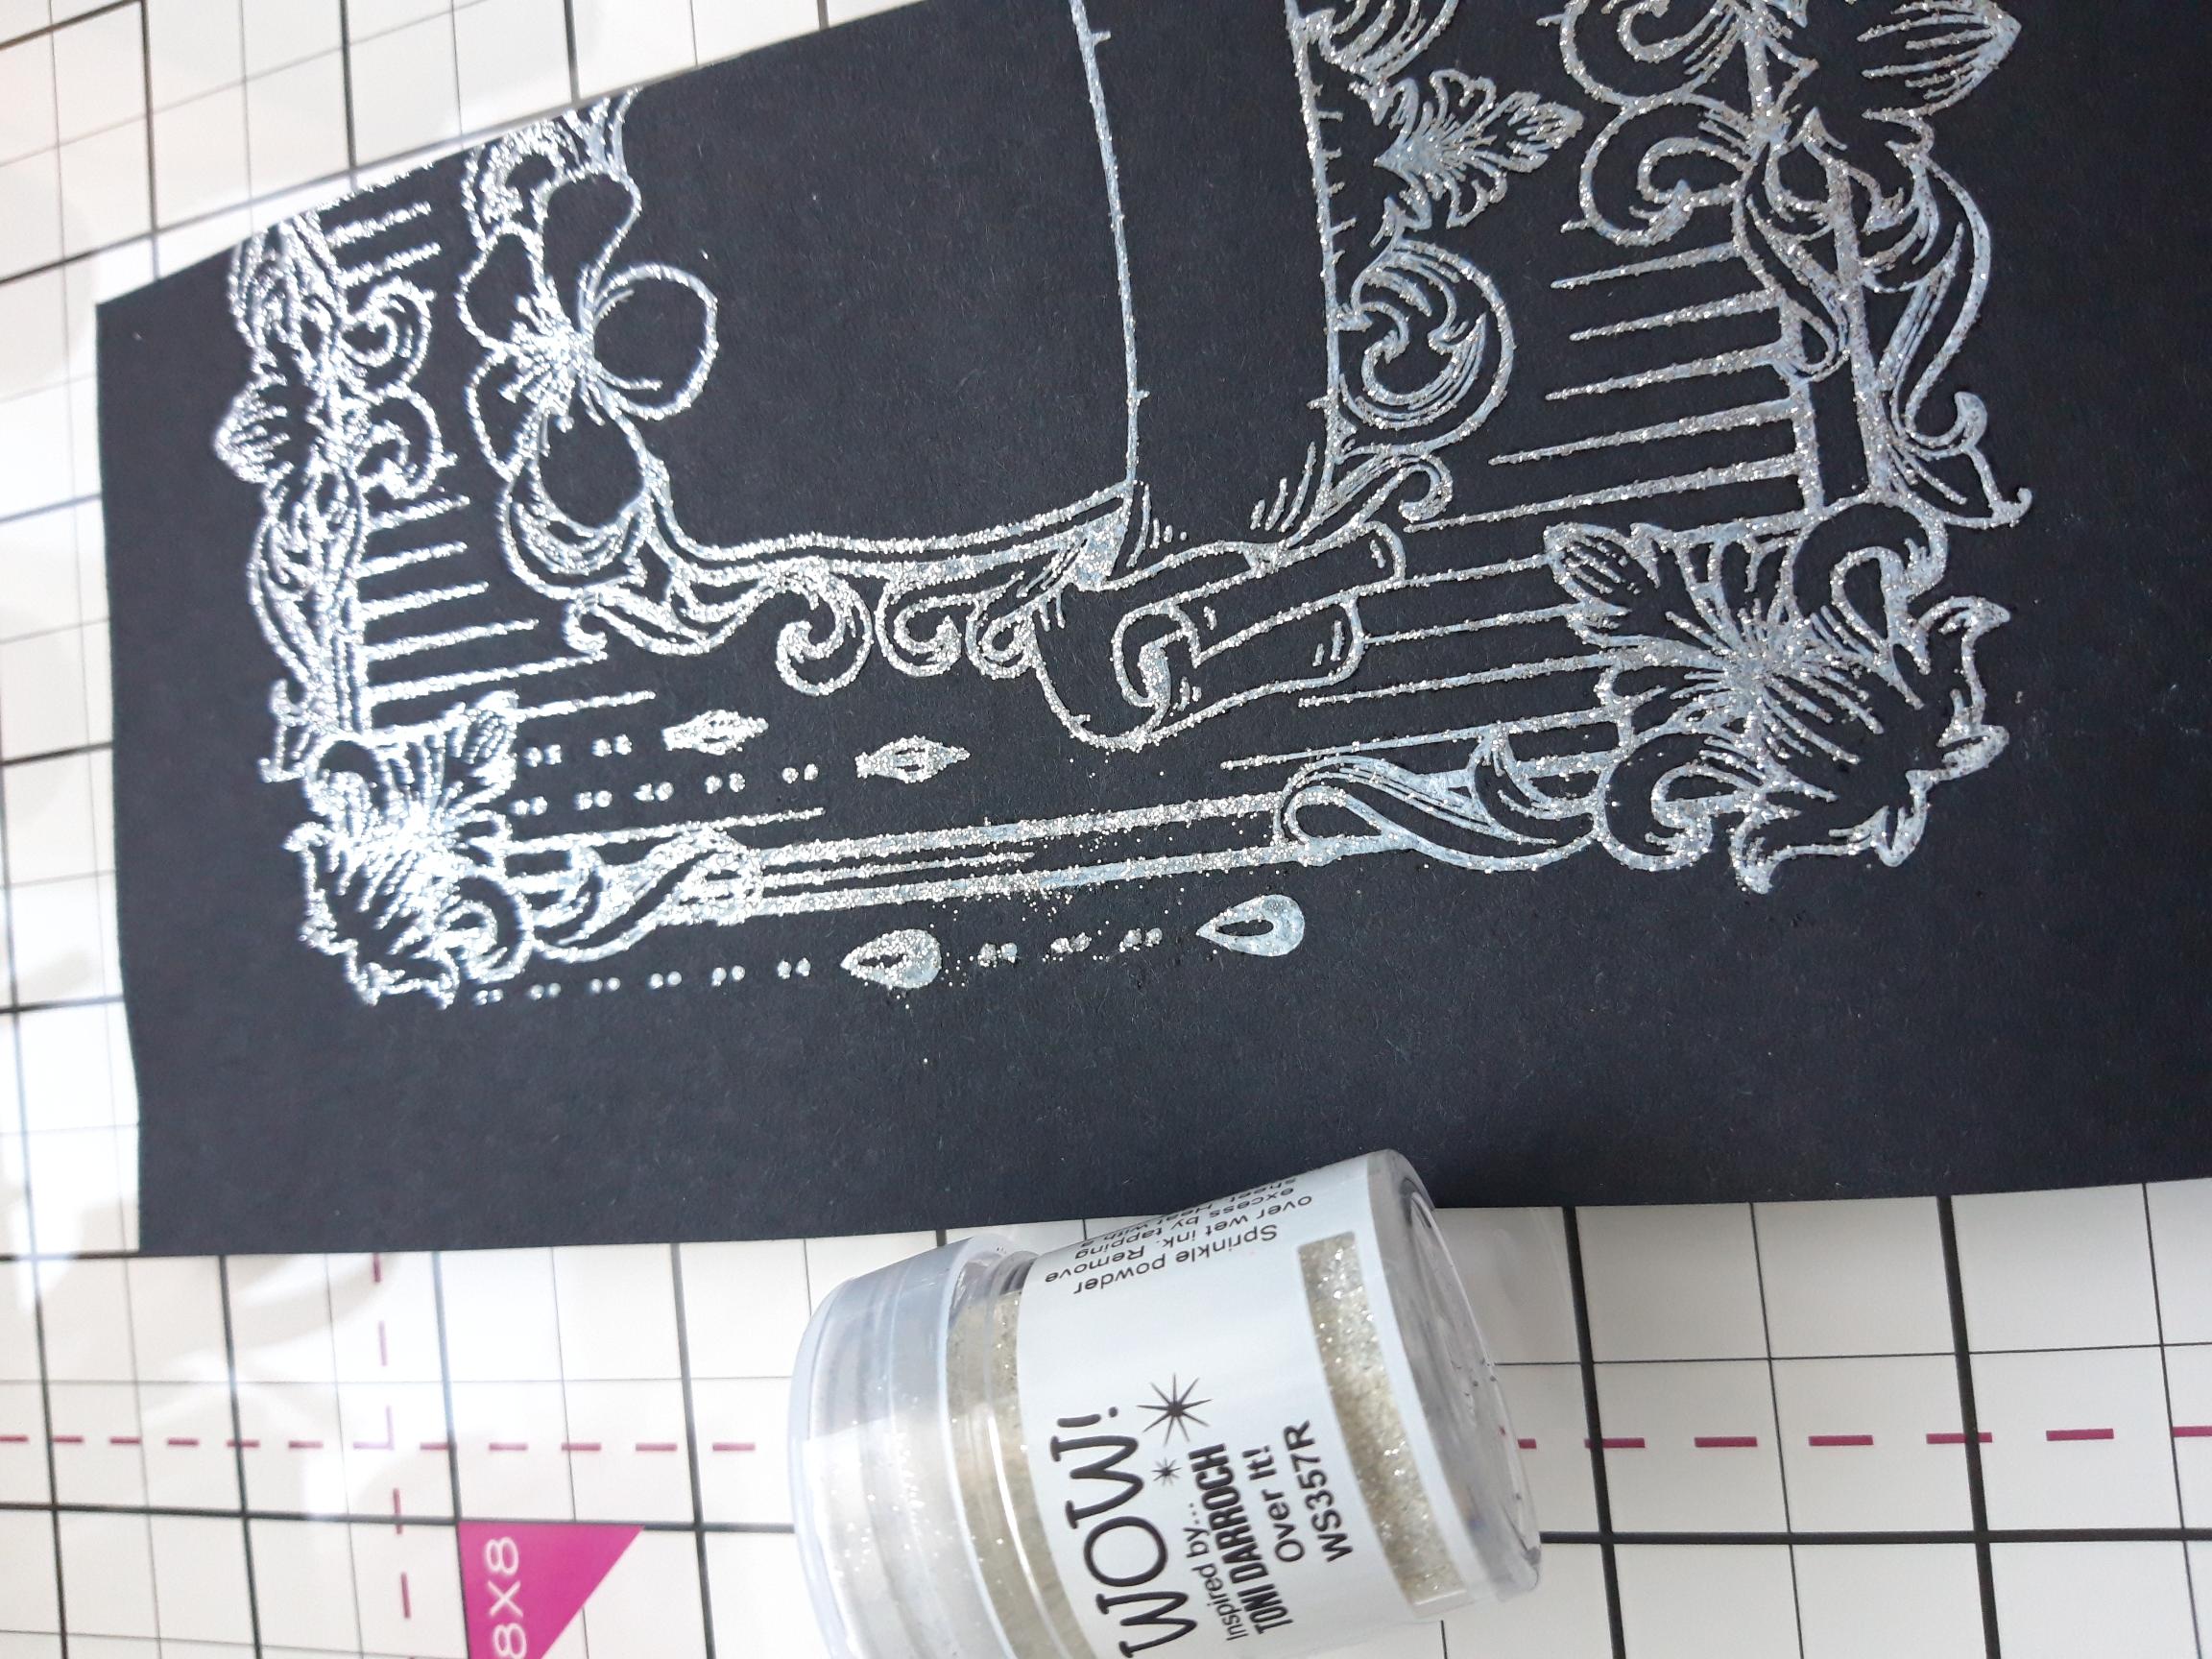
Pigment ink is slow drying, so whilst it is still wet, apply the WOW Over It! powder on to your stamped image. Get your heat tool hot, then set the powder, moving your heat tool as soon as the powder turns, to avoid warping or burning the card. |
|
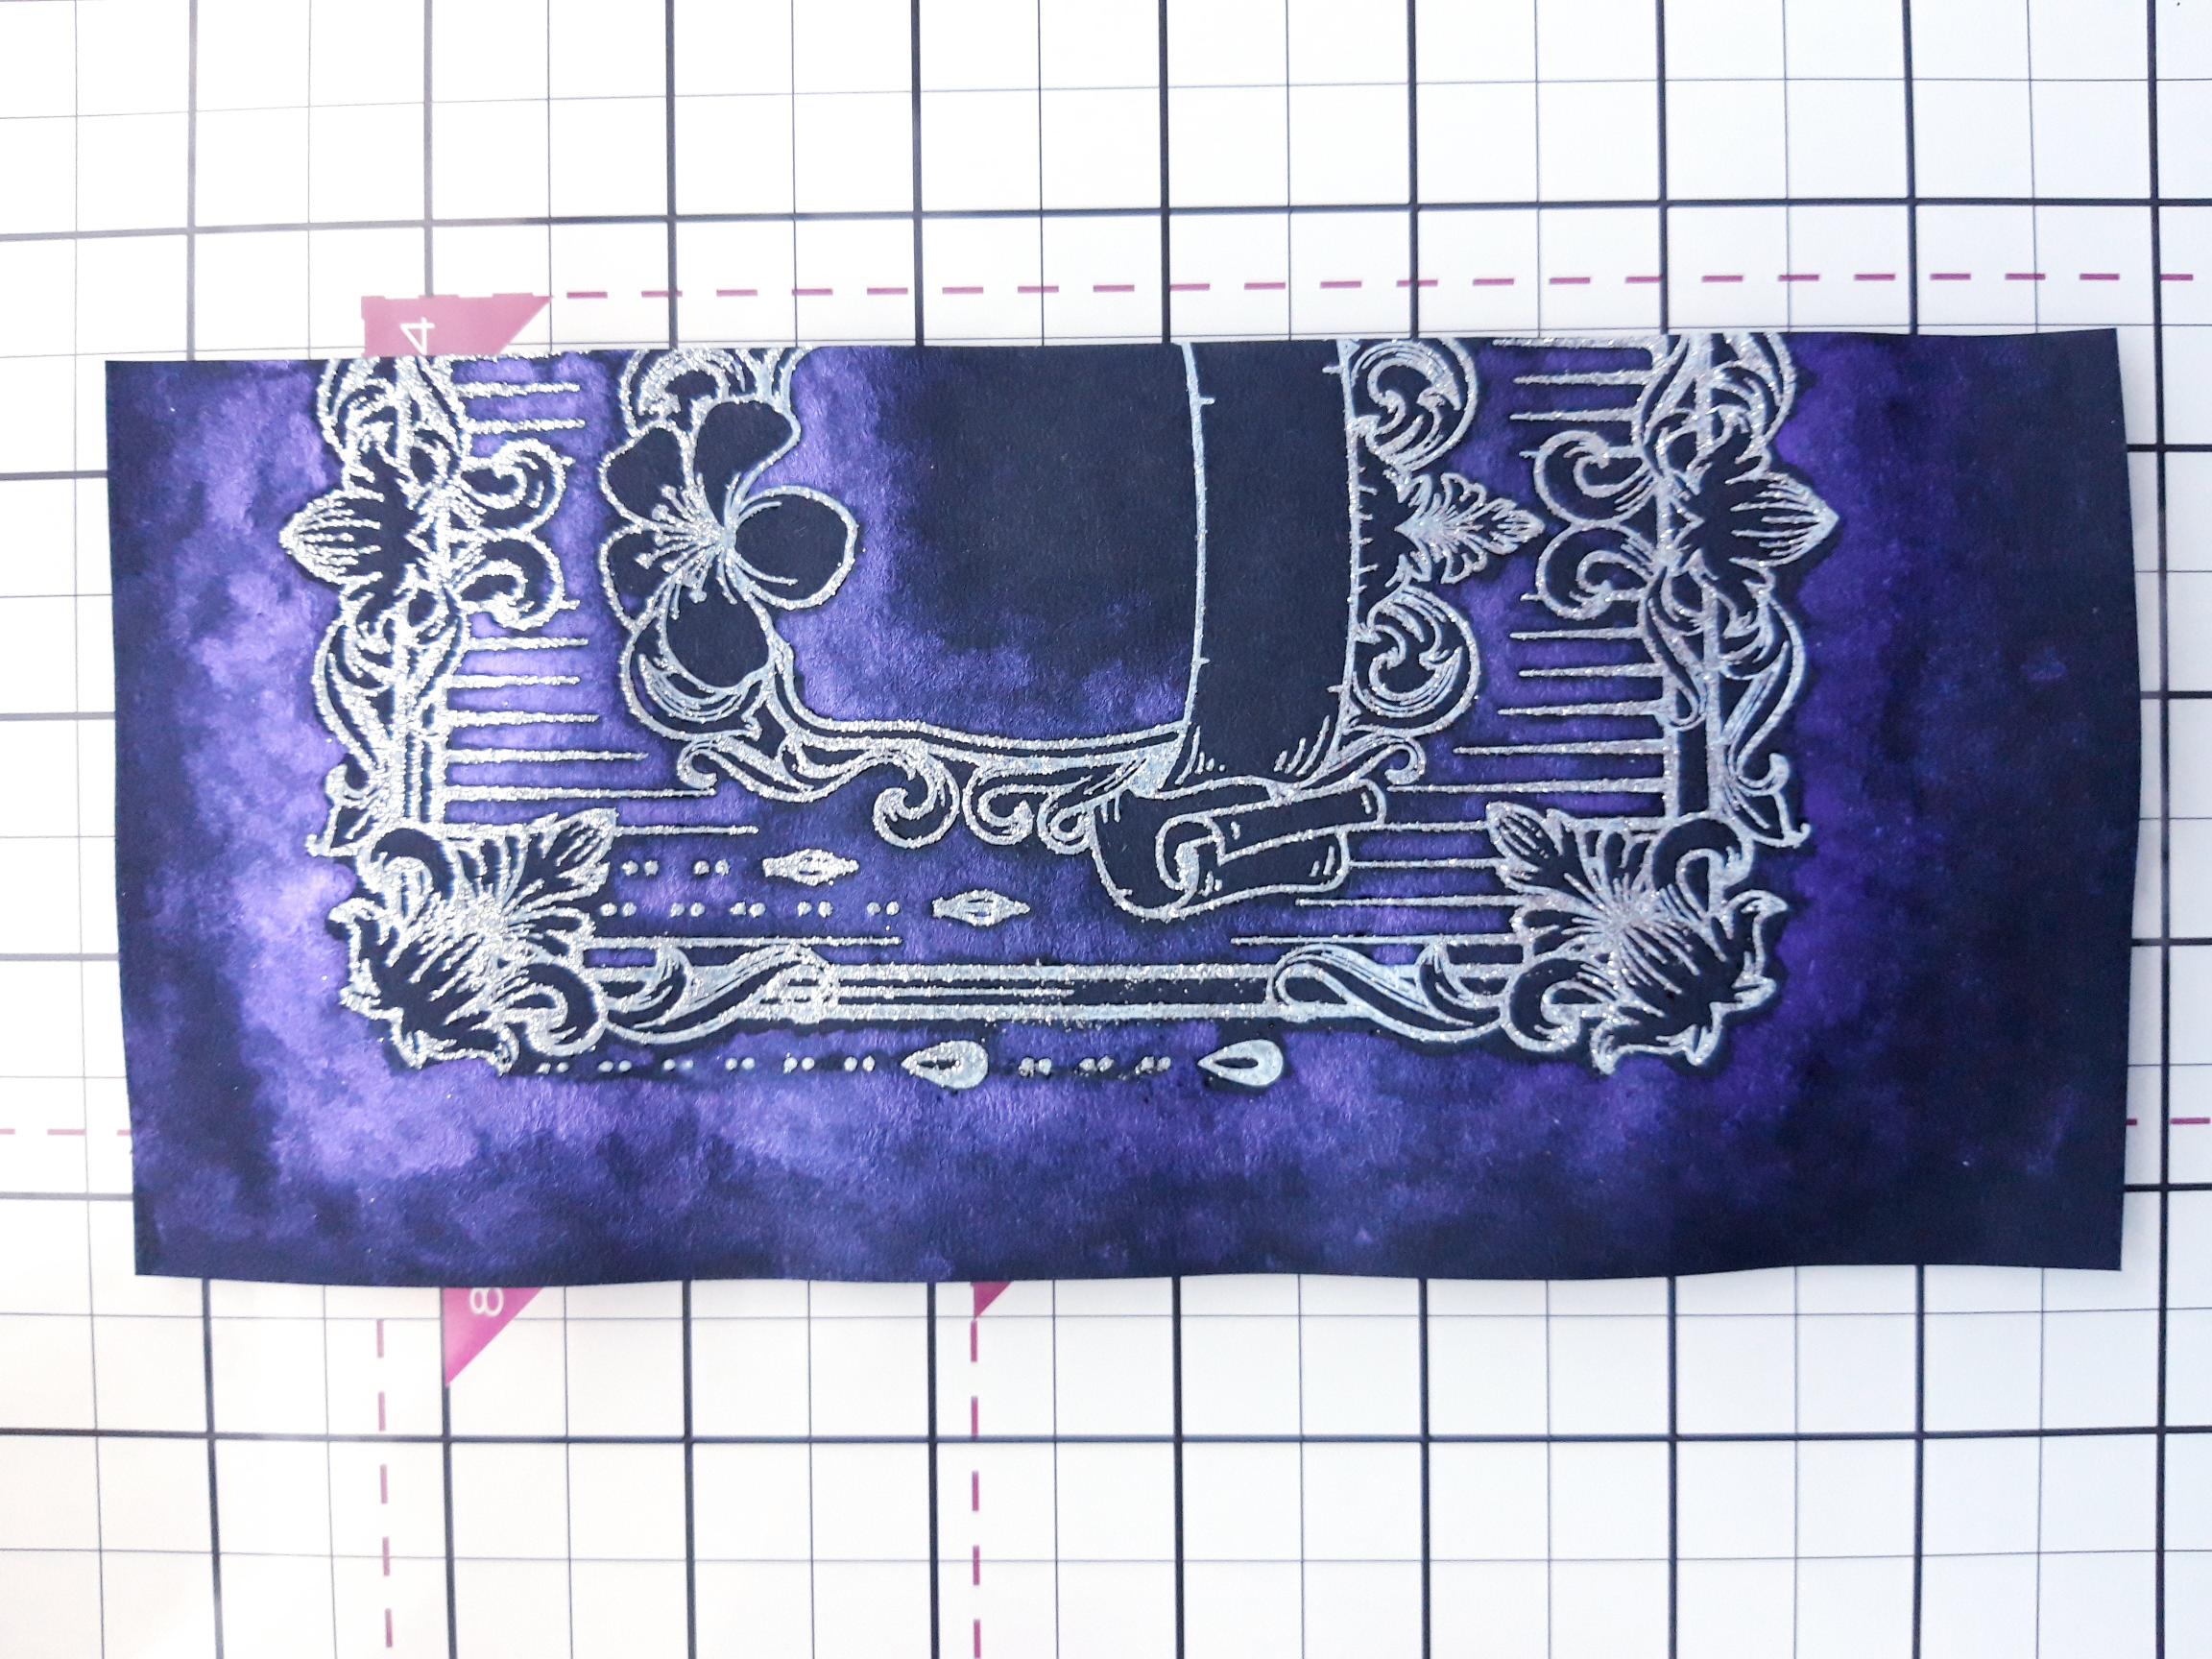
Spritz your Confetti ink with water. Using your paint brush, add water around the ouside of your embossed image, then "drop" the Confetti paint in to the water, allowing it to do it's own thing. You can keep dropping more paint close to the frame and blending it out with water, as the paint moves further away, thus creating definition to the image. Repeat this process in the centre aperture, but only around one side, as seen here. Repeat this process on the middle, inner area of the decorative frame, until you are happy with the final result. You don't want any harsh edges so remeber to fade and blend out the paint, with clear water. If possible, allow the Confetti paint to dry naturally. |
|
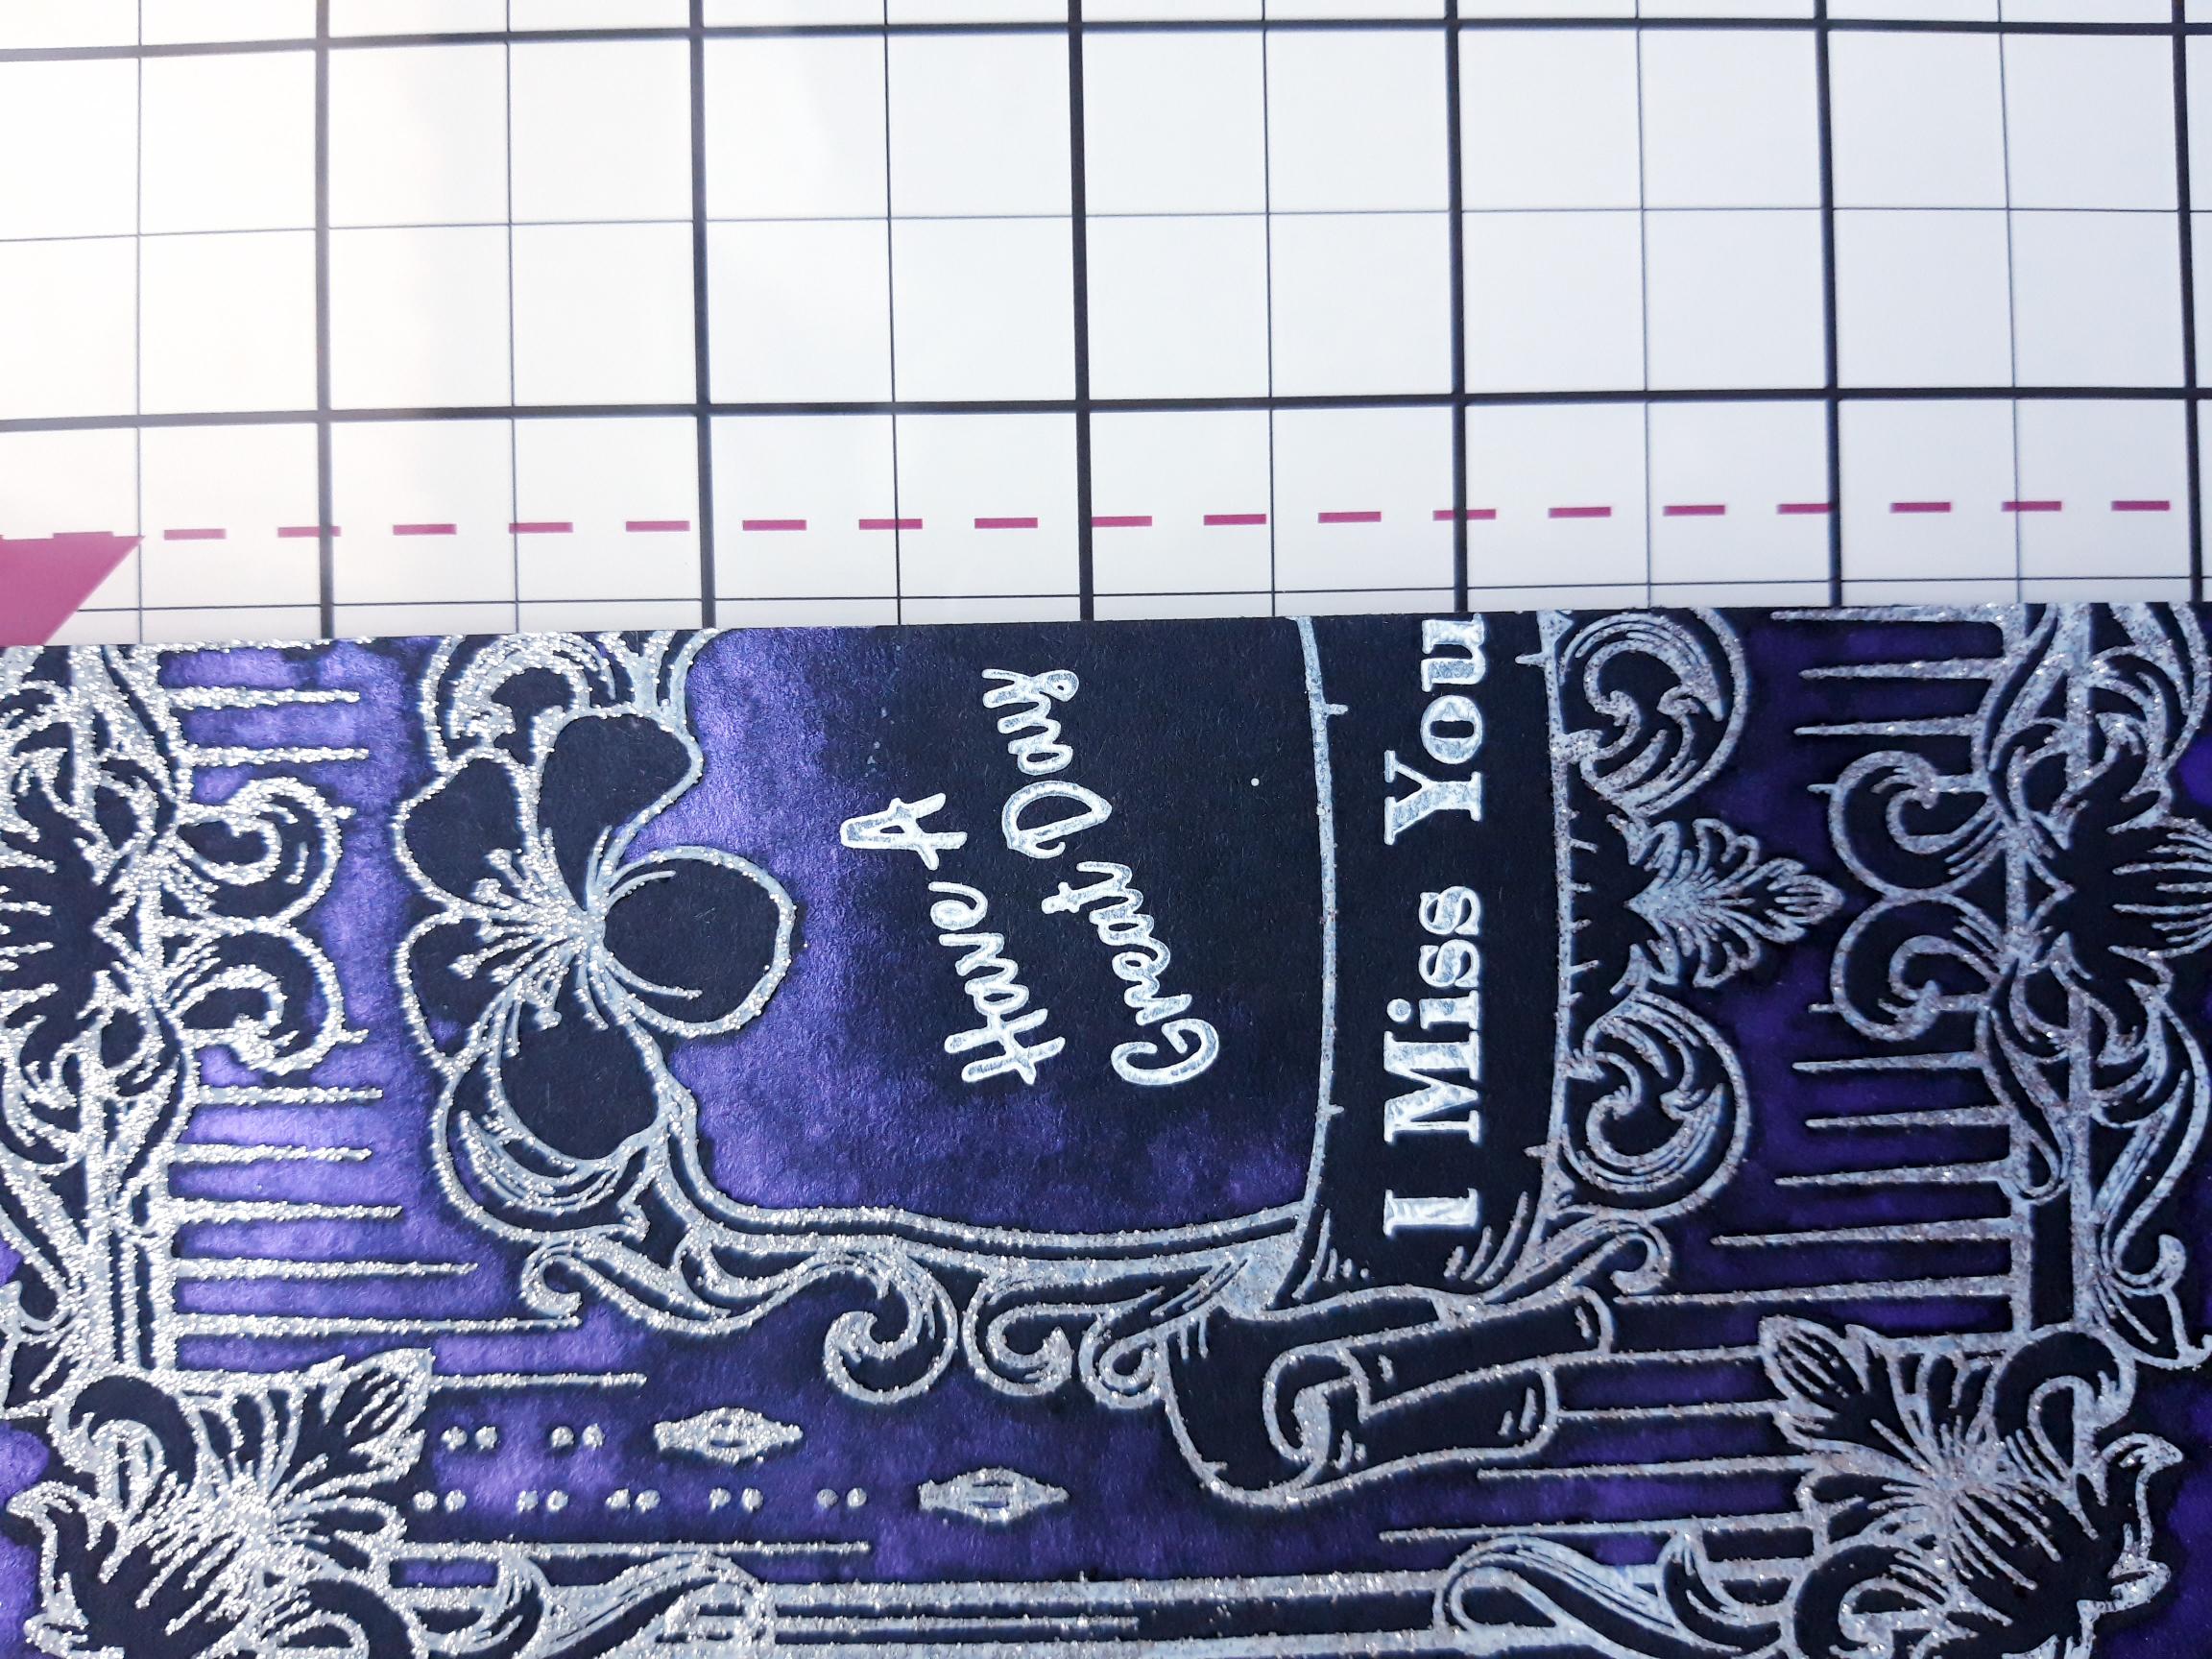
Ink up the sentiment stamps from the Magical Frame and Keep Exploring stamp collections, with the Cotton pigment ink and stamp within your frame, as seen here. Remeber the pigment ink is slow drying so be careful! Either set to one side to dry comletely, or if you are impatient like me, dry it with your heat tool!! |
|
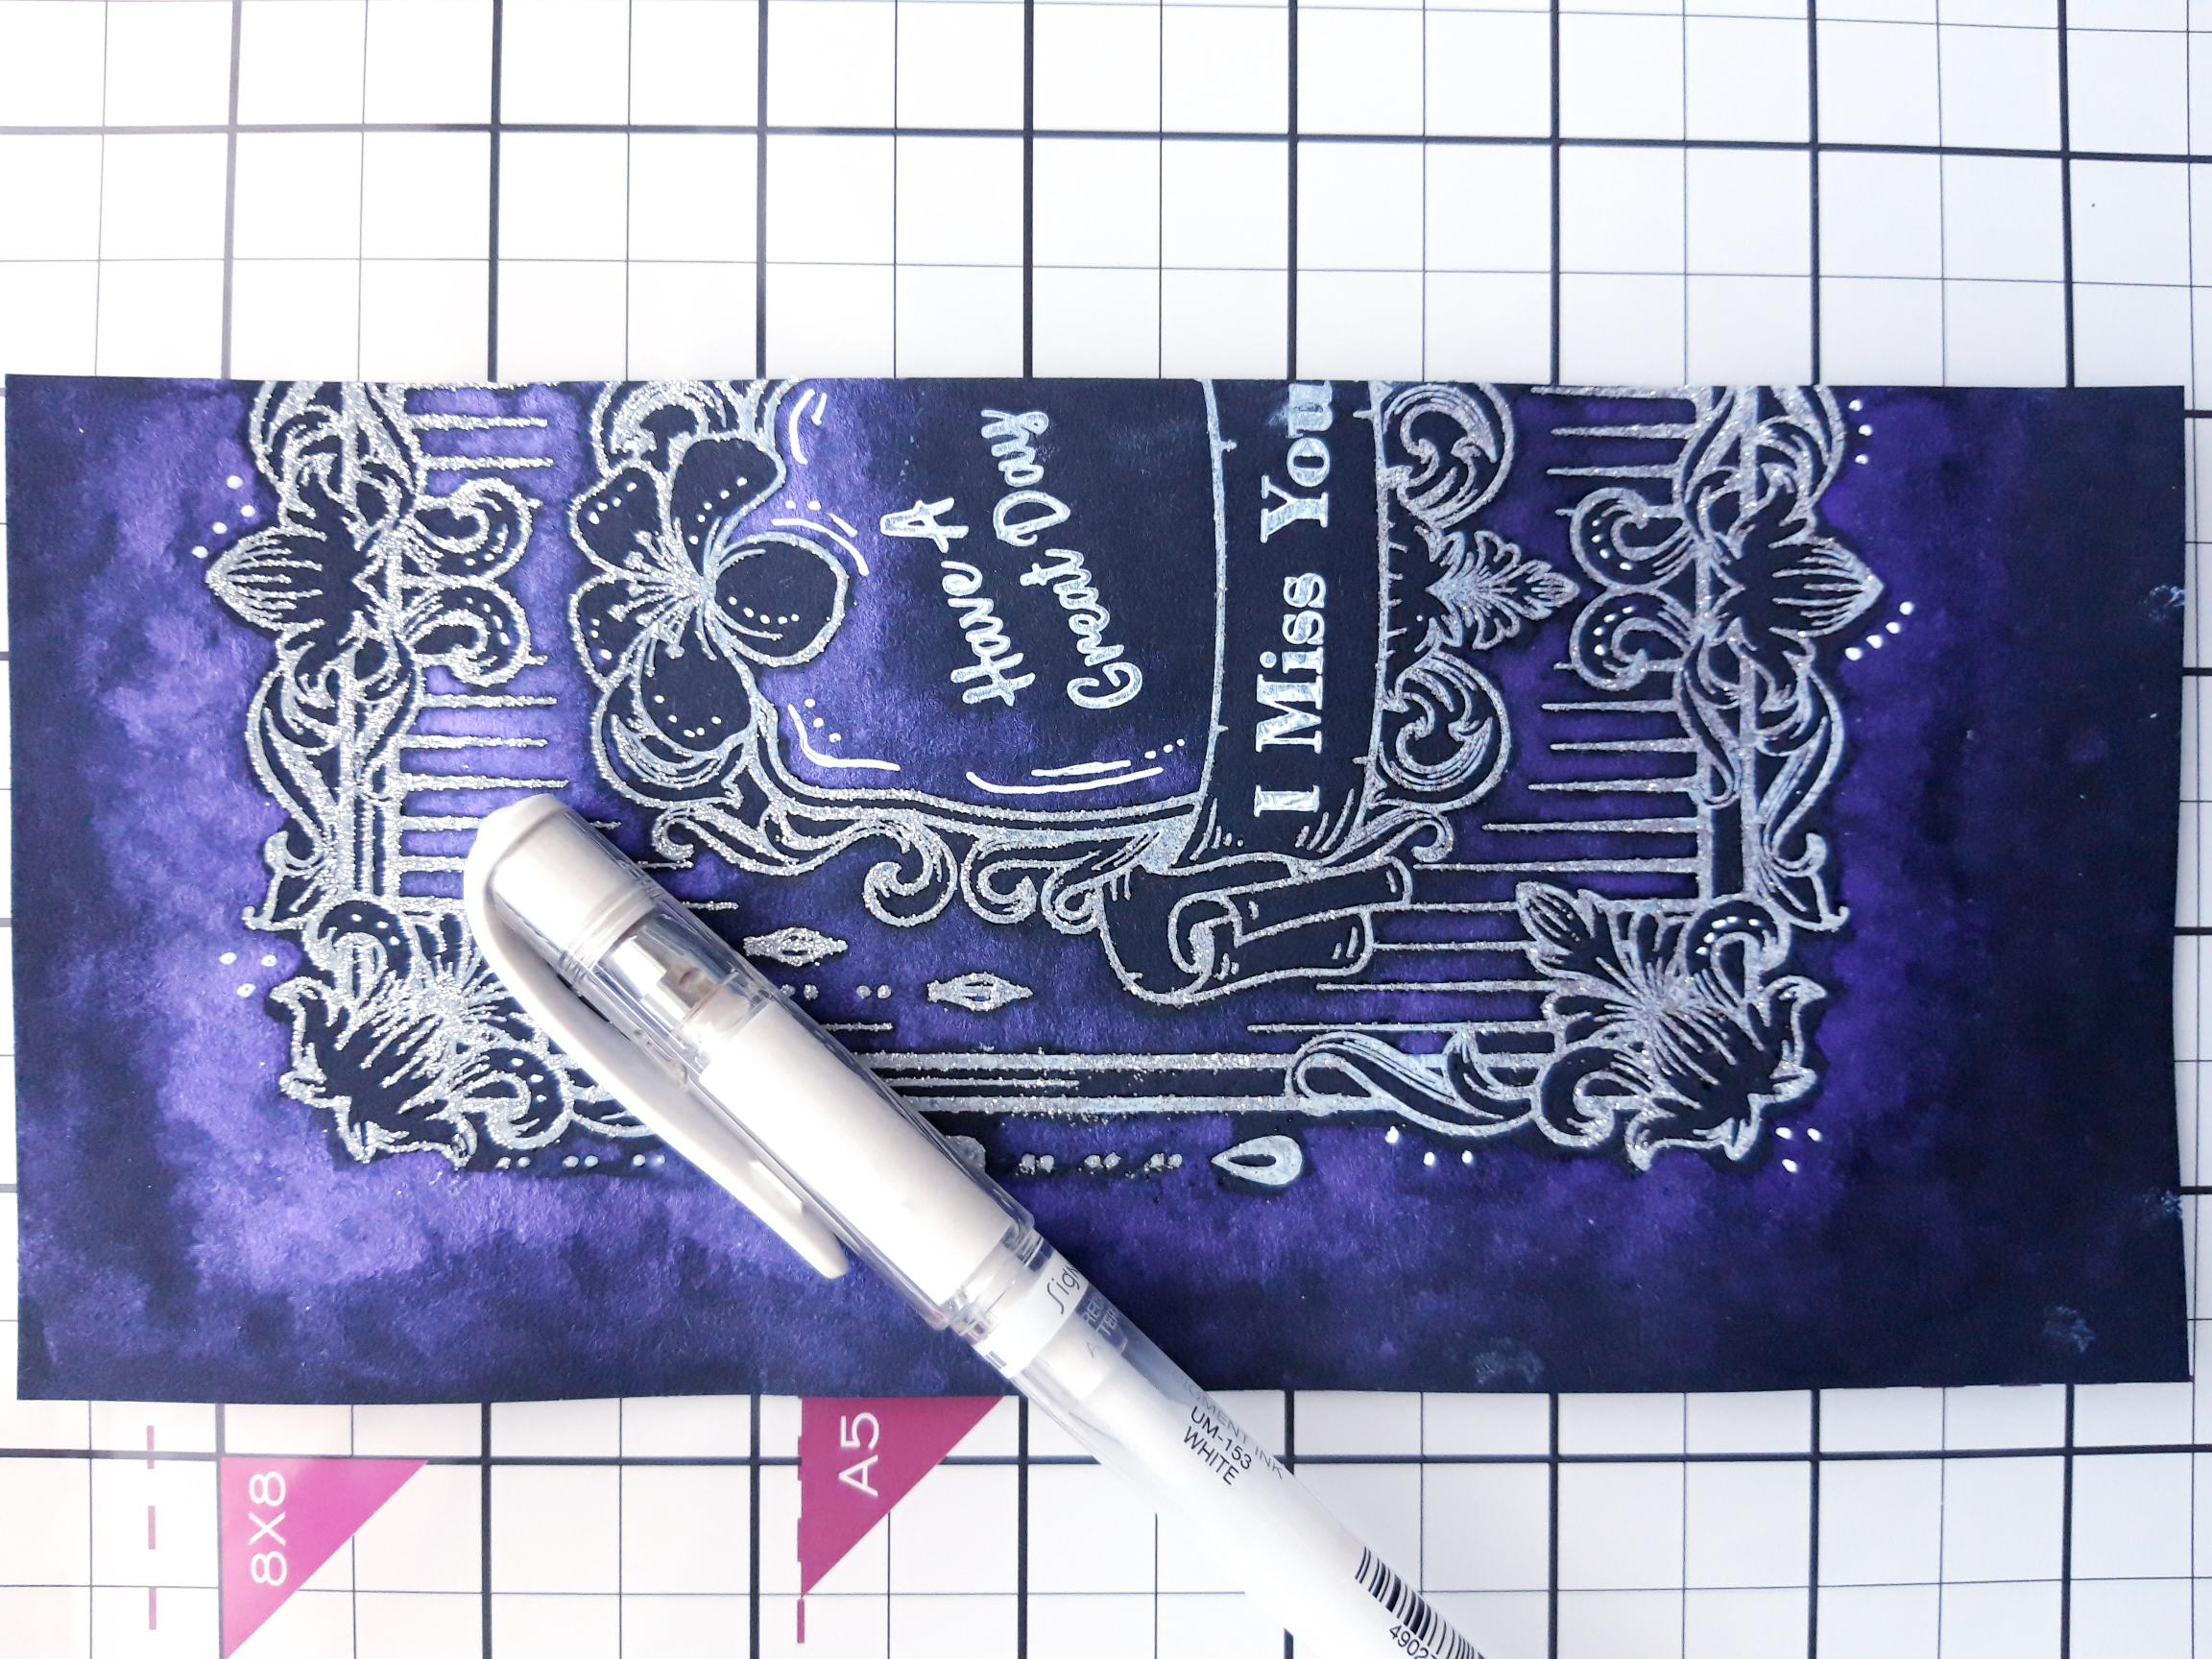
Once your artwork is dry, you can use a white gel pen to add accents and highlights, as required. I added "dots" to extend some of the design.... |
|
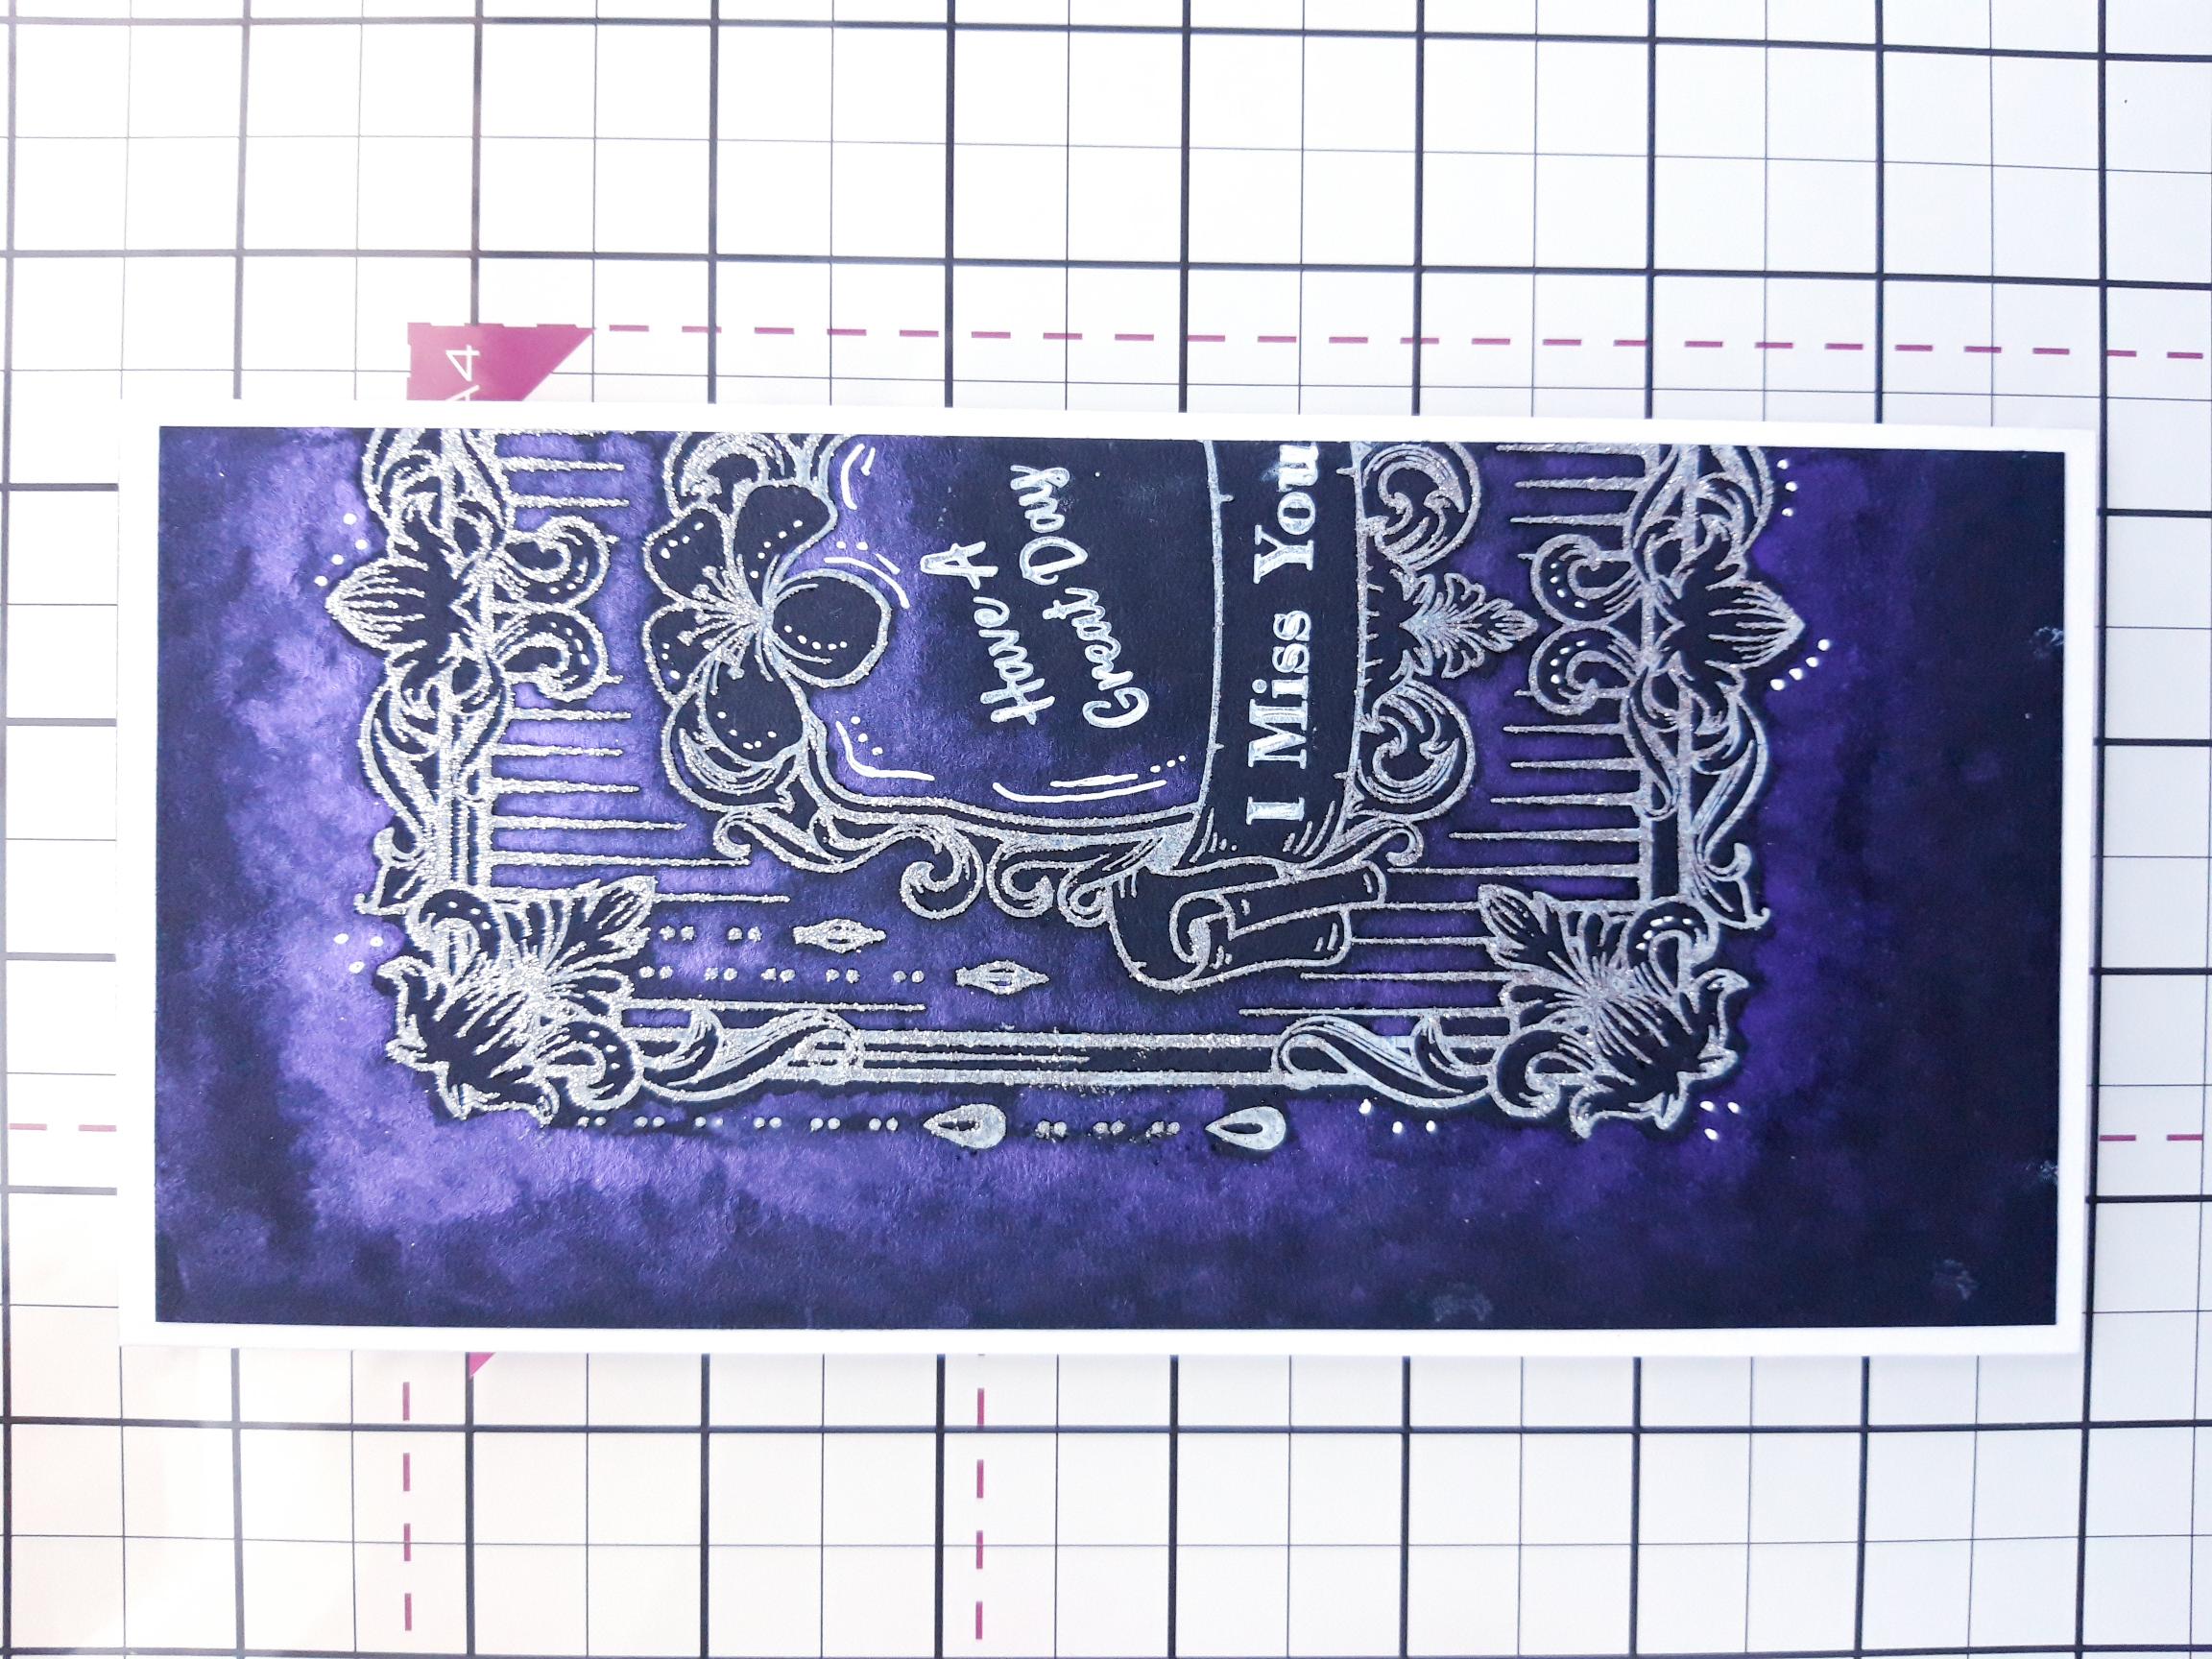
Finally, adhere to the front of your white, DL card blank. |