Give your friends $10 off their first order!
Refer a FRIEND


WHAT YOU WILL NEED:
Red top folding card blank 8 1/4 x 5 3/4"
Black card 8 x 5 1/2"
White card 7 3/4 x 5 1/4"
White card 5 1/2 x 5 1/2" for embossing folder
White/black card for sentiment
Signature Watercolour High Definition 3D Creative Wings Embossing Folder and Die
Be Happy Lamination Stamp Collection
Create Together Club Chapter 1: Beautiful Notes Stamp Set
SBM Hybrid Ink Pad: Midnight
SBM Premium Dye Ink Pad: Magenta, Bittersweet, Sherbet
Distress Ink Pad: Black Soot
Pearlywinks Pearl Mist: Diamond Glitter
Water spray bottle
Paint brush
Blending tool
Eureka 101 Watercolour tablet
Magnetic glass mat
Paper Trimmer
Perfect Together Glue
Die Cutting machine
[click image to enlarge] 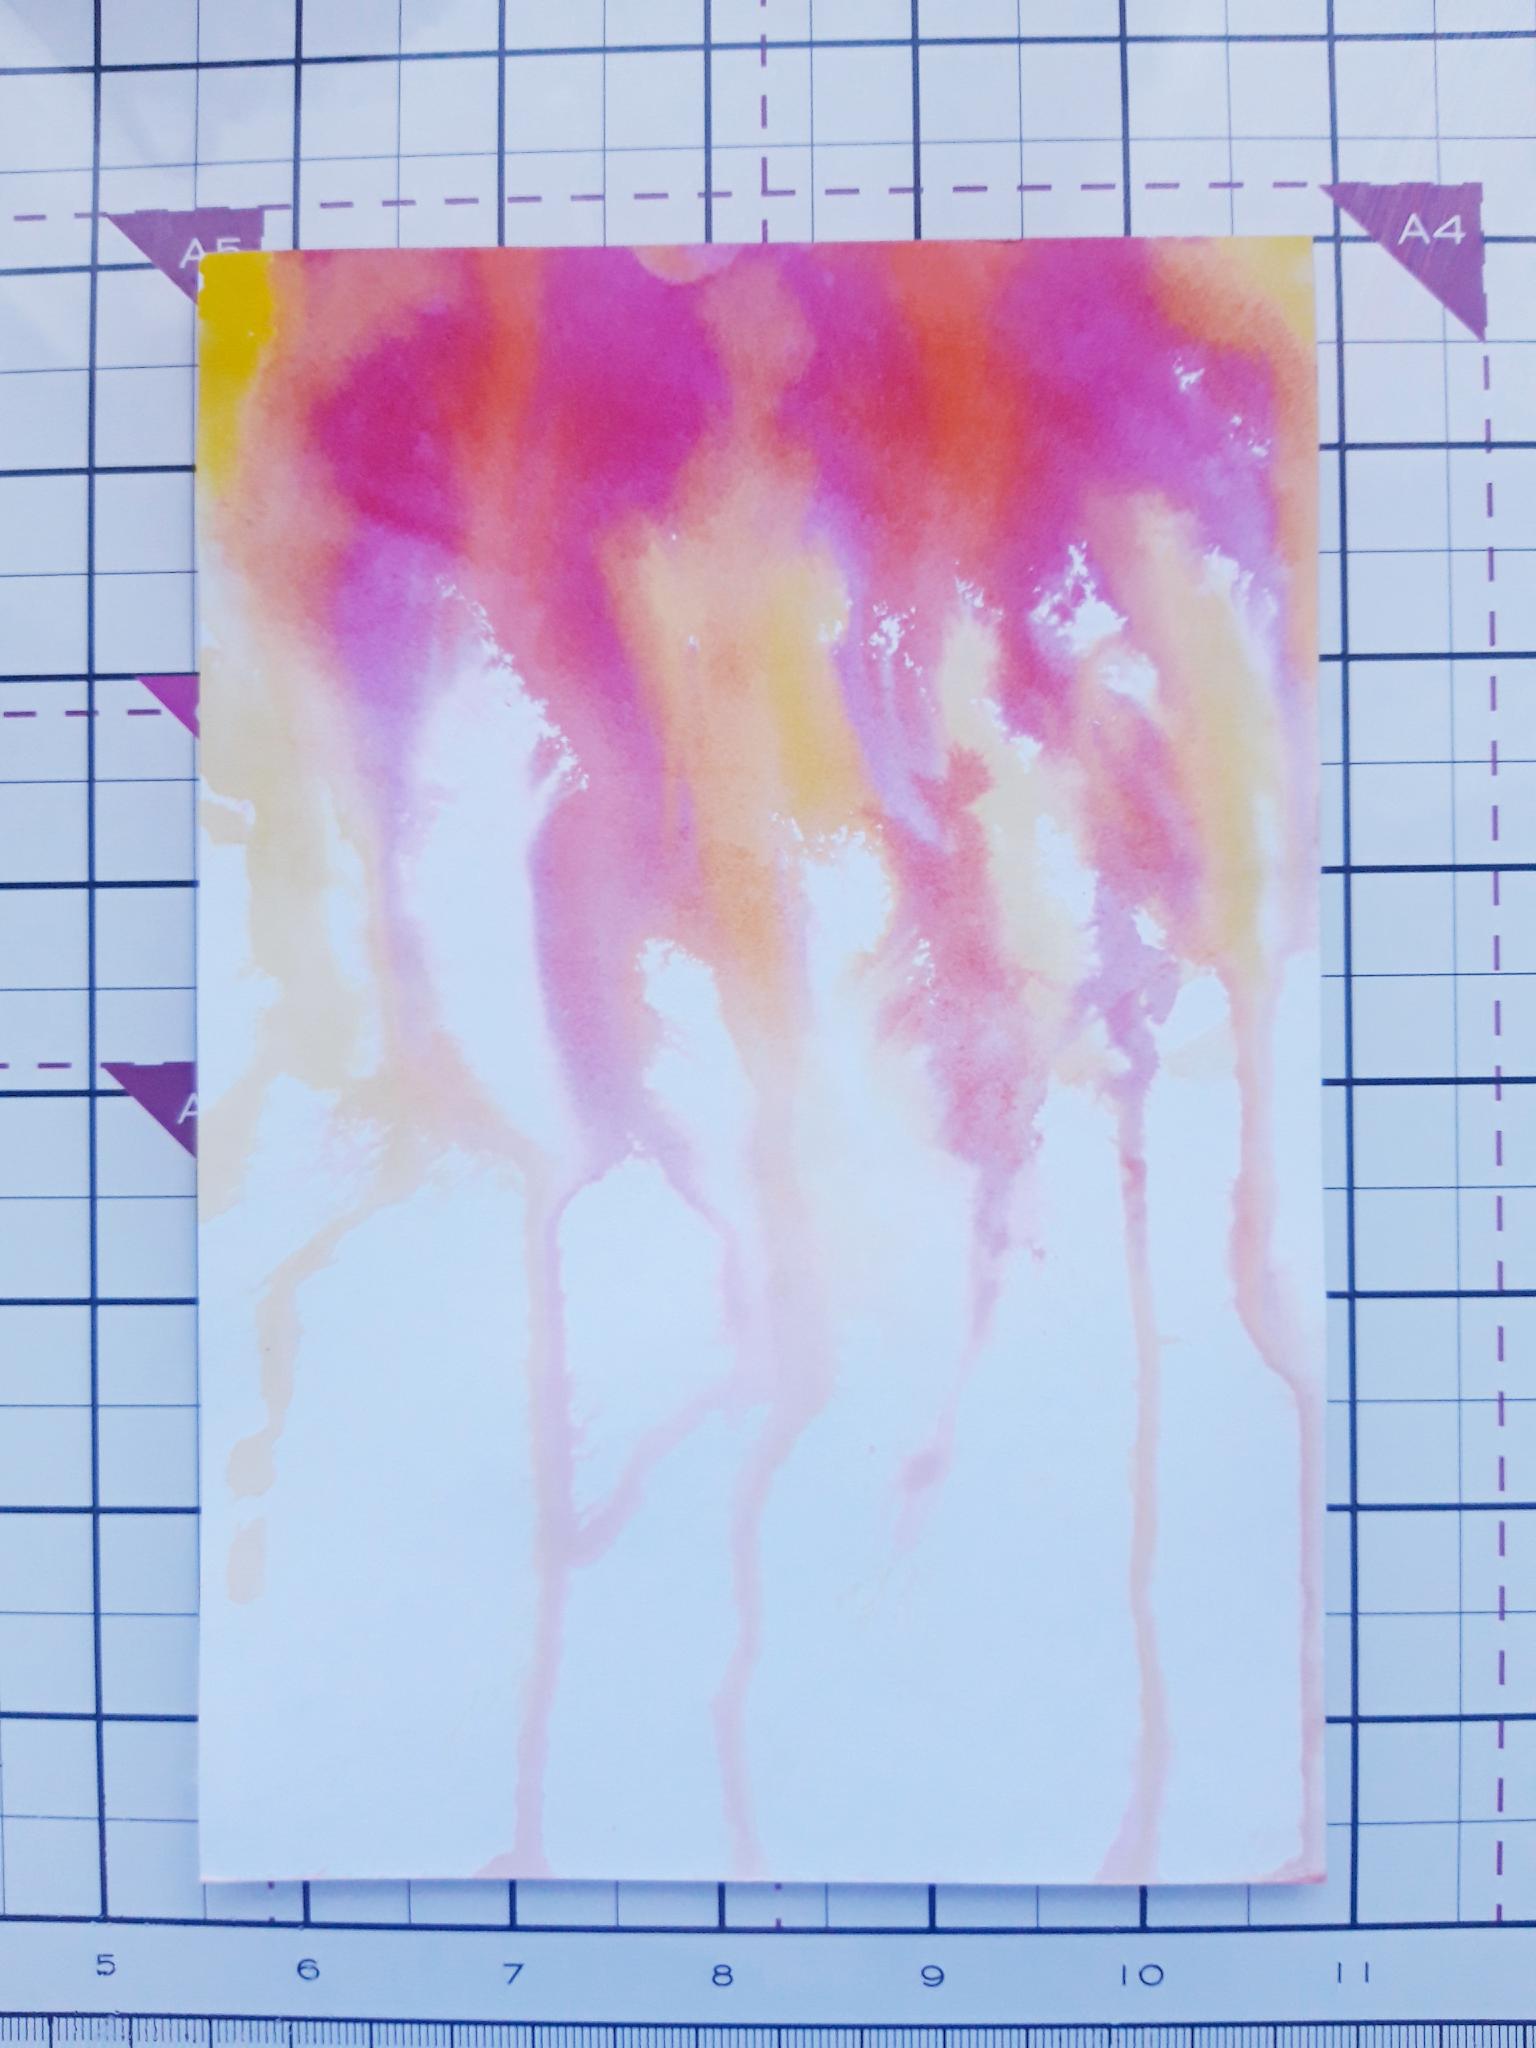
|
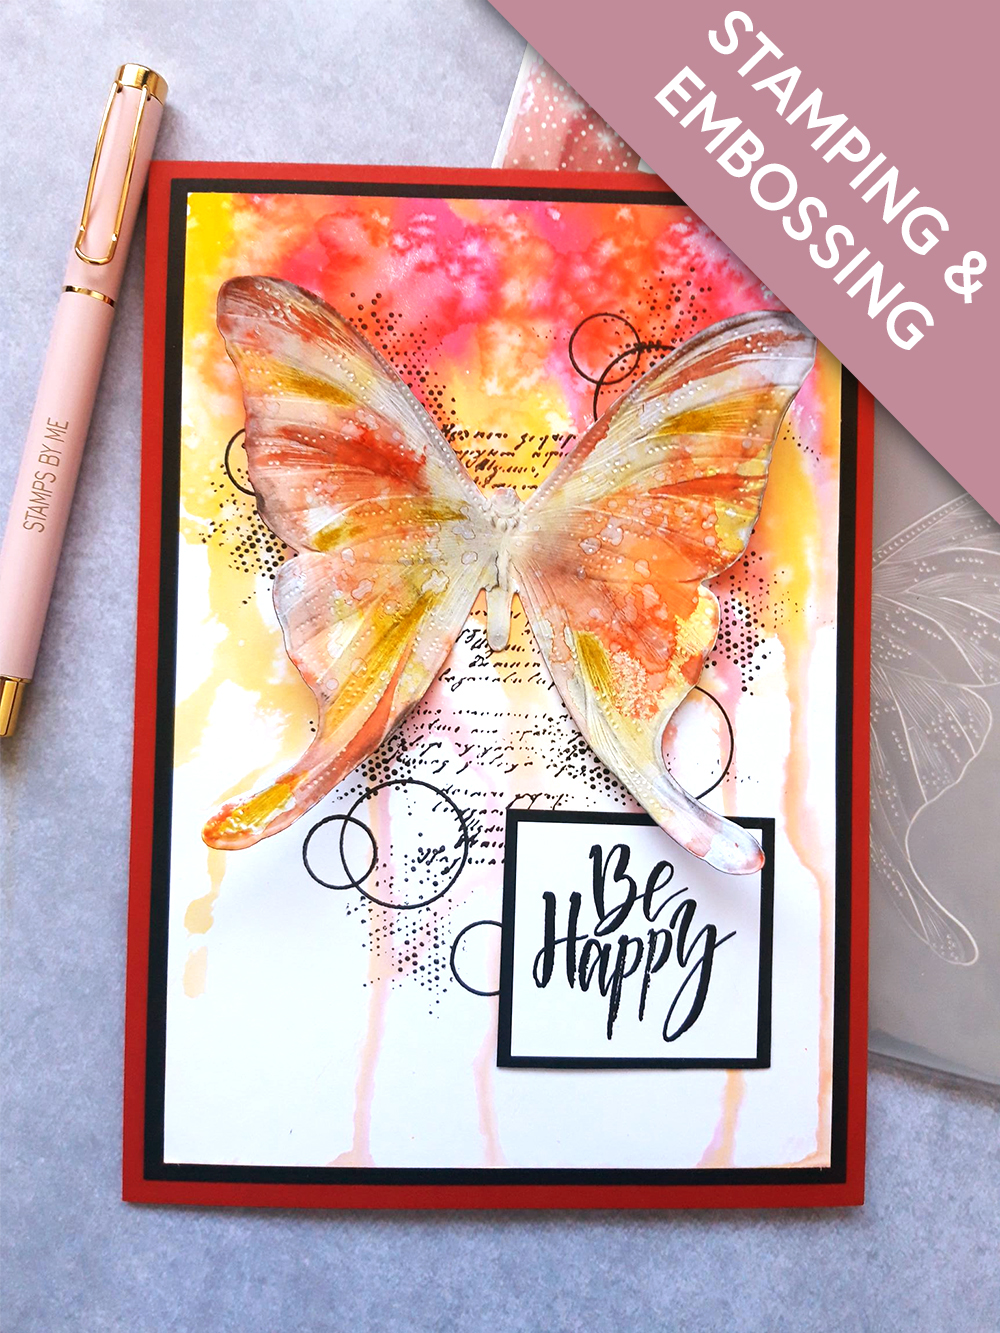
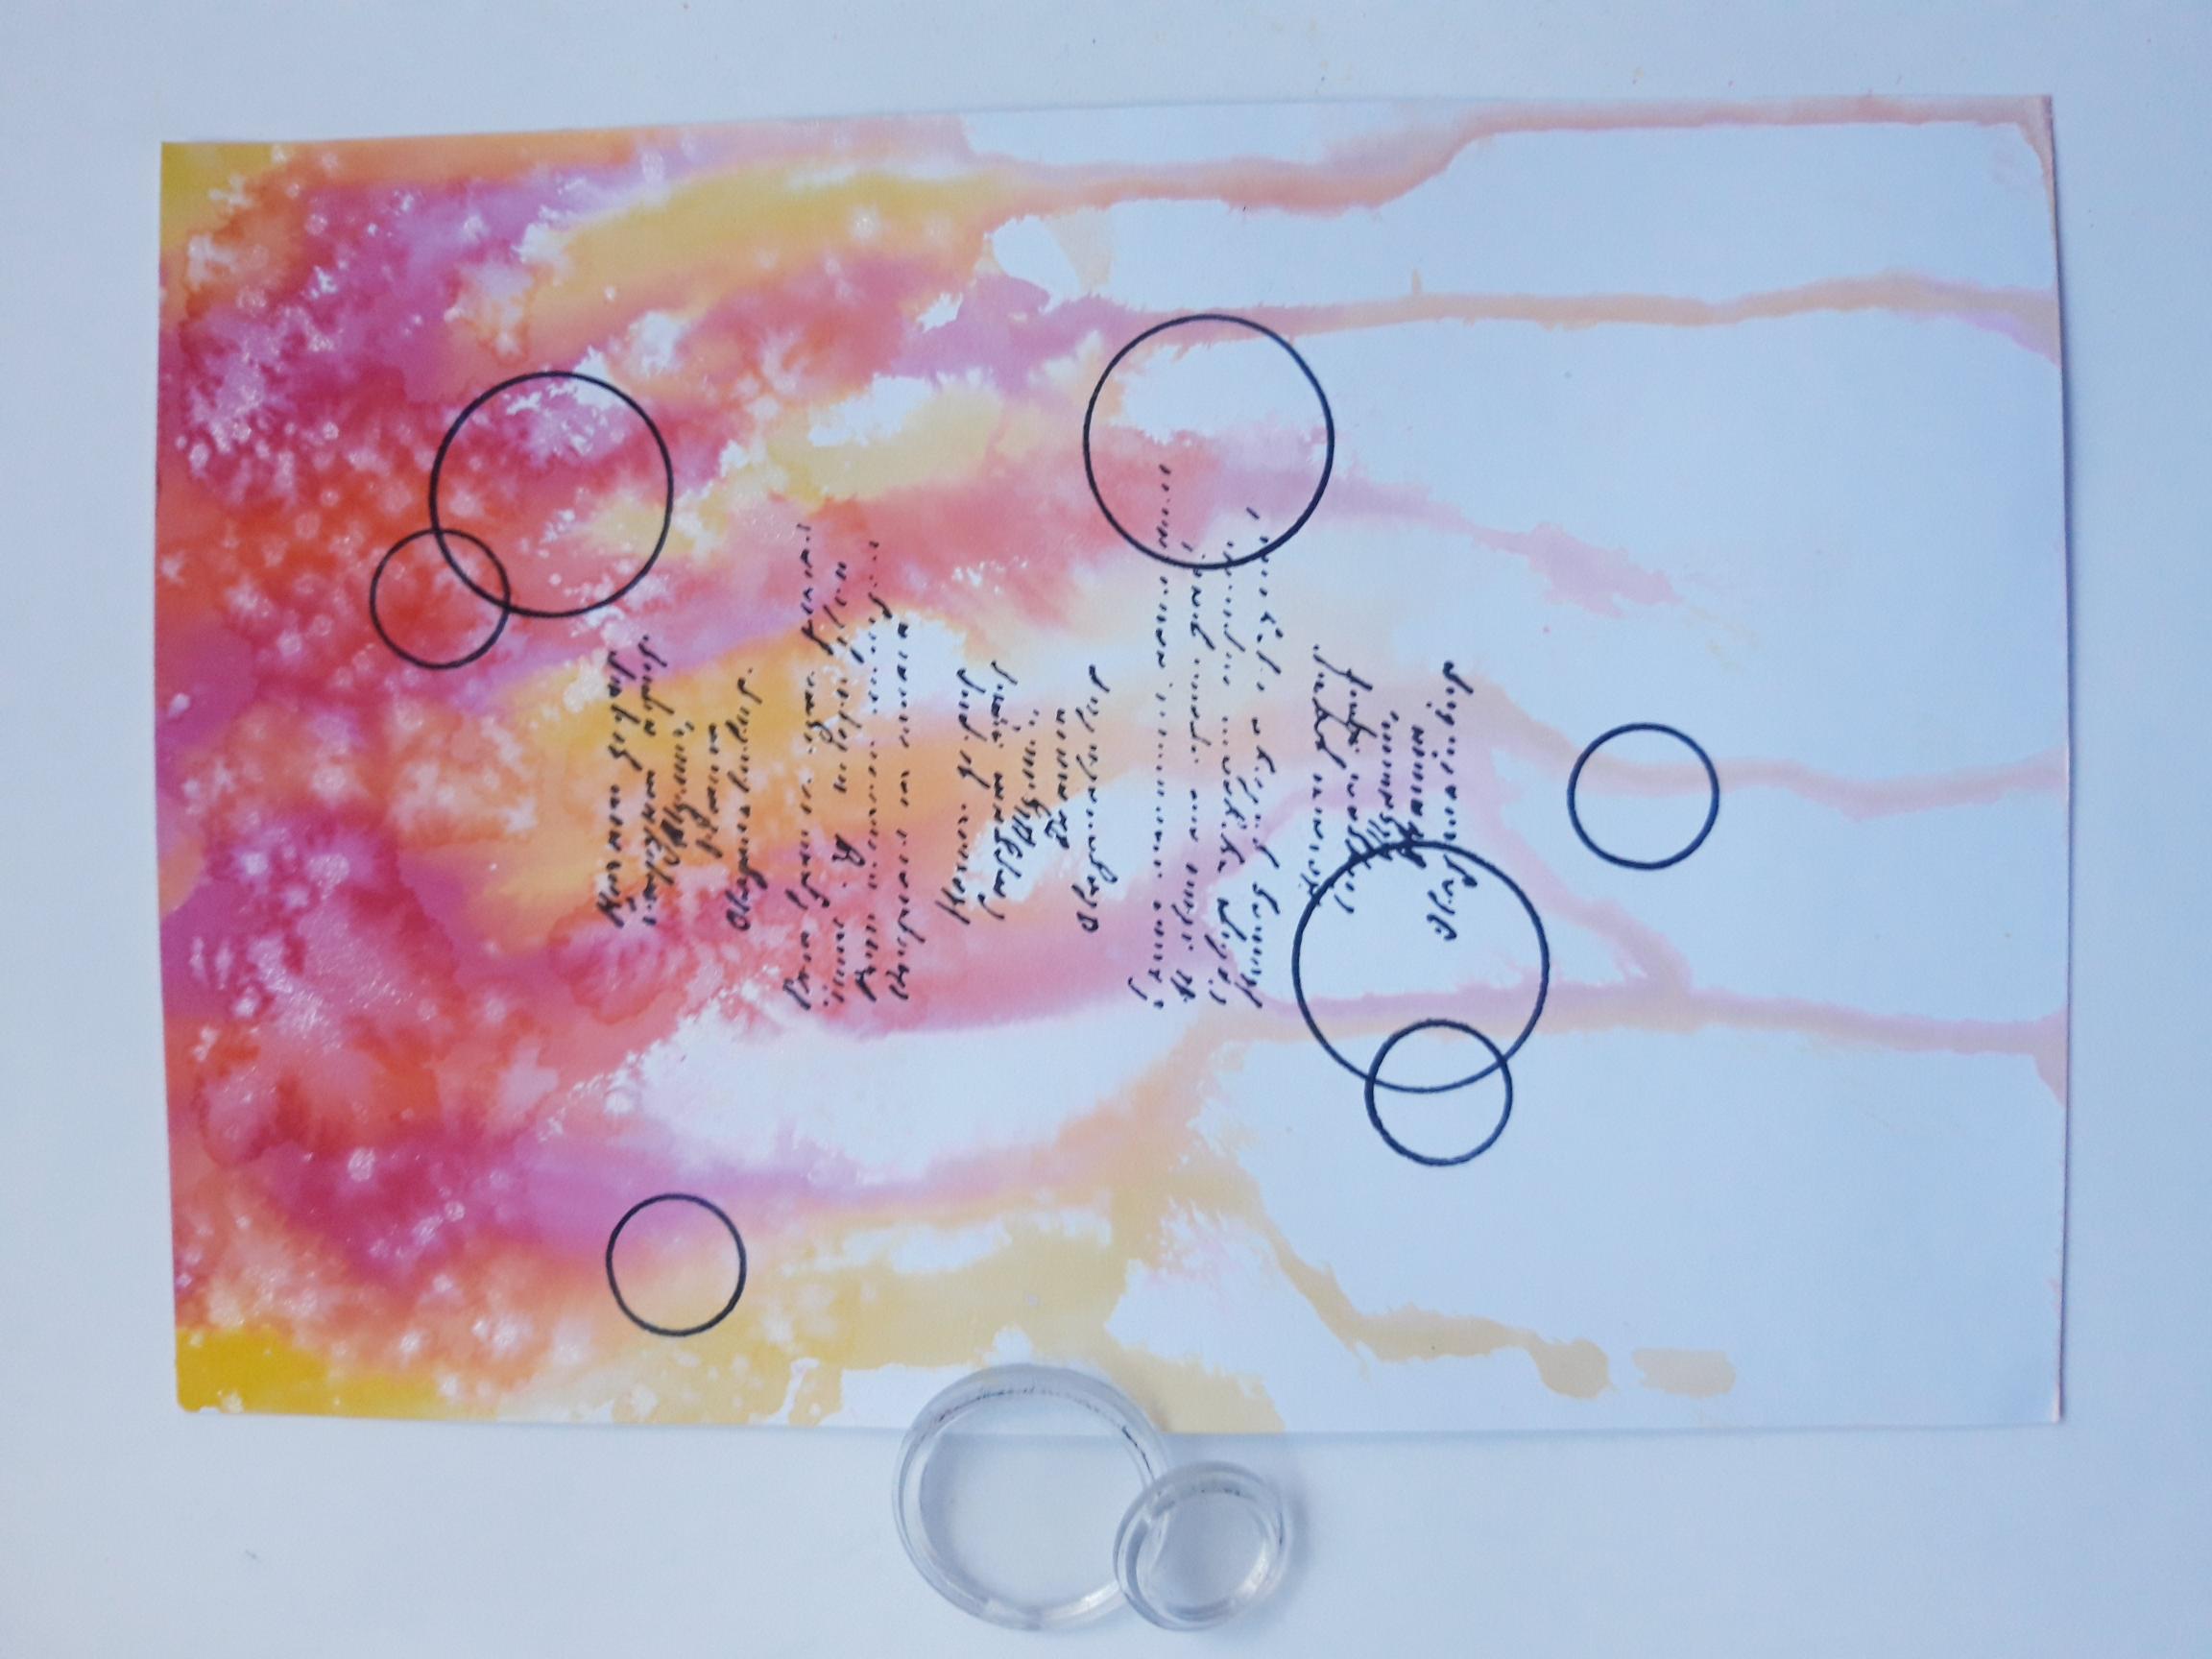
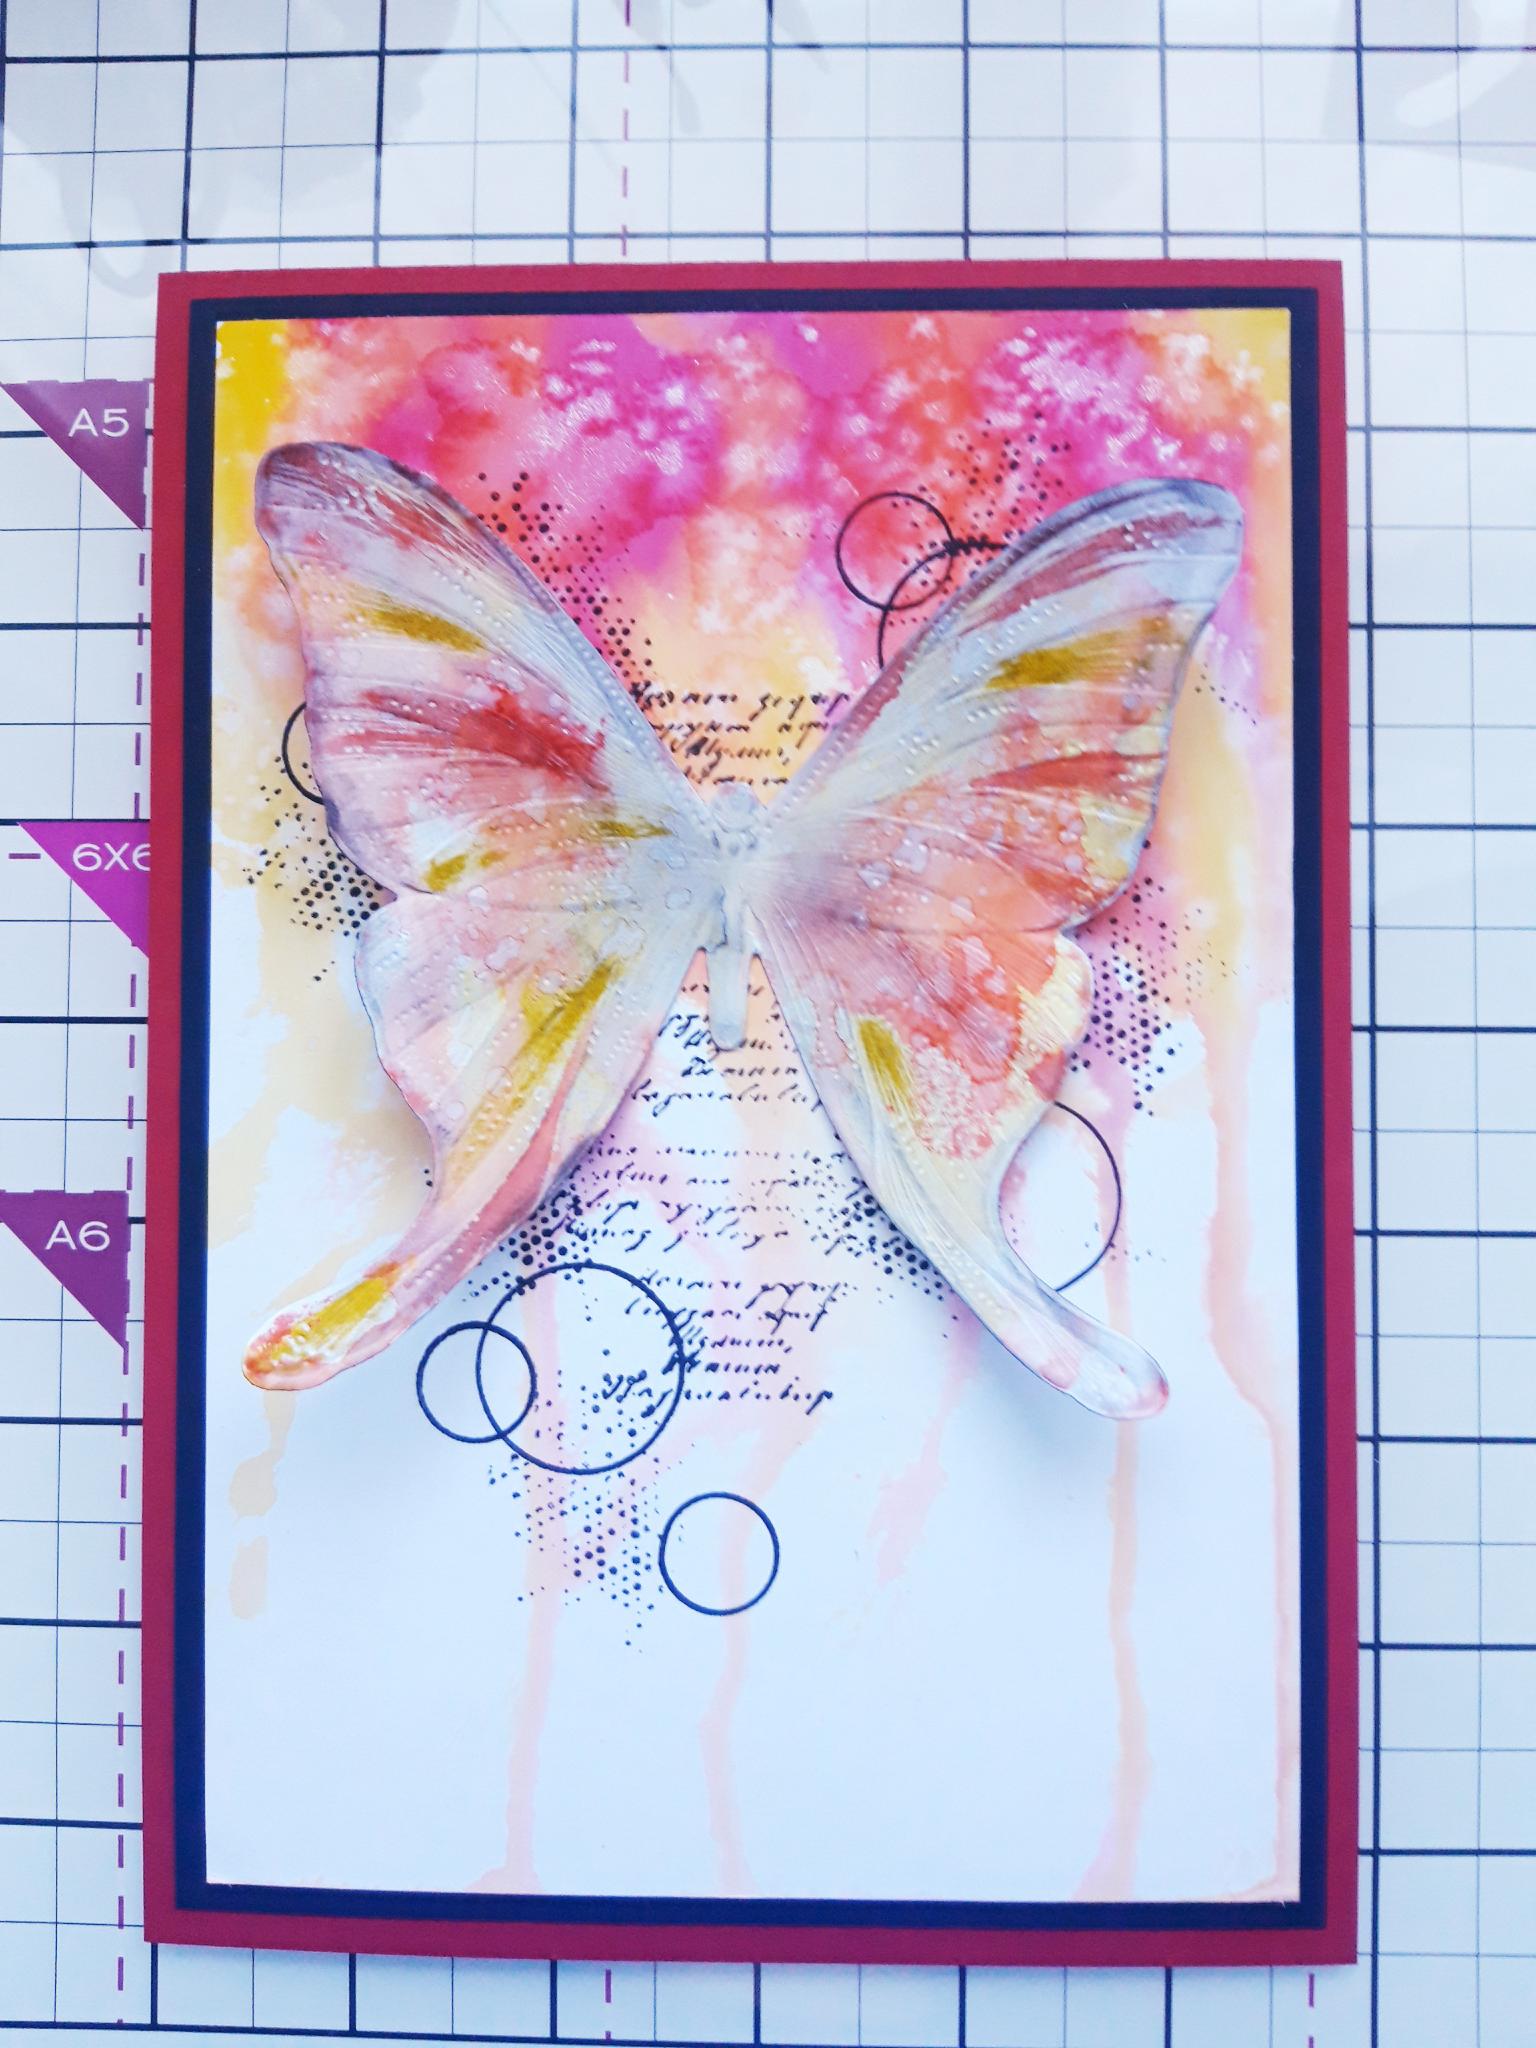
Spray the white card, cut to 7 3/4 x 5 1/4", with lots of water. Using a paint brush, apply the 3 Premium Dye inks randomly along the top of the card and allow the ink to drip down. You can keep reapplying and spraying the ink, until you are happy with the effect. Mop up the excess water/ink and give your background a blast with a heat tool. |
|
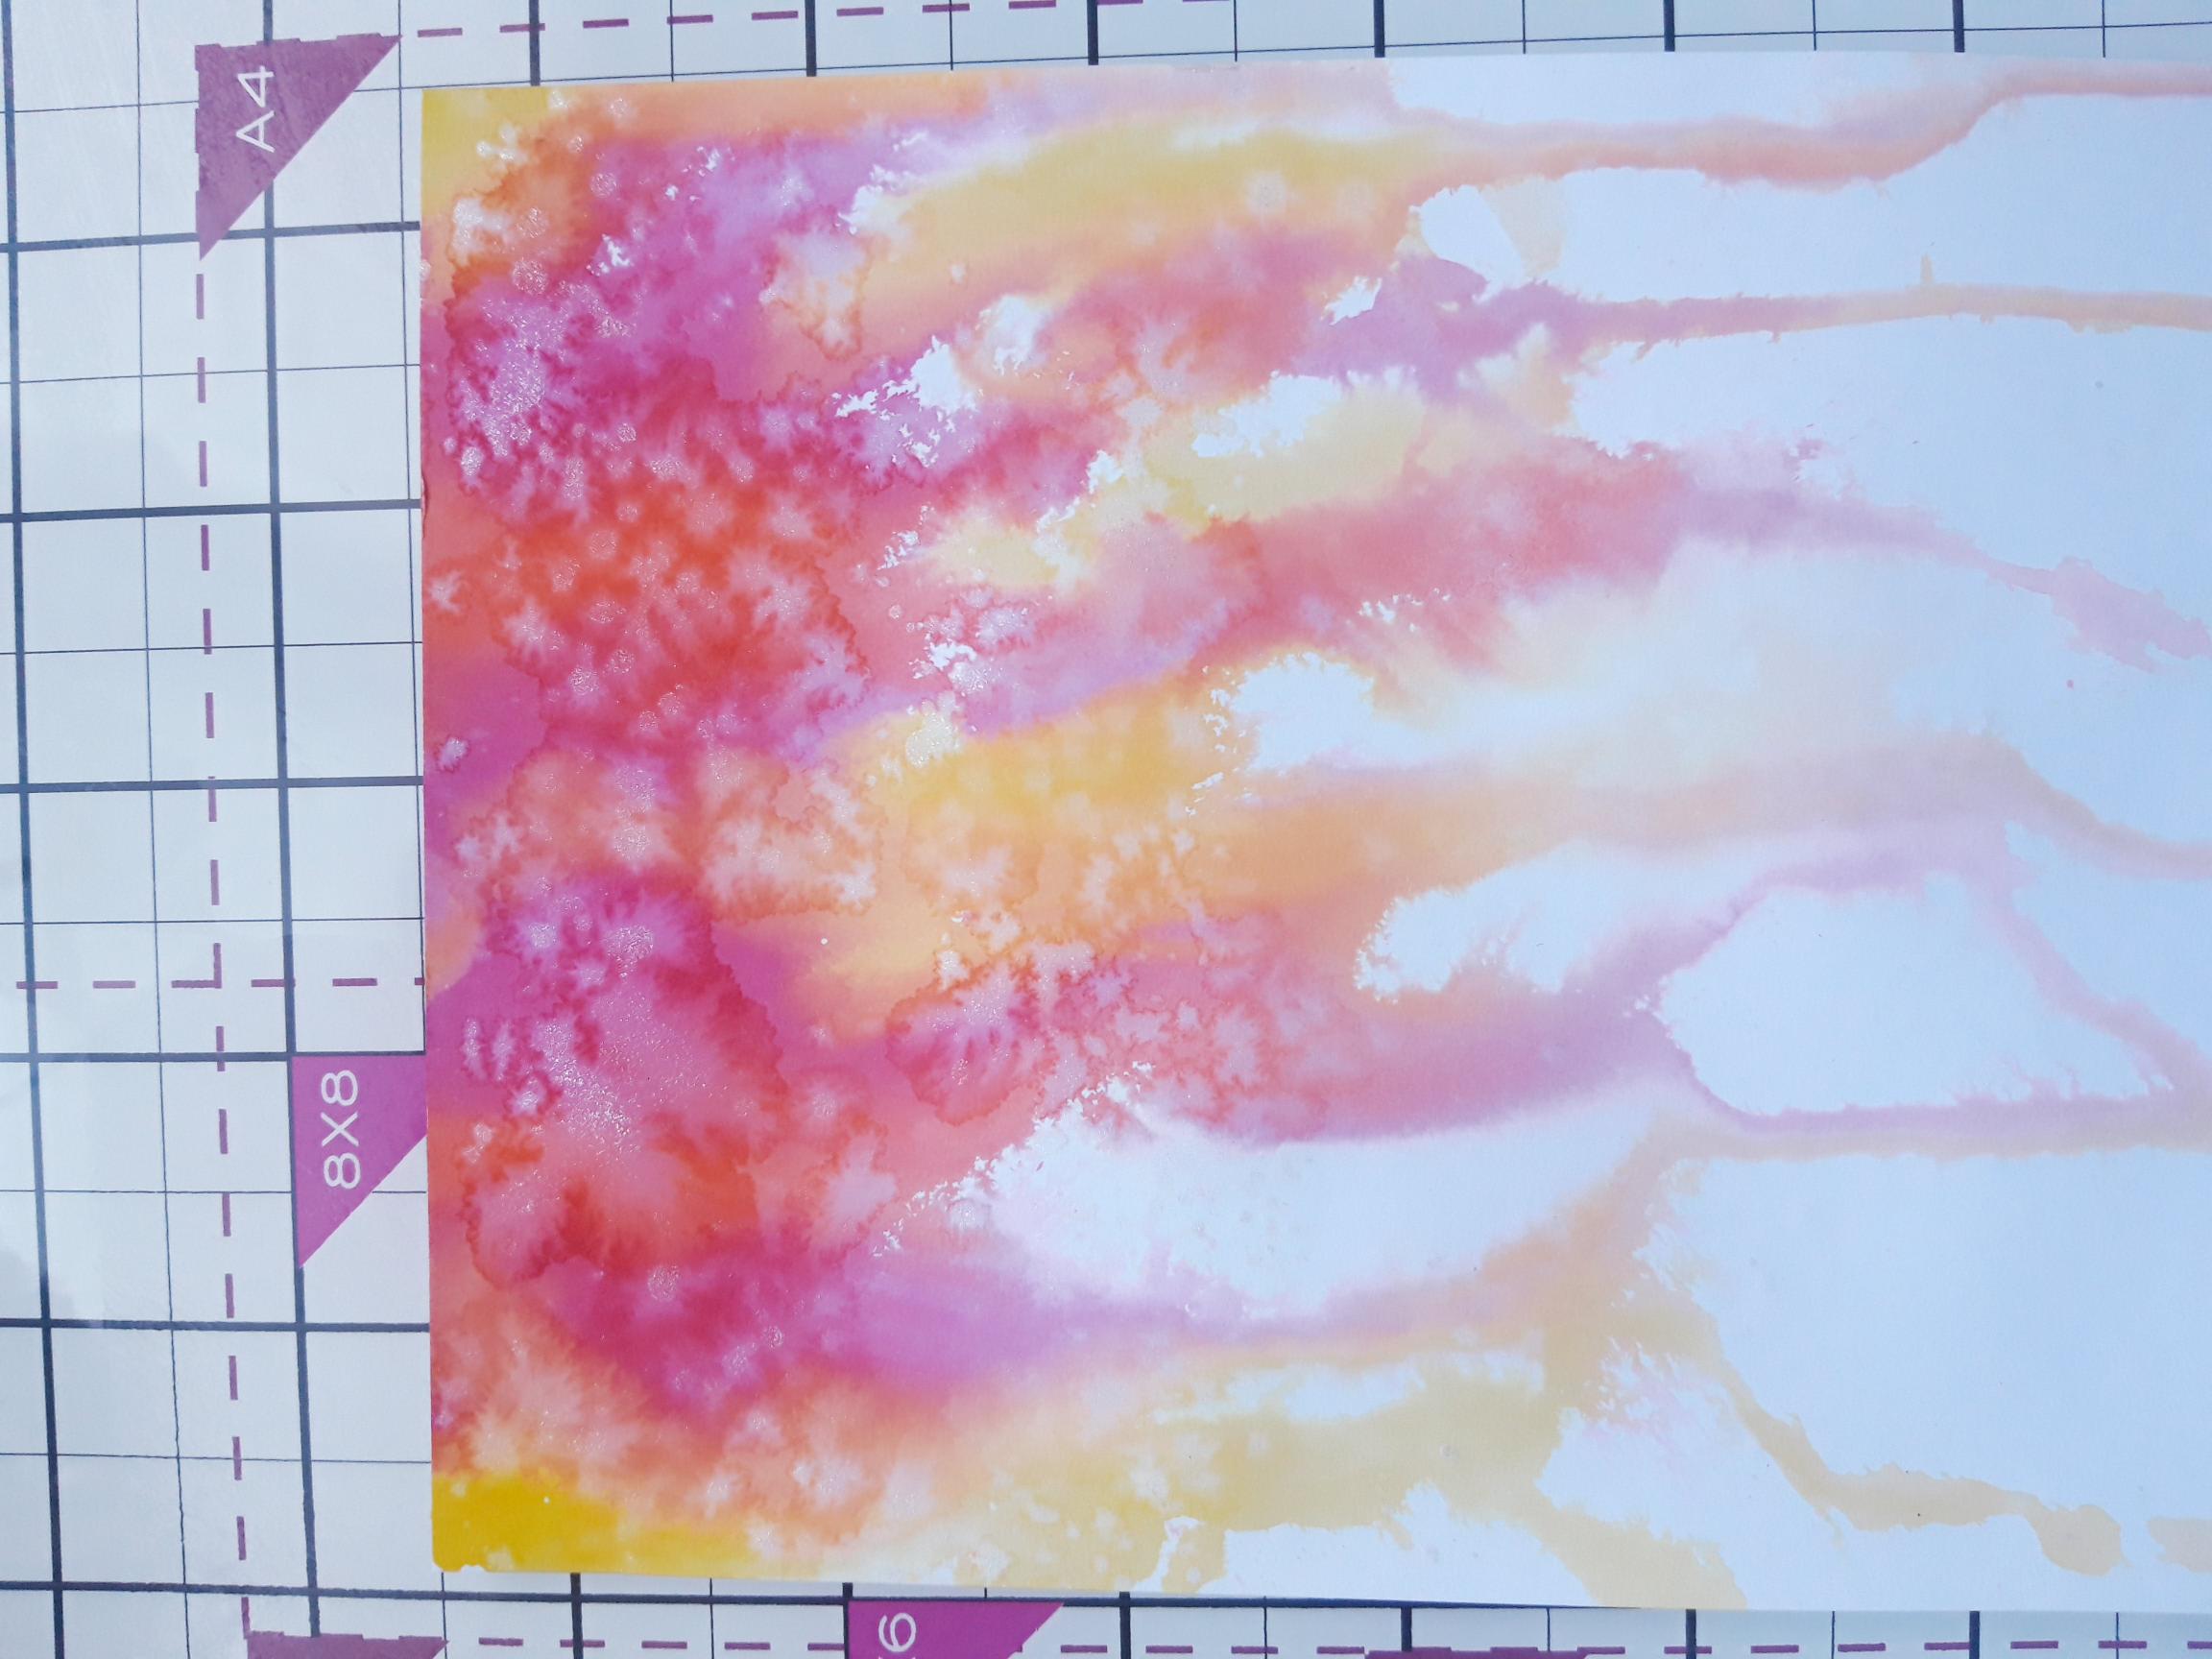
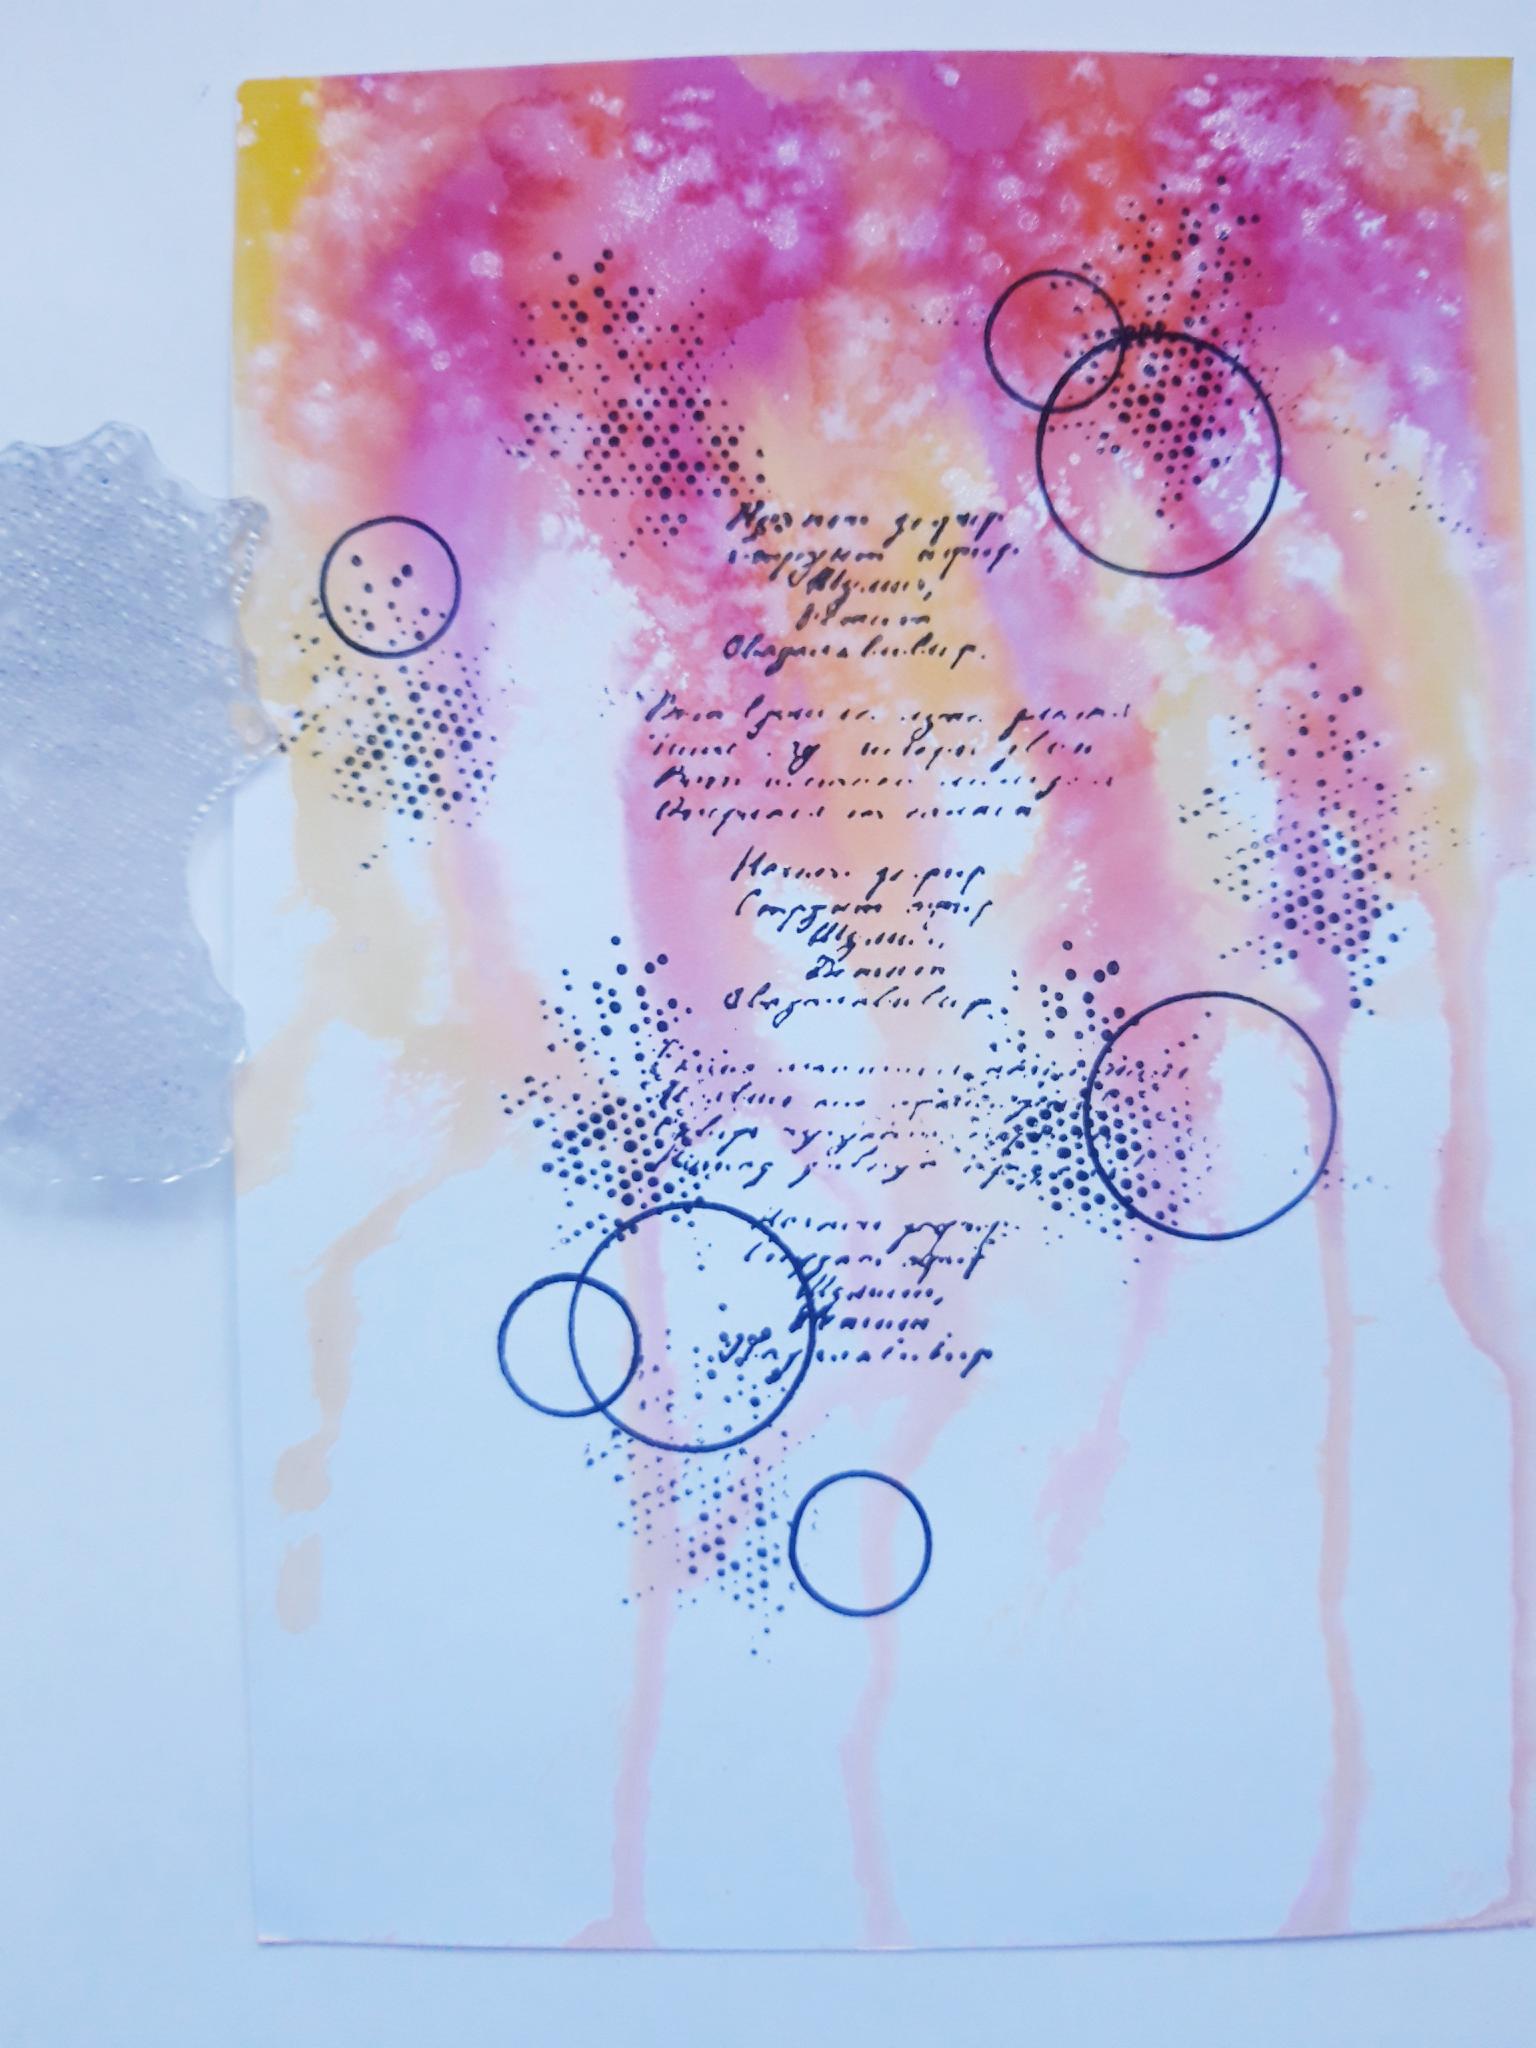
Swirl the Pearlywinks Pearl Mist, to activate the mica and glitter, then spray on to your glass mat. Use your paint brush to splatter all over your background, as required. I like lots of splats!!! |
|
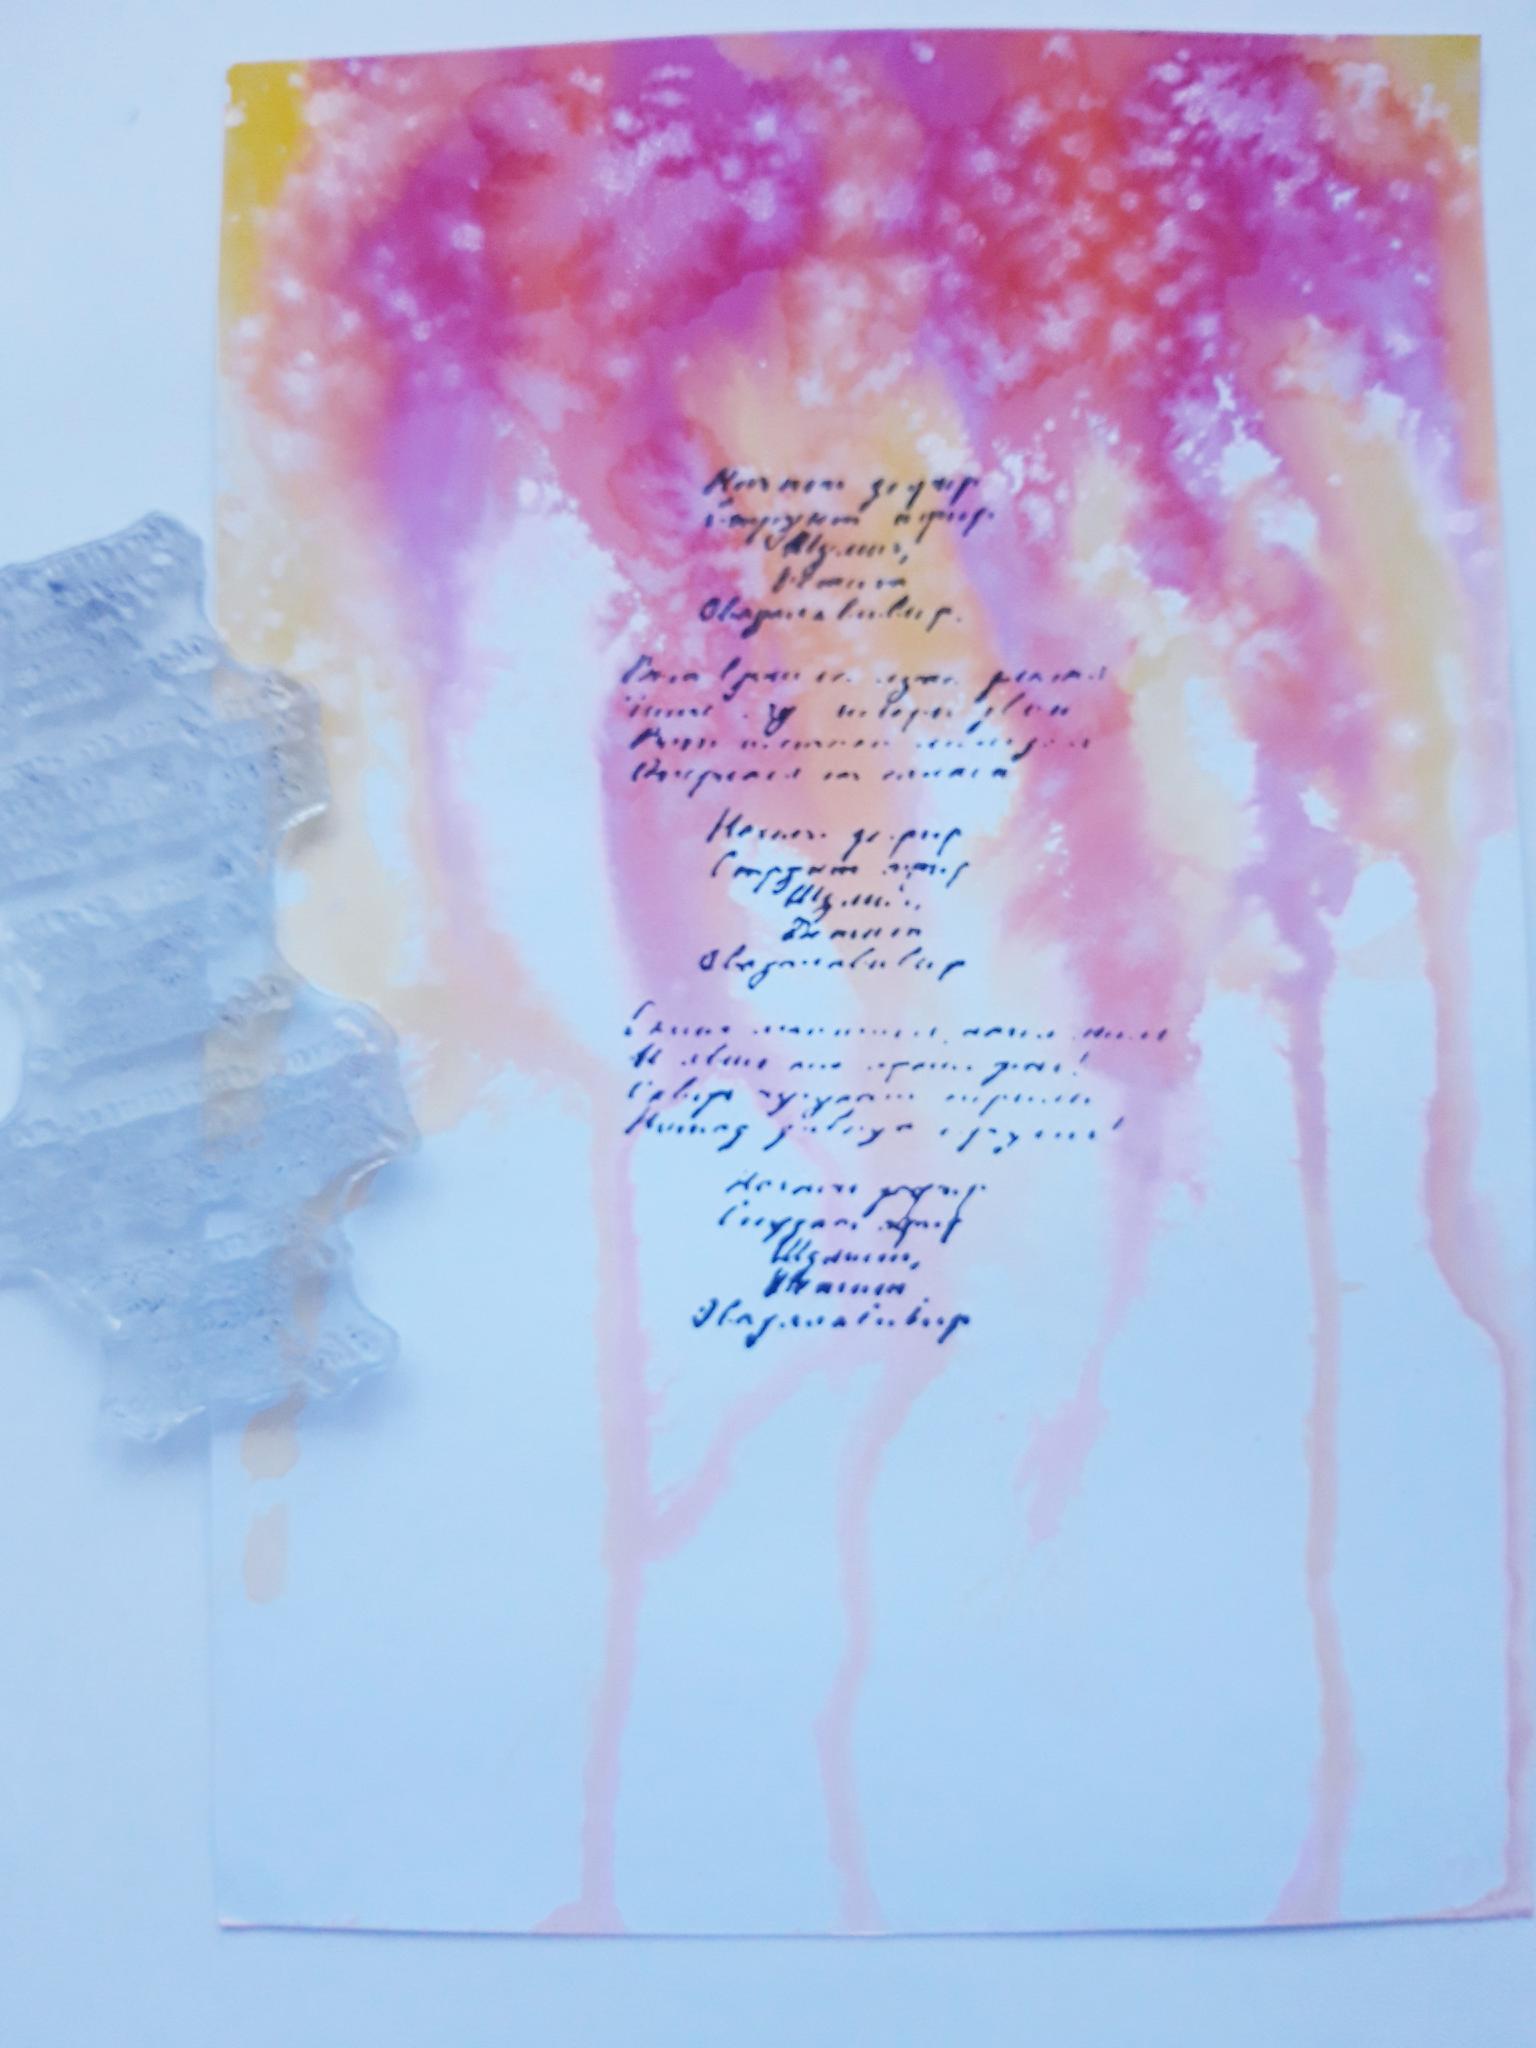
Ink up the script stamp, from the Beautiful Notes set, with the Midnight Hybrid ink and stamp in the centre of your background, thinking about where the placement of your 3D butterfly will be...the script should sit behind it. |
|
Ink up the bubbles texture stamp, from the same set, with the Midnight and stamp randomly over your background. |
|
Ink up the dotty texture stamp with Midnight and randomly stamp as before, connecting some of the bubbles and dots so the design flows smoothly. |
|
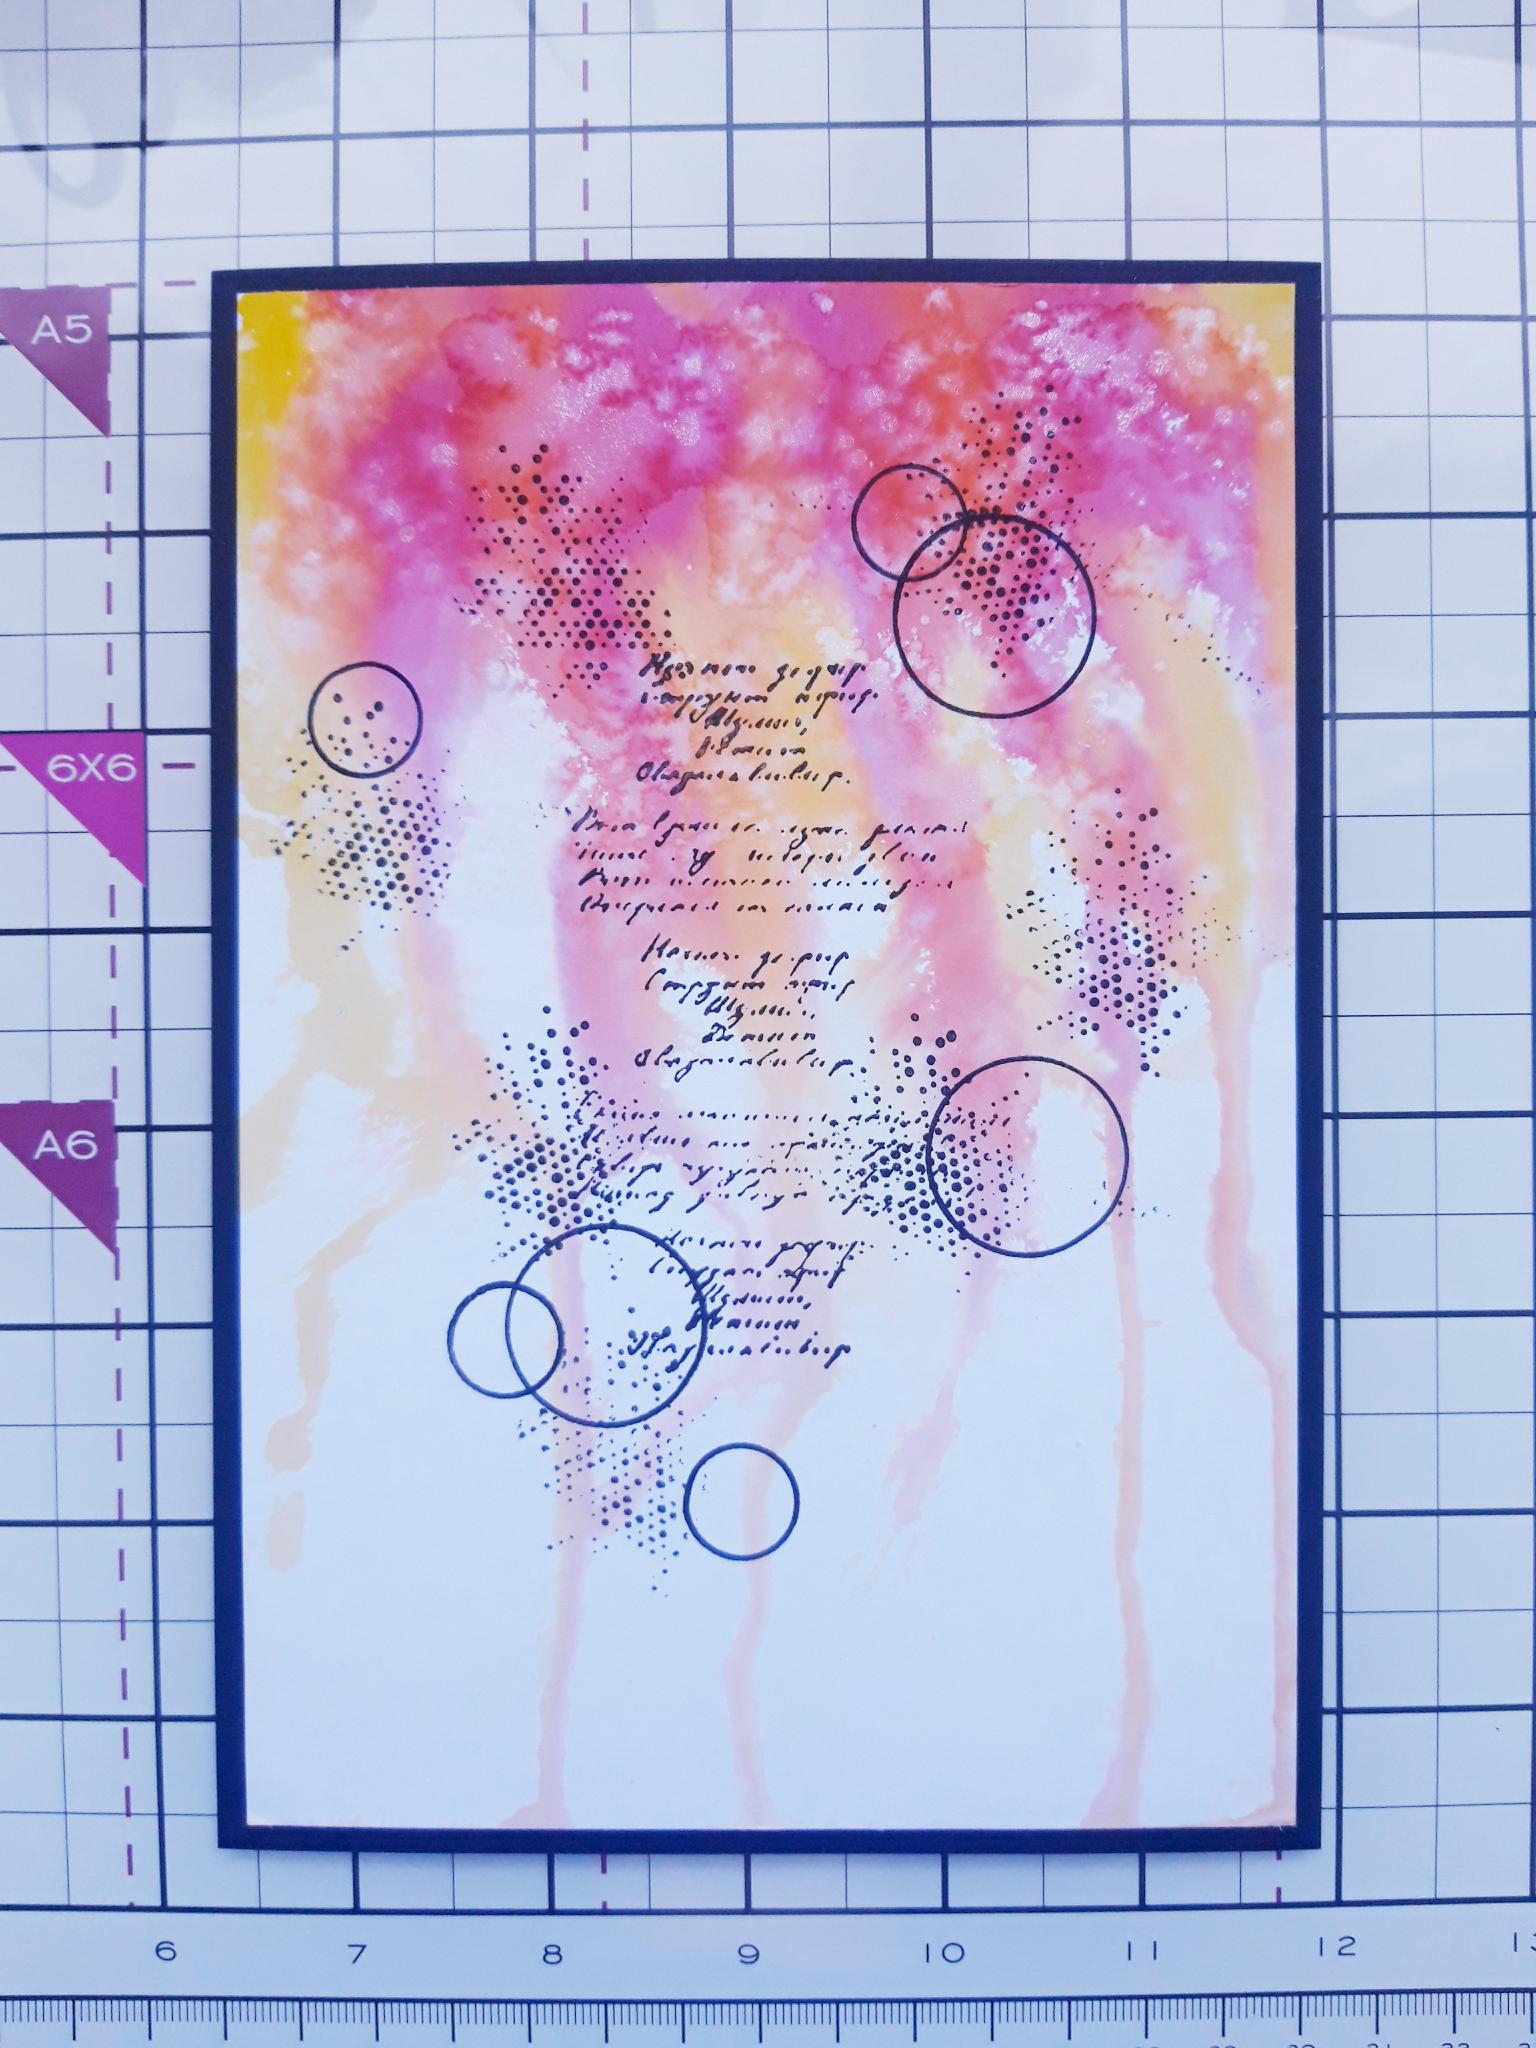
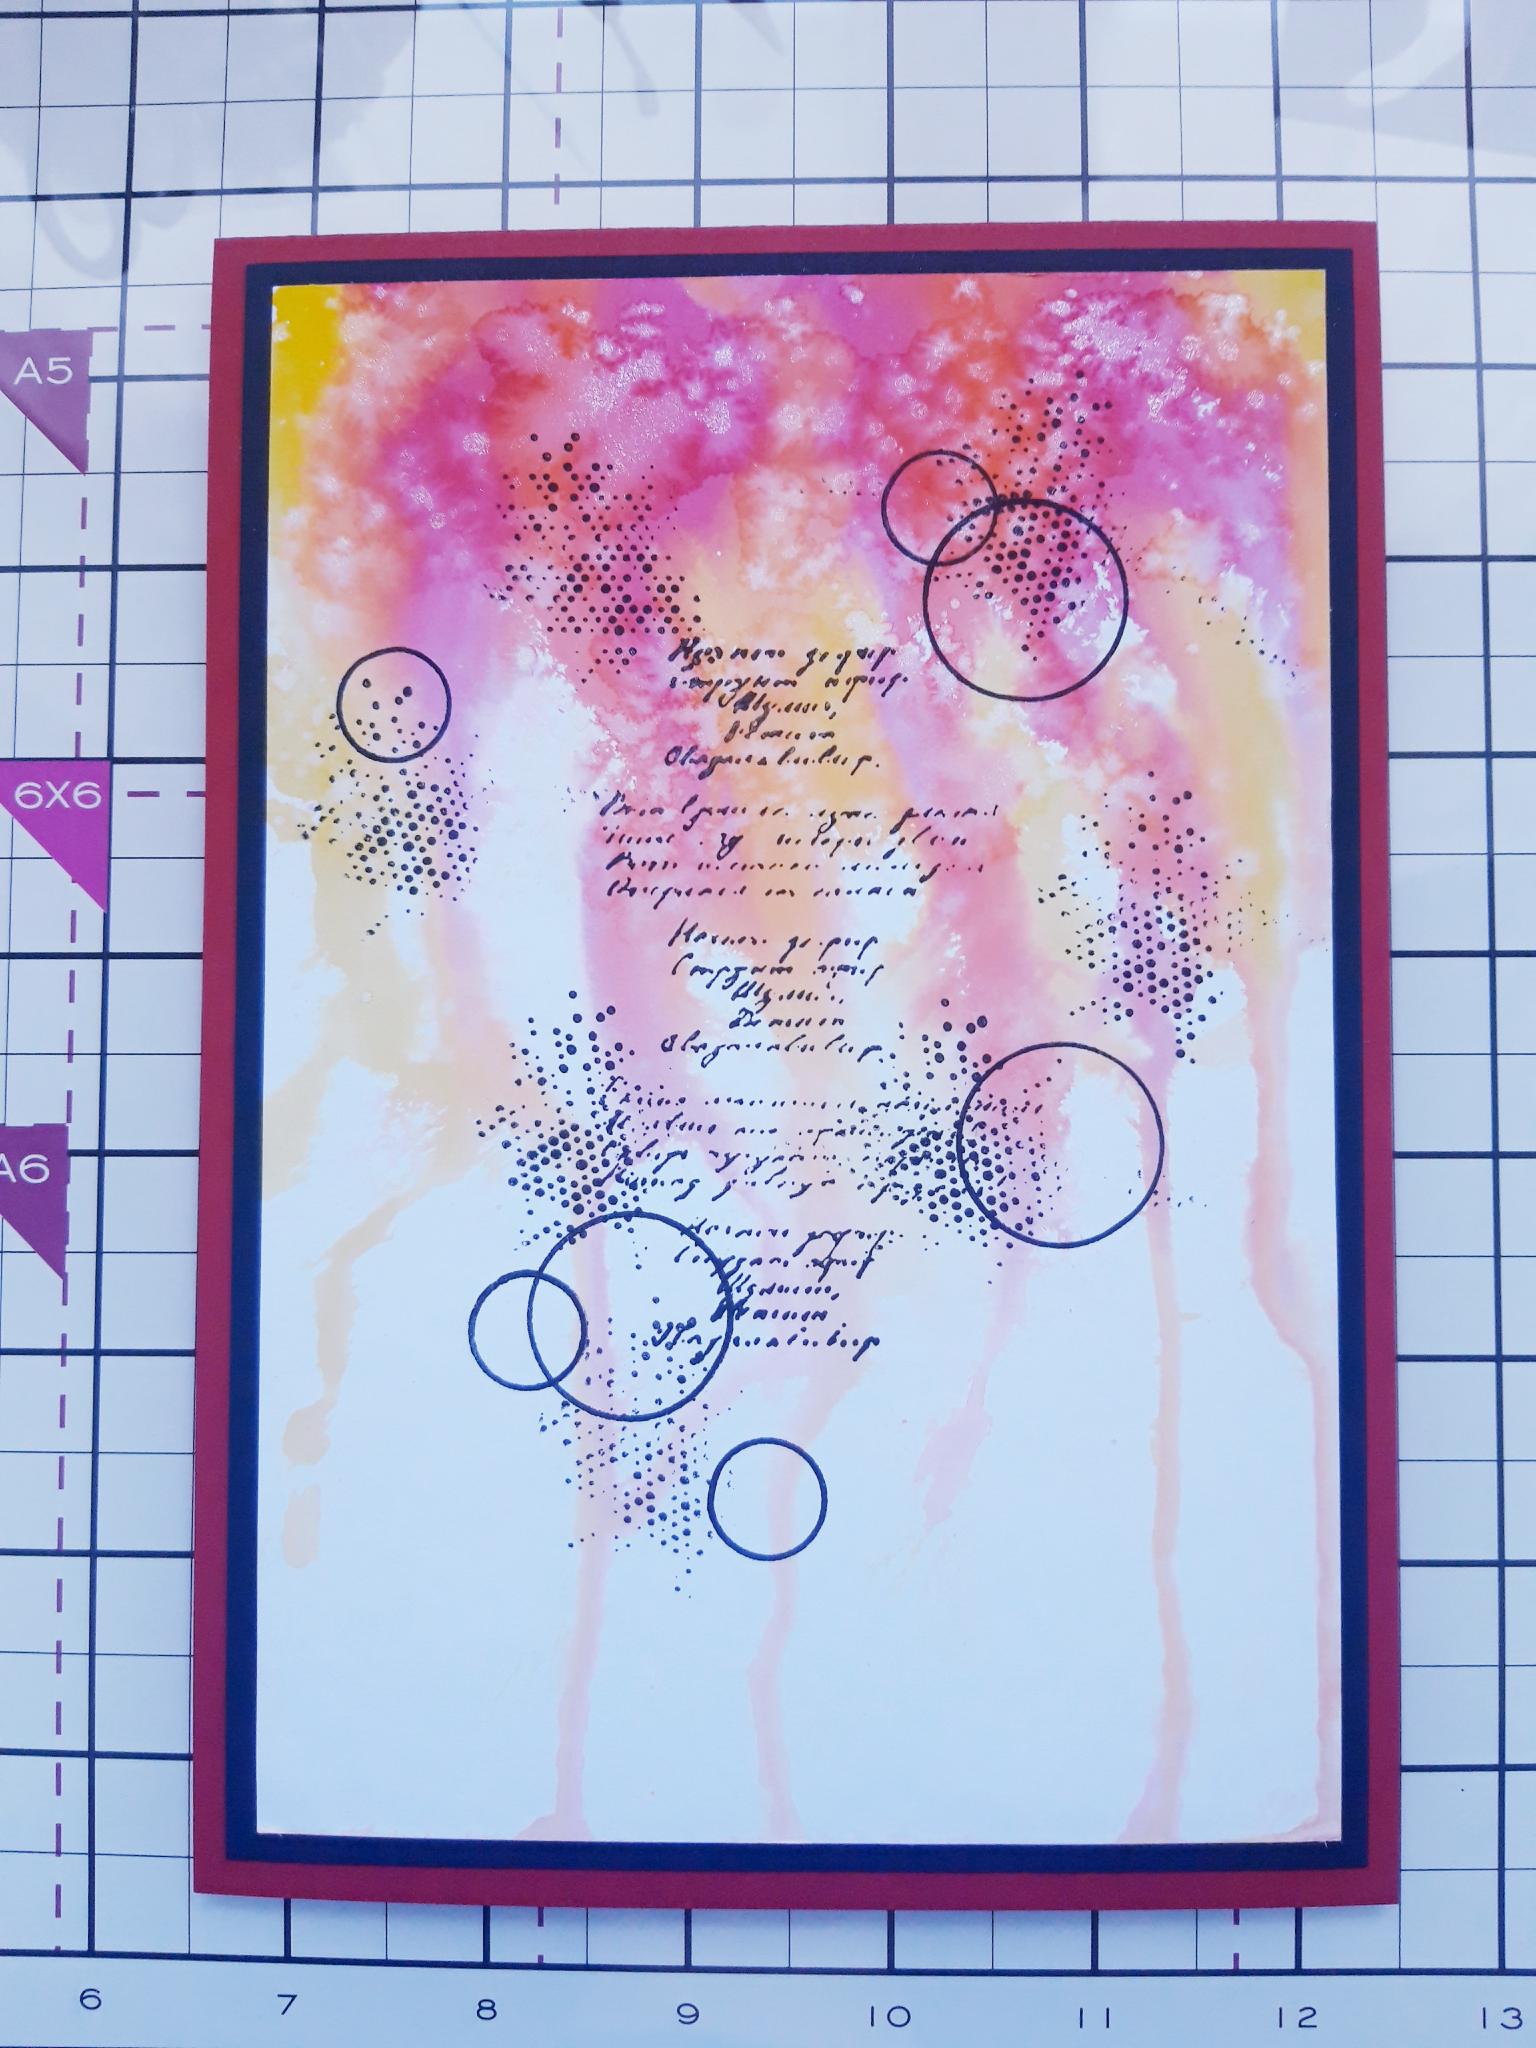
Once your background is completely dry, adhere it to the black card, cut to 8 x 5 1/2". |
|
Adhere this on to the front of your red card blank, then set to one side. |
|
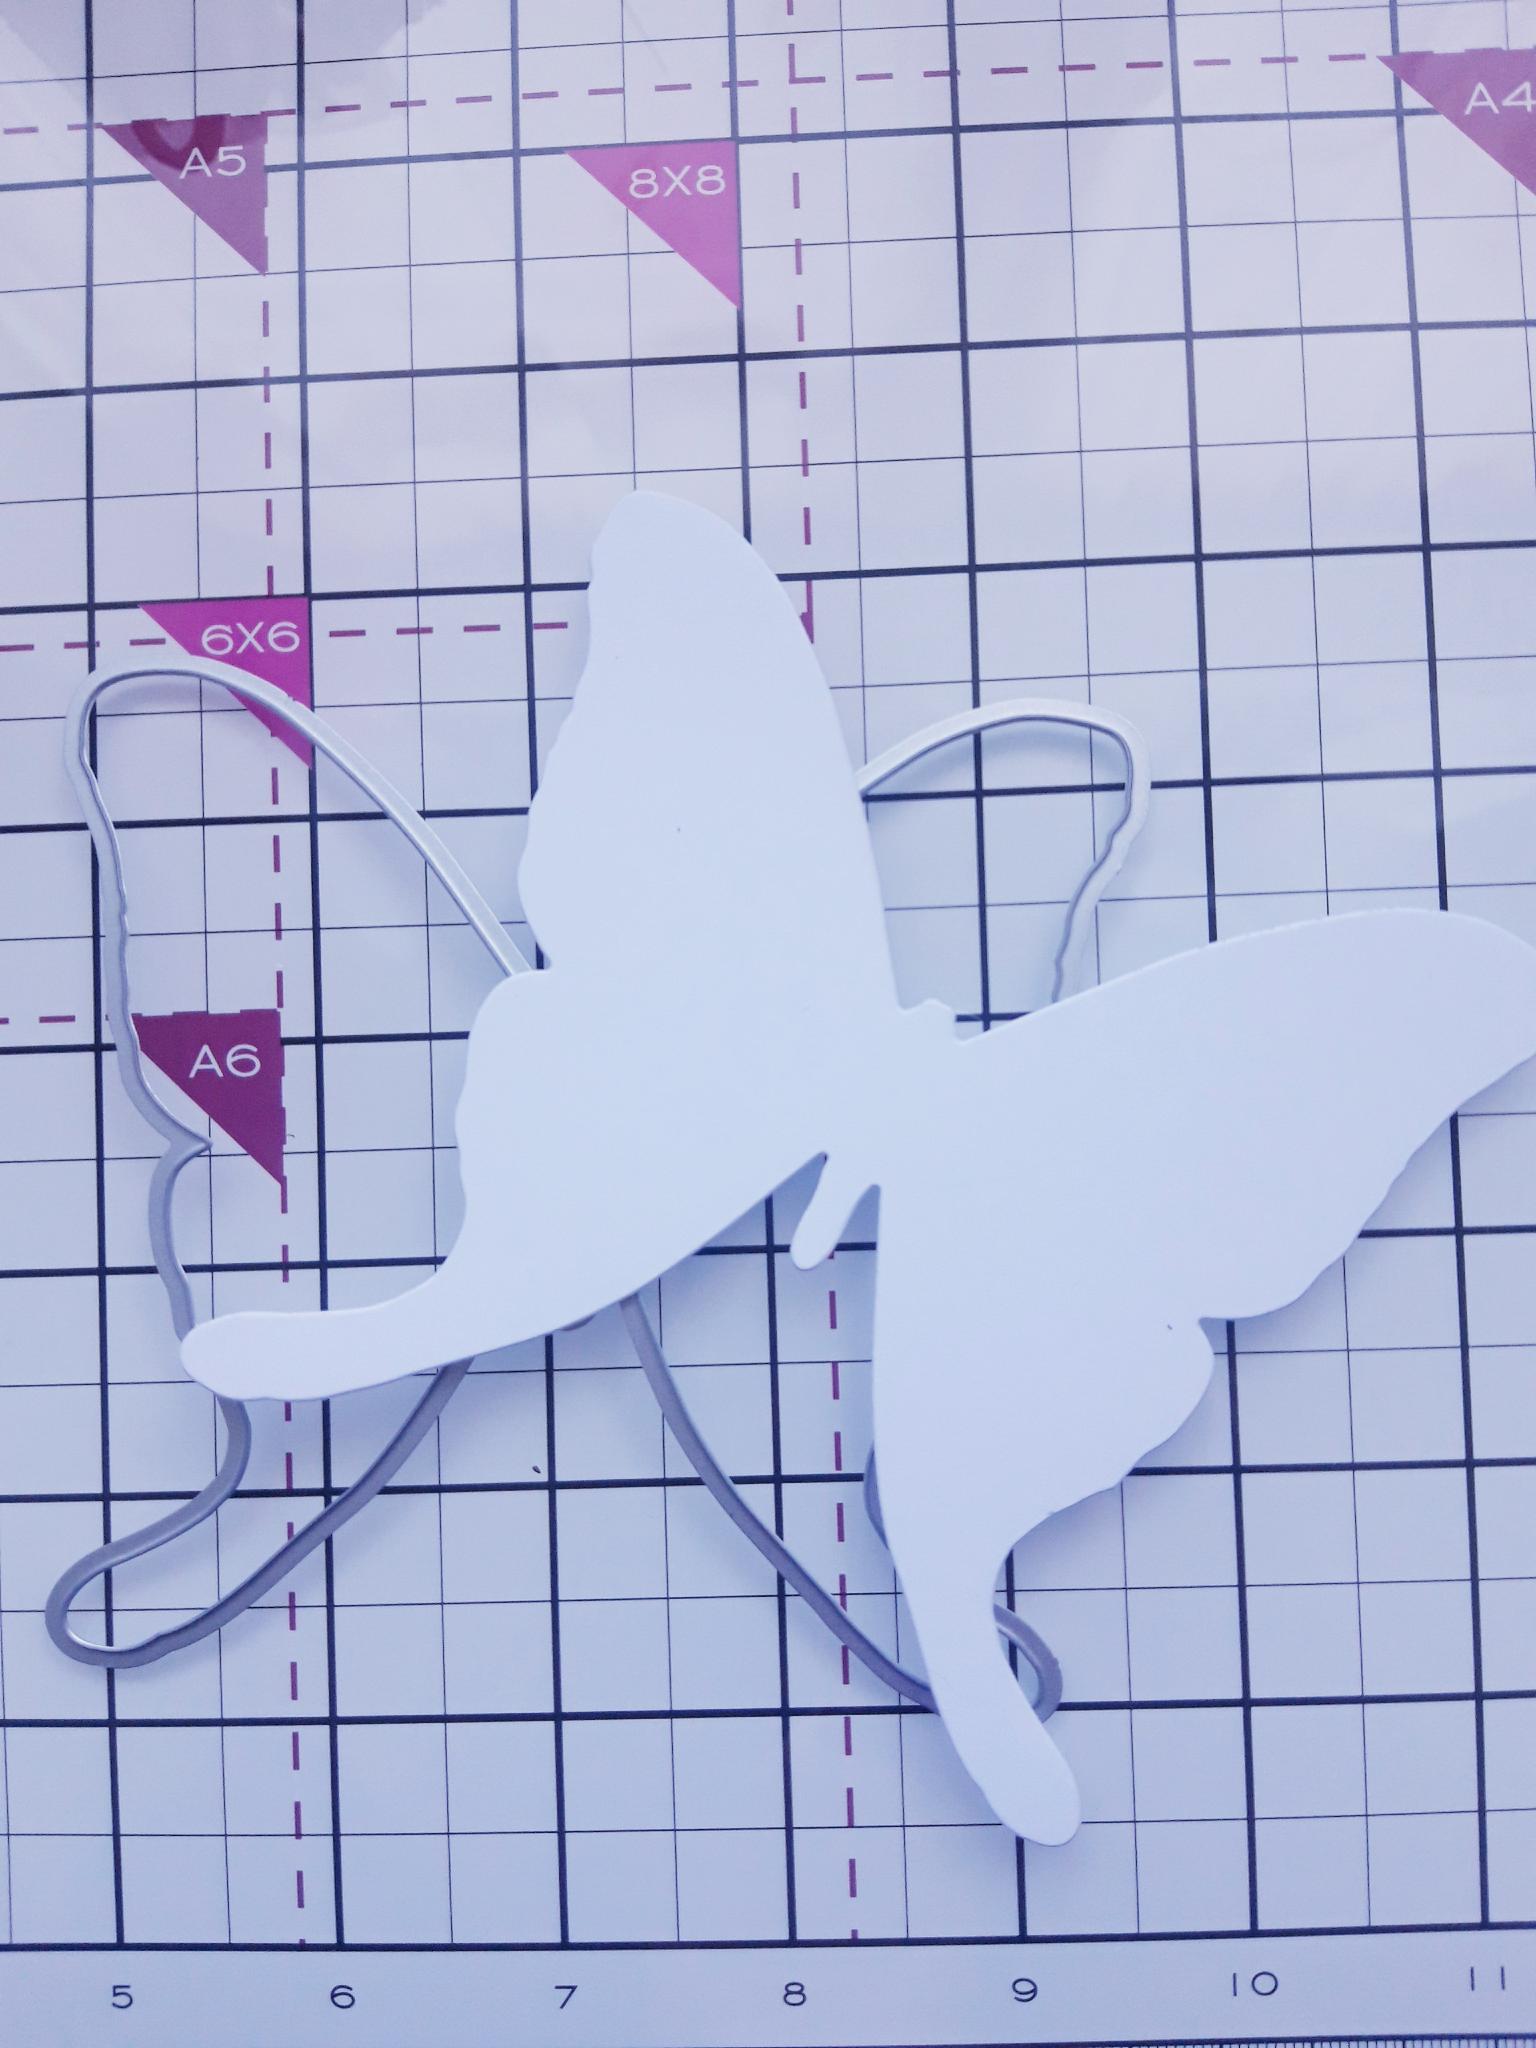
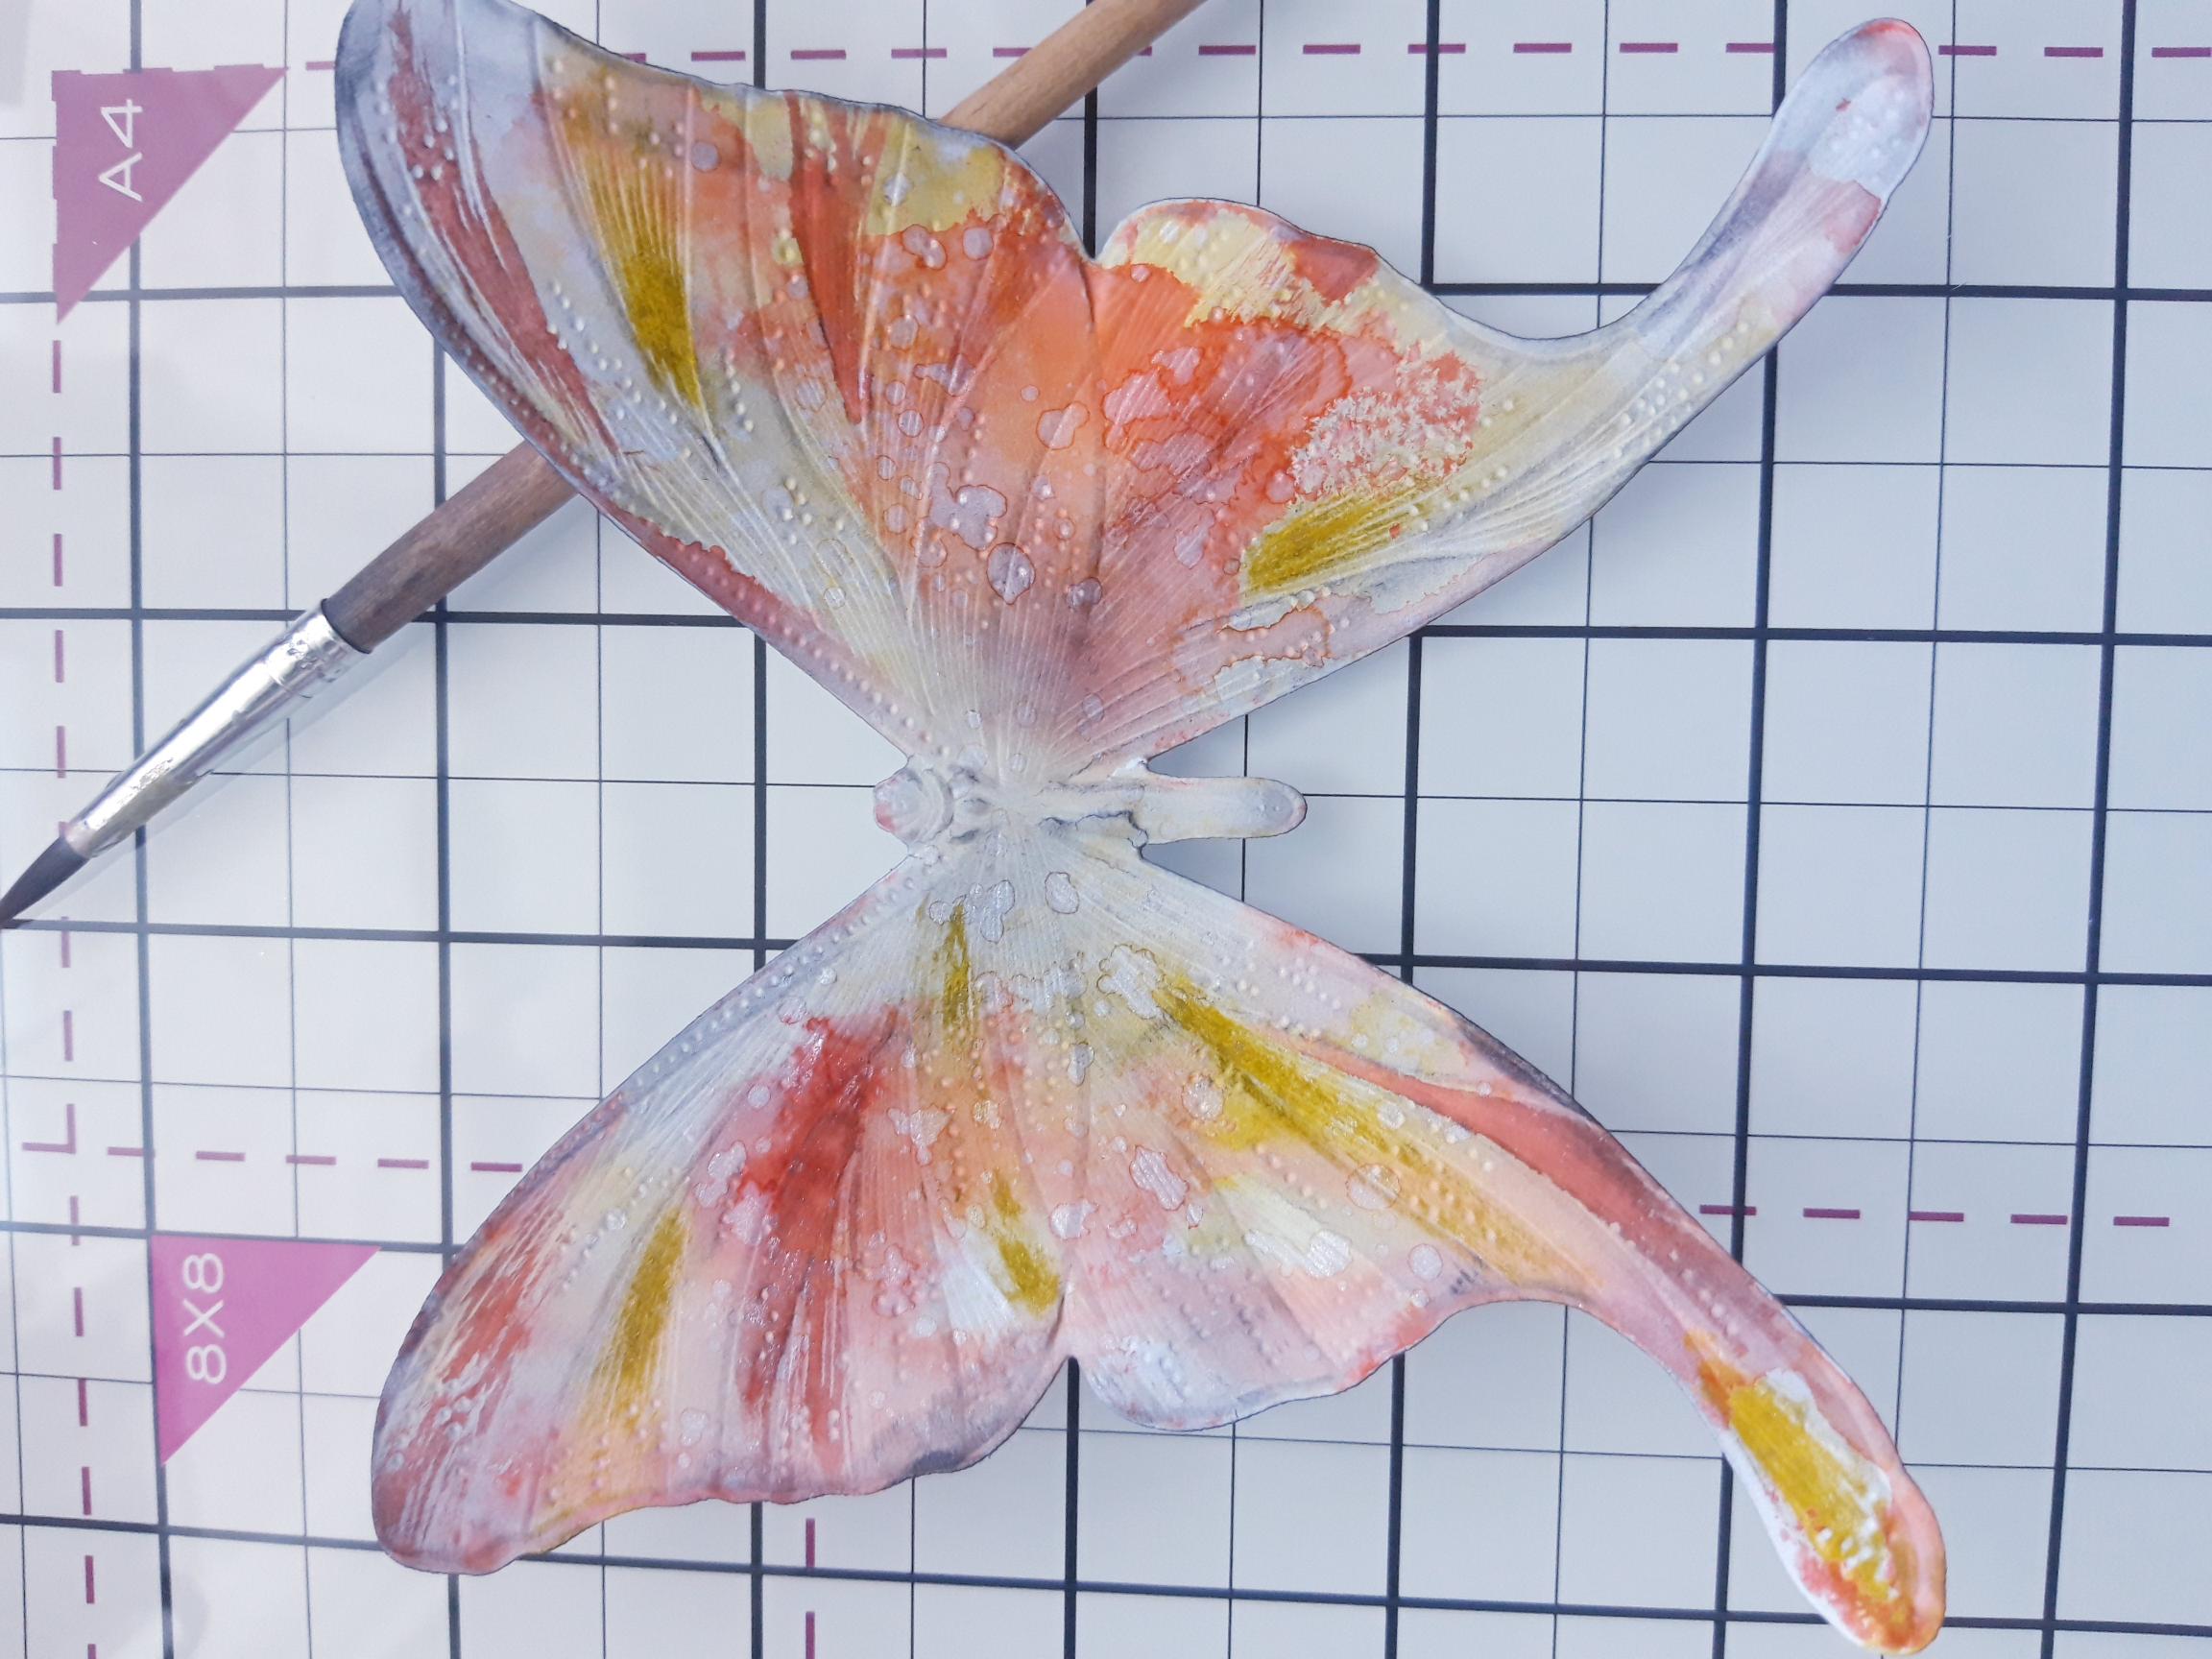
Place the Butterfly die from the HD3D collection, on to the white card cut to 5 1/2" square and run it through your embossing folder. |
|
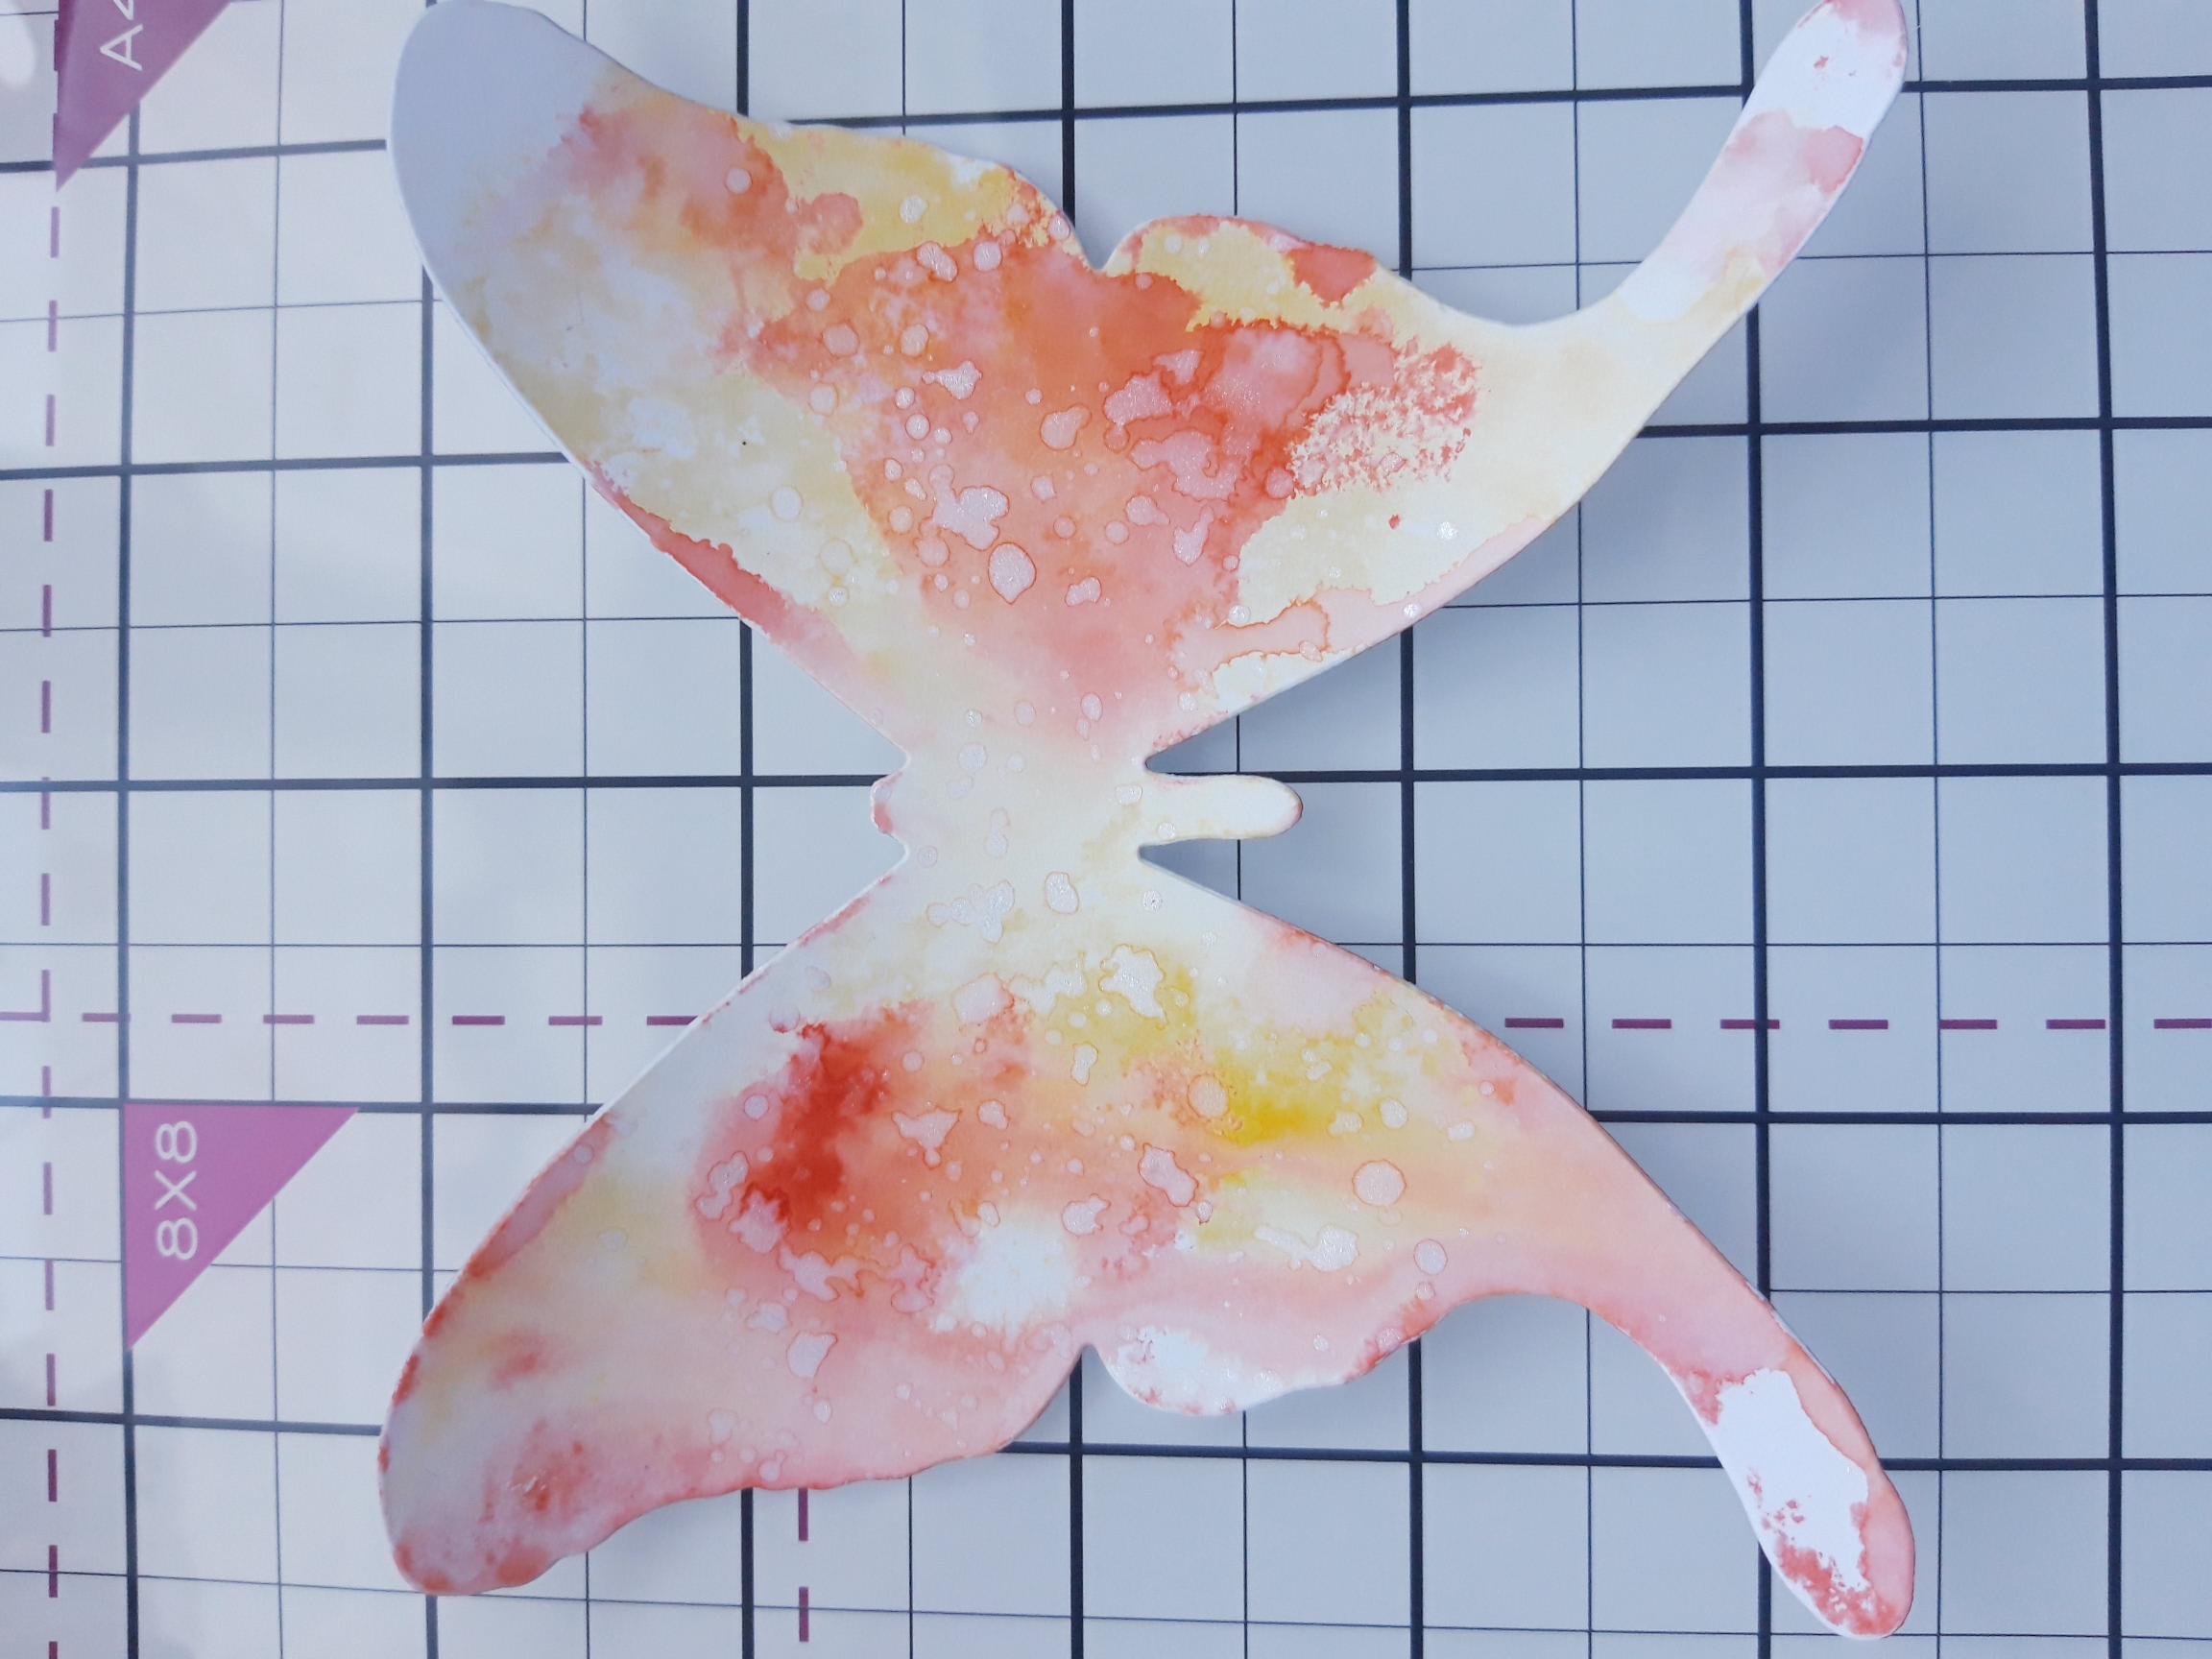
Swipe each of the dye inks on to the glass mat, spritz with water and pick up the inks, one colour at a time, on to the die cut Butterfly. Dry each colour in between, to avoid contaminating and muddying the colours. Repeat as many times as you want, to achieve the desired effect. You can also splatter water on to the ink, wait a few seconds then lift off the ink, to give a distressed effect. Dry your inked Butterfly thoroughly. |
|
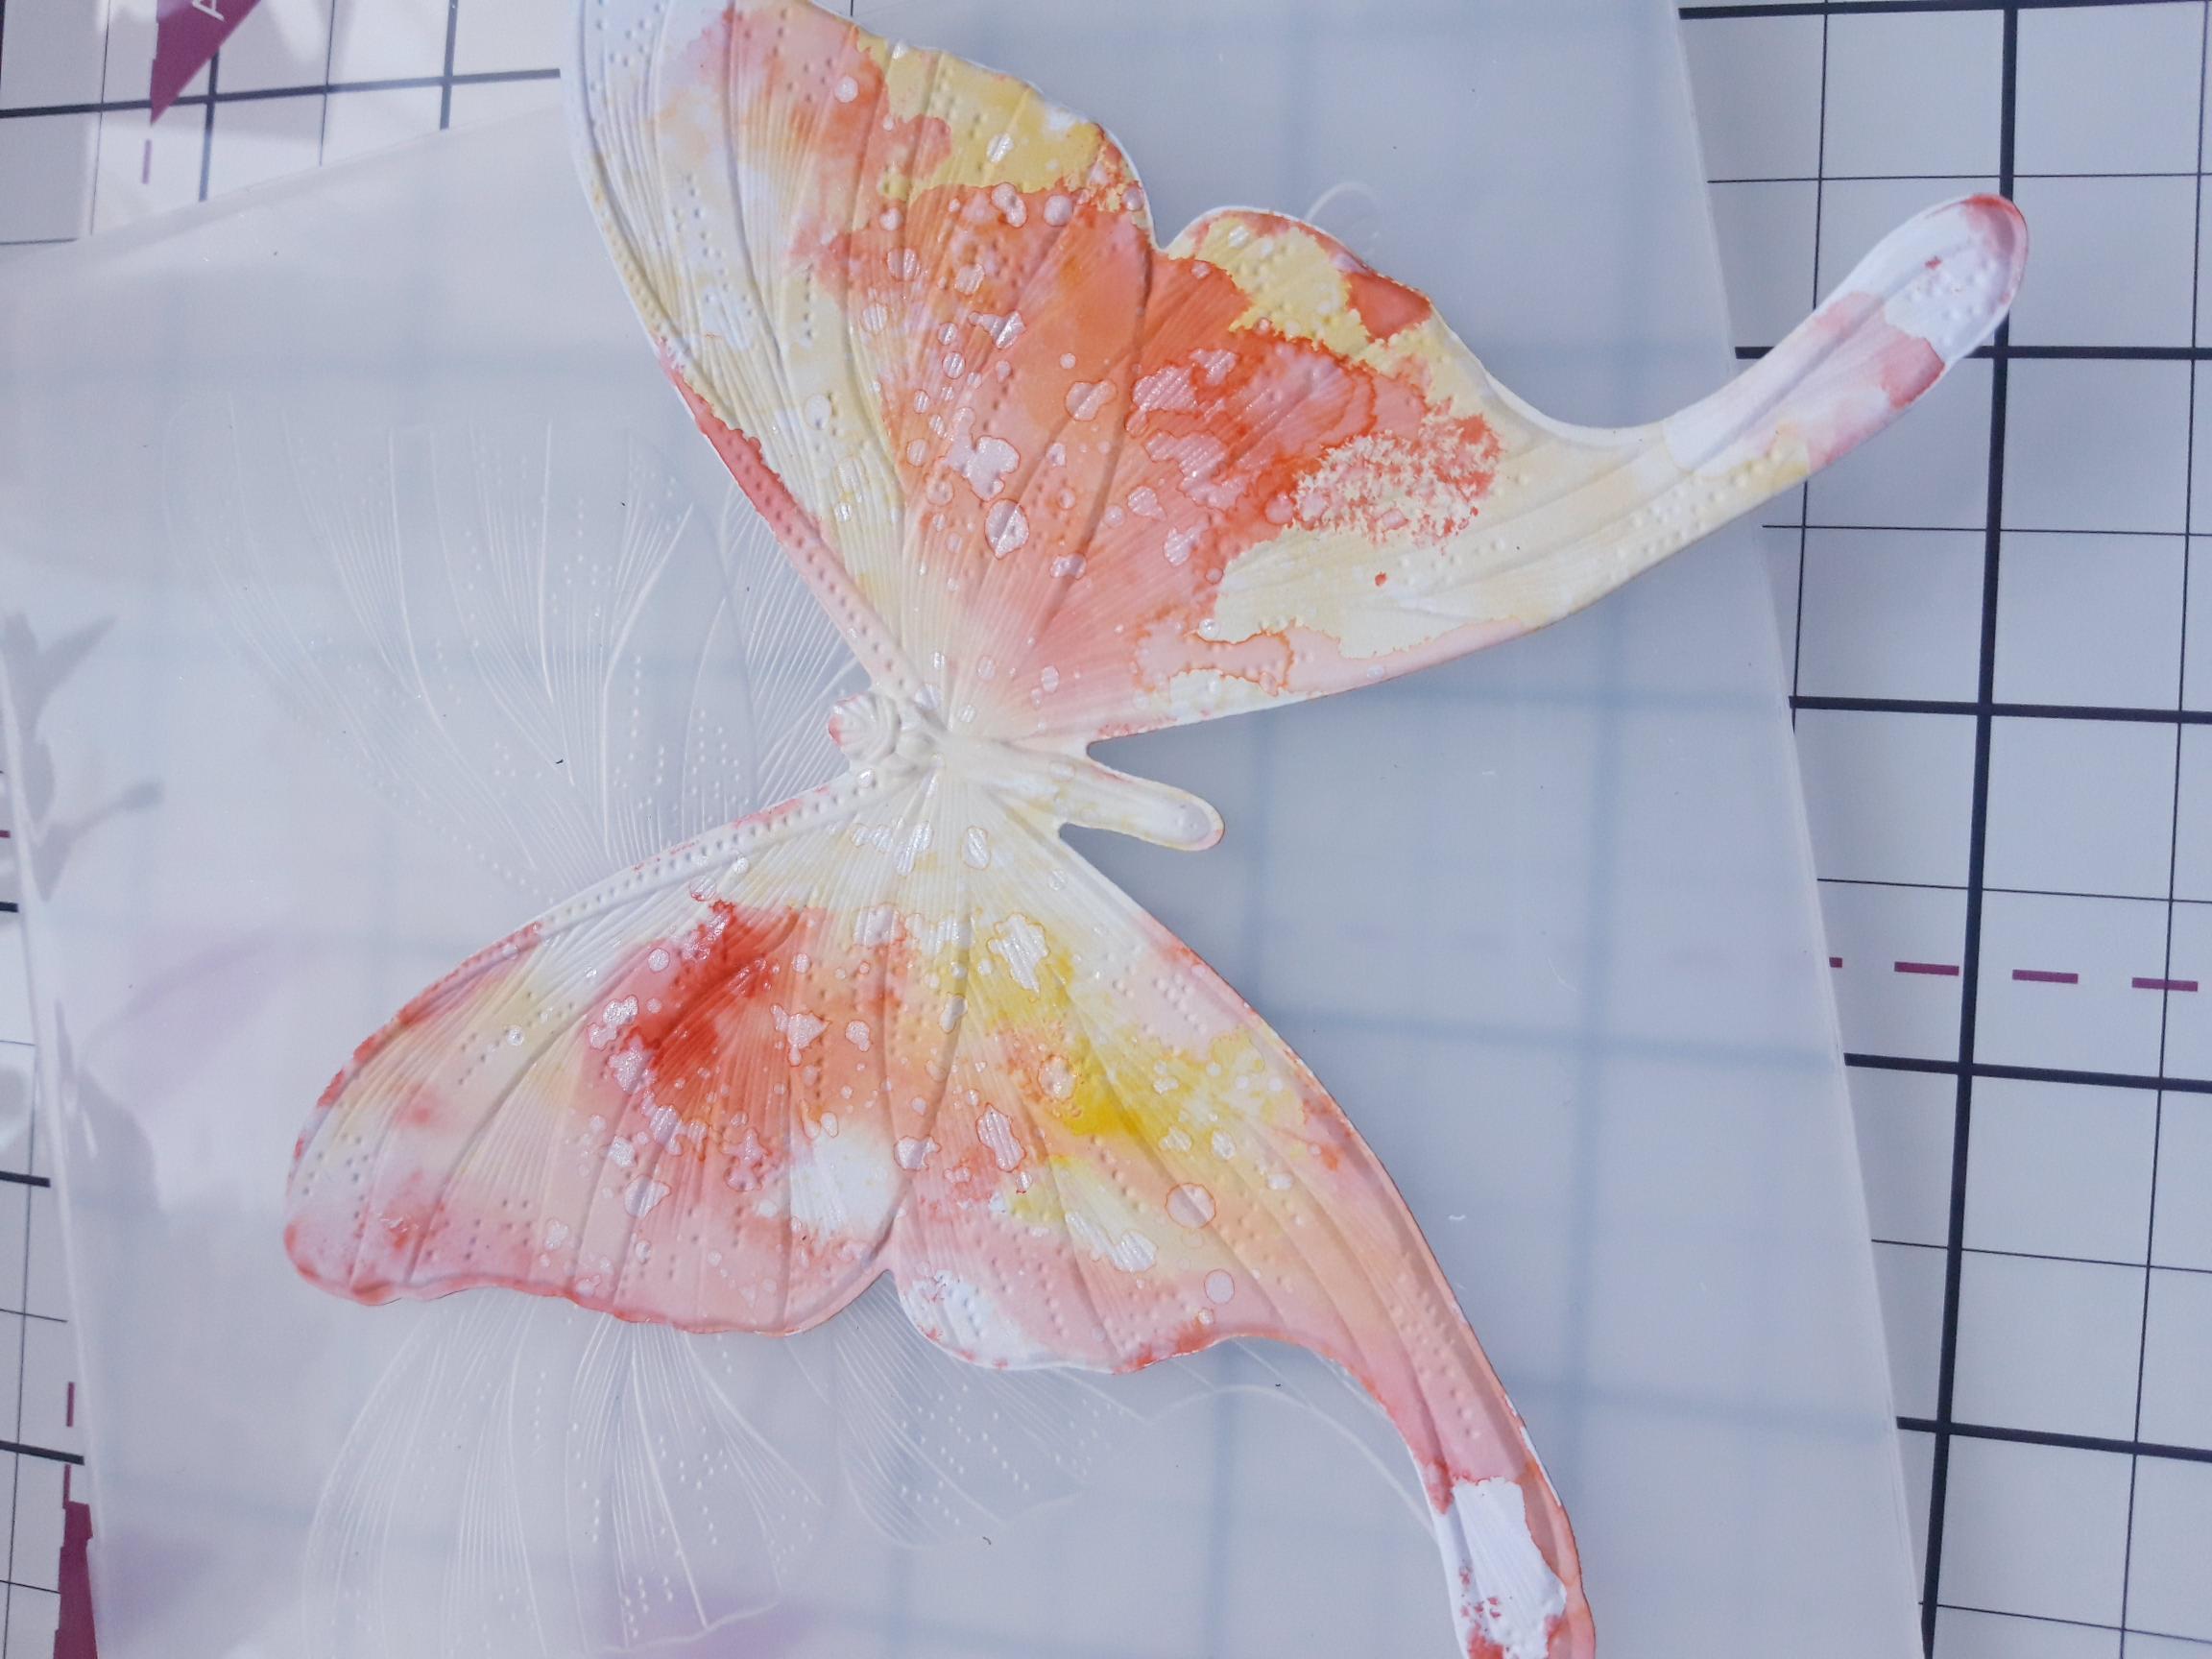
Place the Butterfly inside the HD3D embossing folder, raised image on the bottom and run it through your machine. |
|
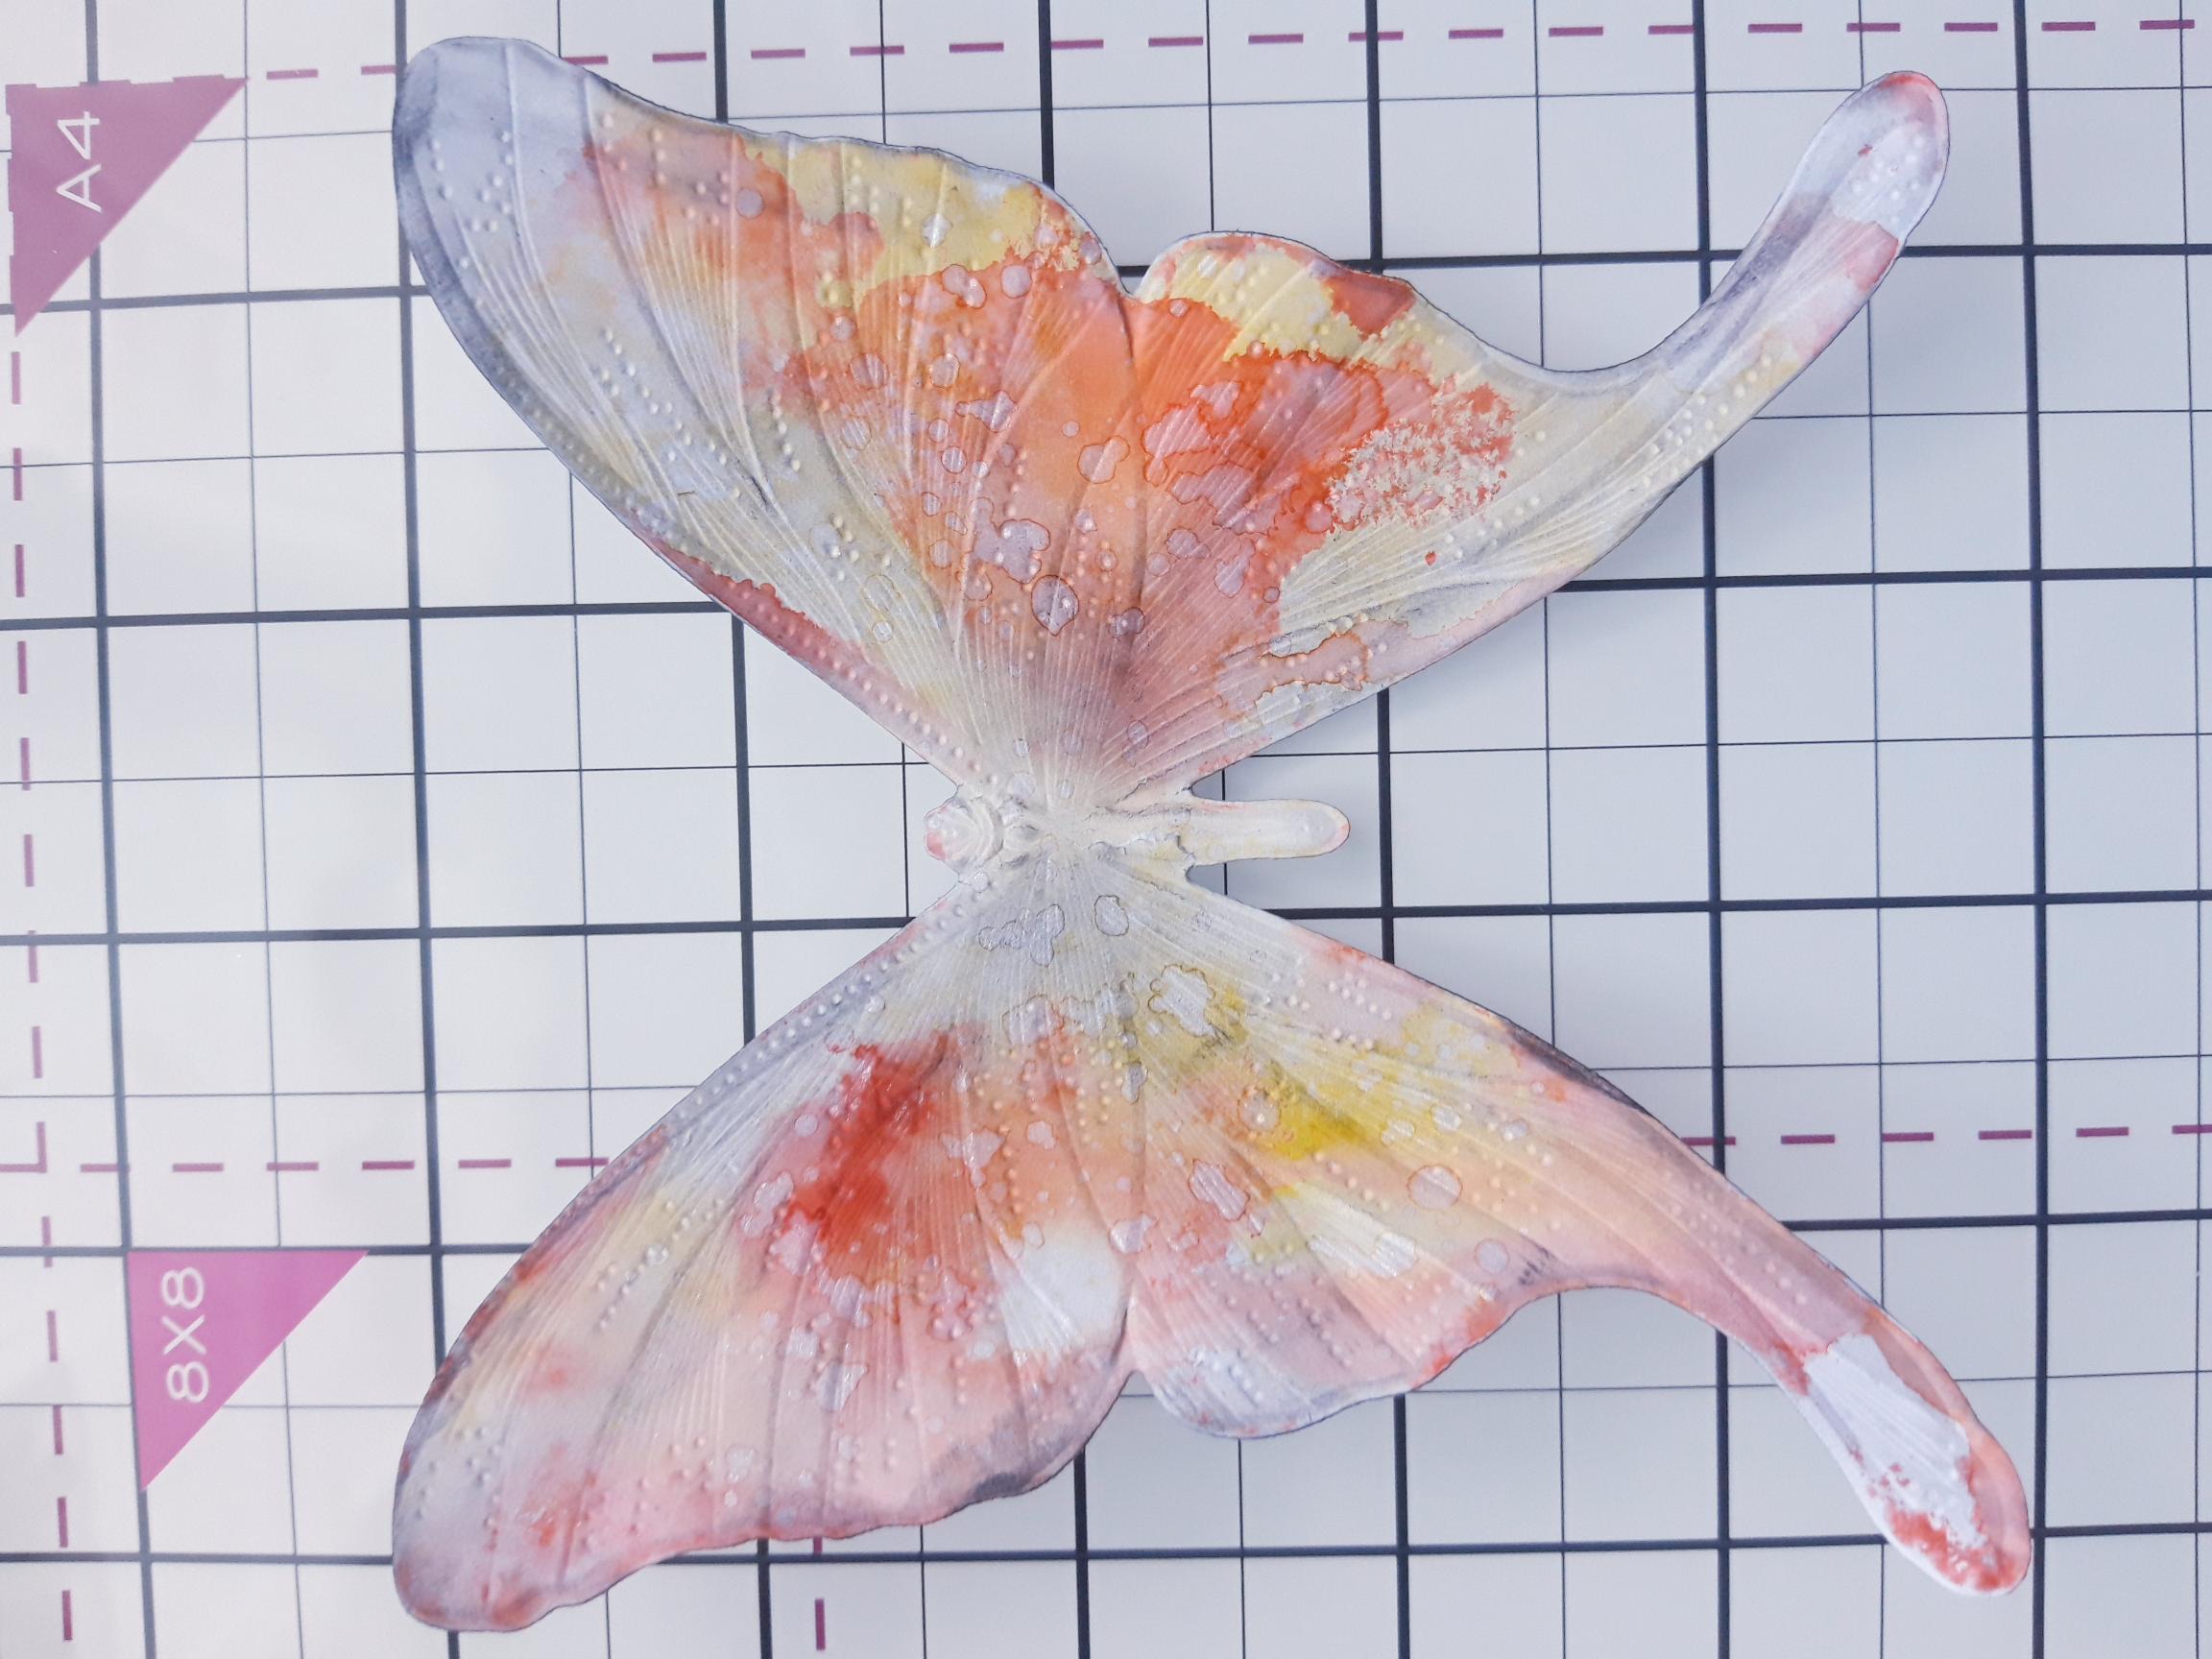
Using a blending tool, blend your Black Soot Distress Ink over and around your embossed Butterfly, as required. You can make the black as subtle or as dramatic as you wish...the choice is yours! |
|
Swipe the Premium inks on to your glass mat, add a little water and use your paint brush to add more depth of colour to areas of your embossed Butterfly. Again, you can be as subtle or as dramatic as you like. |
|
Once dry, mould the wings with your fingers, before adhering your Butterfly on to your background. |
|
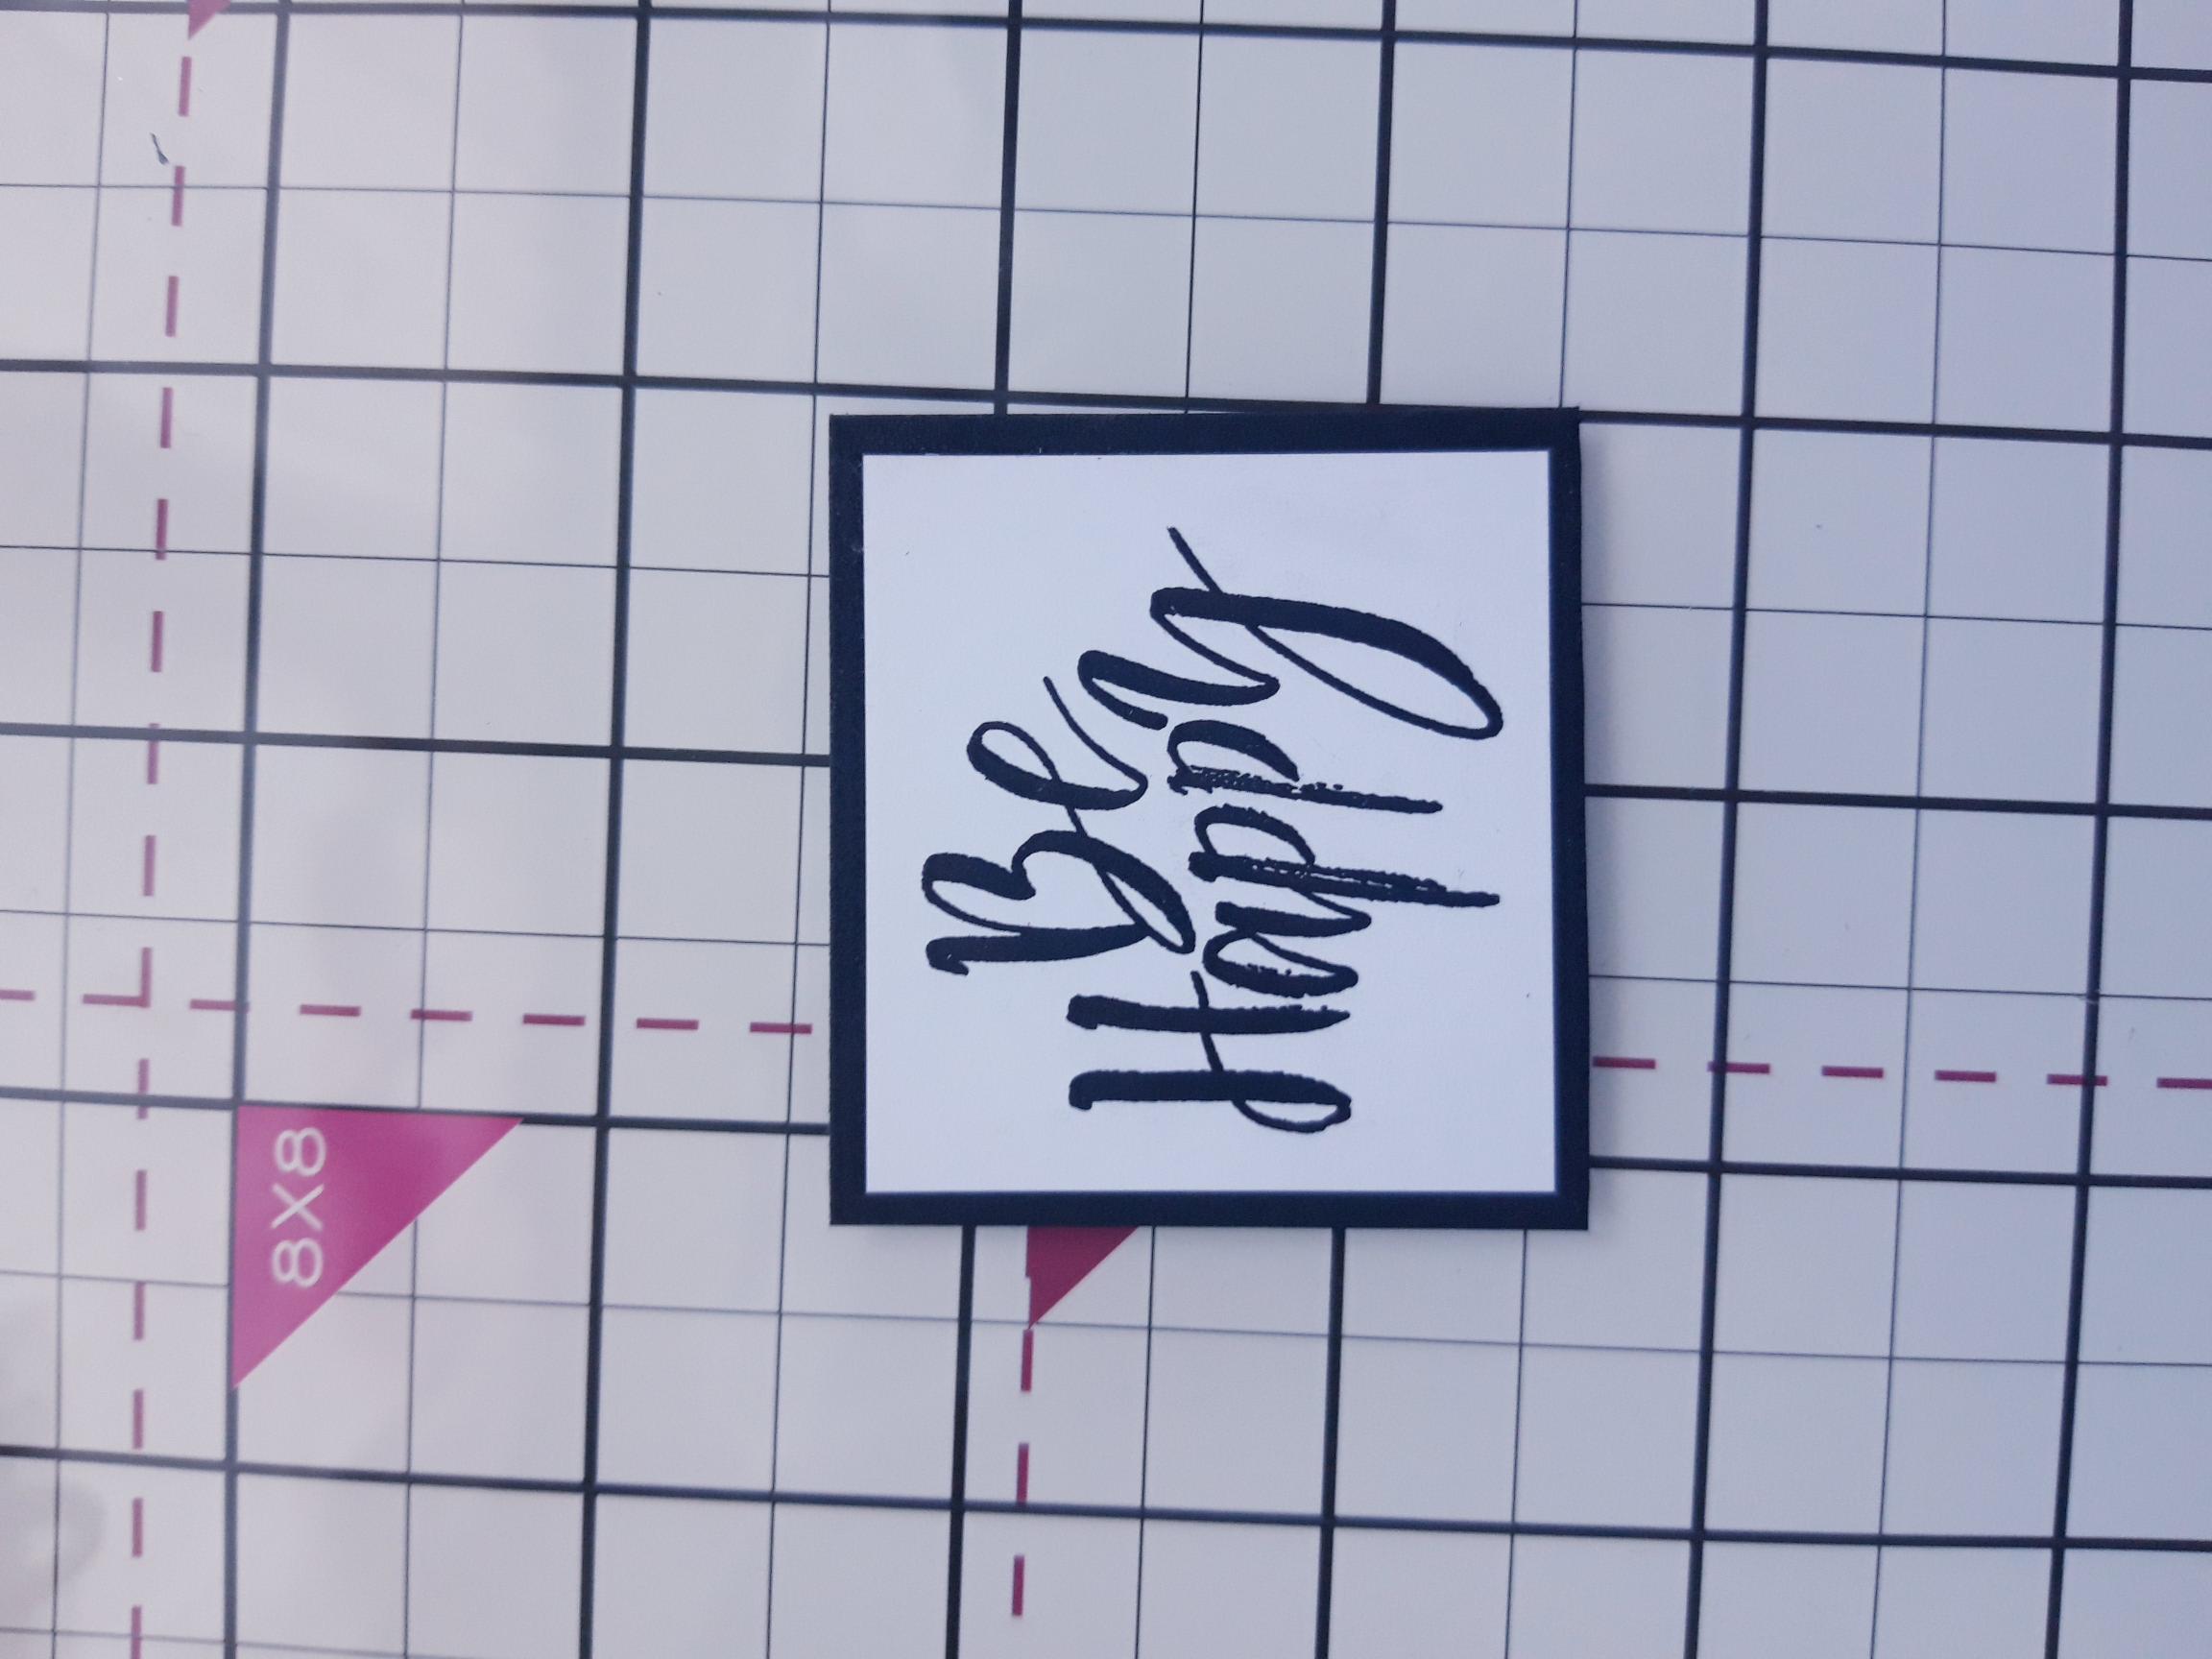
Ink up the sentiment stamp, from the Be Happy Lamination Stamp Collection, with Midnight and stamp on to white card. Cut around your sentiment and adhere to black card, then cut around that to create your mat and layer. |

|
Adhere to the bottom right of your card, flat with wet glue or with foam pads, for added dimension. |