Give your friends $10 off their first order!
Refer a FRIEND


WHAT YOU WILL NEED:
White DL card blank
A4 white card
Thirsty Brush UnLtd Tulip Hugs Creative Stamps
Thirsty Brush UnLtd Garden Rocks Stamp Collection
Thirsty Brush UnLtd Creative Paper Collection
Memento Ink Pad: Tuxedo Black
Gossip alcohol pens
White gel pen
Paint brush
Pearlywinks Pearl Mist: Golden Shimmer
Sequins: Amethyst
Gem pick up and pokey tool
Eureka 101
Foam pads
Perfect Together Glue
[click image to enlarge] 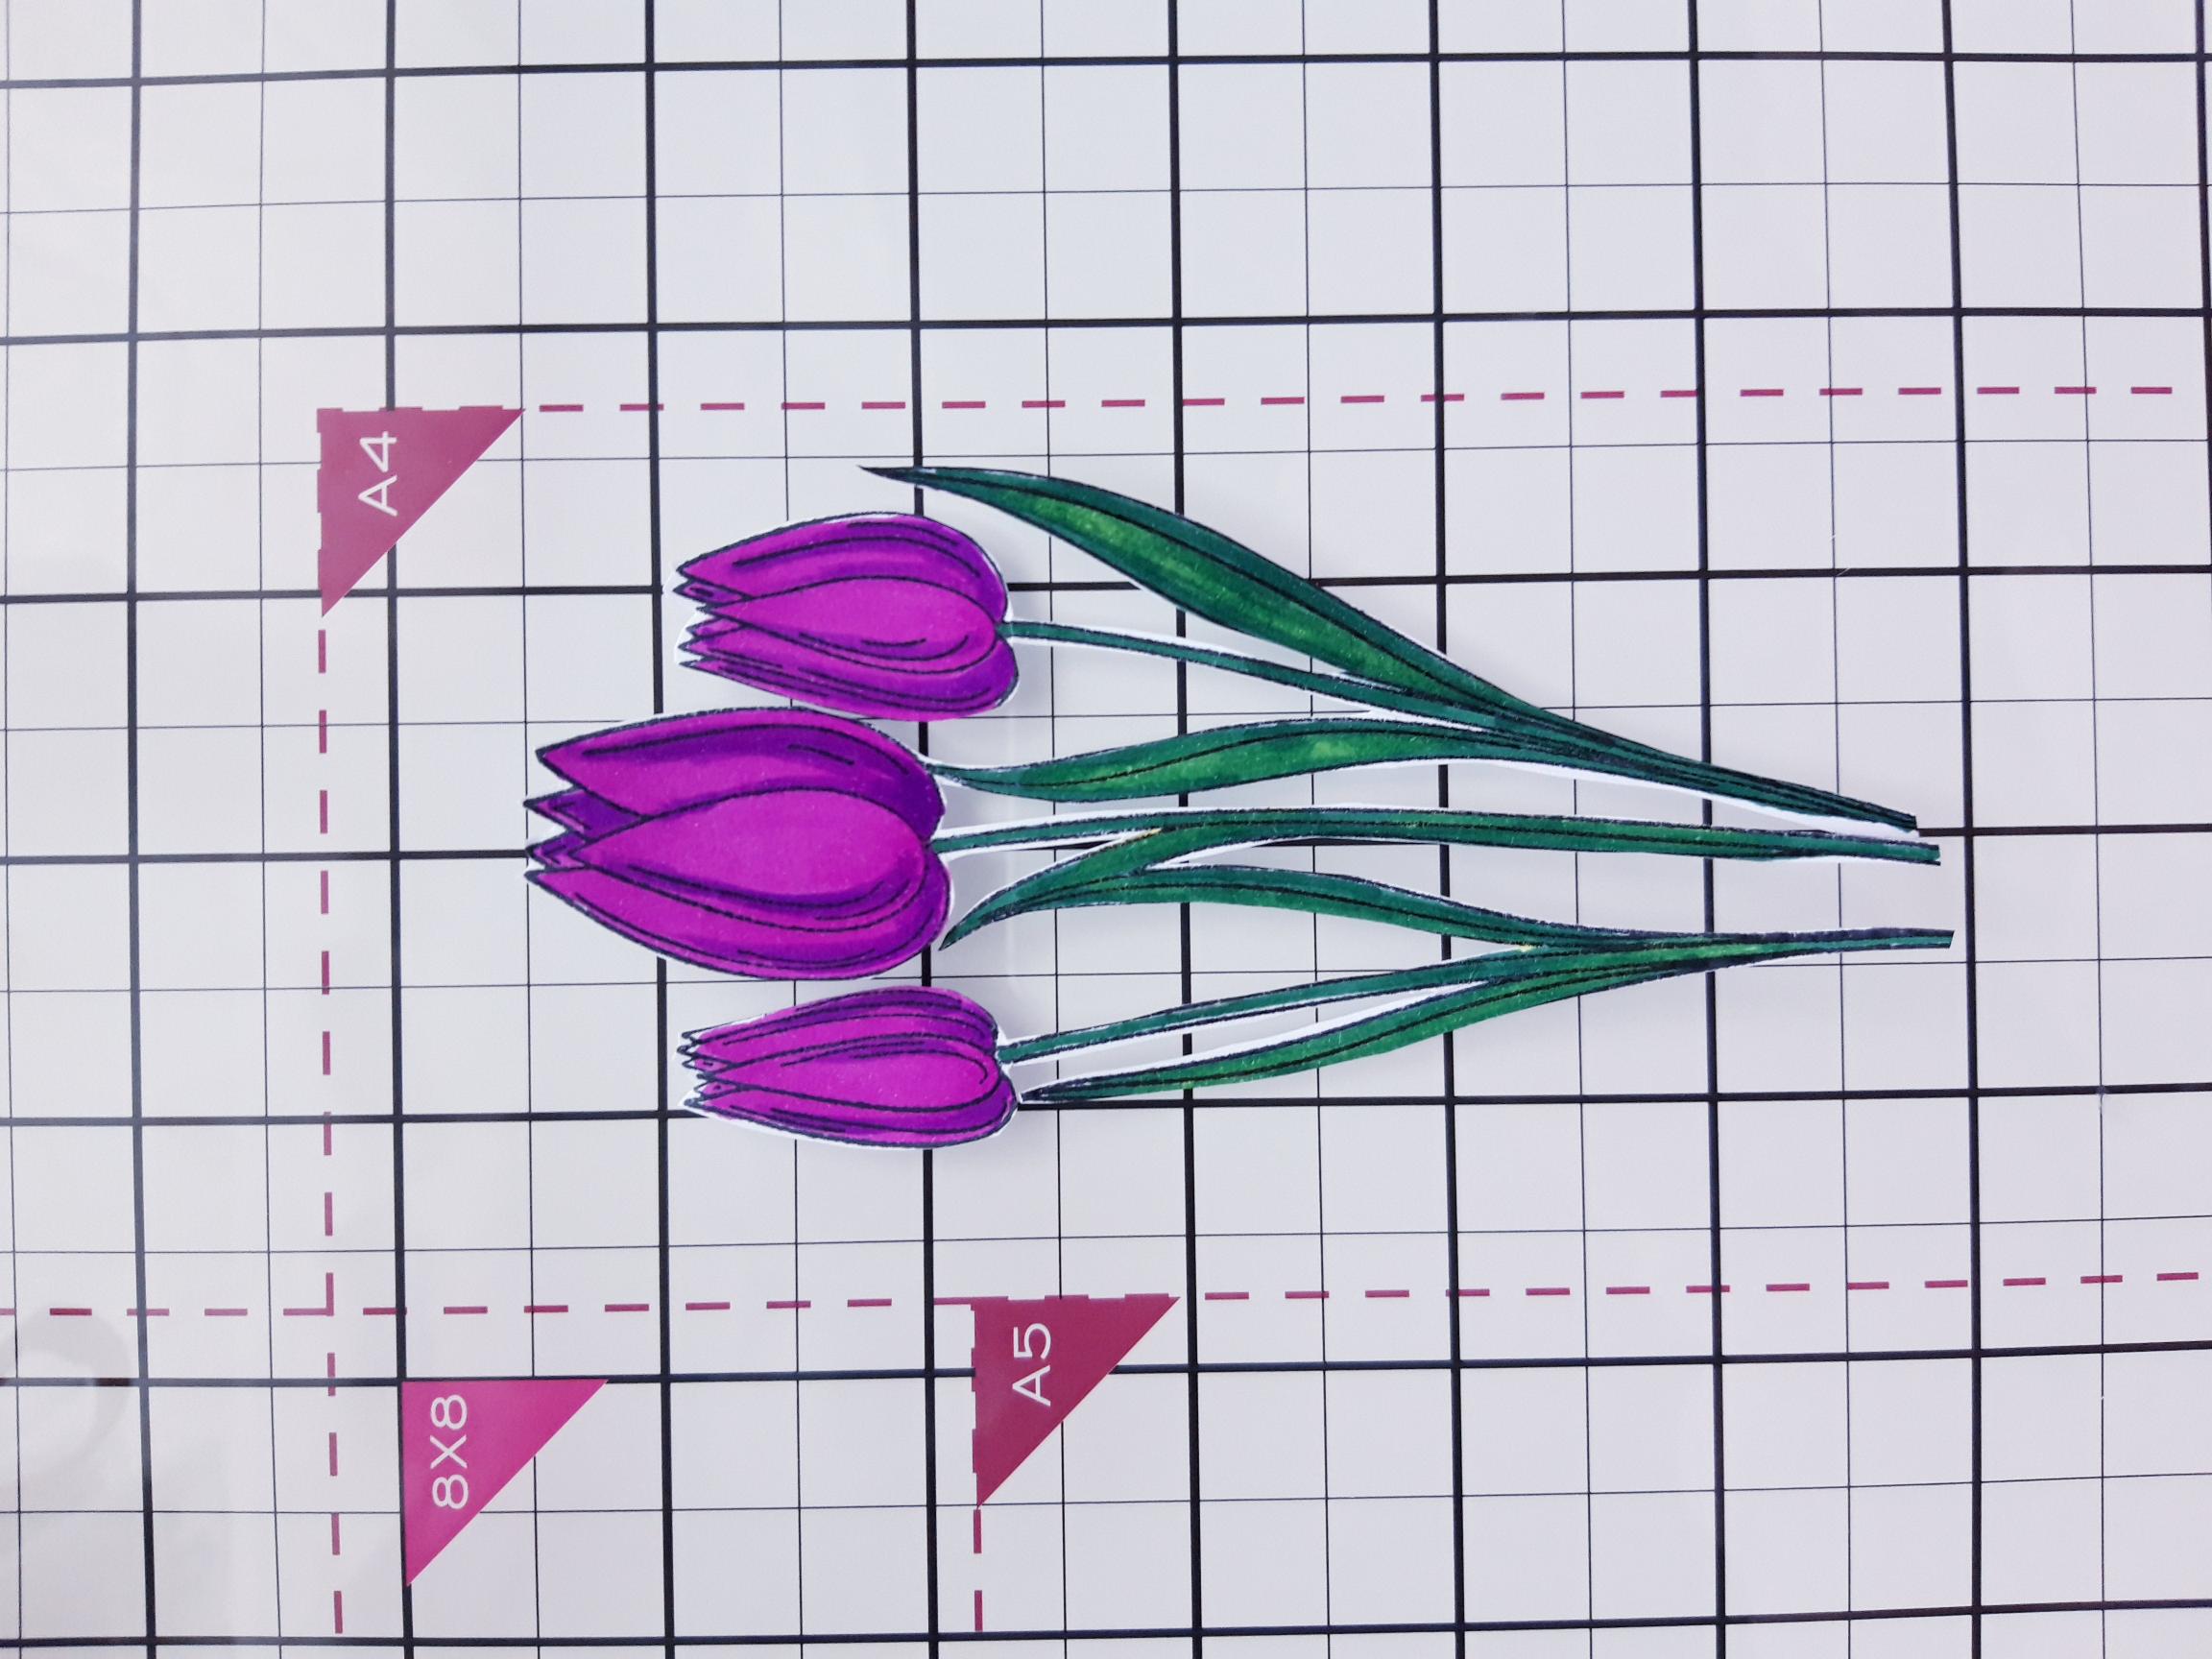
|
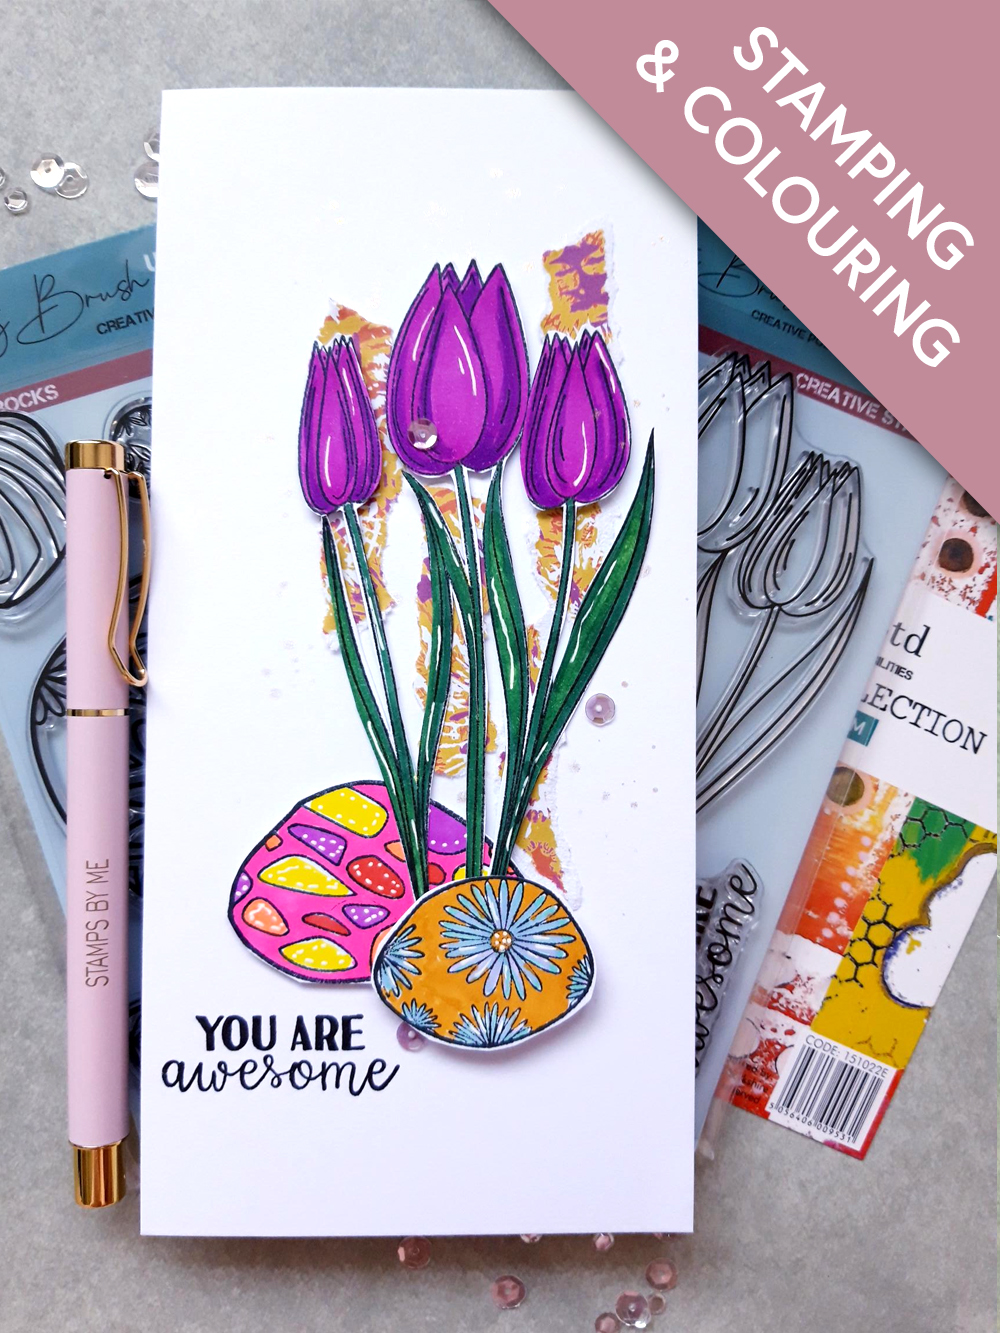
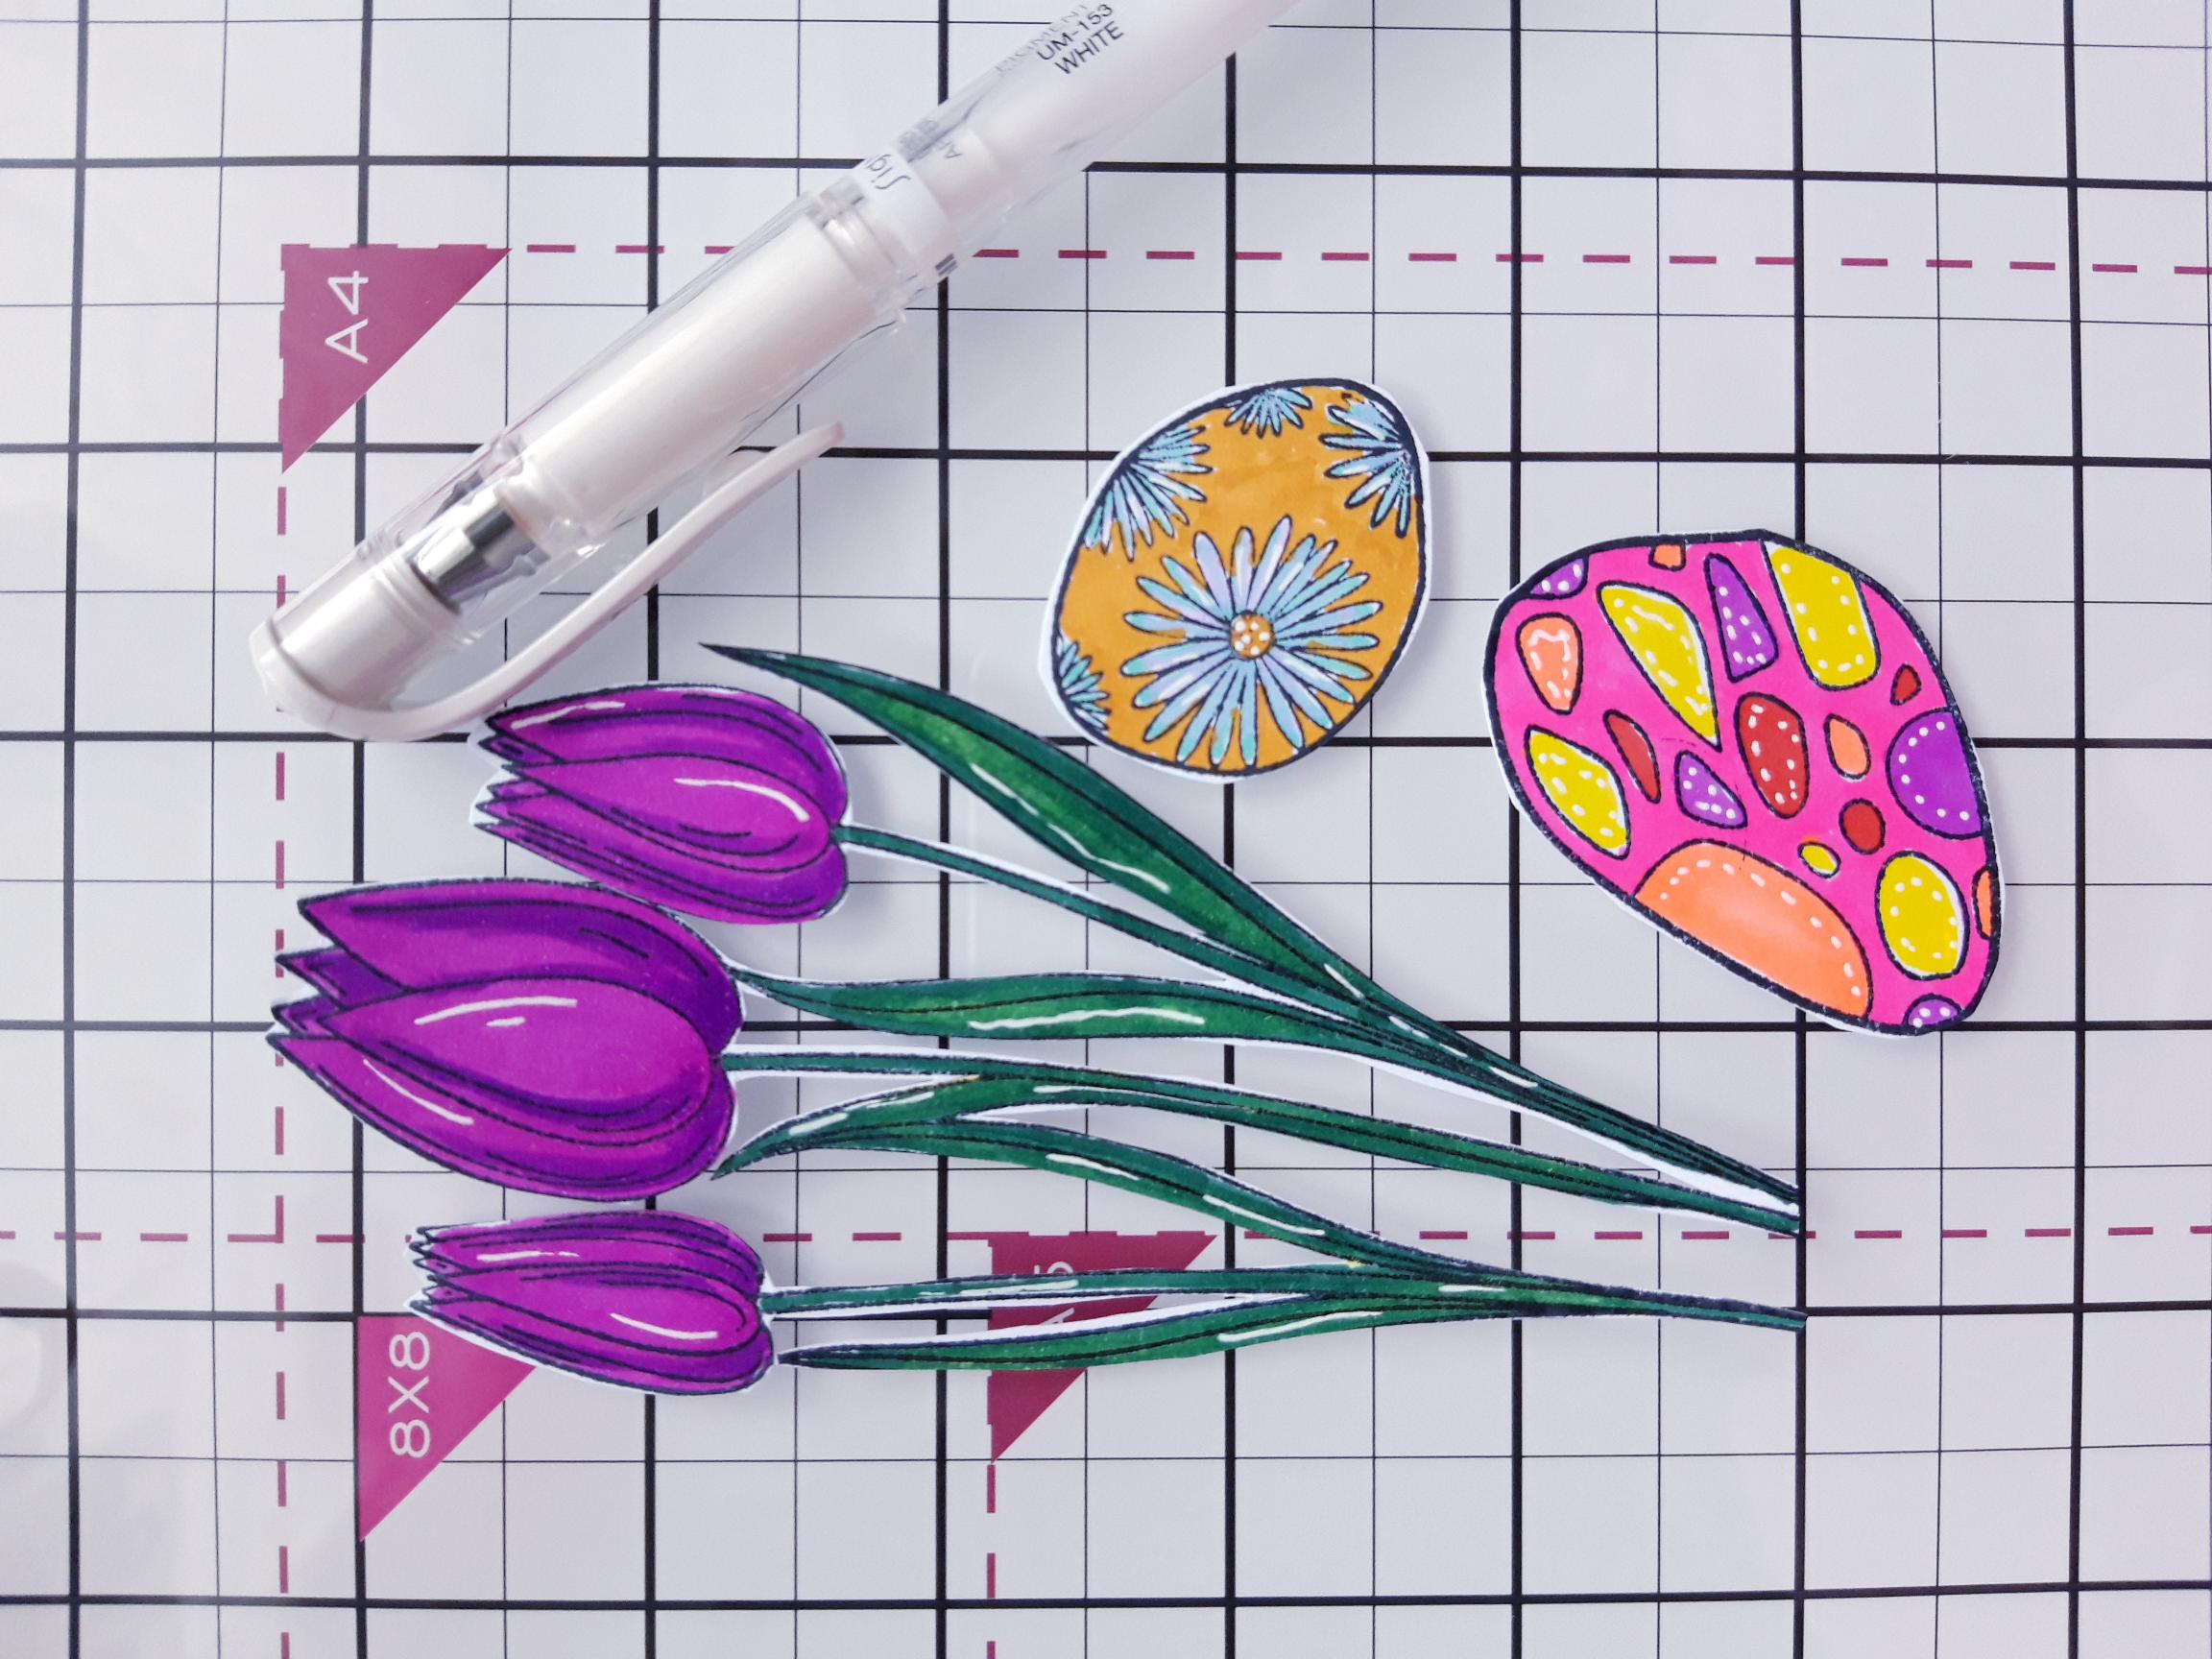
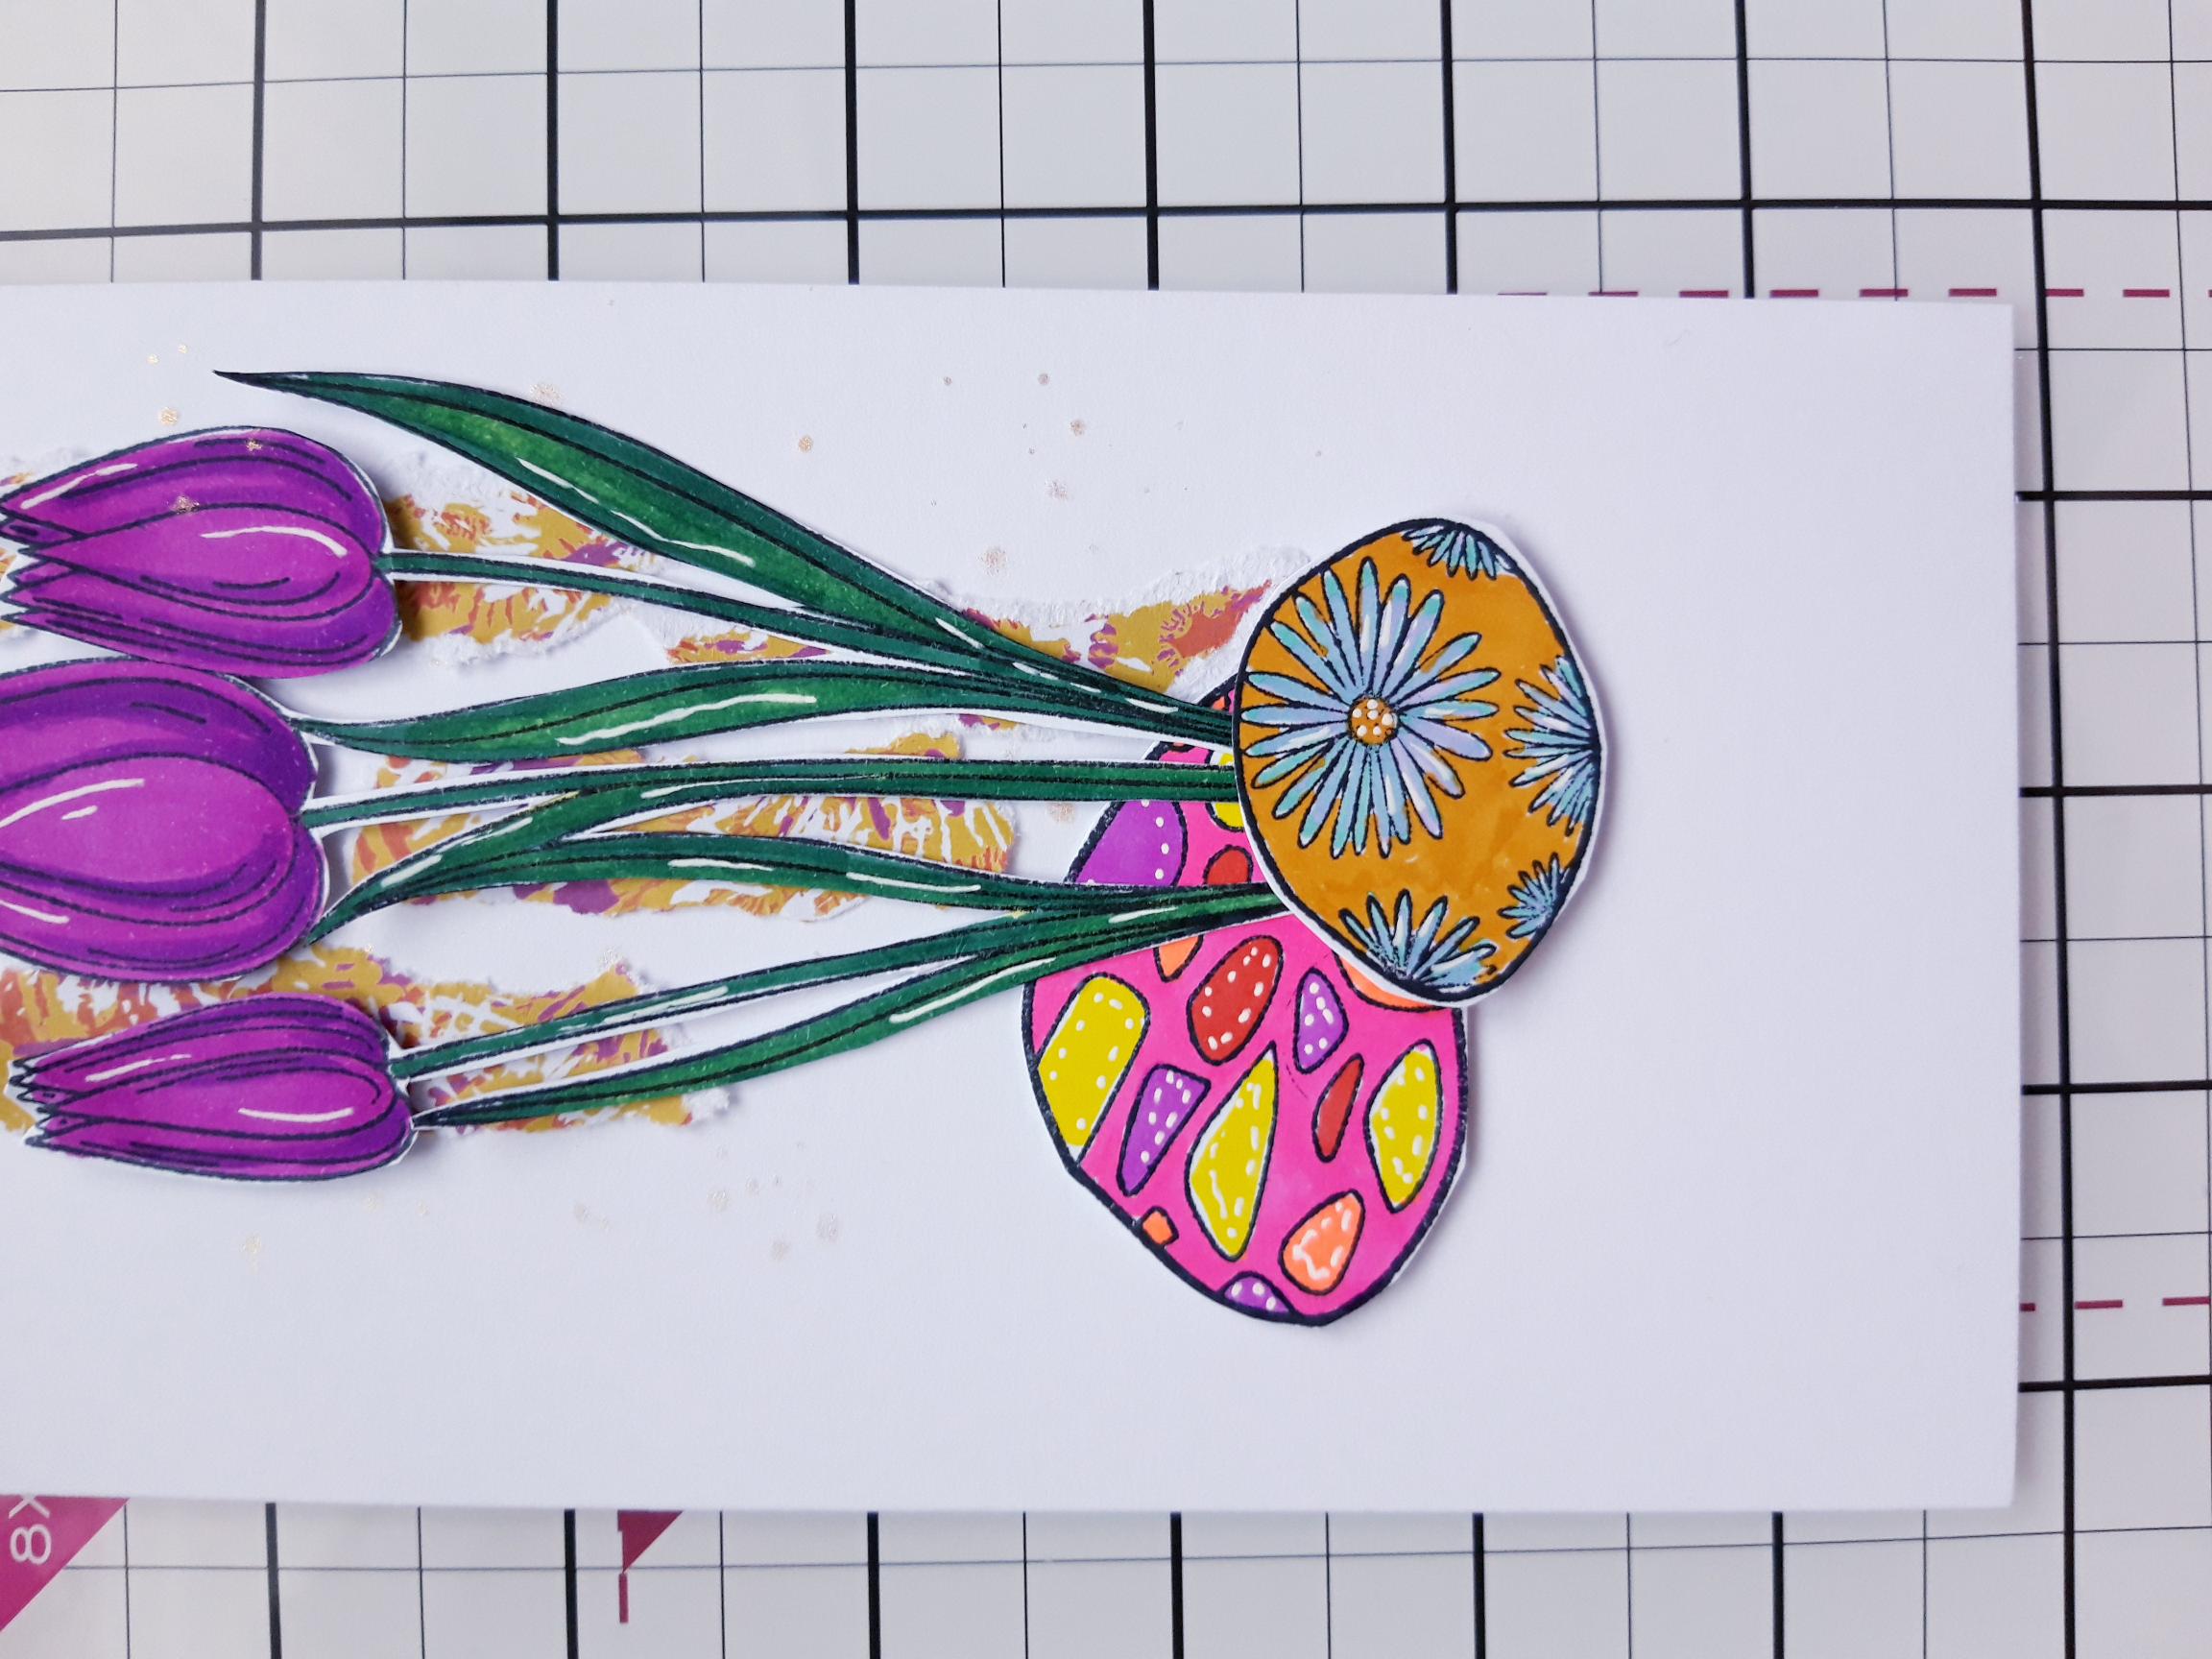
Ink up the Tulip Hugs stamp with the Tuxedo Black Memento and stamp on to the white card. Cut them out, then colour in with your Gossip alcohol pens. NB: Alcohol pens bleed through card, so place a sheet of copy paper underneath, to protect your work surface. |
|
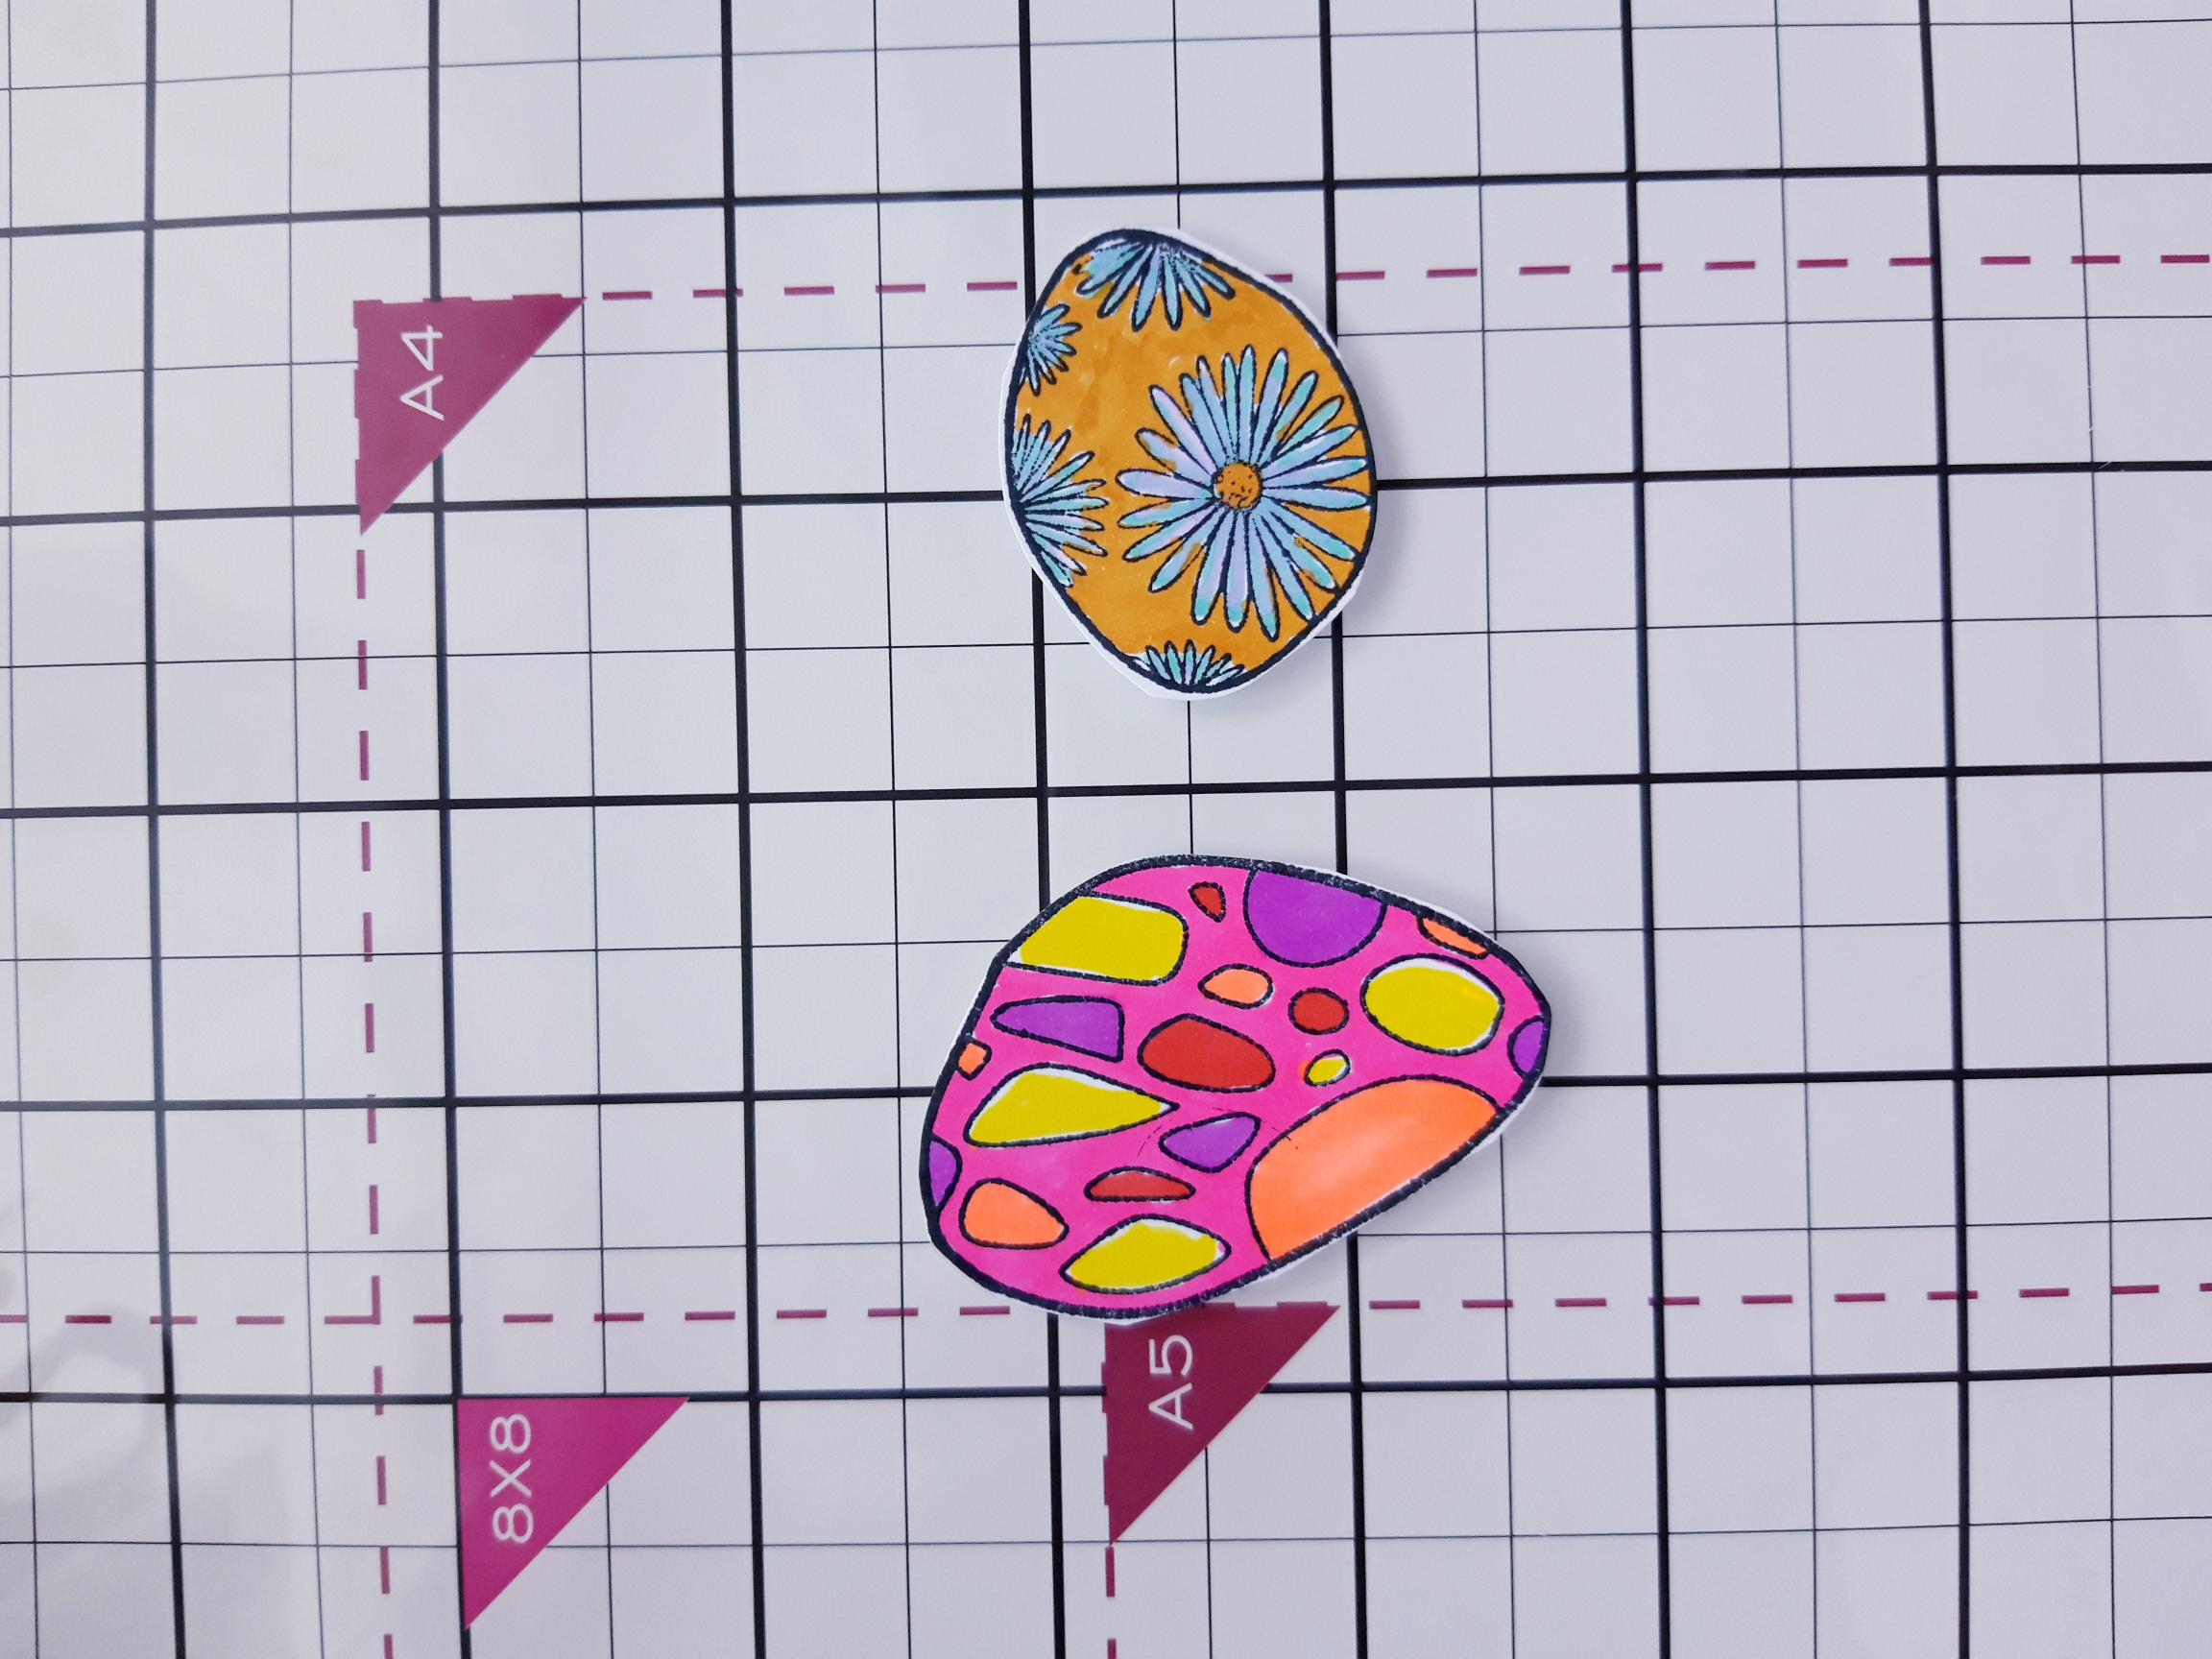
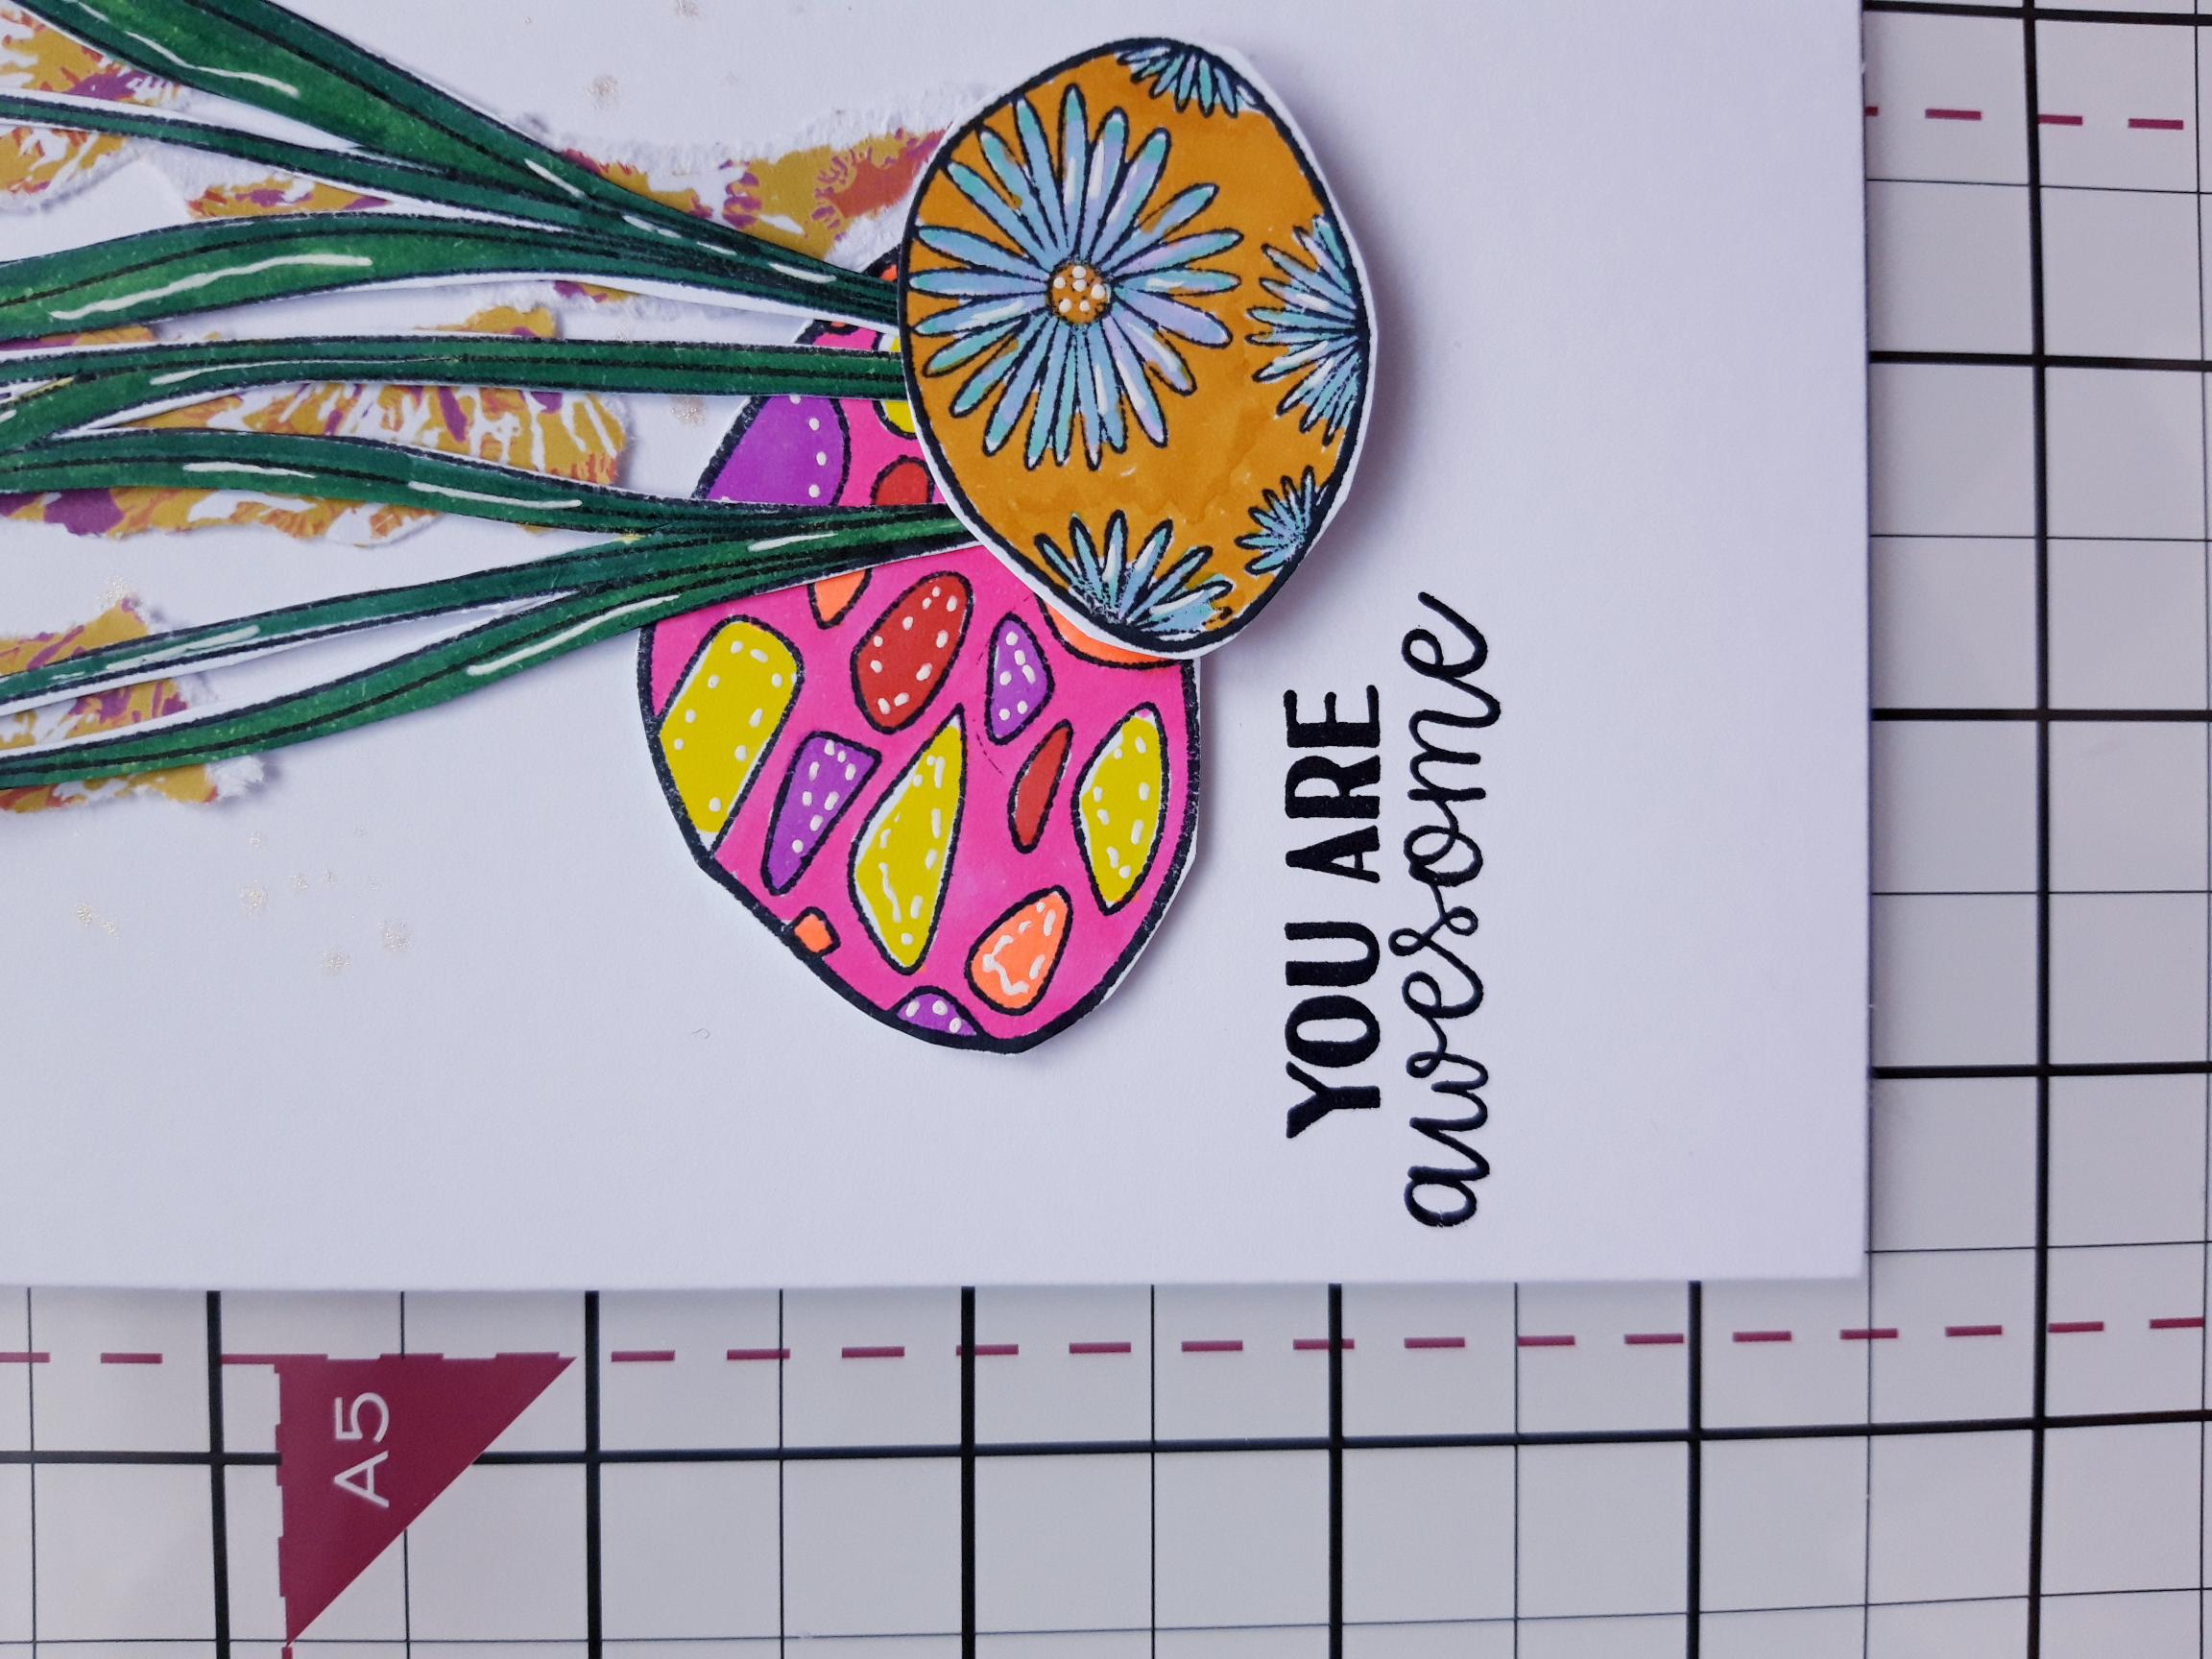
Ink up two of the Garden Rocks stamps with the Memento, stamp on to the white card then cut out and colour with your Gossip pens. |
|
Use a white gel pen to add accents and highlights, to your coloured elements. |
|
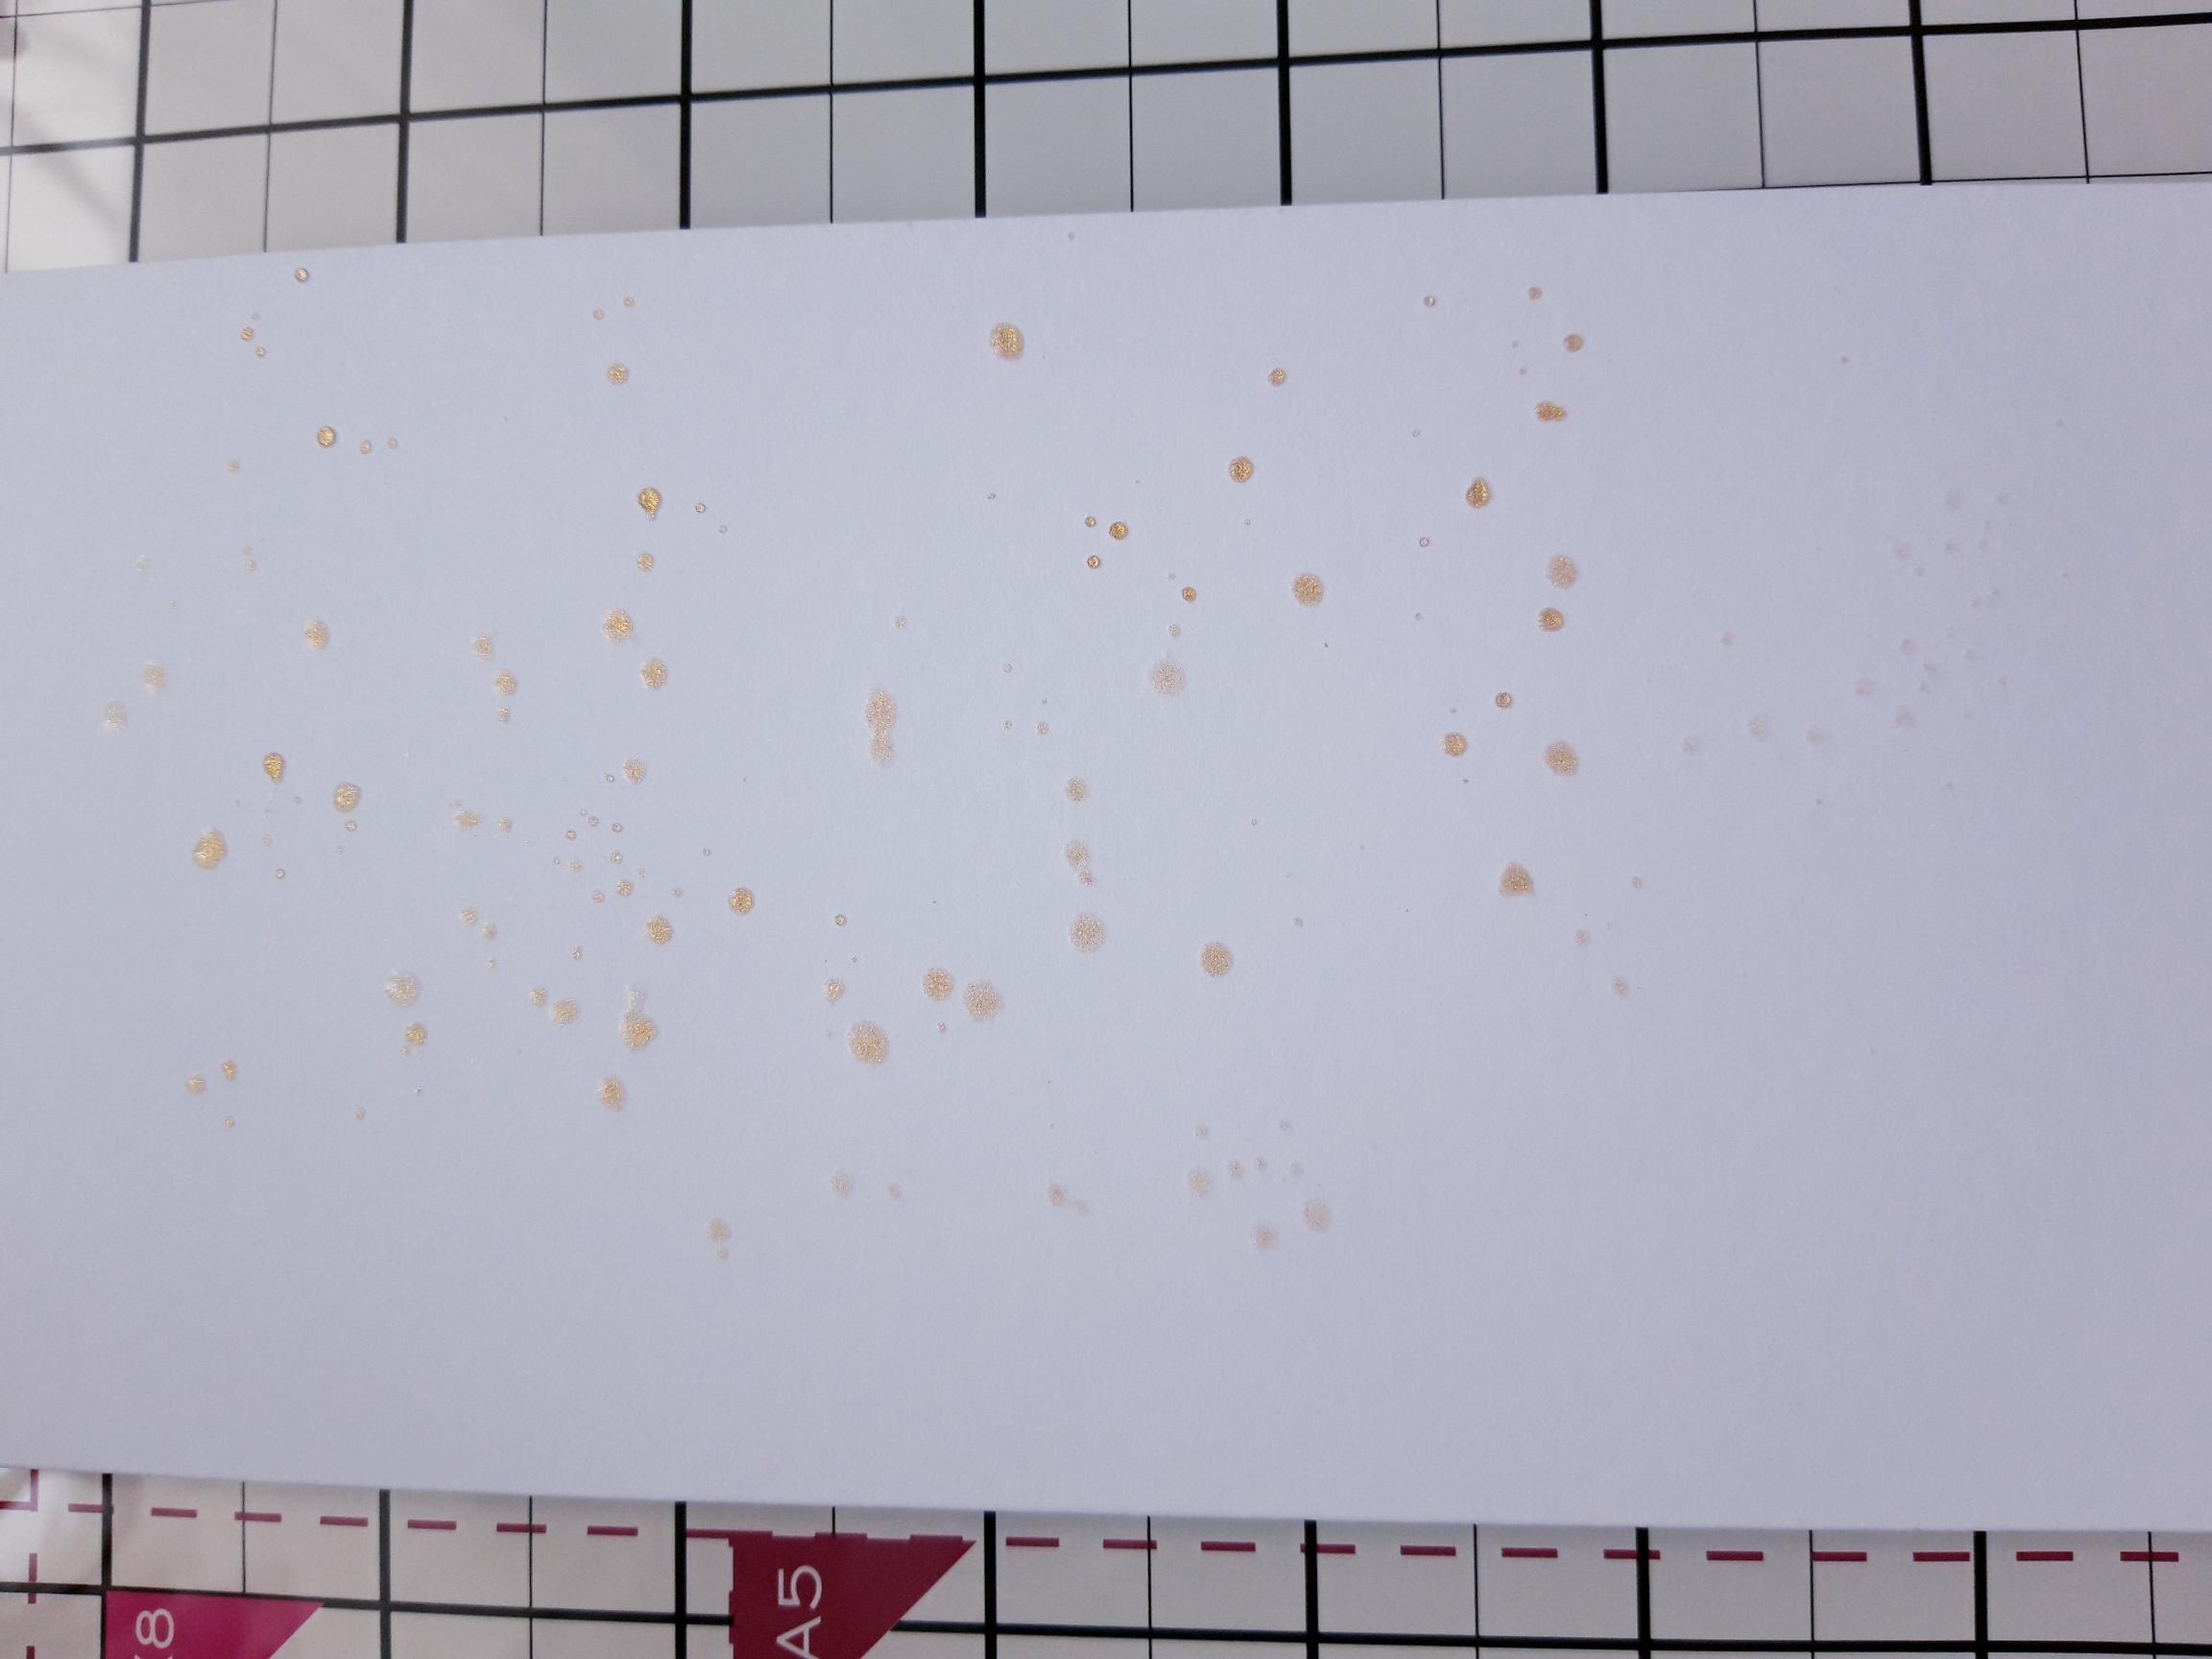
Swirl the Pearlywinks Golden Shimmer Pearl Mist, to wake the Mica, then spray some on to your glass mat. Use a paint brush to splatter over the front of your white DL card blank. |
|
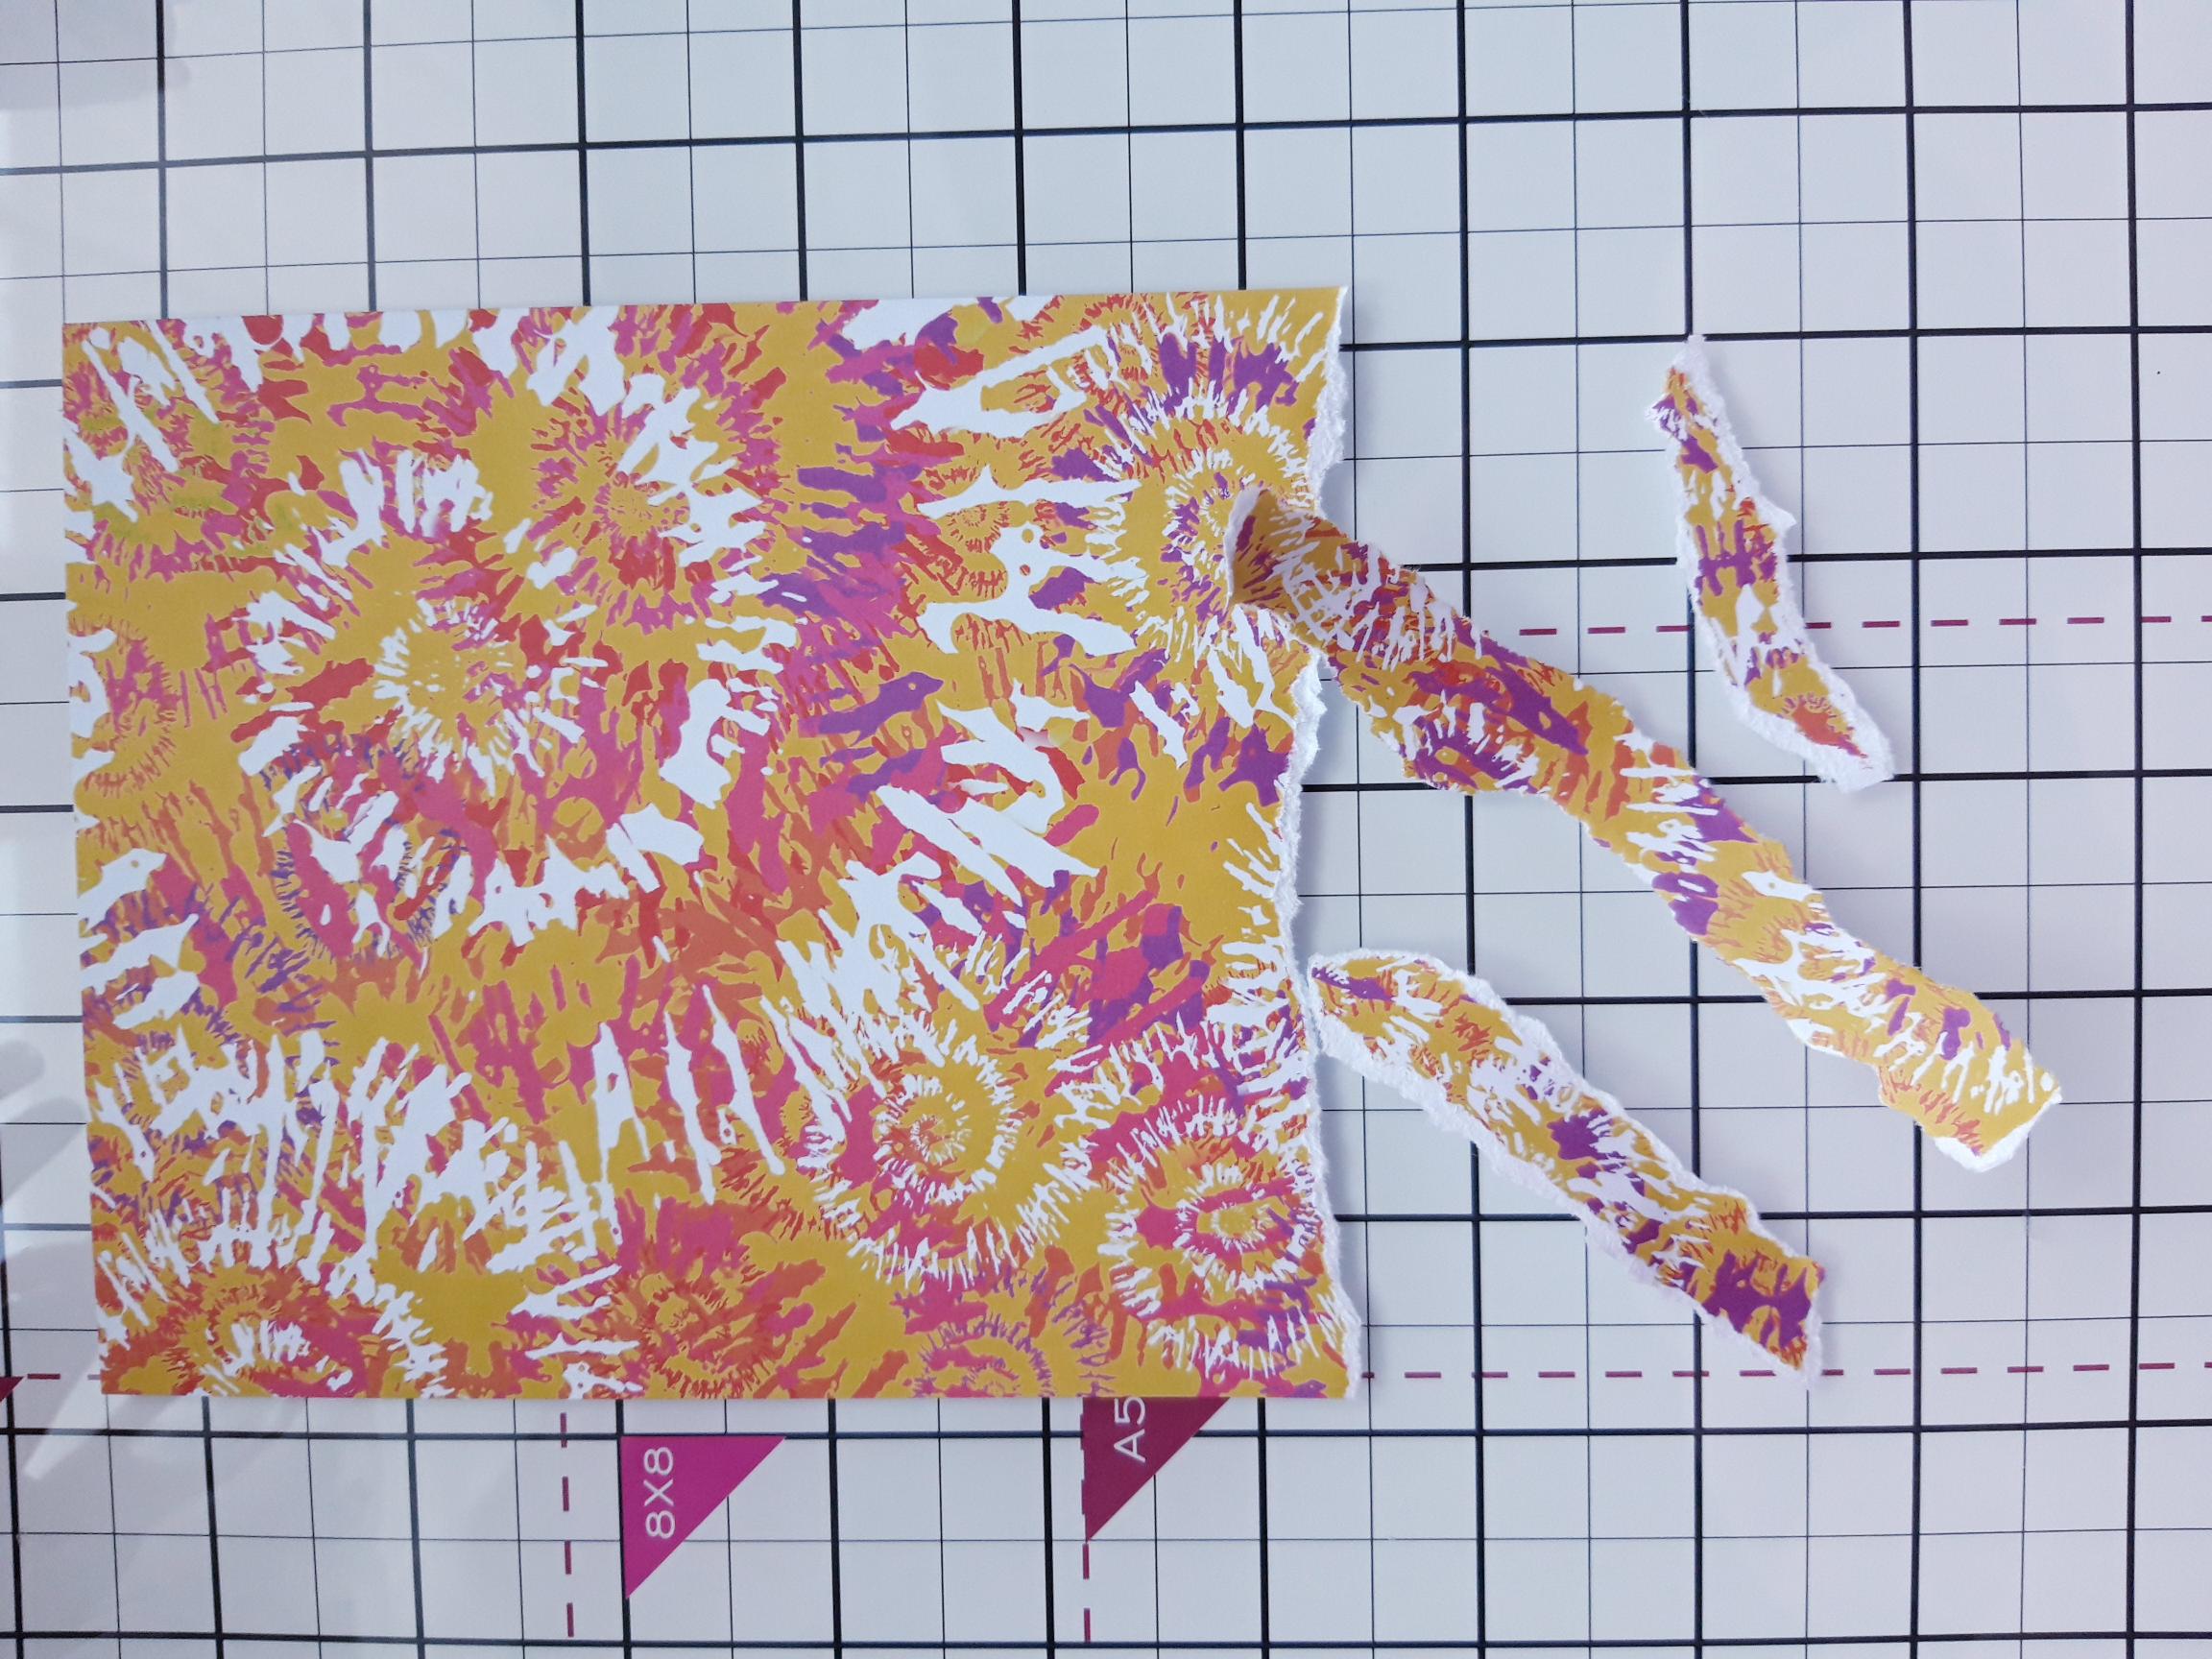
Remove this decorative sheet, from the Thirsty Brush Unltd paper pack and tear off 3/4 random strips. |
|
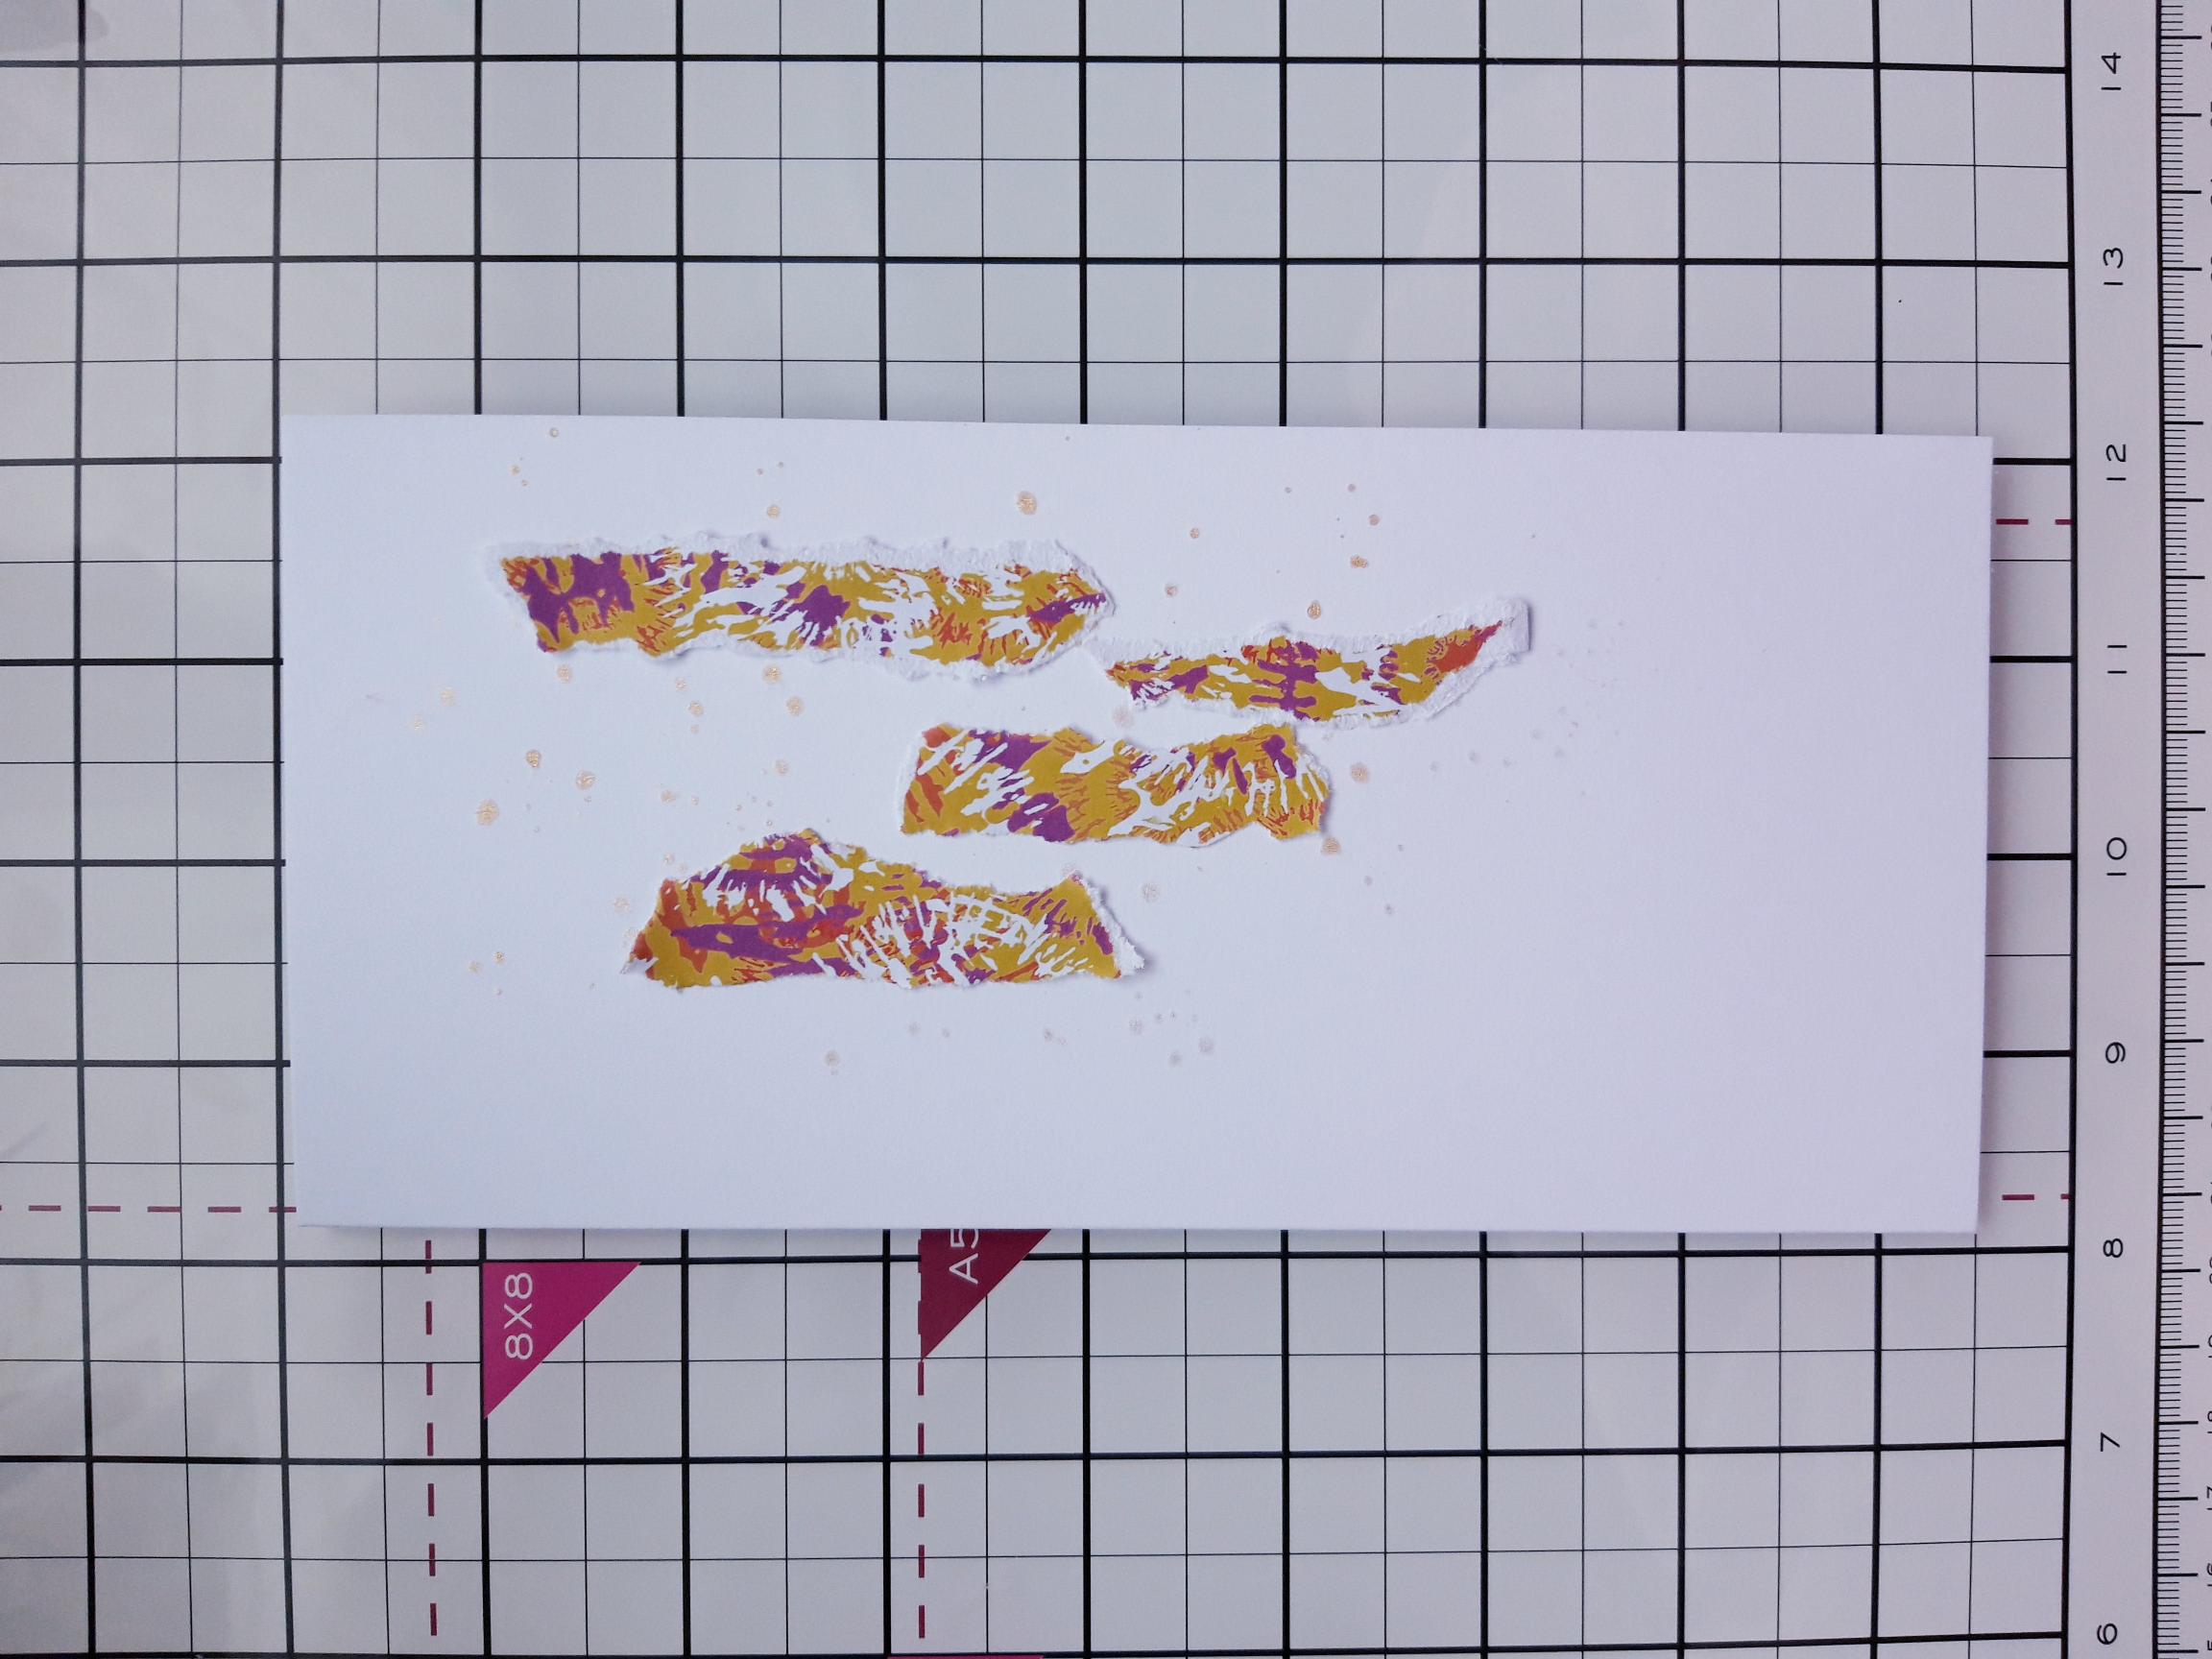
Adhere vertically to the front of your card blank. |

|
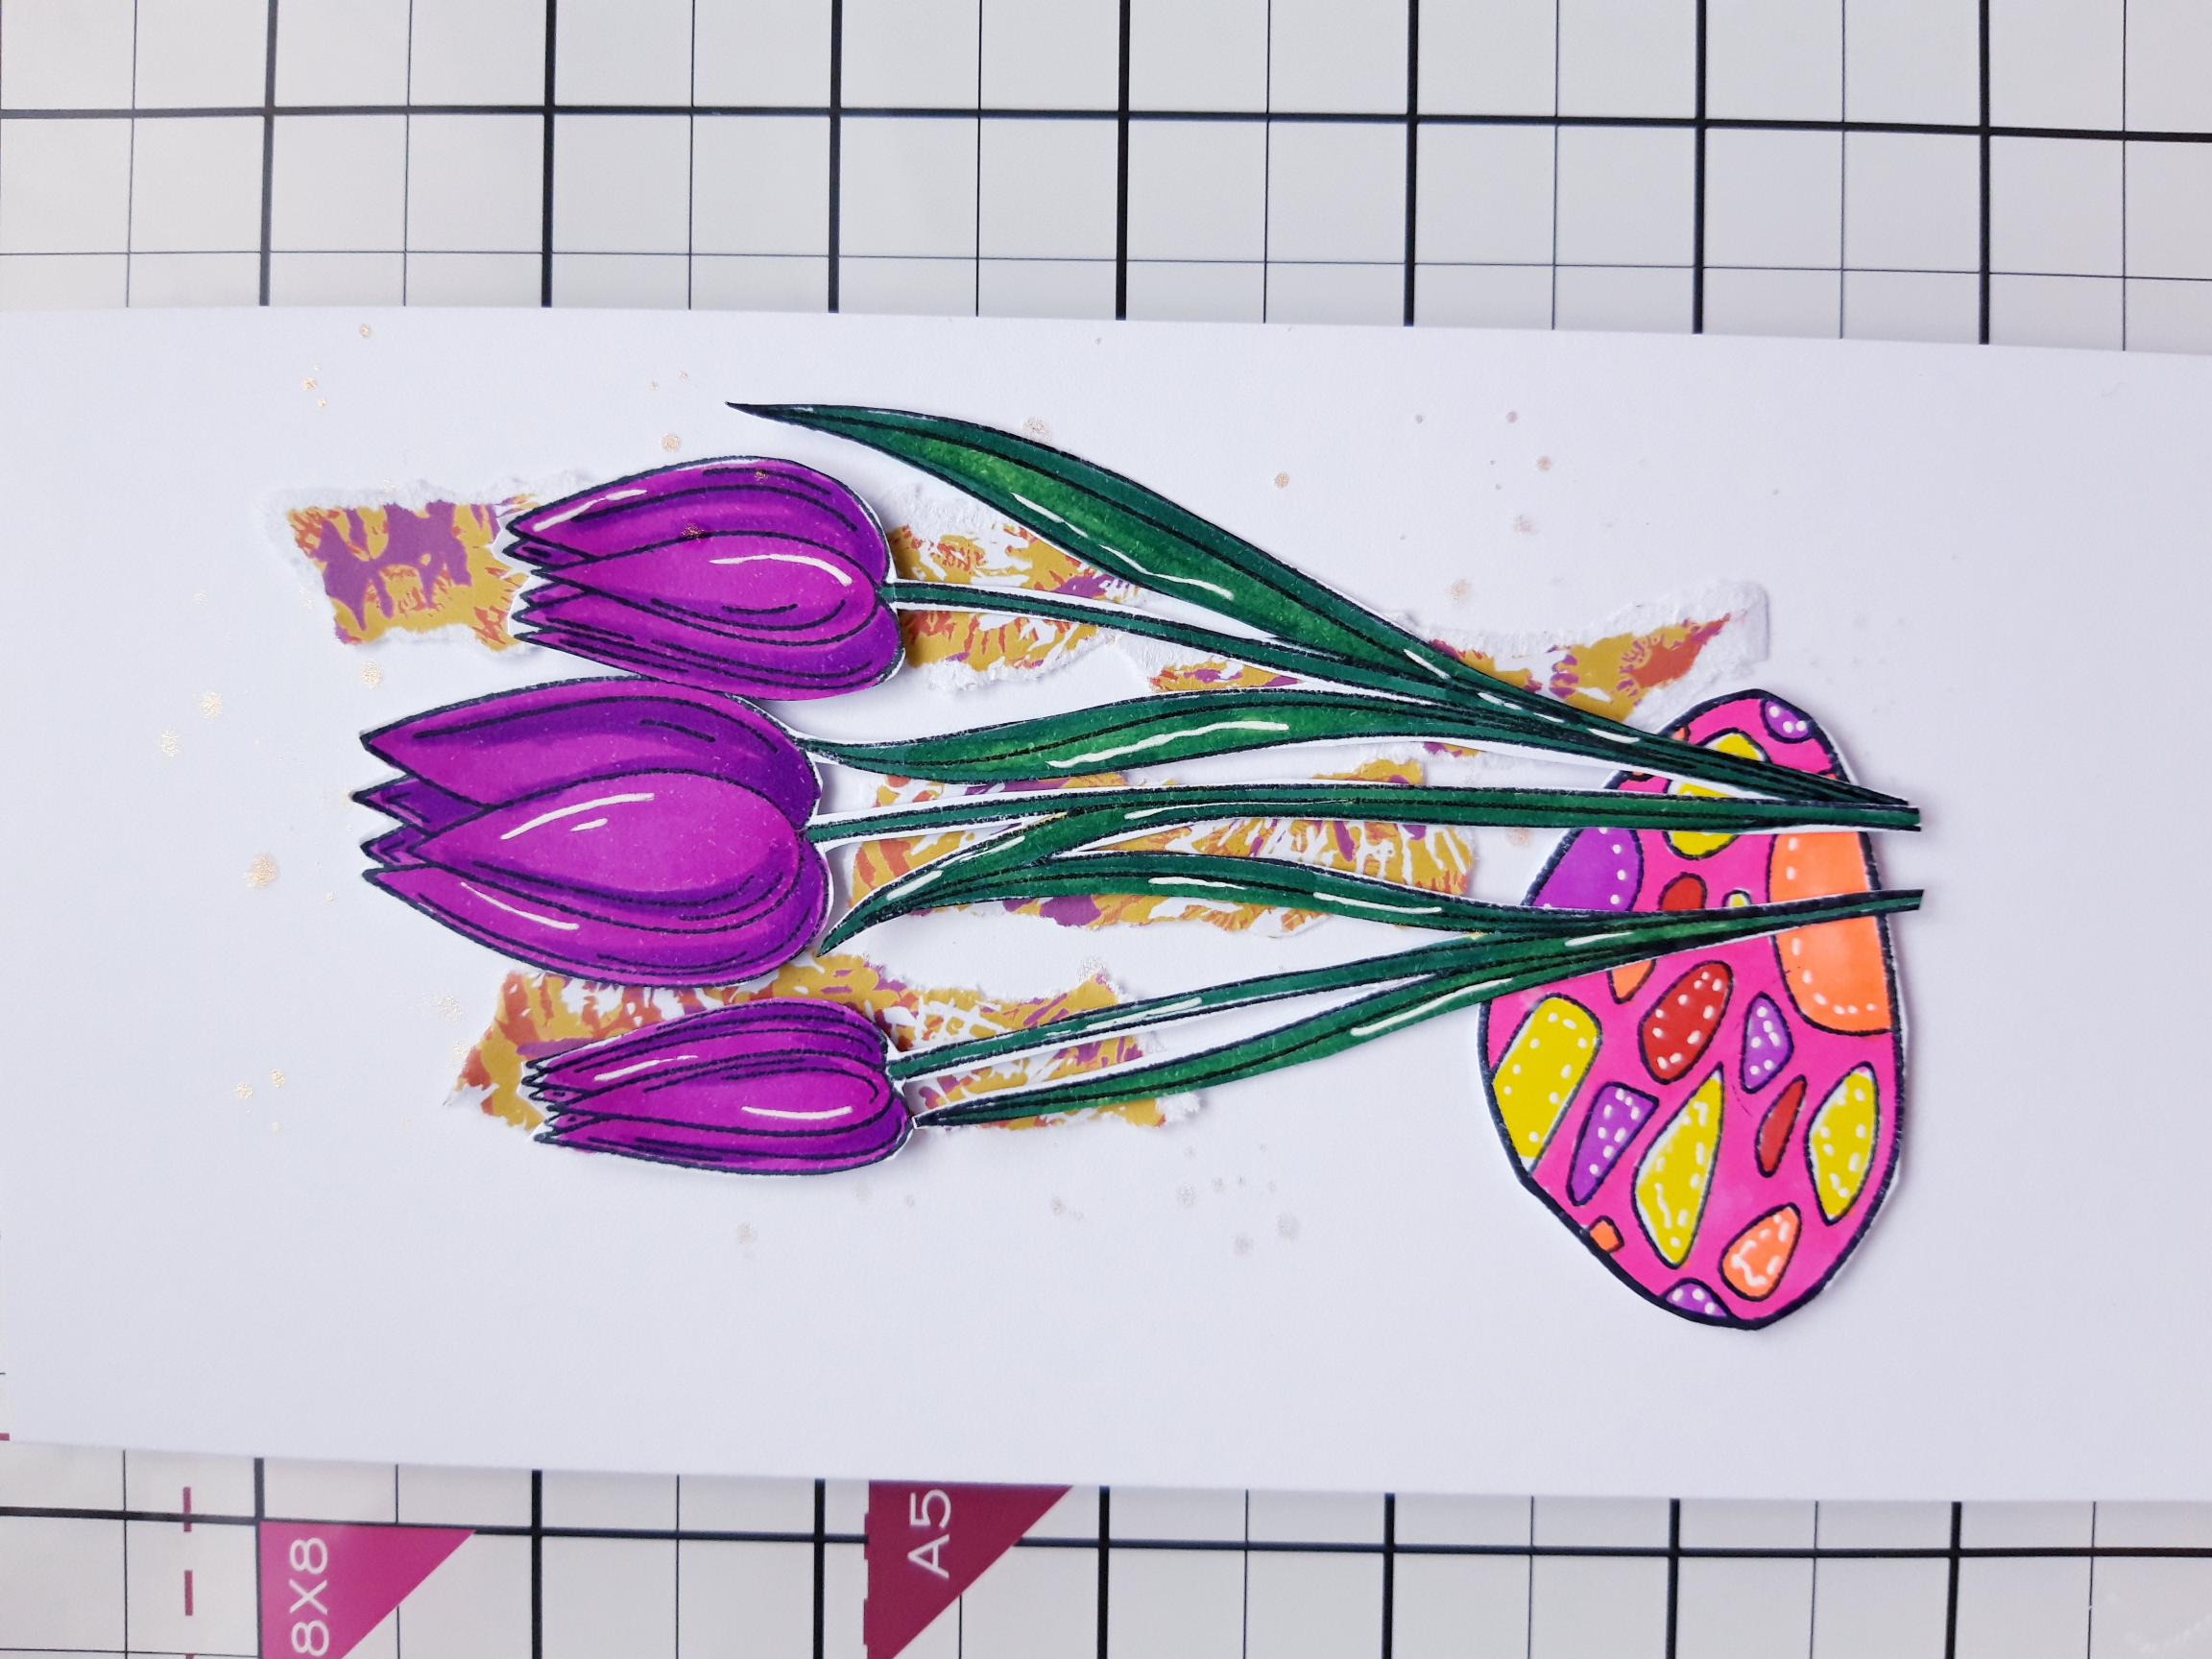
Having first decided on the placement of your 3D elements, adhere one of the Garden Rocks flat, with wet glue. |
|
Glue your Tulips in position, with wet glue on the stems and leaves and foam pads on the heads of the flowers, for added dimension. Leave the tips of the leaves loose, for movement in your card. |
|
Adhere the second Garden Rock, with foam pads, over the base of the Tulip stems. |
|
Ink up the sentiment stamp, from the same set, with the Versafine and stamp bottom left of your artwork. |

|
Finally, adhere sequins on, around and just under your artwork. |