Give your friends $10 off their first order!
Refer a FRIEND


WHAT YOU WILL NEED:
Kraft card blank 7 x 5"
A4 Premium Cardstock Blush Collection: Glitter card 6 3/4 x 4 3/4"
Carta watercolour card 6 1/2 x 4 1/2"
Imala Be Brave Stamp Collection
Versafine Ink Pad: Onyx Black
Masking tape
Premium dye ink pad: Sherbet, Magenta, Surfboard
Cascading Numbers stencil
Paint brush
Water spray bottle
Blending tool
Confetti Ink: White Lace
Pearlywinks Pearl Mist: Golden Shimmer
Eureka 101
Paper Trimmer
Perfect Together Glue
[click image to enlarge] 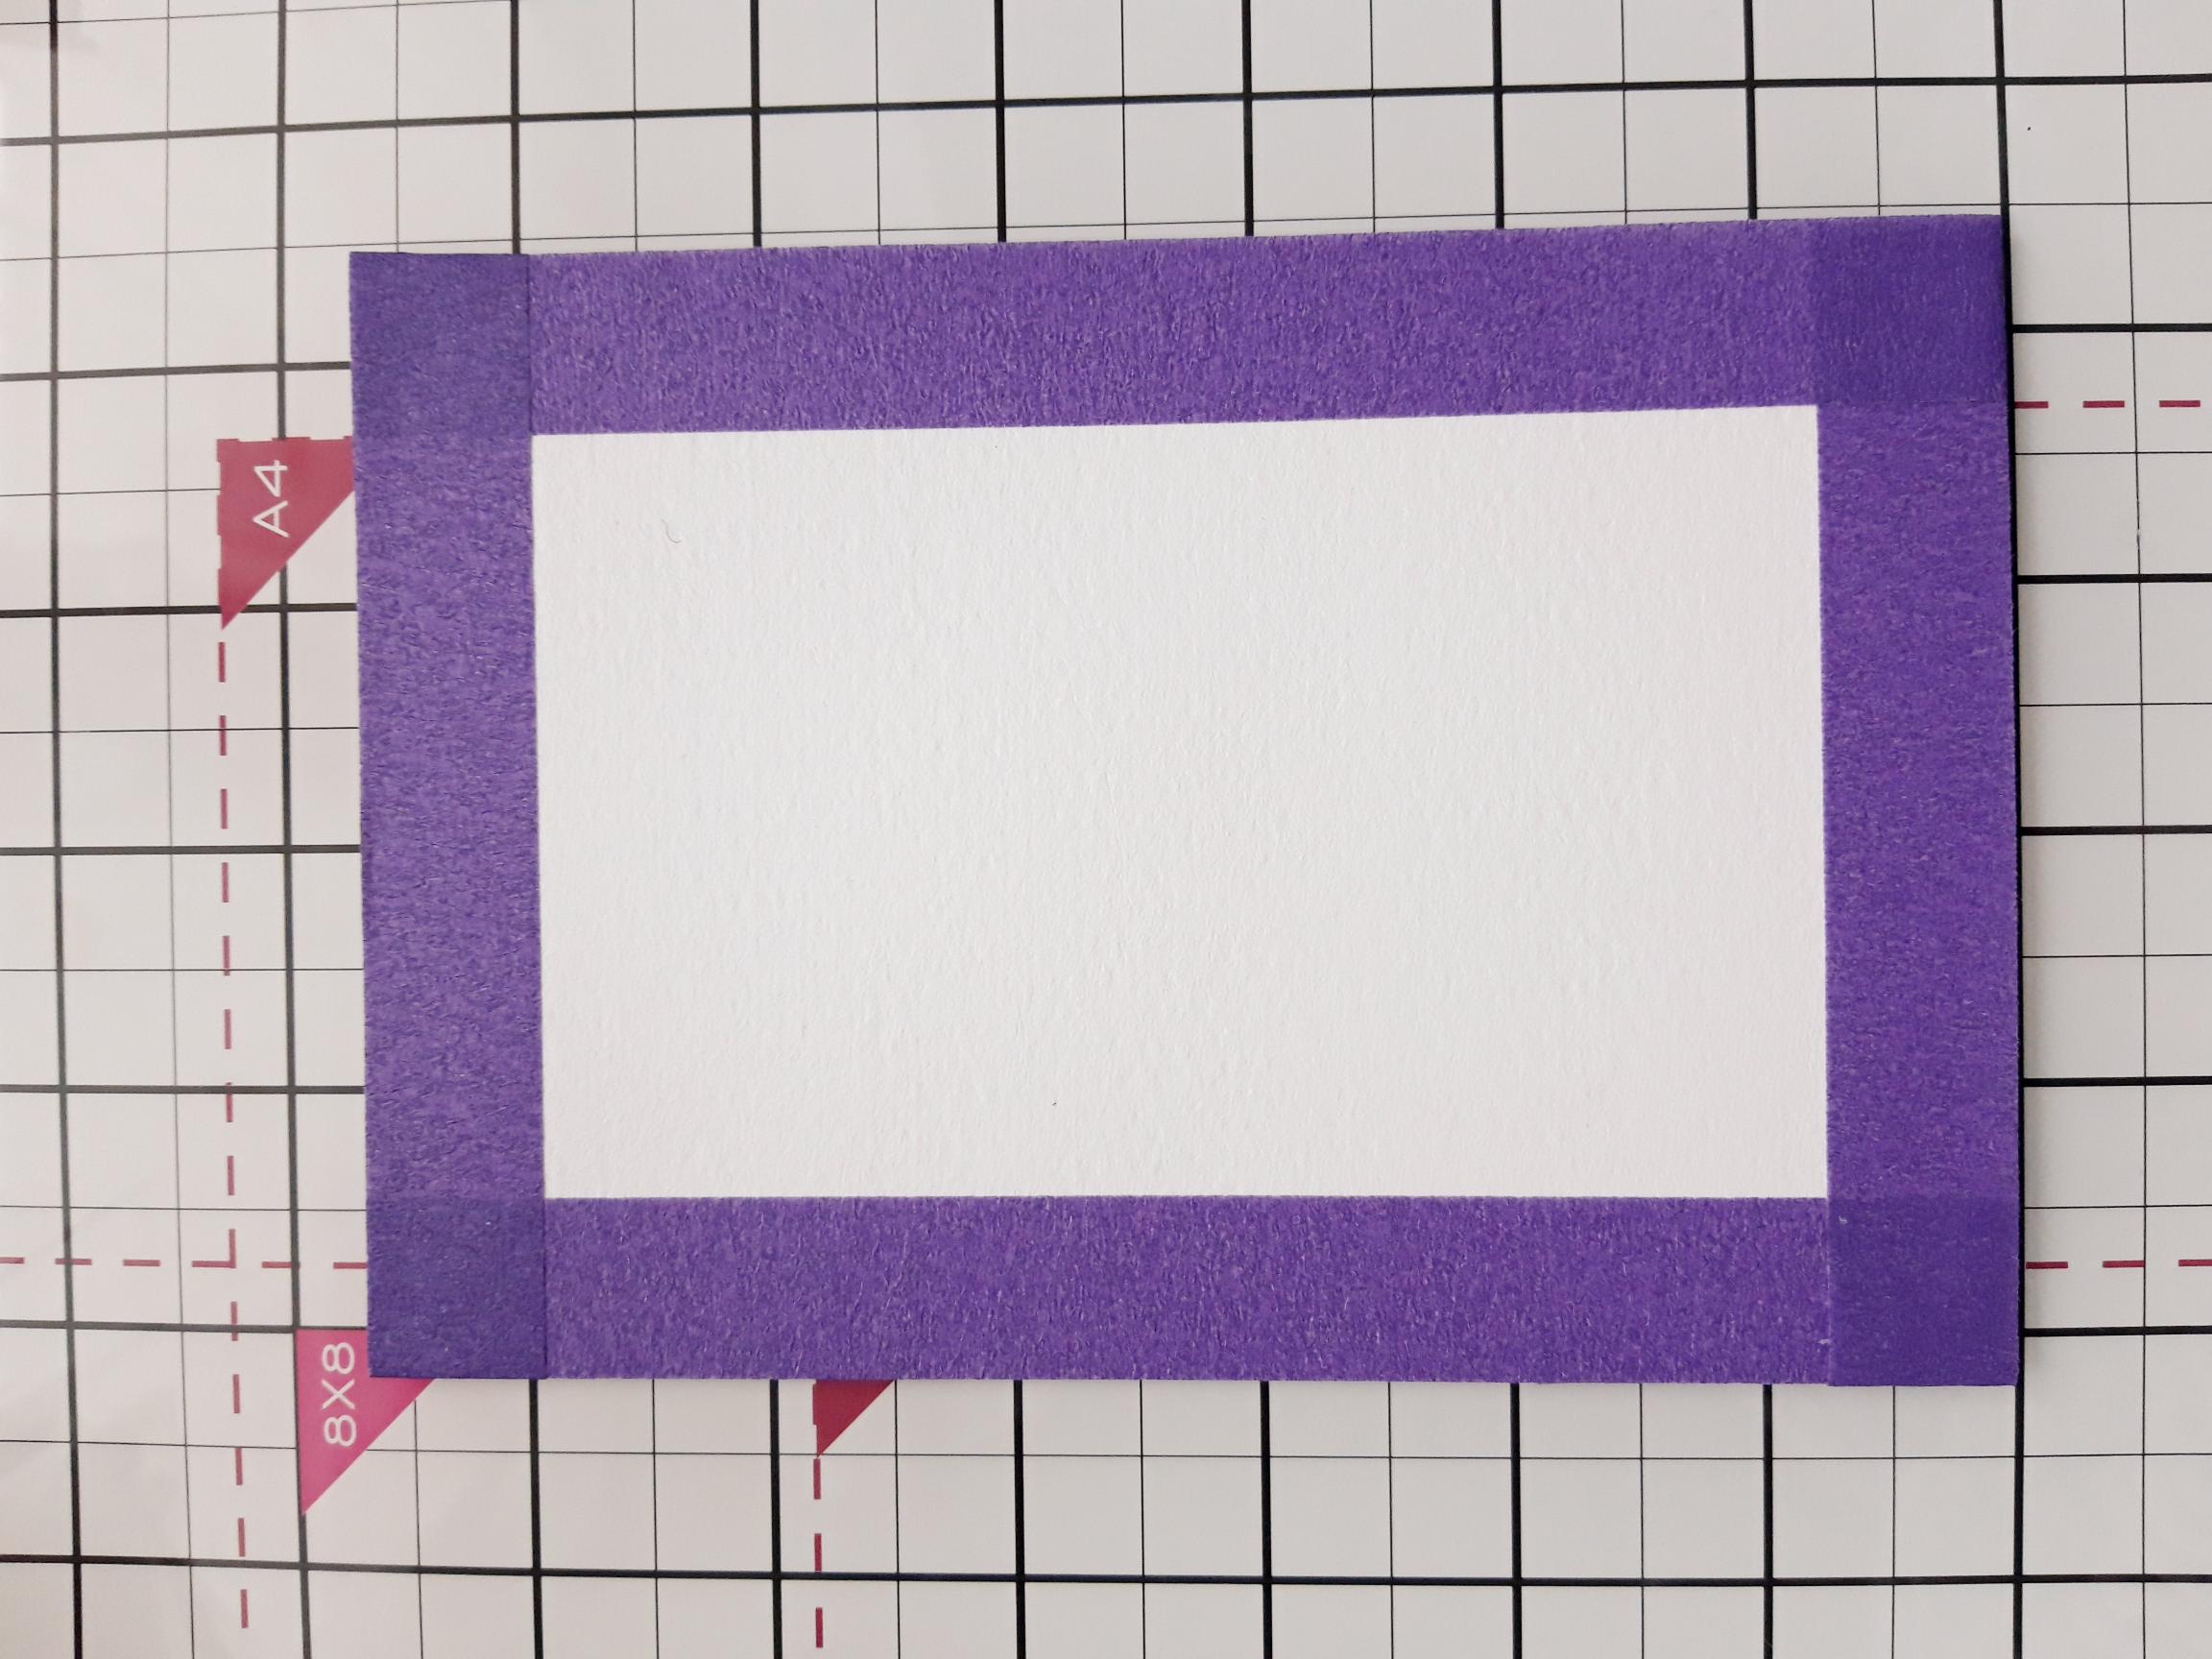
|
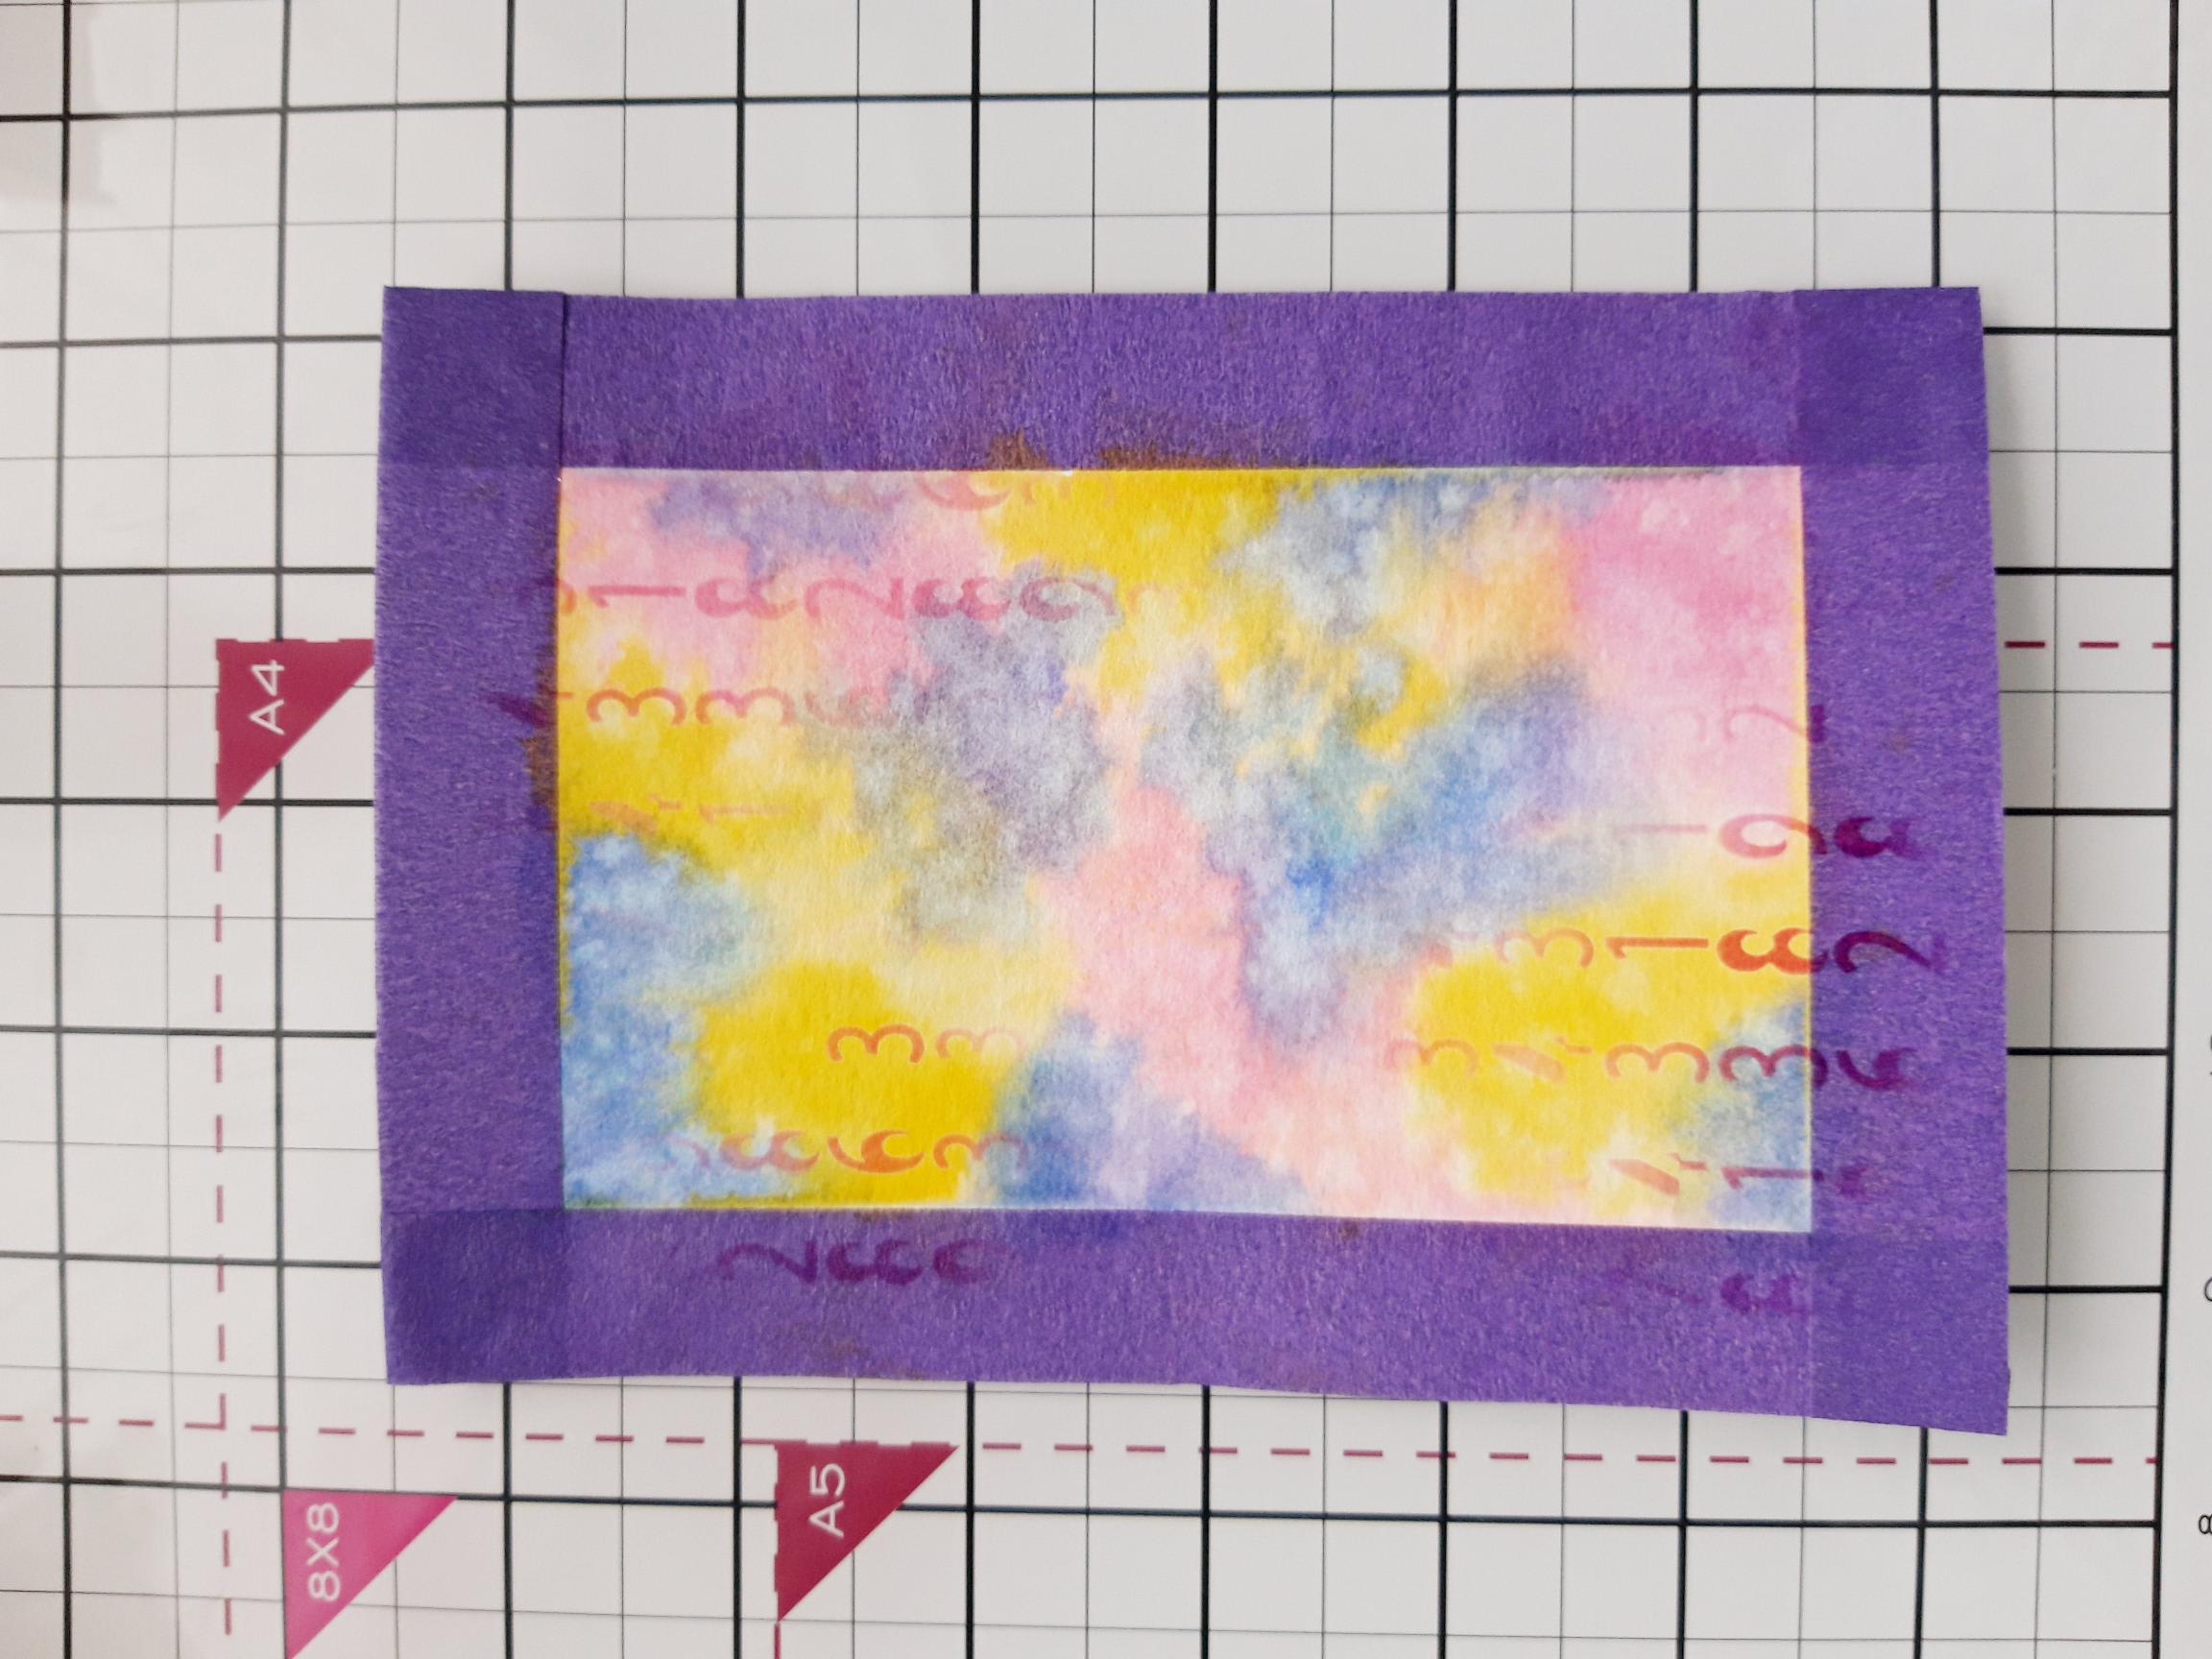
Apply masking tape around the edges of the Carta card, to create a panel as seen here. |
|
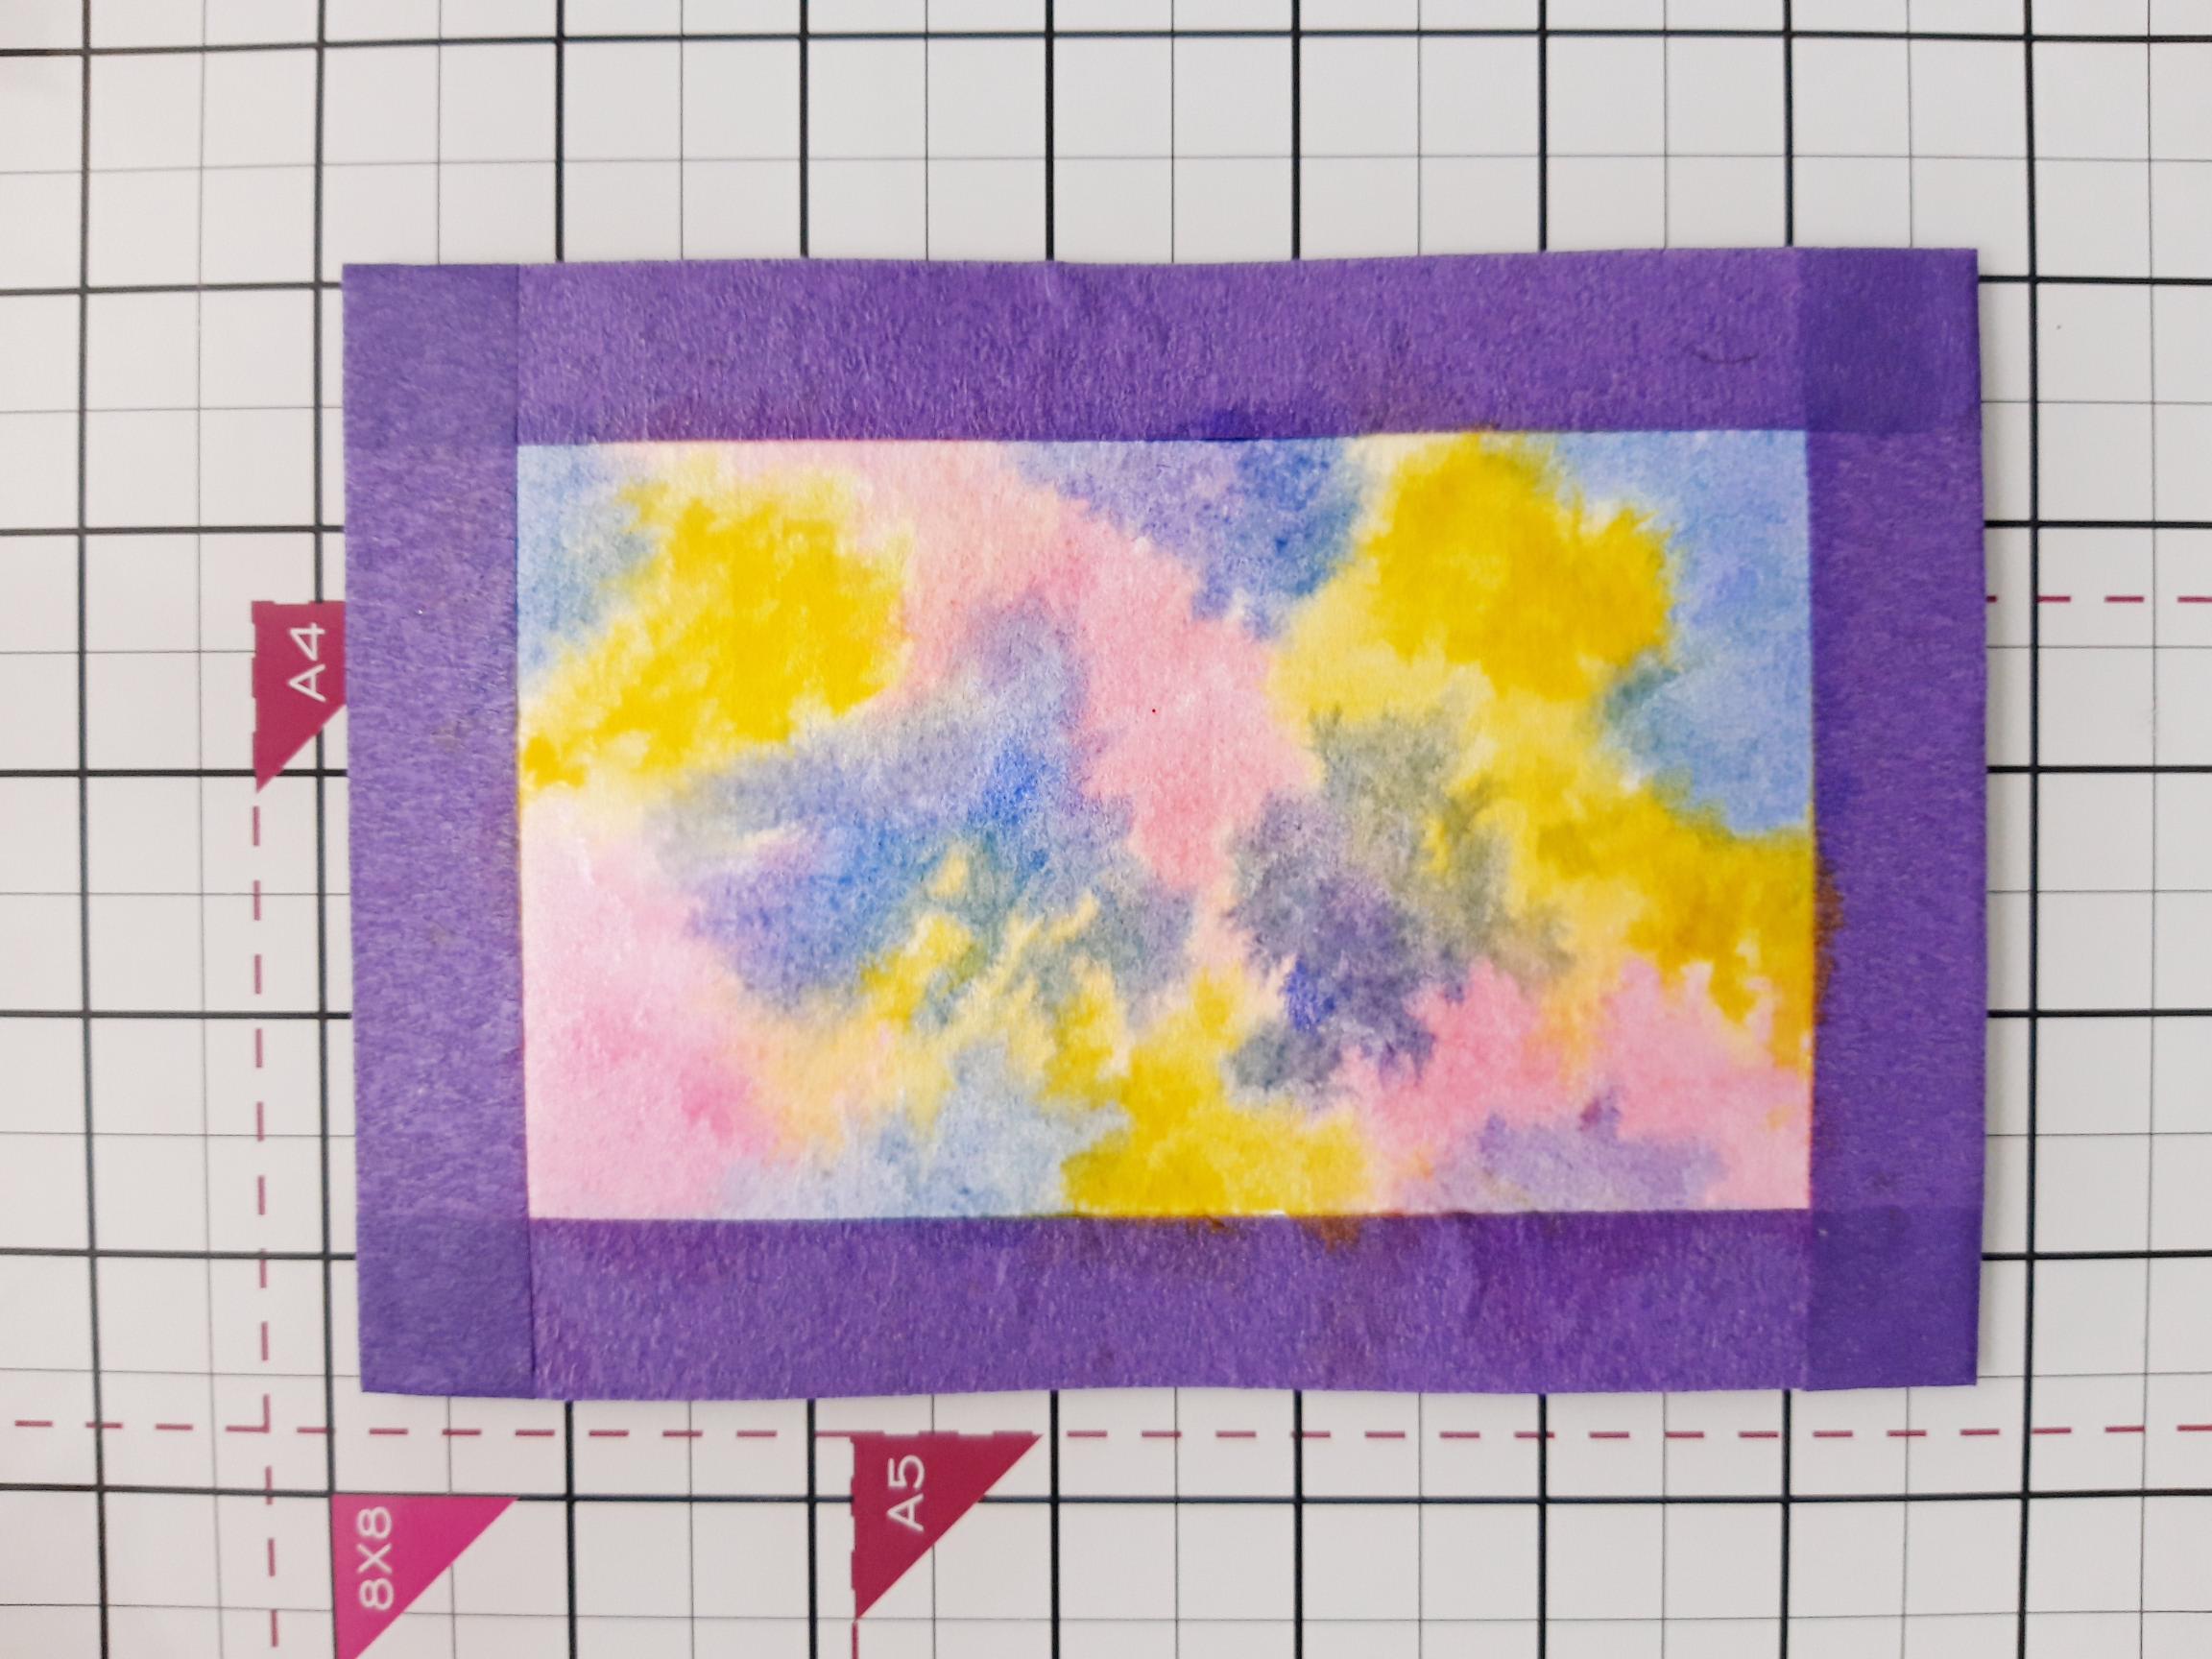
Spray the masked panel liberally with water. Apply a little of each of the Premium inks on to your glass mat, then pick up each colour, one at a time and pounce the ink randomly in to the panel, allowing the ink to do it's own thing. You can add more ink, until you are happy with your background. |
|
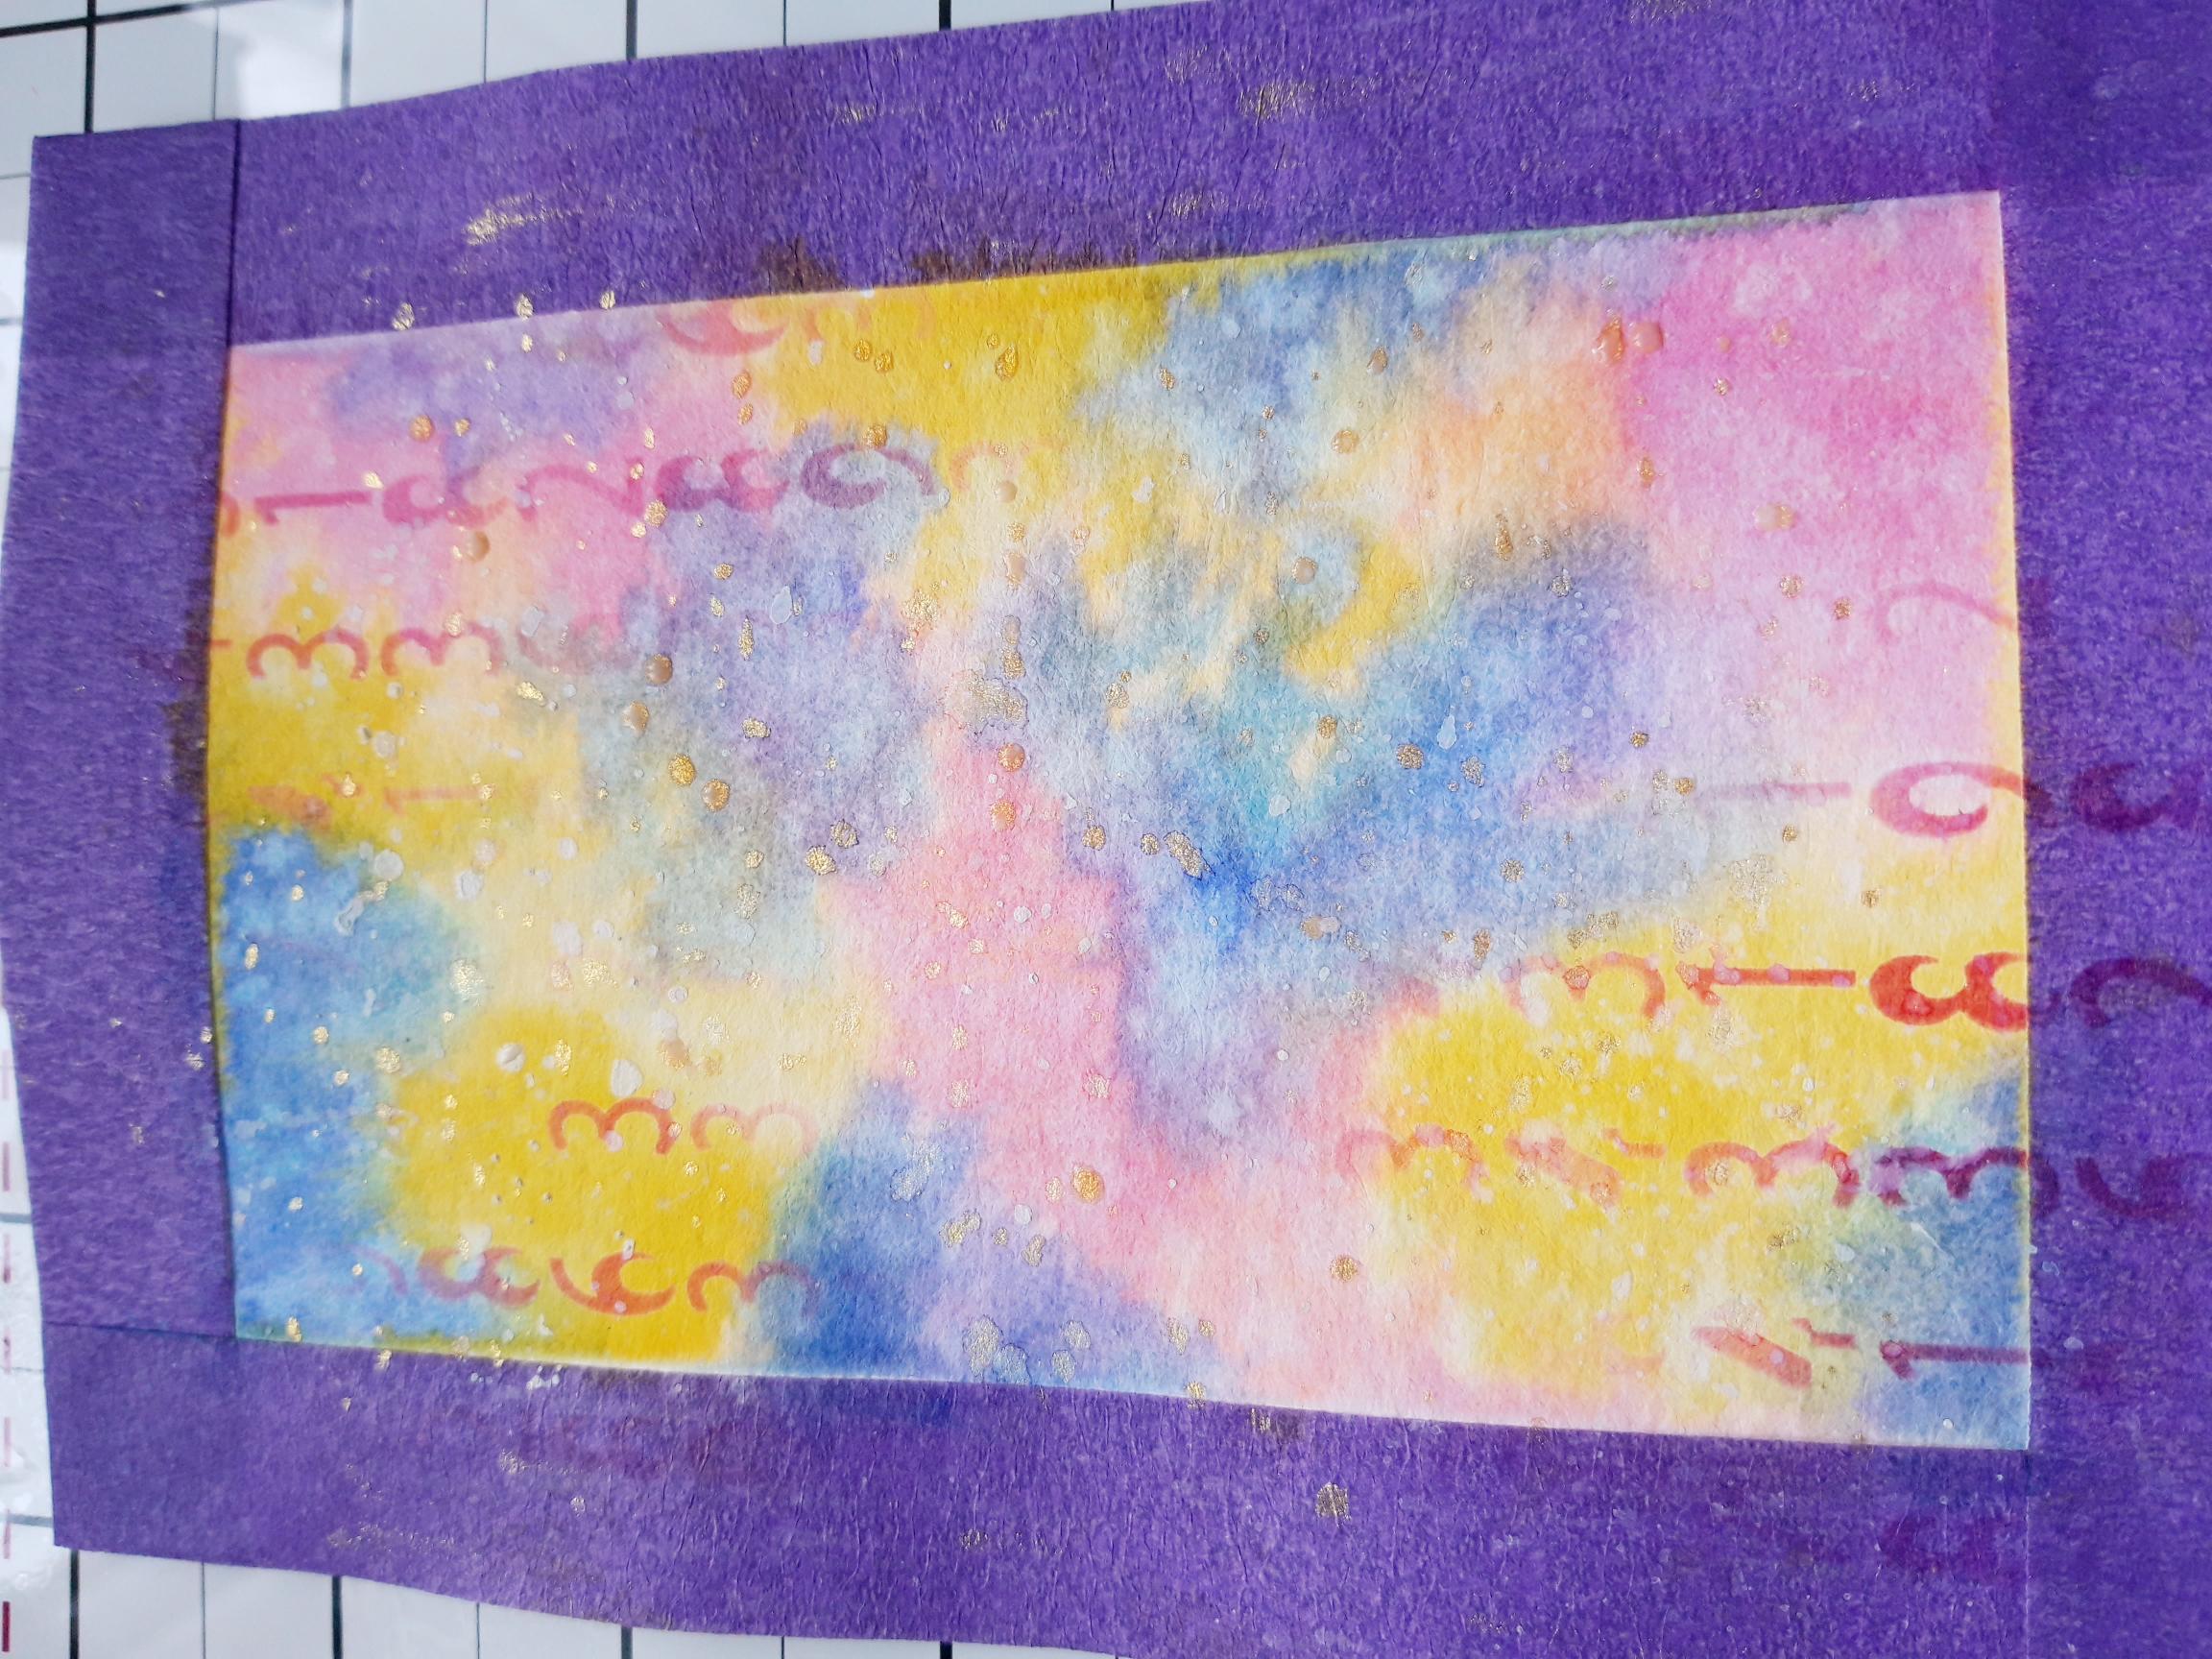
Splatter drops of water over the background, wait a few seconds before dabbing the excess water off with a paper towel, then dry off the inks with a quick blast from your heat tool. |
|
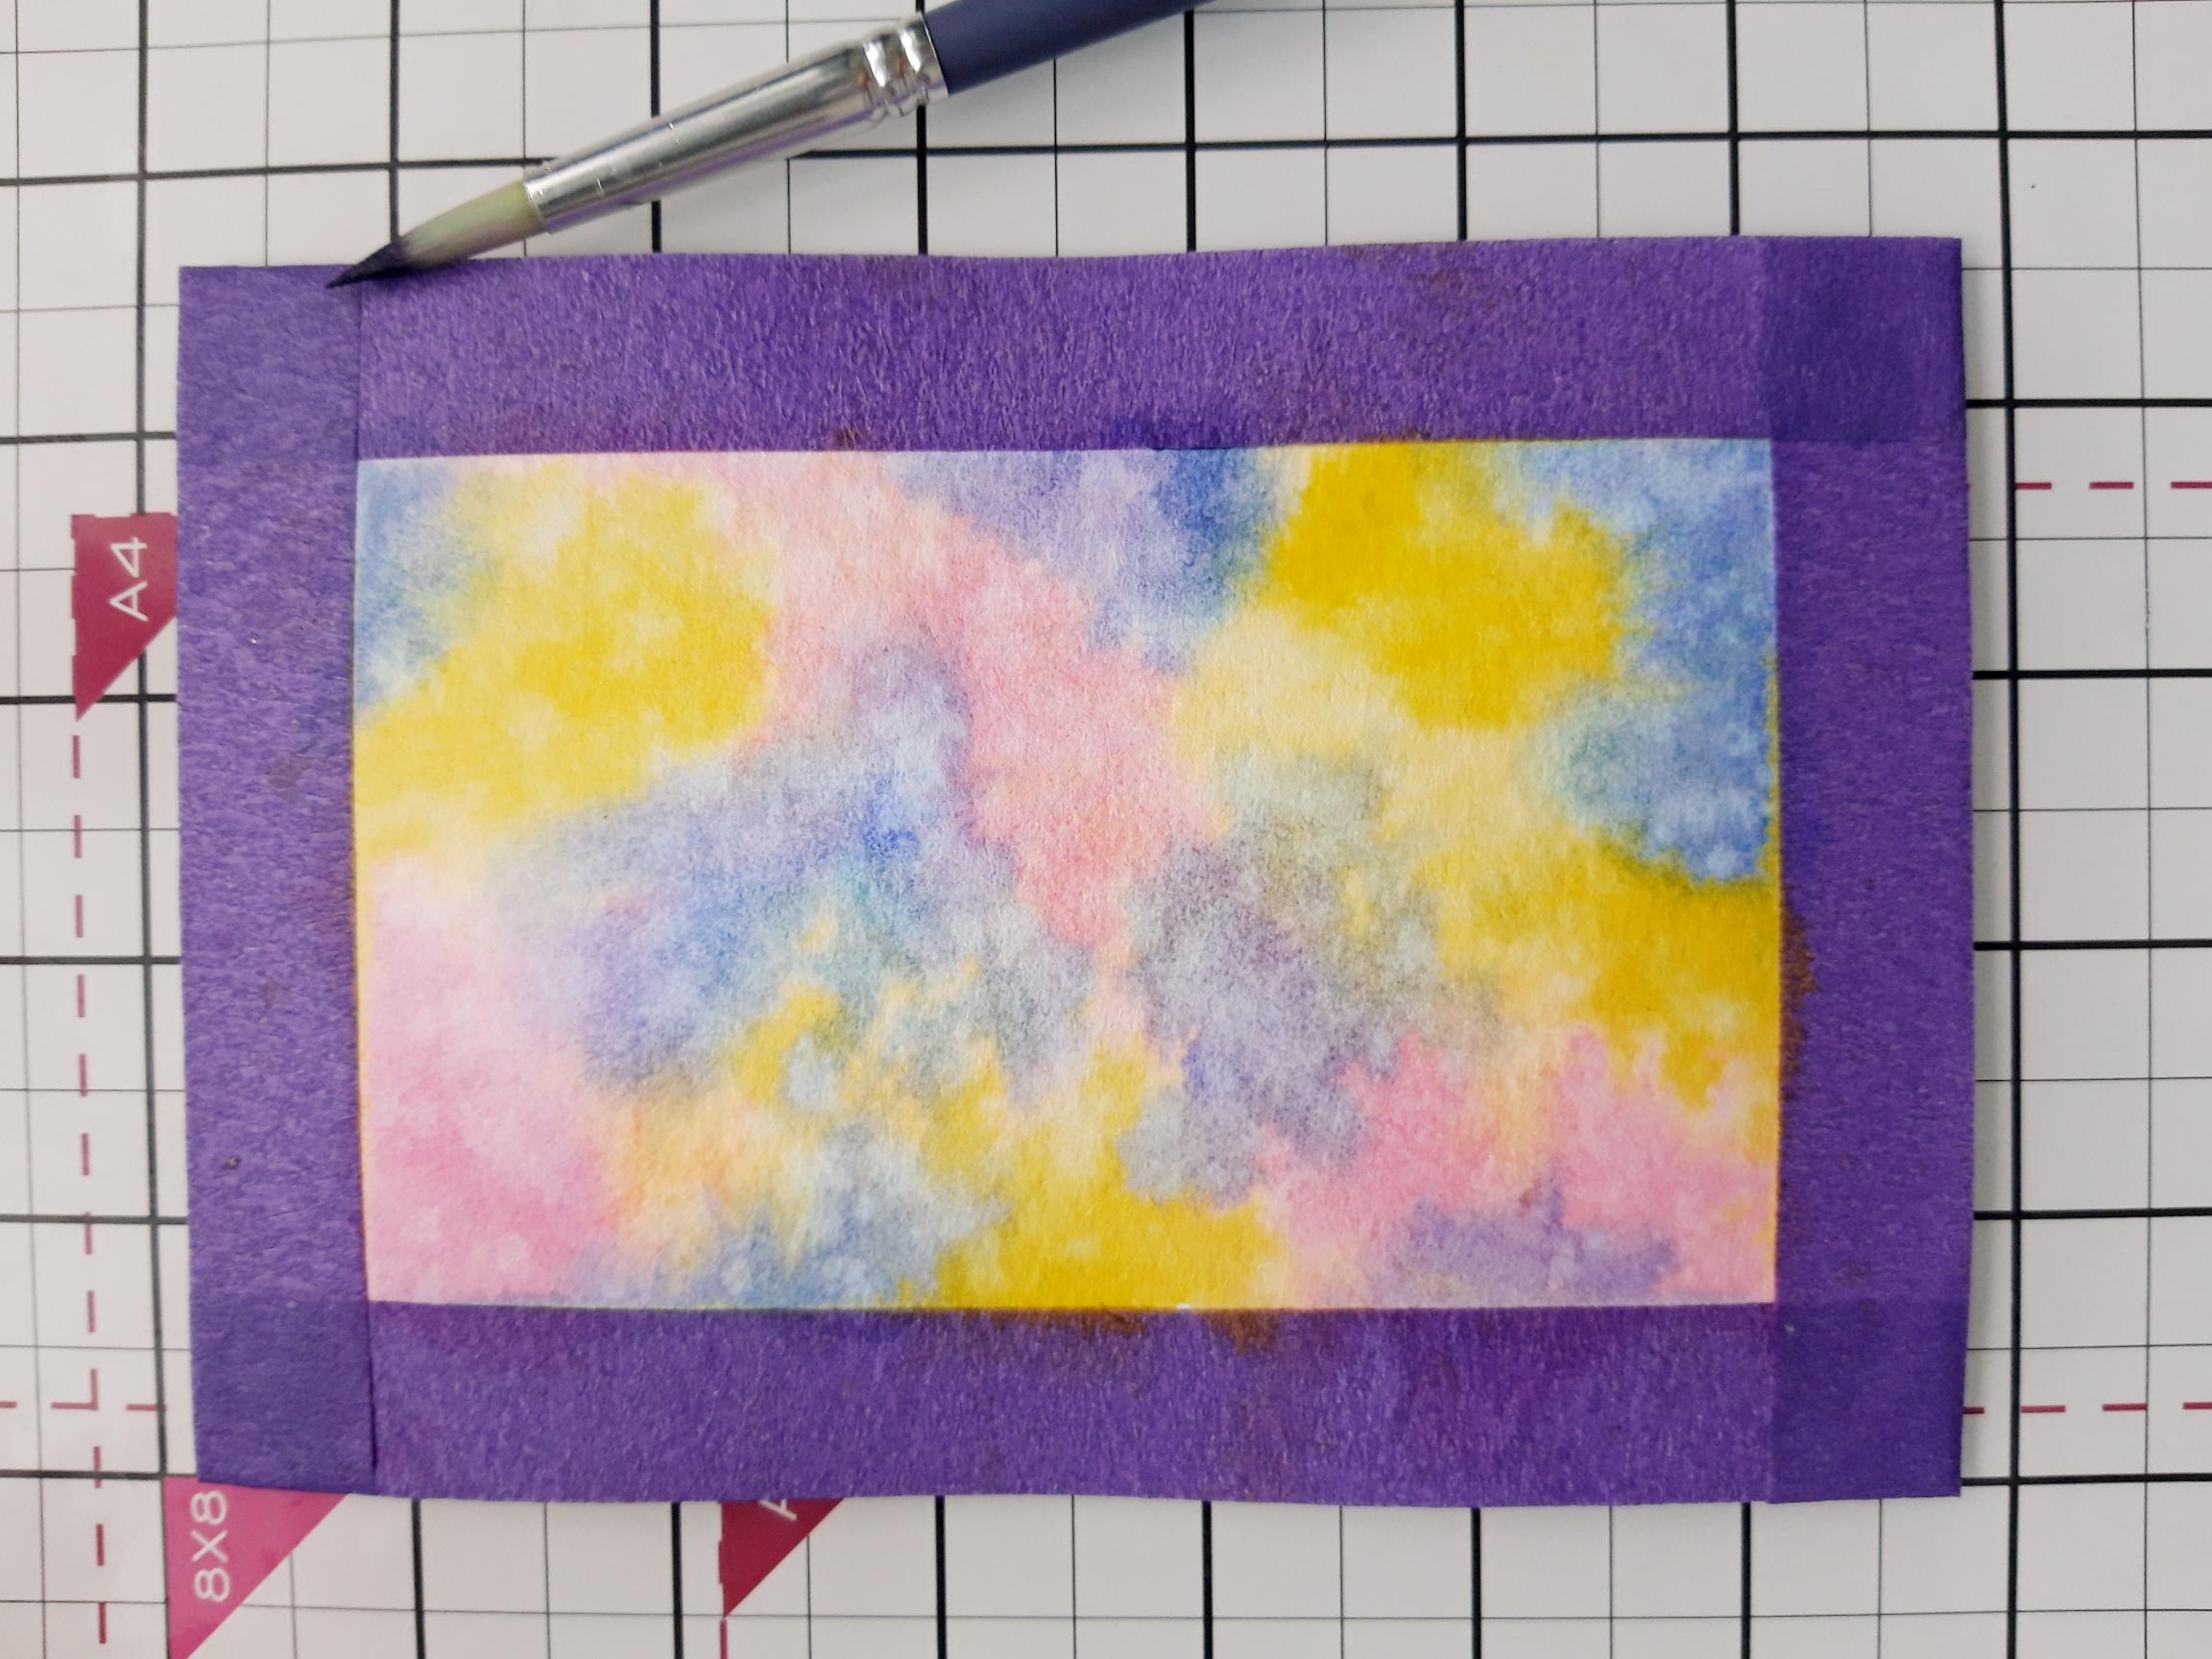
Lay the Cascading Numbers stencil over your background, then randomly blend the Magenta with your blending tool. Give the ink a quick blast with the heat tool, to dry it off. |
|
Add splatters of the White Lace Confetti ink and the Golden Shimmer Pearl Mist, over your background. If possible allow them to dry naturally, to give a more intense effect. However, ensure the background is completely dry before proceeding to the next step. |
|
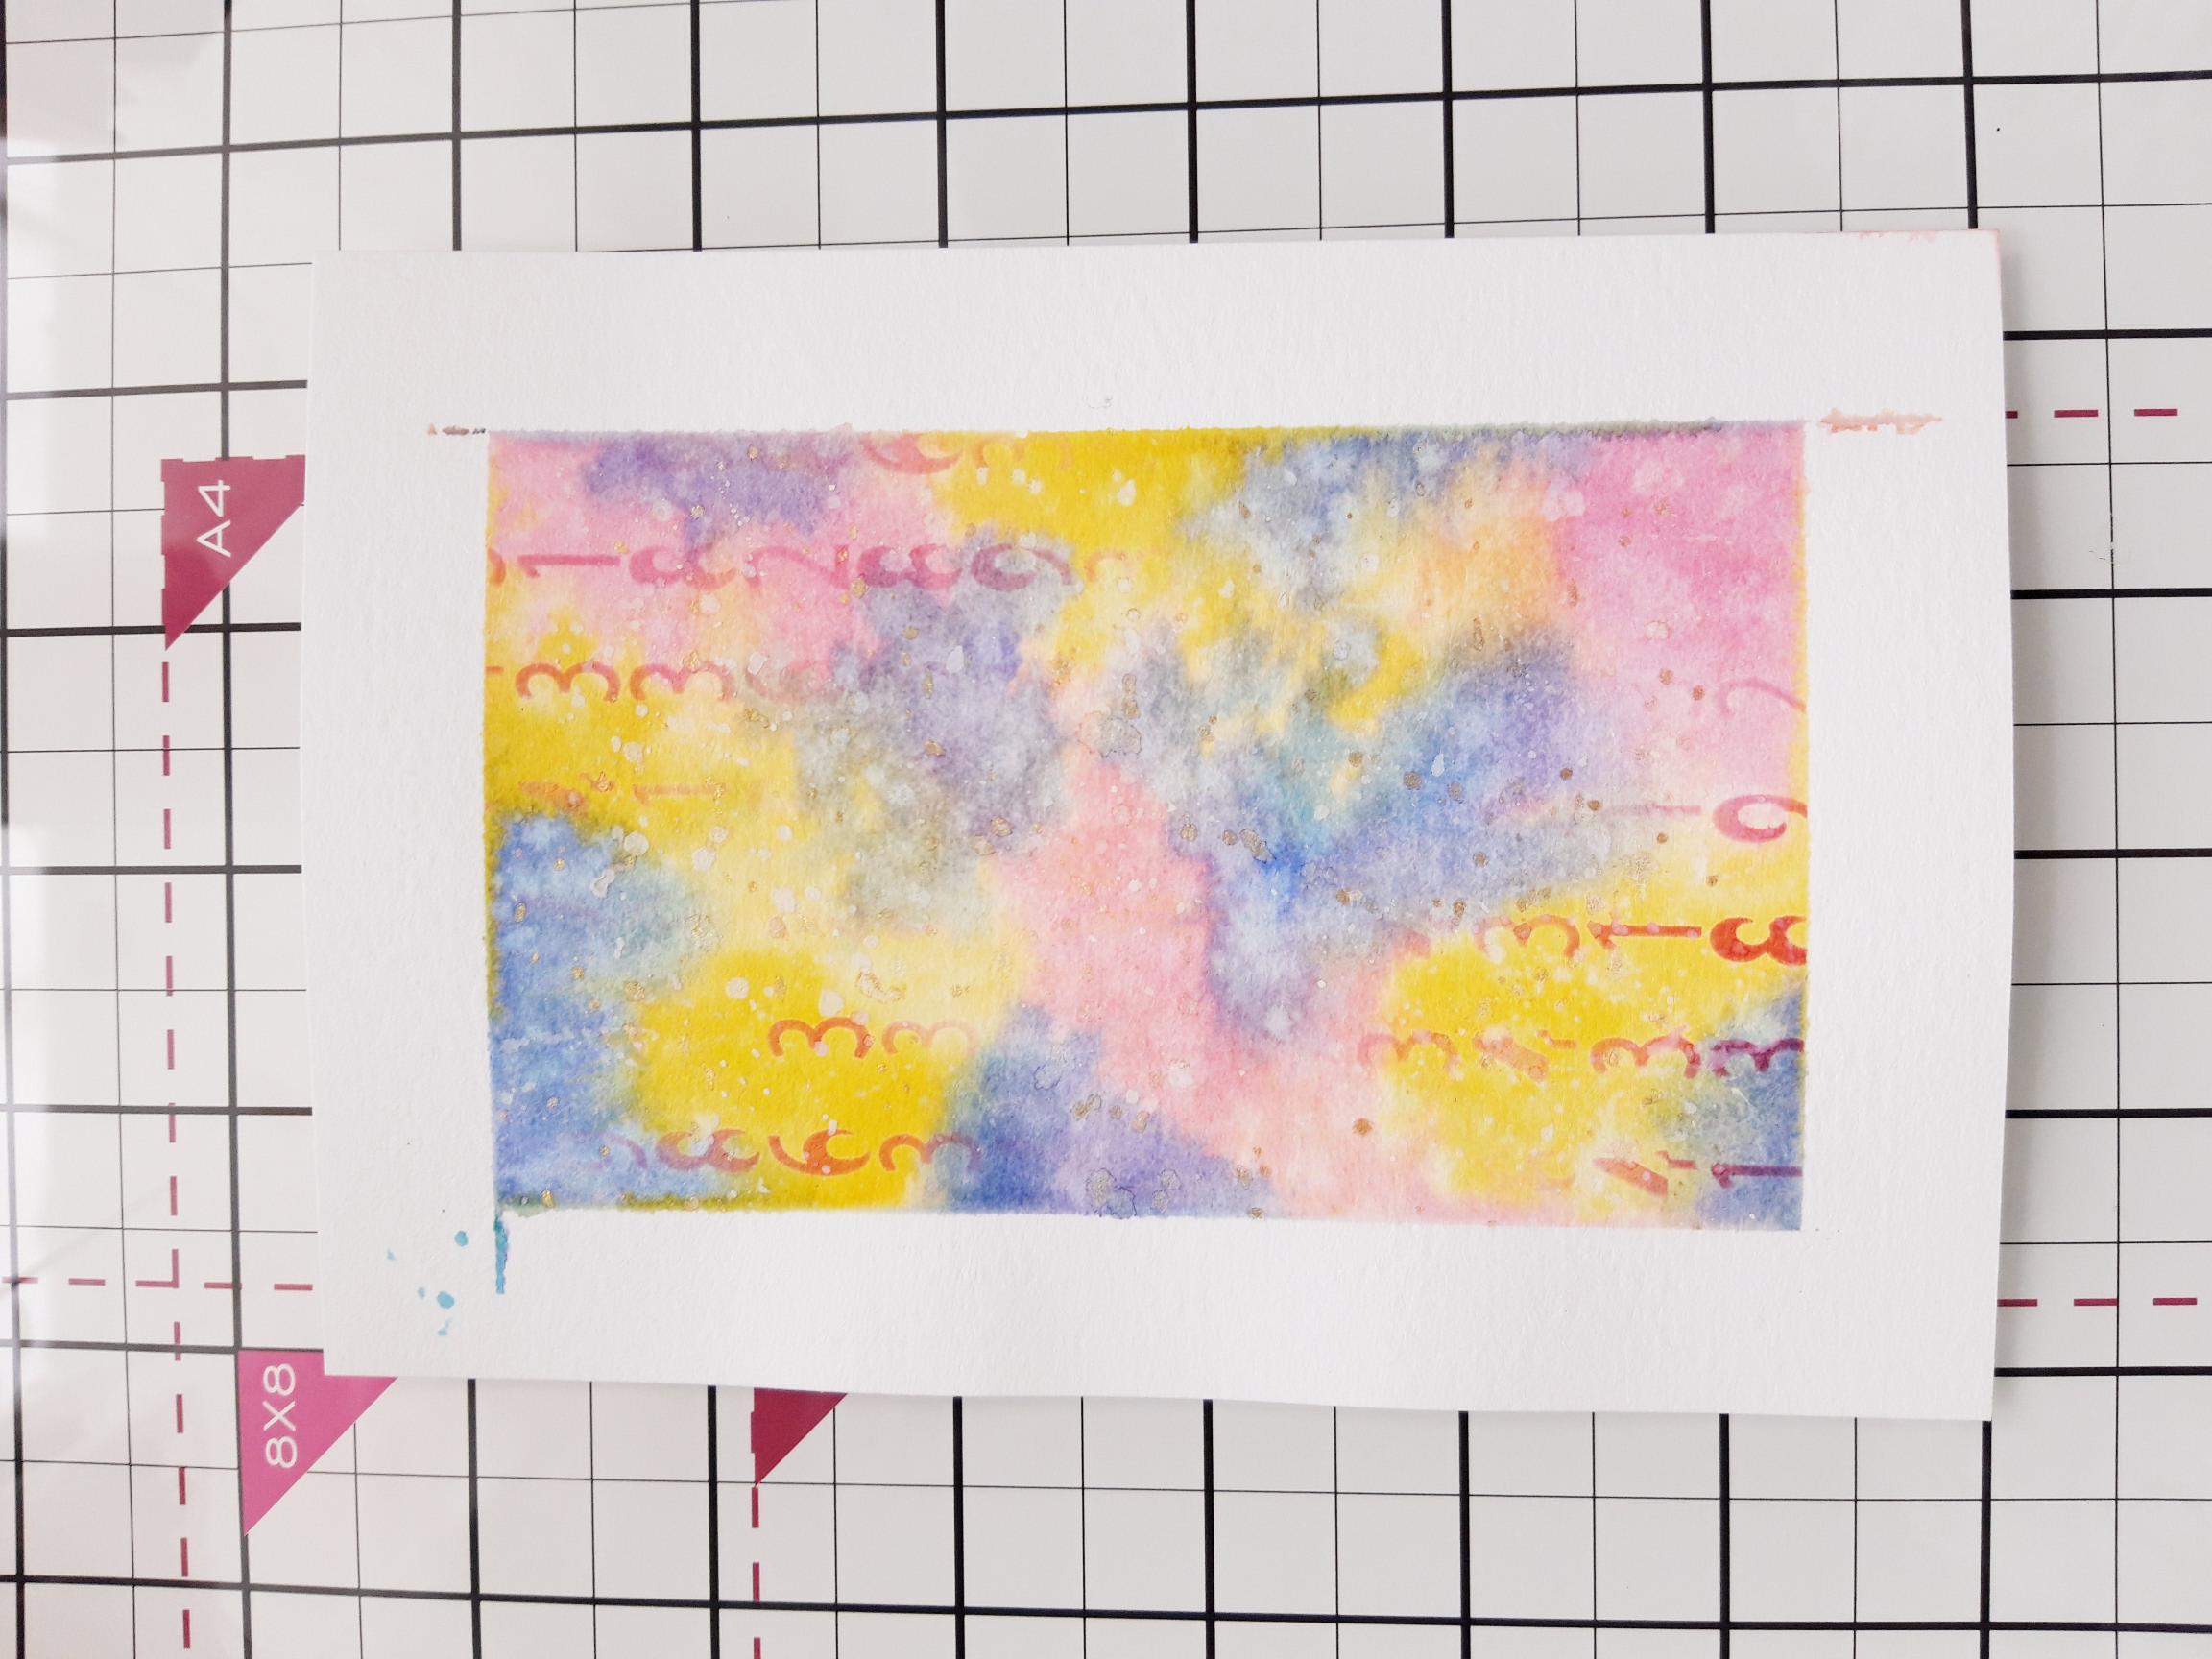
Carefully remove the masking tape, to reveal your inky panel. |
|
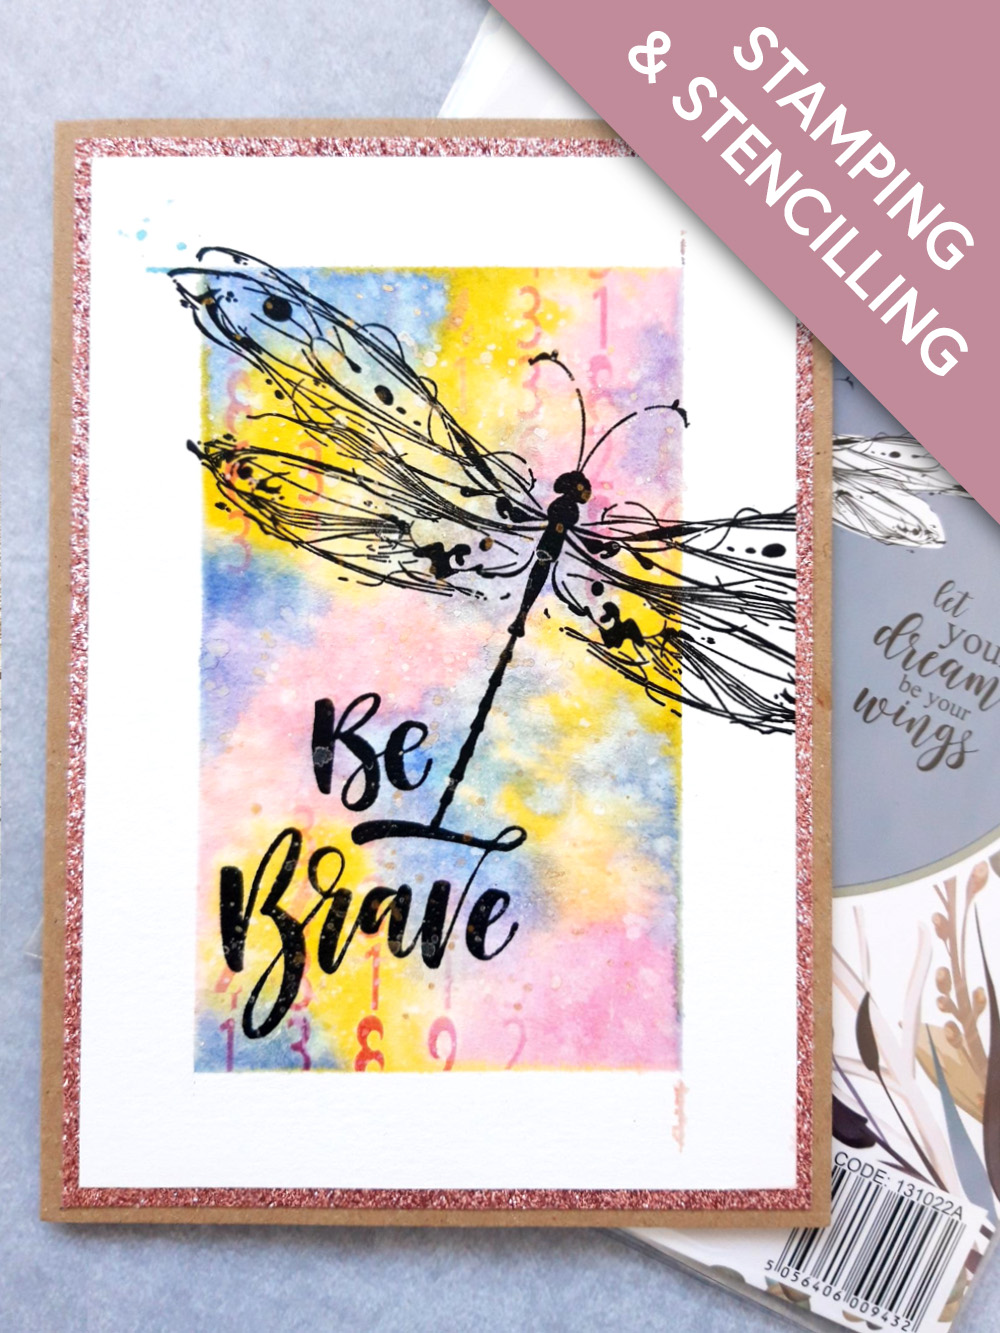
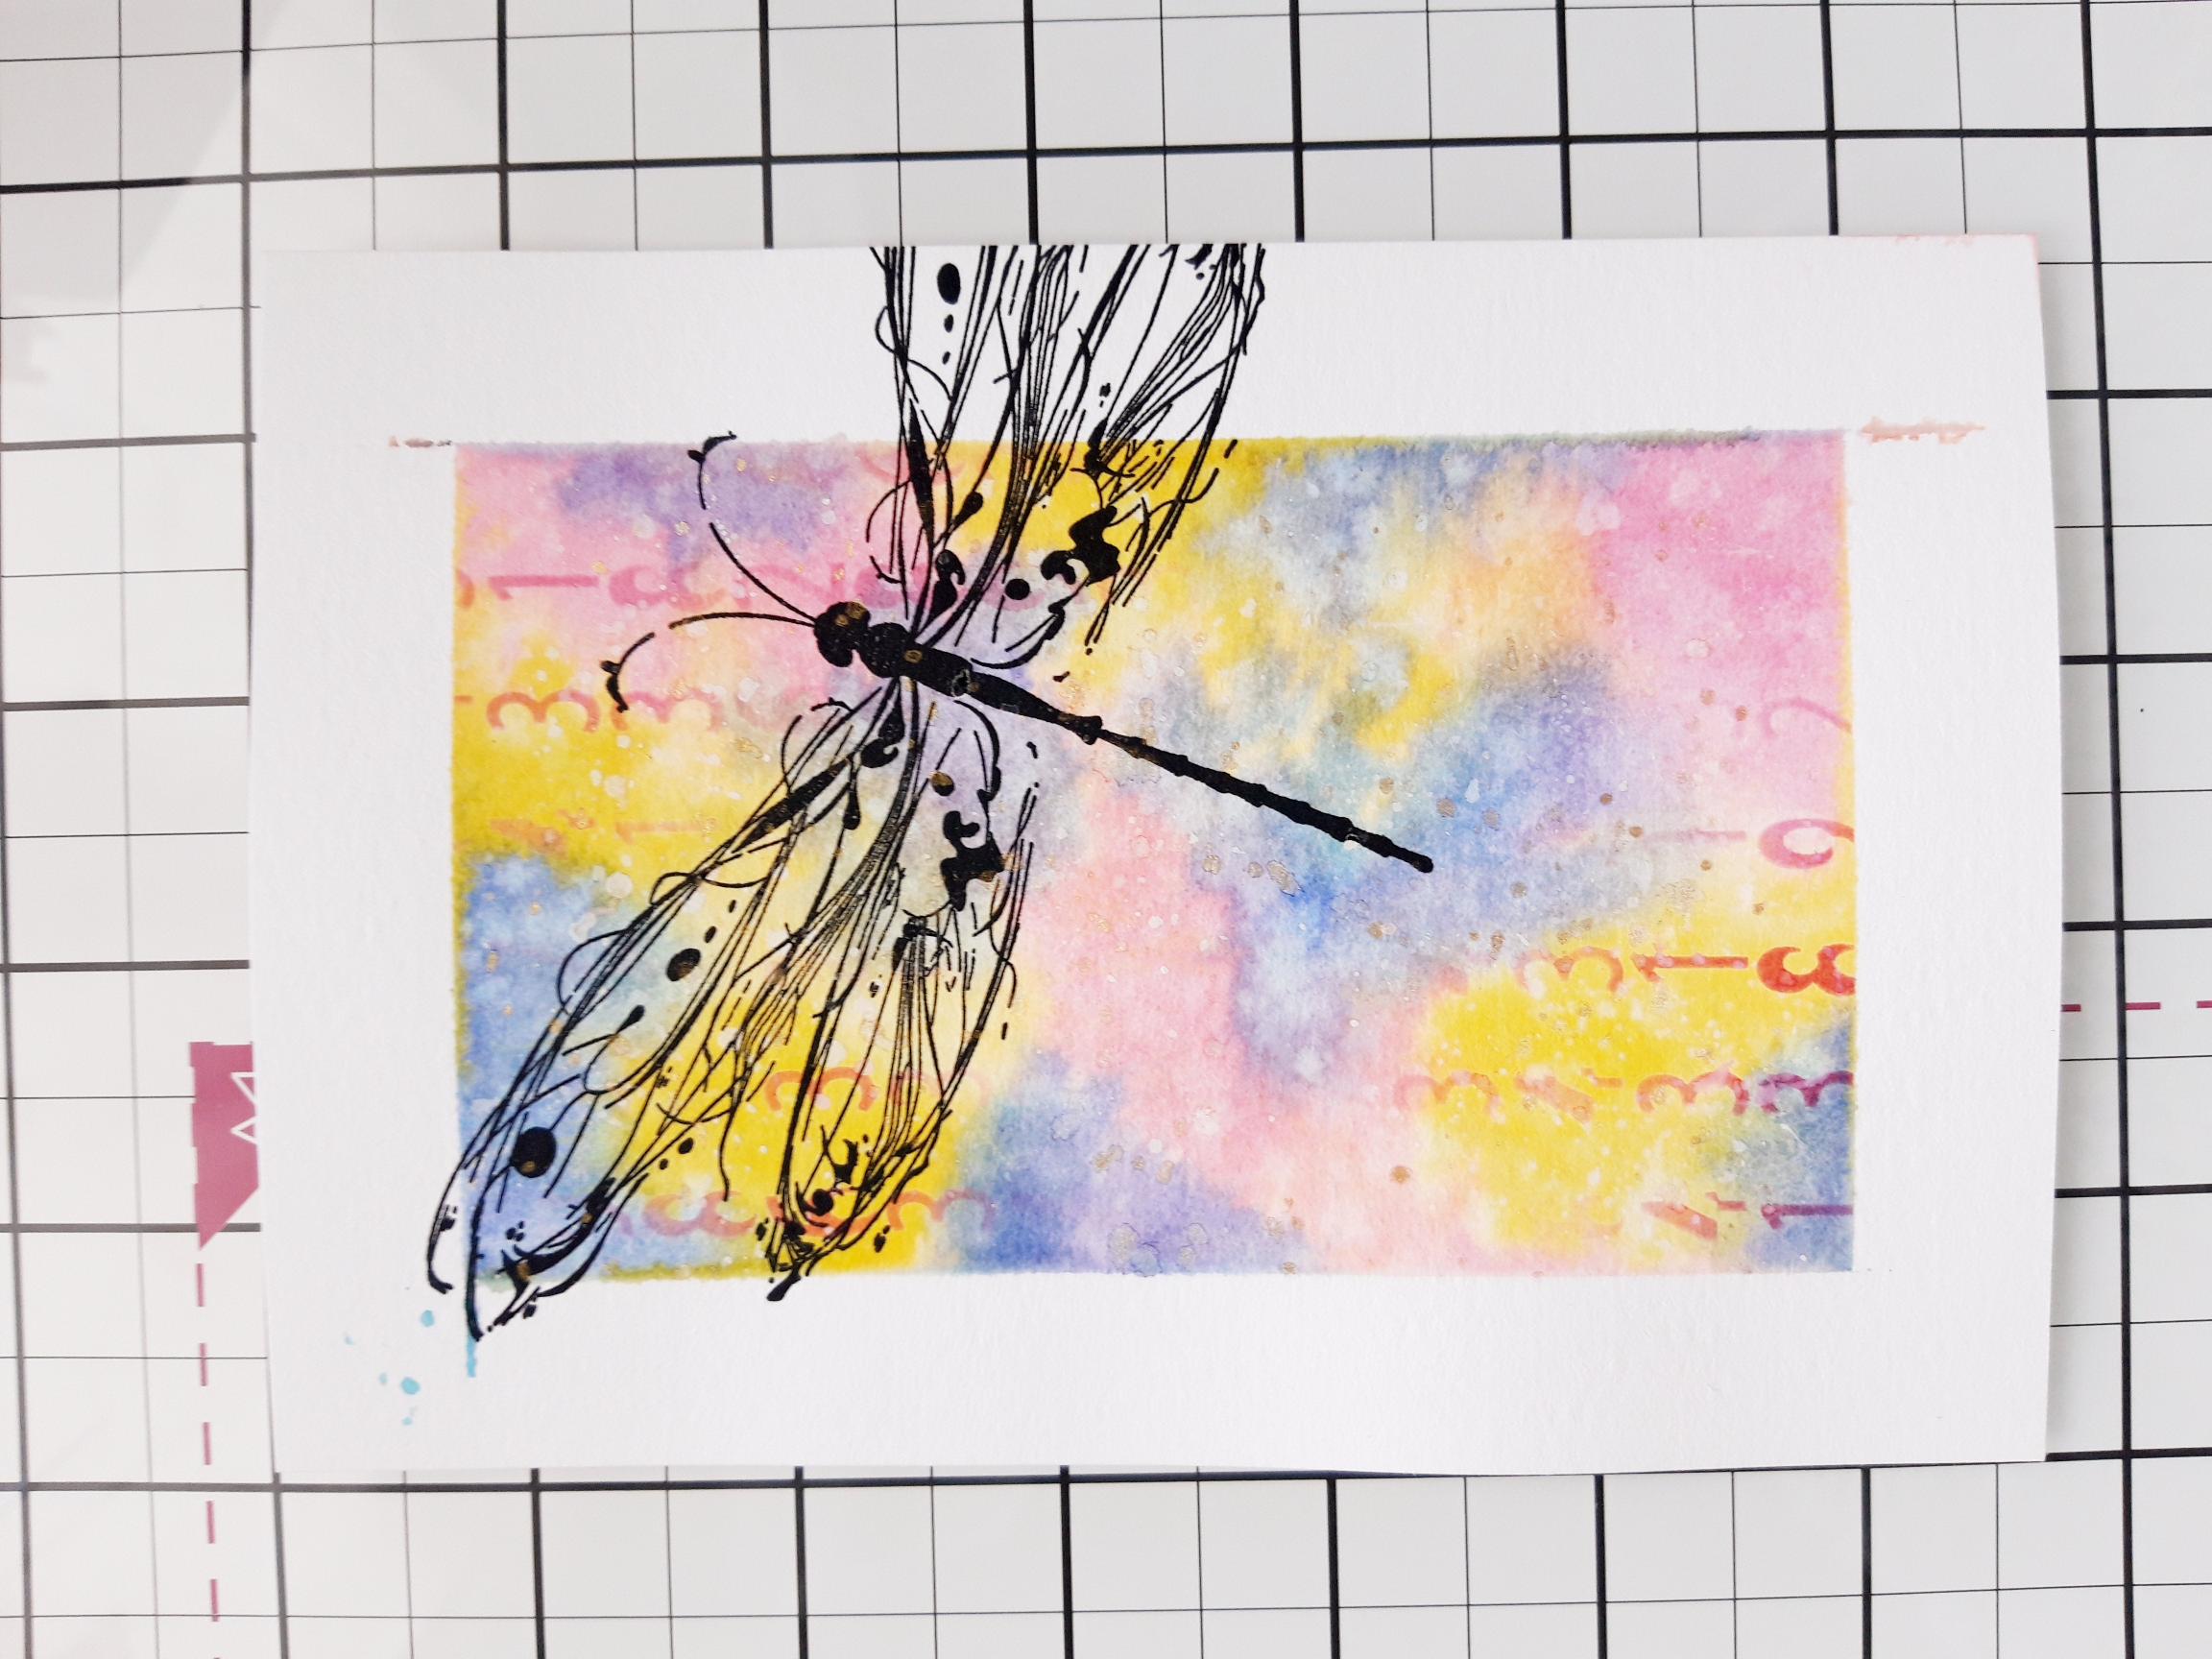
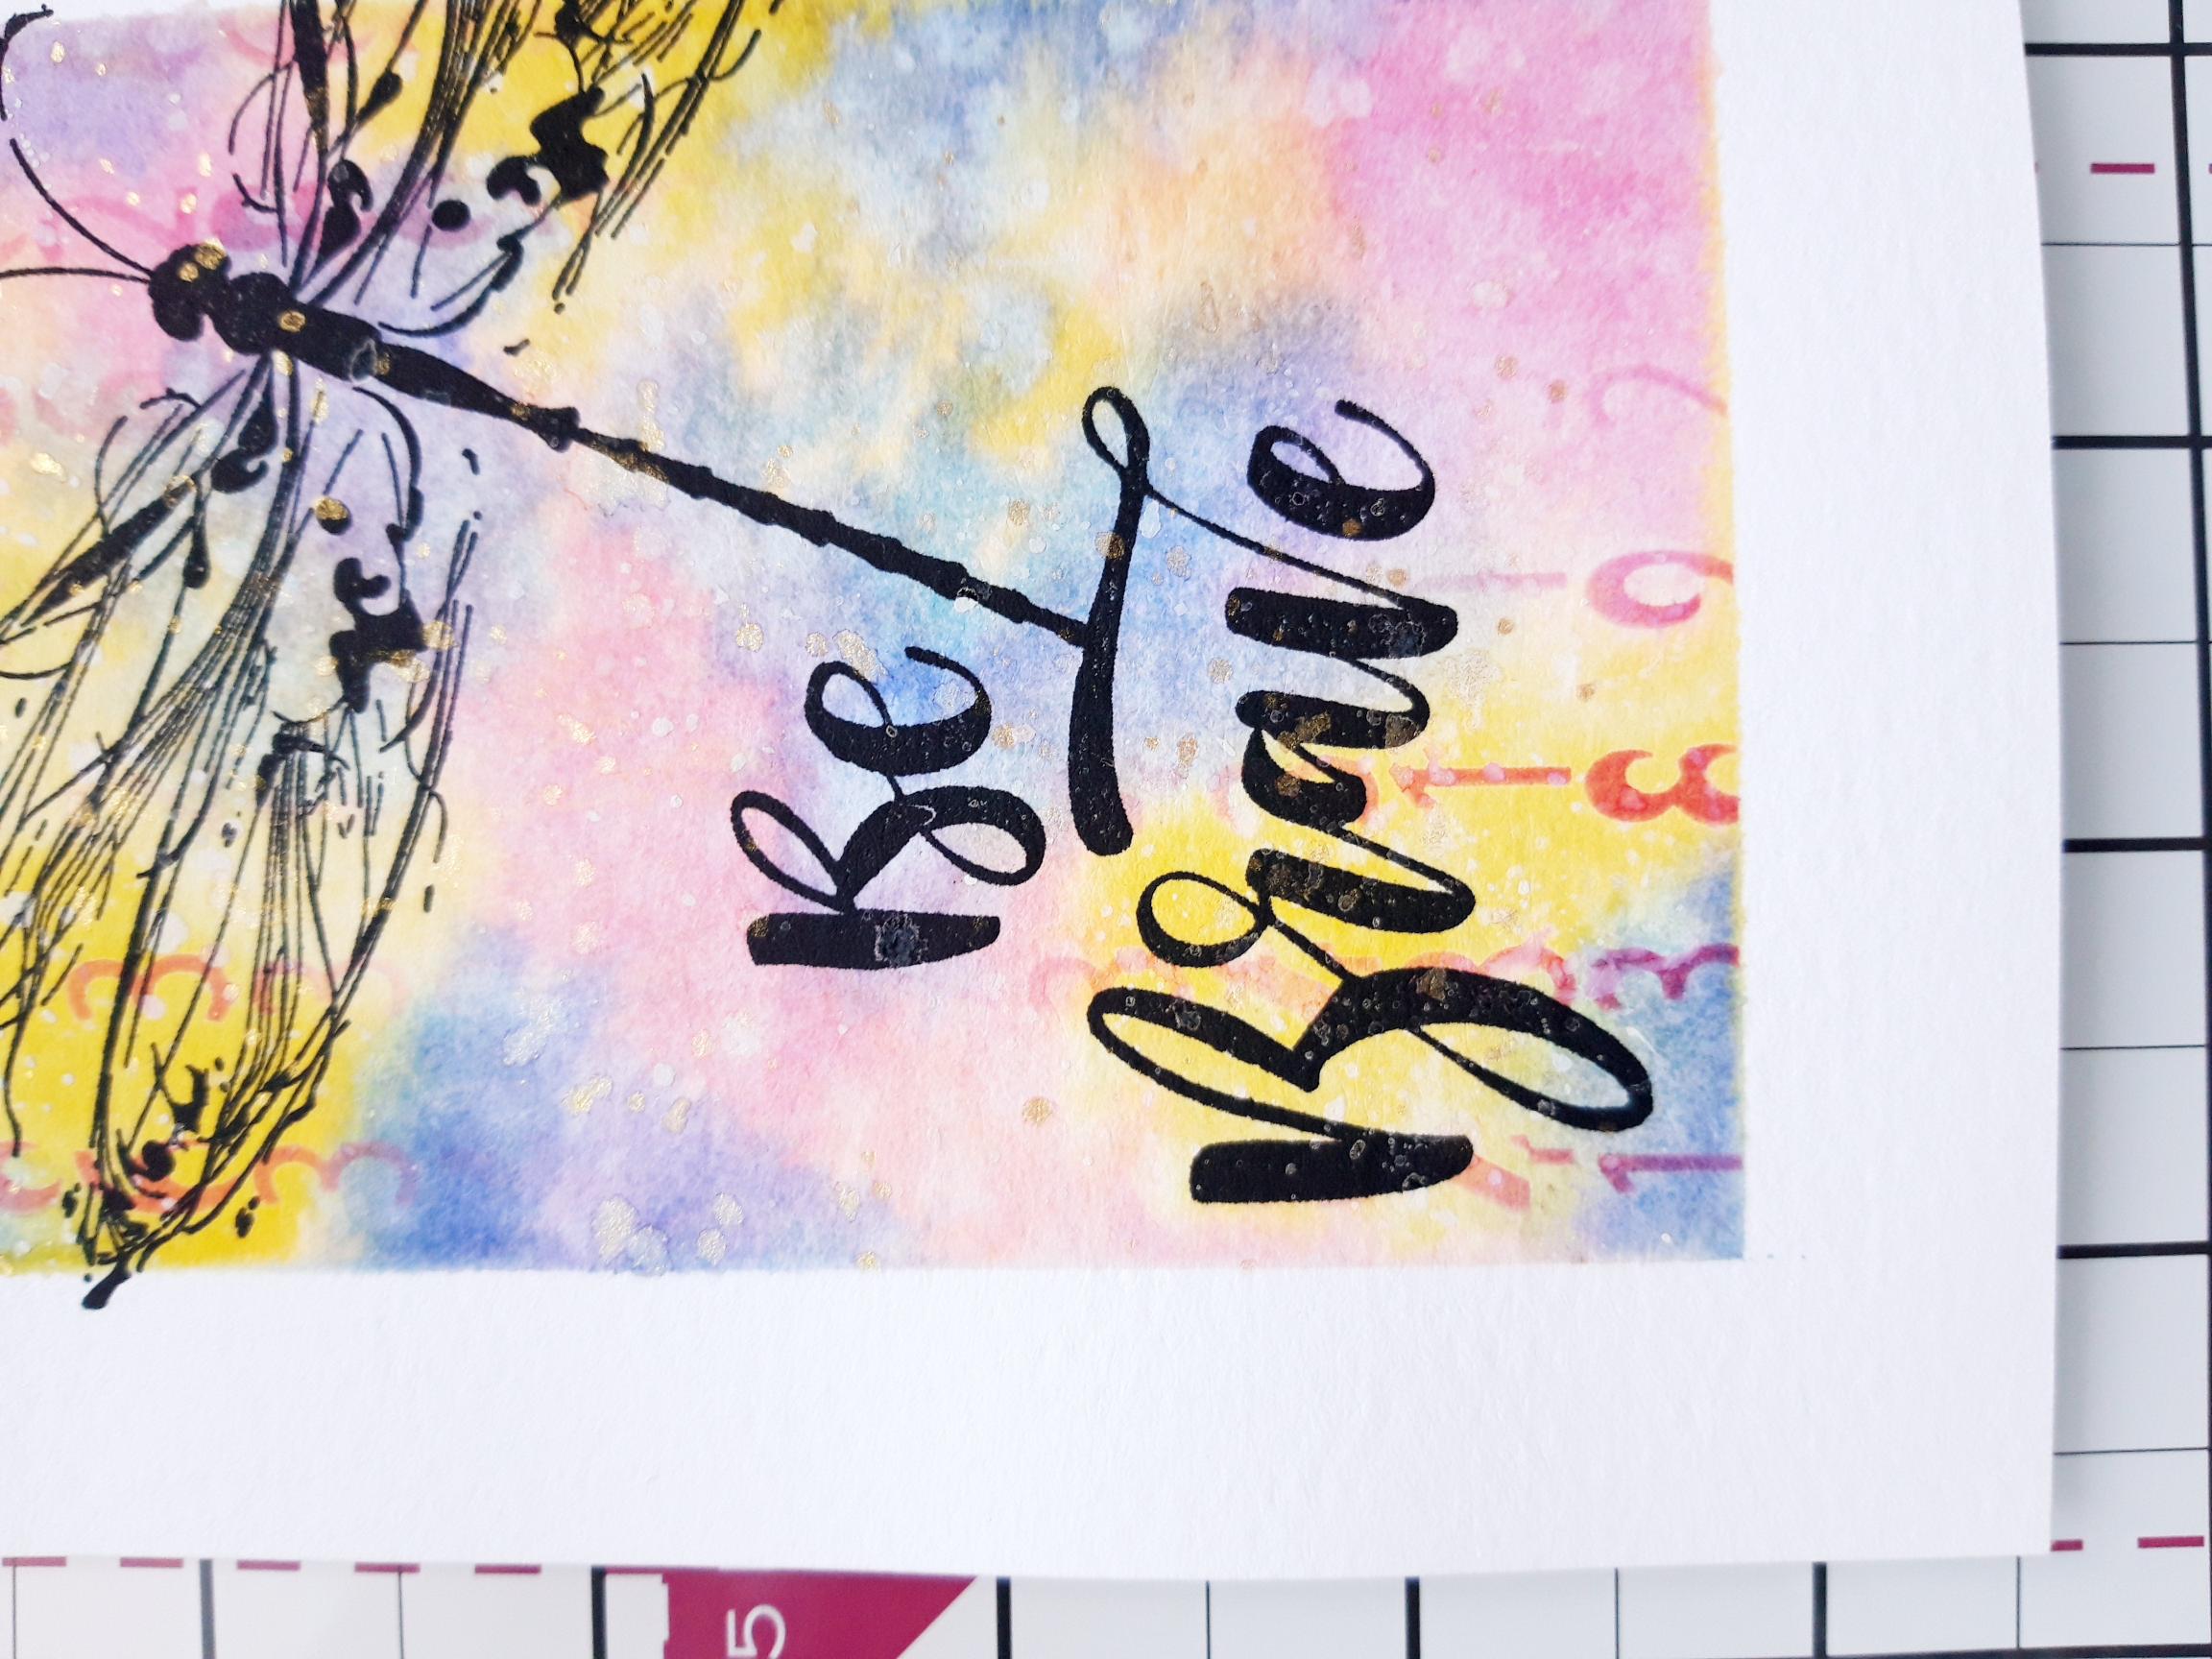
Ink up the gorgeous dragonfly, from Imala Be Brave, with the Onyx Black Versafine and stamp it going off the right side edge, of the card. |
|
Ink up the sentiment stamp with the Versafine and stamp in the bottom left corner of the inky panel. |
|
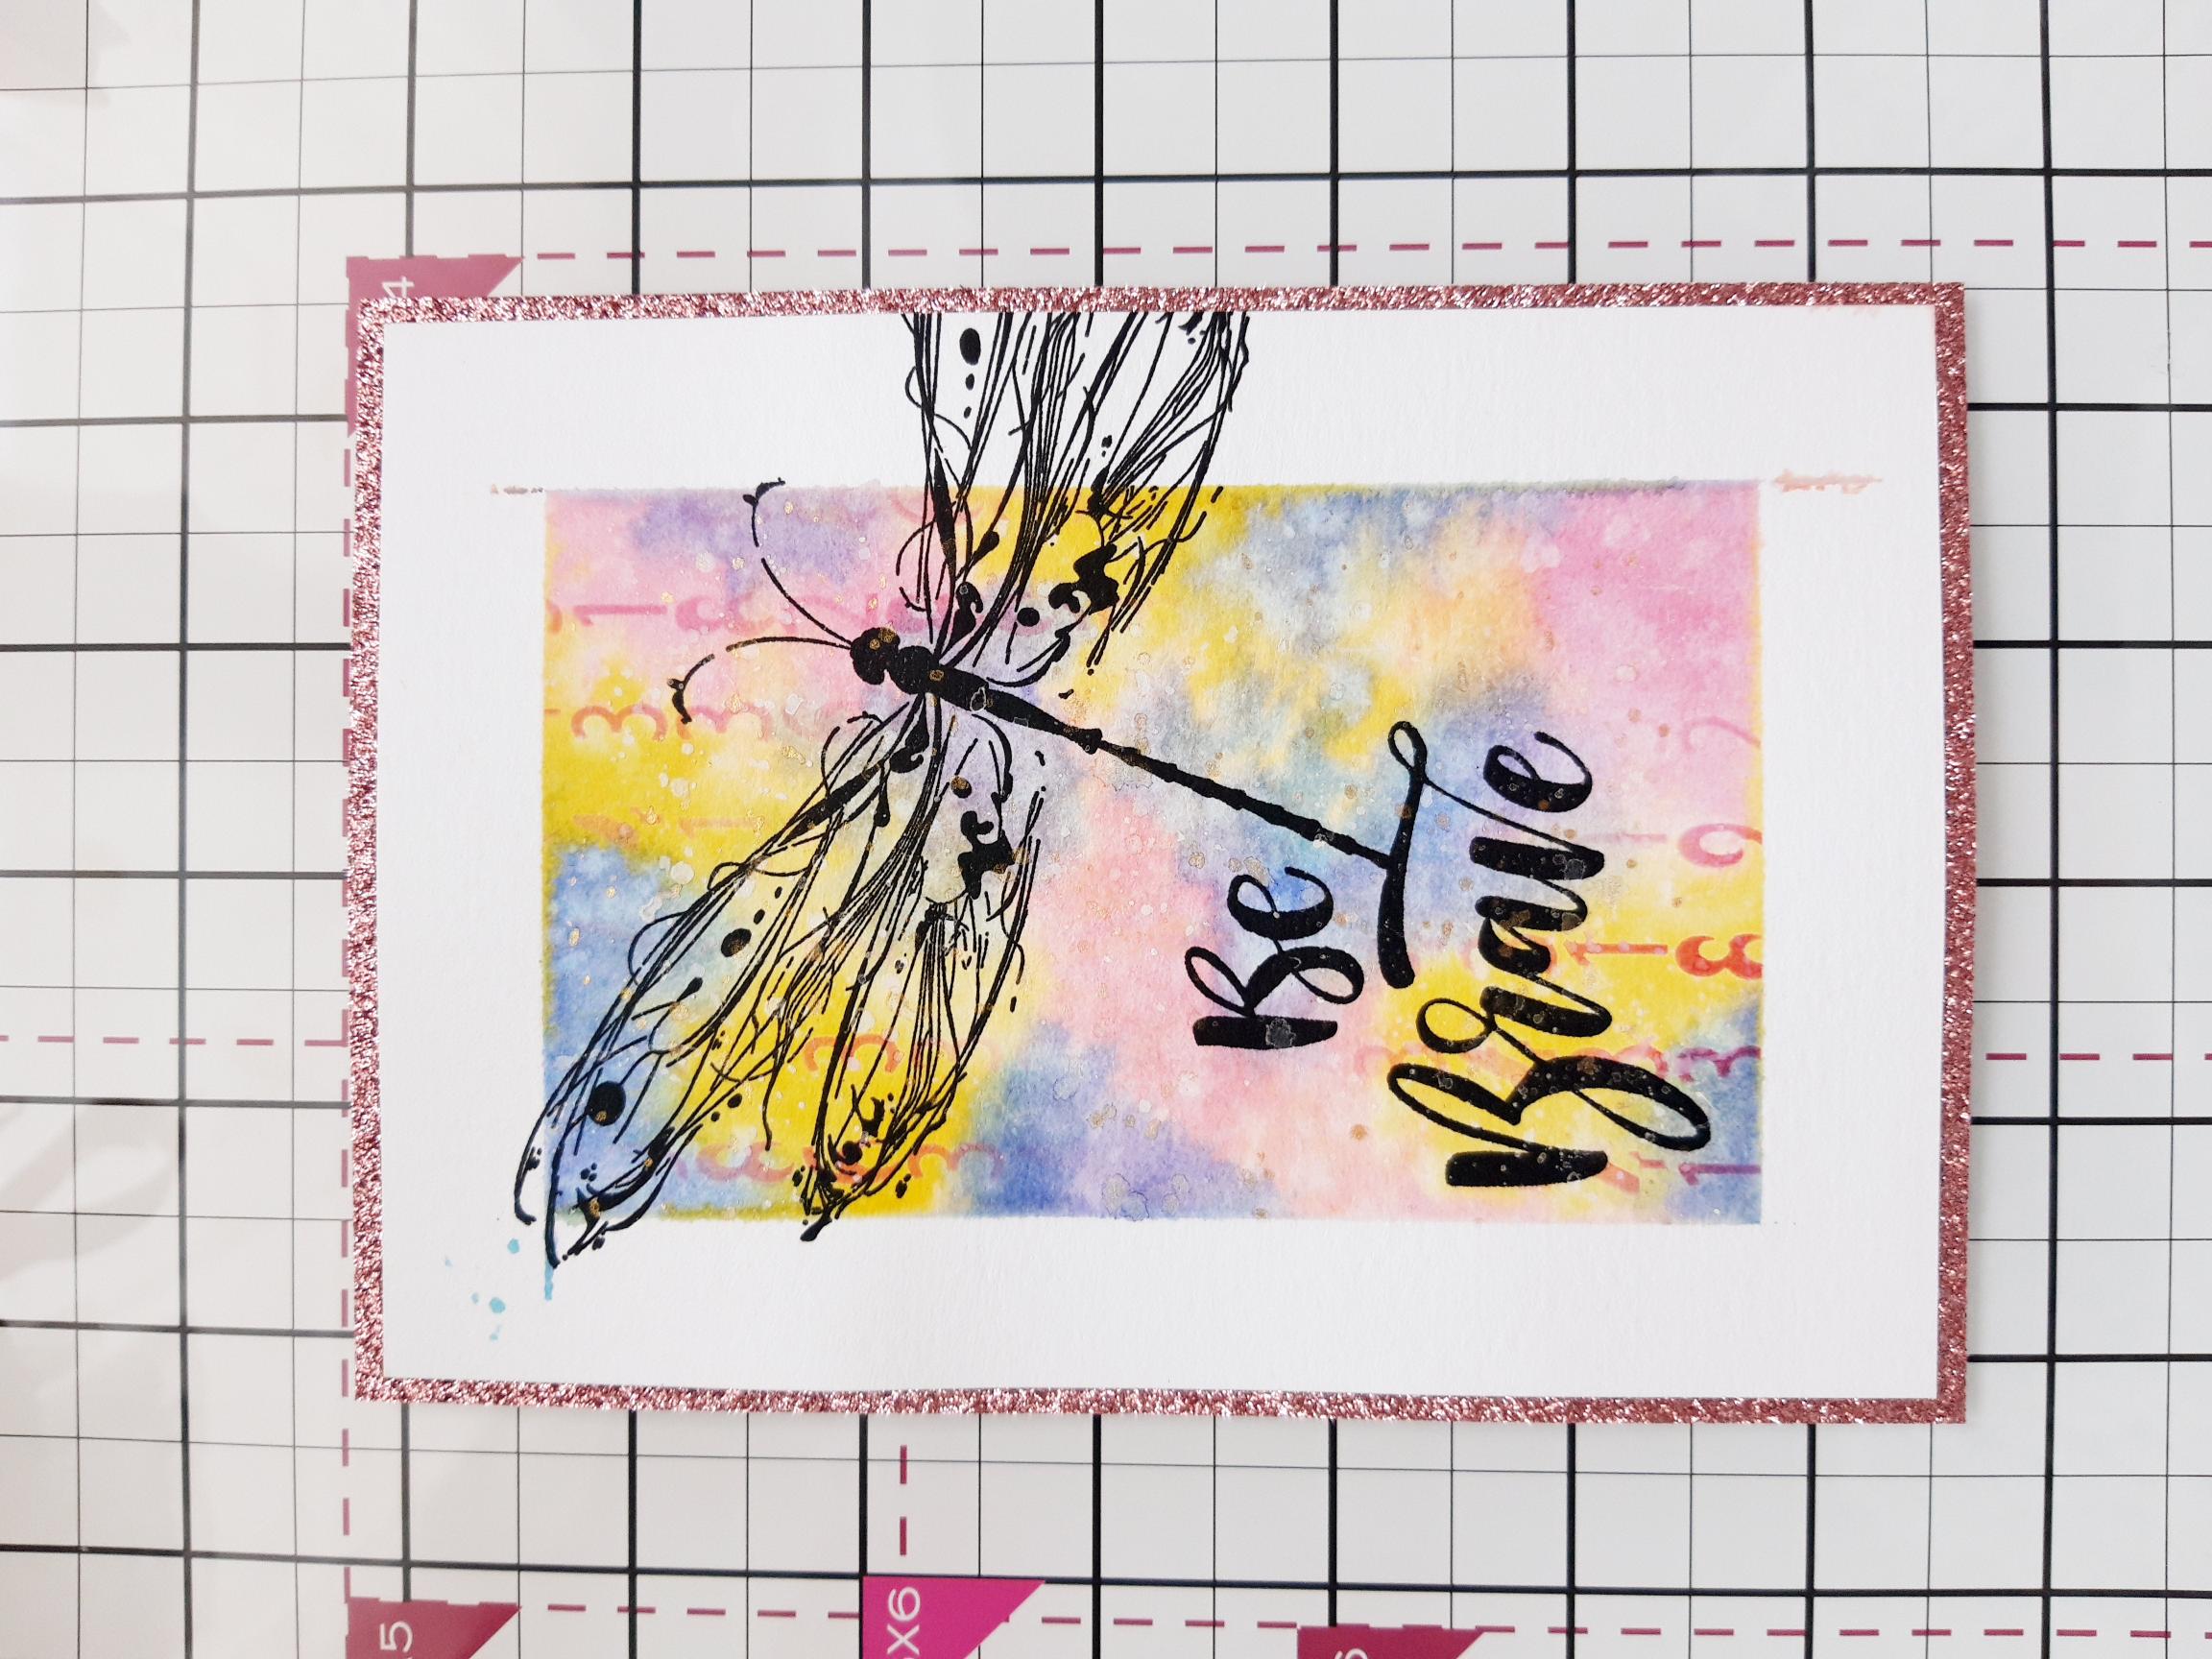
Adhere your artwork on to the blush glitter card. |
|
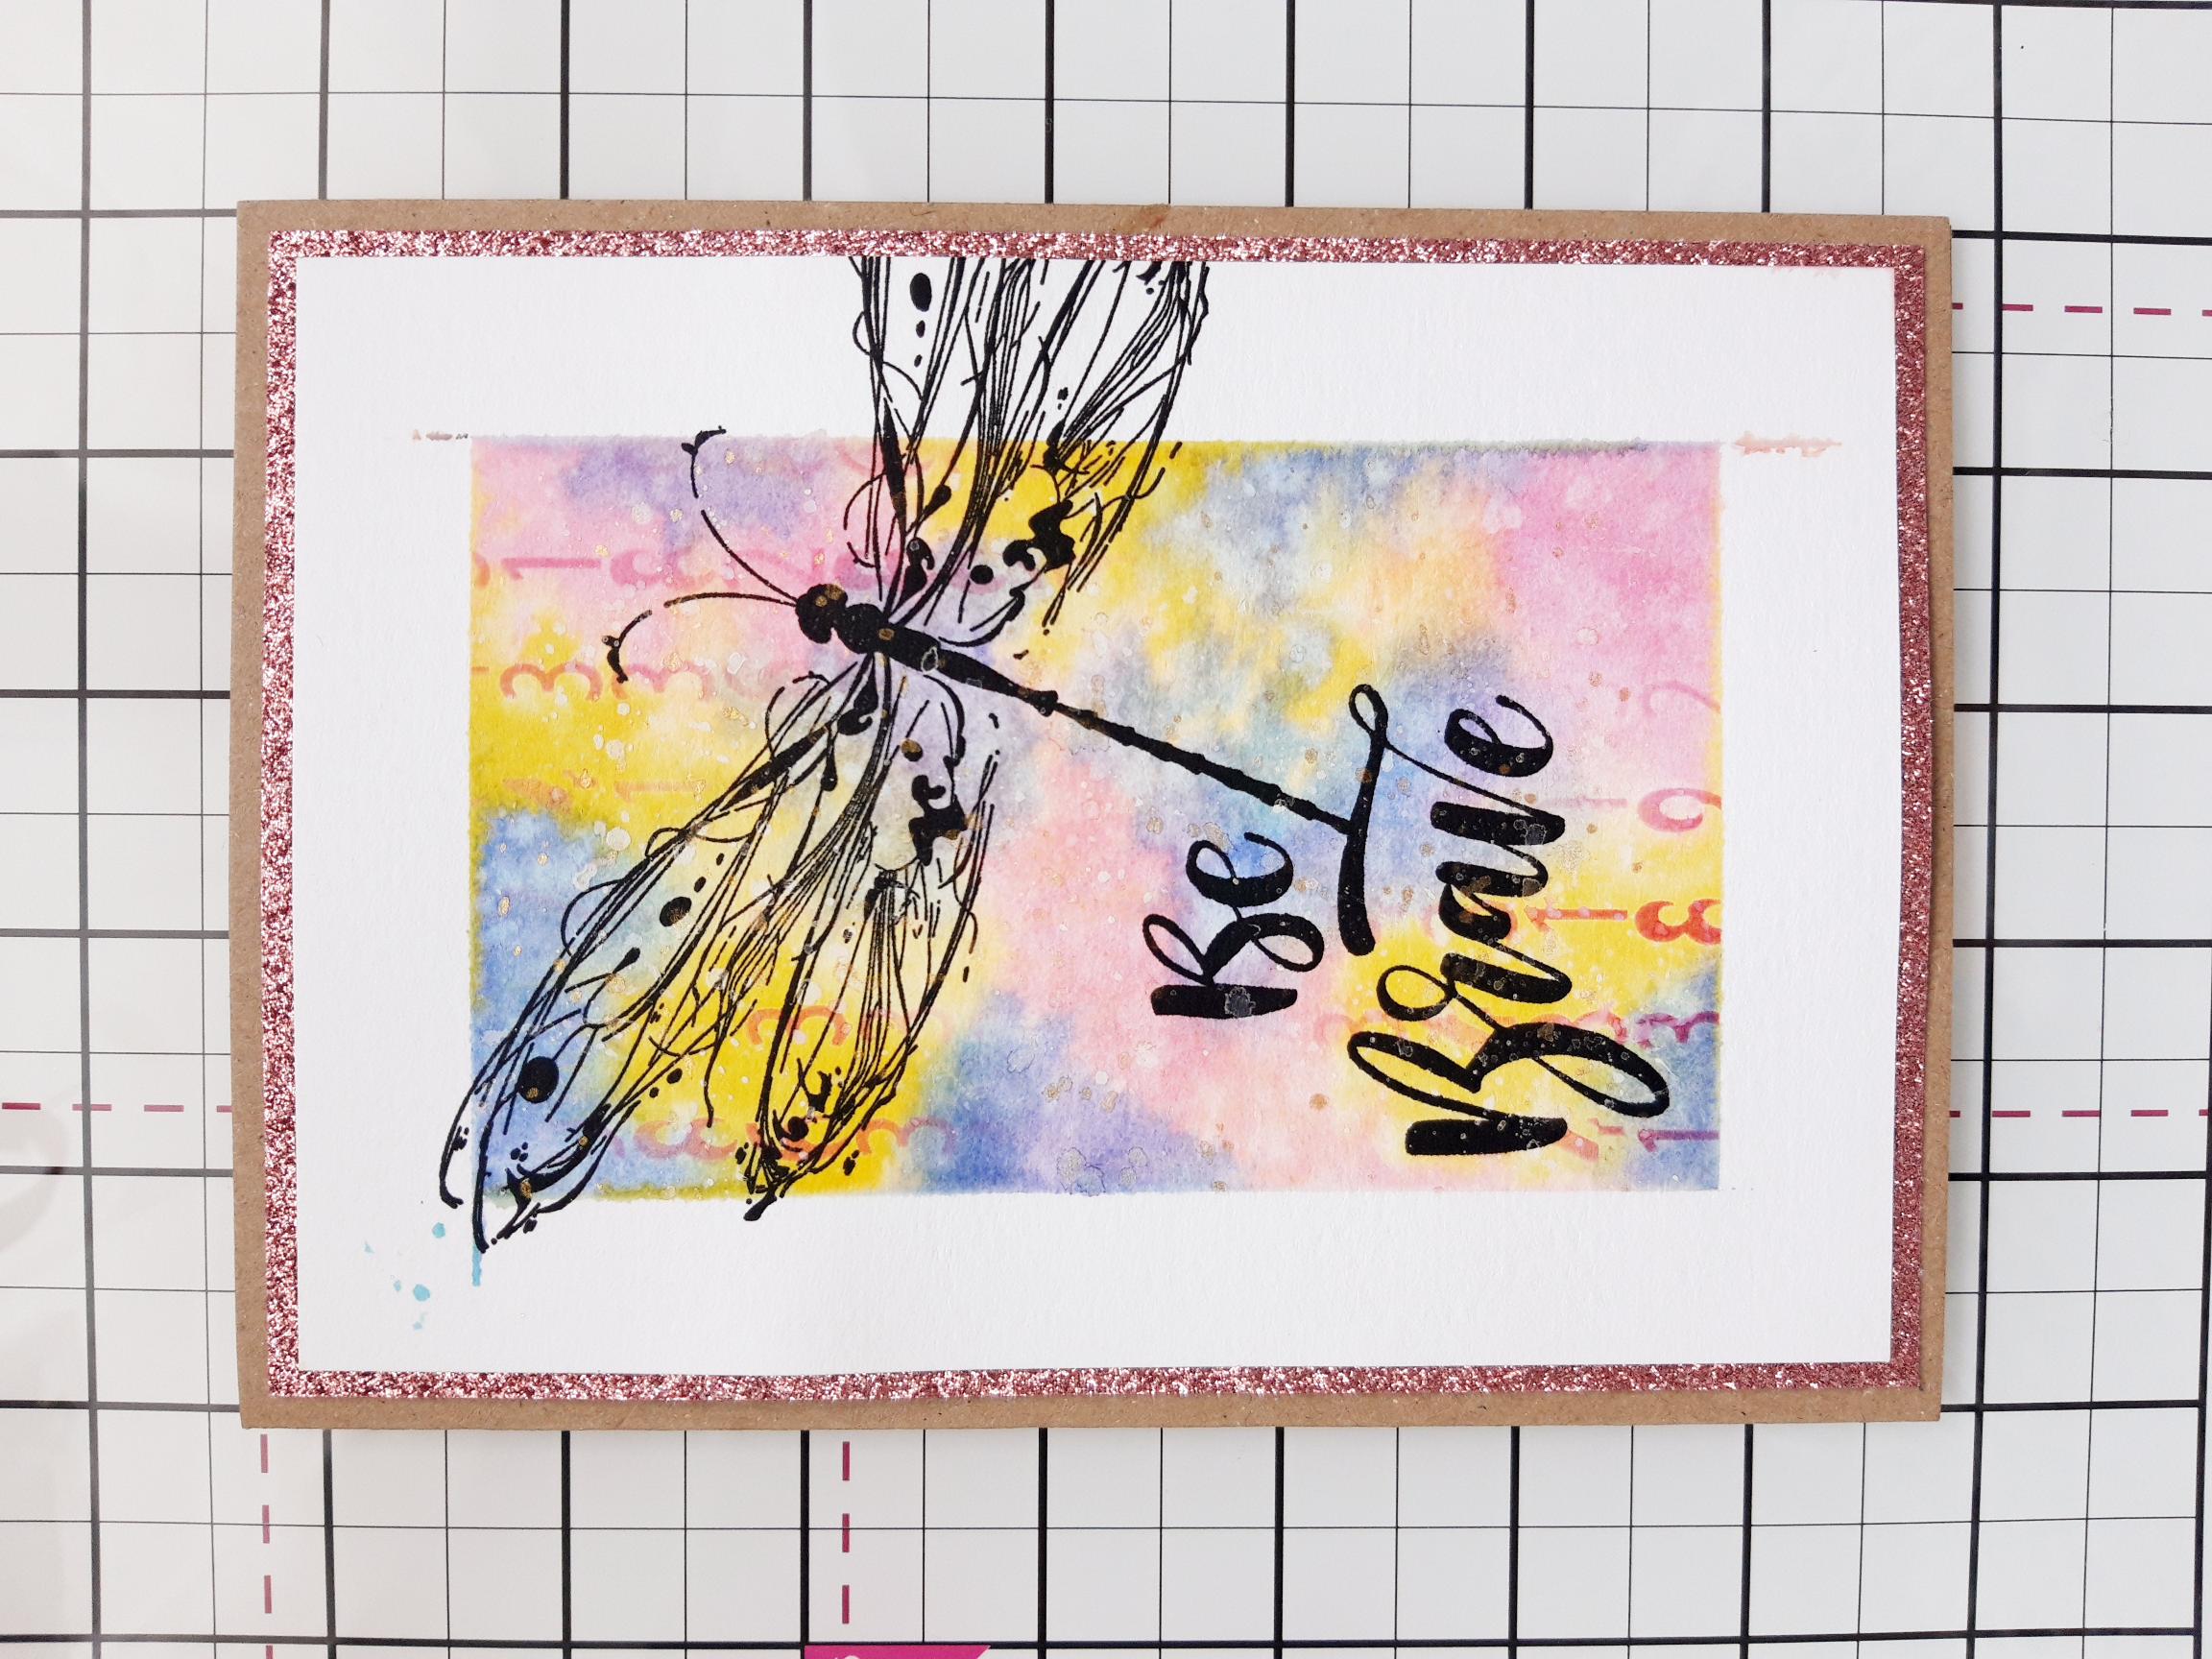
Adhere on to your 7 x 5" kraft card blank, to finish |