Give your friends $10 off their first order!
Refer a FRIEND


WHAT YOU WILL NEED:
White scallop edge card blank 6 x 6"
White card 5 1/4 x 5 1/4"
White card 2 x 2"
Acetate 5 x 5"
Beautiful Stamp And Die Collection
Funky Fossil Watercolour Rainbow 8 x 8" paper pad
Versafine Ink Pad: Onyx Black
Watercolour paints
Paint brush
White gel pen
Twinkle Glitter Collection: Feras Gold
Anti-static bag
Eureka 101
Paper Trimmer
Perfect Together Glue
Double sided tape/red liner tape
Foam pads and/or foam shaker tape
Die Cutting machine
[click image to enlarge] 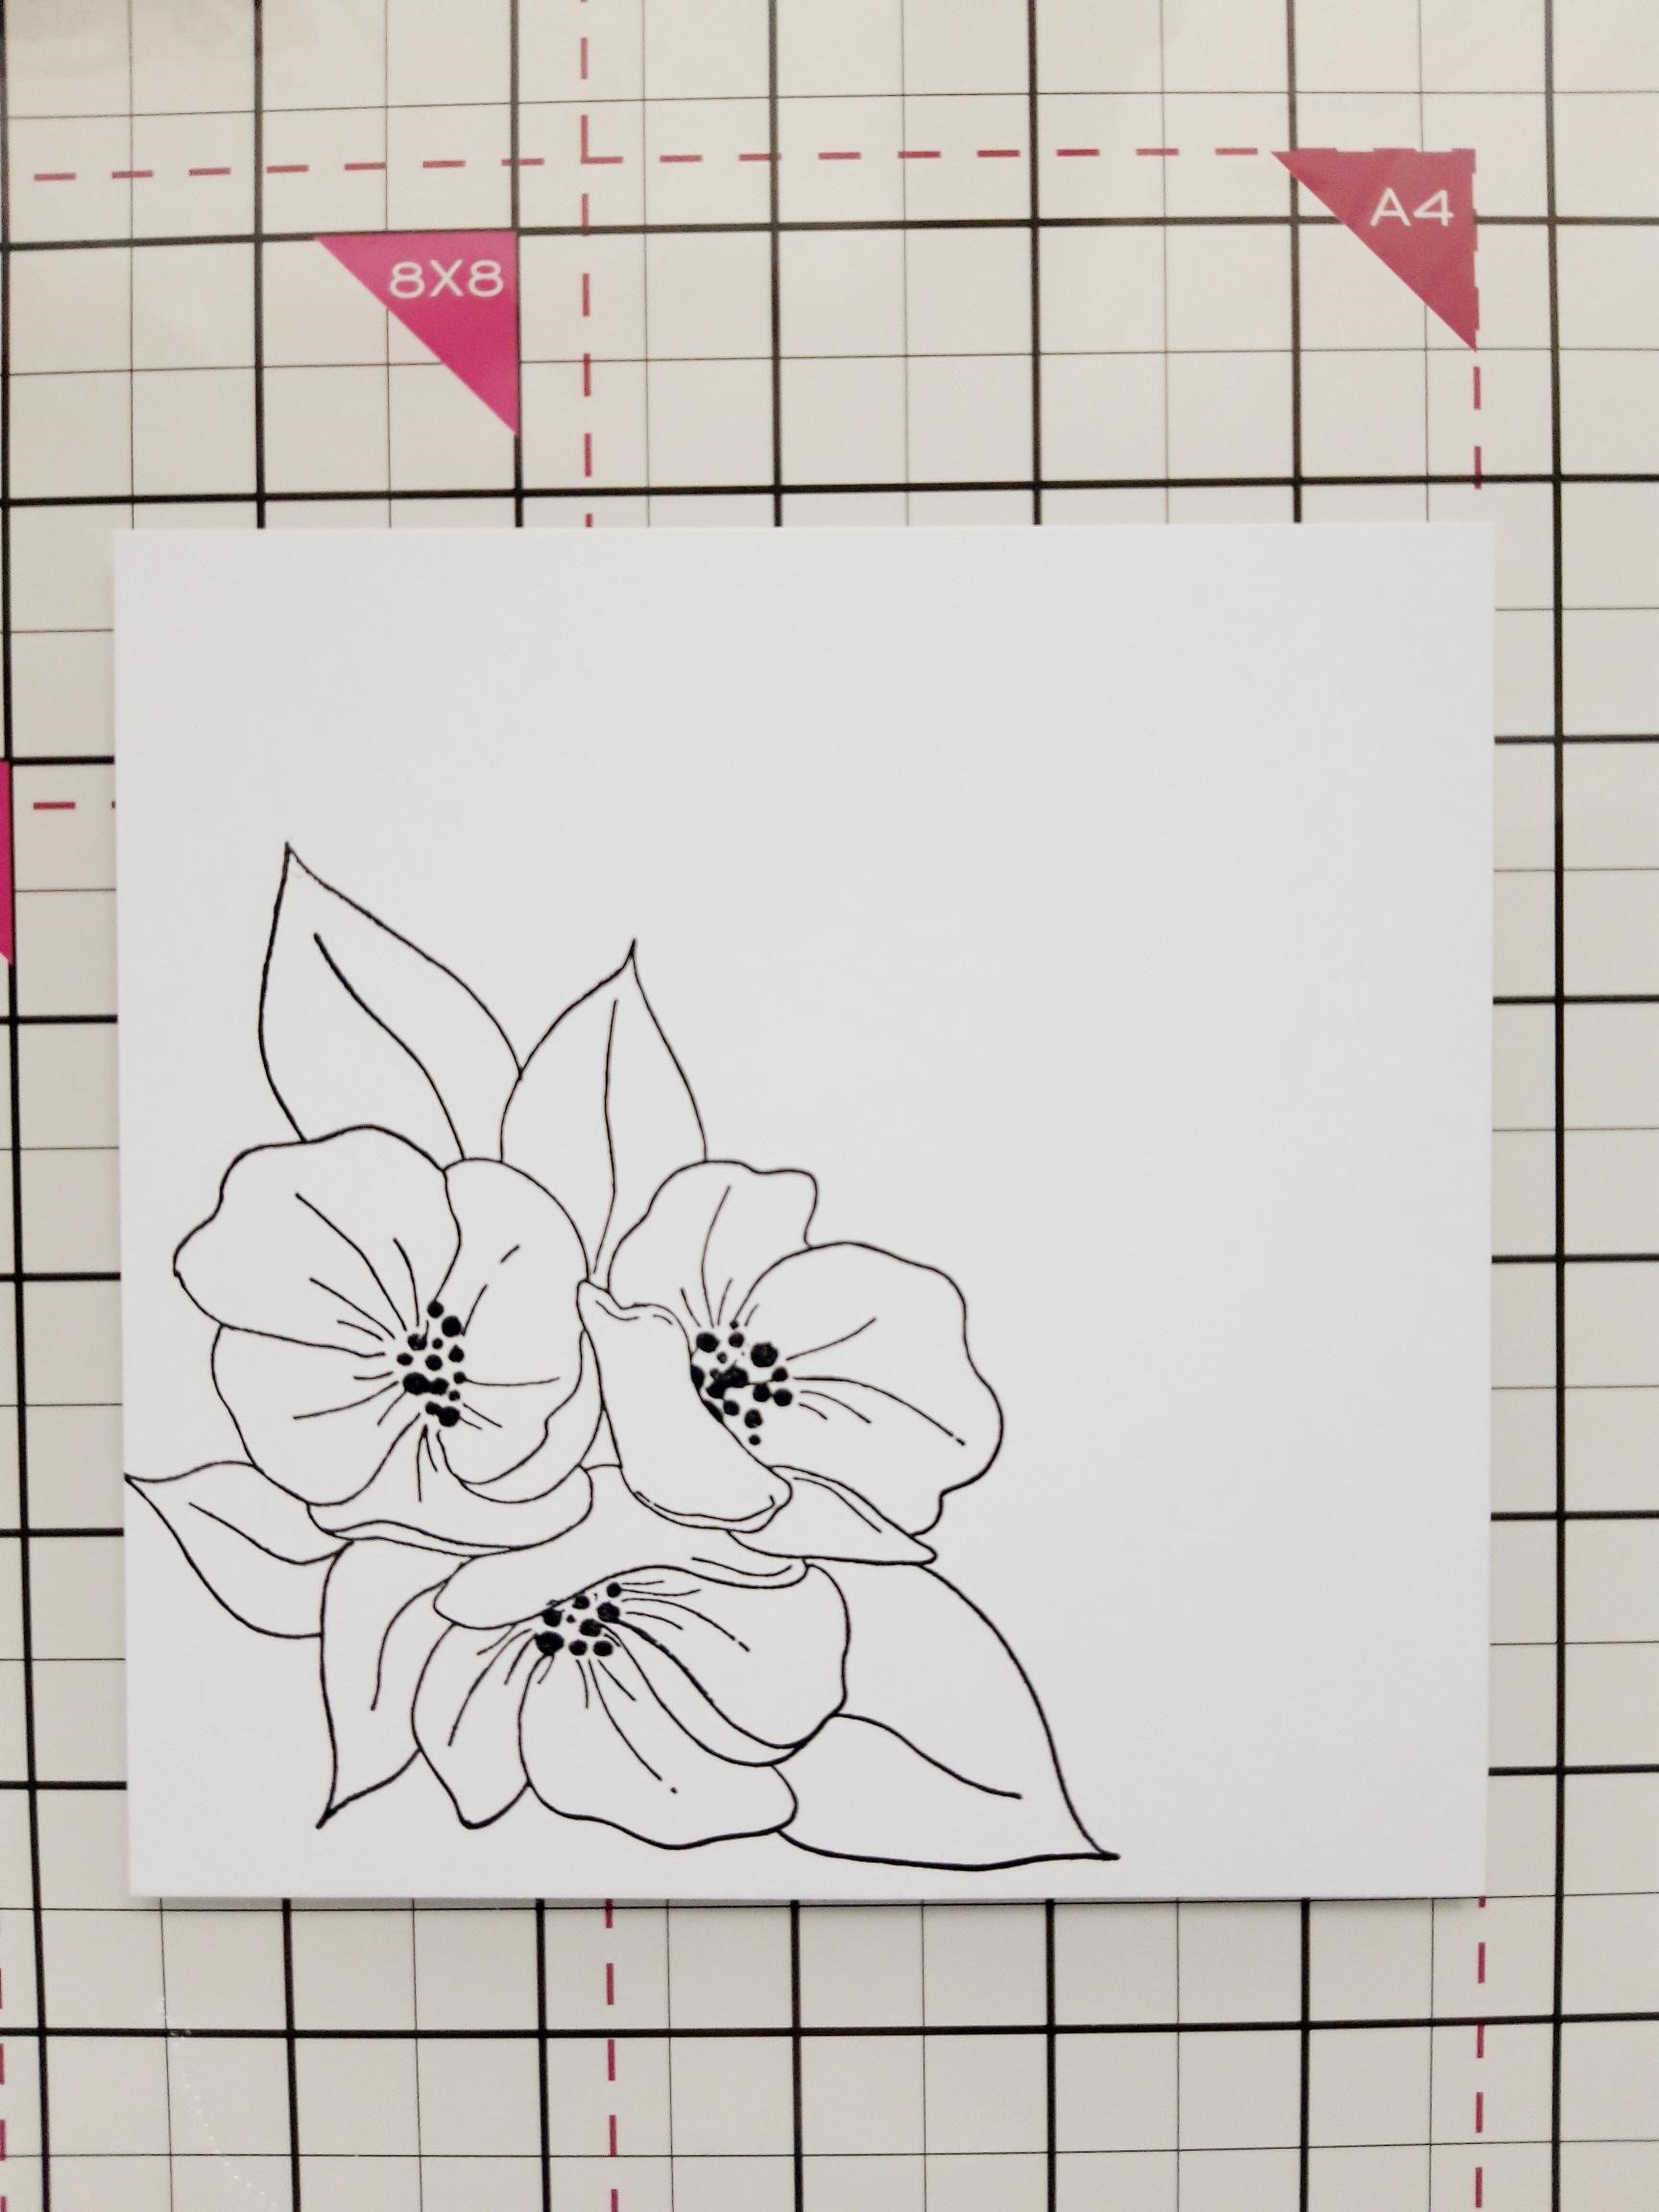
|
Ink up the floral stamp, from the Beautiful collection, with the Onyx Black Versafine and stamp in the bottom left corner of the 5 1/4" square, white card. |
|
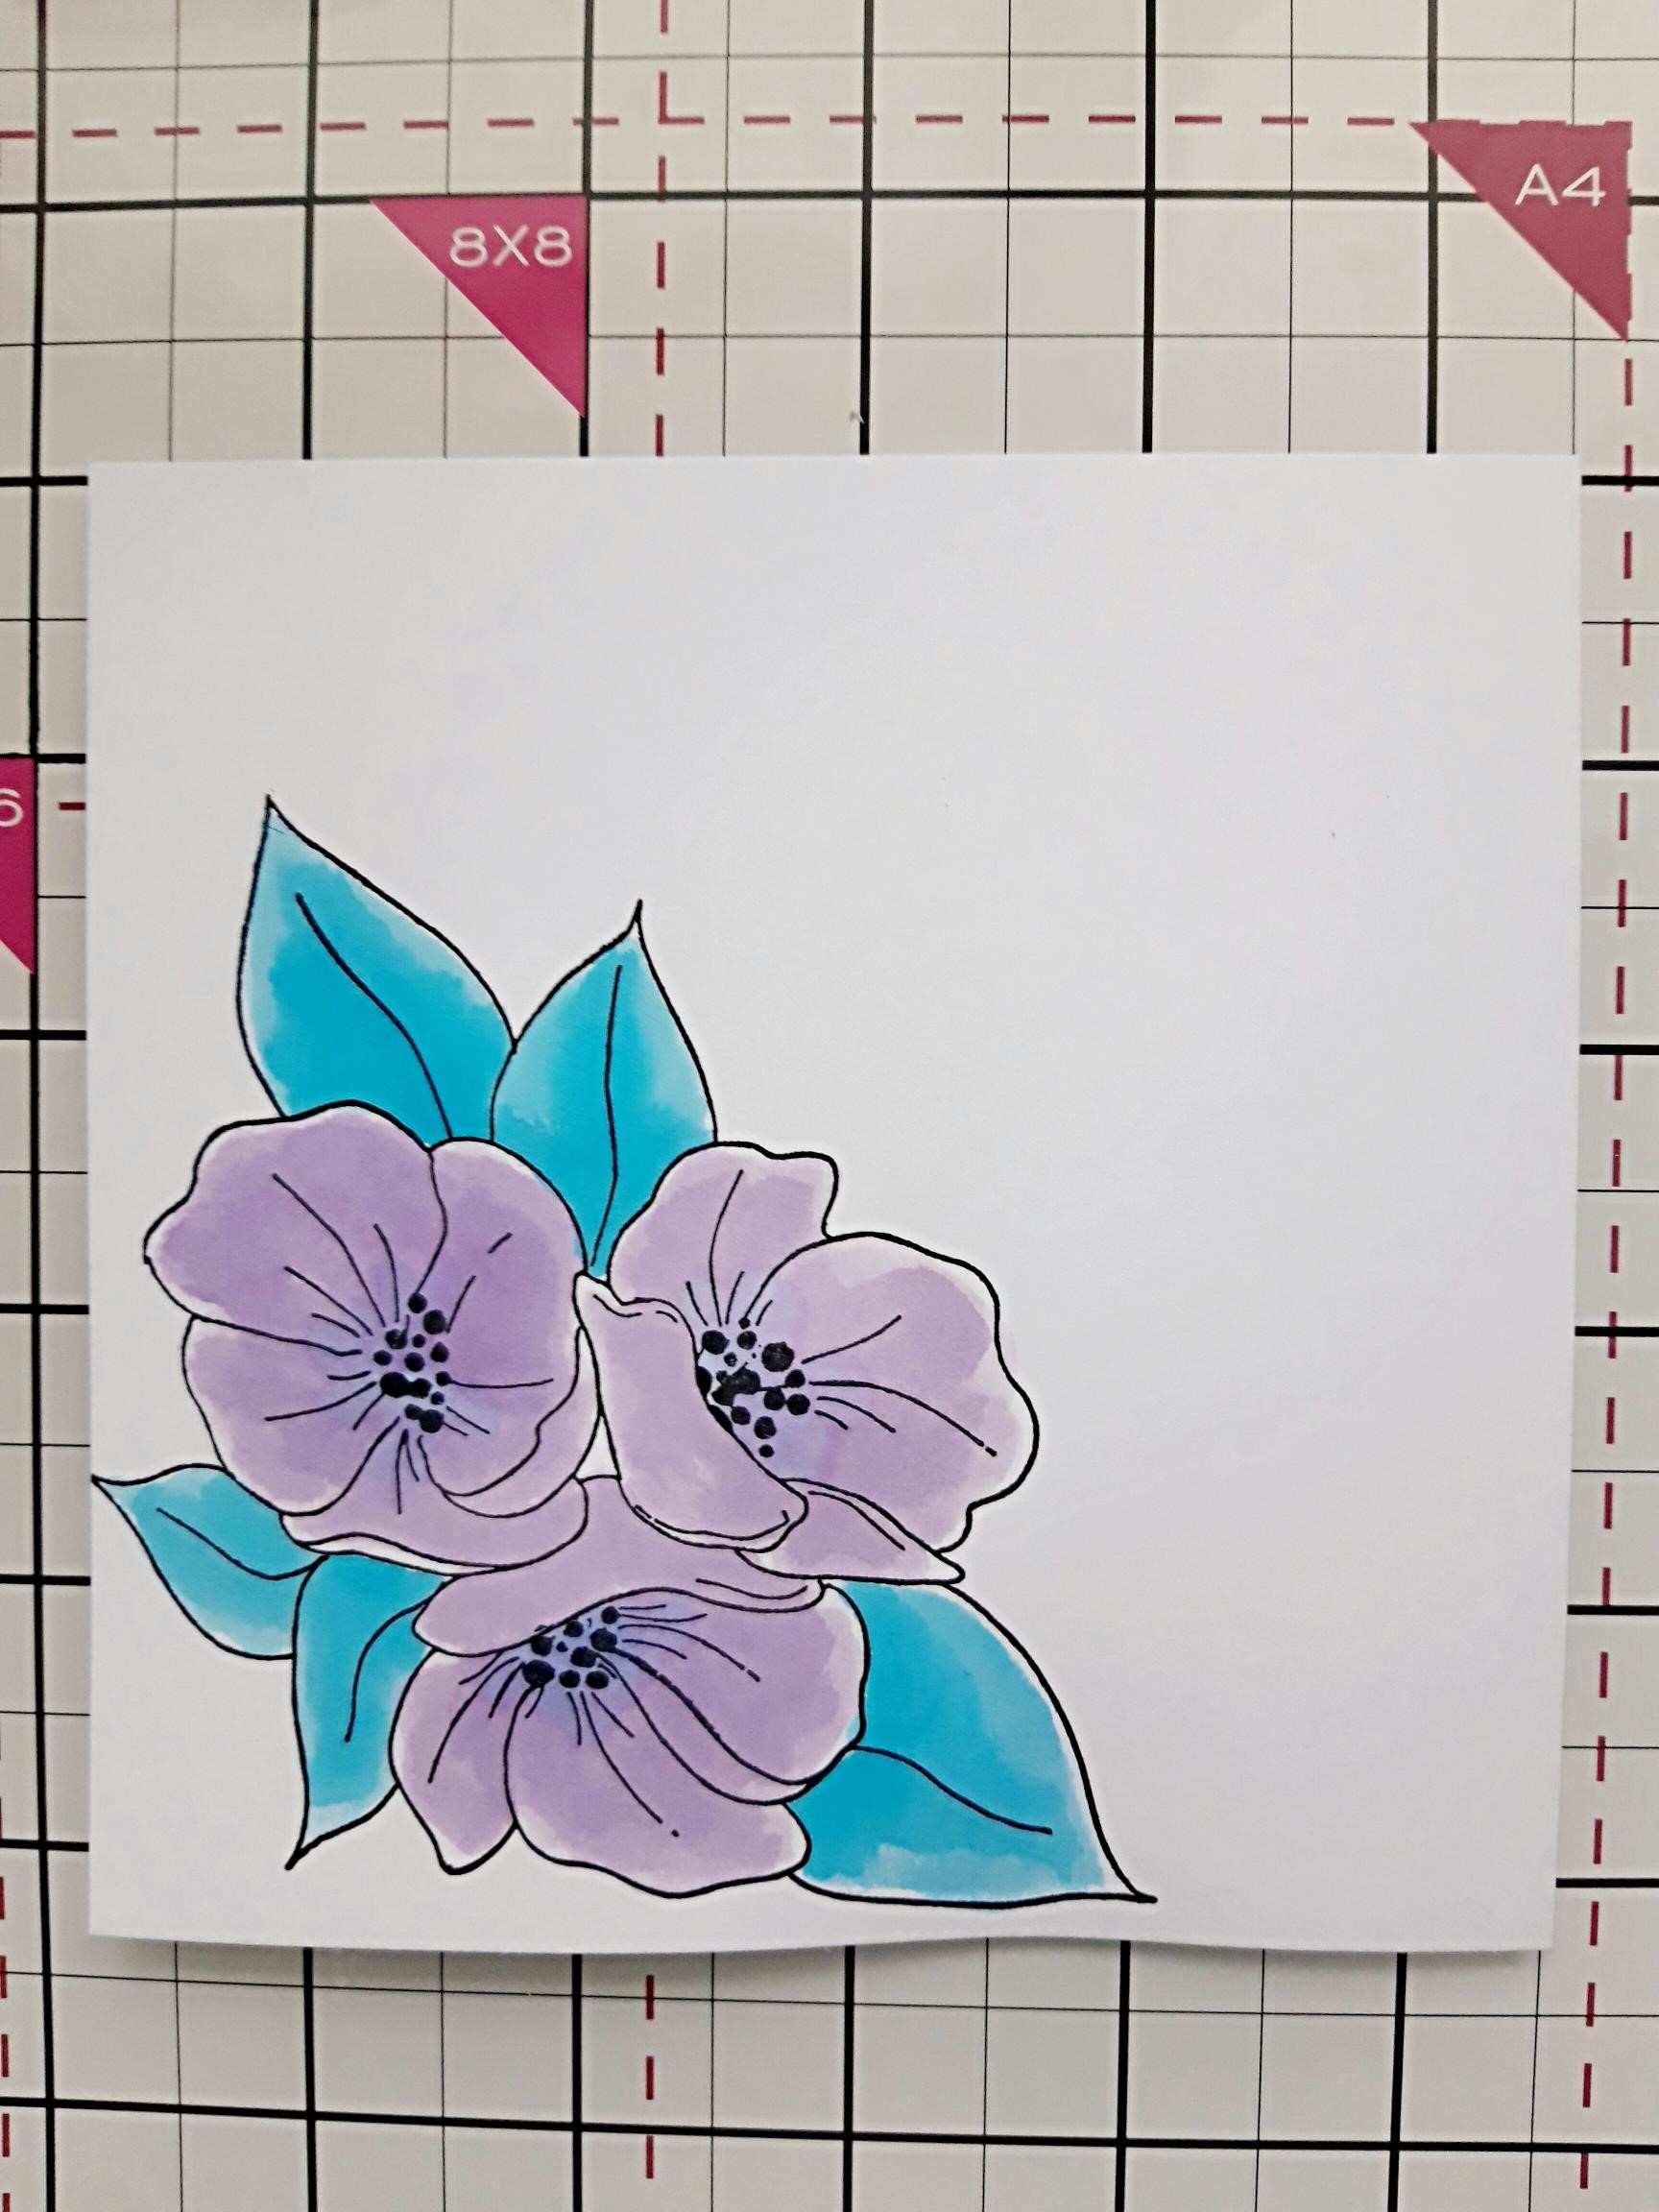
Use your watercolour paints to paint your stamped image. |
|
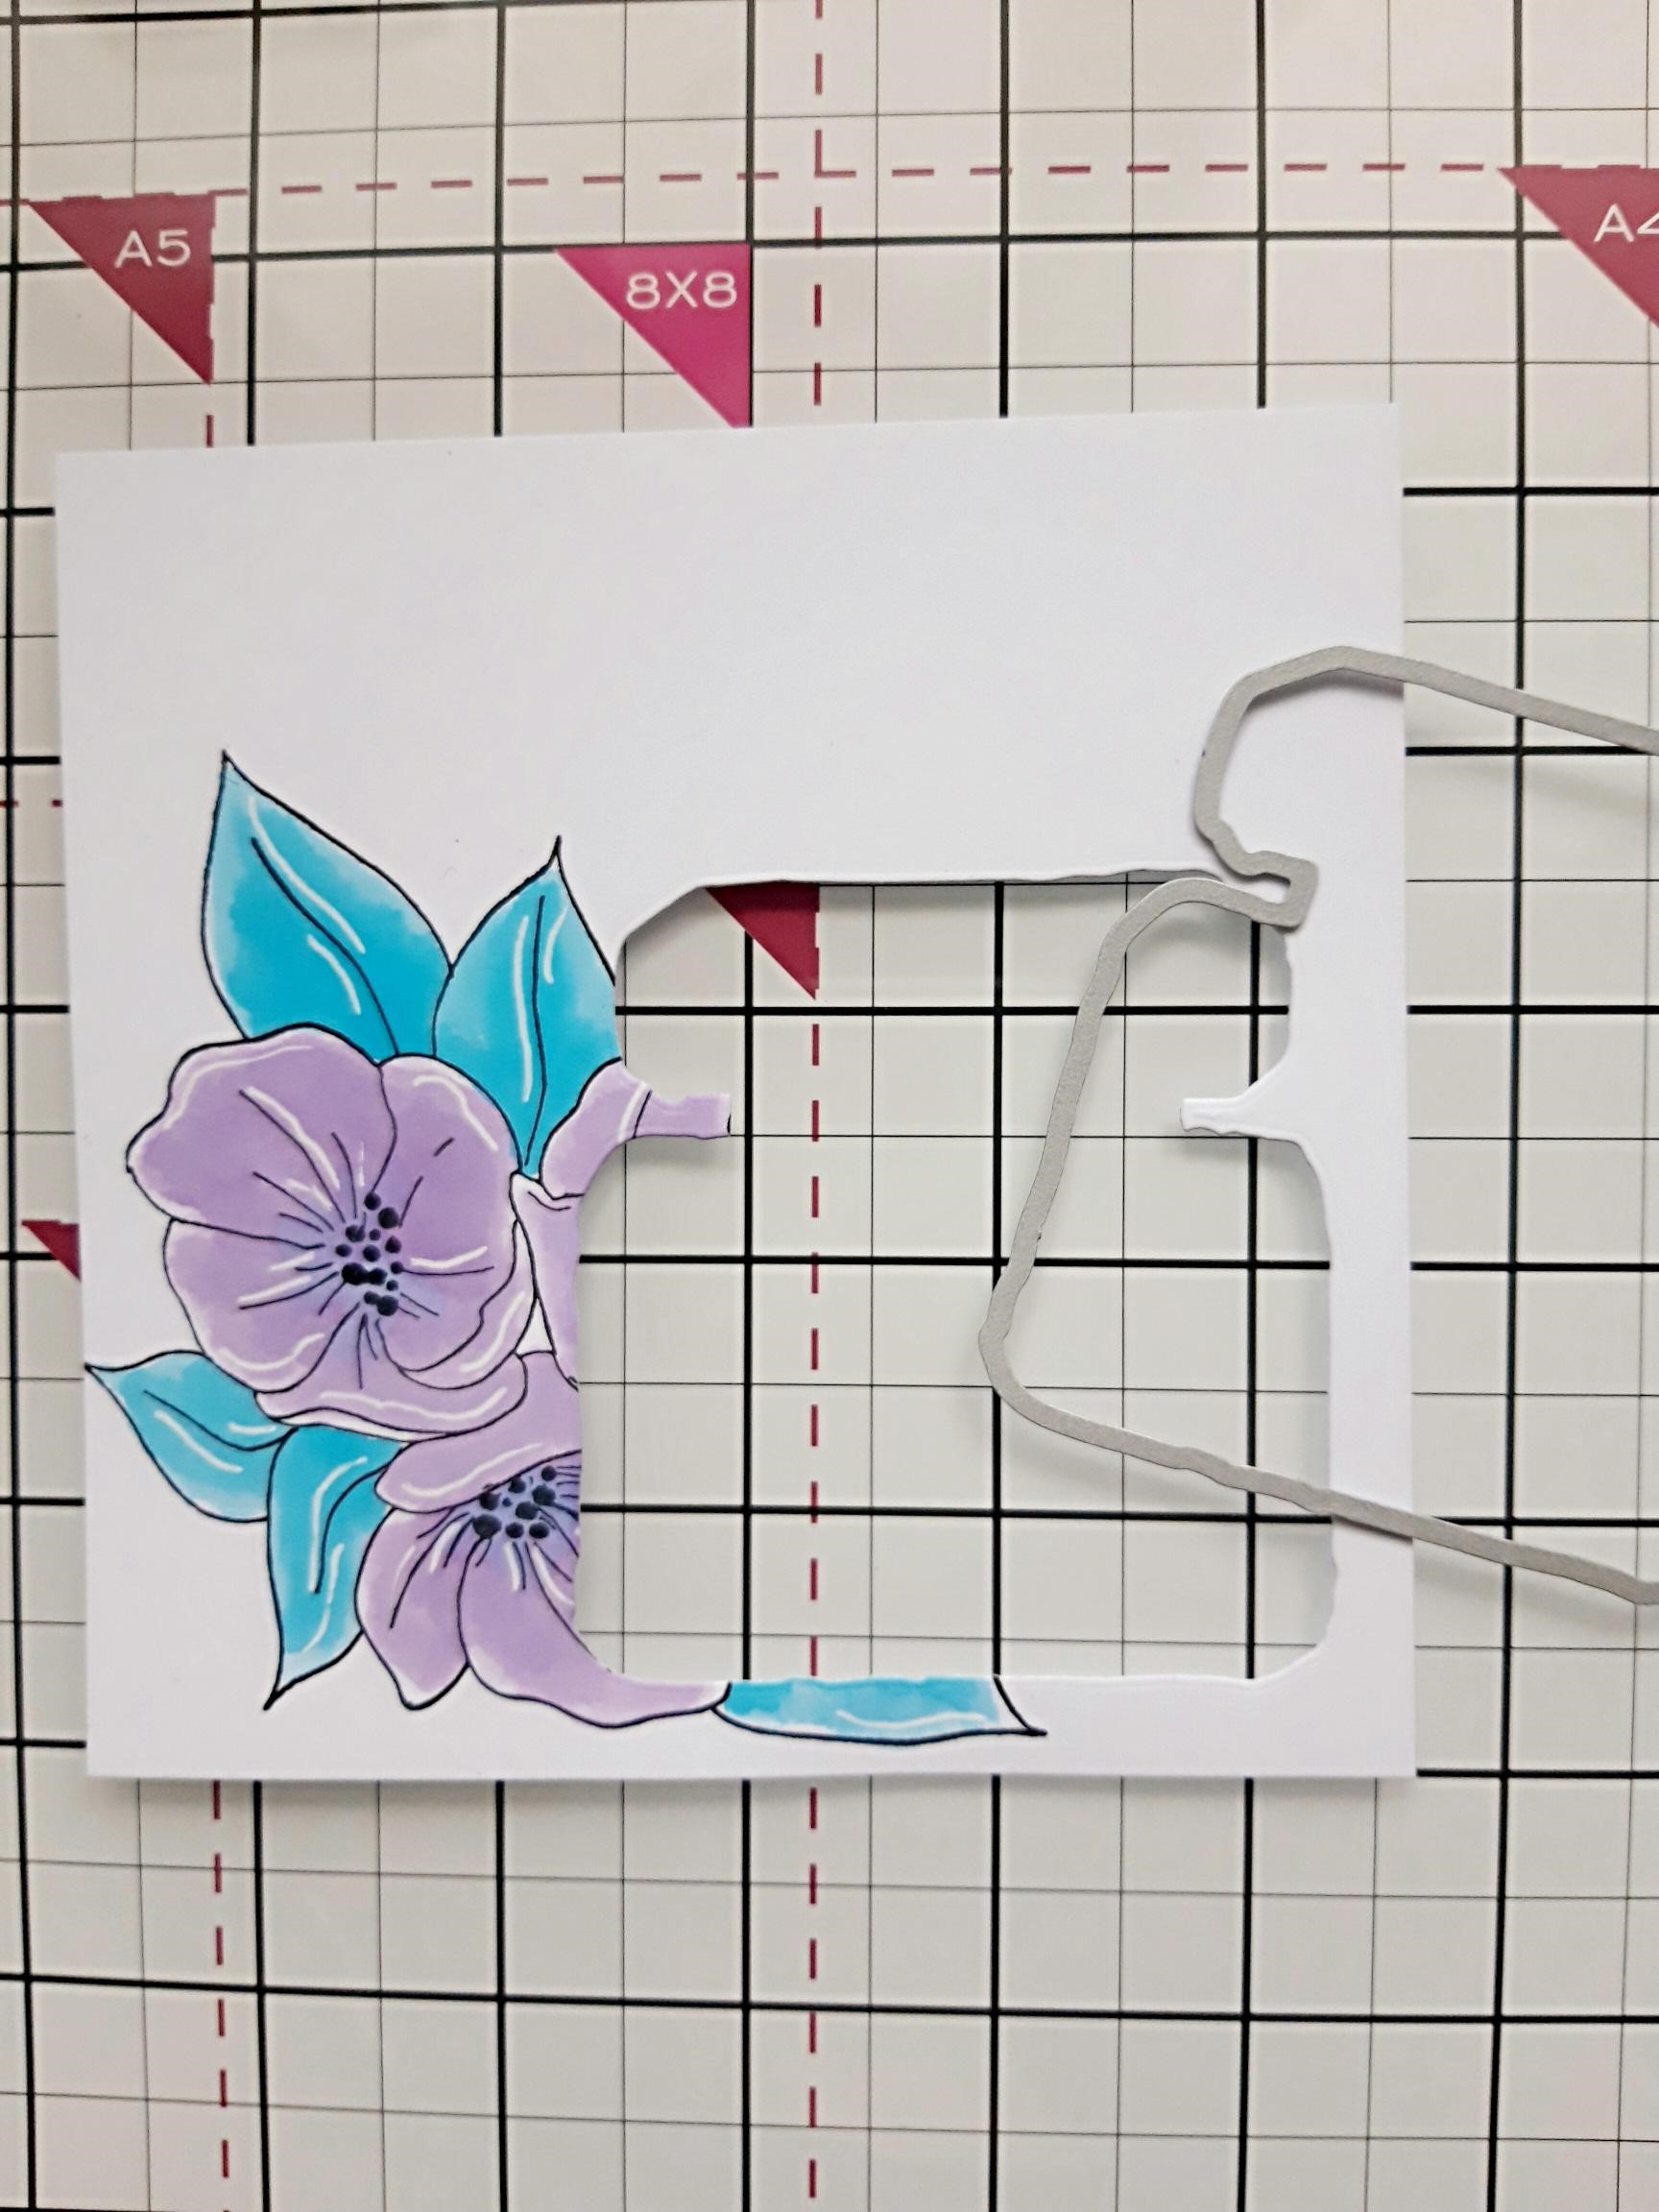
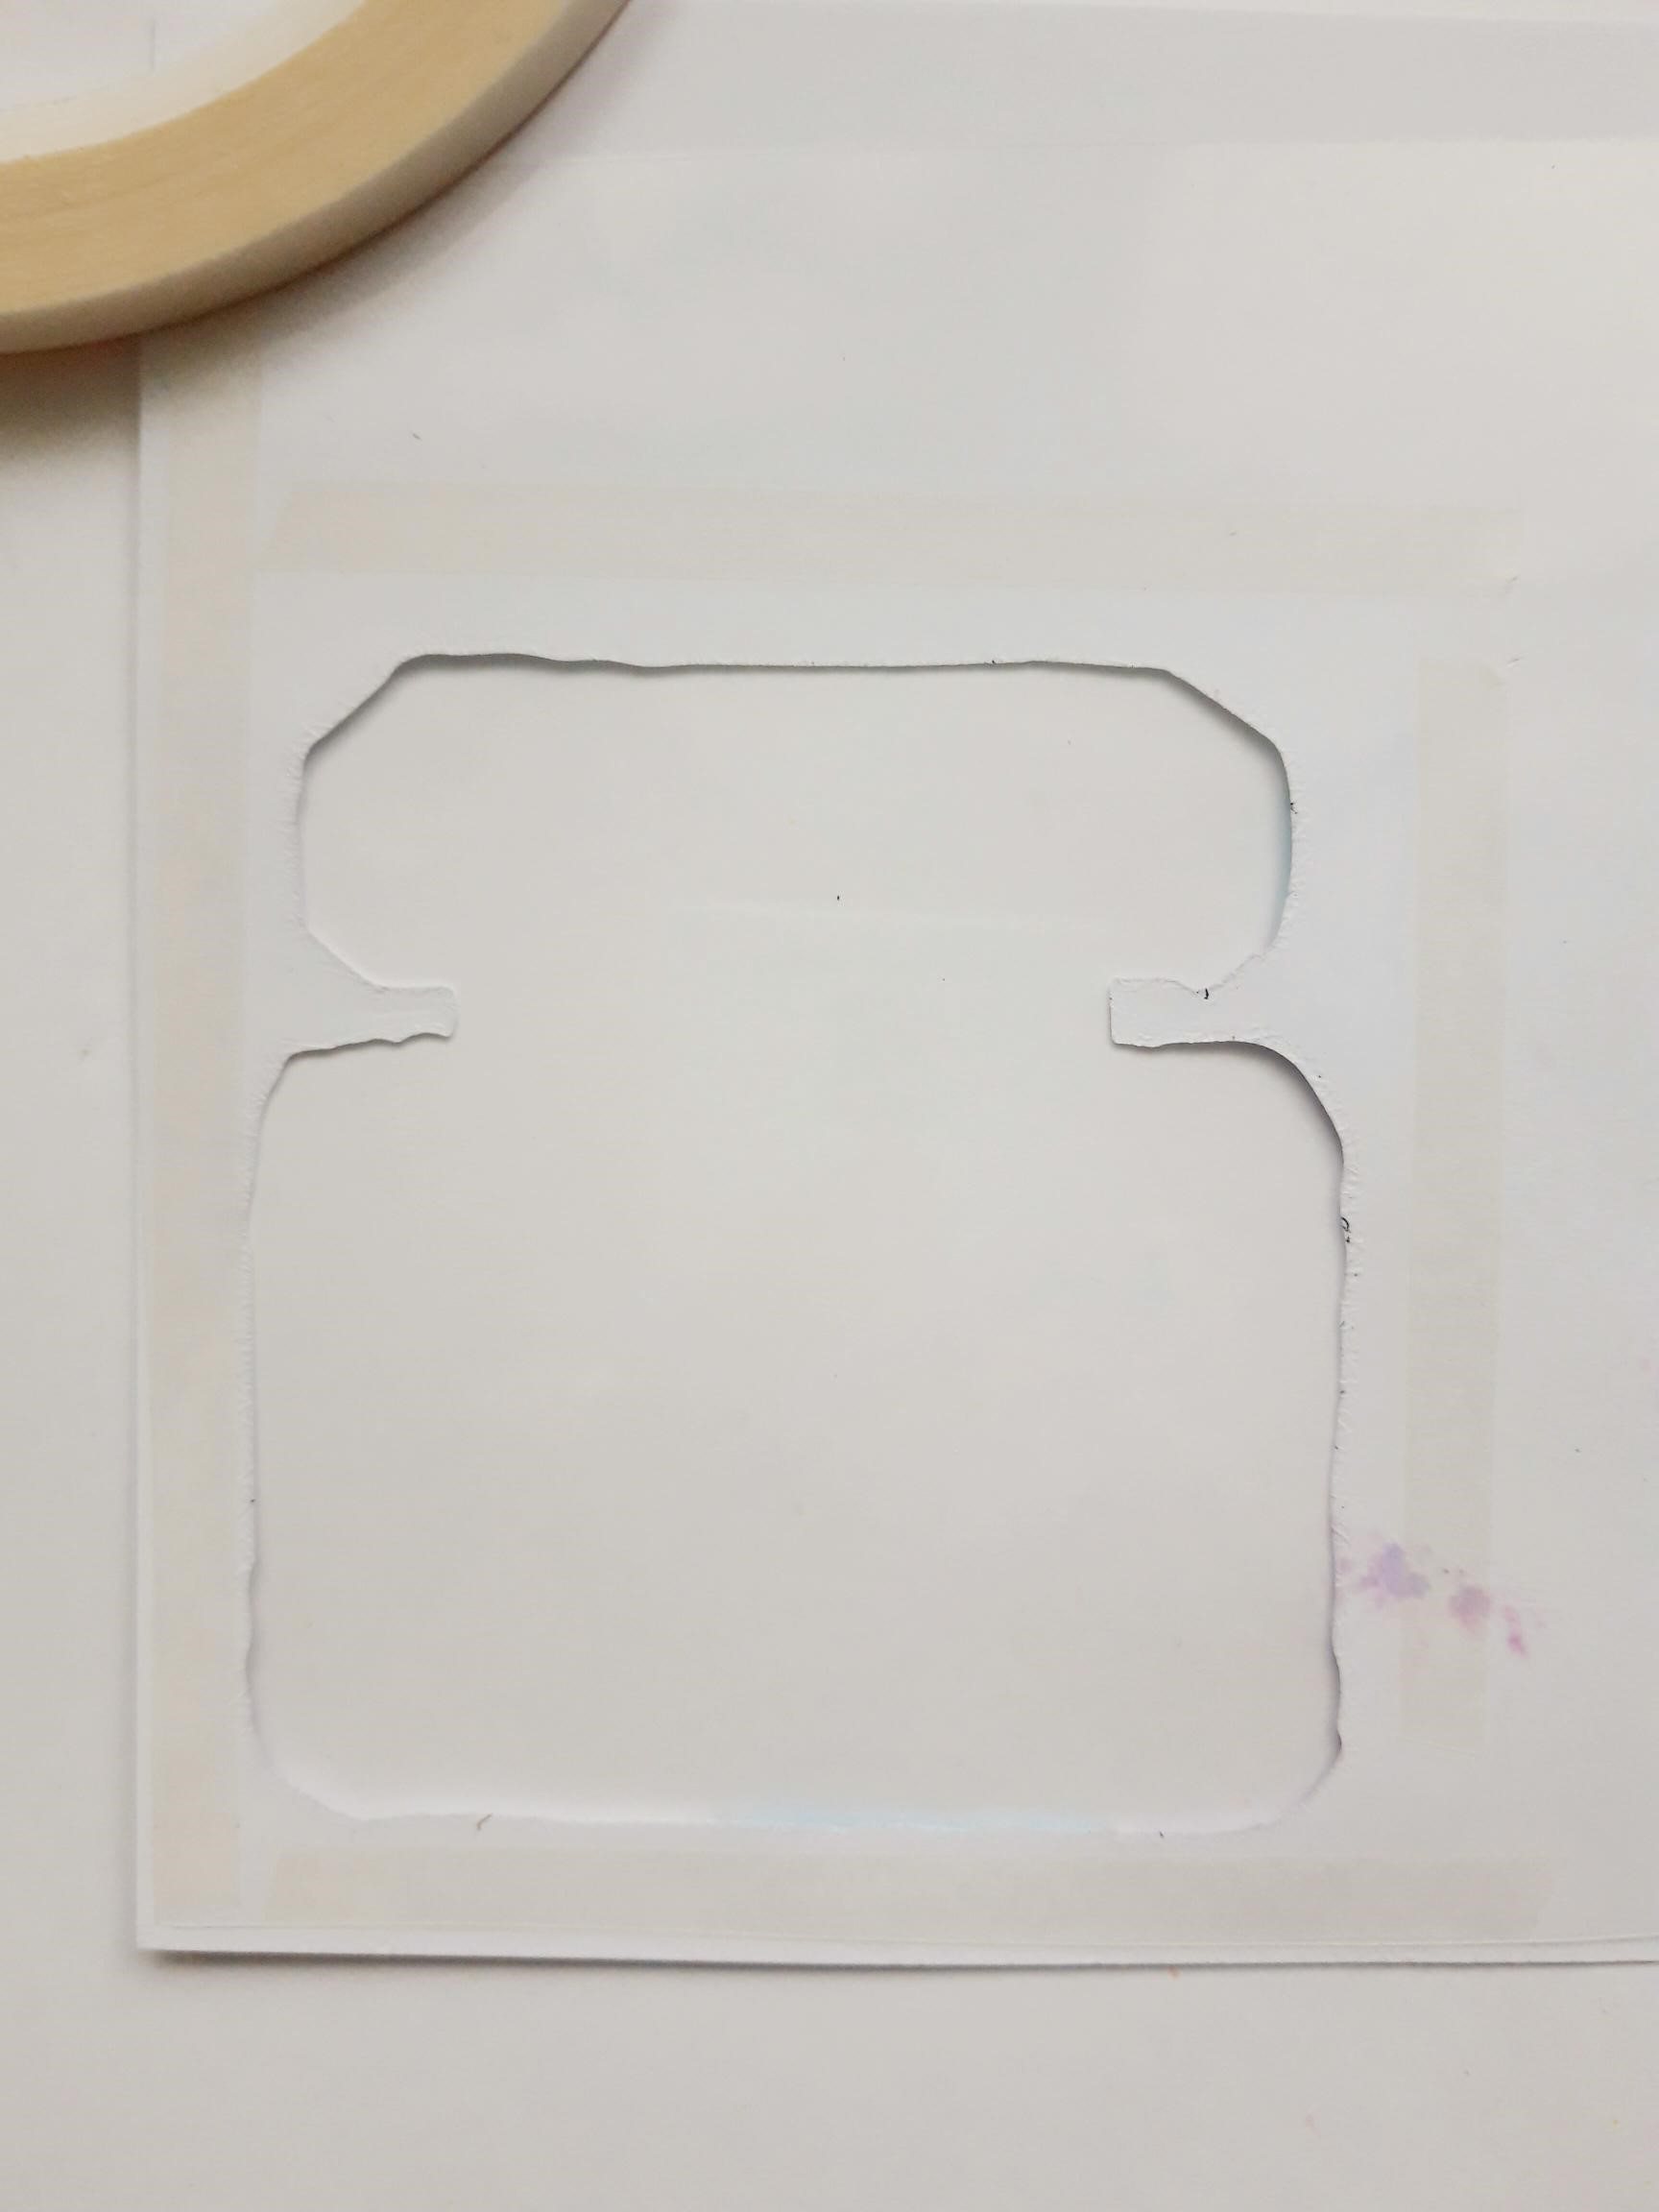
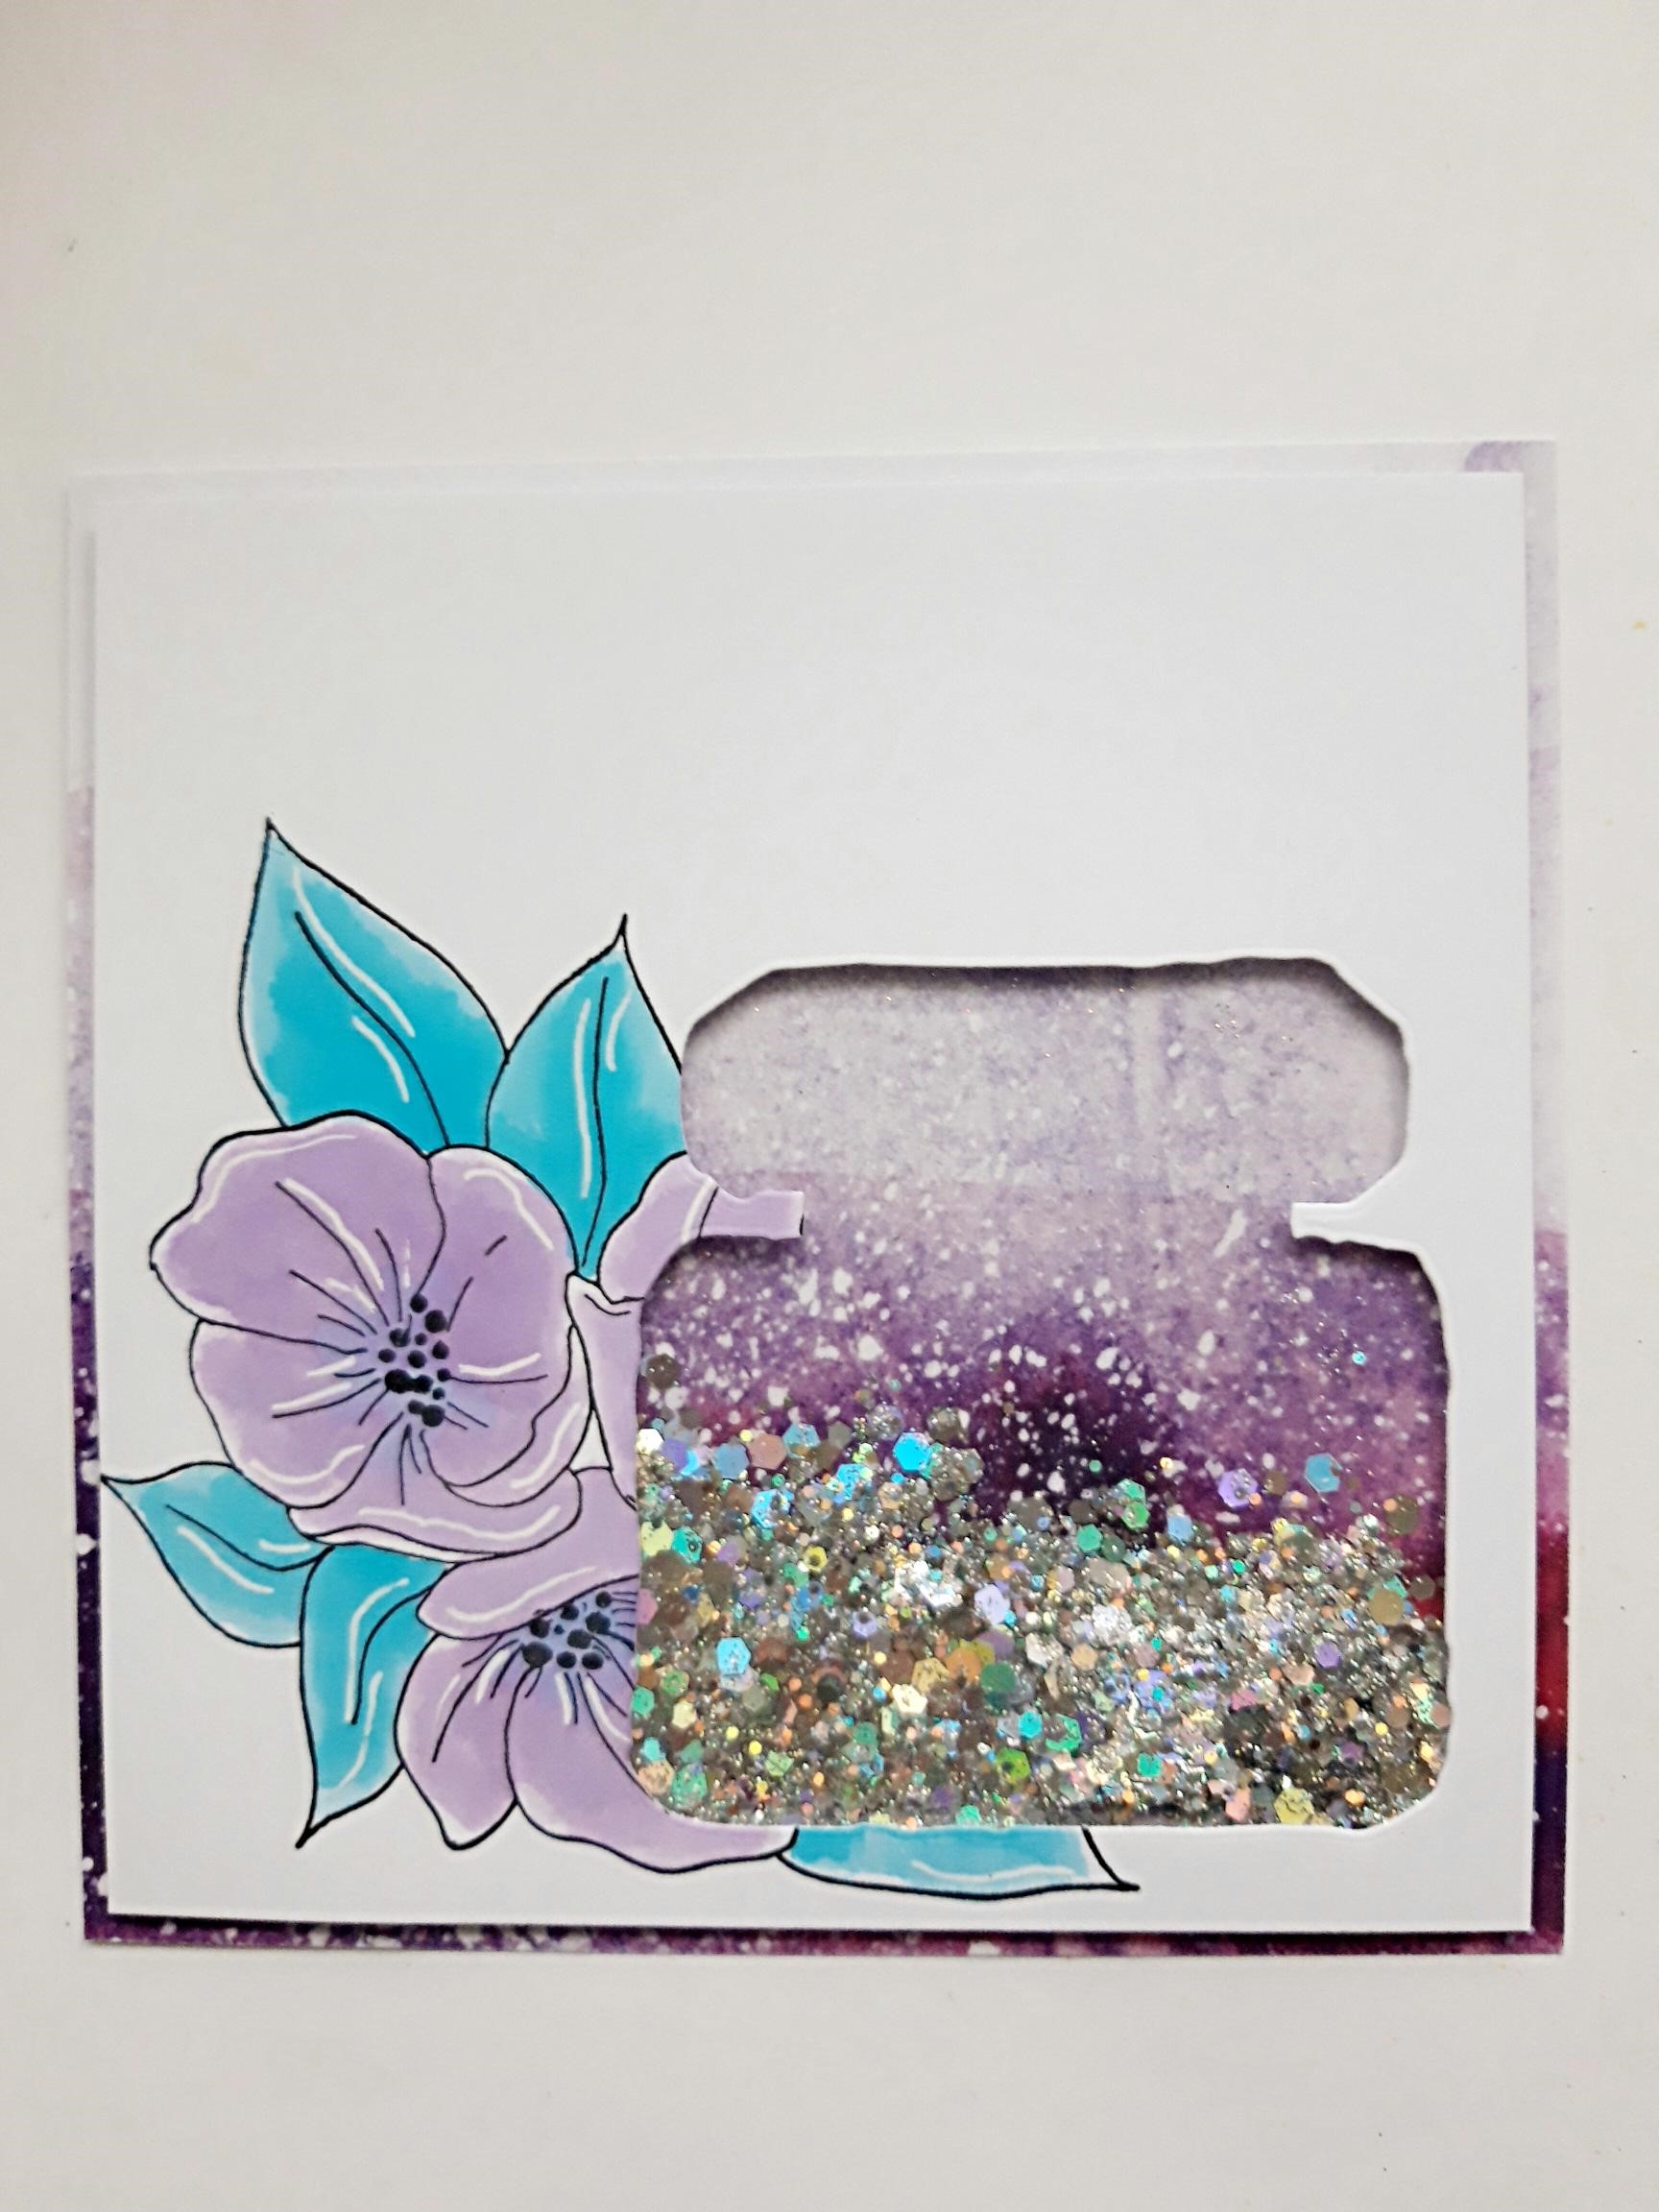
Once the paint is dry, use a white gel pen to add accents and highlights to your coloured image. Place the perfume bottle die from the Beautiful set, as shown here, and run it through your die cutting machine. Keep the die cut perfume bottle element, for a later step. NB: Leave enough of the cardstock down the right side of the perfume bottle, to place foam pads or foam shaker tape.
|
|
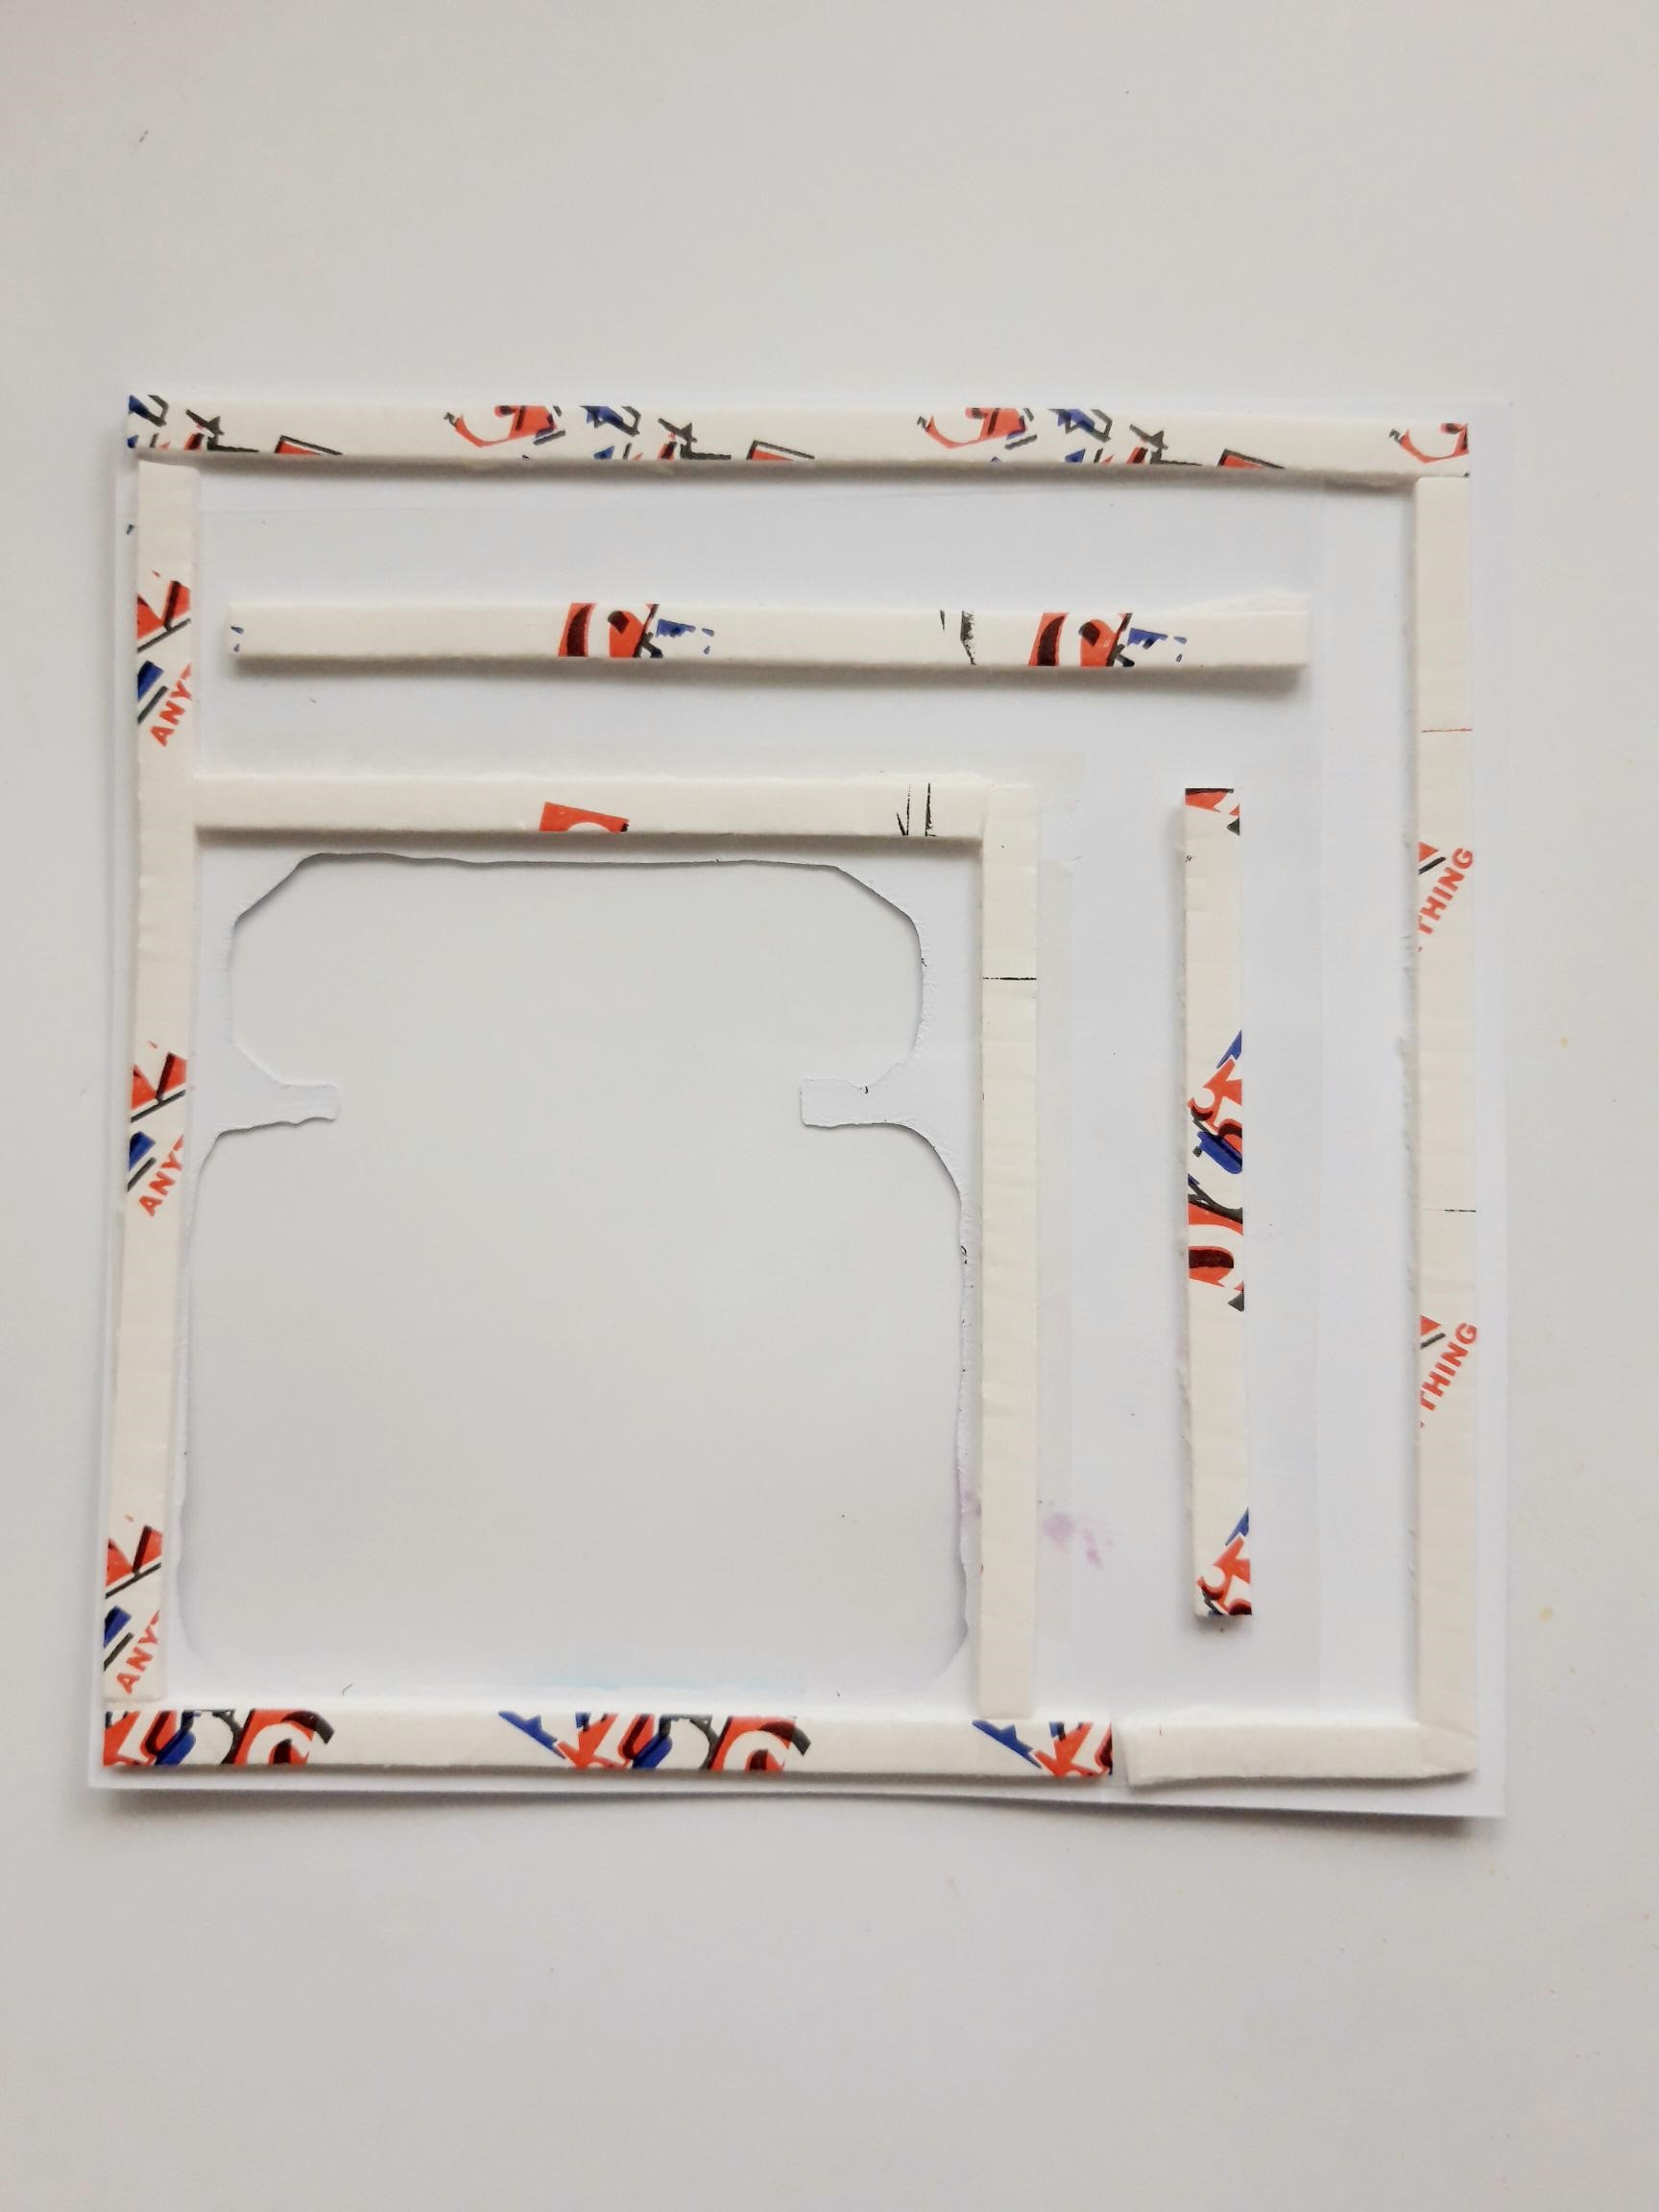
Place double sided tape or red liner tape, on the reverse, around the edges of the die cut perfume aperture and the cardstock. Adhere the acetate in place. |
|
Adhere your foam pads or foam shaker tape, around the outer edges of the cardstock and as close as you can to the edges of the perfume bottle aperture. This will prevent the glitter leaking out of any gaps. Pop to one side.
|

|
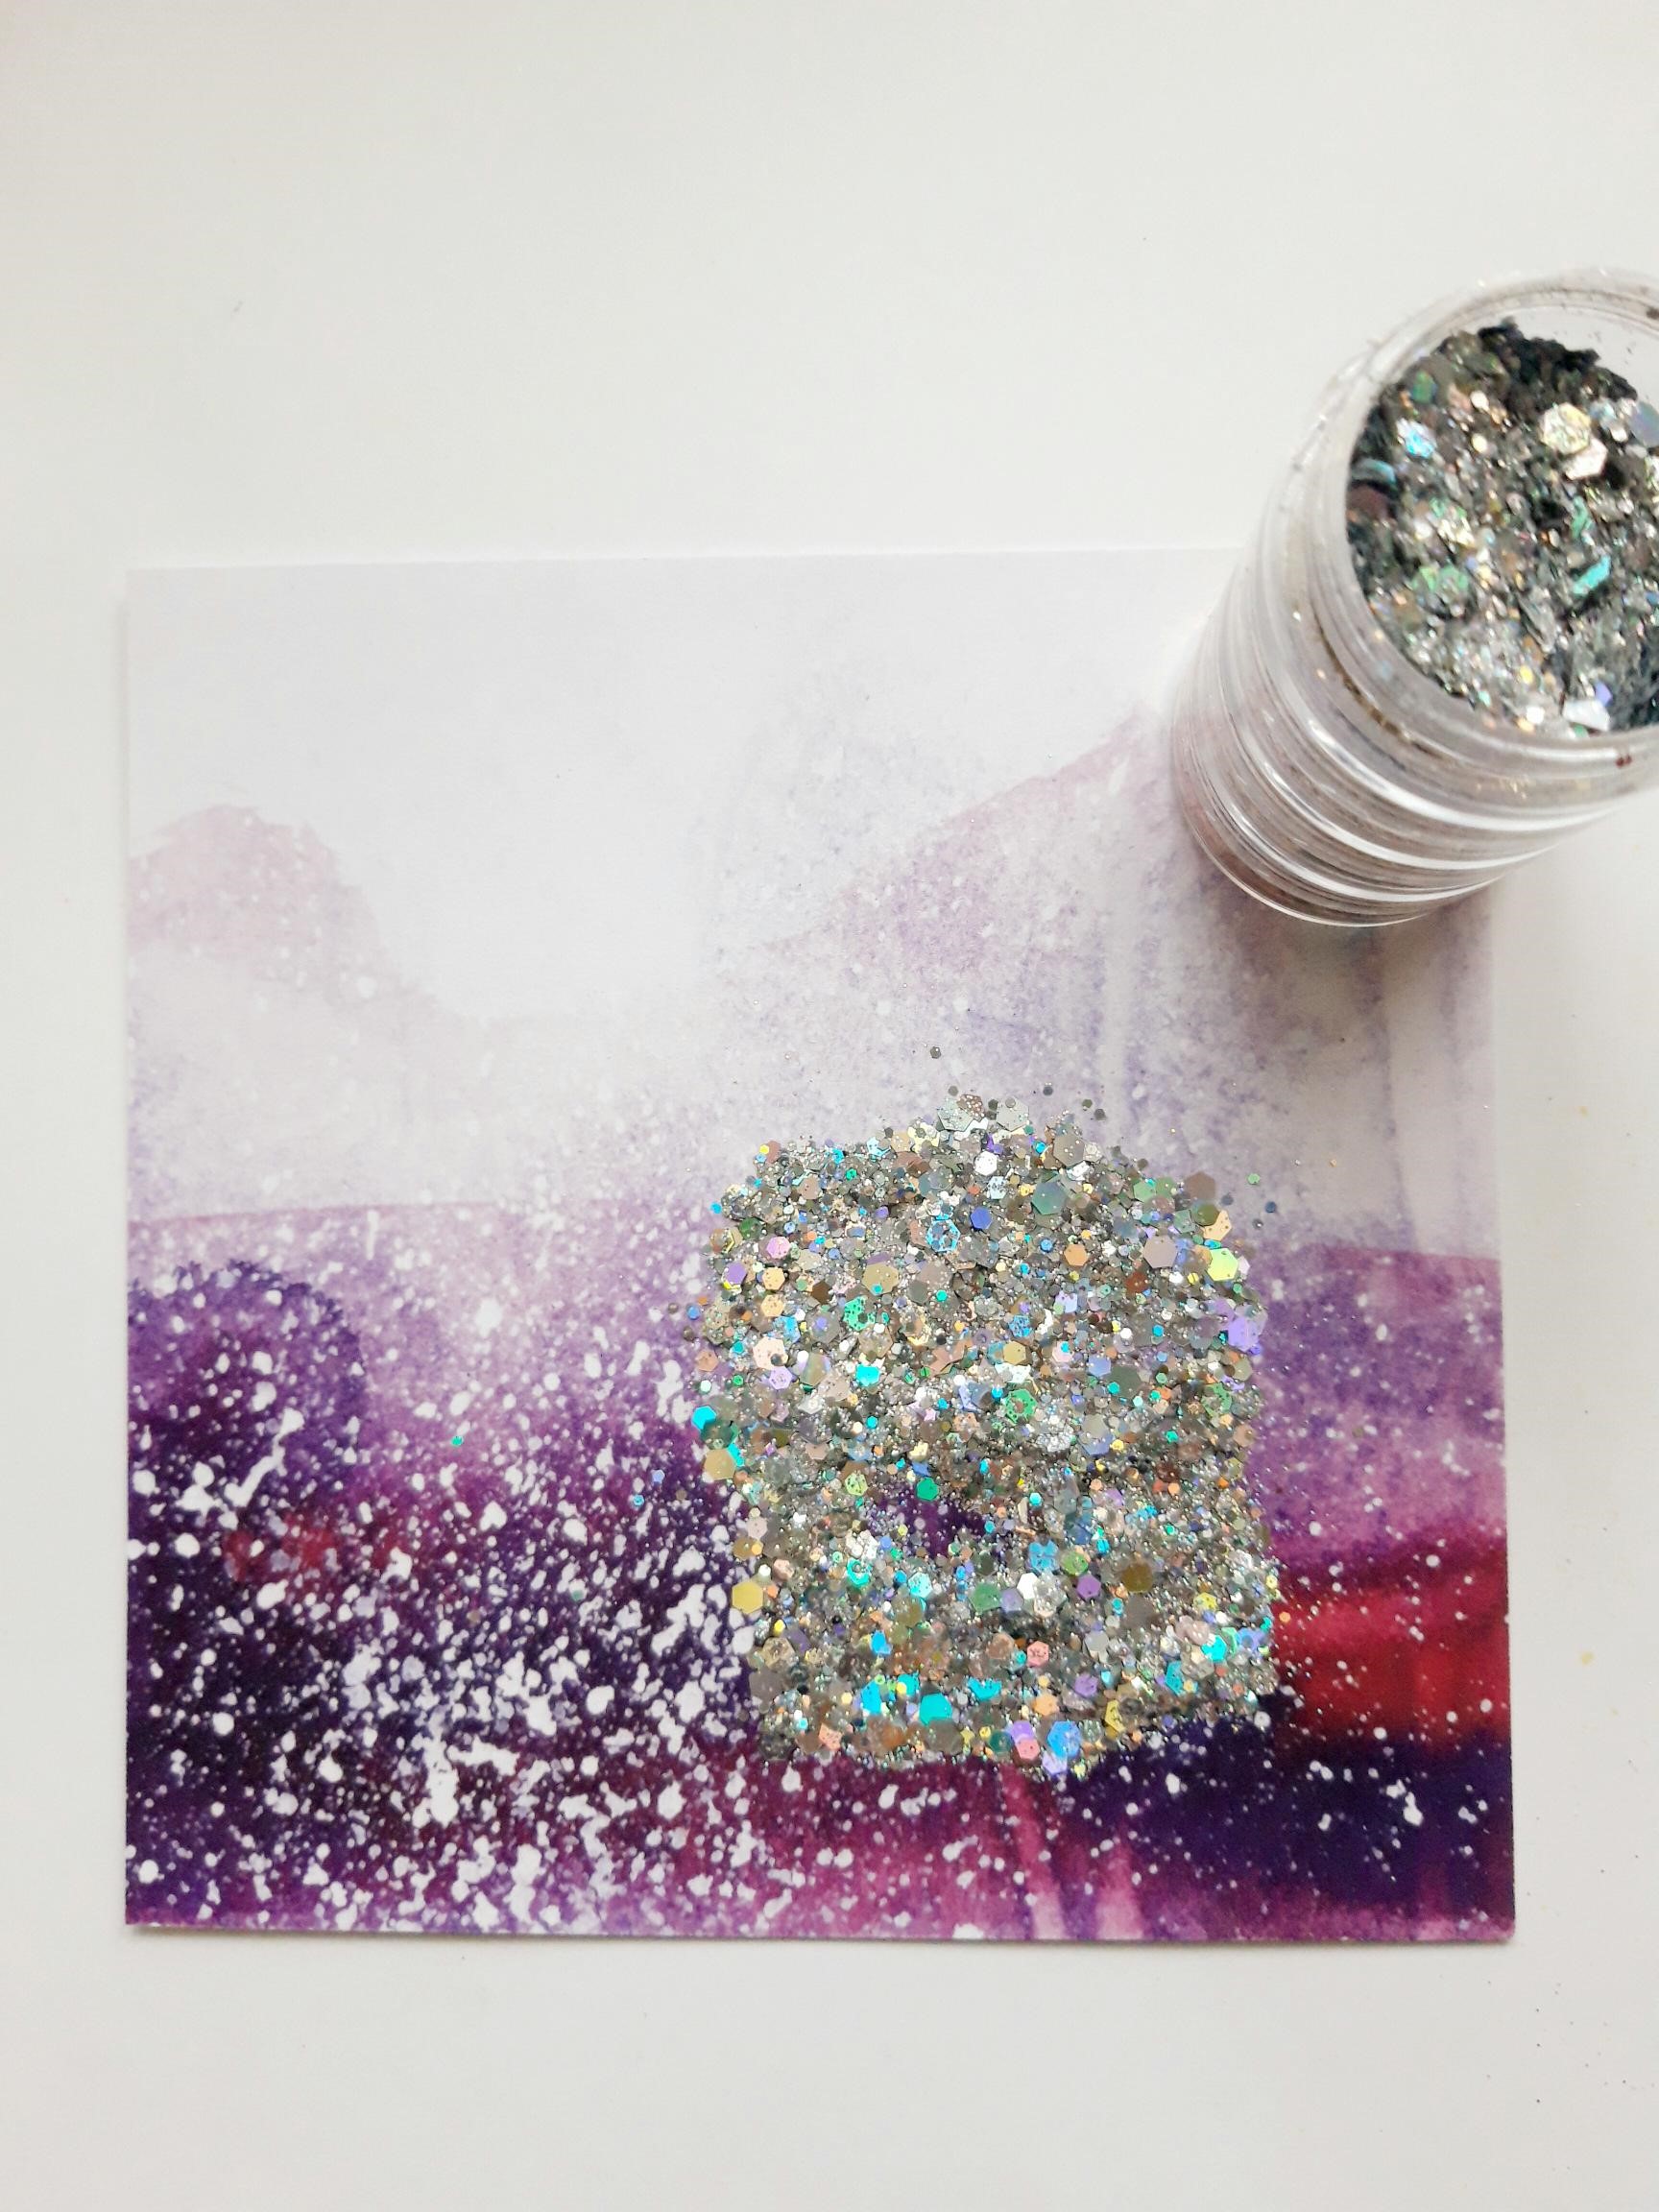
Tear this sheet from the Funky Fossil Watercolour Rainbow Paper Pad and trim to 5 1/2" square. |
|
Using your perfume aperture artwork as a guide, sprinkle your chosen glitter on to the paper, so it will appear through the perfume bottle window, when adhered. Try to spread out the glitter within the area the window will be, so it will "shake" freely. |
|
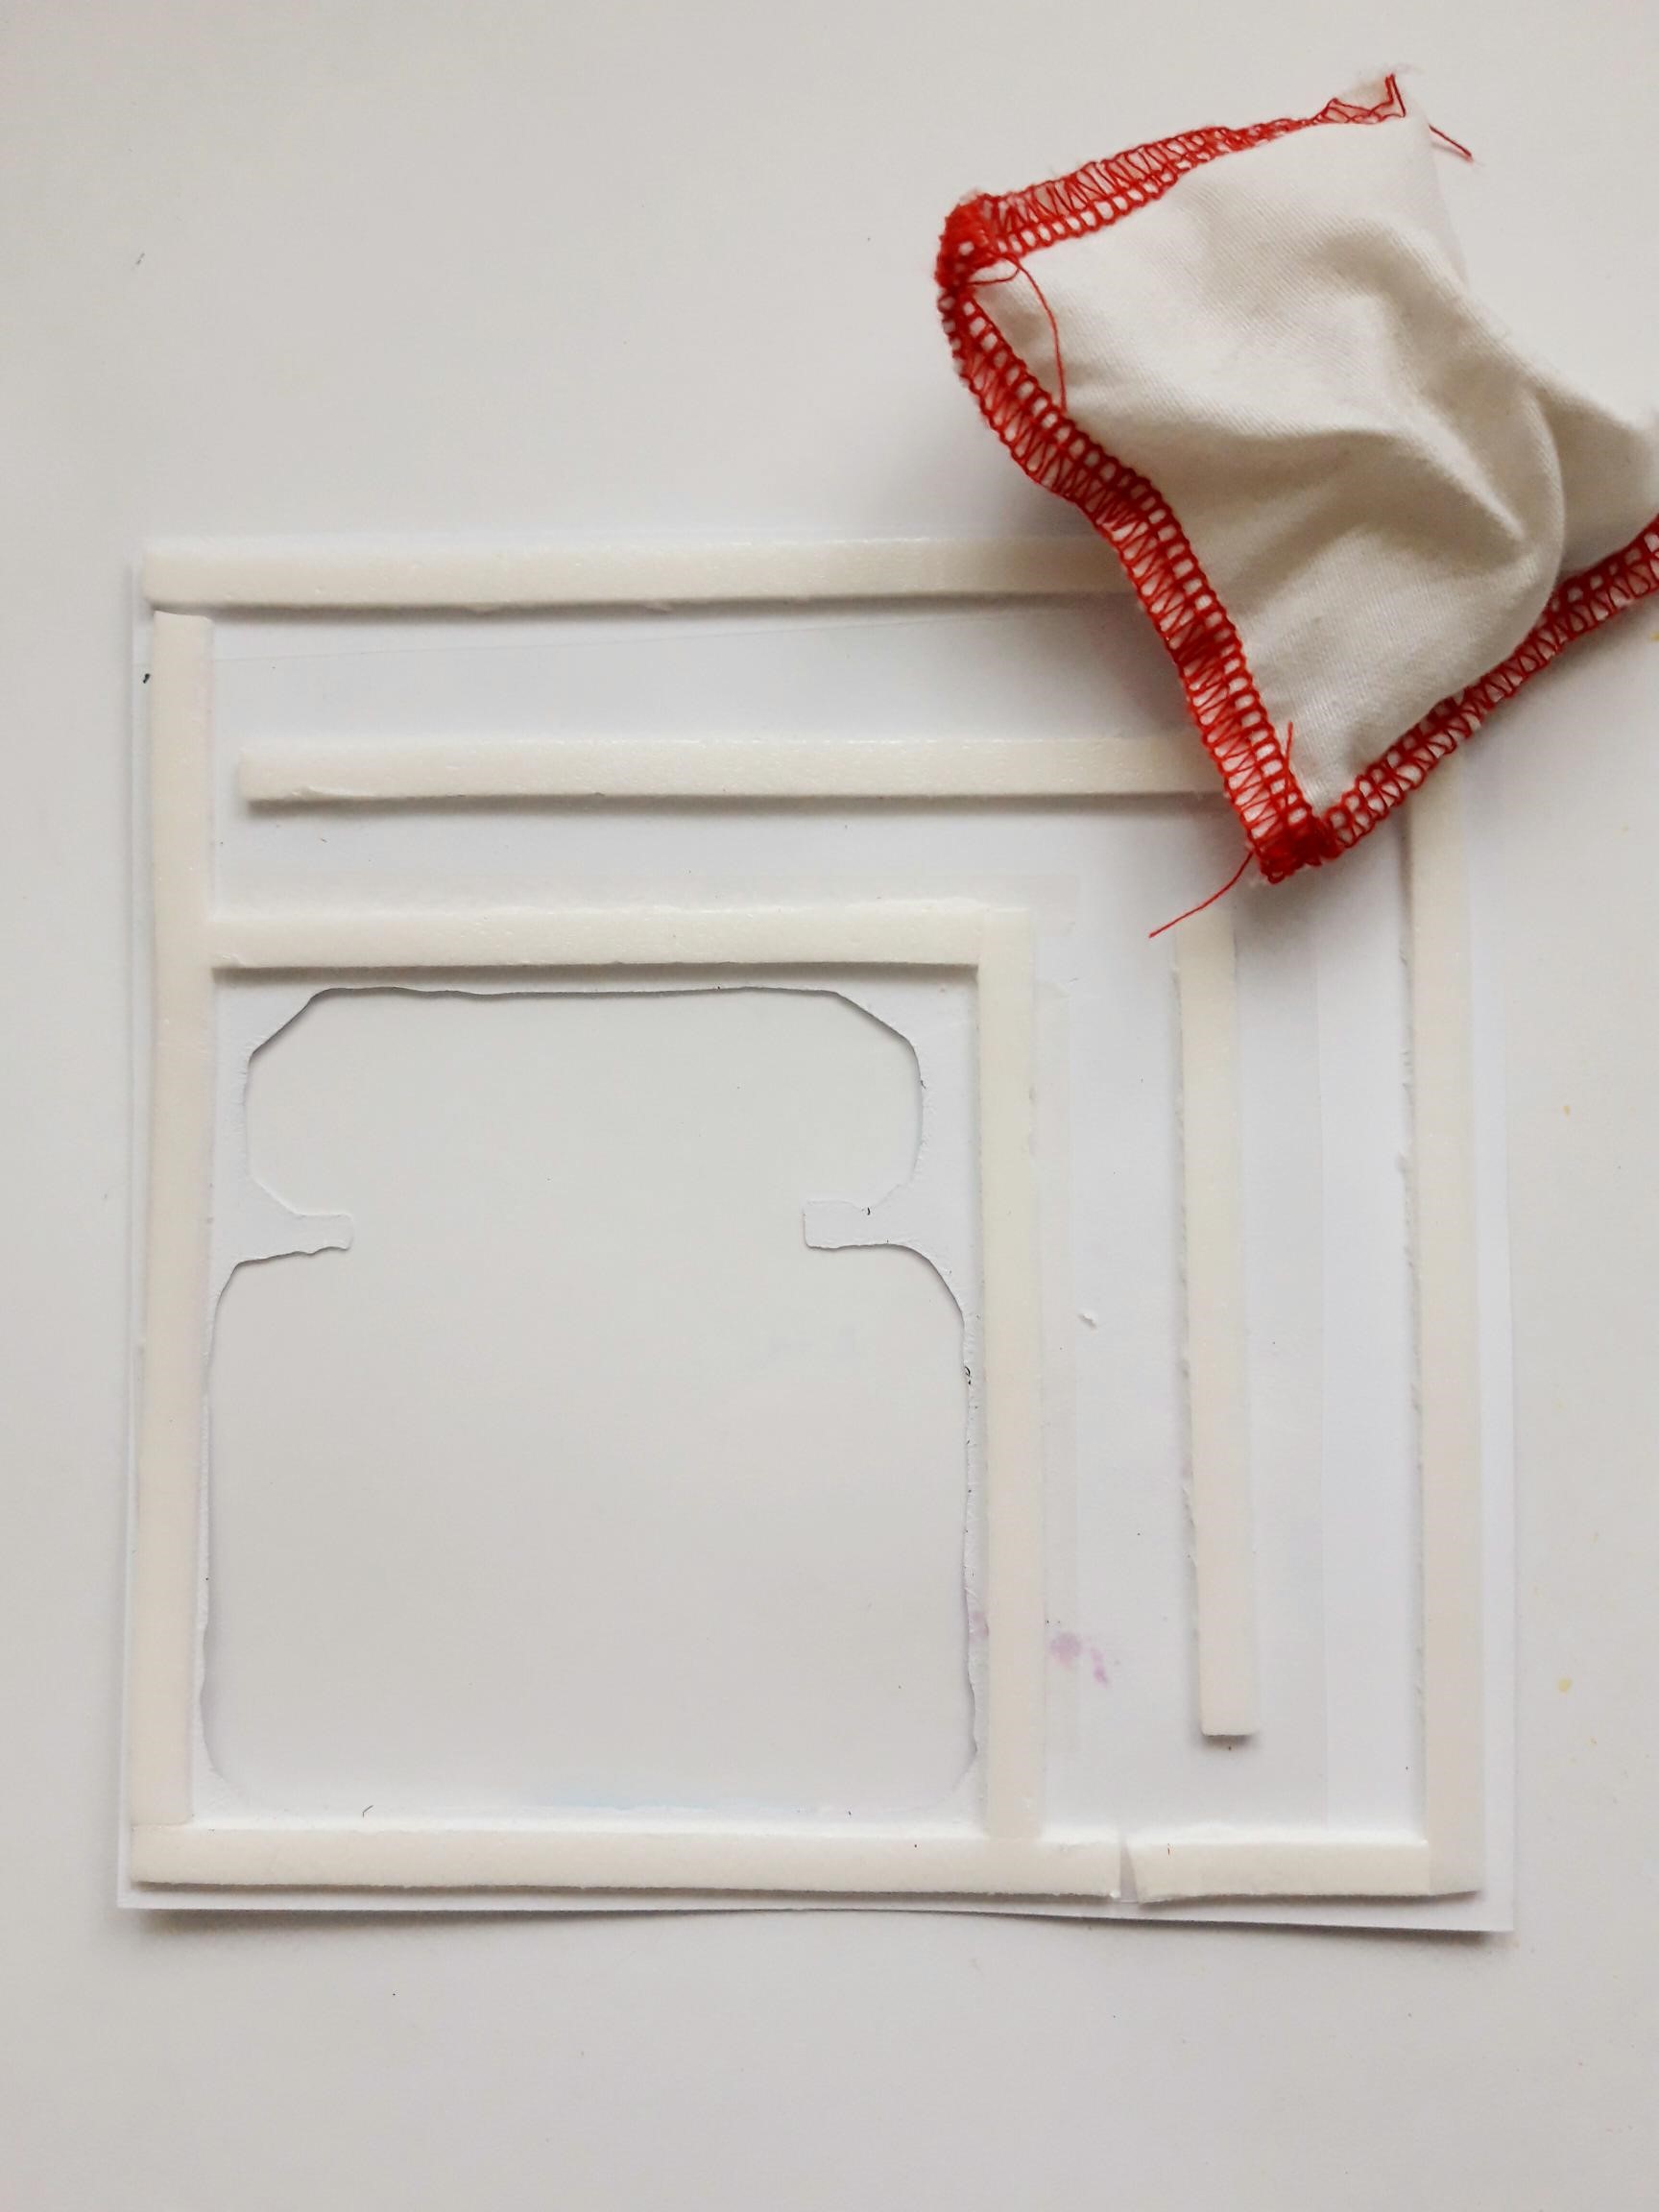
Remove the backing from the foam tape and wipe over the acetate aperture window and the inside edges of the foam, with your anti-static bag. |
|
Carefully adhere your artwork on top of the decorative paper, ensuring the glitter sits within the acetate window. Make sure your foam tape is pressed down firmly and has created a secure bond, before you move and shake the glitter! |
|
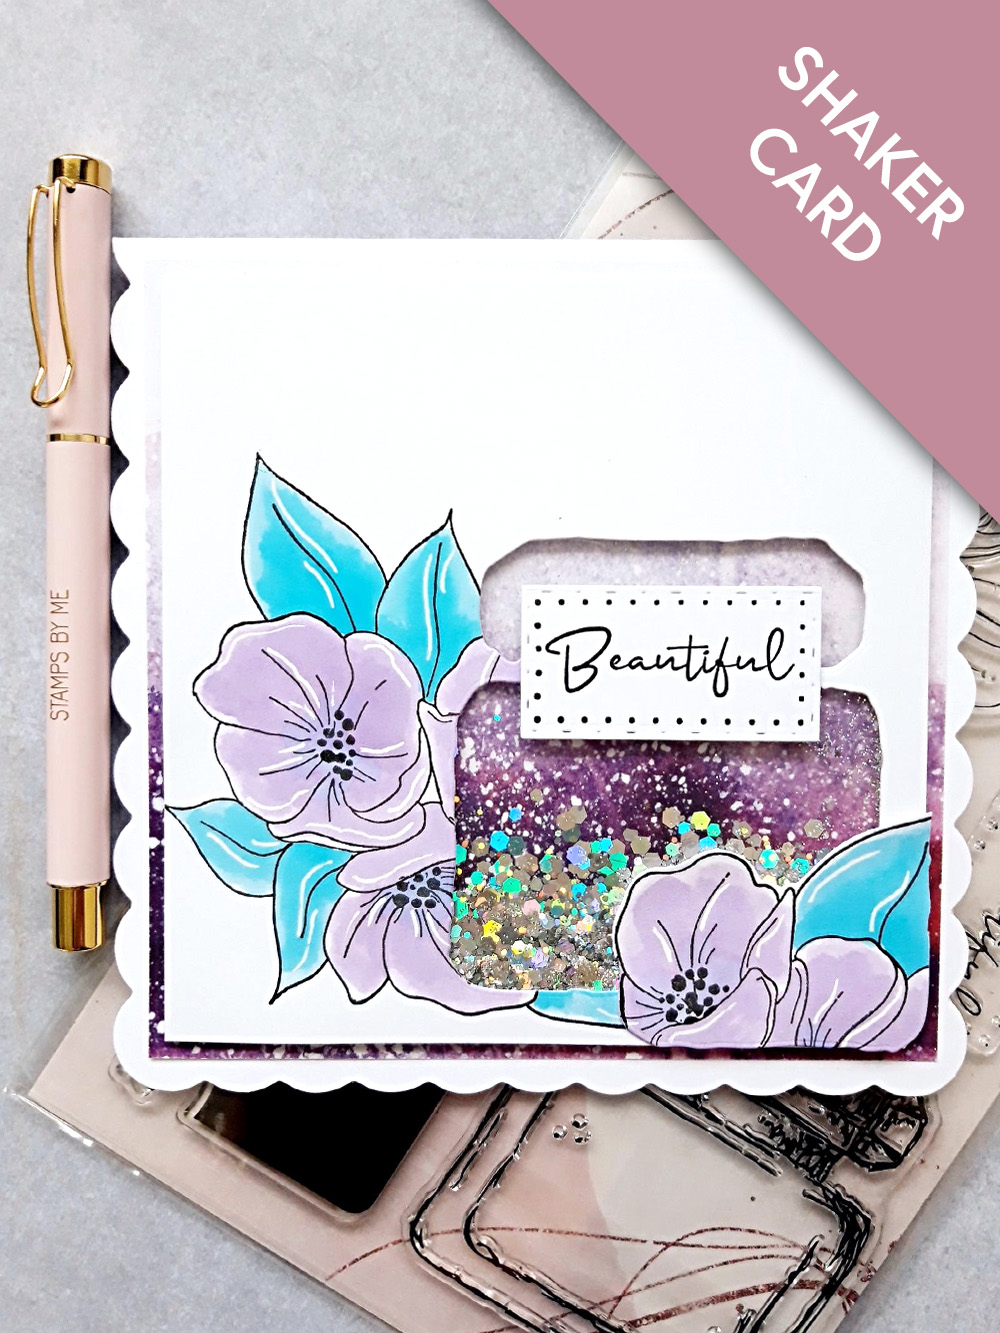
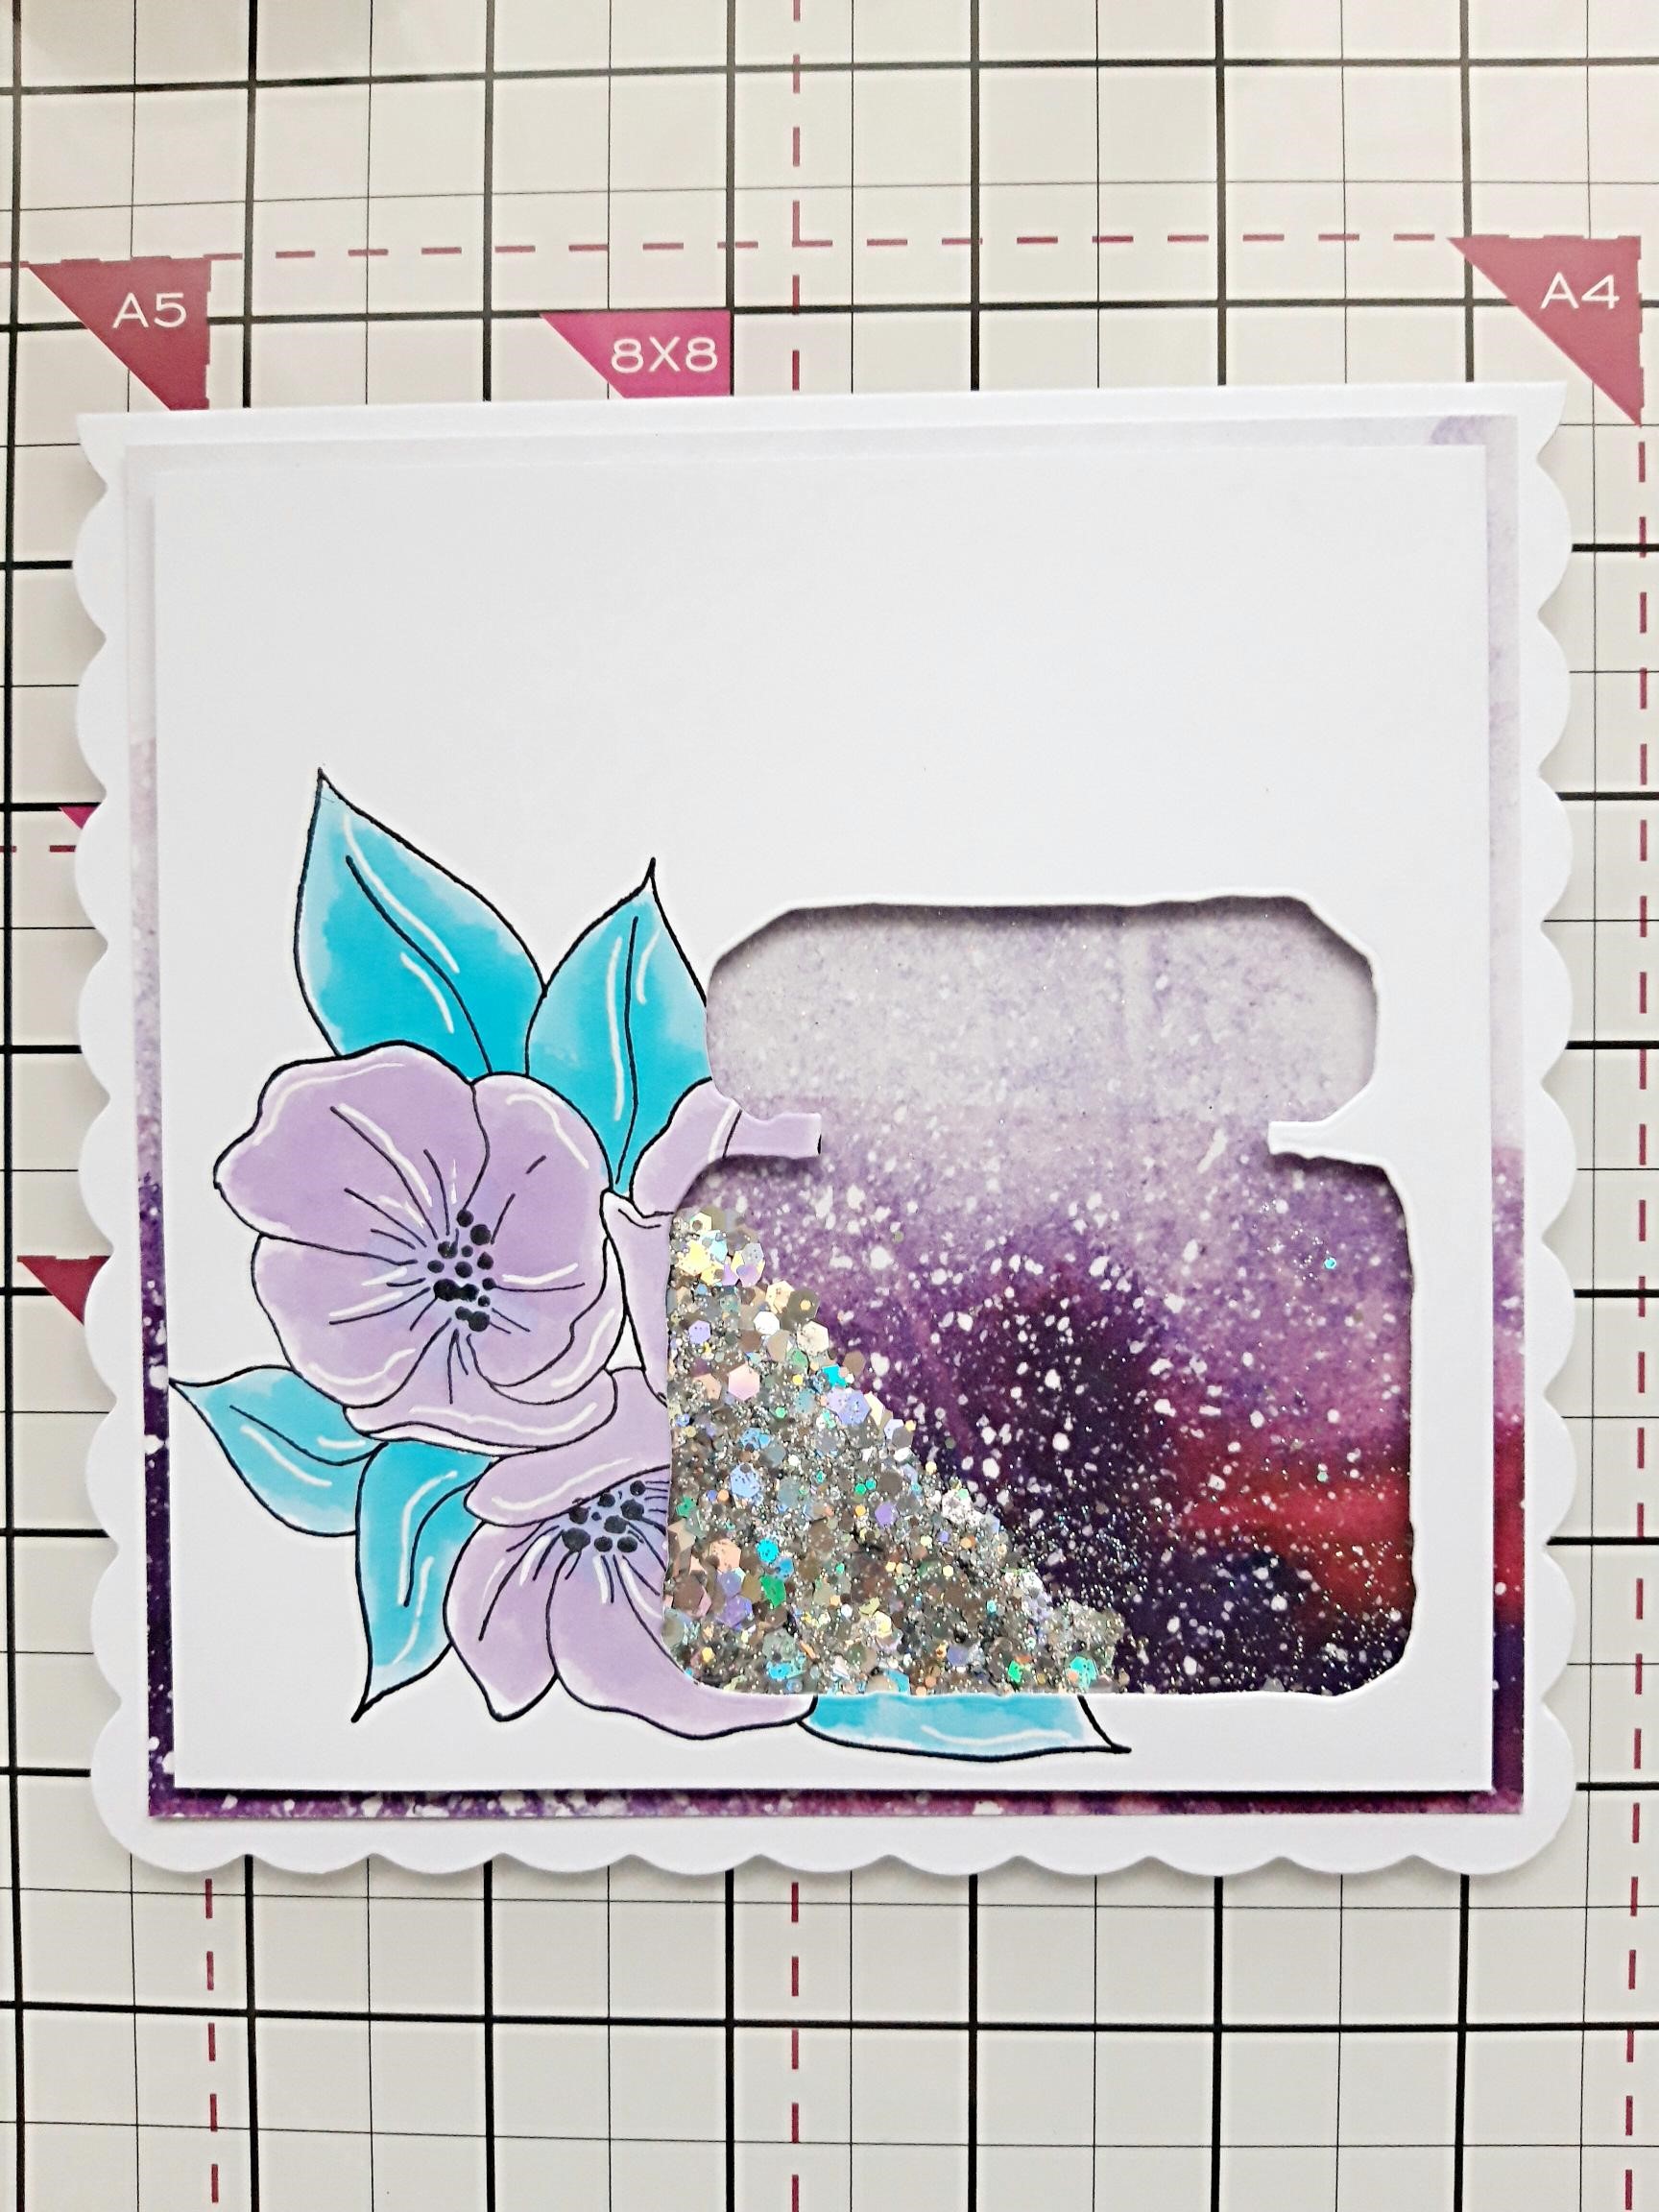
Adhere to the front of your 6 x 6" card blank. |
|
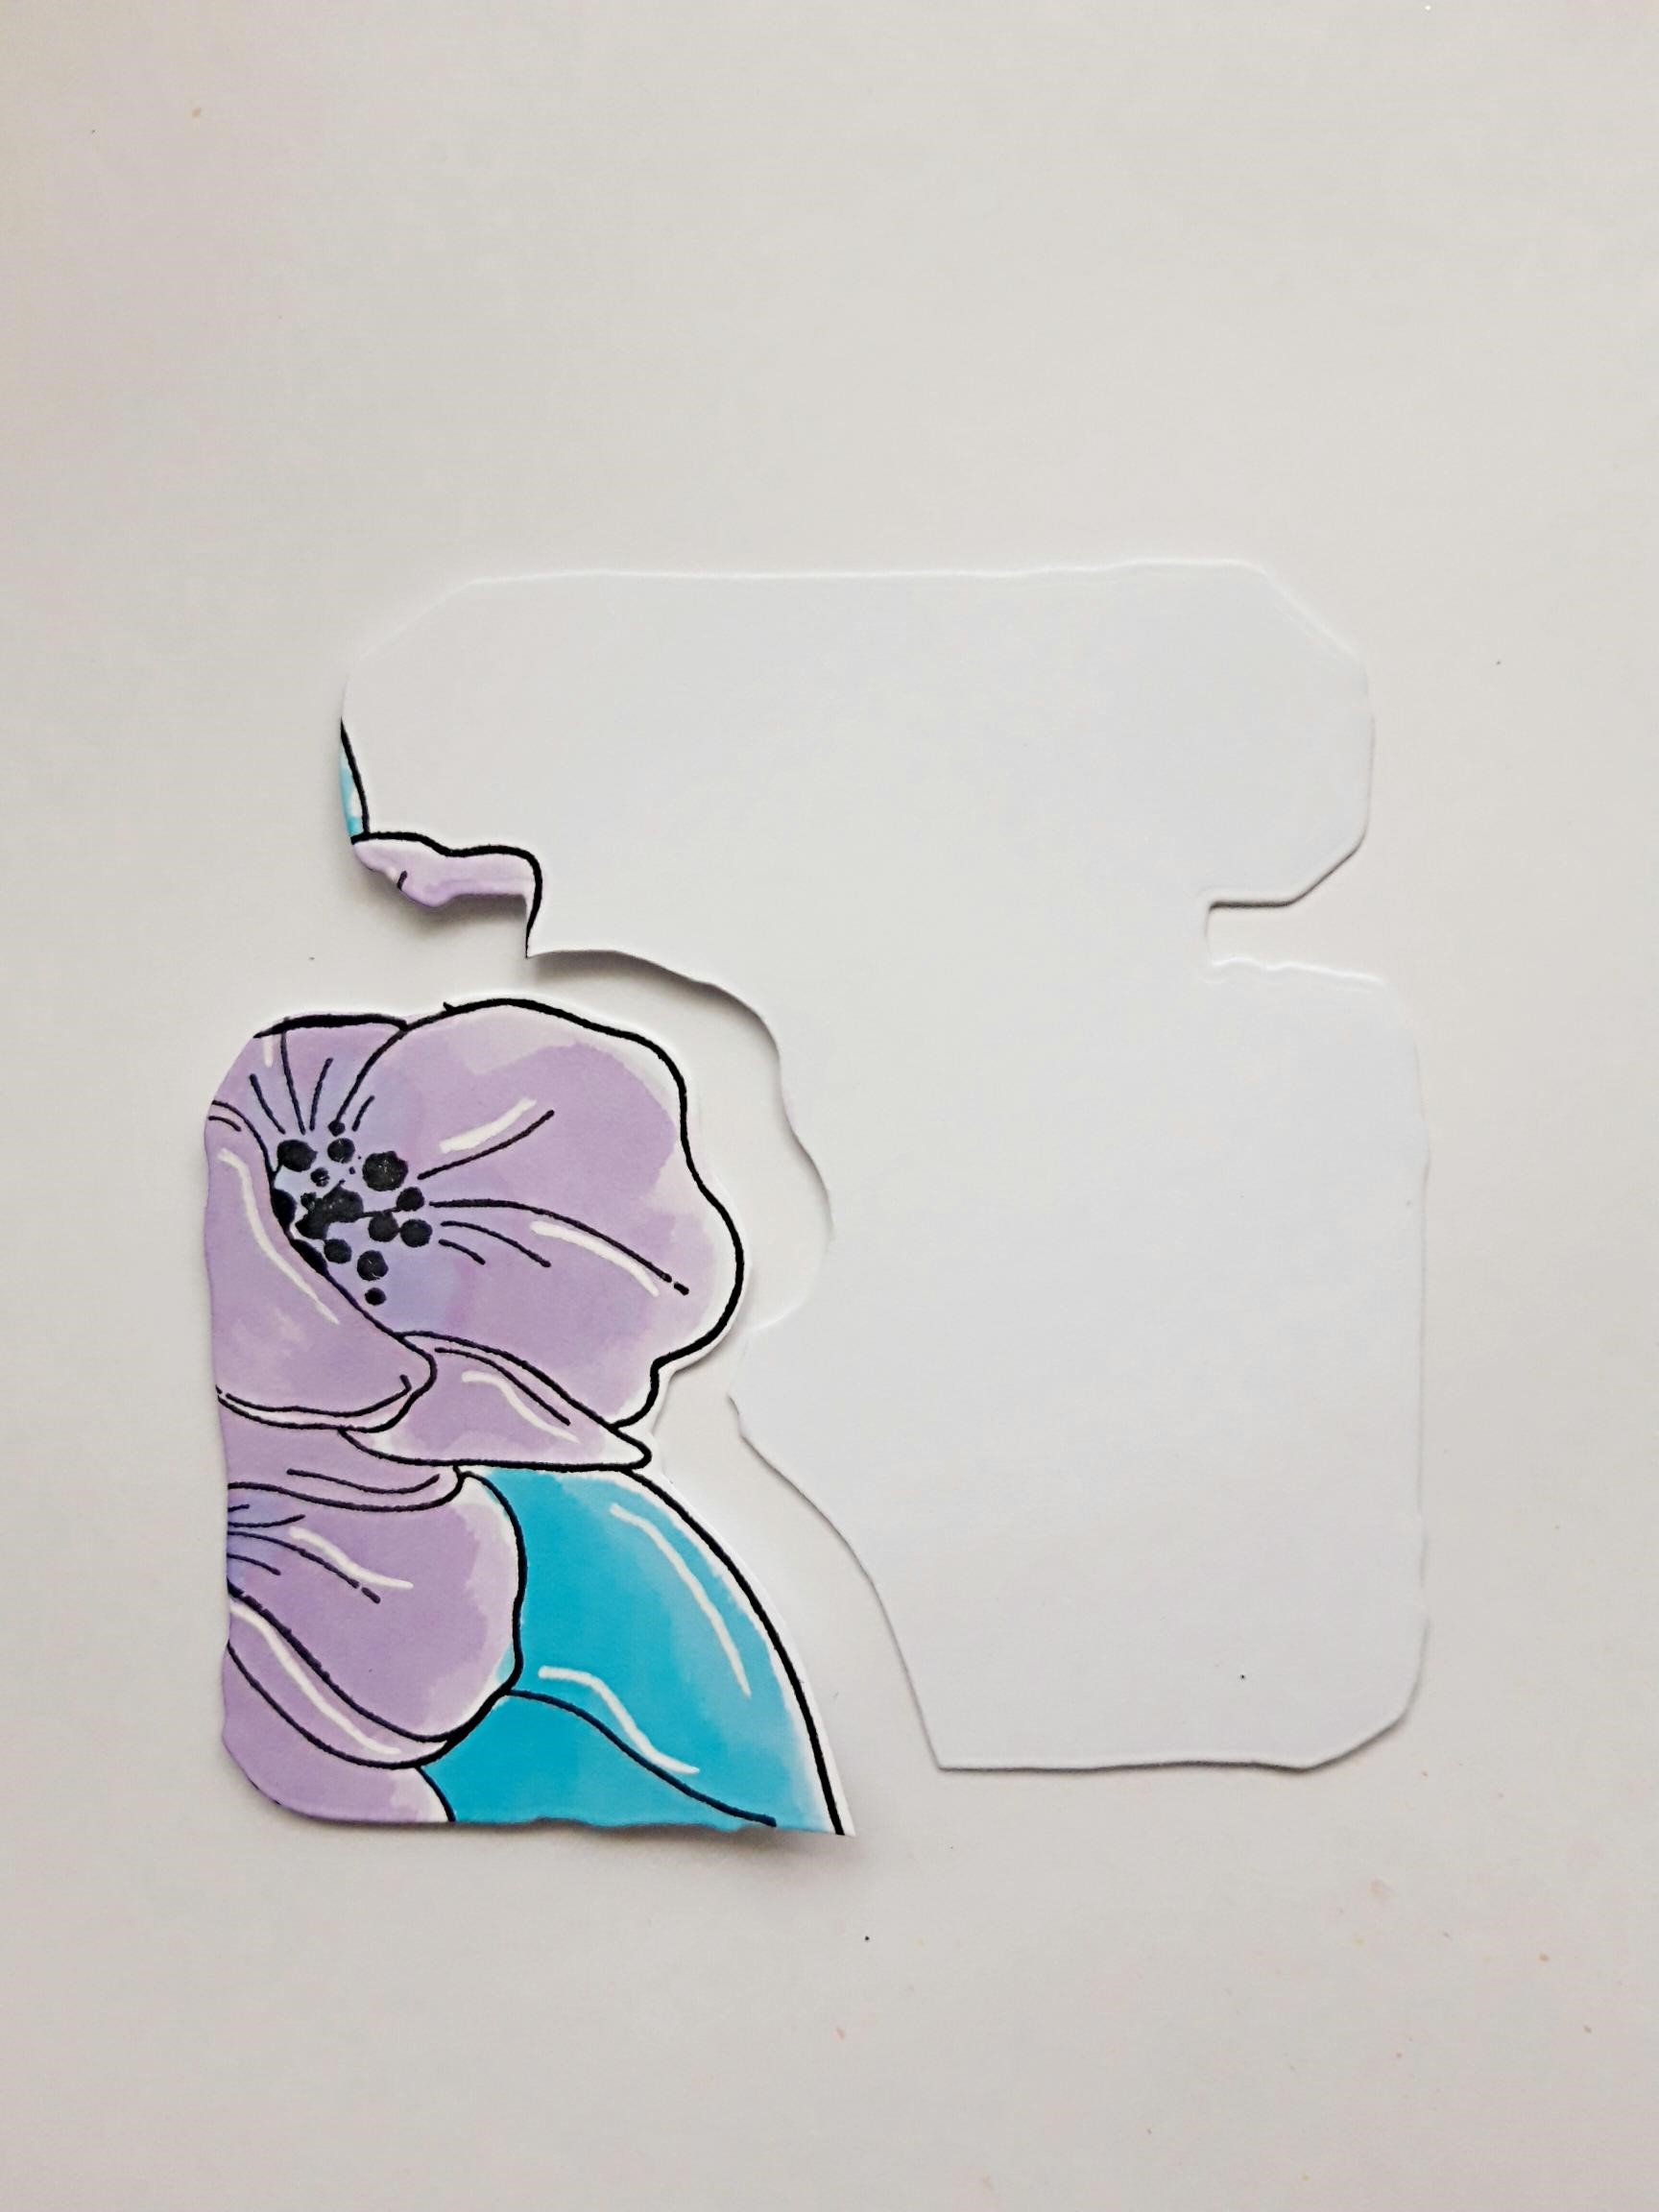
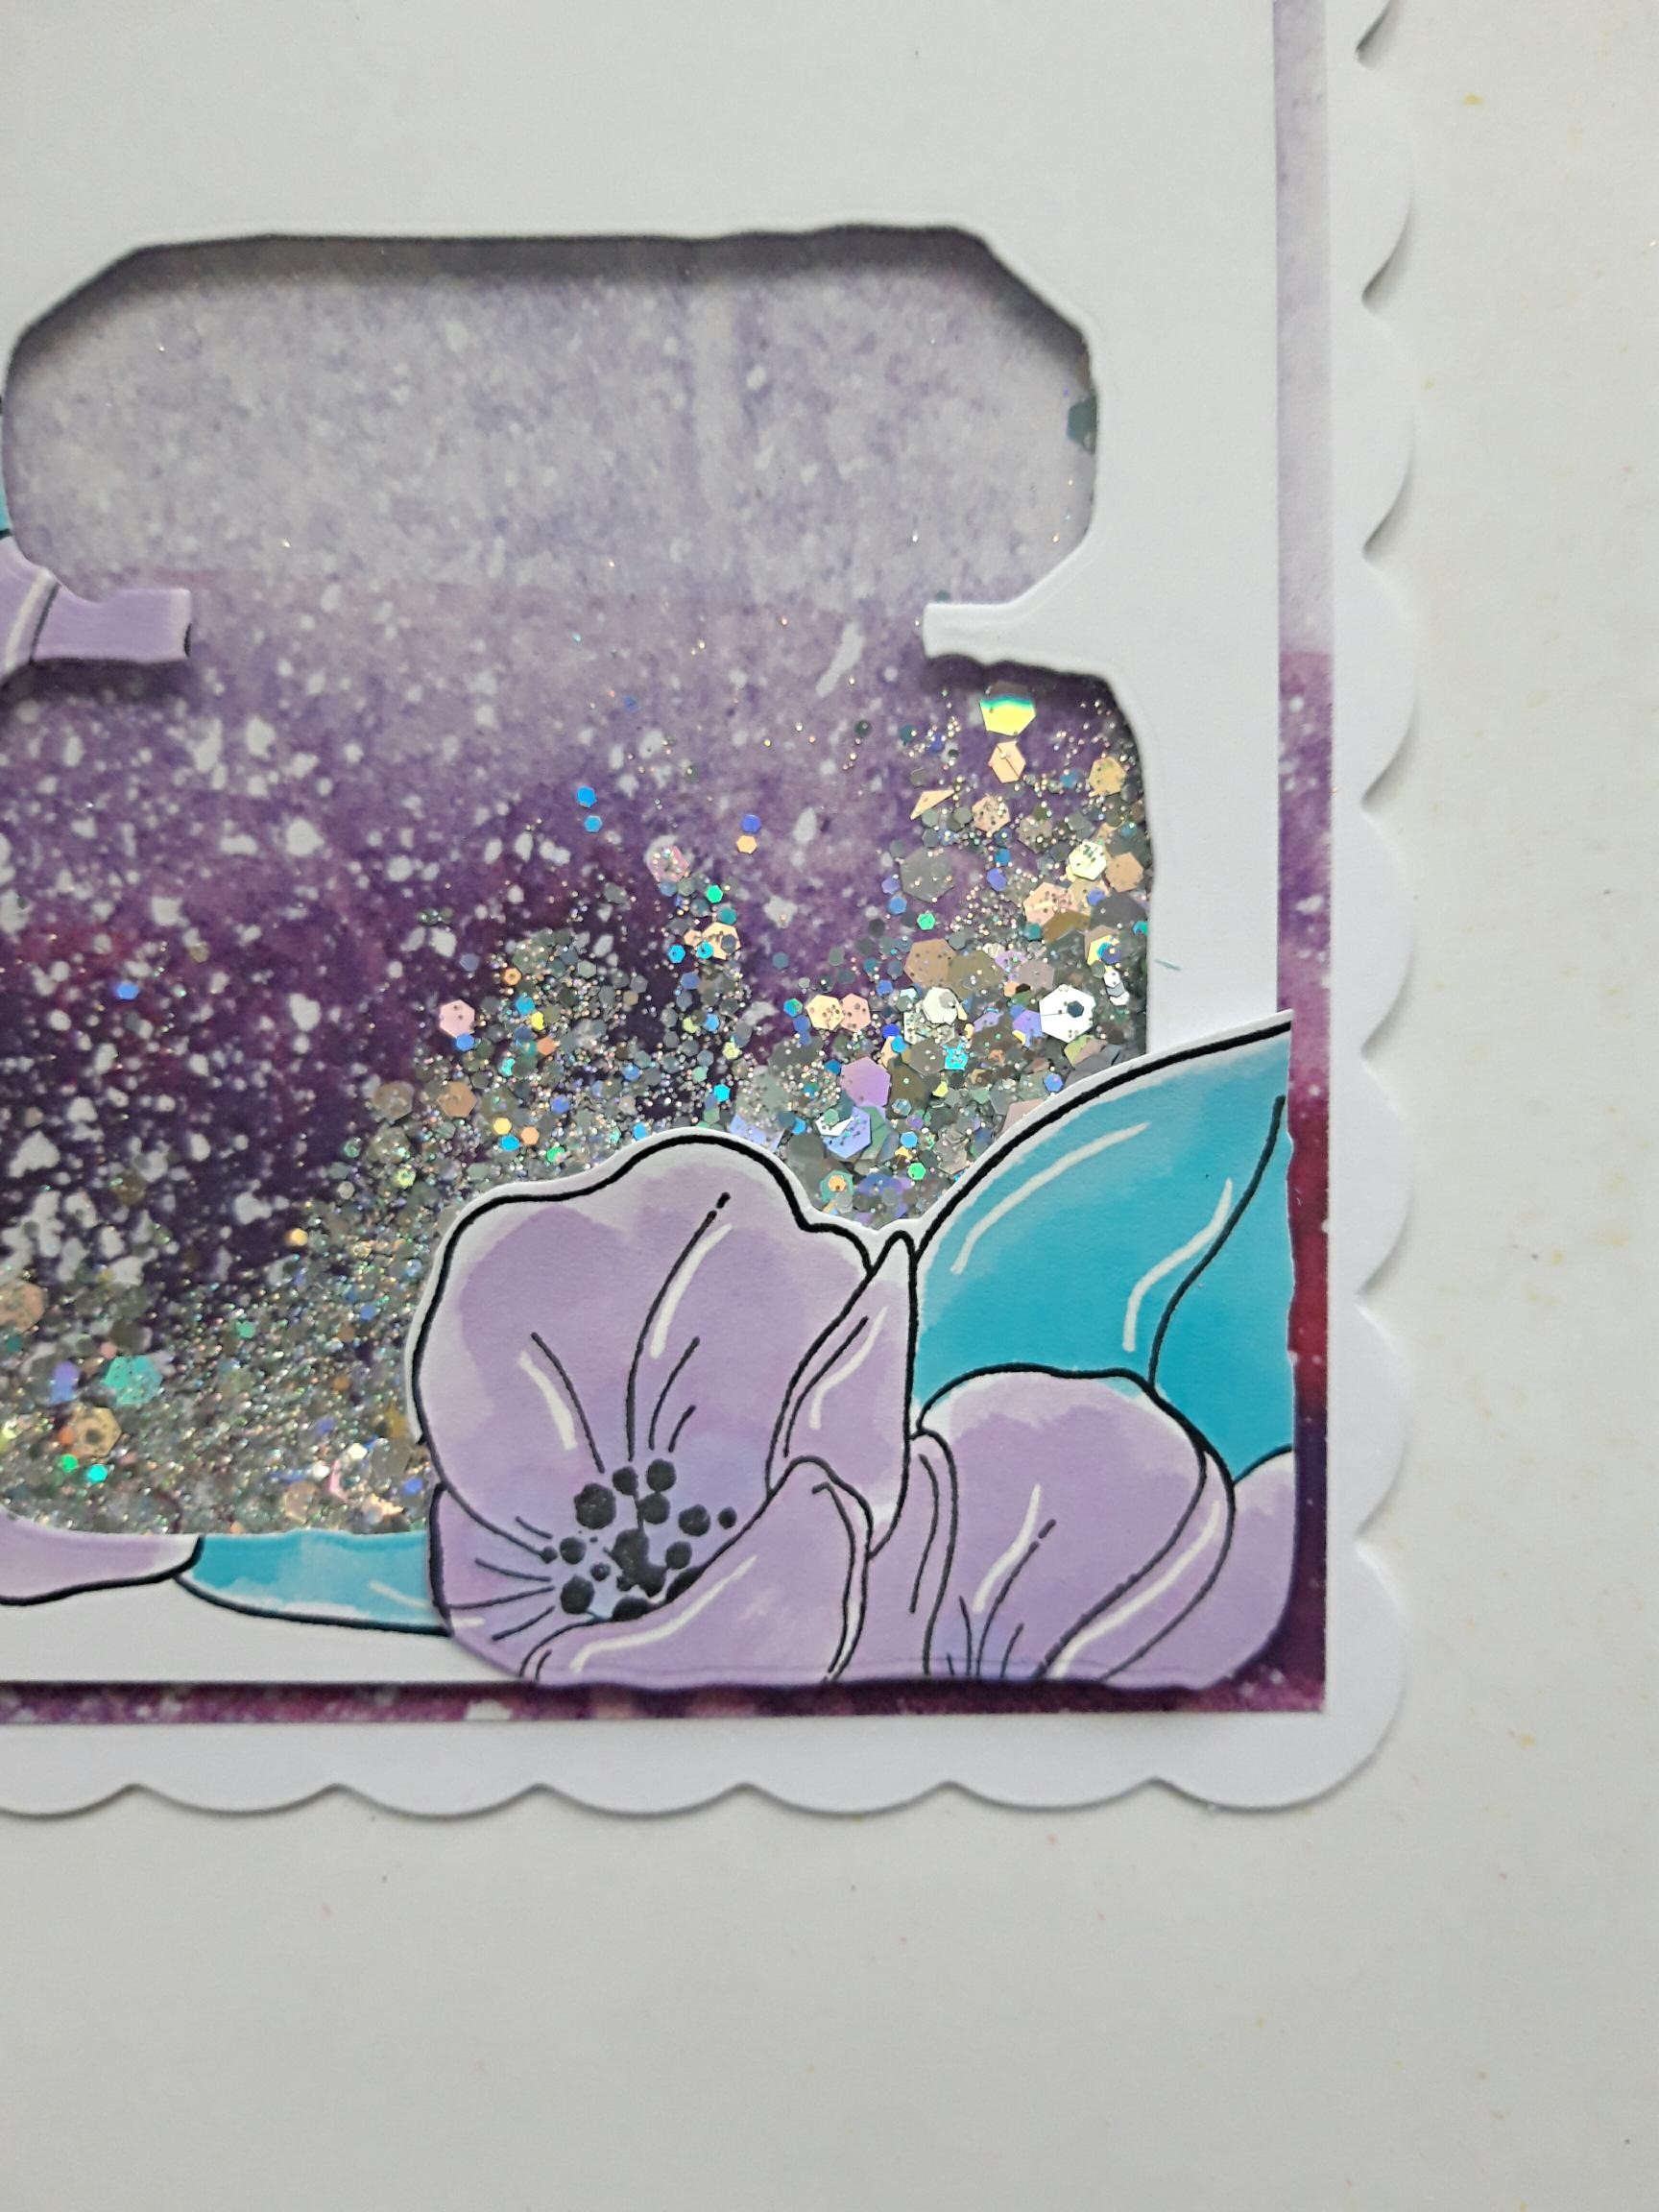
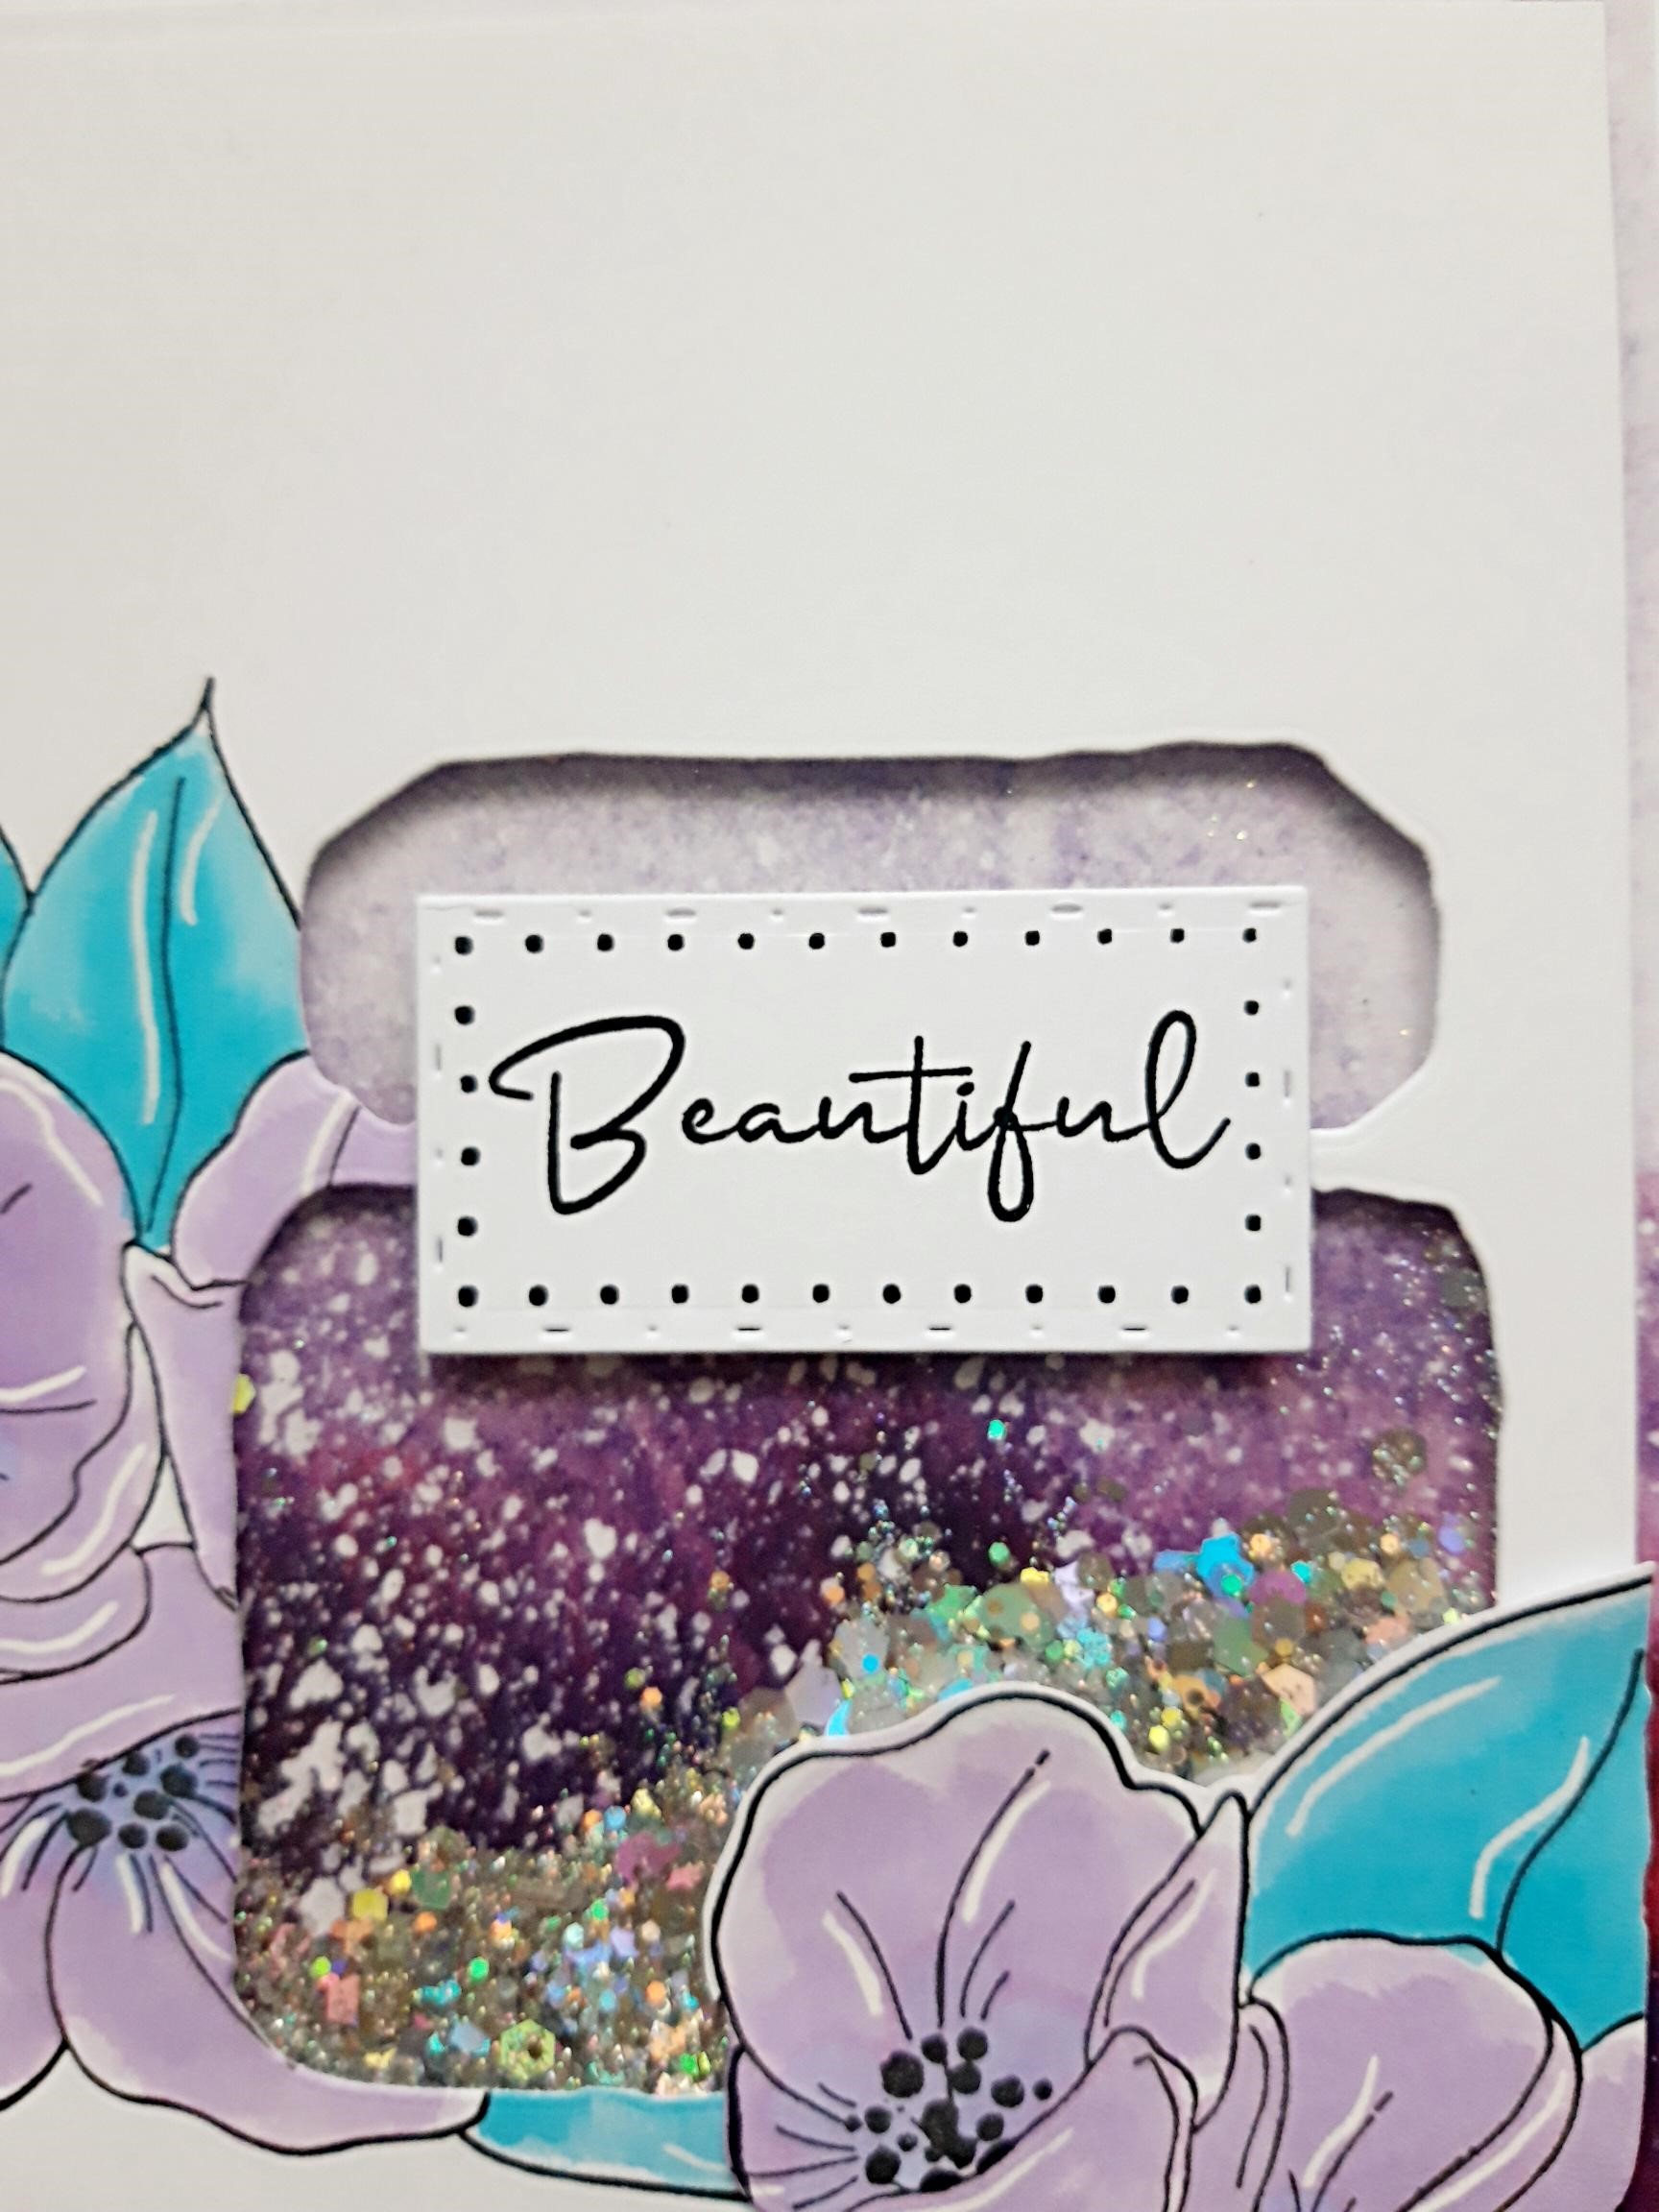
Cut out the floral element, from the perfume bottle die cut you set aside earlier. |
|
Adhere to the bottom right corner of your artwork and pop to one side. |
|
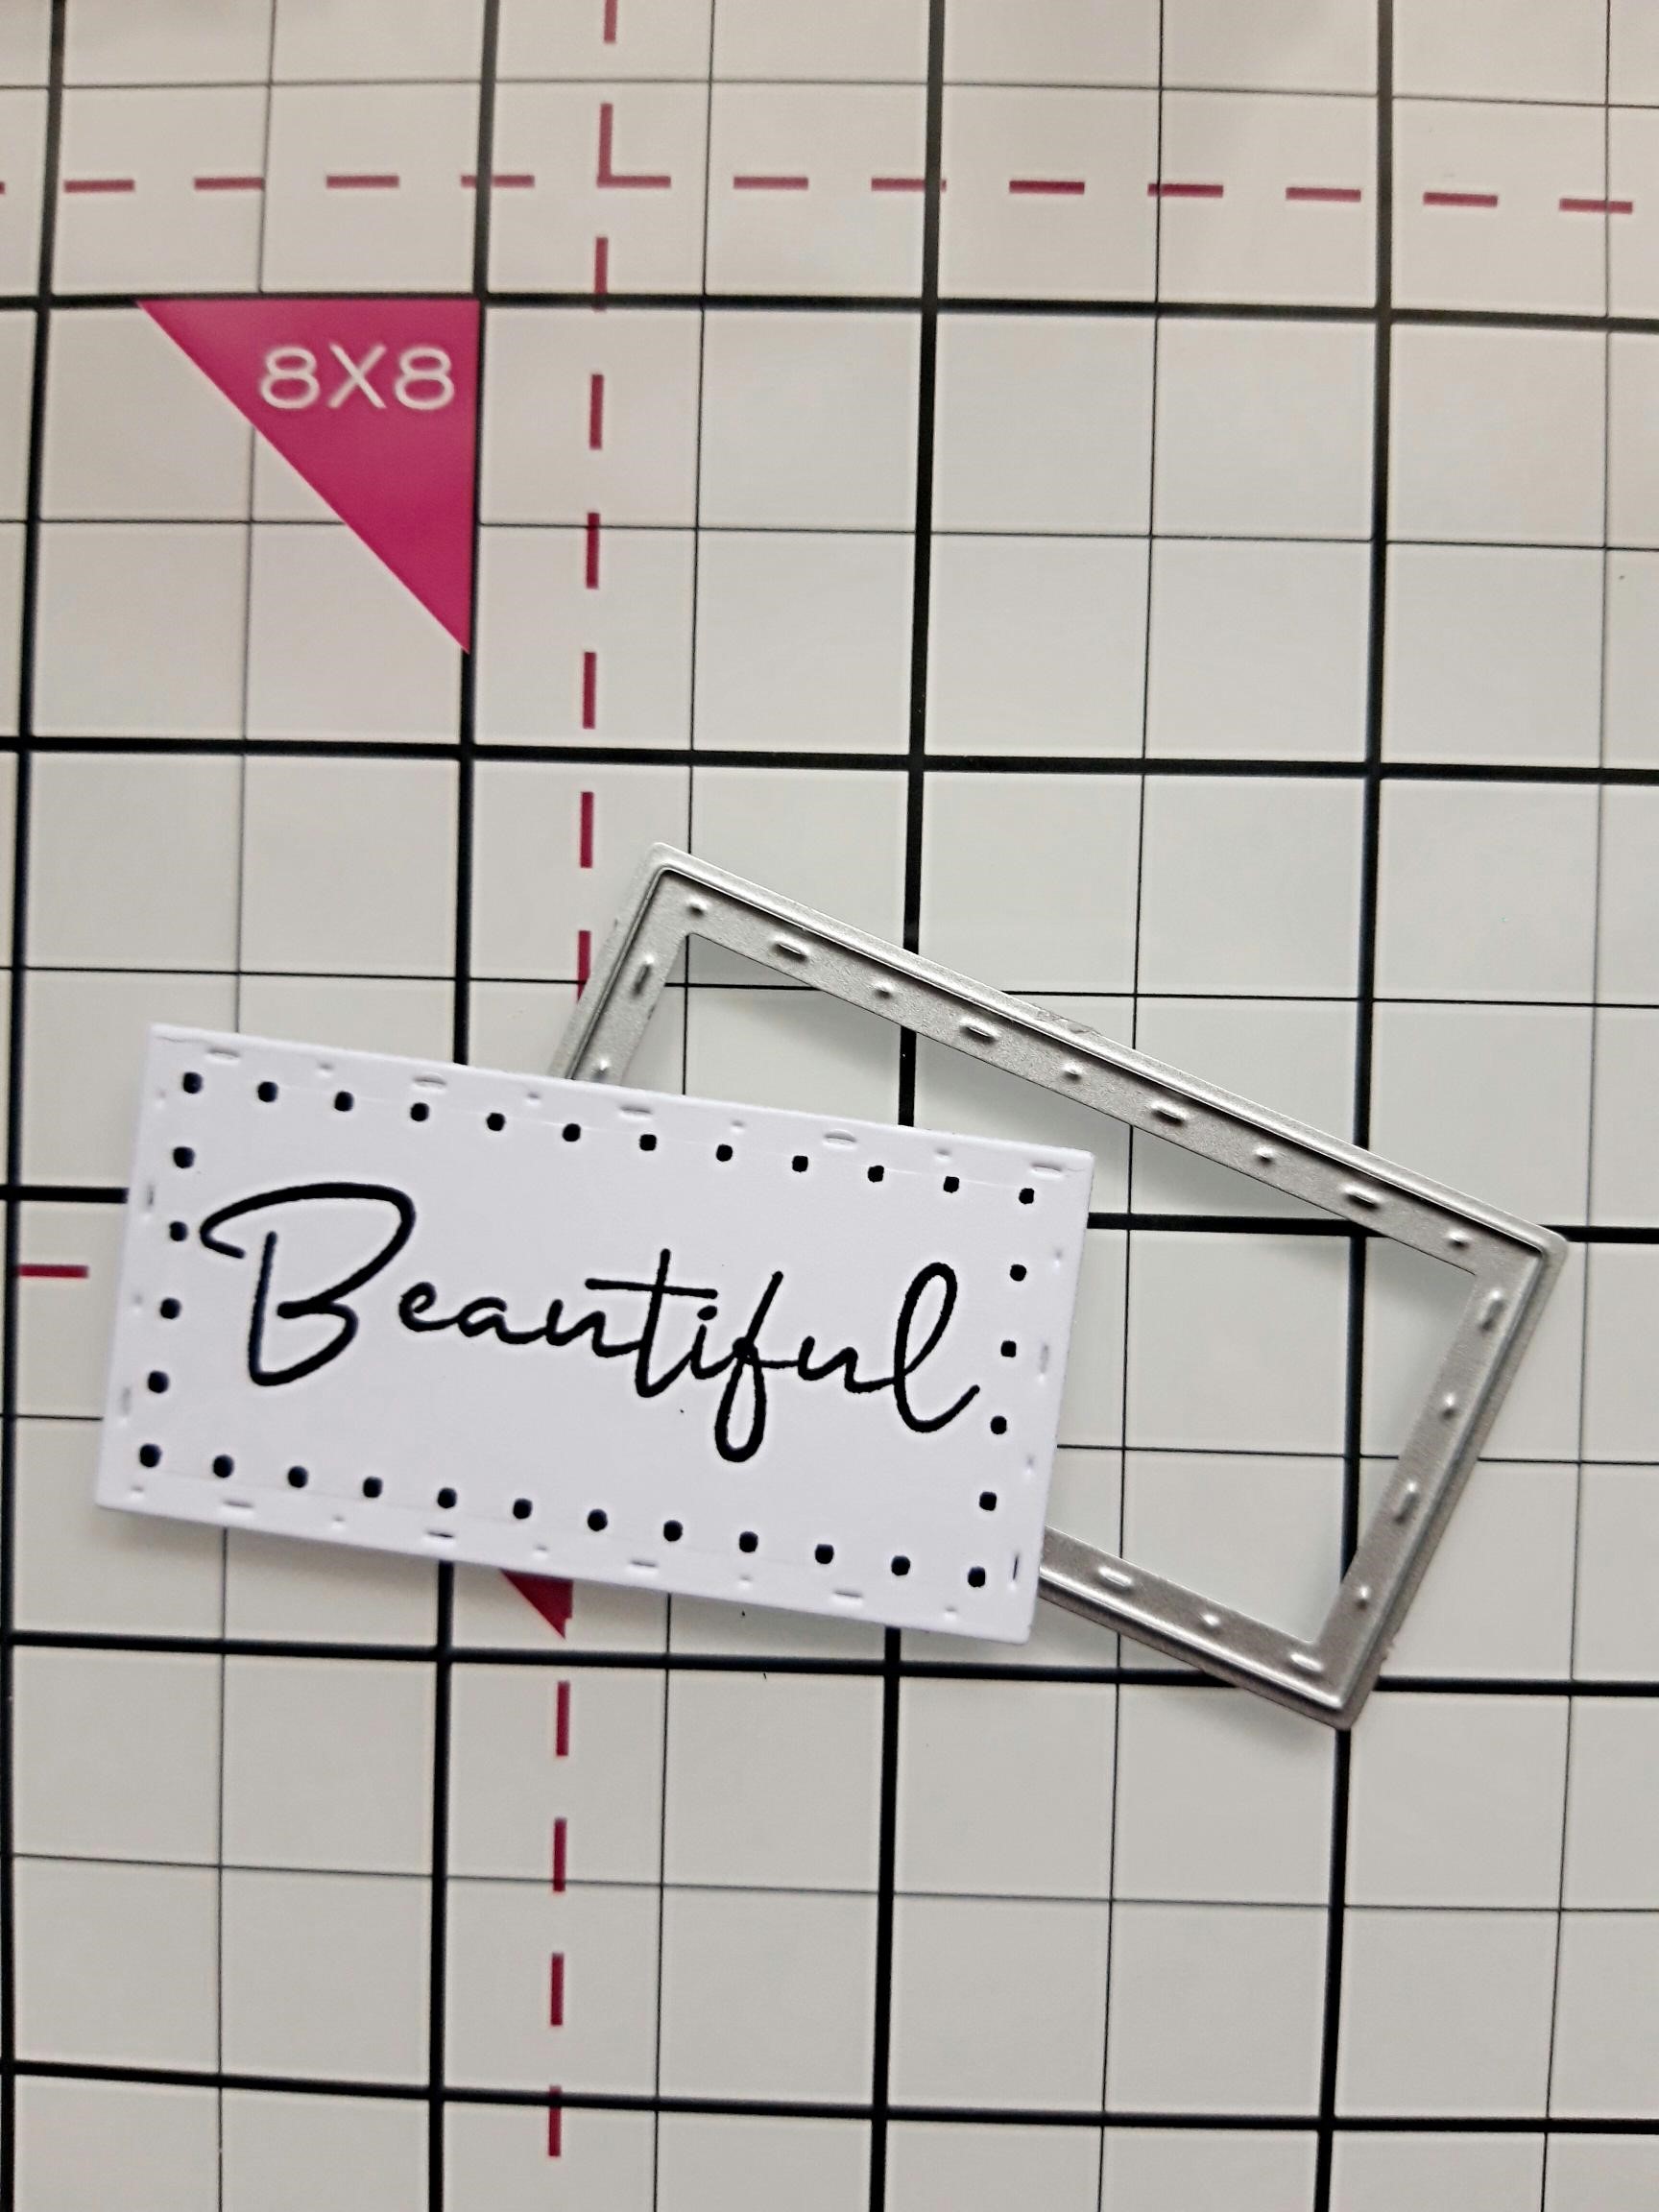
Ink up the sentiment stamp with the Versafine and stamp on to the 2 x 2" white card. Use the co-ordinating outline die to cut it out. |
|
Adhere on to your perfume bottle, to finish. |