Give your friends $10 off their first order!
Refer a FRIEND


WHAT YOU WILL NEED:
White card blank 6 x 6"
Black card 5 1/2 x 5 1/2"
White card 5 1/4 x 5 1/4"
A4 White card
Clear Acetate 5 x 5""
Forever Lilies Stamp, Die and Stencil Collection
Remember This Stamp and Die set
Versafine Ink Pad:Onyx Black
Stamps By Me Premium Dye Ink Pad:Indigo, Surfboard, Hedgerow
Distress Ink: Black Soot
Blending tool
Eureka 101
Paper Trimmer
Perfect Together Glue
Double sided adhesive tape
Foam pads
Die Cutting machine
[click image to enlarge] 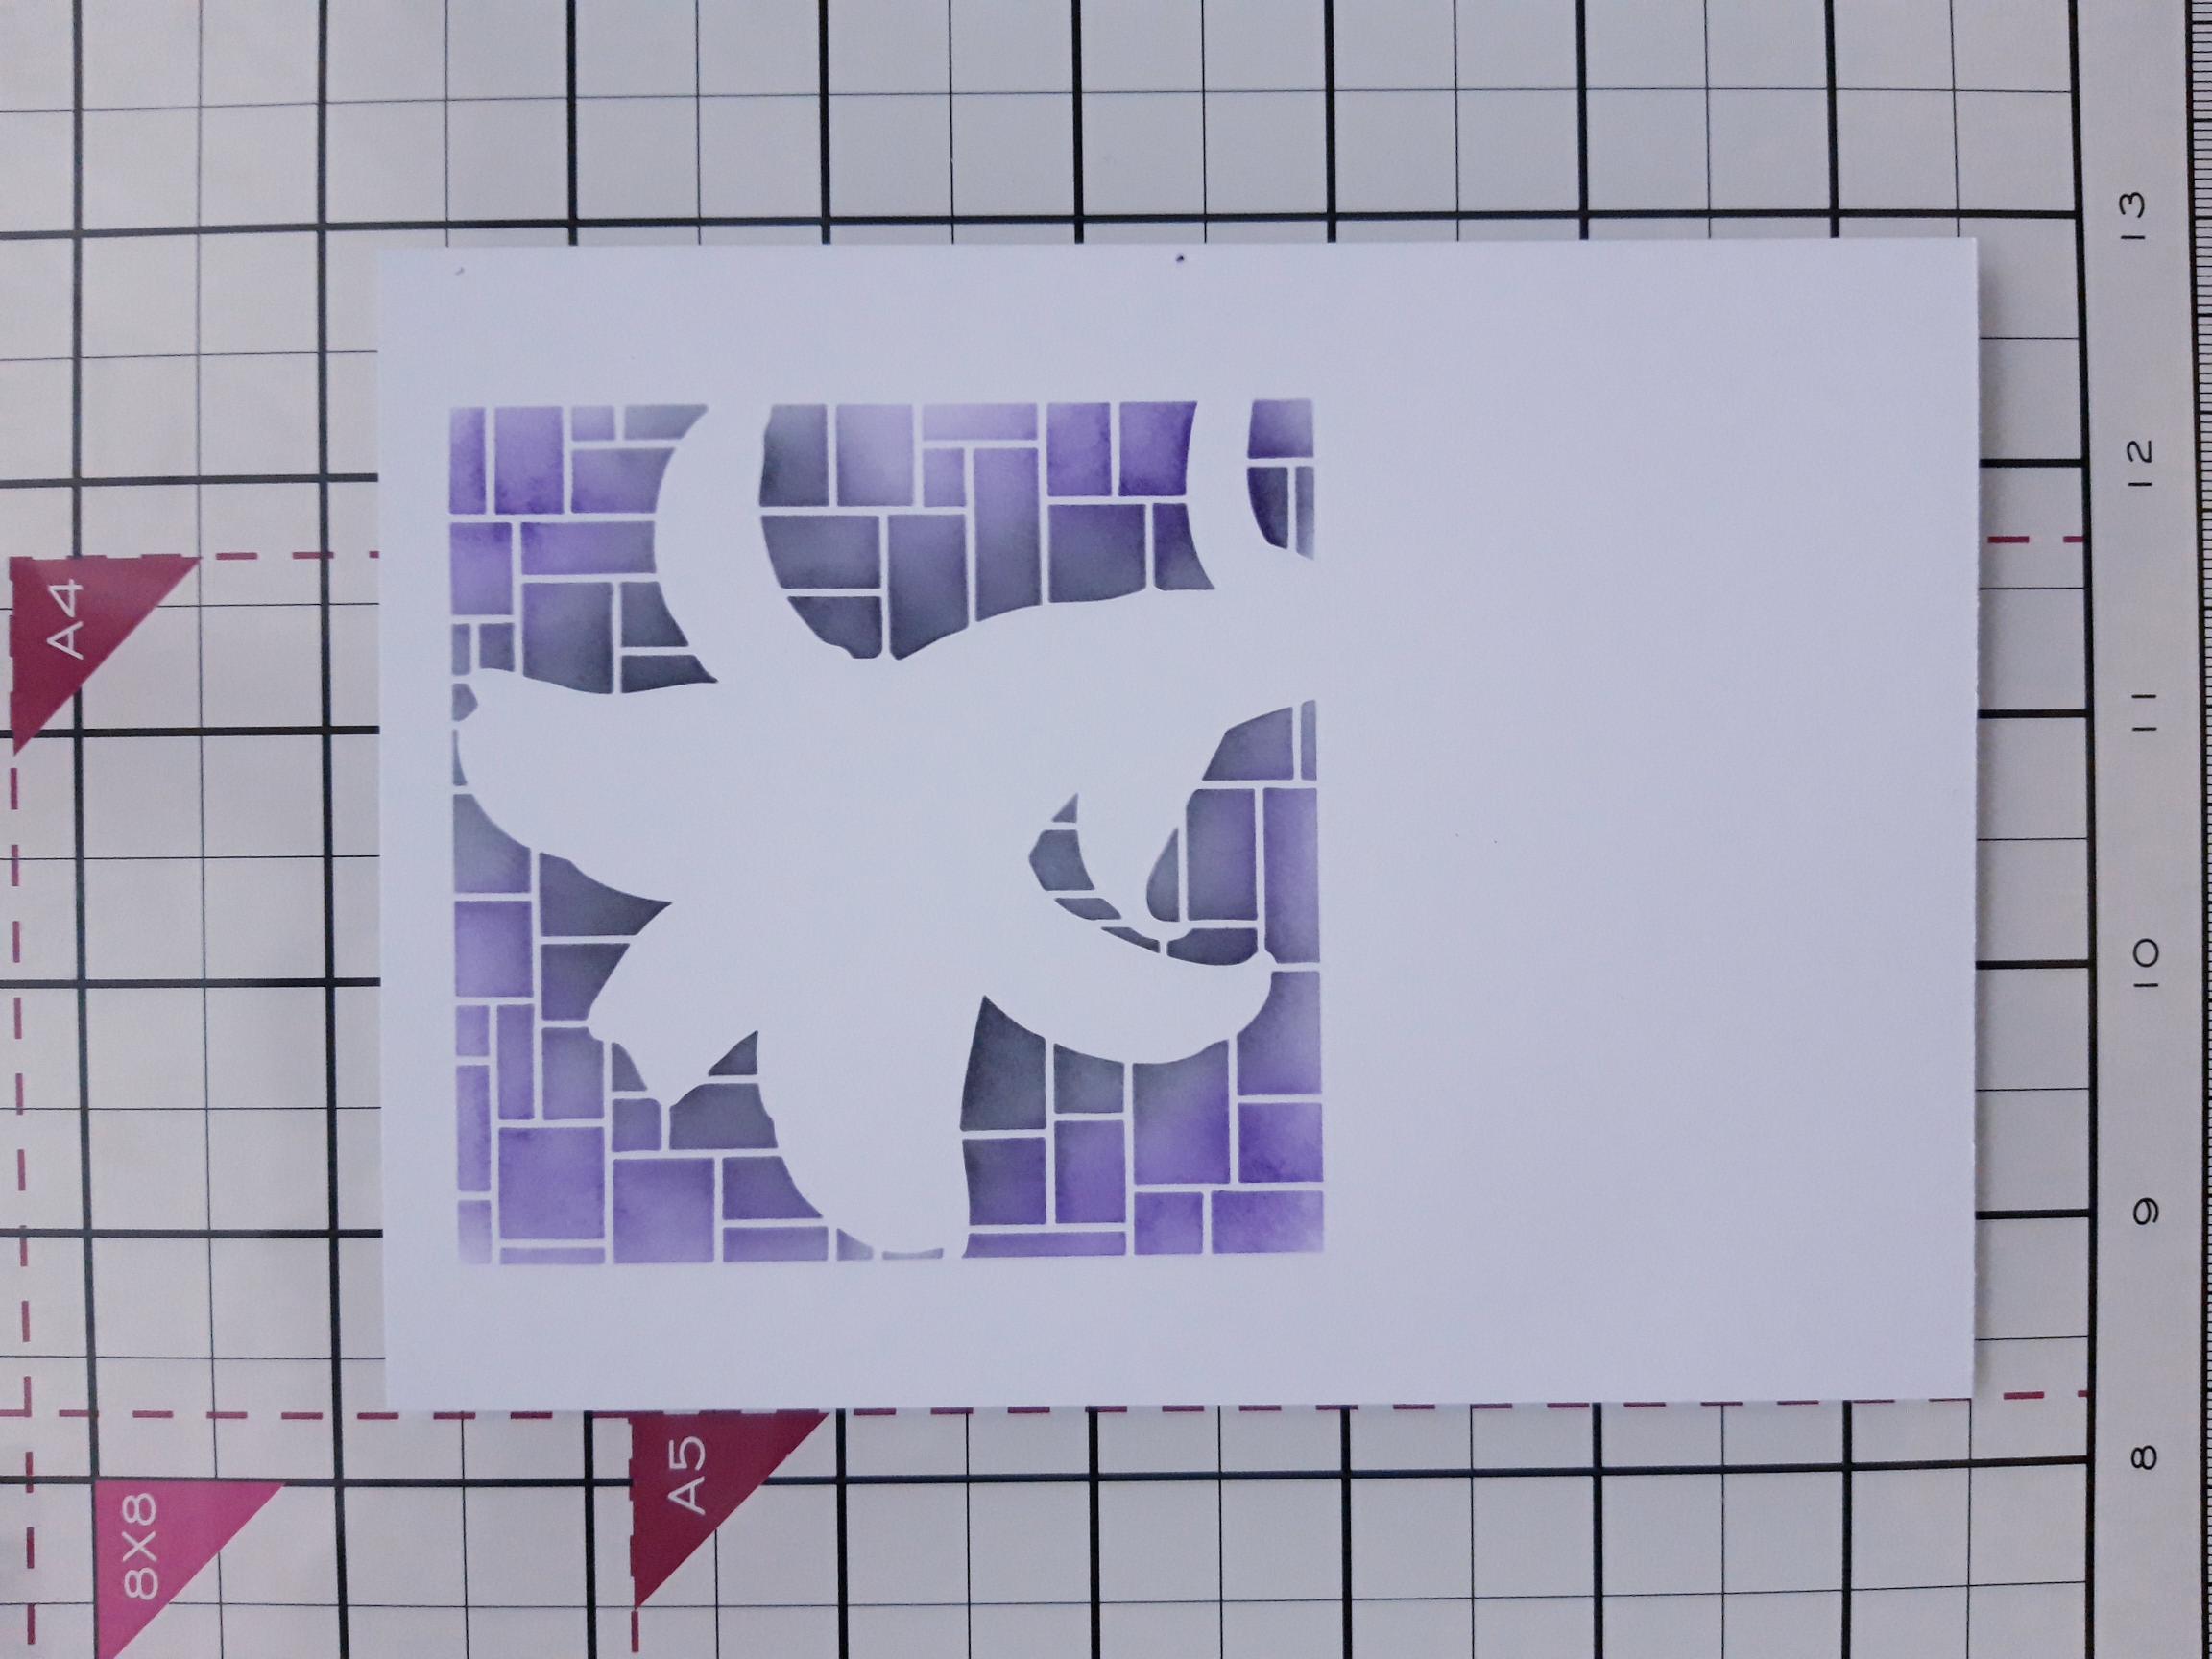
|
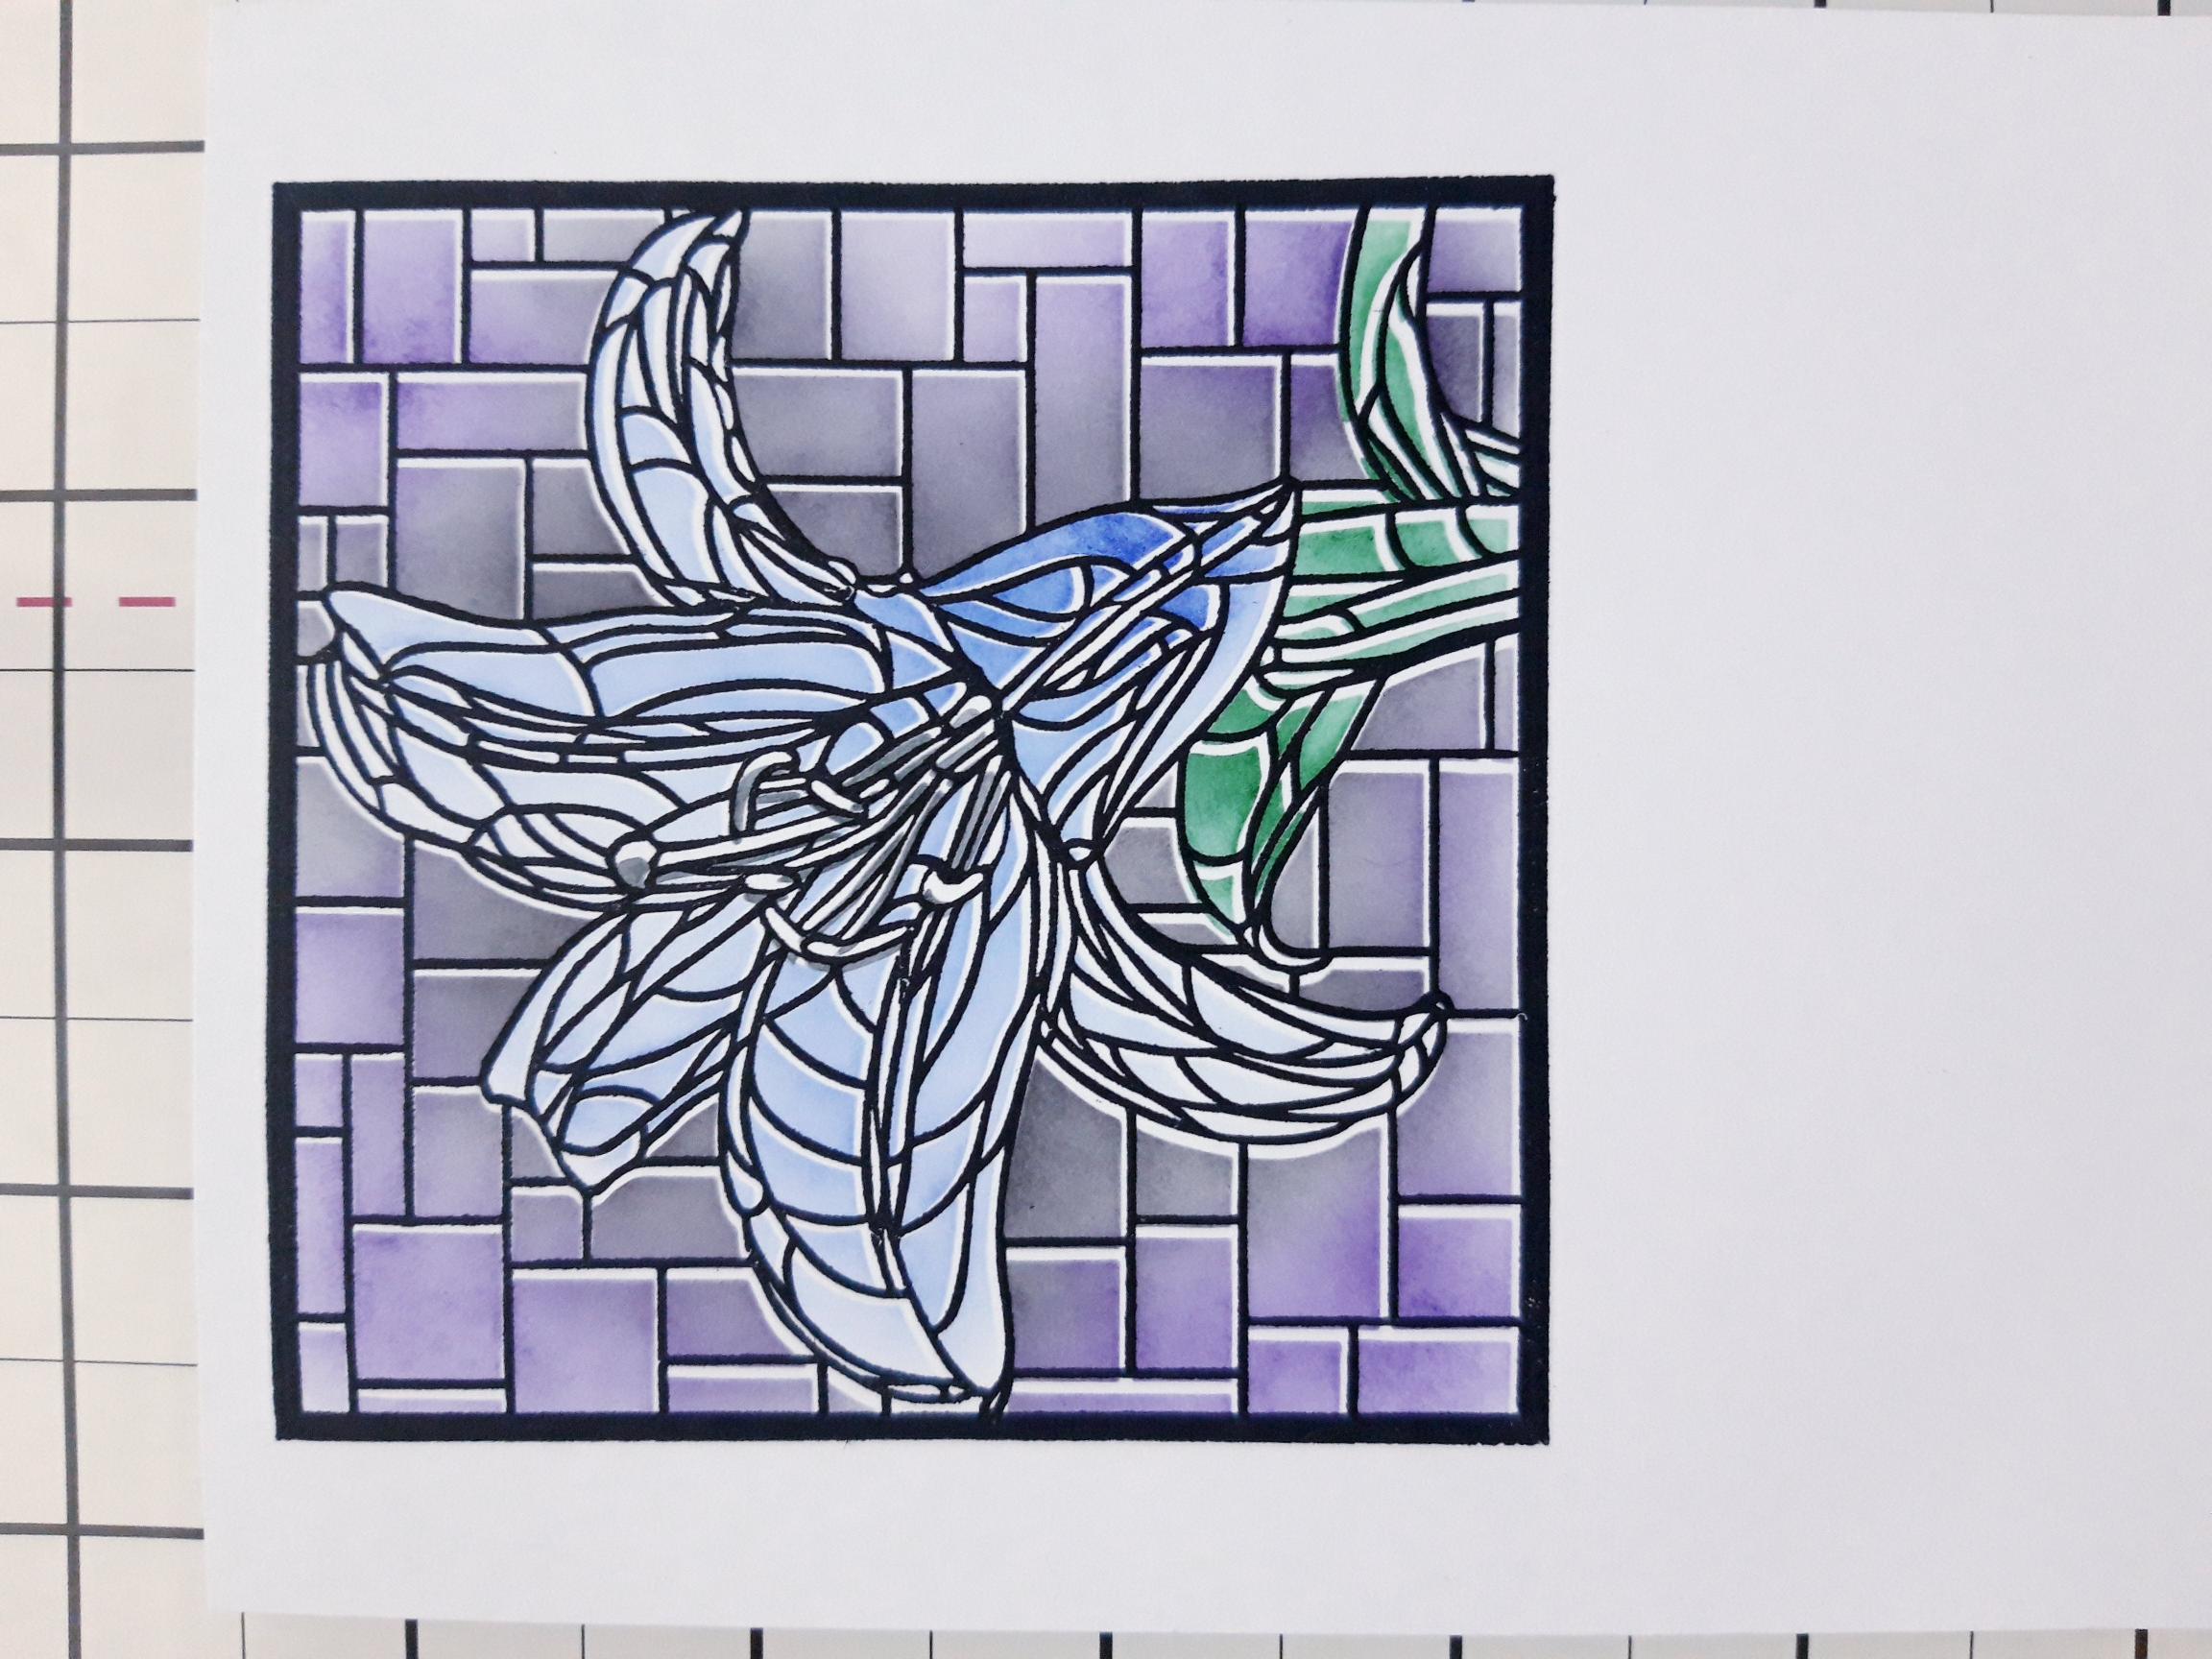
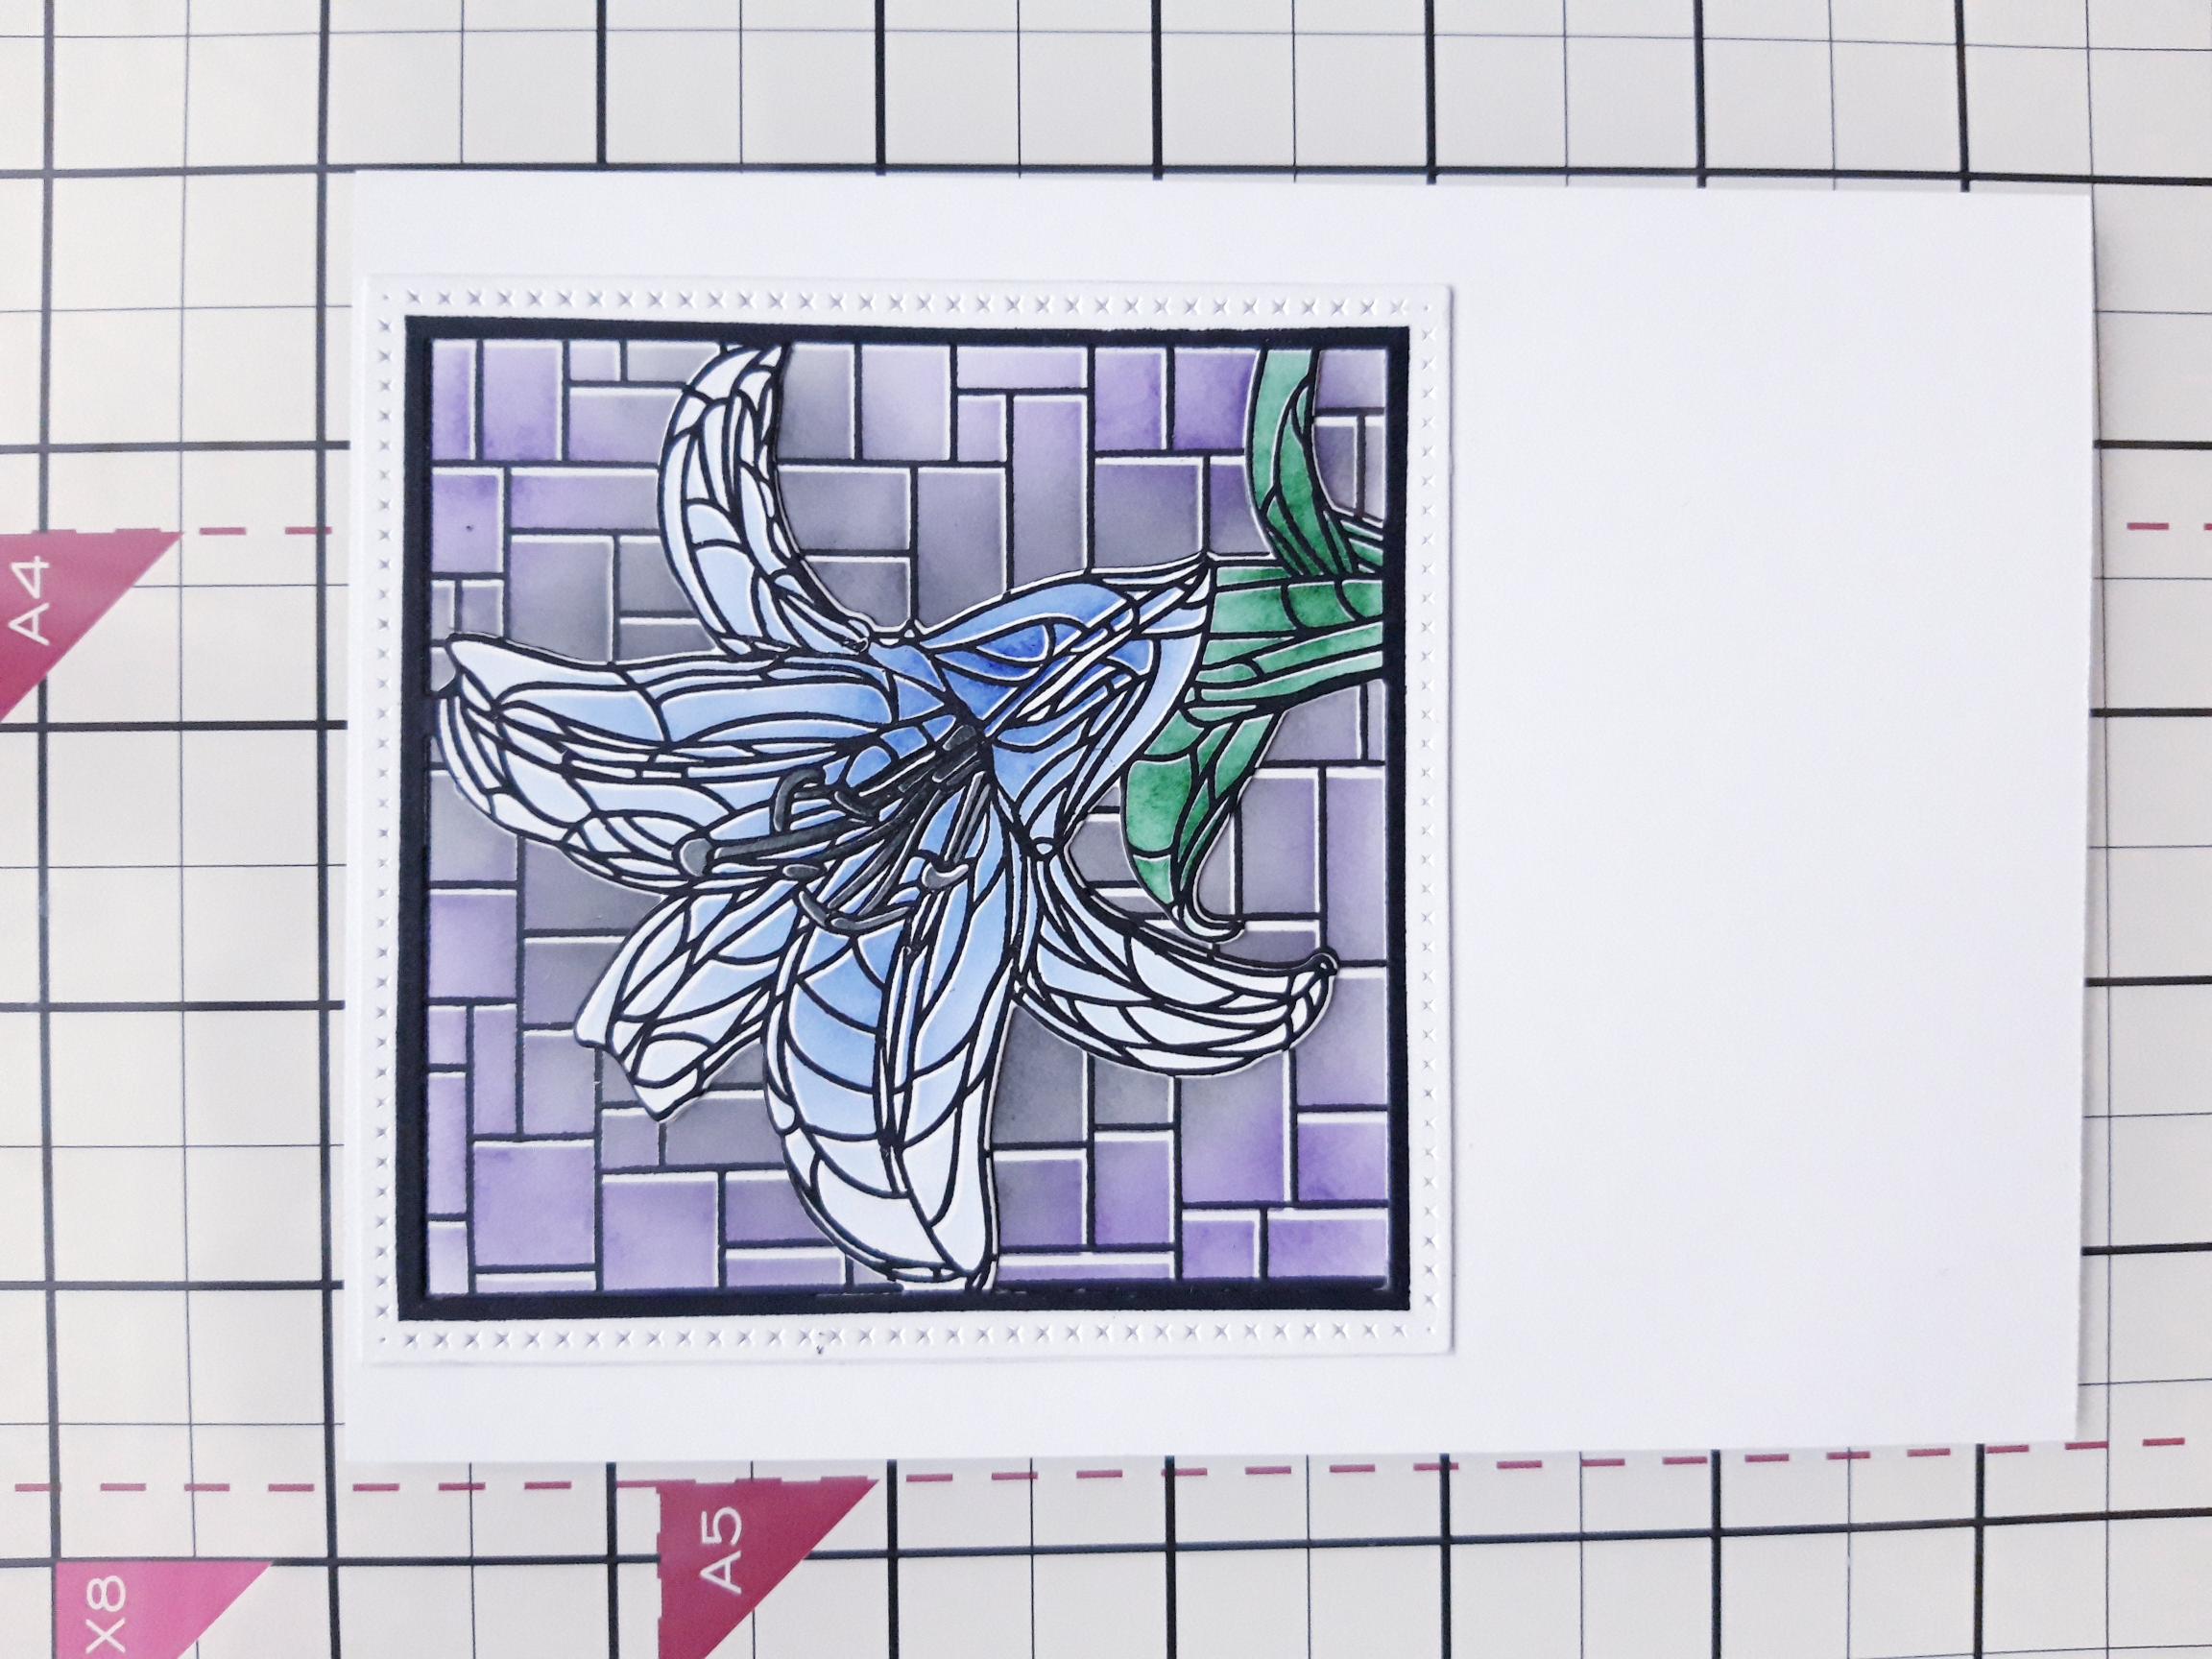
Cut the A4 white card in half, setting one piece aside for now. Place stencil 1 on the card and use your blending tool to blend the Indigo through the stencil. Blend the Black Soot just around the edges of the Lilies, as seen here, to add depth to your image. TIP:You can add ink through the 4 corner hearts, to help you line up each stencil, if required. |
|
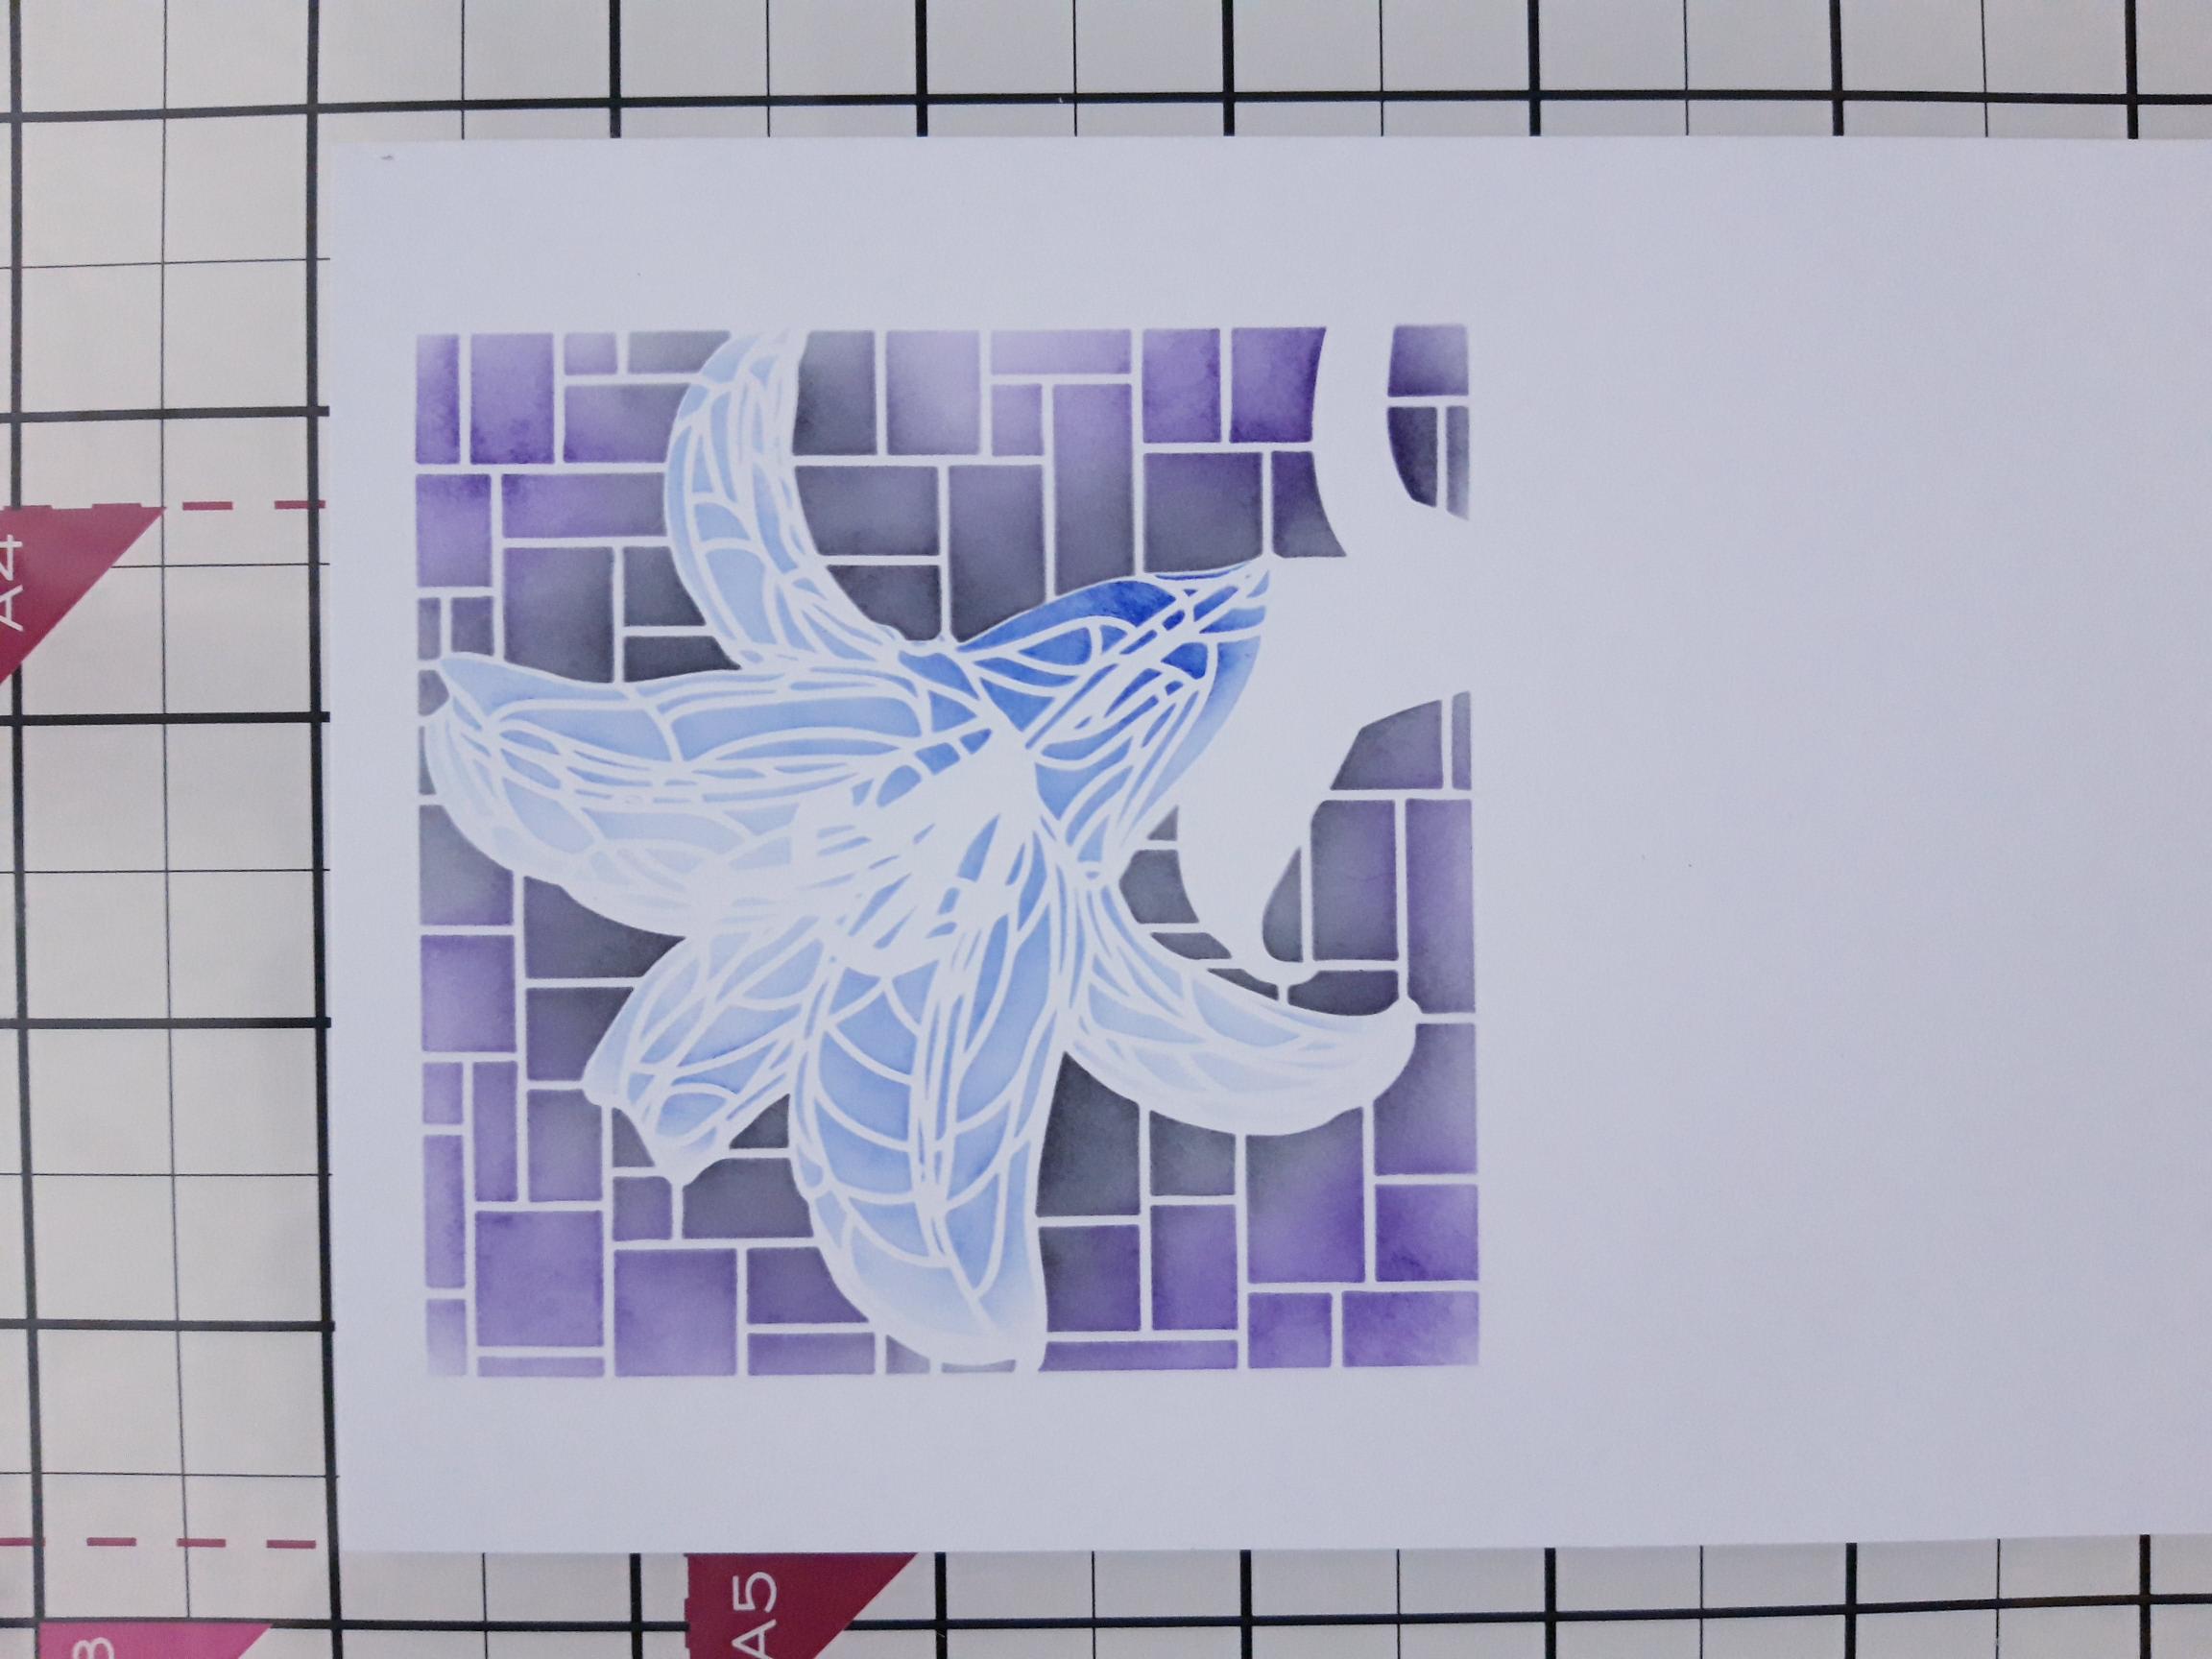
Line up stencil 2 and blend through with the Surfboard dye ink. |
|
Having lined up stencil 3, blend the Hedgerow on the foliage and the Black Soot on the stamens. |
|
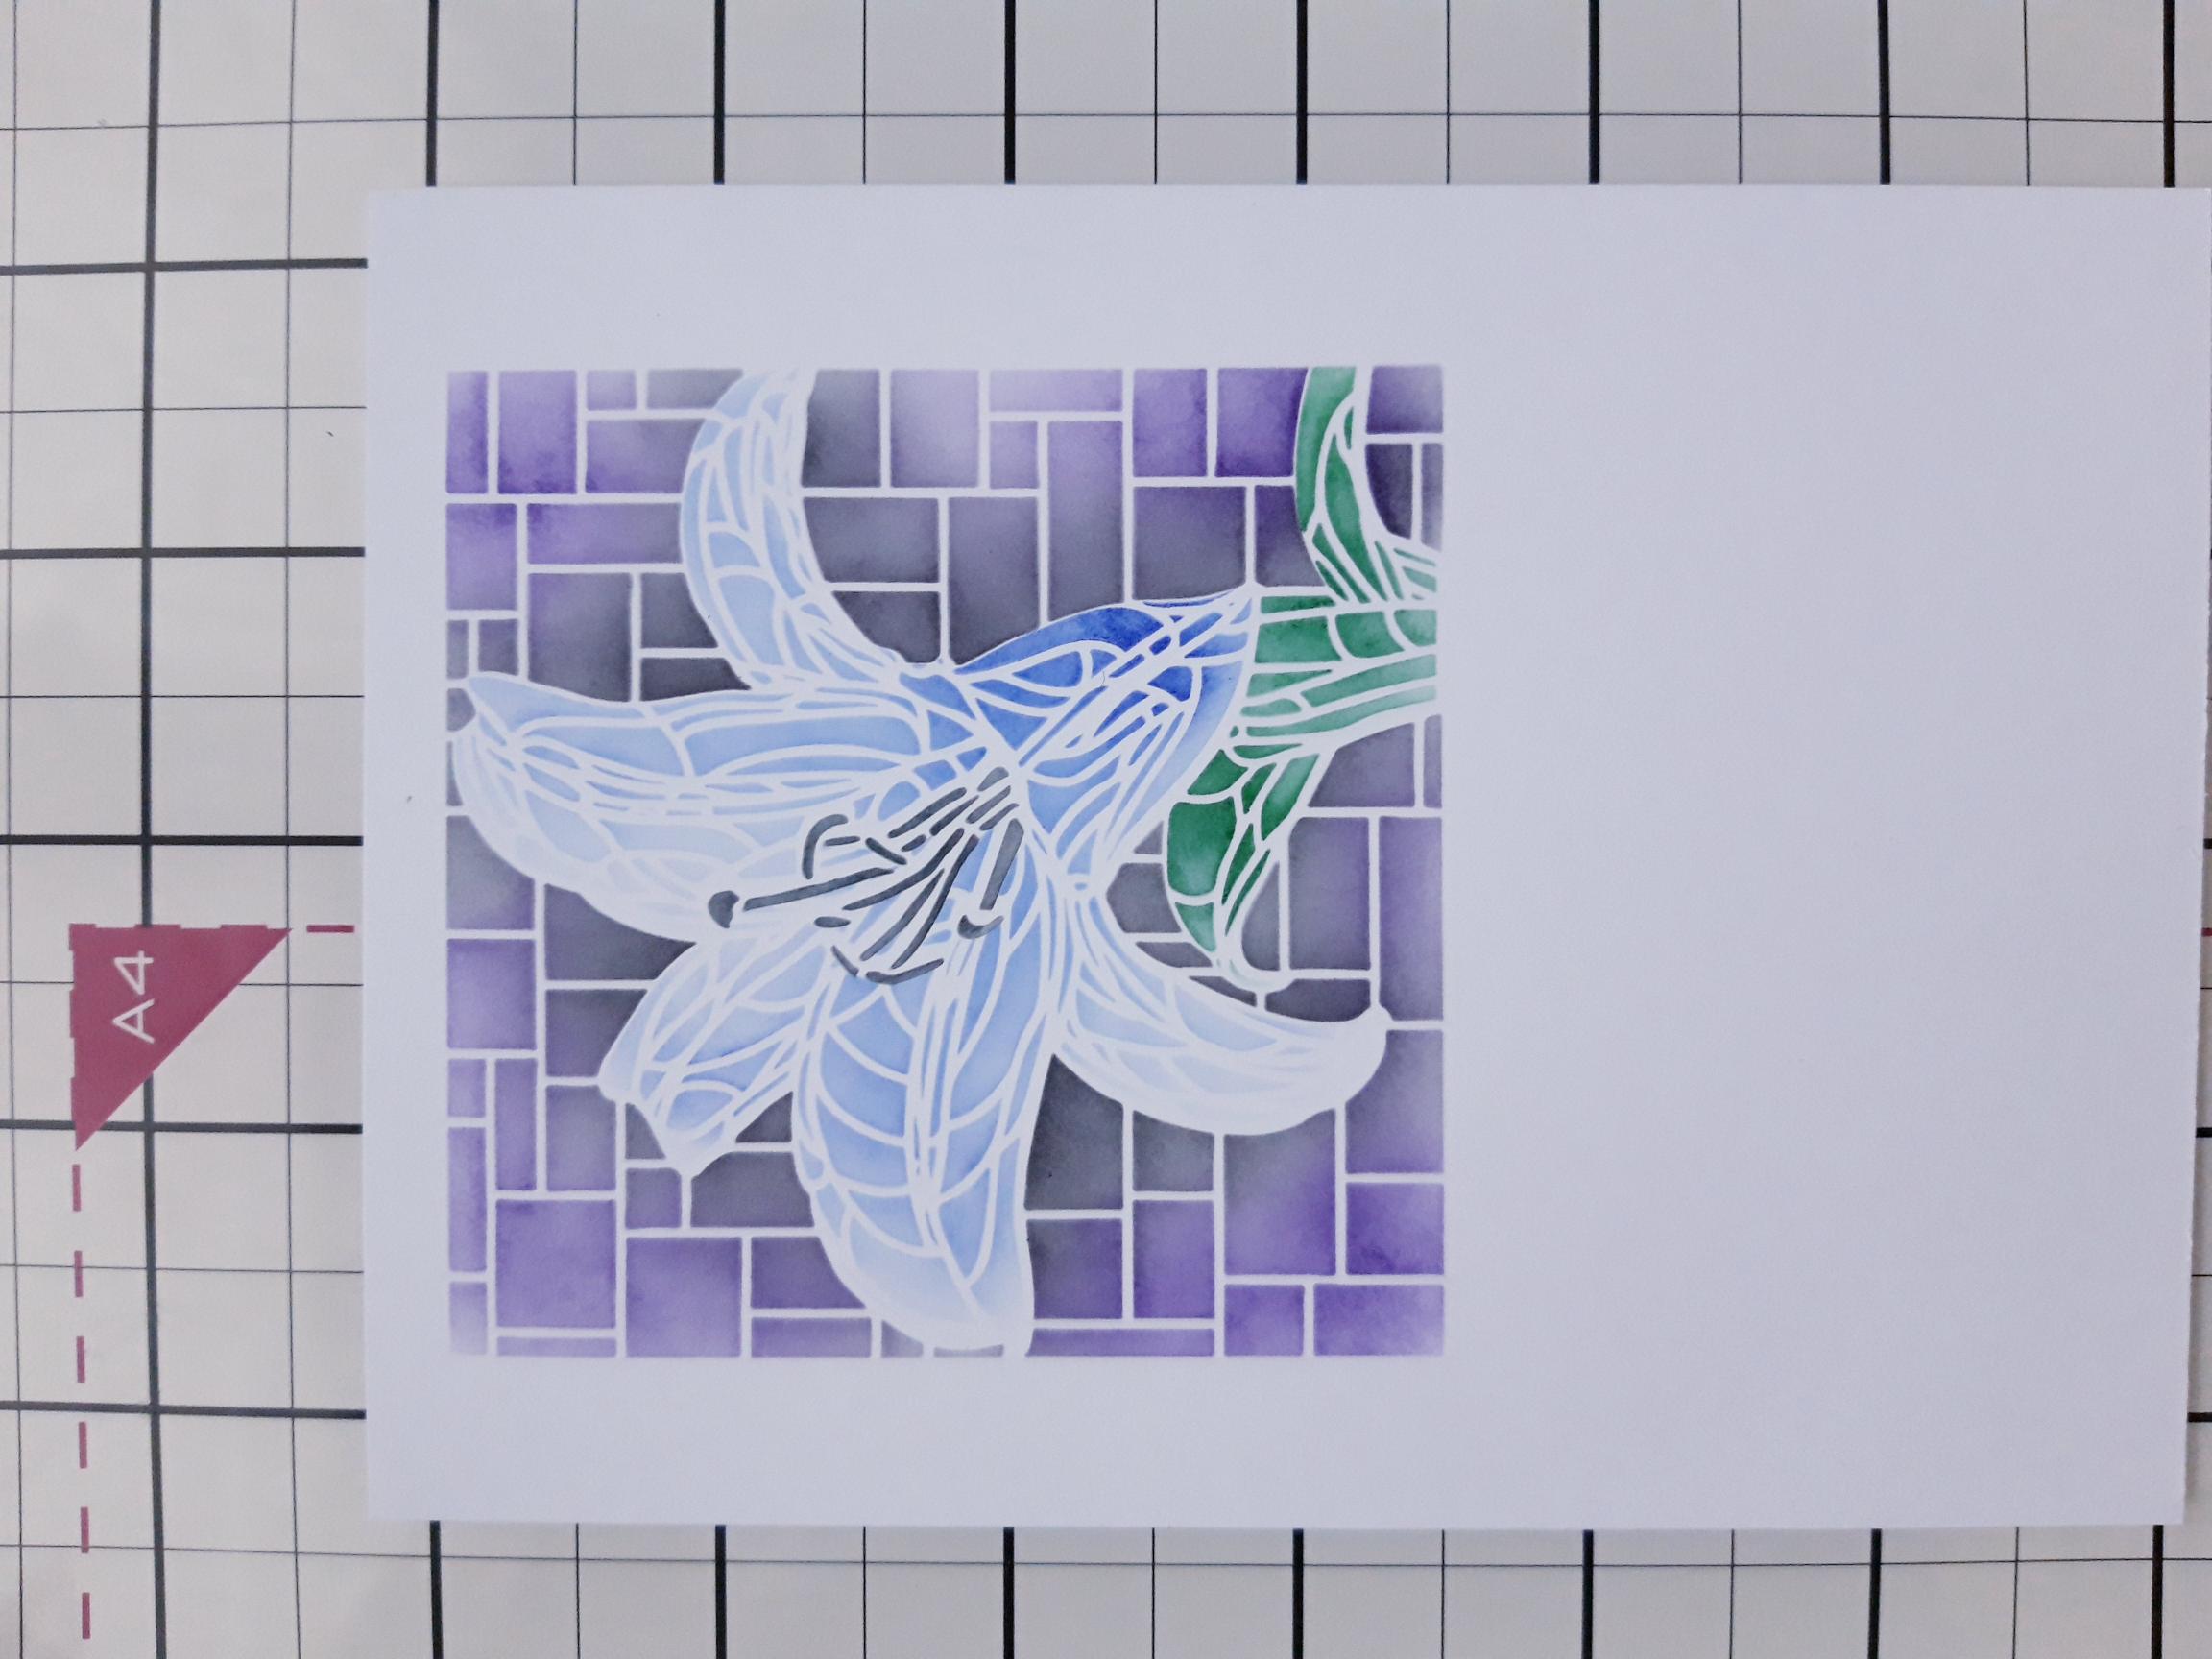
Ink up the co-ordinating stamp with the Onyx Black Versafine, line it up and stamp over your stencilled image. Set this to one side. |
|
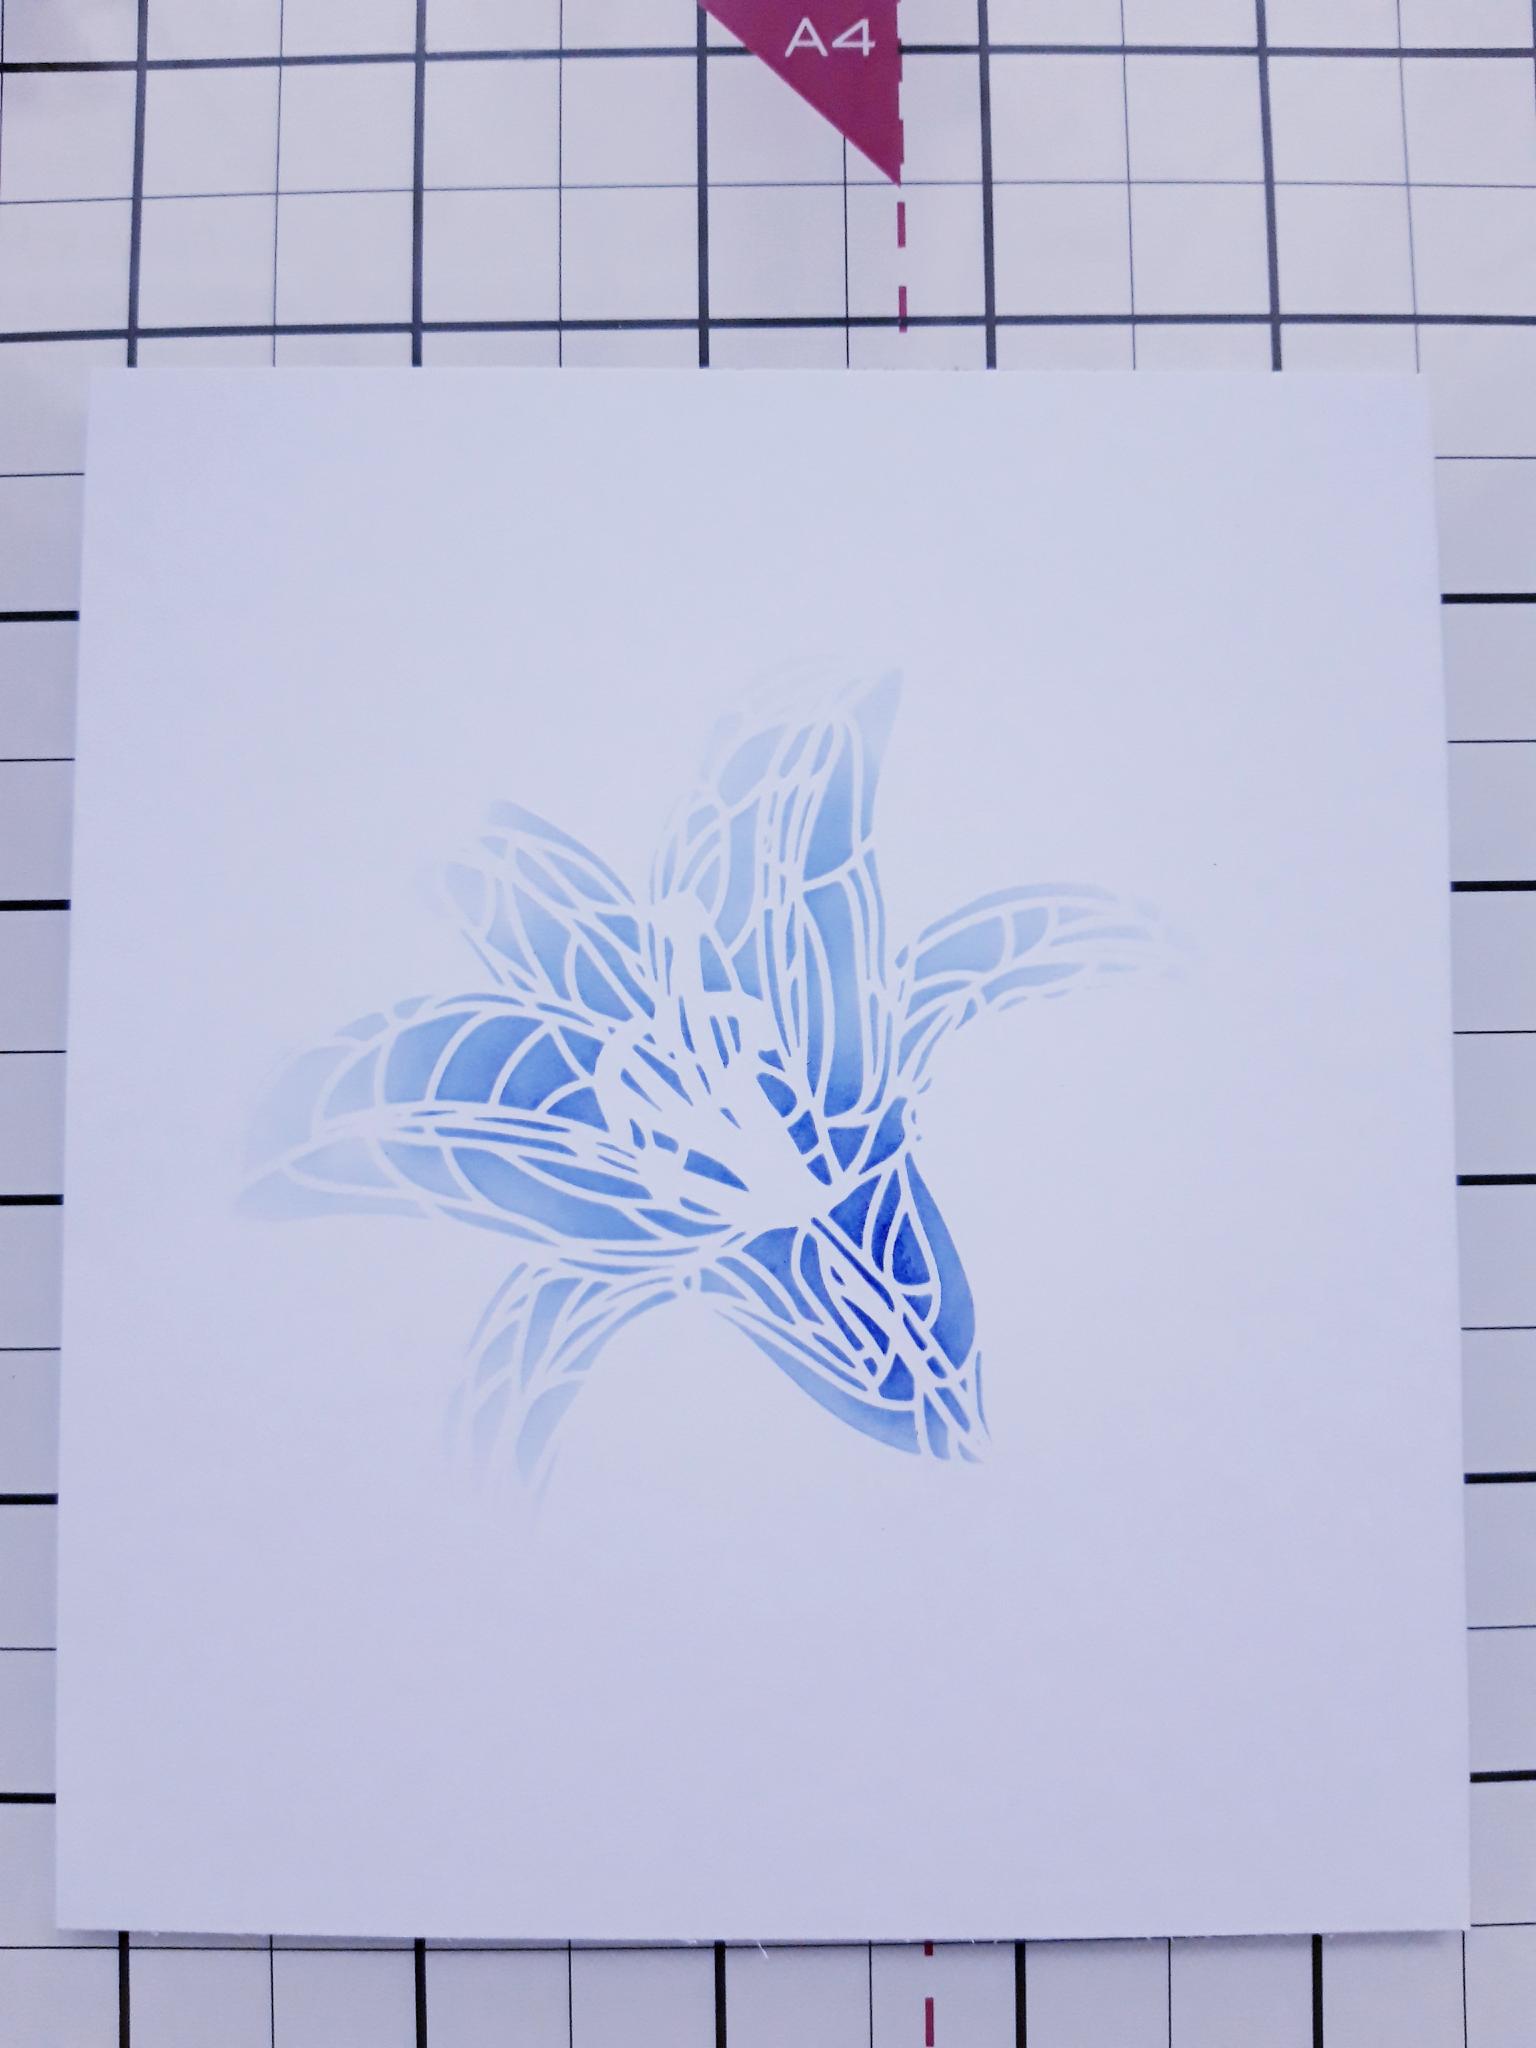
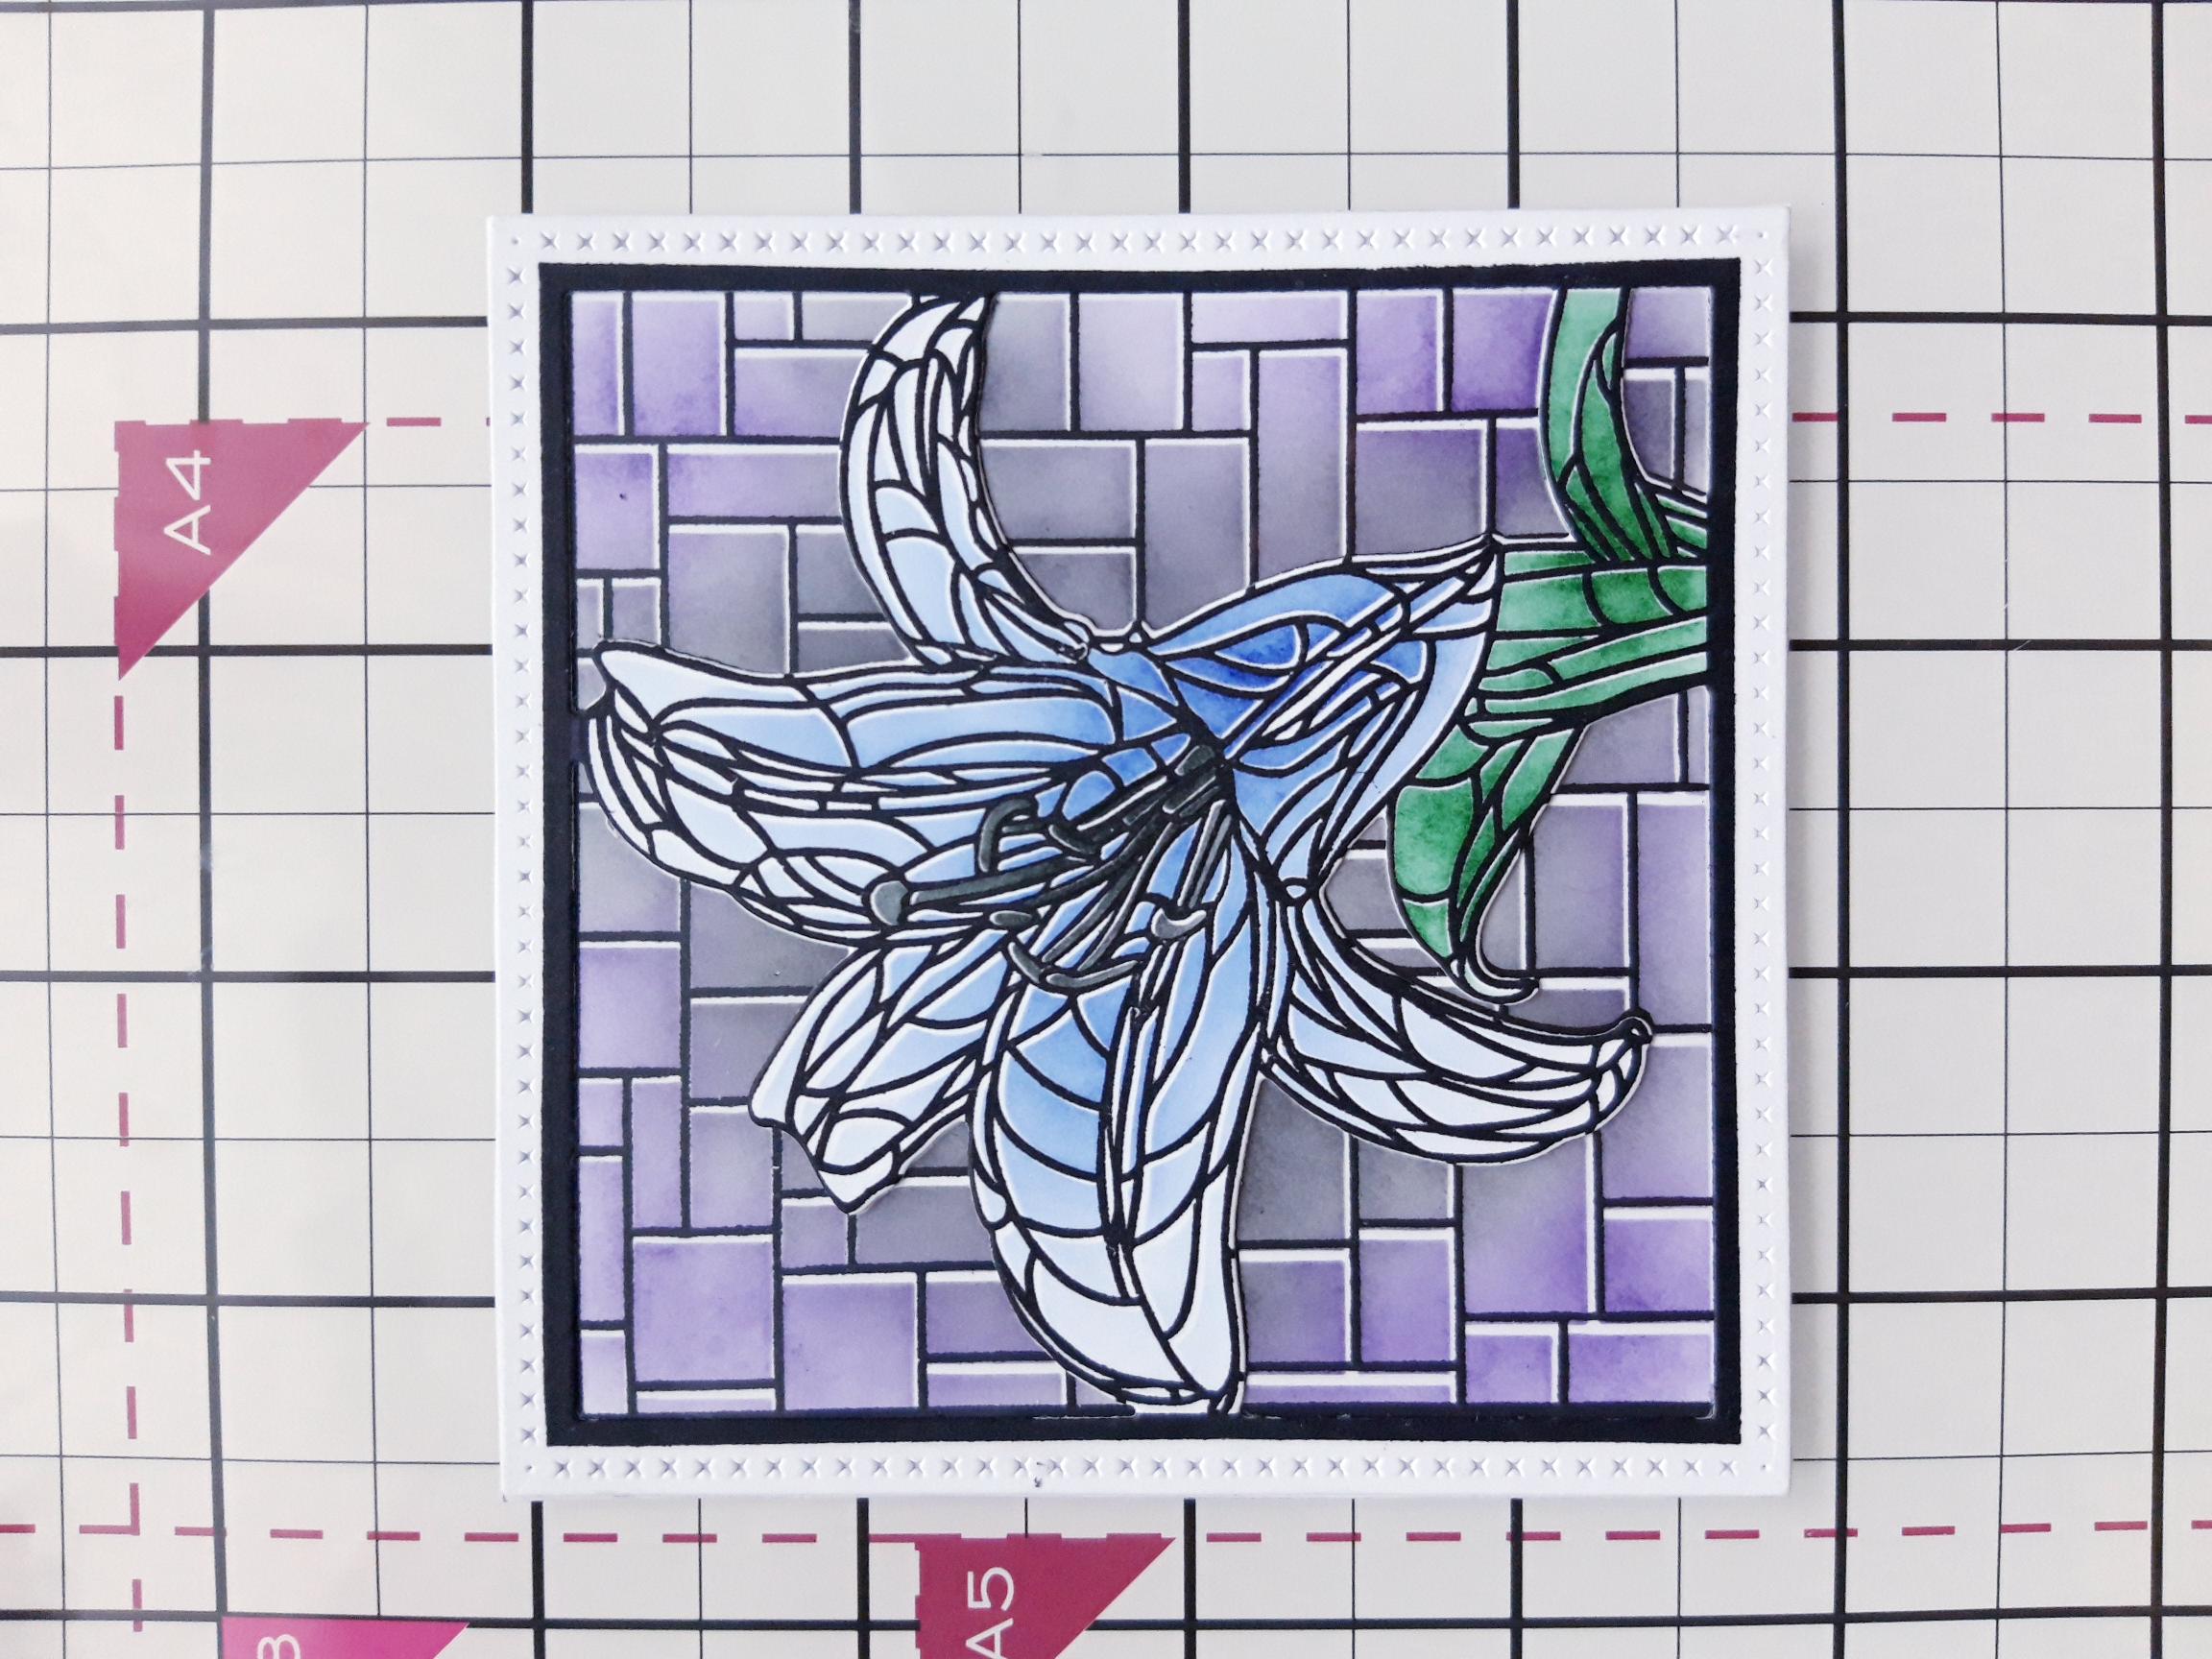
Place stencil 2 on to the other half of the white card, you set aside earlier. Keep a small piece to one side, to stamp a little butterfly on, in a later step. Use your blending tool to apply the Surfboard through stencil 2. |
|
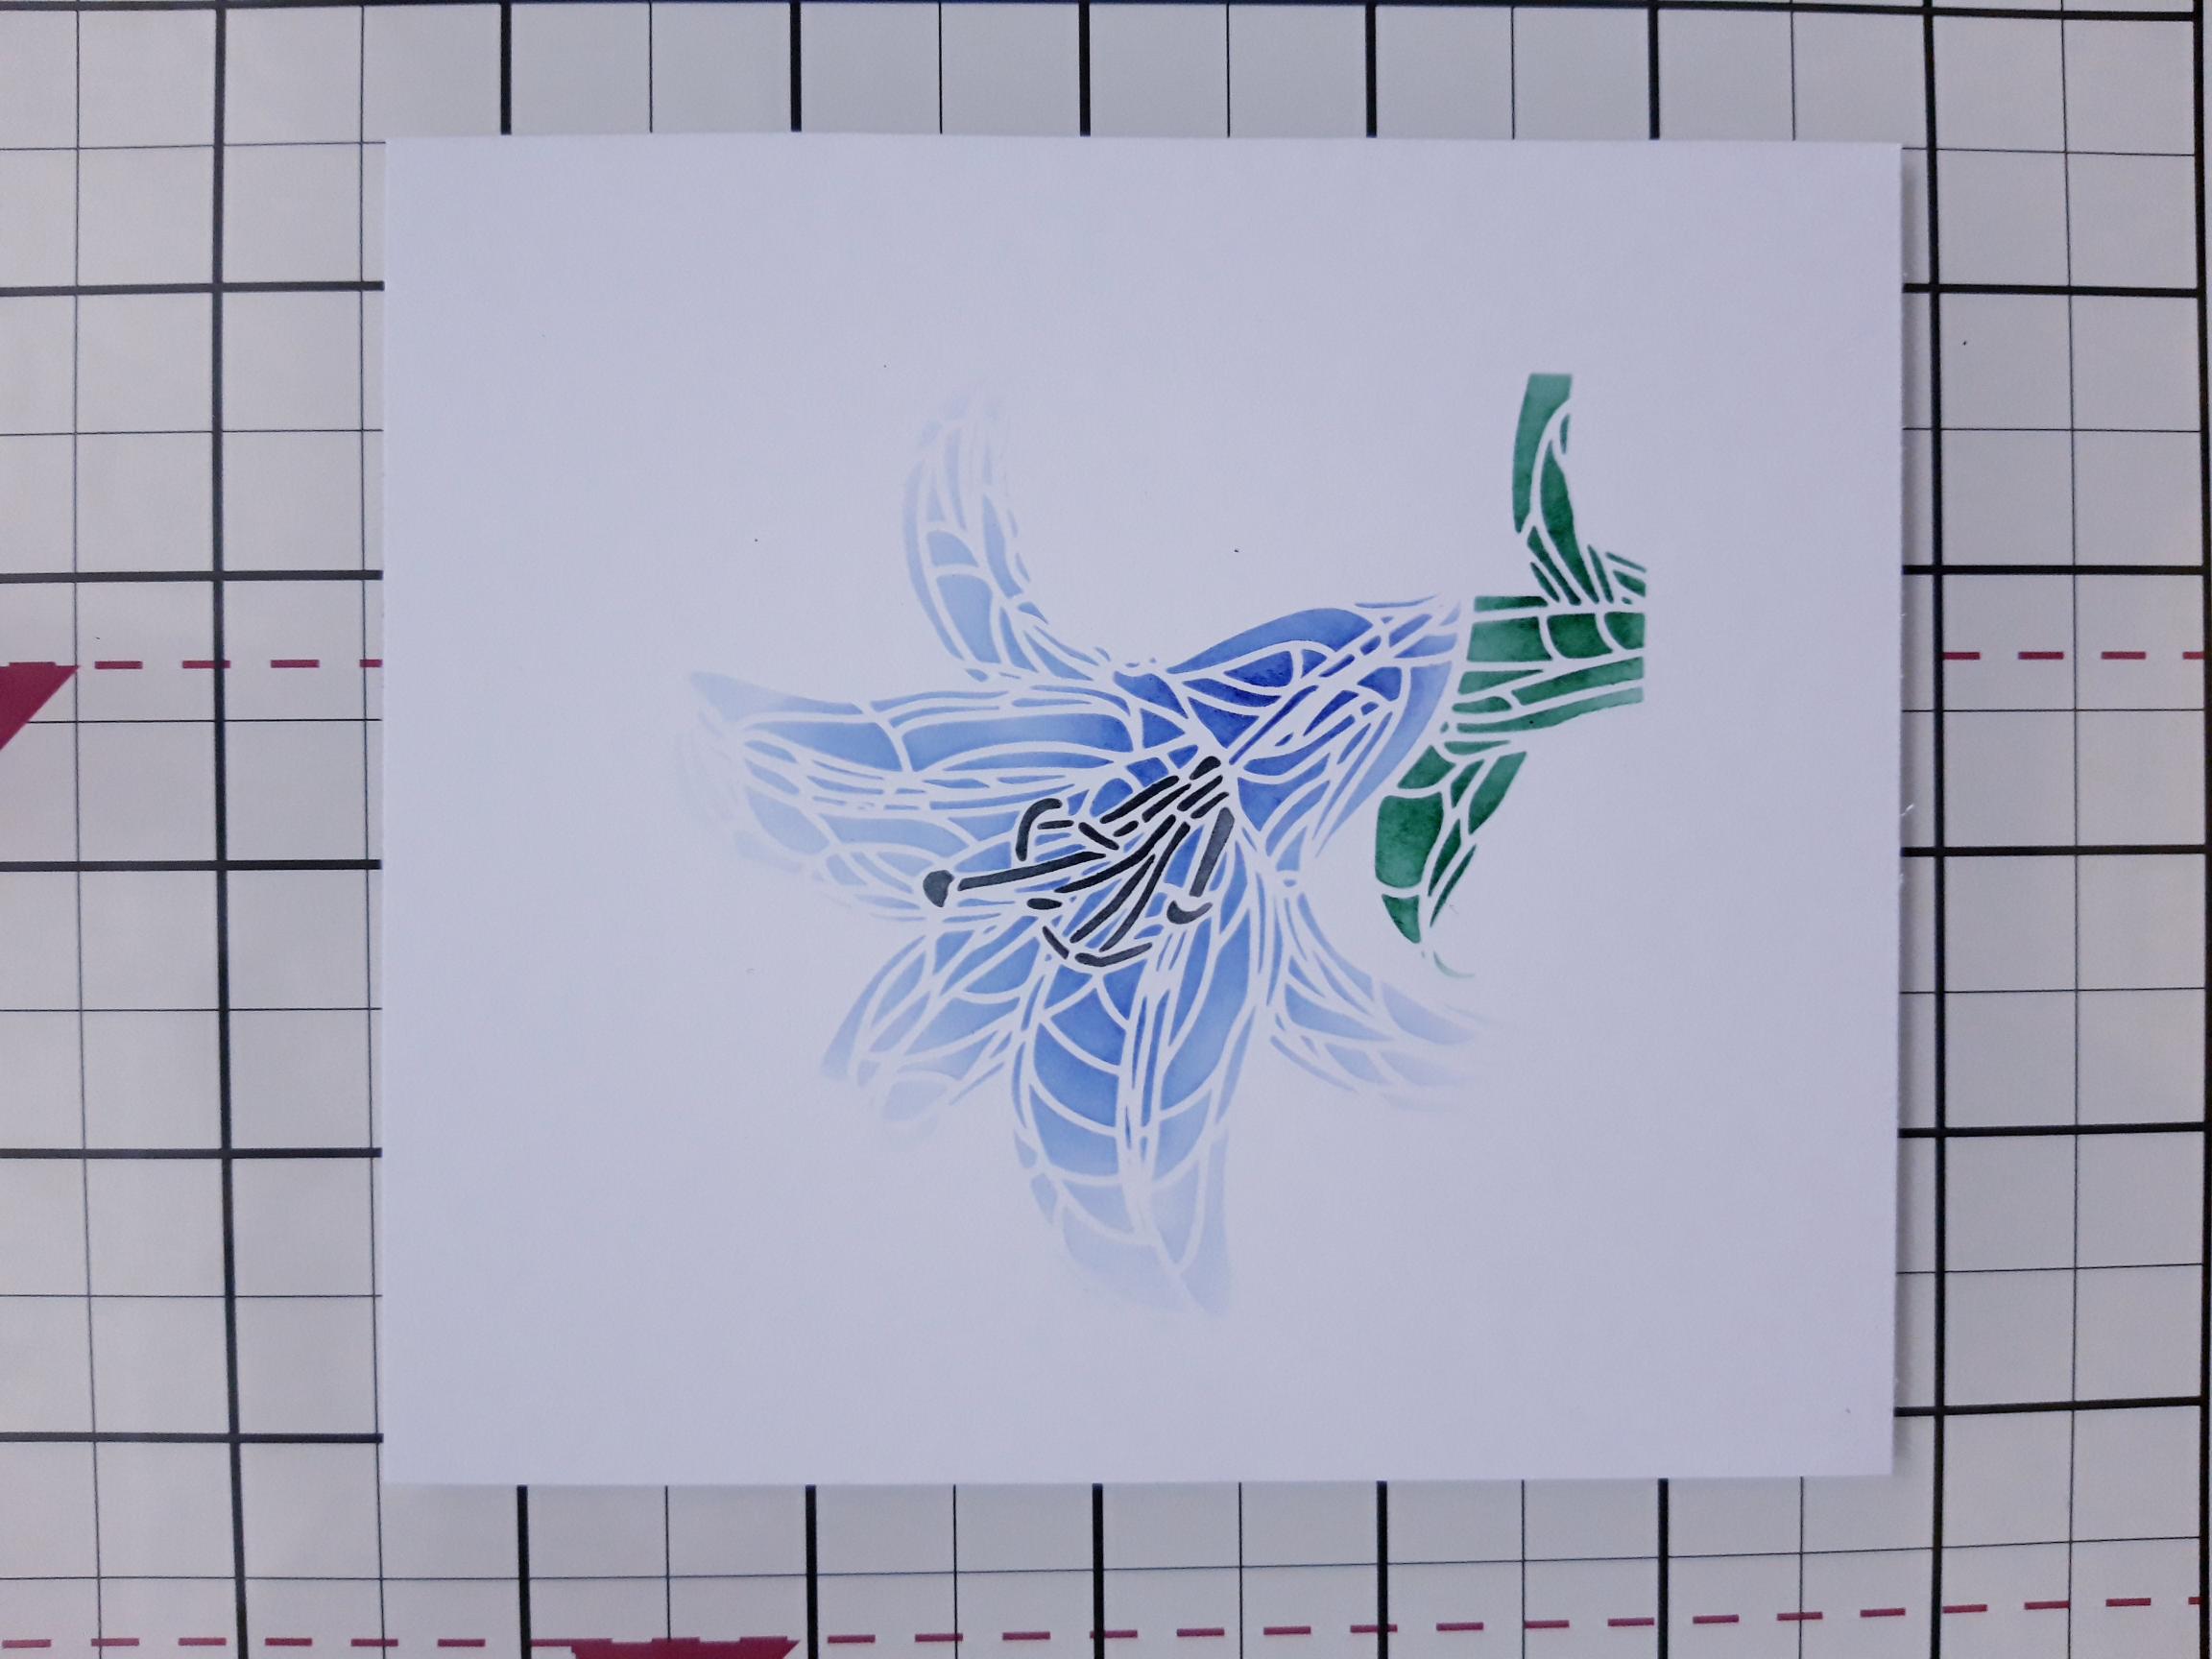
Line up stencil 3 and blend with the Hedgerow and Black Soot, as before. |
|
Ink up the co-ordinating stamp with the Versafine and stamp over your stencilled image. |
|
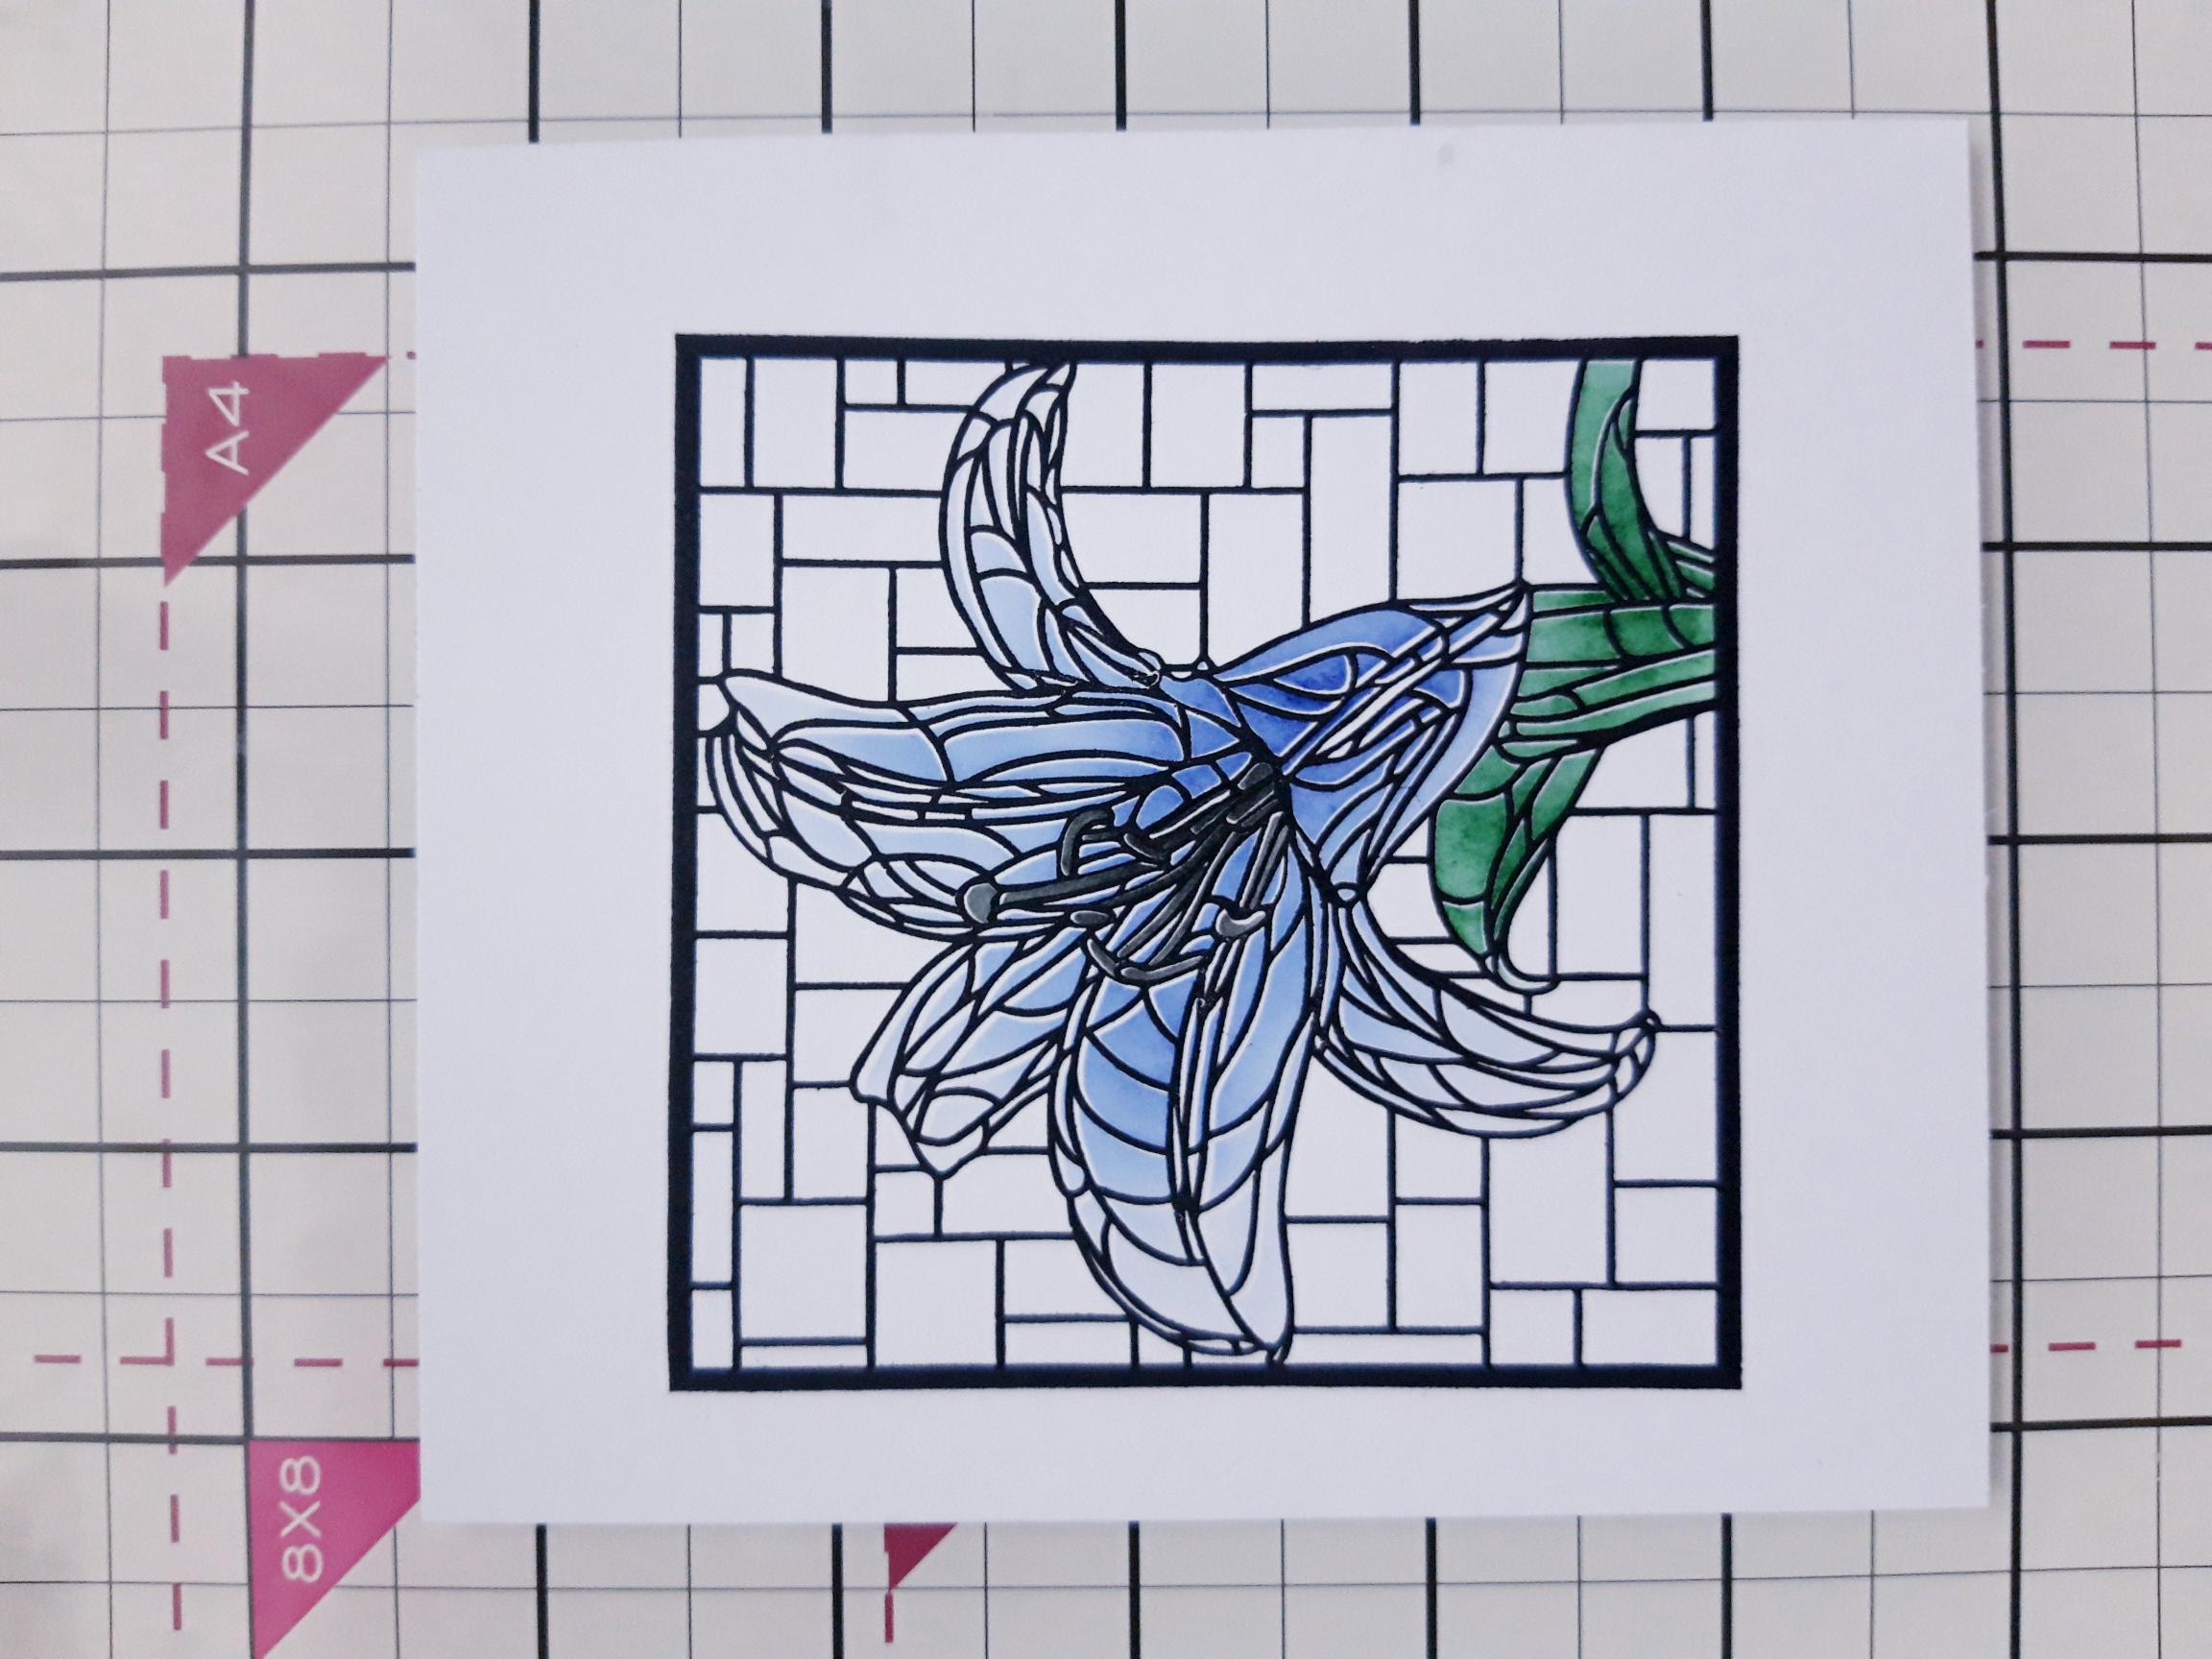
Use the co-ordinating die to cut out the stencilled frame. |
|
Apply double sided tape and/or wet glue to the reverse of the die cut frame, then adhere the acetate. Cut off any overhang. |
|
Apply the double sided tape and/or glue, to the reverse of the acetate frame and adhere over the stencilled artwork you set aside earlier. |
|
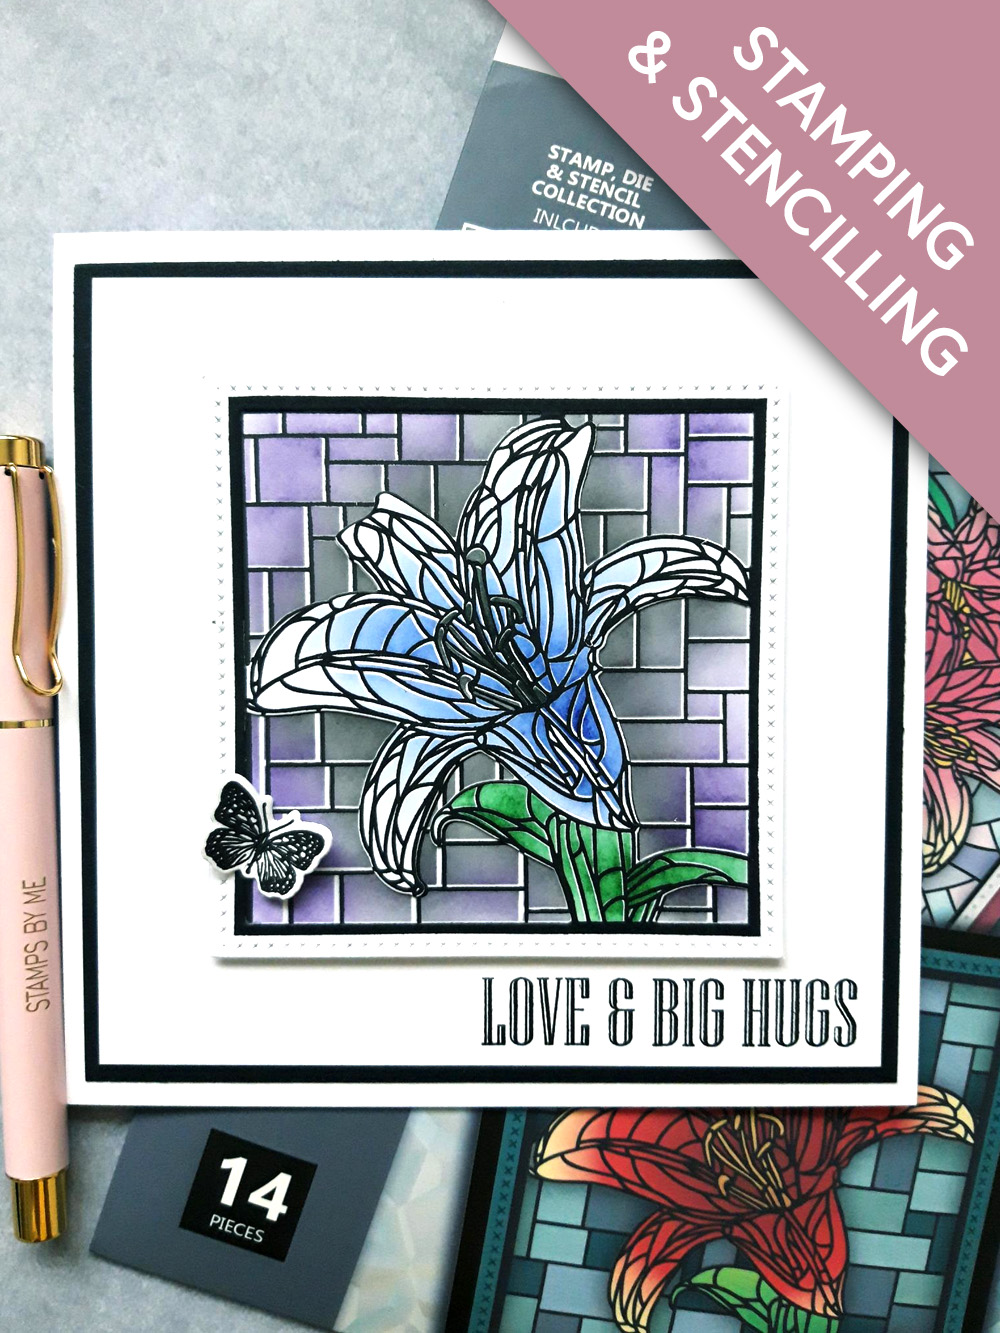
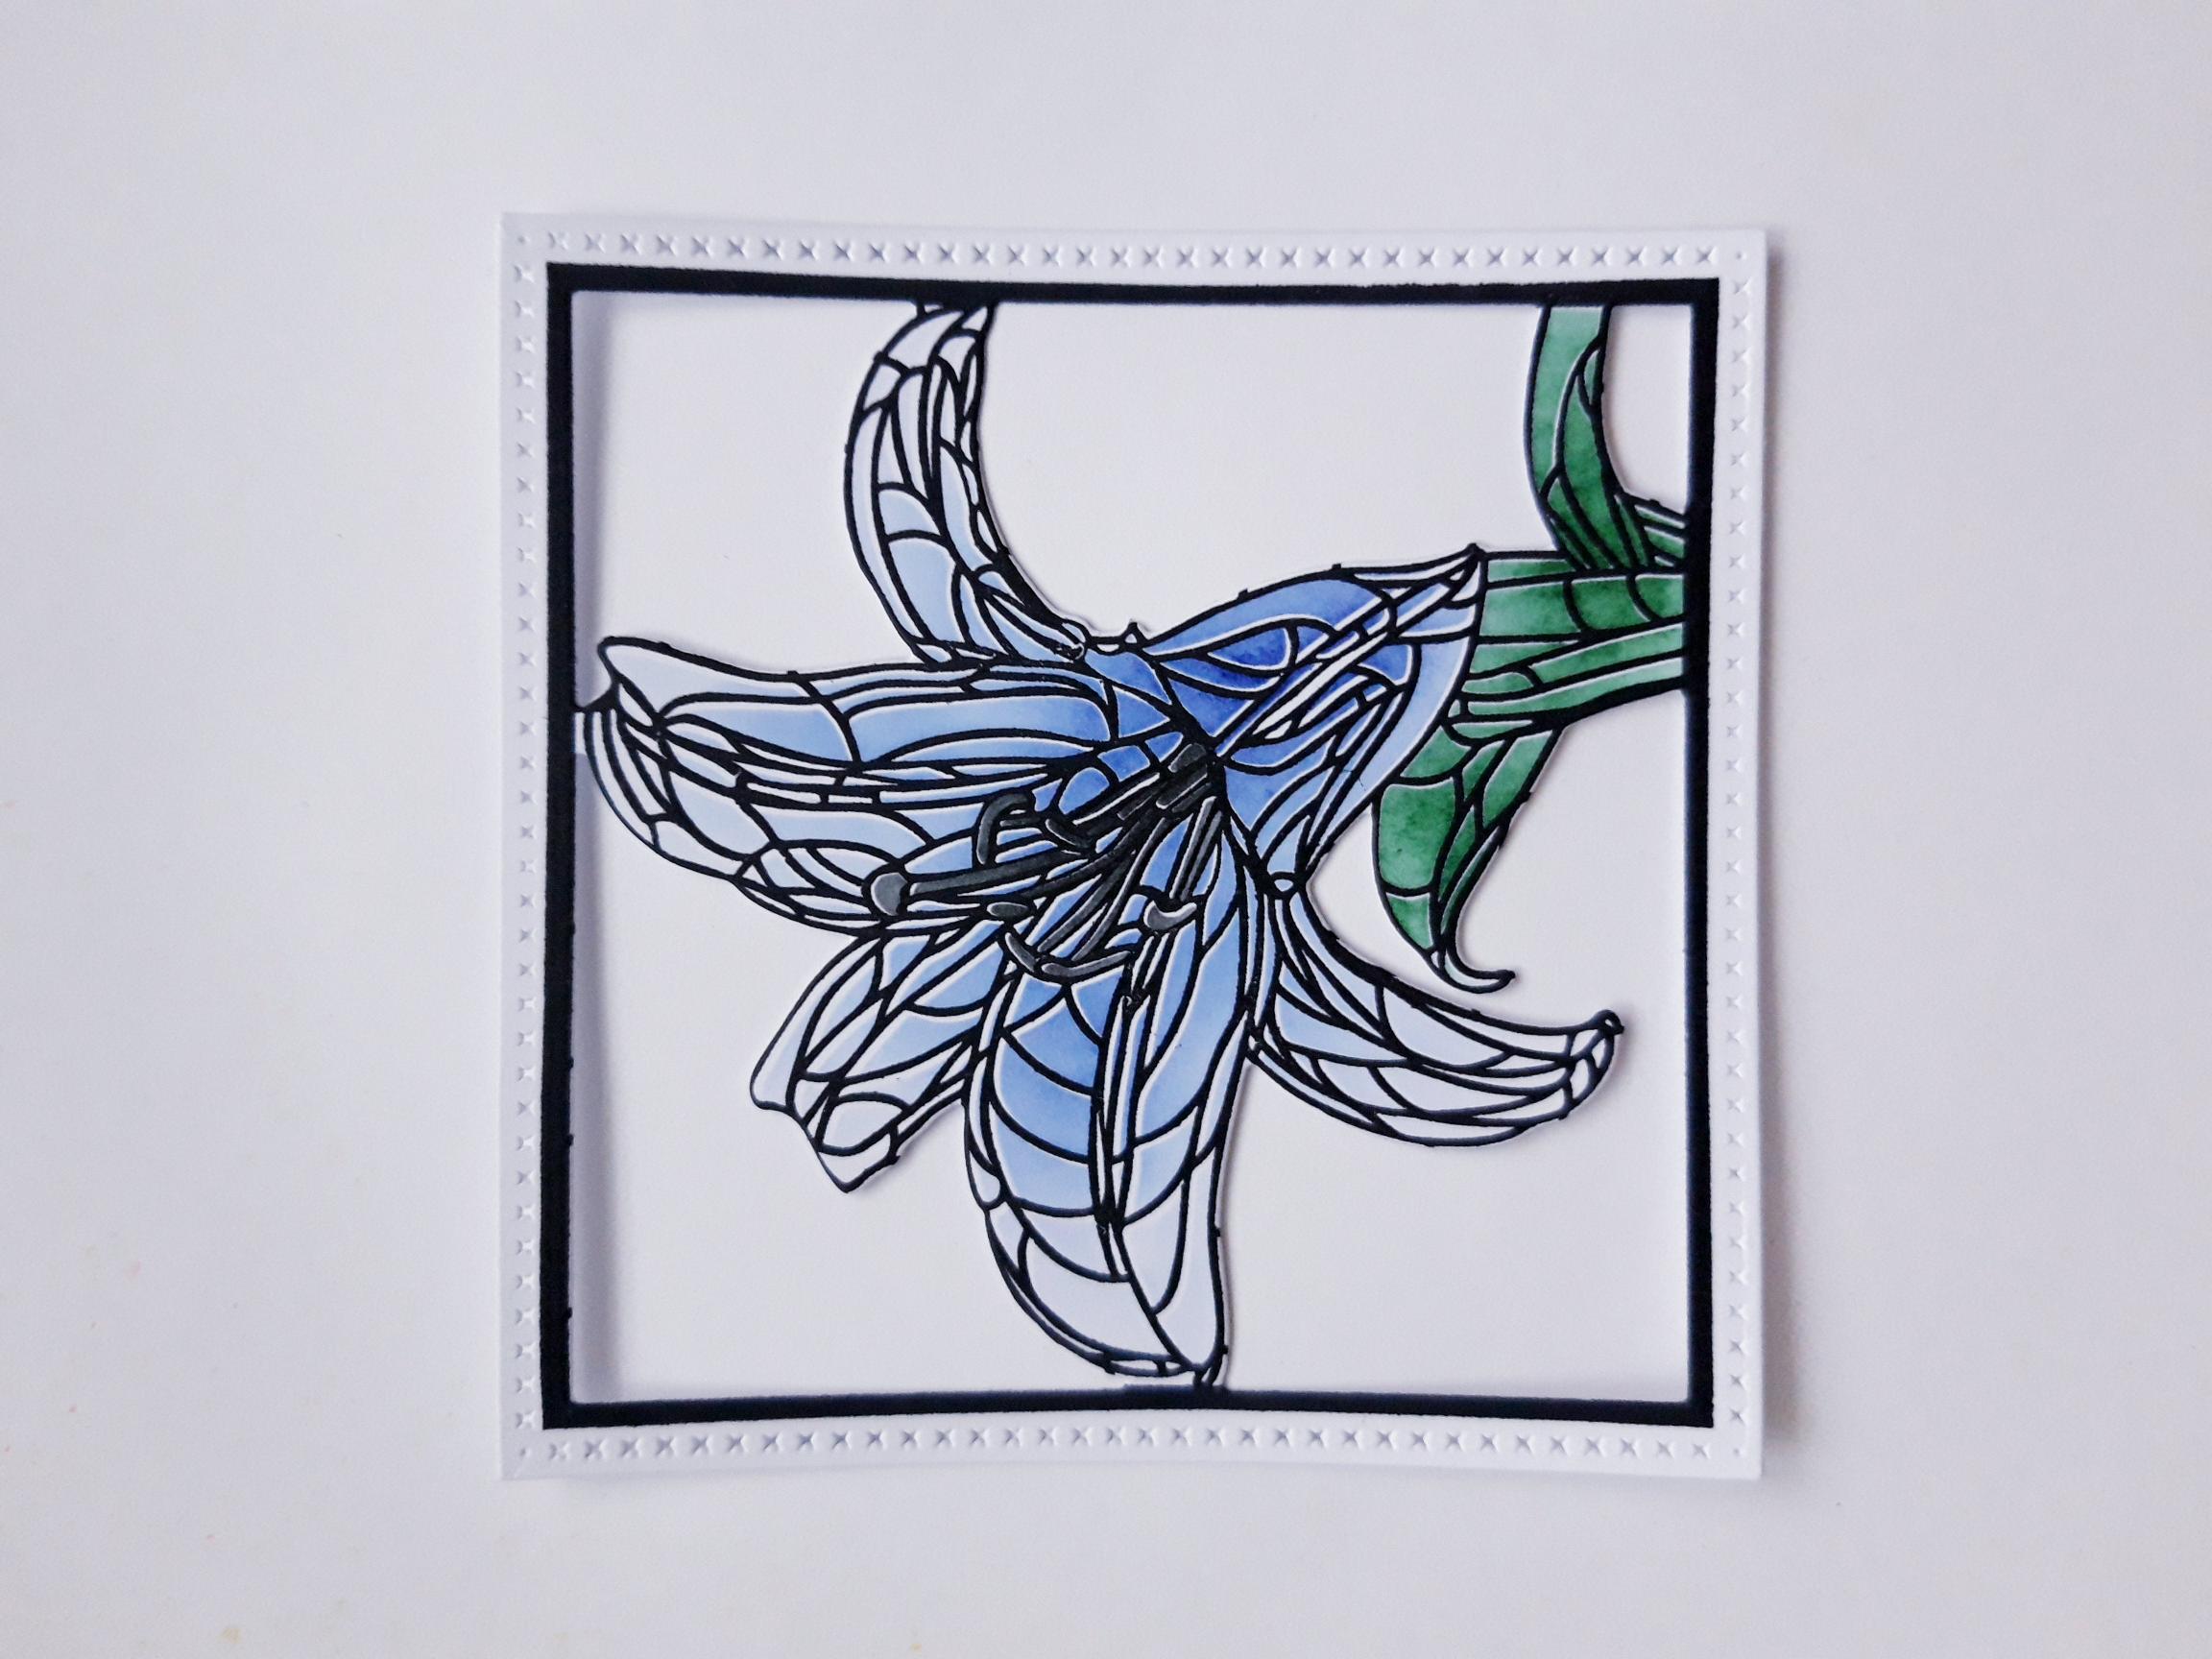
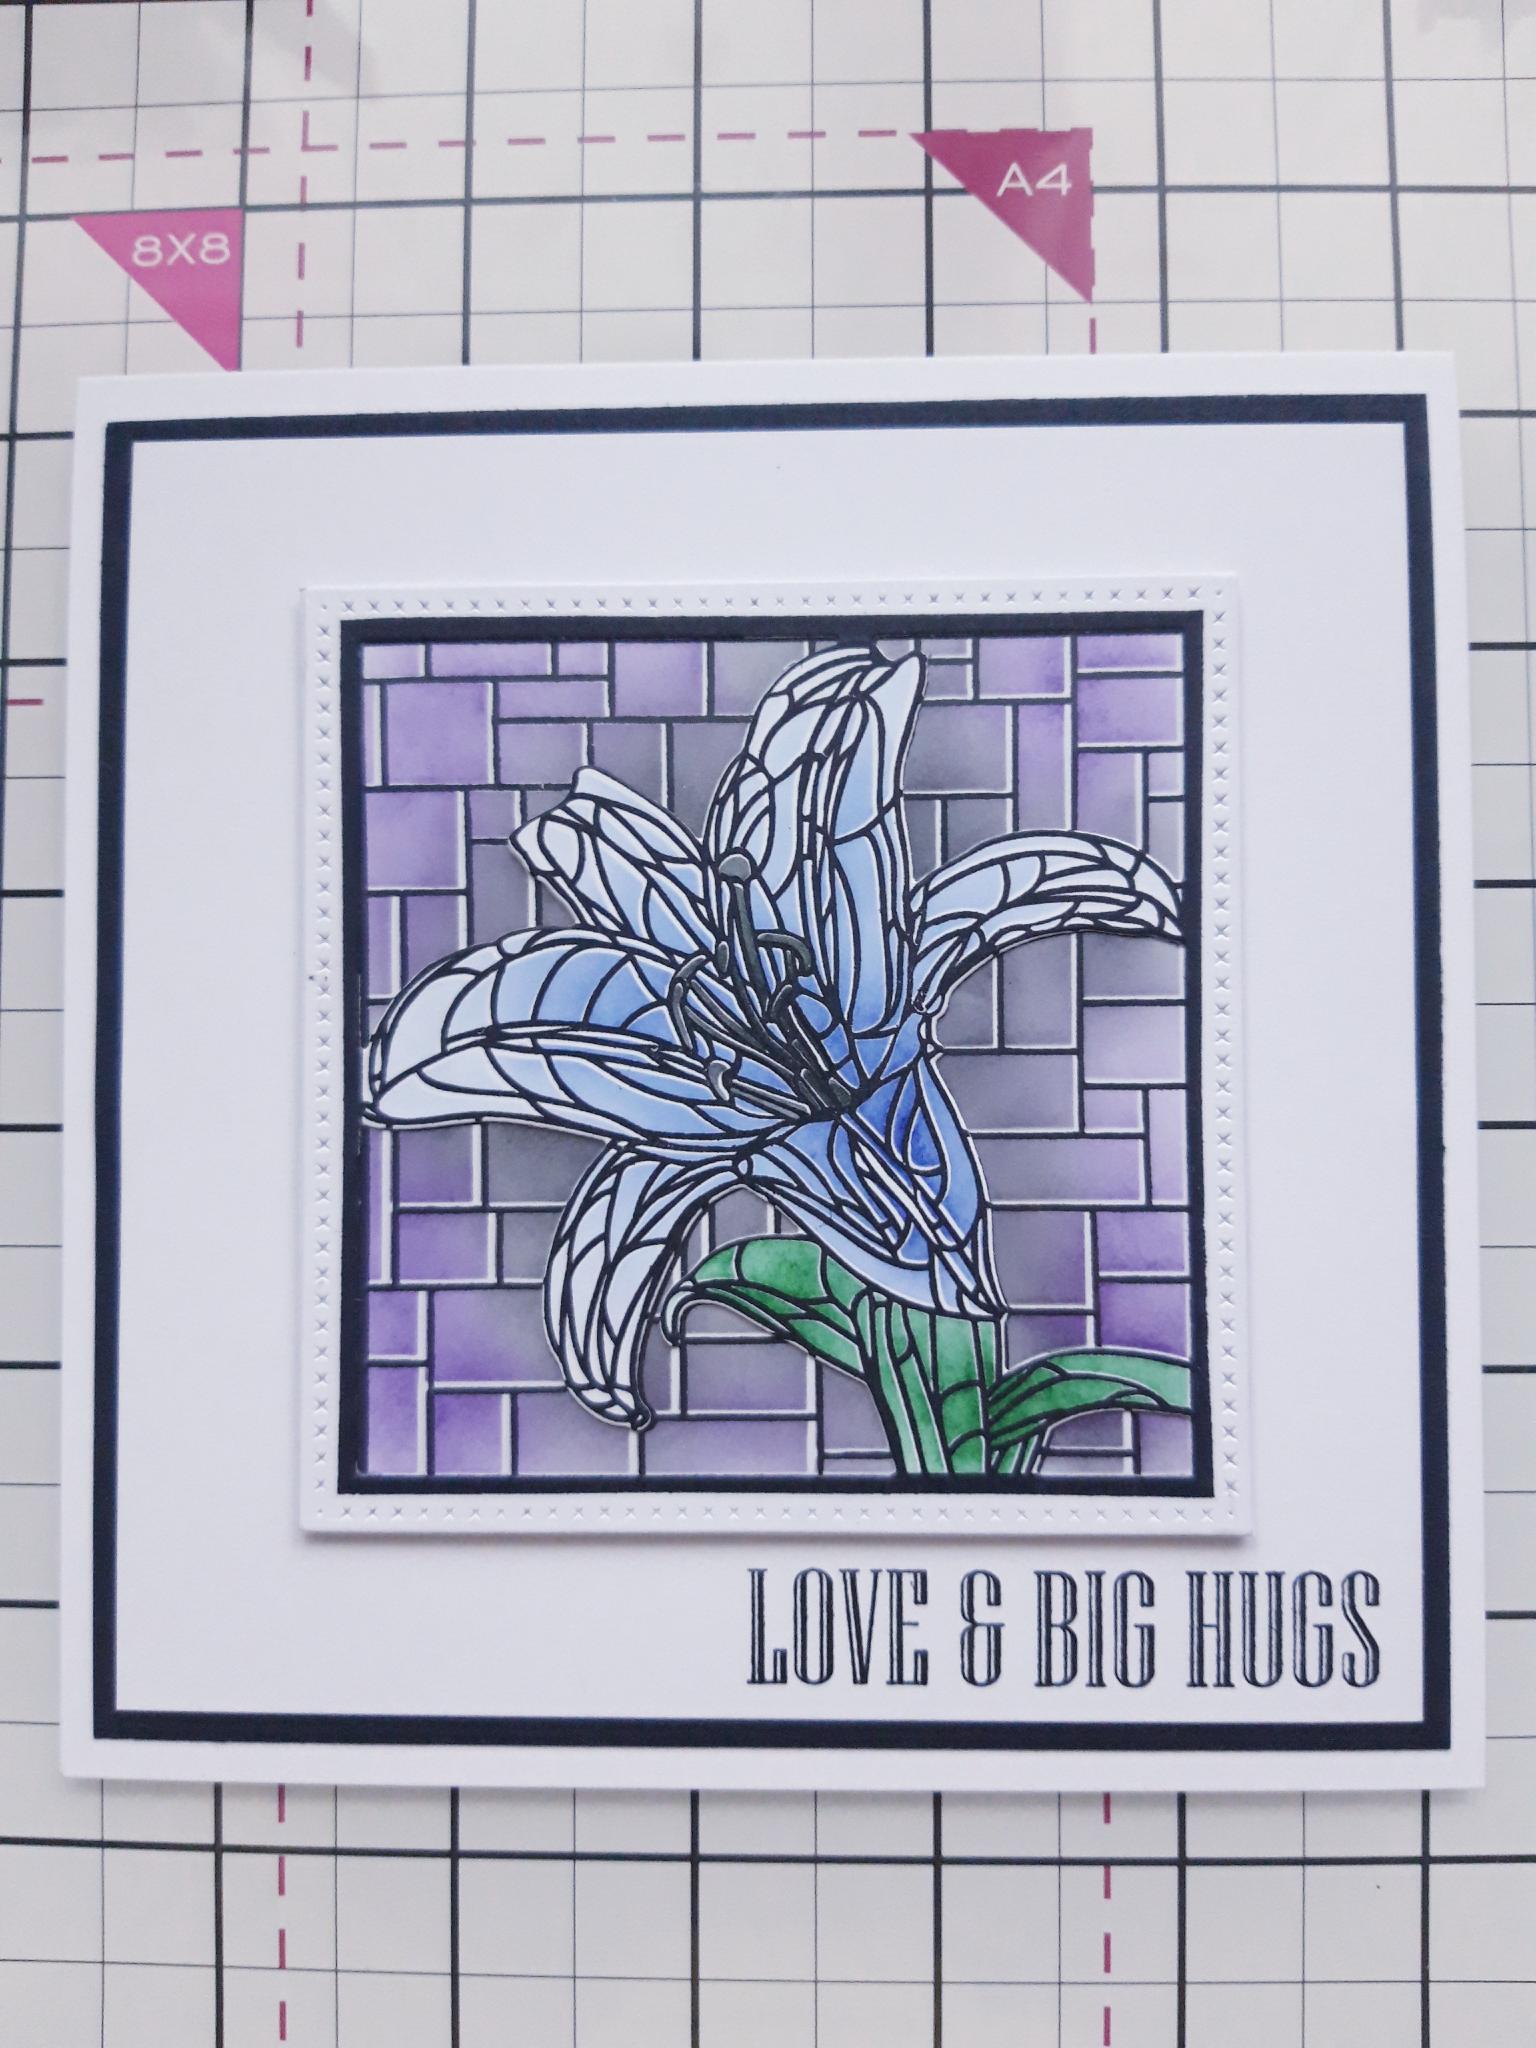
Cut around your frame, discarding the excess white card, leaving your beautiful stencilled, acetate stained glass window, as seen here.
|
|
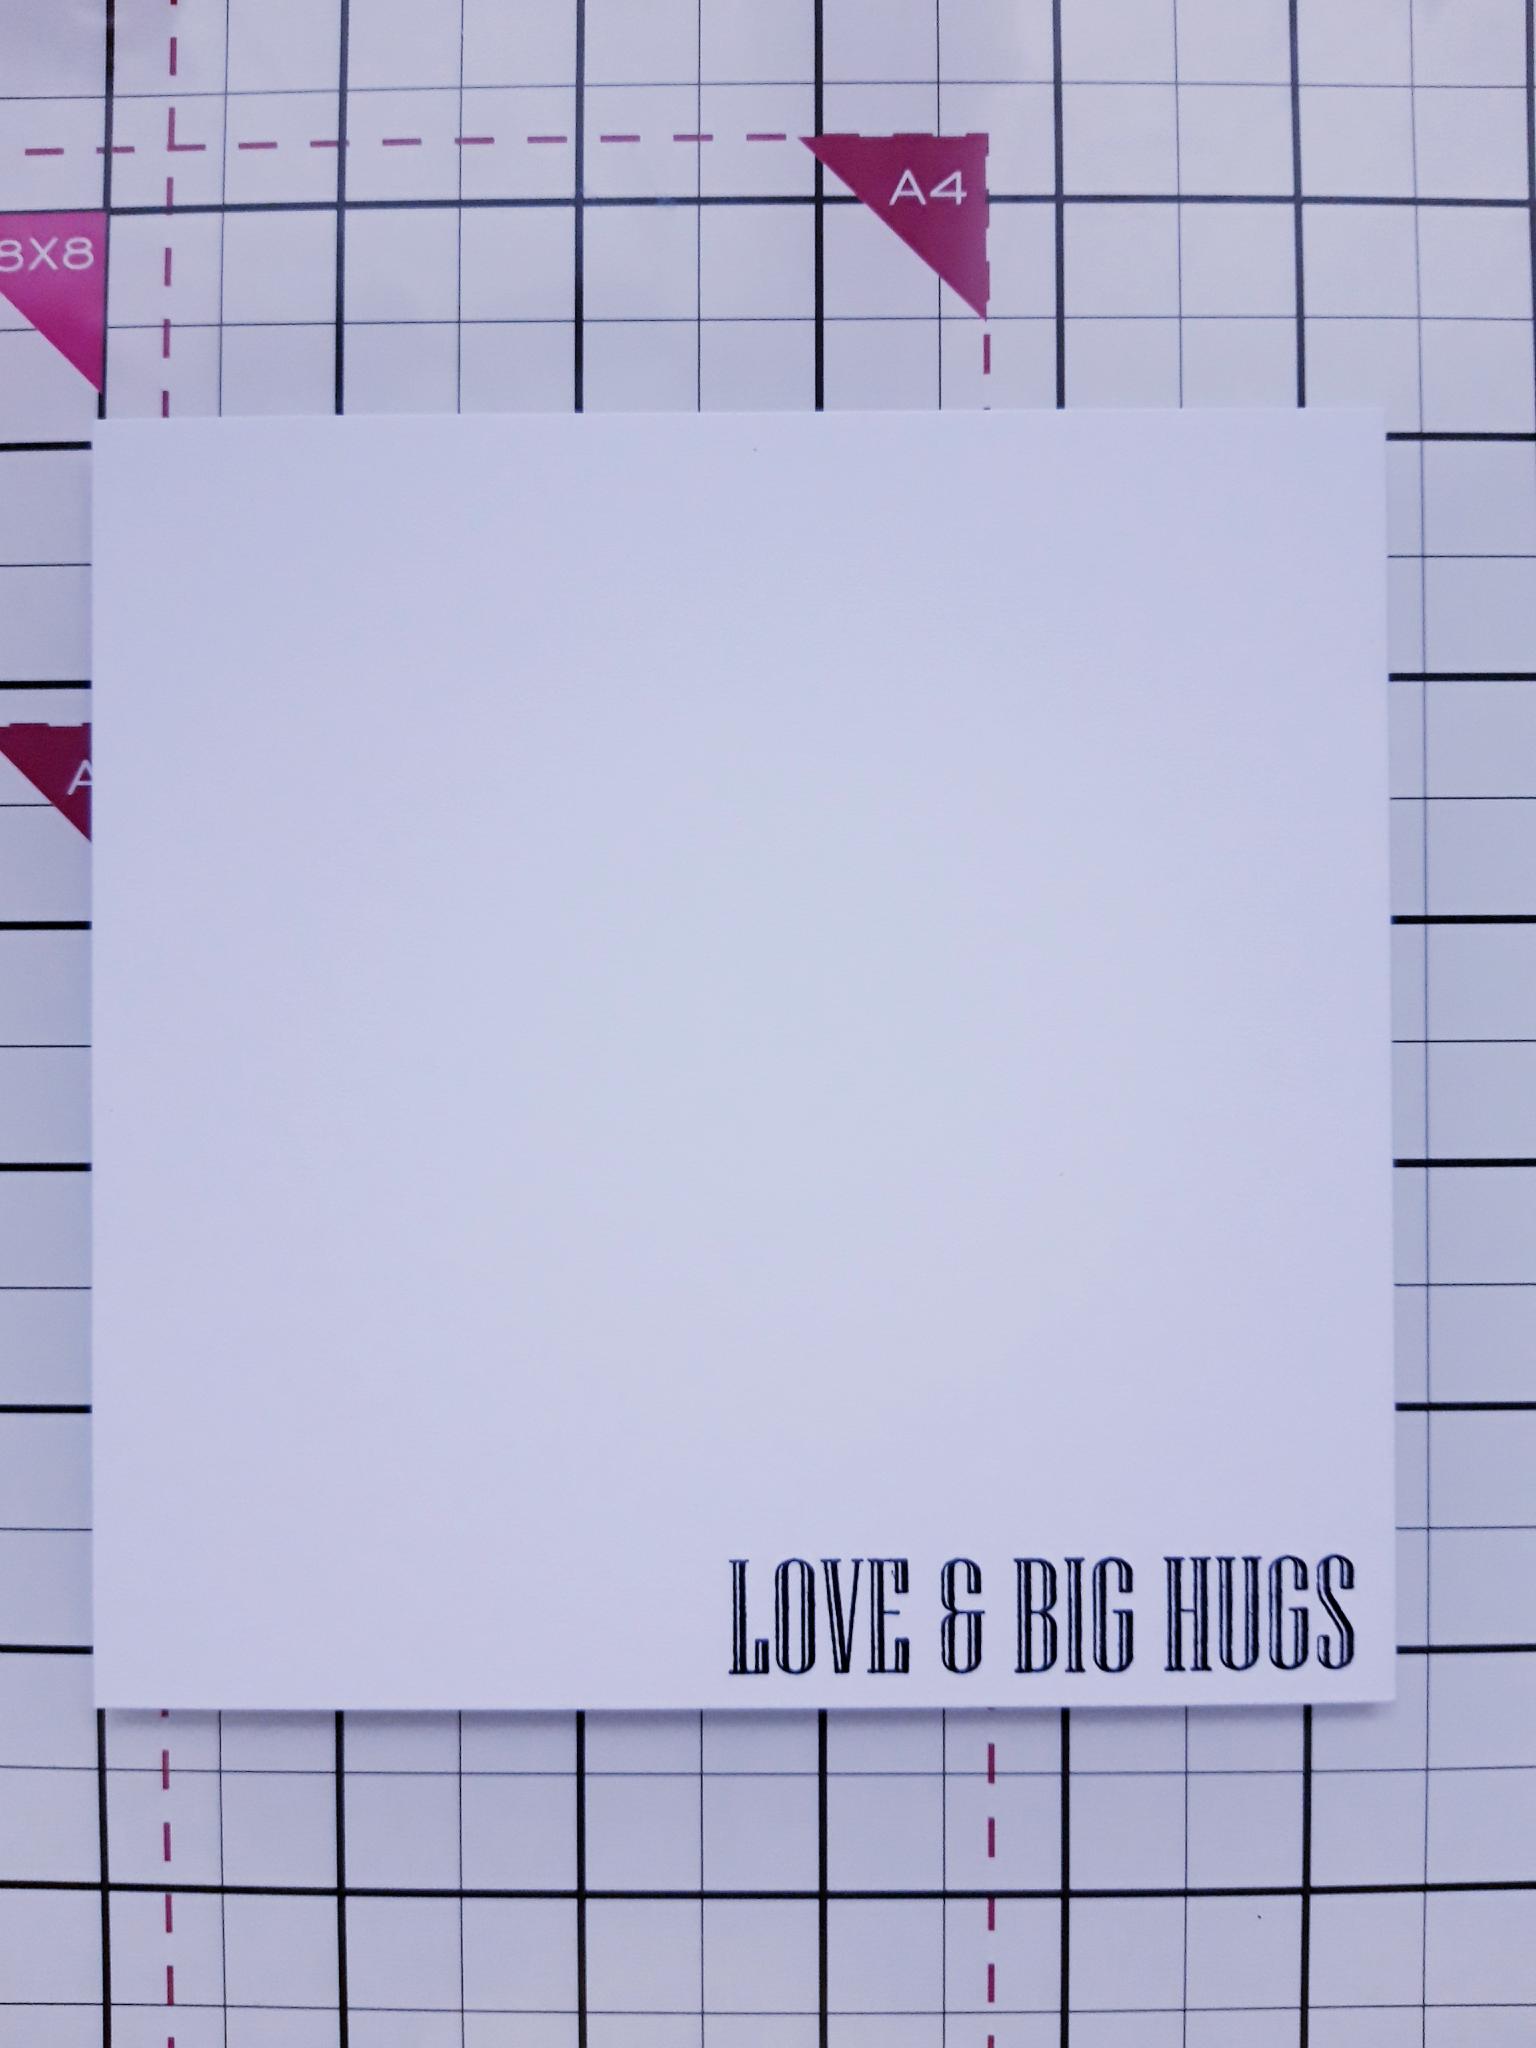
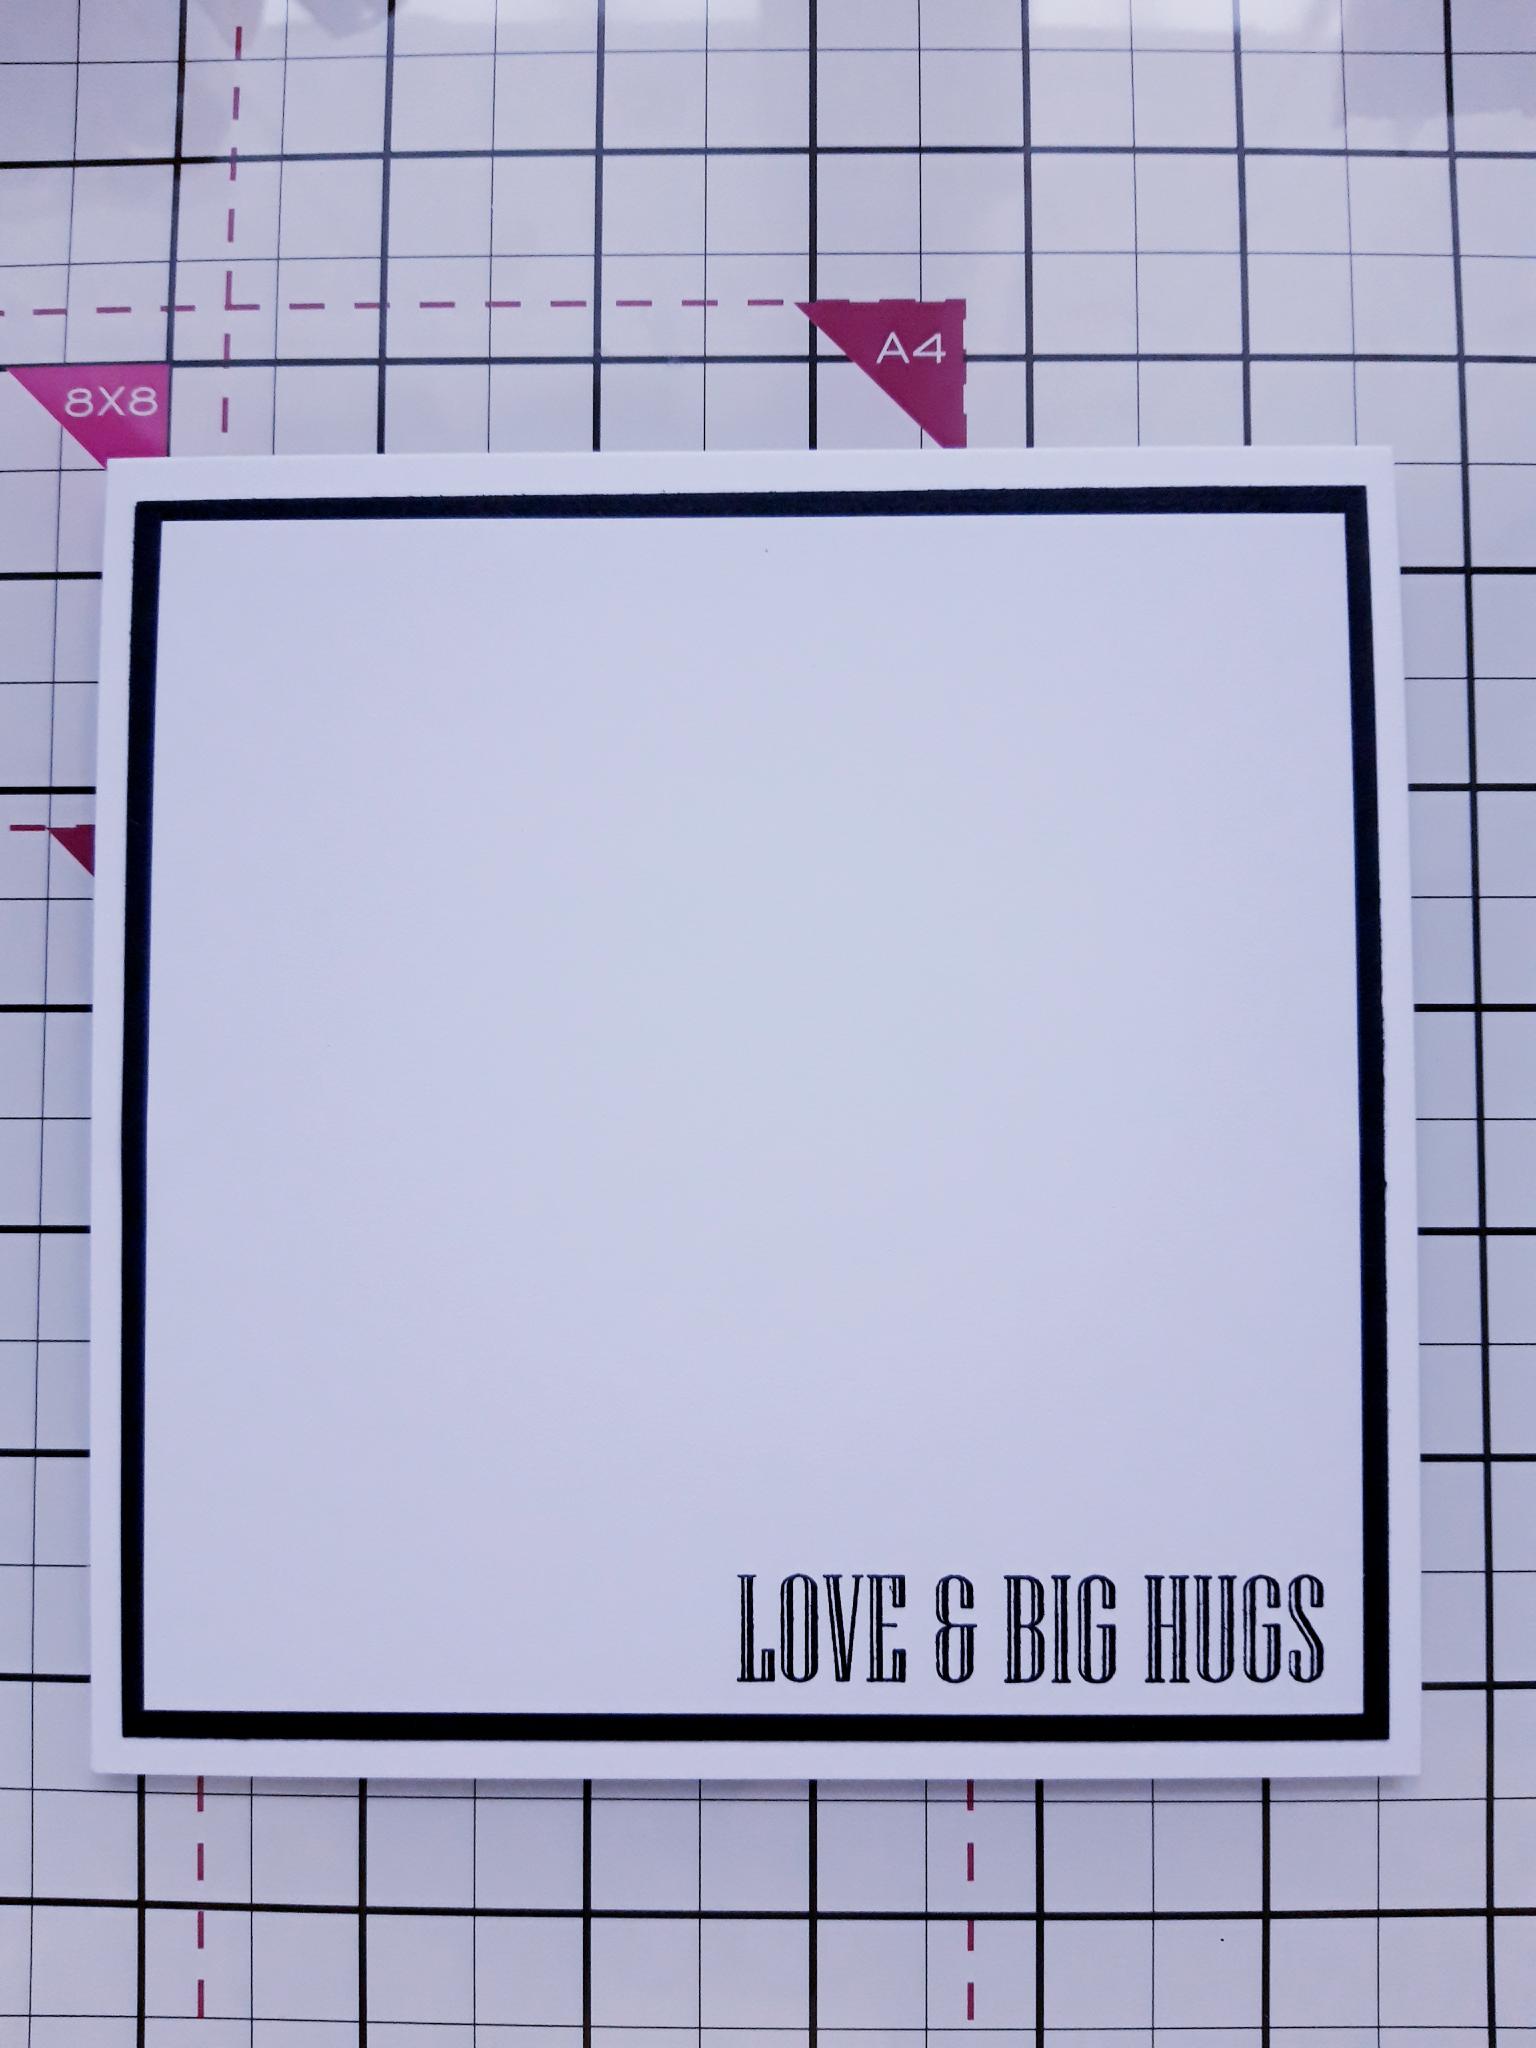
Ink up the sentiment stamp with the Versafine and using your stained glass window topper as a guide, stamp your sentiment along the bottom right corner of the white card (5 1/4 x 5 1/4"). |
|
Adhere this on to the black card, cut to 5 1/2 x 5 1/2" and then on to the front of your 6 x 6" white card blank. |
|
Adhere your stained glass window topper in the centre of your card, with wet glue or foam pads for added dimension. |

|
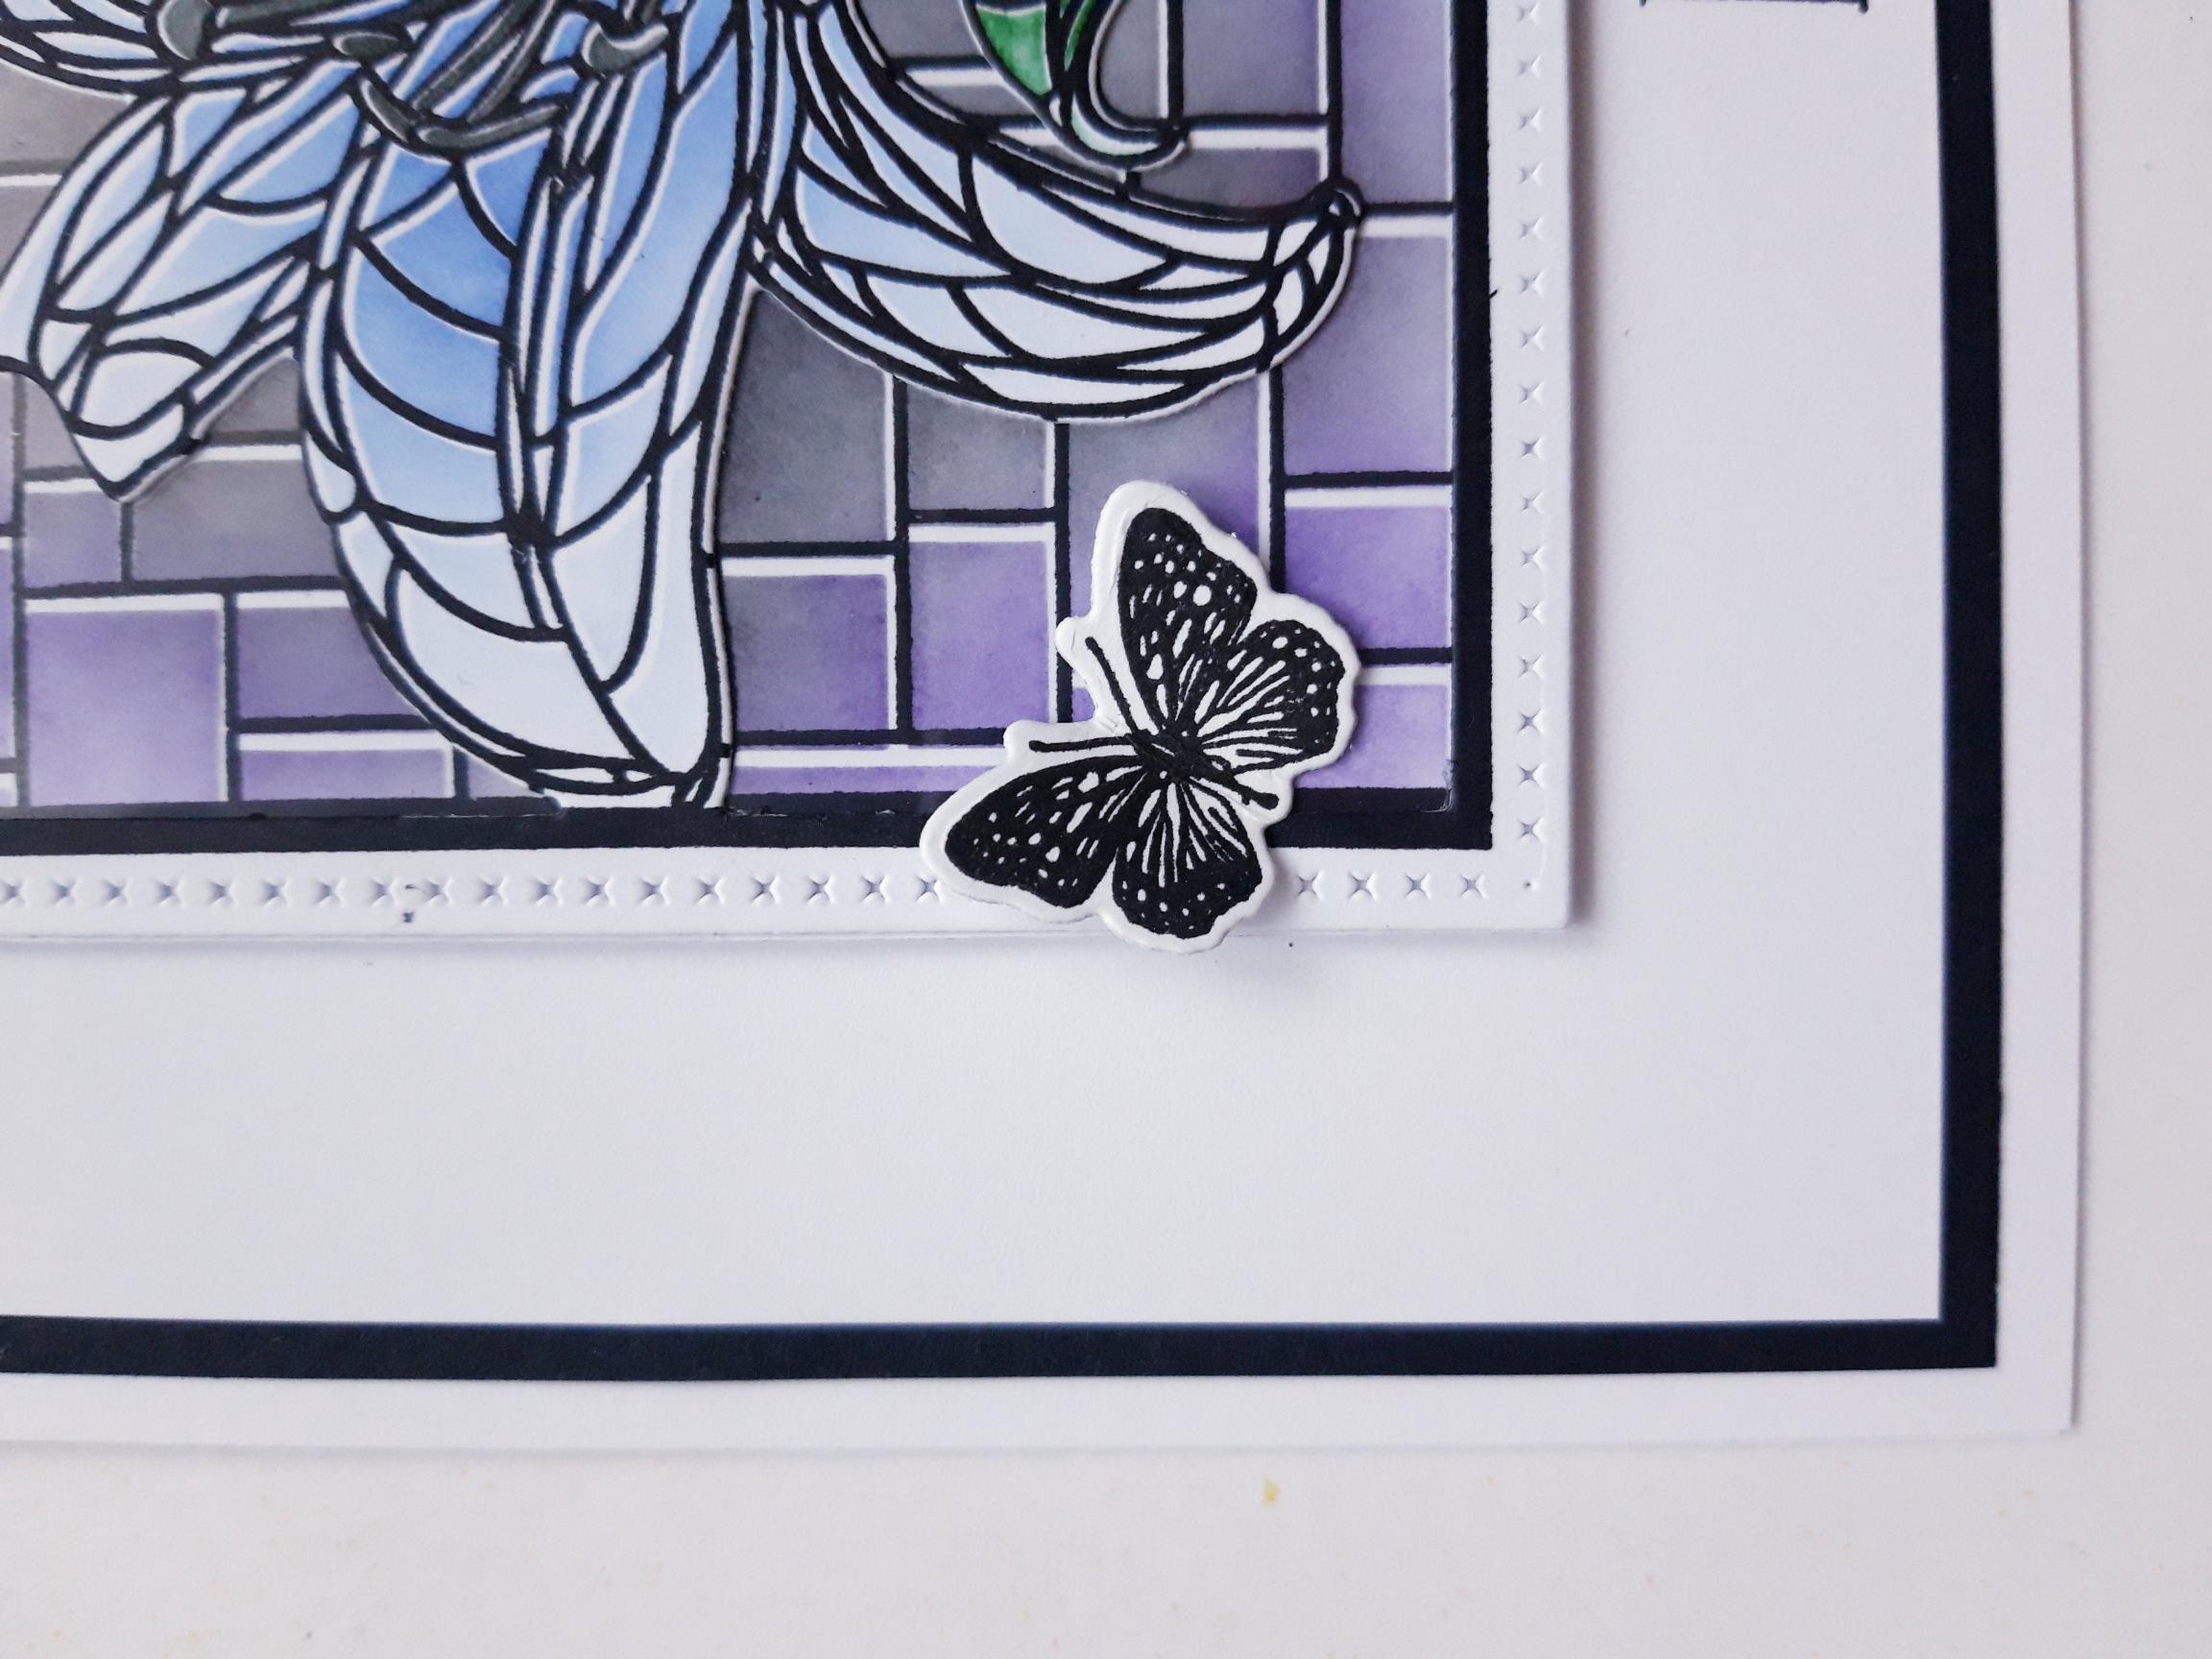
Ink up the little butterfly, from Remember This, with the Versafine, then use the co-ordinating die to cut it out. |
|
To finish, adhere the butterfly to the bottom right of your stained glass window. |