Give your friends $10 off their first order!
Refer a FRIEND


WHAT YOU WILL NEED:
Black top folding card blank 8 1/4 x 5 3/4" with coordinating black envelope (can be a white one)
Black card 6 x 6"
Remember This Collection by Toni and Teresa Collins: Paper stack, vellum, stamp and die set, fold and seal envelopes
WOW embossing ink pad
WOW gold embossing powder
WOW heat tool
Anti-static bag
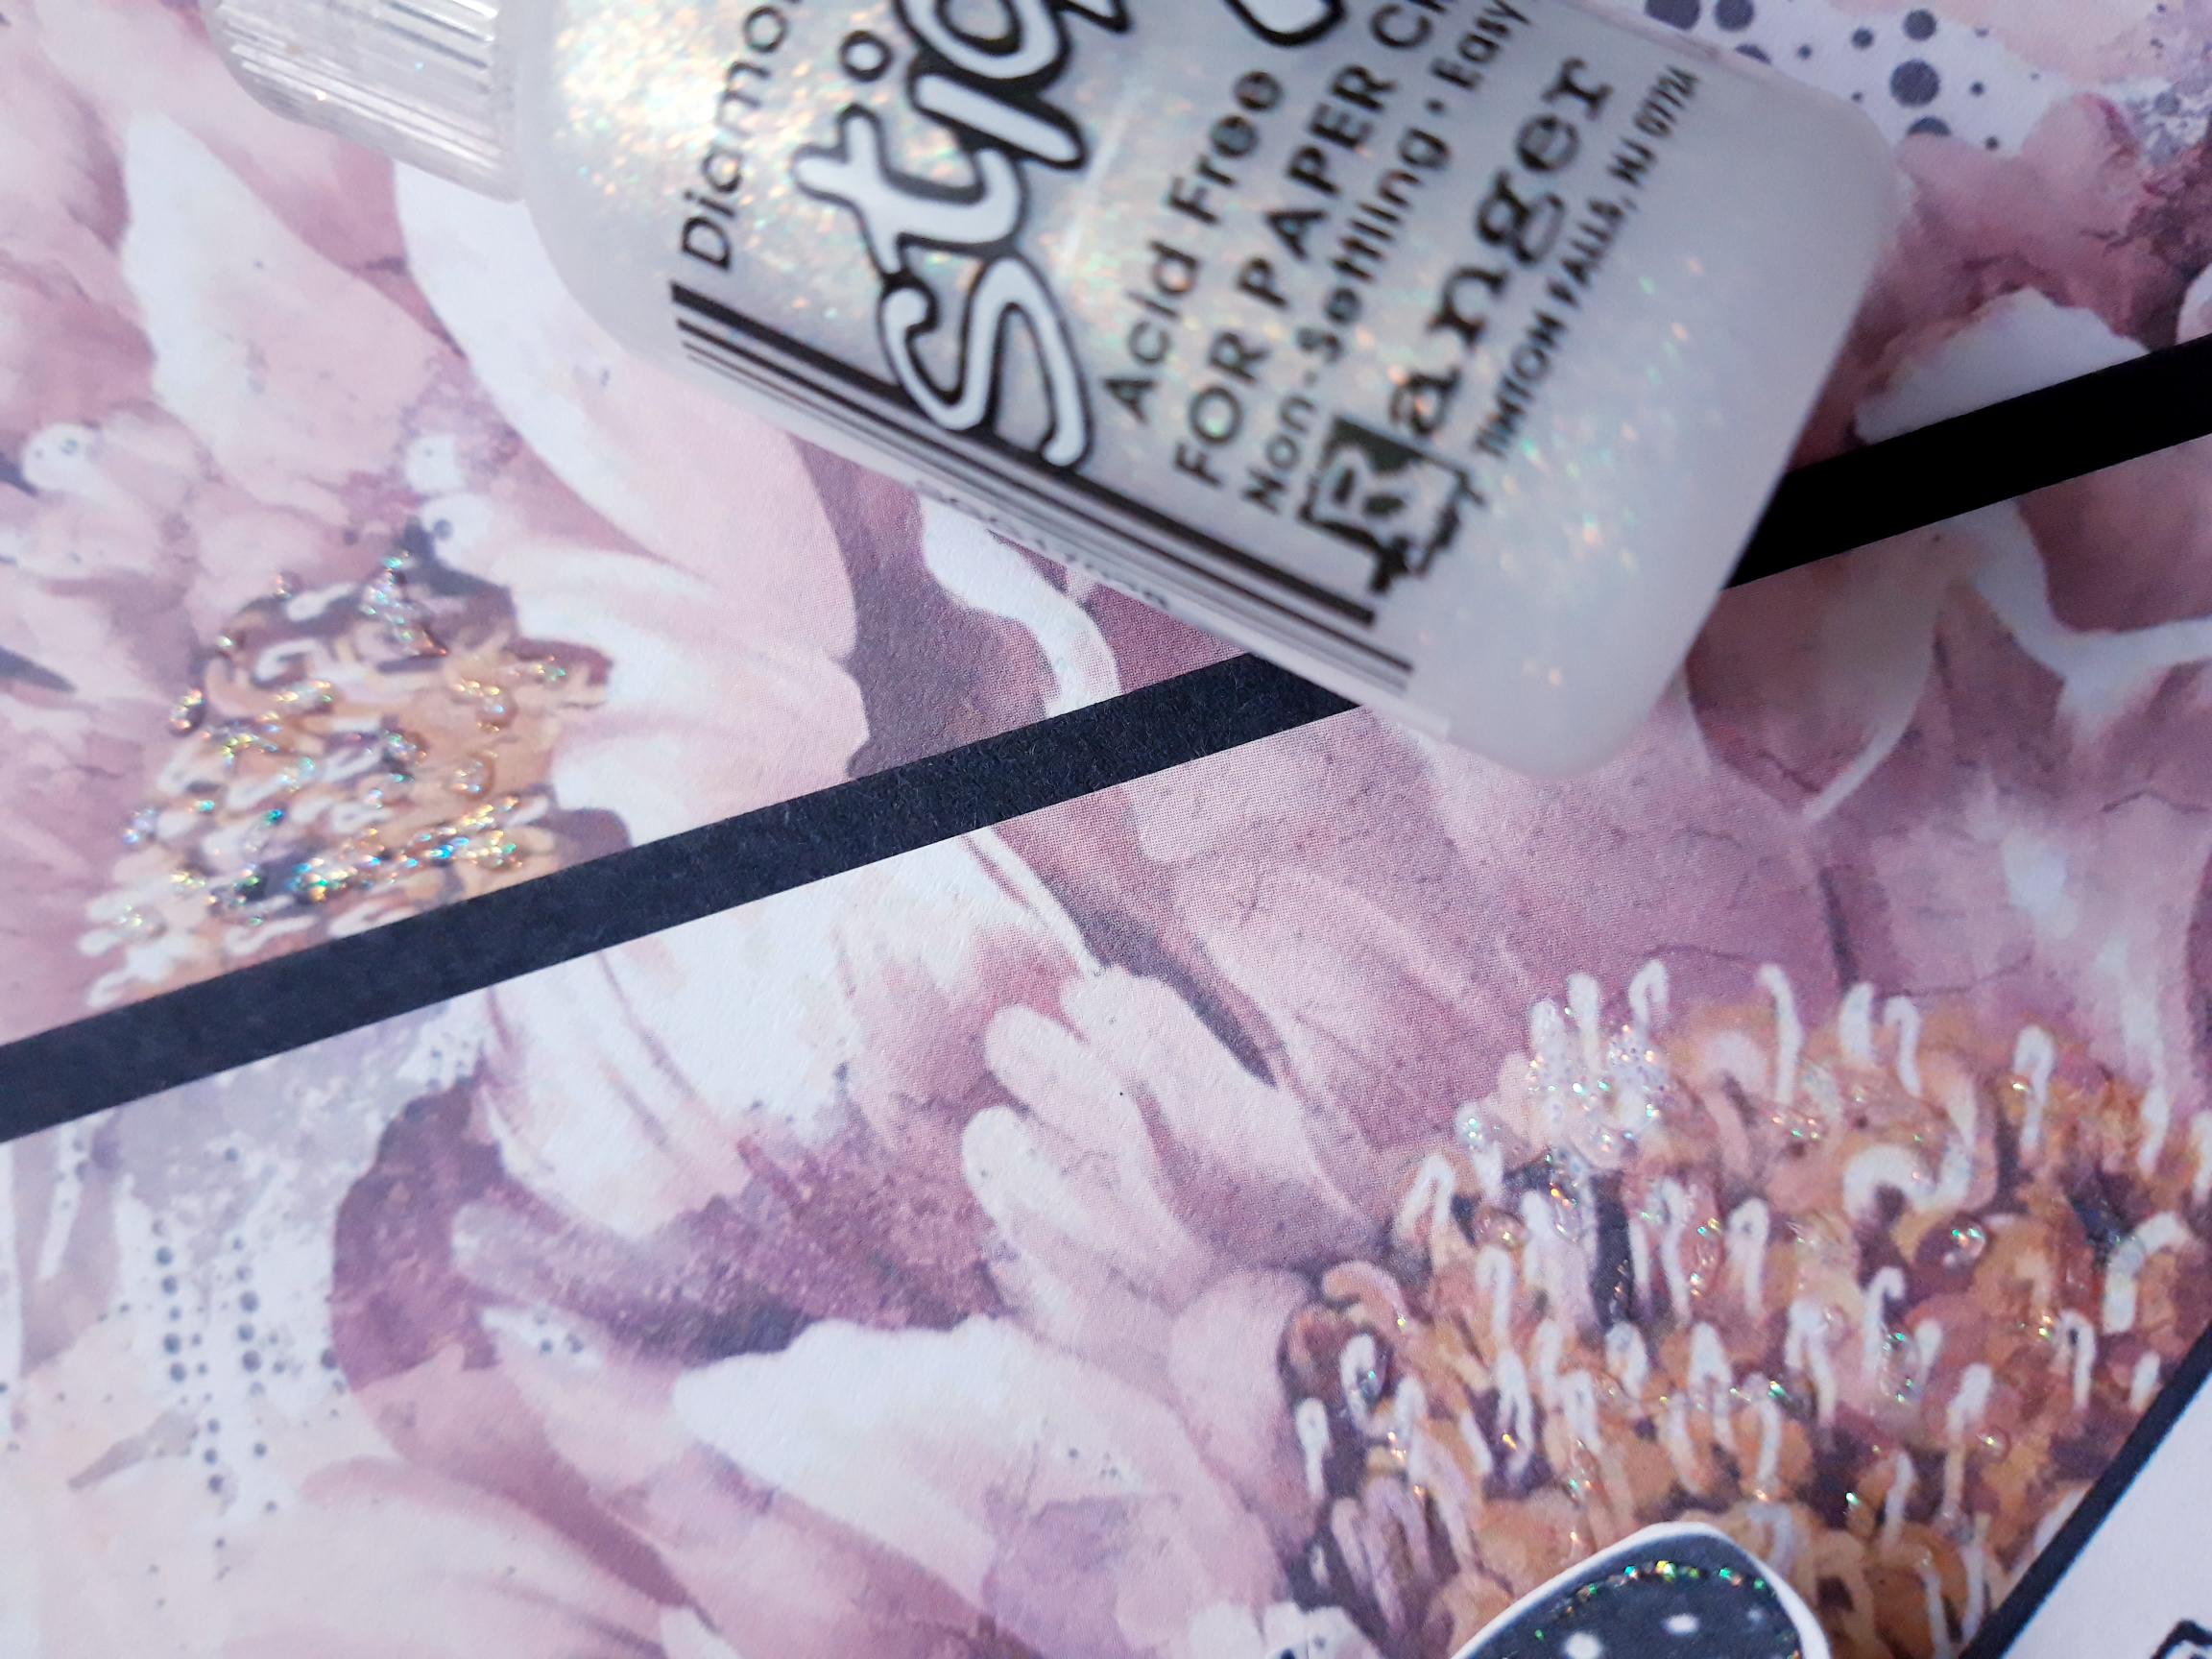
Ranger Stickles: Diamond
White gel pen
Black pen
Eureka 101
Paper Trimmer
Perfect Together Glue
Double sided tape
Die Cutting machine
[click image to enlarge] 
|
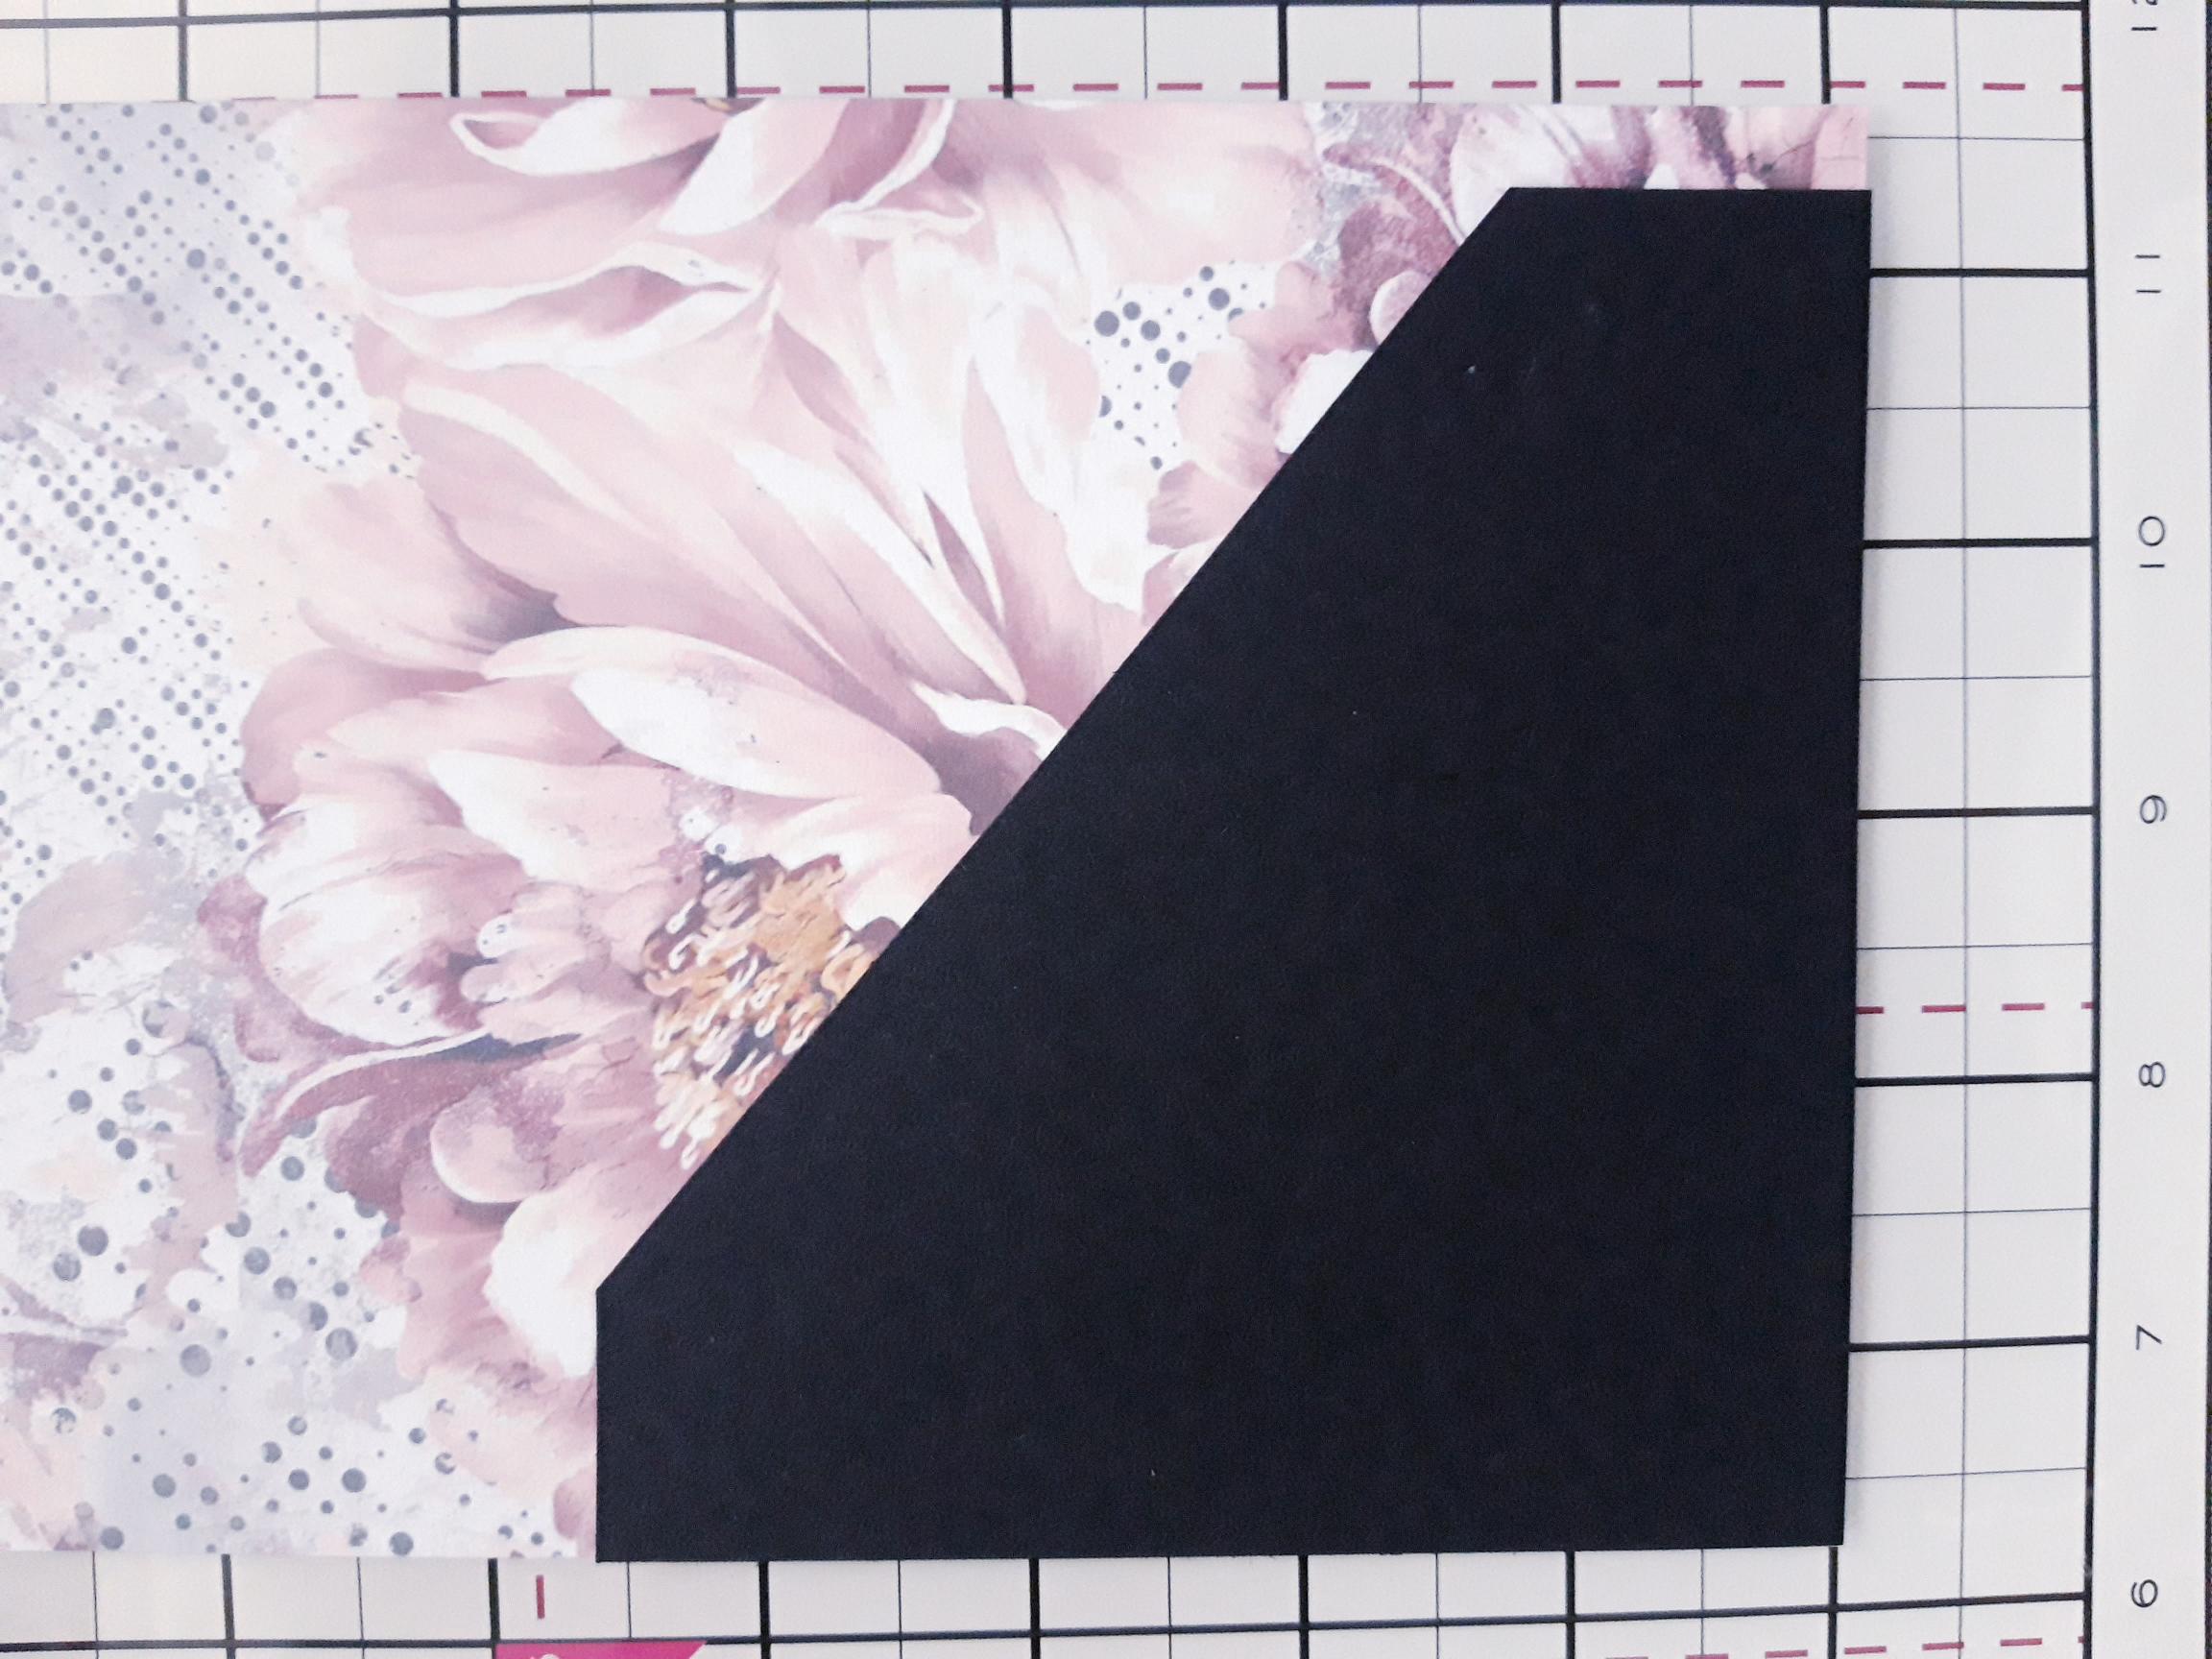
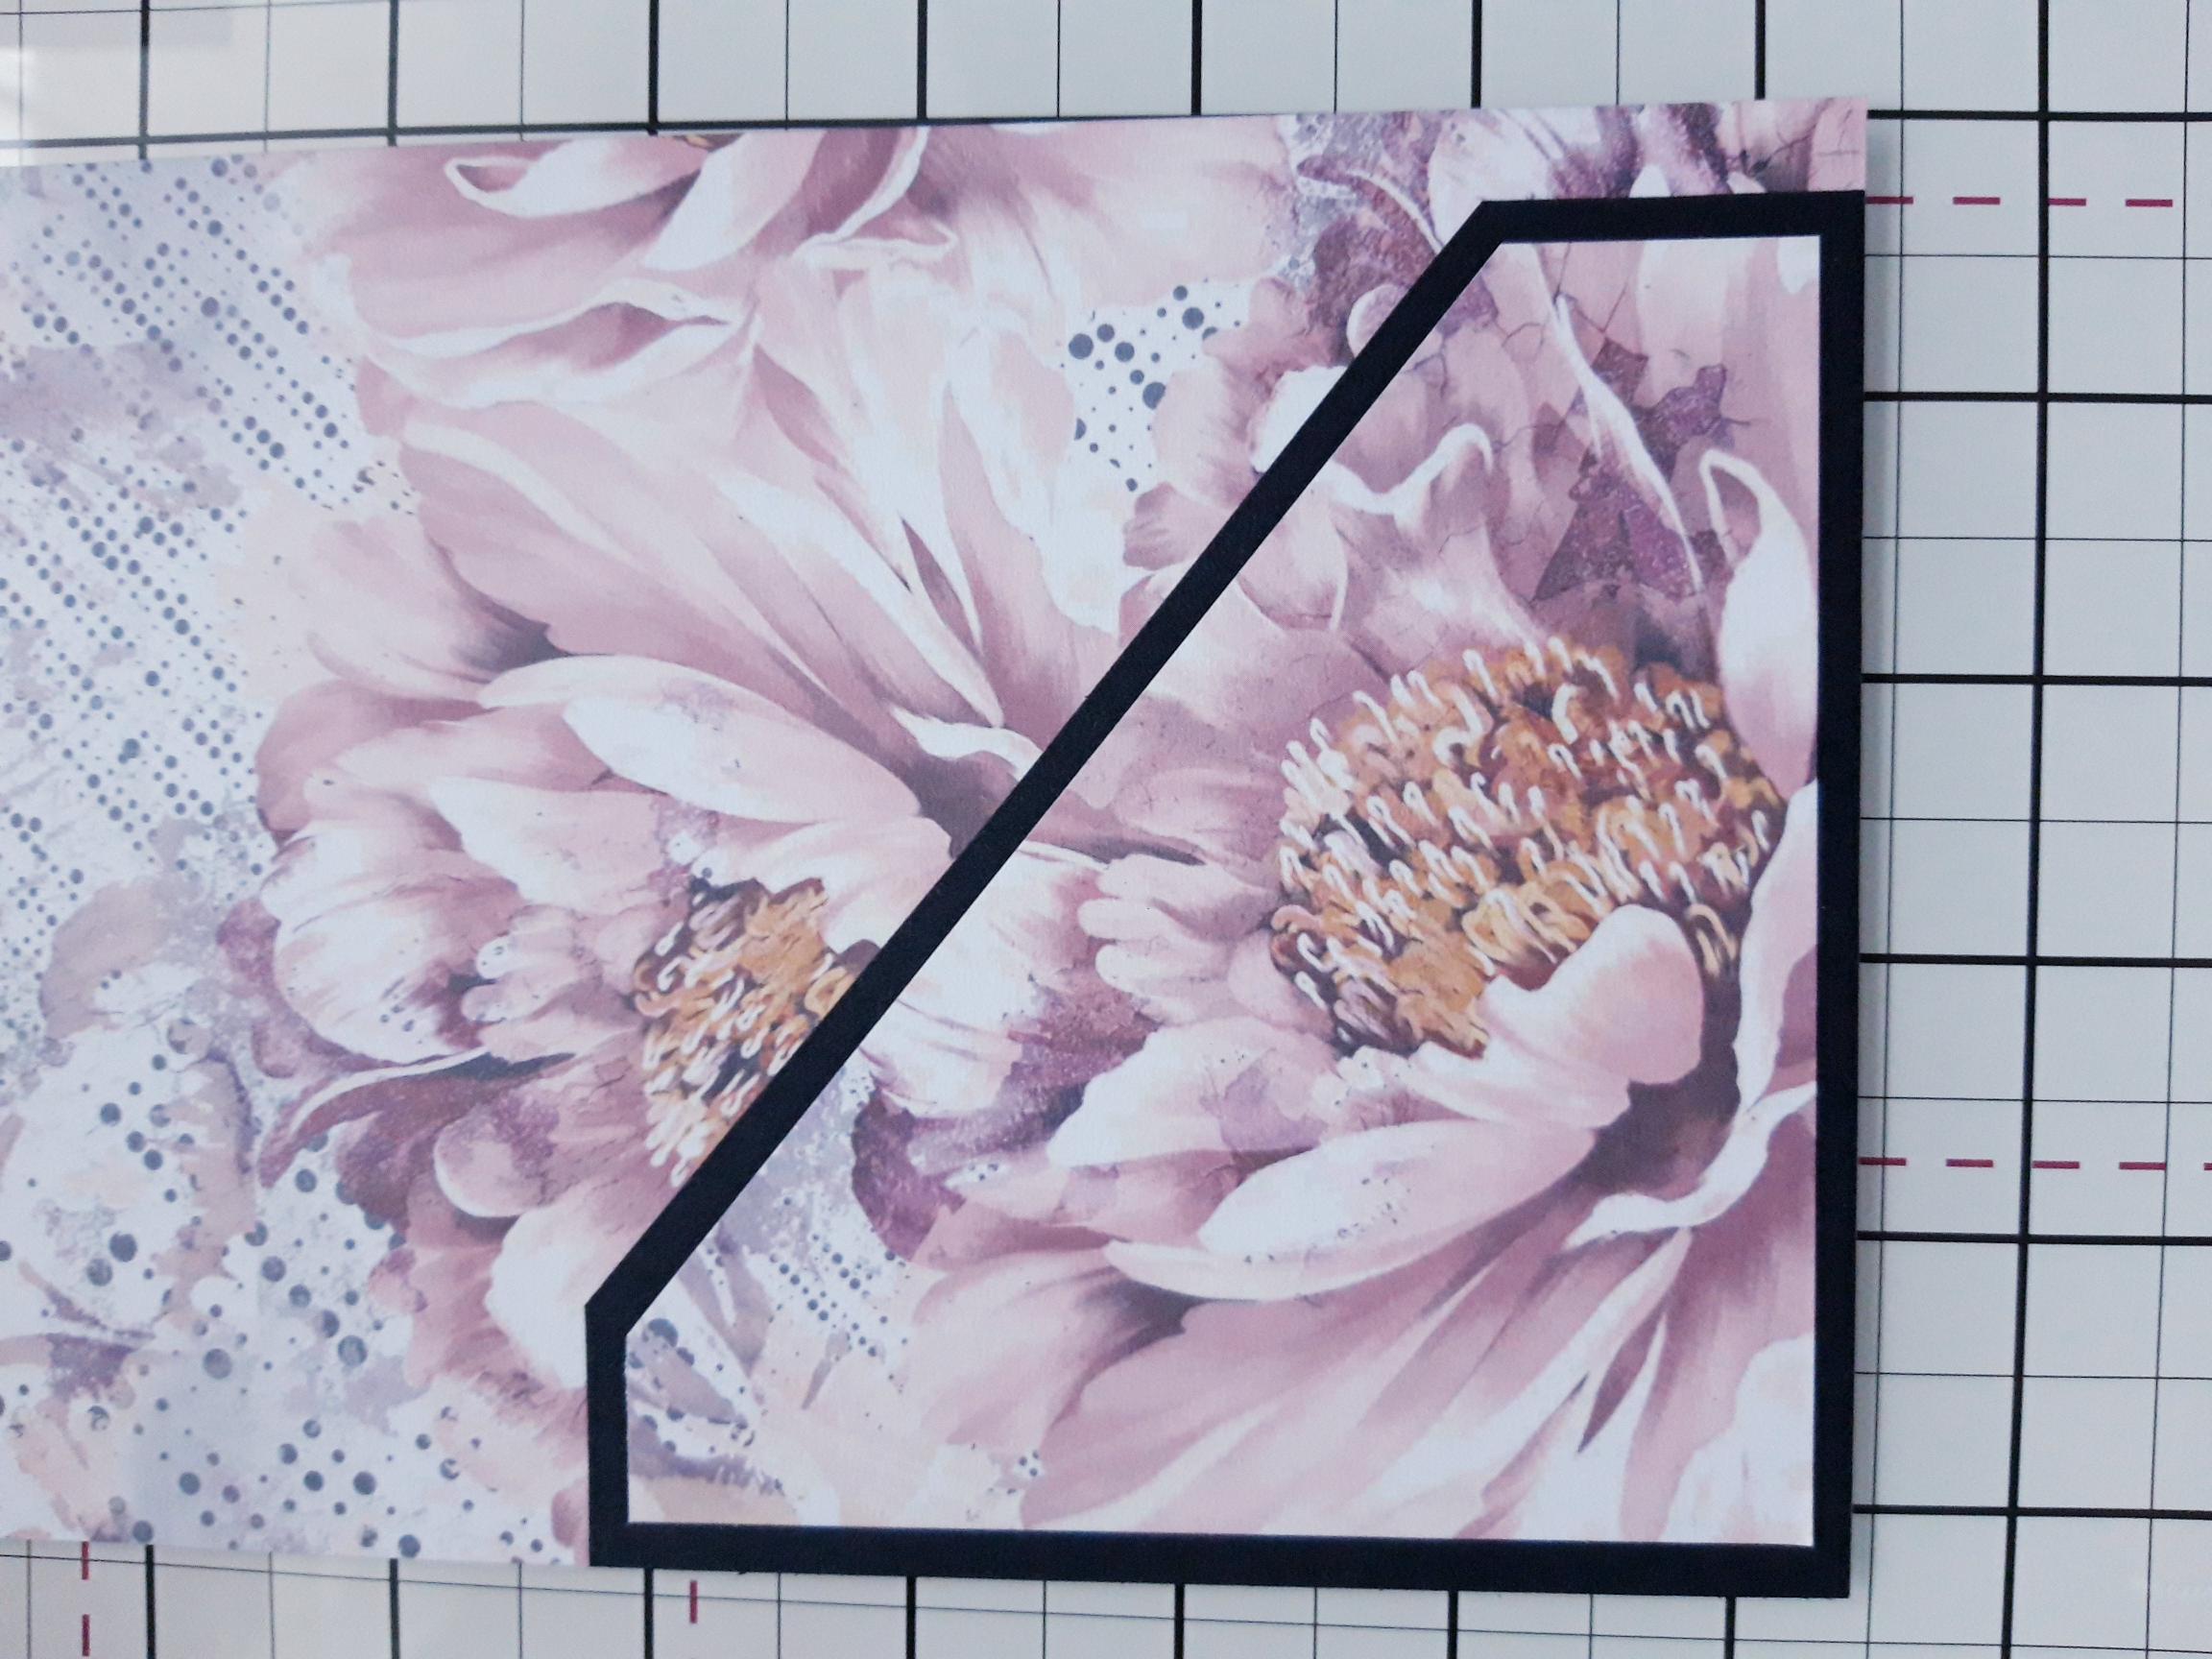
Cut this sheet of decorative paper, from the paper stack, to 7 3/4 x 5" and set the remaining paper to one side for later. |
|
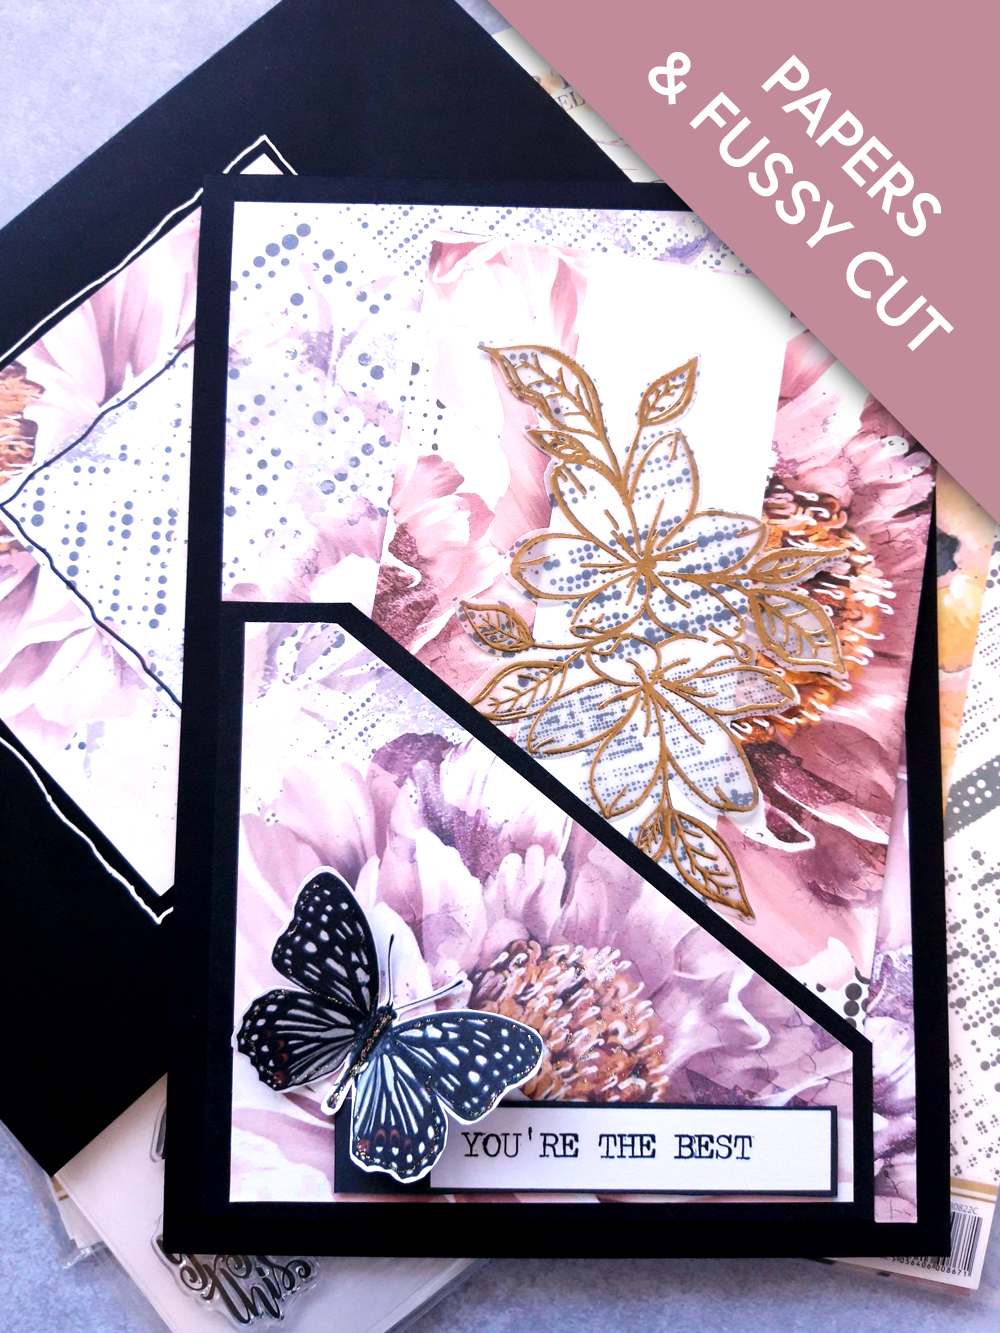
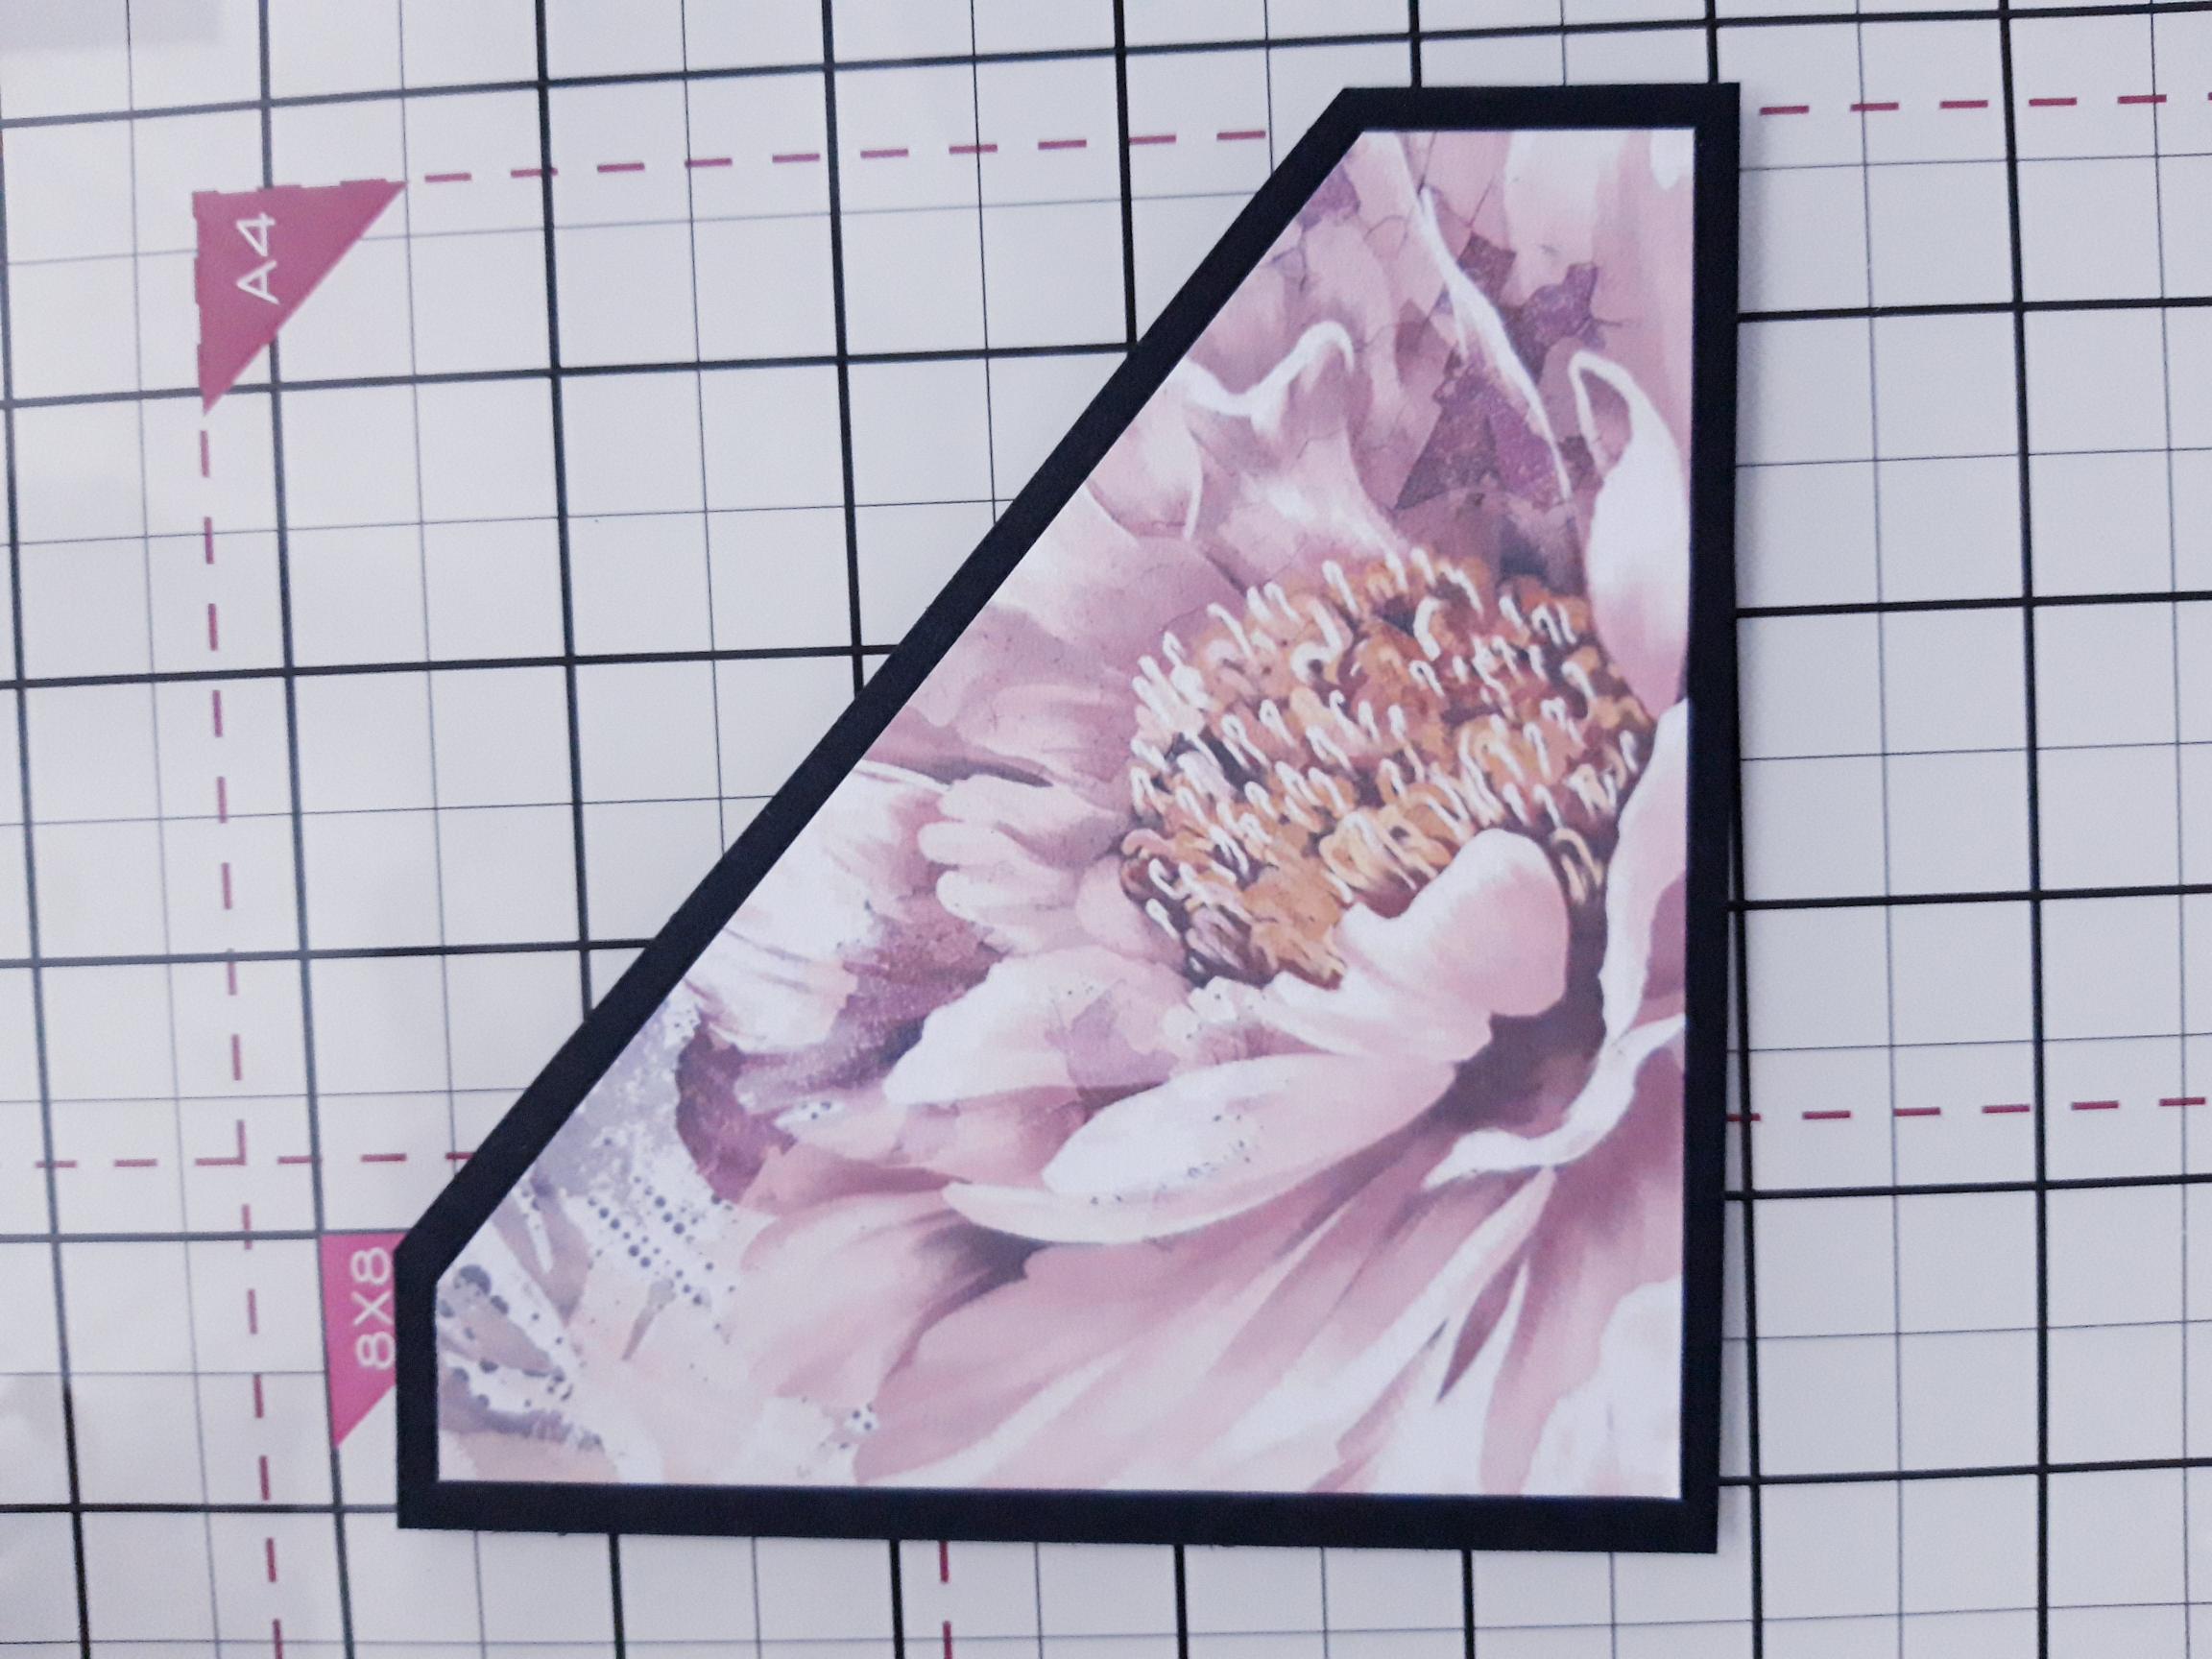
Place the black card on the bottom of your decorative paper, mark and cut, to create a pocket, as shown here. |
|
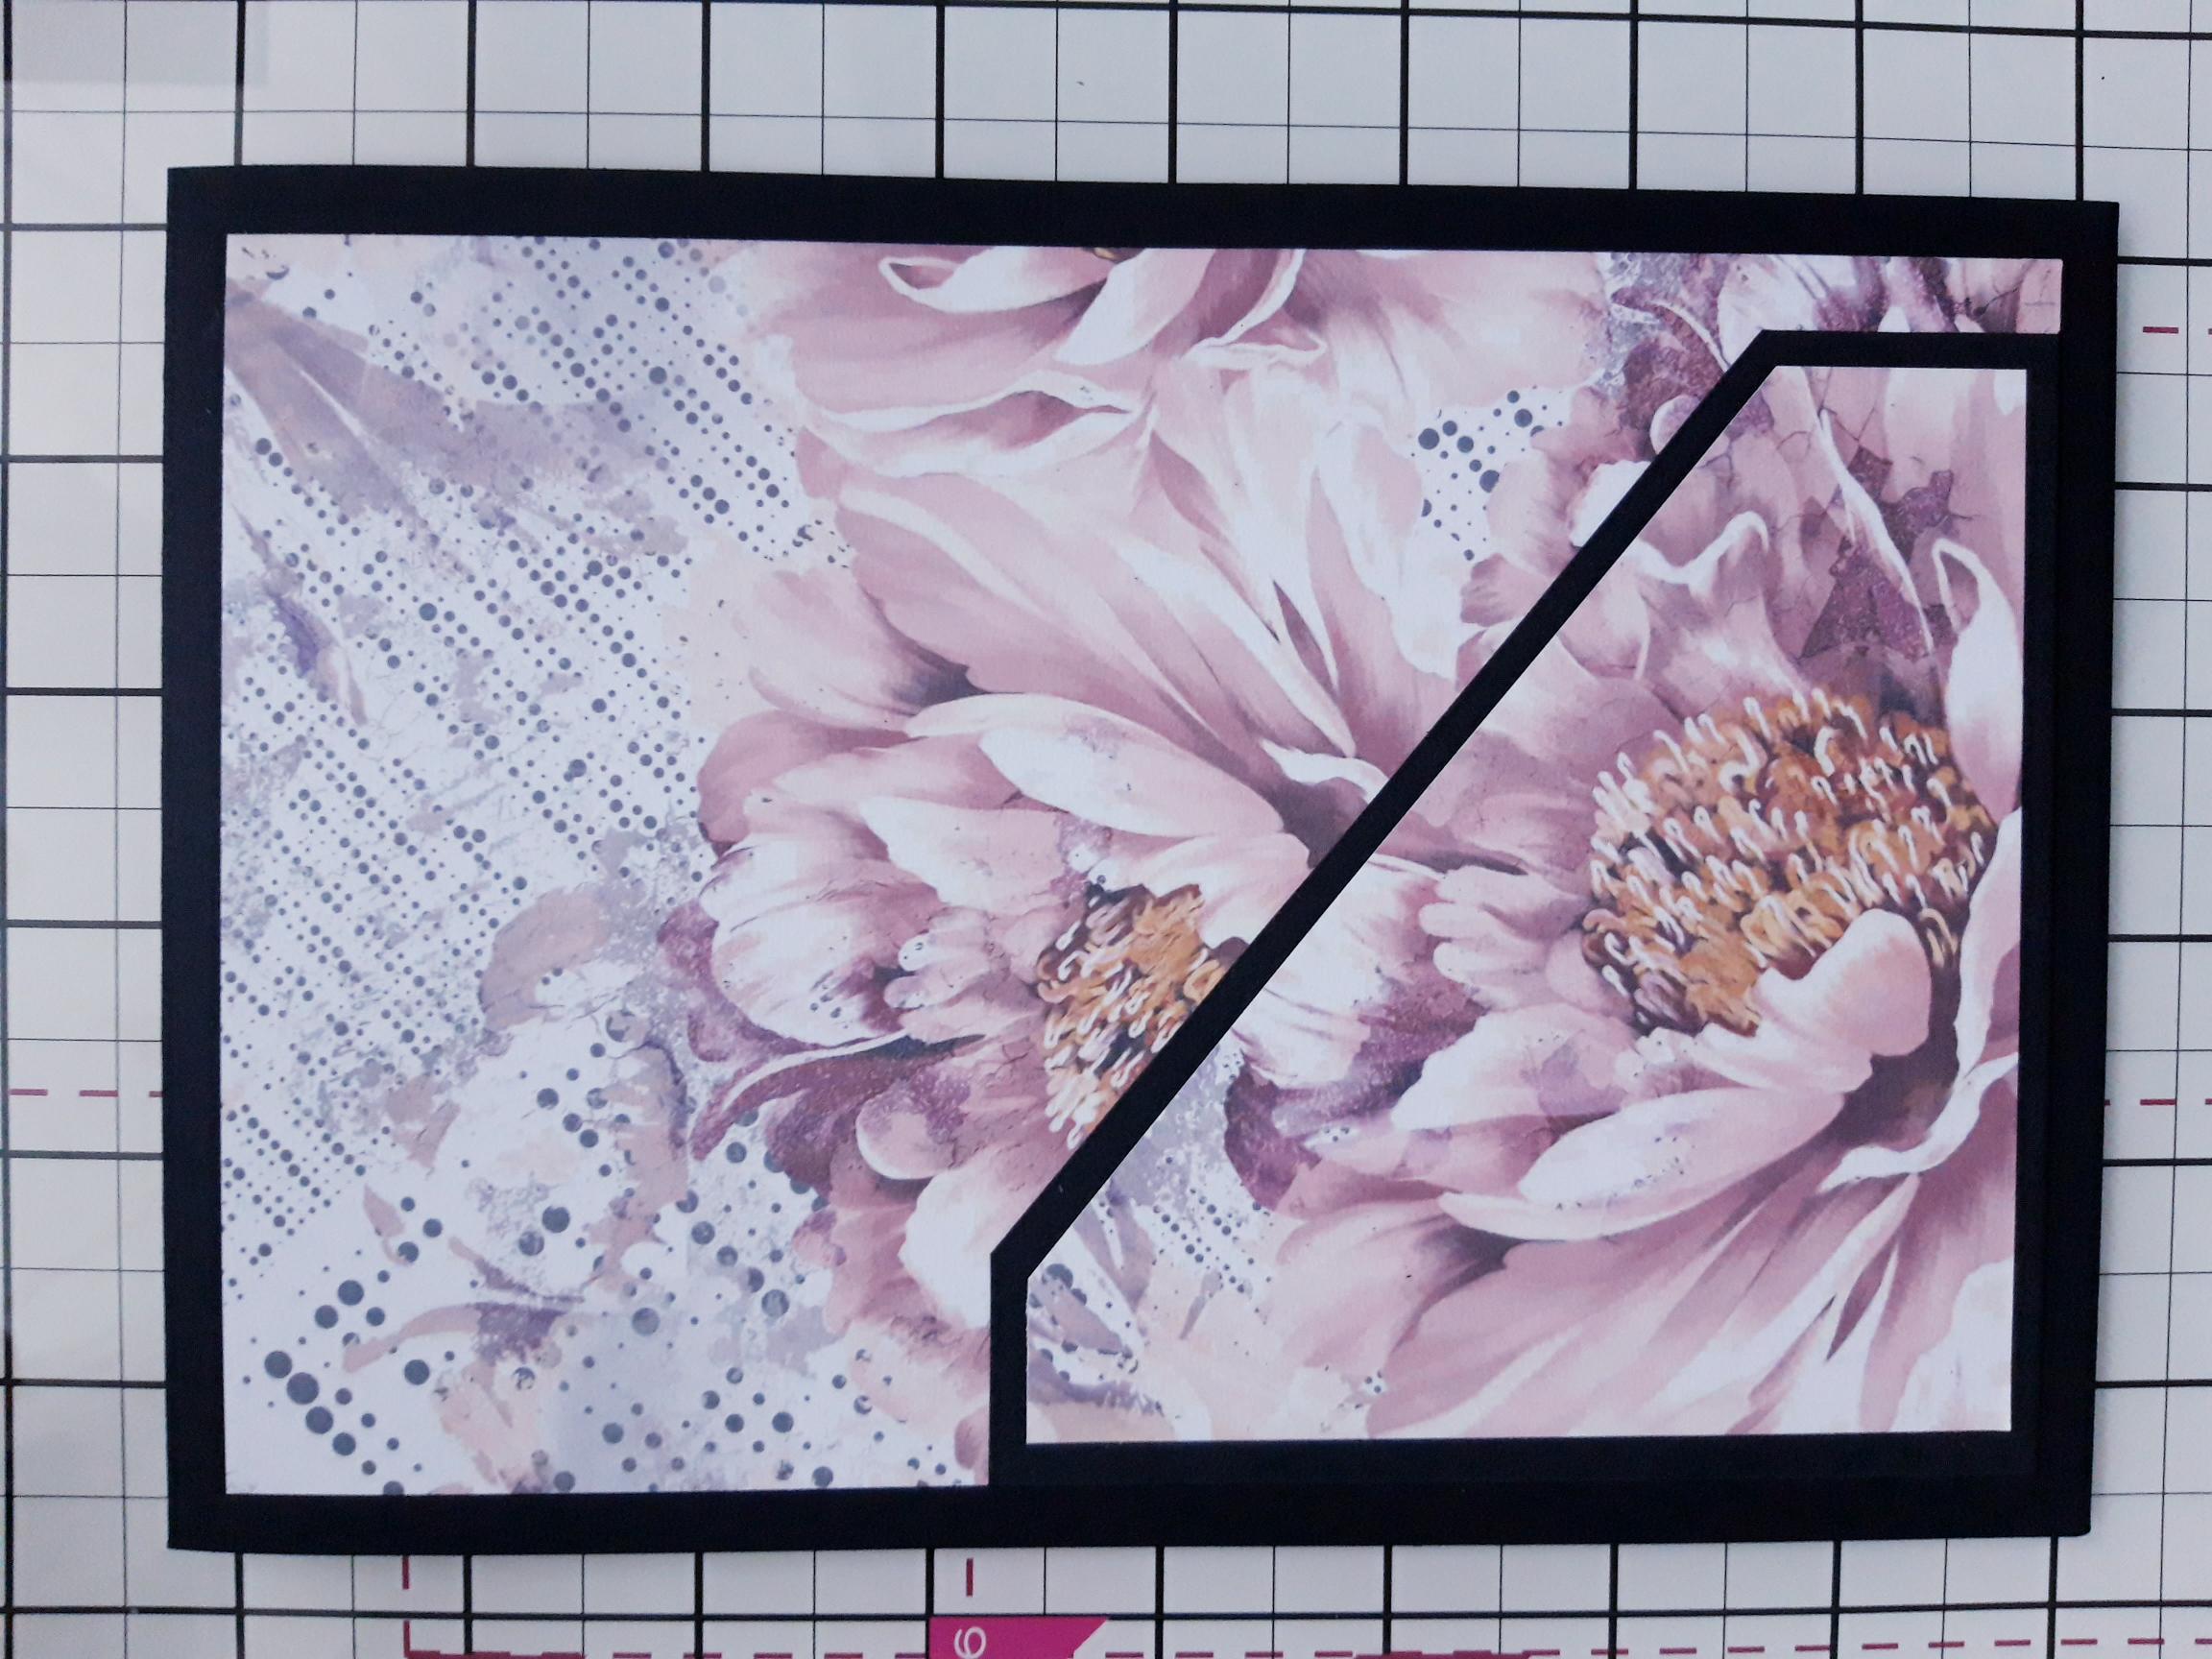
Using some the remaining paper you set aside earlier, mark and trim it, so its slightly smaller than the black pocket, then adhere in place. Set any paper that's left to one side. |
|
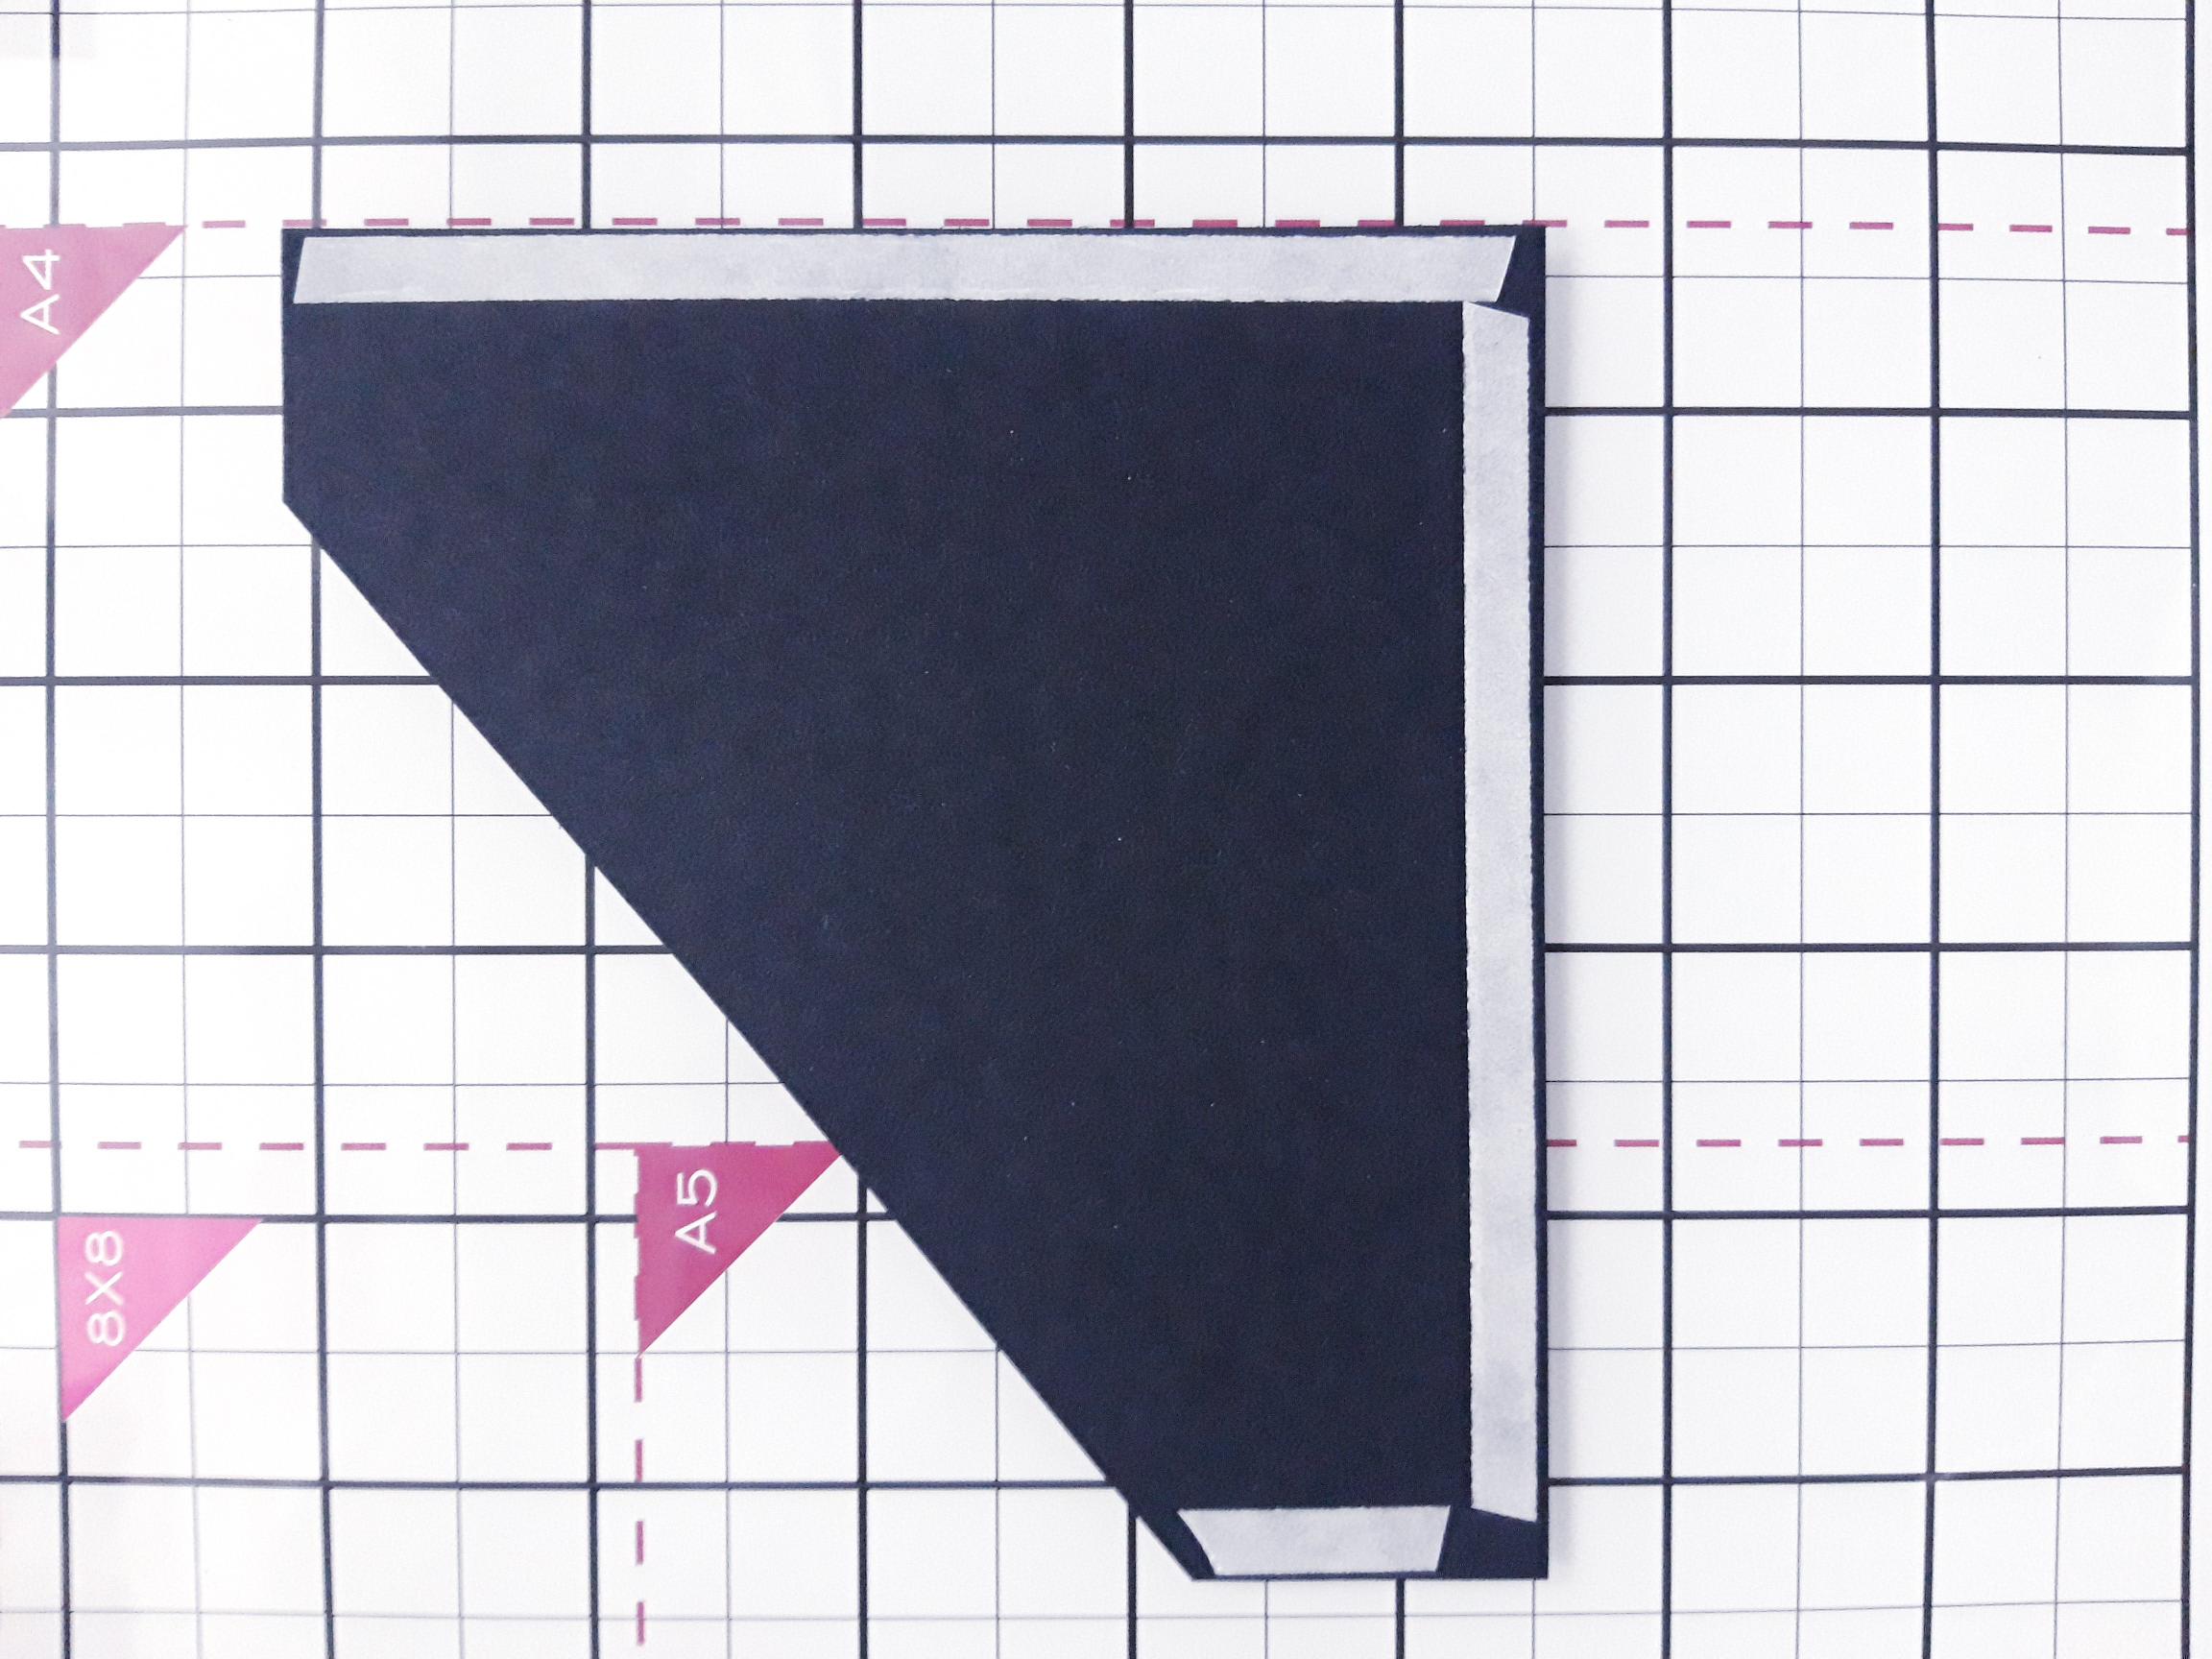
Apply double sided adhesive tape down the 2 sides and along the bottom. |
|
Adhere to the bottom of your trimmed, decorative paper. |
|
Adhere to the front of your black, top folding card blank and set to one side. |
|
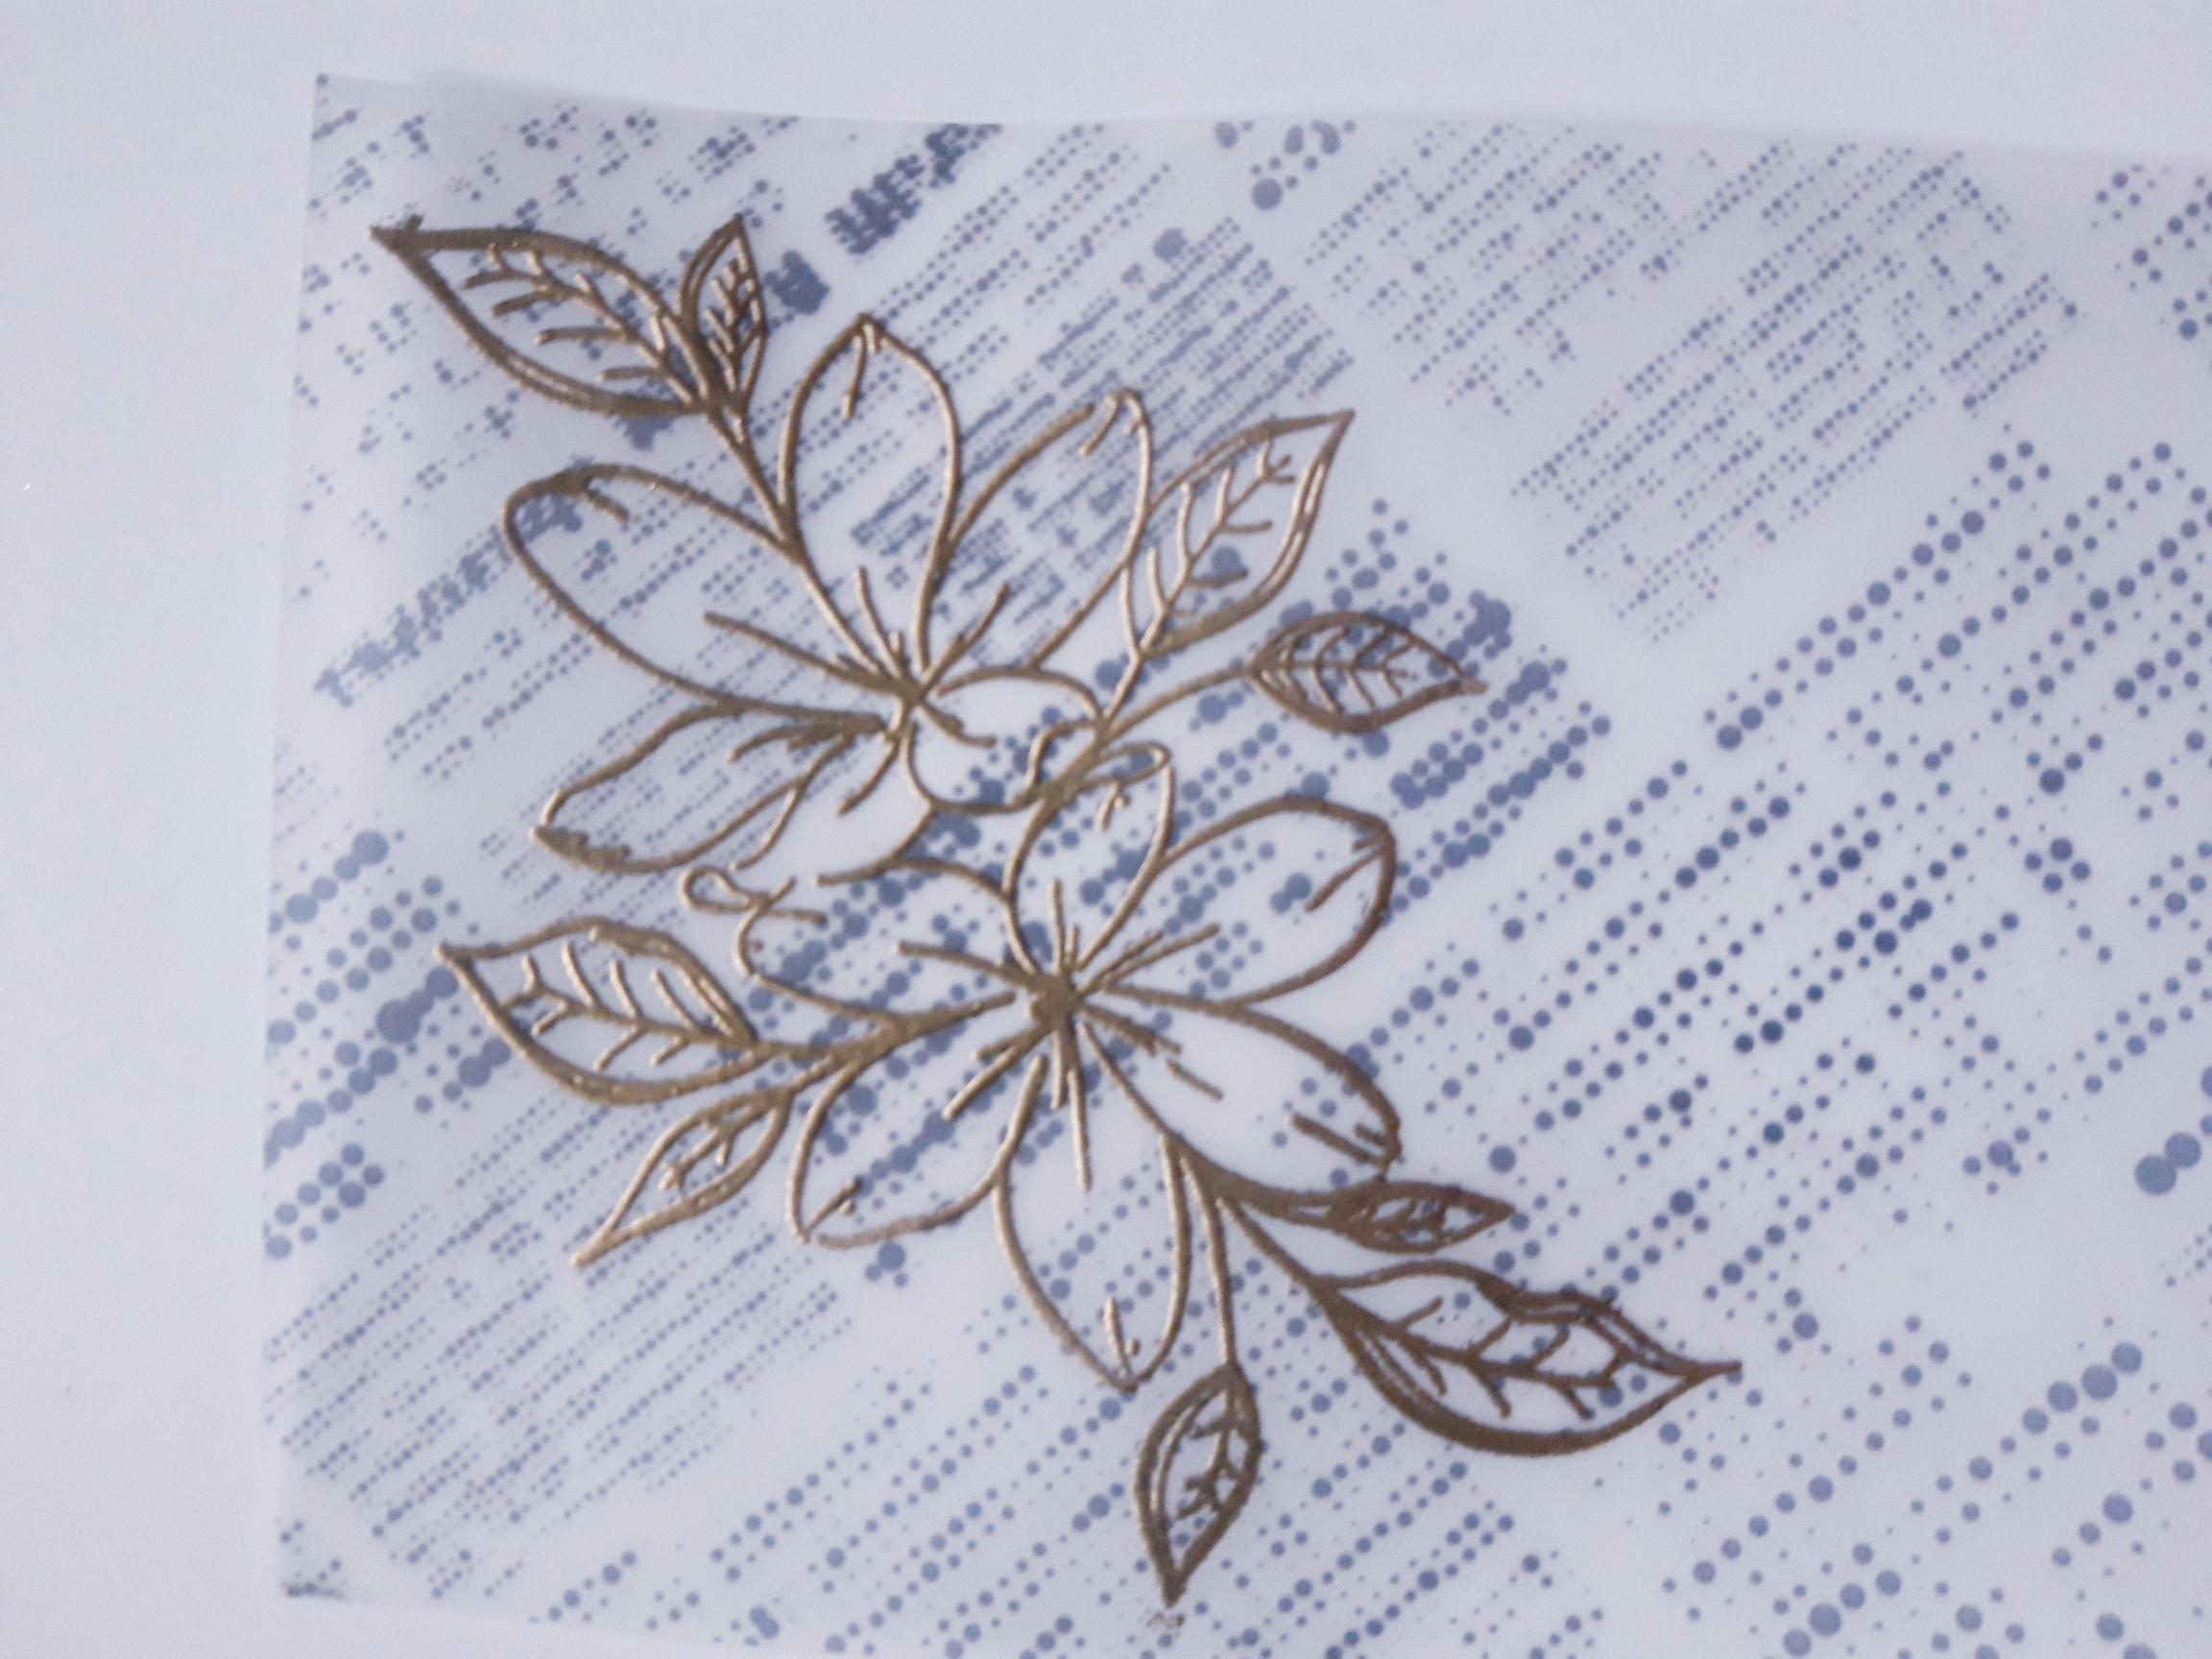
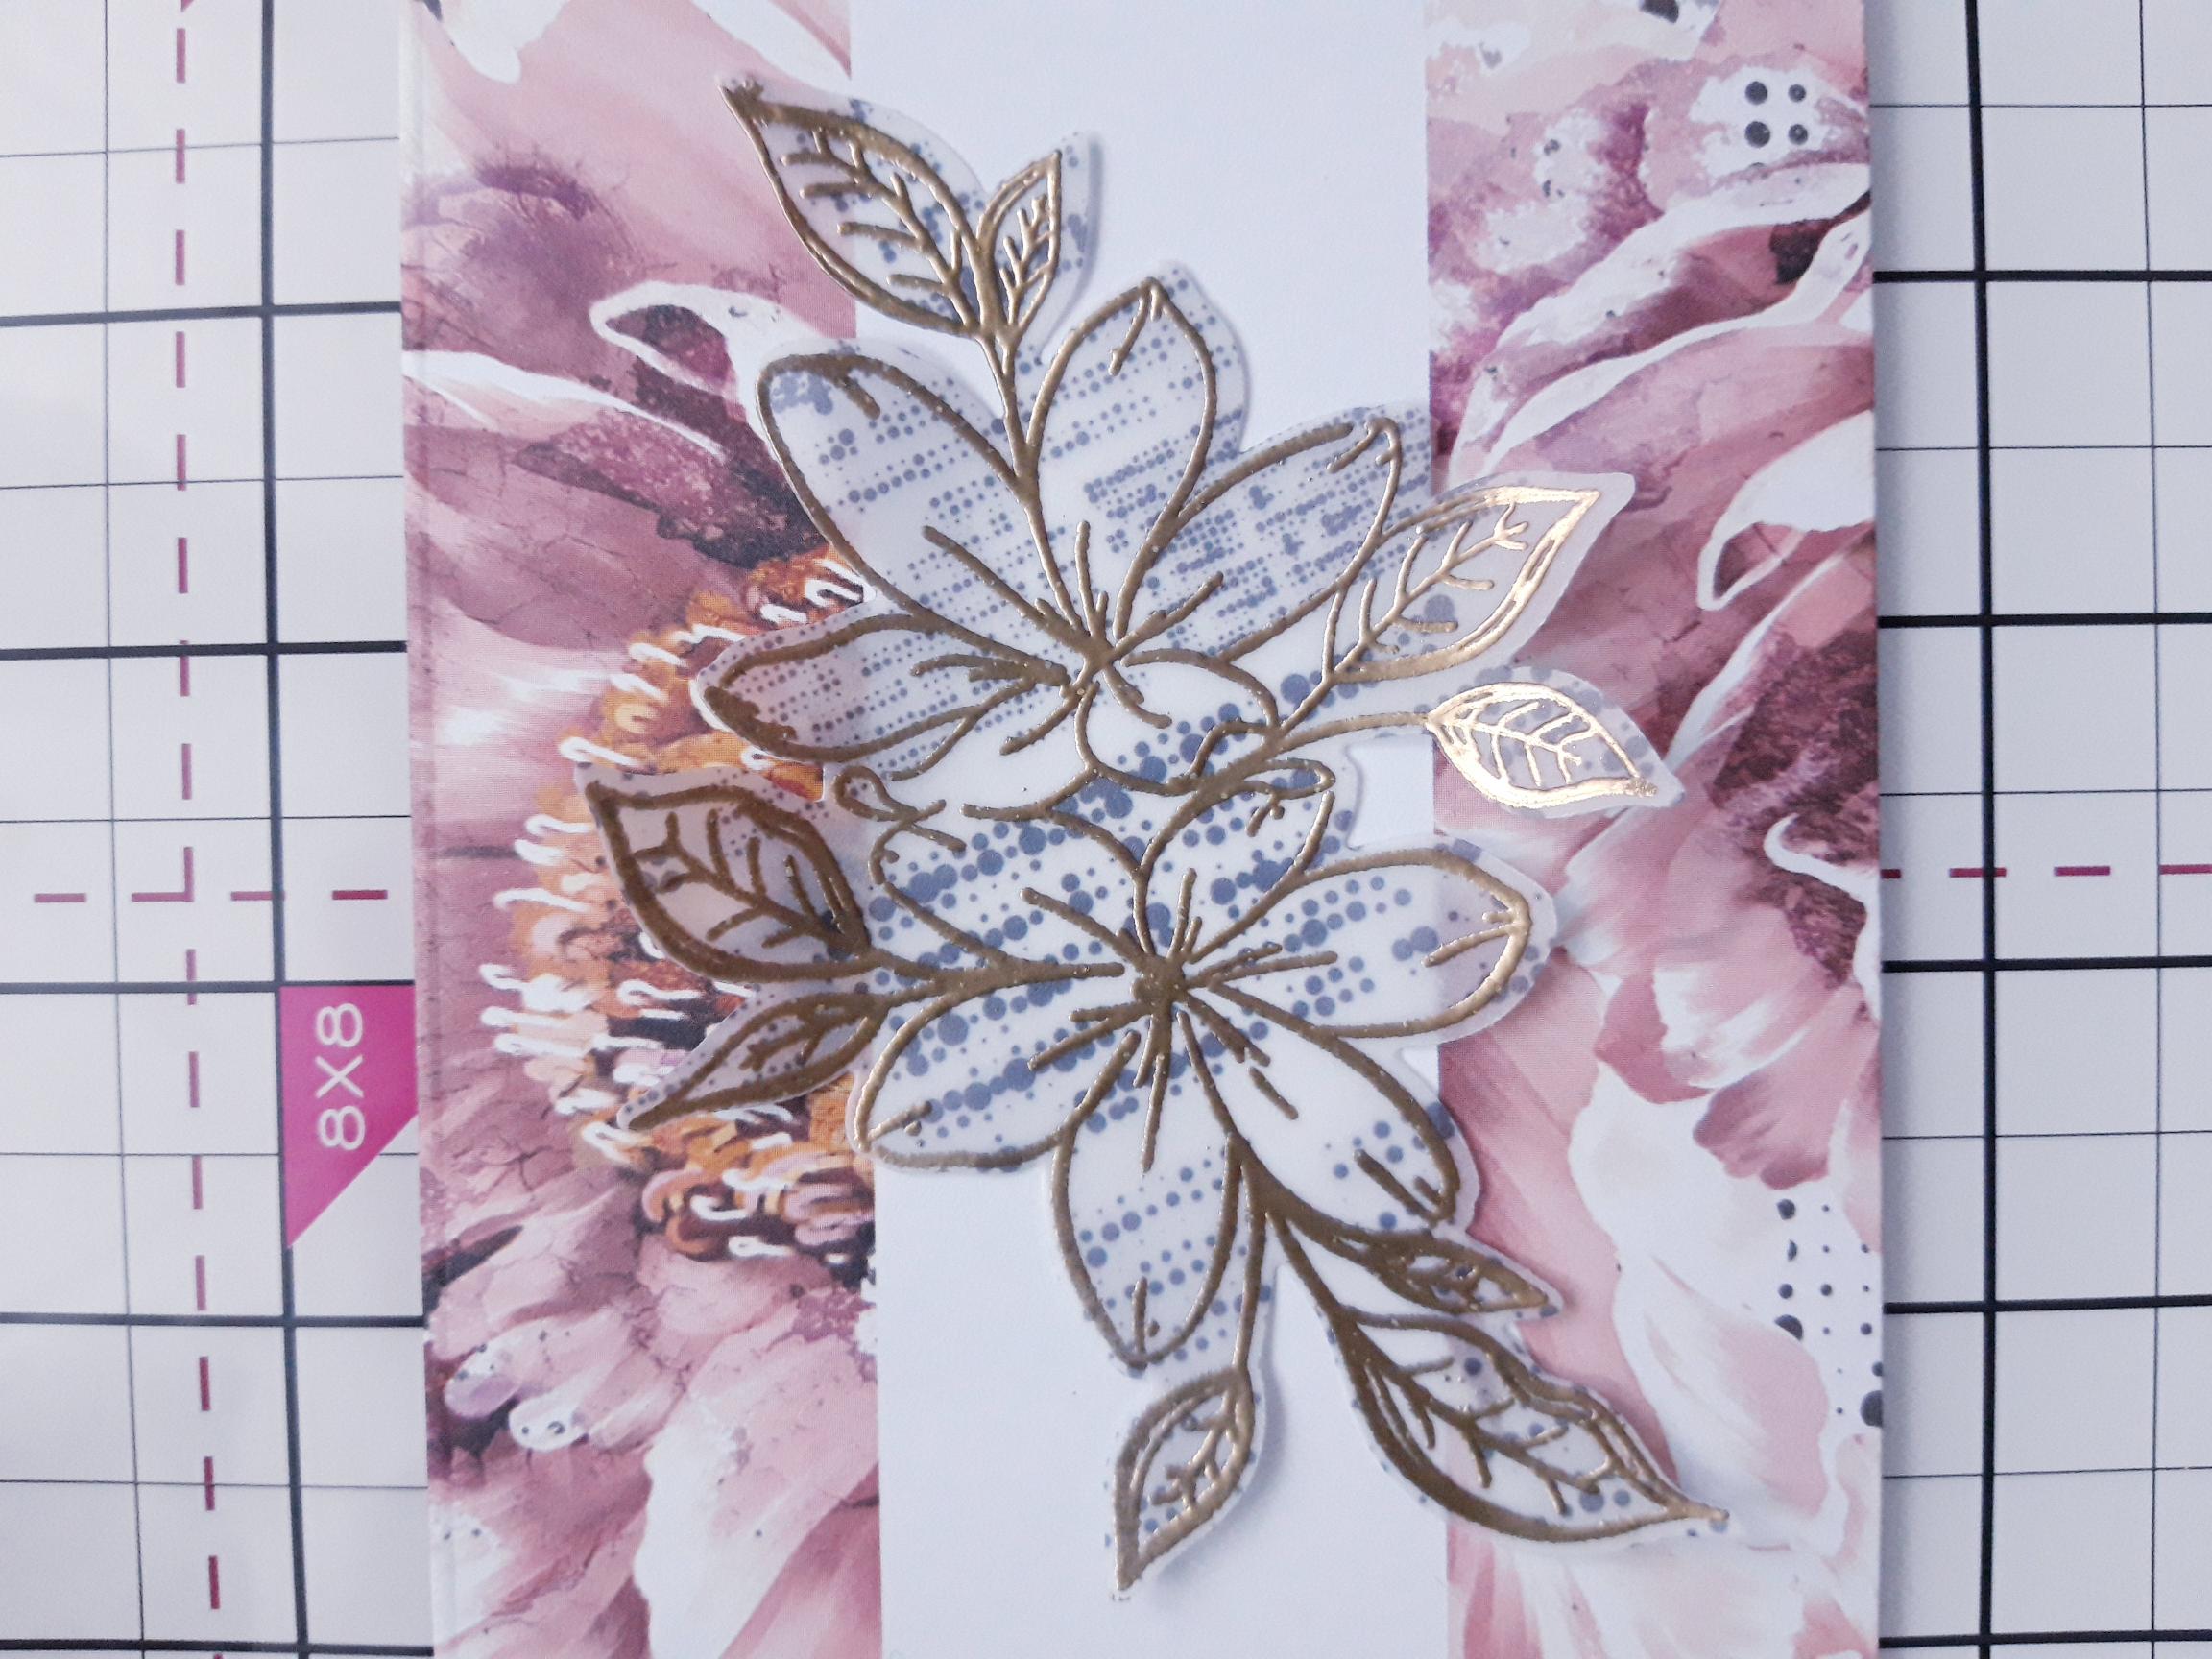
Take this sheet from the vellum pack and wipe over with your anti-static bag. Ink up the floral stamp from the collection, with the WOW embossing ink and stamp on to the vellum. Apply the gold embossing powder over the sticky image, then once your heat tool is hot, heat set the powder, ensuring you move the tool as soon as the powder starts to turn. This will help avoid burning the powder, or warping your vellum. |
|
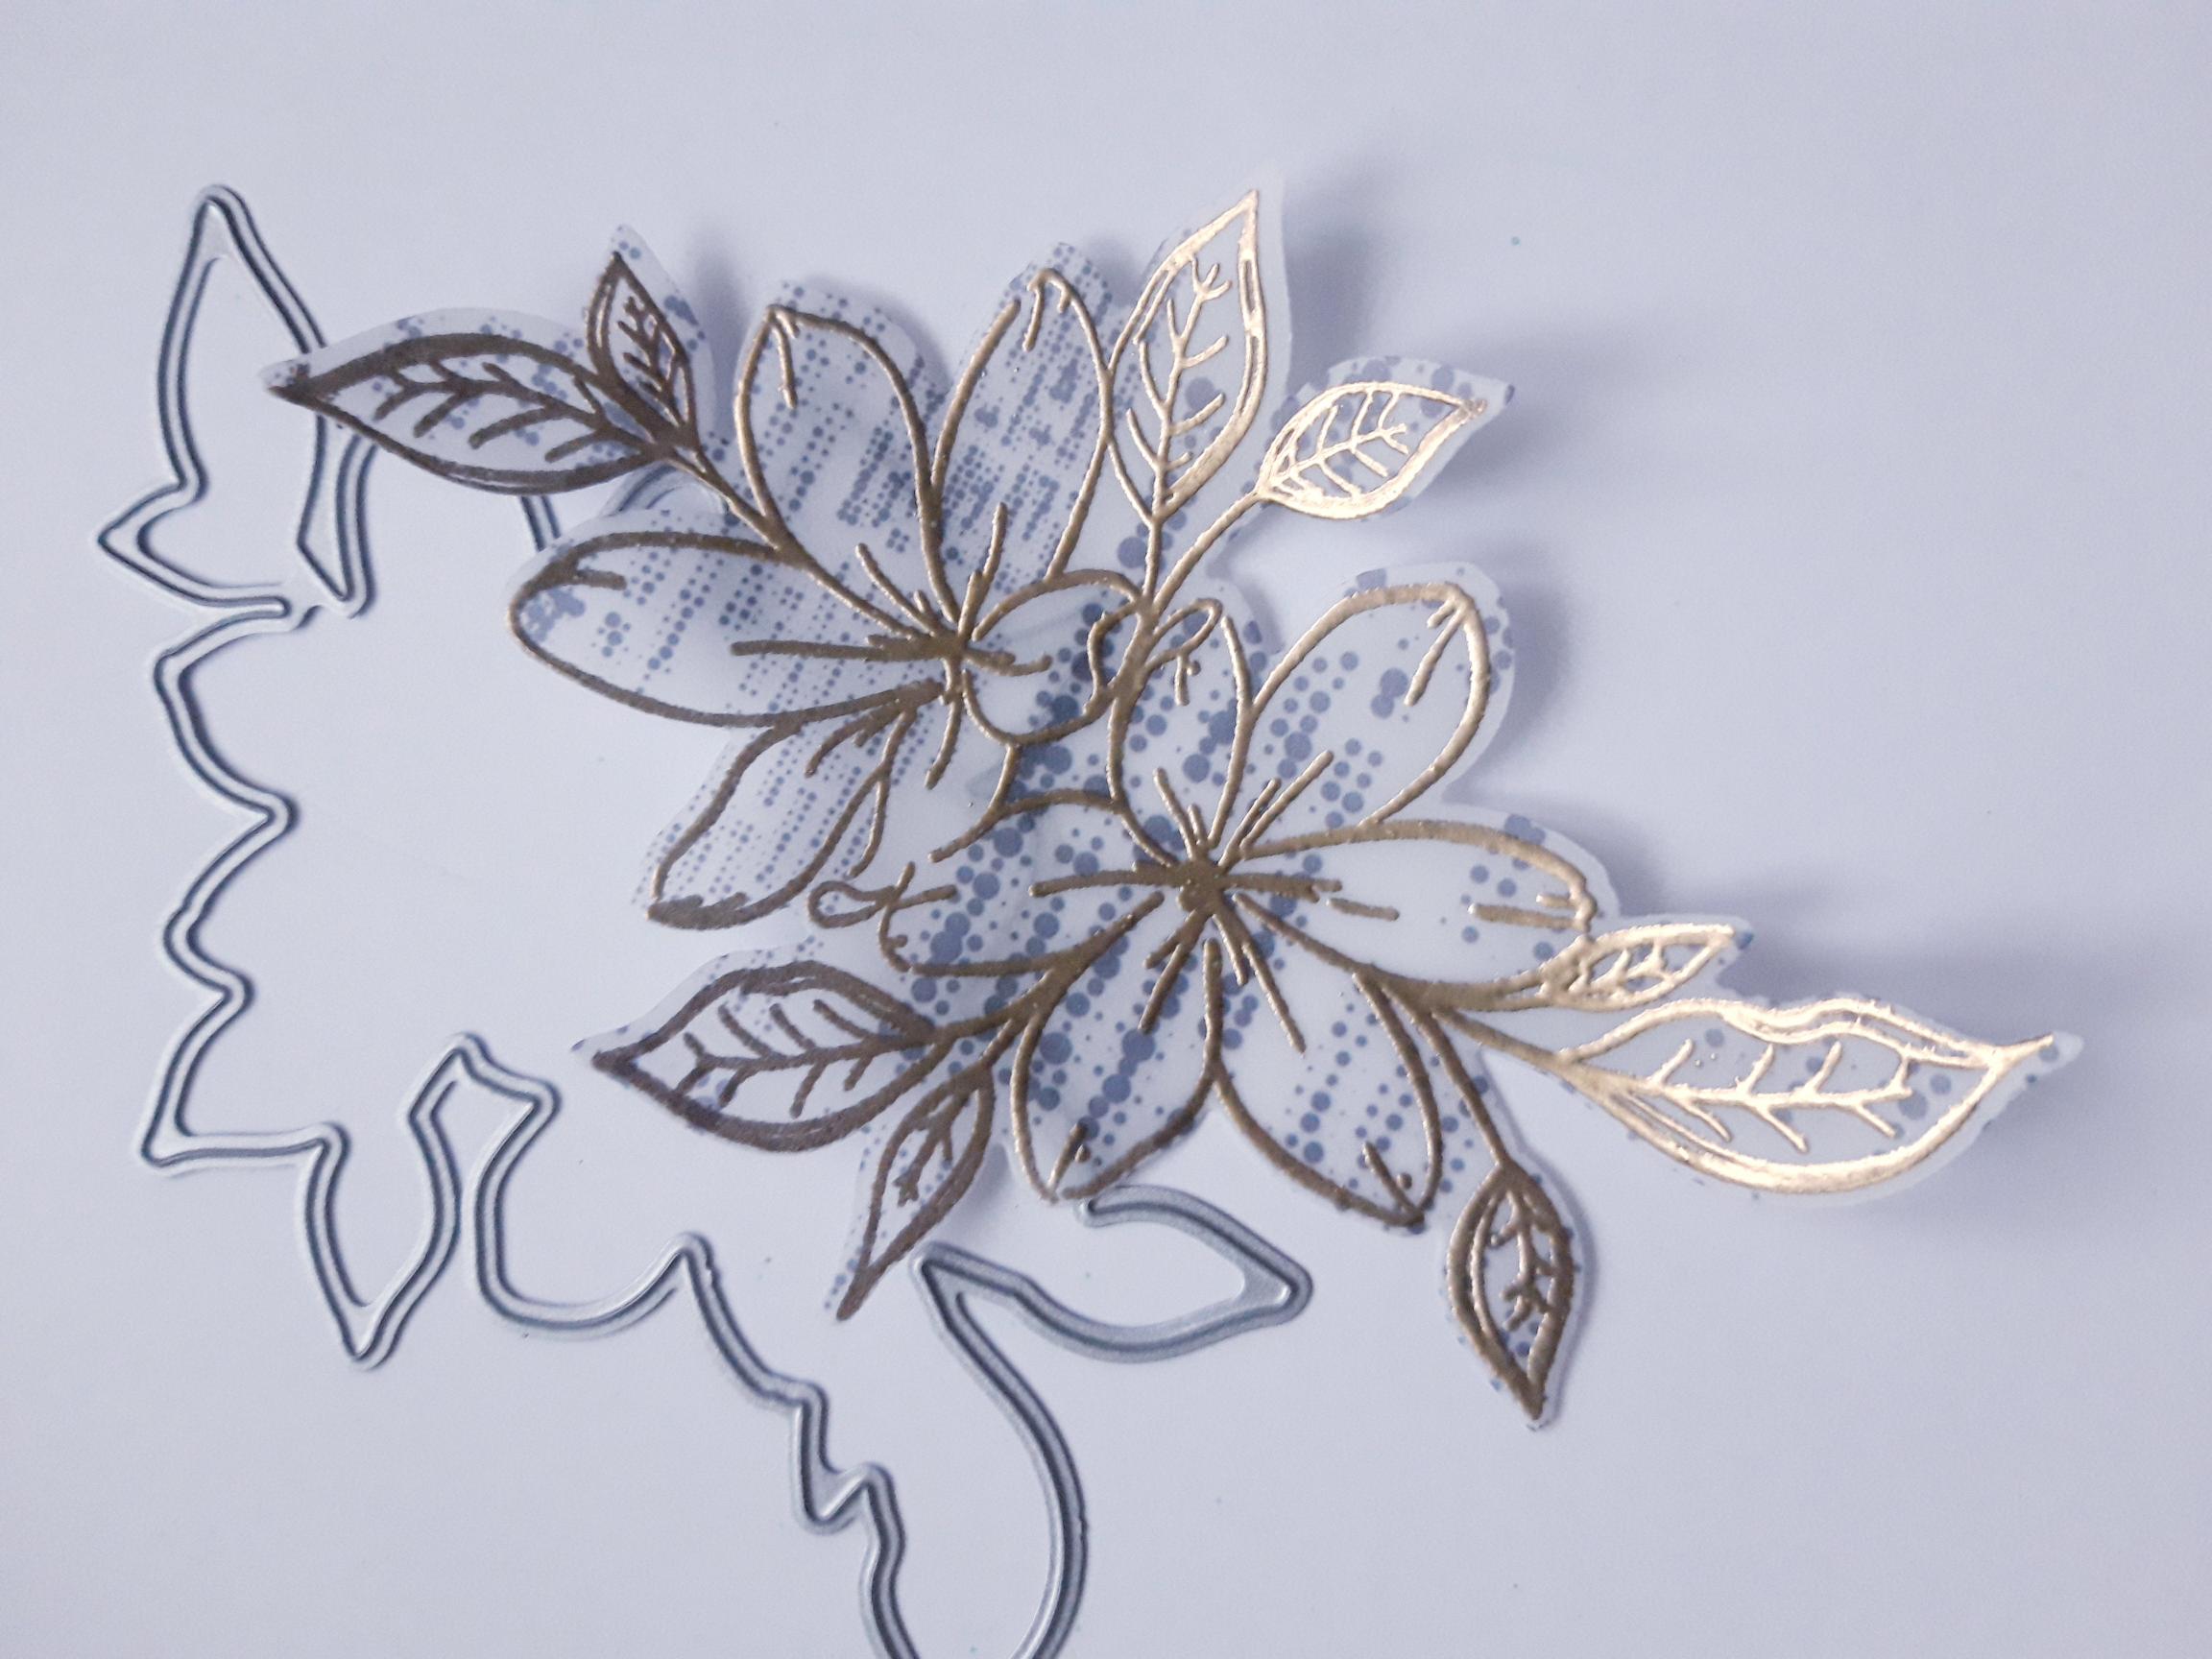
Use the coordinating die to cut out your embossed, vellum floral element. Set to one side. |
|
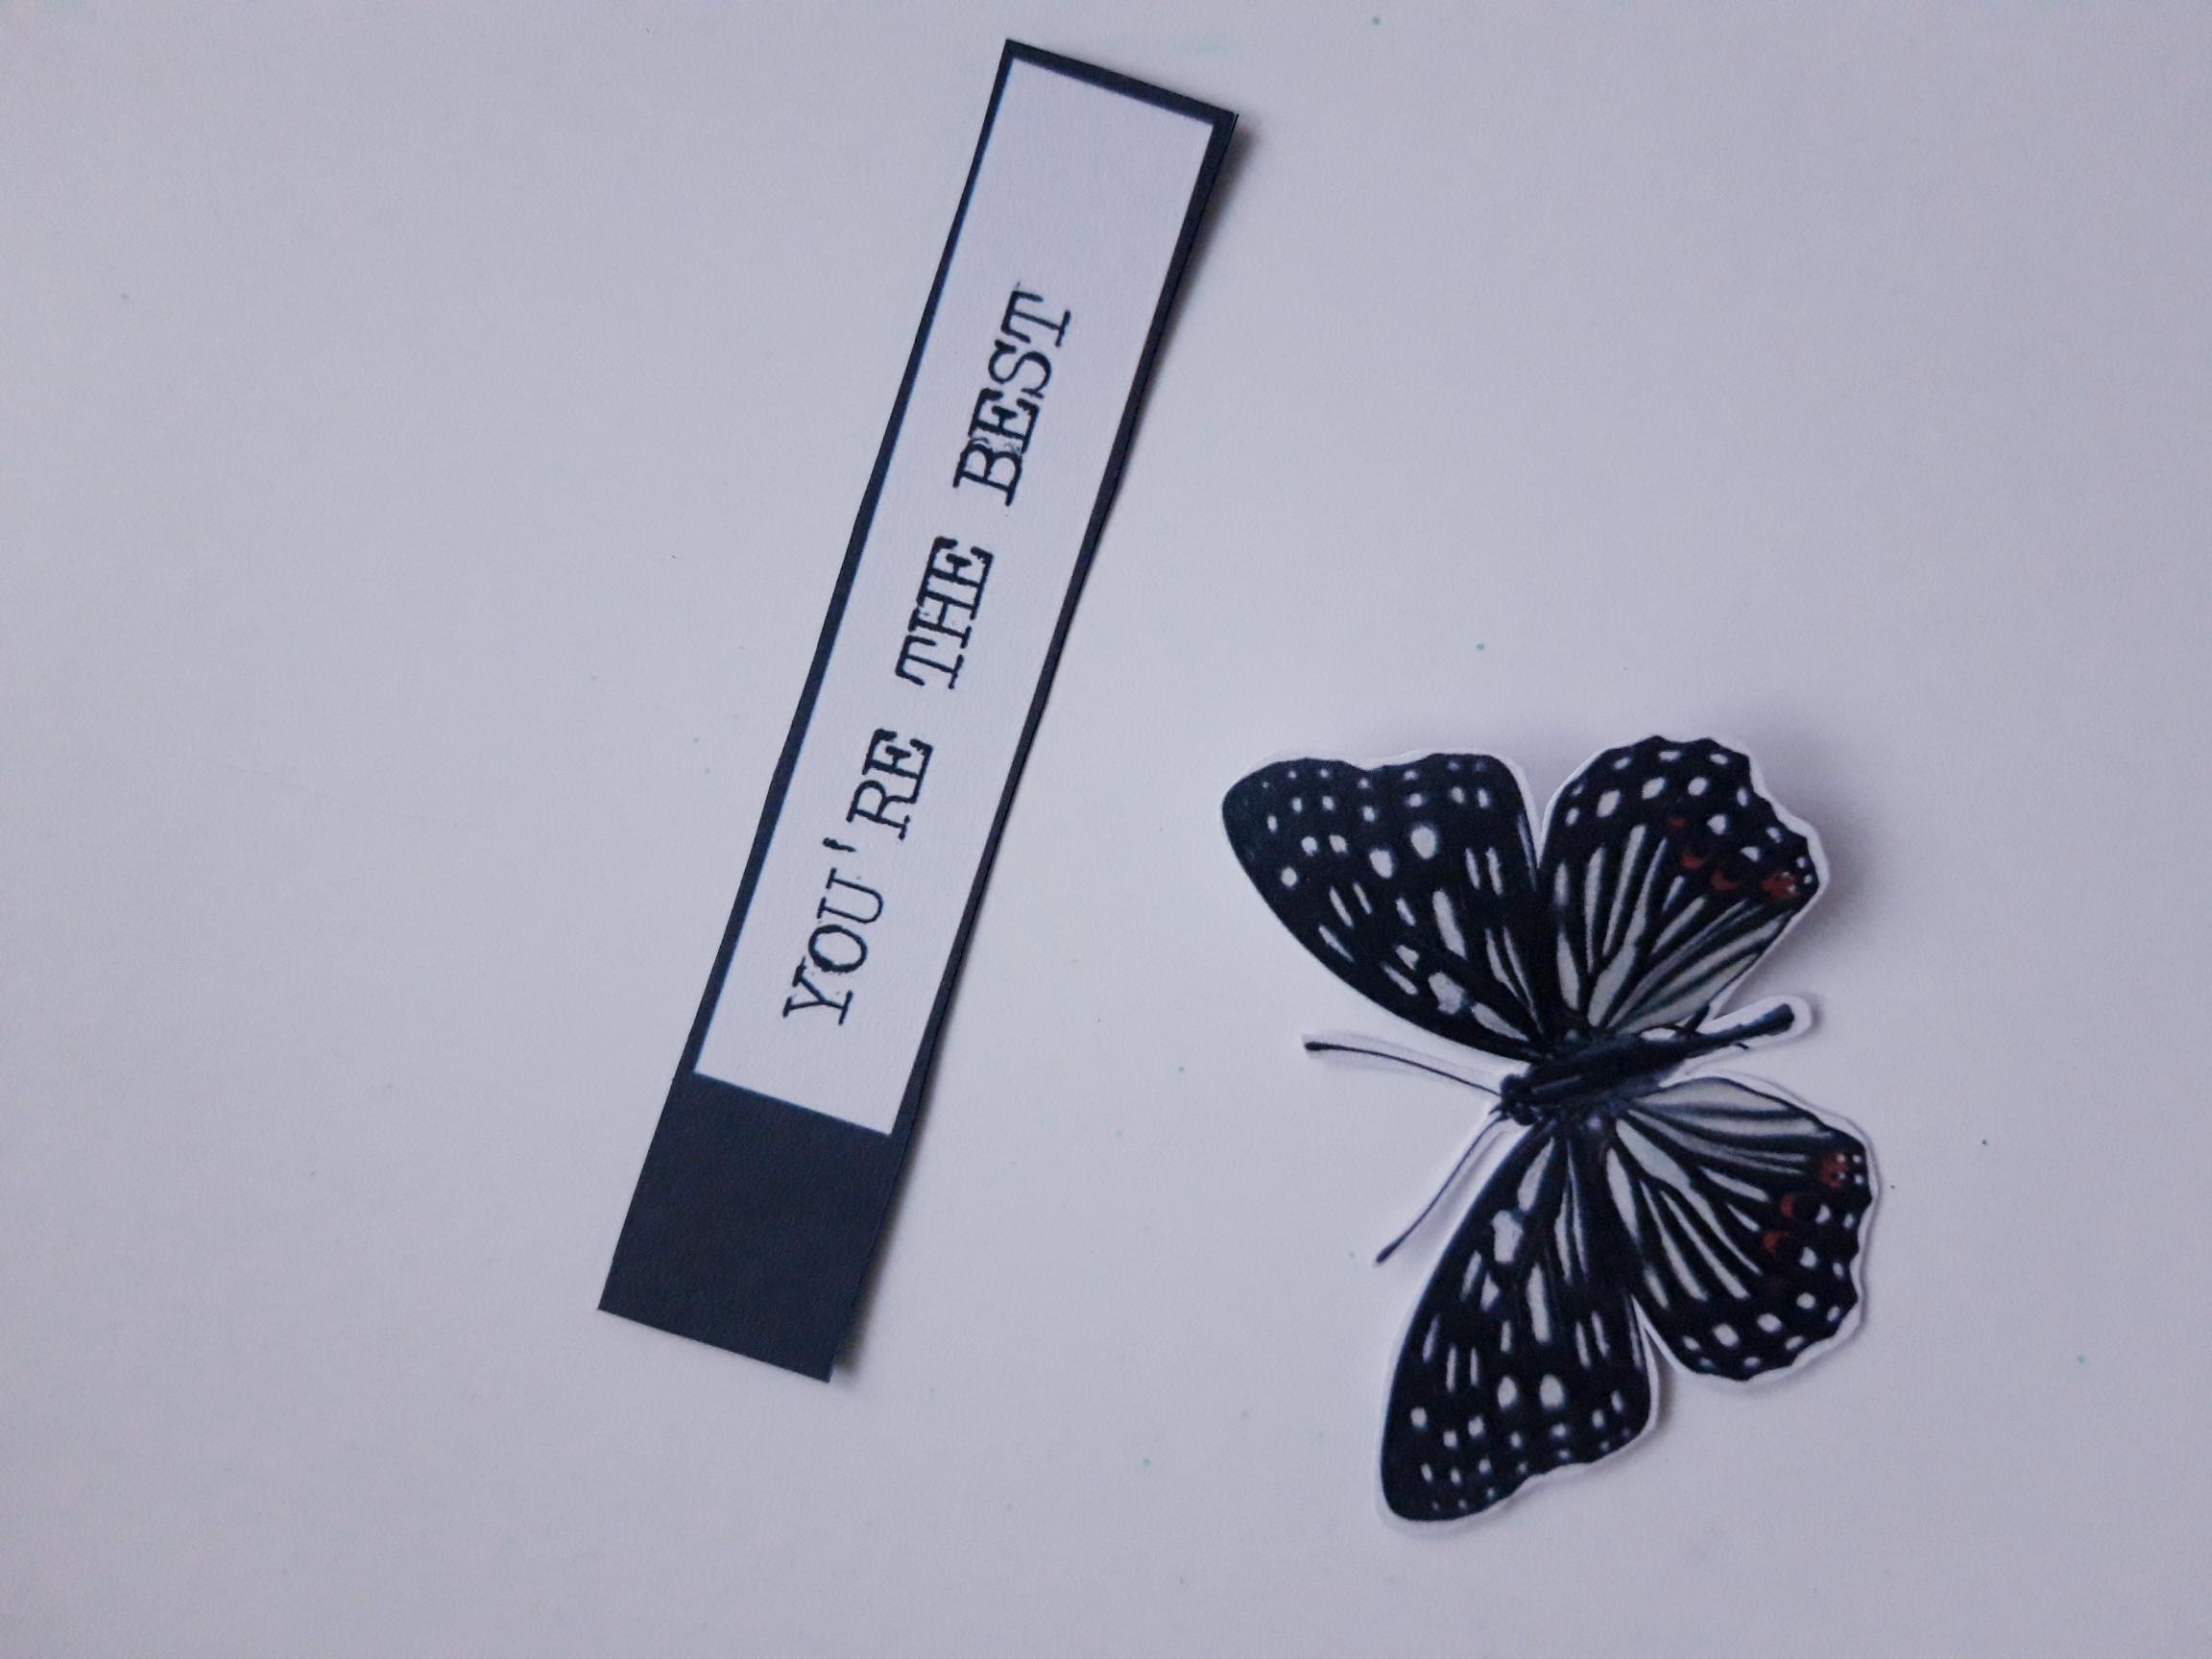
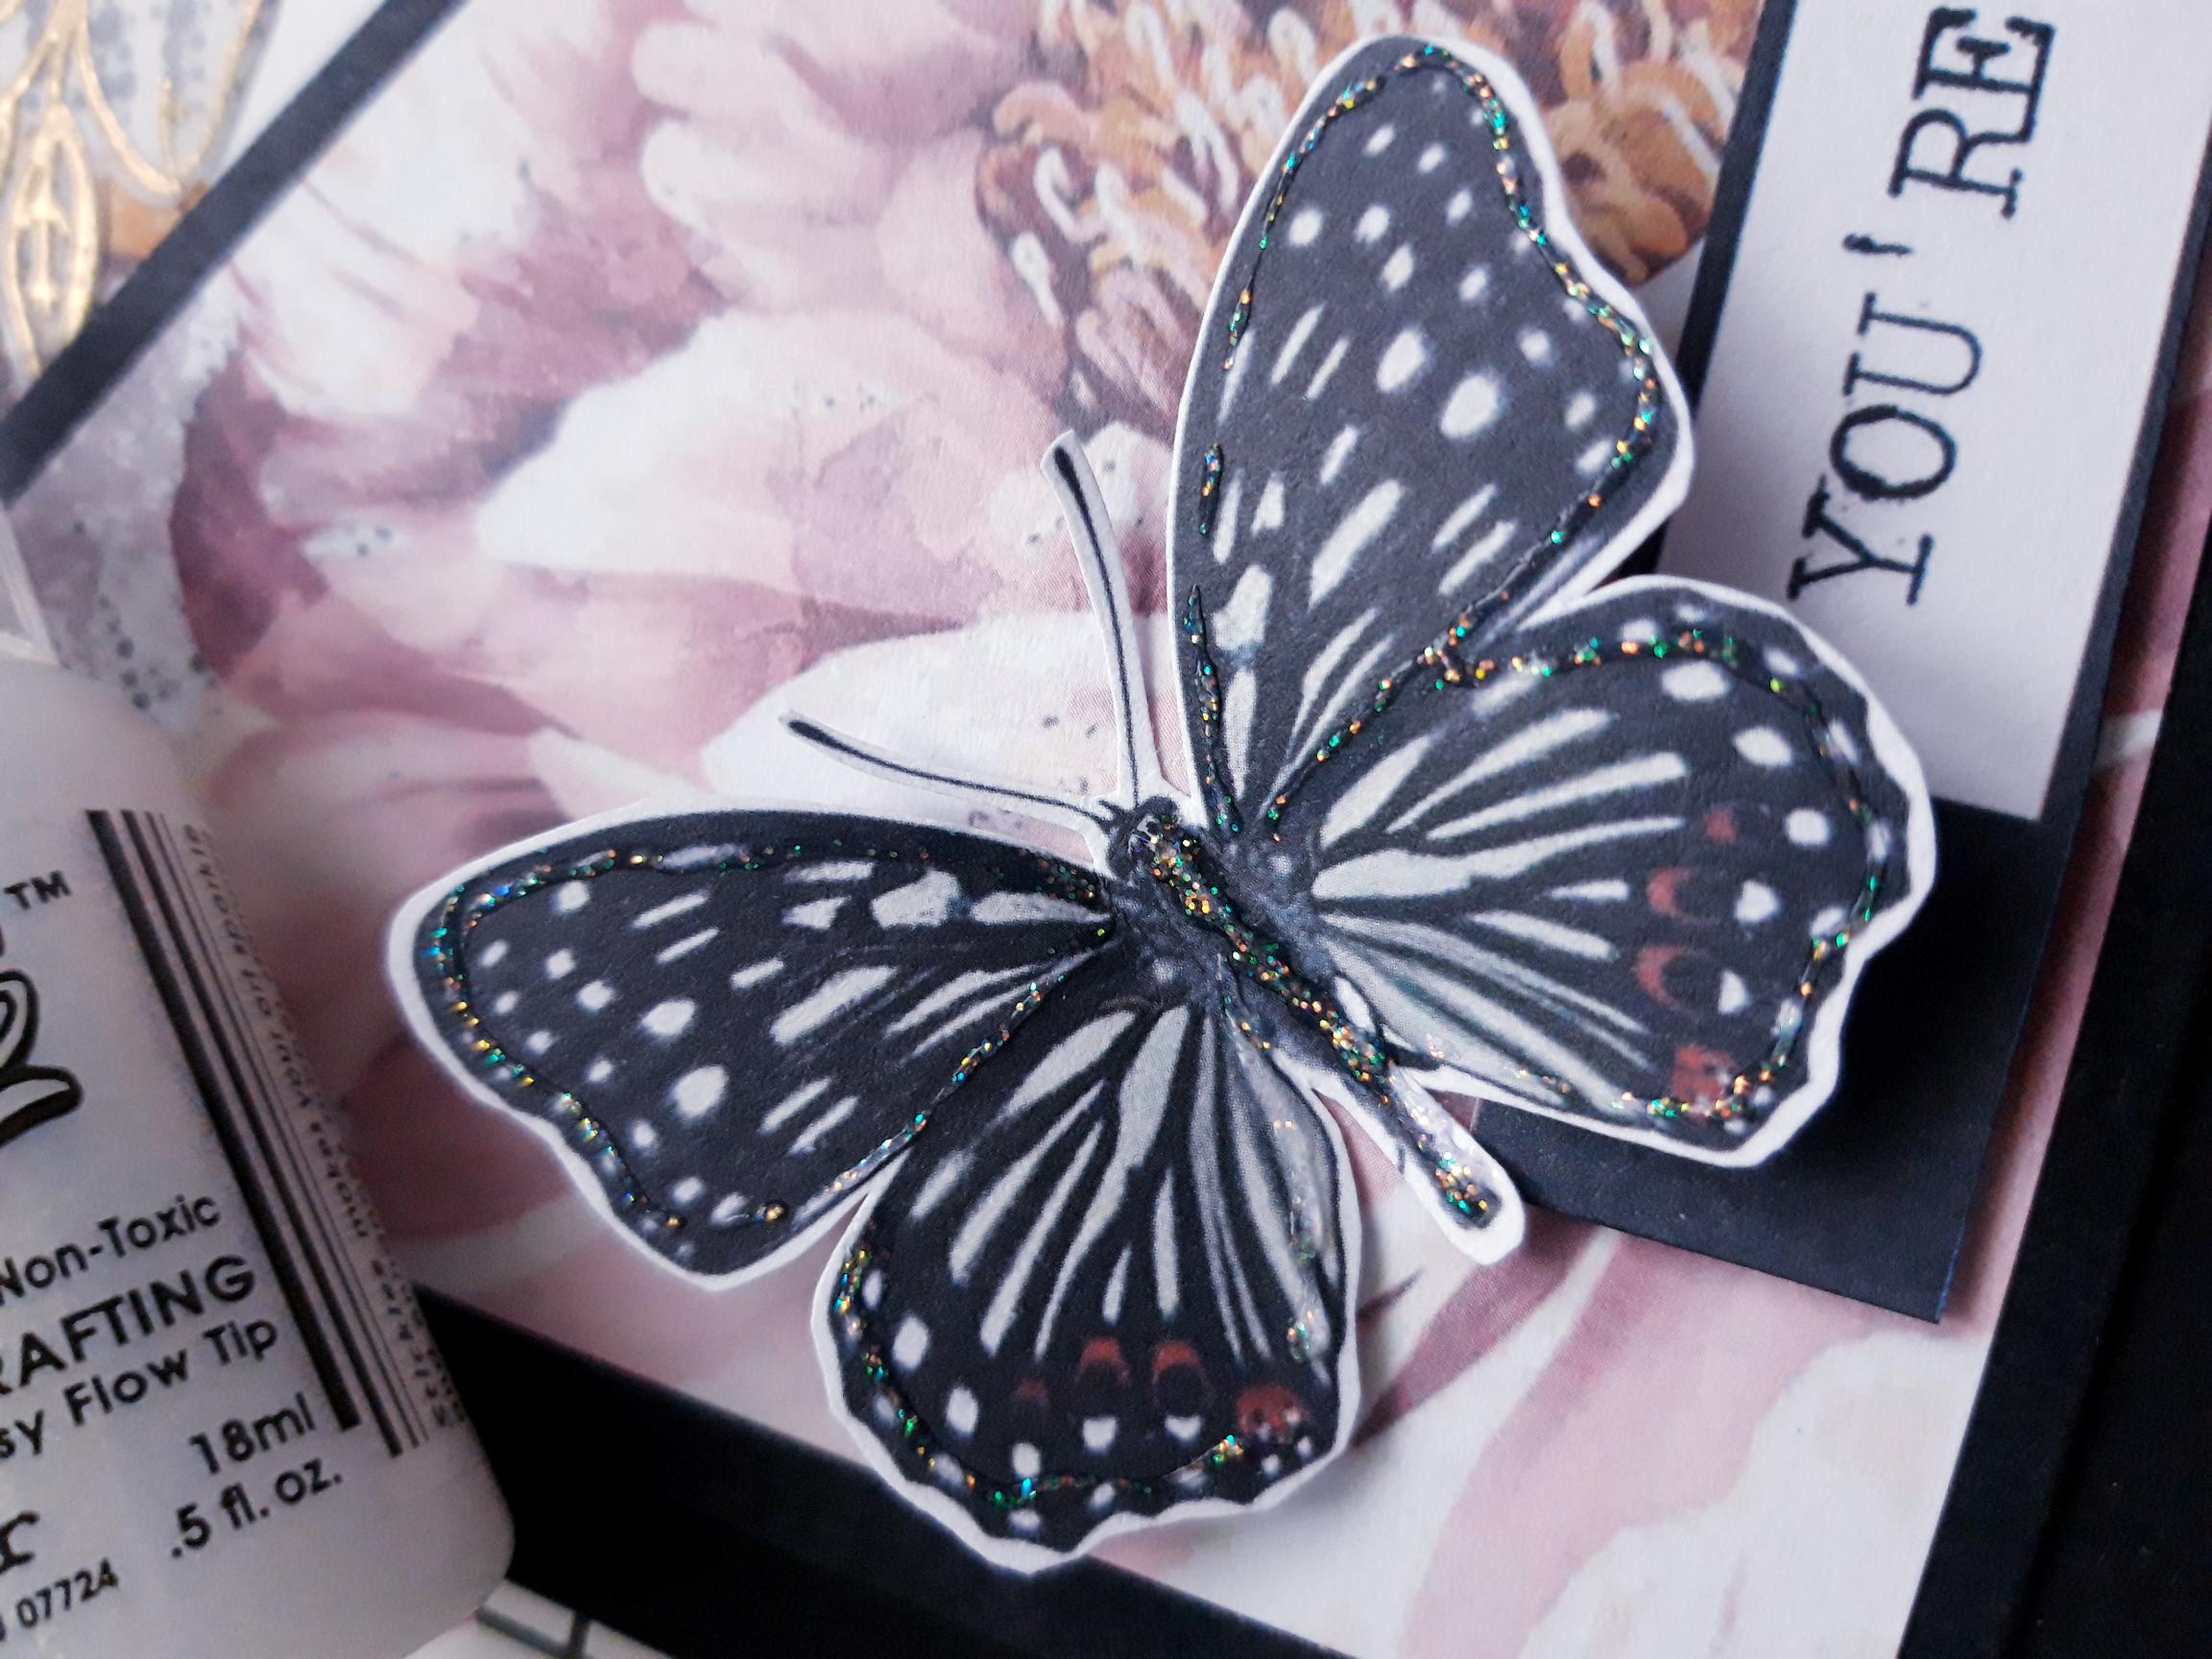
Cut out the sentiment tab and butterfly, from the embellishment sheet in the paper stack. |
|
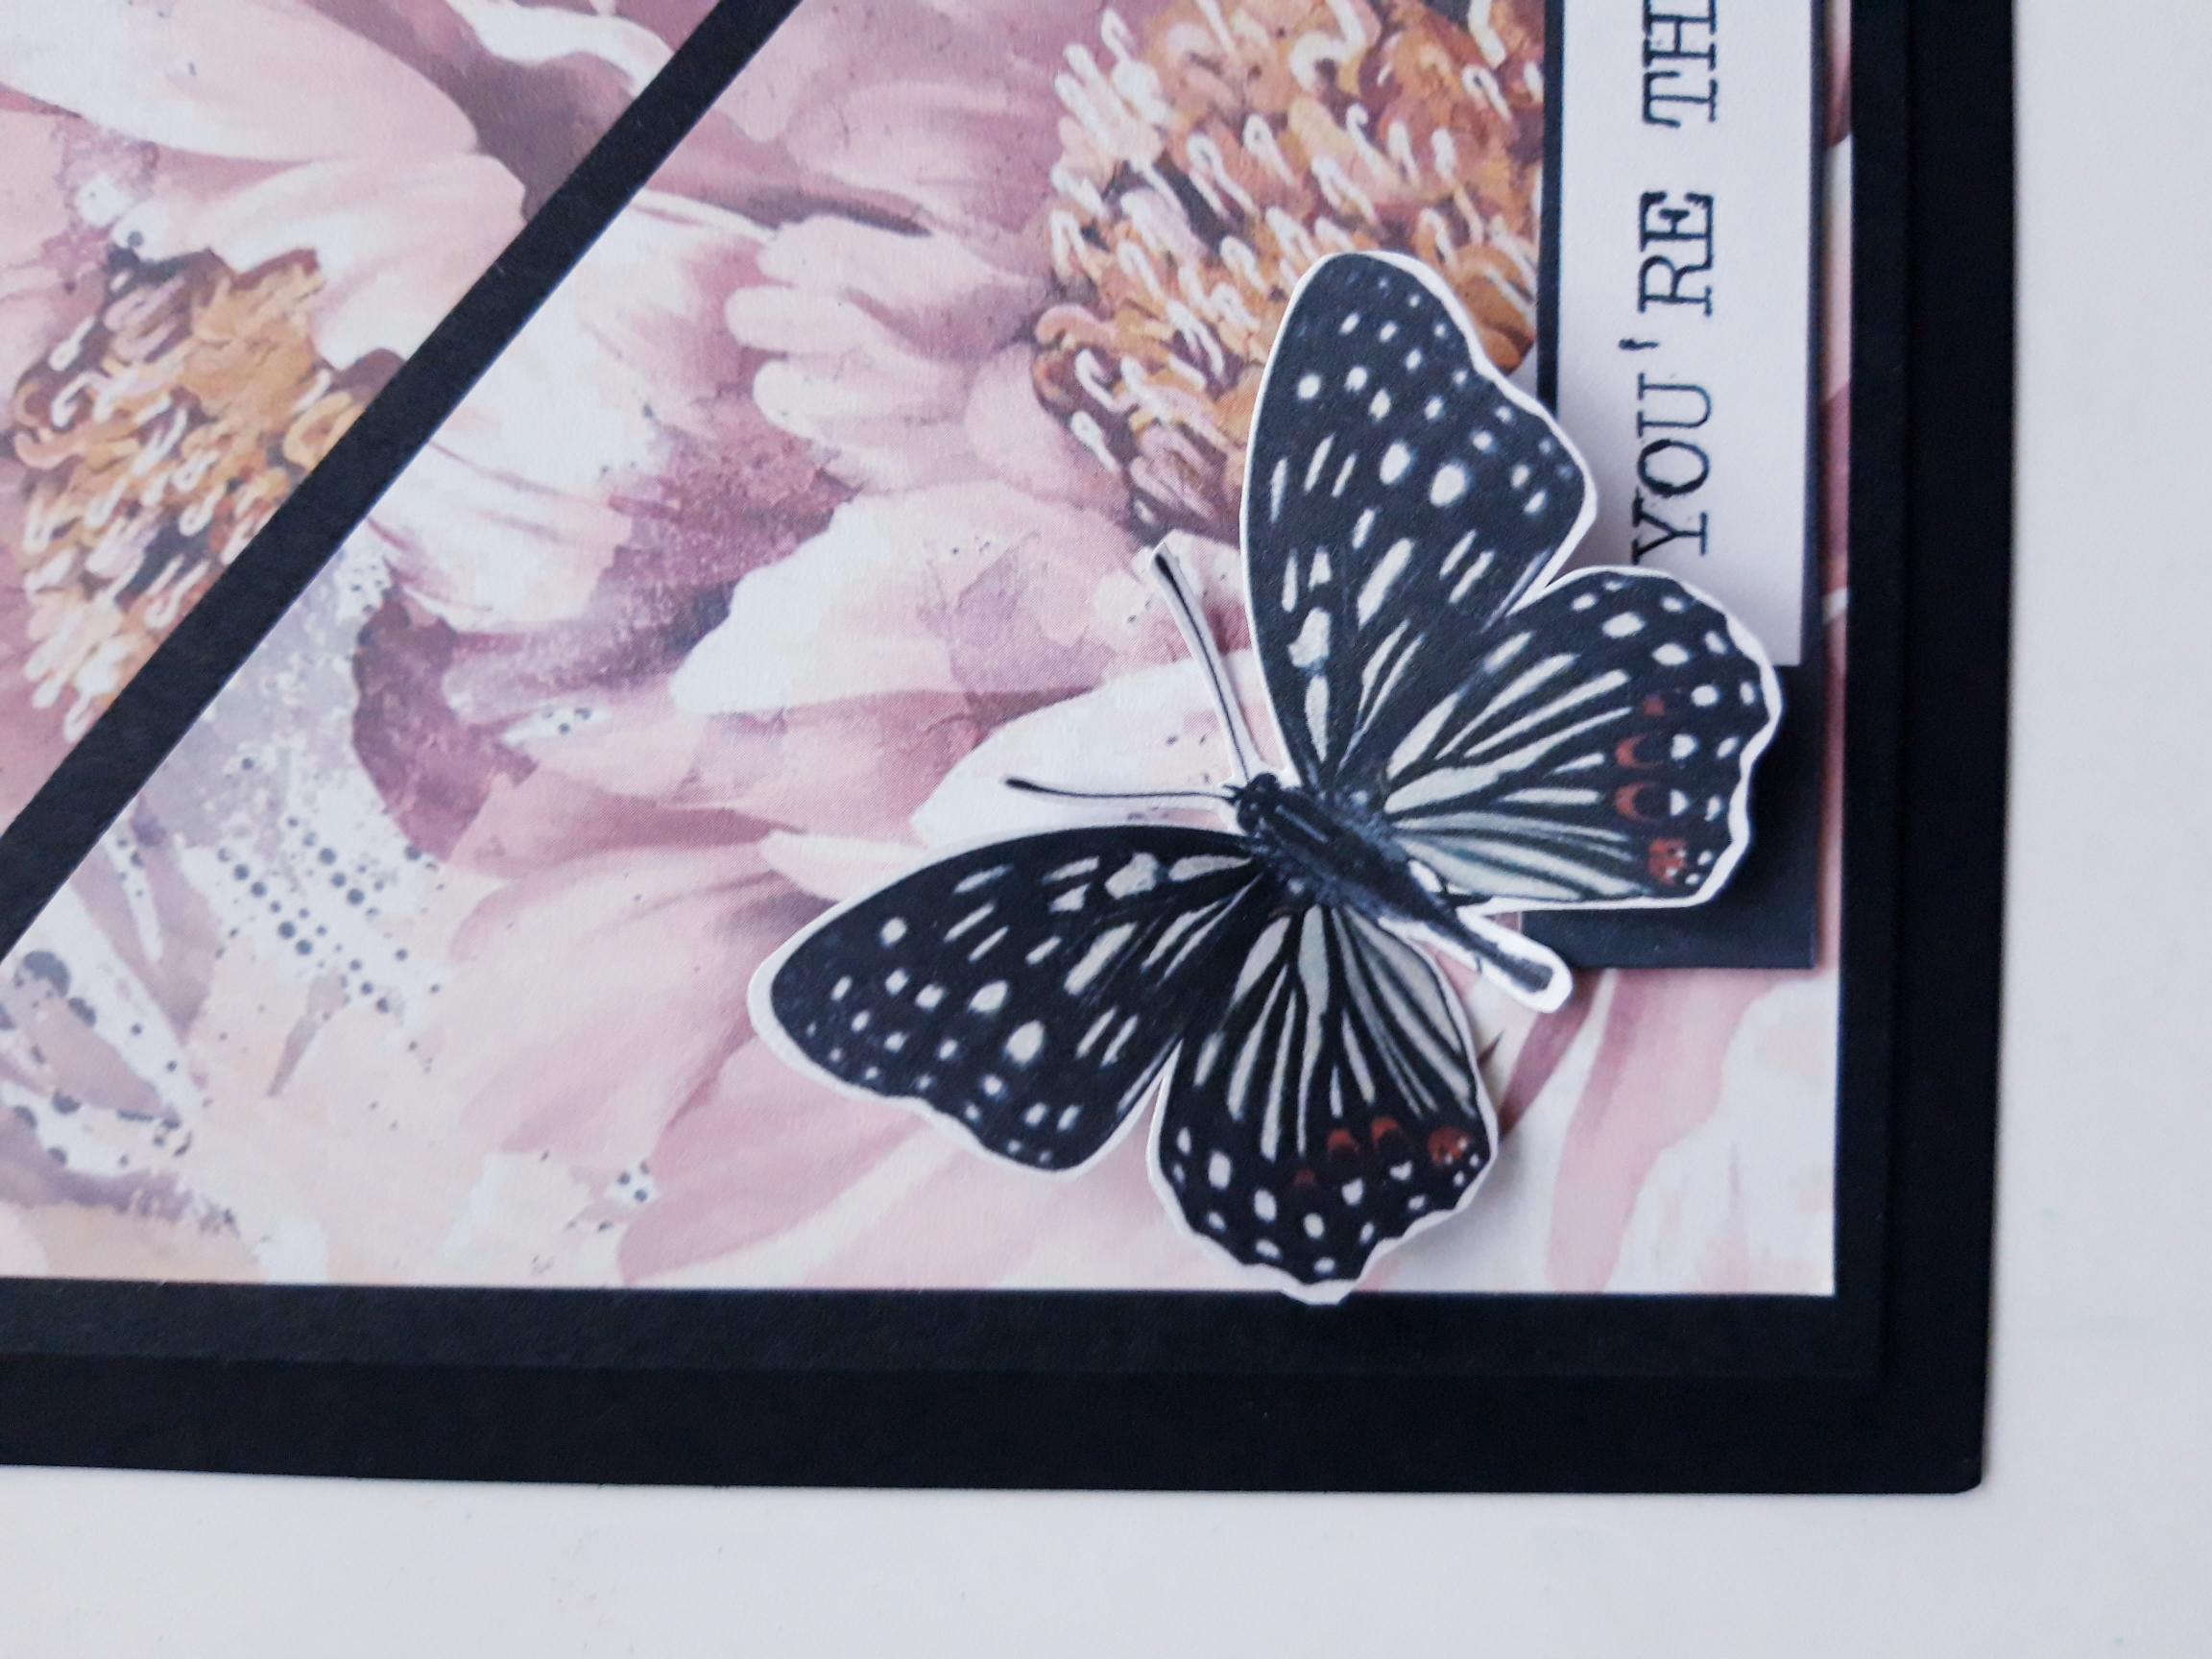
Adhere the sentiment tab along the bottom of your pocket and the butterfly to it's left. Set your card to one side. |
|
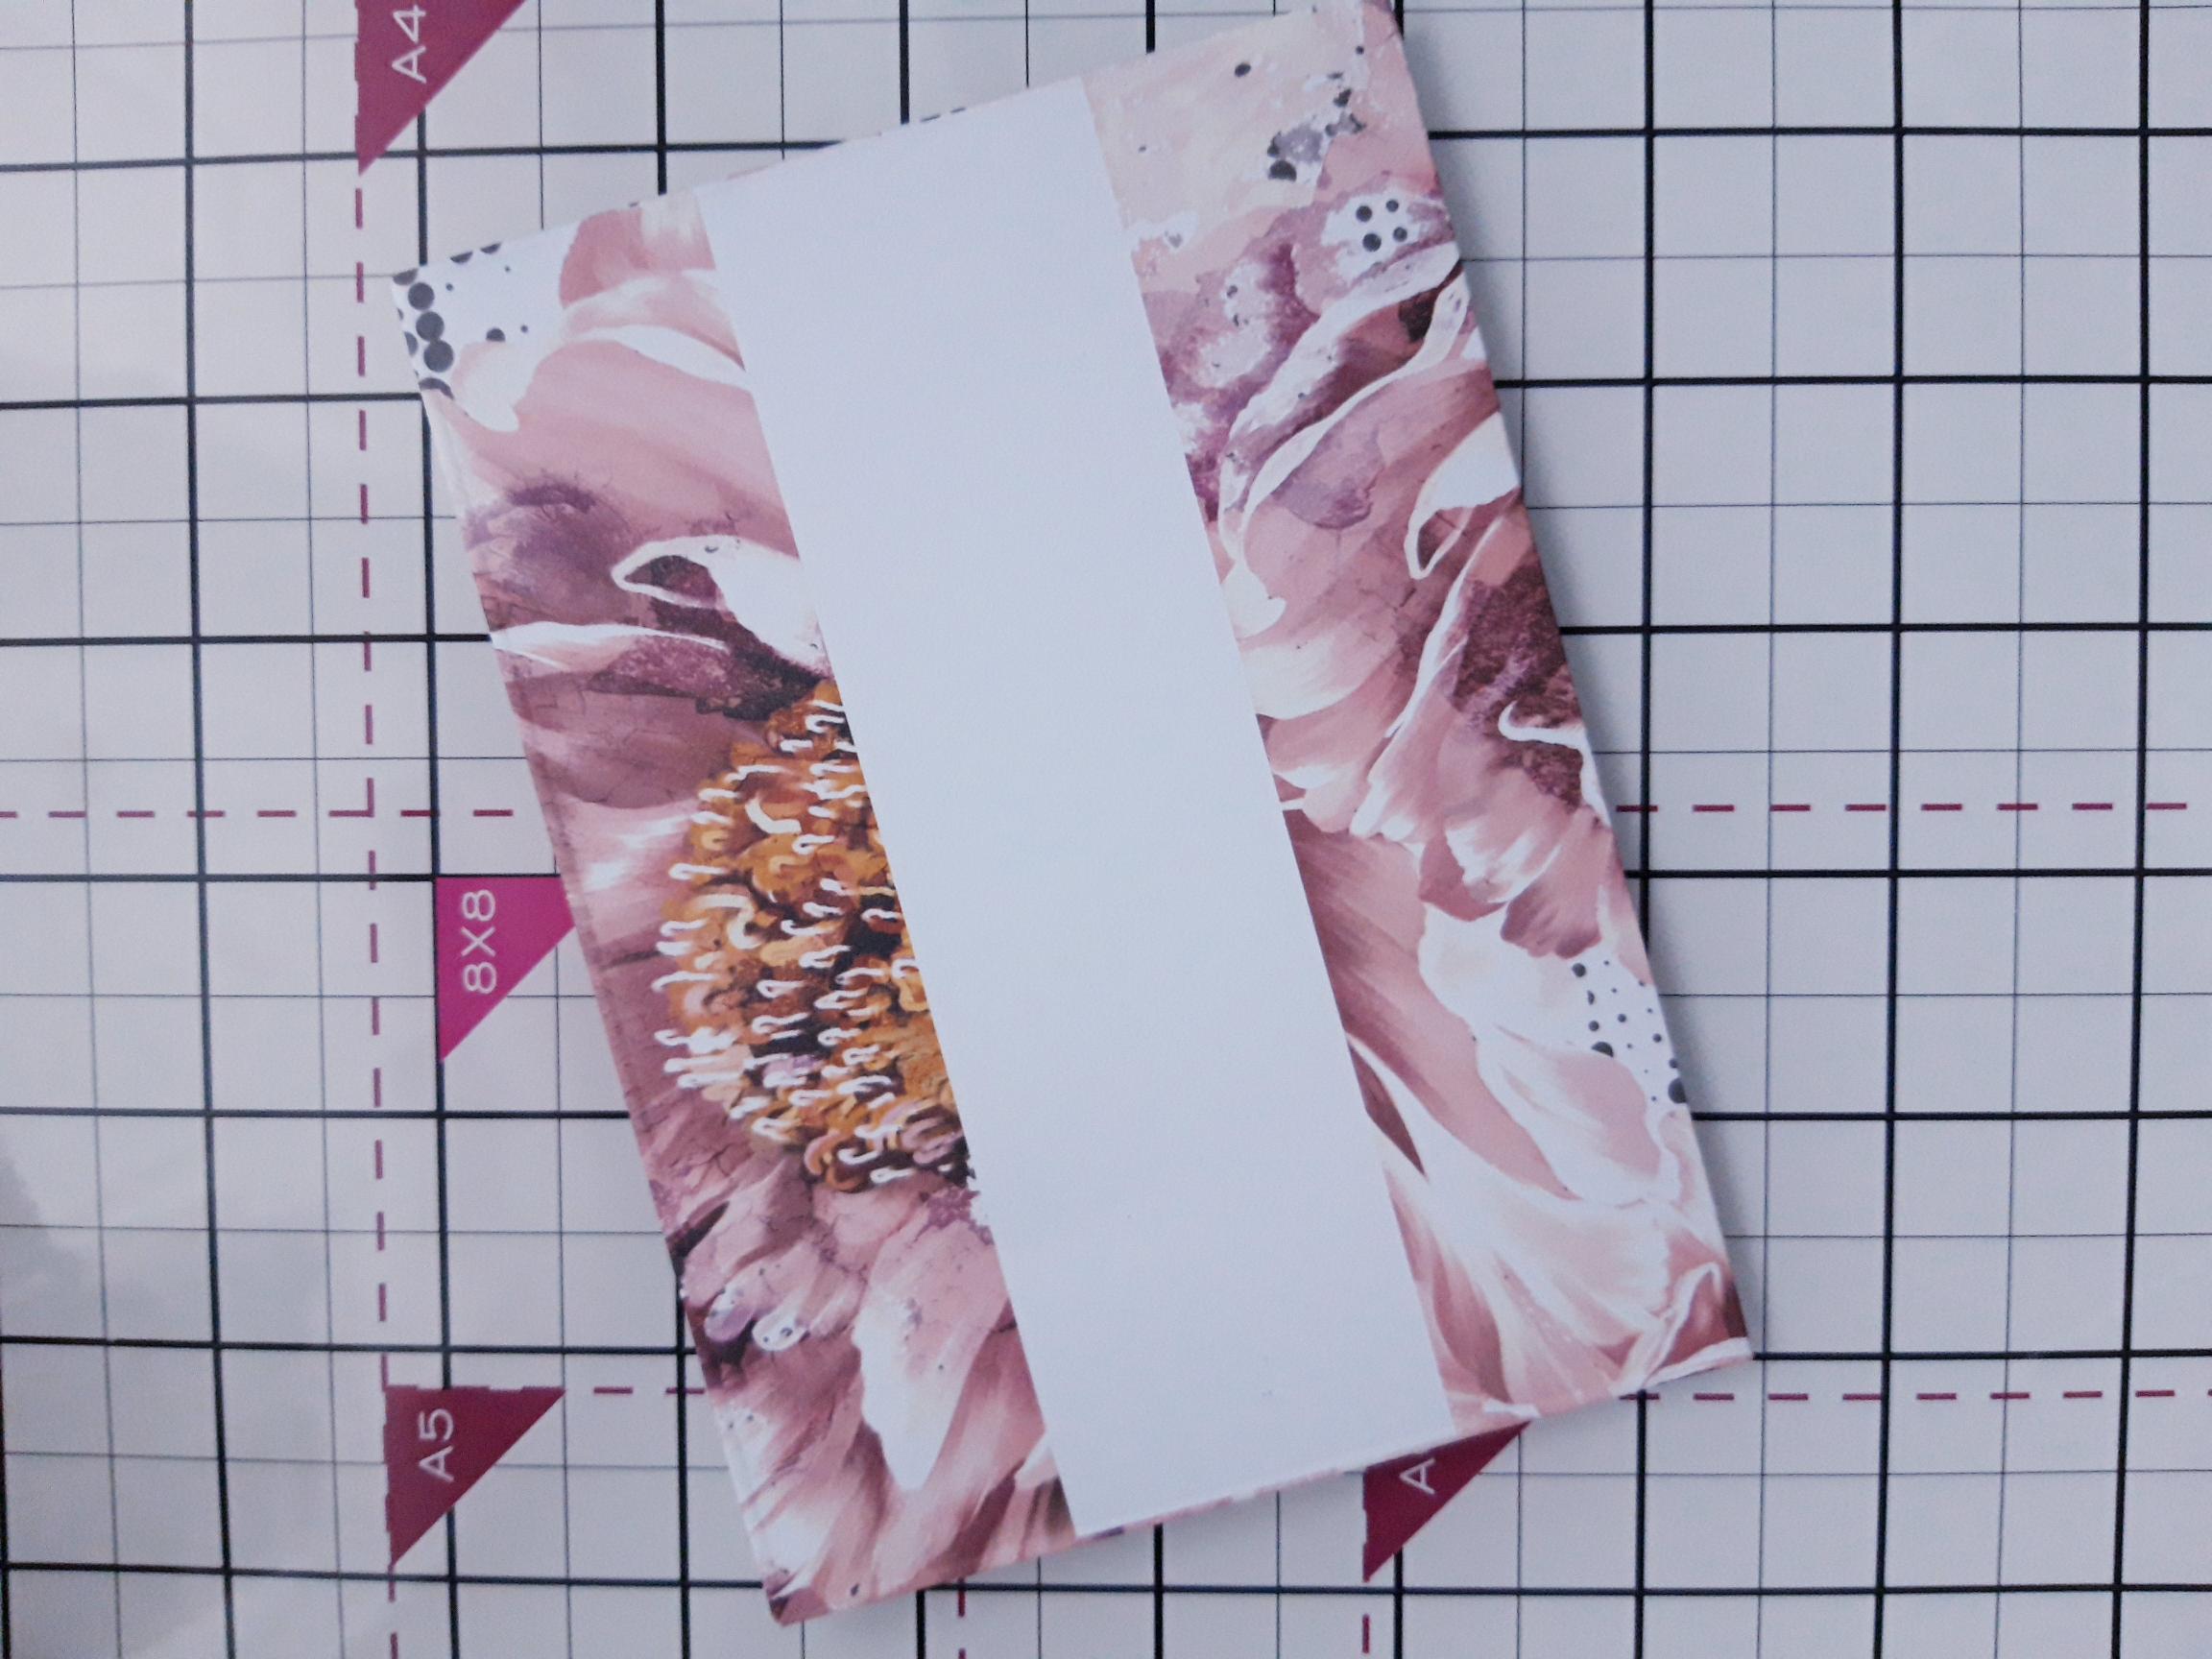
Fold up one of the coordinating envelopes, from the collection. You can add a seal at a later date, once you put your "gift" inside. |
|
Adhere the embossed, vellum, floral element, on to the front of your gift envelope and set to one side. |
|
Add the Stickles to the wings of your butterfly. |
|
Add Stickles to the centres of the flowers, on the decorative paper, as required. |
|
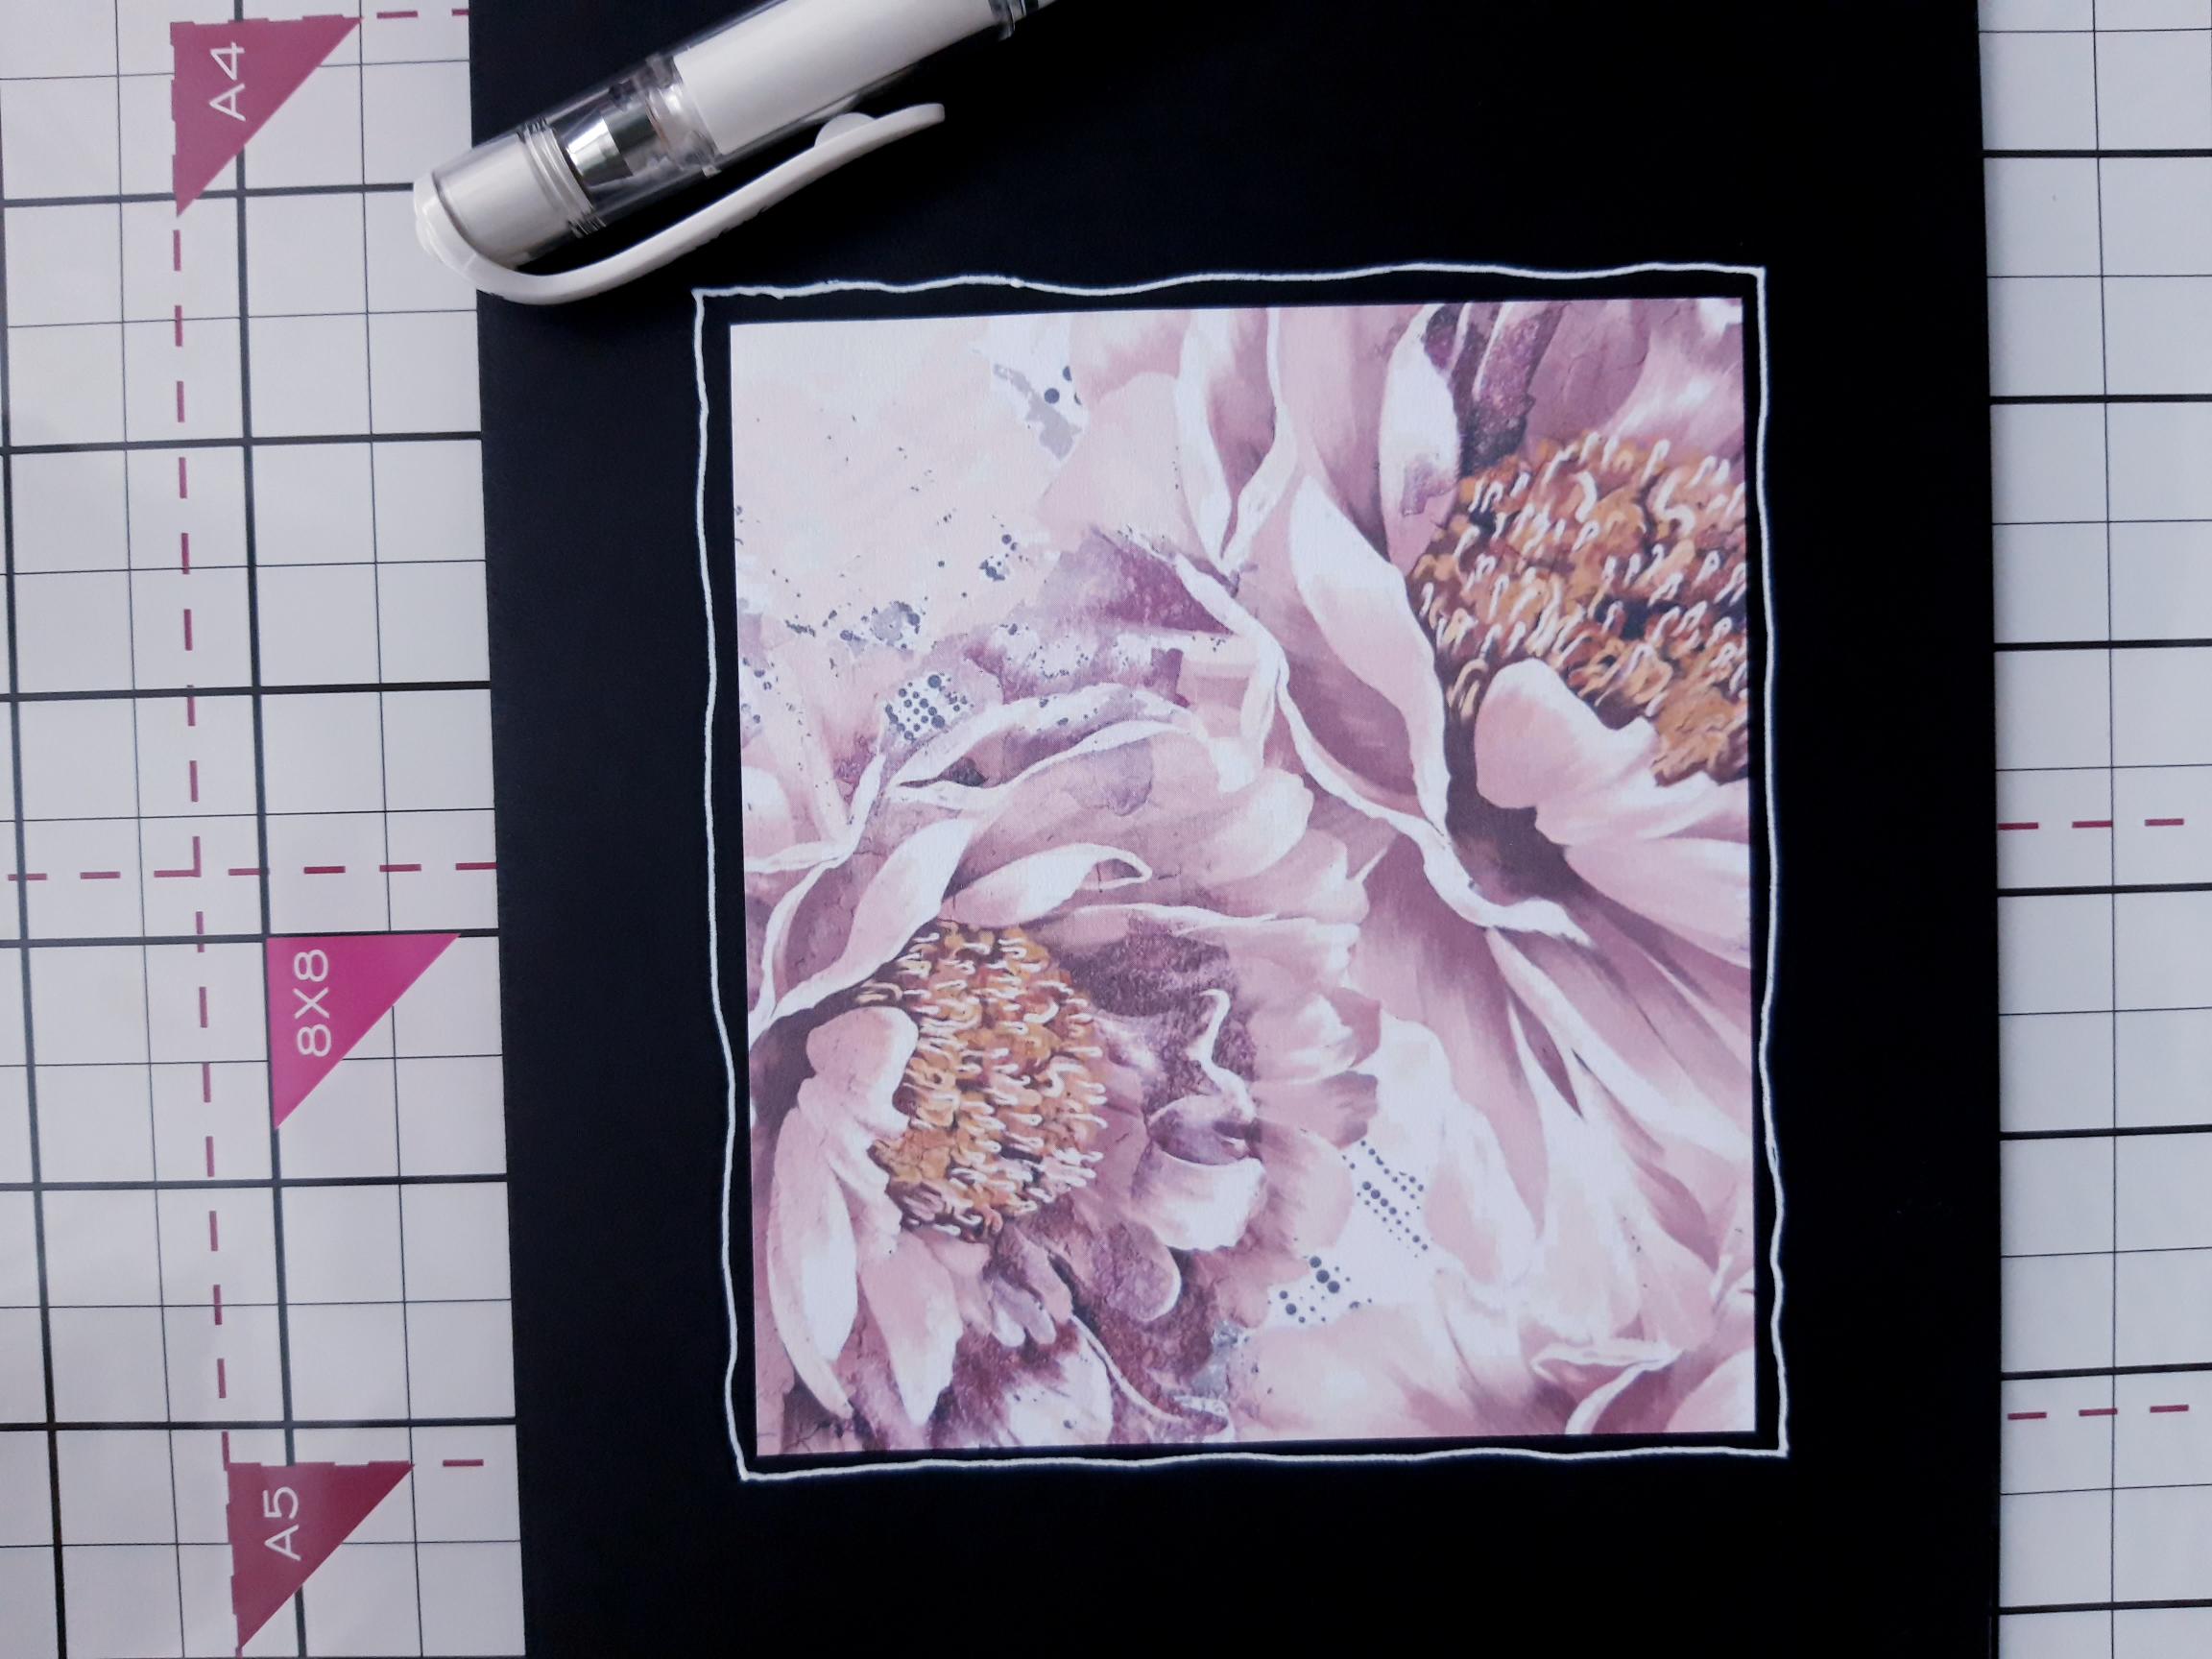
Cut a piece of the remaining paper in to a rectangle and adhere to the front of your black envelope. Use a white gel pen to draw a decorative frame around the paper panel.
|
|
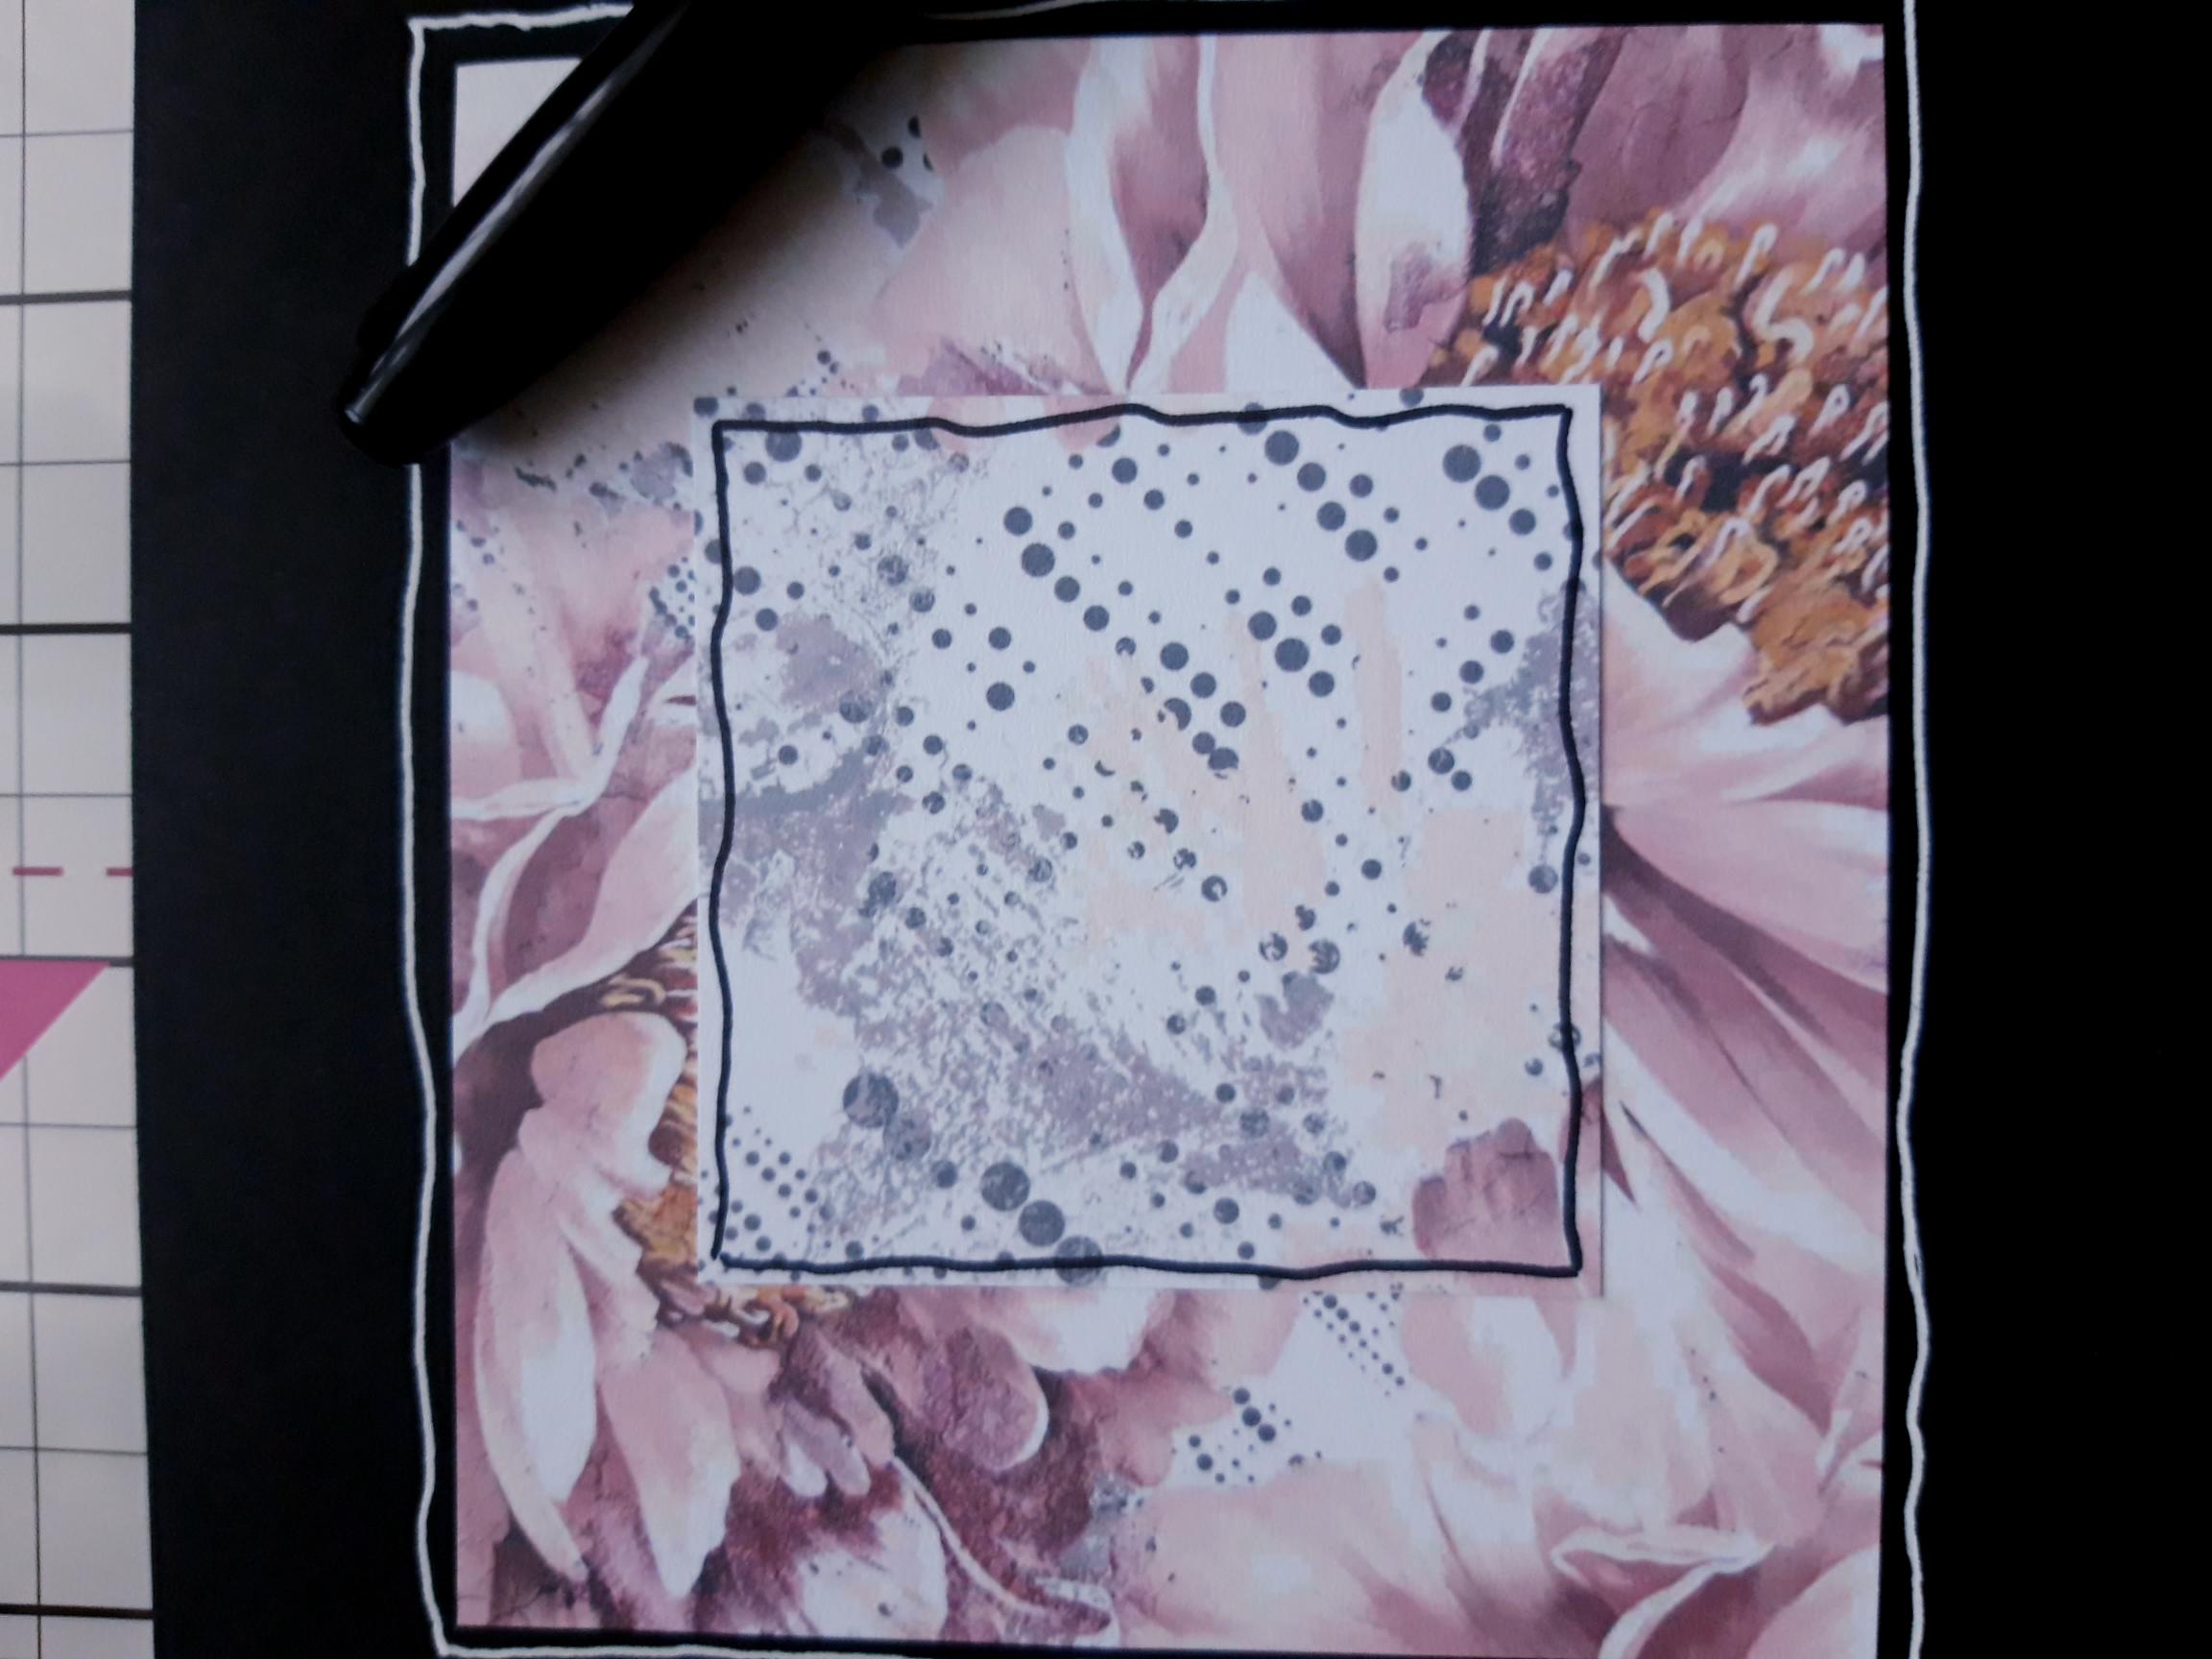
Cut a smaller panel from one of the other lighter, decorative papers, from the paper stack and draw a frame around it, with a black pen, to finish. |