Give your friends $10 off their first order!
Refer a FRIEND


WHAT YOU WILL NEED
Kraft card blank 7 x 5"
Black card 6 3/4 x 4 3/4"
White card 6 1/2 x 4 1/2"
White card 3 x 3" (super smooth)
Vellum - tear to approx 6 x 1 3/4"
Friends For Life Stamp and Die Collection
QuattroD Peonies Collection
Memento Ink Pad: Tuxedo Black
Izink Dye Ink Pad: Miel, Reglisse
Water spray bottle
Gossip Alcohol Pens
WOW heat tool
WOW embossing ink pad
WOW white embossing powder
Anti-static bag
Eureka 101
Paper Trimmer
Perfect Together Glue
Double sided tape/tape runner
Foam pads
Die Cutting machine
[click image to enlarge] 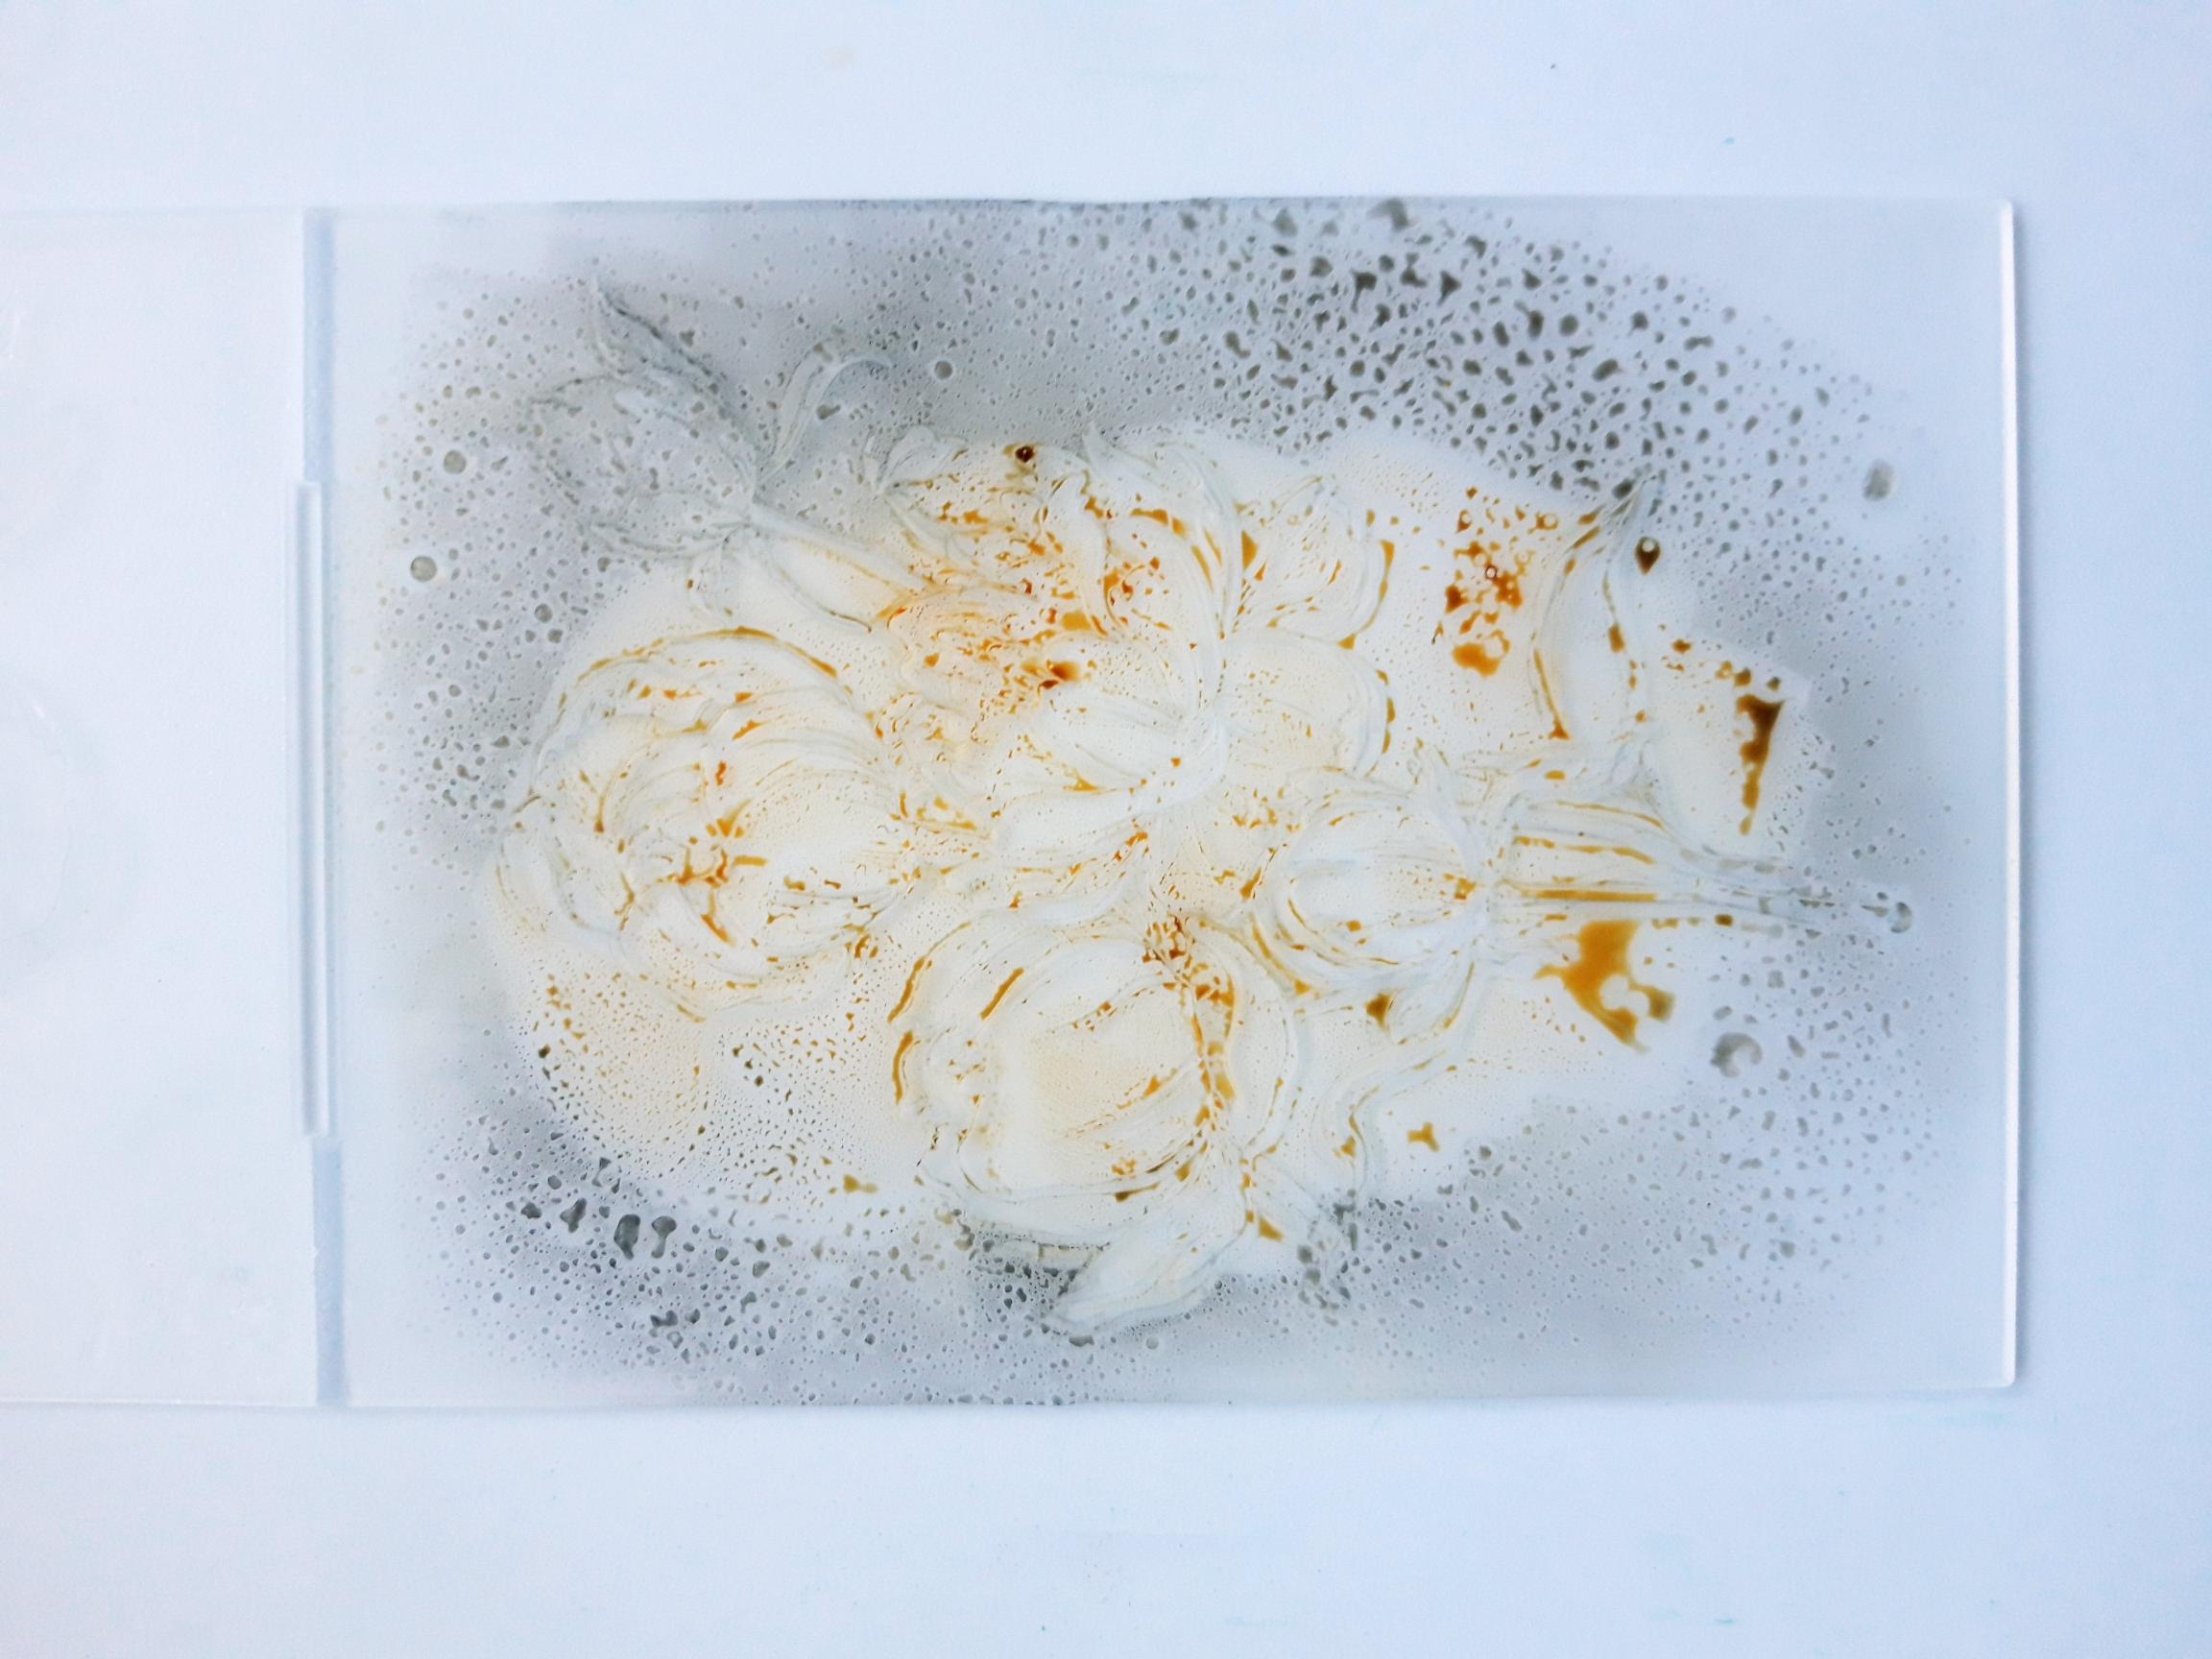
|
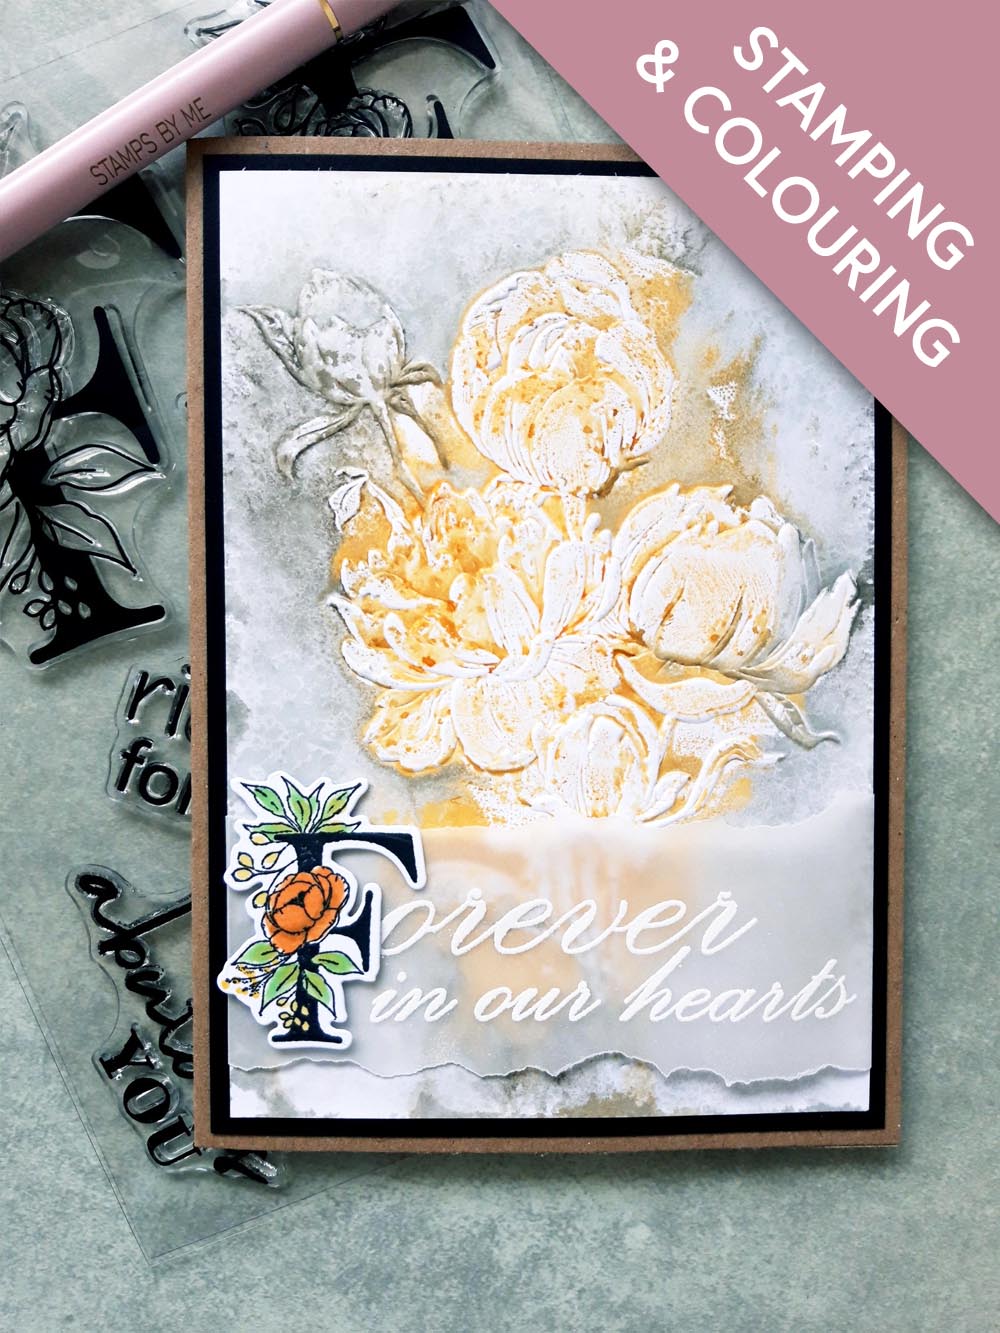
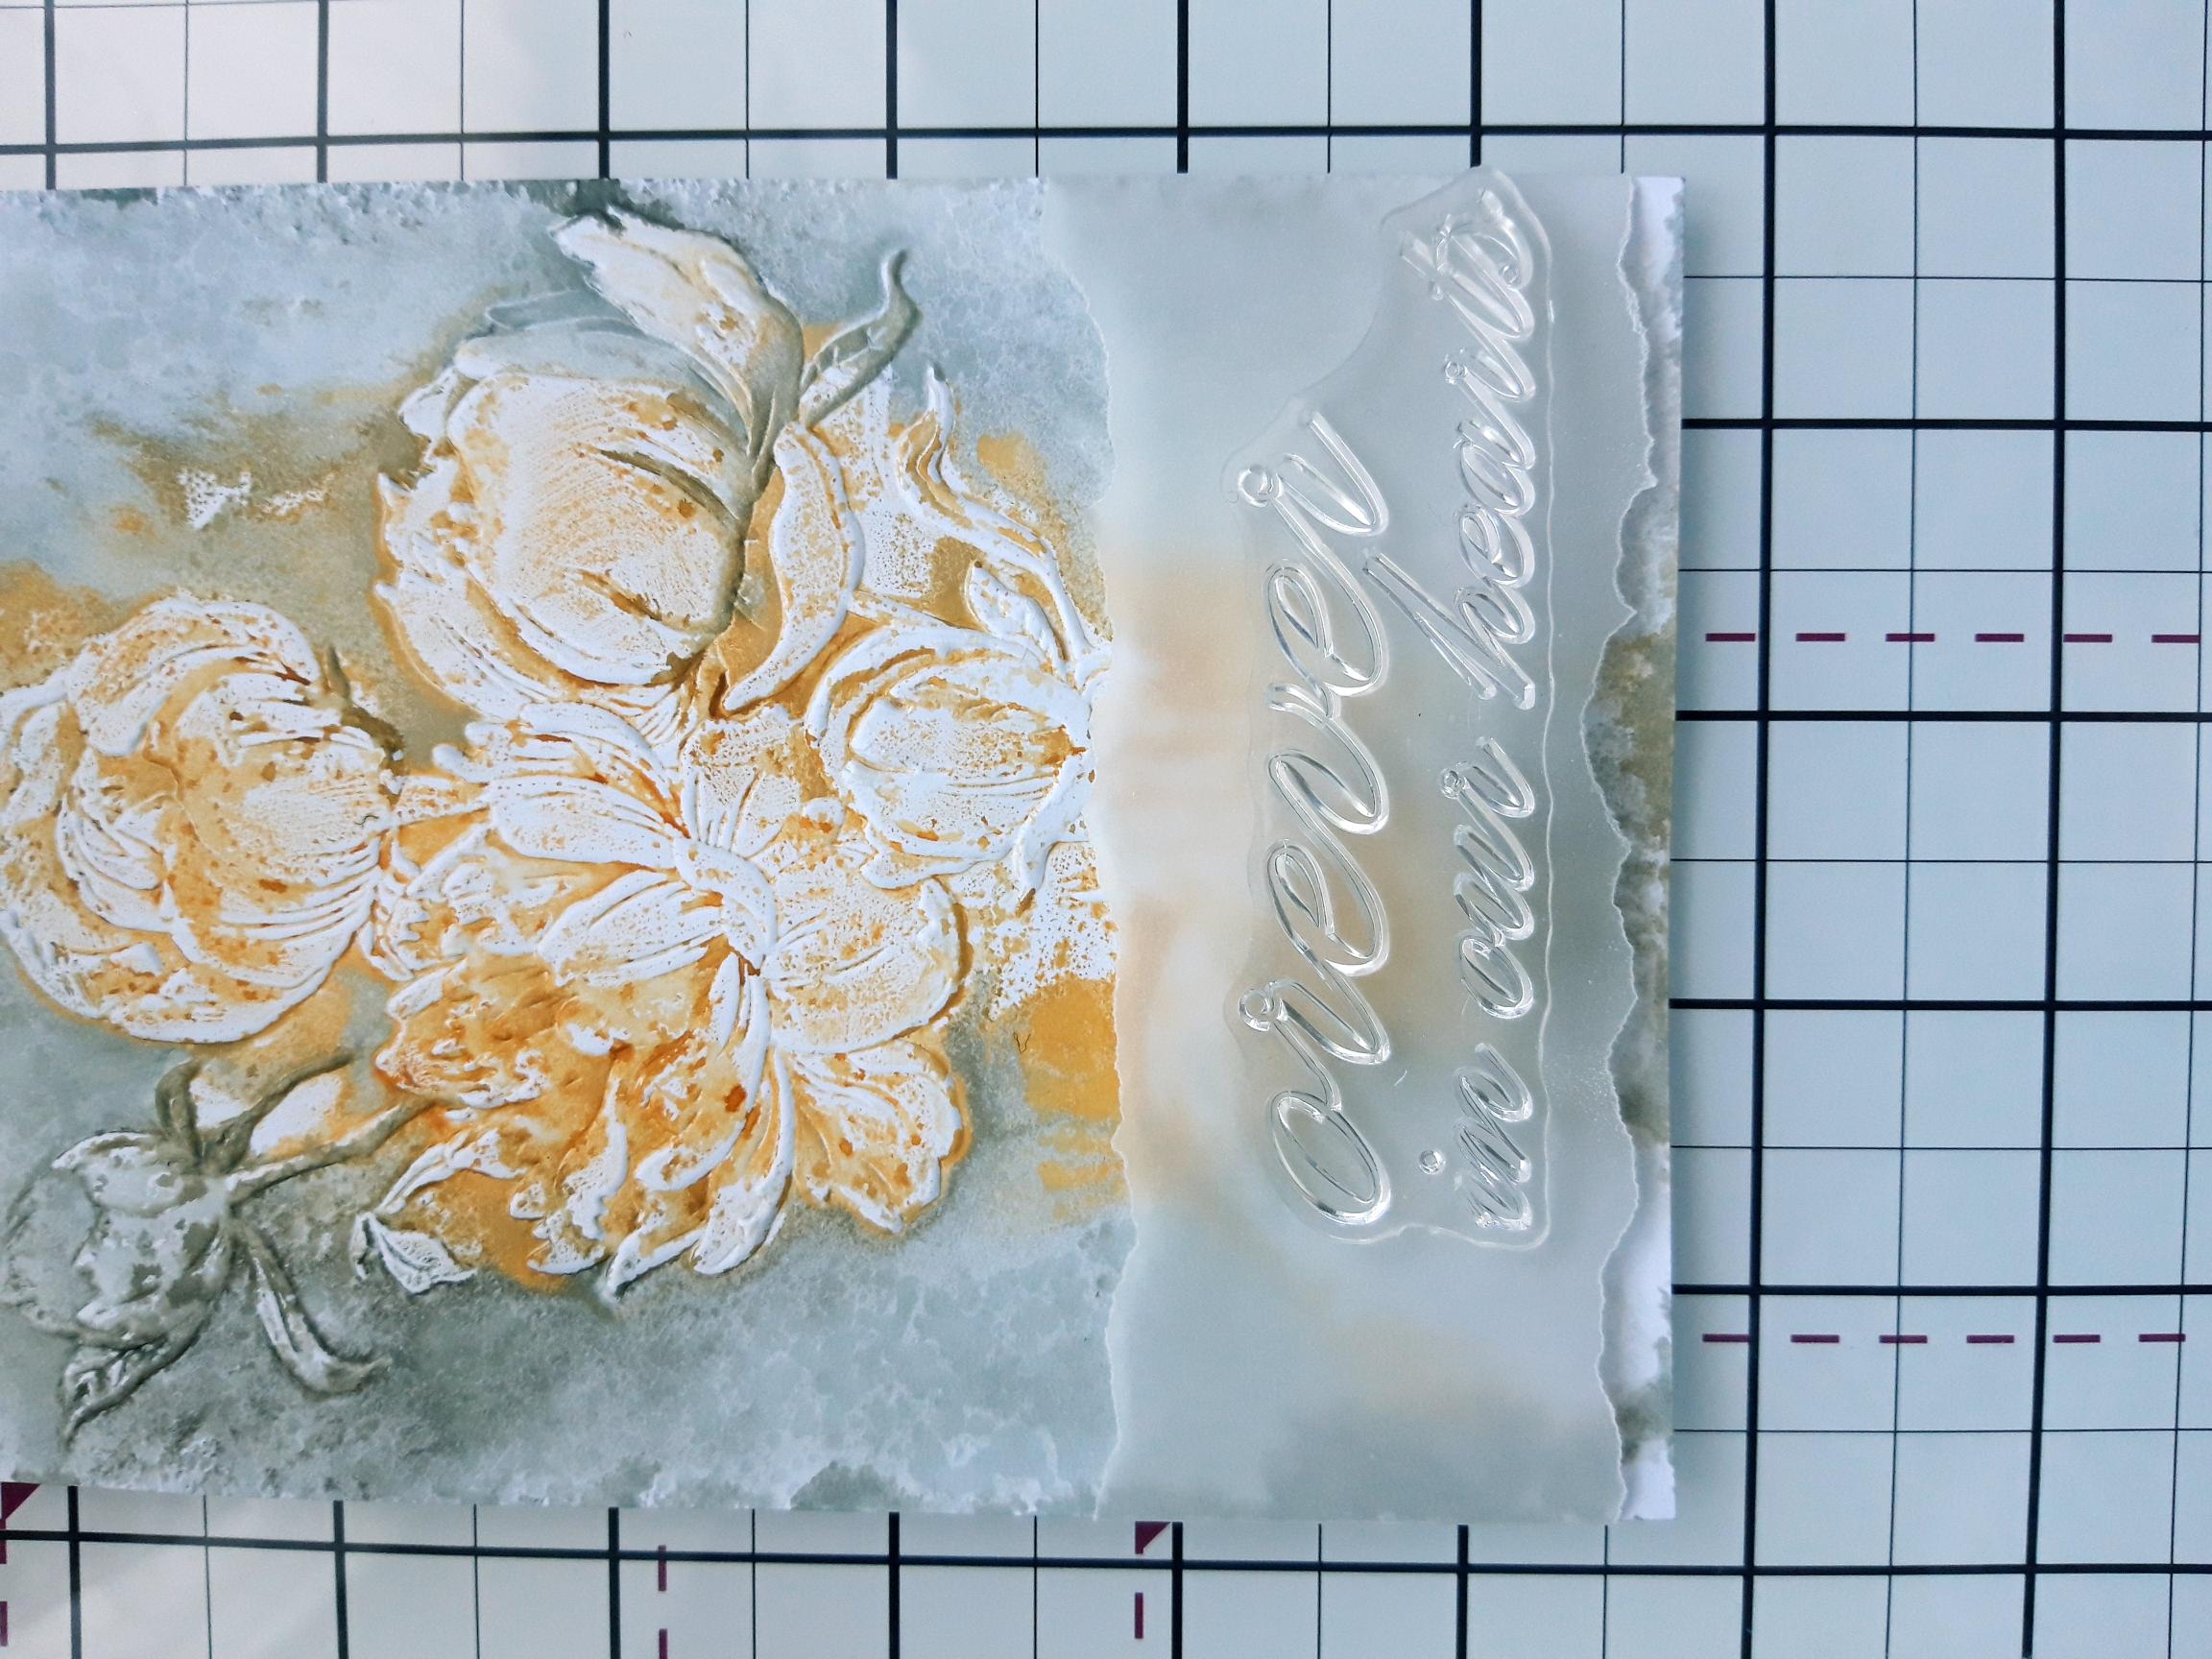
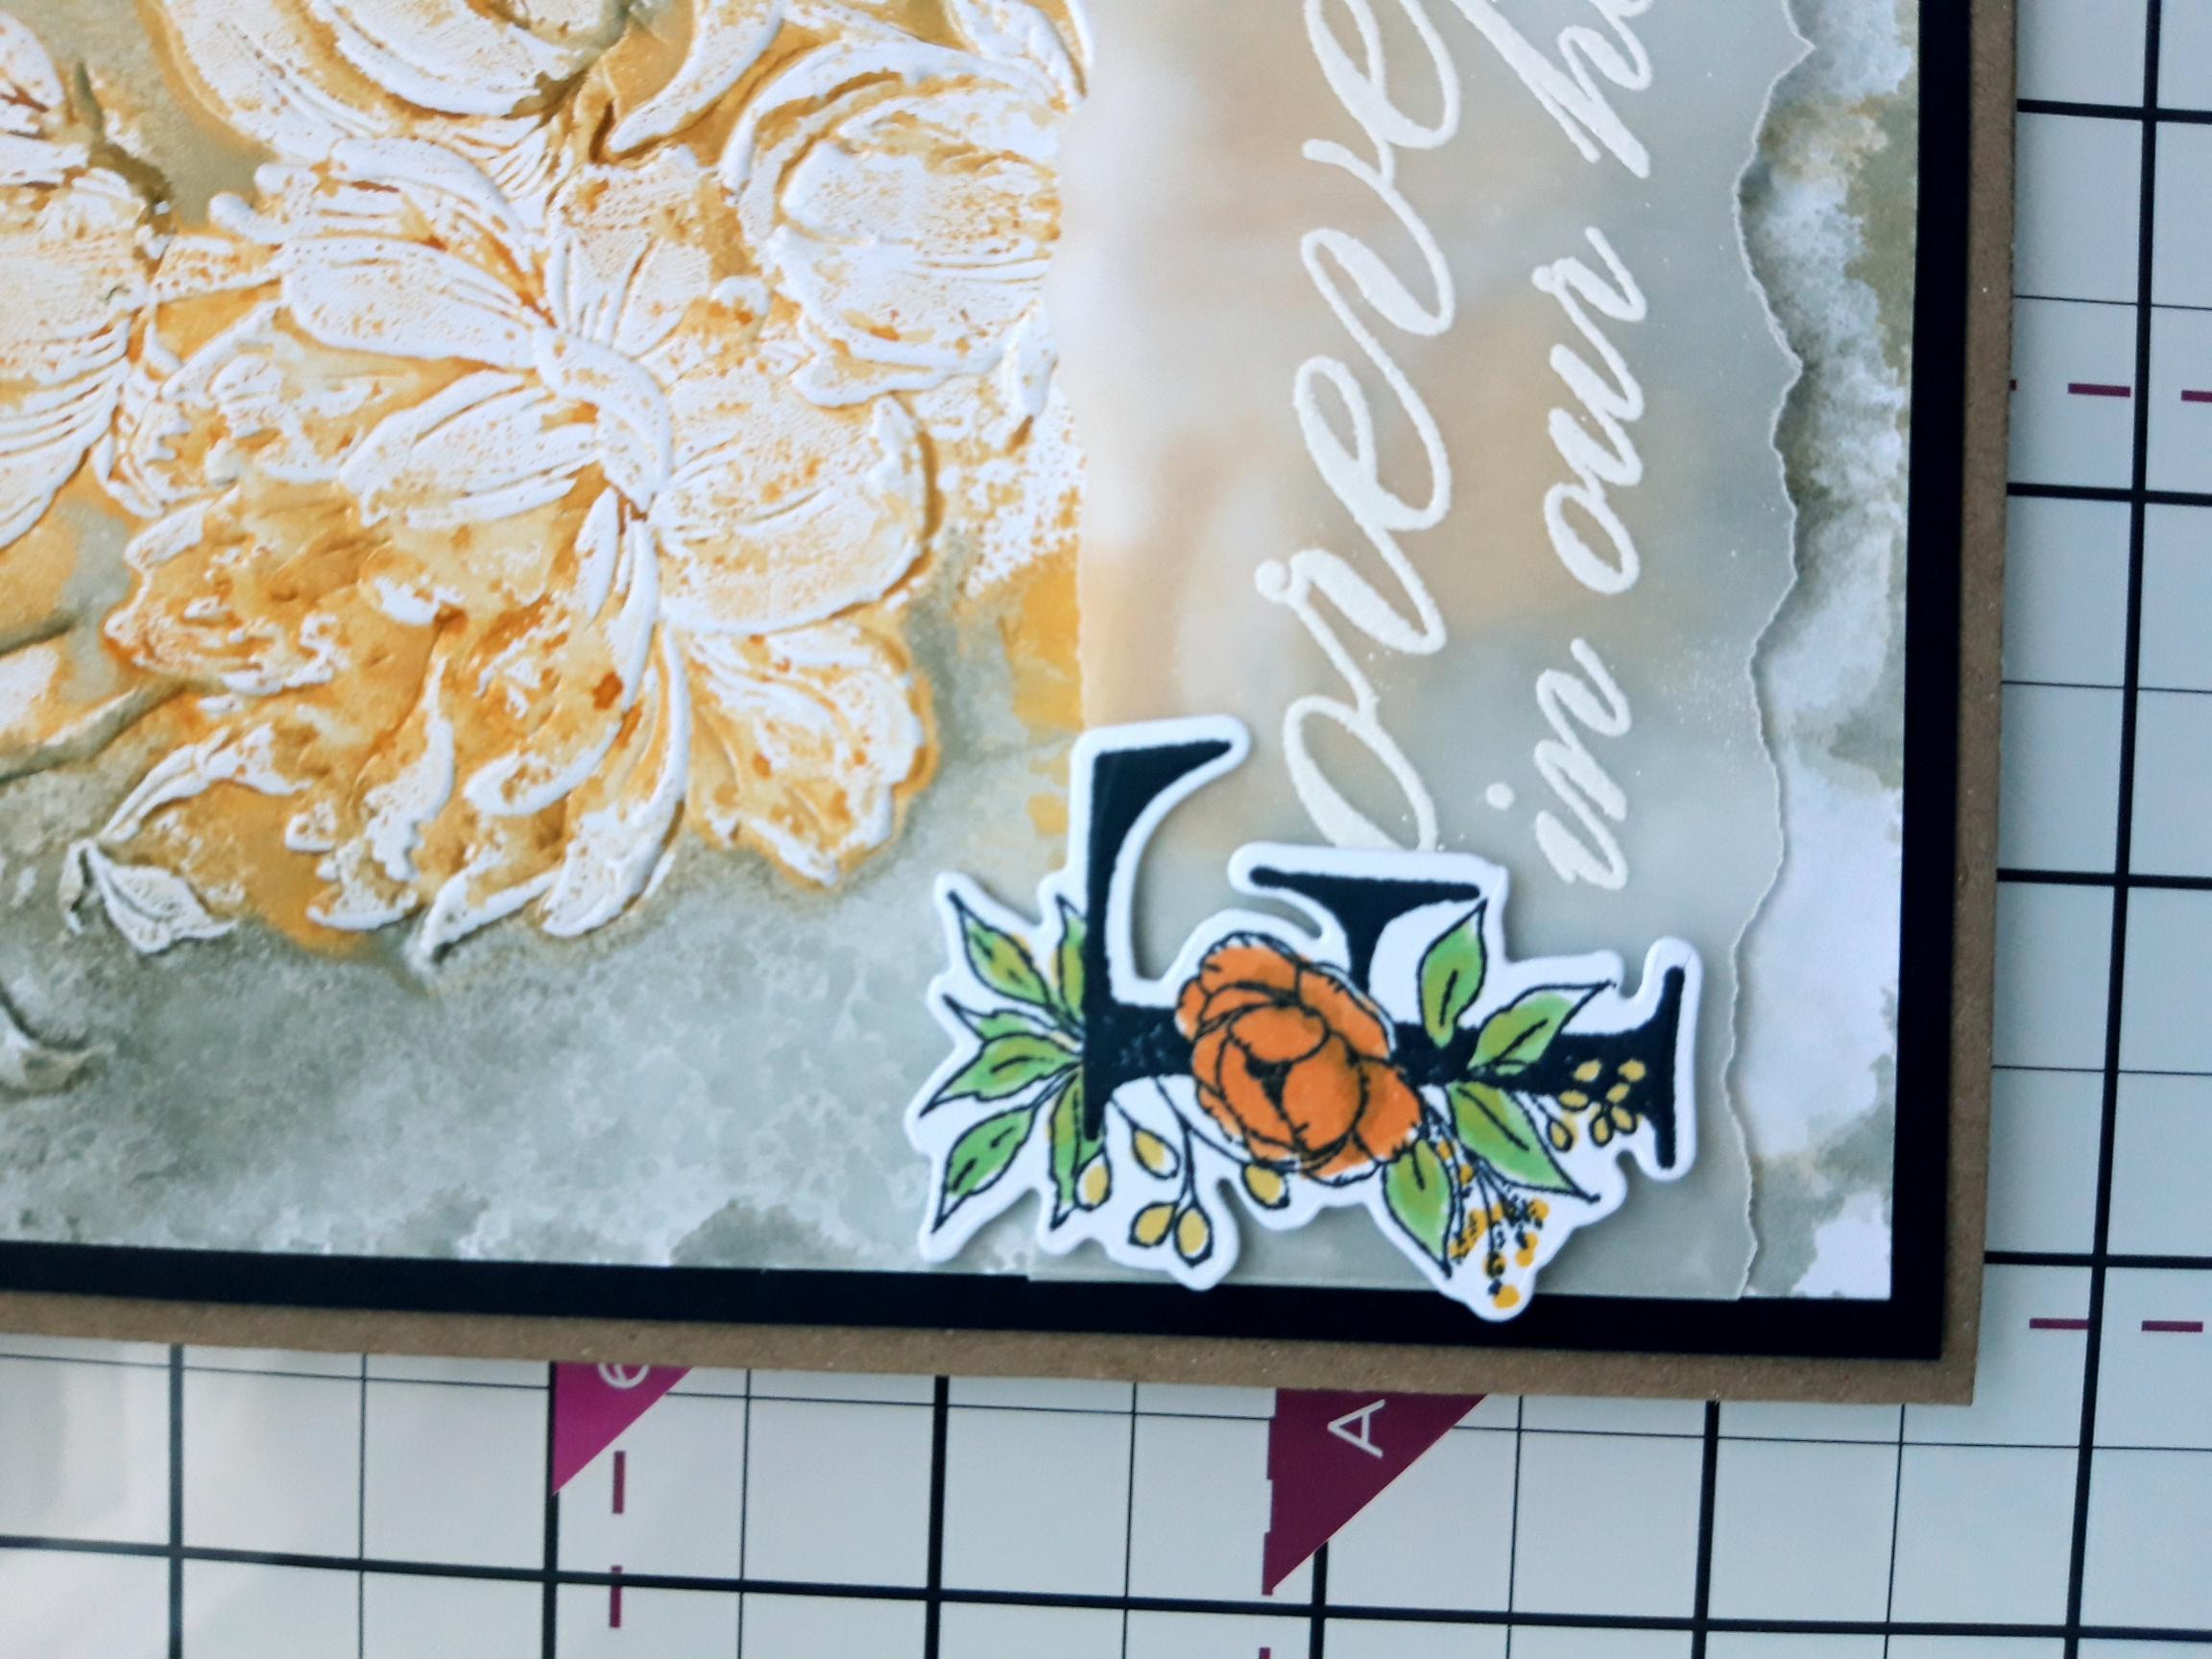
Ink up the debossed side of the QuattroD Peonies embossing folder, with the Izink Dye ink pads, using the Miel around the centre and the Reglisse around the outside, as shown here. Spritz with water. |
|
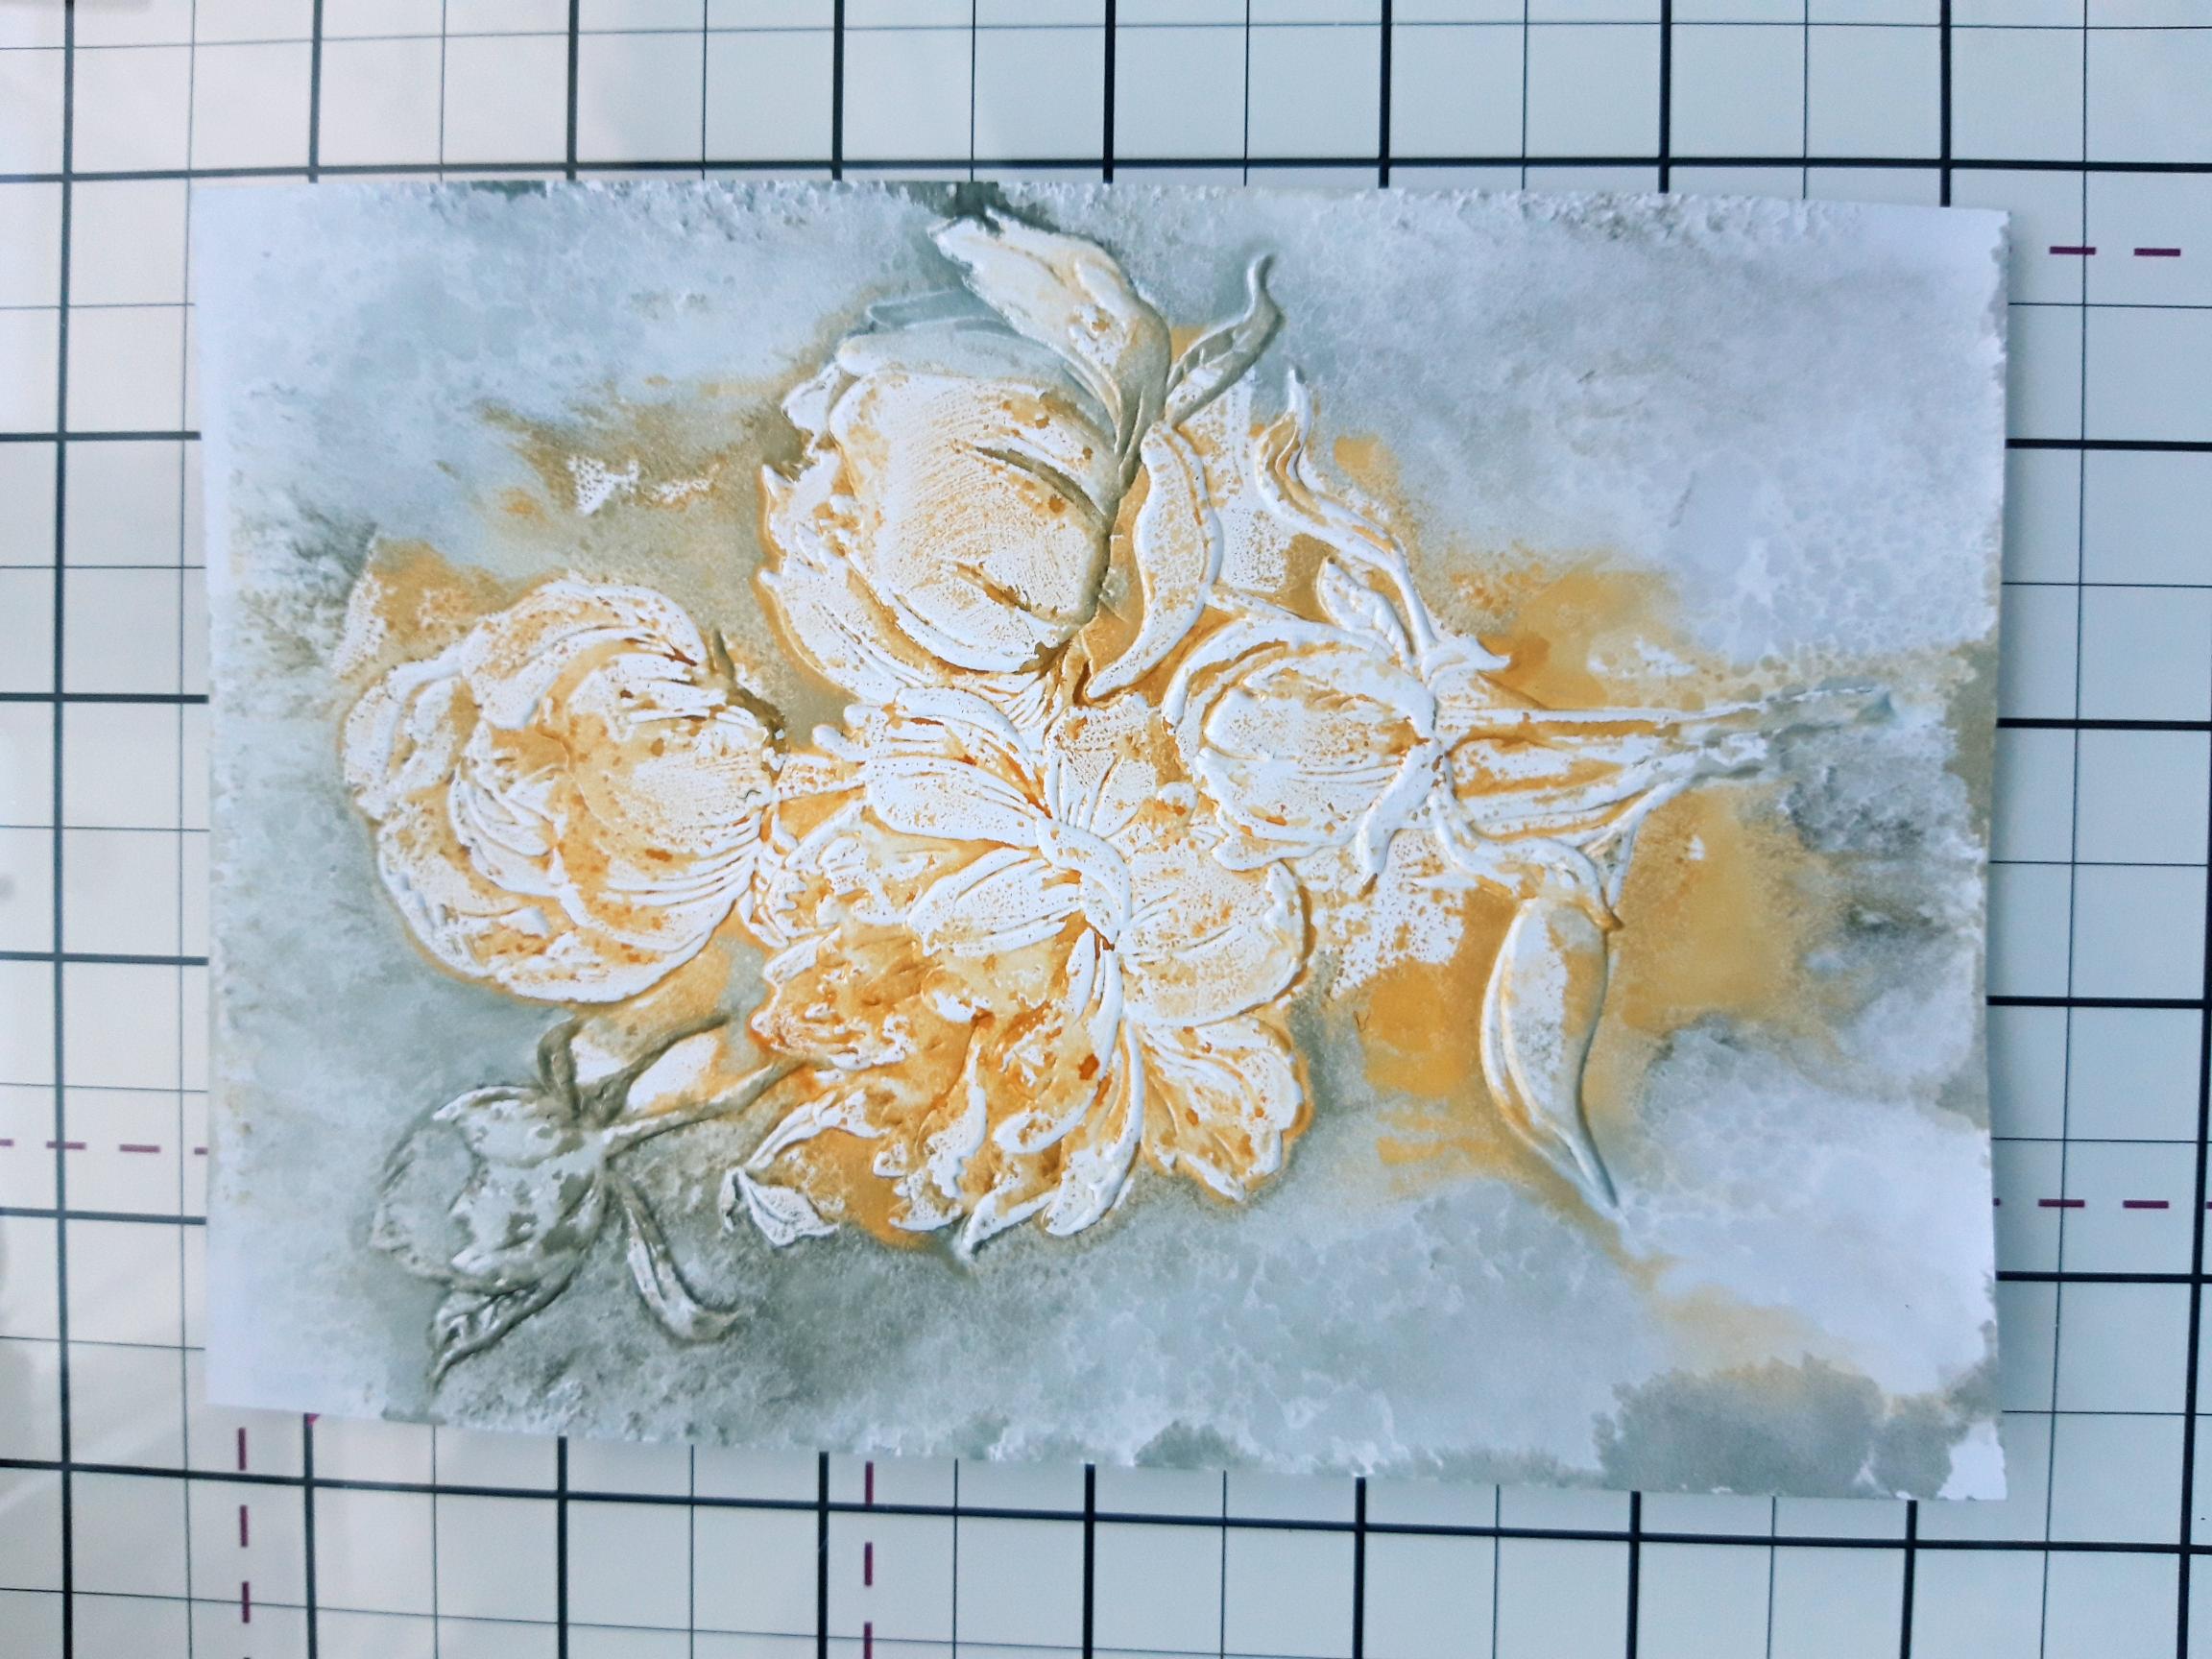
Place the white card, measuring 6 1/2 x 4 1/2", inside the embossing folder and run it through your embossing machine. Mop up any excess ink and blast with your heat tool. Set it to one side. |
|
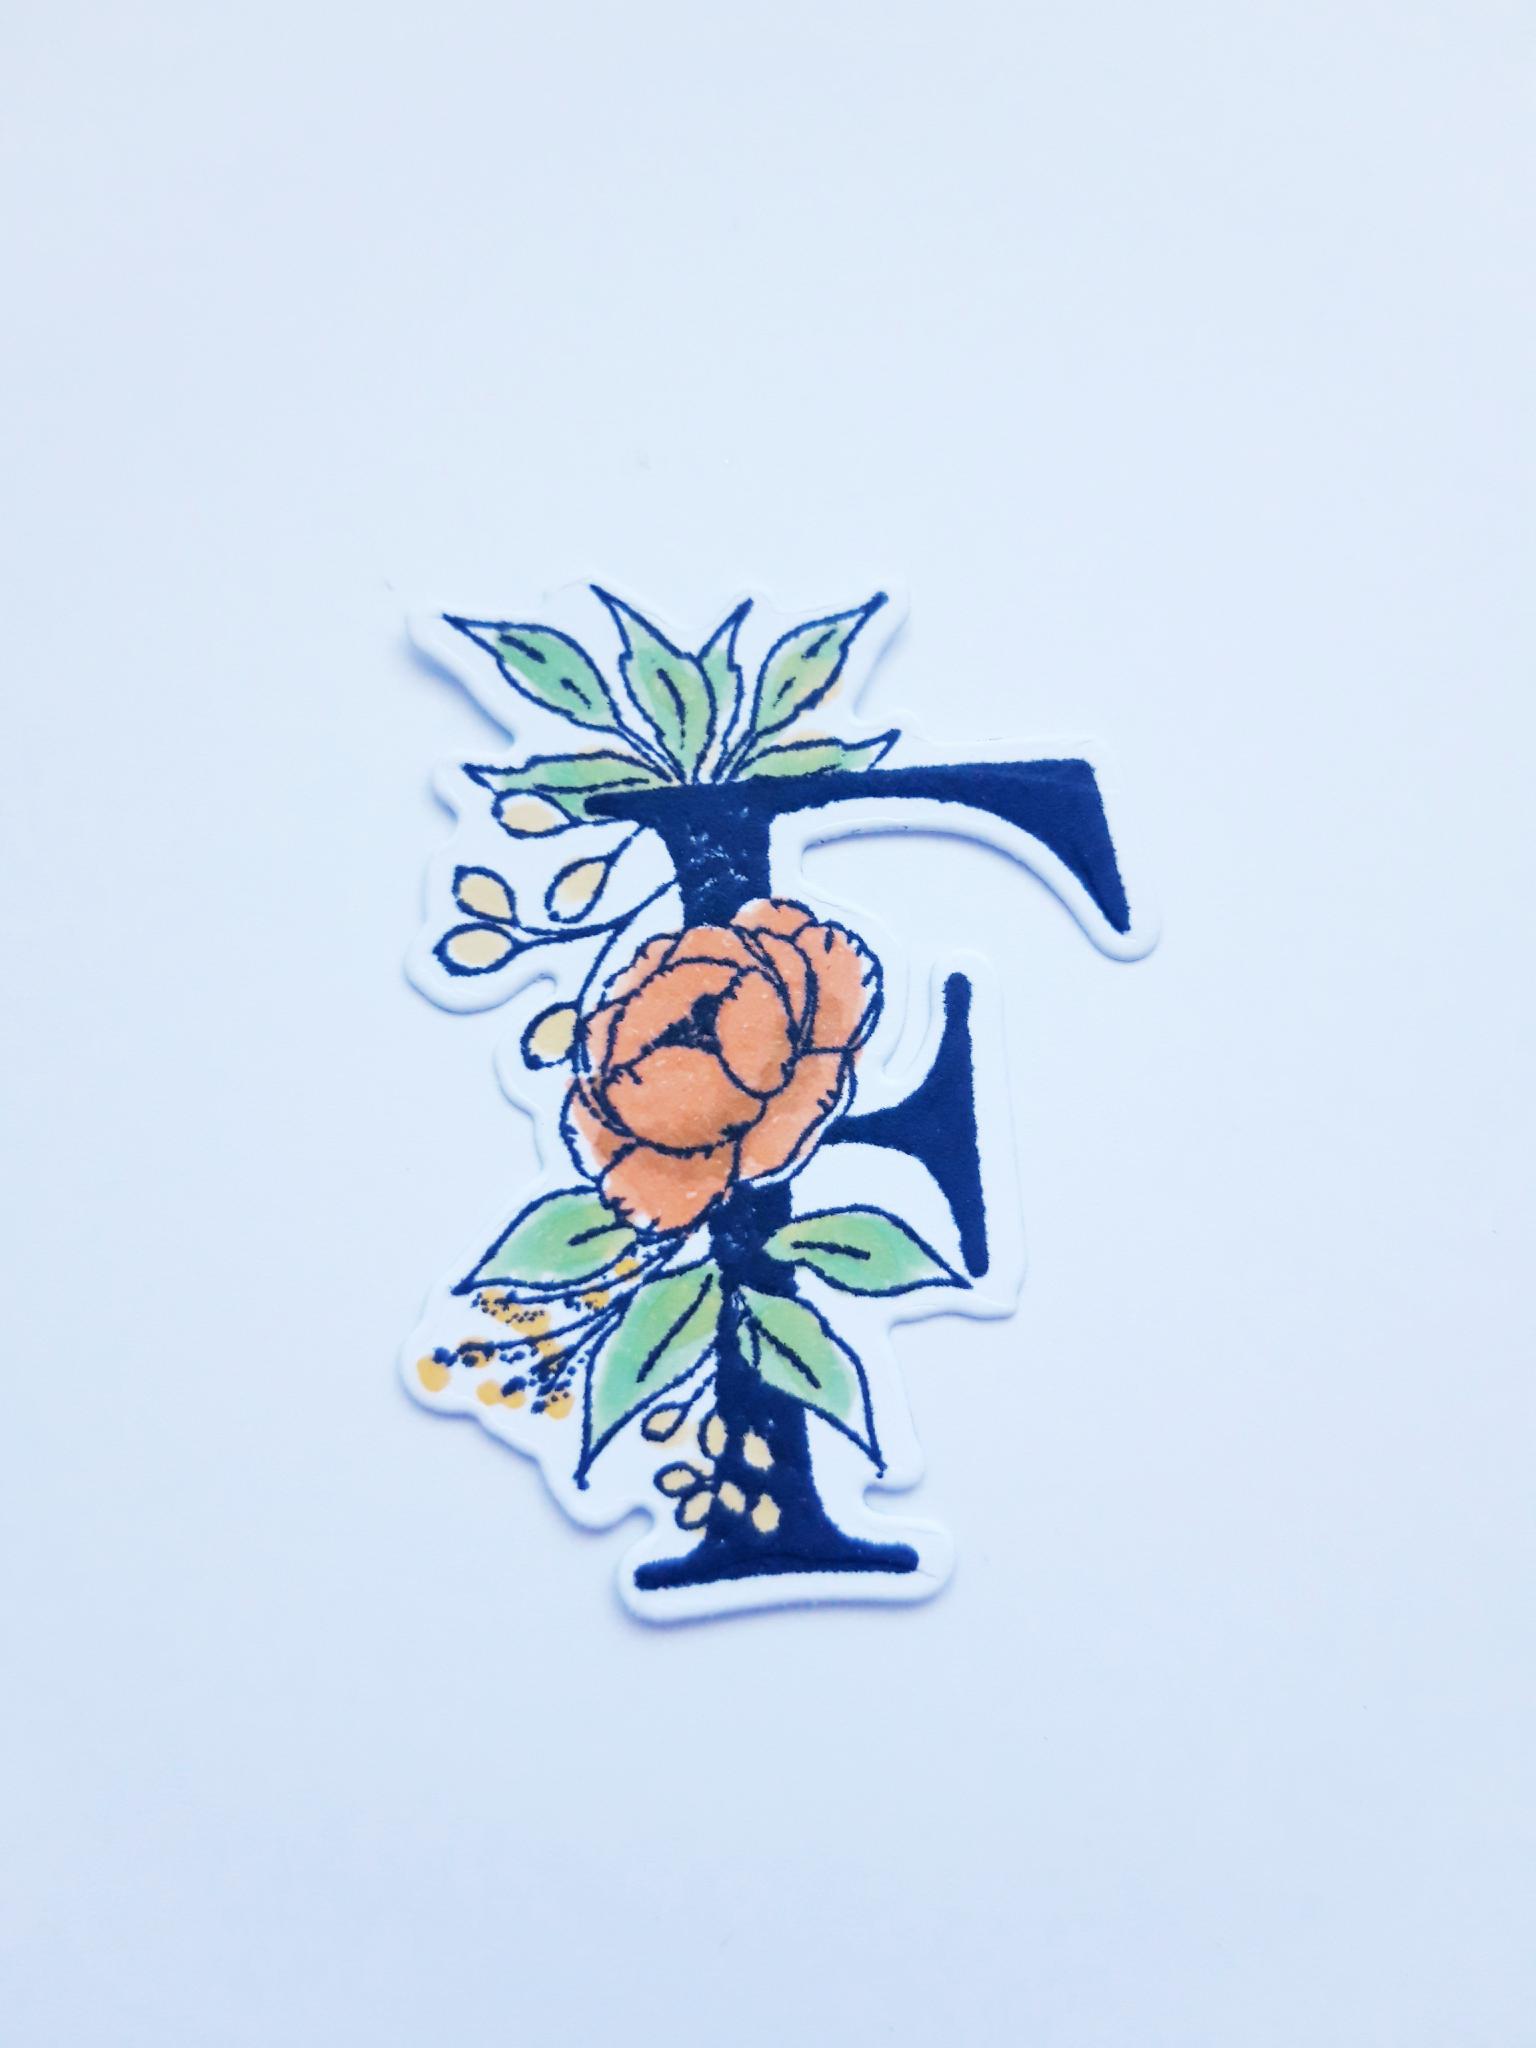
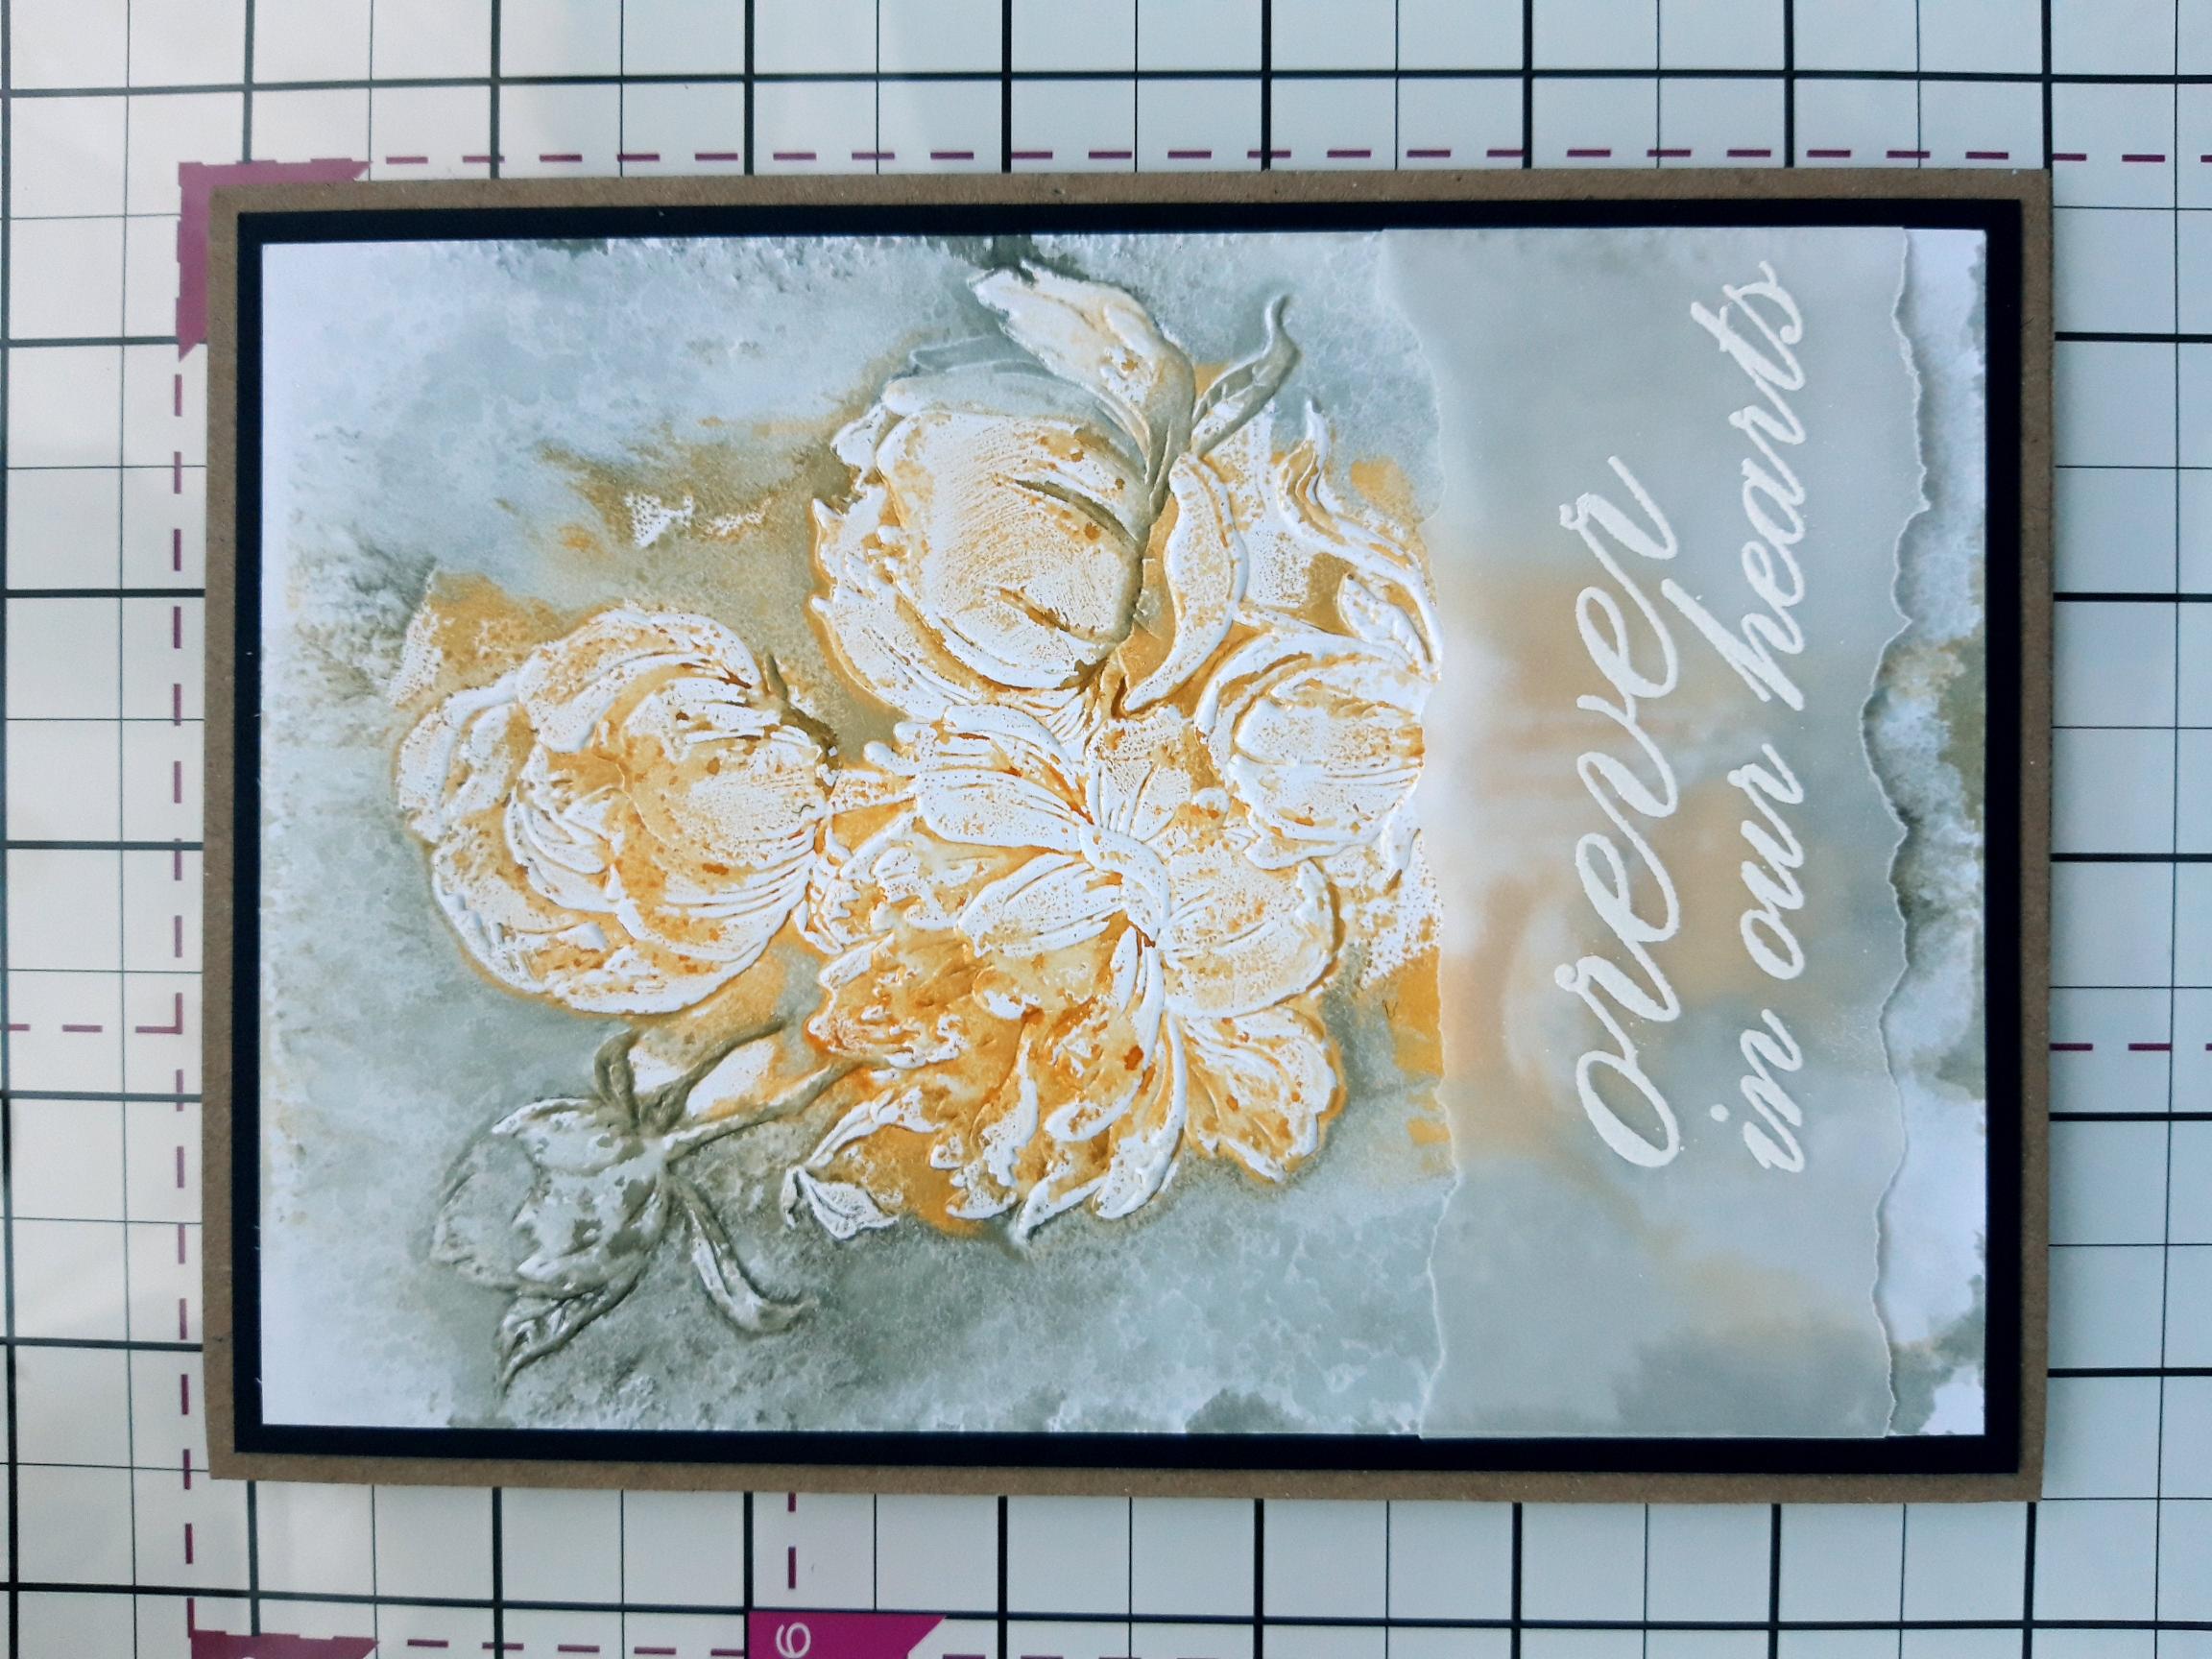
Ink up the middle-sized floral "F" stamp, from the Friends For Life Stamp And Die Collection, with the Memento Tuxedo Black ink pad and stamp on to the super smooth 3 x 3" white card. Place a scrap piece of paper or card underneath, then colour in your stamped image using your Gossip alcohol pens. Alcohol ink bleeds through your card, hence the need to put copy paper, or scrap card underneath, to protect your work surface. Use the coordinating die to cut it out. |
|
Fold your panel of vellum over the bottom of your embossed artwork and using your die cut floral "F" as a guide, decide where you want the add-on sentiment stamp to be positioned, as shown here. |
|
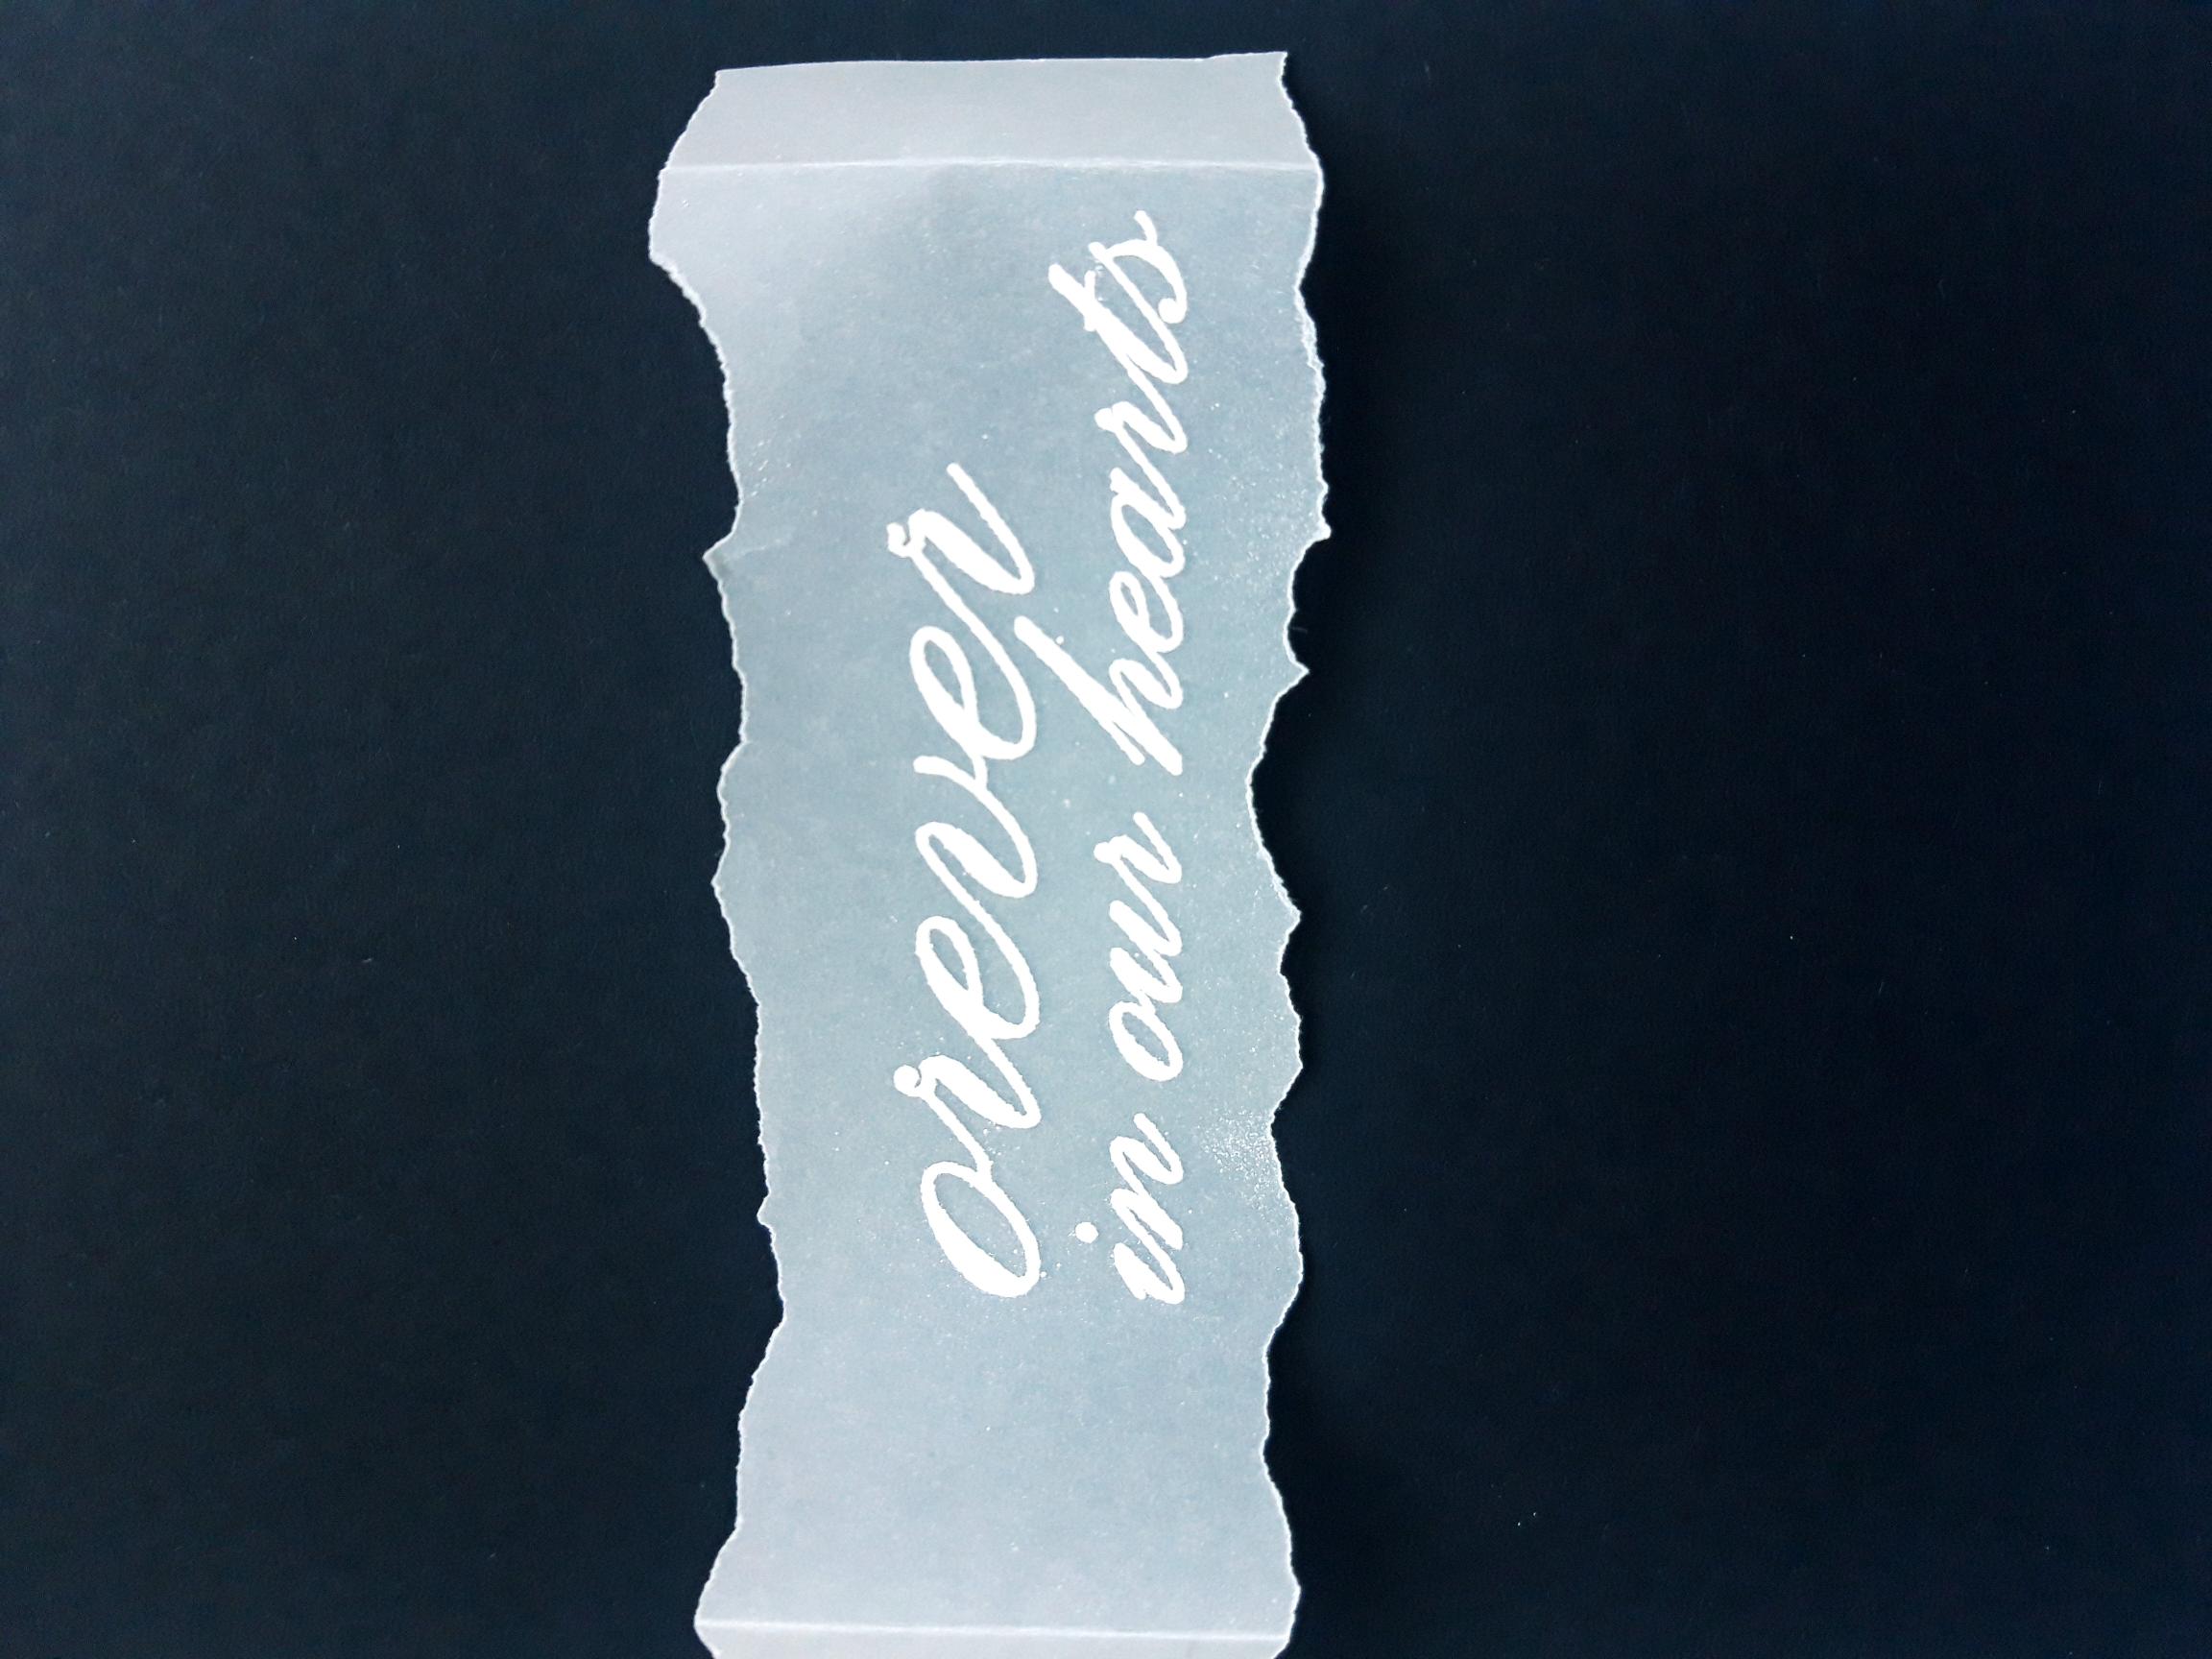
Wipe over your vellum with the anti-static bag, before inking up your sentiment stamp with the WOW embossing ink. Stamp in position on to the vellum. Apply the white embossing powder over your sticky sentiment then, having got your heat tool hot first, heat set the powder. Ensure you move the heat tool as soon as the powder starts to turn, to avoid burning the powder and warping your vellum. |
|
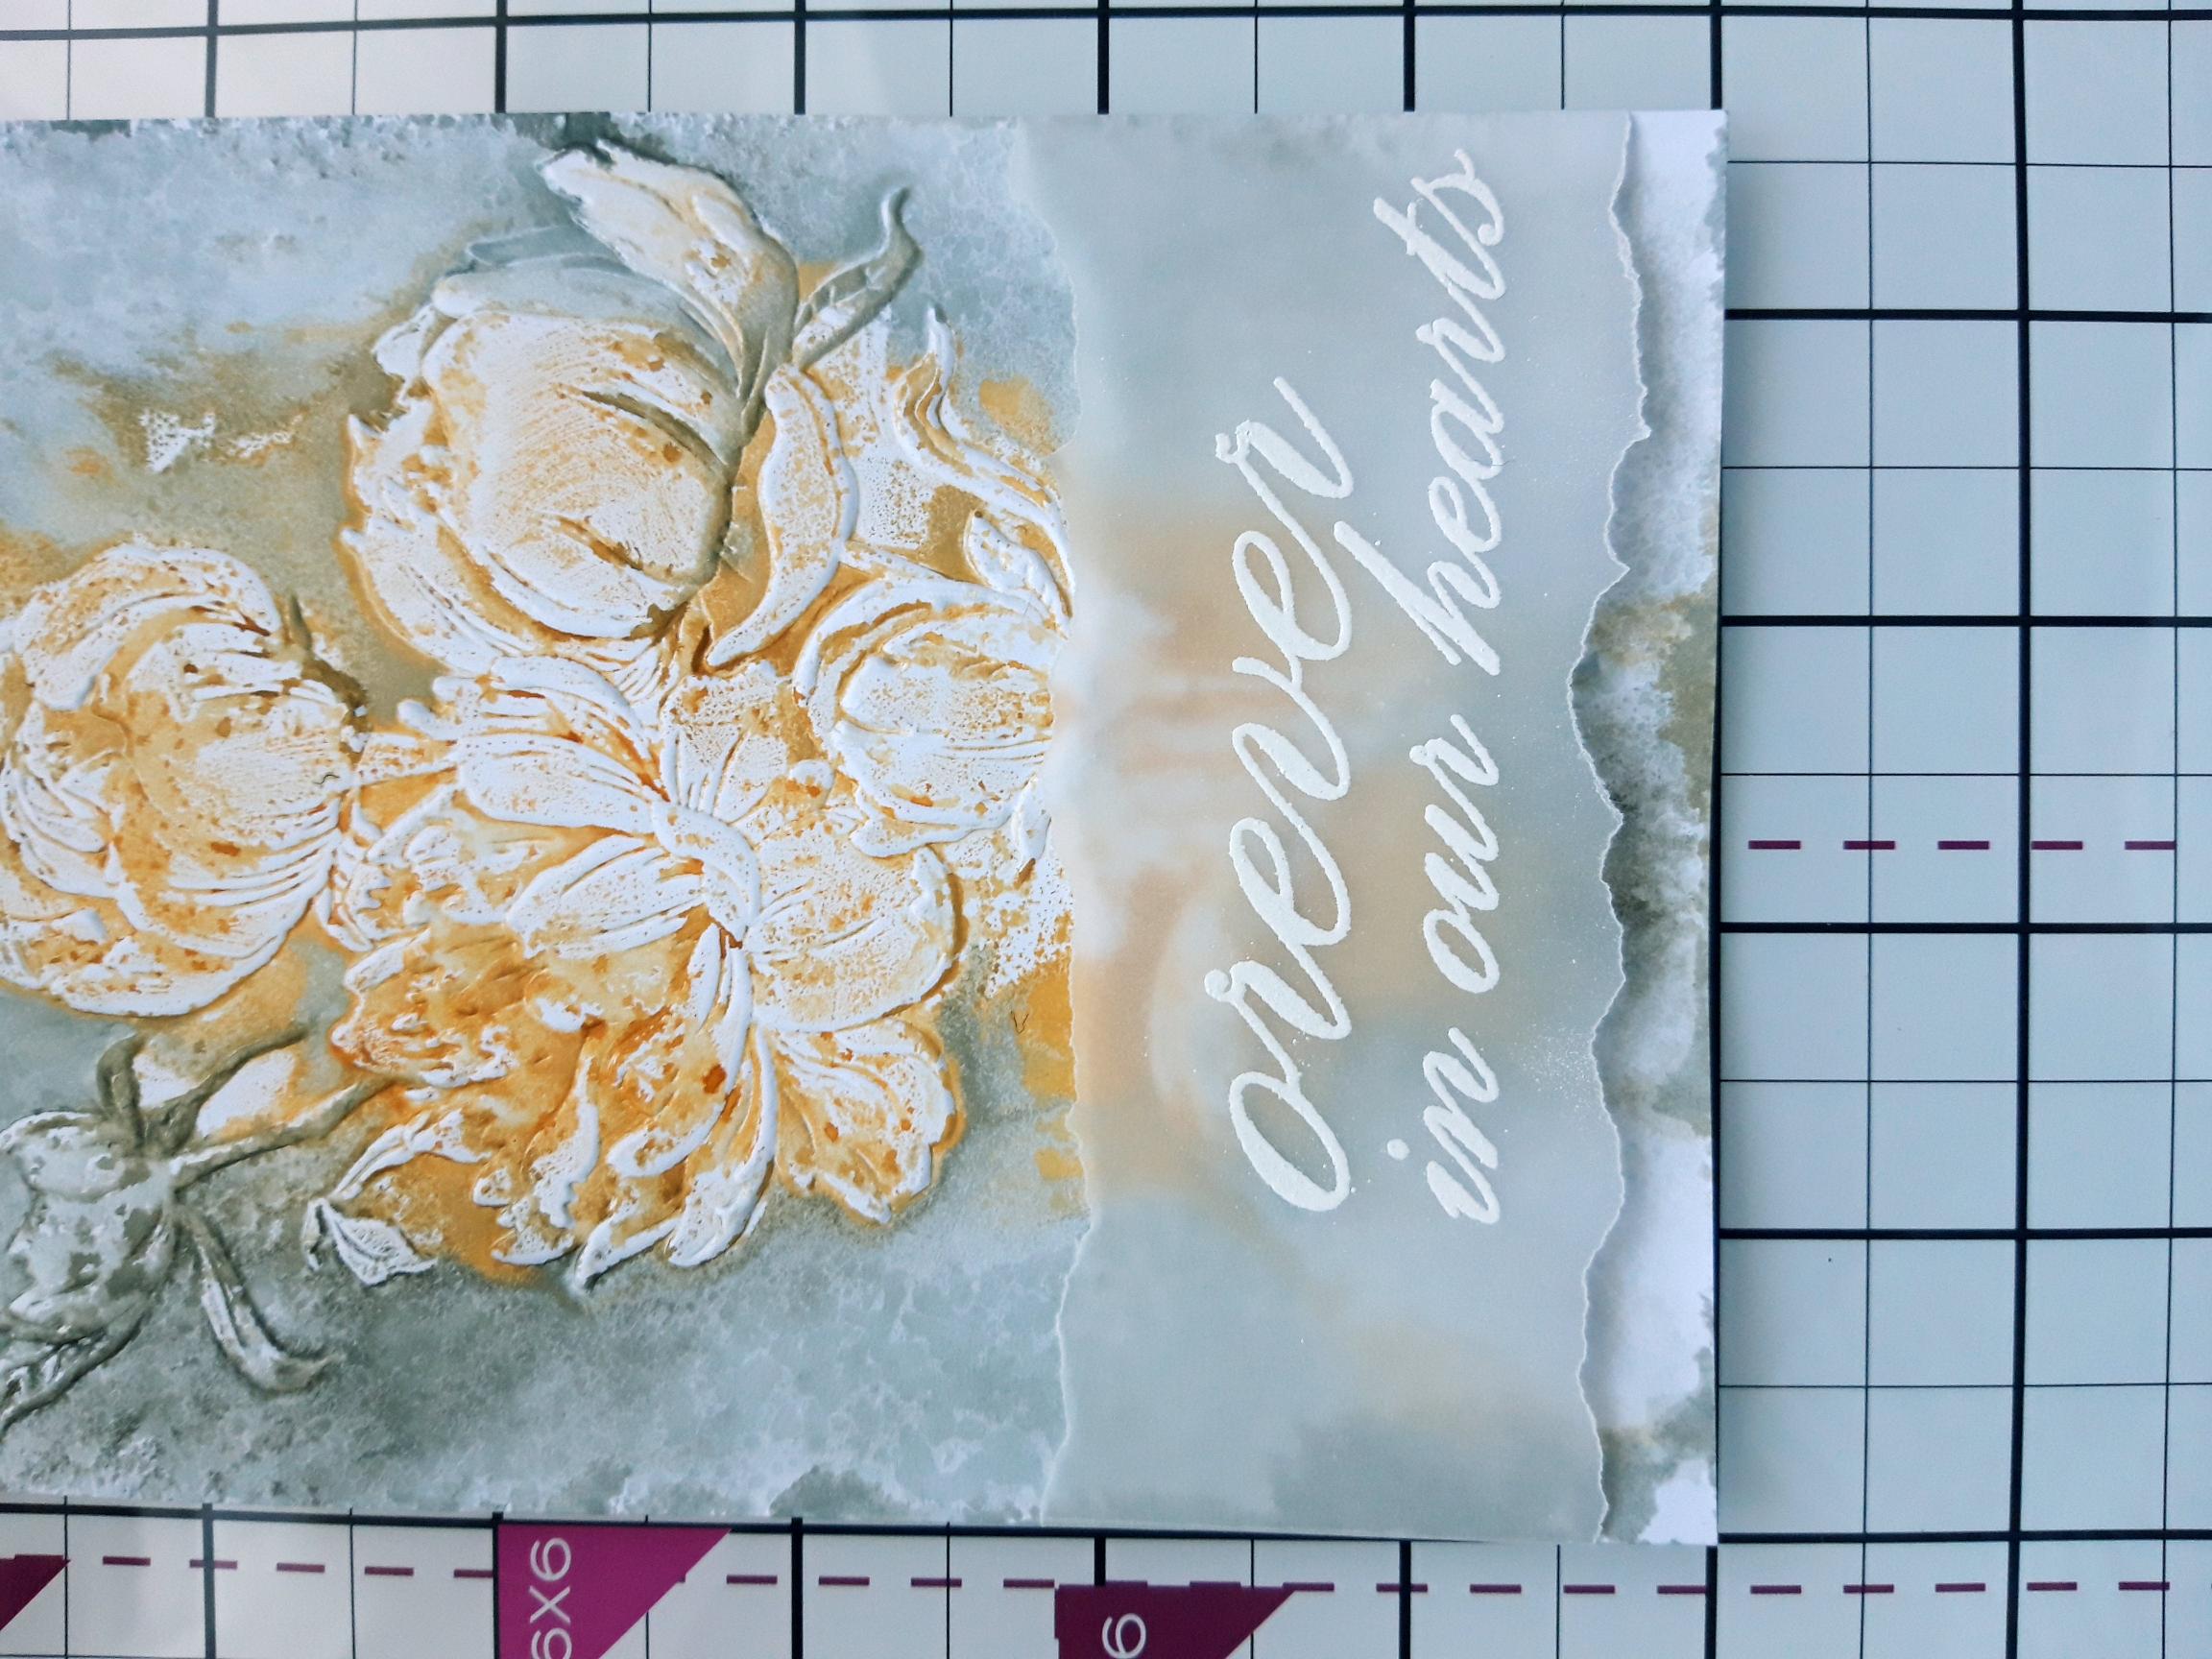
Place your embossed vellum panel back over your embossed image and secure on the reverse of the card with double sided tape, or a tape runner. |

|
Adhere on to the black card. |
|
Adhere on to the front of your kraft card blank. |
|
To finish, adhere your die cut floral "F" element in place, with foam pads. |