Give your friends $10 off their first order!
Refer a FRIEND


WHAT YOU WILL NEED
Black top folding card blank 7 x 5"
Black card 3 1/2 x 1 1/4"
Unstoppable Stamp Collection
Celebrate and Create Lamination Stamp Collection
Dash Frame Stamp Collection
Happy Times 8 x 8" paper pad
Versafine Ink Pad: Onyx Black
Banner tag punch
White gel pen
Clear adhesive gems
Pick up gem and pokey tool
Eureka 101
Paper Trimmer
Perfect Together Glue
[click image to enlarge] 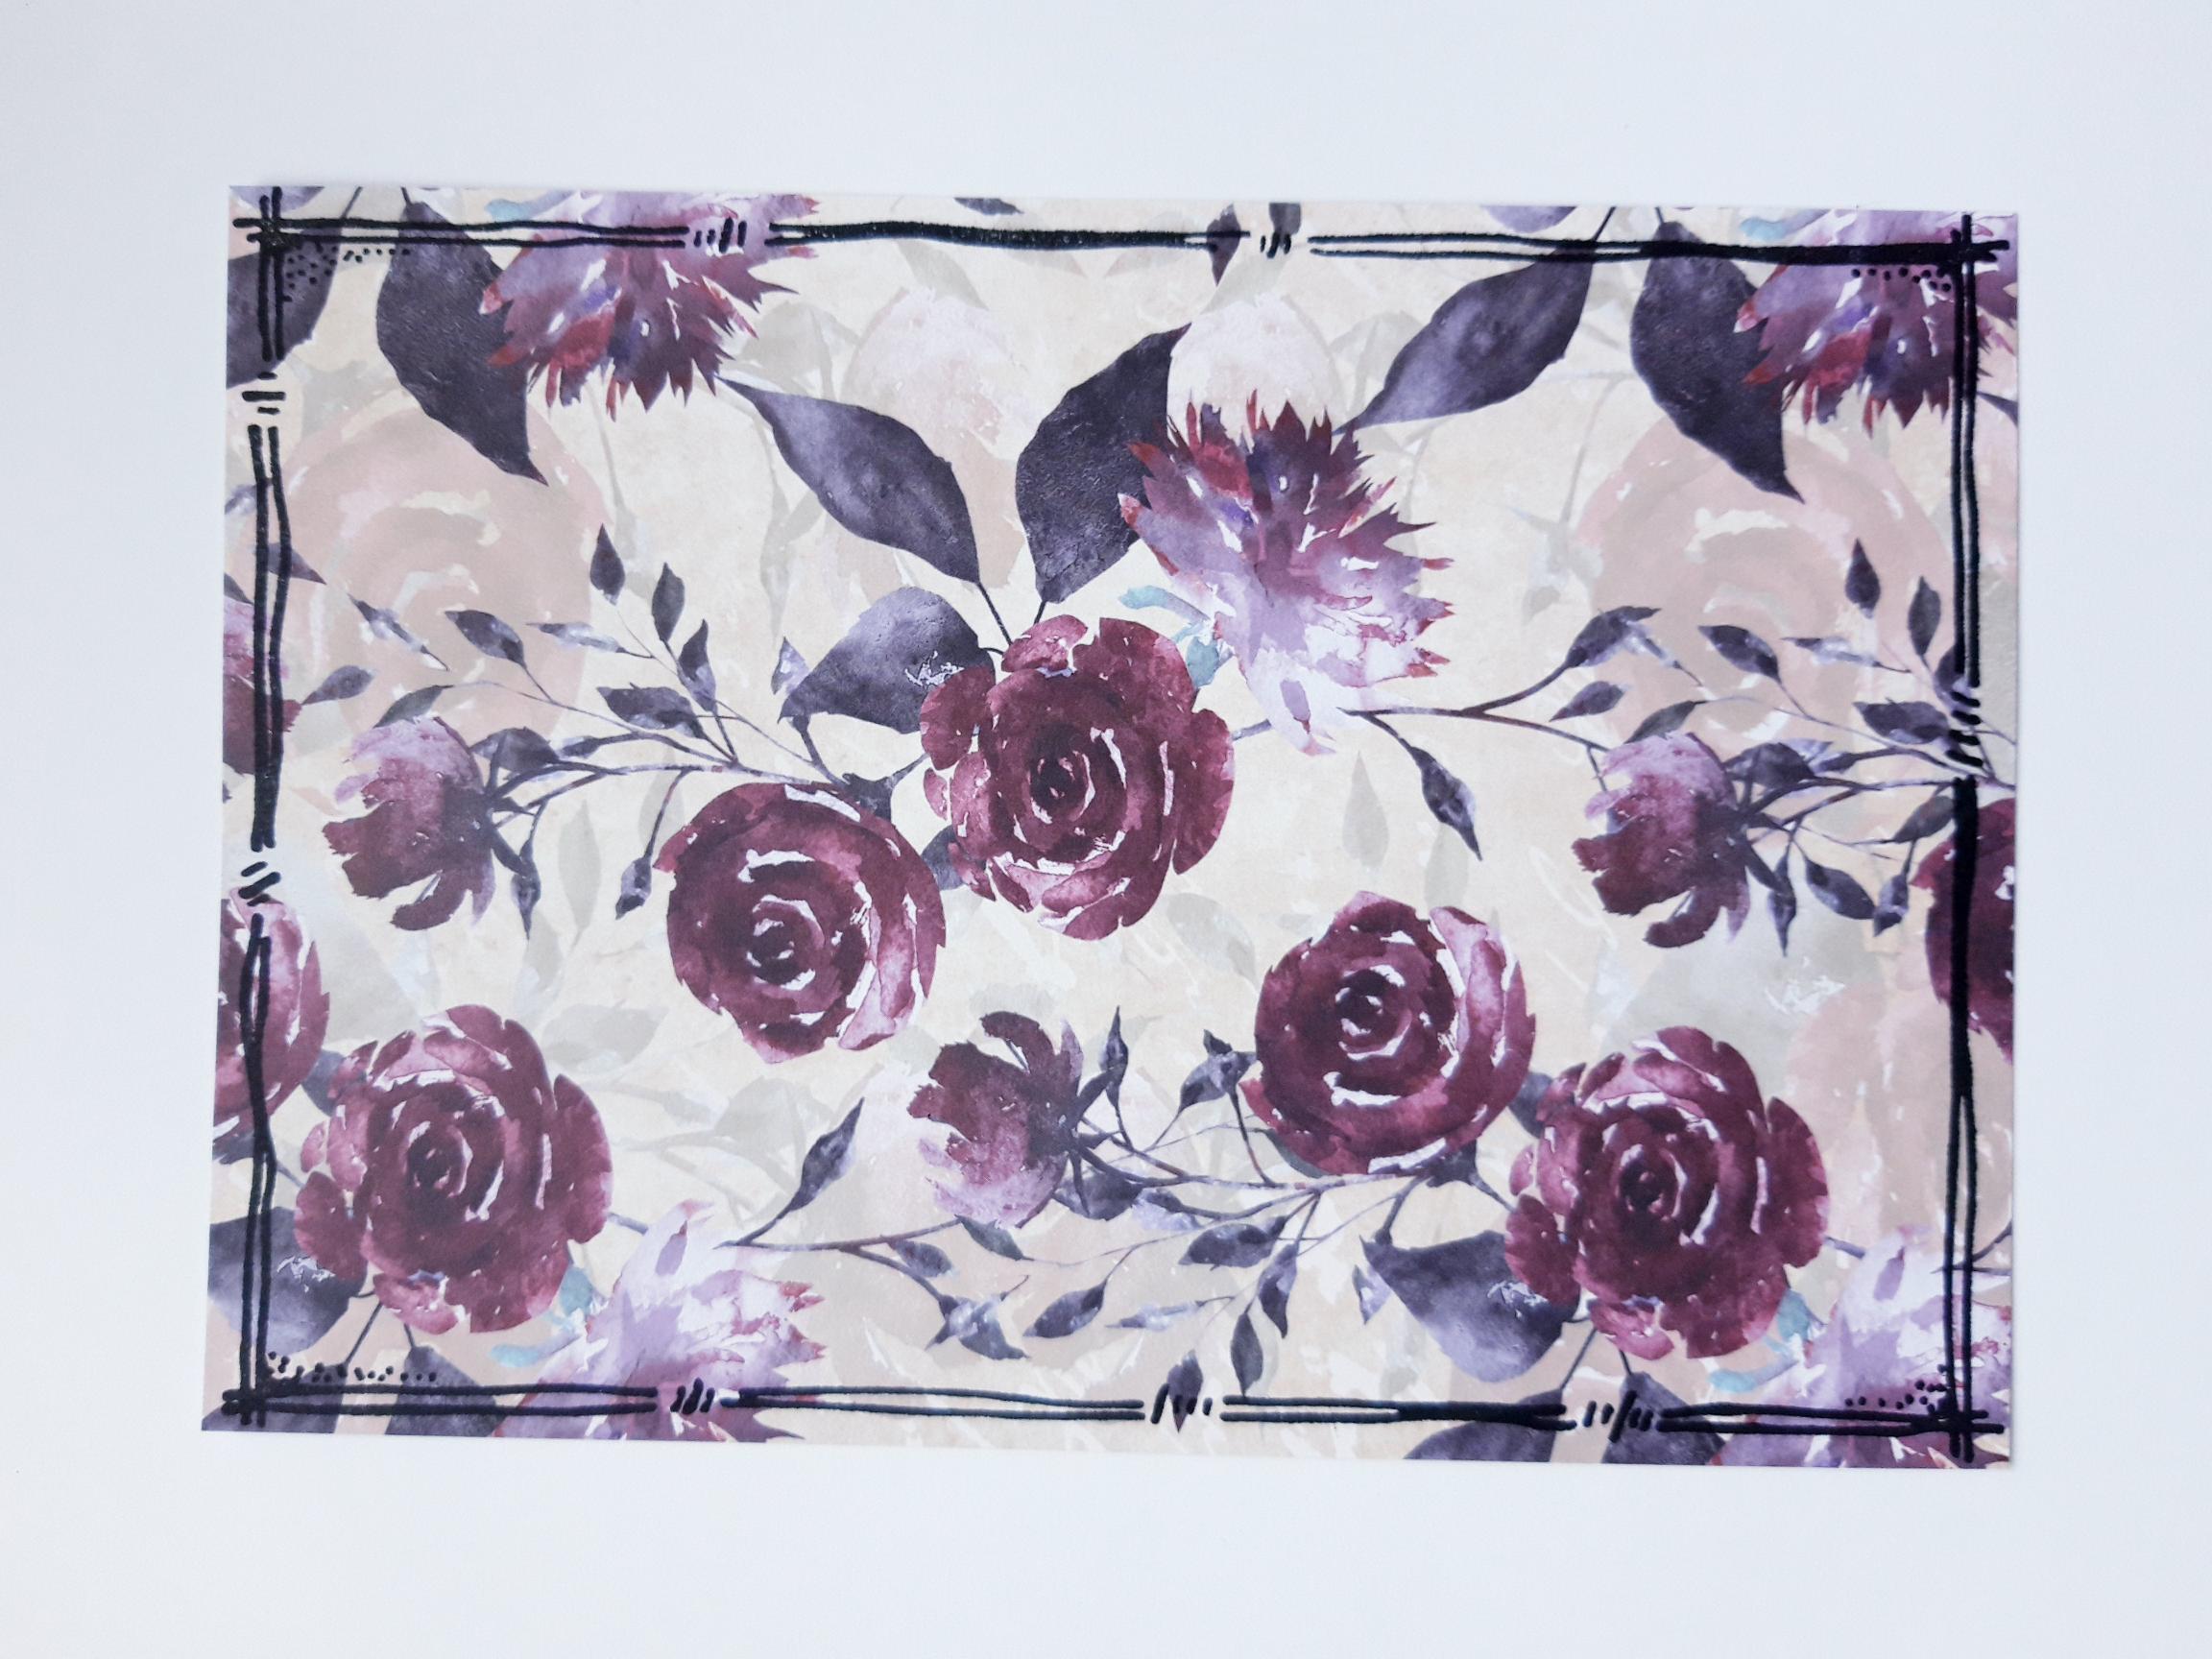
|
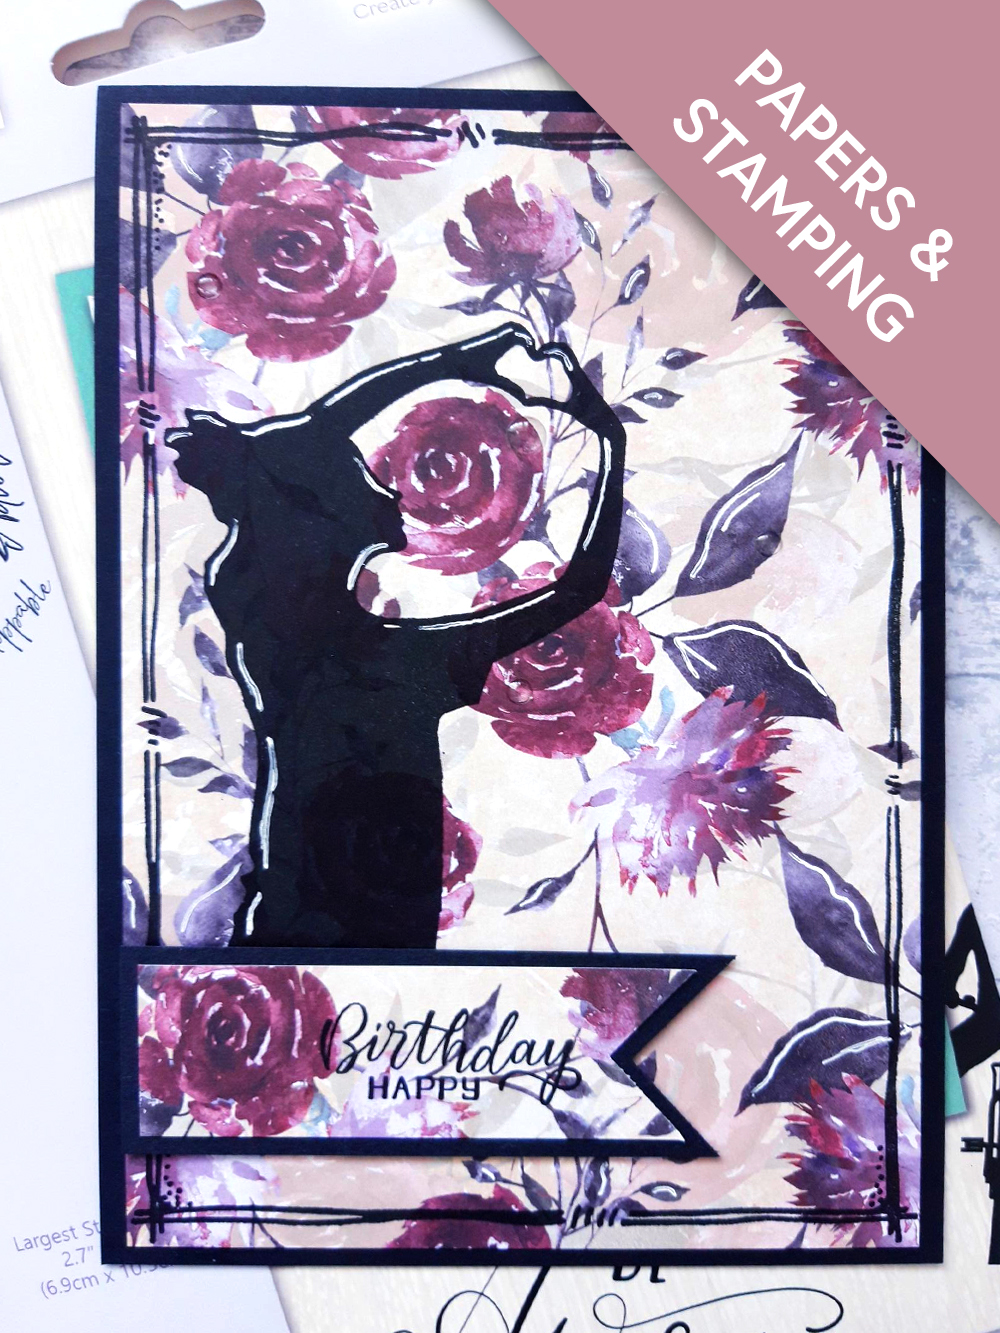
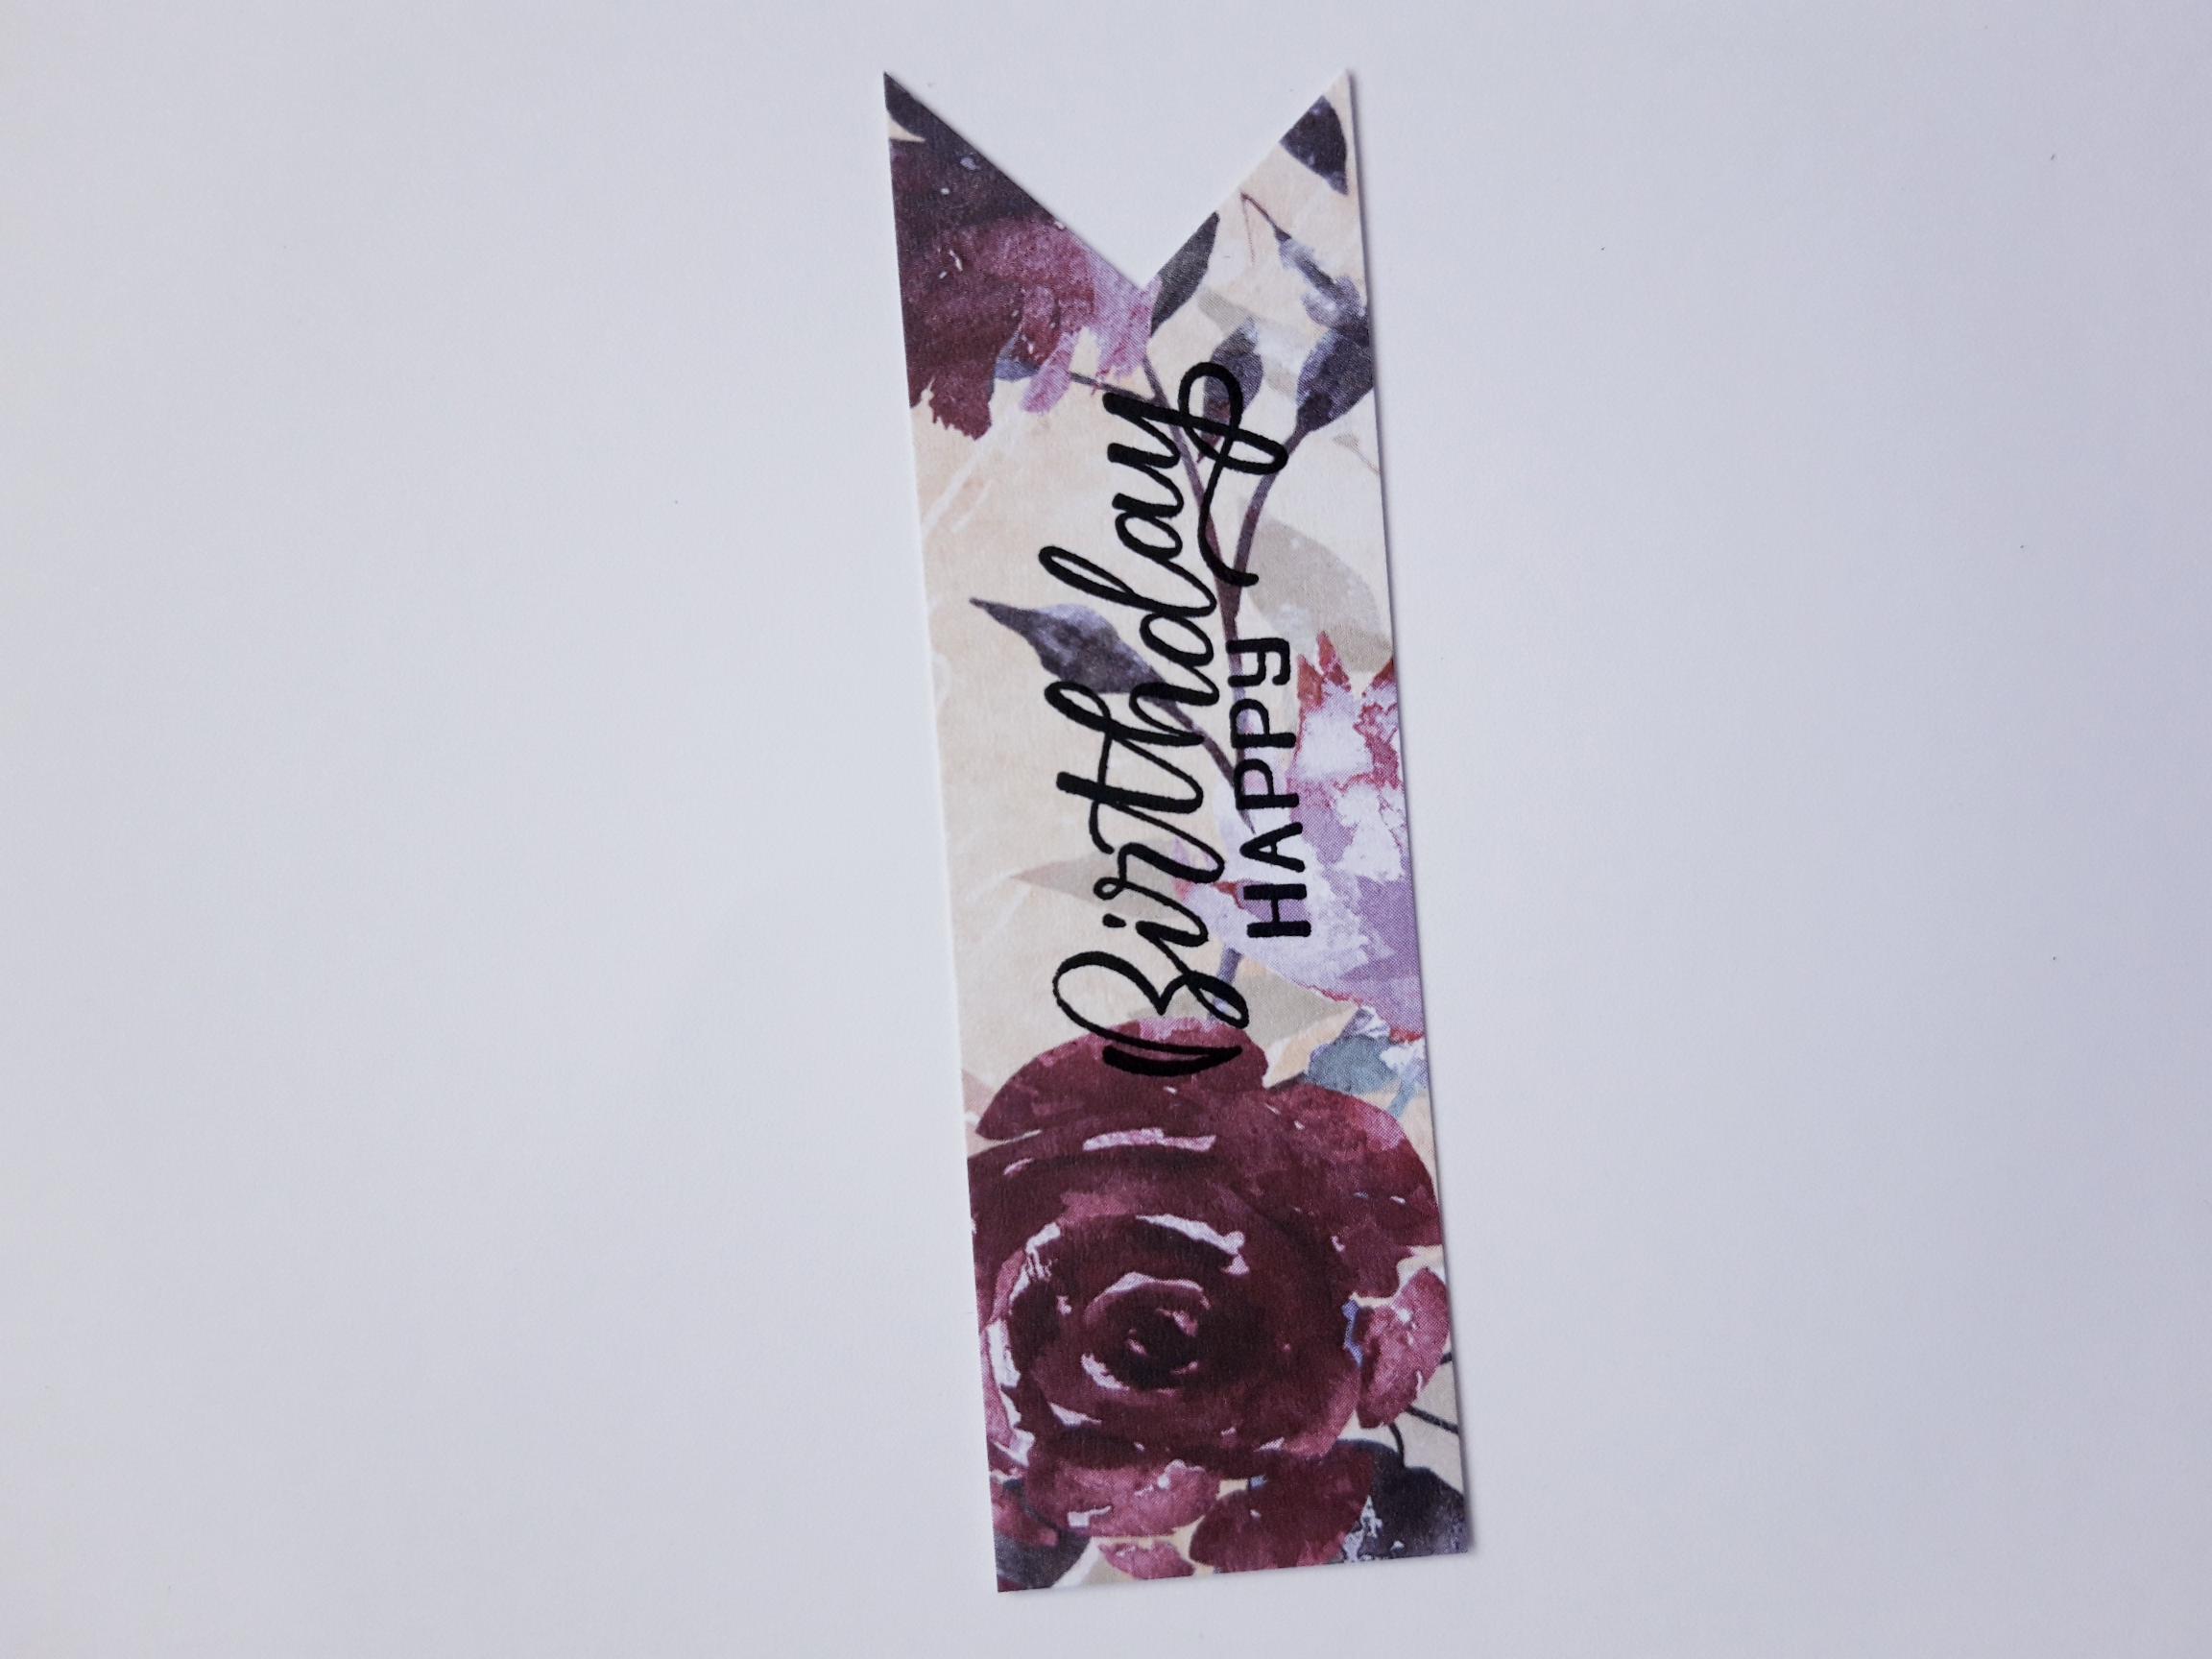
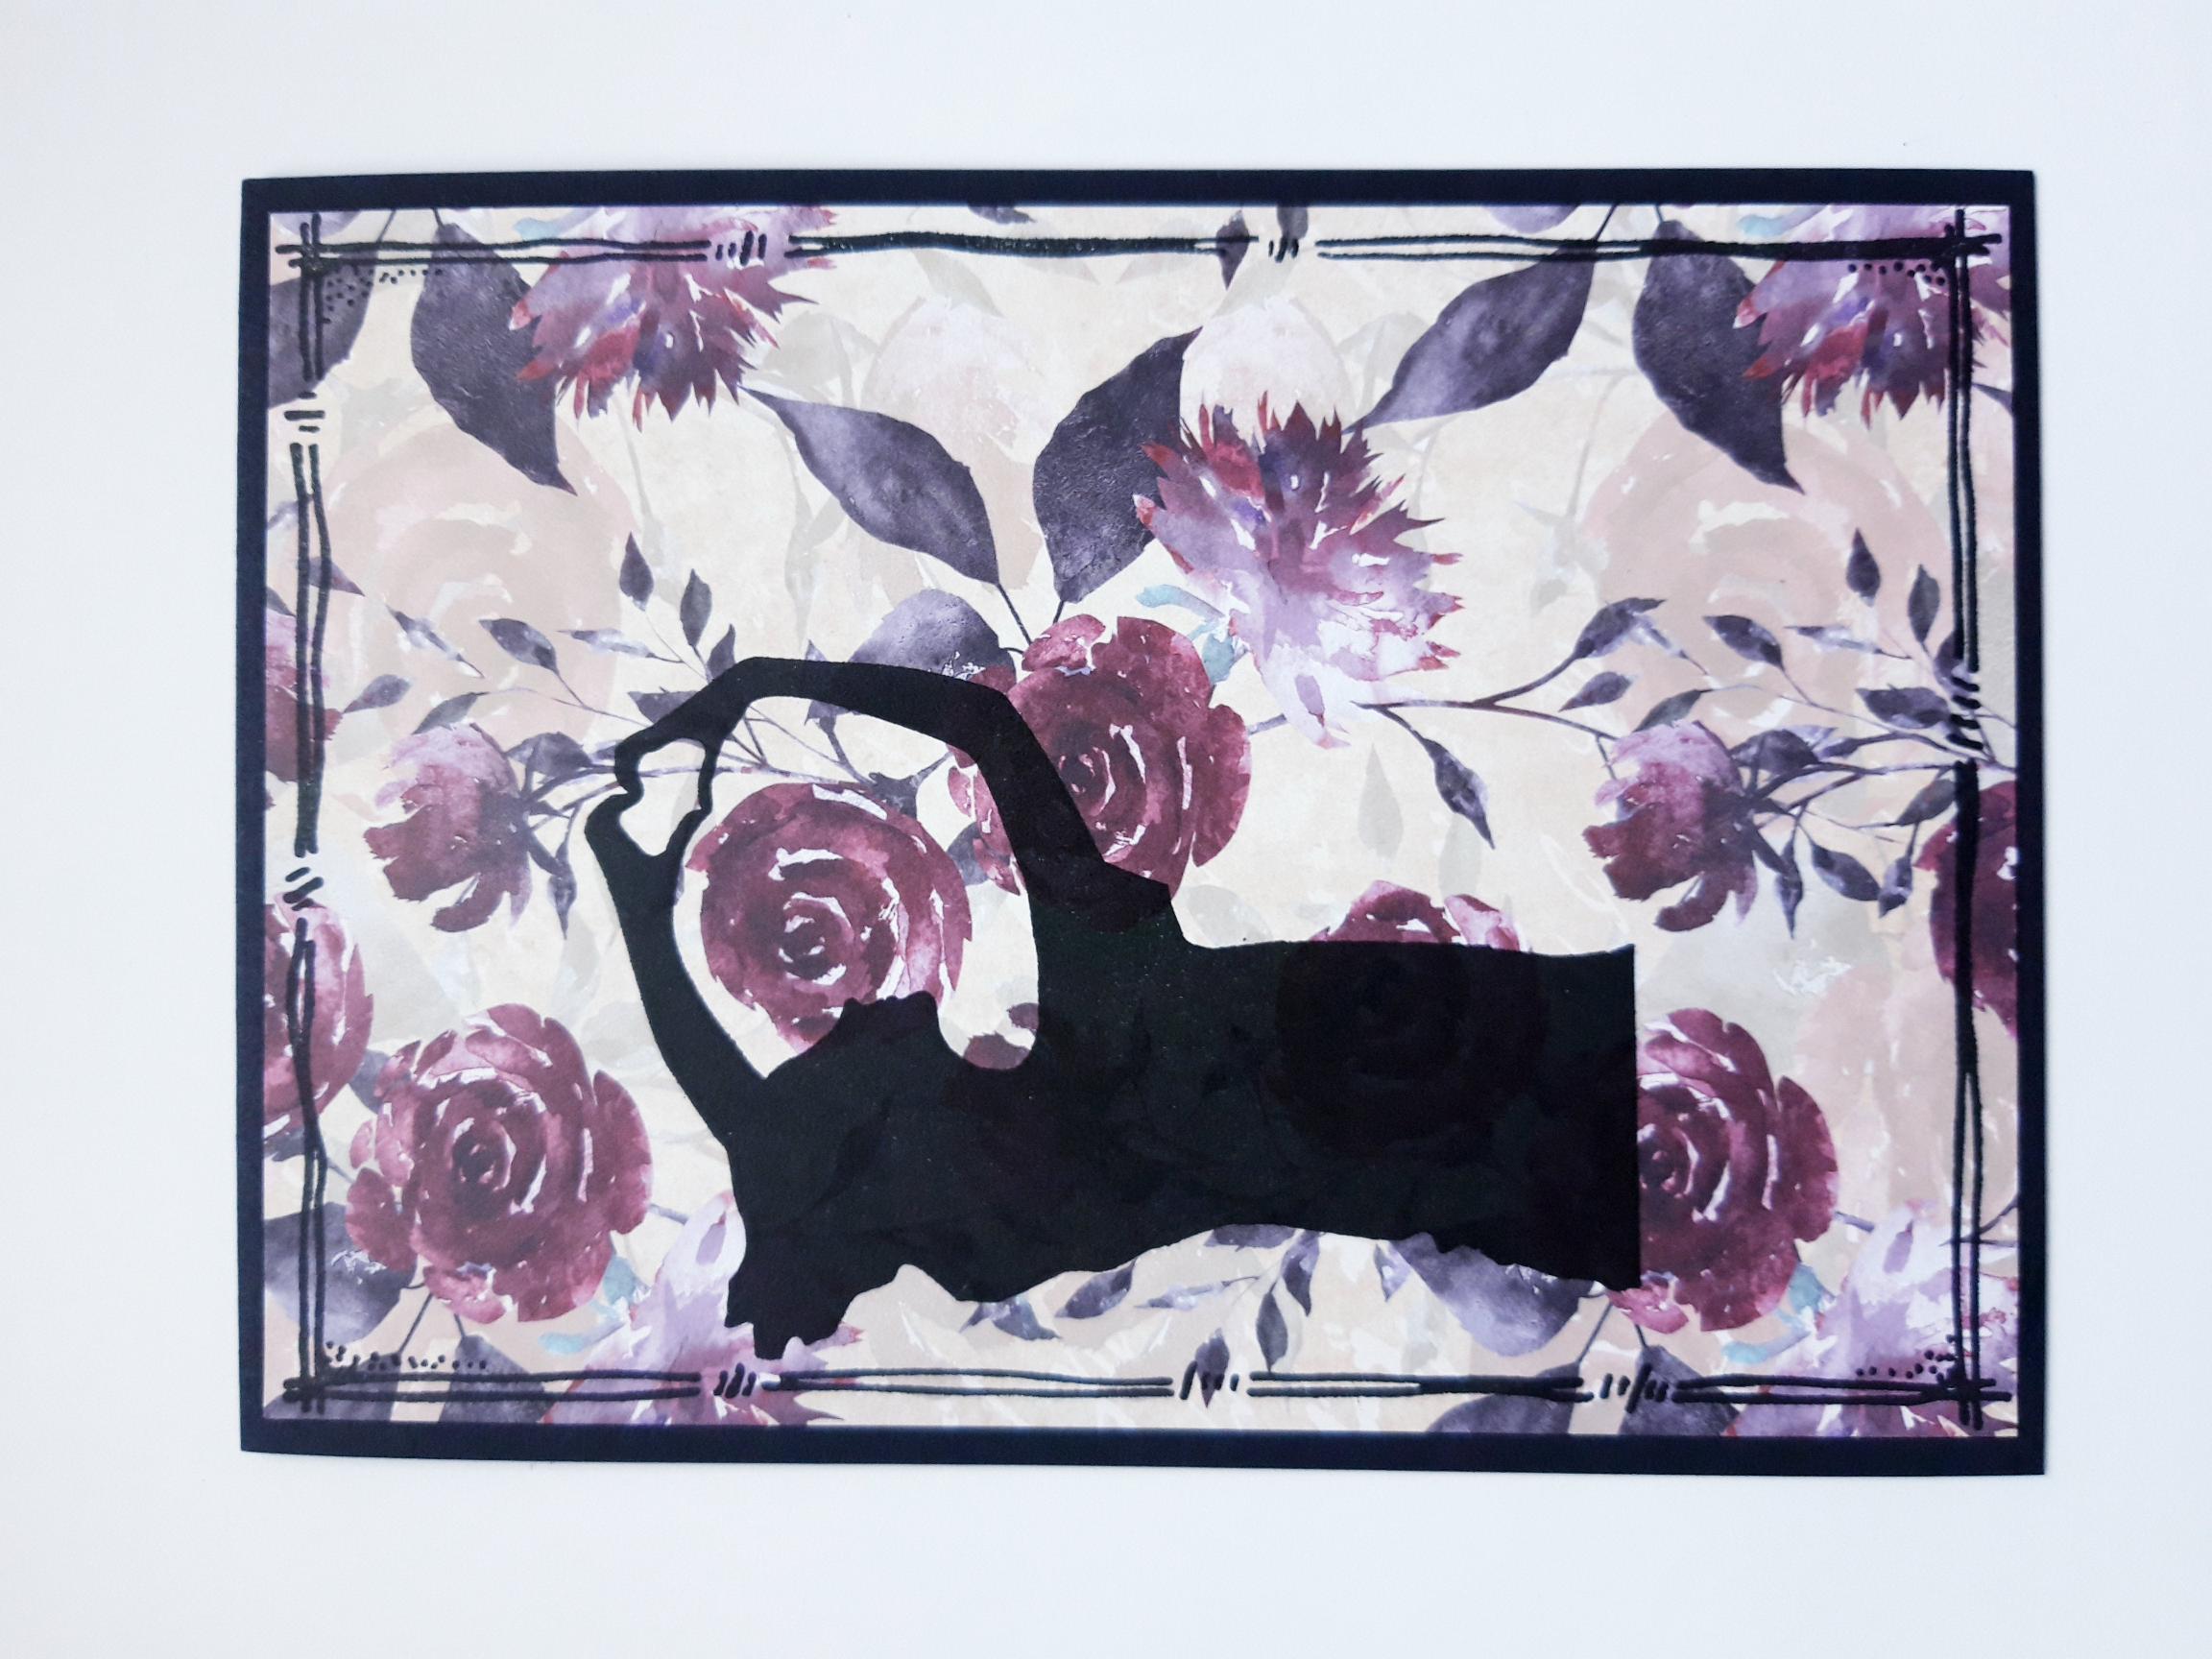
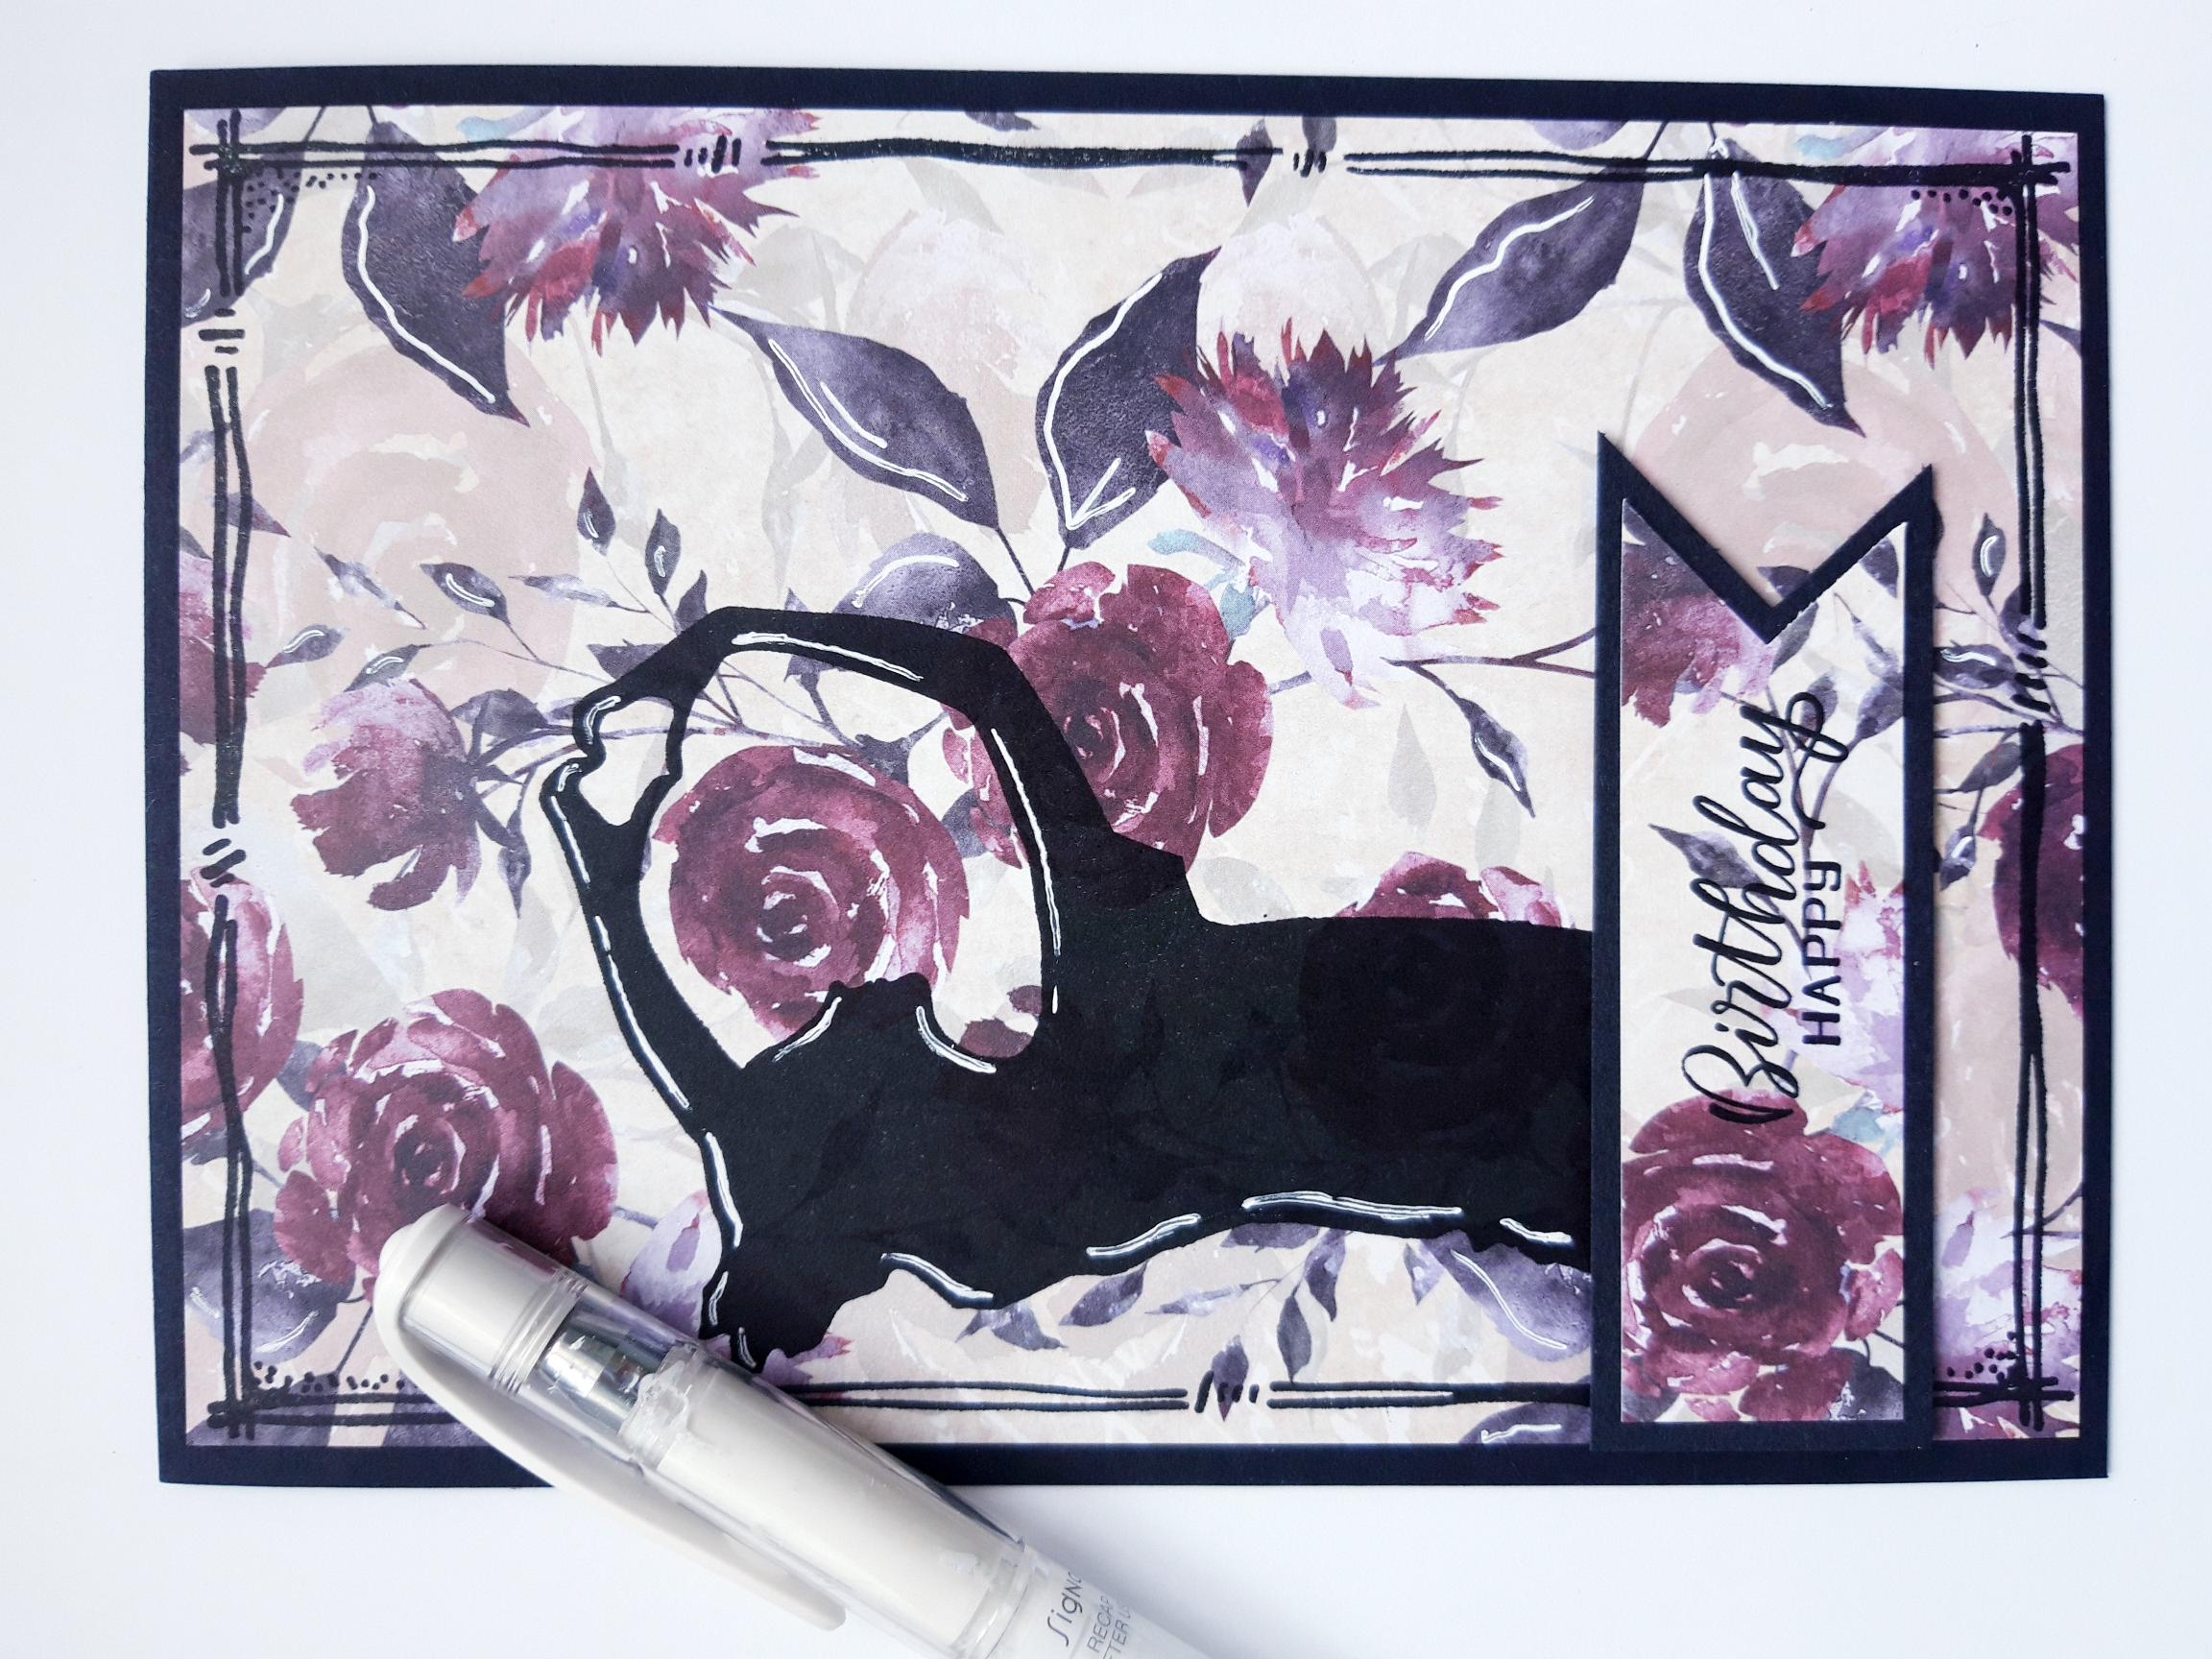
Tear this decorative sheet from the Happy Times paper pack and cut two pieces. One at 6 3/4 x 4 3/4" and the second at 3 1/4 x 1". Ink up the largest Dash Frame stamp, with the Onyx Black Versafine and stamp on to the largest of the trimmed papers. |
|
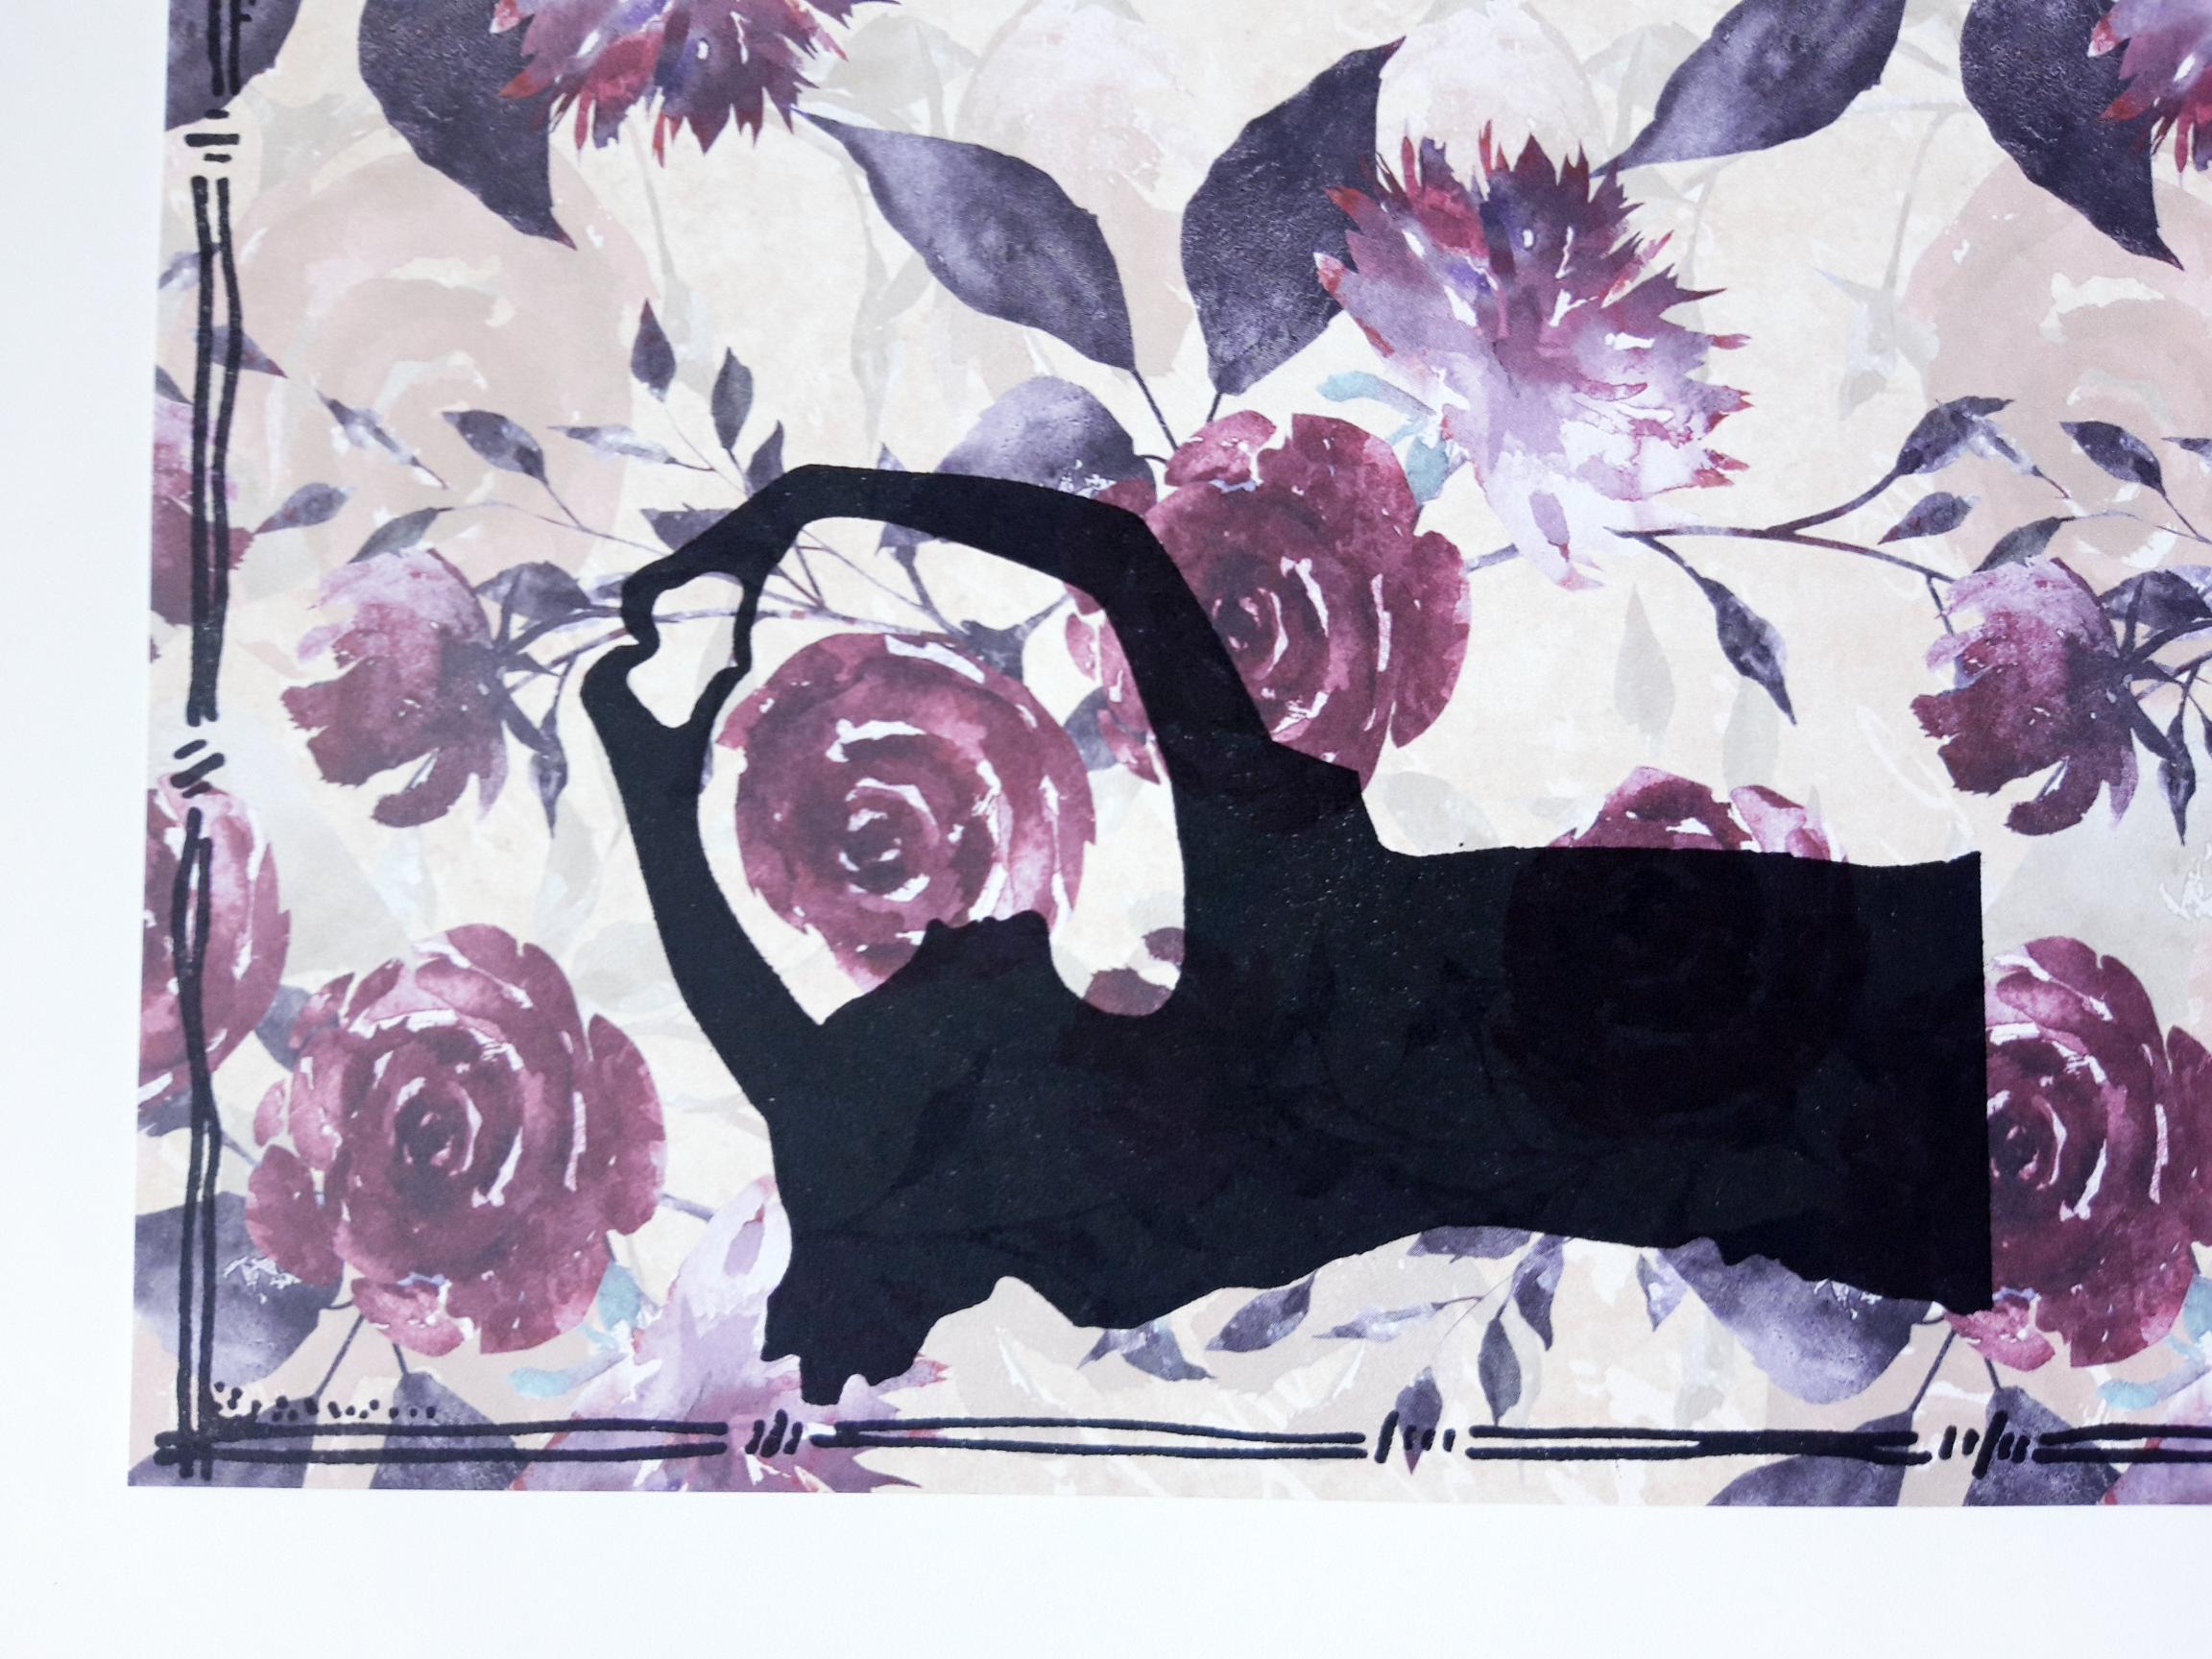
Ink up this beautiful stamp from the Unstoppable Stamp Collection, with the Versafine and stamp centrally, to the left of the decorative paper. Set to one side. |
|
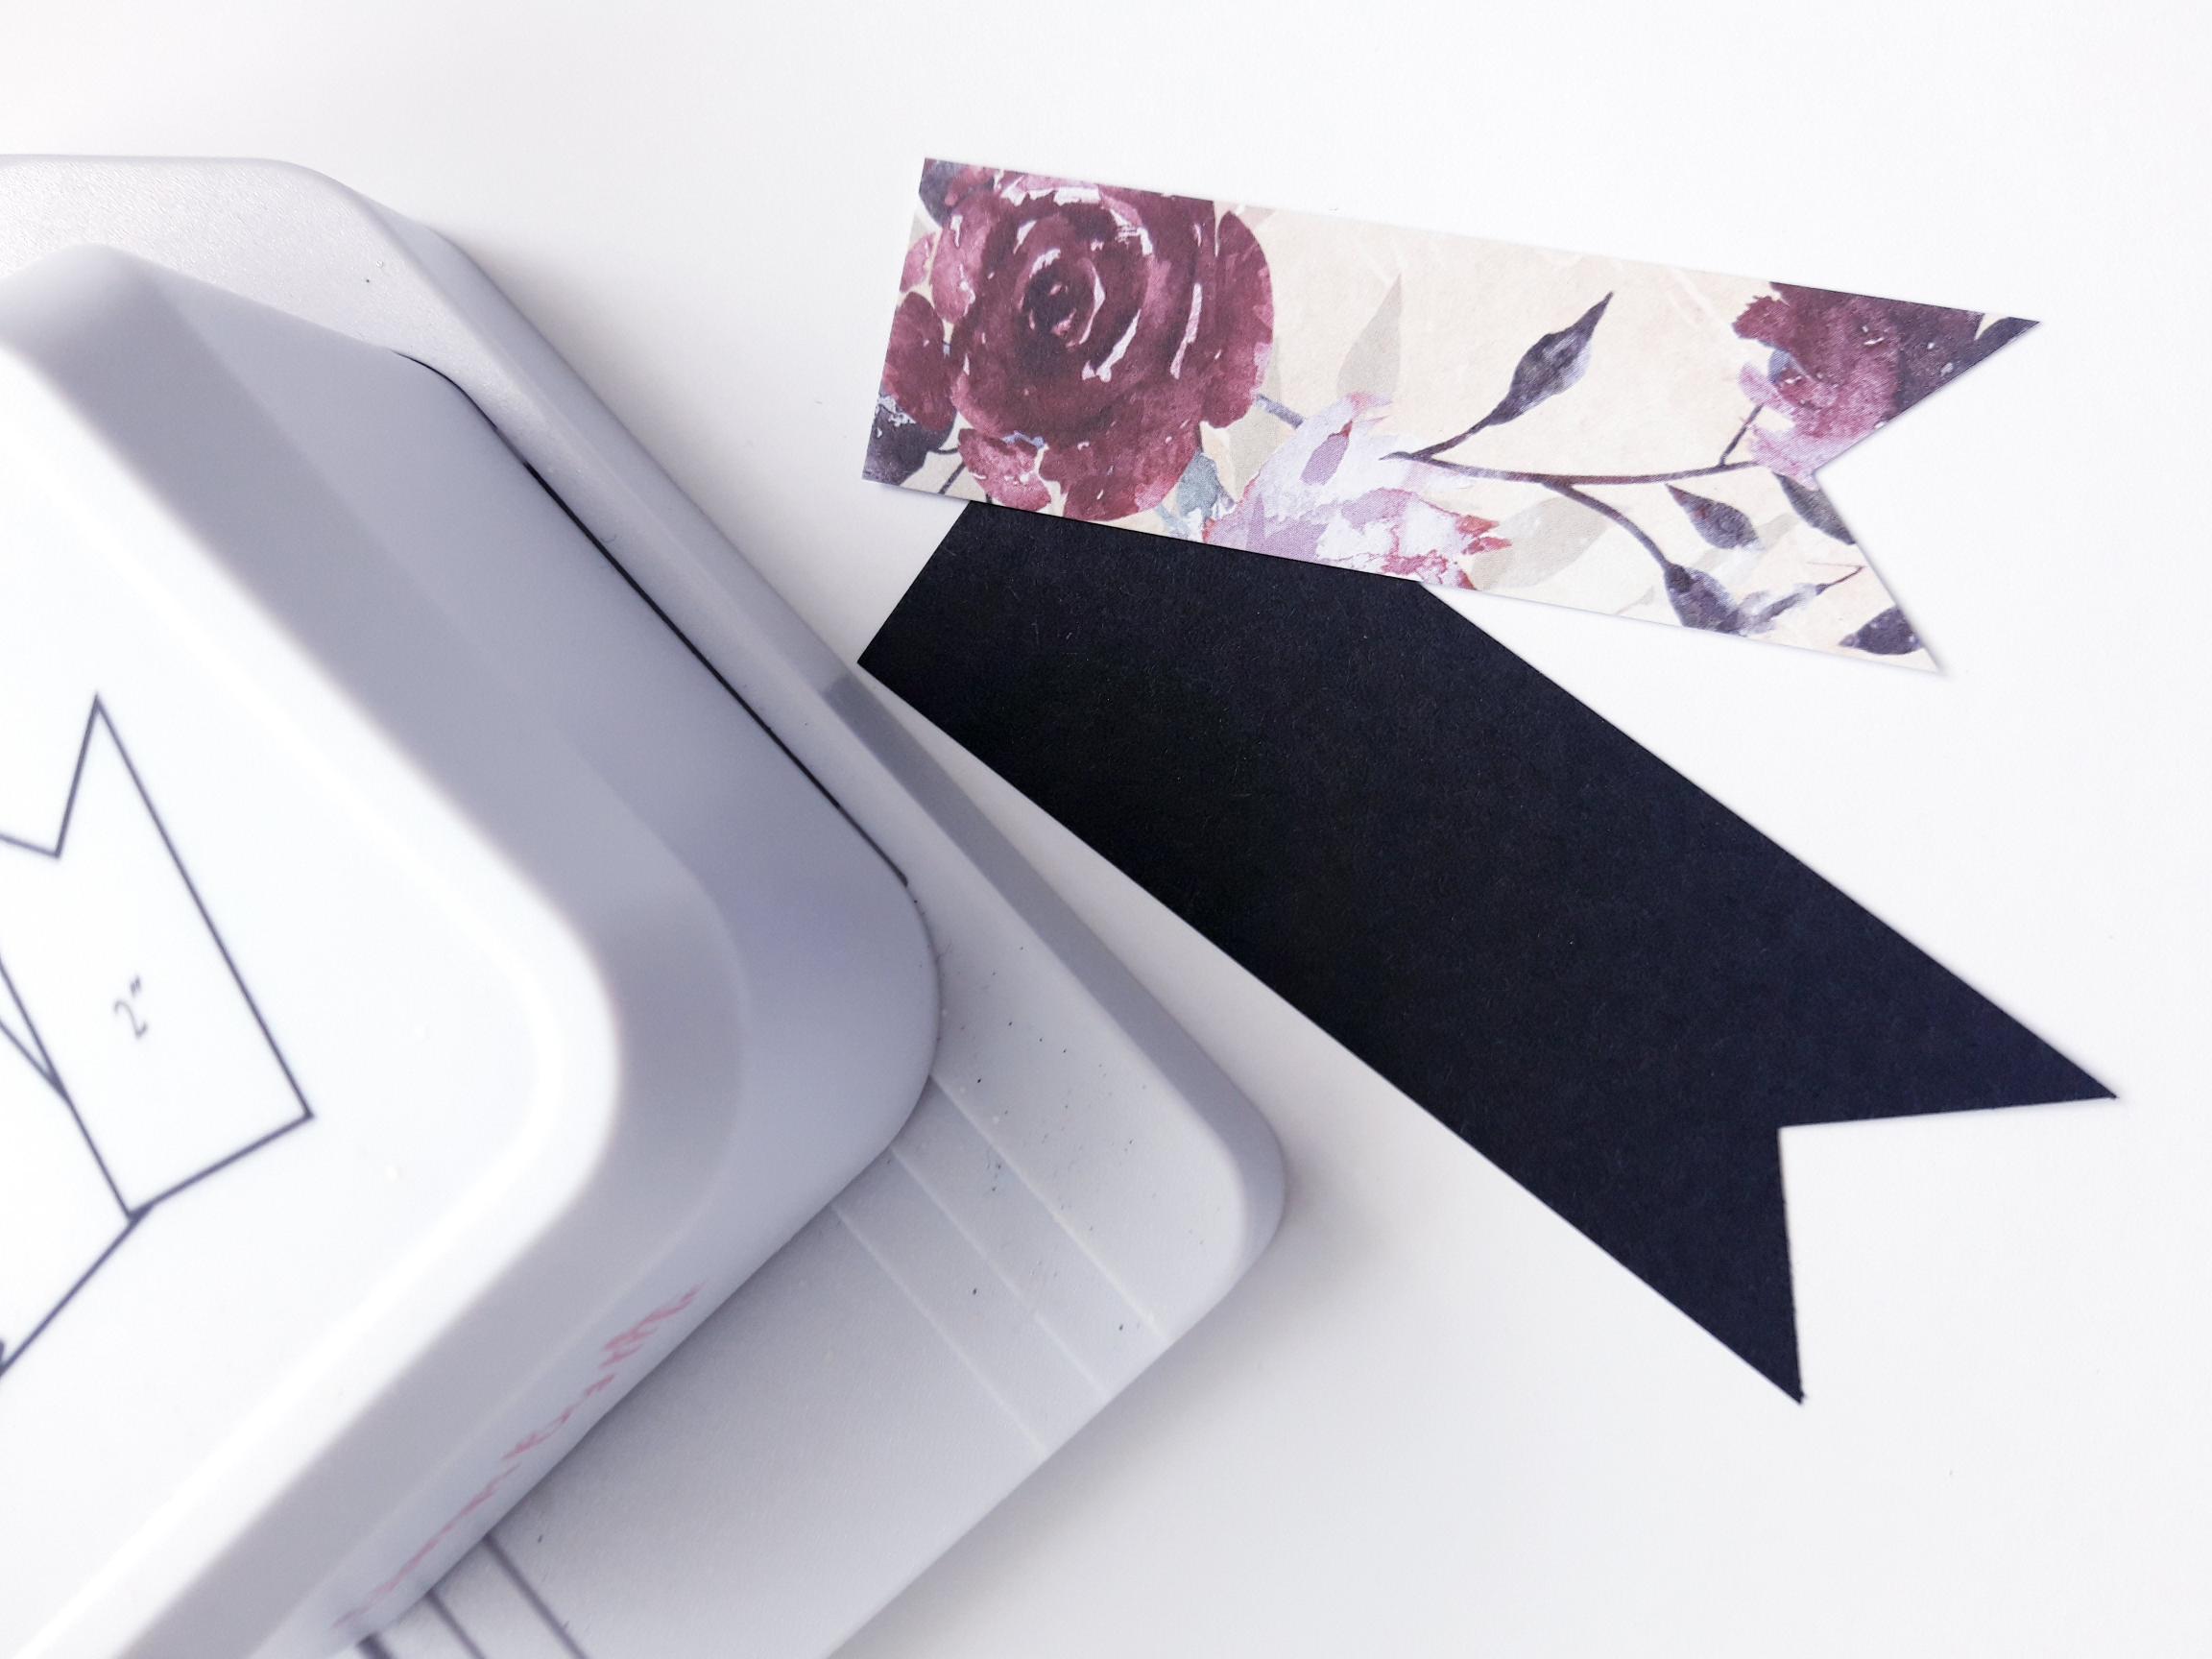
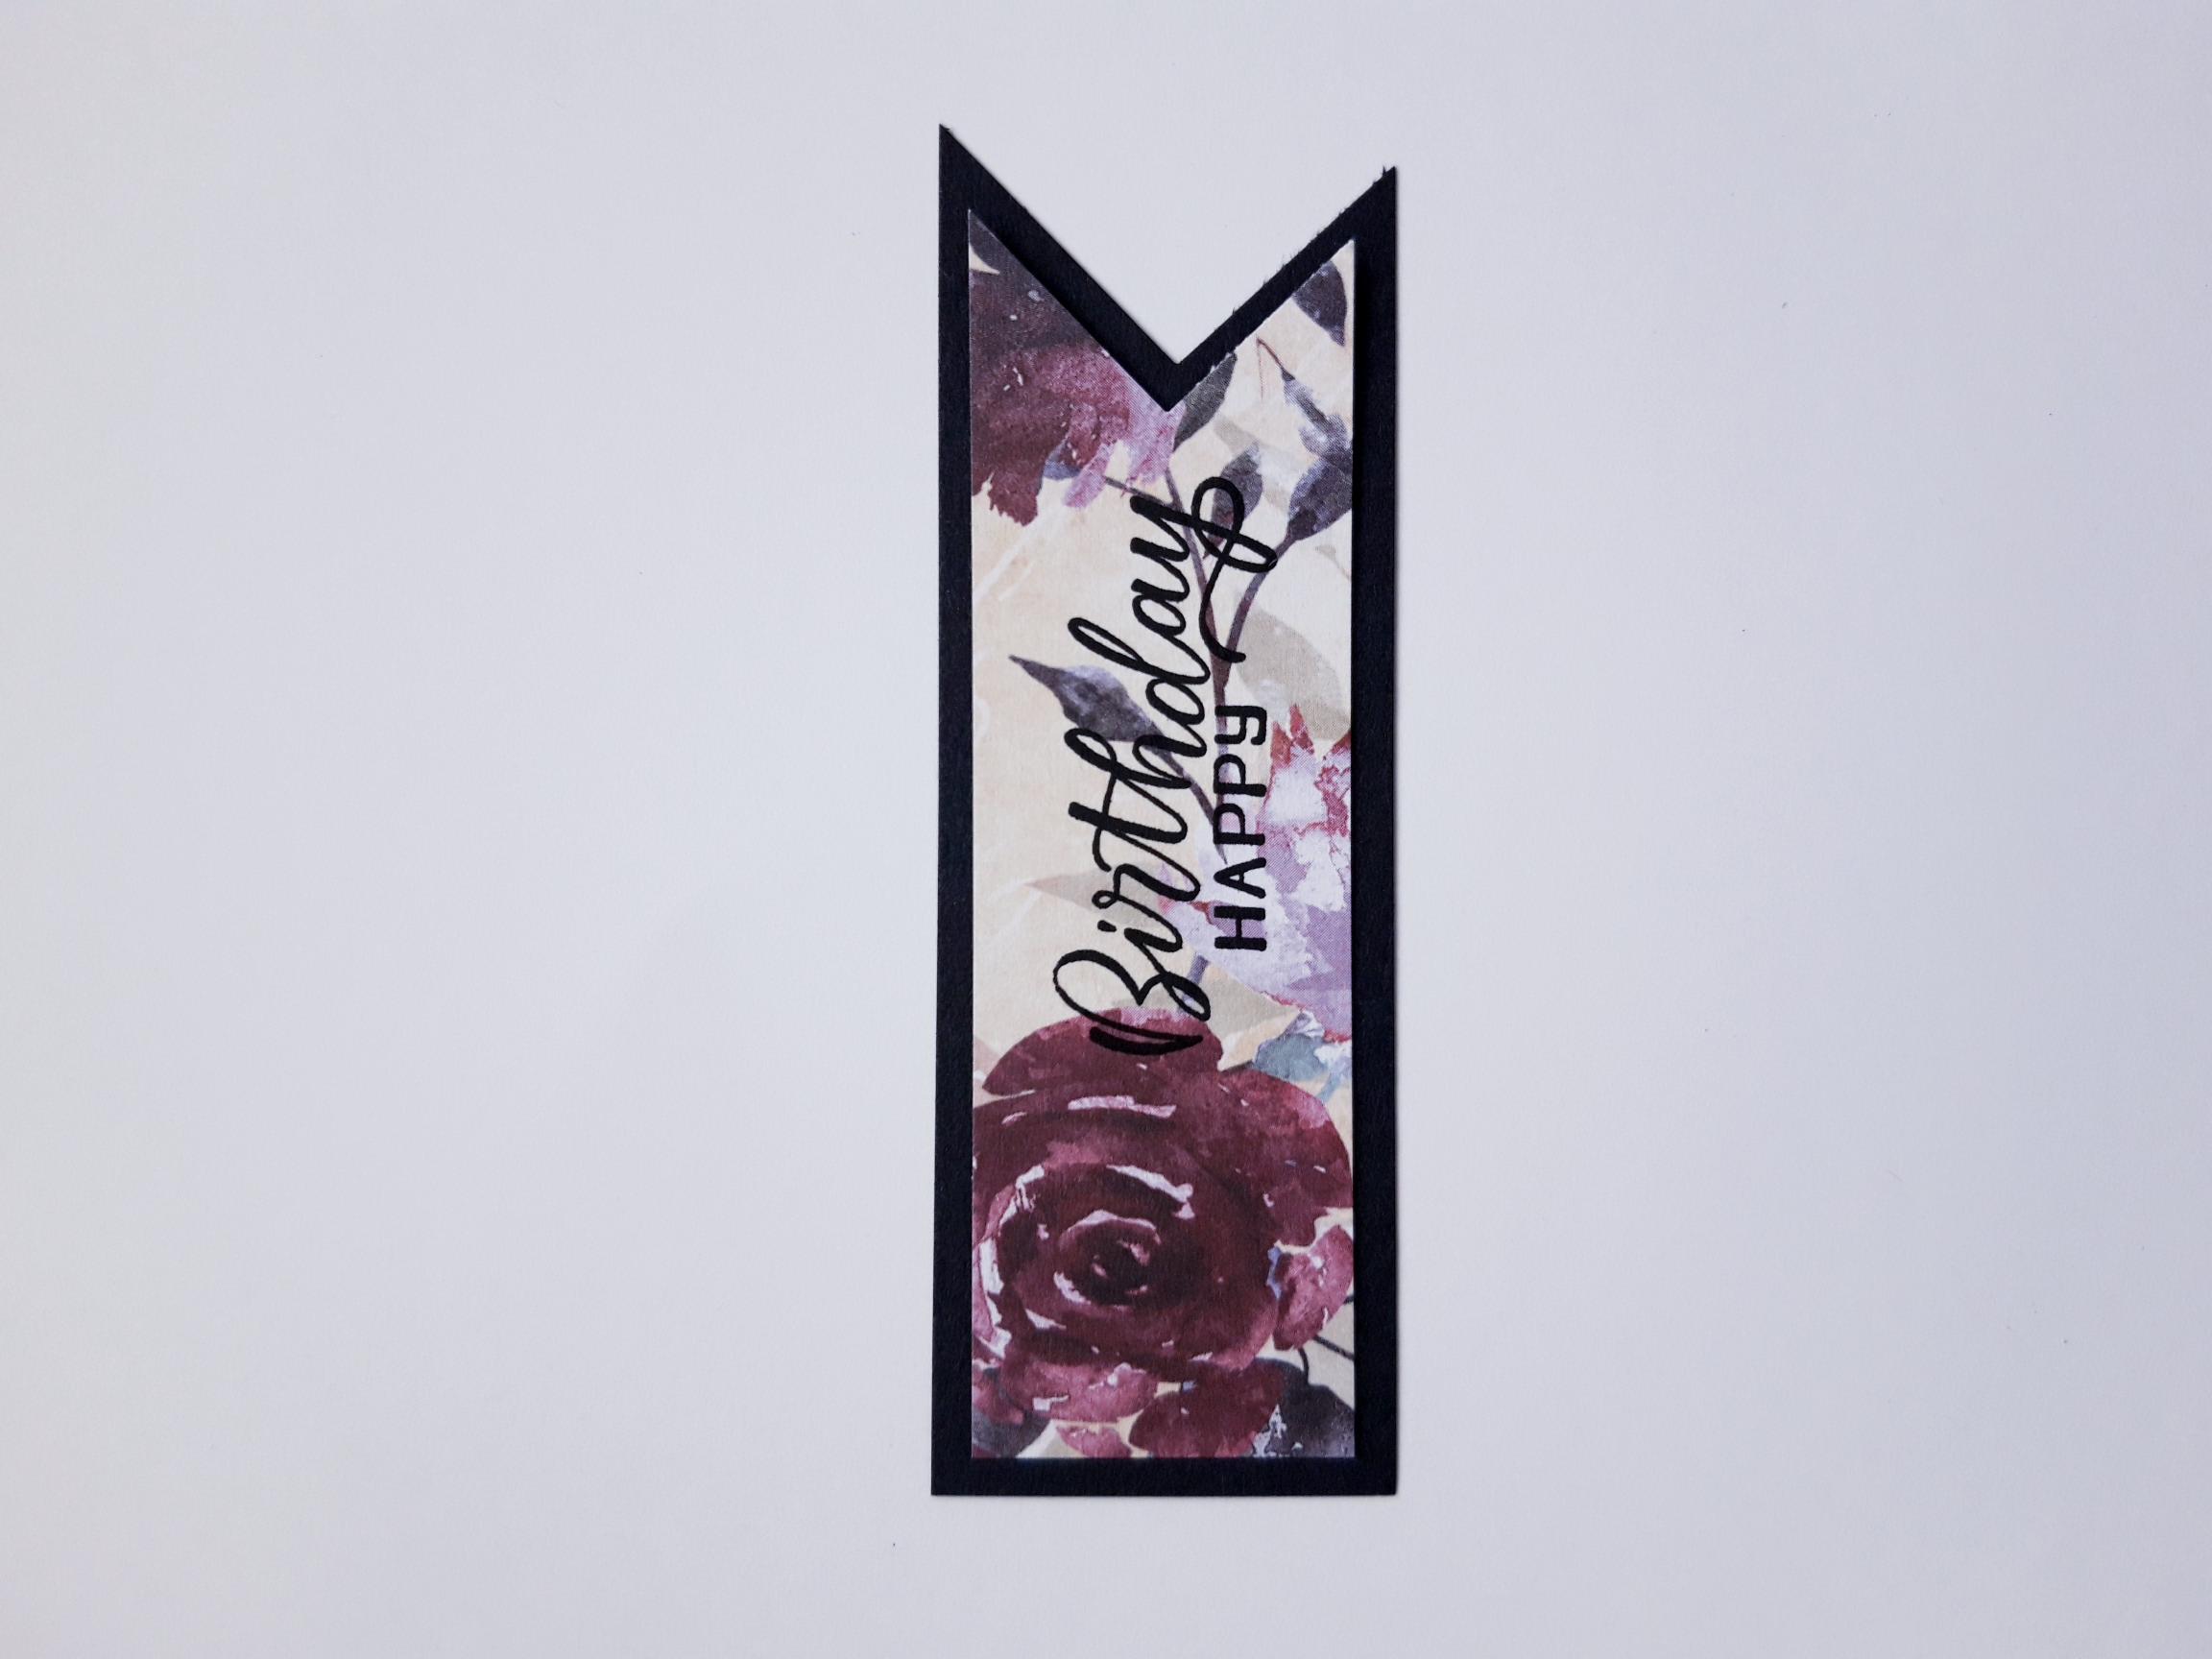
Use the banner tag punch on one end of both the black card (3 1/2 x 1 1/4") and the smaller, trimmed decorative paper, you set aside earlier. |
|
Ink up the sentiment stamp, from the Celebrate and Create Lamination Stamp Collection, with the Versafine. Stamp on to the decorative paper banner. |
|
Adhere this on to the black card banner. |
|
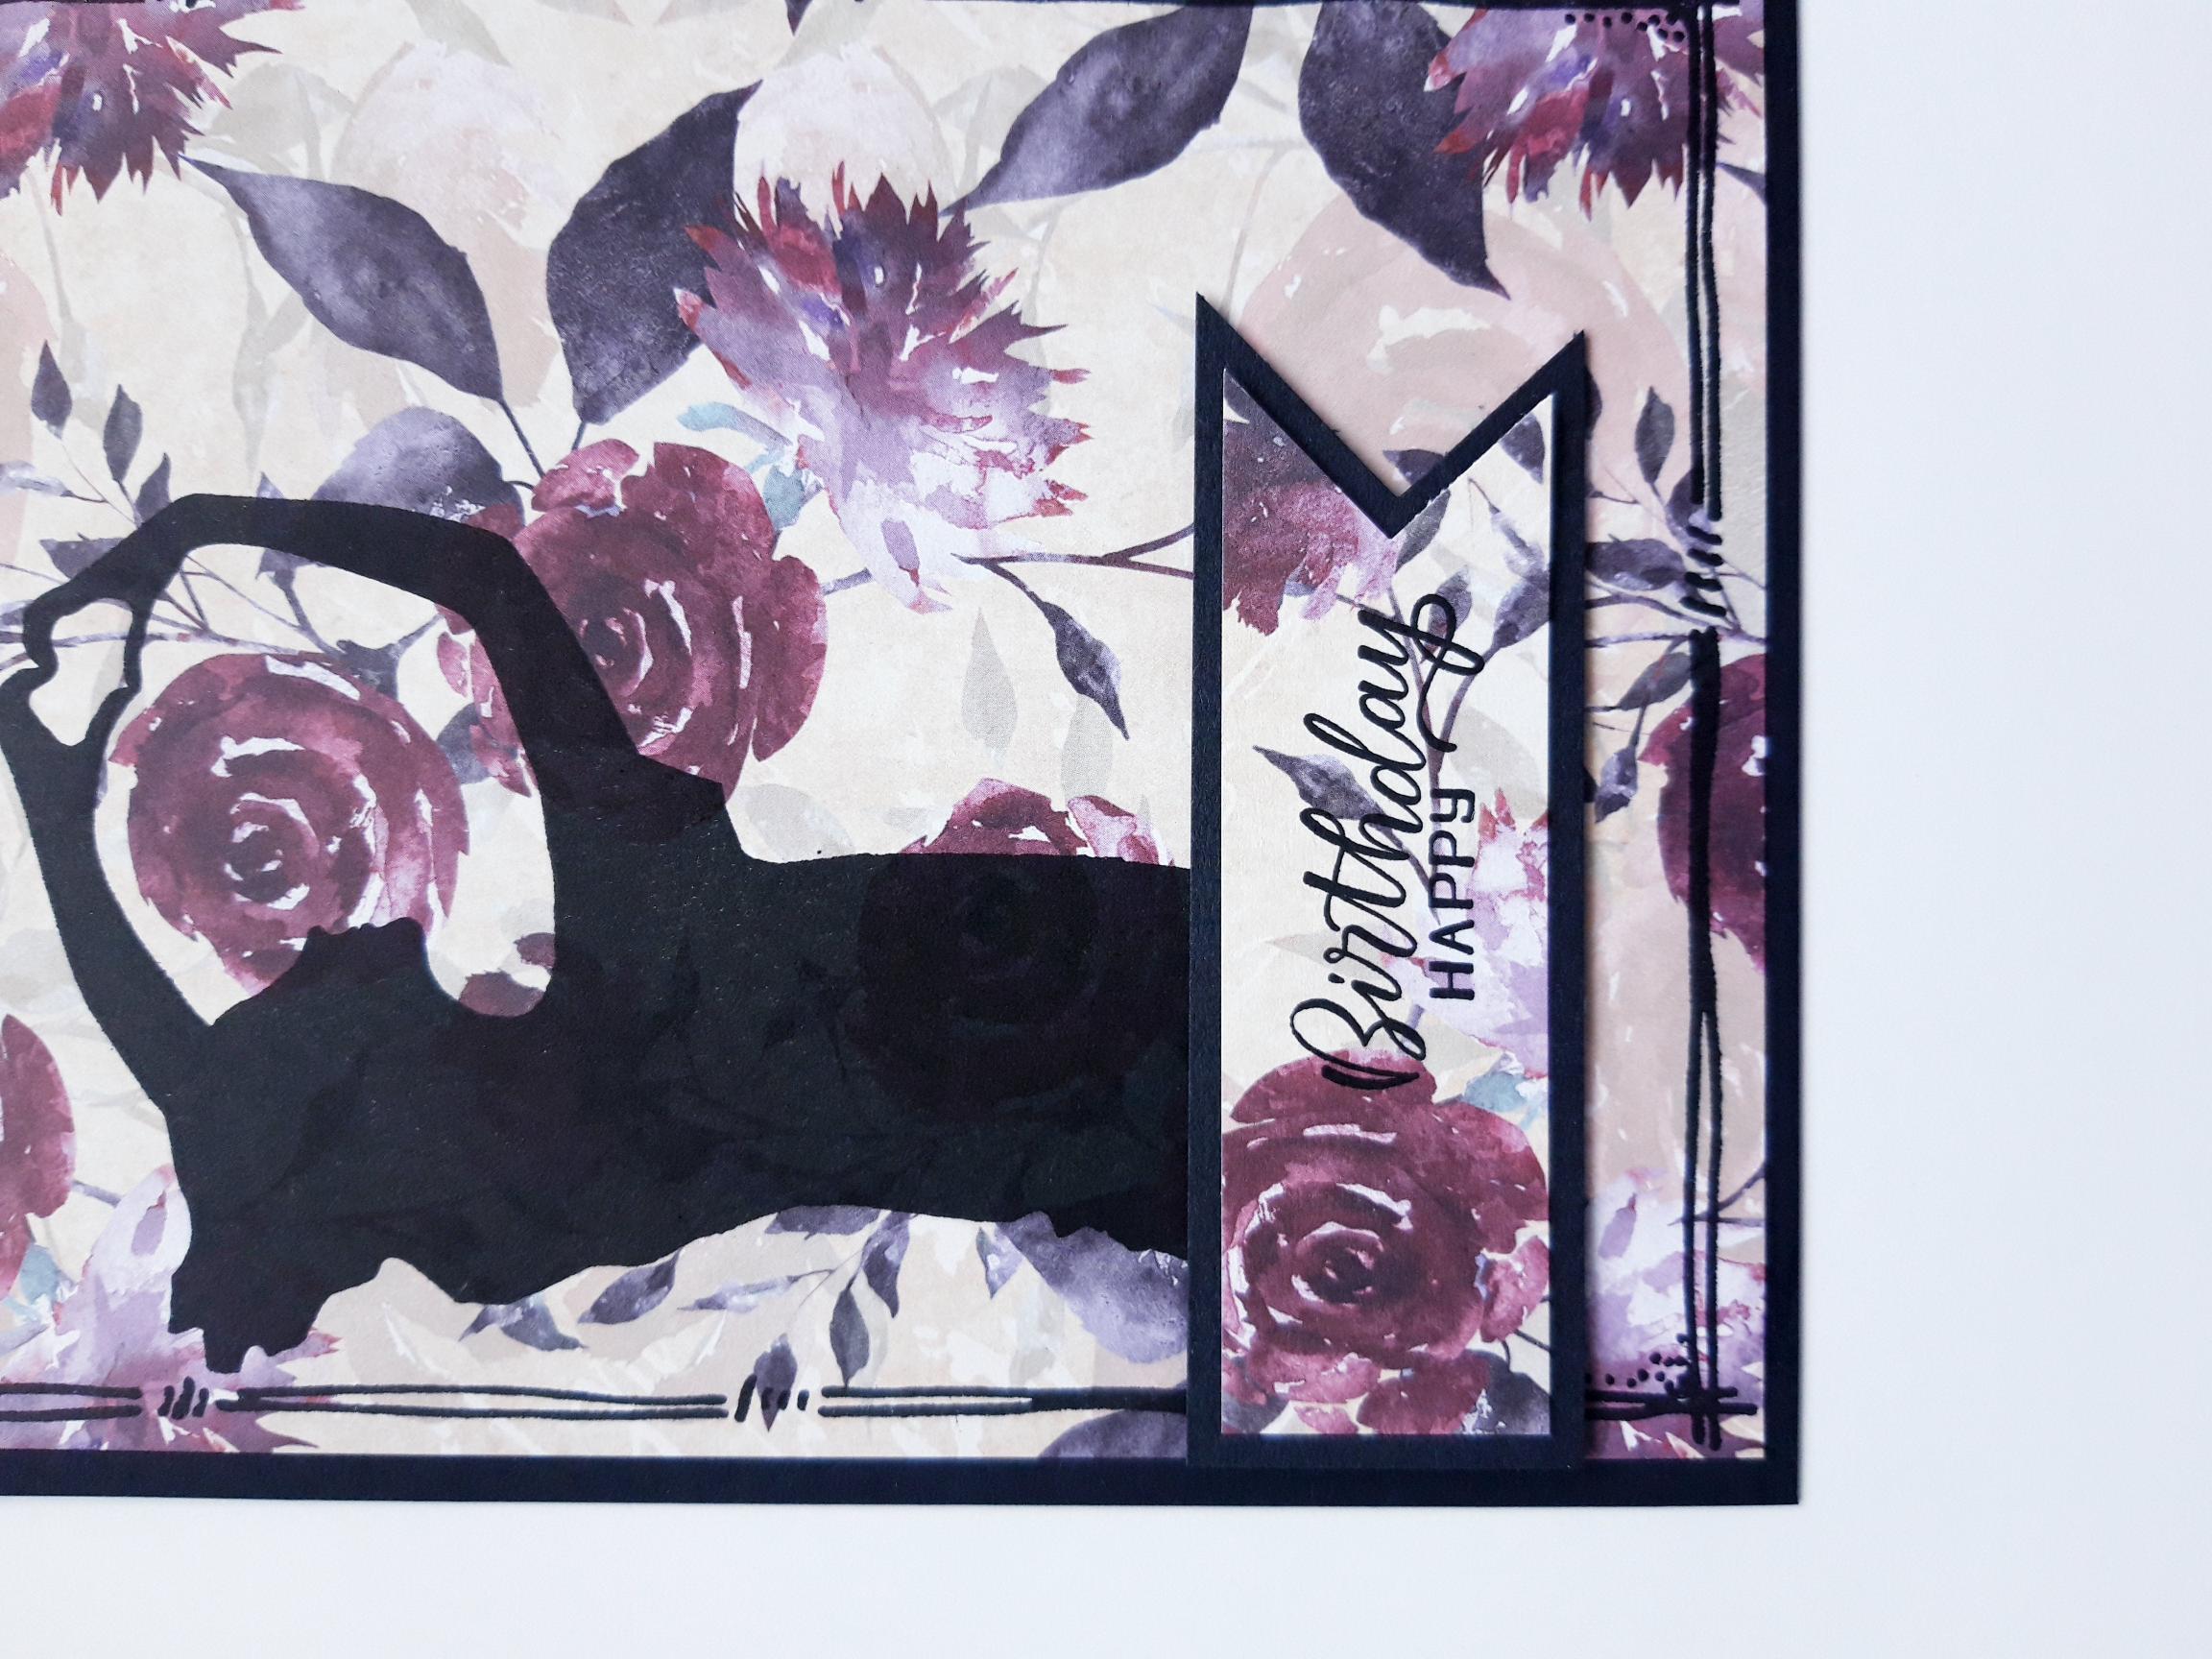
Adhere your stamped decorative paper, on to the front of your black, top folding card blank. |
|
Adhere the banner underneath your stamped image, flush with the left hand edge of the decorative paper. Leave the tails of the banner loose, to add movement to your card. |
|
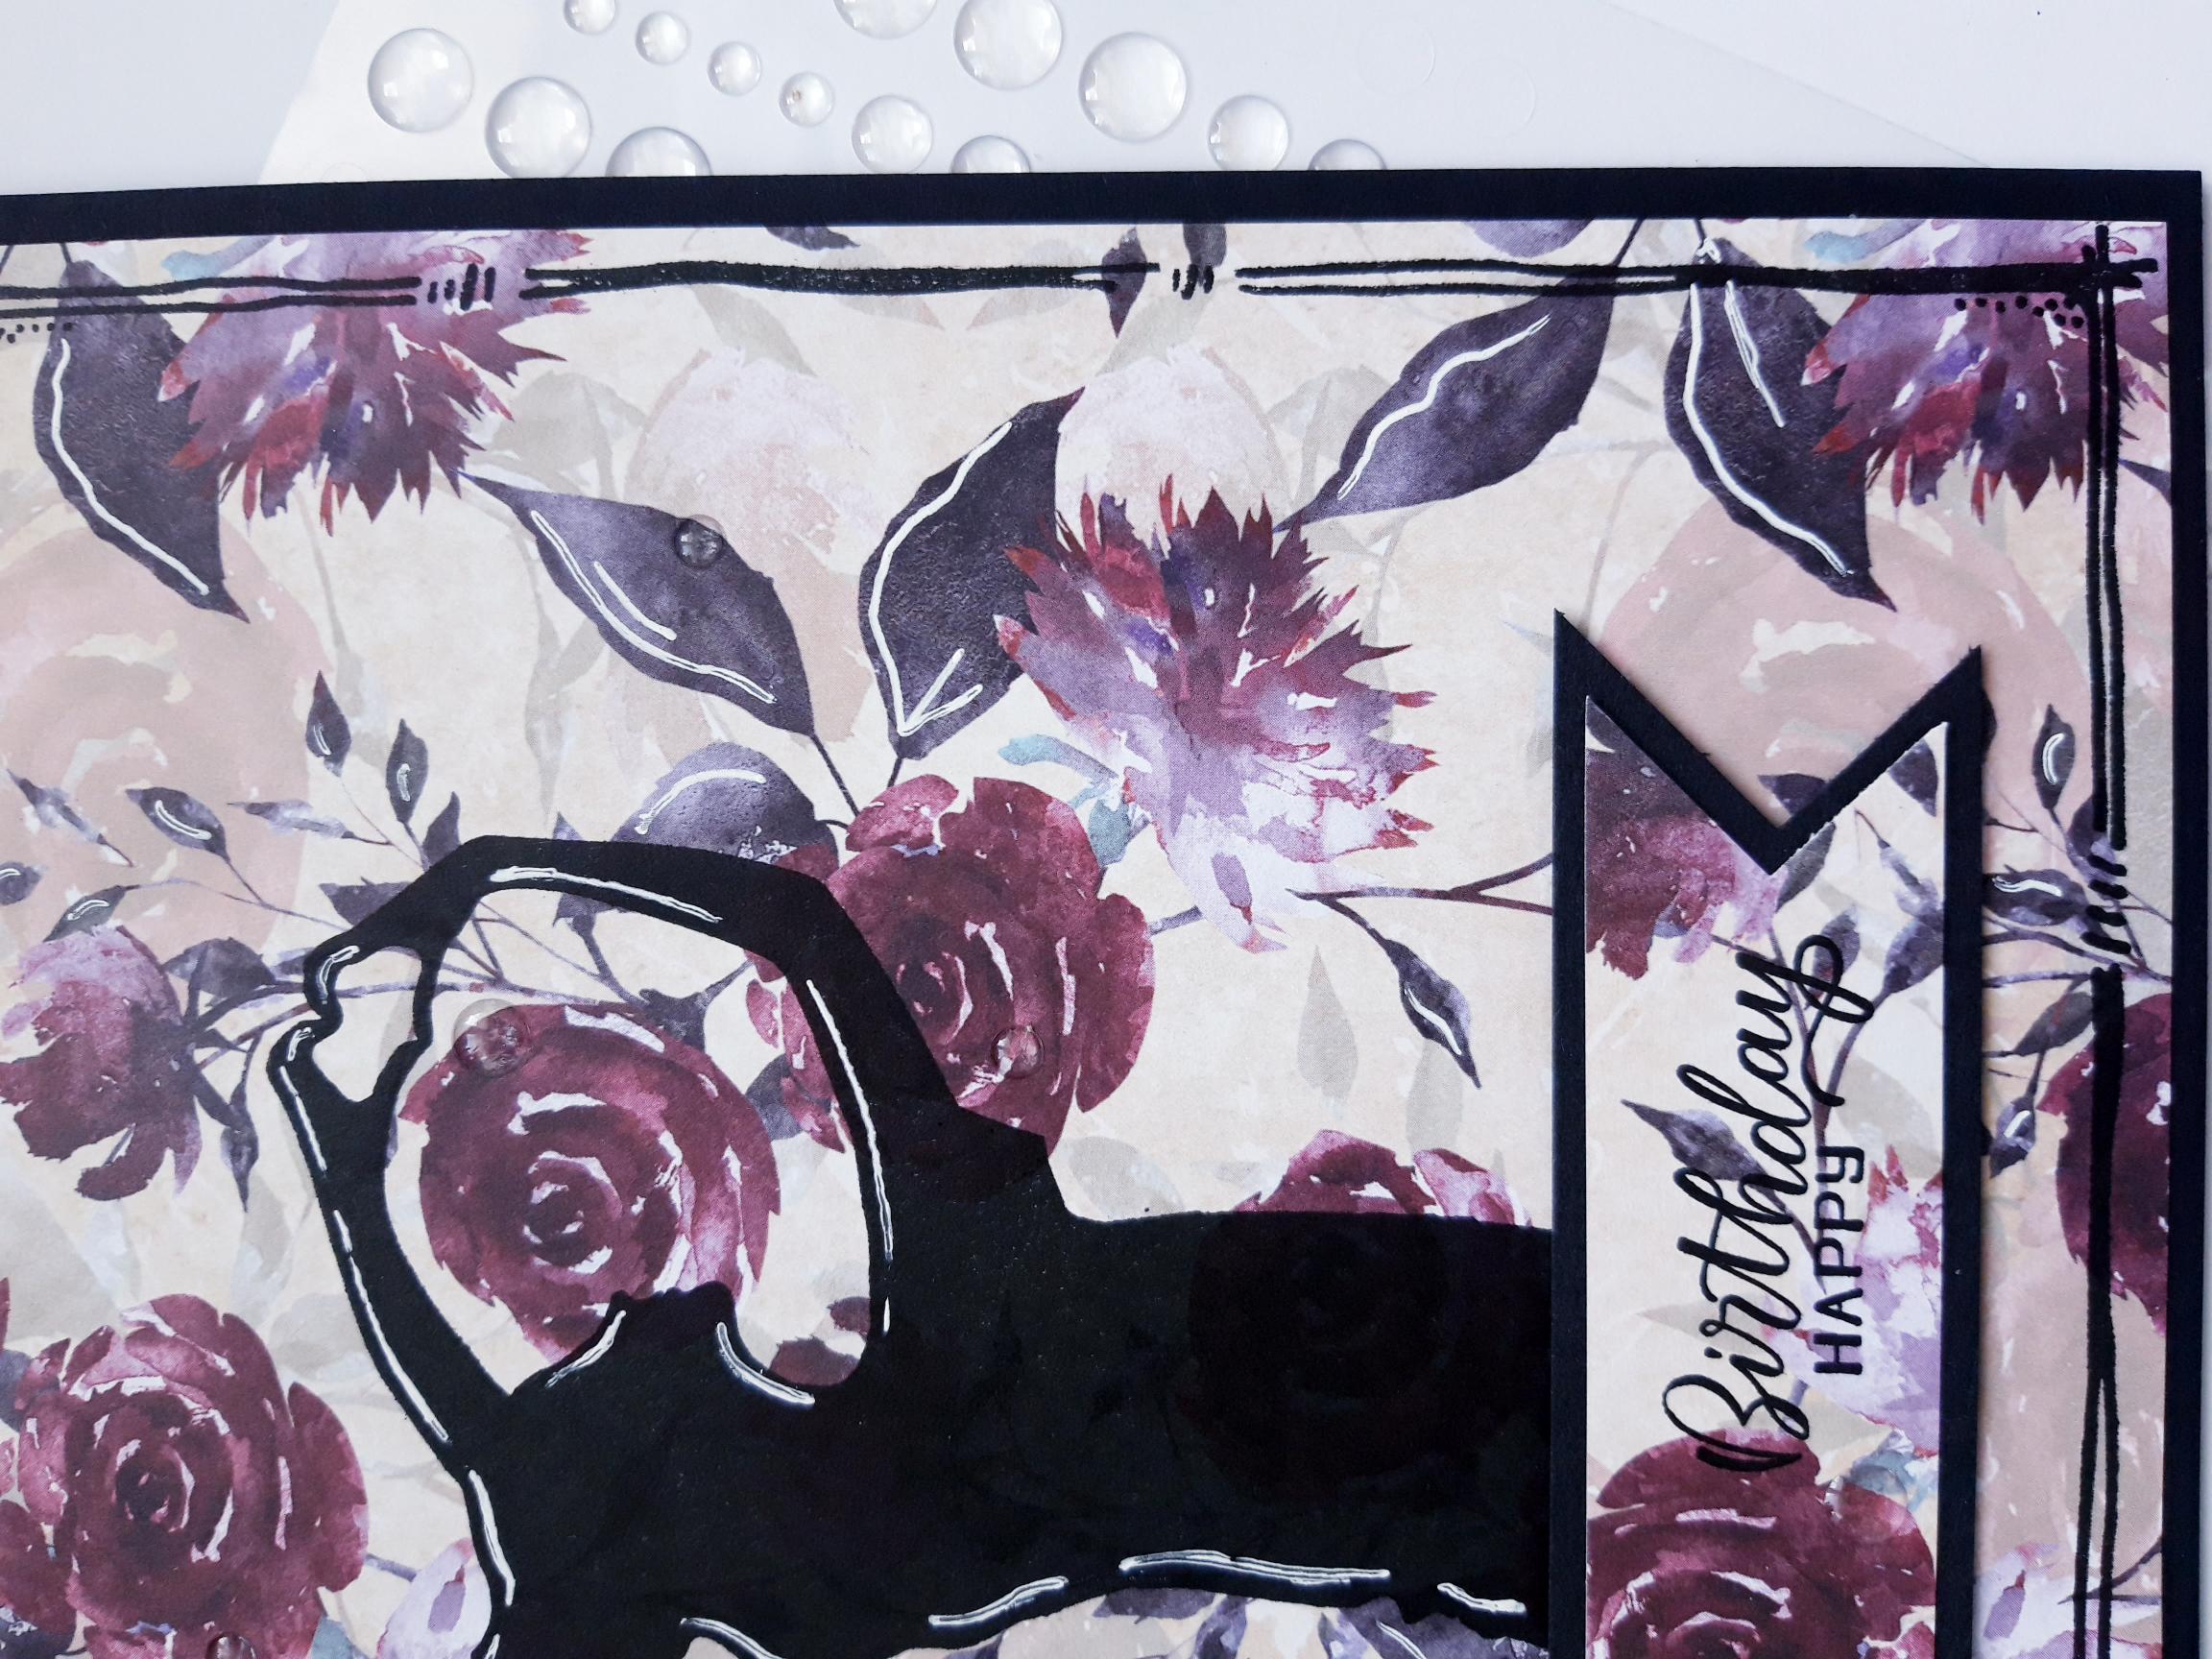
Use a white gel pen to add accents and highlights, to both your stamped image and the images on the decorative paper. |
|
To finish, add clear adhesive gems randomly, on to the florals of your decorative paper. |