Give your friends $10 off their first order!
Refer a FRIEND


WHAT YOU WILL NEED
White card blank 7 x 7"
White card 6 x 6"
Imala Dear Santa Stamp Collection
Imala Gorgeous Snowflake stencil
Star Stitching Die Collection
JOY Die Collection
Take The Photo/Night Before Christmas/Angelic Frame Die Collections - for snowflake dies
Funky Fossil Patina 8 x 8" paper pad
Versafine Ink Pad: Onyx Black
Distress Ink/Oxide ink pad: Unchartered Mariner, Vintage Photo
Blending tool
Paintbrush
Black pen
Ranger Liquid Pearl Drops: White Opal
Ranger Stickles: Frosted Lace
Eureka 101
Paper Trimmer
Perfect Together Glue
Foam pads/sheet
Die Cutting machine
[click image to enlarge] 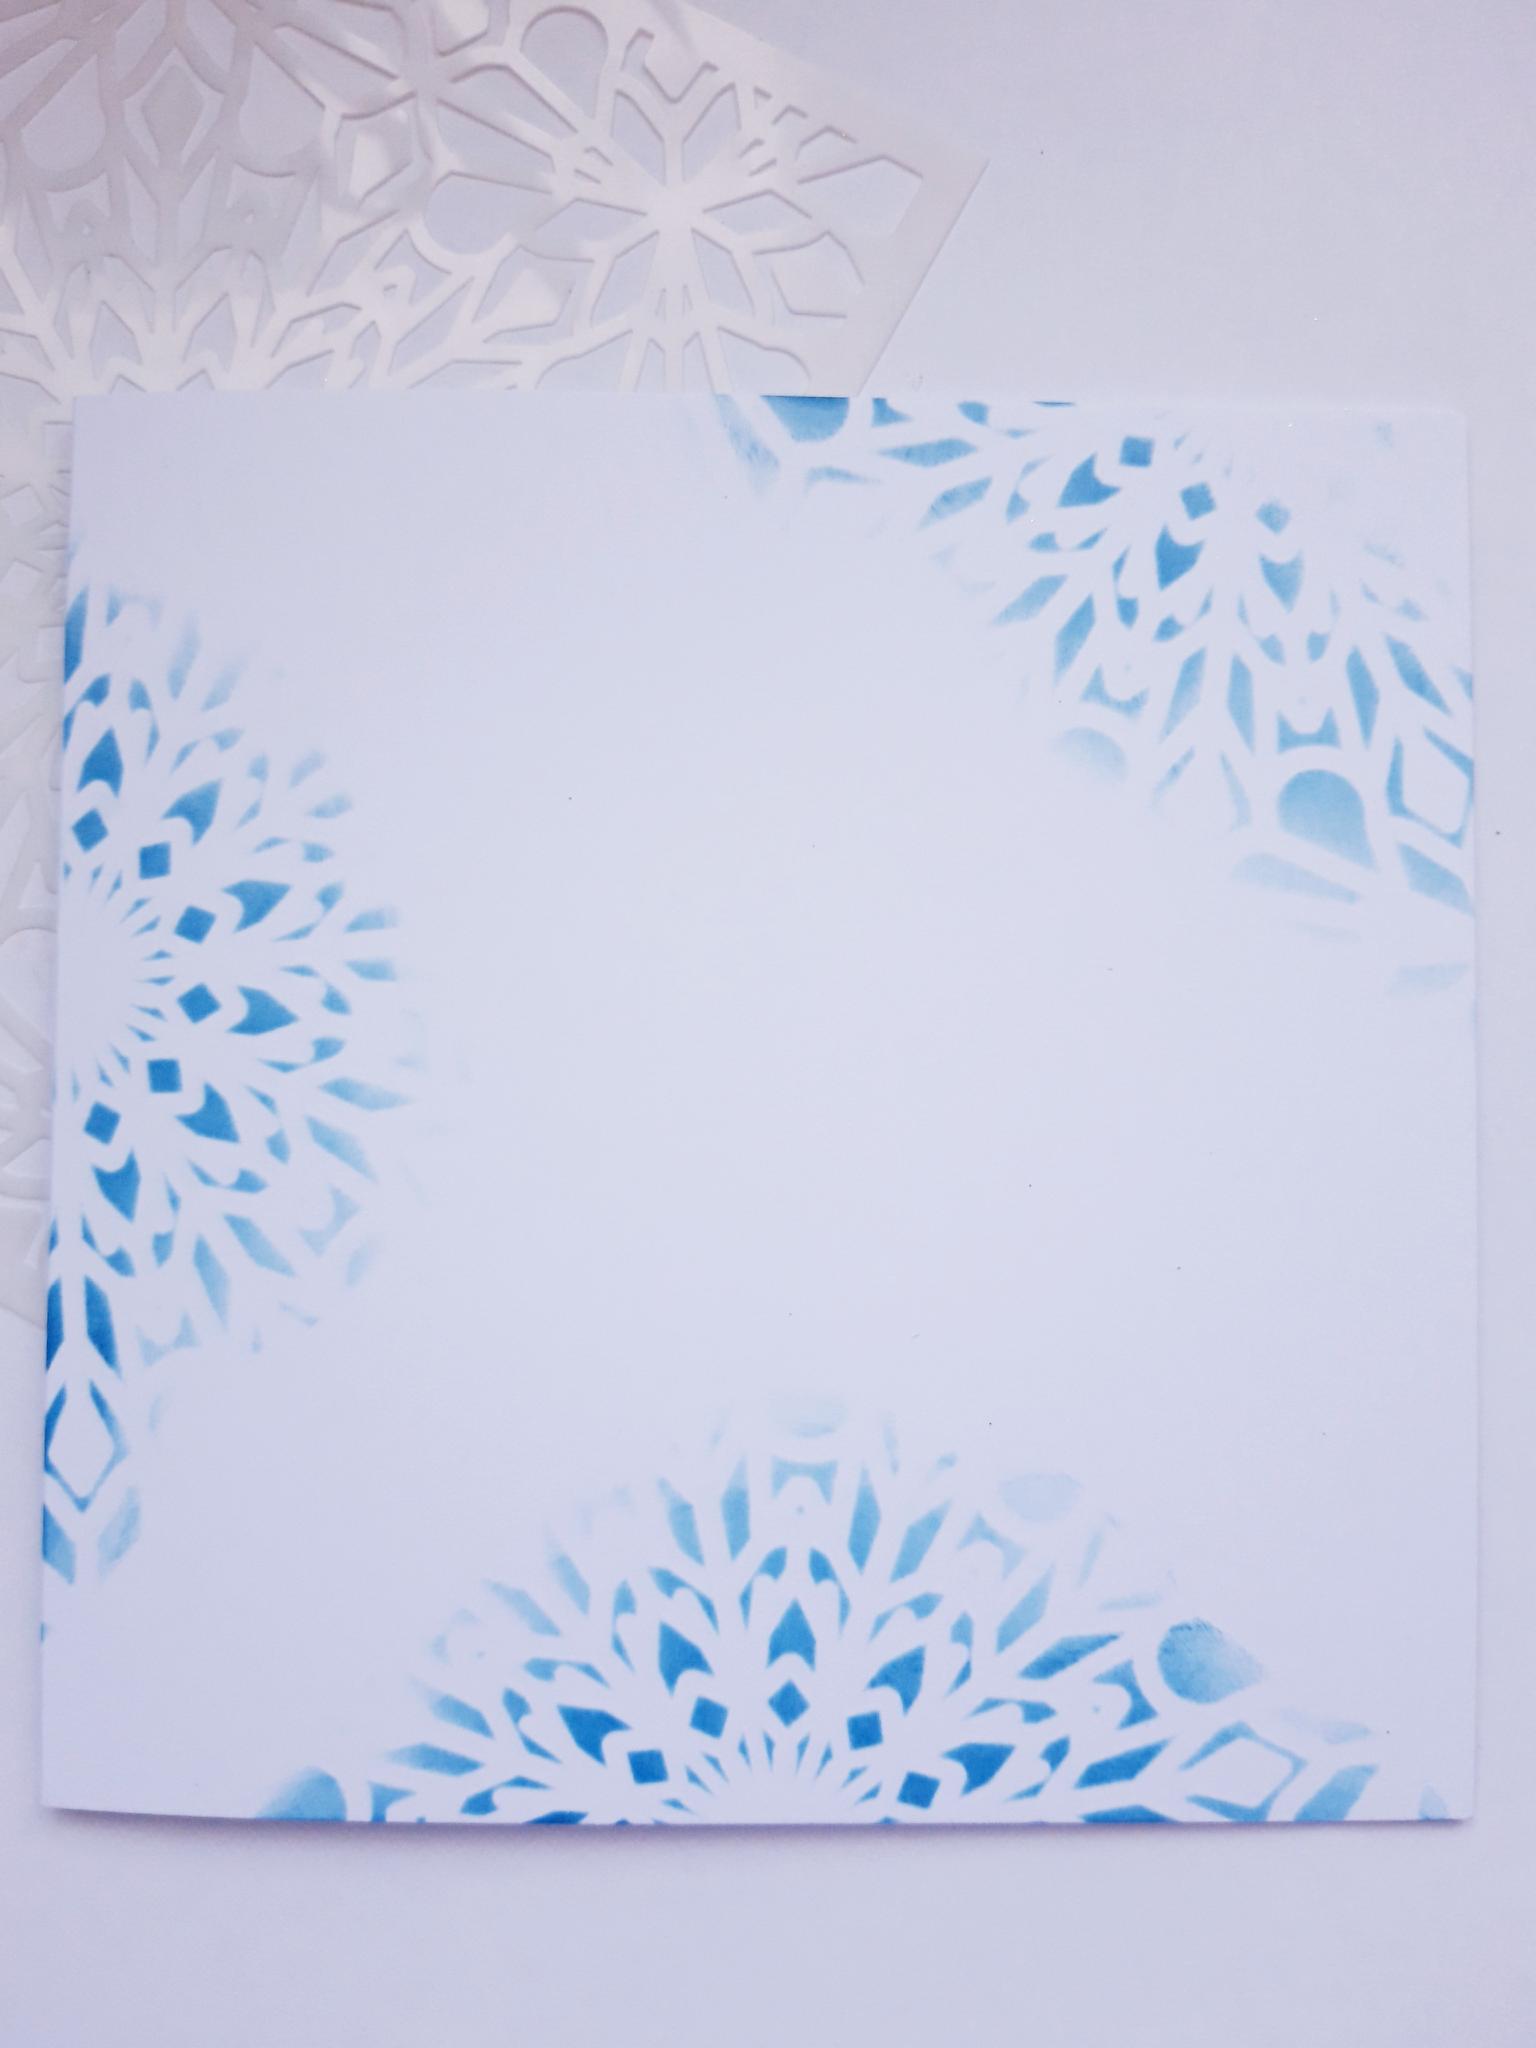
|
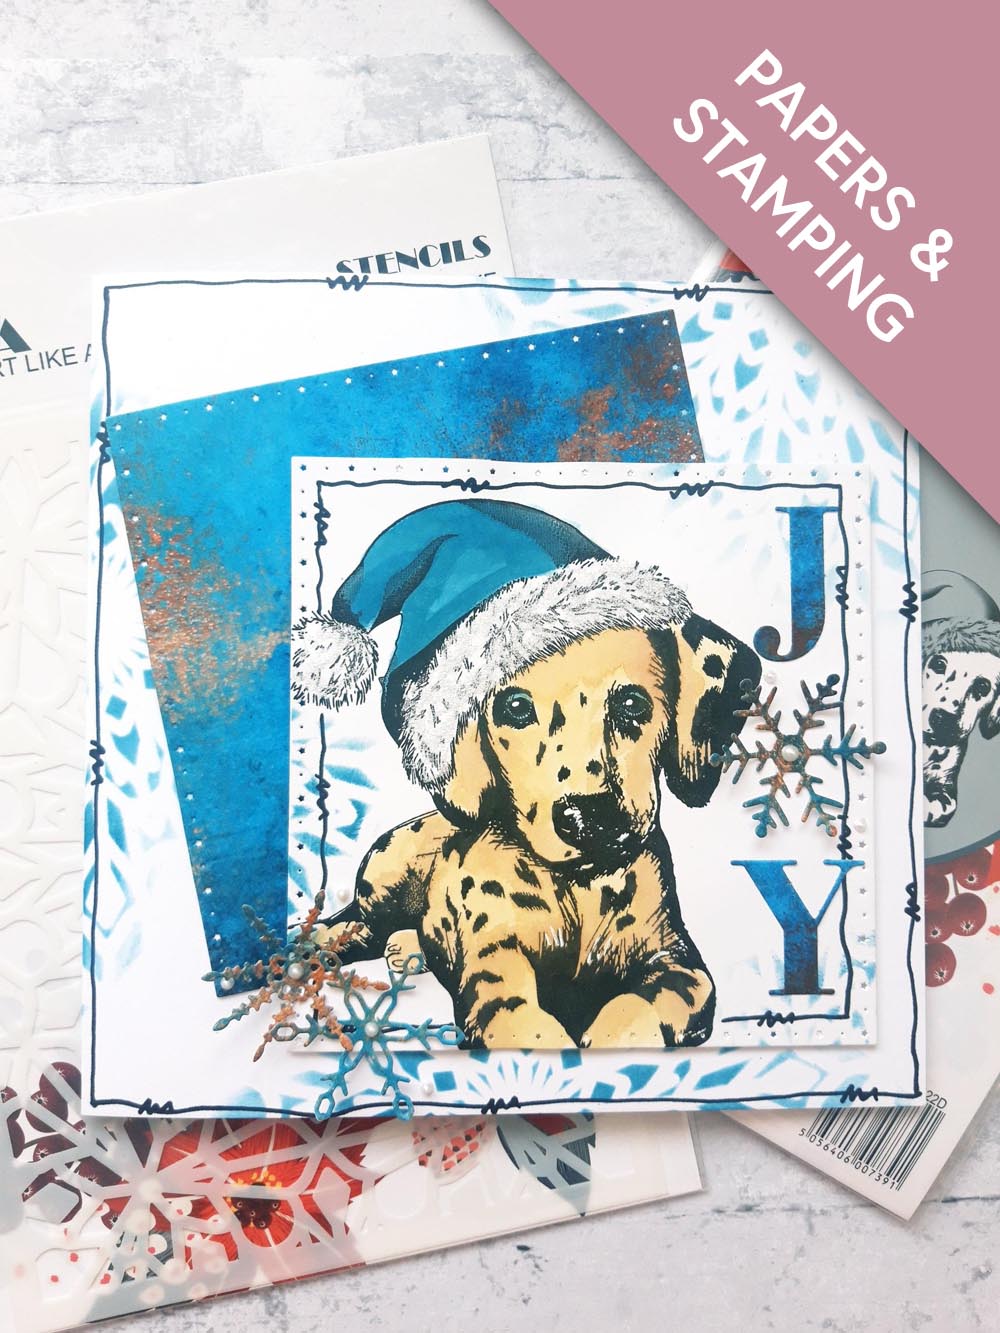
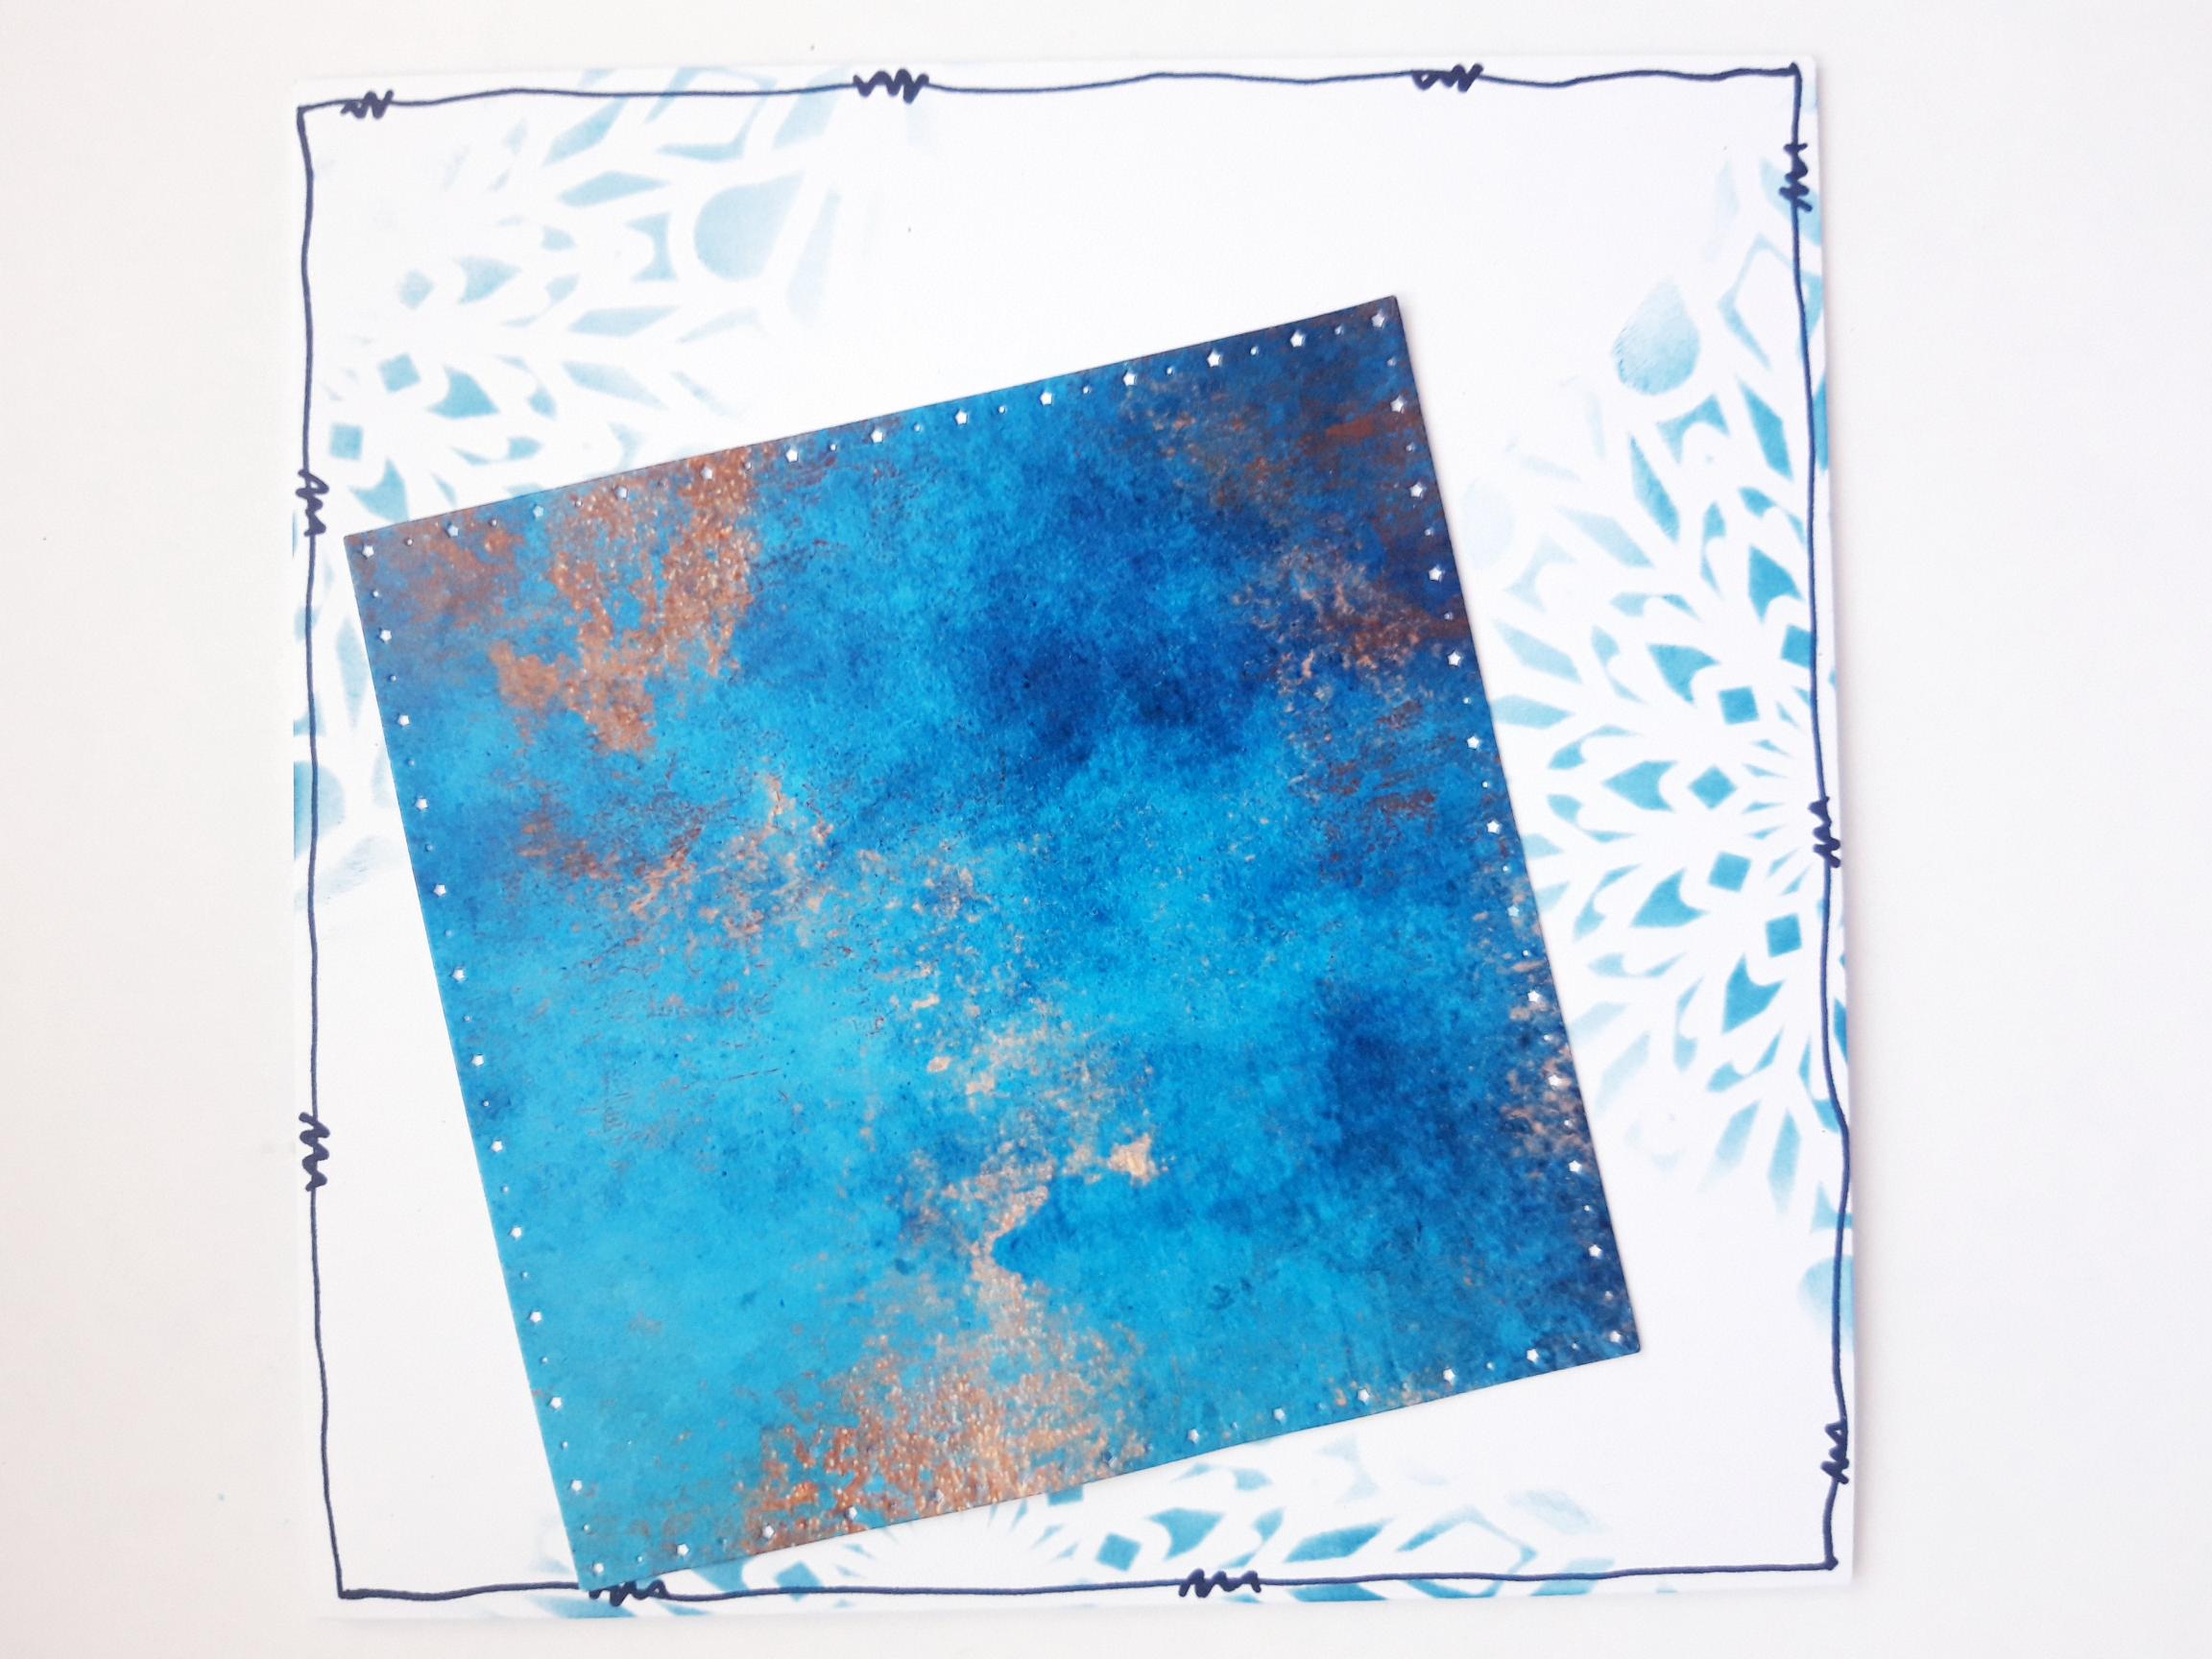
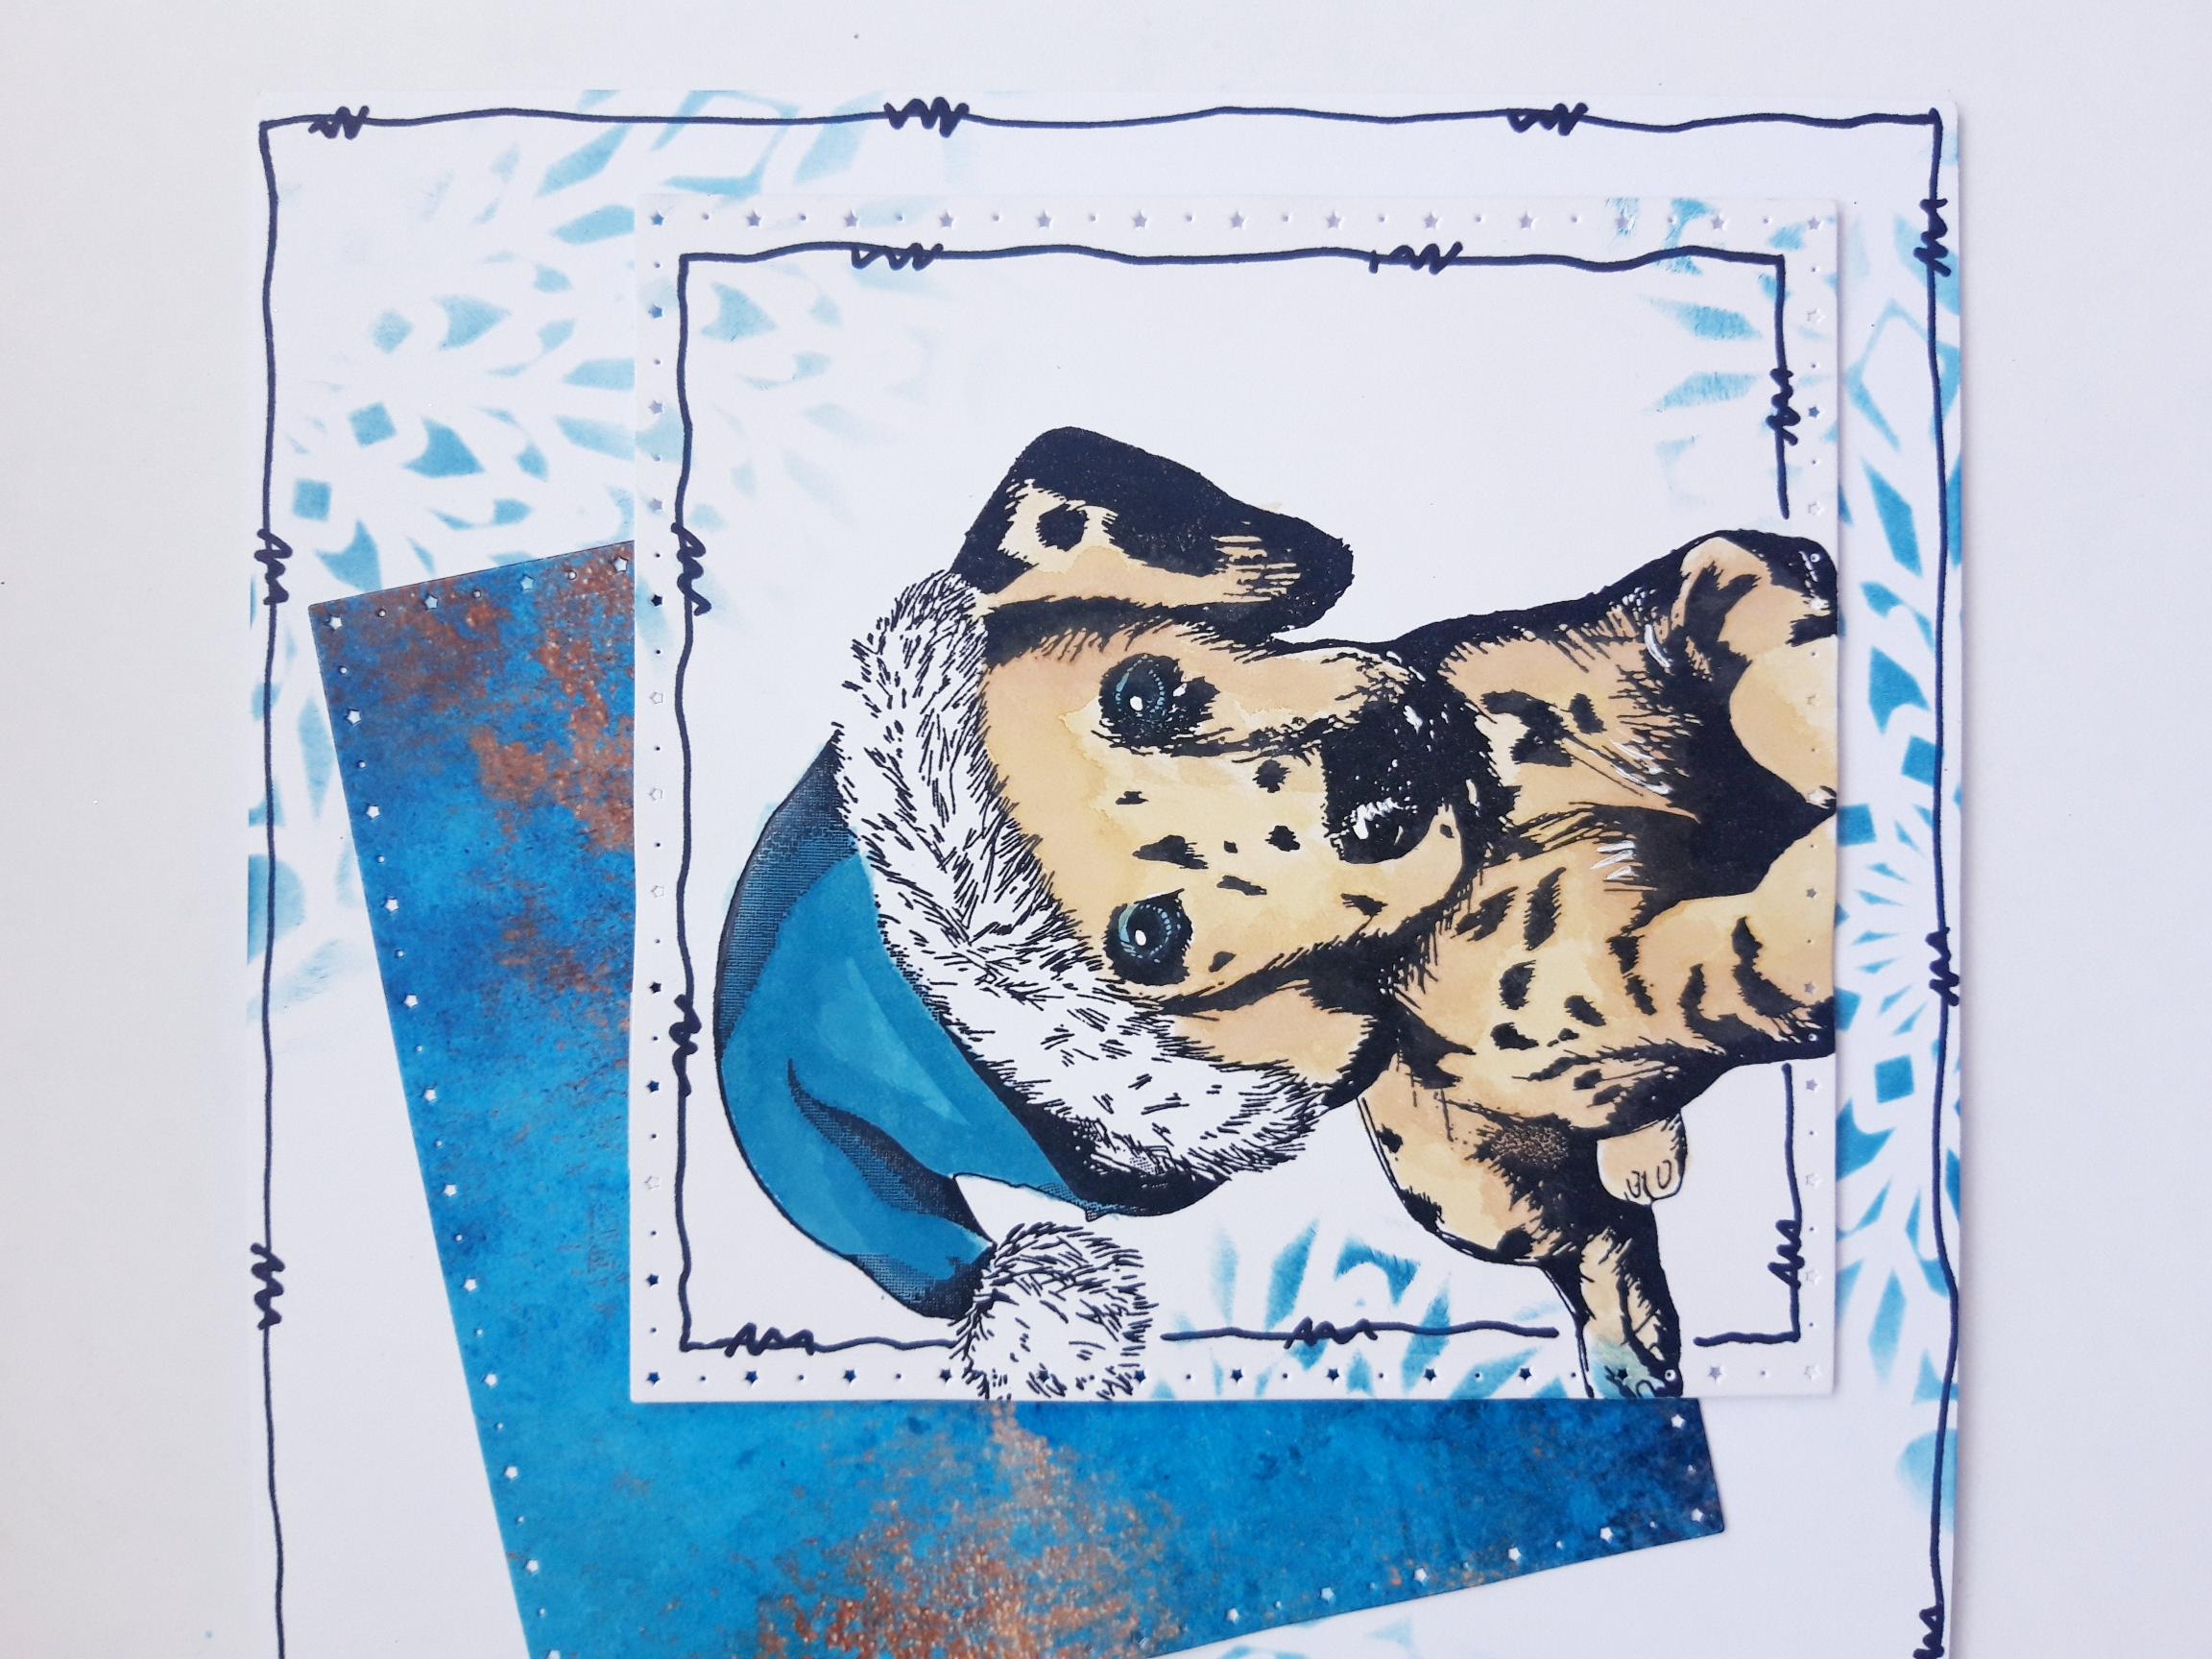
Use your blending tool to randomly blend the Unchartered Mariner Oxide through the Imala Gorgeous Snowflake stencil, directly on to the front of your white card blank. |
|
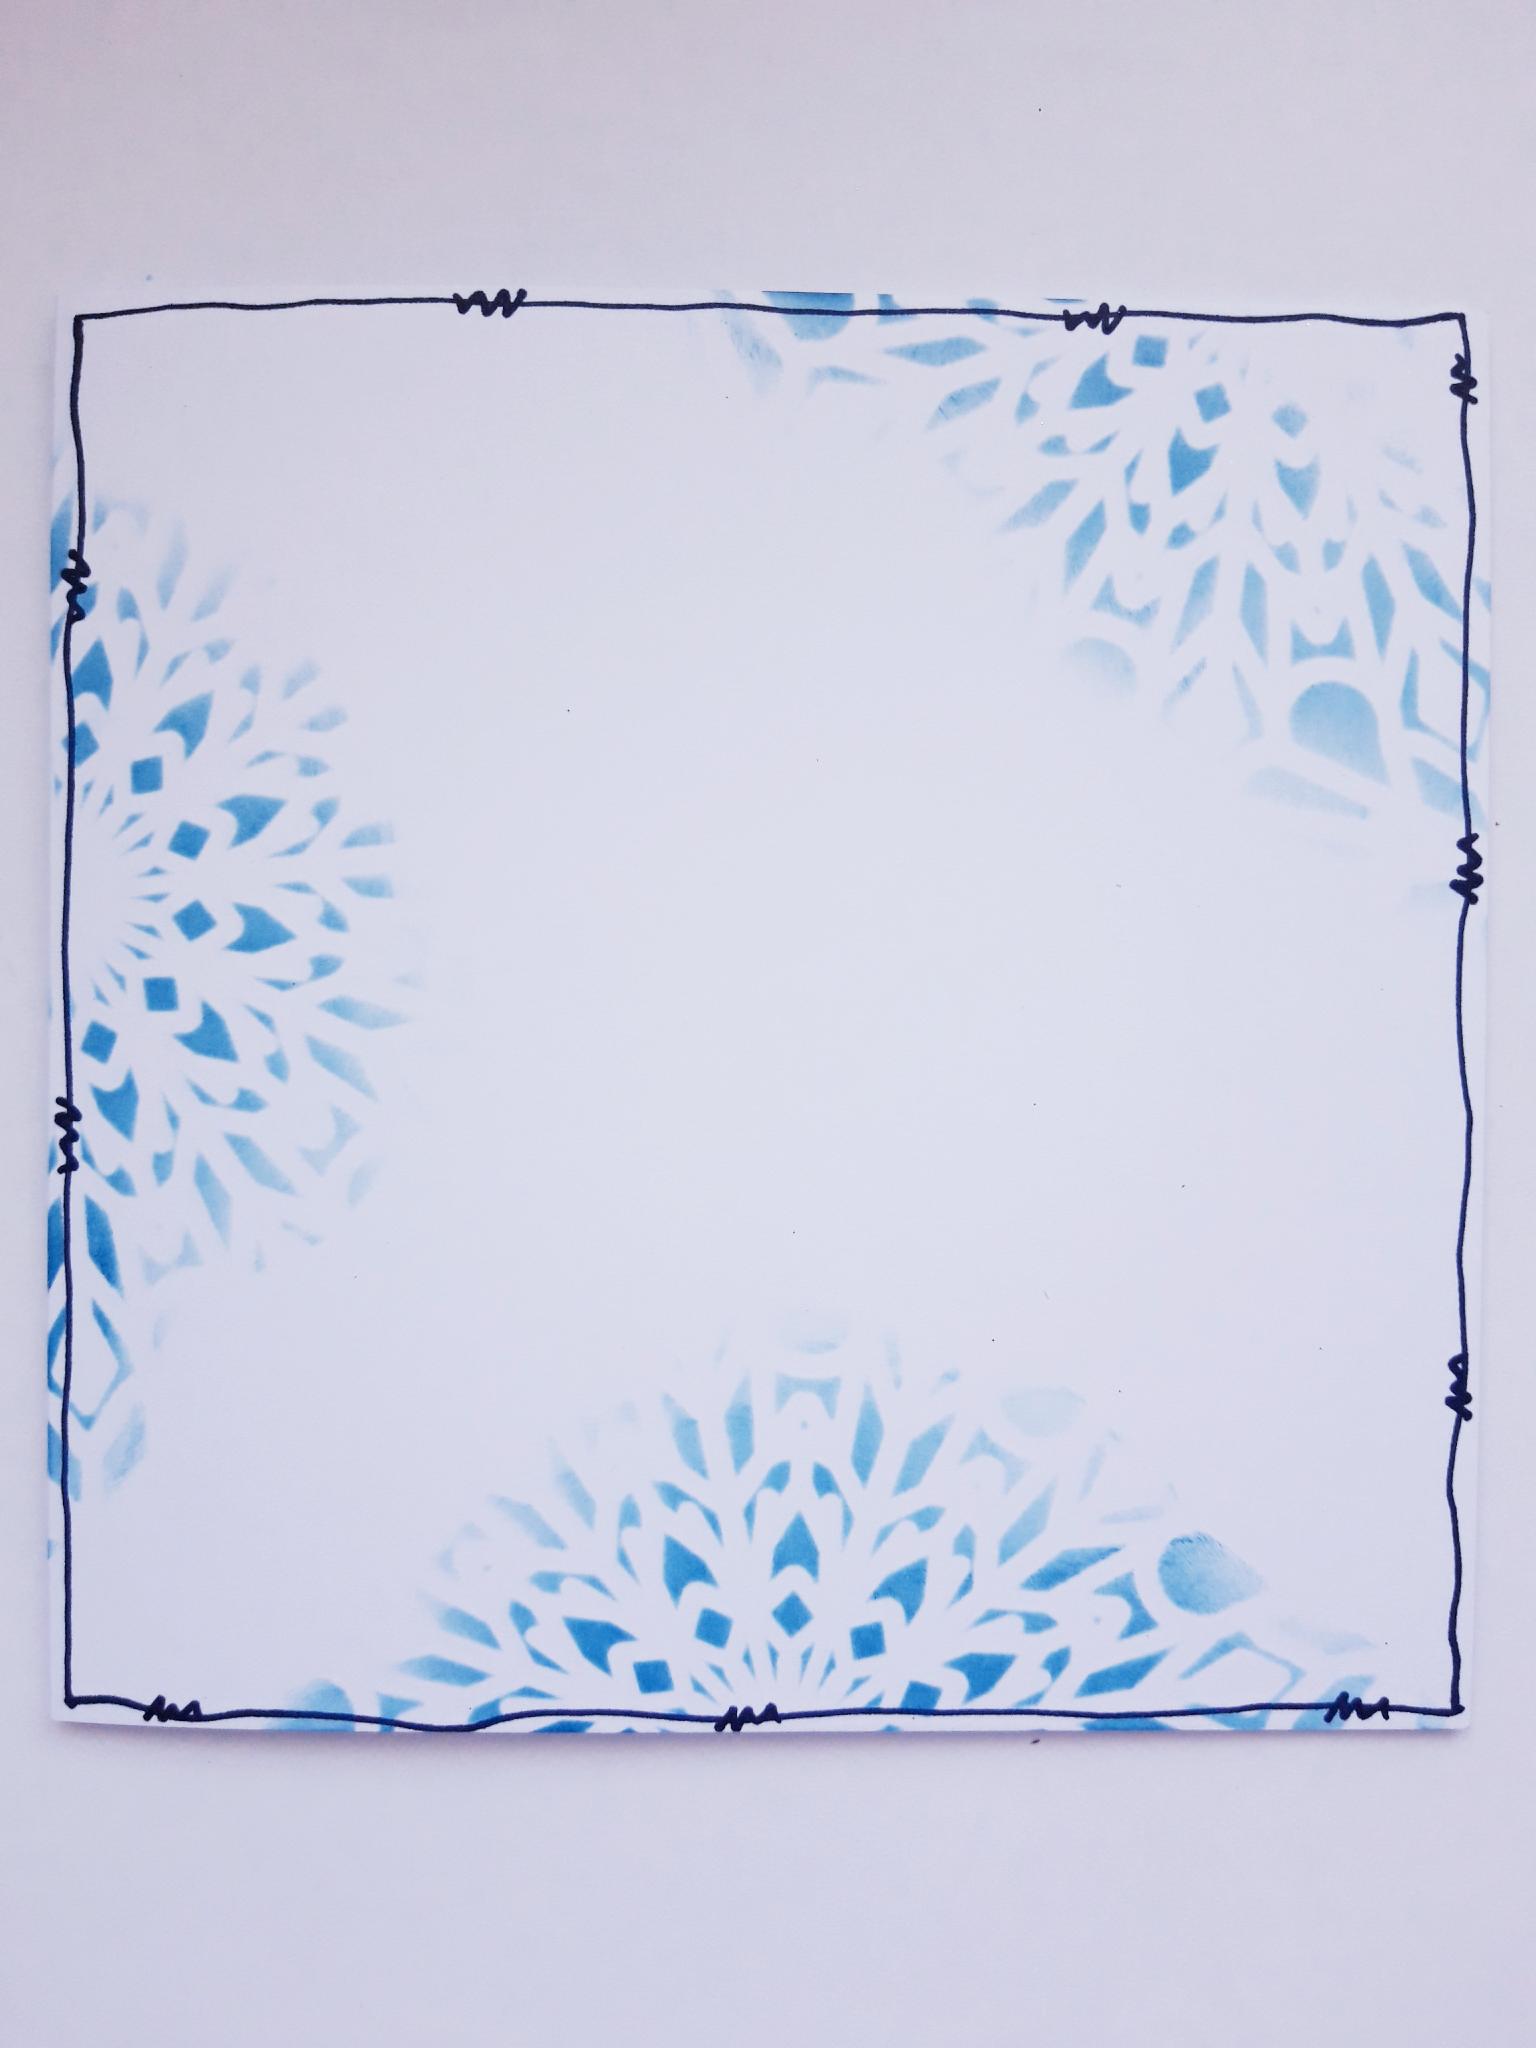
Use a black pen to draw a decorative frame around the stencilled card blank, then set it to one side. |
|
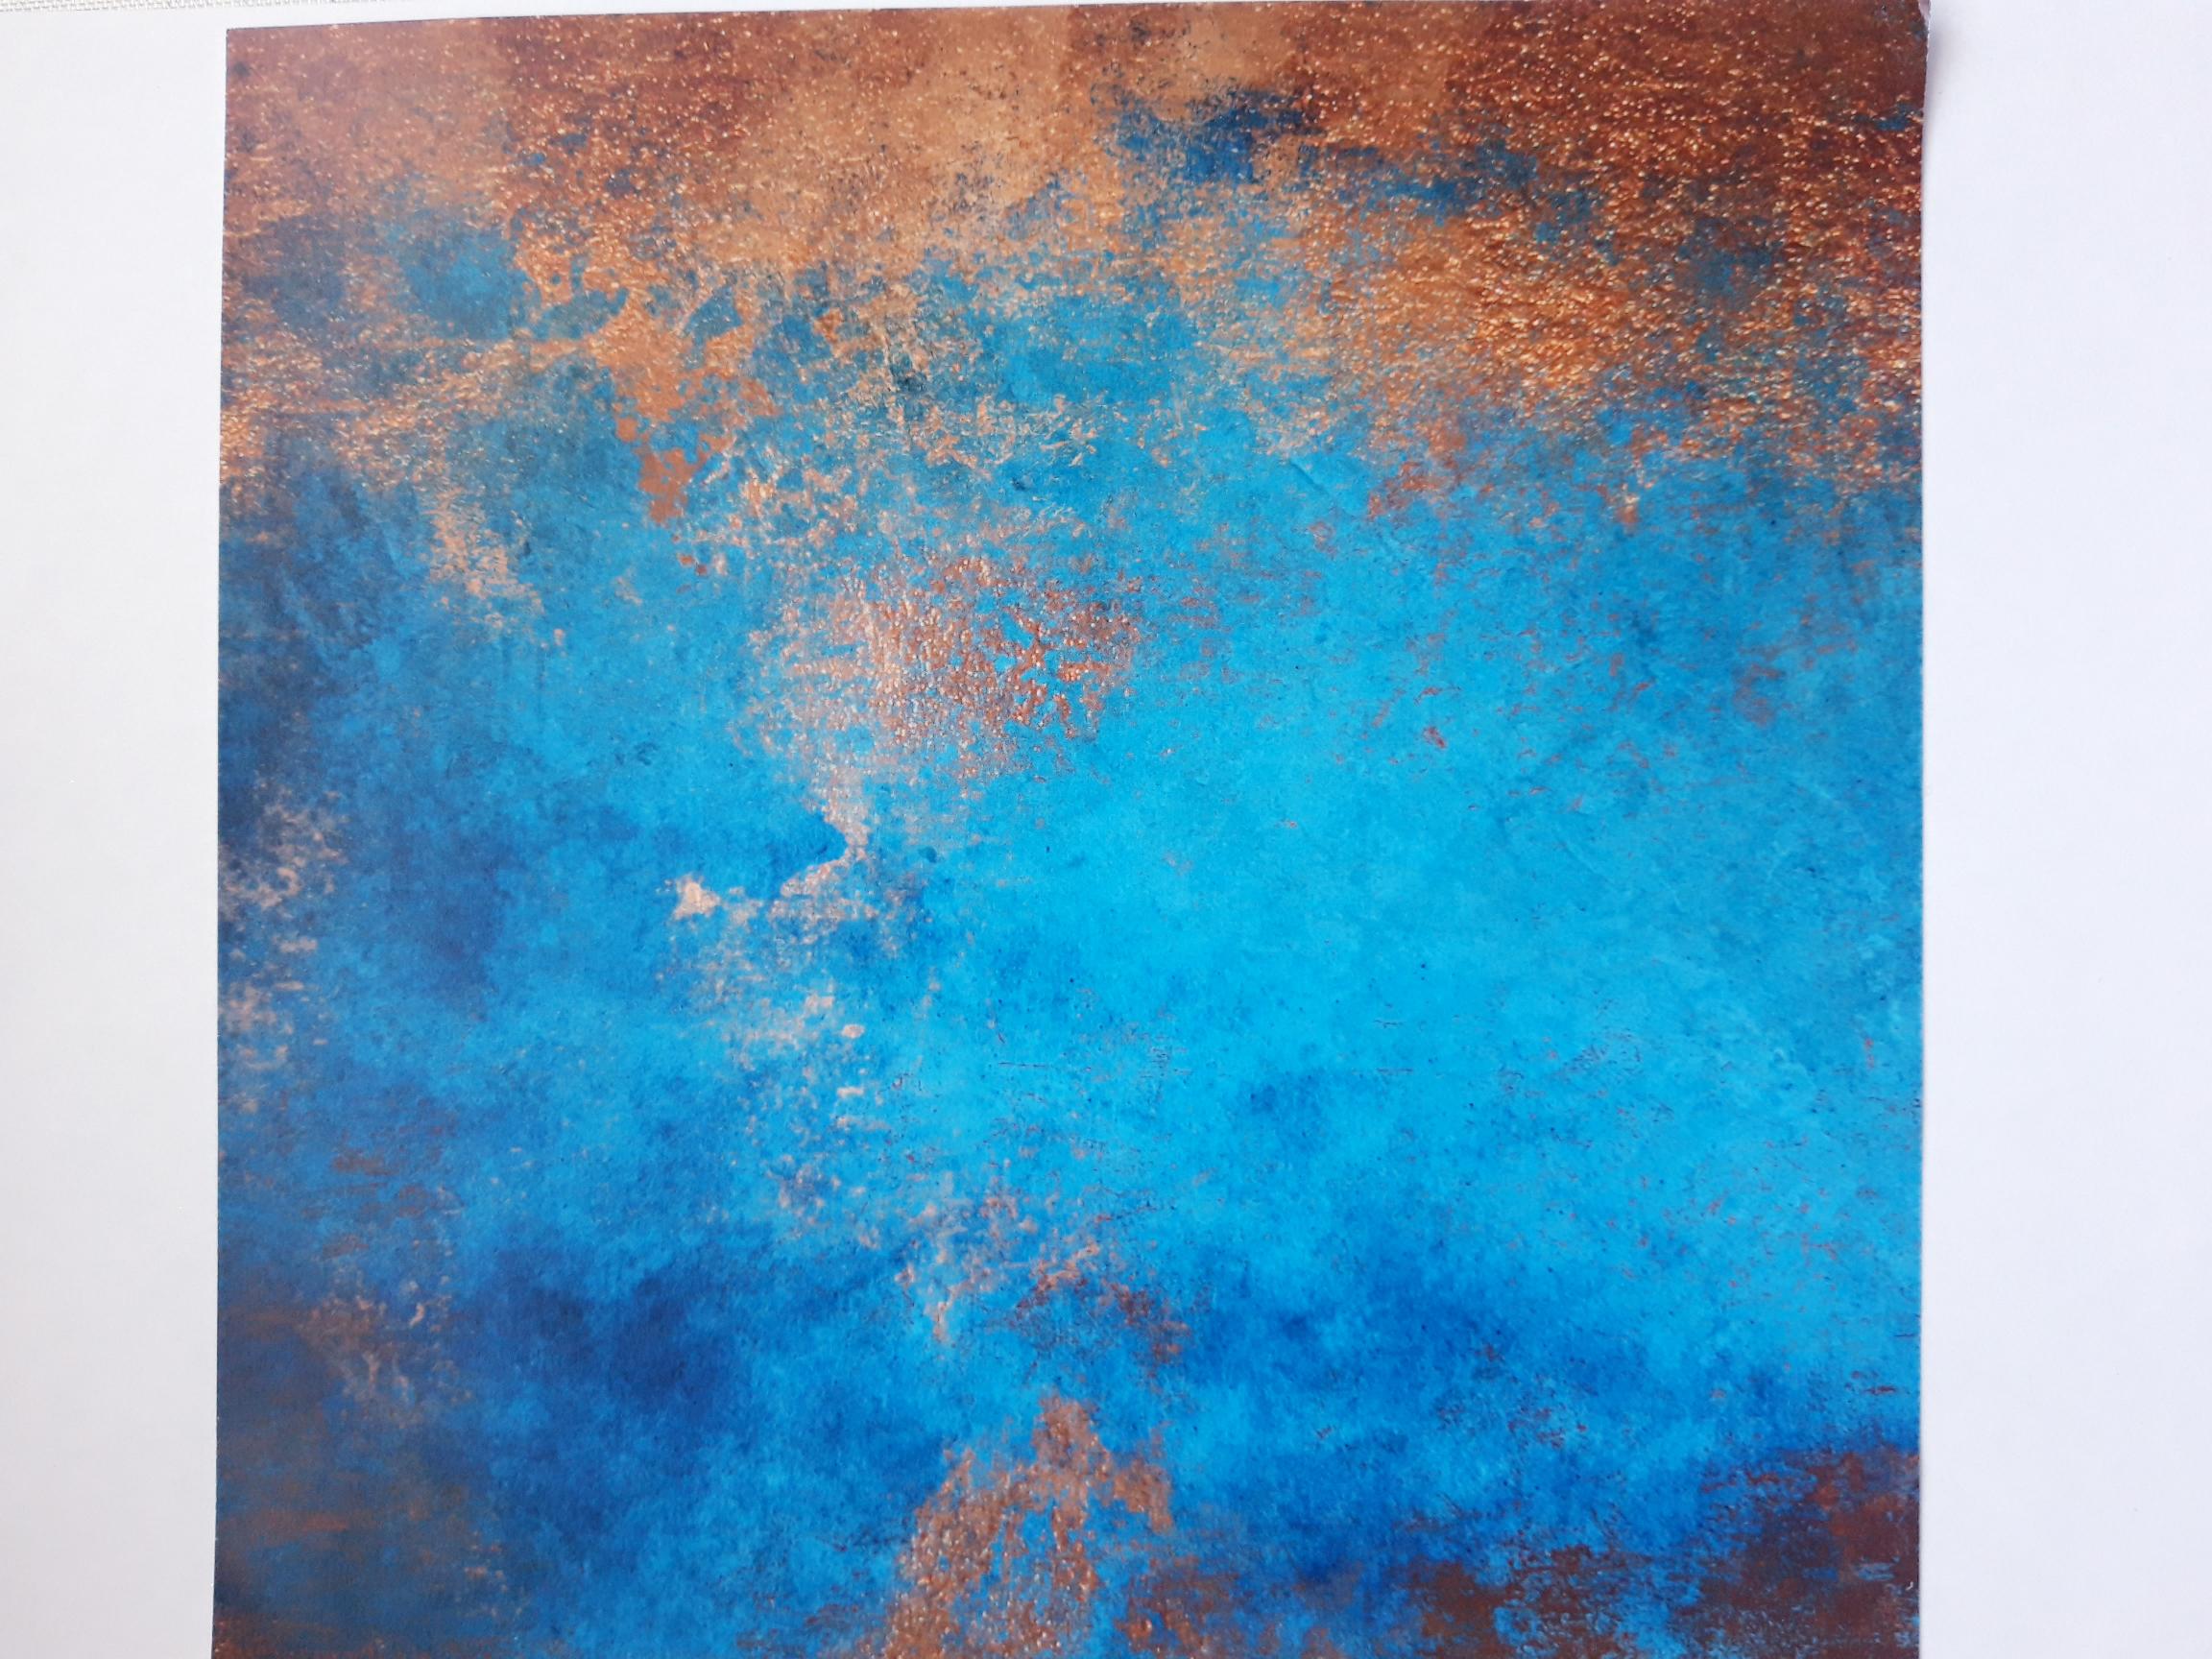
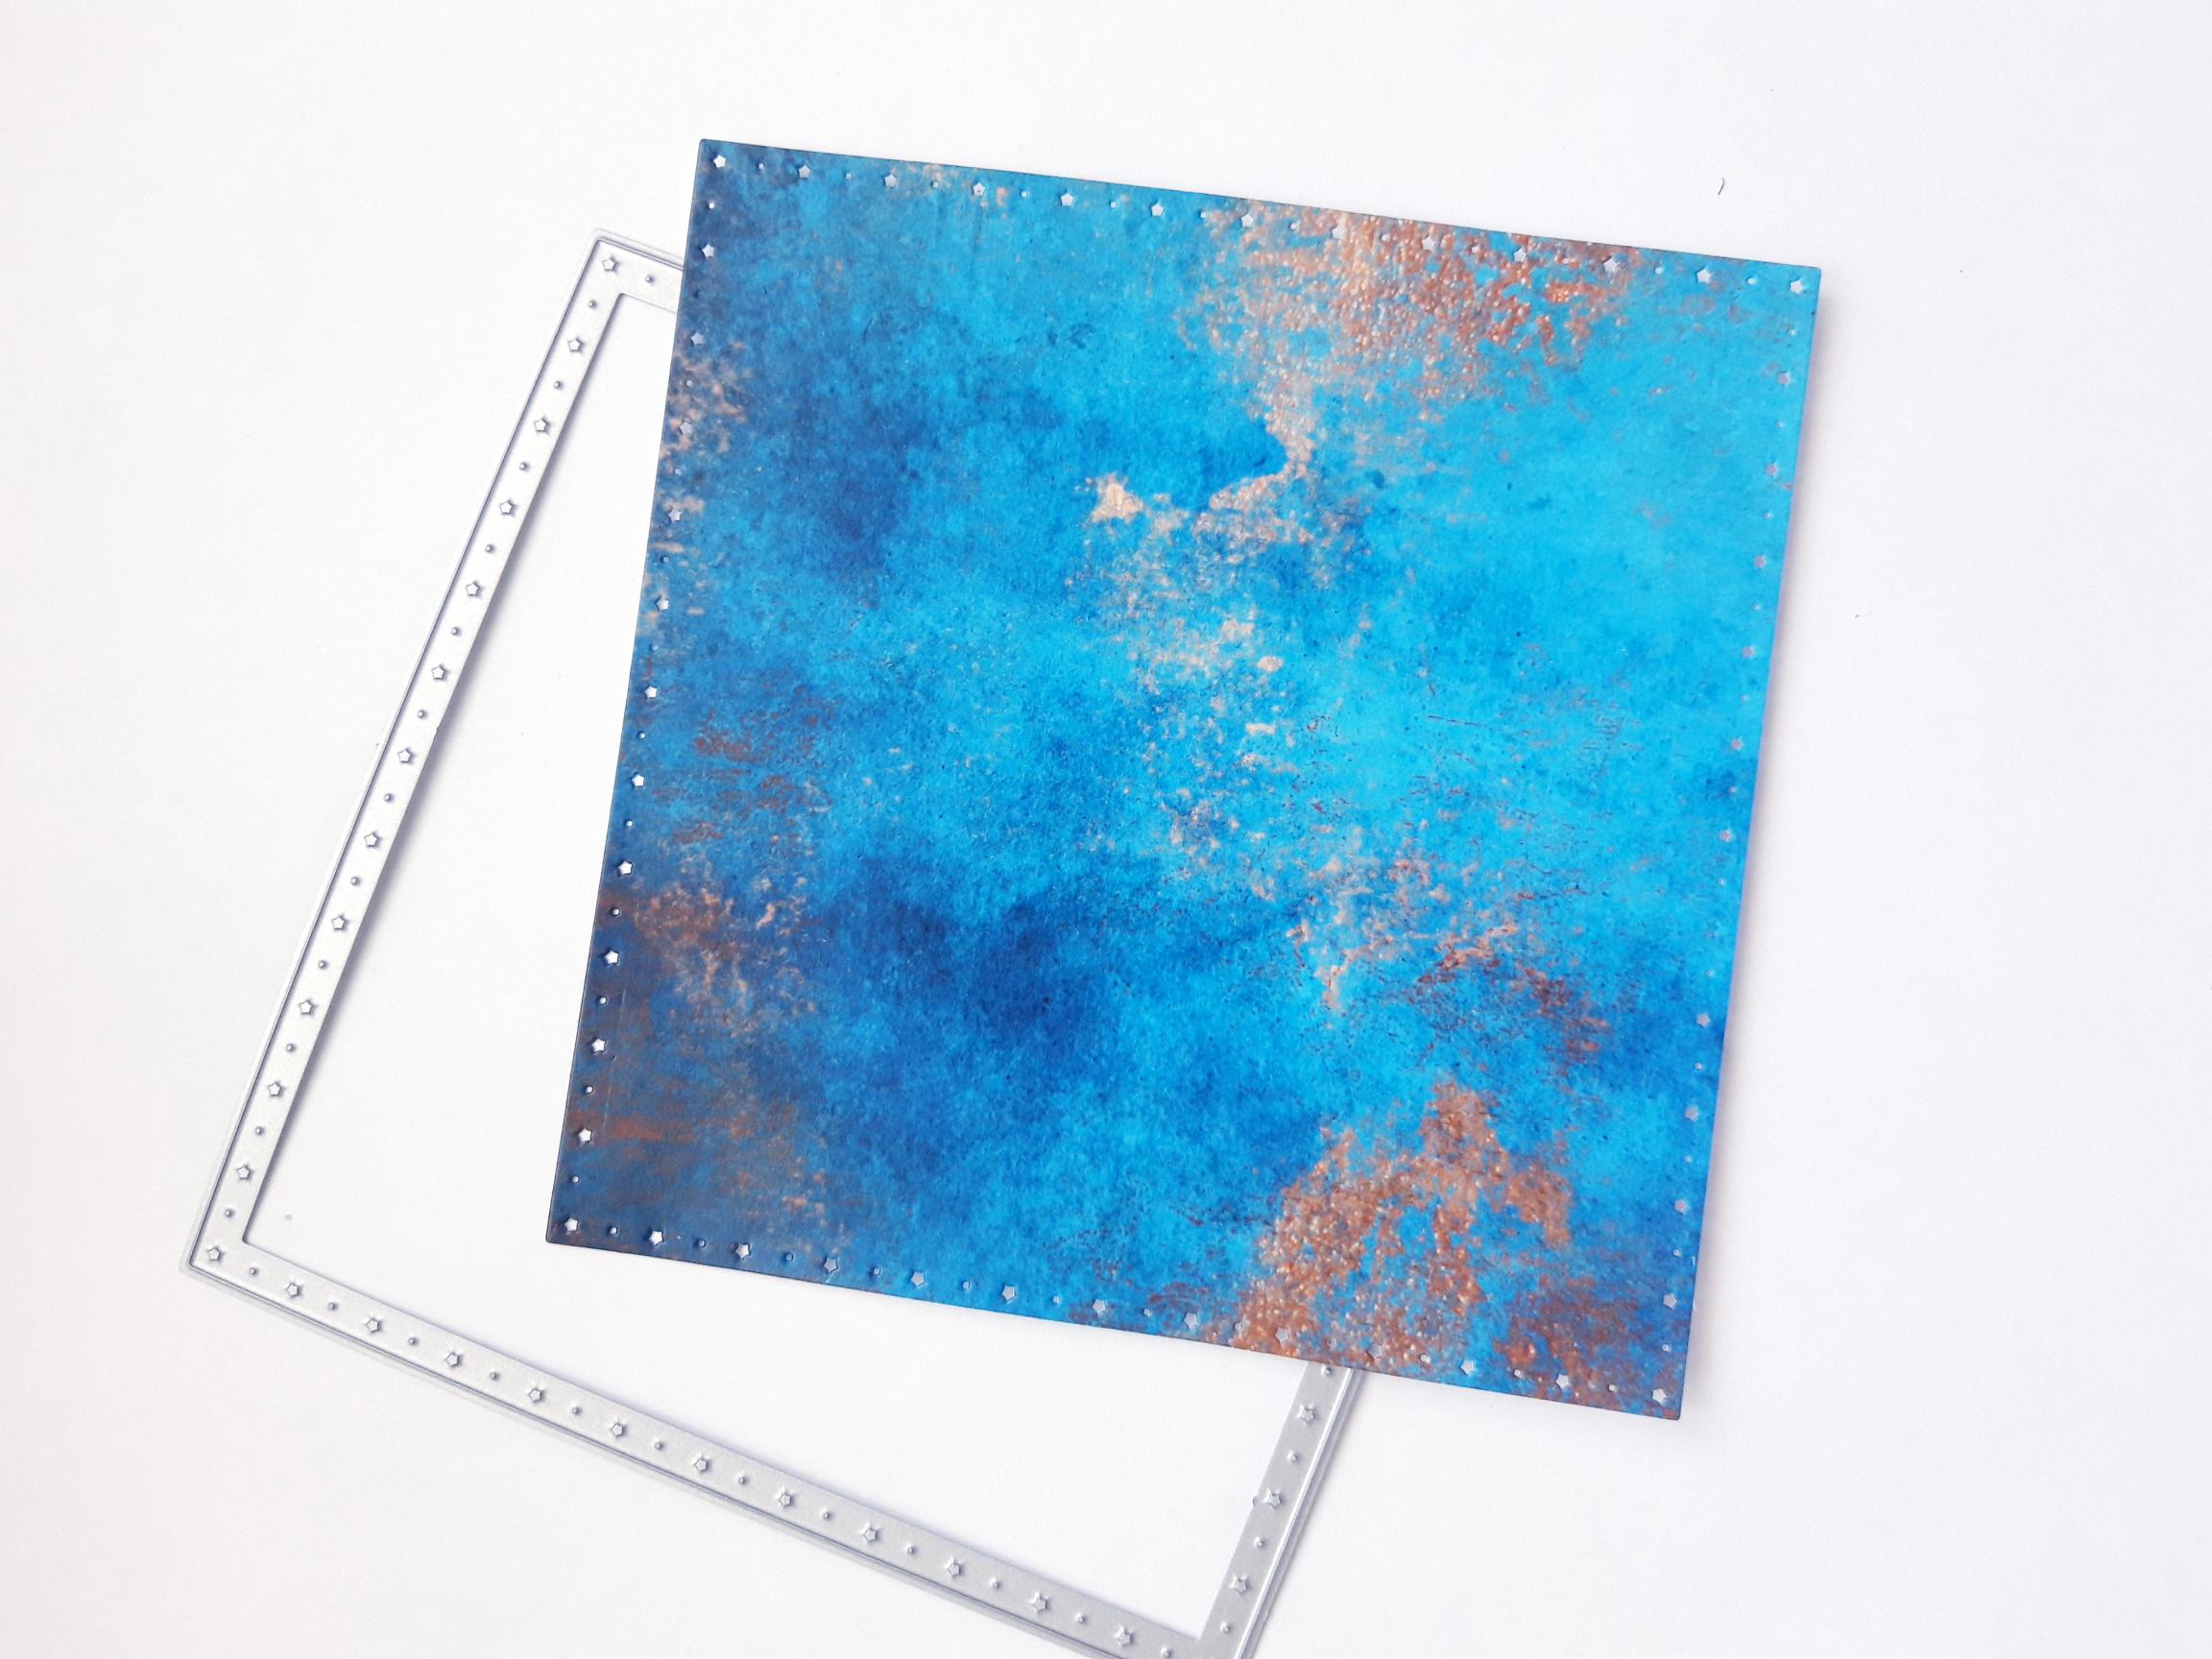
Tear this decorative paper from the Funky Fossil Patina 8 x 8" paper pad. |
|
Place the Star Stitching nesting die, measuring approx 5 x 5", on to the decorative paper and run it through your die cutting machine. Put the remaining paper to one side, to use with the snowflake and sentiment dies, in a later step. |
|
Adhere the die cut decorative square, at an angle, on the front of your stencilled card blank. Set to one side. |
|
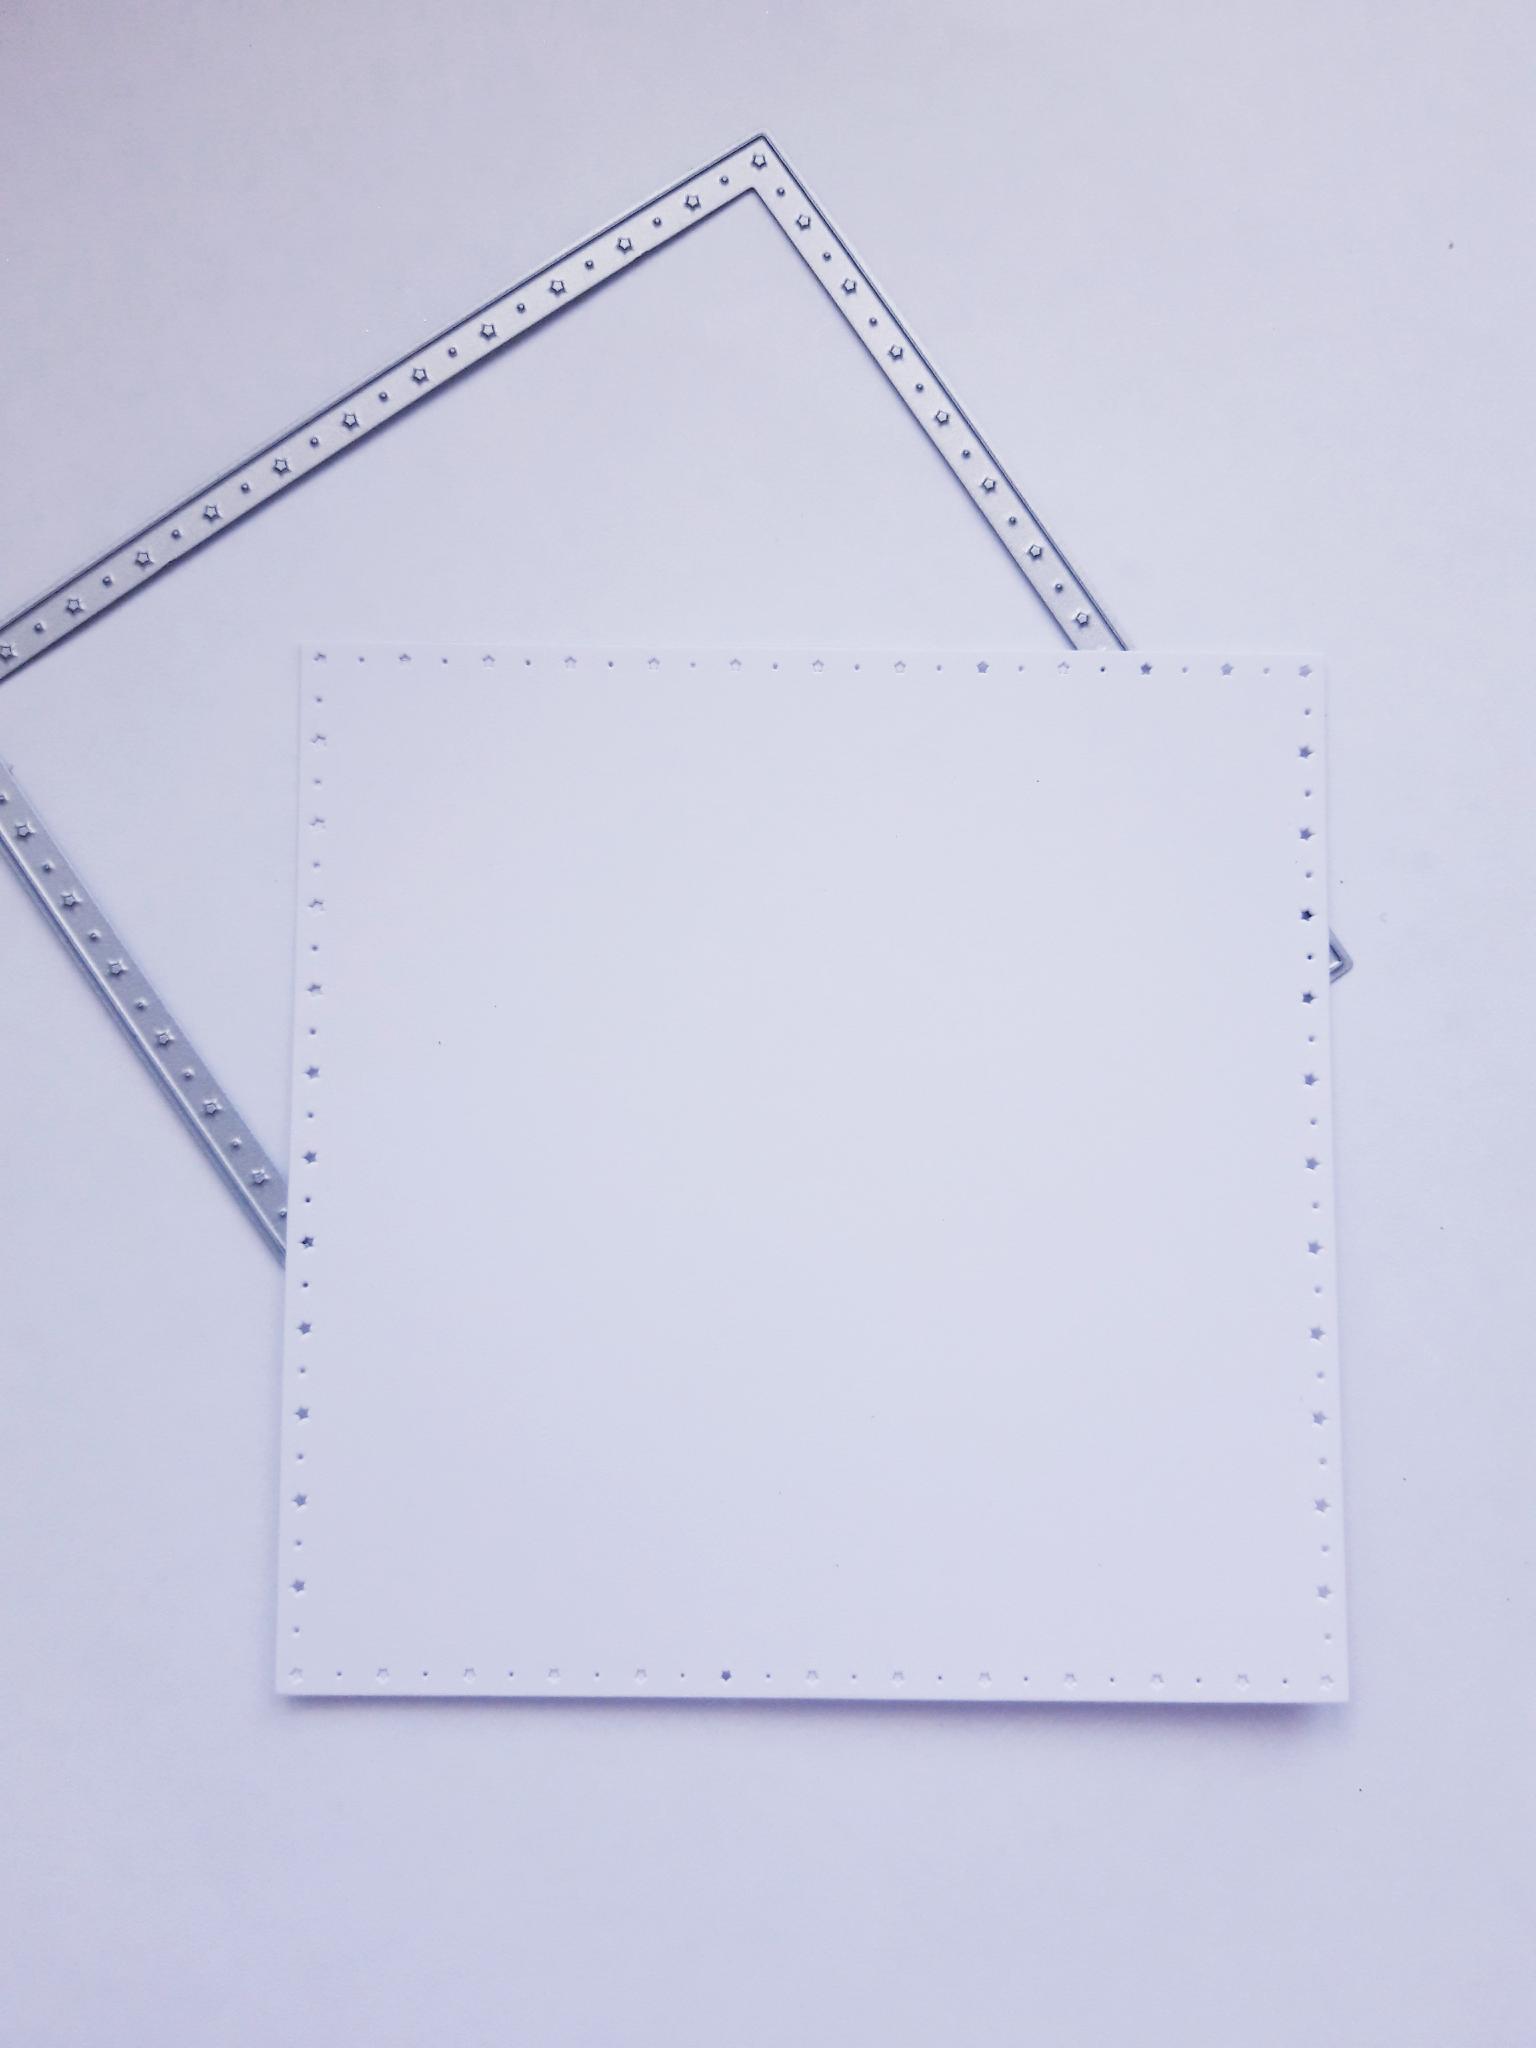
Place the same 5 x 5" Star Stitching die on to the white 6 x 6" card and run it through your die cutting machine. |

|
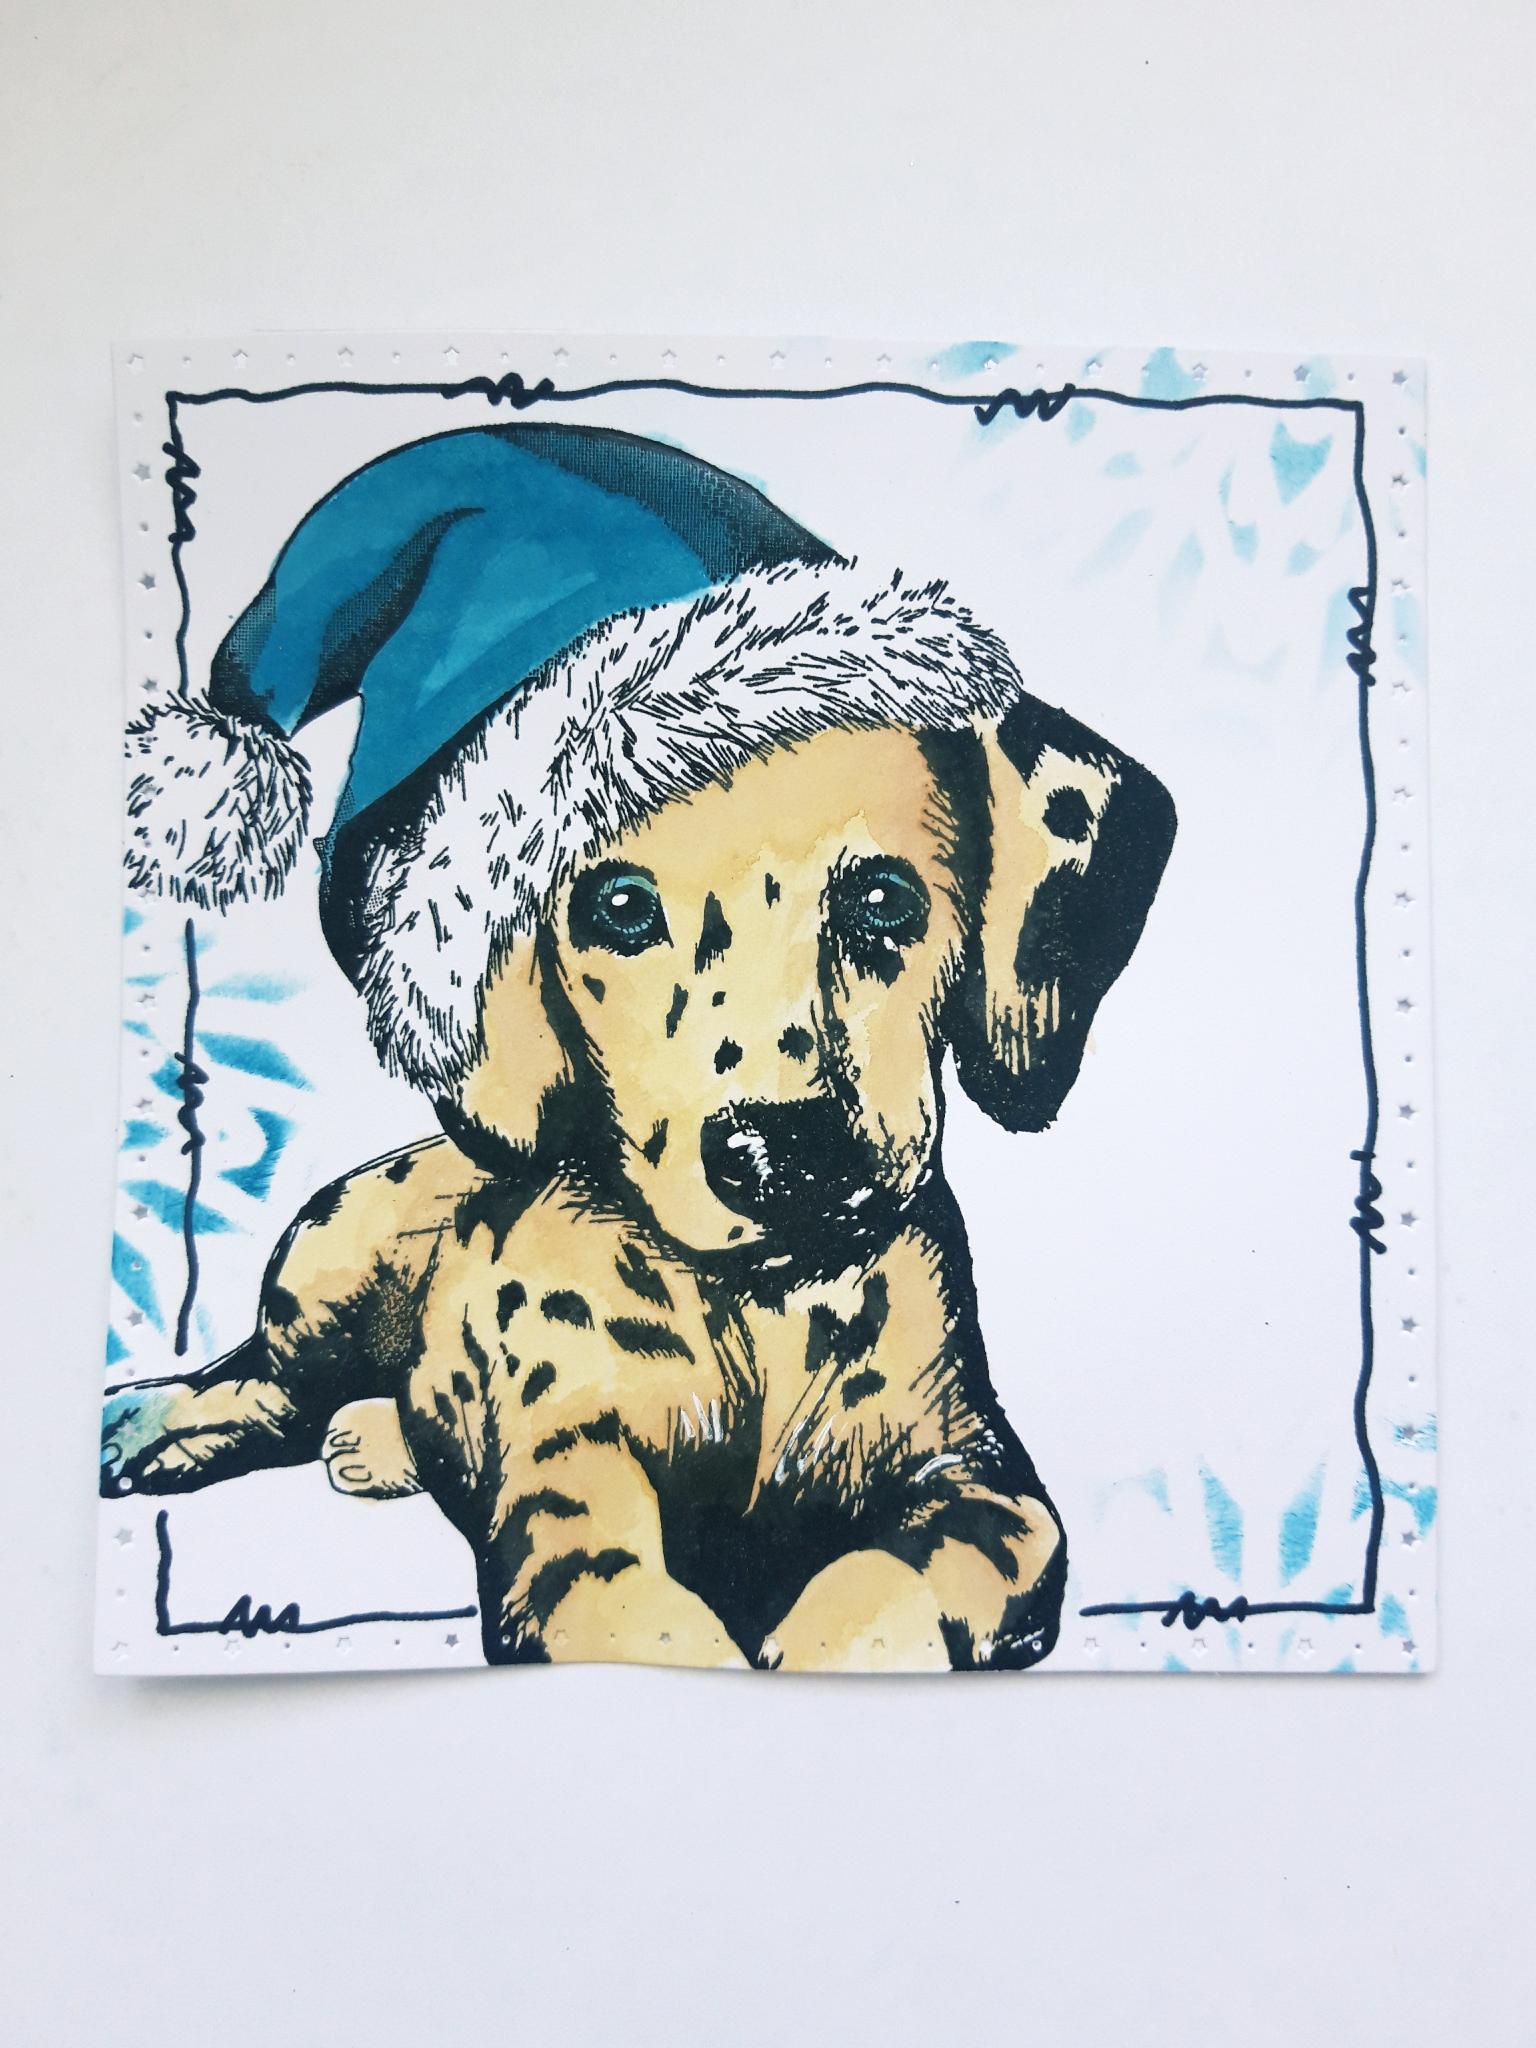
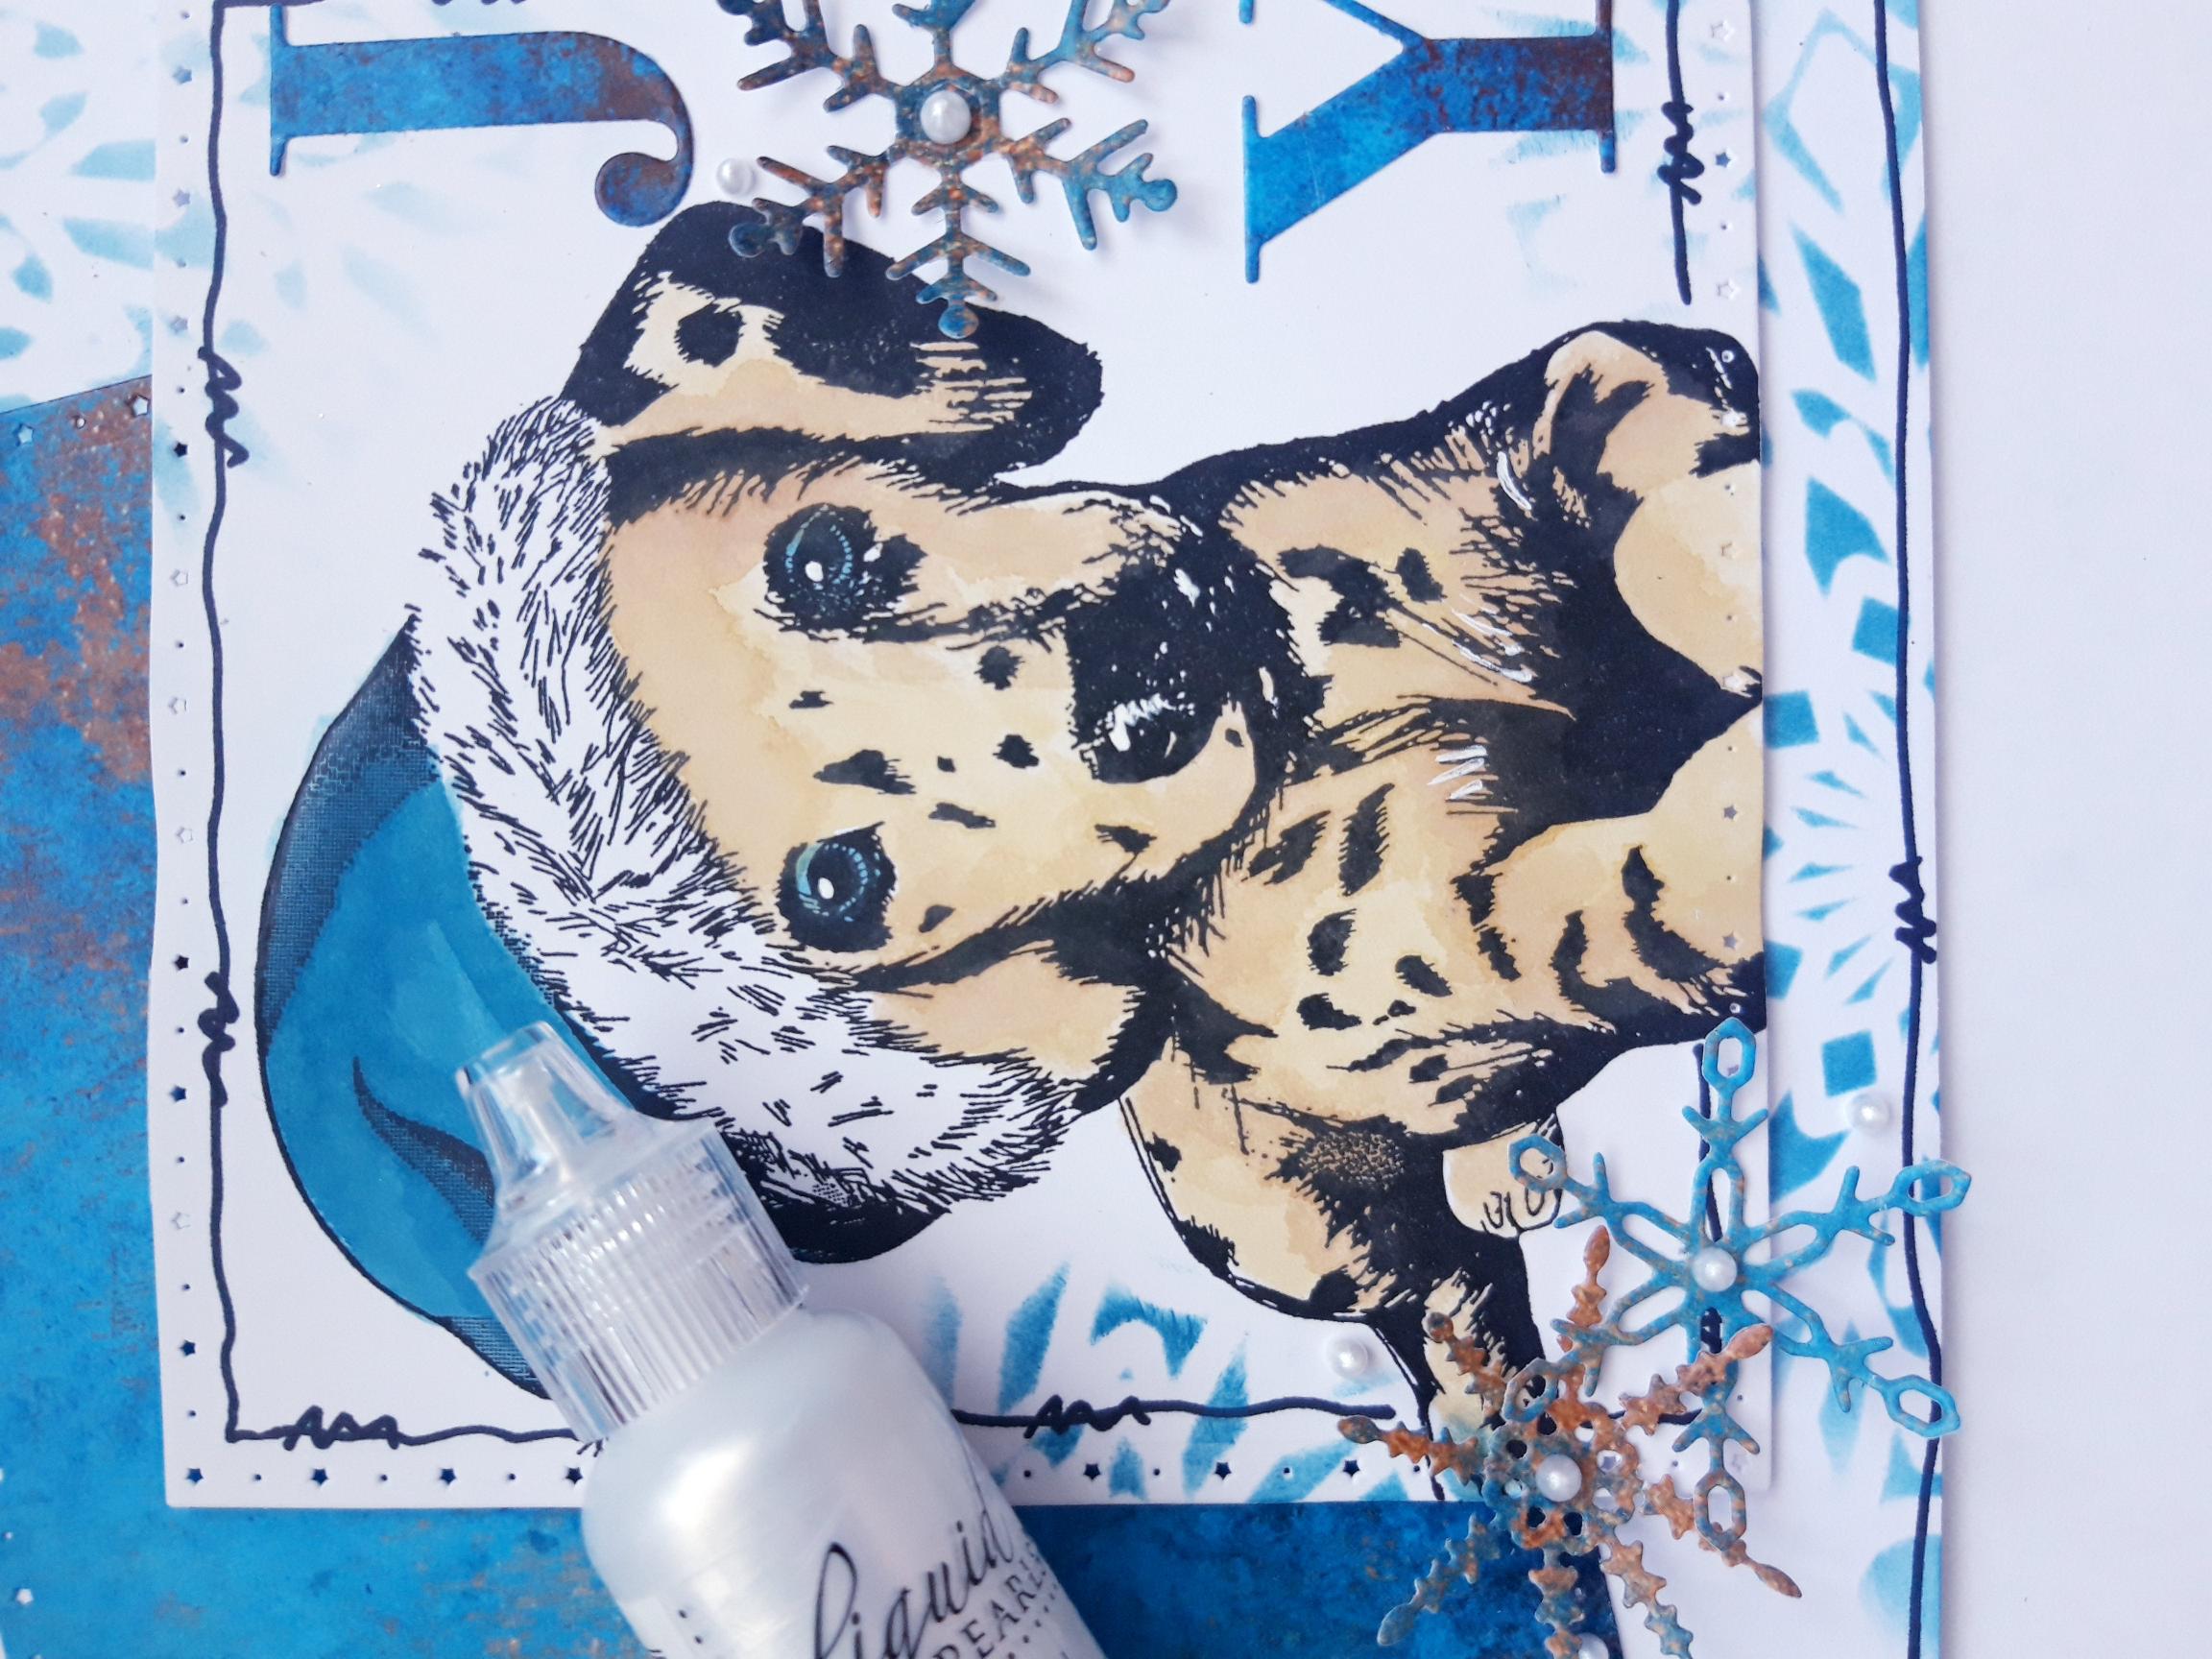
Ink up this cute stamp, from the Imala Dear Santa Stamp Collection, with the Onyx Black Versafine. Stamp it just off the bottom, left edge of the die cut white, square panel. Smoosh the Unchartered Mariner and Vintage Photo Oxides, on to your craft mat. Mix with a little water and paint your stamped image. |

|
Place the Gorgeous Snowflake stencil over your card and lightly blend the Unchartered Mariner randomly, around your stamped image. |
|
Use your black pen to draw the same decorative frame, around your image. |
|
Adhere this on straight, on to the front of your card blank. |
|
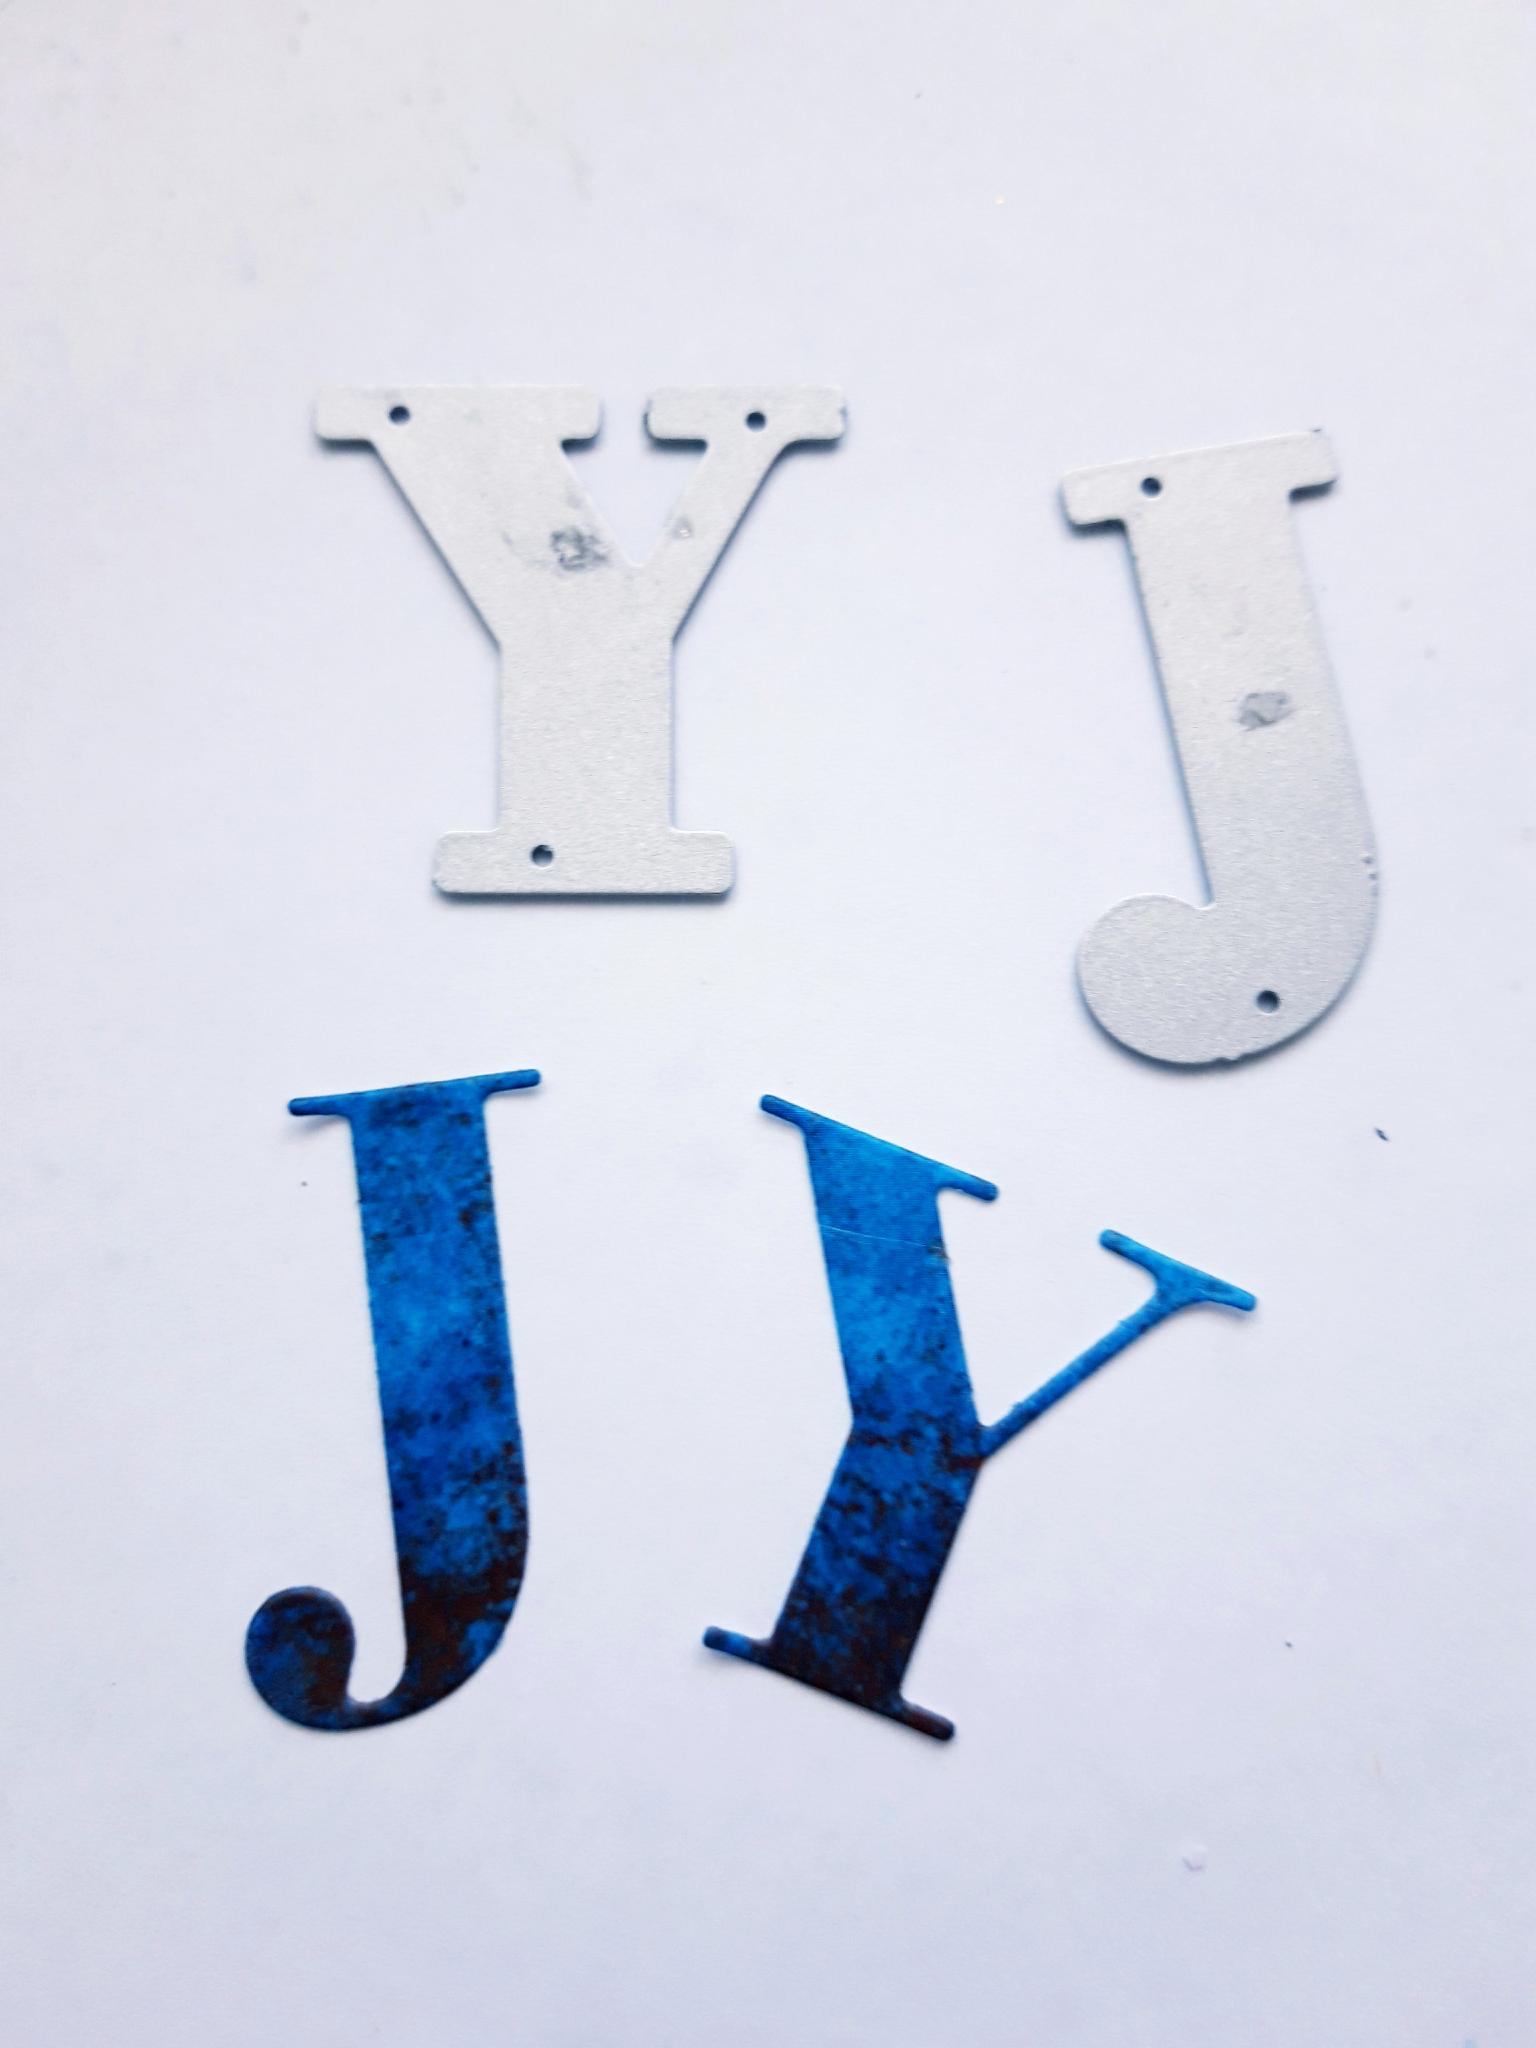
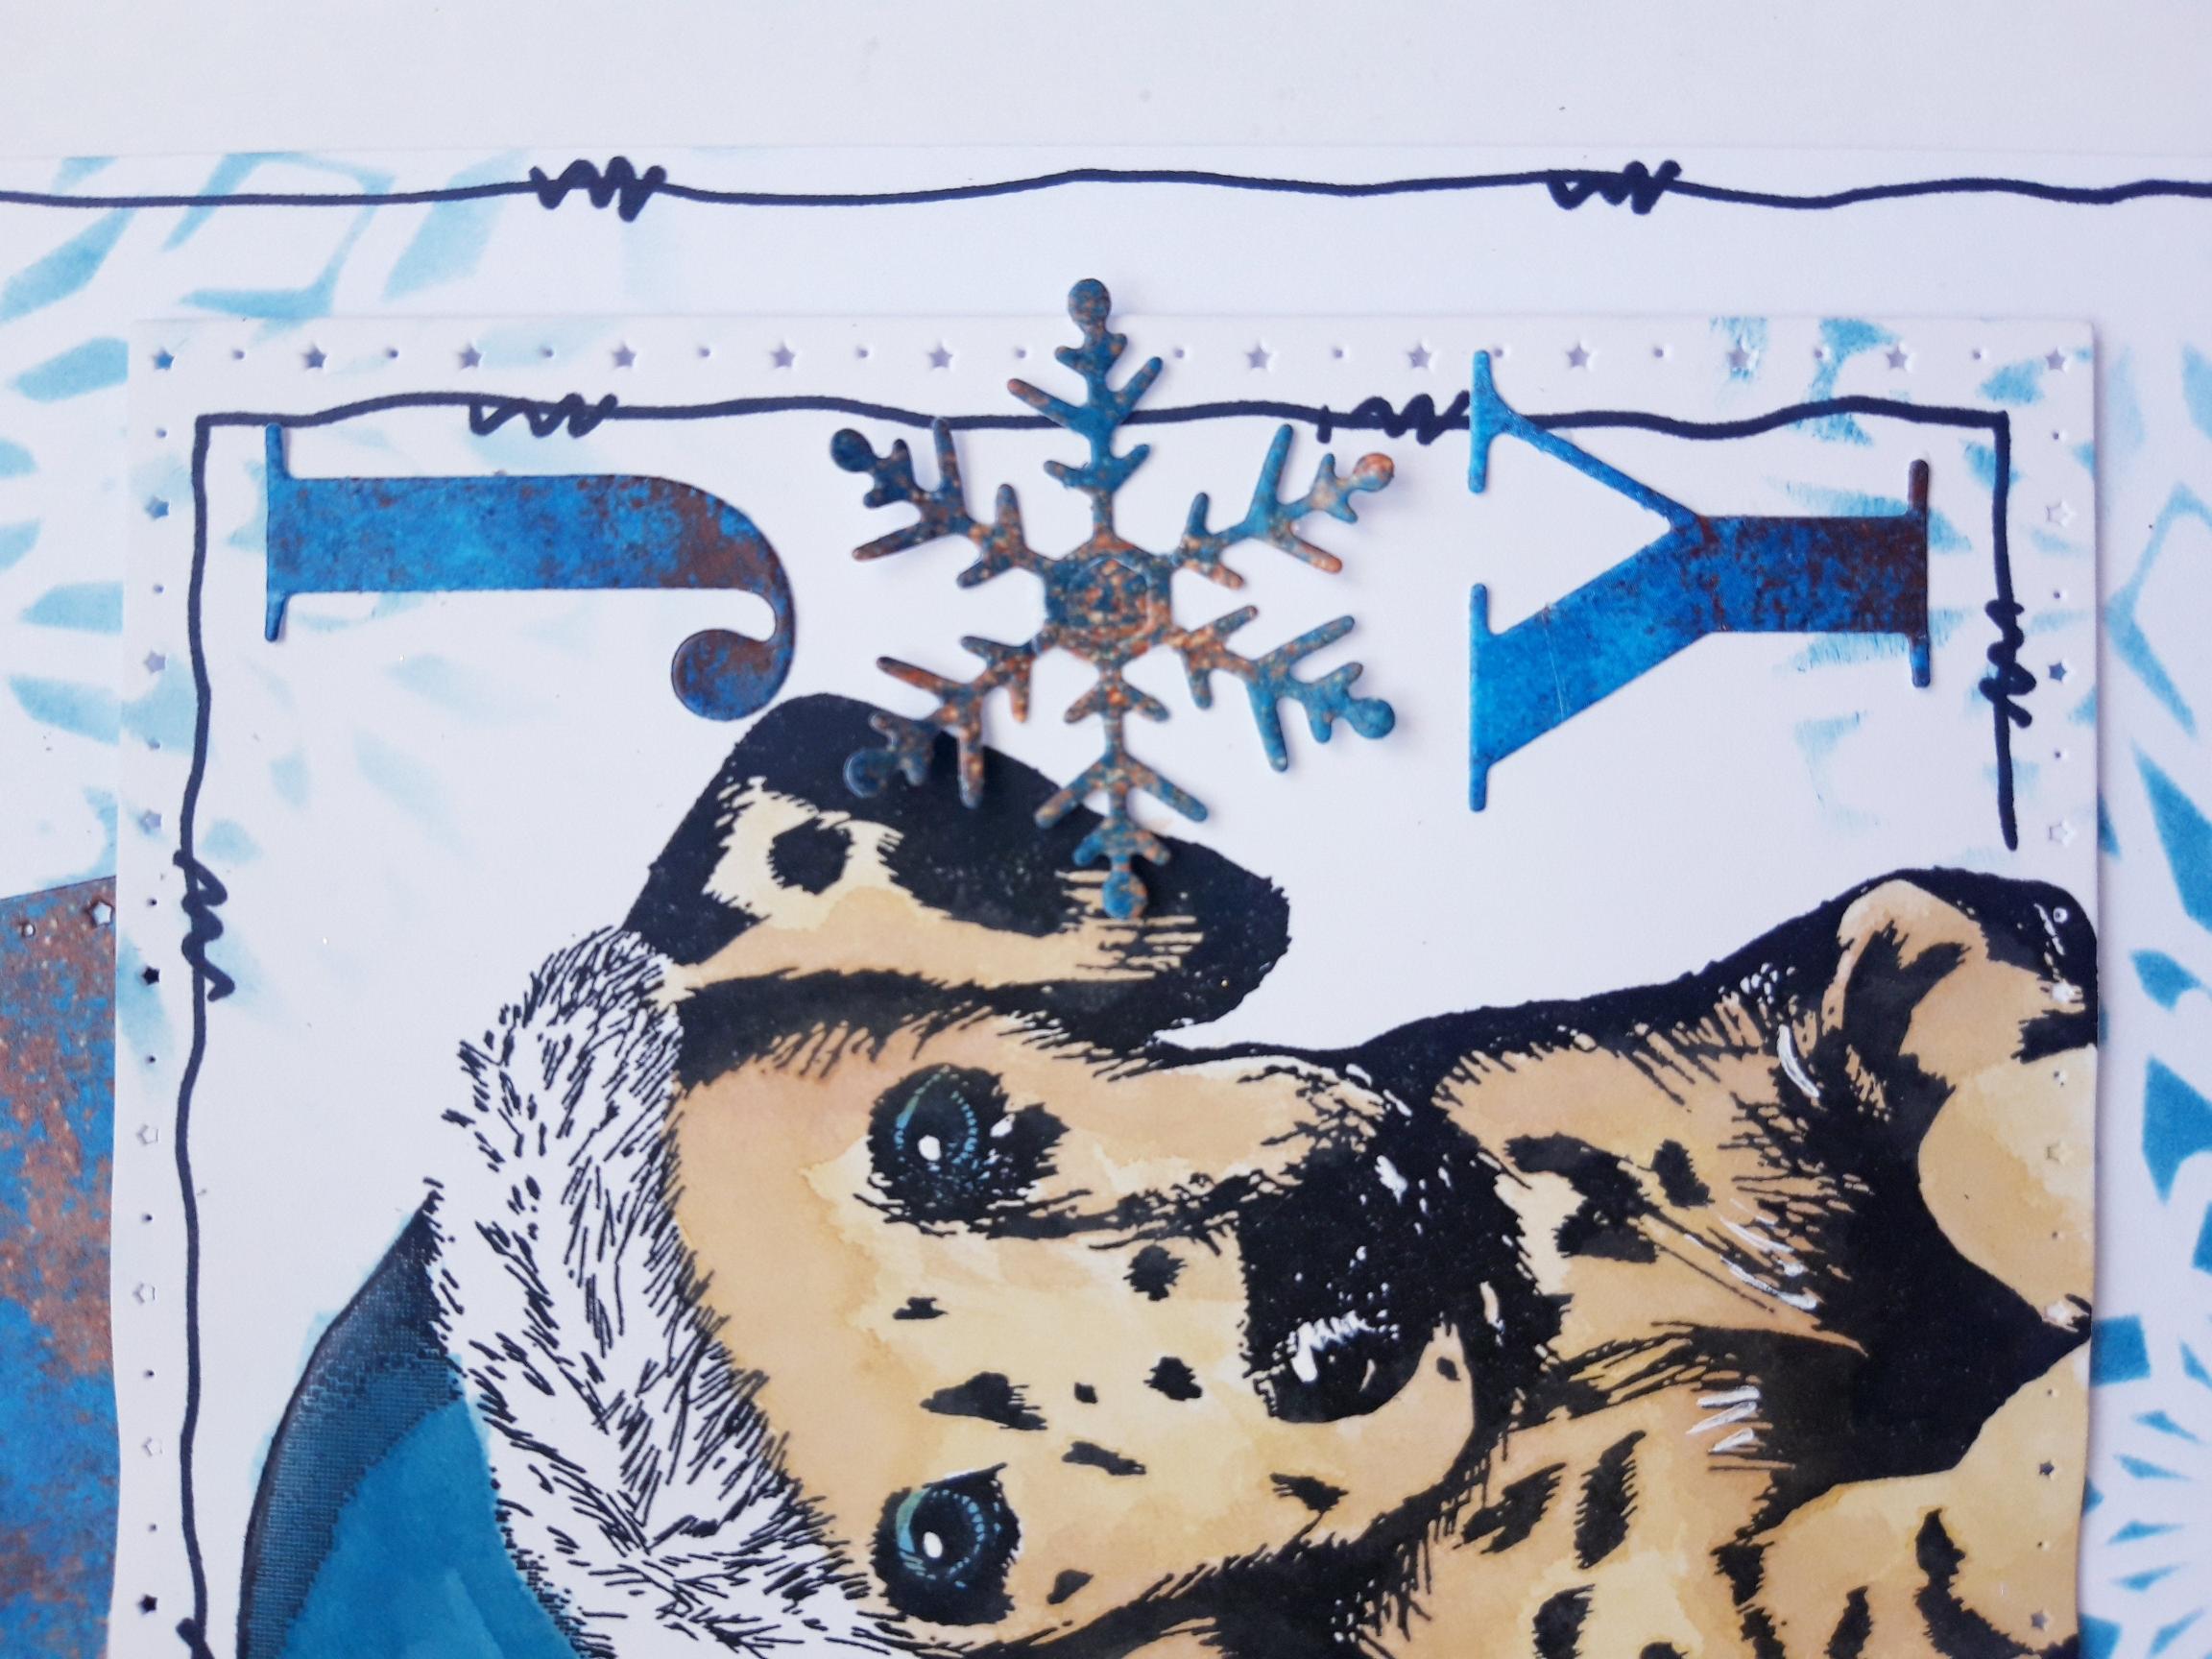
Place the J and the Y dies, from the JOY die collection, on to some of the decorative paper you set aside earlier and run it through your die cutting machine. |
|
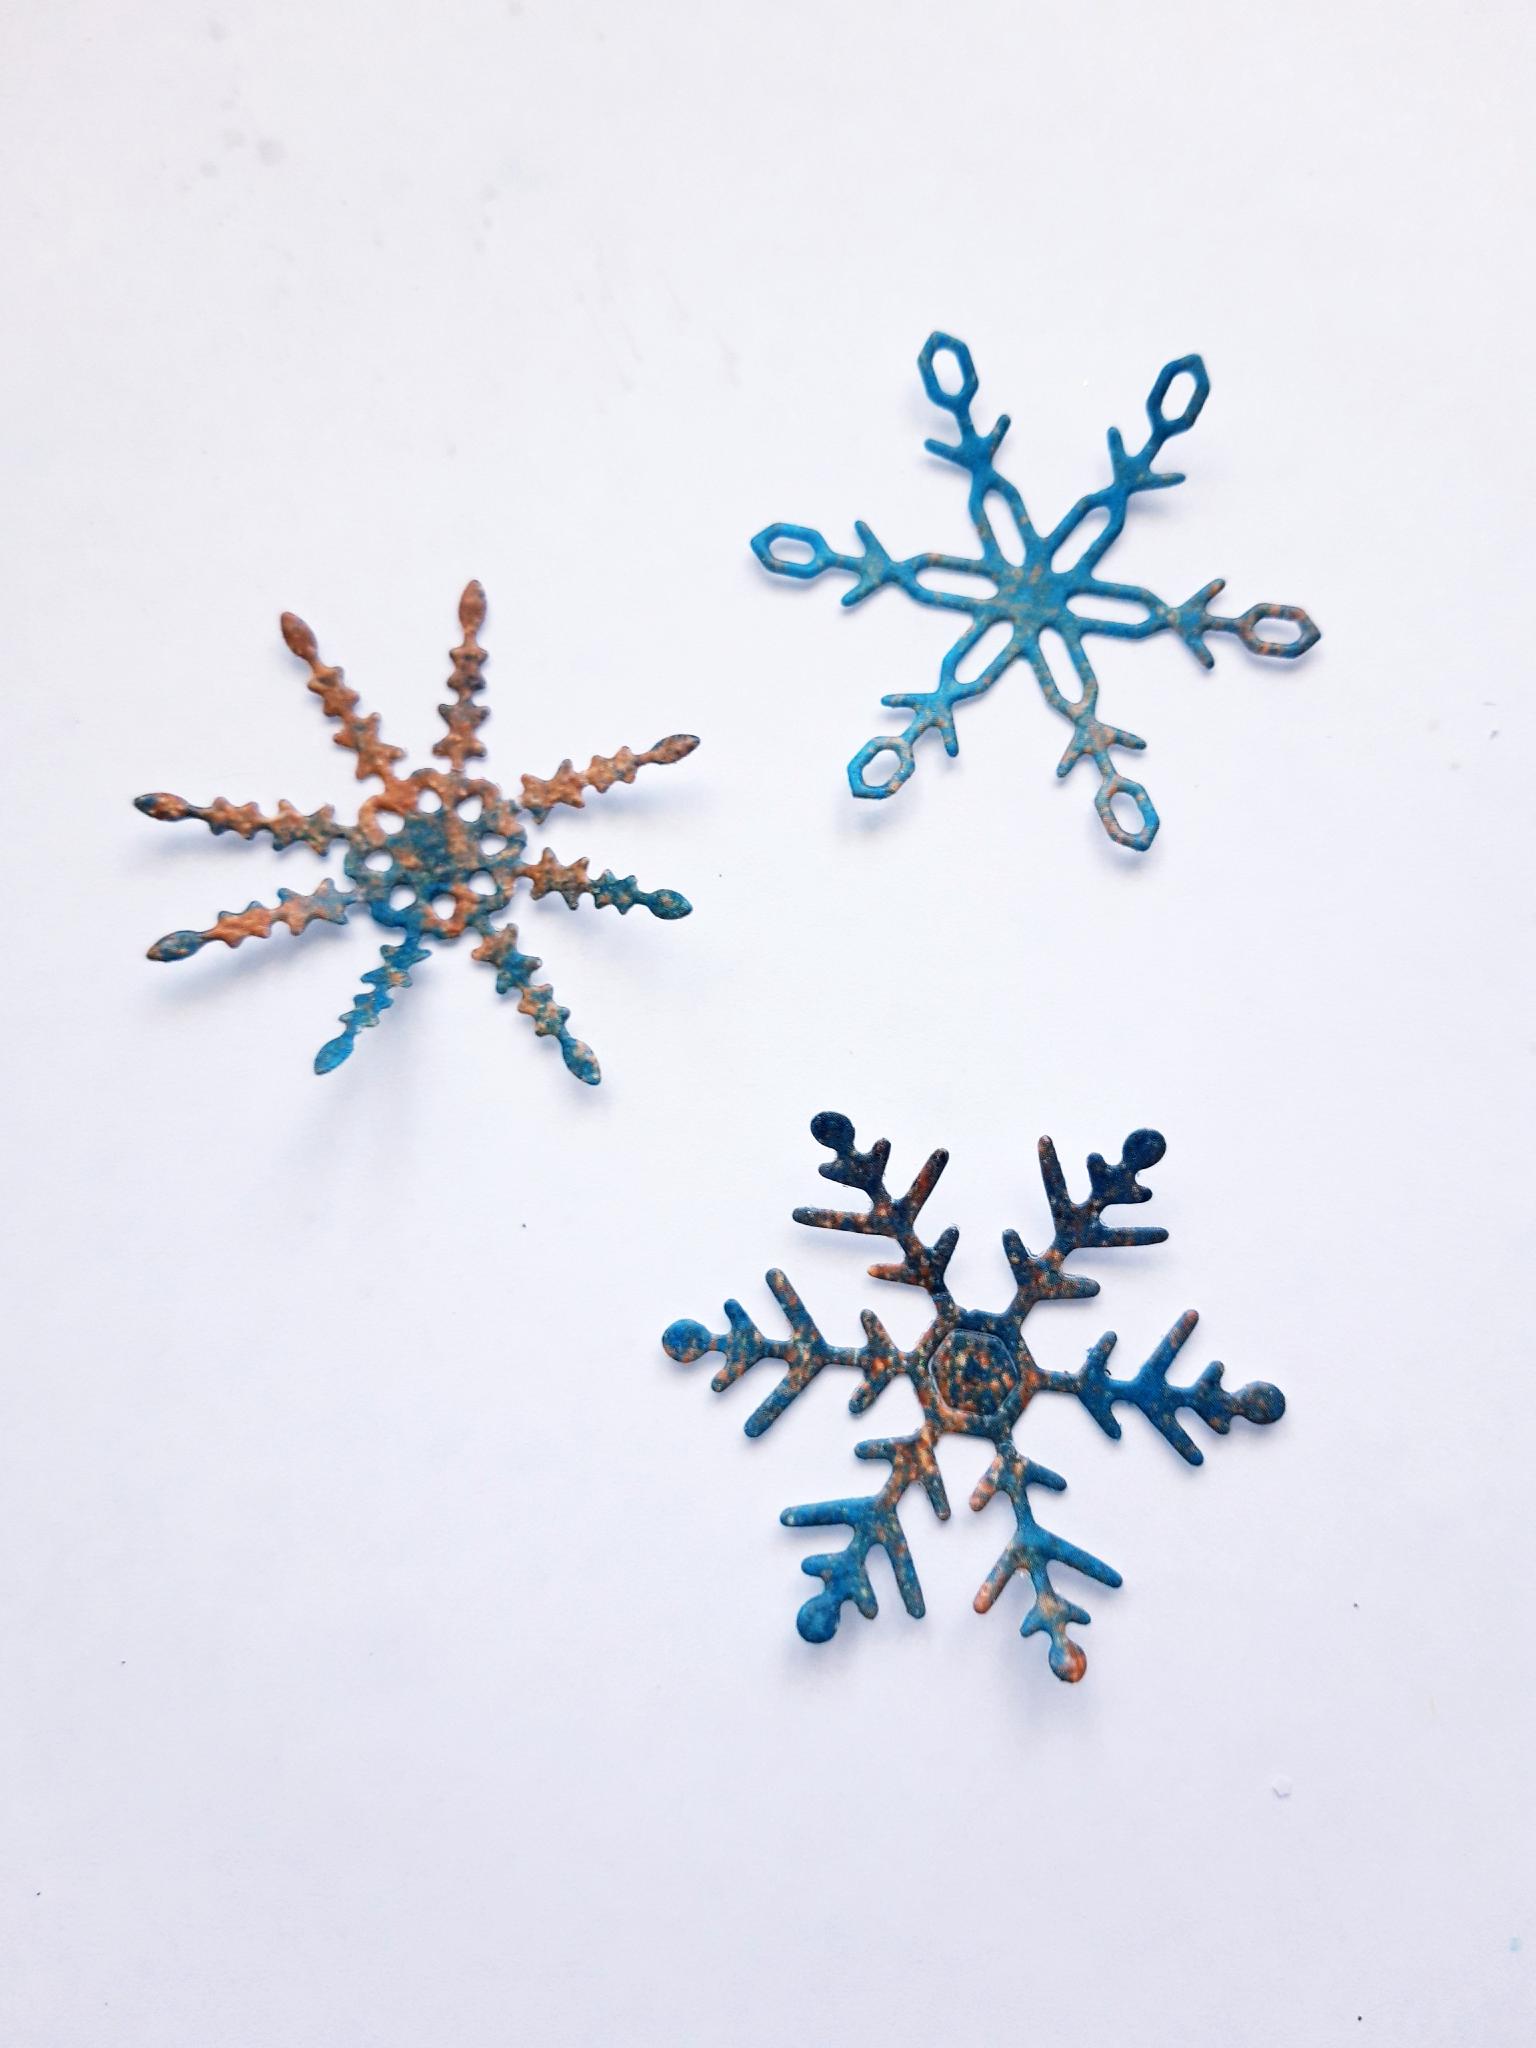
Place the snowflake dies, from the photo frame die sets, on to the remaining decorative paper and run them through your machine. |
|
Adhere the die cut J in place, one of the snowflakes under, in place of the O and then the Y under that. |

|
Adhere the other 2 snowflakes in the bottom left corner of your design. |
|
Add pearl drops to the centres of your snowflakes. |
|
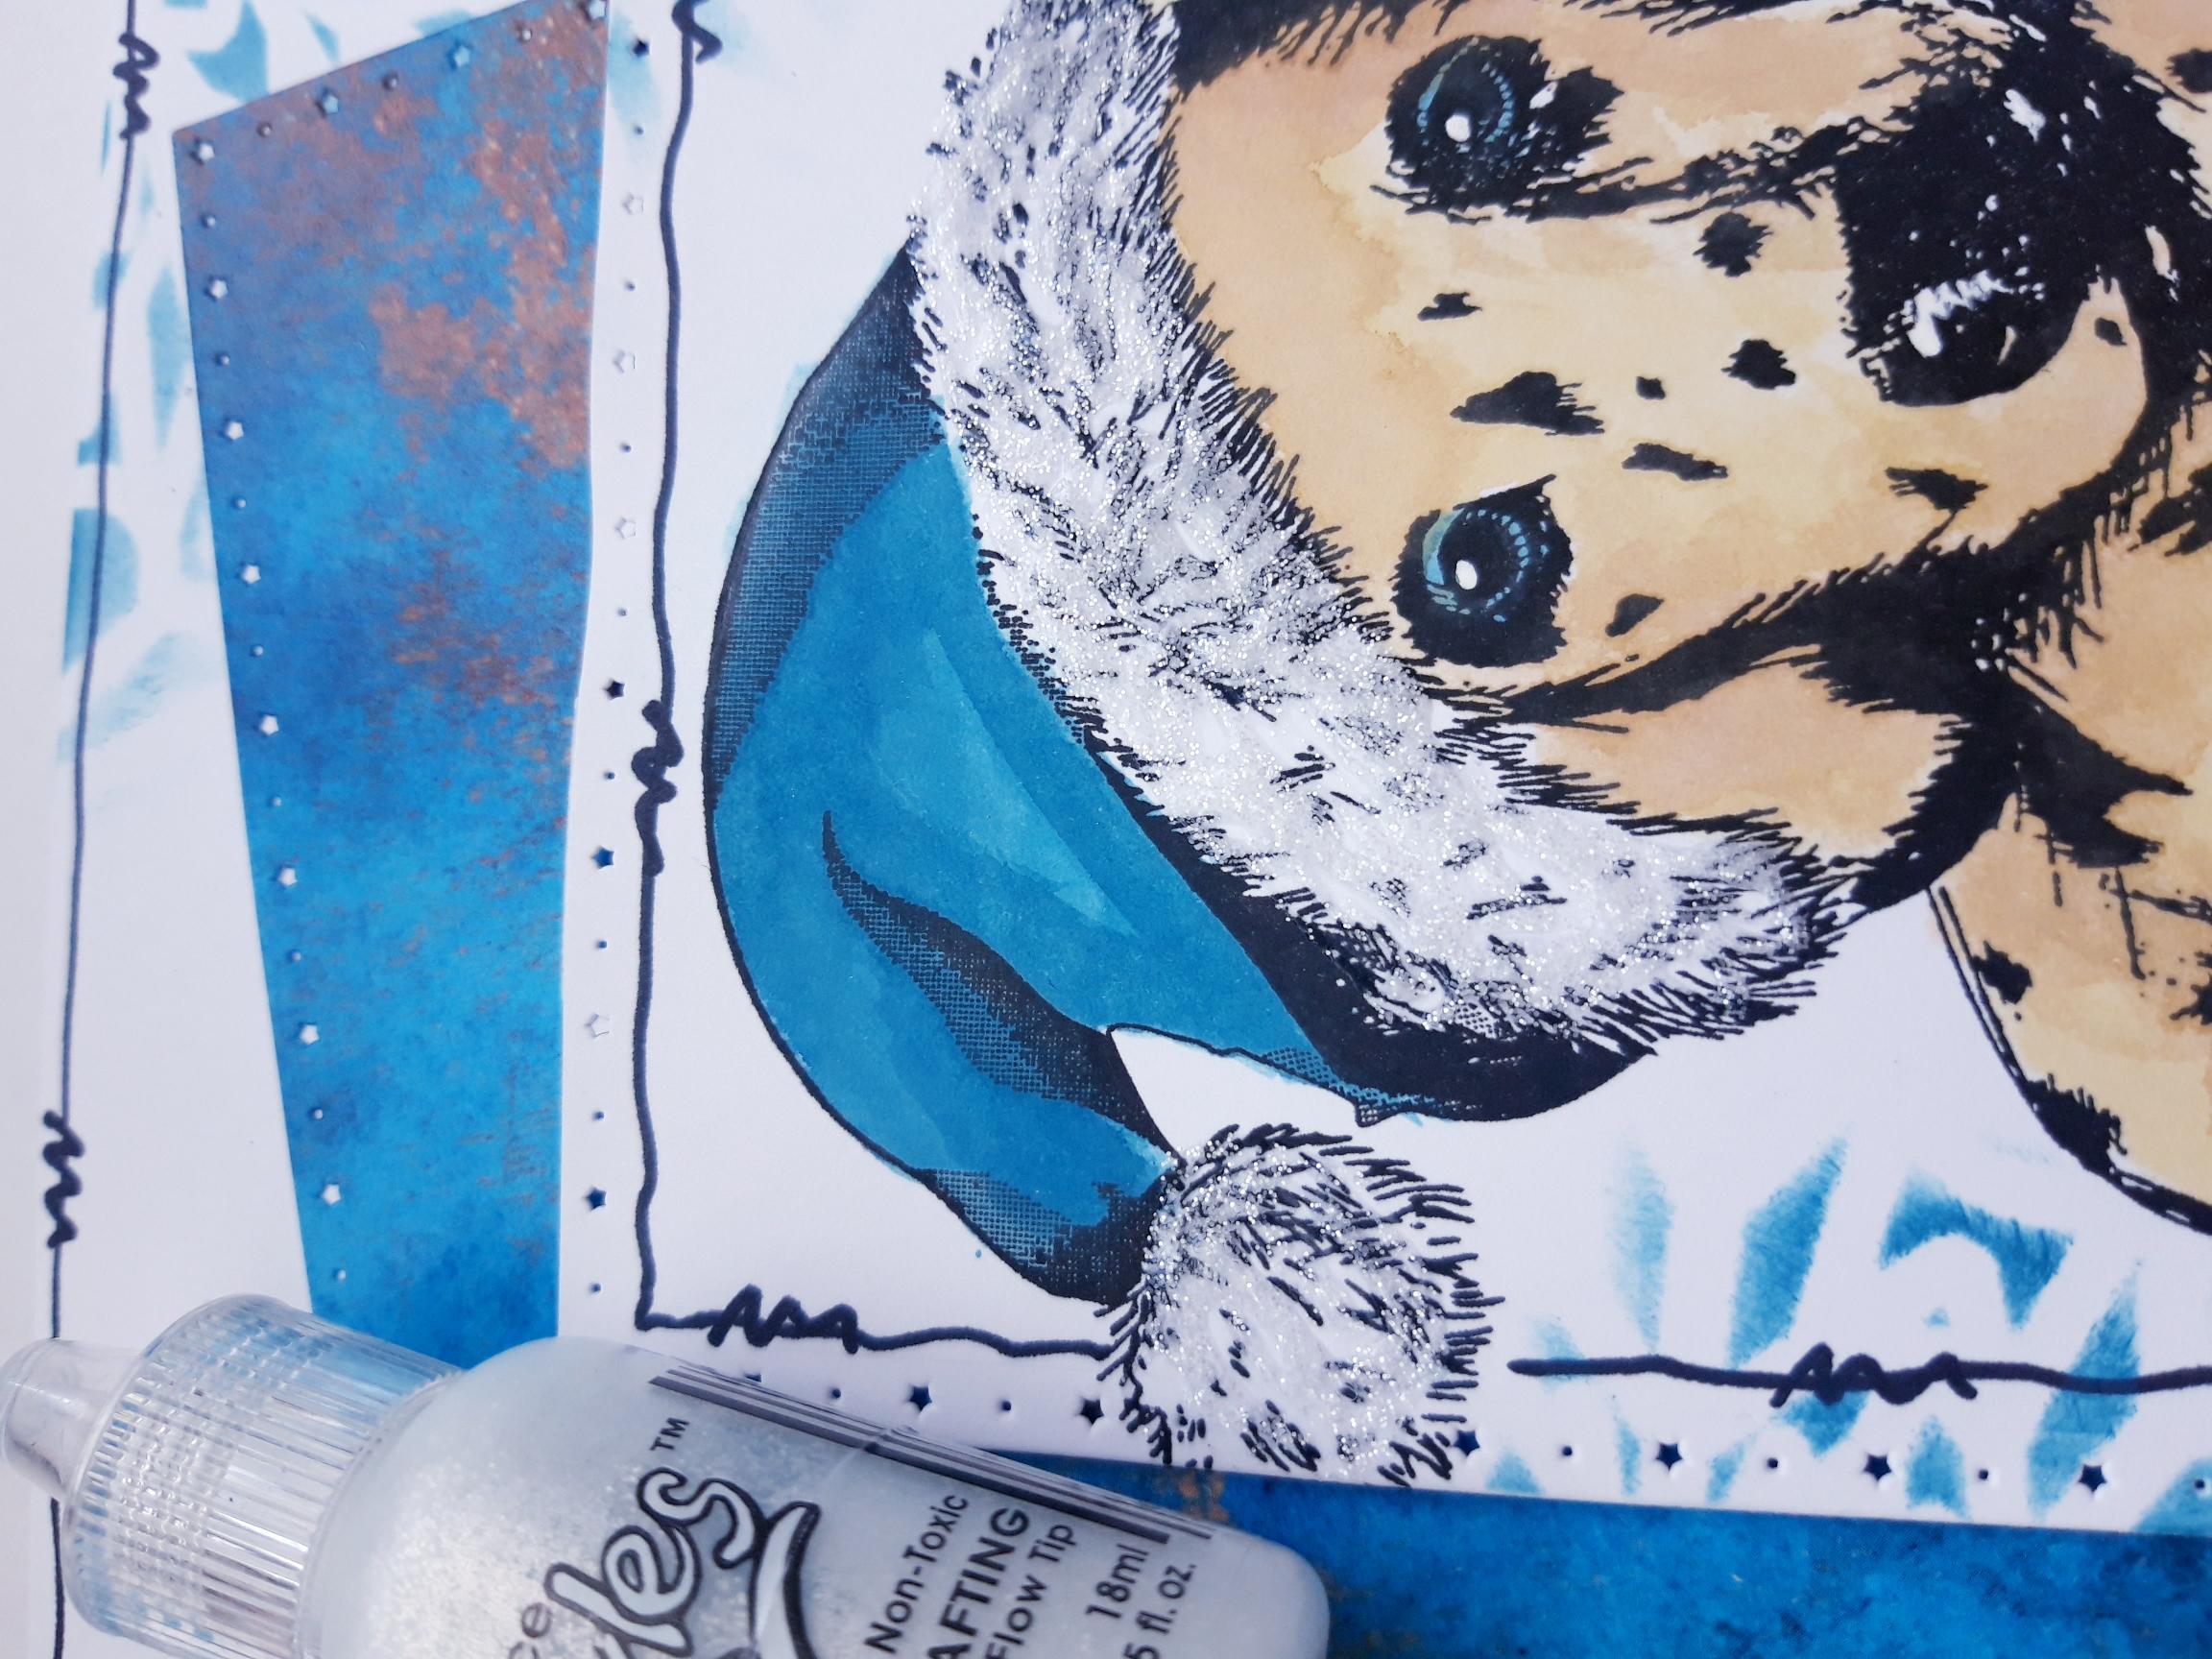
To finish, add lots of sparkly Stickles to the edge and bobble, of the Christmas hat. |