Give your friends $10 off their first order!
Refer a FRIEND


WHAT YOU WILL NEED
Black top folding card blank 8 1/4 x 5 3/4"
White card 7 3/4 x 5 1/4"
White card 7 1/2 x 5"
Black card 4 x 4"
Rose Branch Layering Stencils And Die Collection
Dot Frame Stamp Collection
Kind Friends Die Collection
Create Together Club Beautiful Notes Stamp Collection
Versafine Ink Pad: Onyx Black
Izink Pigment Classic Ink pad Collection: Yellow, dark green
Blending tool/brush
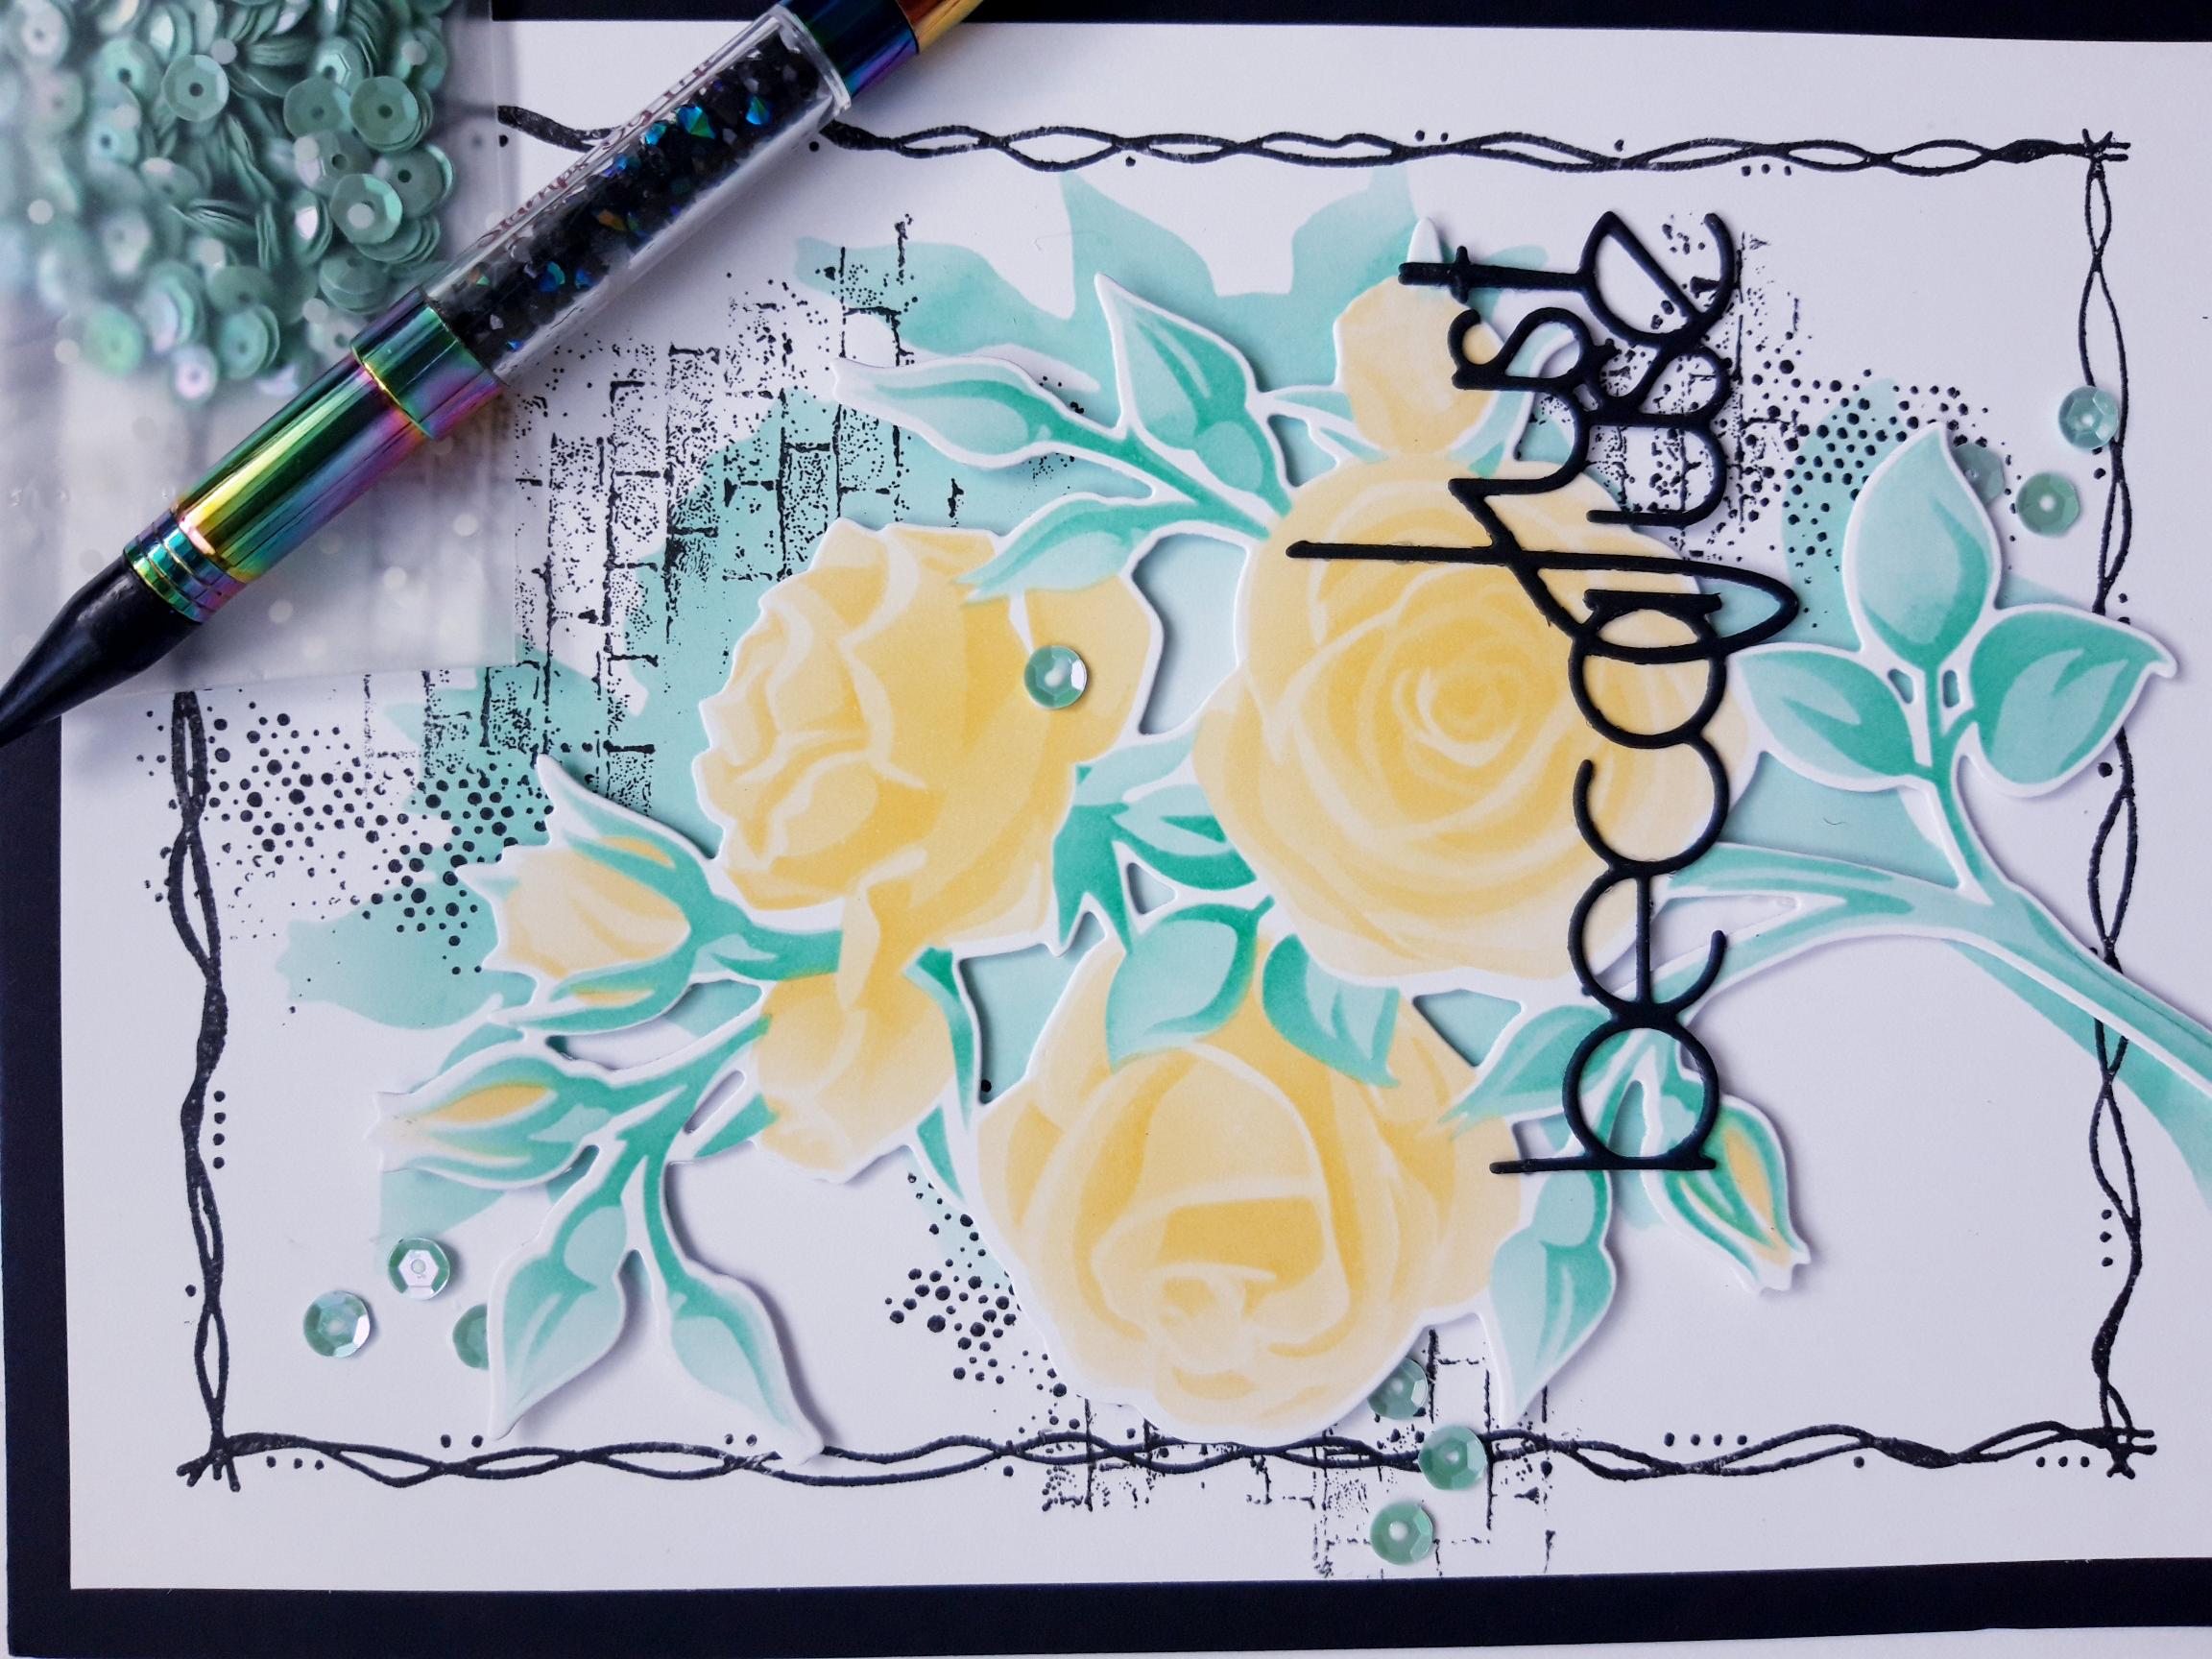
Sequins: Down The Bay
Gem pick up and pokey tool
Eureka 101
Paper Trimmer
Perfect Together Glue
Foam pads
Die Cutting machine
[click image to enlarge] 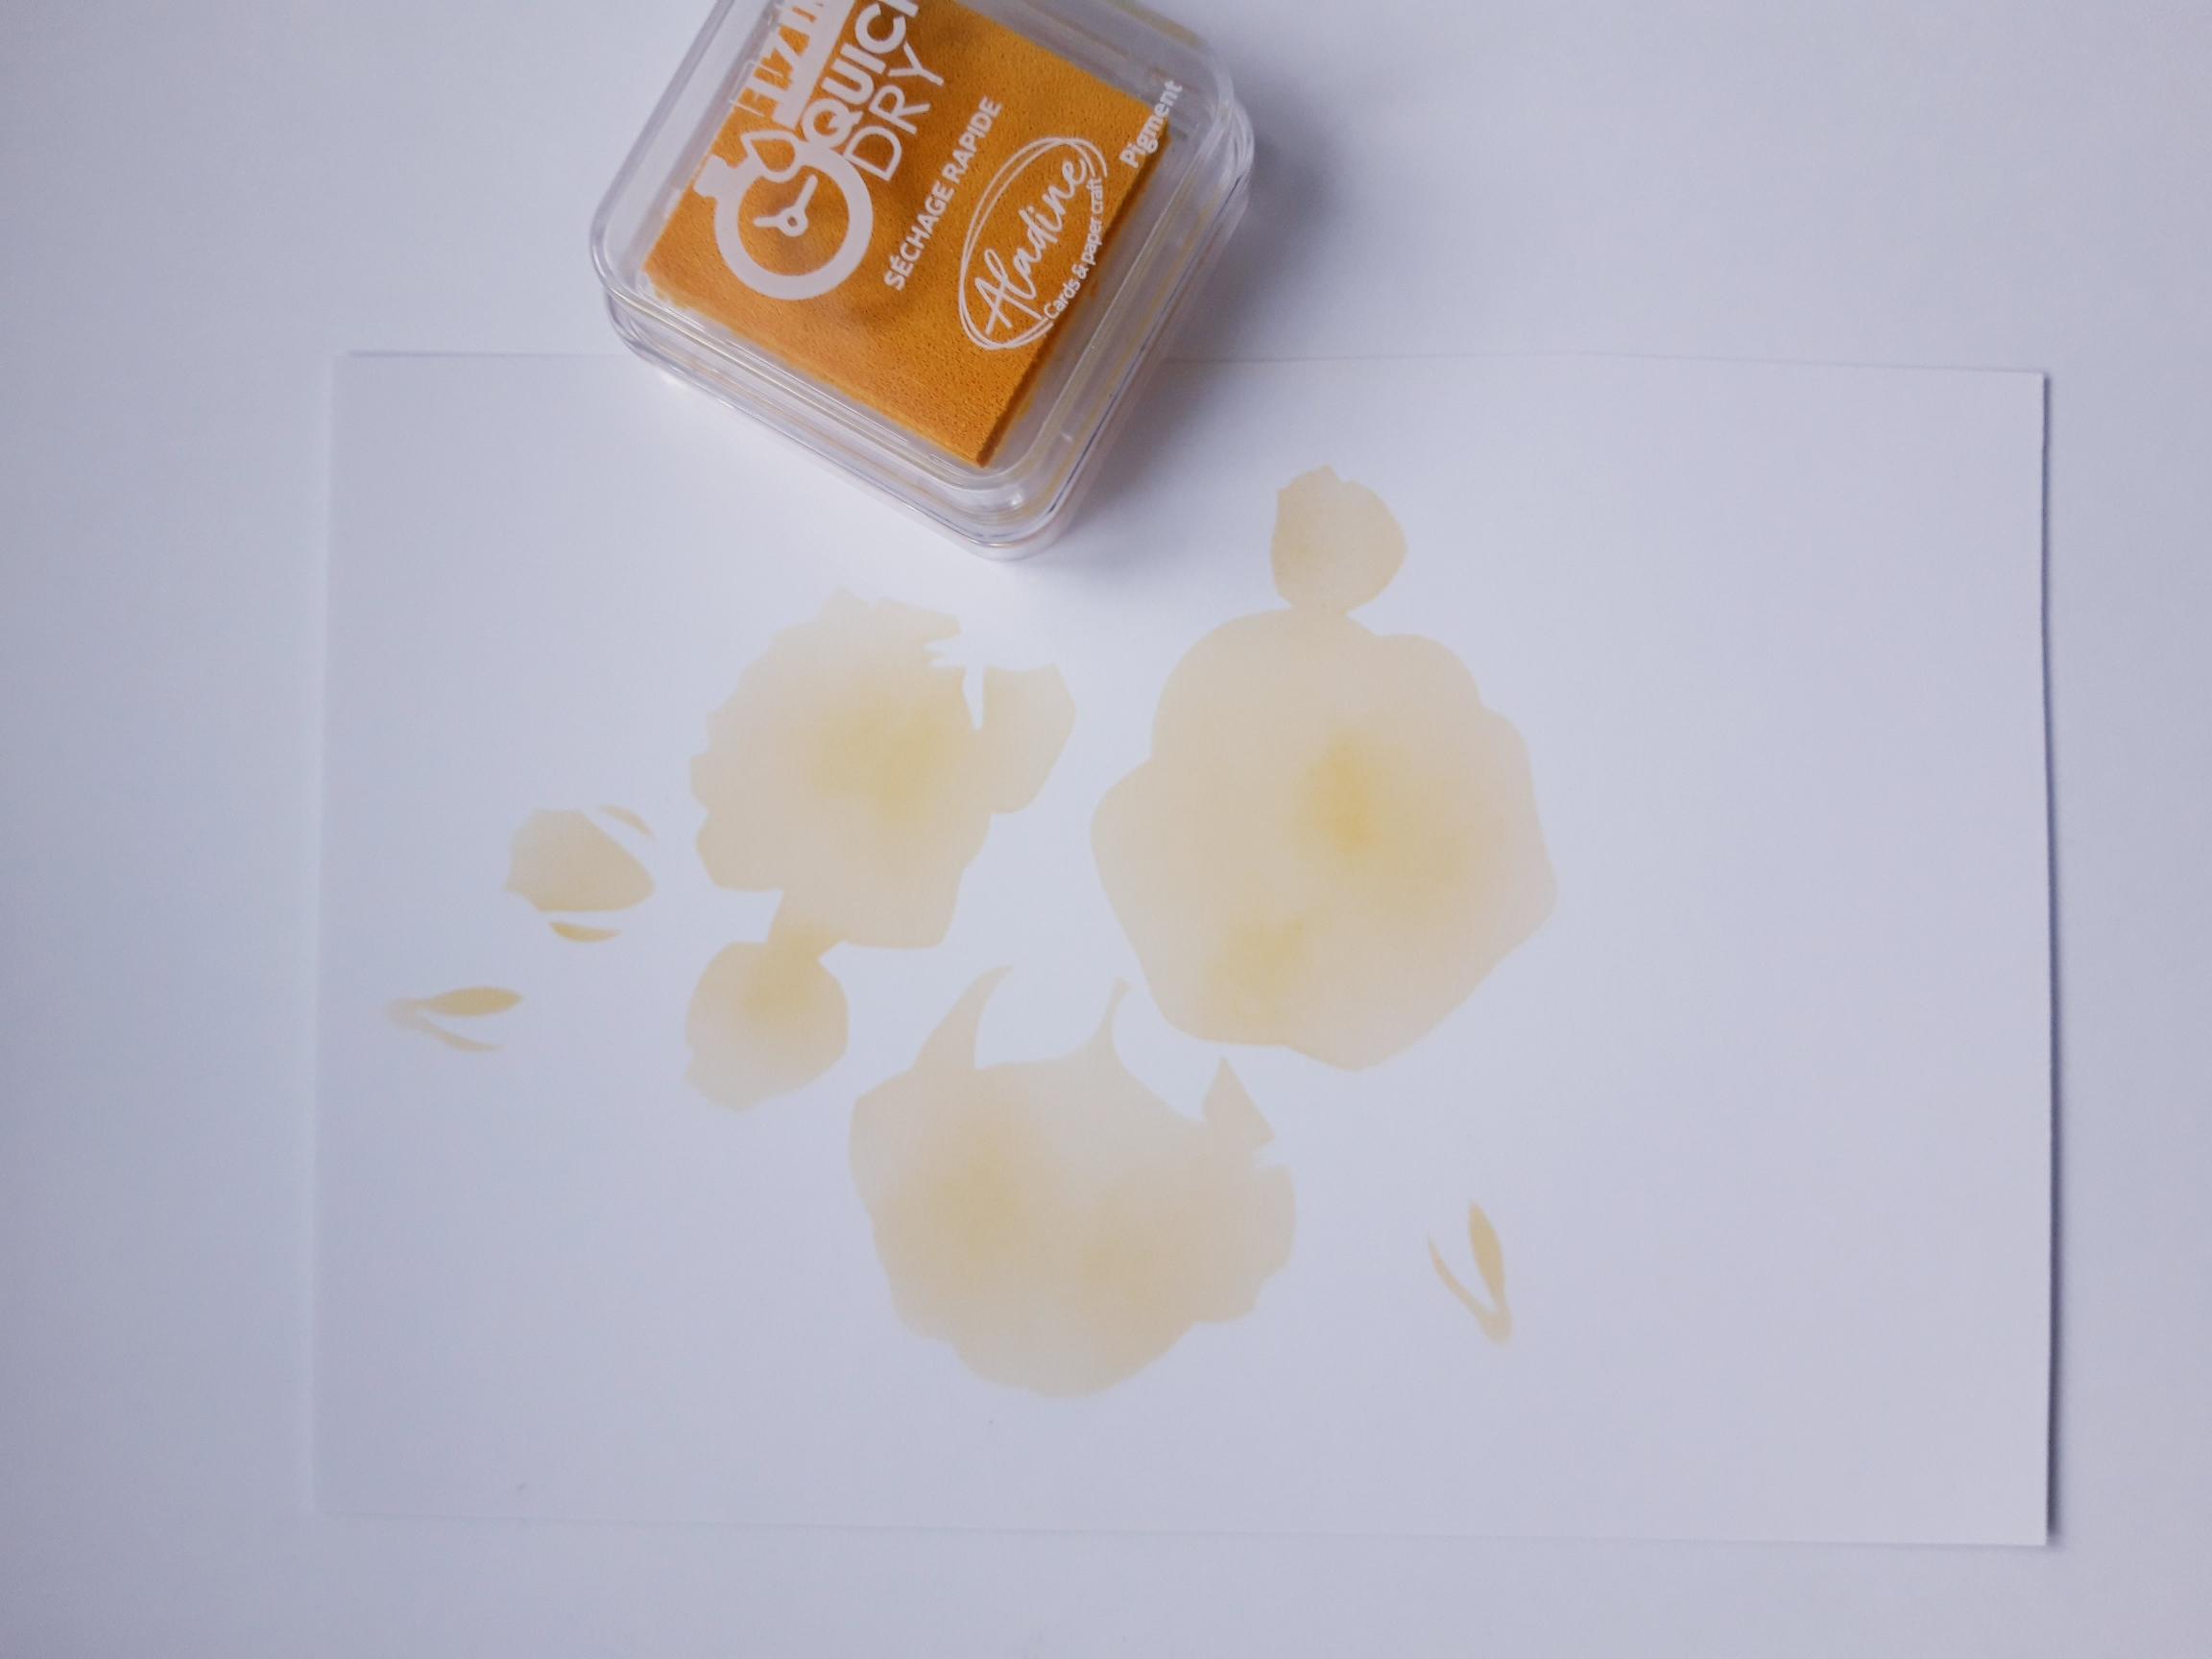
|
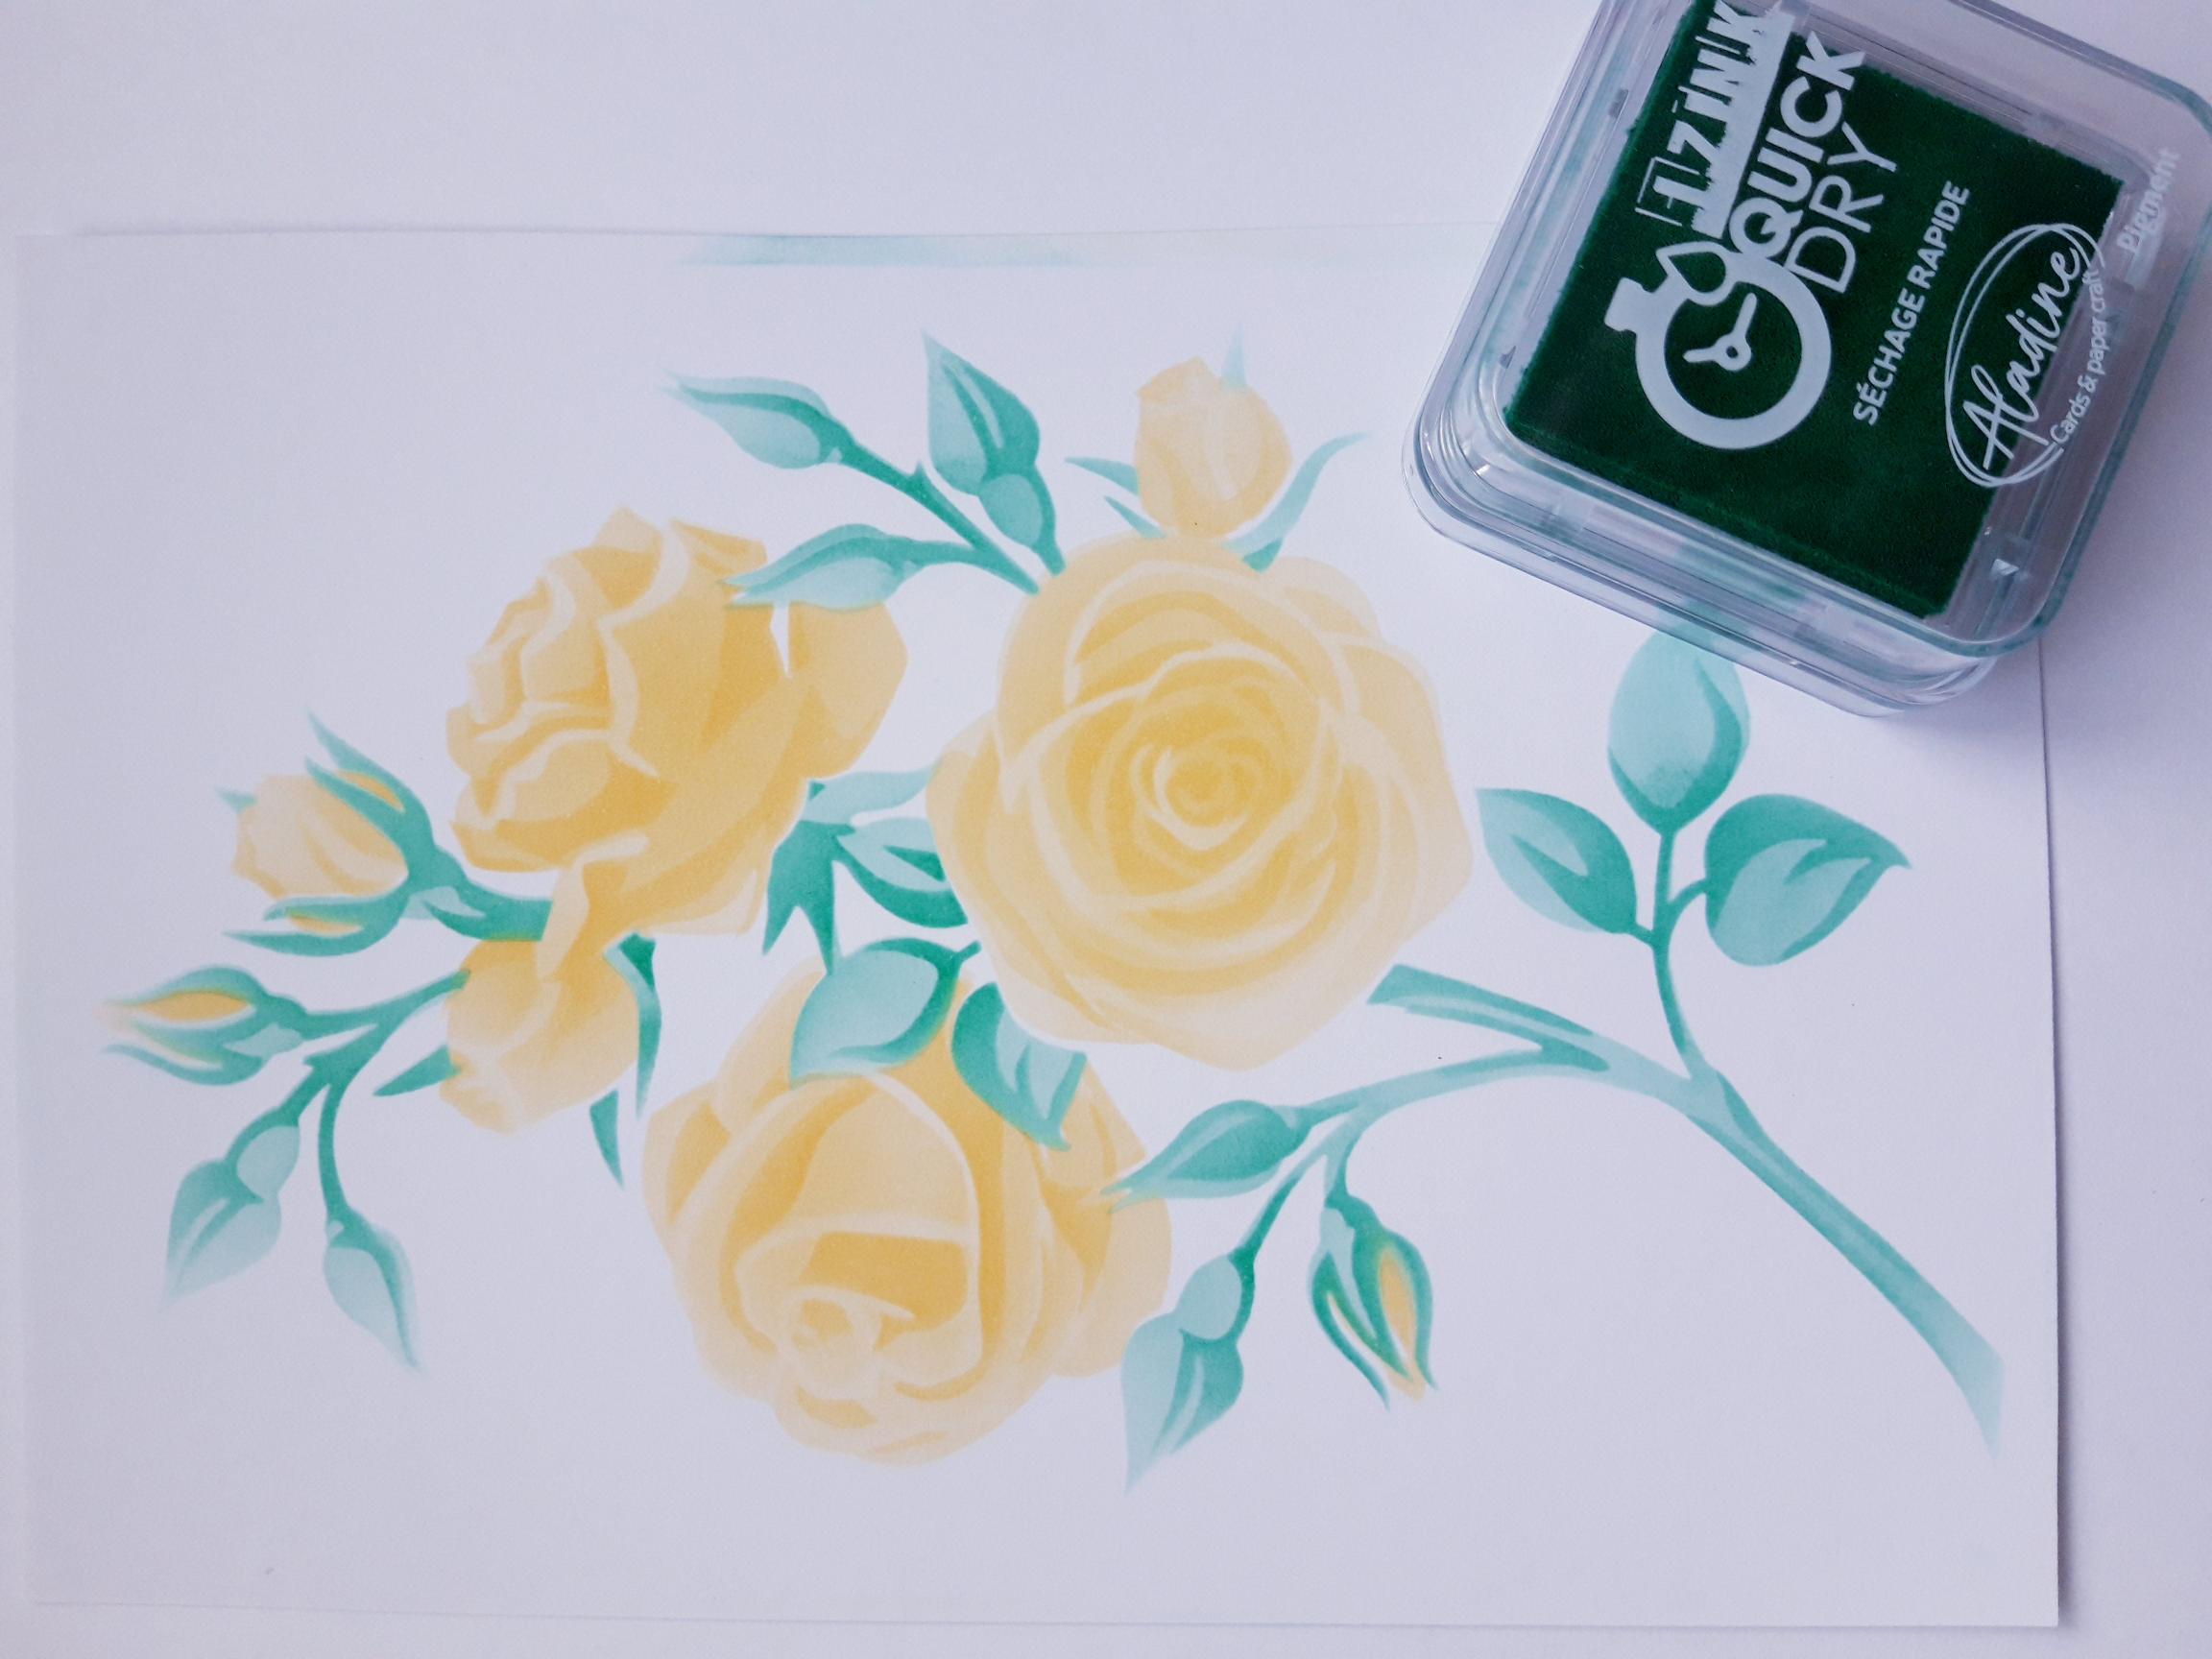
Place stencil 1, from the Rose Branch Collection, on to the white card (7 1/2 x 5"). Ink through the 4 corner hearts, as this will help you line up each stencil. Using your blending tool, apply the Izink yellow Pigment lightly, through the stencil. |
|
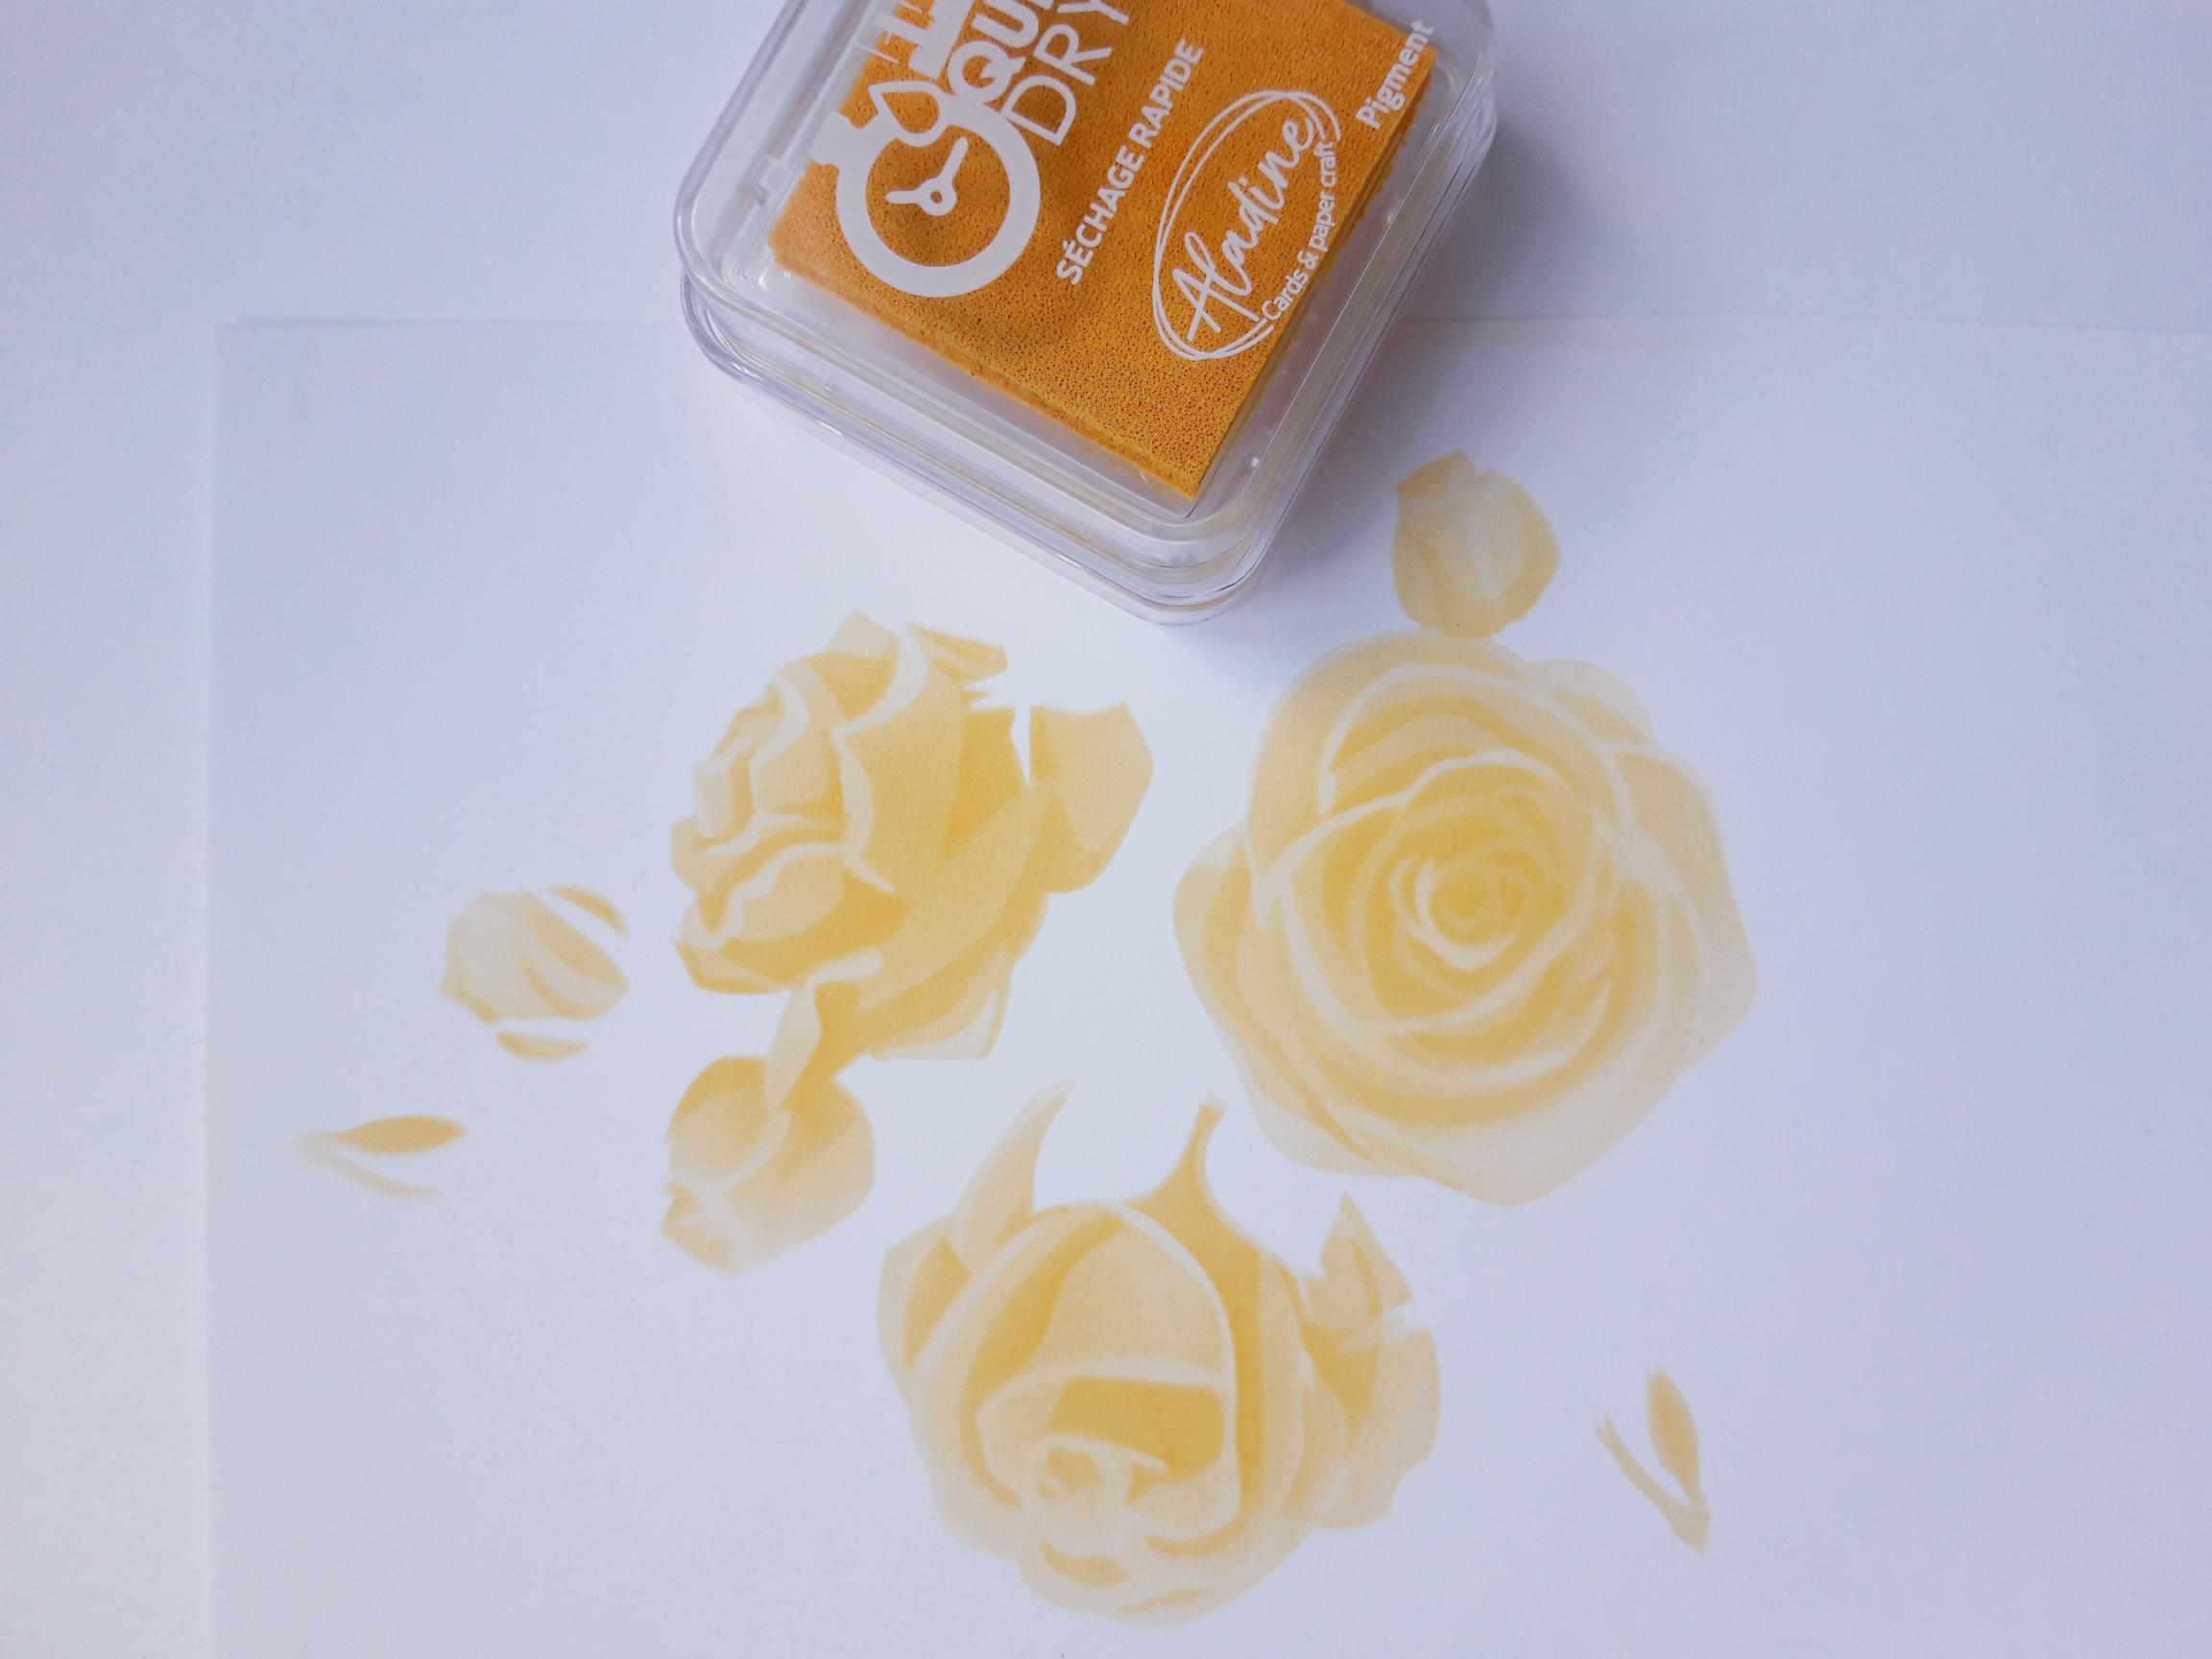
Place stencil 2 in place and reapply the yellow Izink, but this time with more pressure, to achieve a deeper tone. |
|
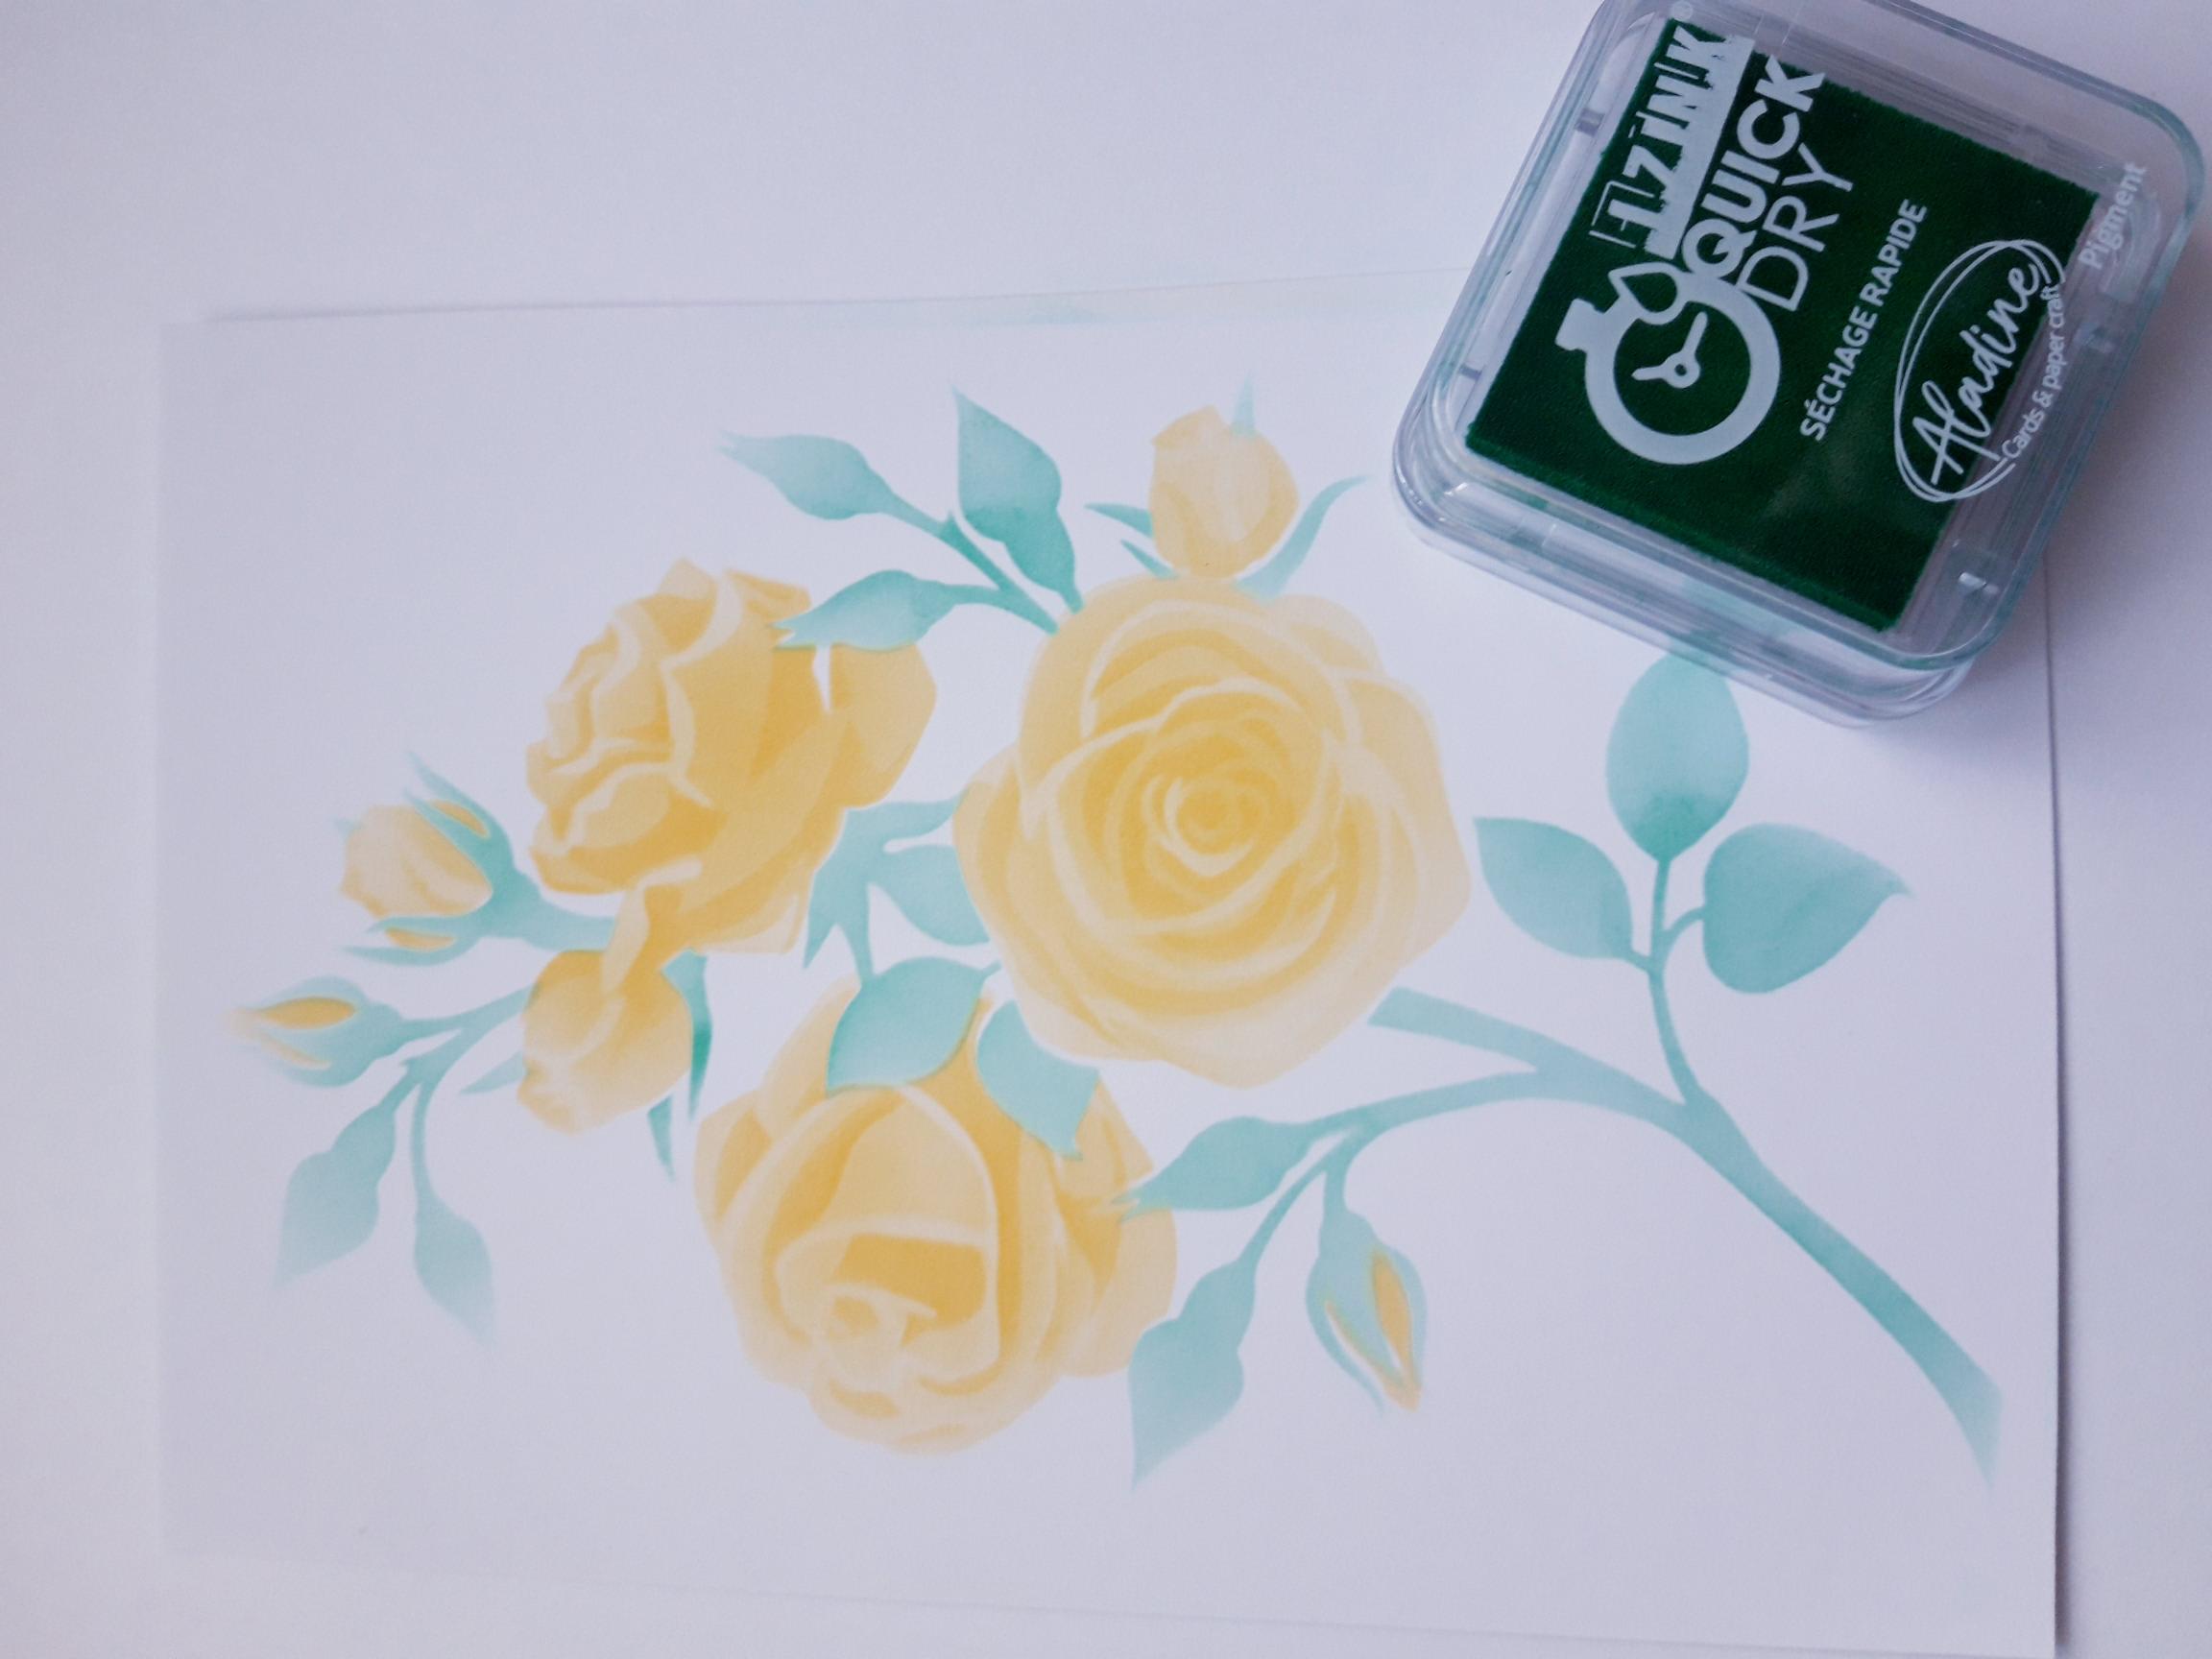
Line up stencil 3 and blend lightly, with the dark green Pigment ink. |
|
Place stencil 4 in position and apply the same ink, with more pressure. Remove the stencil and dry the ink, as Pigment ink is slow drying and you don't want it to smudge! |
|
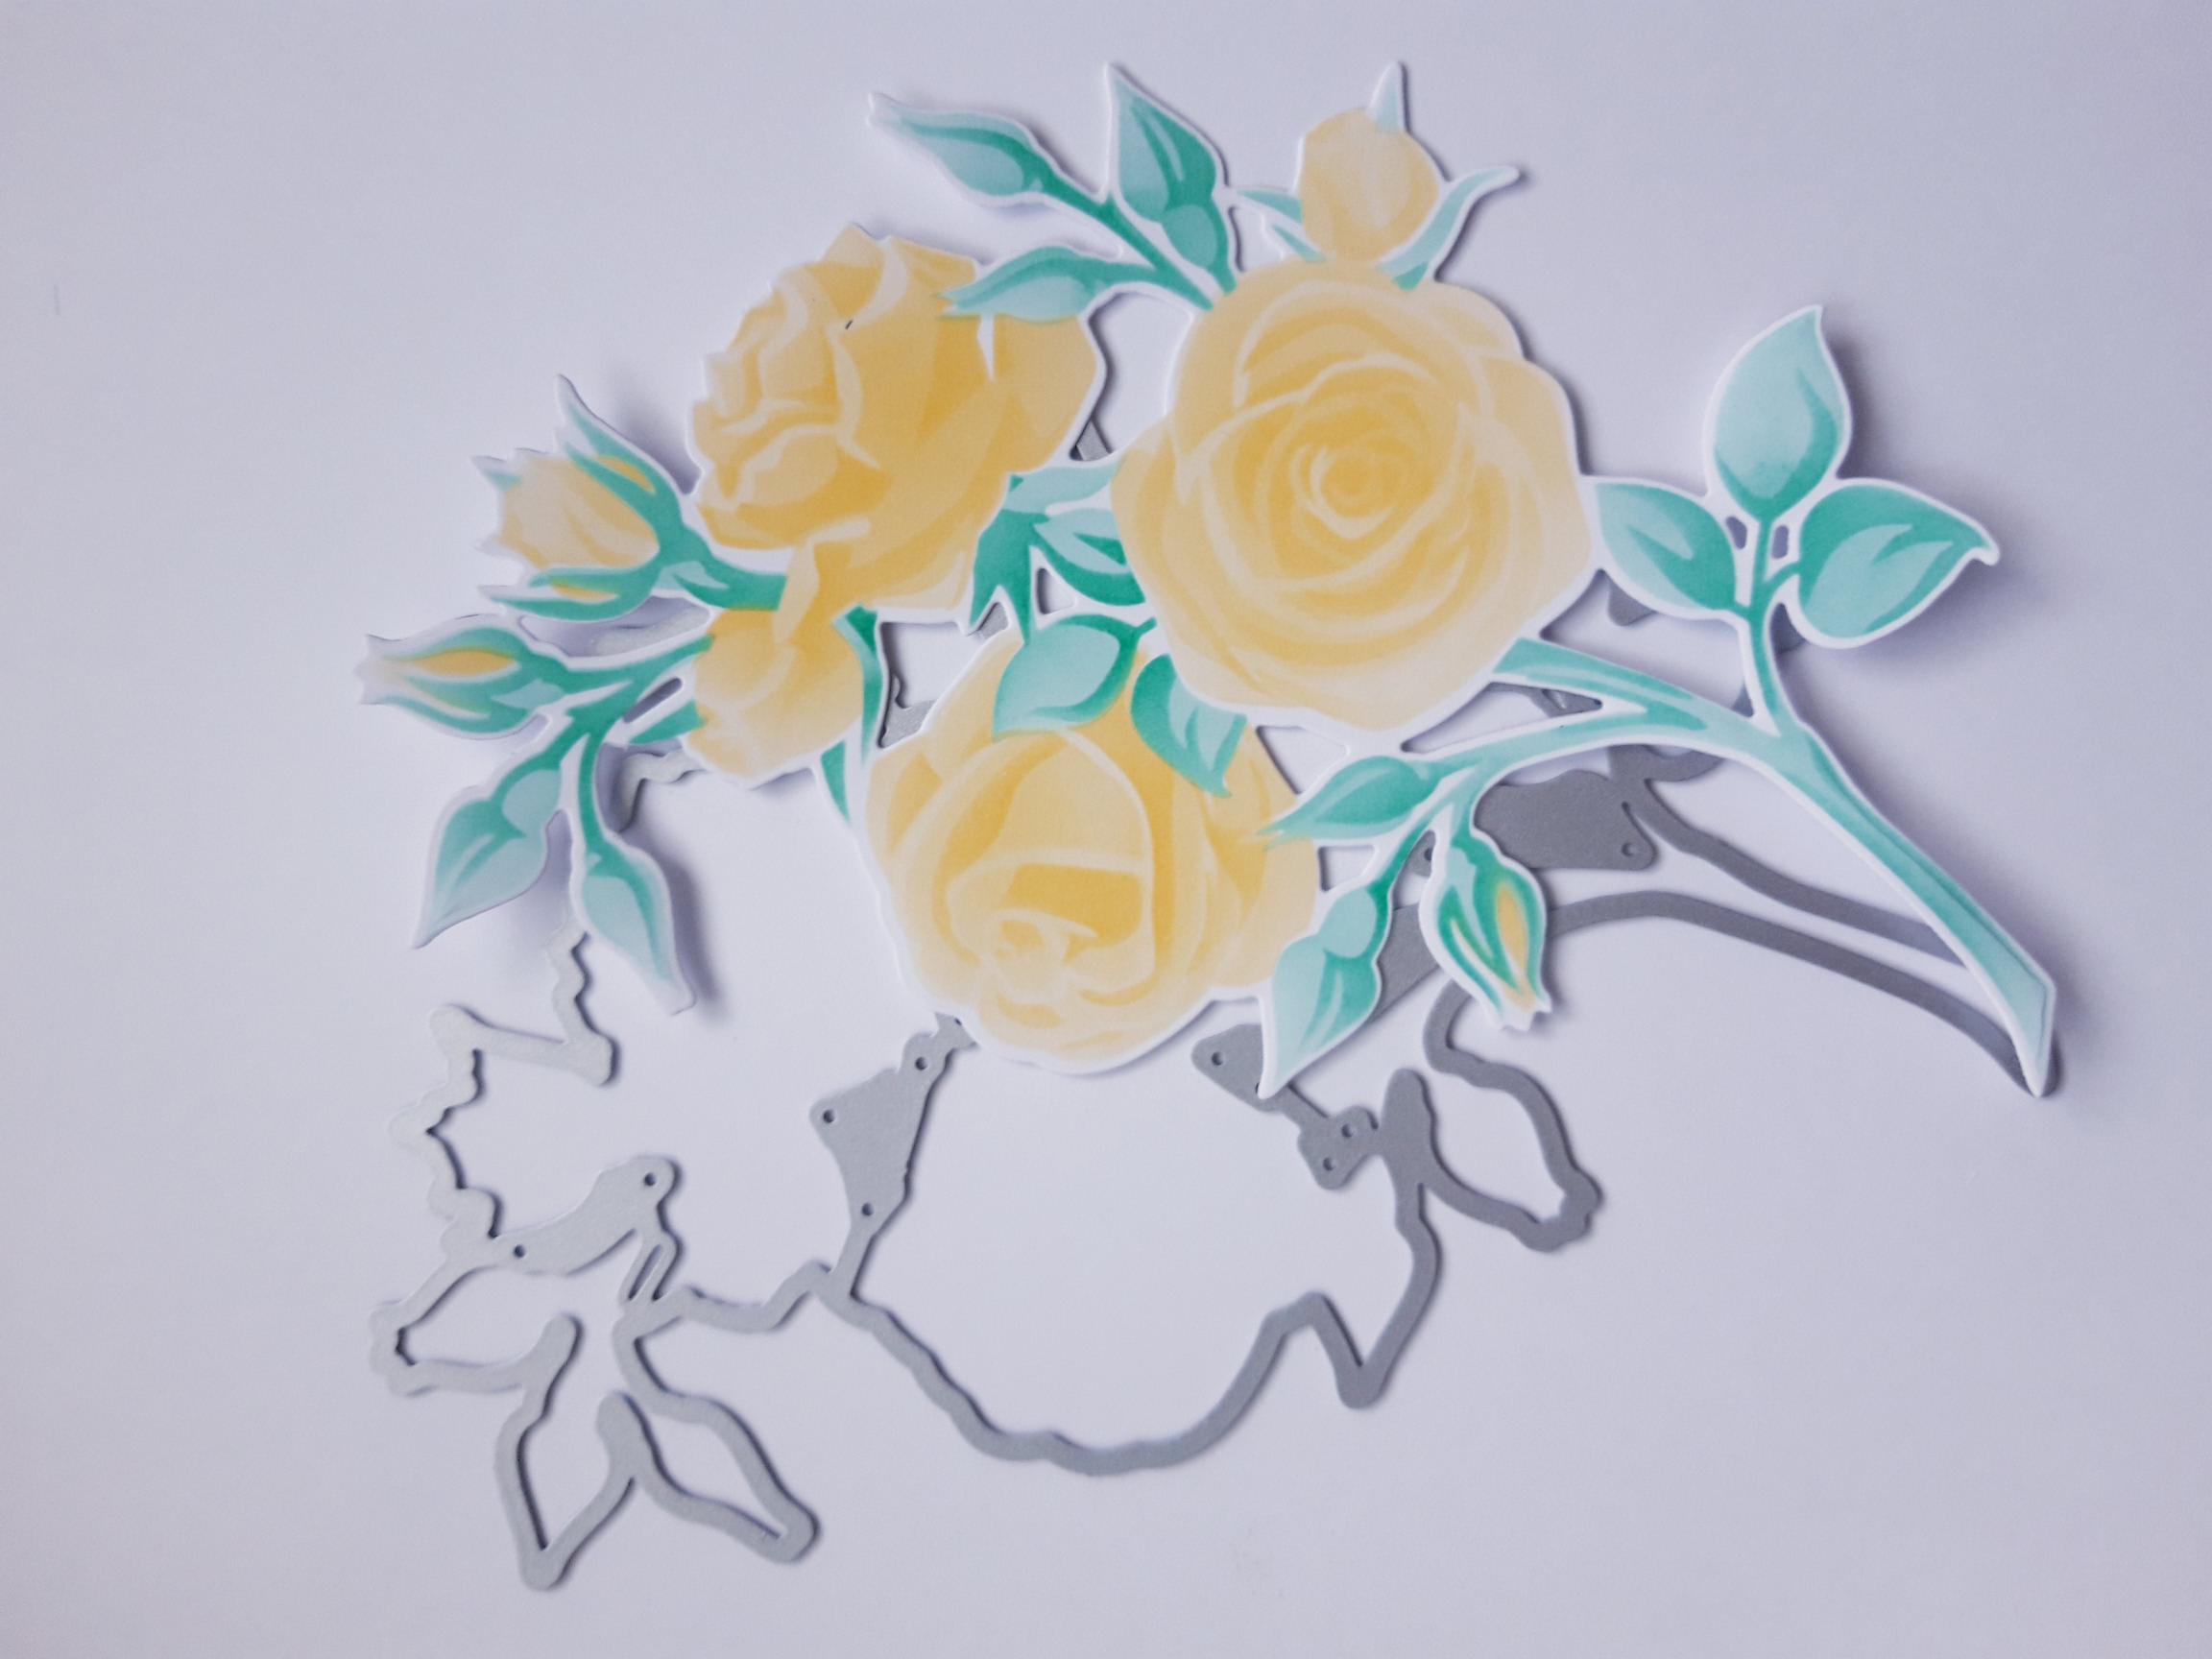
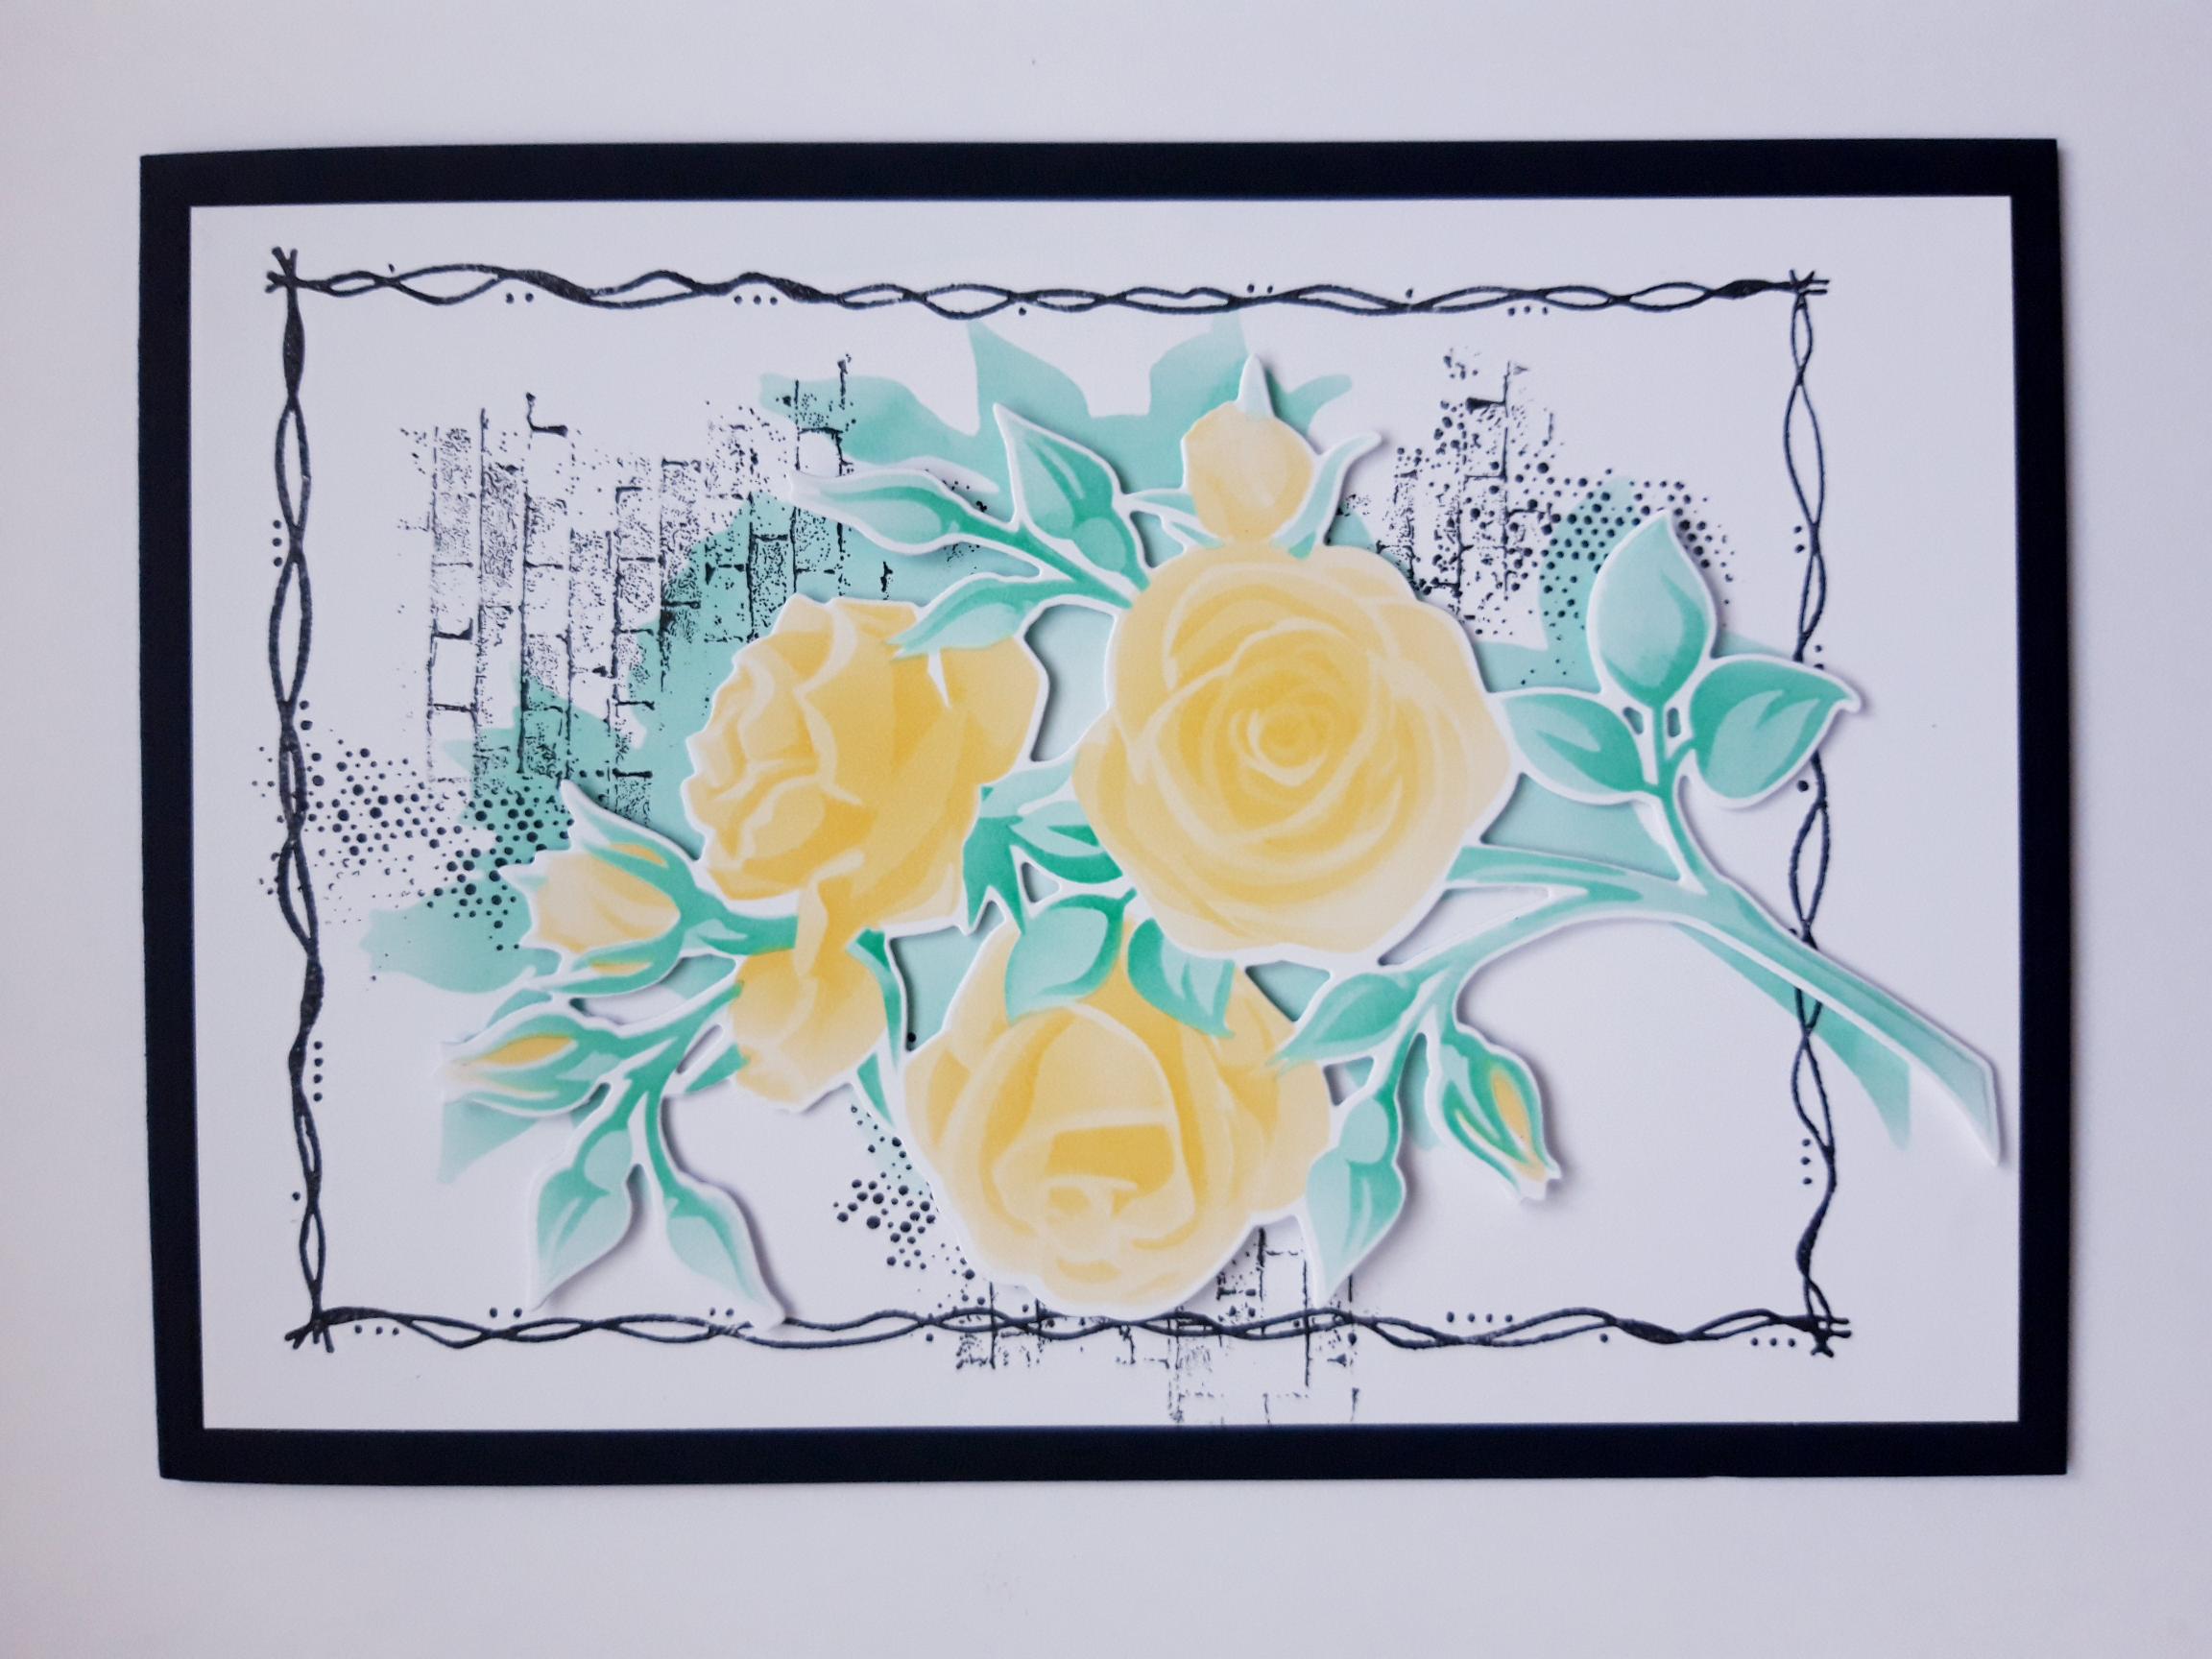
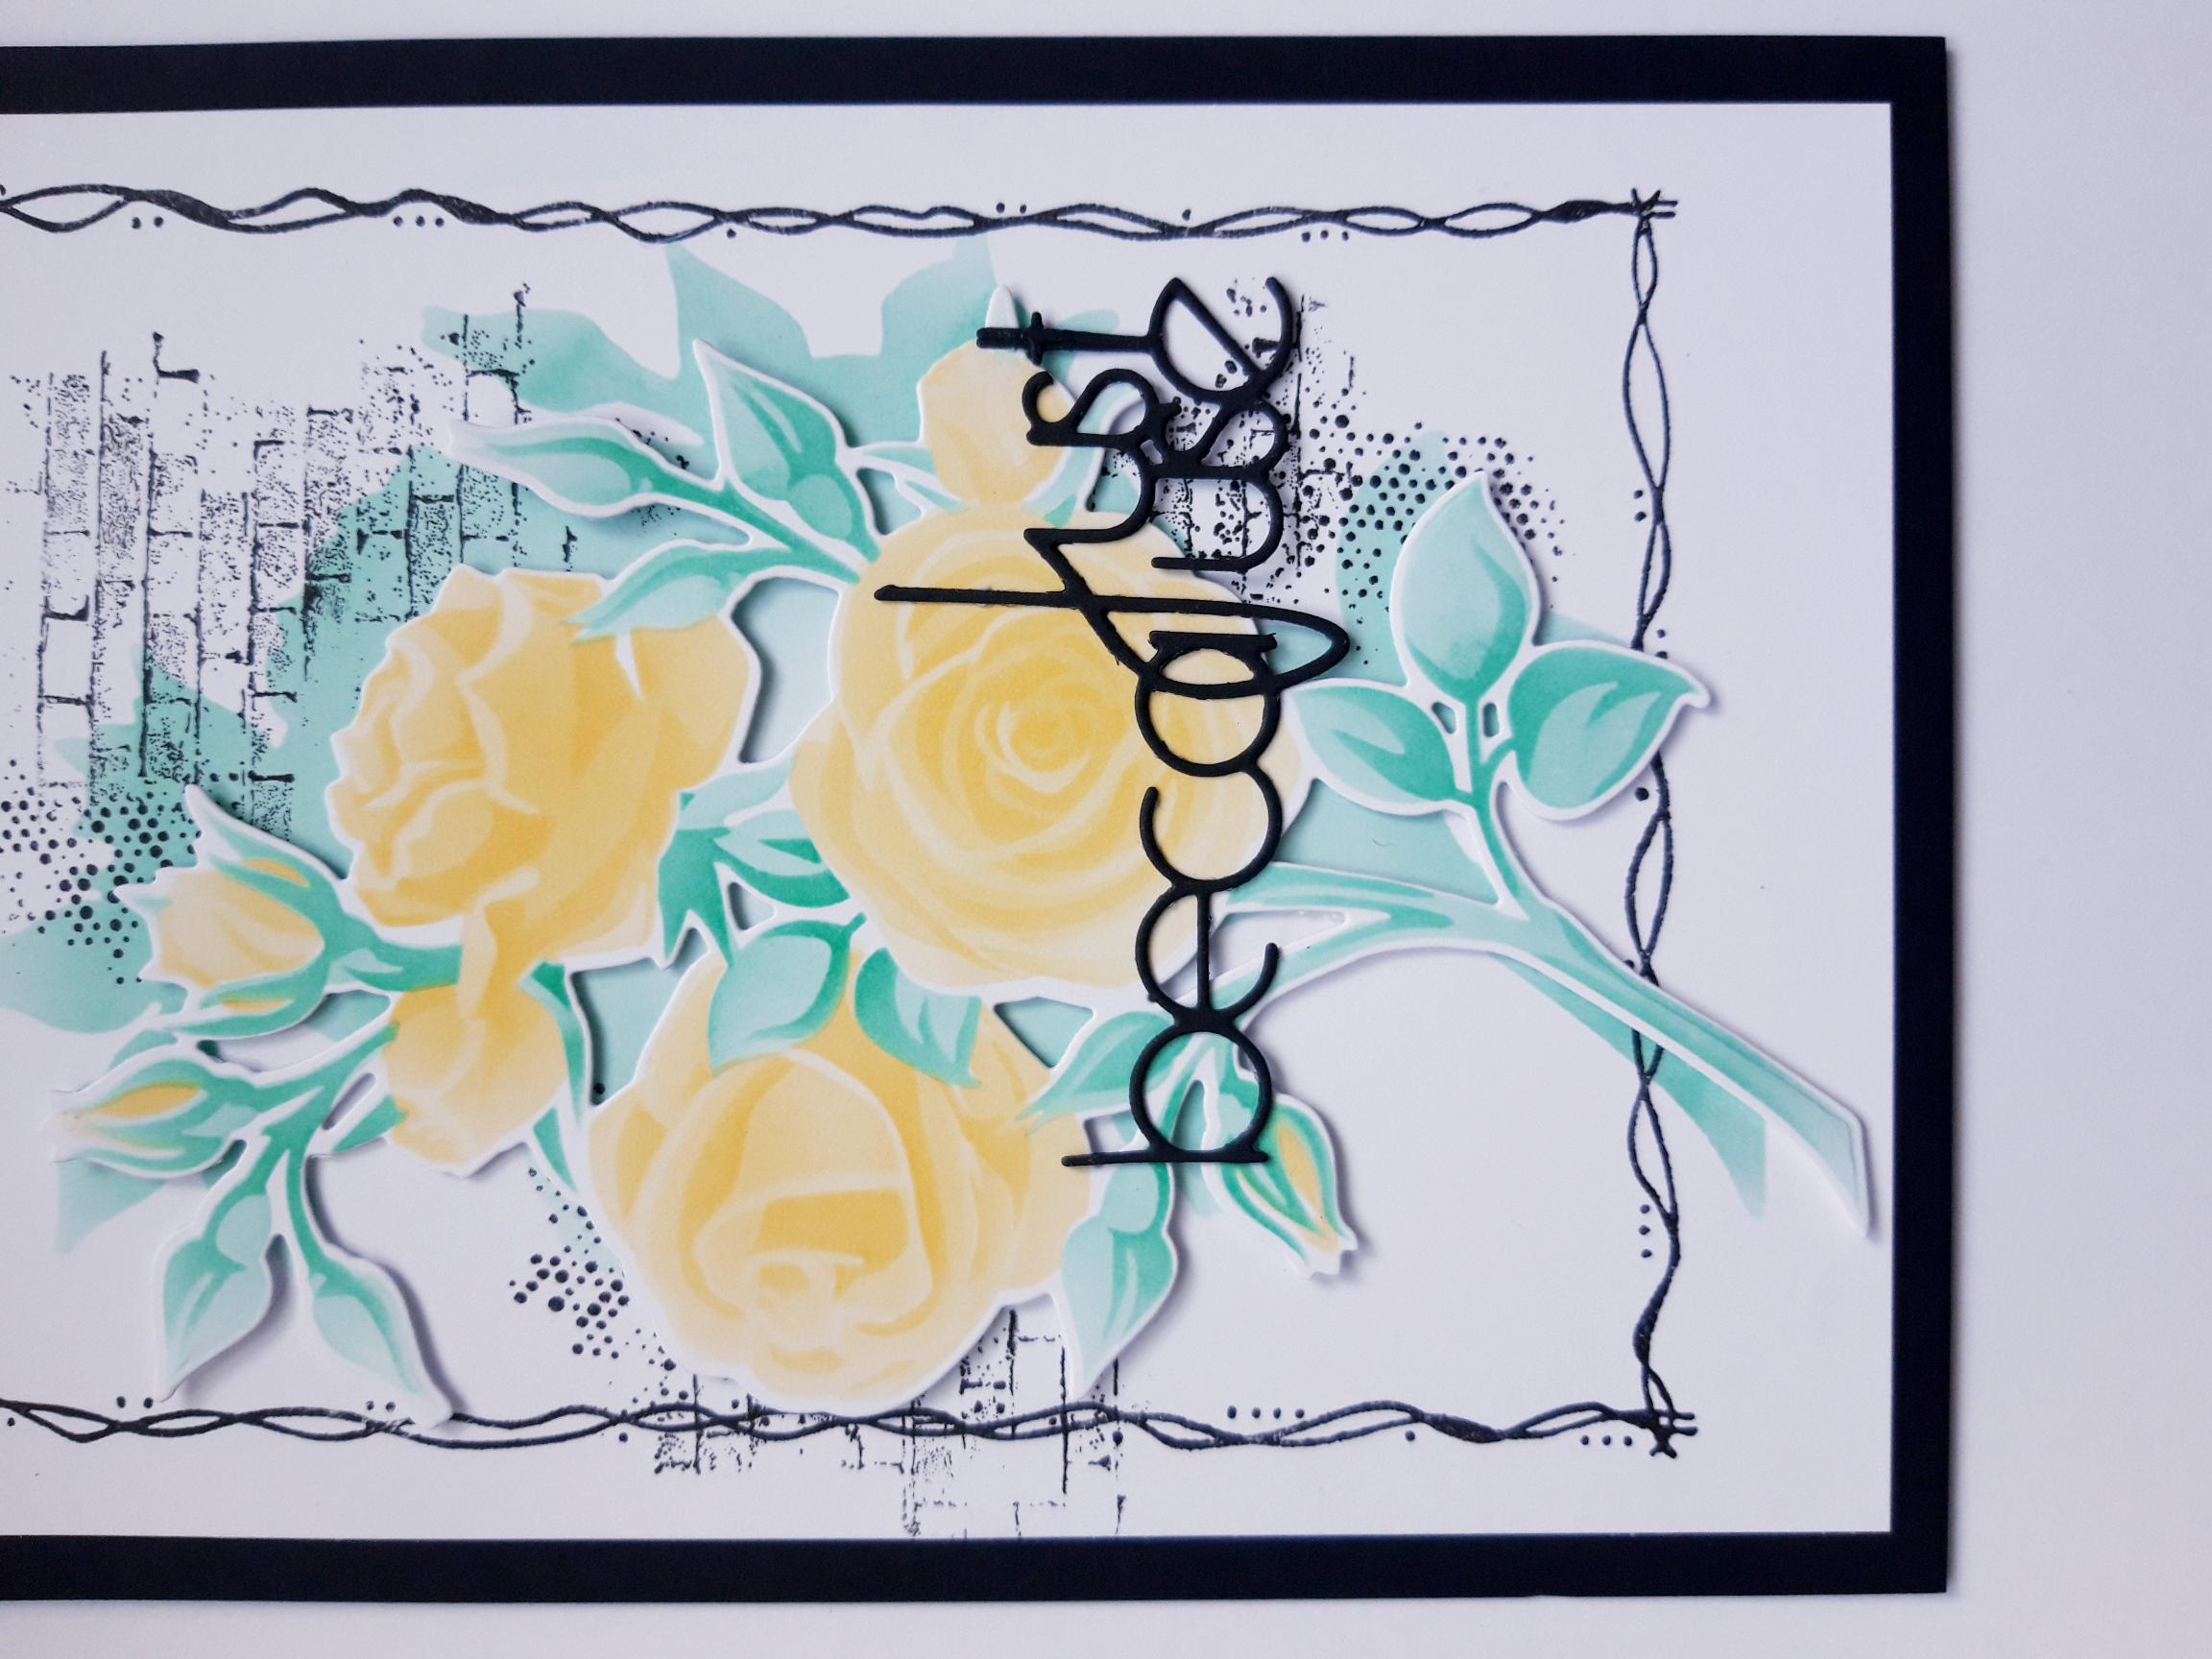
Secure the coordinating die in place, with low tack tape and run it through your die cutting machine, ensuring you do NOT throw away the "waste" Rose aperture, as you will be using this as a stencil. . Set you 3D Rose element to one side. |
|
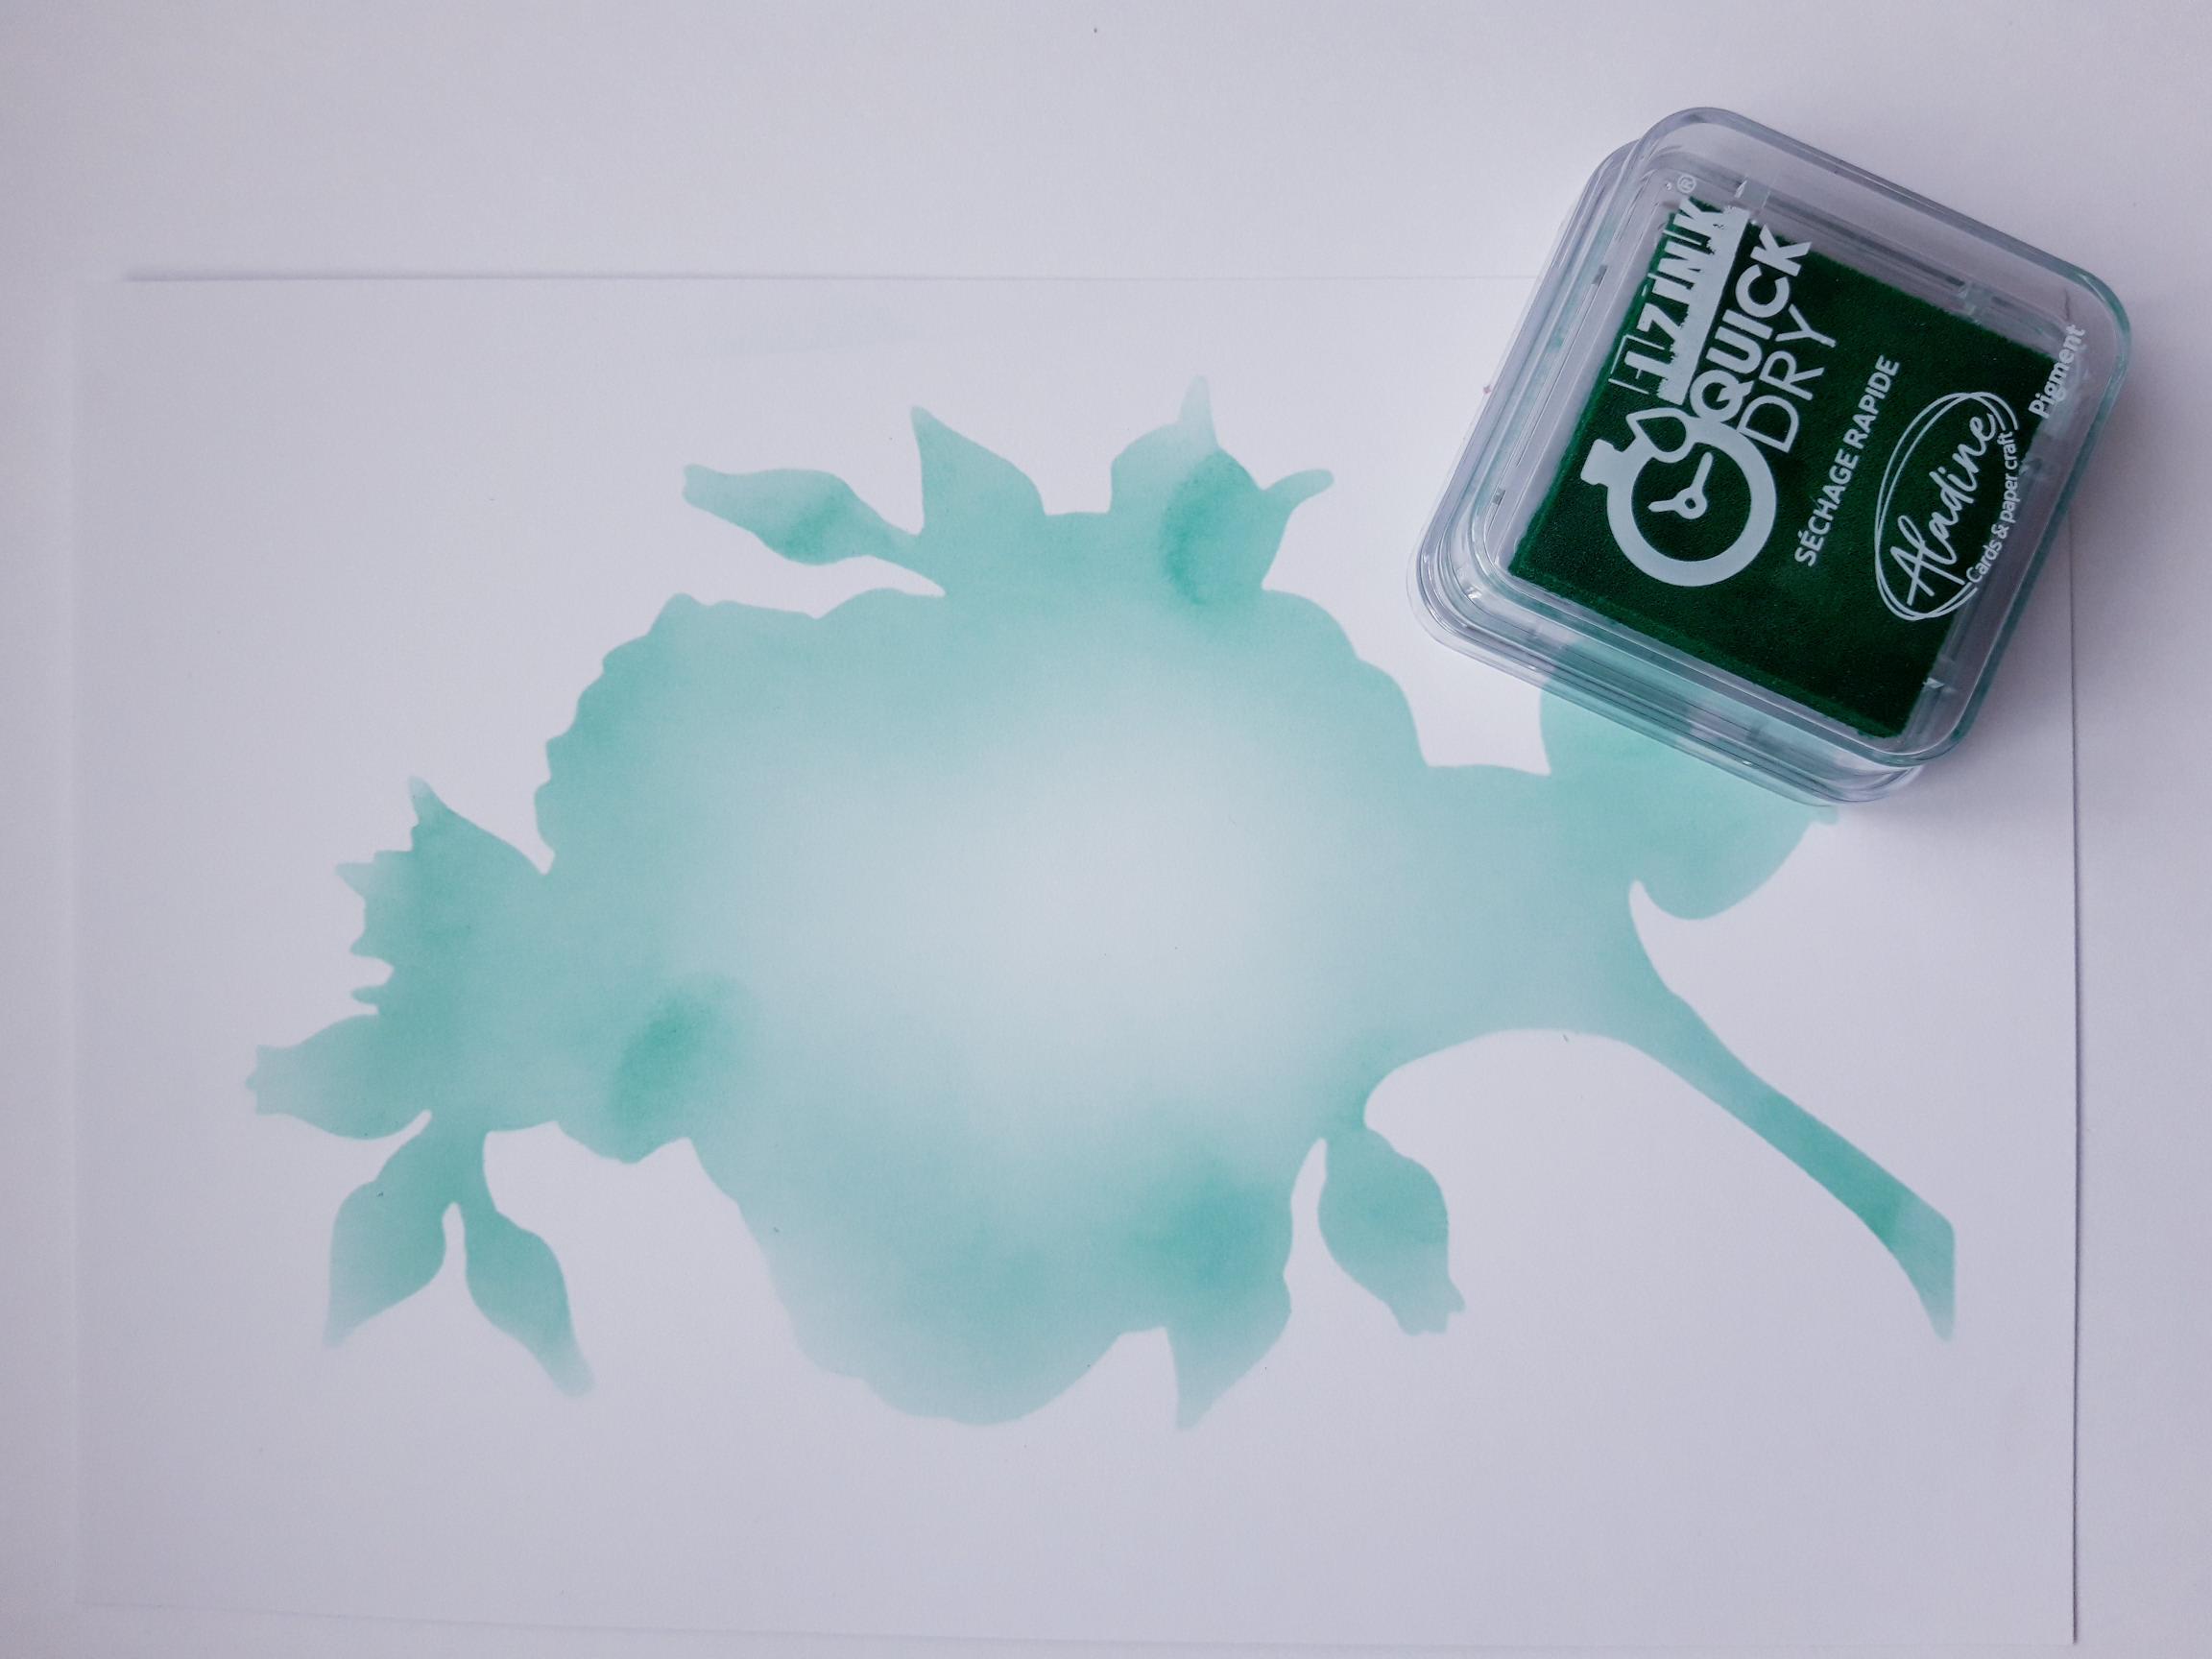
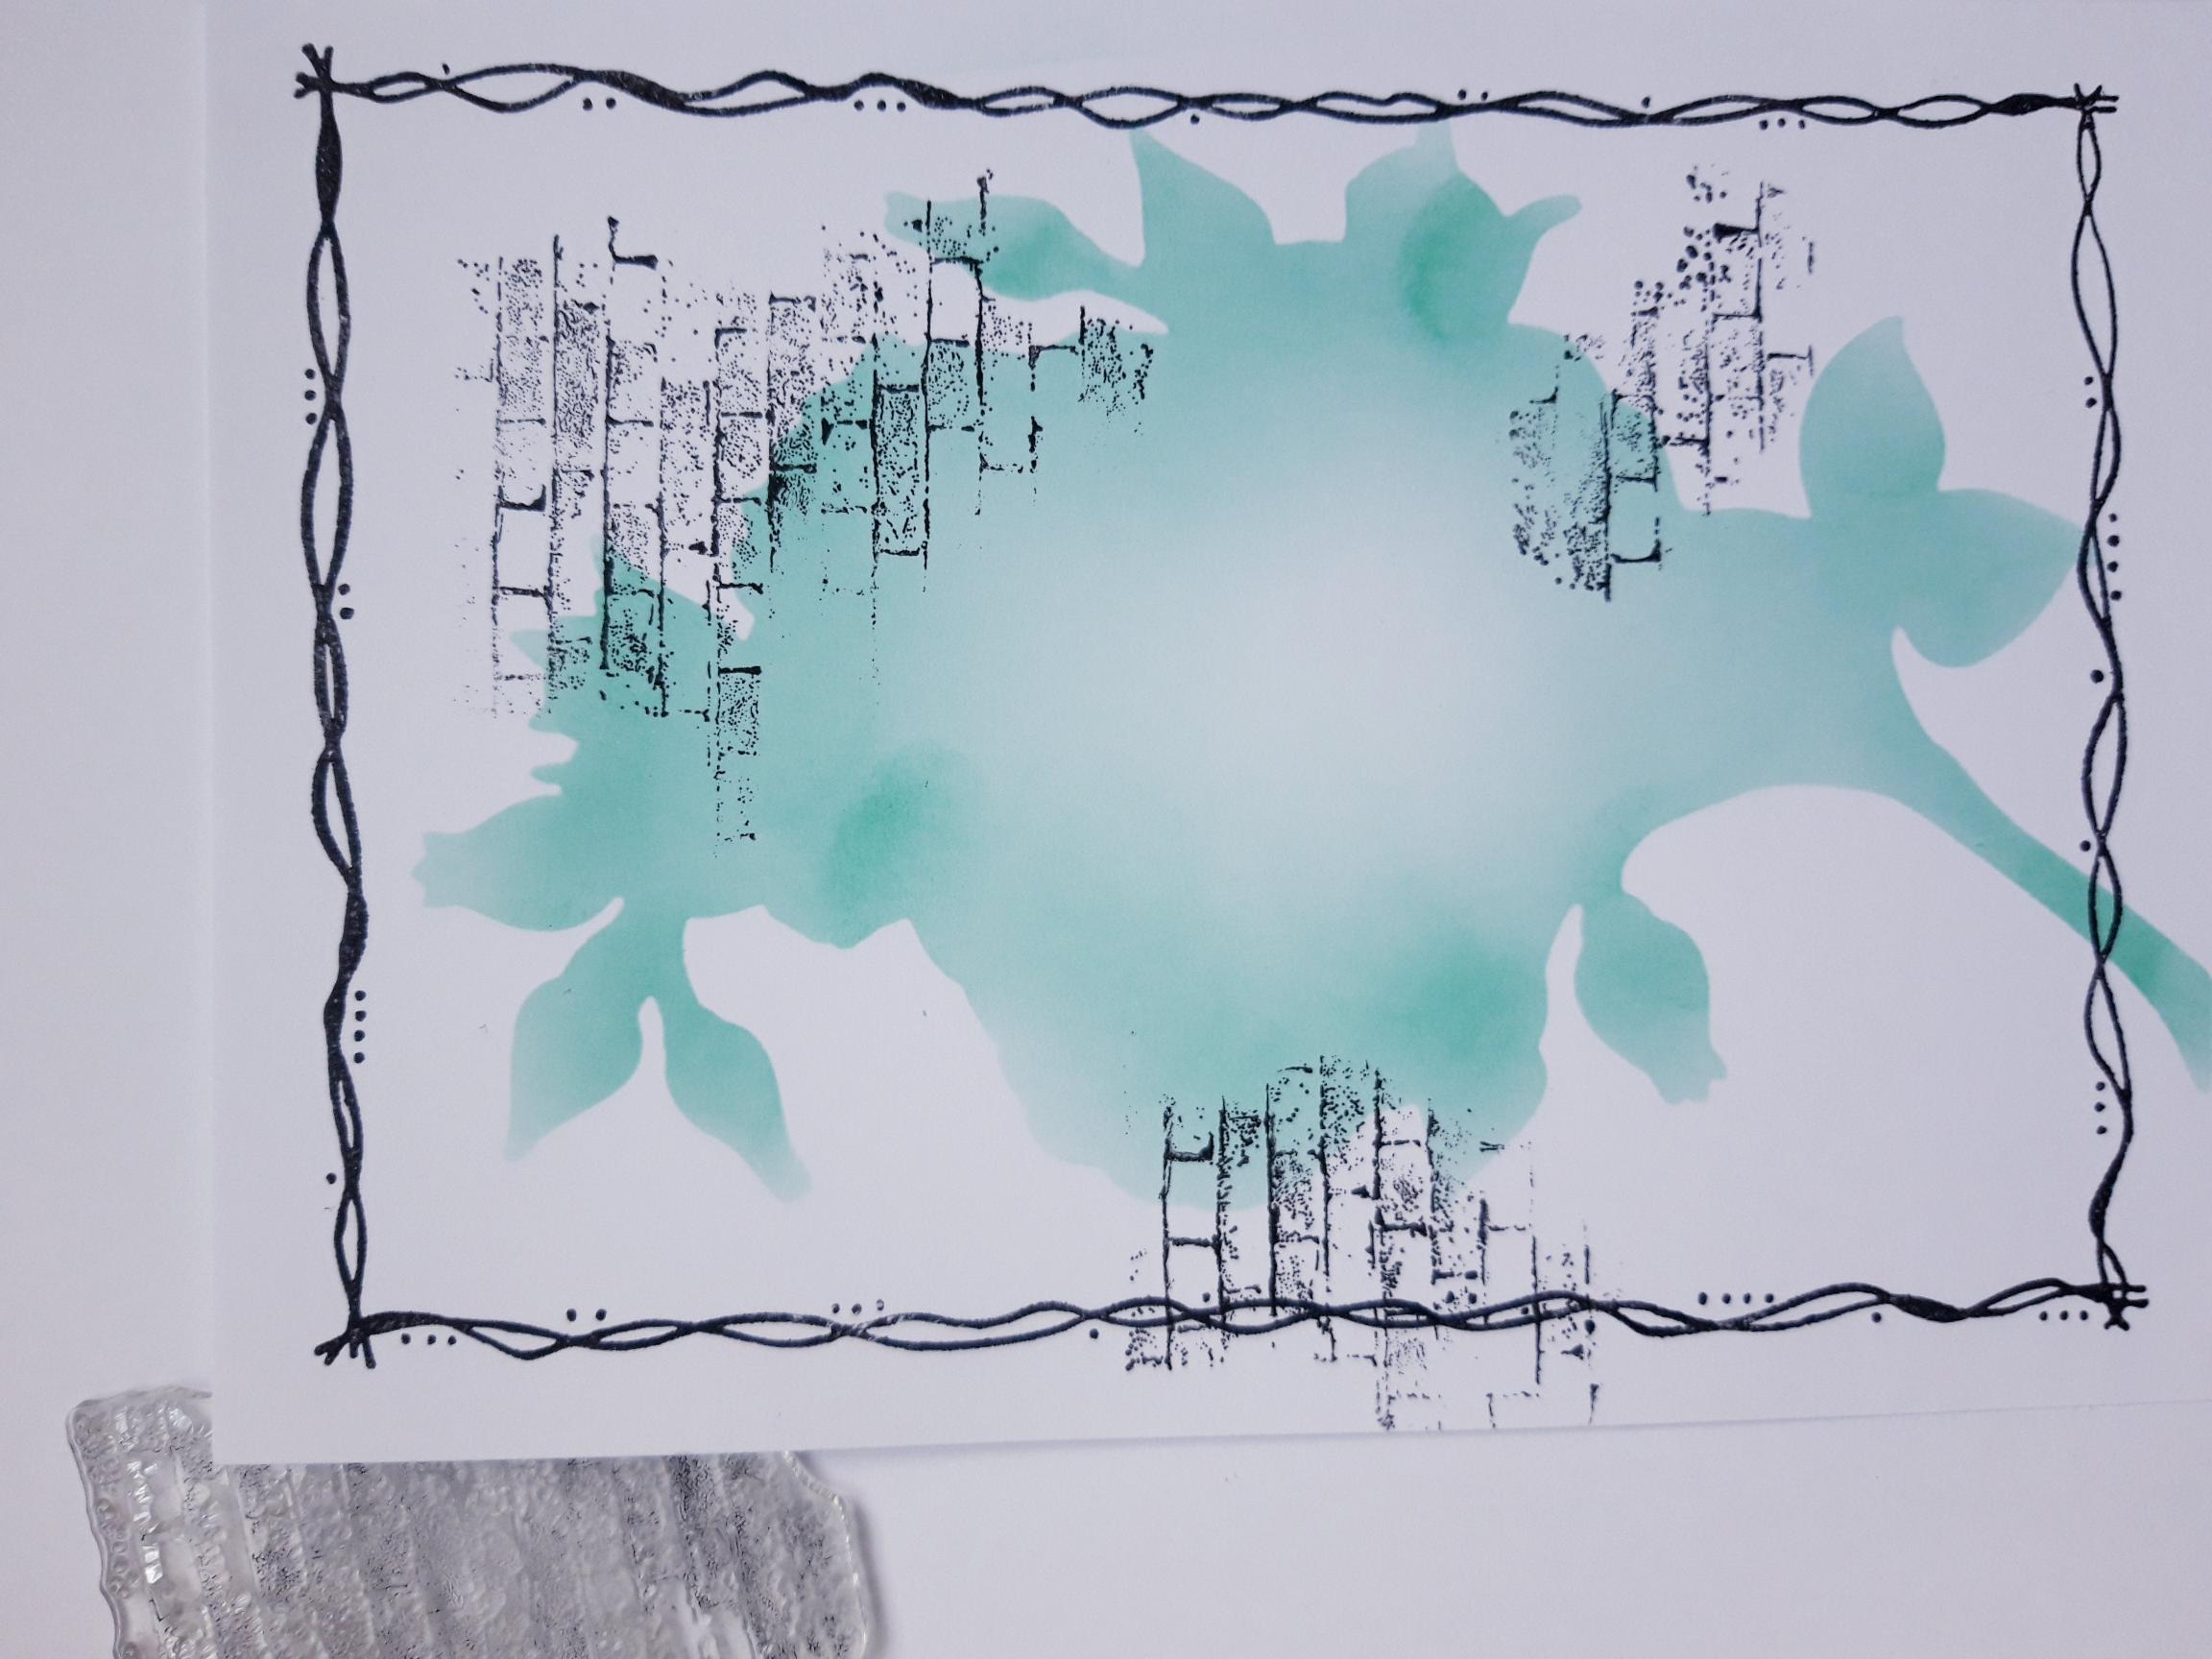
Place the Rose die cut aperture over the white card (7 3/4 x 5 1/4"). Use your blending tool to lightly apply the same green Pigment ink, within the aperture, fading out the colour as you move inwards. Dry the ink with your heat tool. |
|
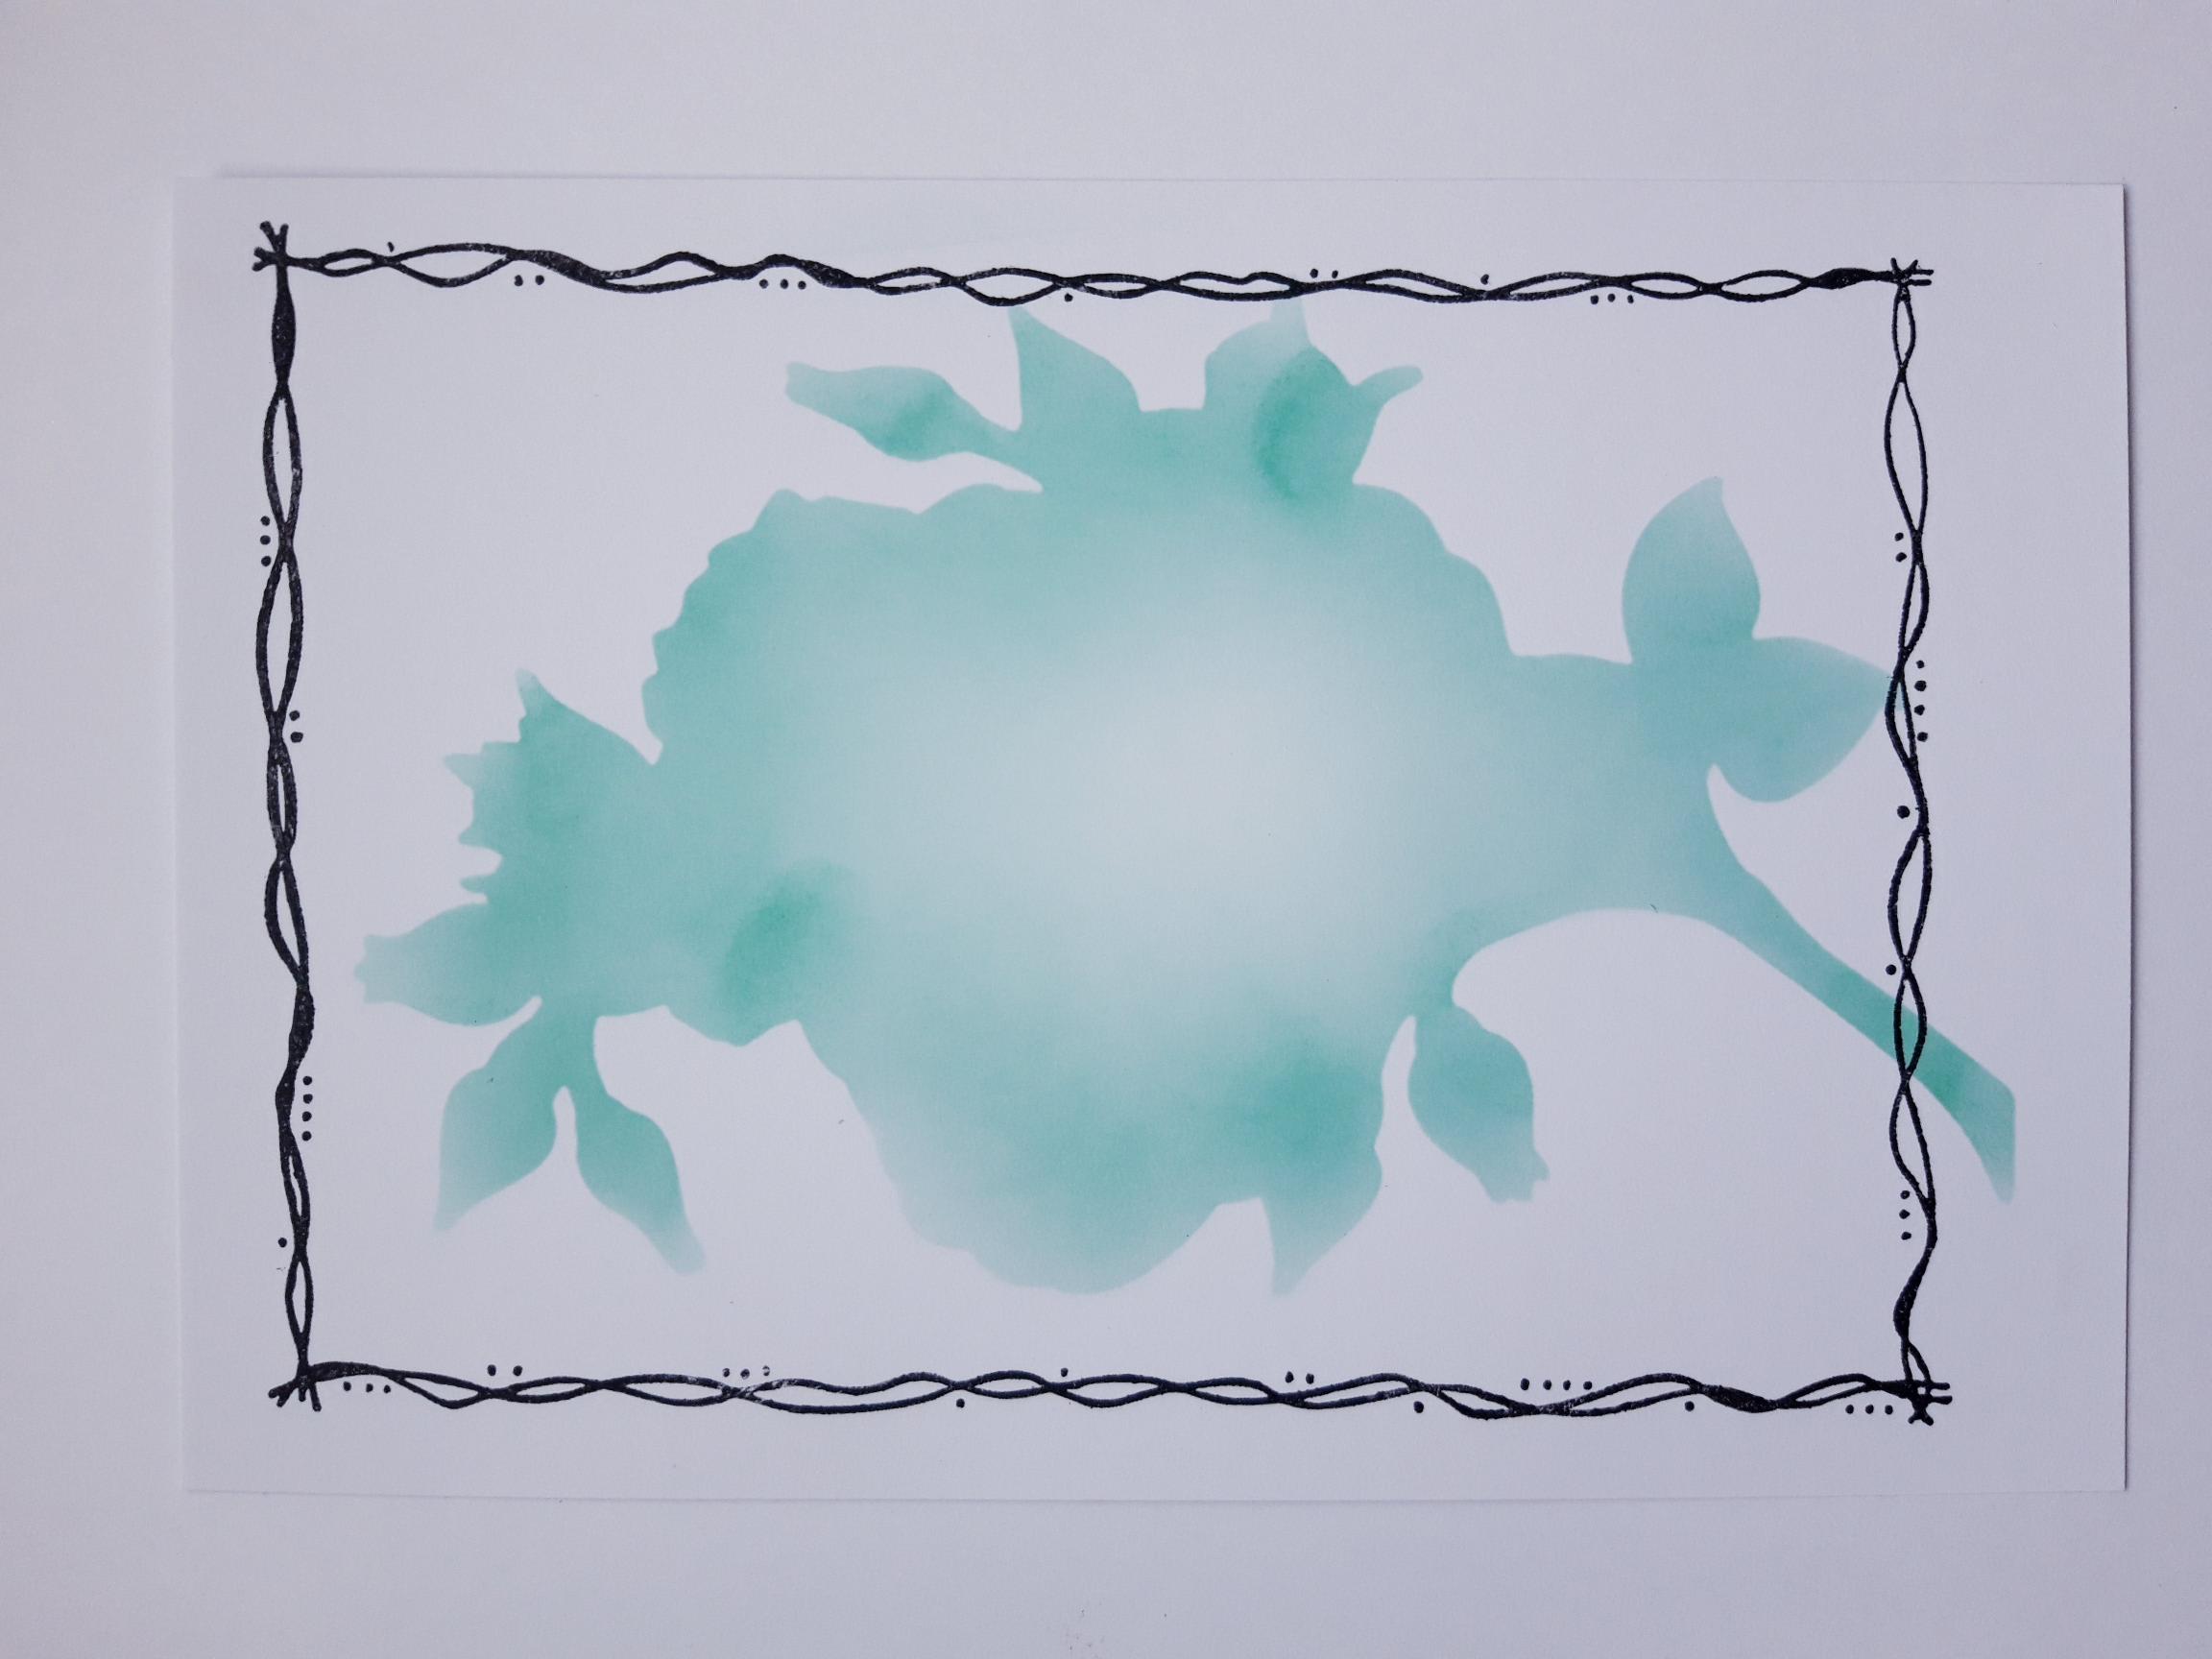
Ink up one of the frames stamps, from the Dot Frame Collection, with the Onyx Black Versafine. Stamp on to your stencilled background. |
|
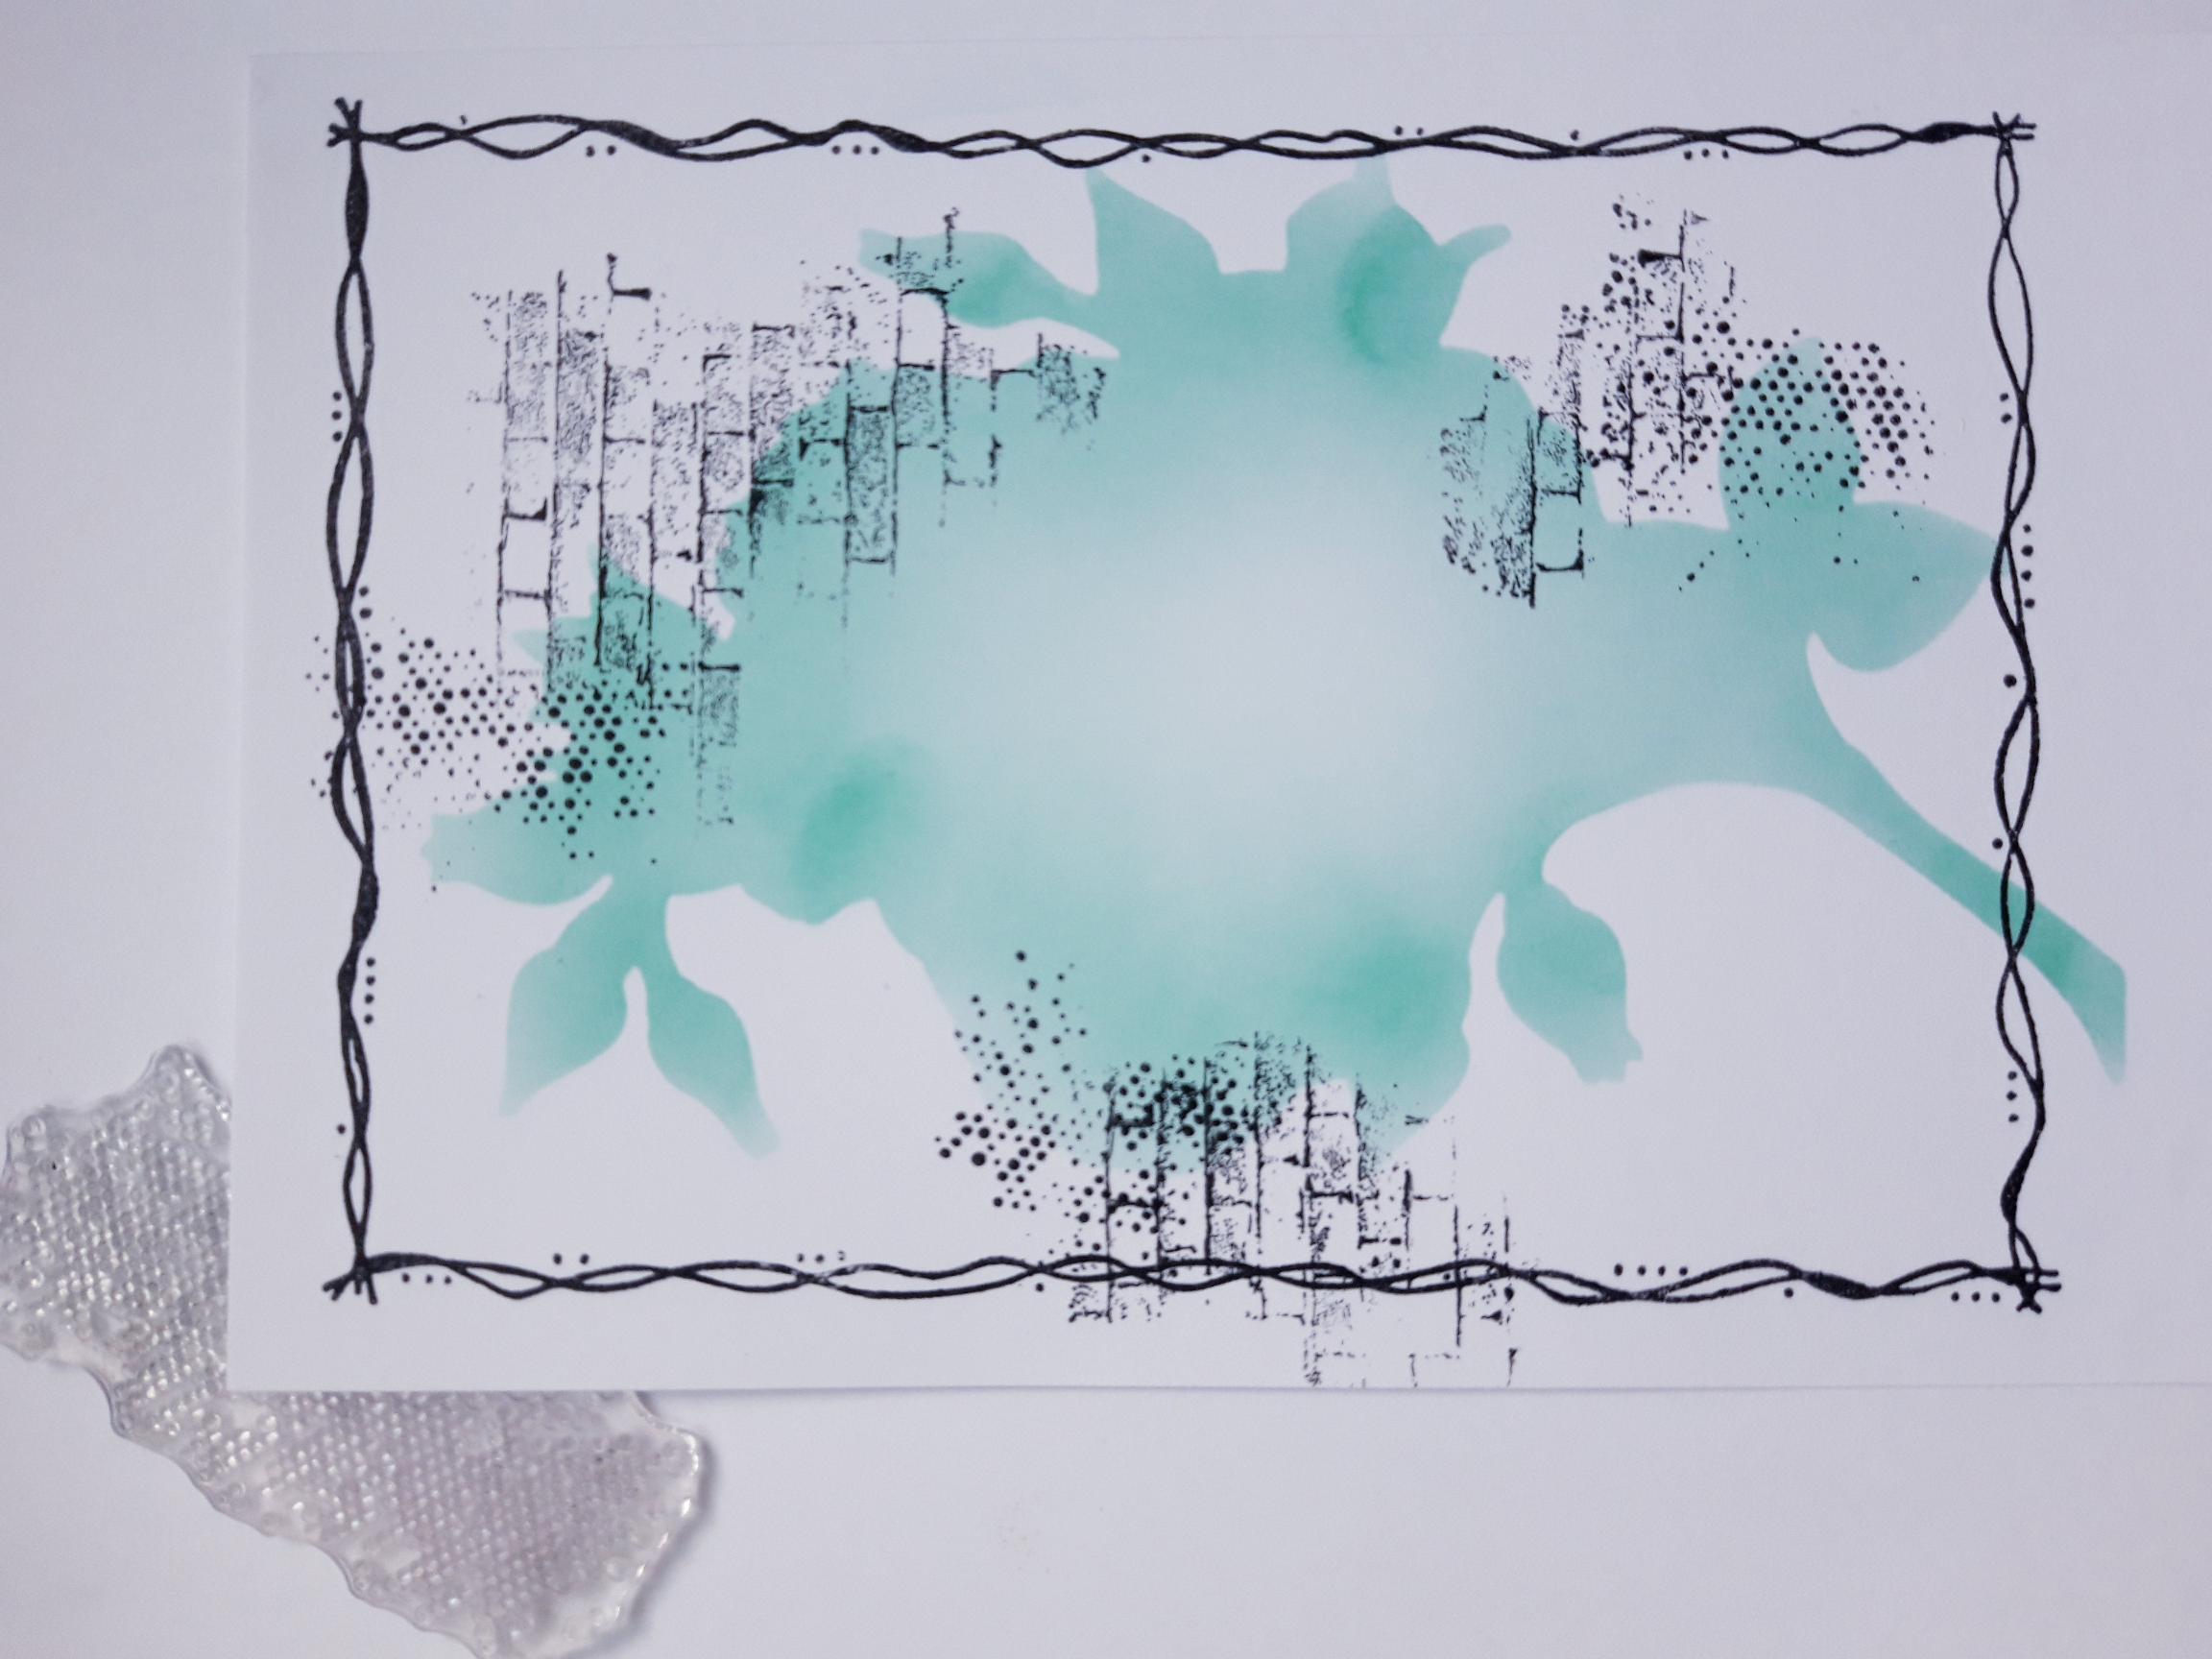
Ink up the brickwork stamp, from the Beautiful Notes Collection, with the Versafine and, holding it in your hand, stamp it randomly around your artwork. The idea is to create a distressed look rather than a crisp, clean image. |
|
Repeat the previous step, this time using the texured dots stamp, from the same set. |
|
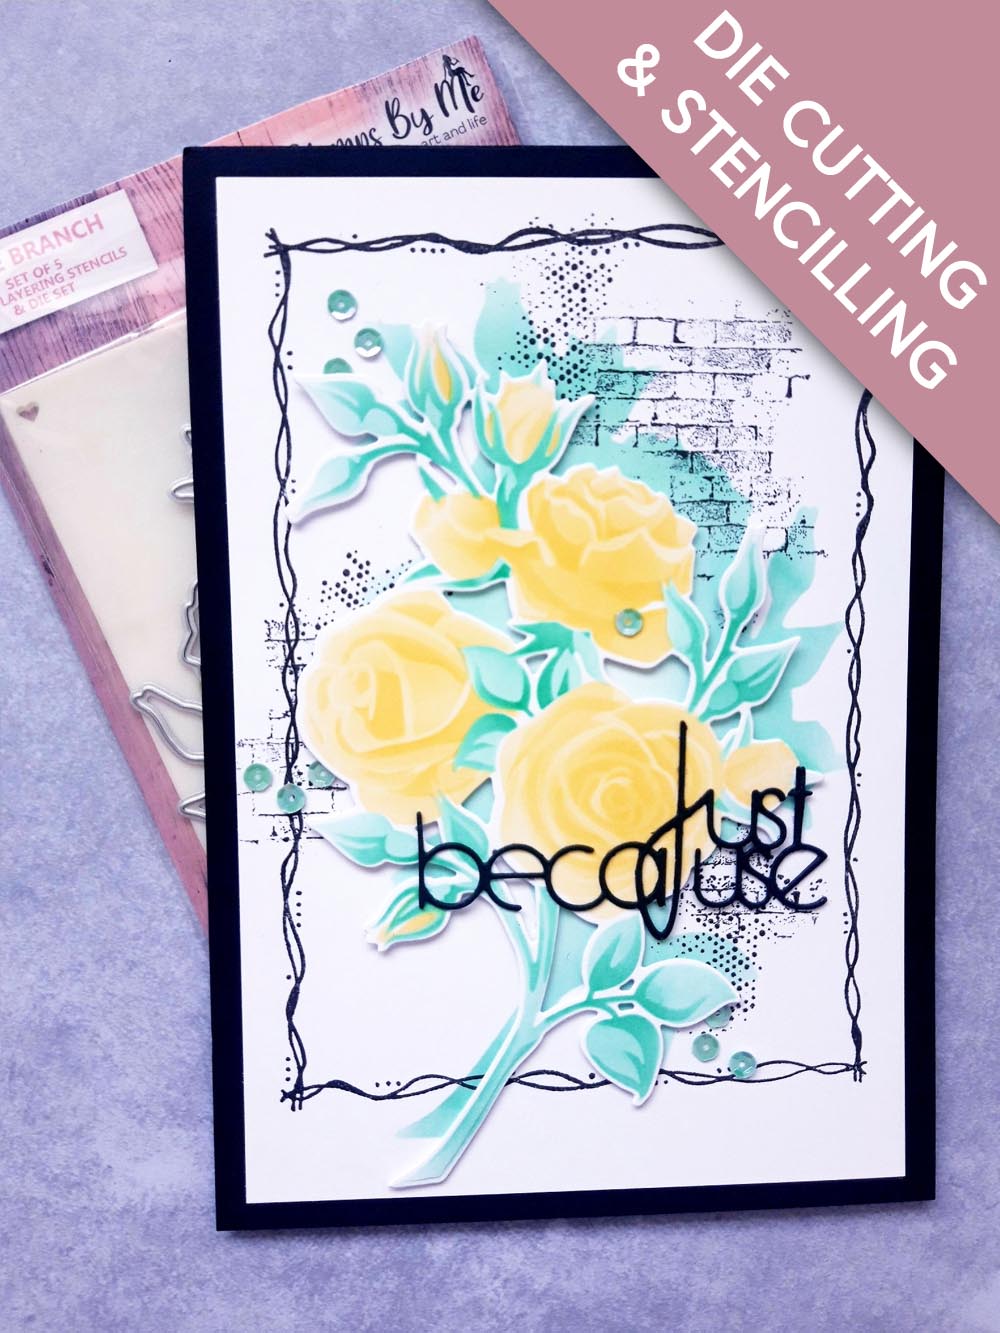
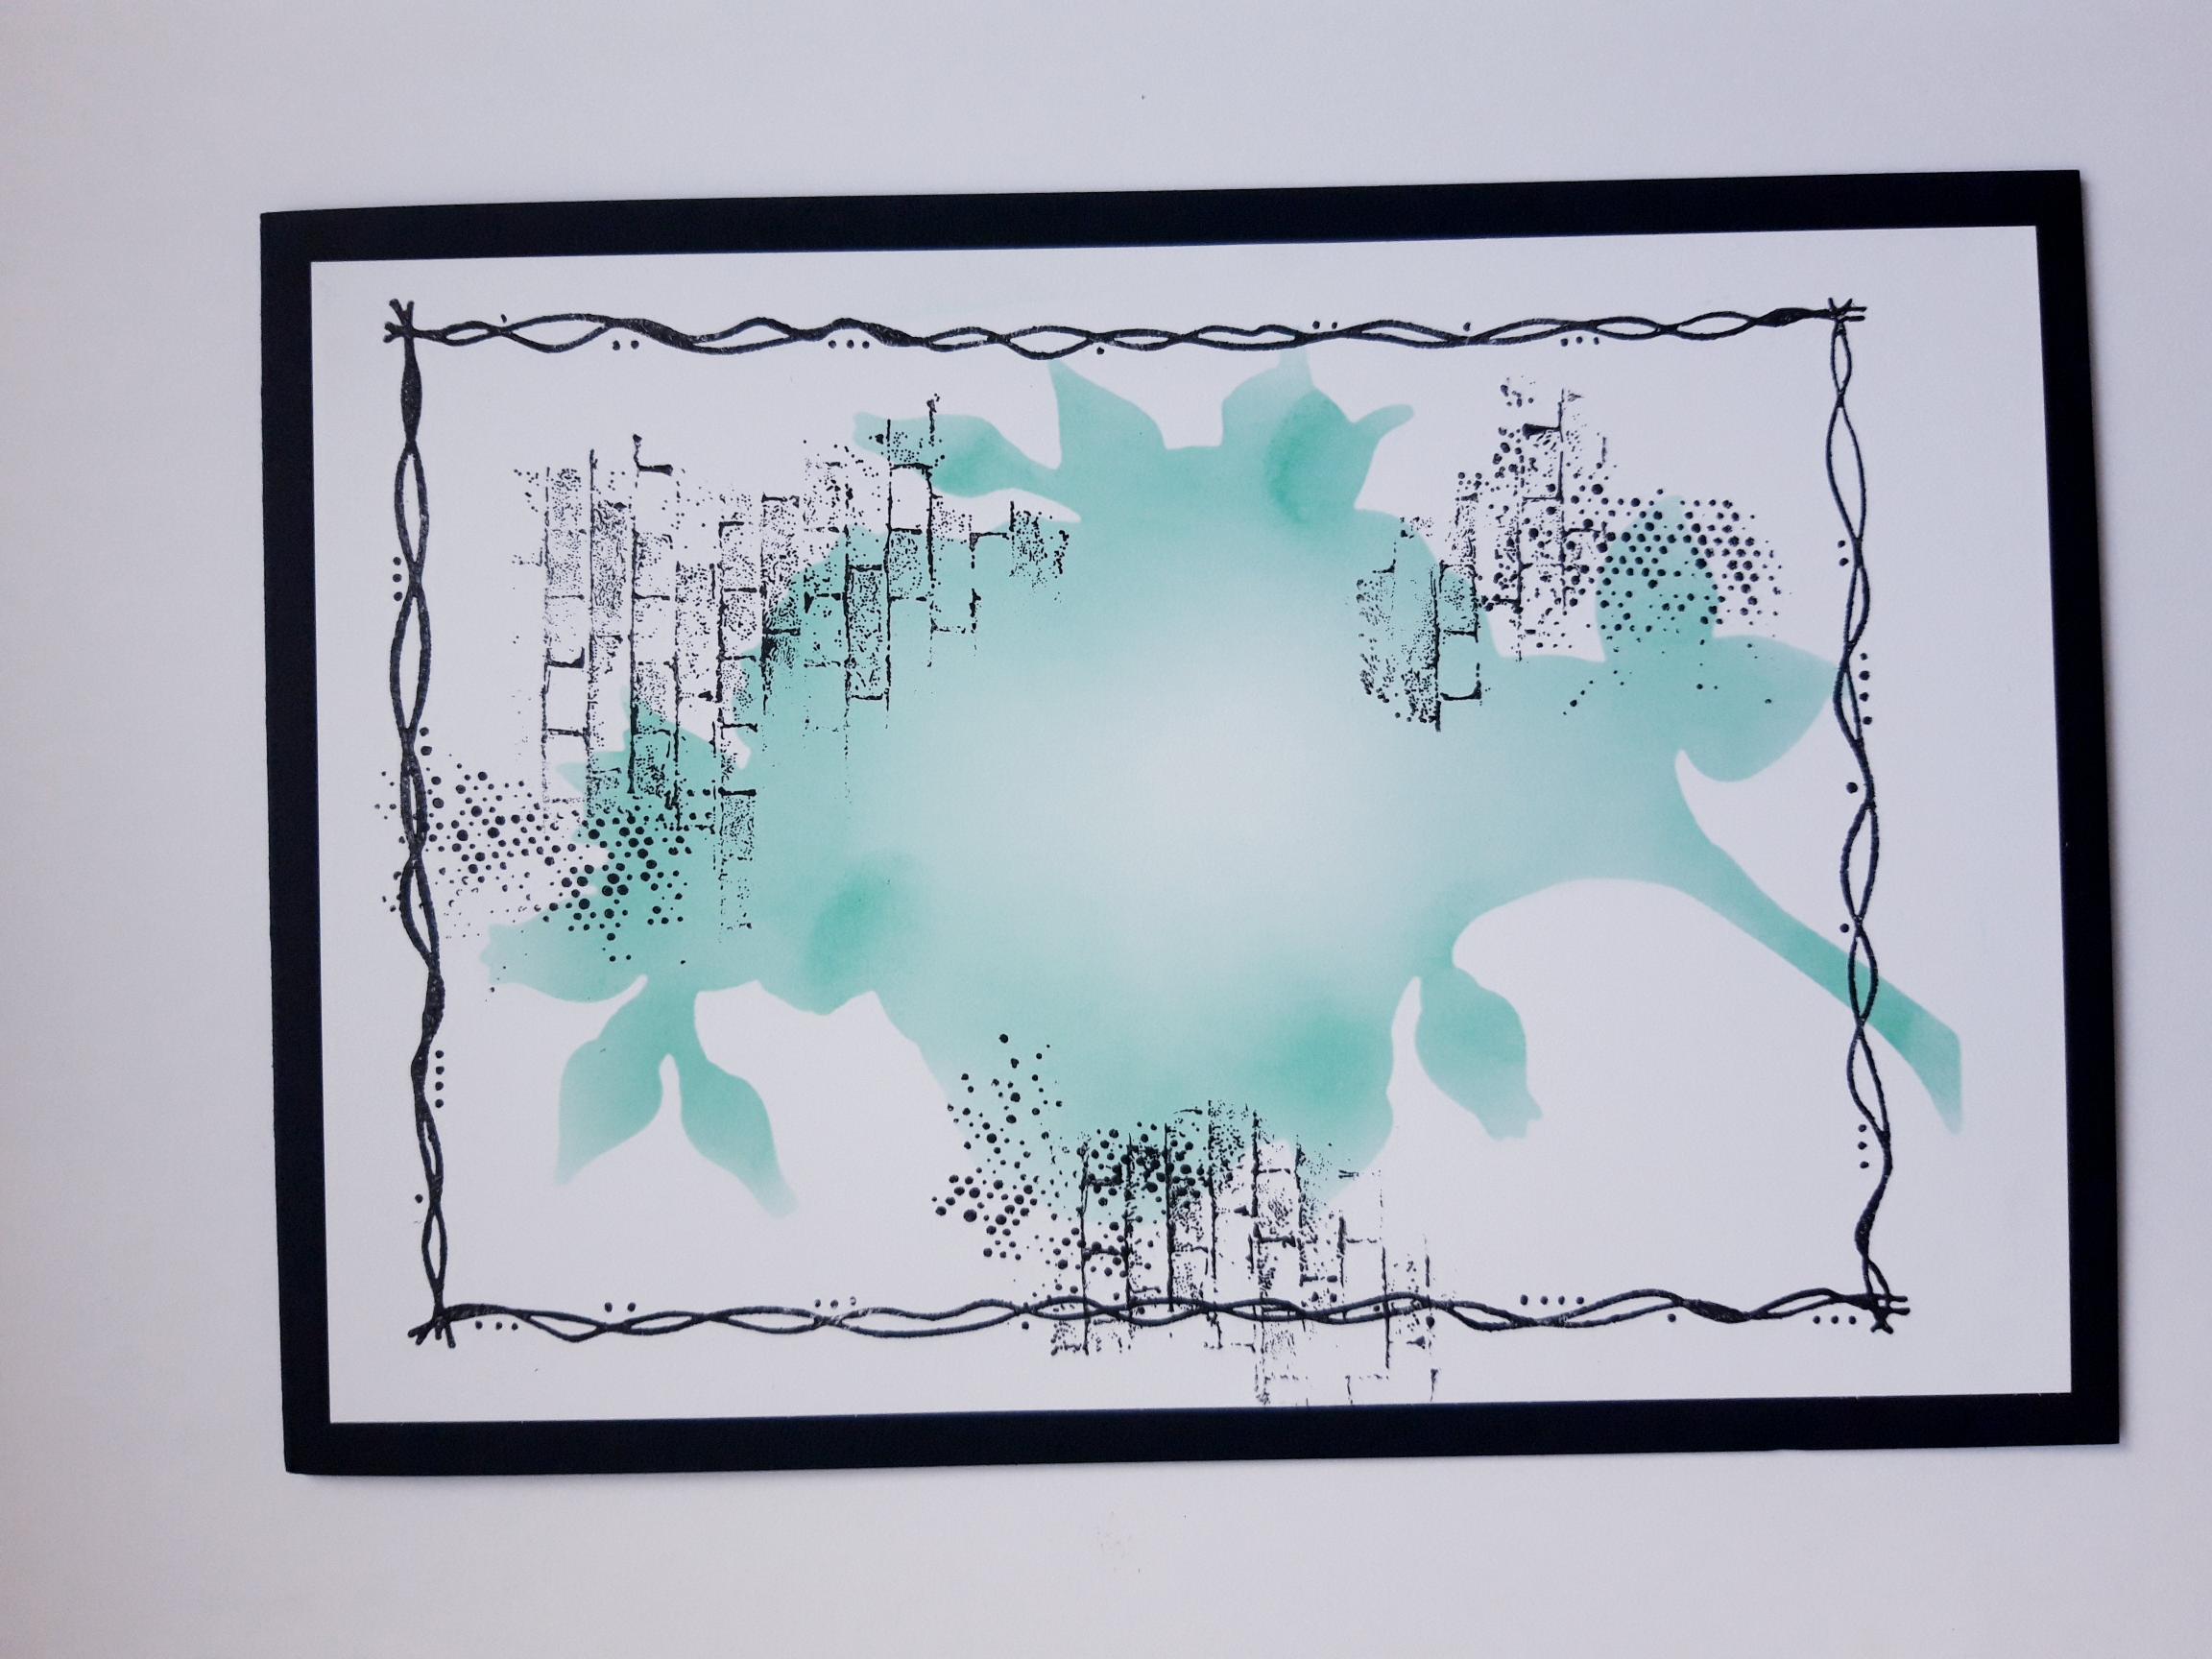
Once dry, adhere your artwork on to your black, top folding card blank. |
|
Adhere your 3D Rose element, with foam pads, on to your background, allowing the stencilled Rose to be visible, thus creating the effect of a dropped shadow. Set your card aside. |
|
Die cut the Just Because, from the Kind Friends Die Collection, TWICE, out of the 4 x 4" black card. Adhere one on top of the other, then adhere on to your card. |
|
Finally, add sequins on, around and under your artwork. |