Give your friends $10 off their first order!
Refer a FRIEND


WHAT YOU WILL NEED
Red top folding card blank 8 1/4 x 5 3/4"
Black card 7 1/2 x 6"
Black card 2 3/4 x 1 3/4"
White card 2 1/2 x 1 1/2"
White card 6 x 6"
Poppy Bunch Stencil and Die Collection
Tomorrow Stamp Collection
Imala Prestige Collection A4 Paper Pad
Versafine Ink Pad: Onyx Black
Izink Pigment Vintage Ink Pad Collection: Rose pink, brown, grey/blue, lime green
Izink Pigment ink pad: Black
Blending tool/brush
White gel pen
Sequins
Gem pick up and pokey tool
Eureka 101
Paper Trimmer
Perfect Together Glue
Foam pads
Low tack tape
Die Cutting machine
[click image to enlarge] 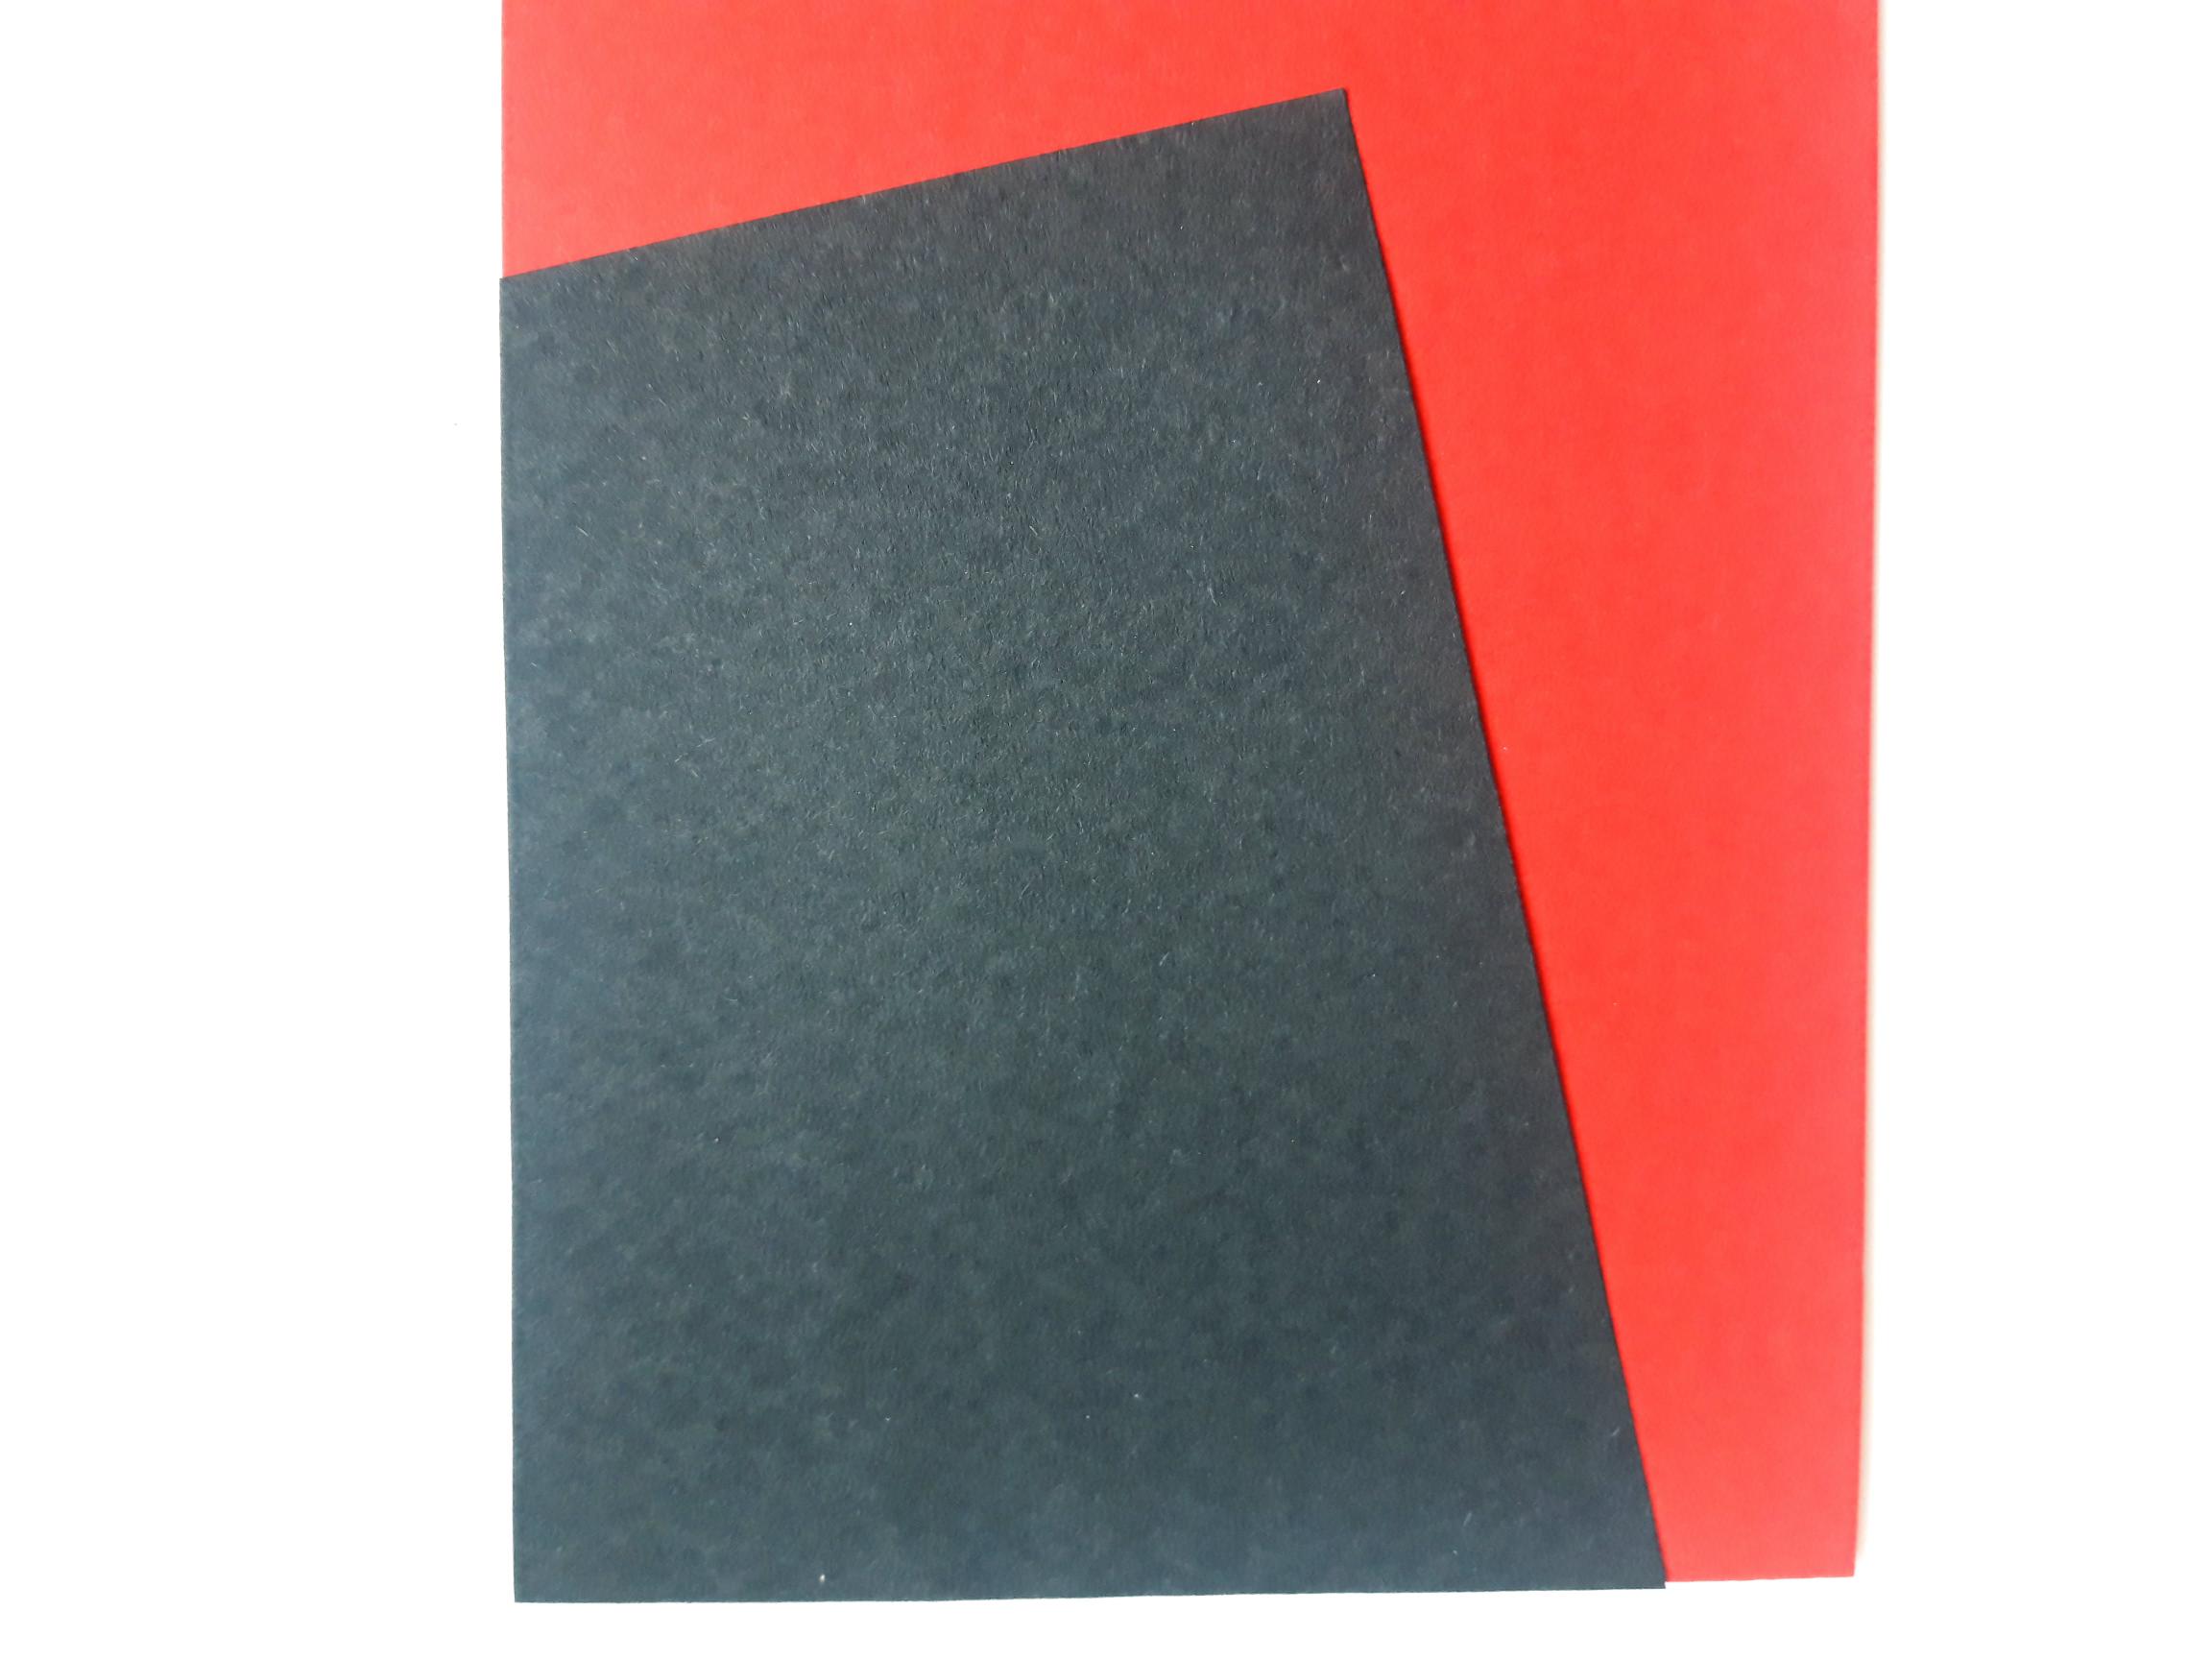
|
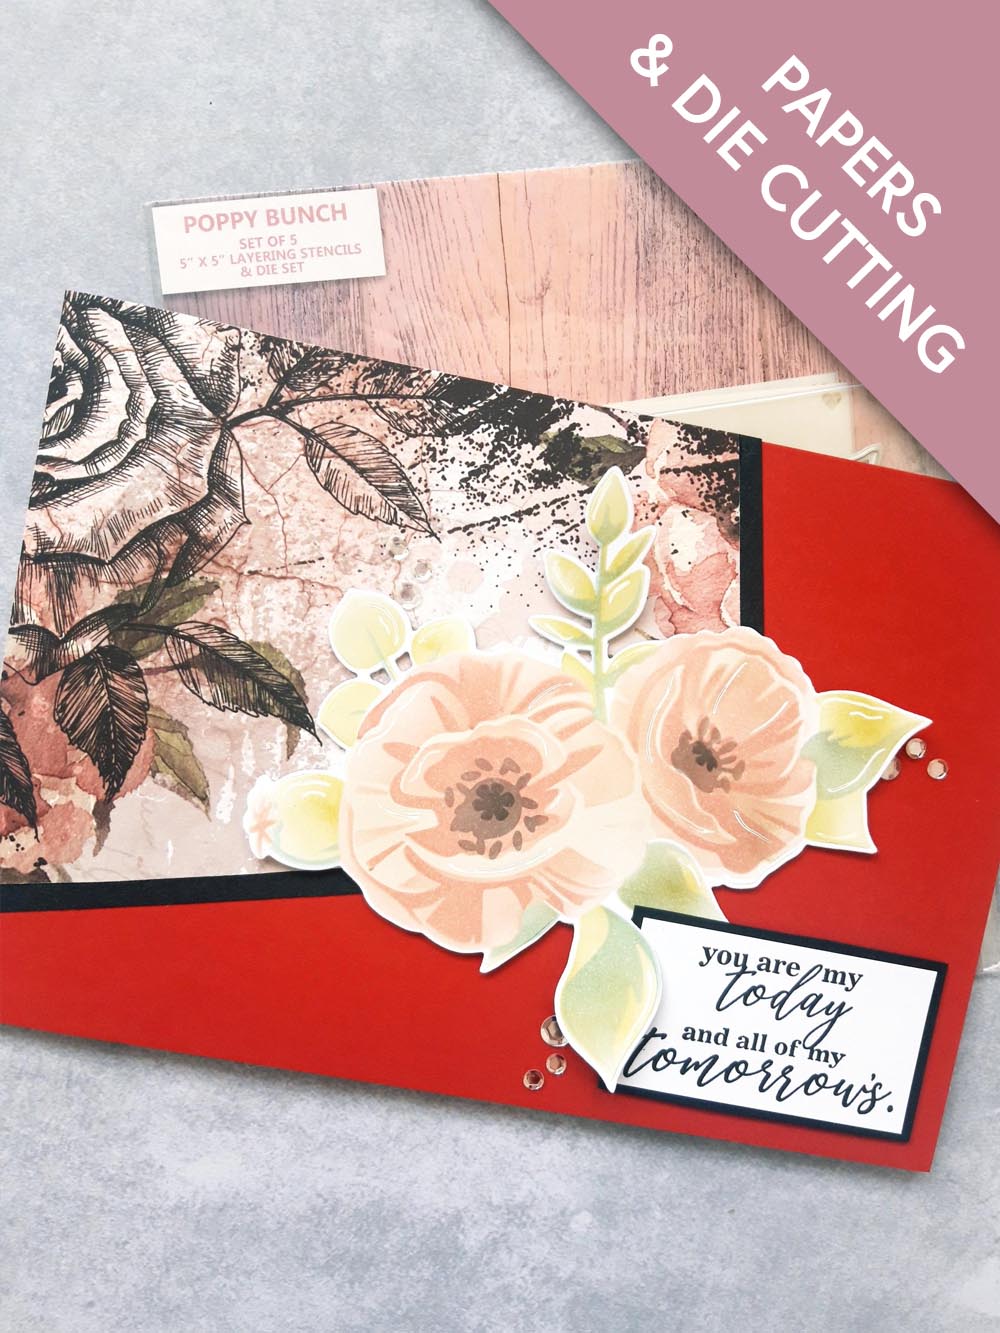
Turn your red top folding card blank landscape. Cut the black card (7 1/2 x 6"), so it will fit on to your card blank on a jaunty angle, as seen here. |
|
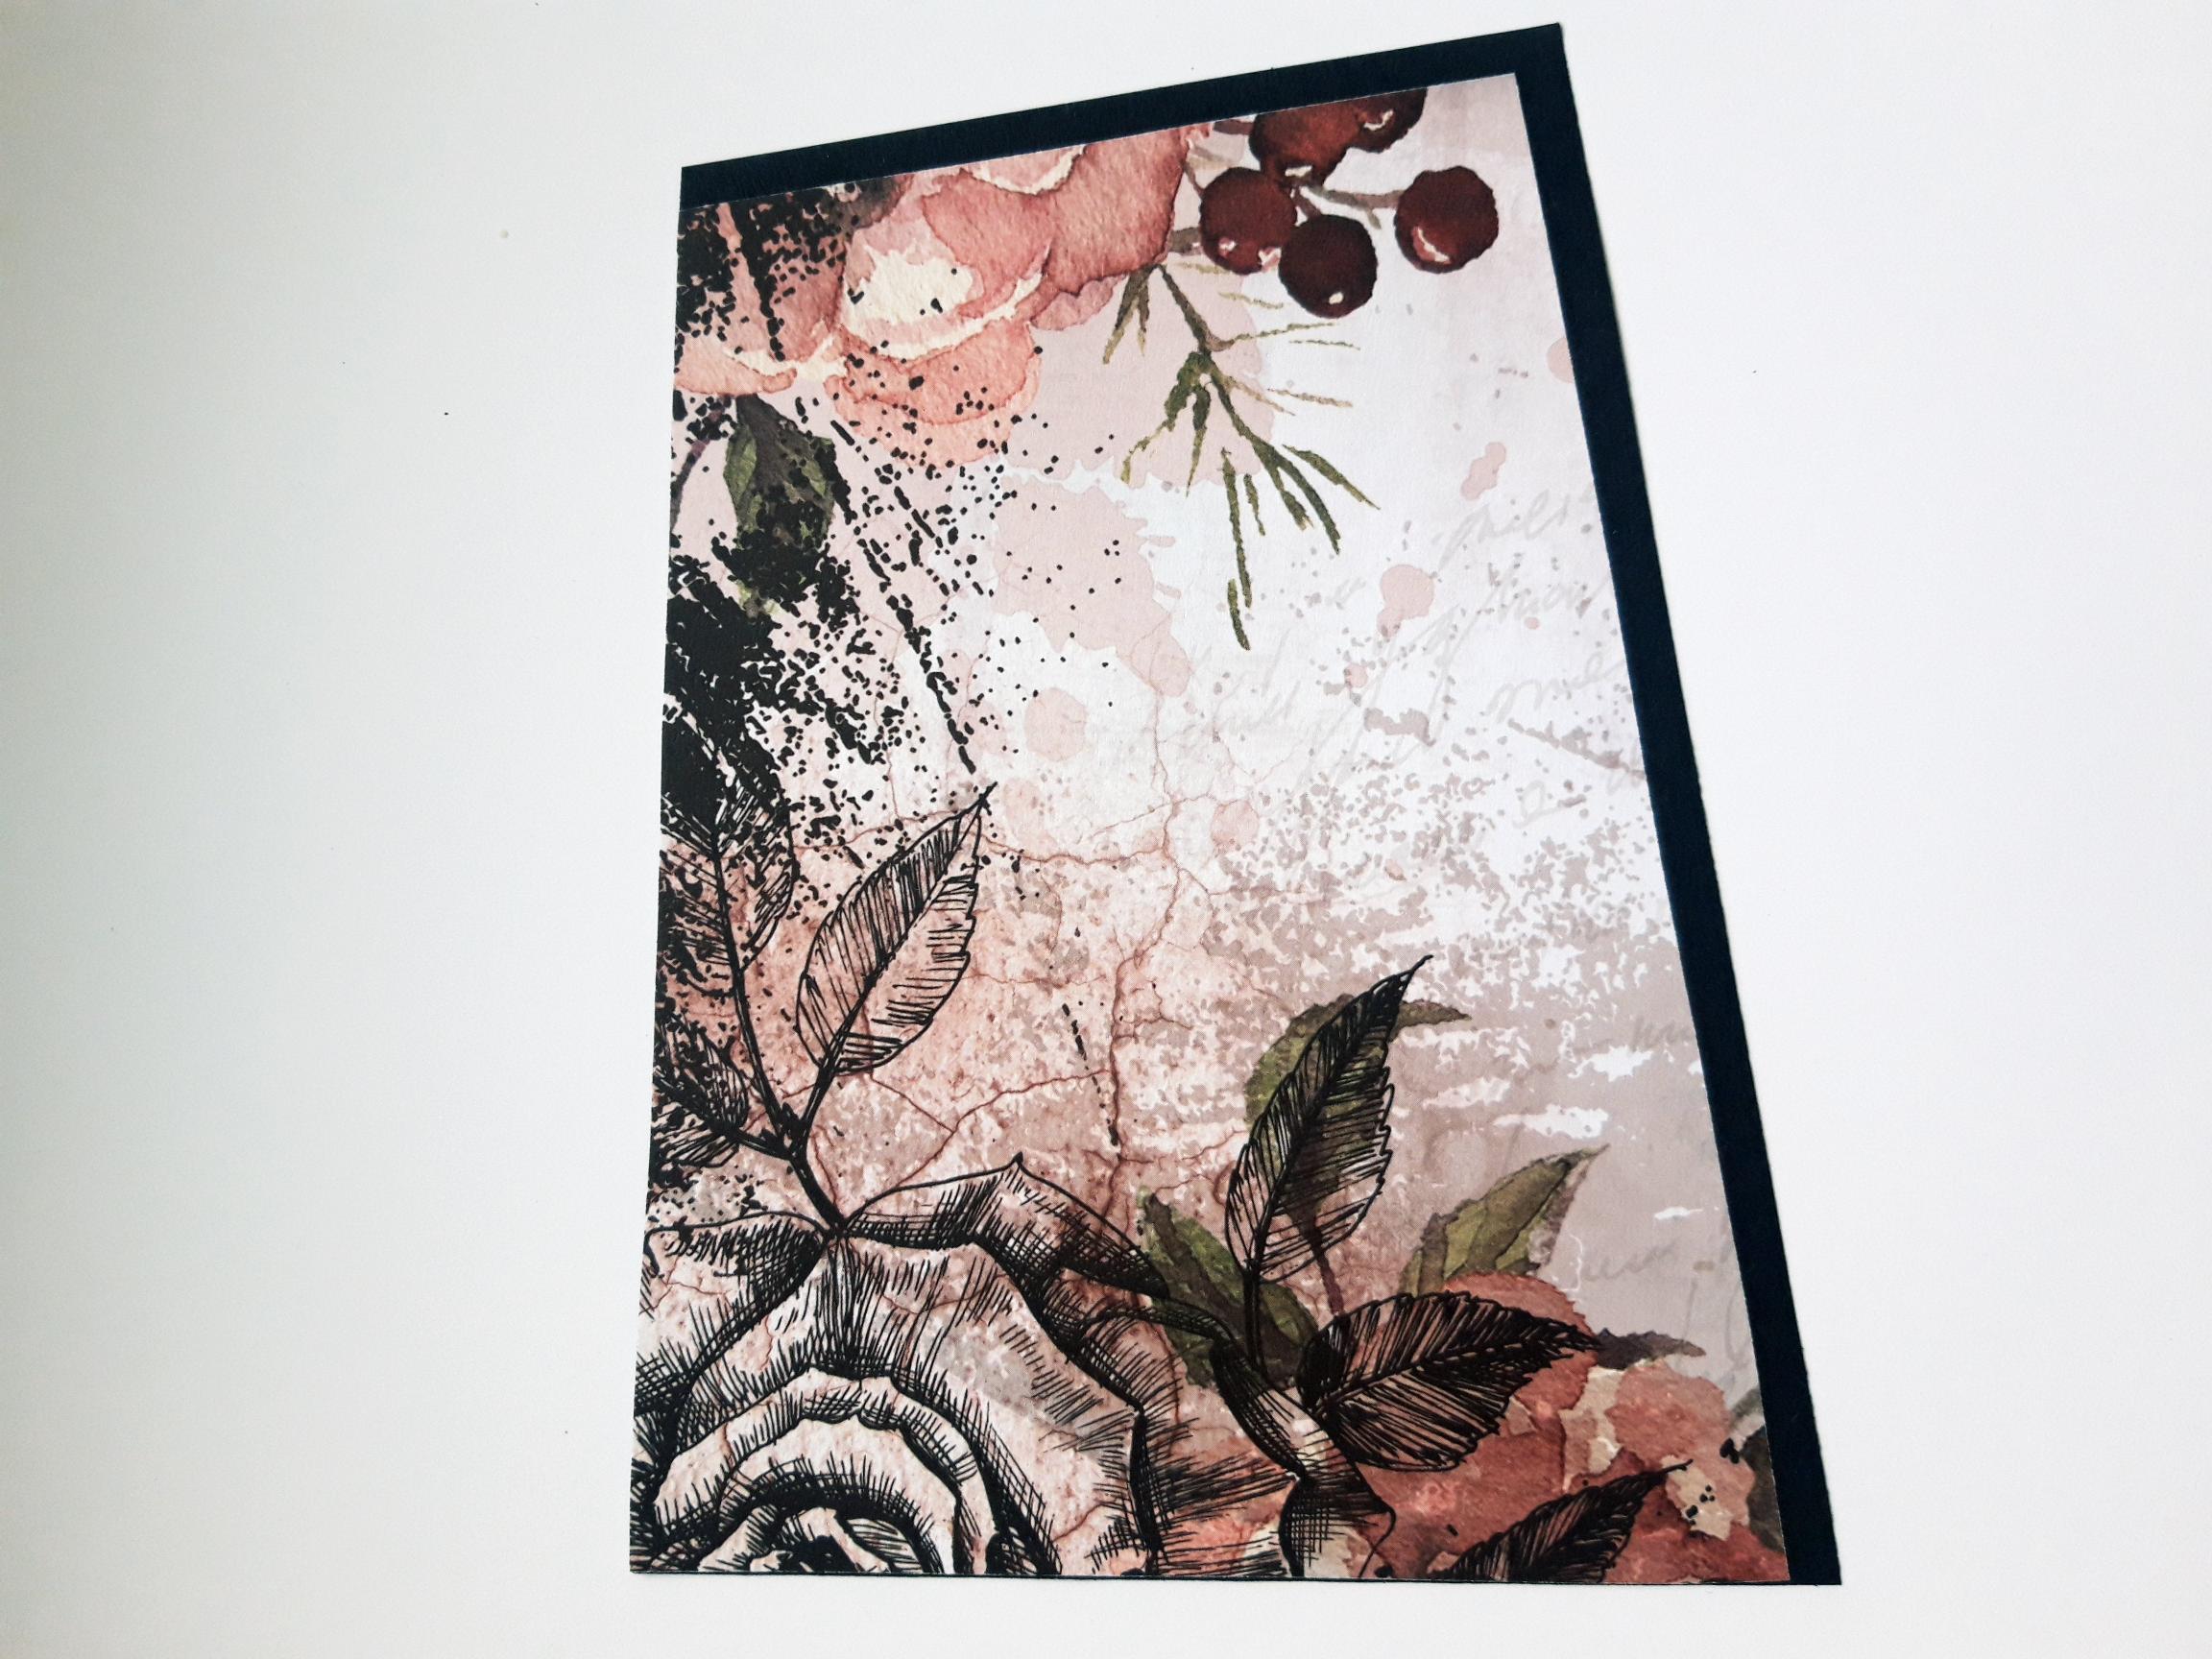
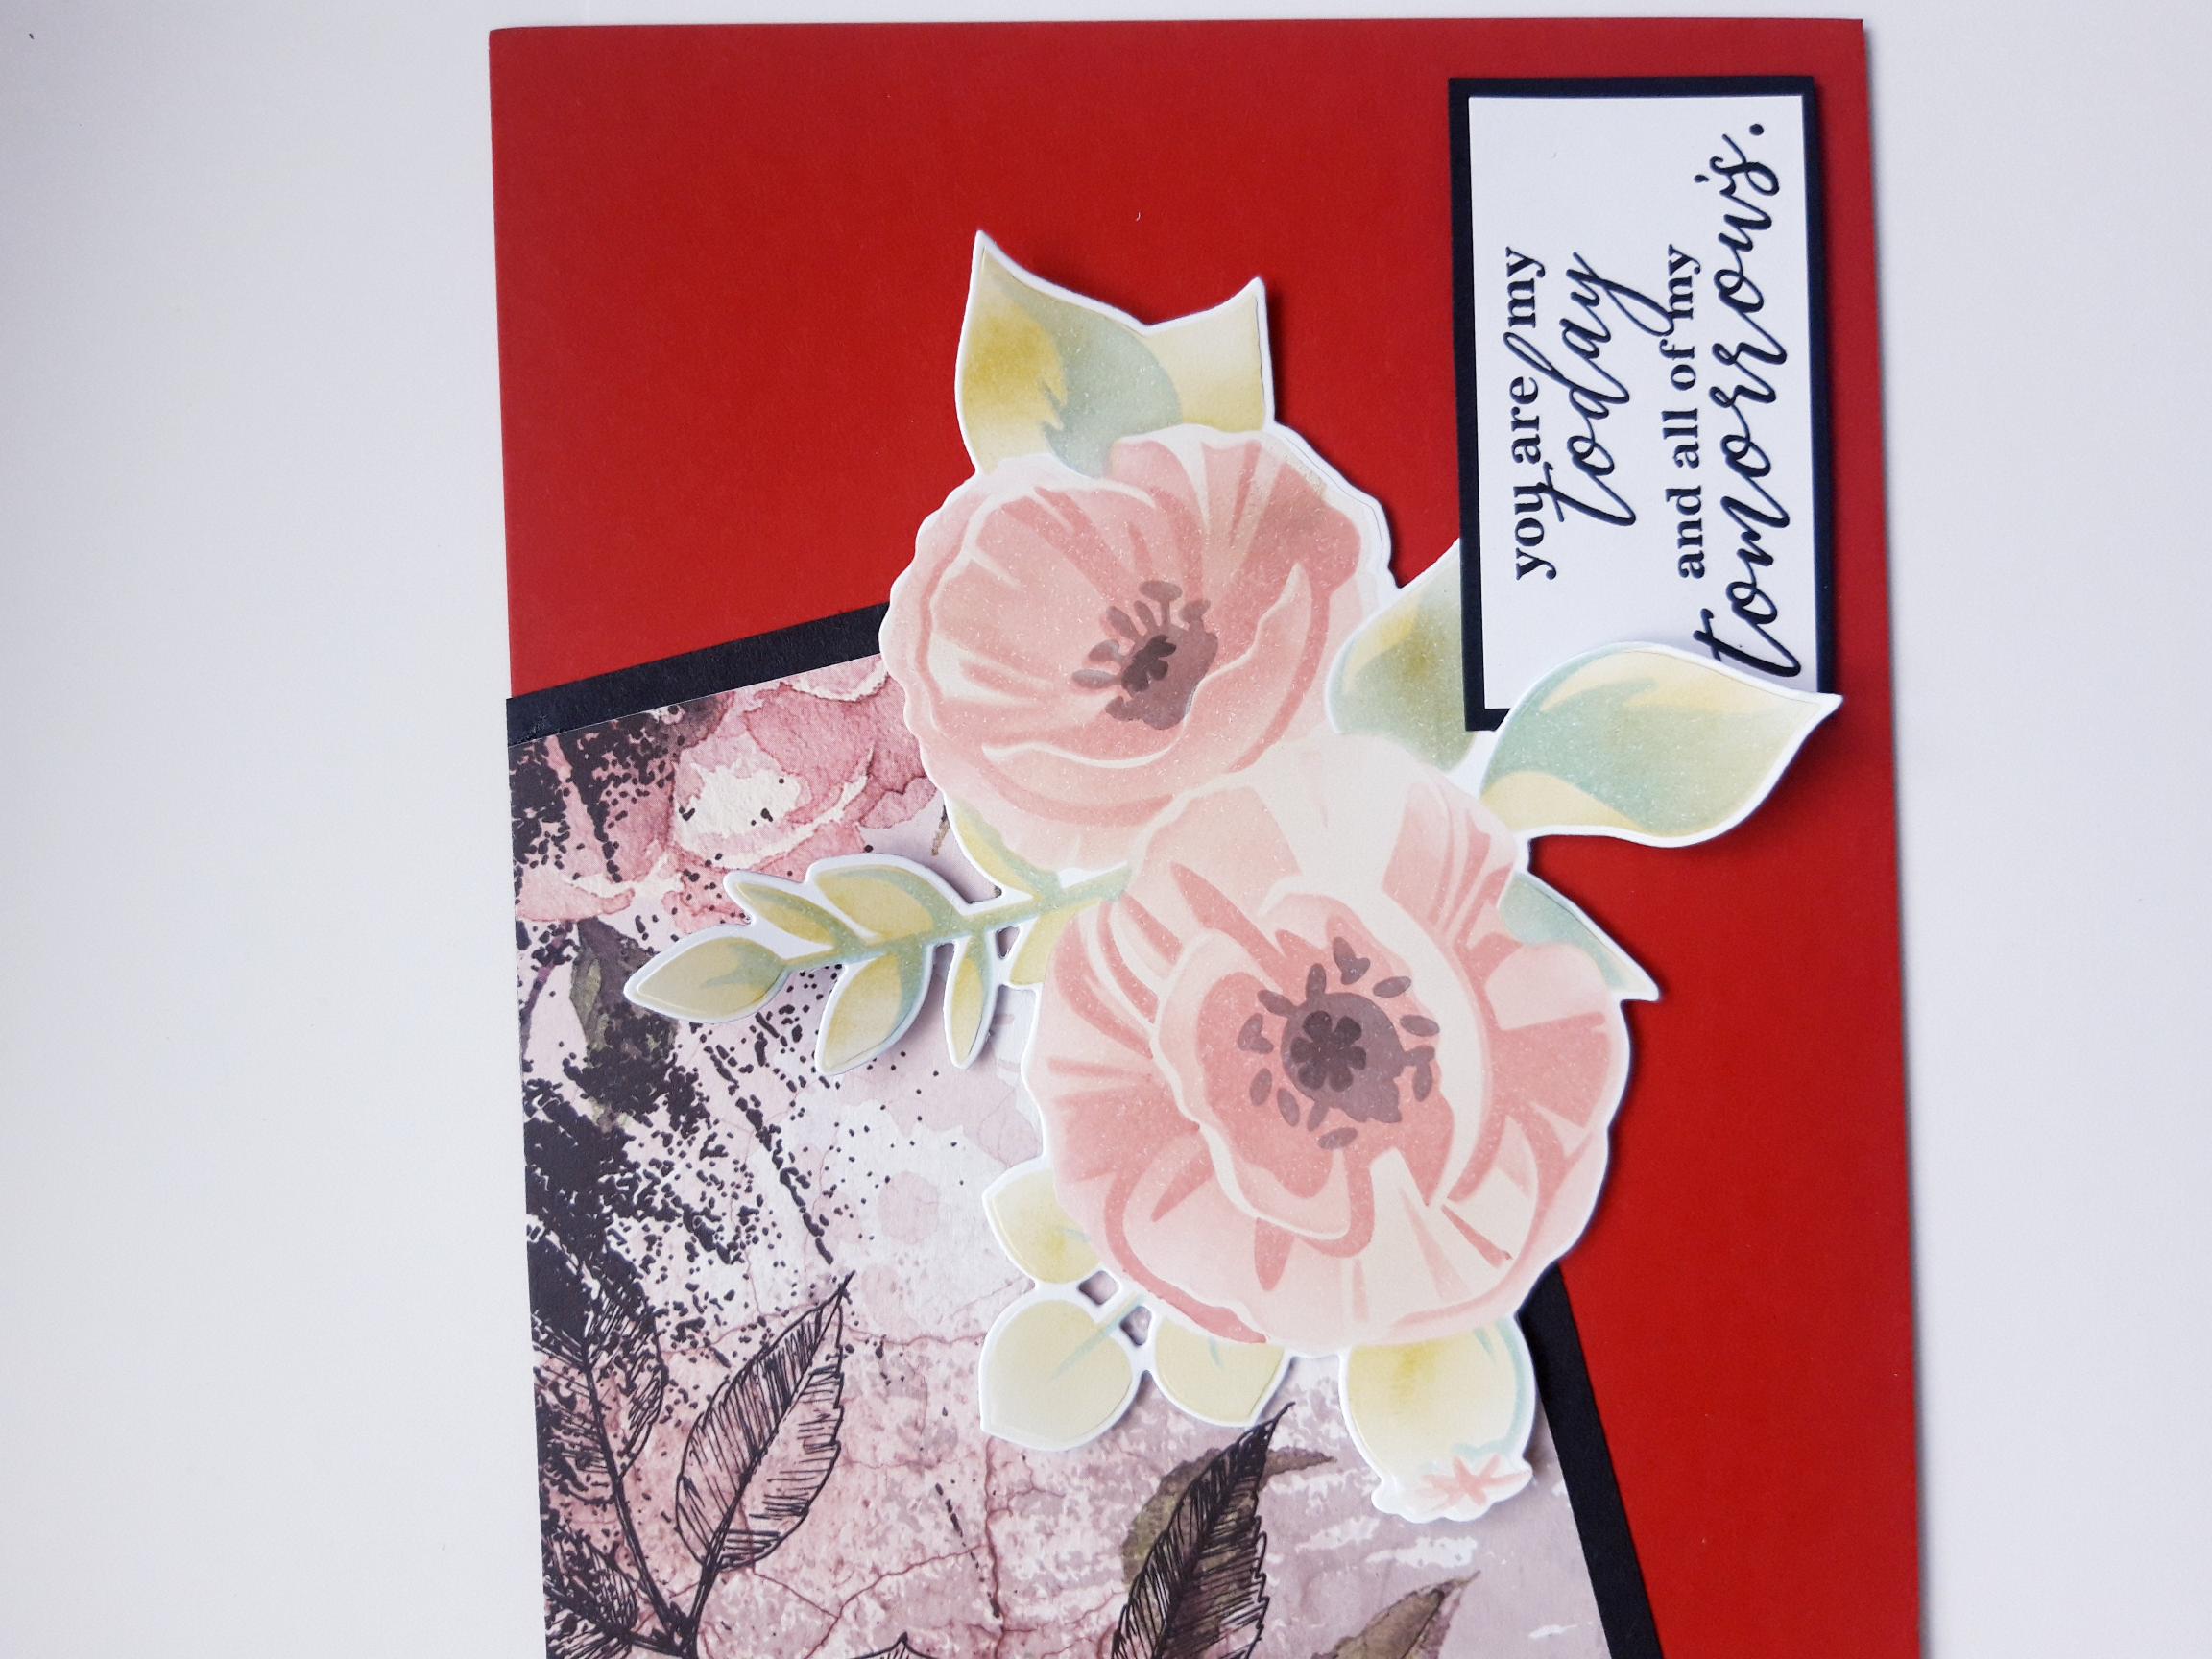
Tear out a sheet of decorative paper, from the Imala Prestige paper pad. Trim it to fit on to your black card mat, so it fits flush at the top and left hand sides and with black card visible bottom and on the right side, as shown here. Adhere the paper to your card.
|

|
Adhere to the front of your landscape card blank, as shown here, then set to one side. |
|
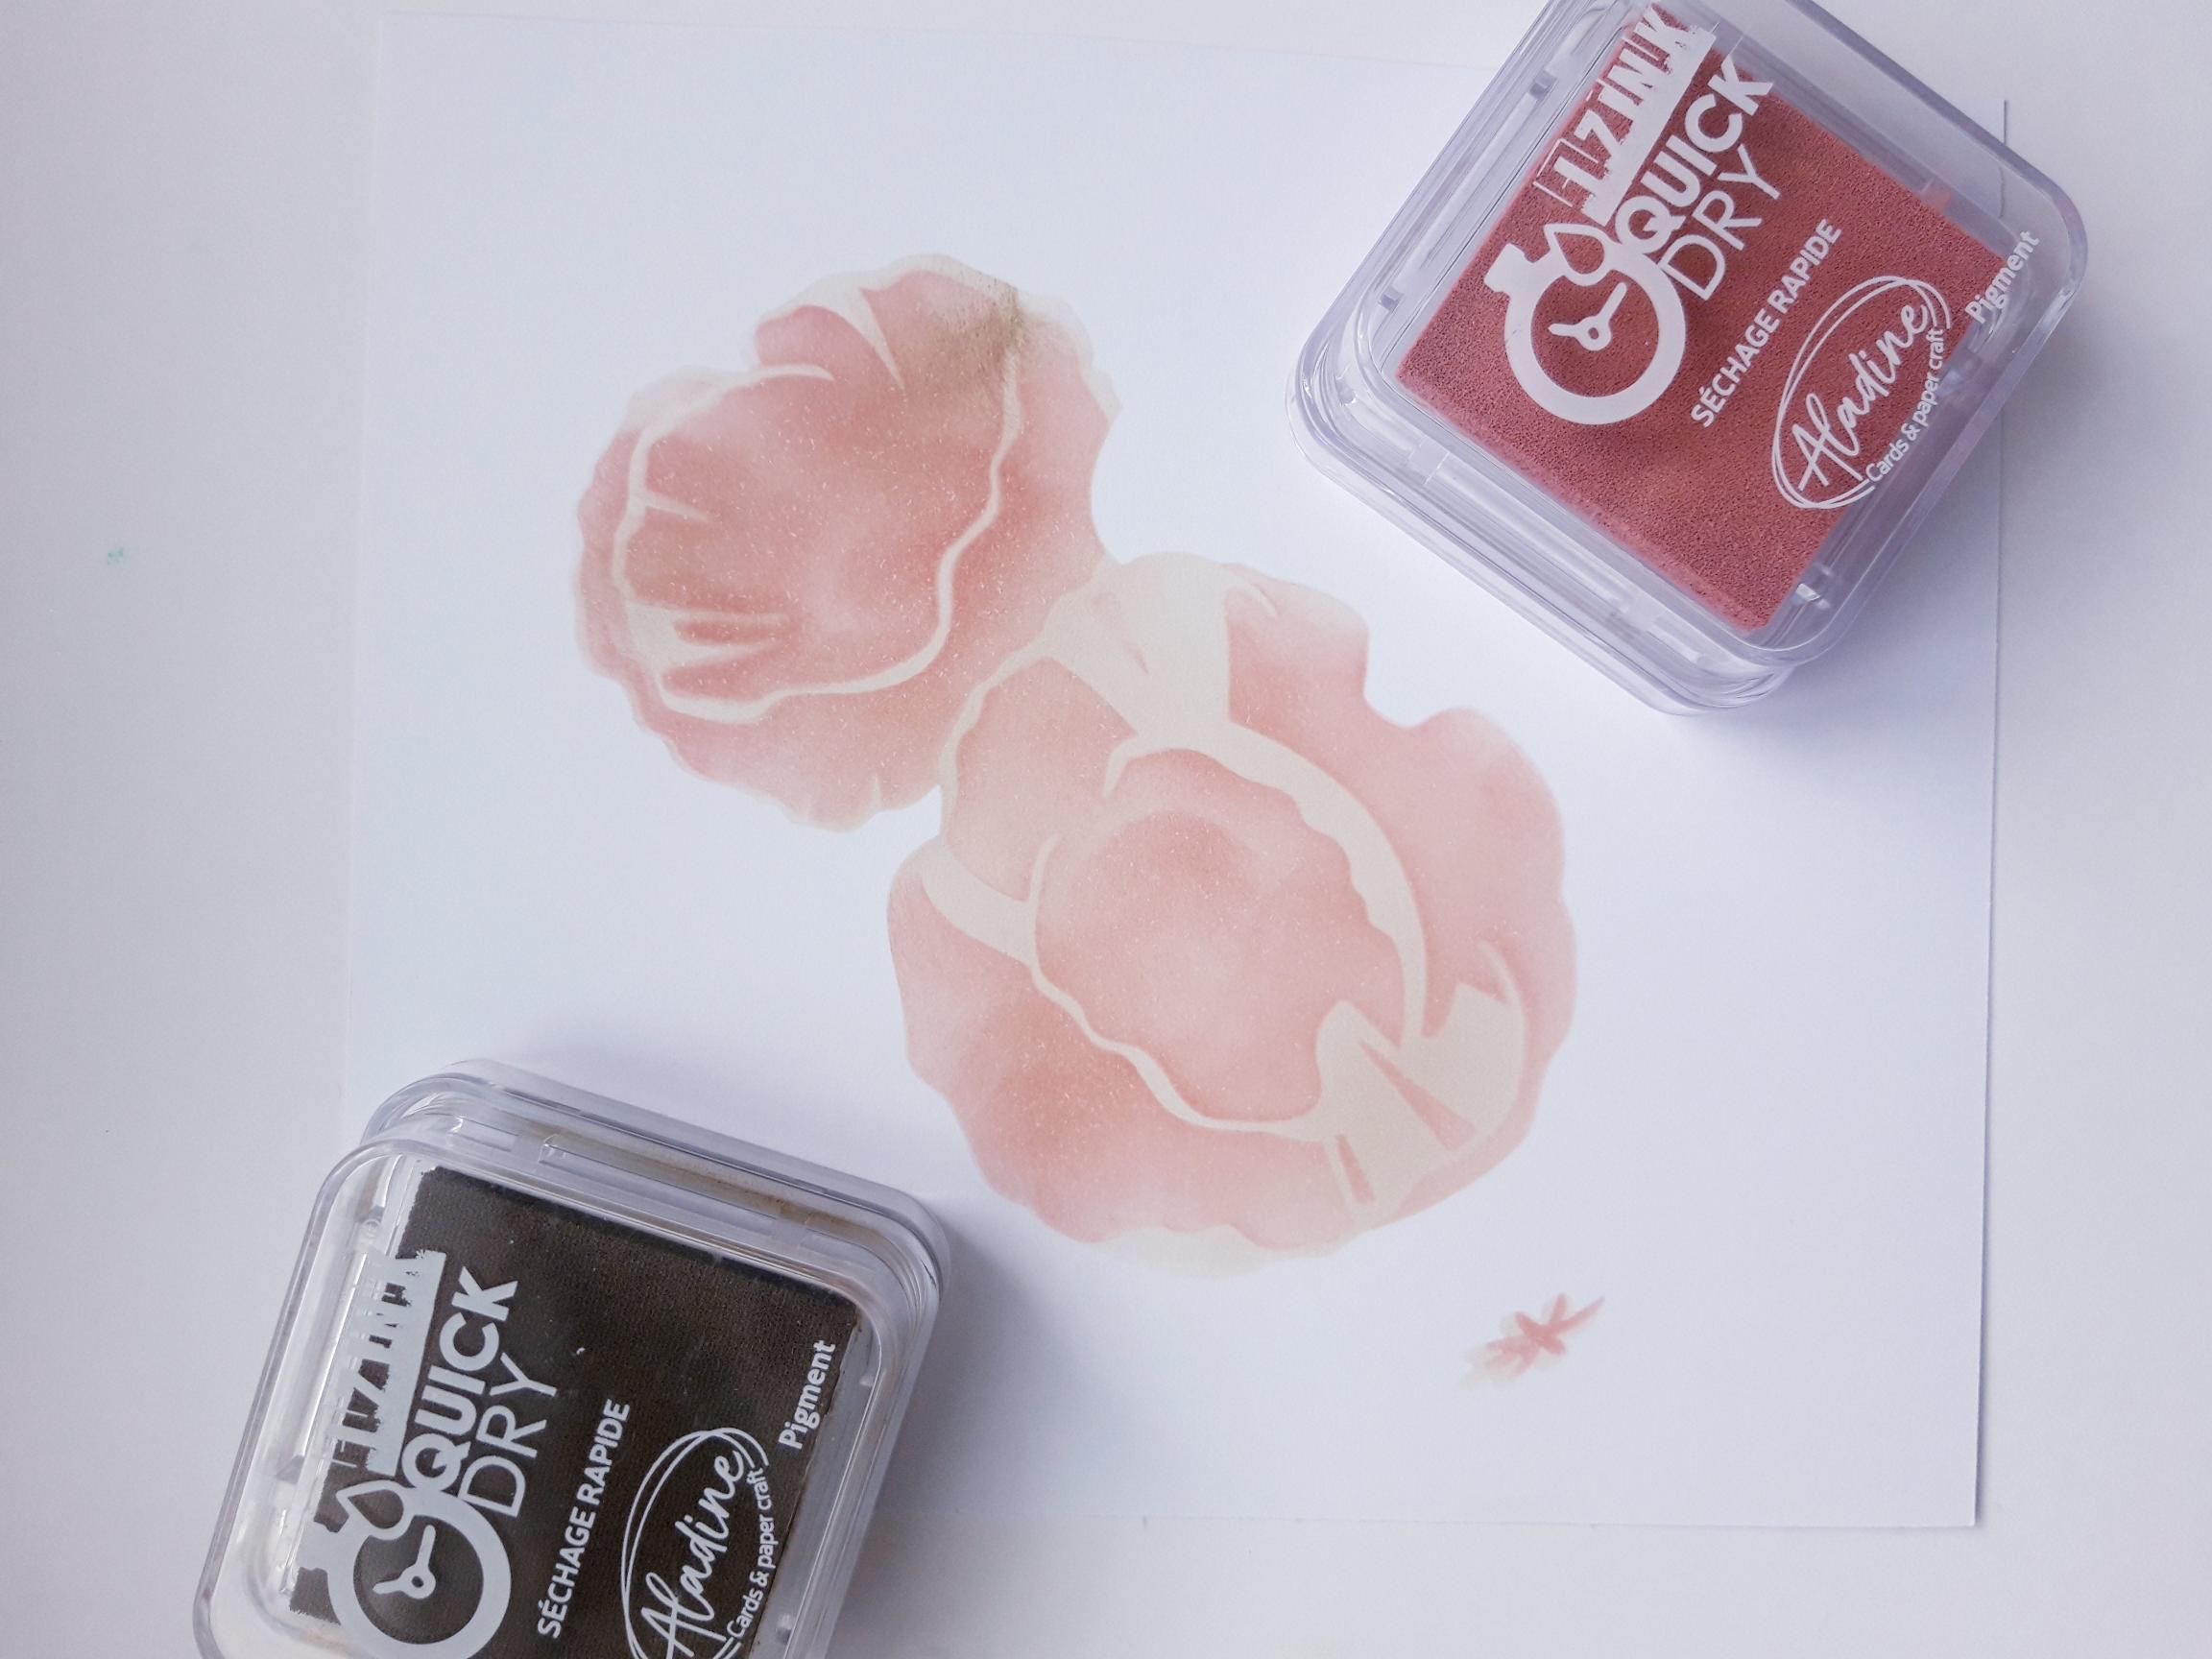
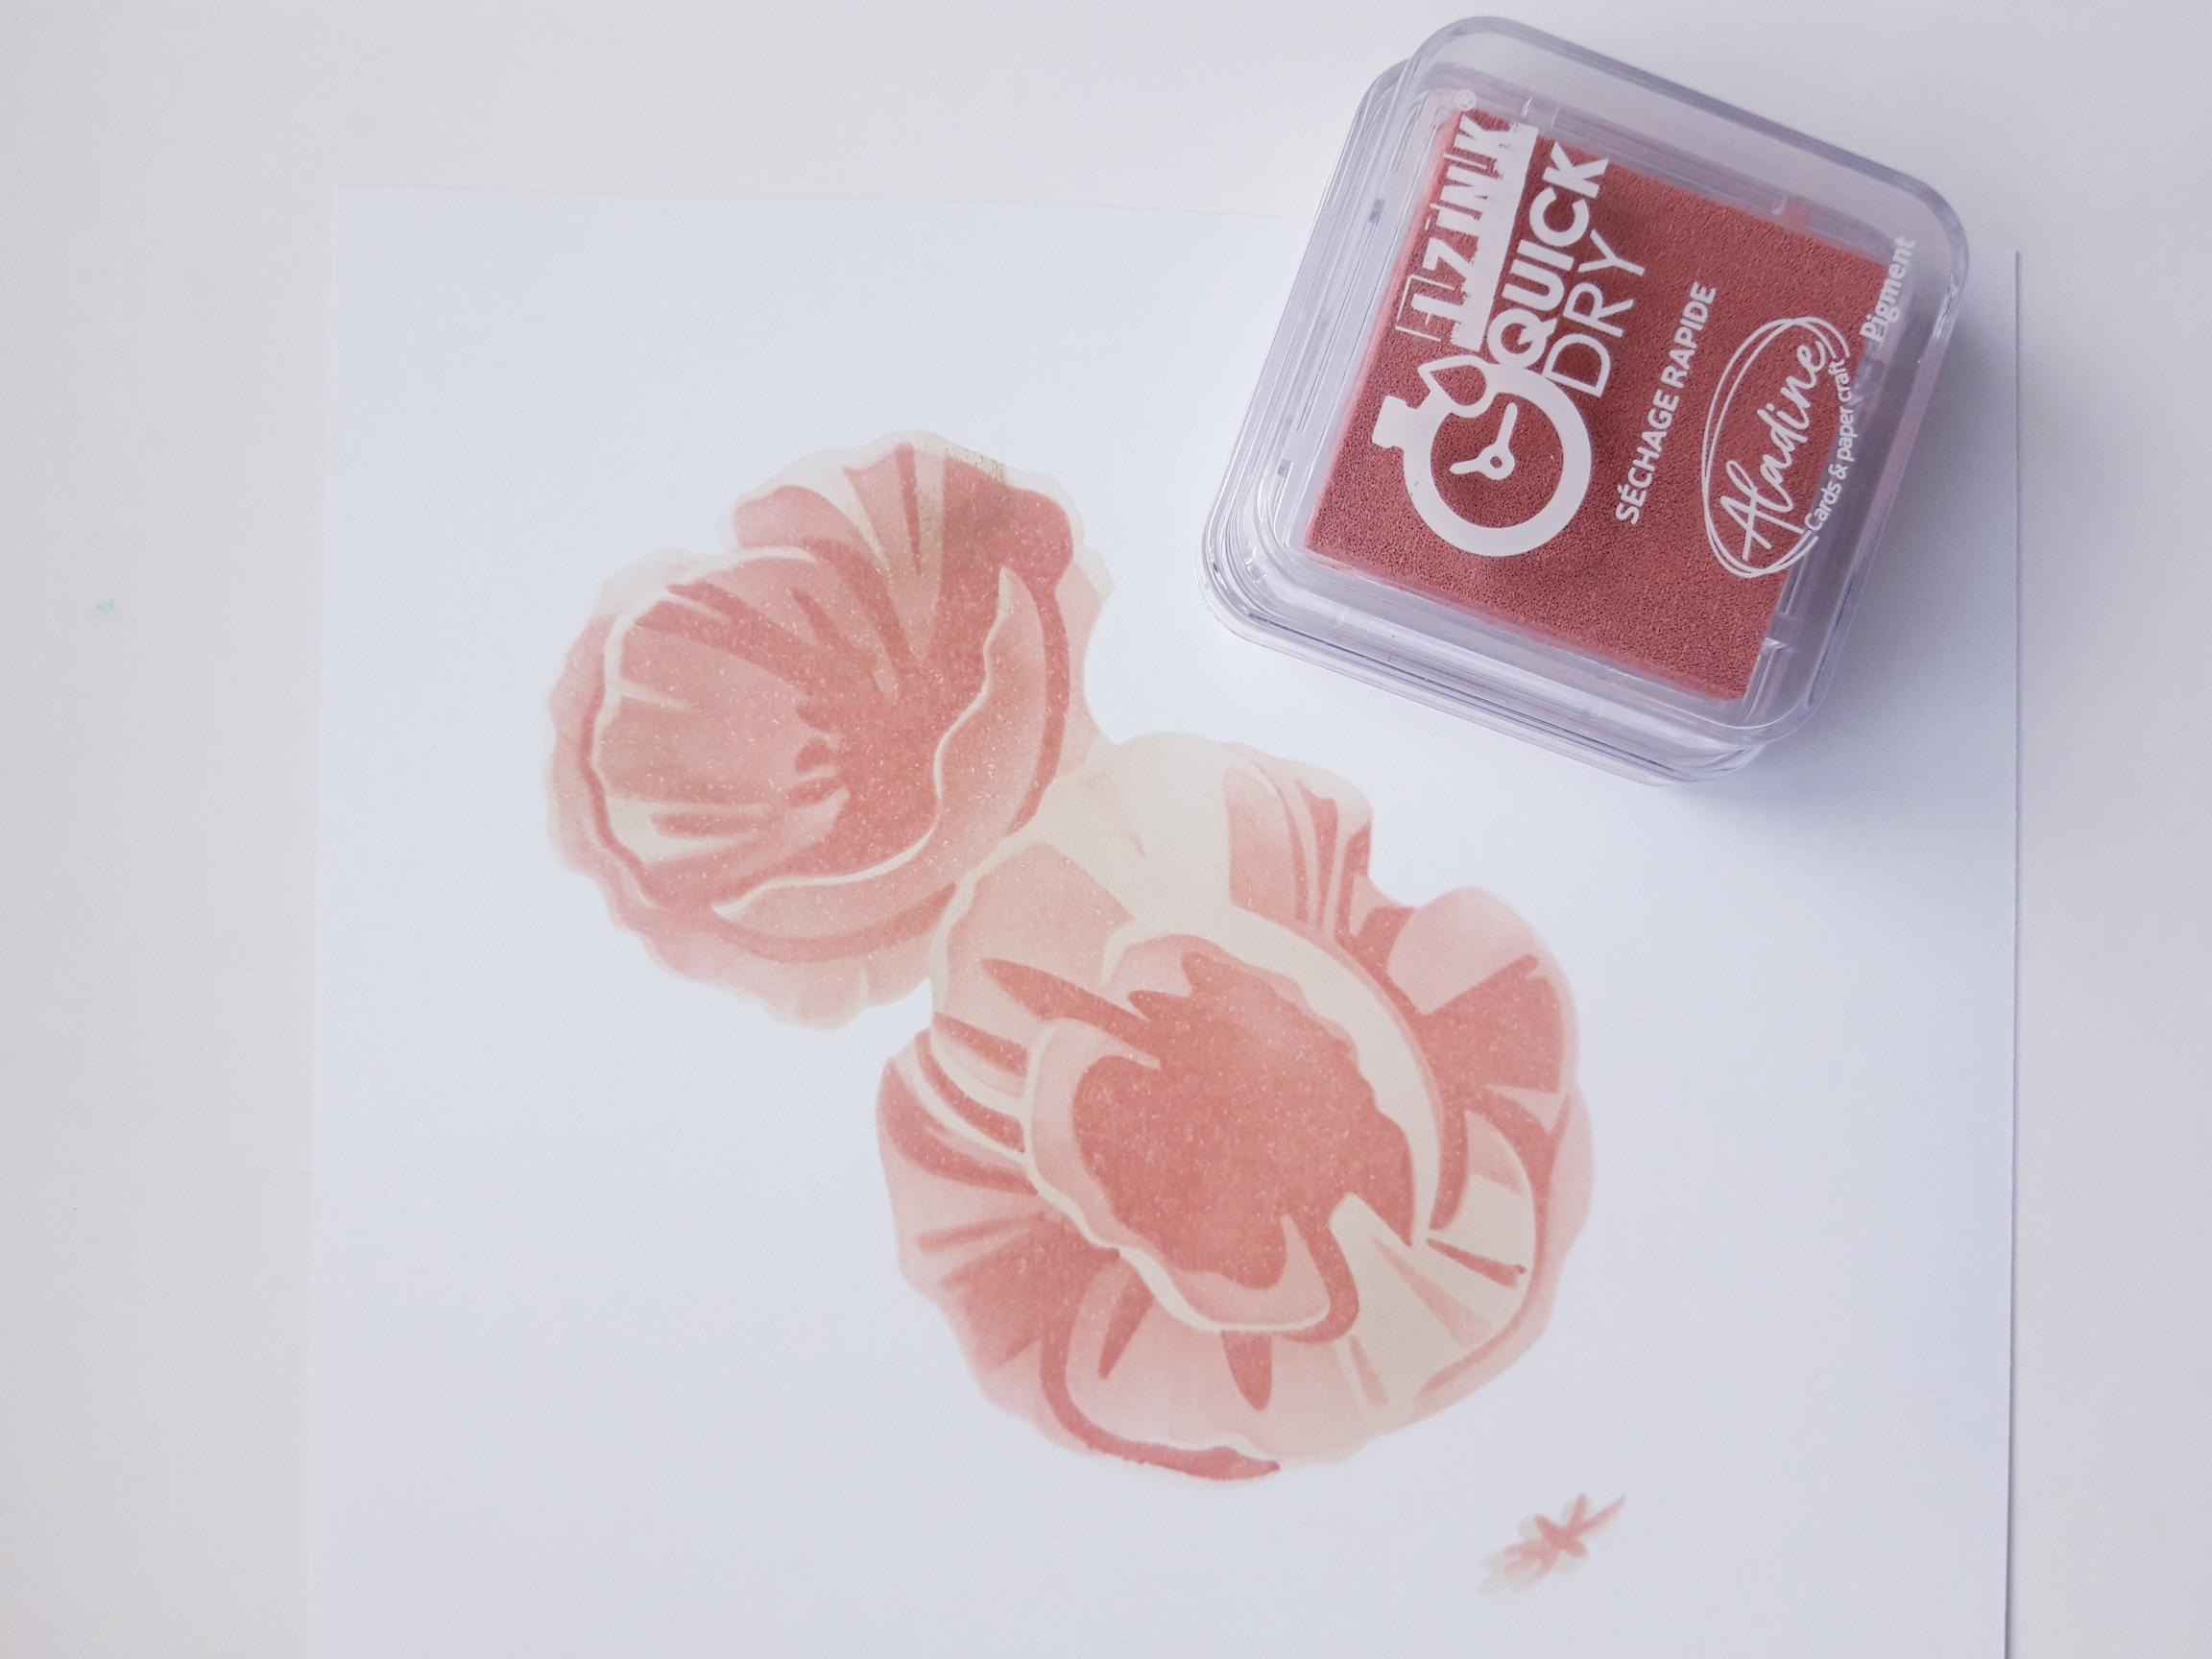
Place stencil 1, from the Poppy Bunch Collection, on to the white card cut to 6 x 6". Using your blending tool apply the rose pink Izink Pigment lightly through the stencil. Add a hint of the Izink brown pigment where you think the shadow would fall. TIP: You can ink through the 4 corner hearts on the stencil, which you line up with each stencil. |
|
Line up stencil 2 and reapply the rose pink Pigment, this time using more pressure for a deeper shade of colour. |
|
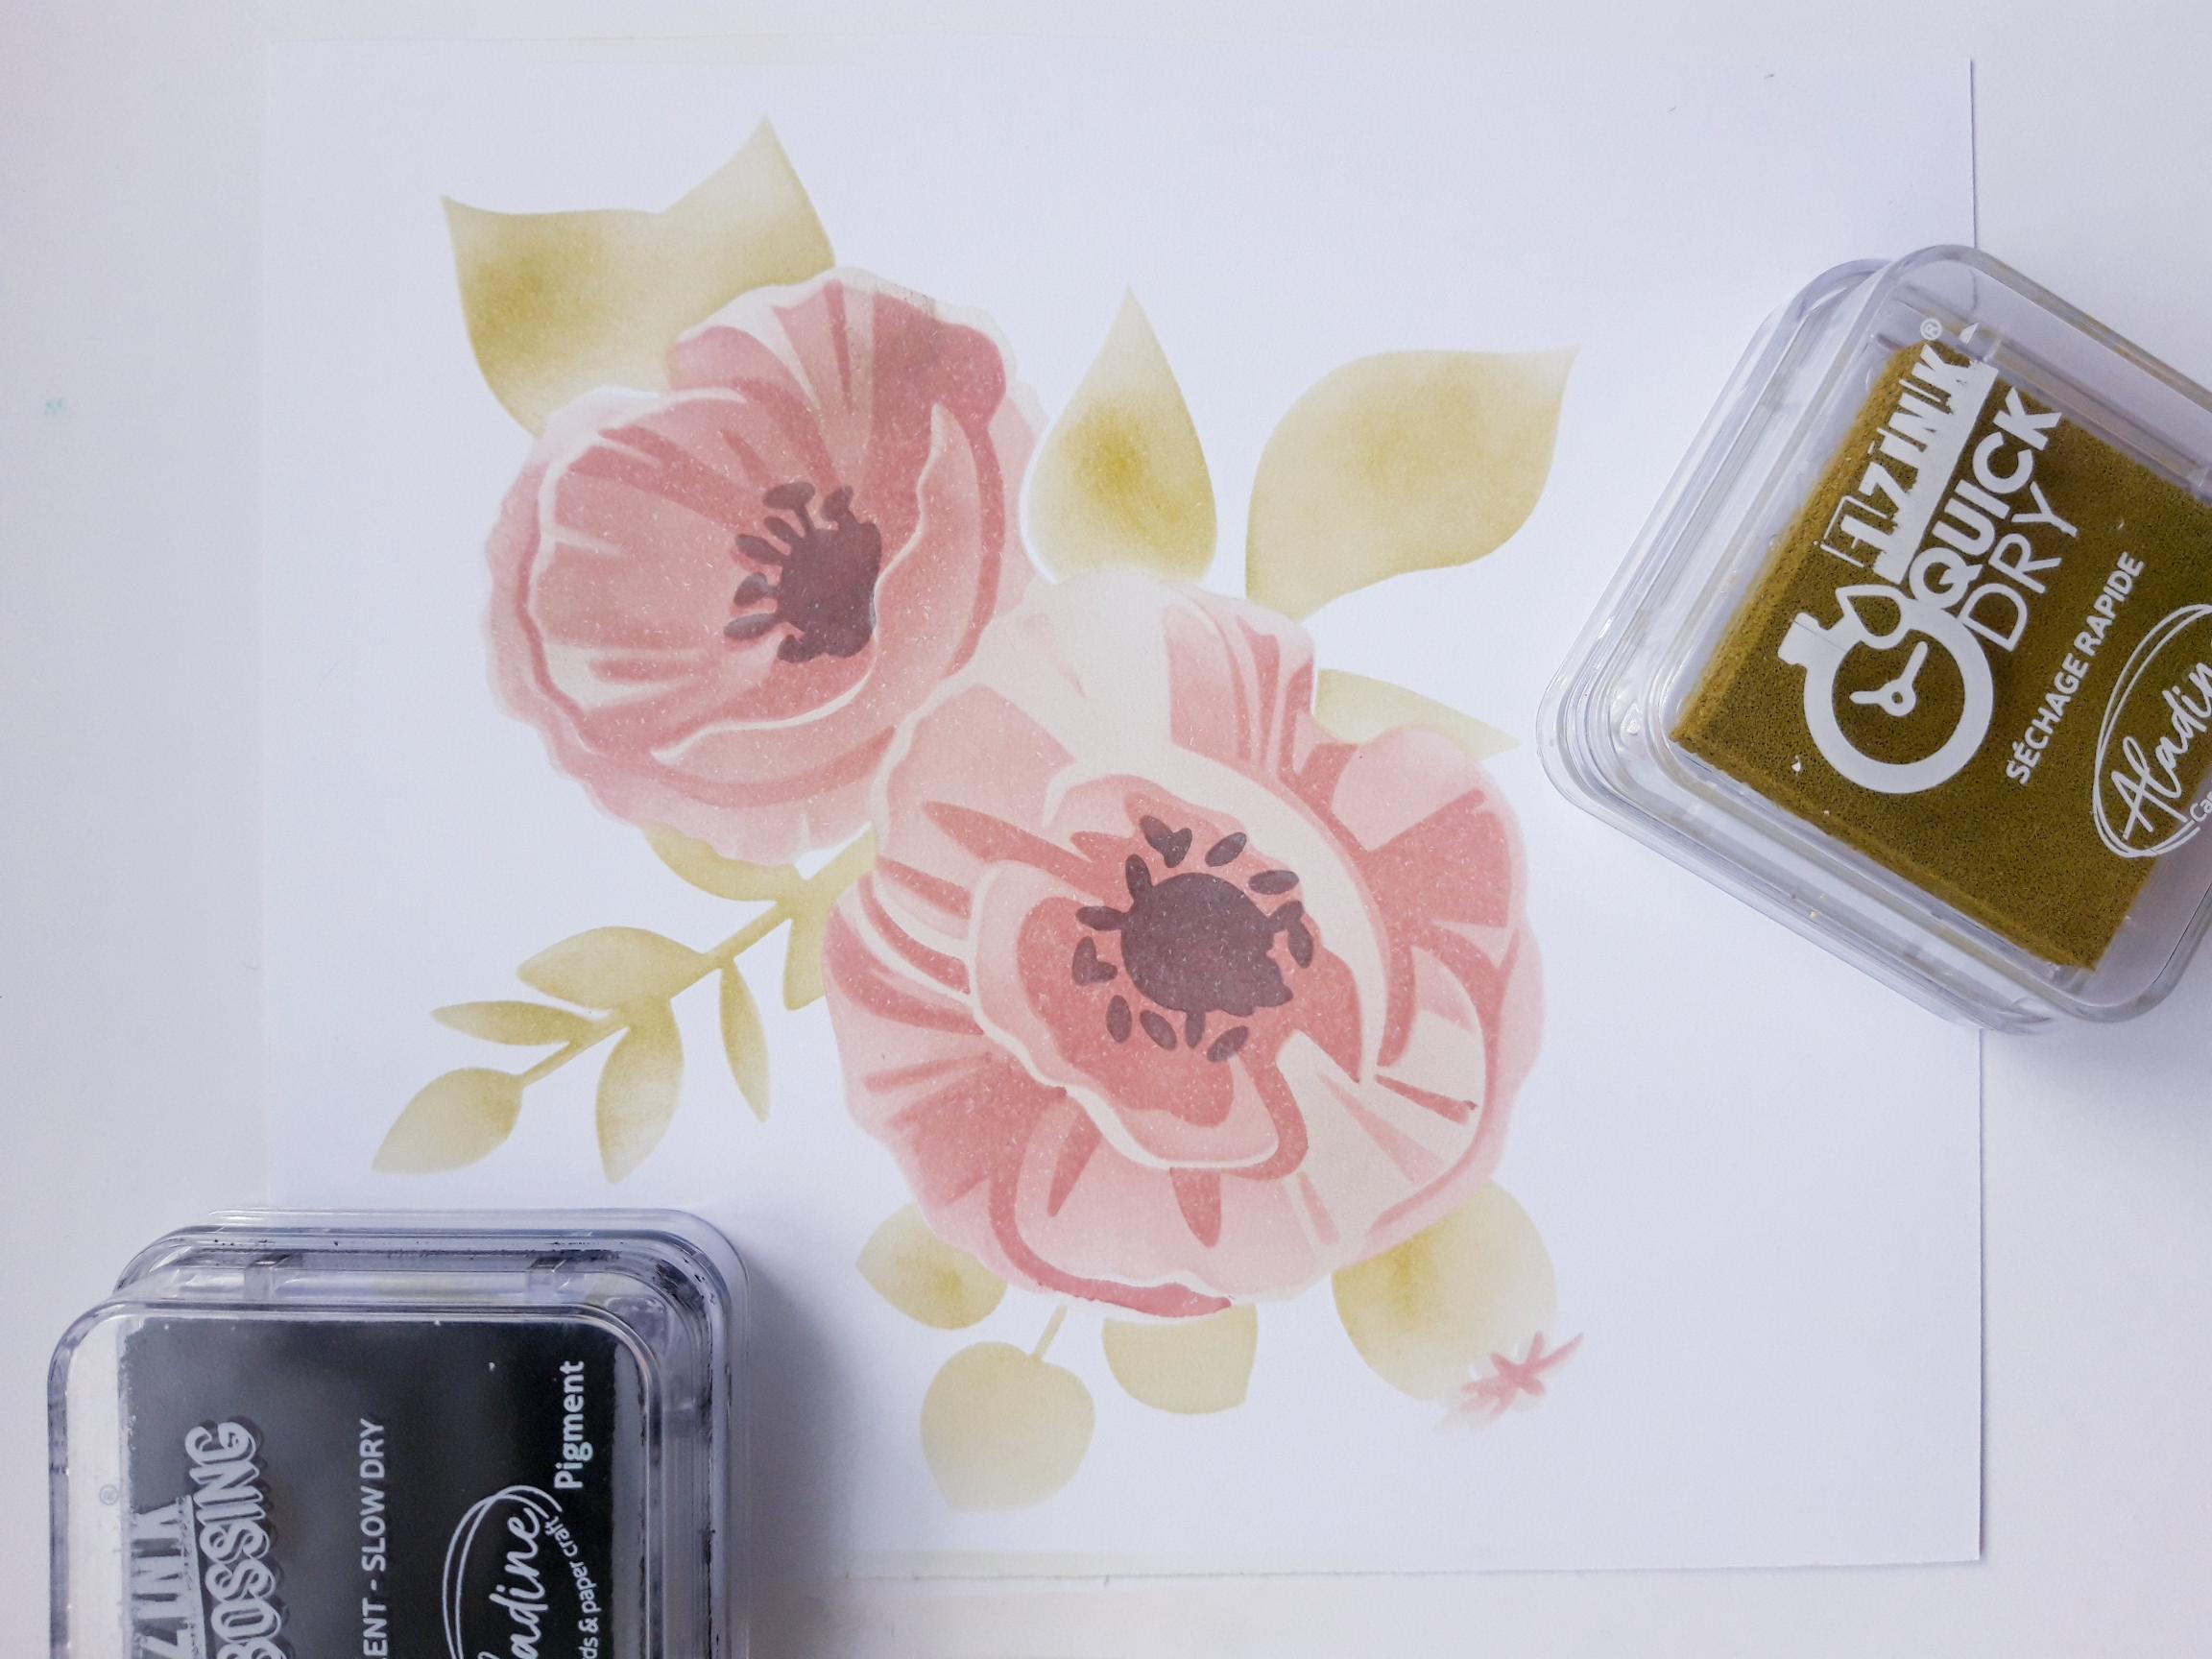
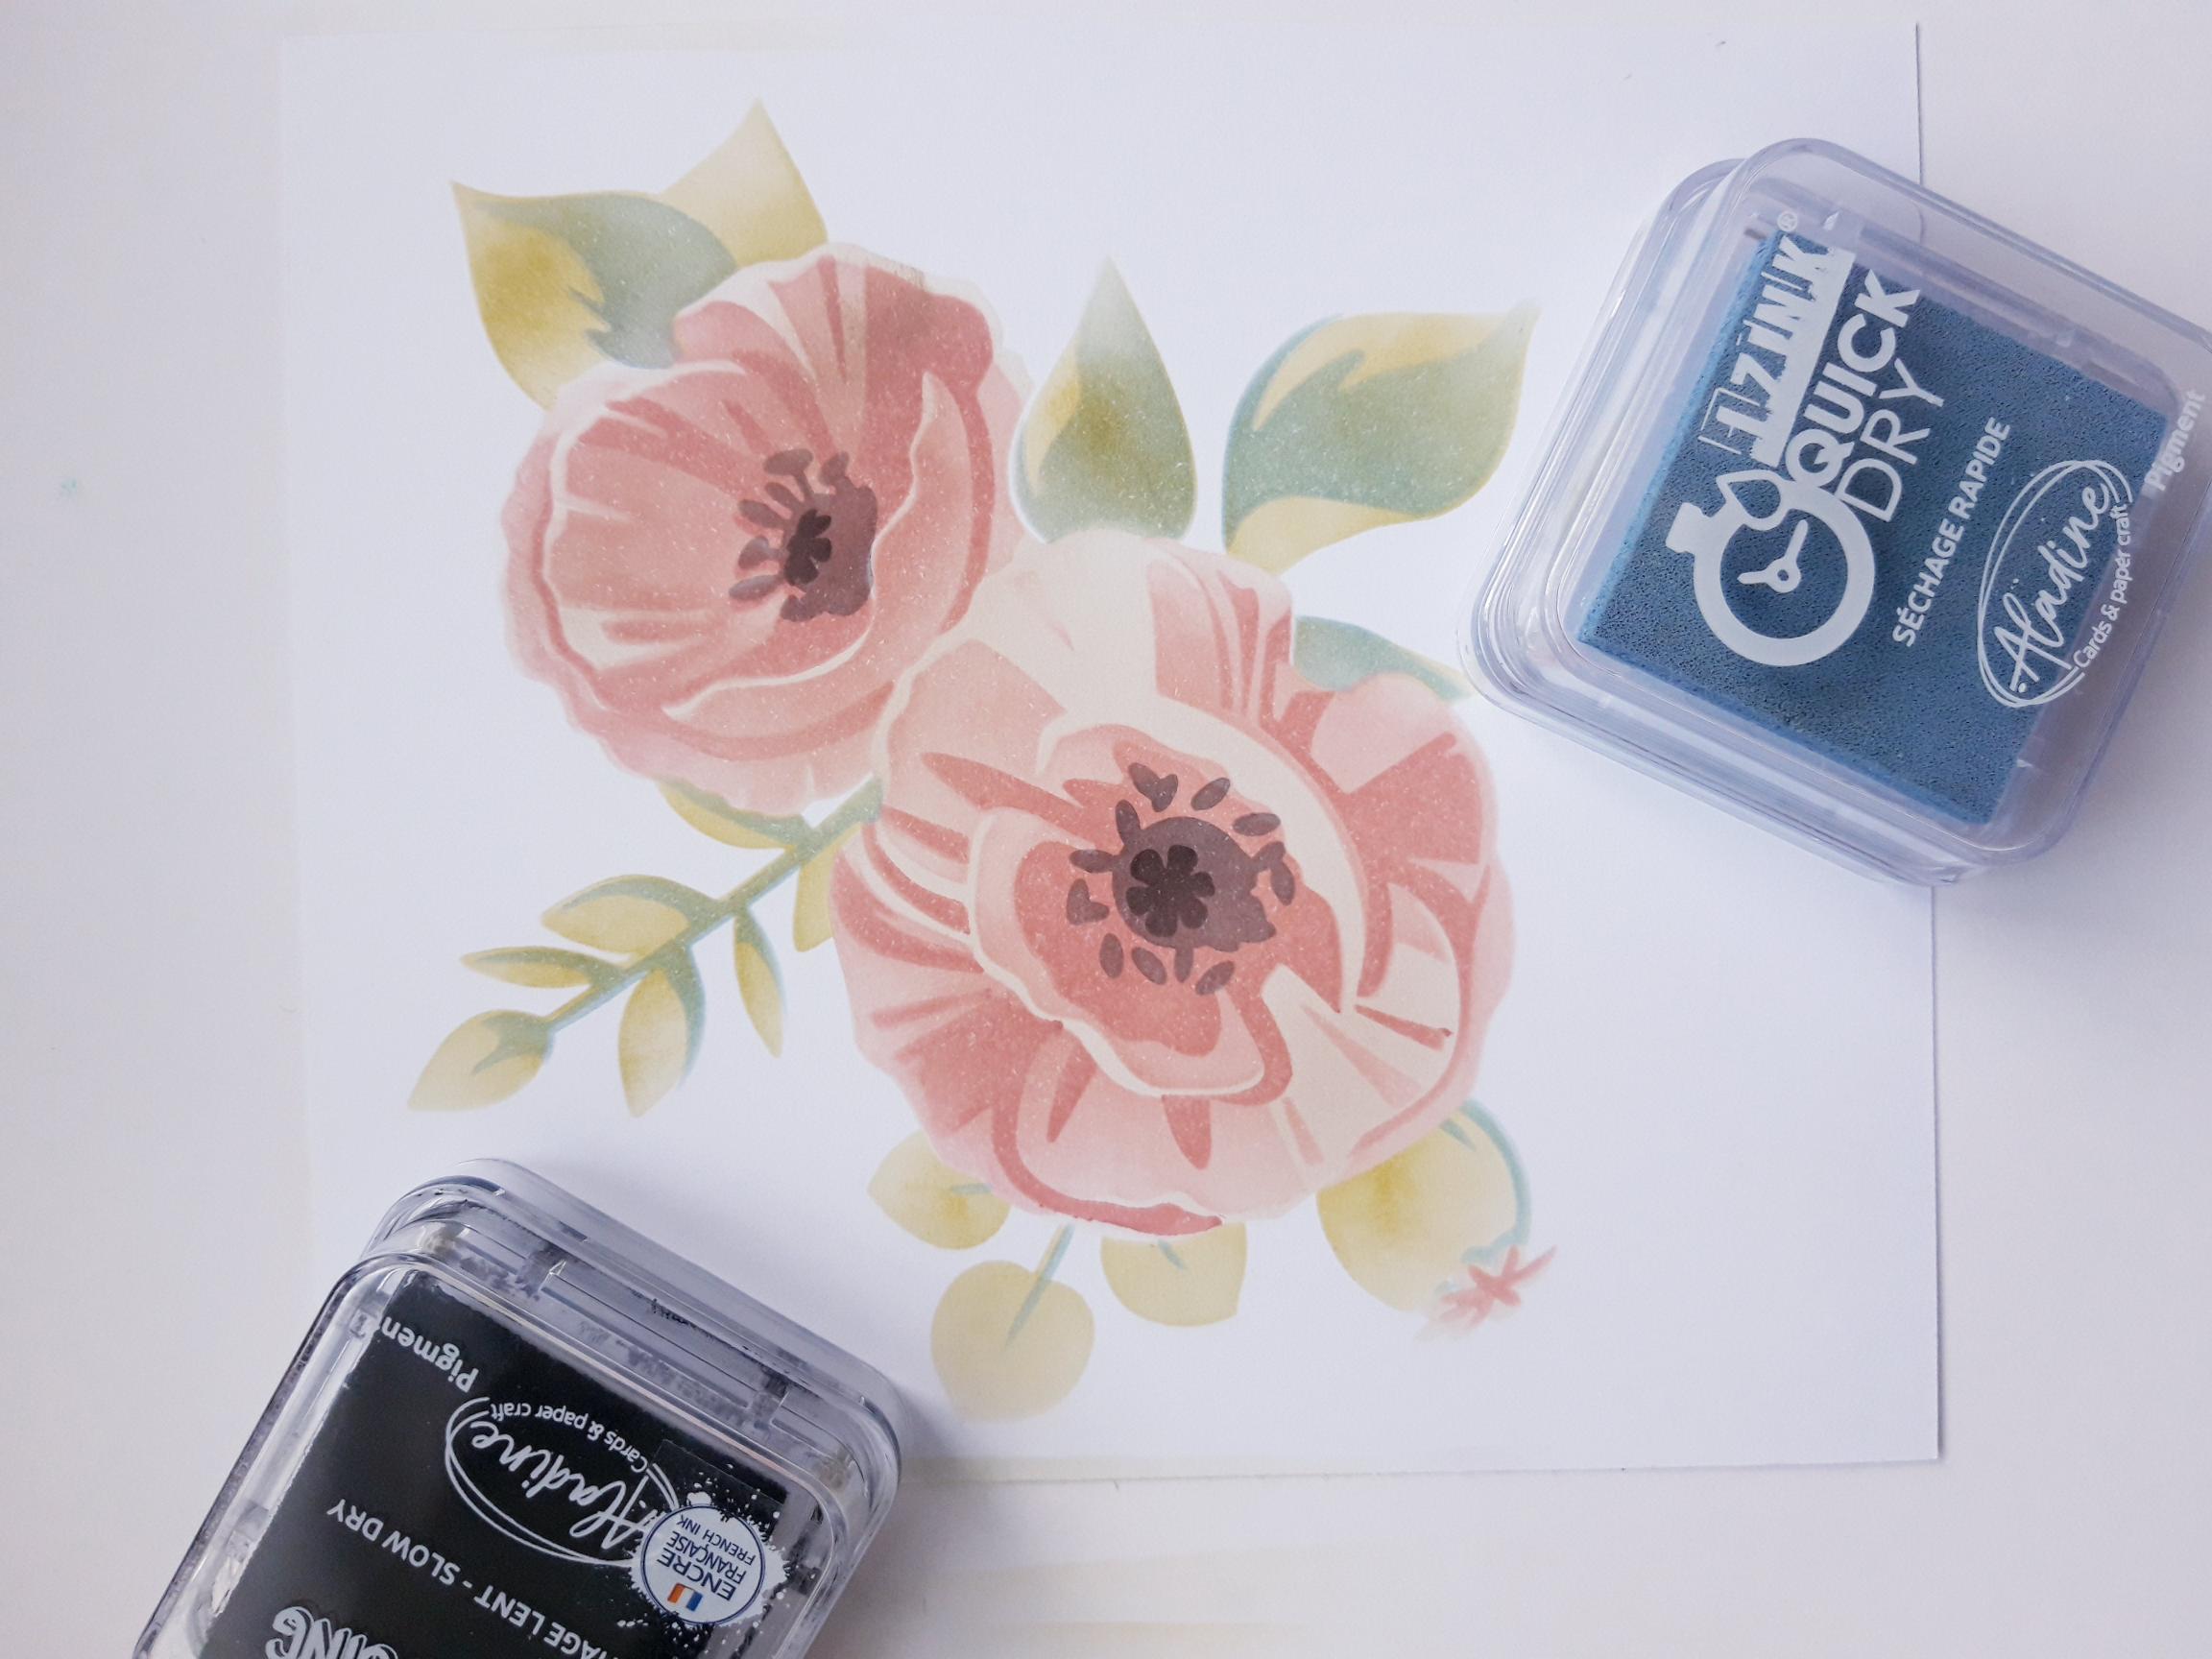
Lay down stencil 3 and blend the lime green Pigment through the foliage areas of the stencil and the black pigment lightly in the centres of the Poppies. |
|
Place stencil 4 down and apply the grey/blue Pigment on the foliage and apply the black with more pressure, through the flower head centres. Dry the ink, as it's a slow drying ink and you do not want it to smudge! Secure the coordinating die in place, with low tack tape and run it through your die cutting machine. Set your die cut Poppy element to one side. |

|
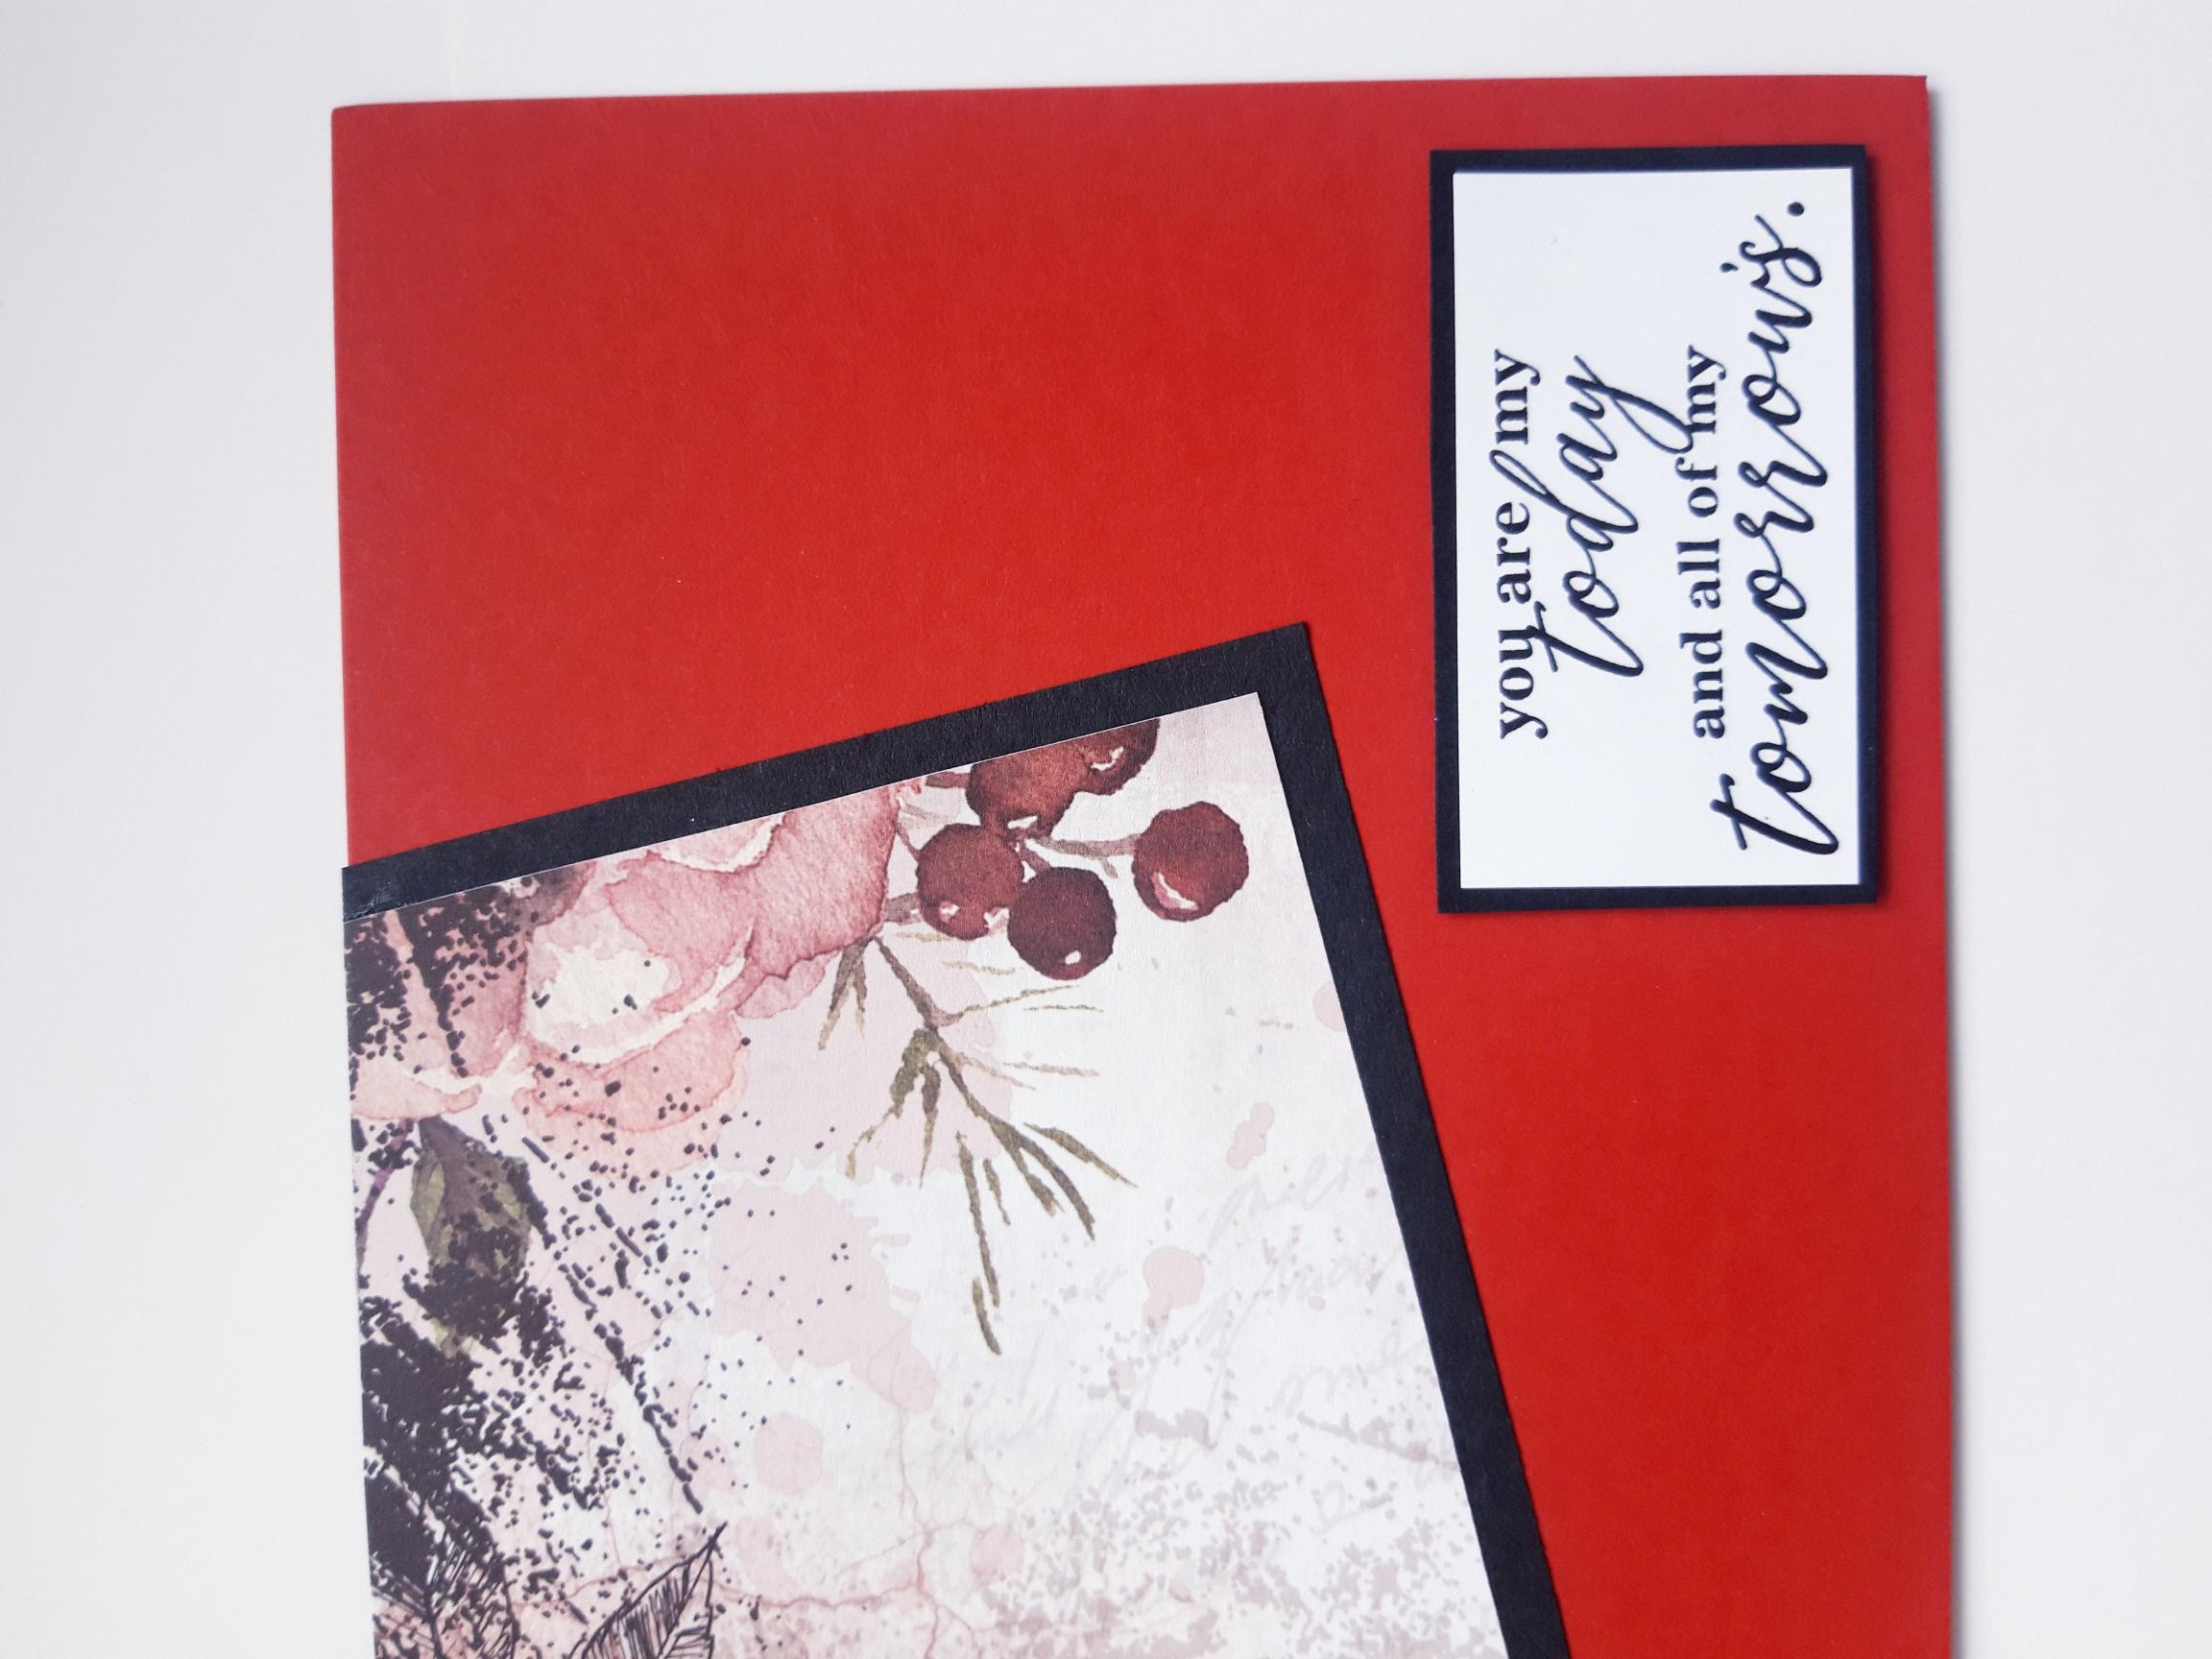
Ink up the sentiment stamp, from the Tomorrow Stamp Collection, with the Onyx Black Versafine. Stamp on to the white card (2 1/2 x 1 1/2"). |

|
Adhere on to the black card cut to 2 3/4 x 1 3/4". |
|
Adhere on to the bottom right corner, of your card. |
|
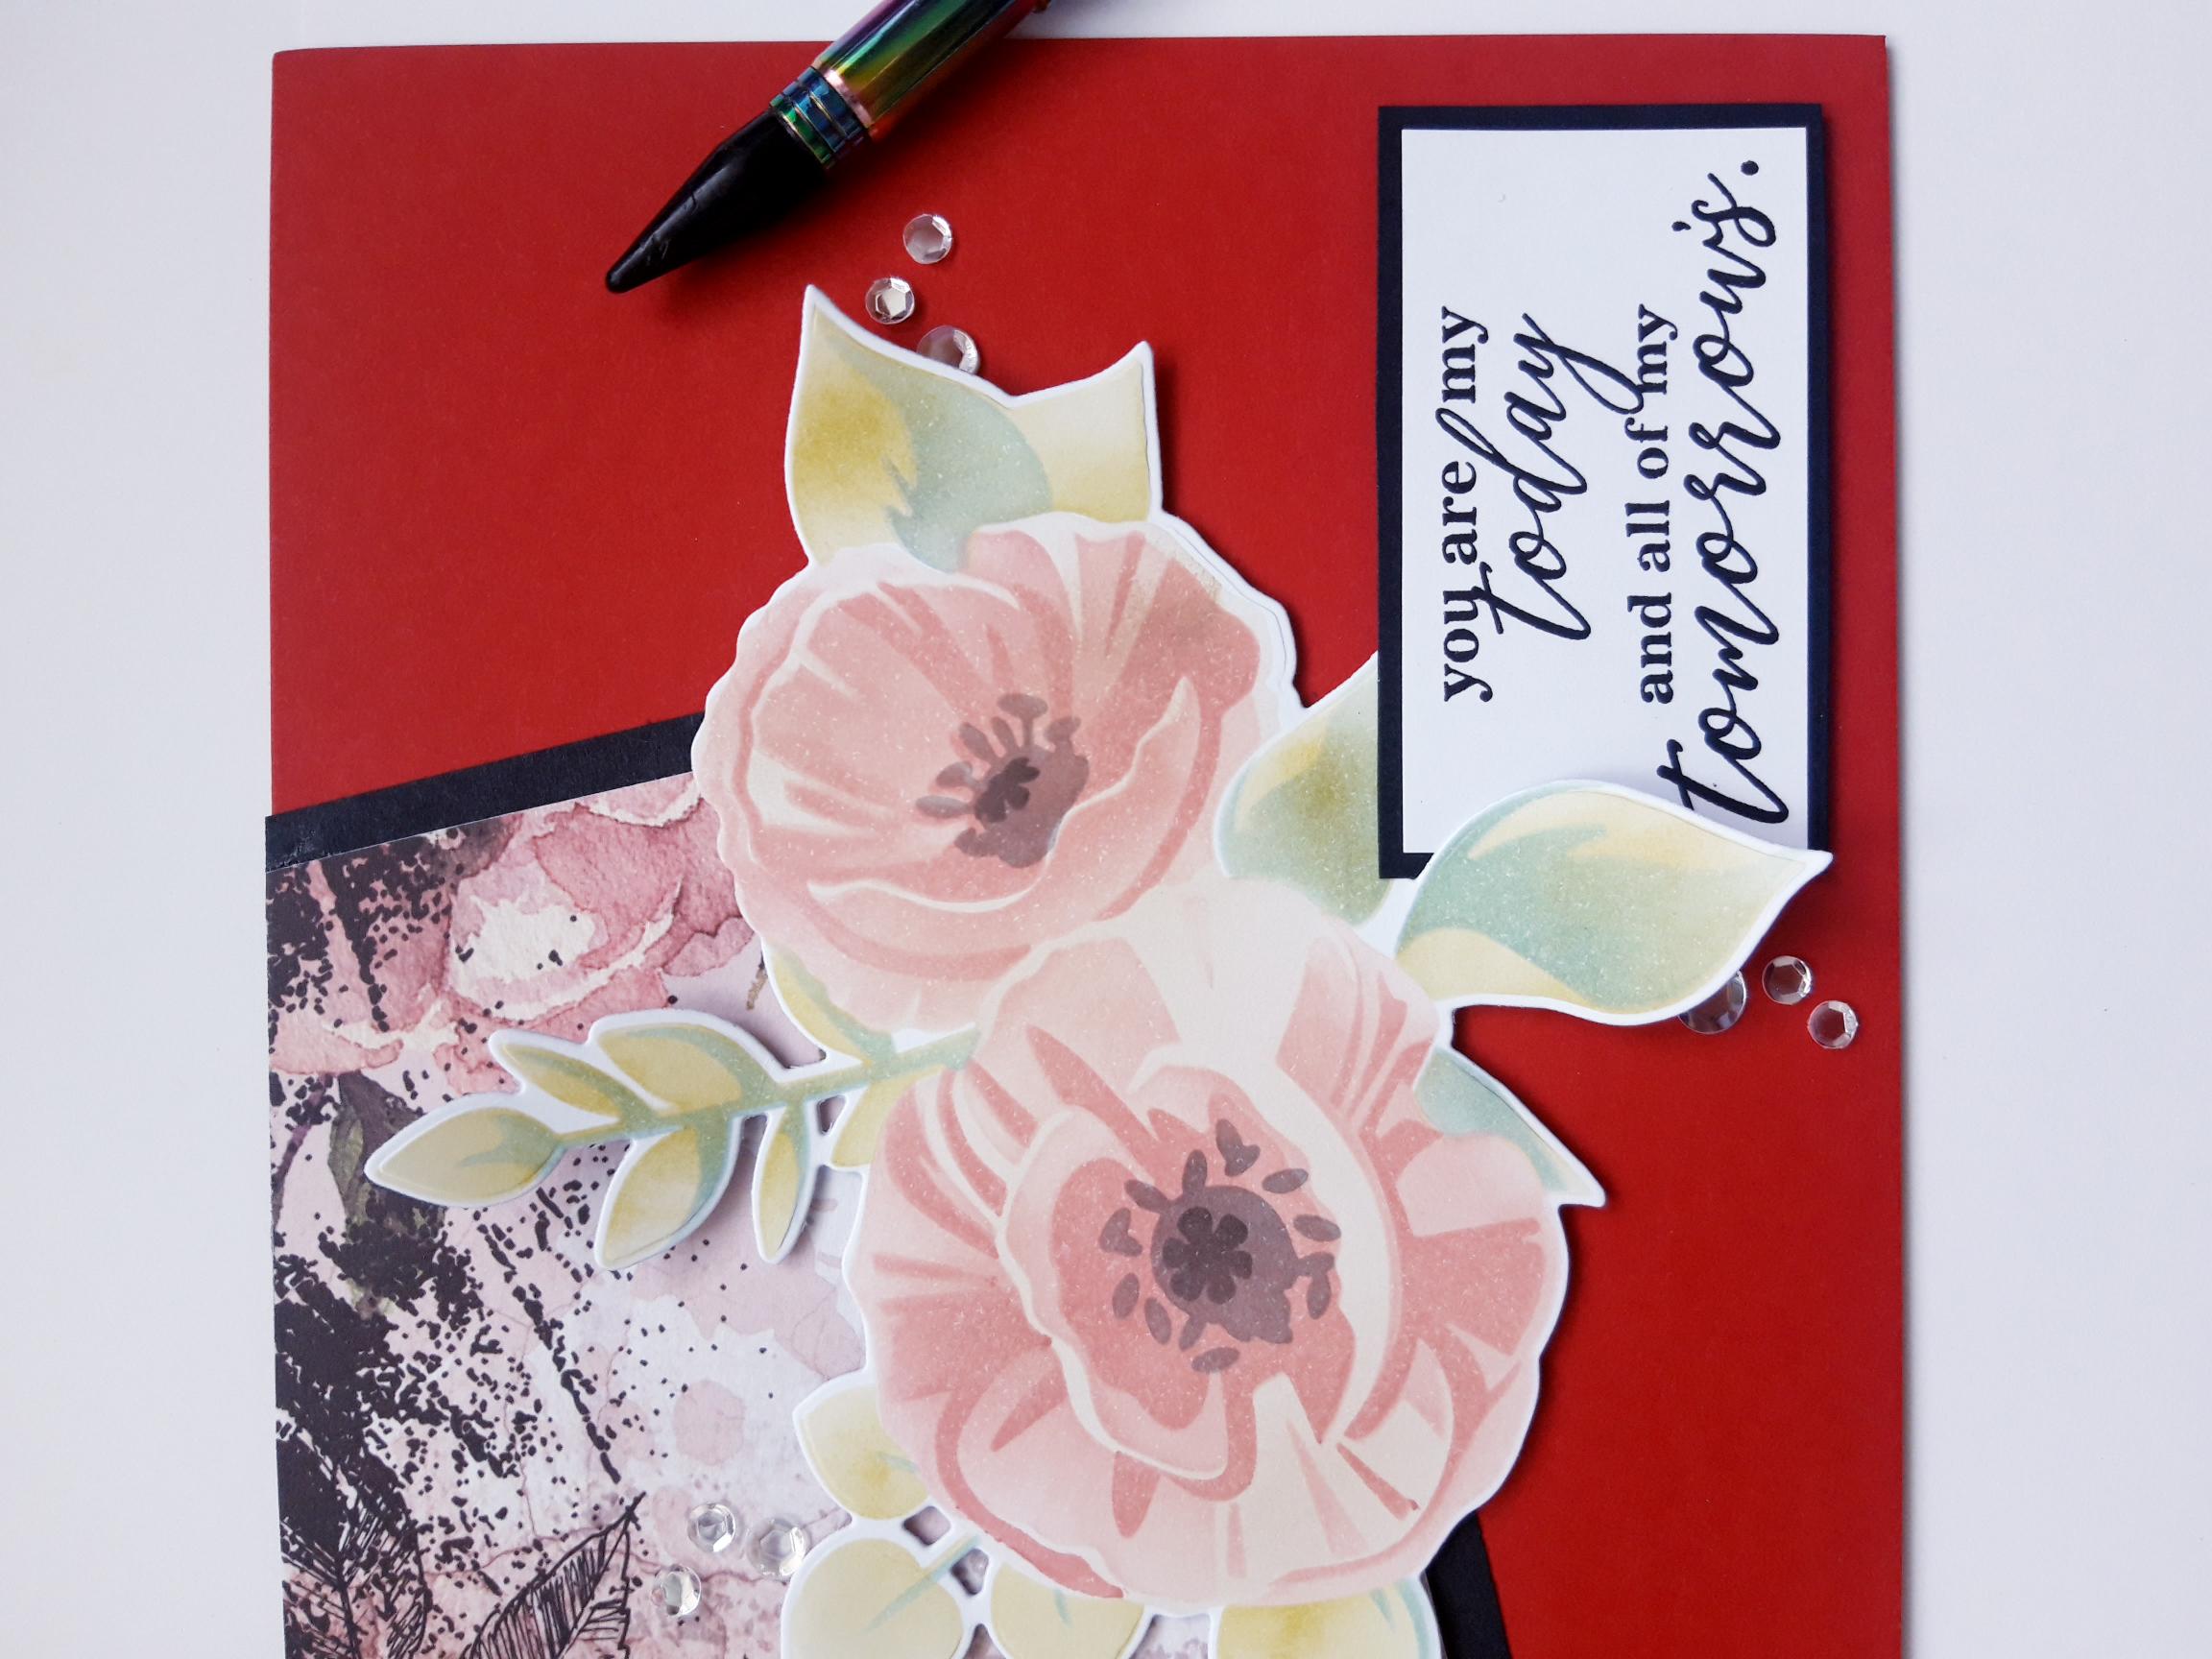
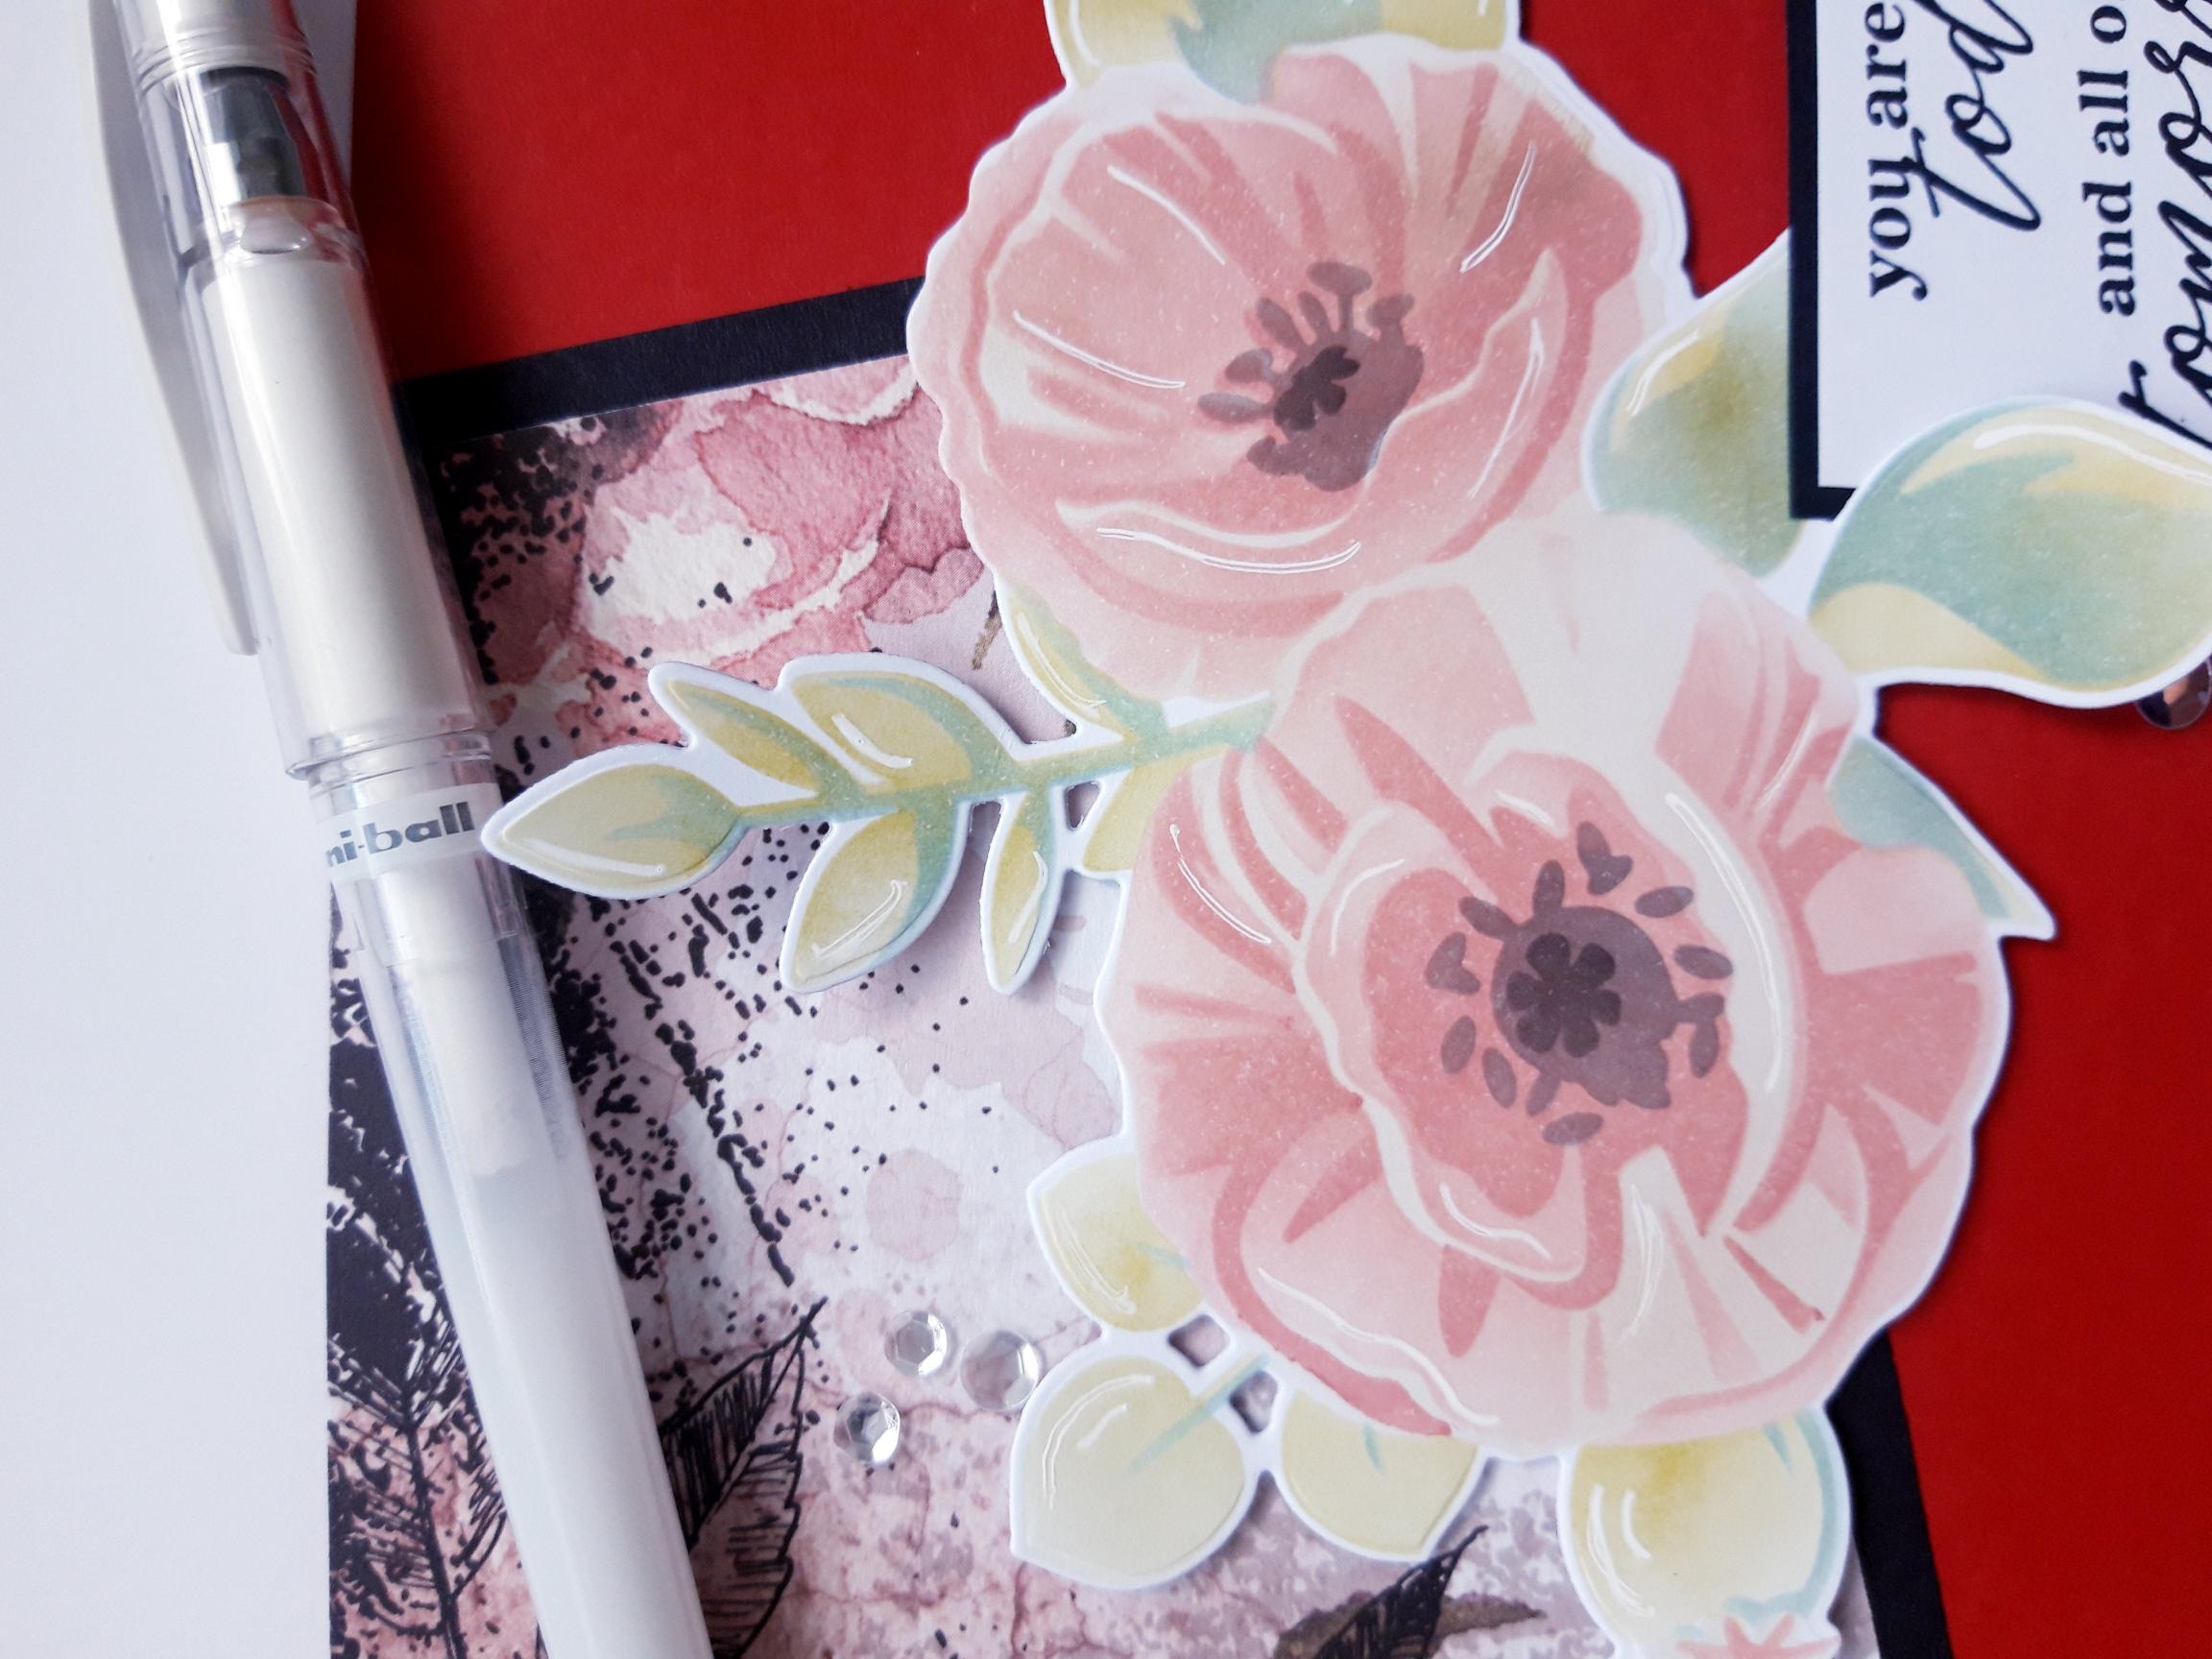
Adhere your die cut Poppies in place, with foam pads, as shown here. |
|
Adhere sequins on, around and tucked under your 3D element. |
|
Finally, add accents and highlights to your Poppies, using your white gel pen. |