Give your friends $10 off their first order!
Refer a FRIEND


WHAT YOU WILL NEED
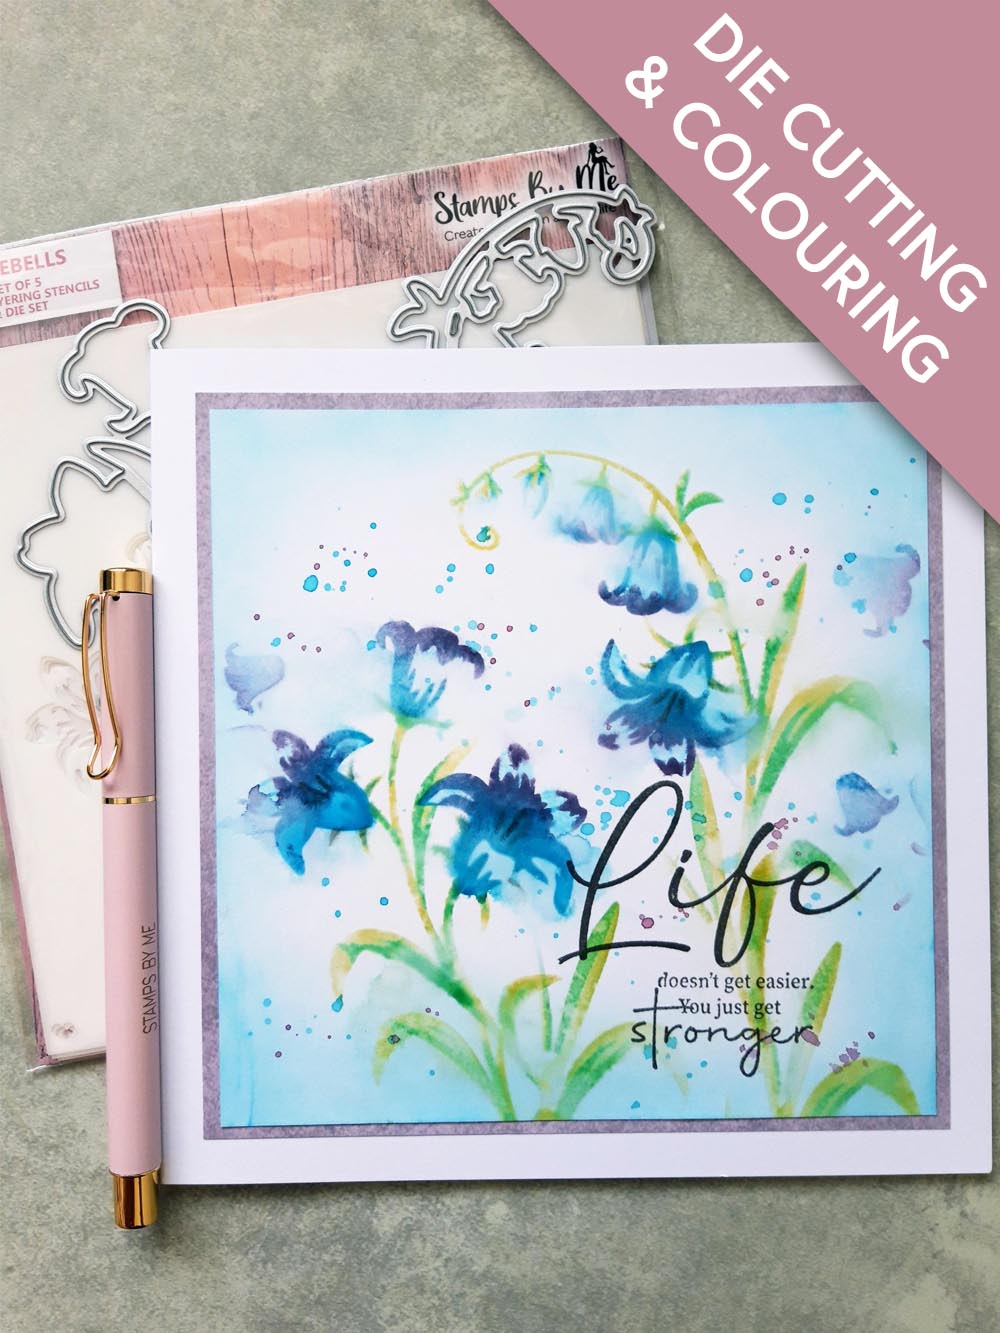
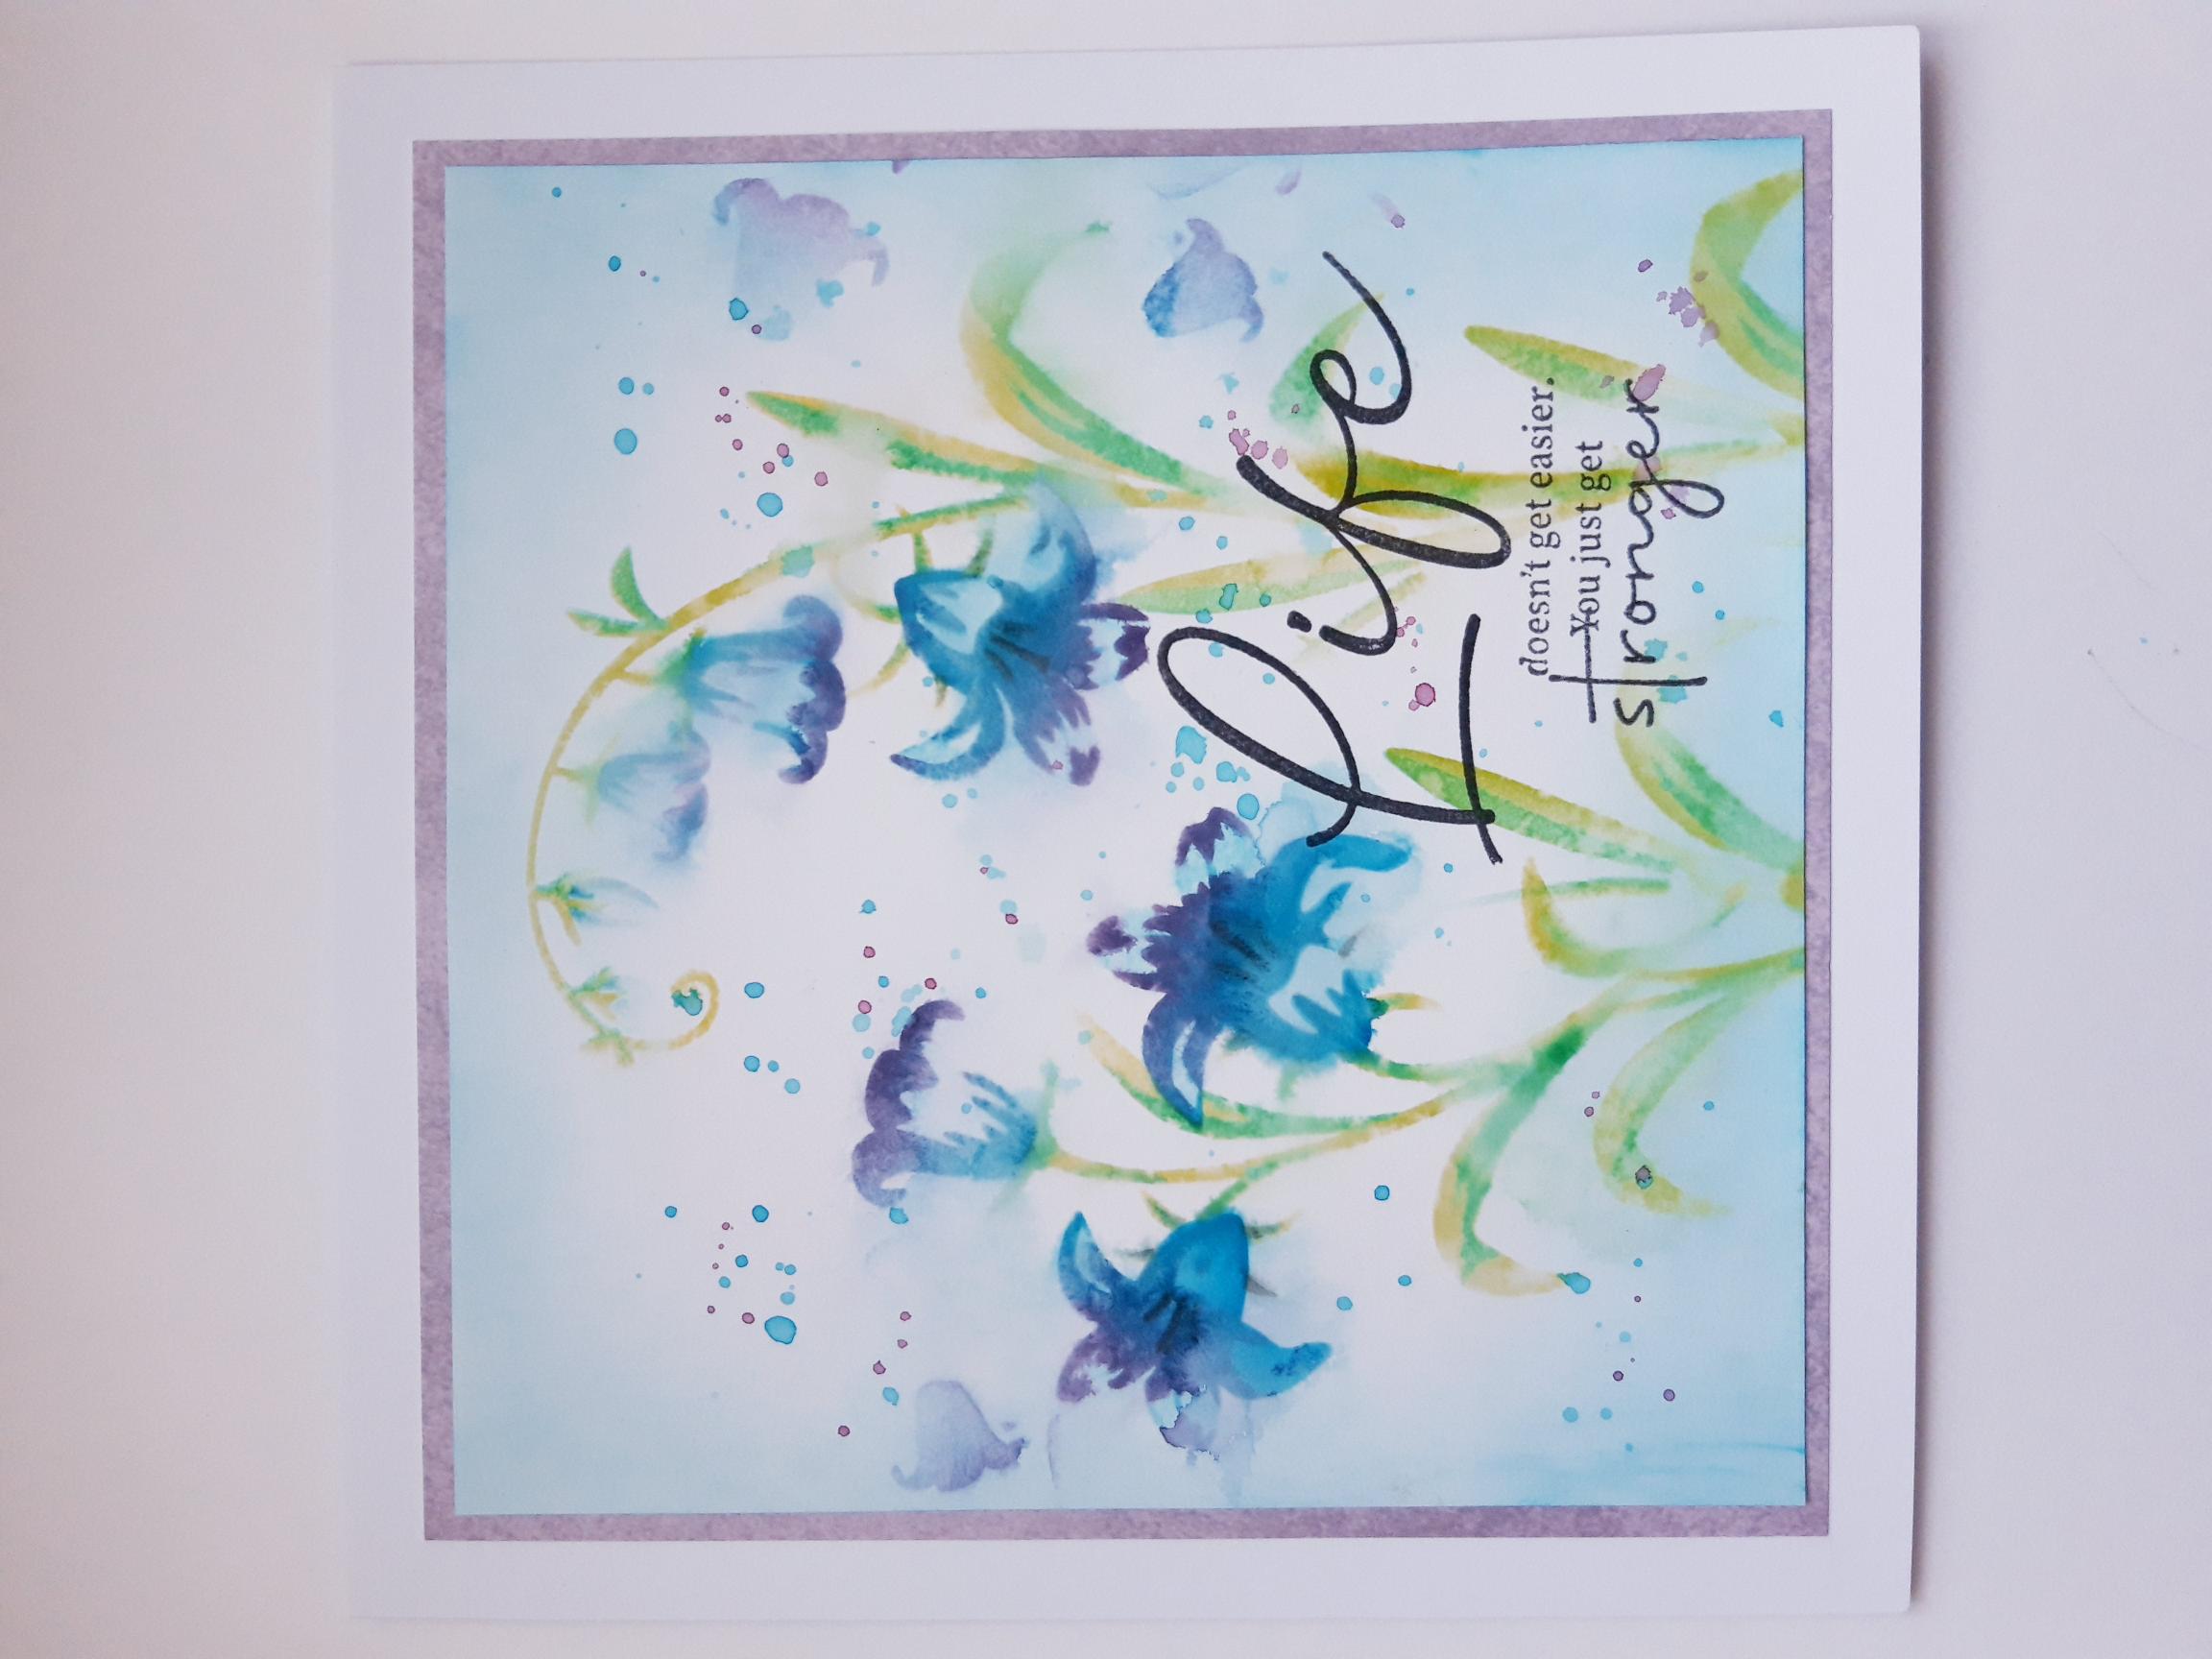
White card blank 7 x 7”
White card
Stamps By Me 12 x 12” Paper Stack: Texture Collection
Stamps By Me Bluebells Layering Stencils and Die Collection
Stamps By Me Stronger Lamination Stamp Collection
Smoky Grey Versafine ink pad
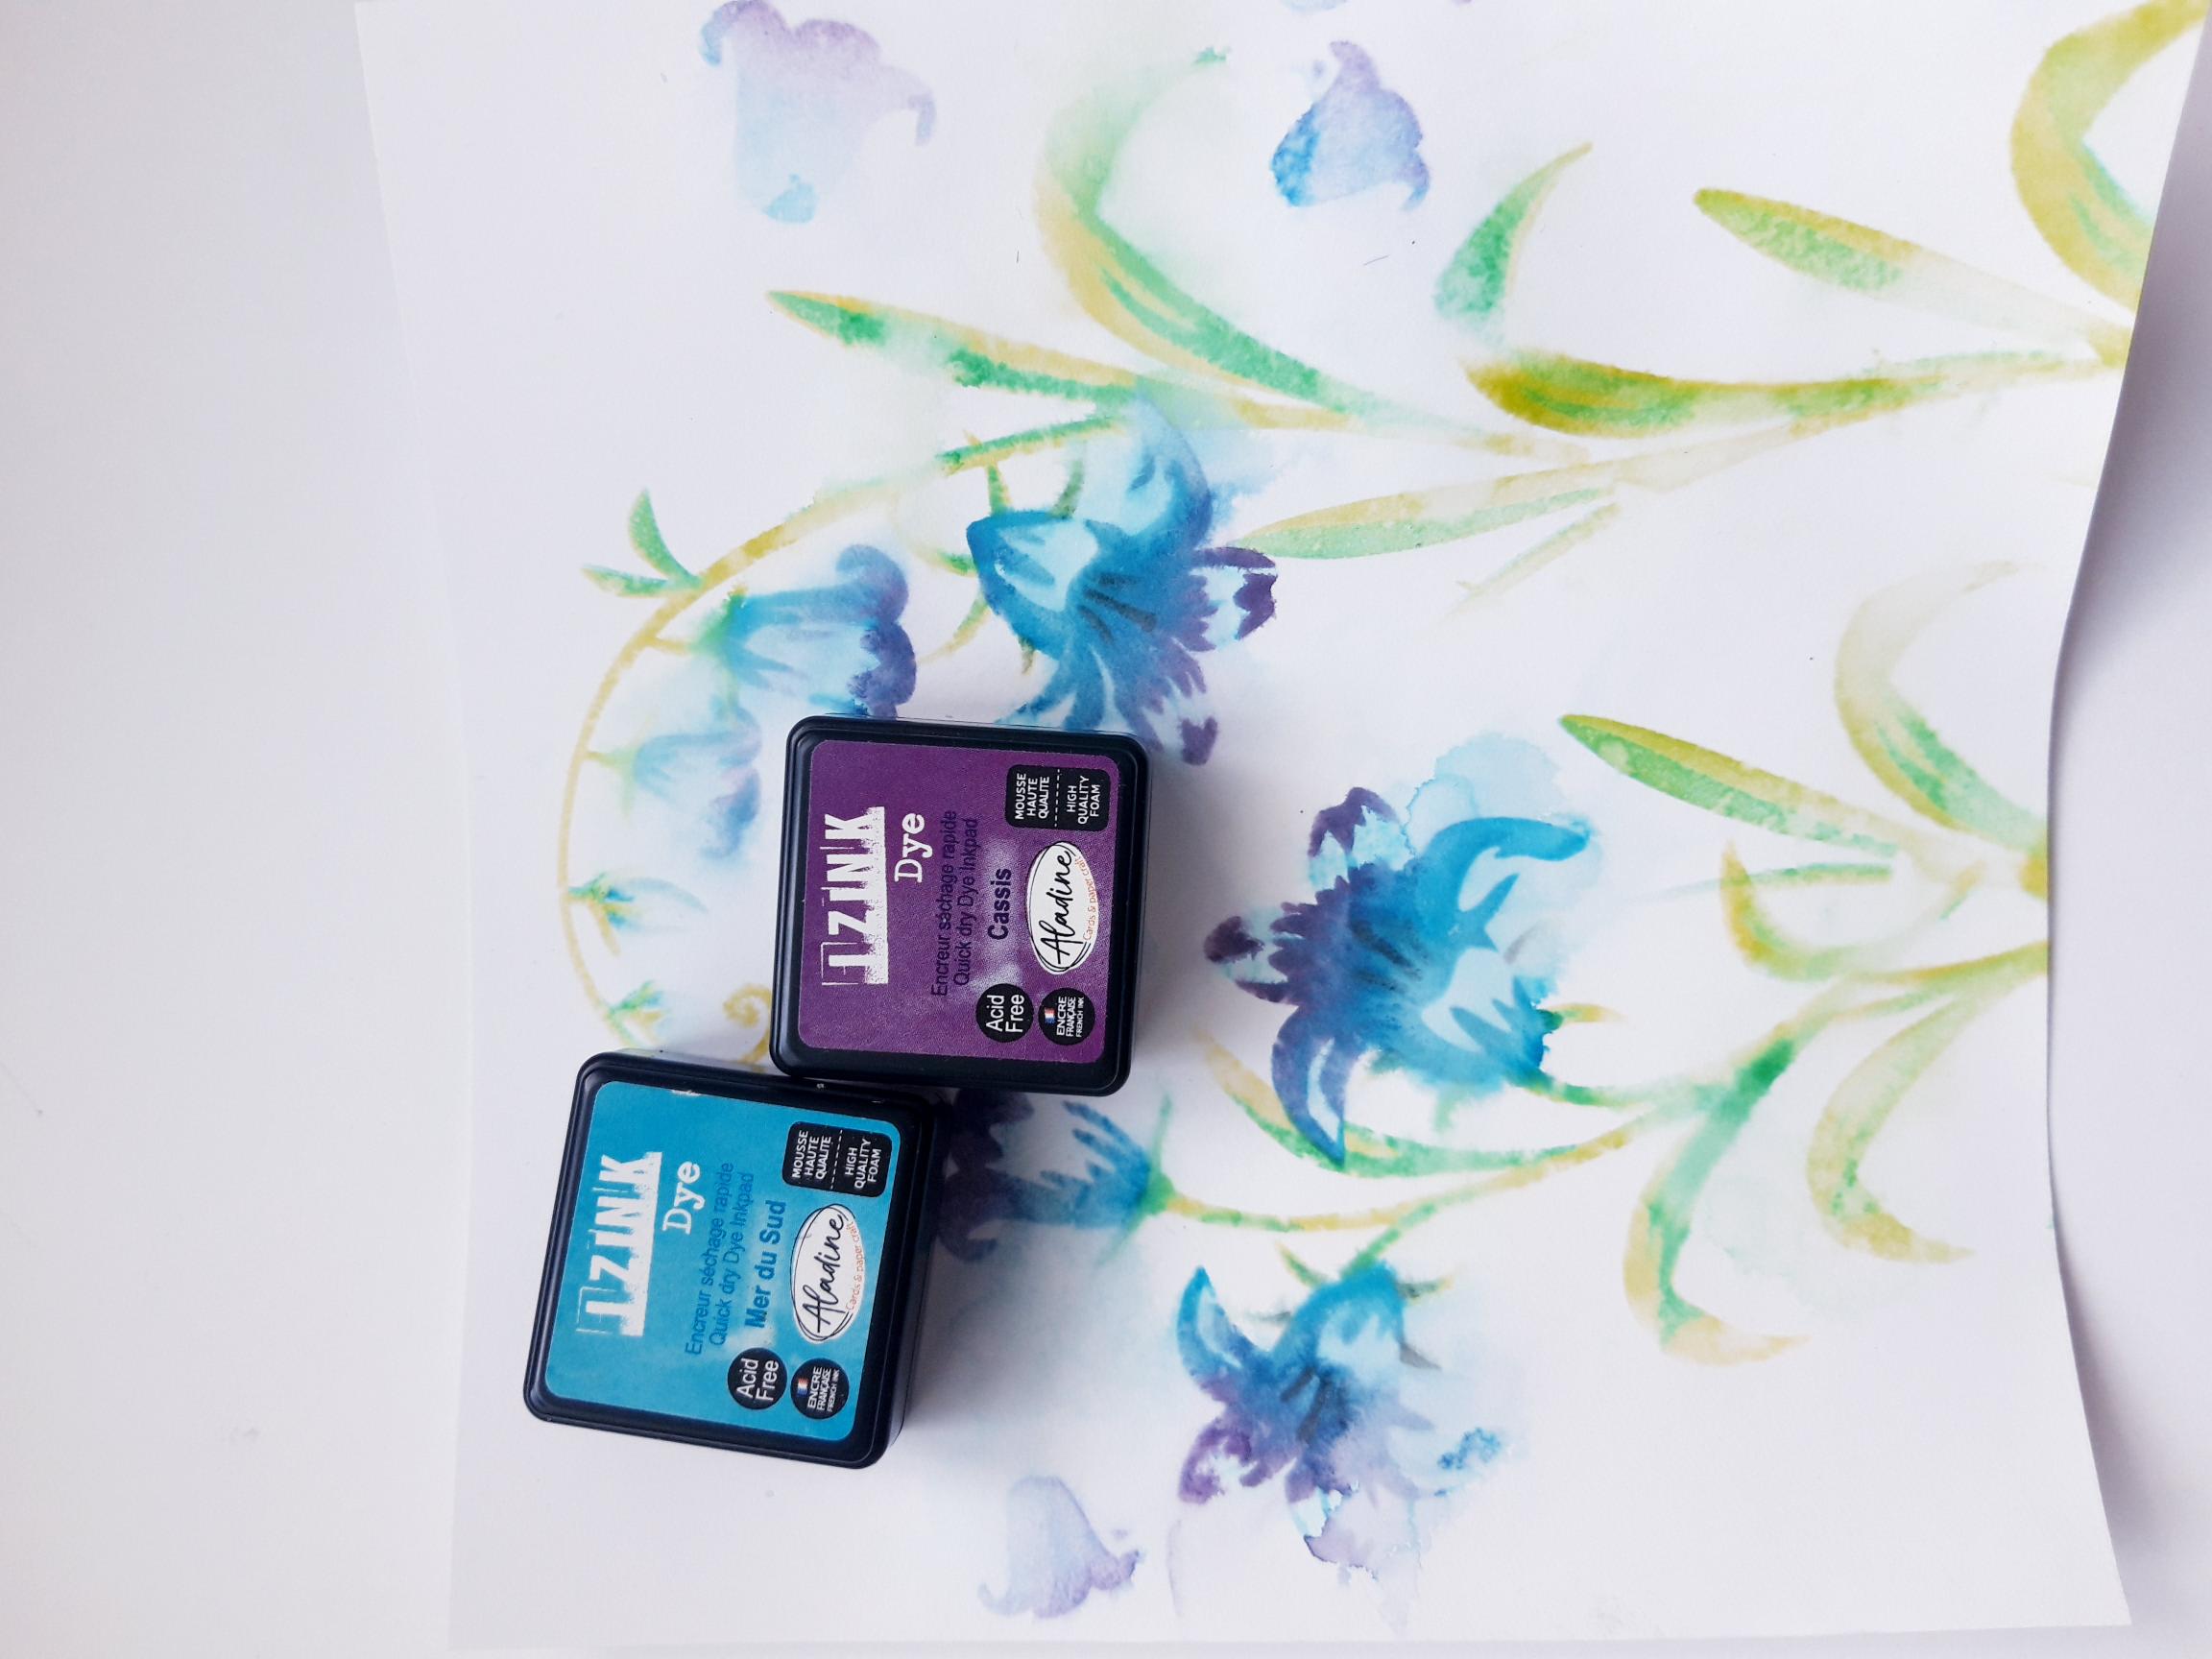
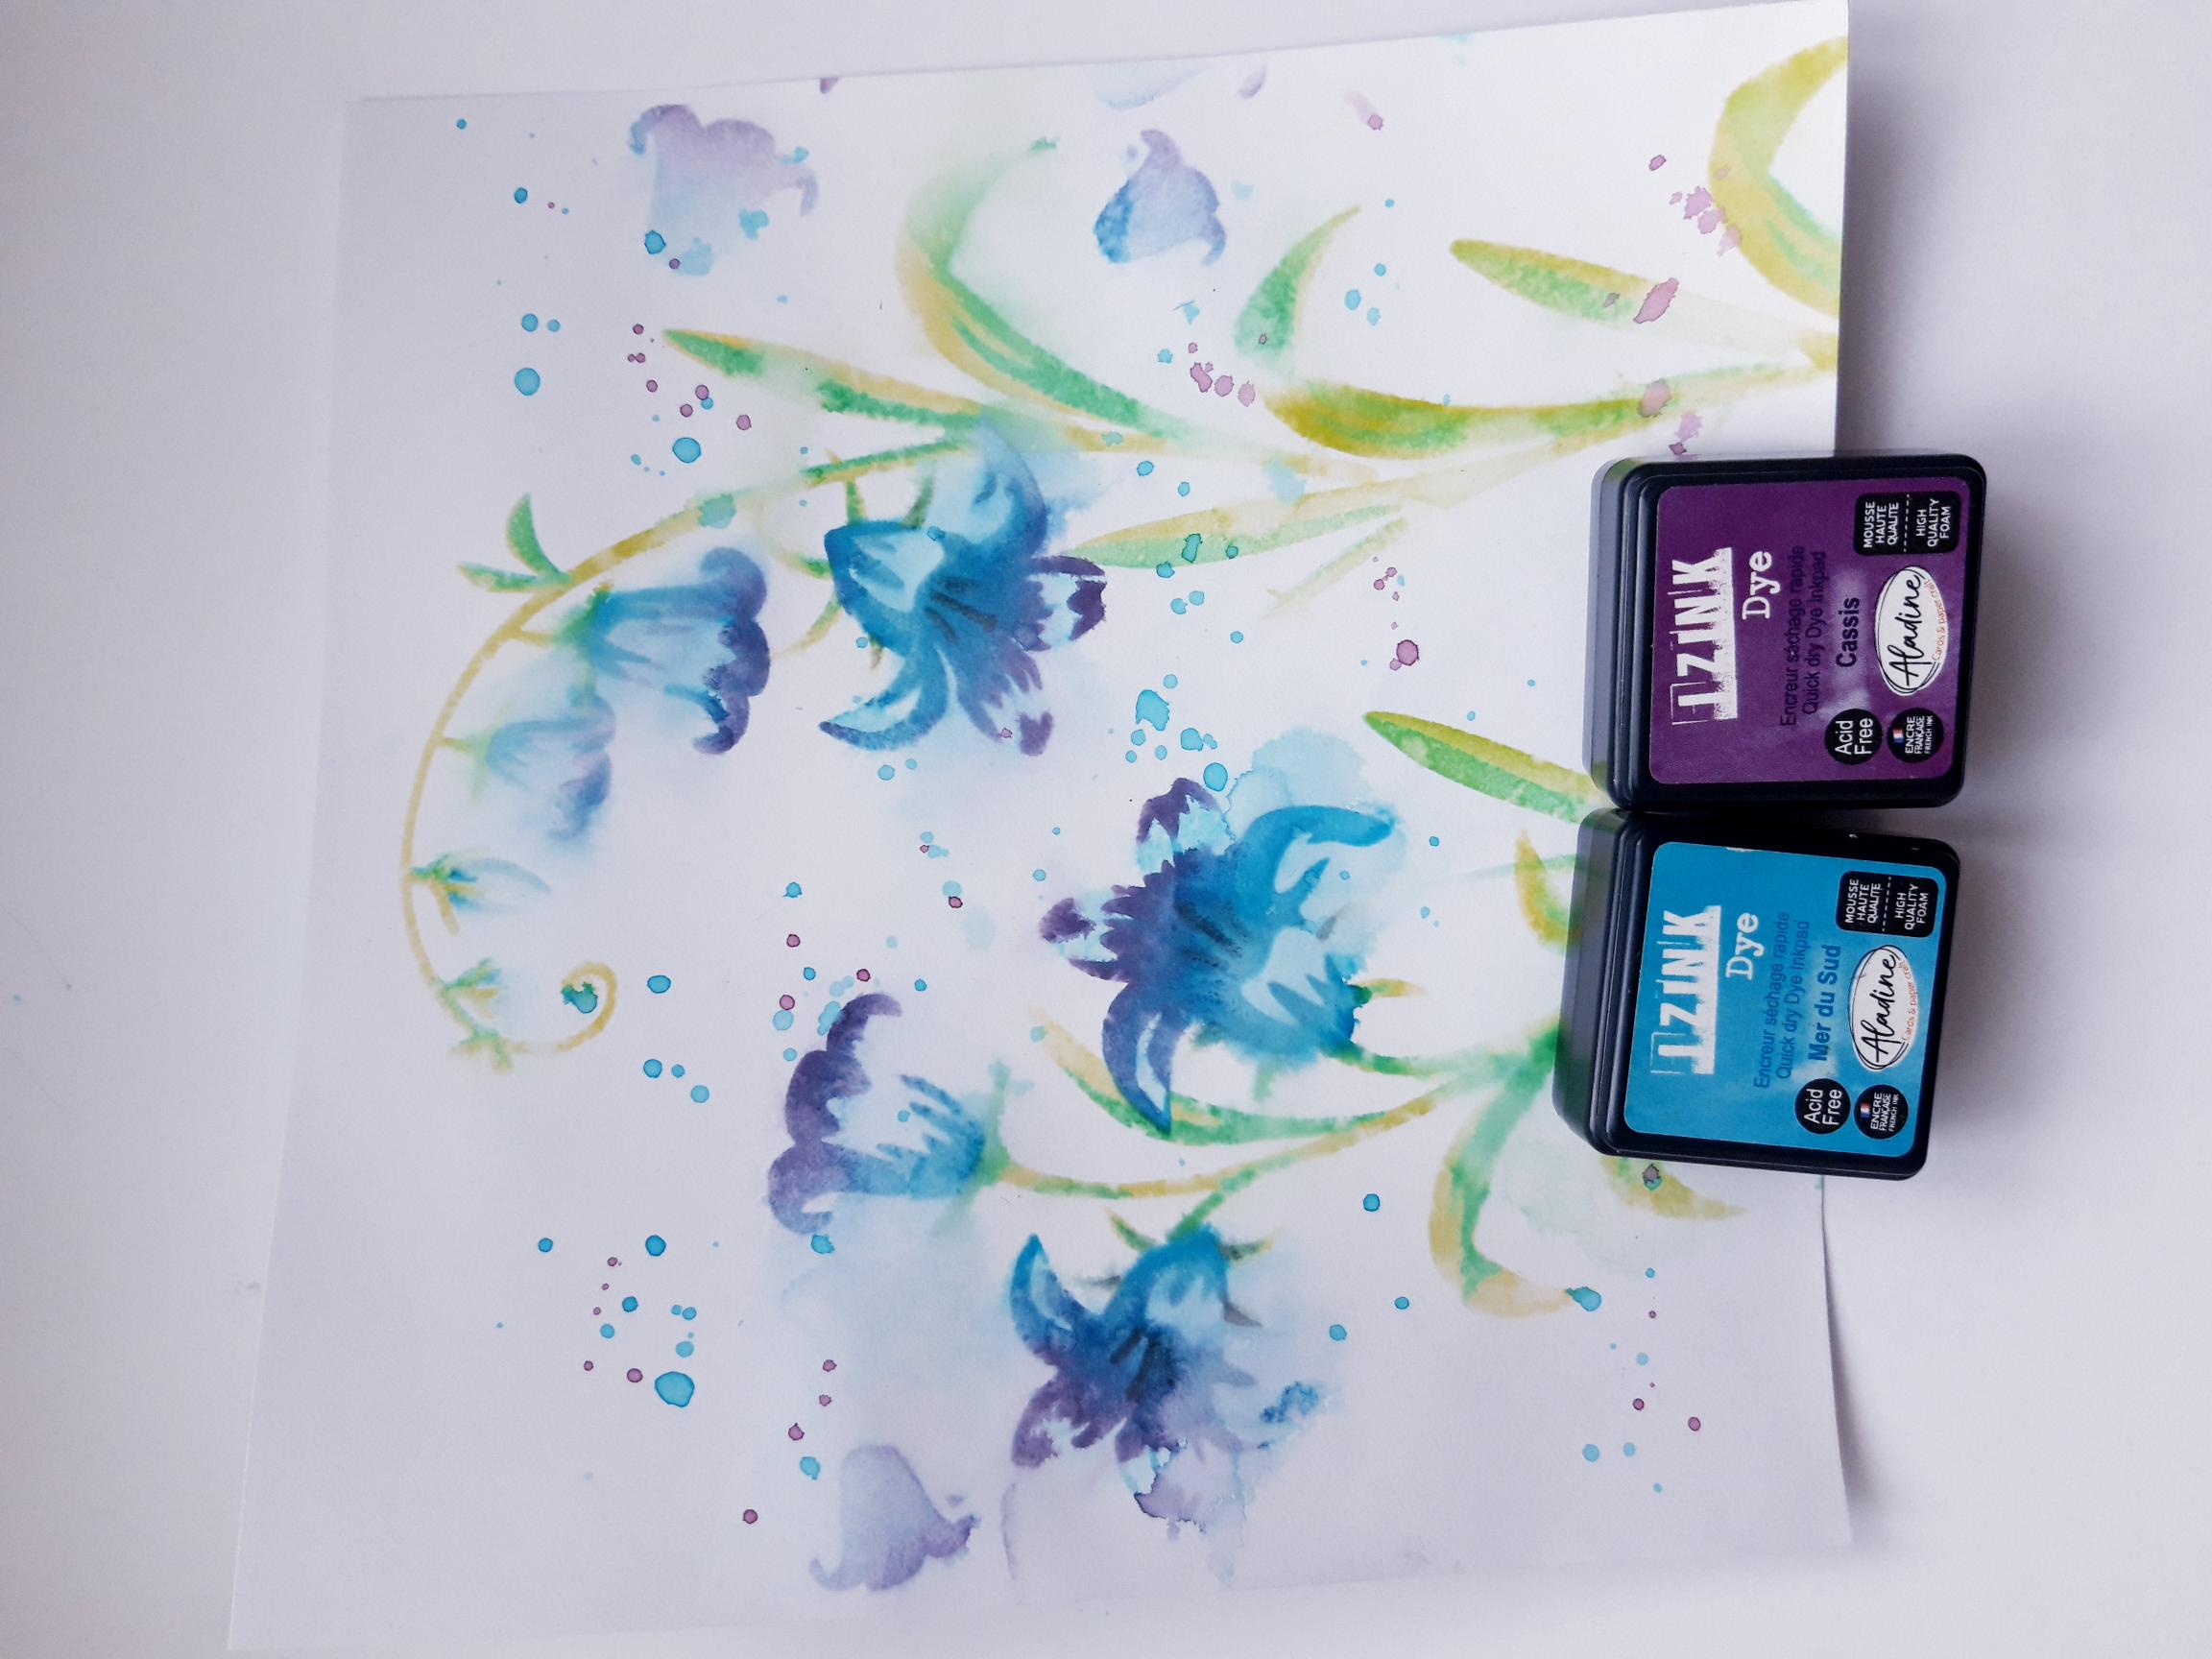
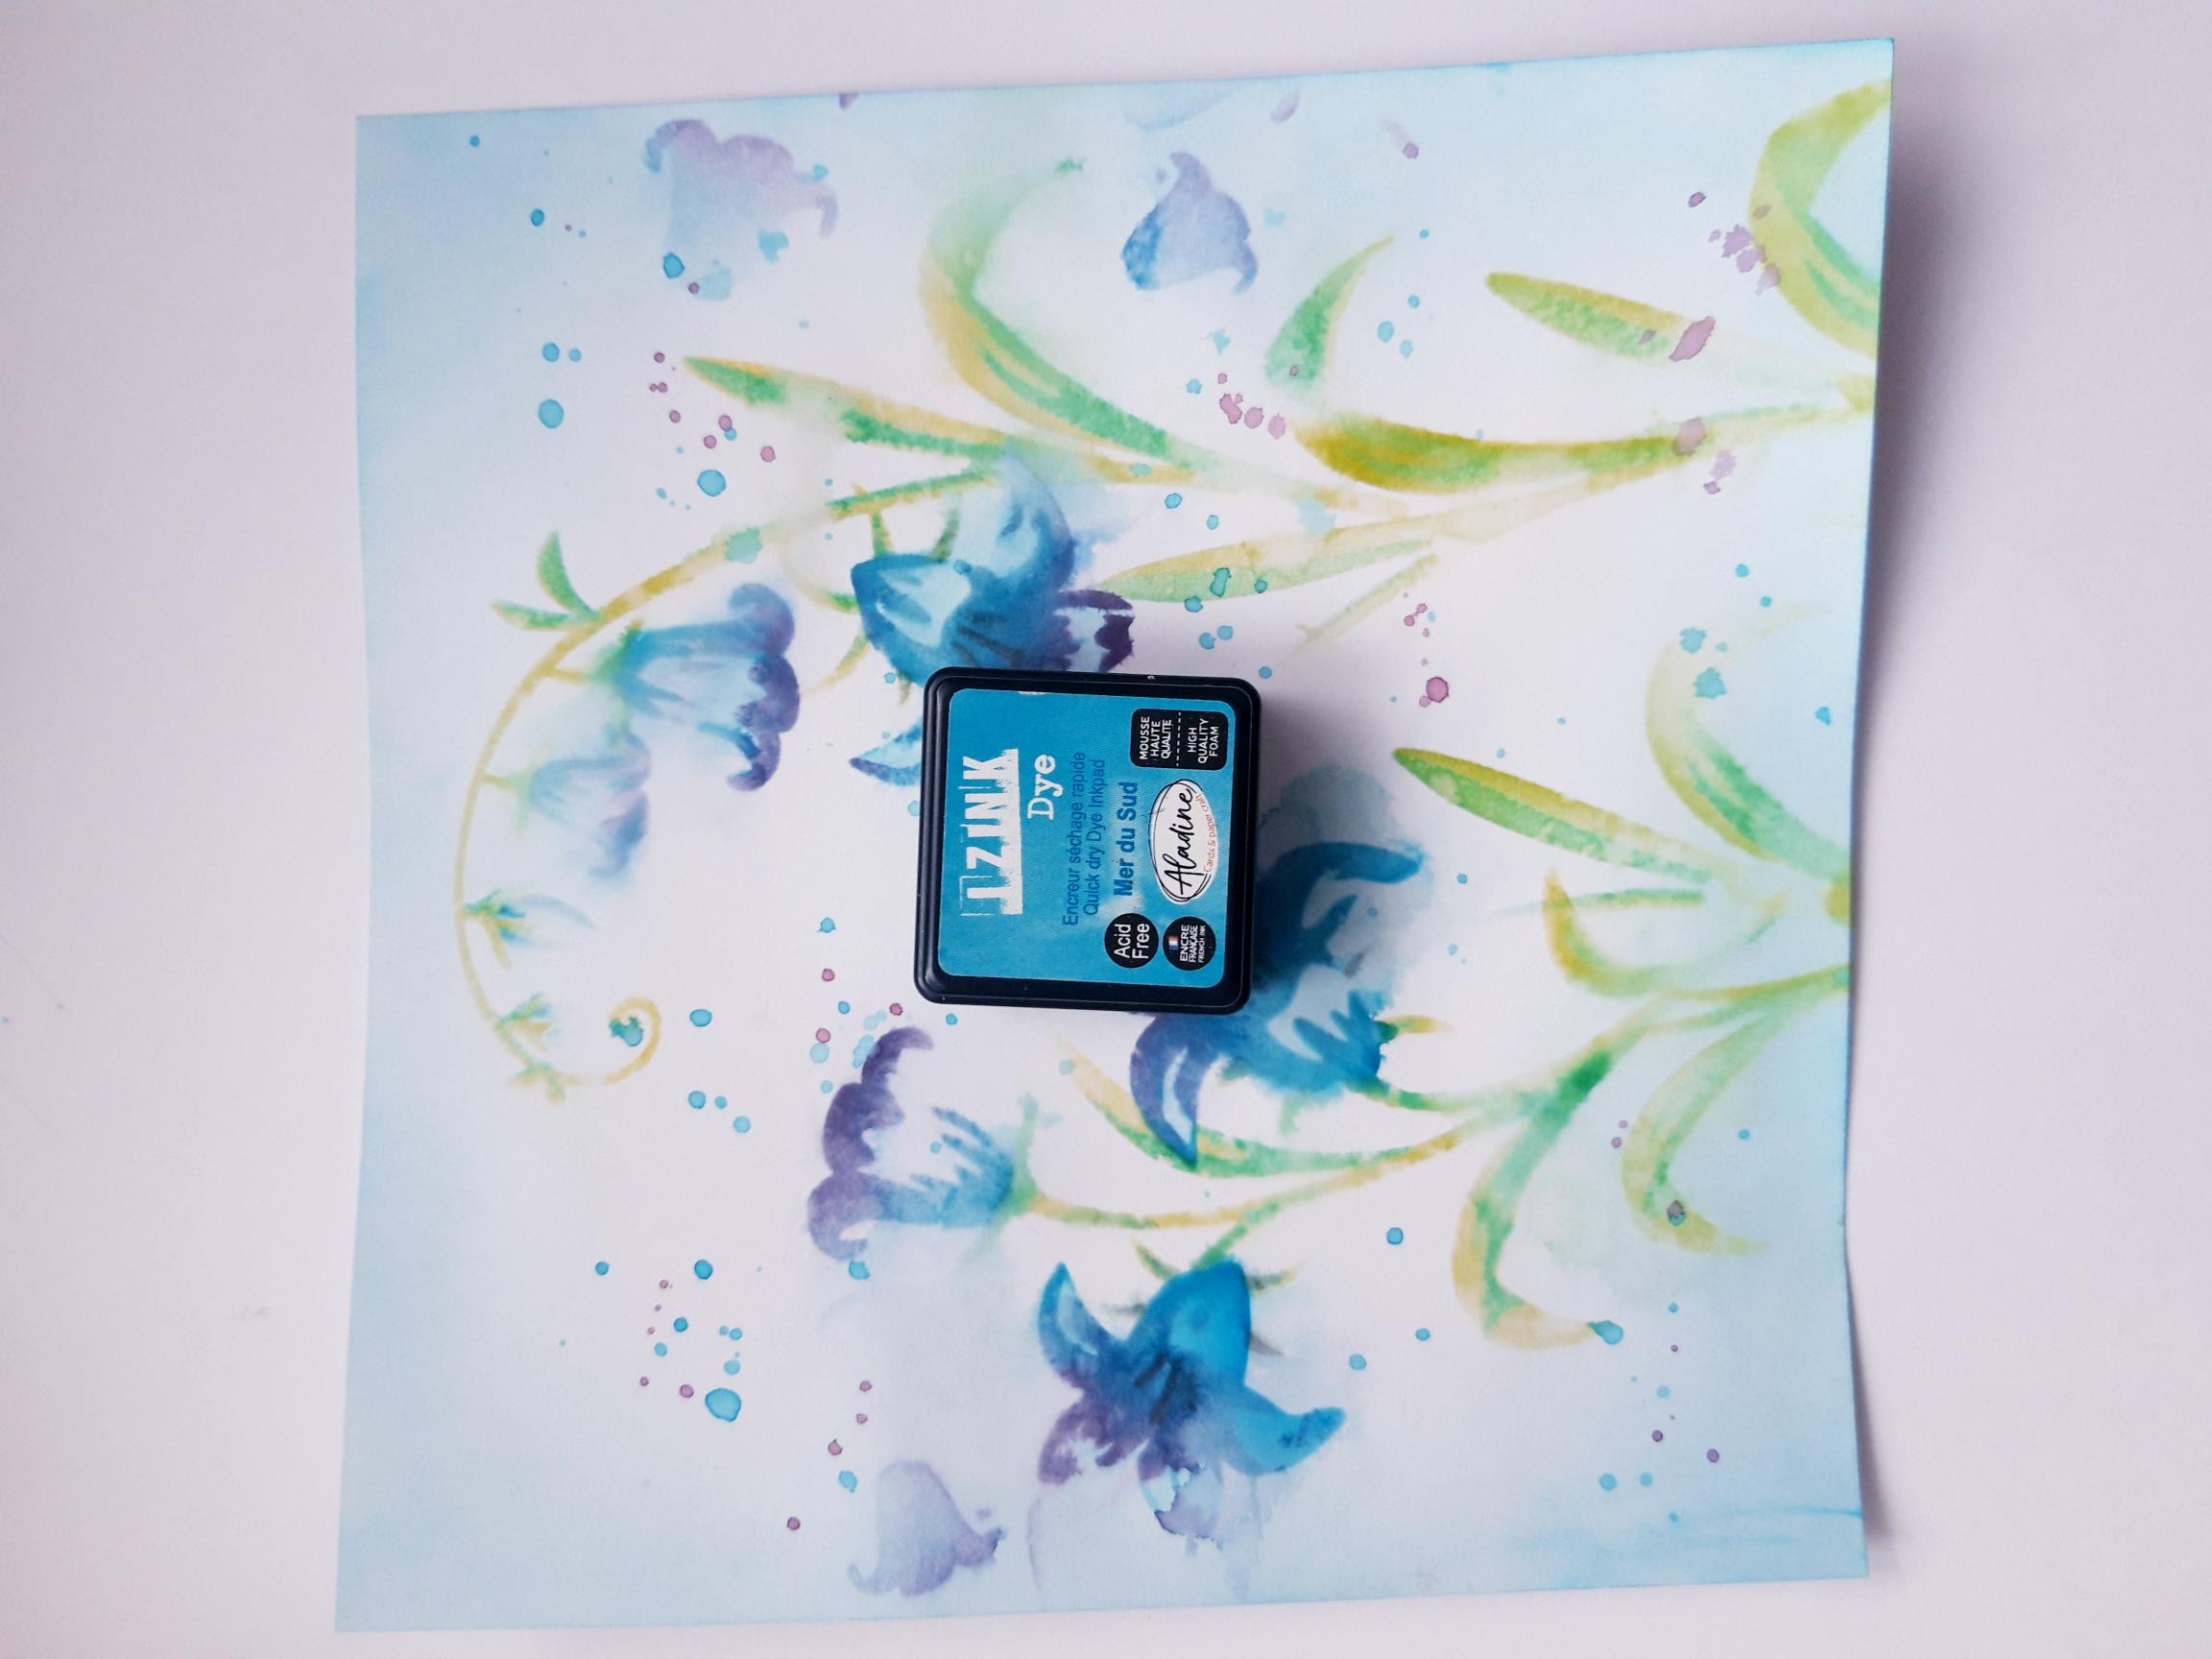
Aladine Izink Dye ink pad: Mer Du Sud, Petrole, Outremer, Cassis, Verveine, Menthe, Emeraude, Reglisse
Blending tool/brush
Water spray bottle
Paint brush
Eureka 101 Watercolour Tablet
Paper trimmer
Glue
[click image to enlarge] 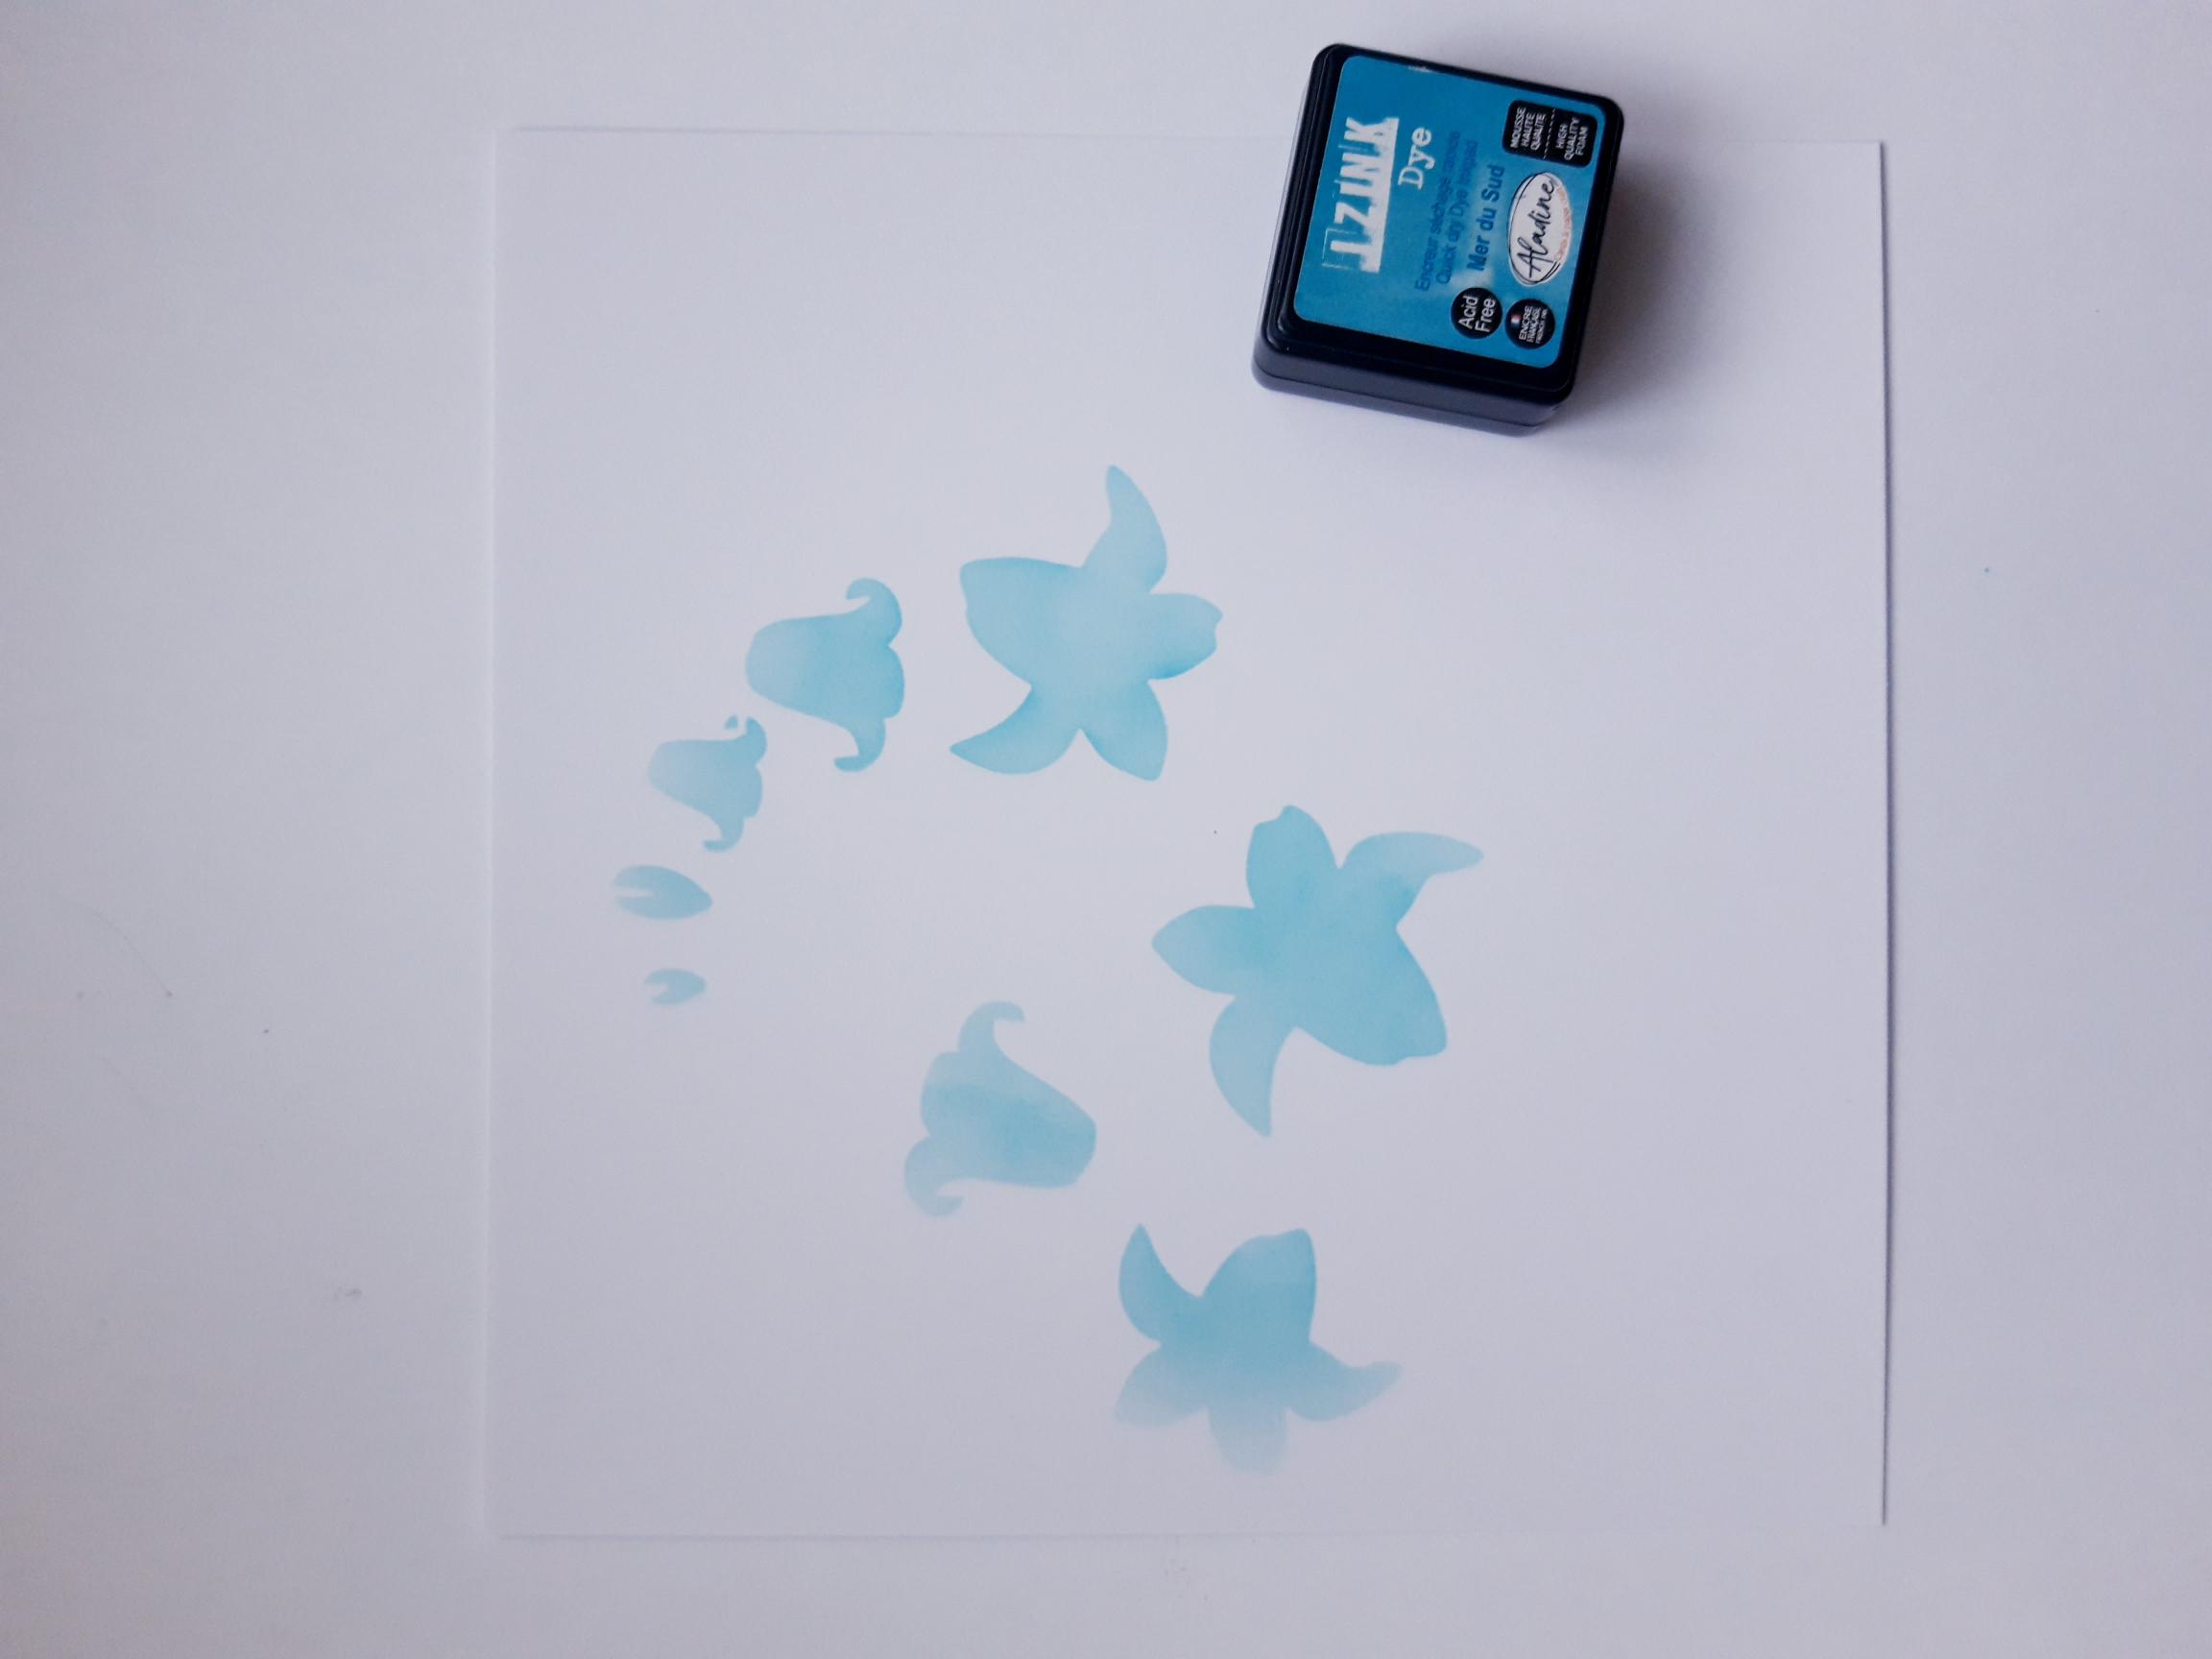
|
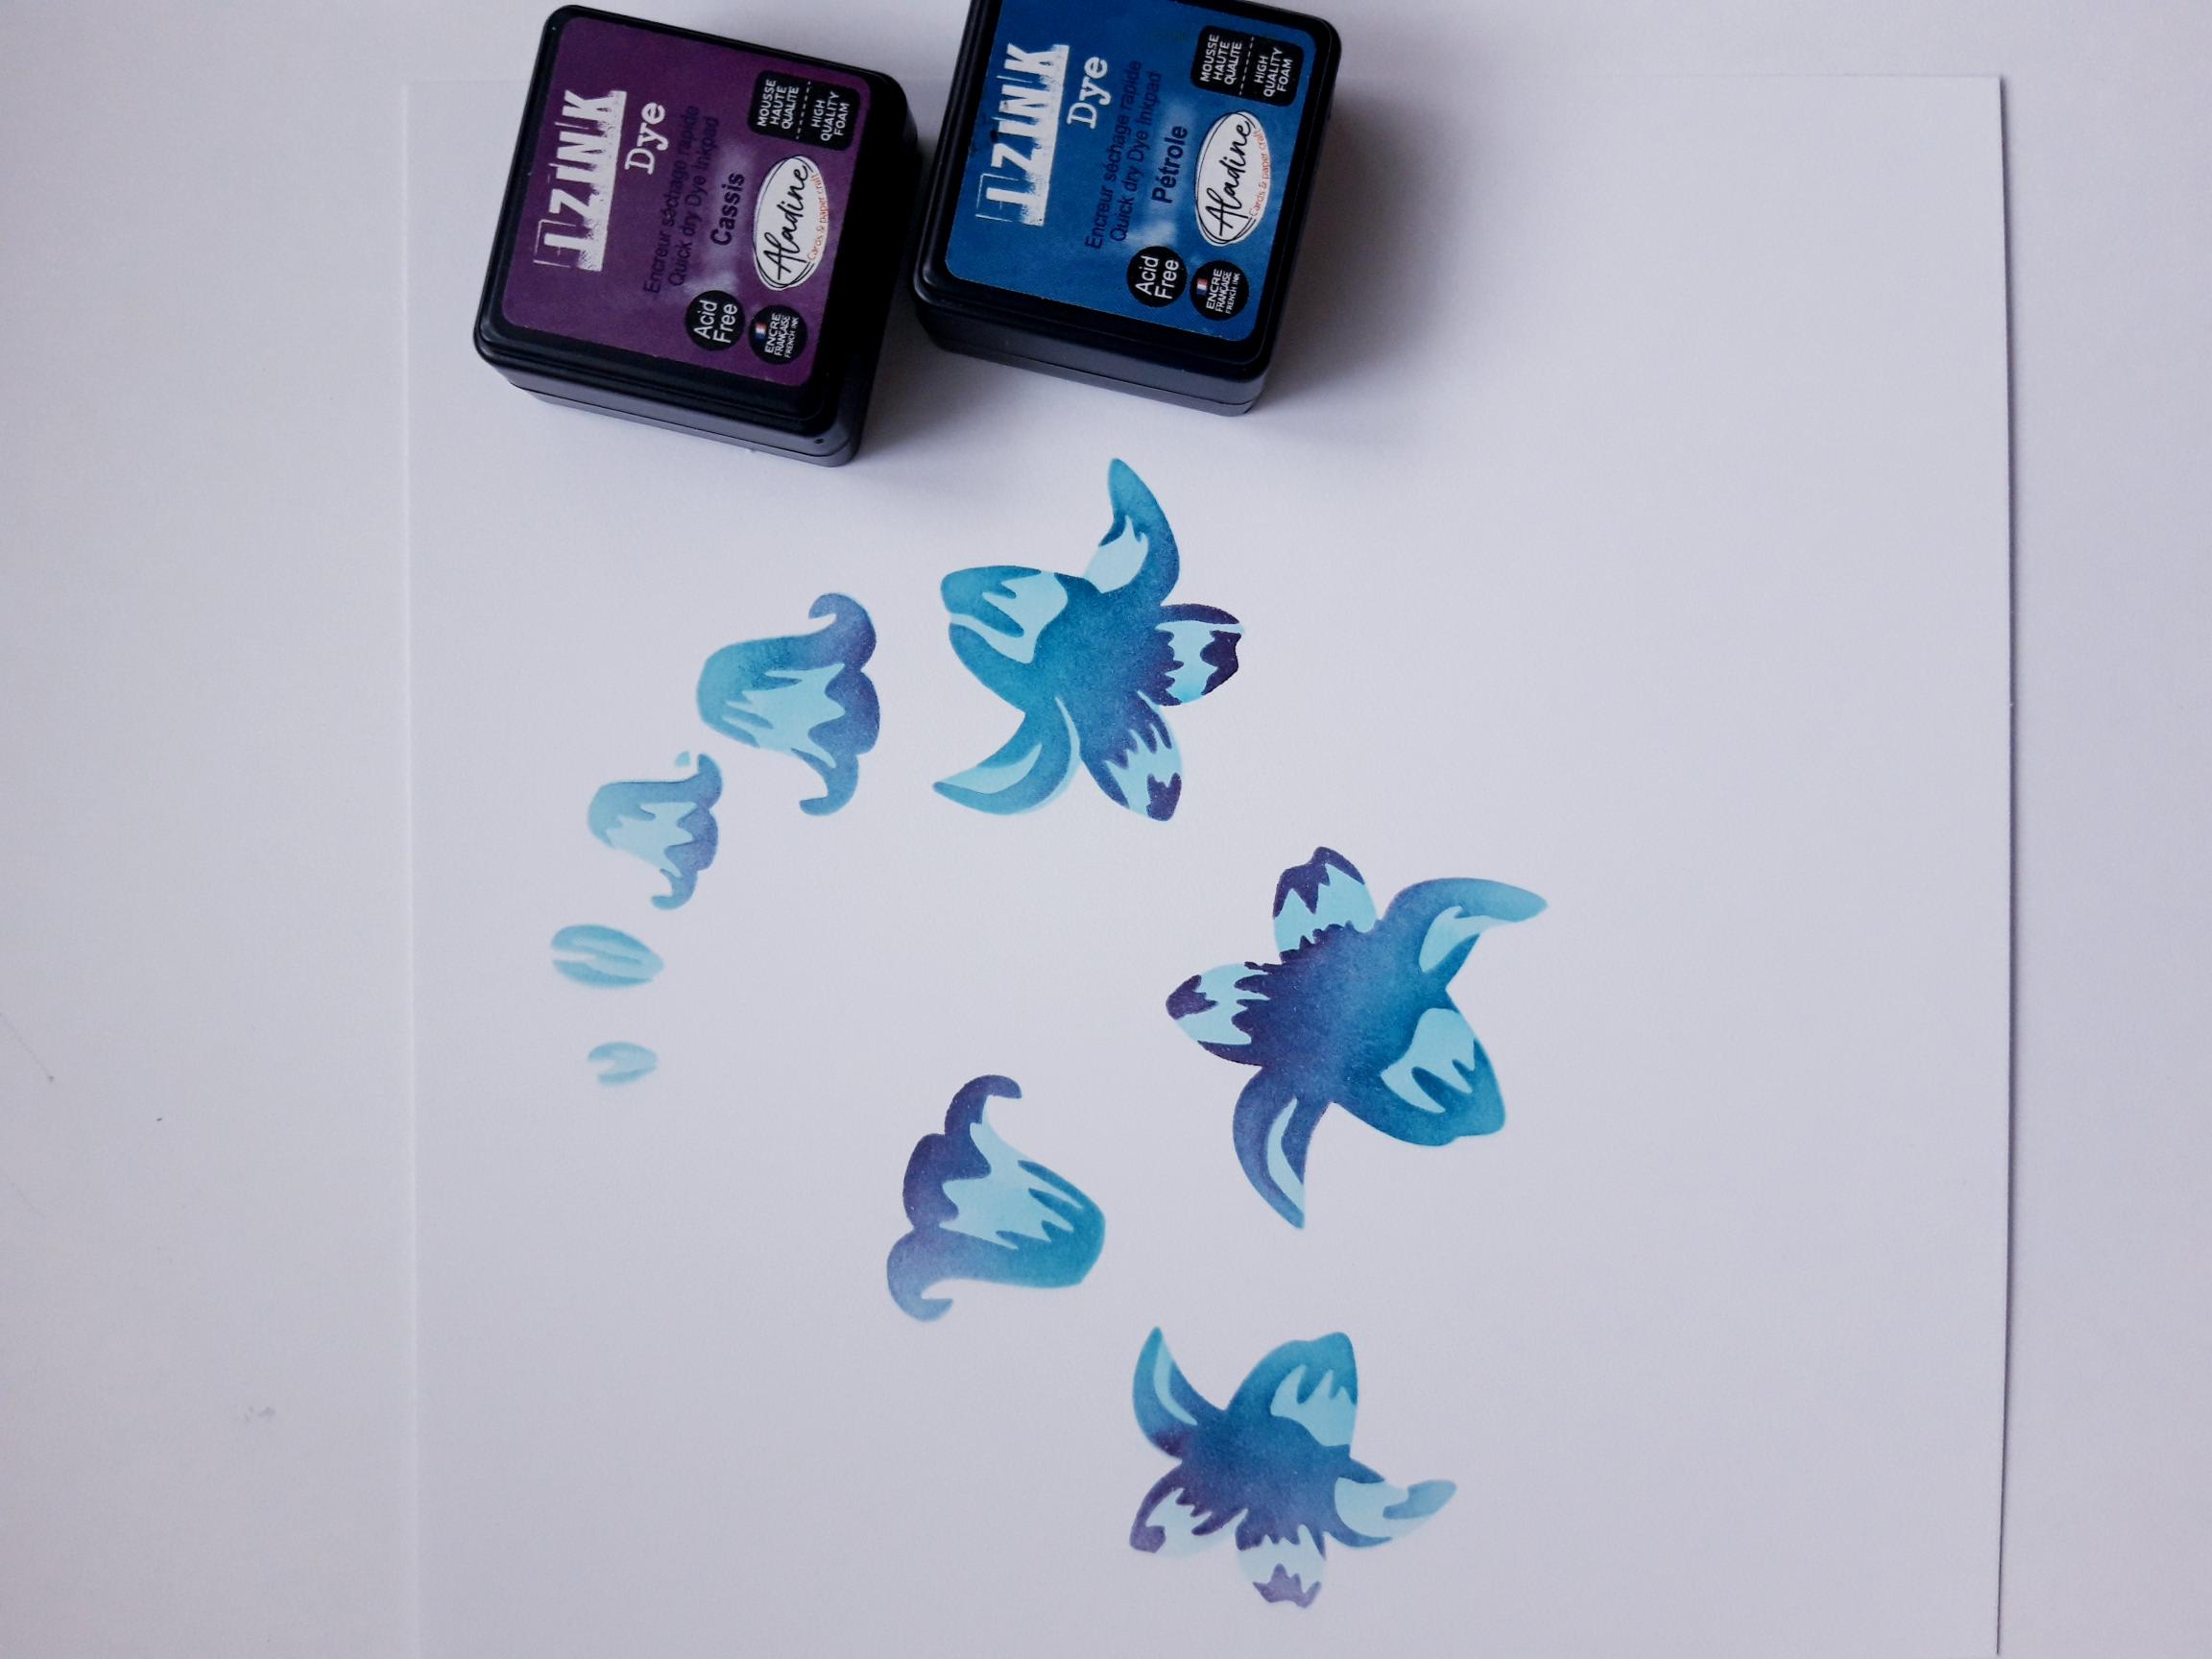
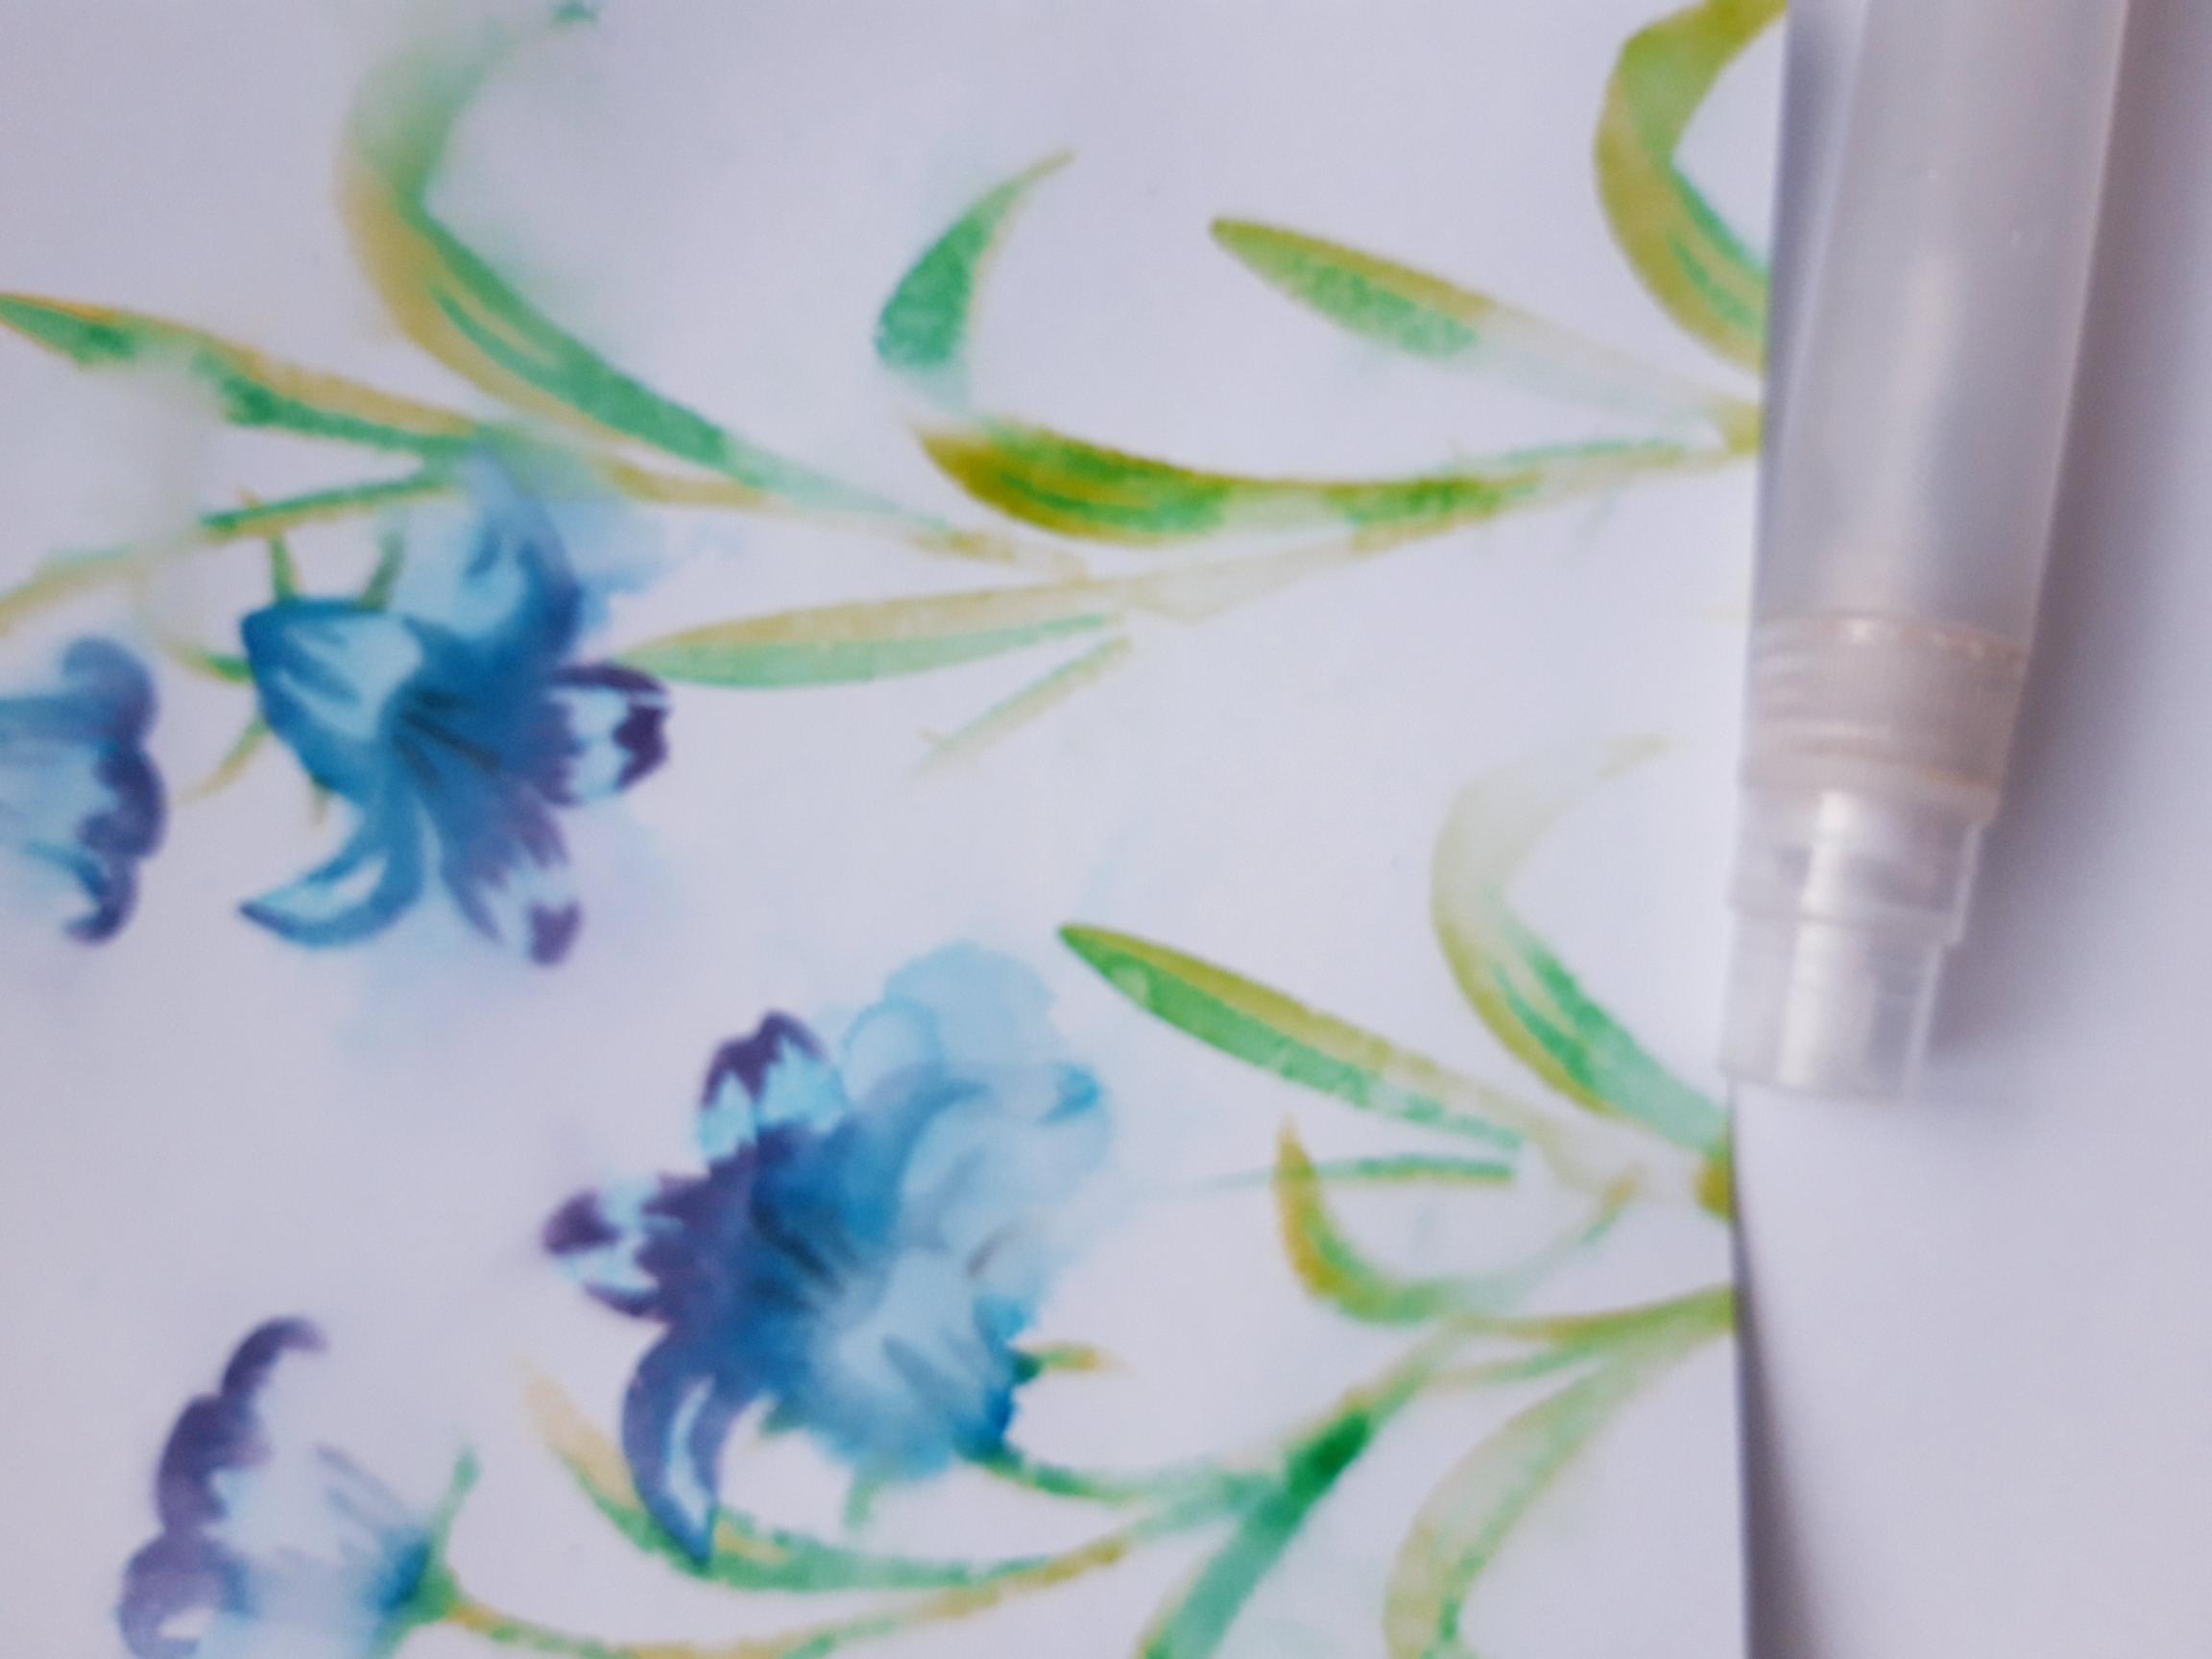
On a piece of white card cut to 6 x 6”, using the Izink Mer Du Sud ink pad and blending brush/tool, lightly add colour through stencil 1. The stencils are numbered in the top left hand corner, so ensure you can always see this, thus allowing your layering designs to line up perfectly. |
|
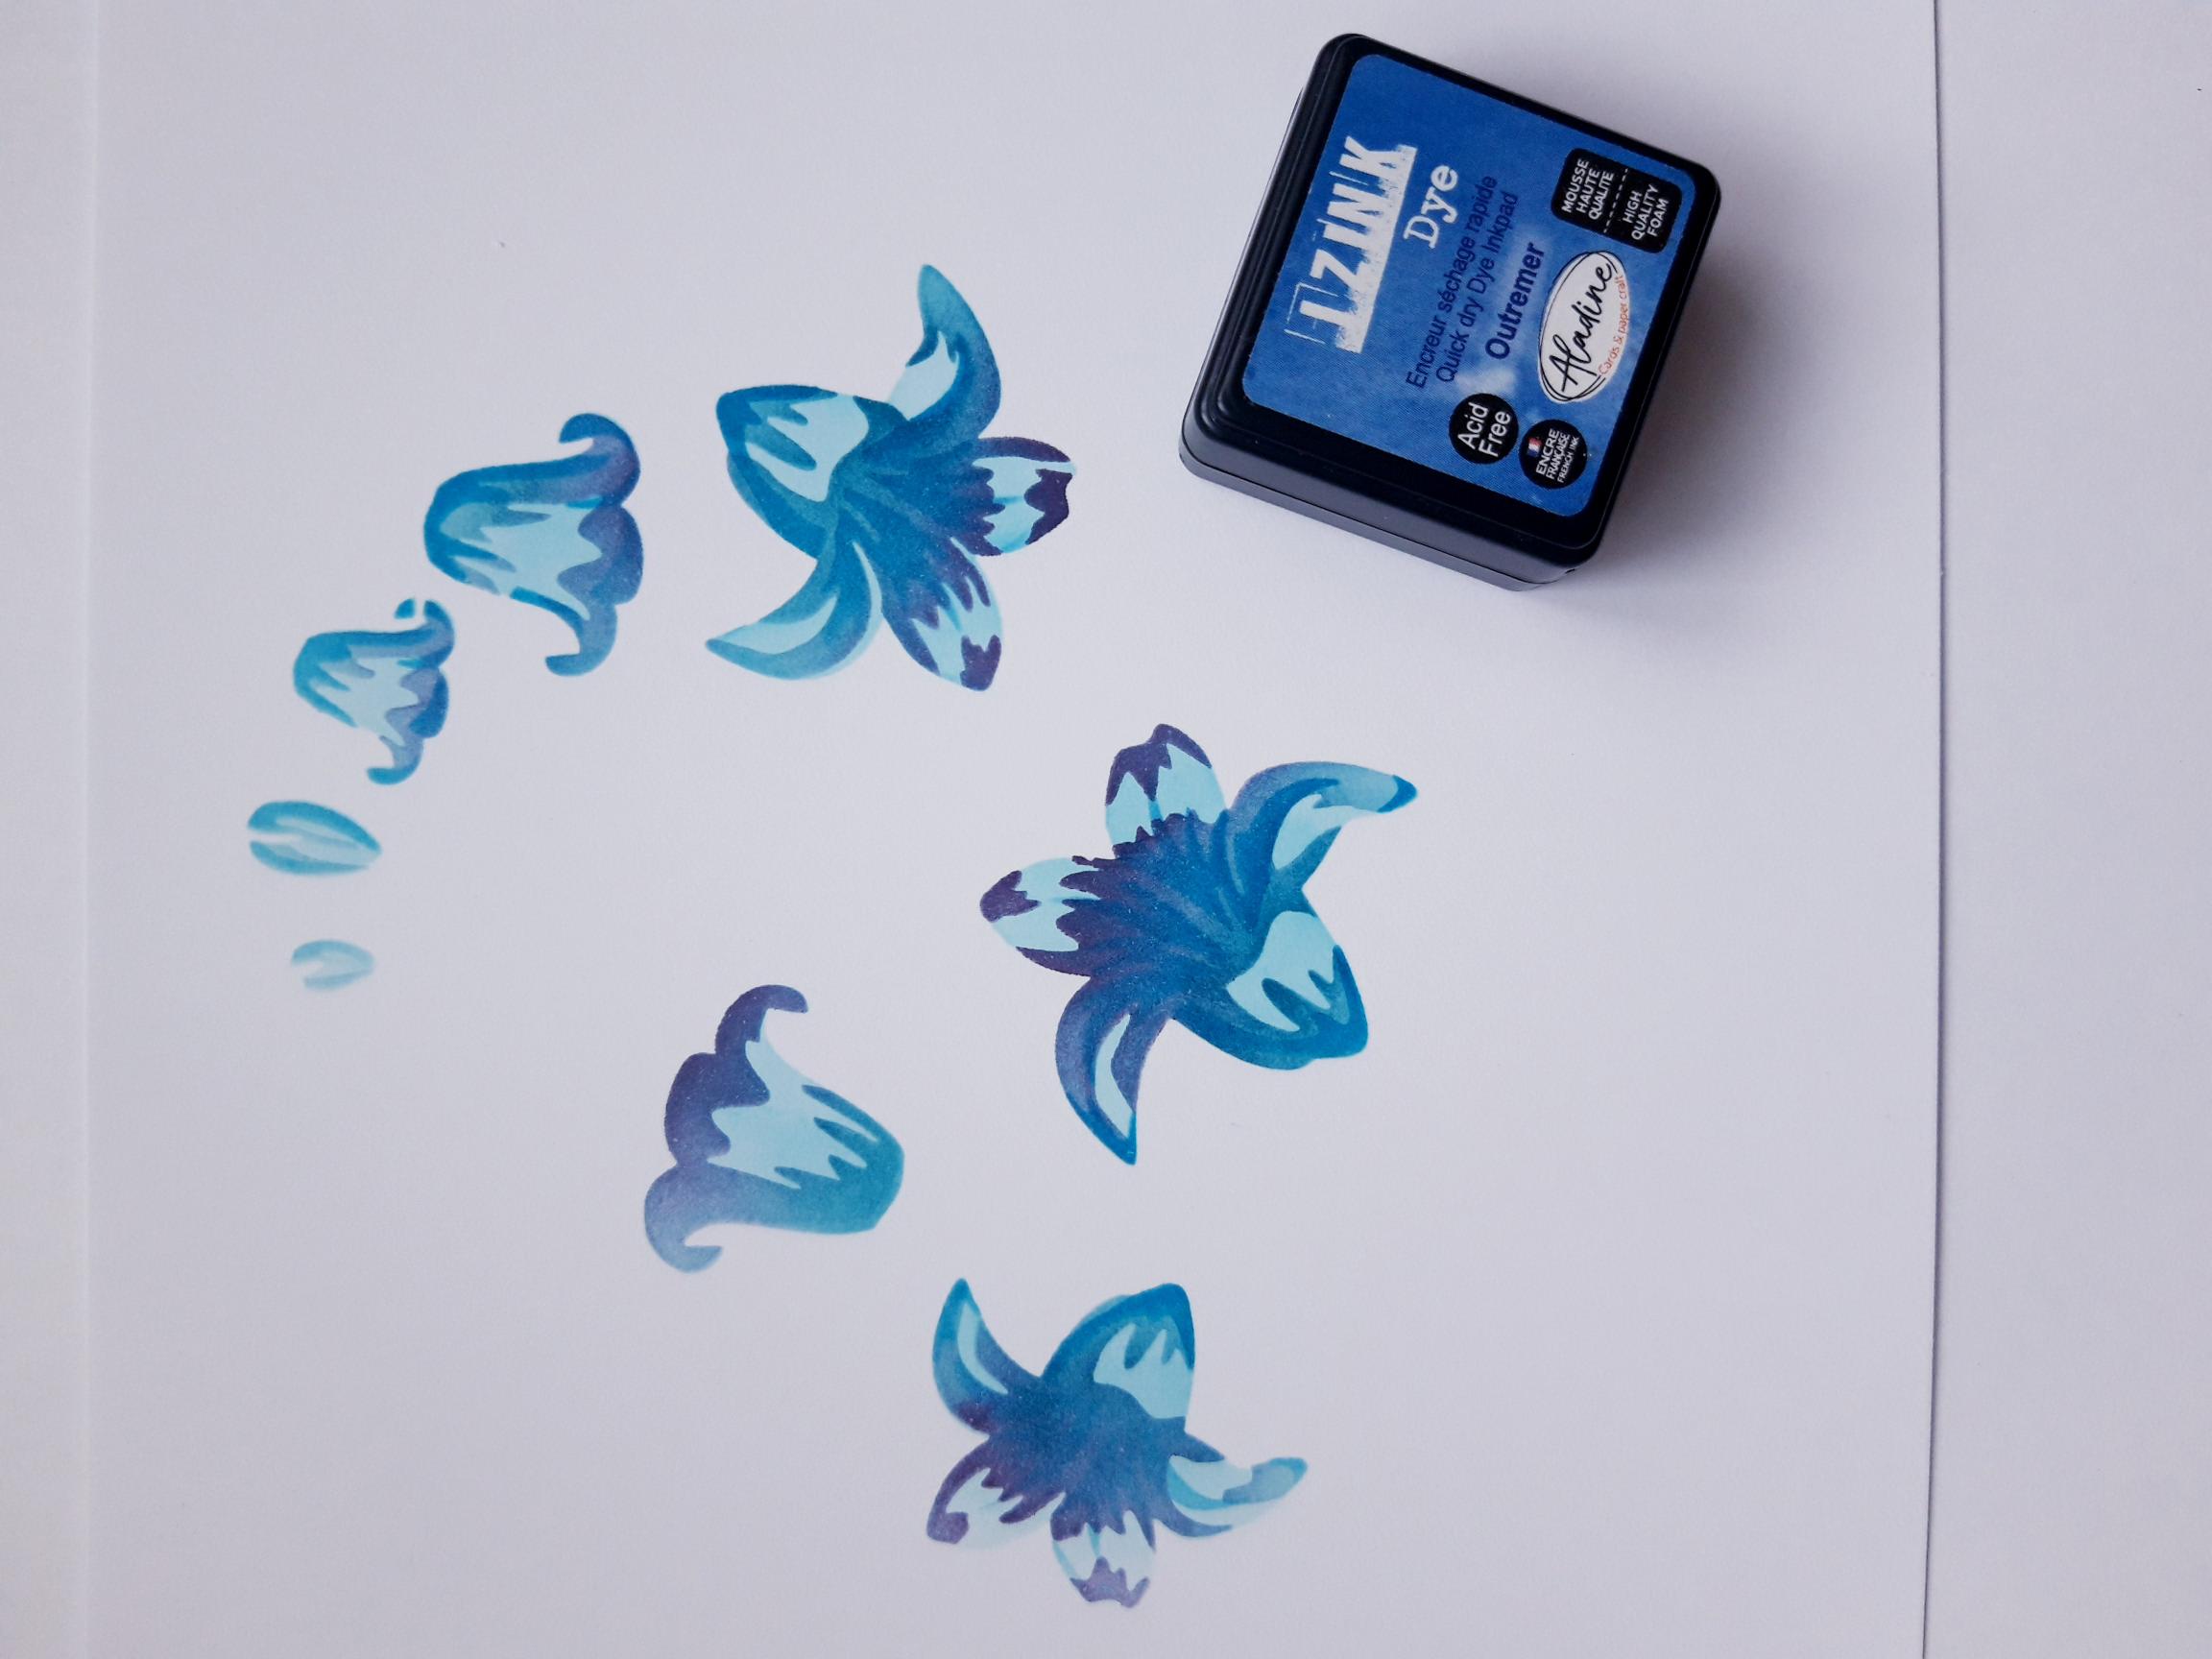
Line up stencil 2 and blend with the Izink Outremer. You can apply more ink where you think the shadow would be. |
|
Keeping the same stencil in place, blend the Izink Cassis on the tips of the Bluebells only. |
|
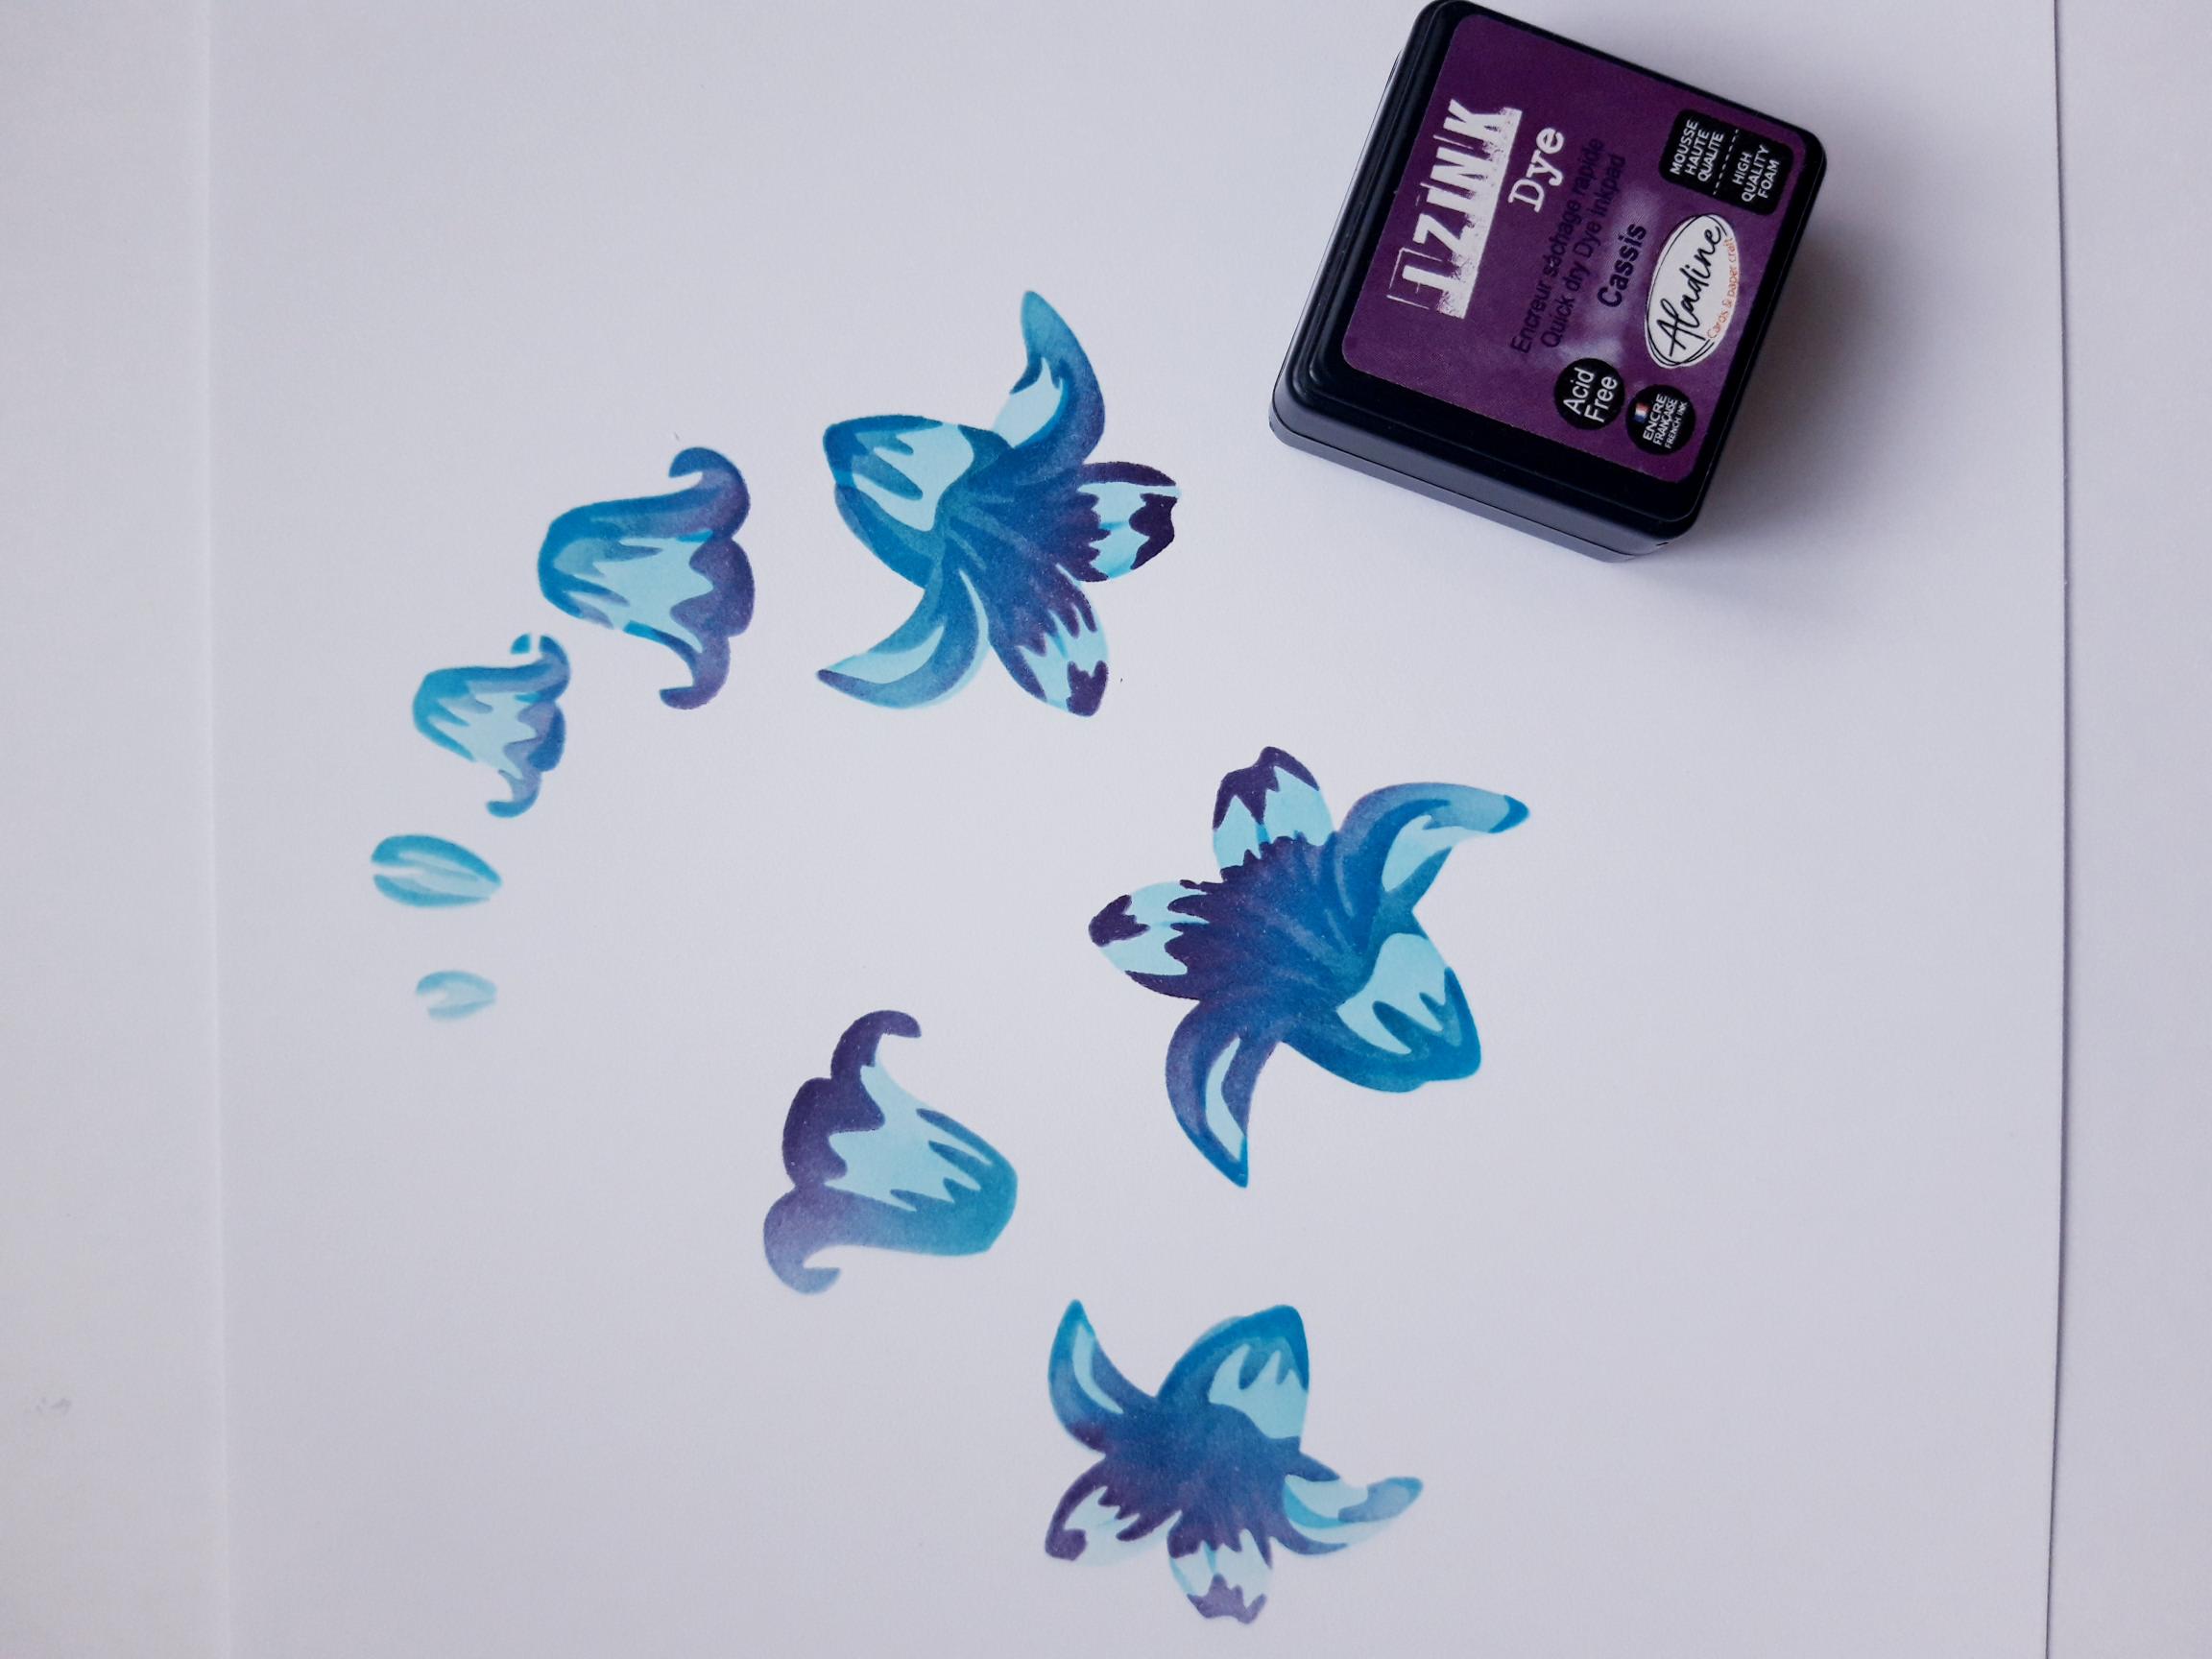
Line up stencil 3 and using the Petrole and Cassis ink pads, add more of an intense colour through the stencil. |
|
Line up stencil 4 and lightly blend together the Verveine and Menthe. |
|
Position stencil 5 in place and add Emeraude on the foliage and Reglisse to the centres of the Bluebells. |
|
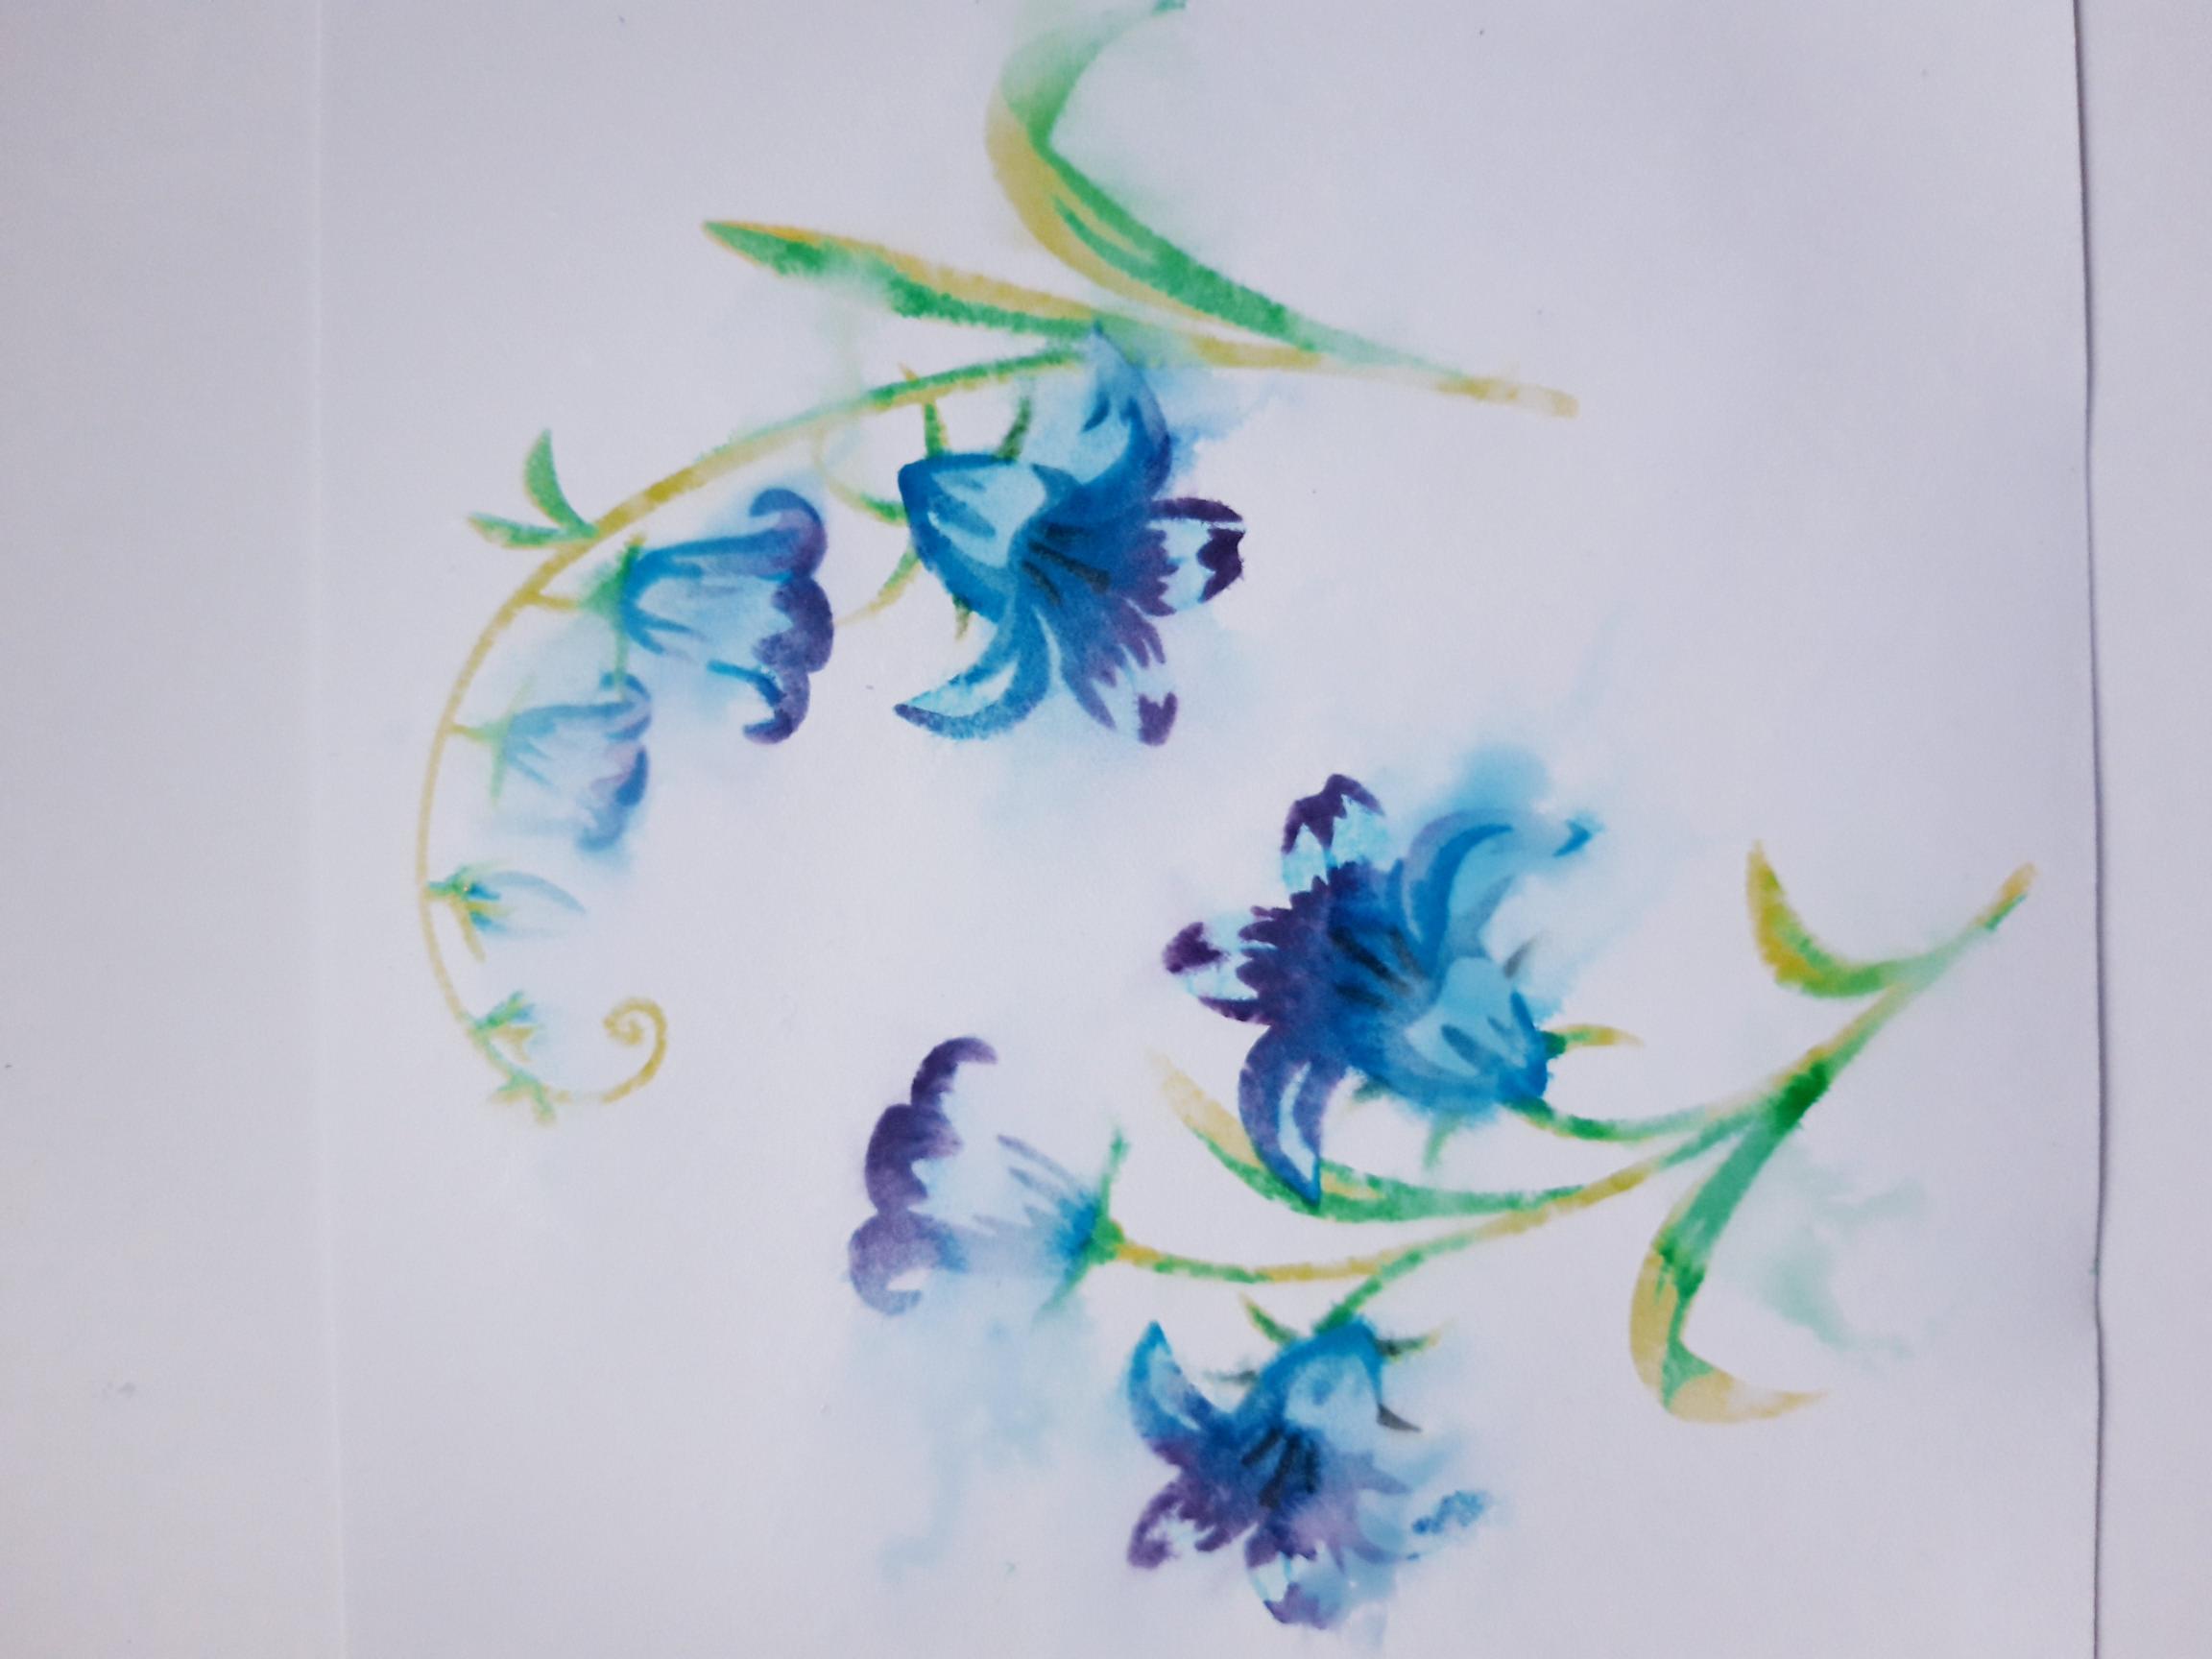
Now to be brave.....lightly spritz water on to your stencilled image! Wait a few seconds, allowing the ink to “bleed”, then mop up the excess water with a paper towel. |
|
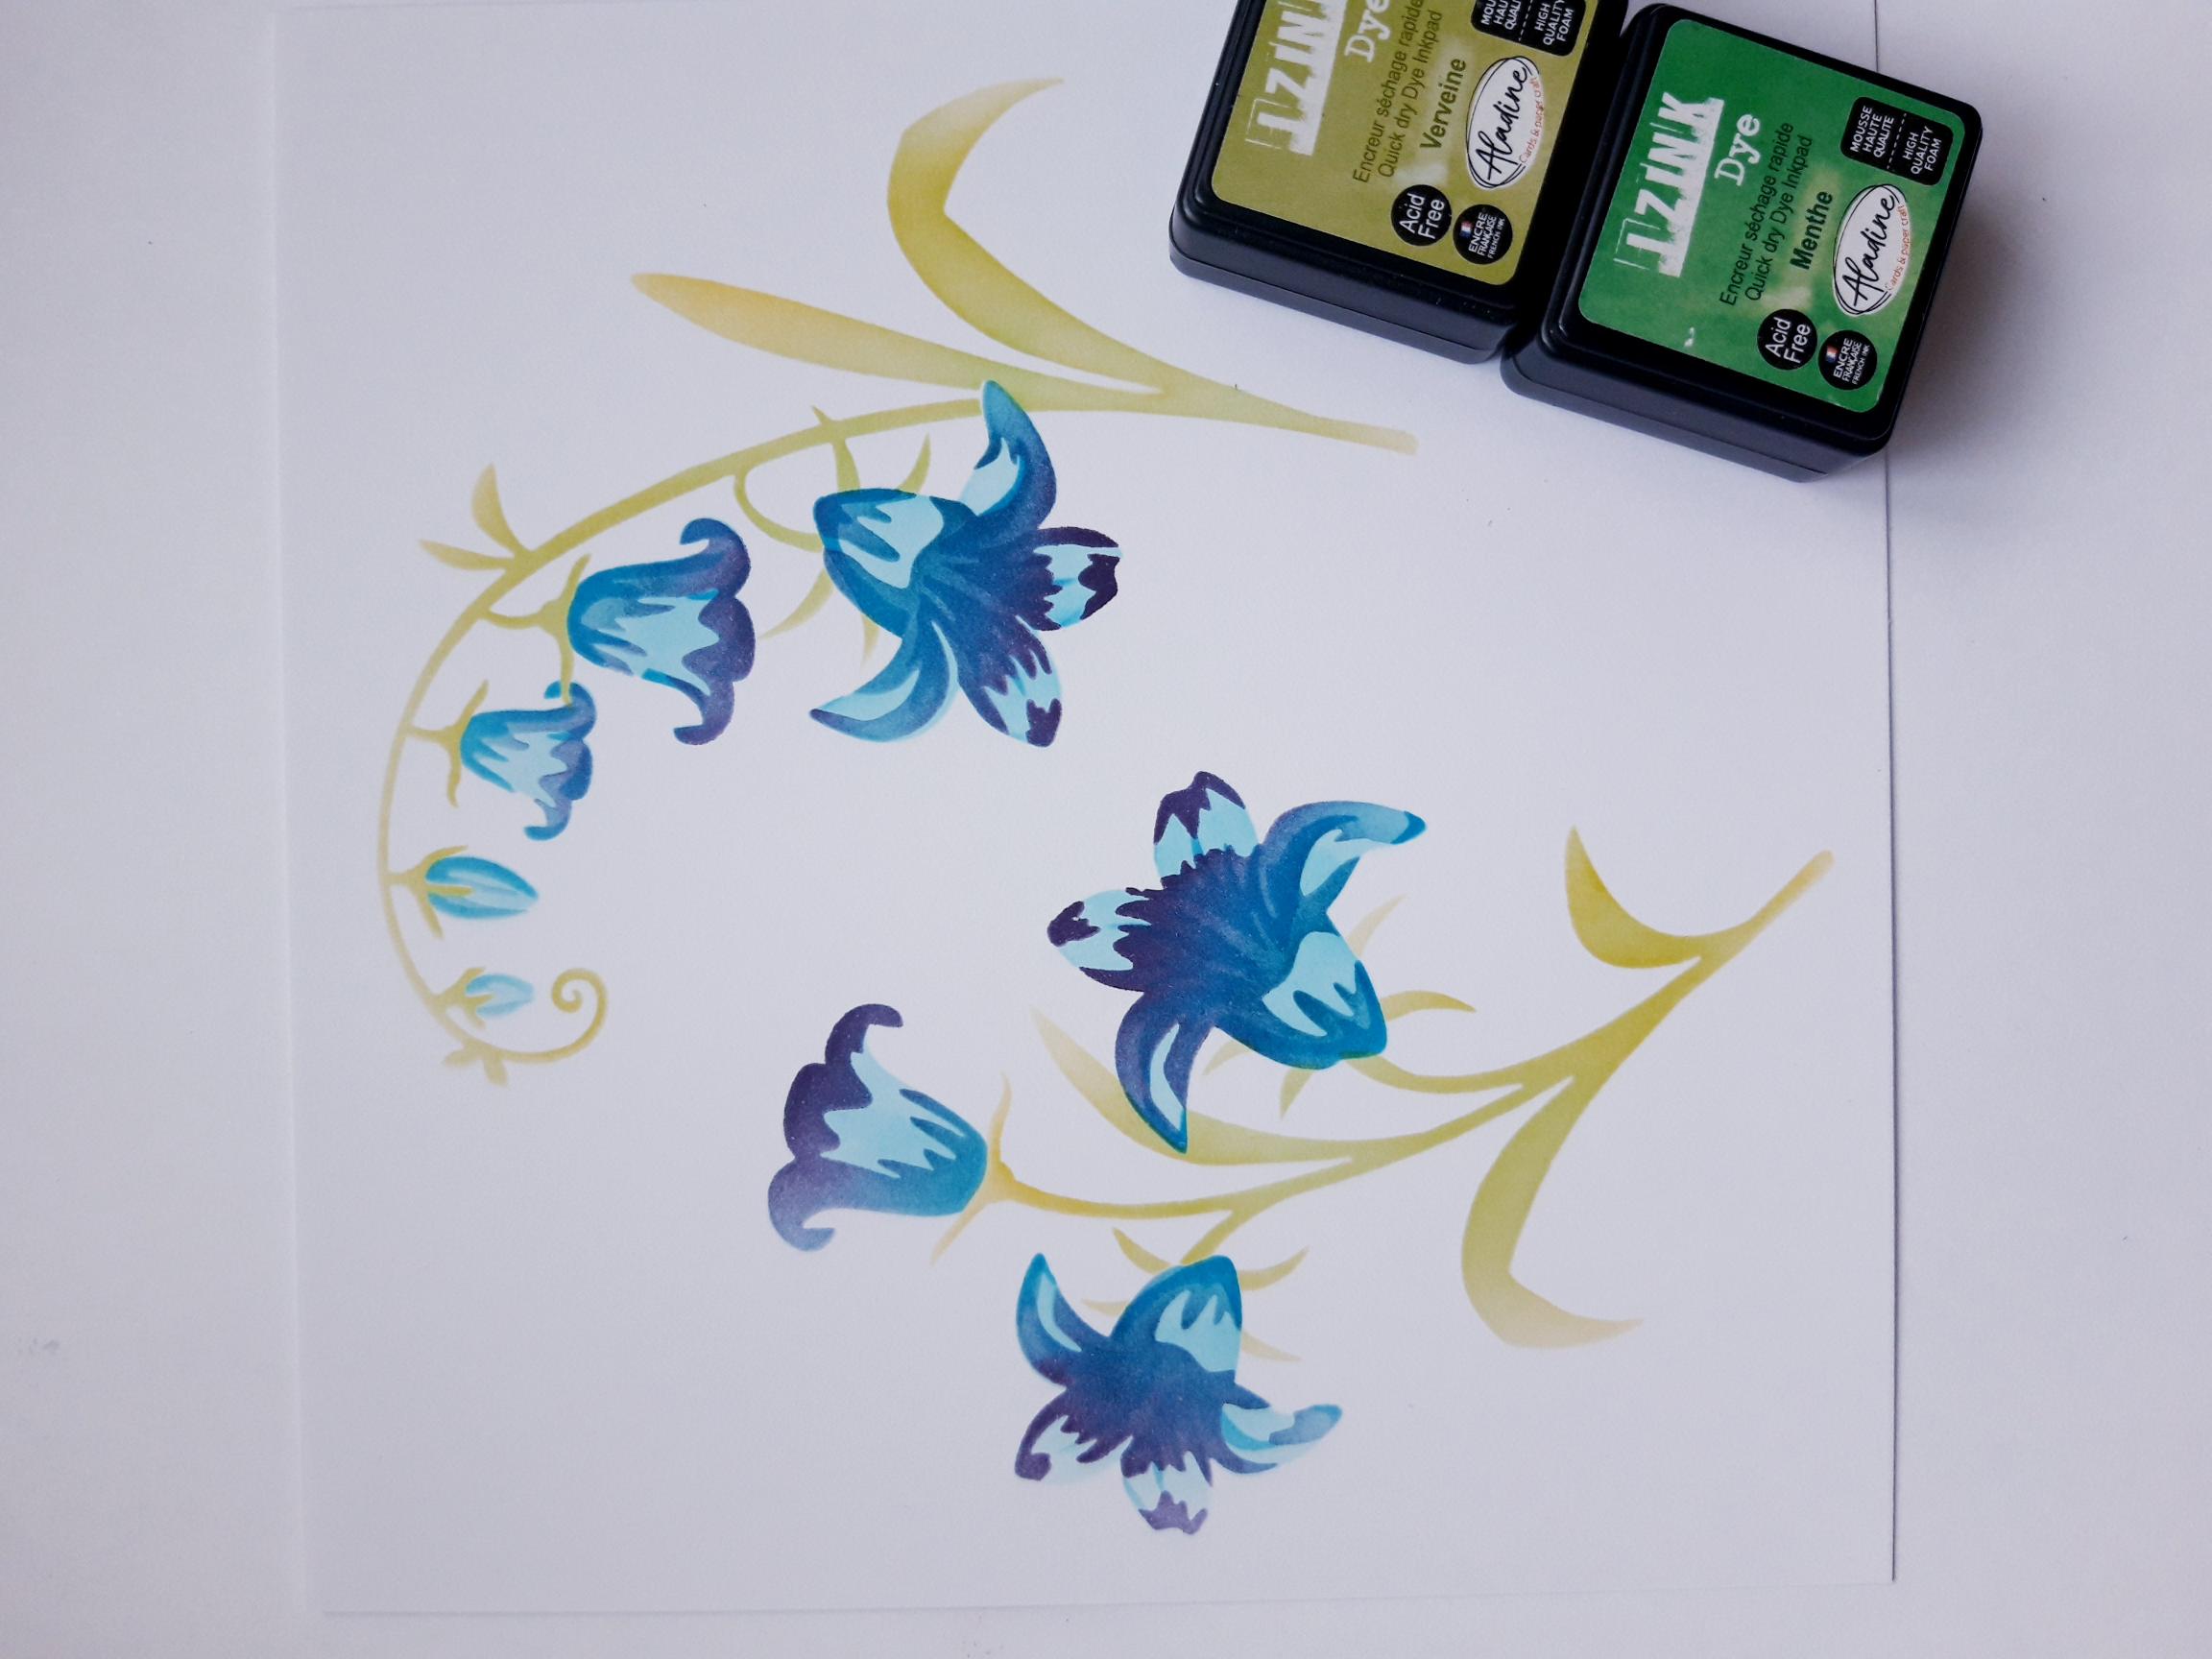
Now we are going to extend your design by using stencil 4 and 5, with the same coloured inks as before, bringing just the foliage element up from the bottom of the card, ensuring you blend it in with the rest of your artwork. Spritz the foliage with water, as before and mop up the excess water and ink. |
|
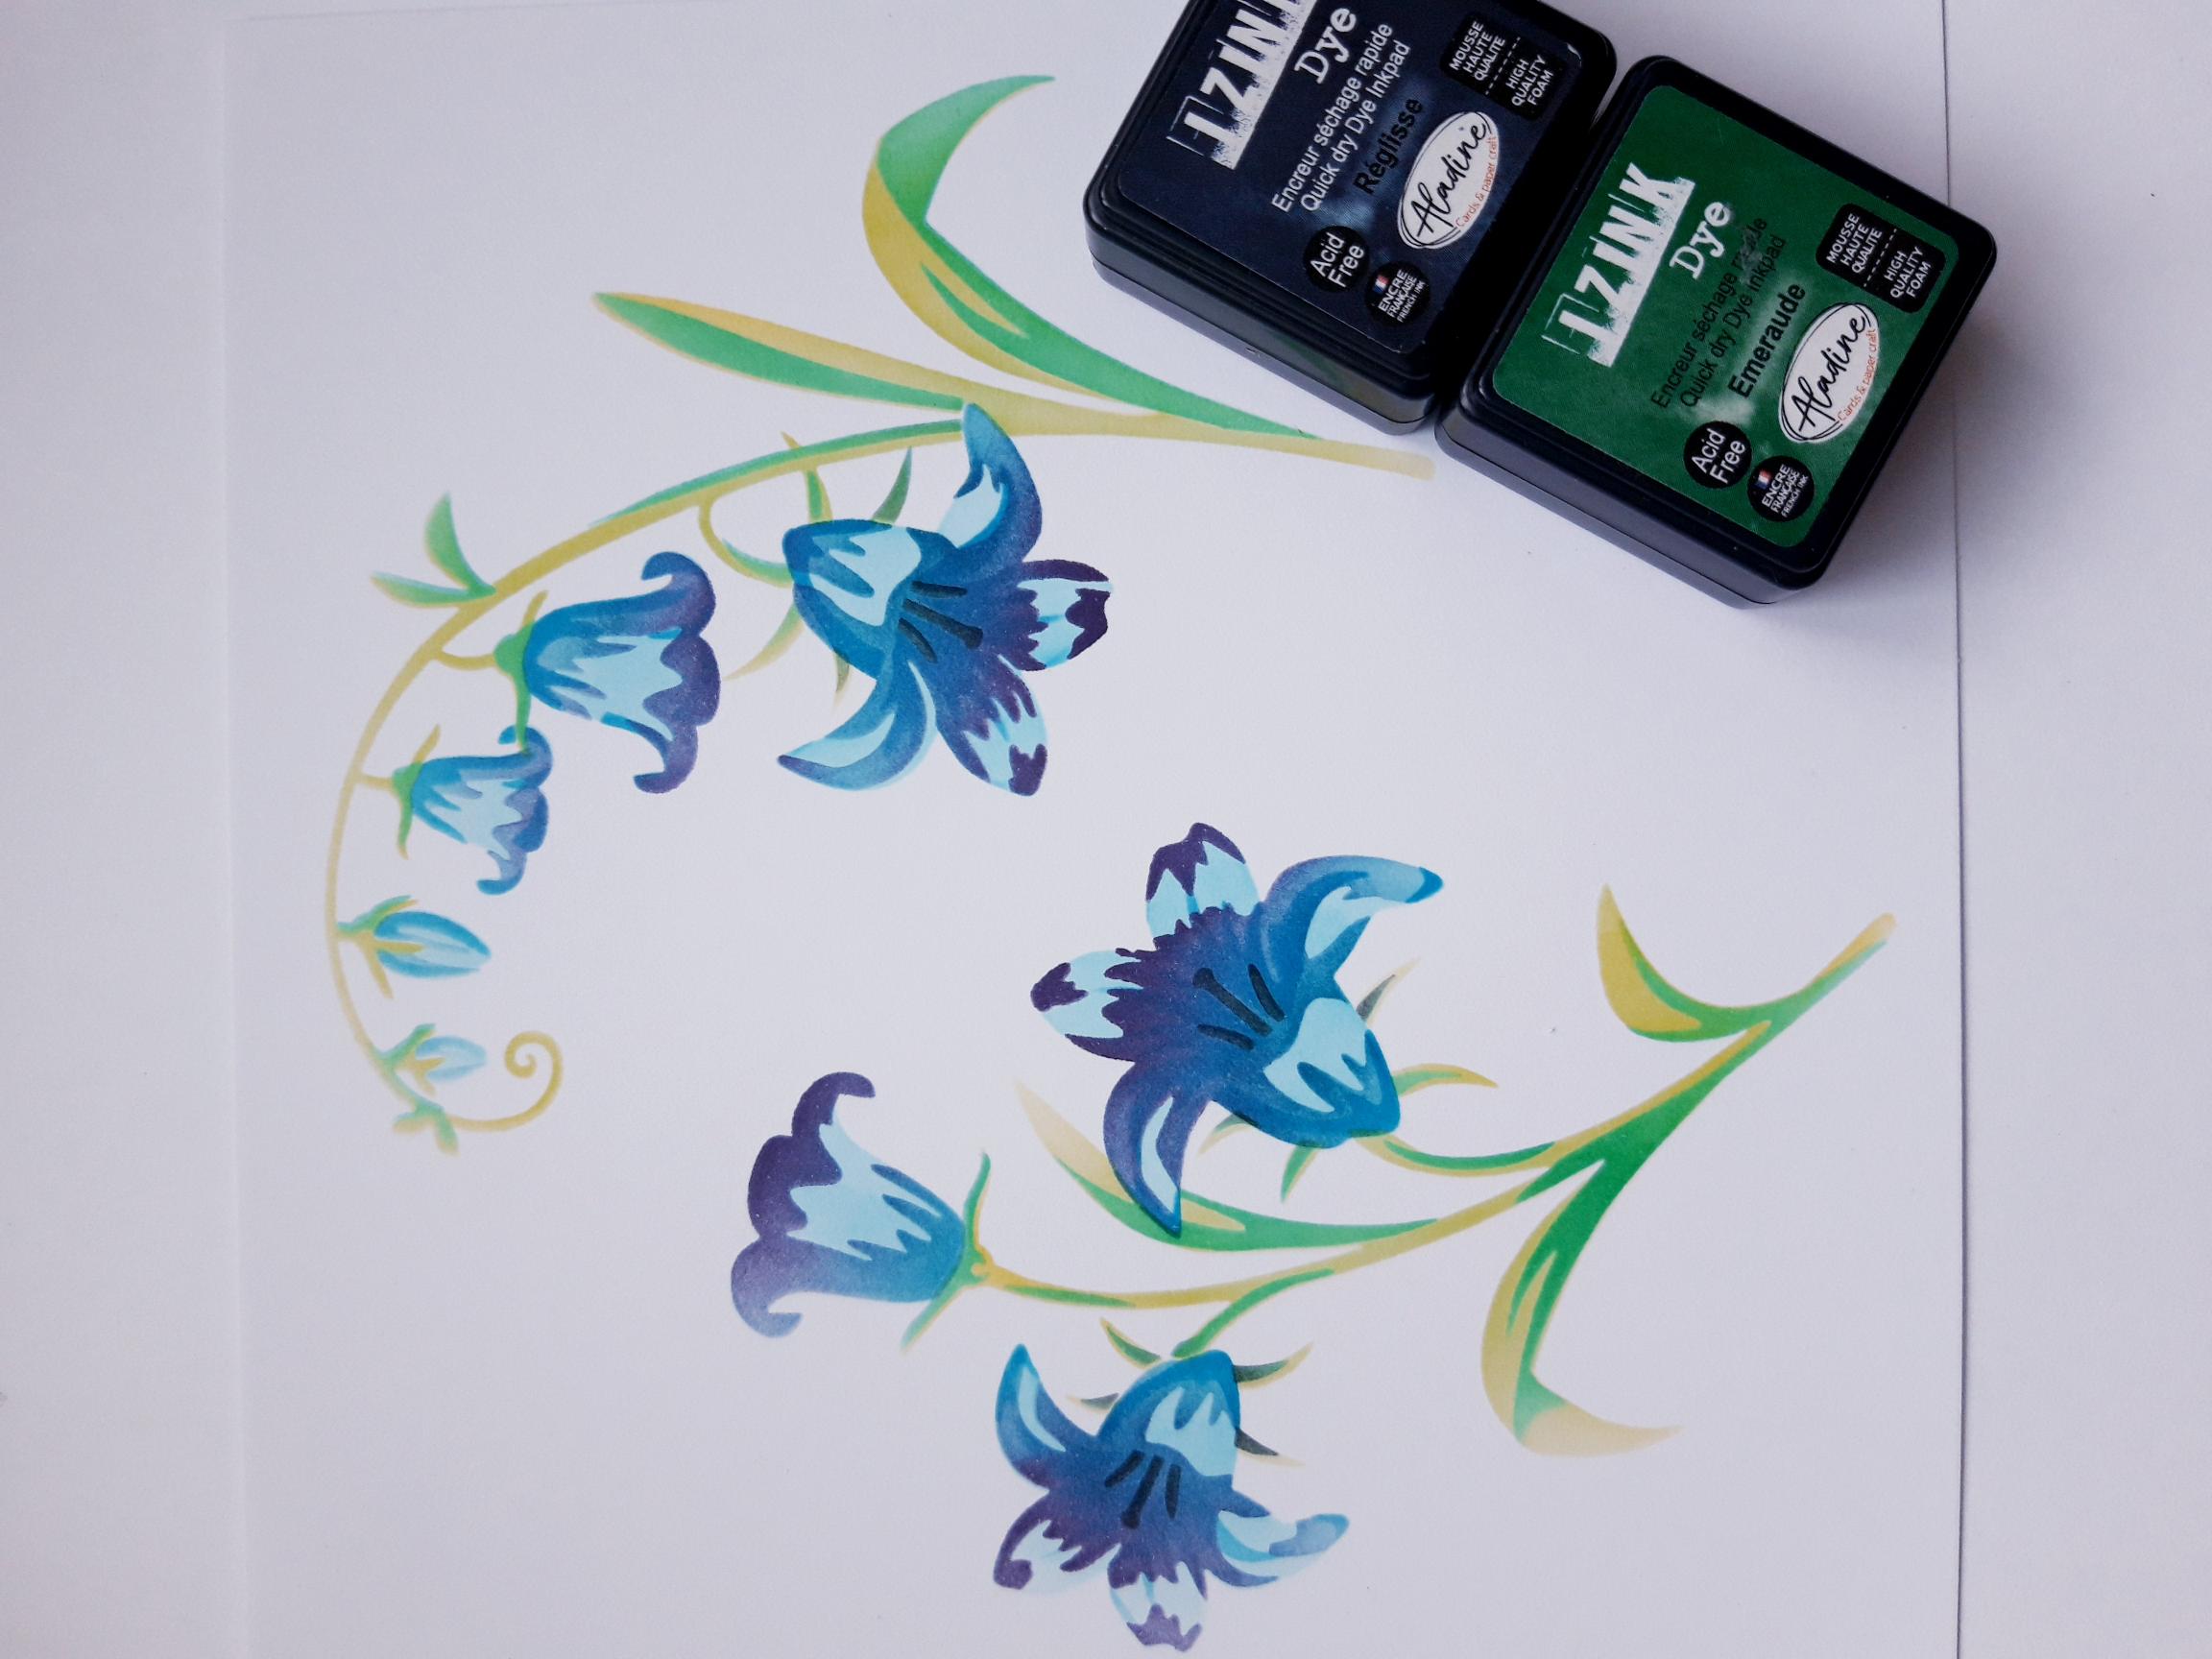
You are now going to use stencil 1 with the Mer Du Sud and Cassis, to add random flower heads coming out from your main image. Keep them light, almost see-through and spritz with water, to keep the loose watercolour effect. Mop up any excess water and ink, before allowing your artwork to dry naturally if possible. You can speed it up with a heat tool if preferred |
|
Apply a little of Mer Du Sud and Cassis on to your craft mat. Add a little water, then splatter the ink over your artwork, as required. I like lots of splats, but the choice is yours! |
|
Using your blending tool, lightly apply the Mer Du Sud around the outer edges of your card, fading it out as you move inwards |
|
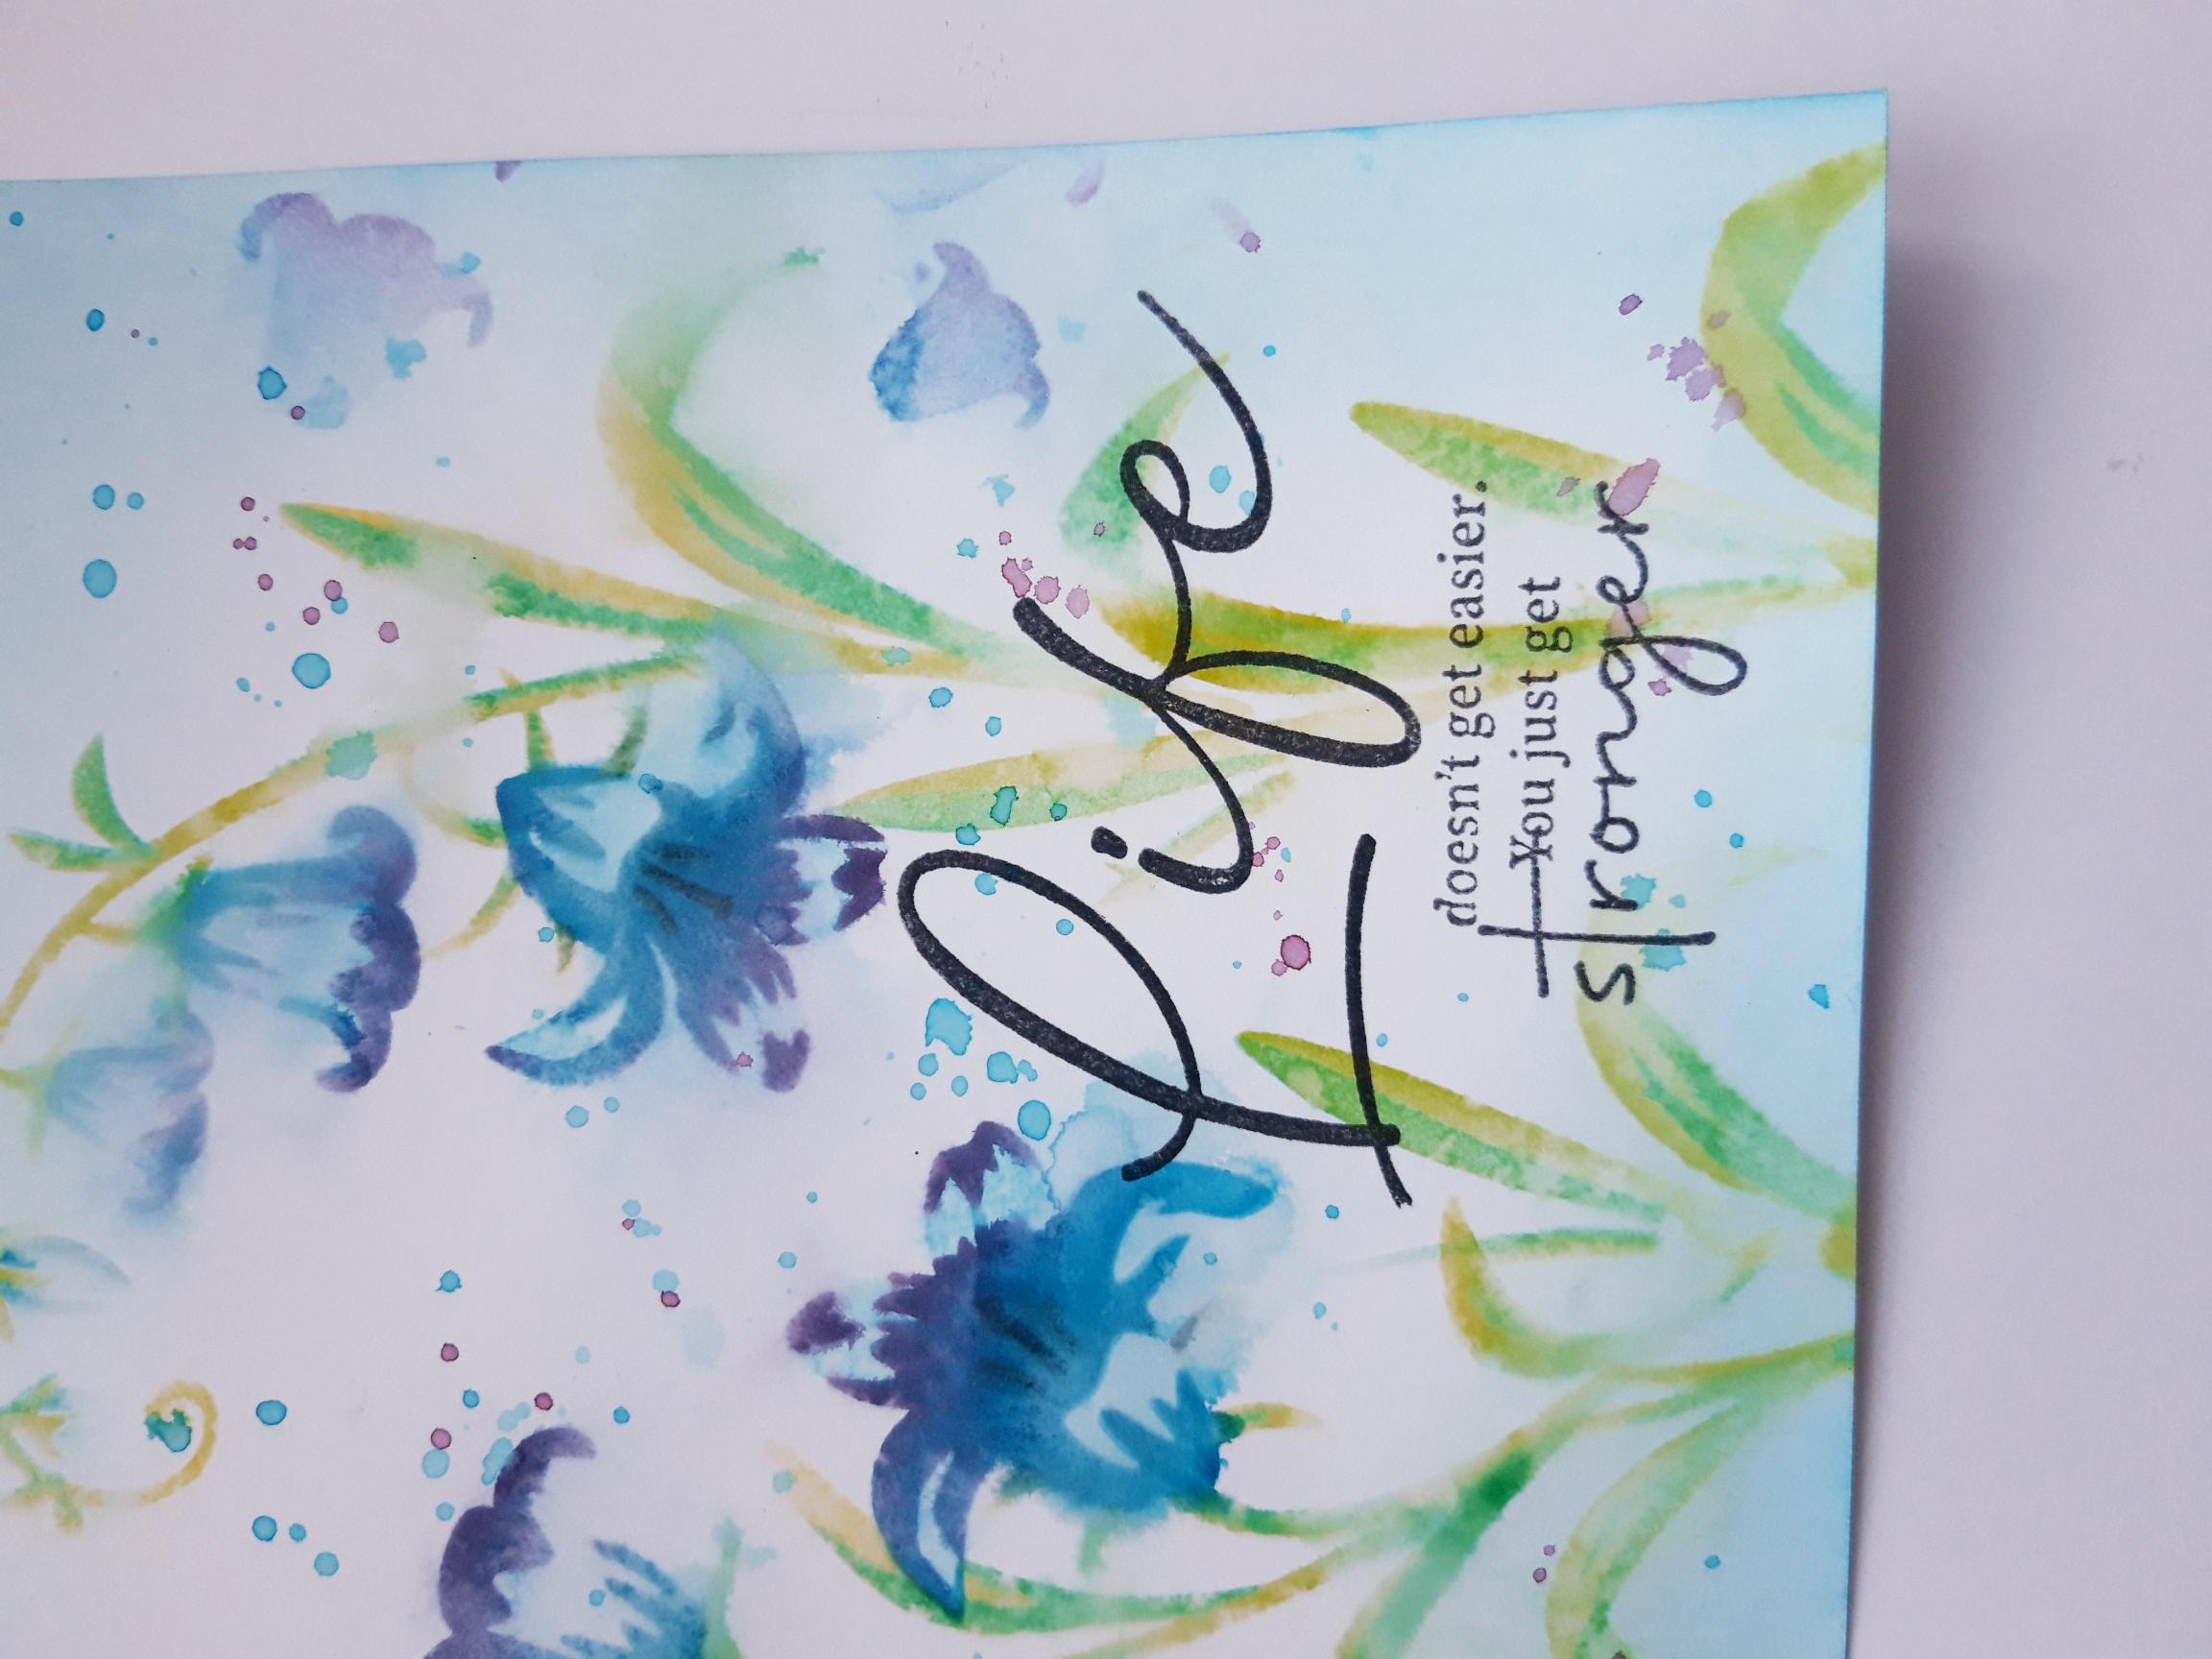
Ink up the sentiment stamp, from Stronger Lamination Stamp Collection, with the Onyx Black Versafine and stamp it through the bottom right of your artwork |
|
To finish, cut a coordinating sheet, from the Textured Paper Collection, to 6 ¼ x 6 ¼”. Adhere your artwork on top, then adhere this to your card blank. |