Give your friends $10 off their first order!
Refer a FRIEND


WHAT YOU WILL NEED:
Grey top folding card blank 7 3/4 x 5 1/2"
Black card 7 1/2 x 5 1/4"
White card 7 1/4 x 5"
White card 7 x 5"
Quattro D Peonies Collection
Dot Frame Stamp Collection
My Sunshine Lamination Stamp Collection
Versafine Ink Pad: Onyx Black
Acrylic blocks - various sizes
Izink Spray: Vert D'Eau, Bleu Clair, Misty Morning
Distress Oxide/Ink ink pad: Squeezed Lemonade, Spiced Marmalade, Worn Lipstick, Cracked Pistachio, Mowed Lawn
Confetti Ink: White Lace
Sequins: Down The Bay
Gem pick up and pokey tool
Paint brush
Water spray bottle
Eureka 101
Paper Trimmer
Perfect Together Glue
Low tack tape
Die Cutting machine
[click image to enlarge] 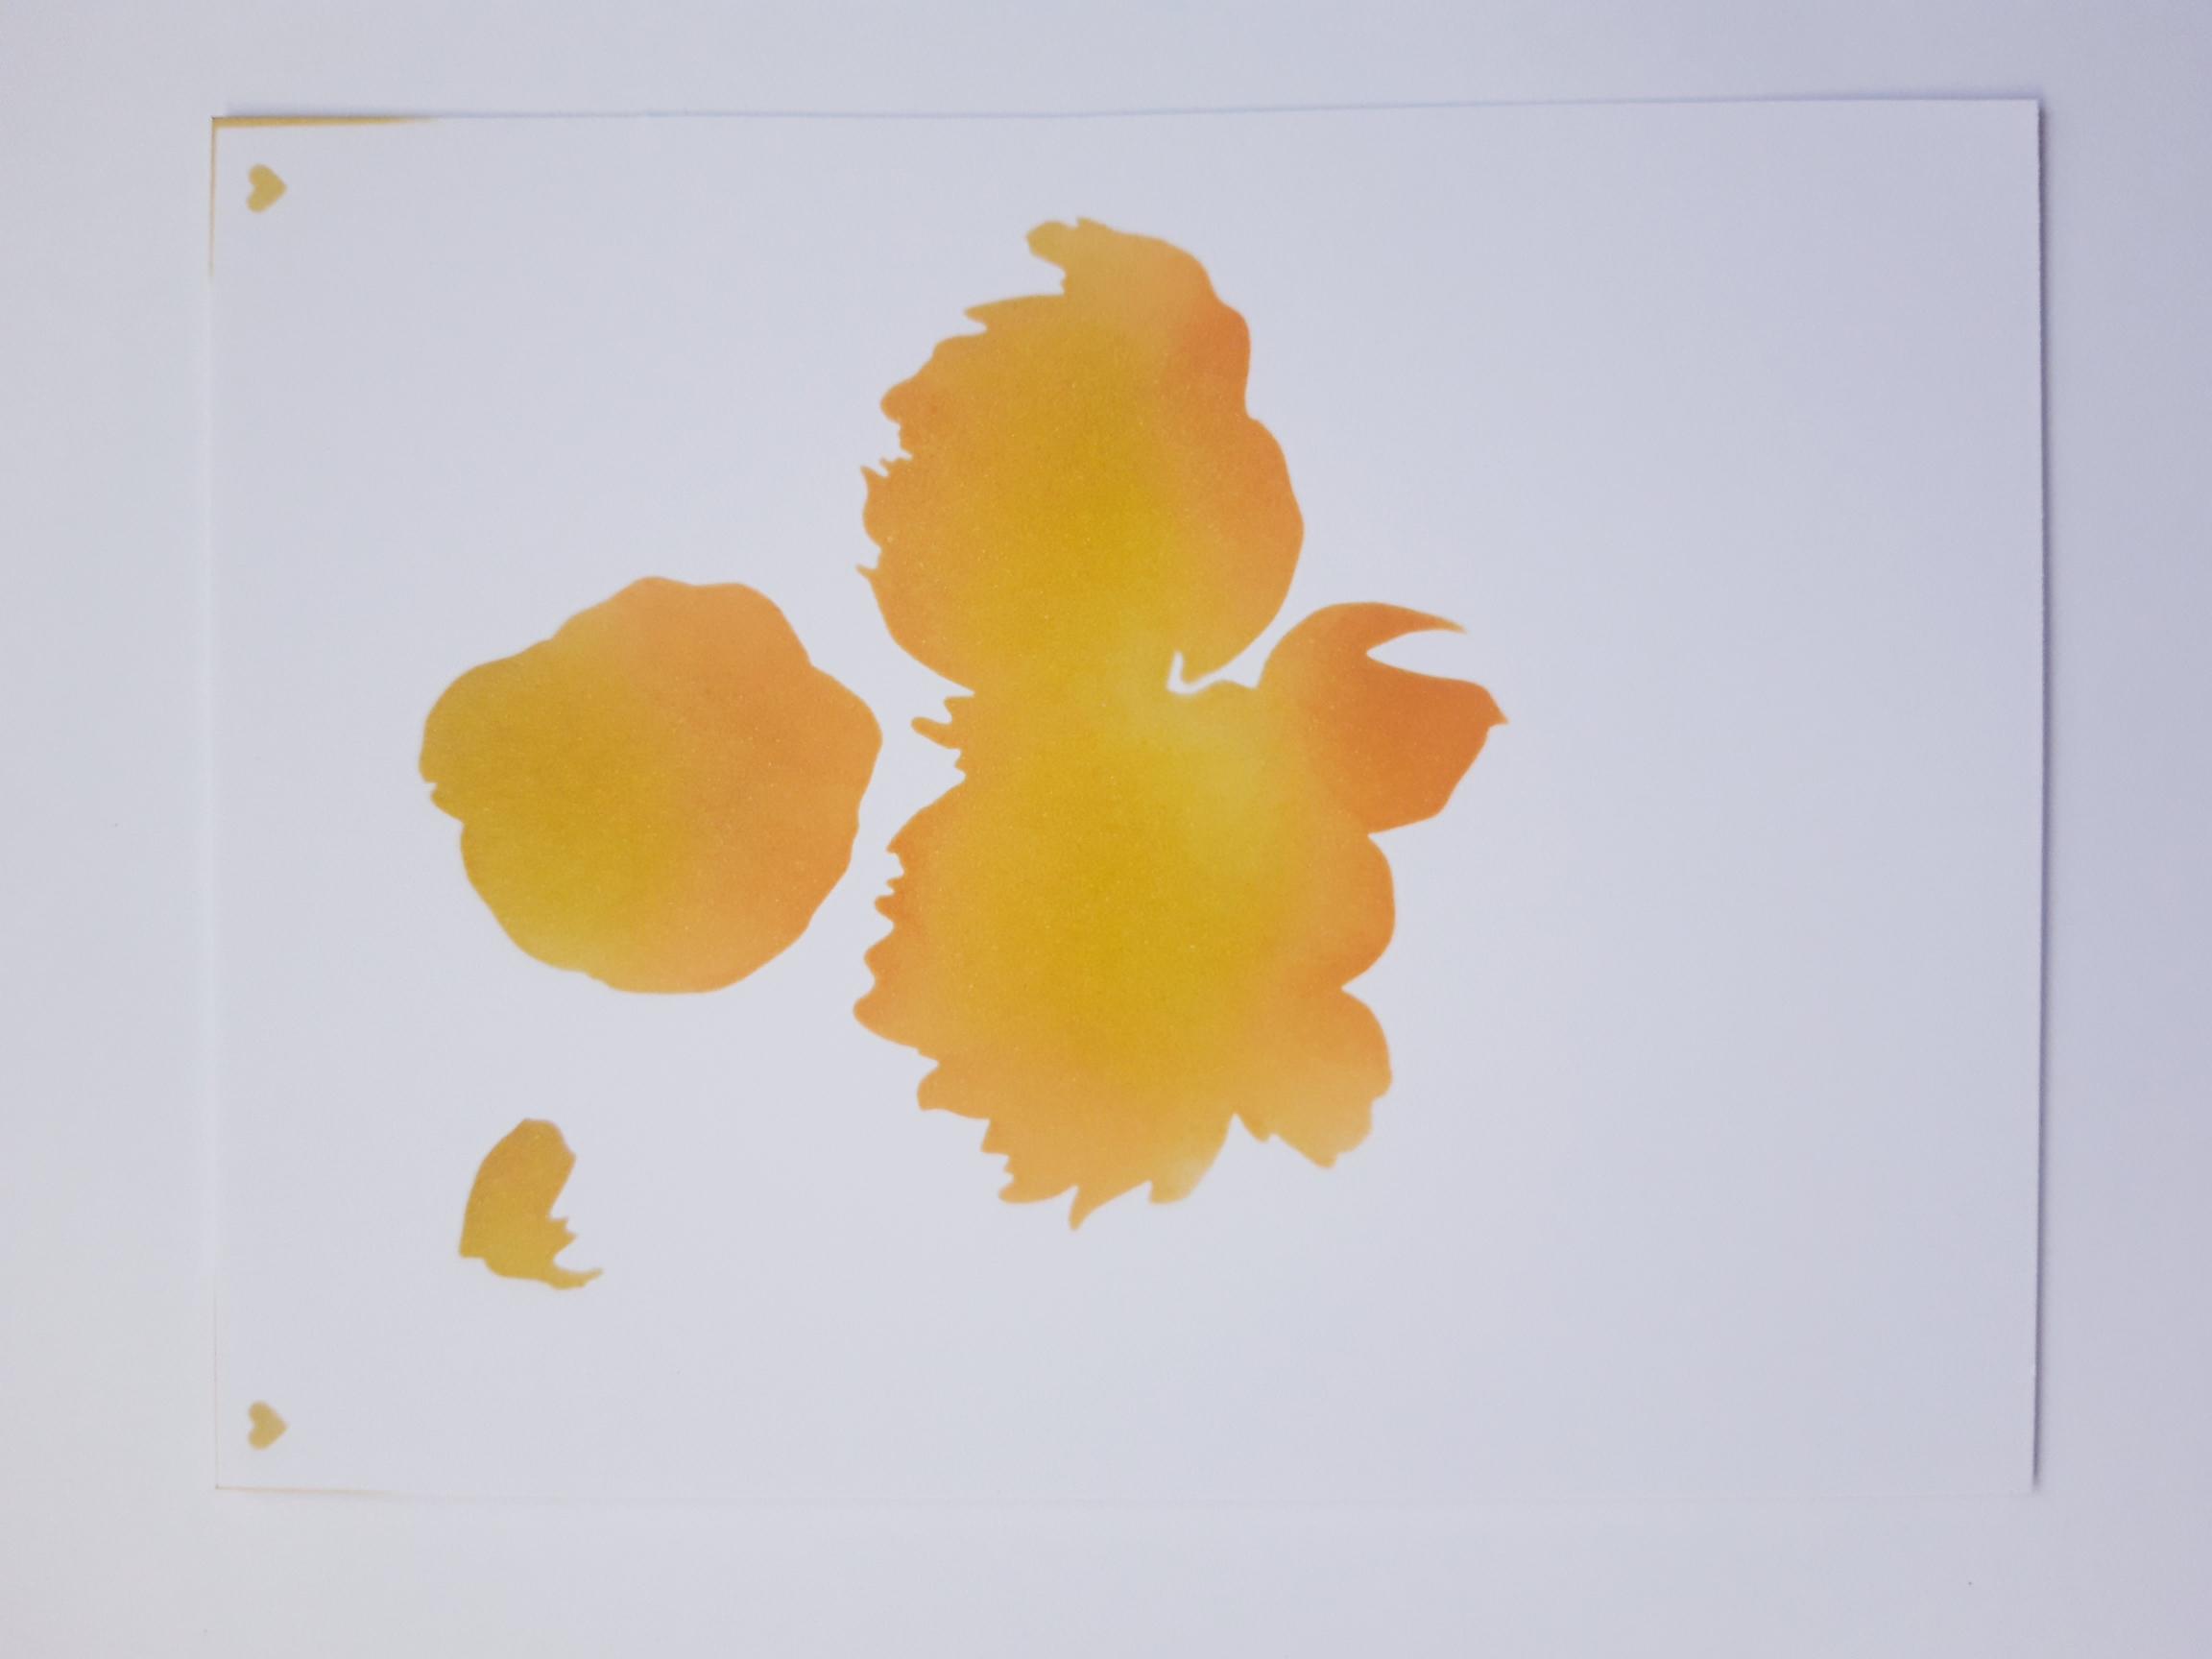
|
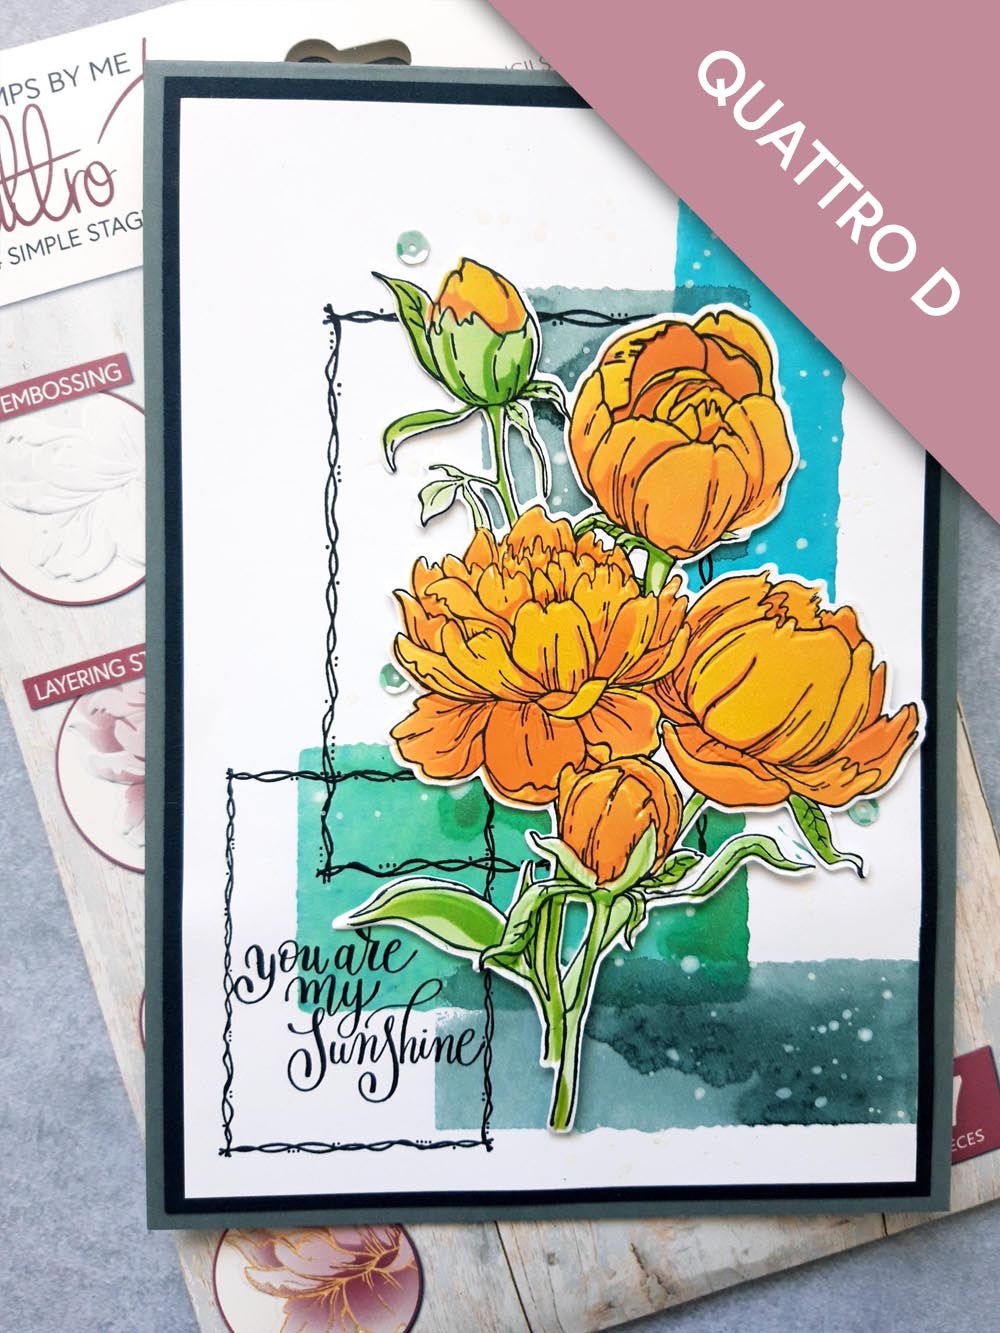
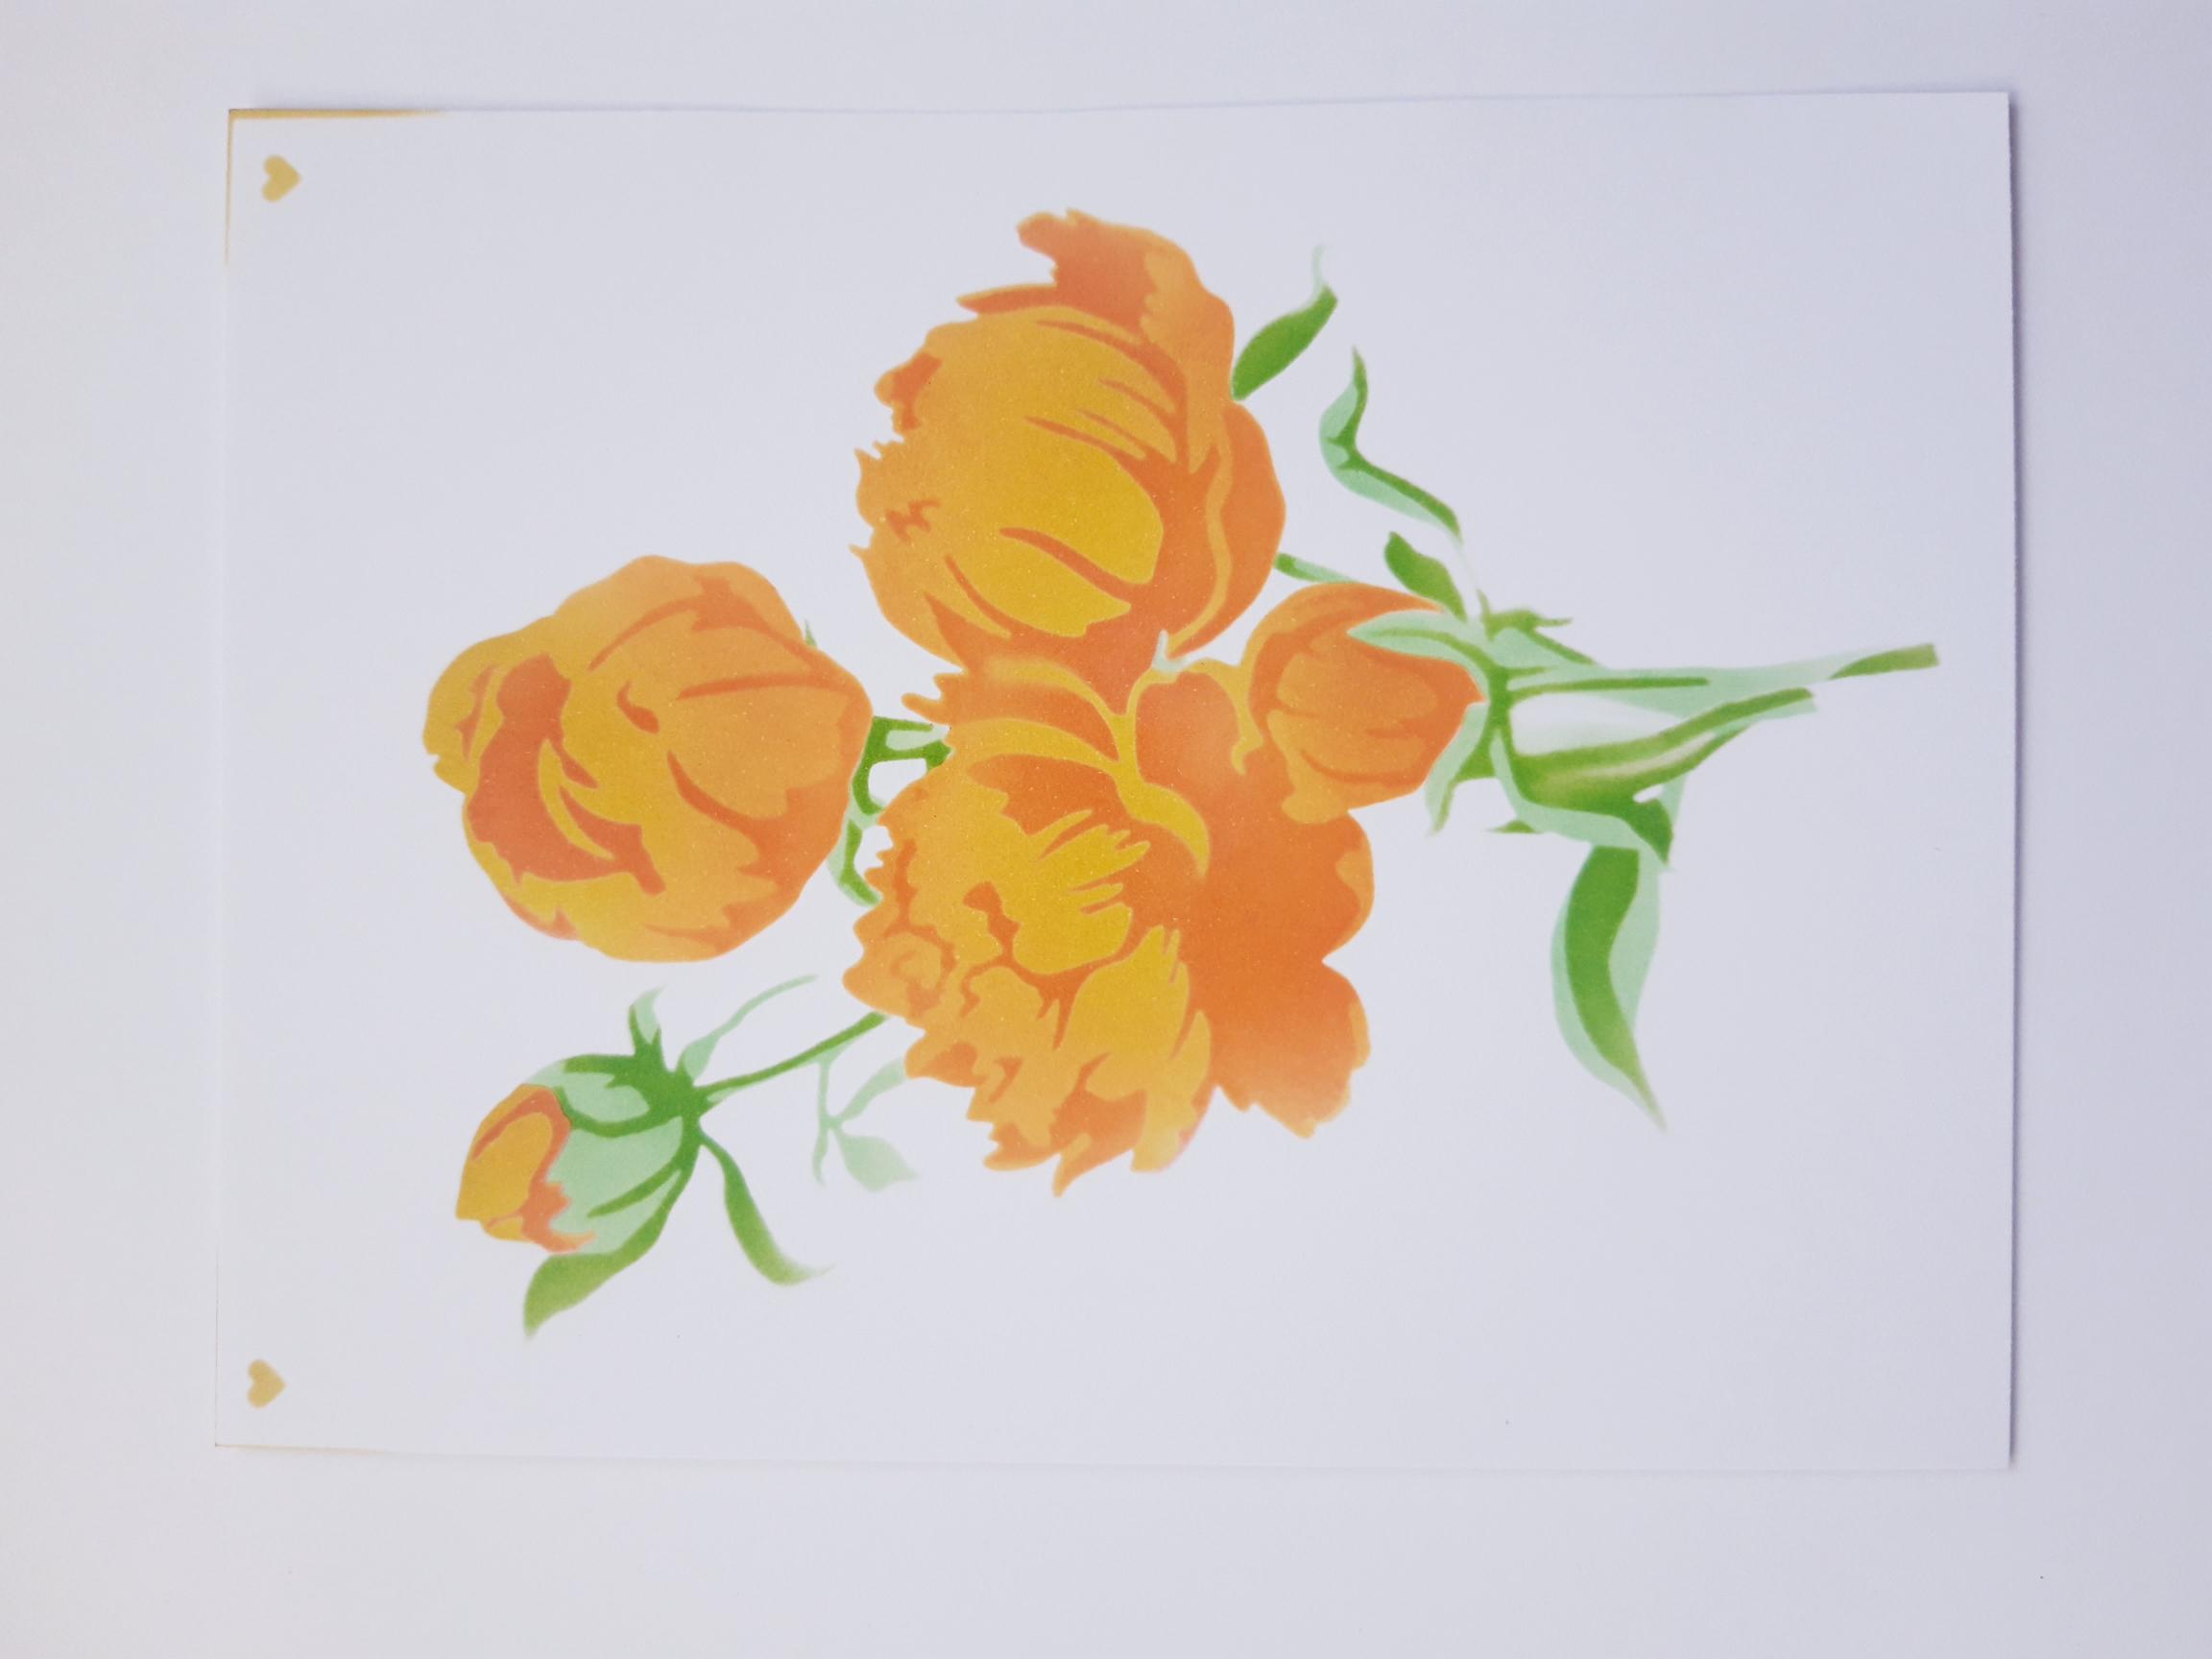
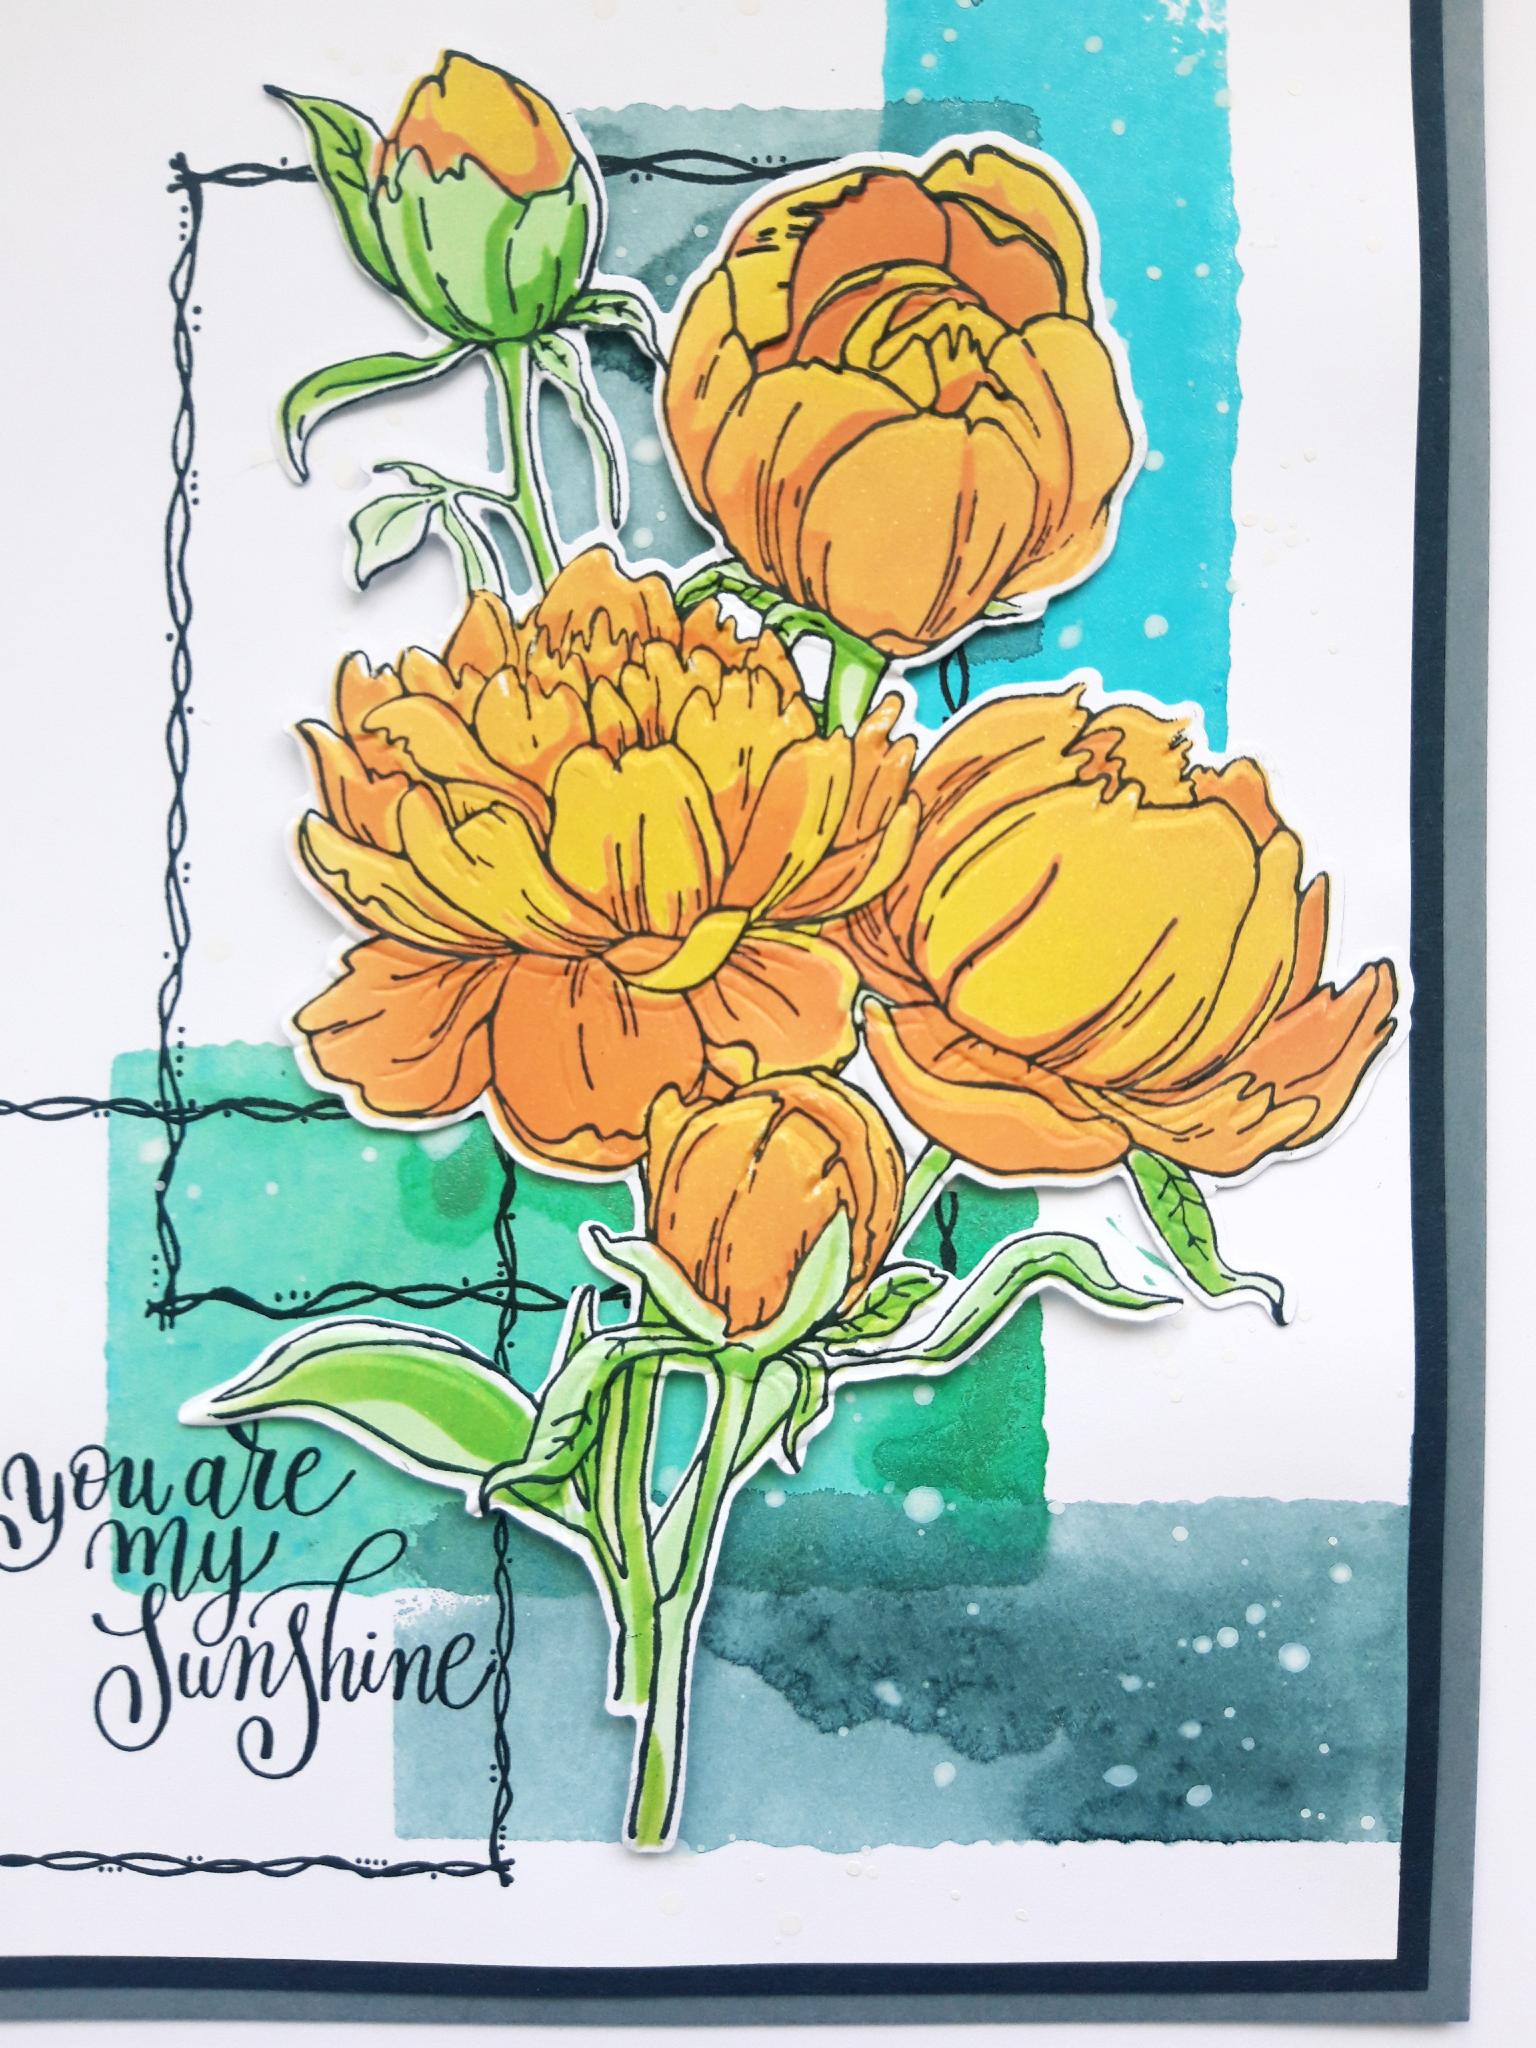
Place stencil 1 on to the white card cut to 7 x 5". Blend the Squeezed Lemonade Oxide through the stencil, then apply the Spiced Marmalade around the outer edges only. TIP: If you are unsure how to line up the stencils, apply a little ink through each of the corner hearts, then every time you swap a stencil, line up the hearts. |
|
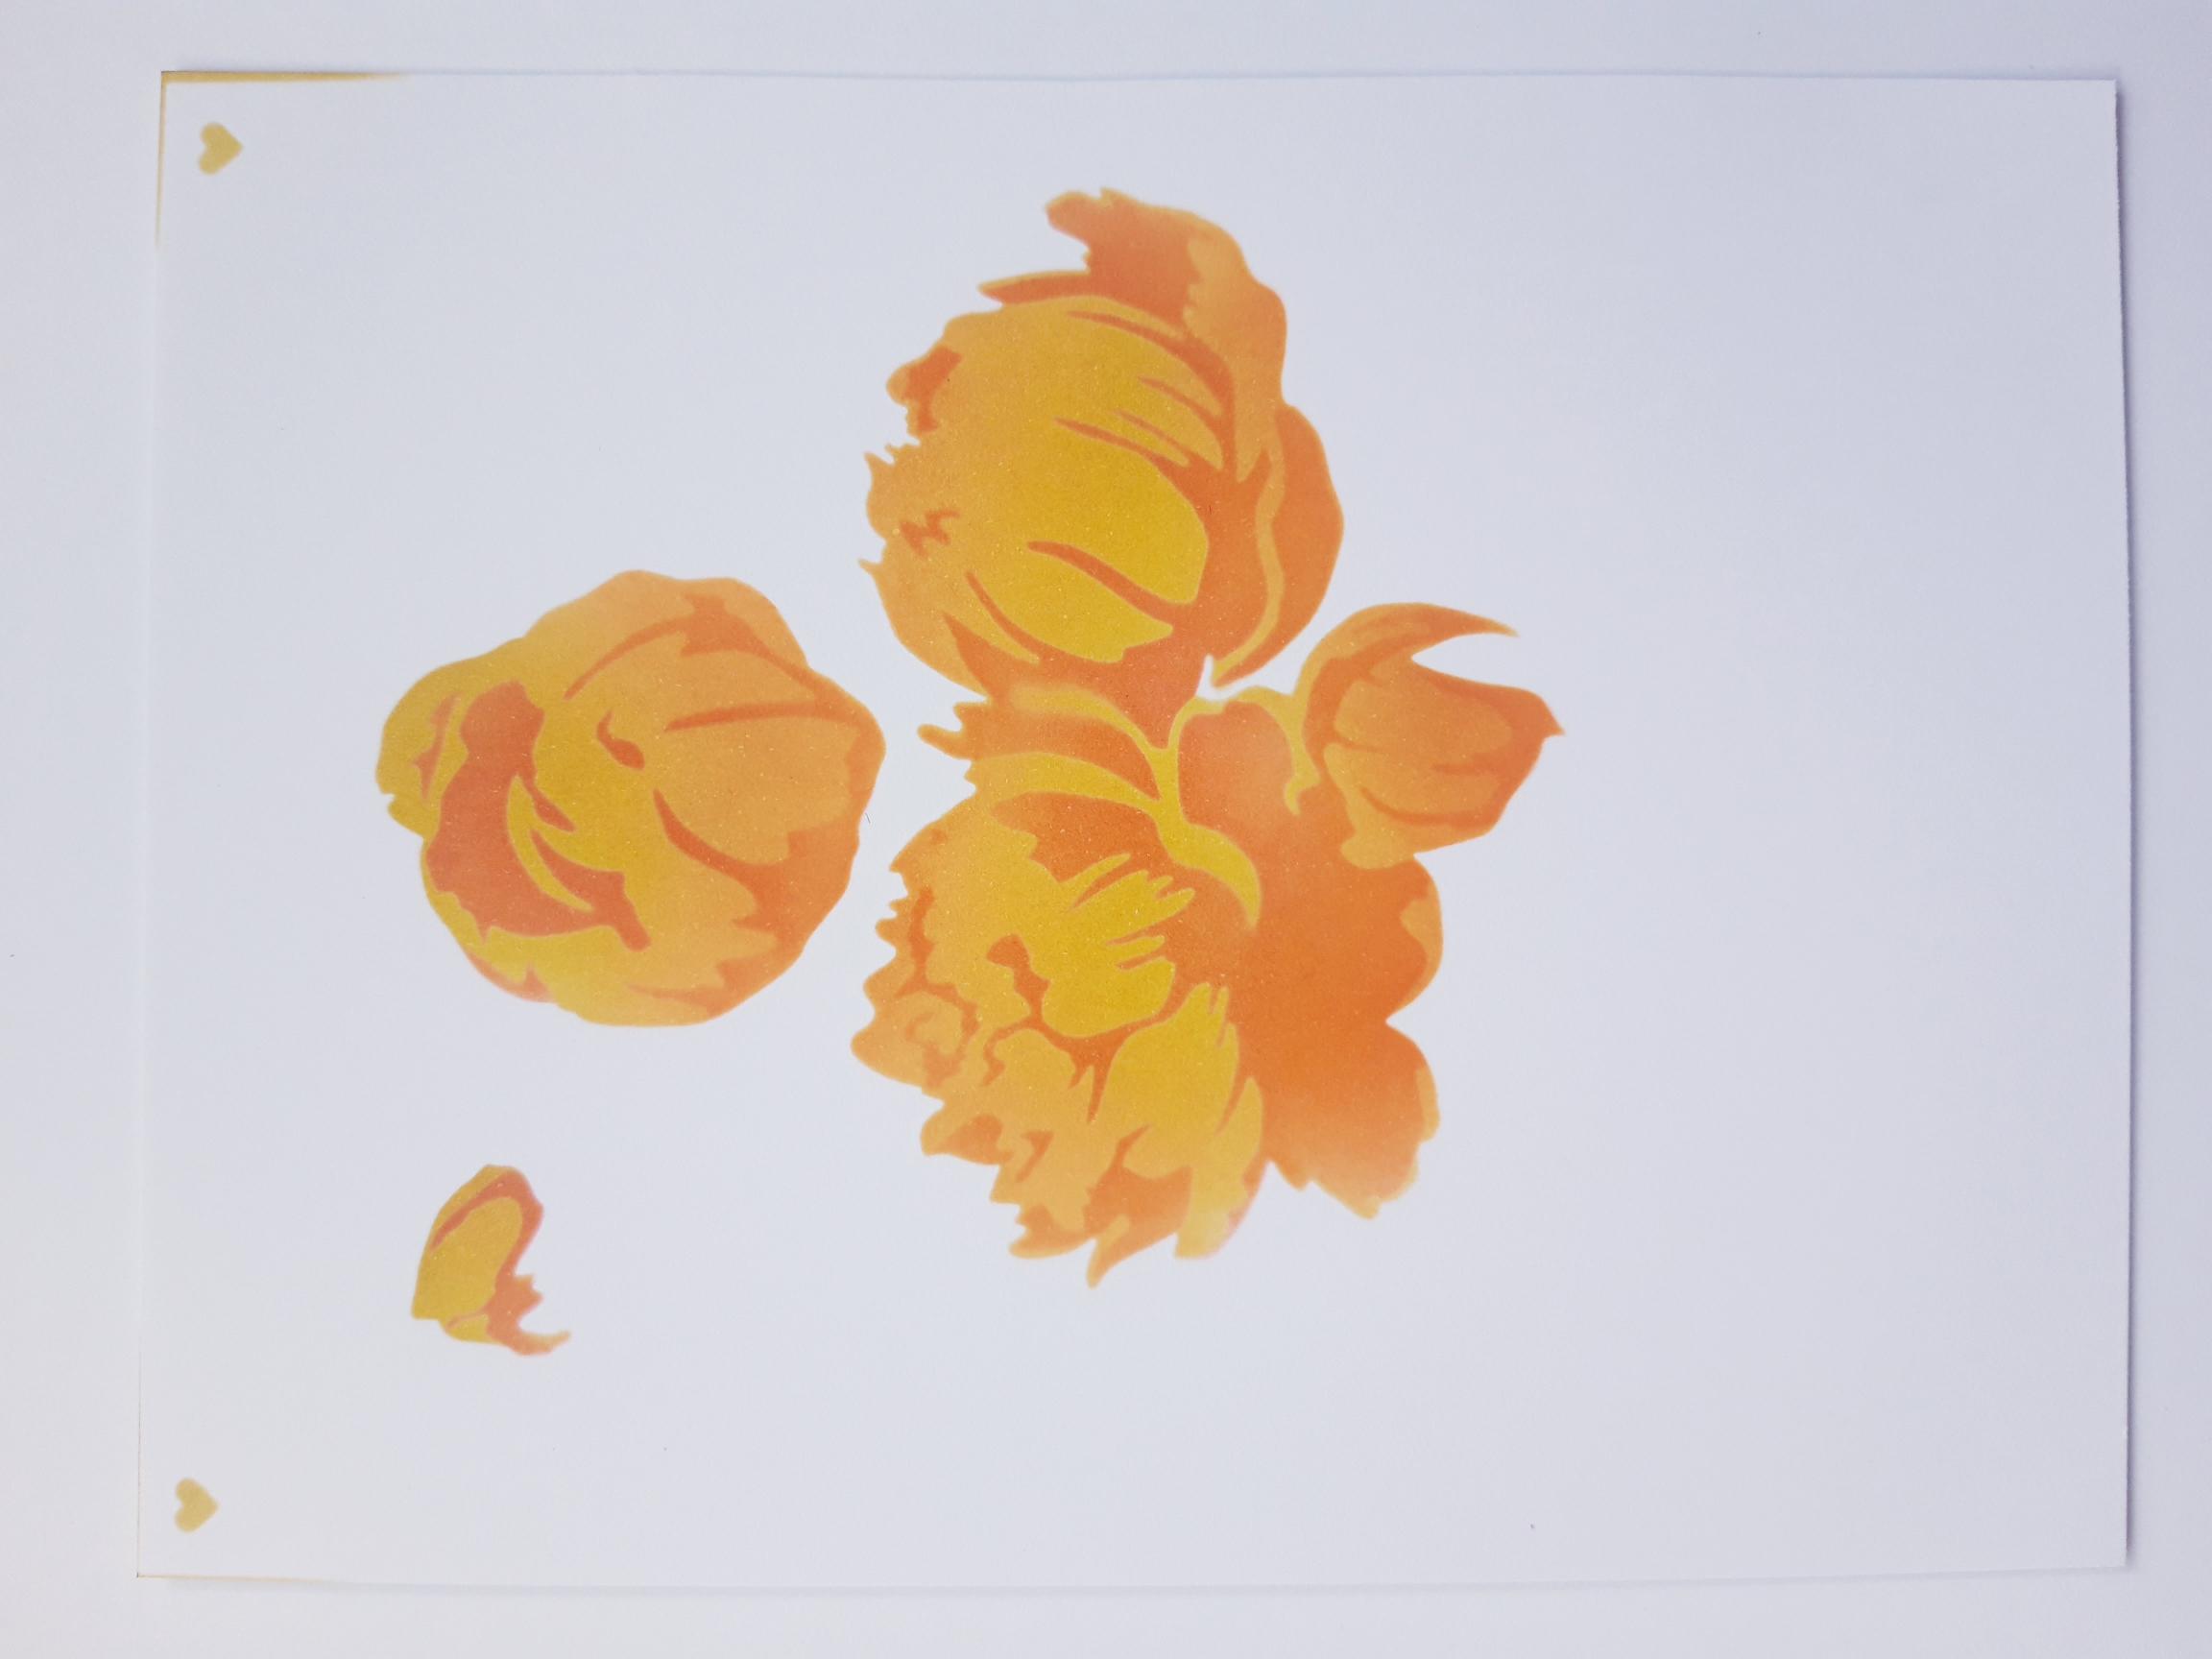
Place stencil 2 in position and blend through with the Worn Lipstick Oxide. |
|
Line up stencil 3 and apply the Cracked Pistachio. |
|
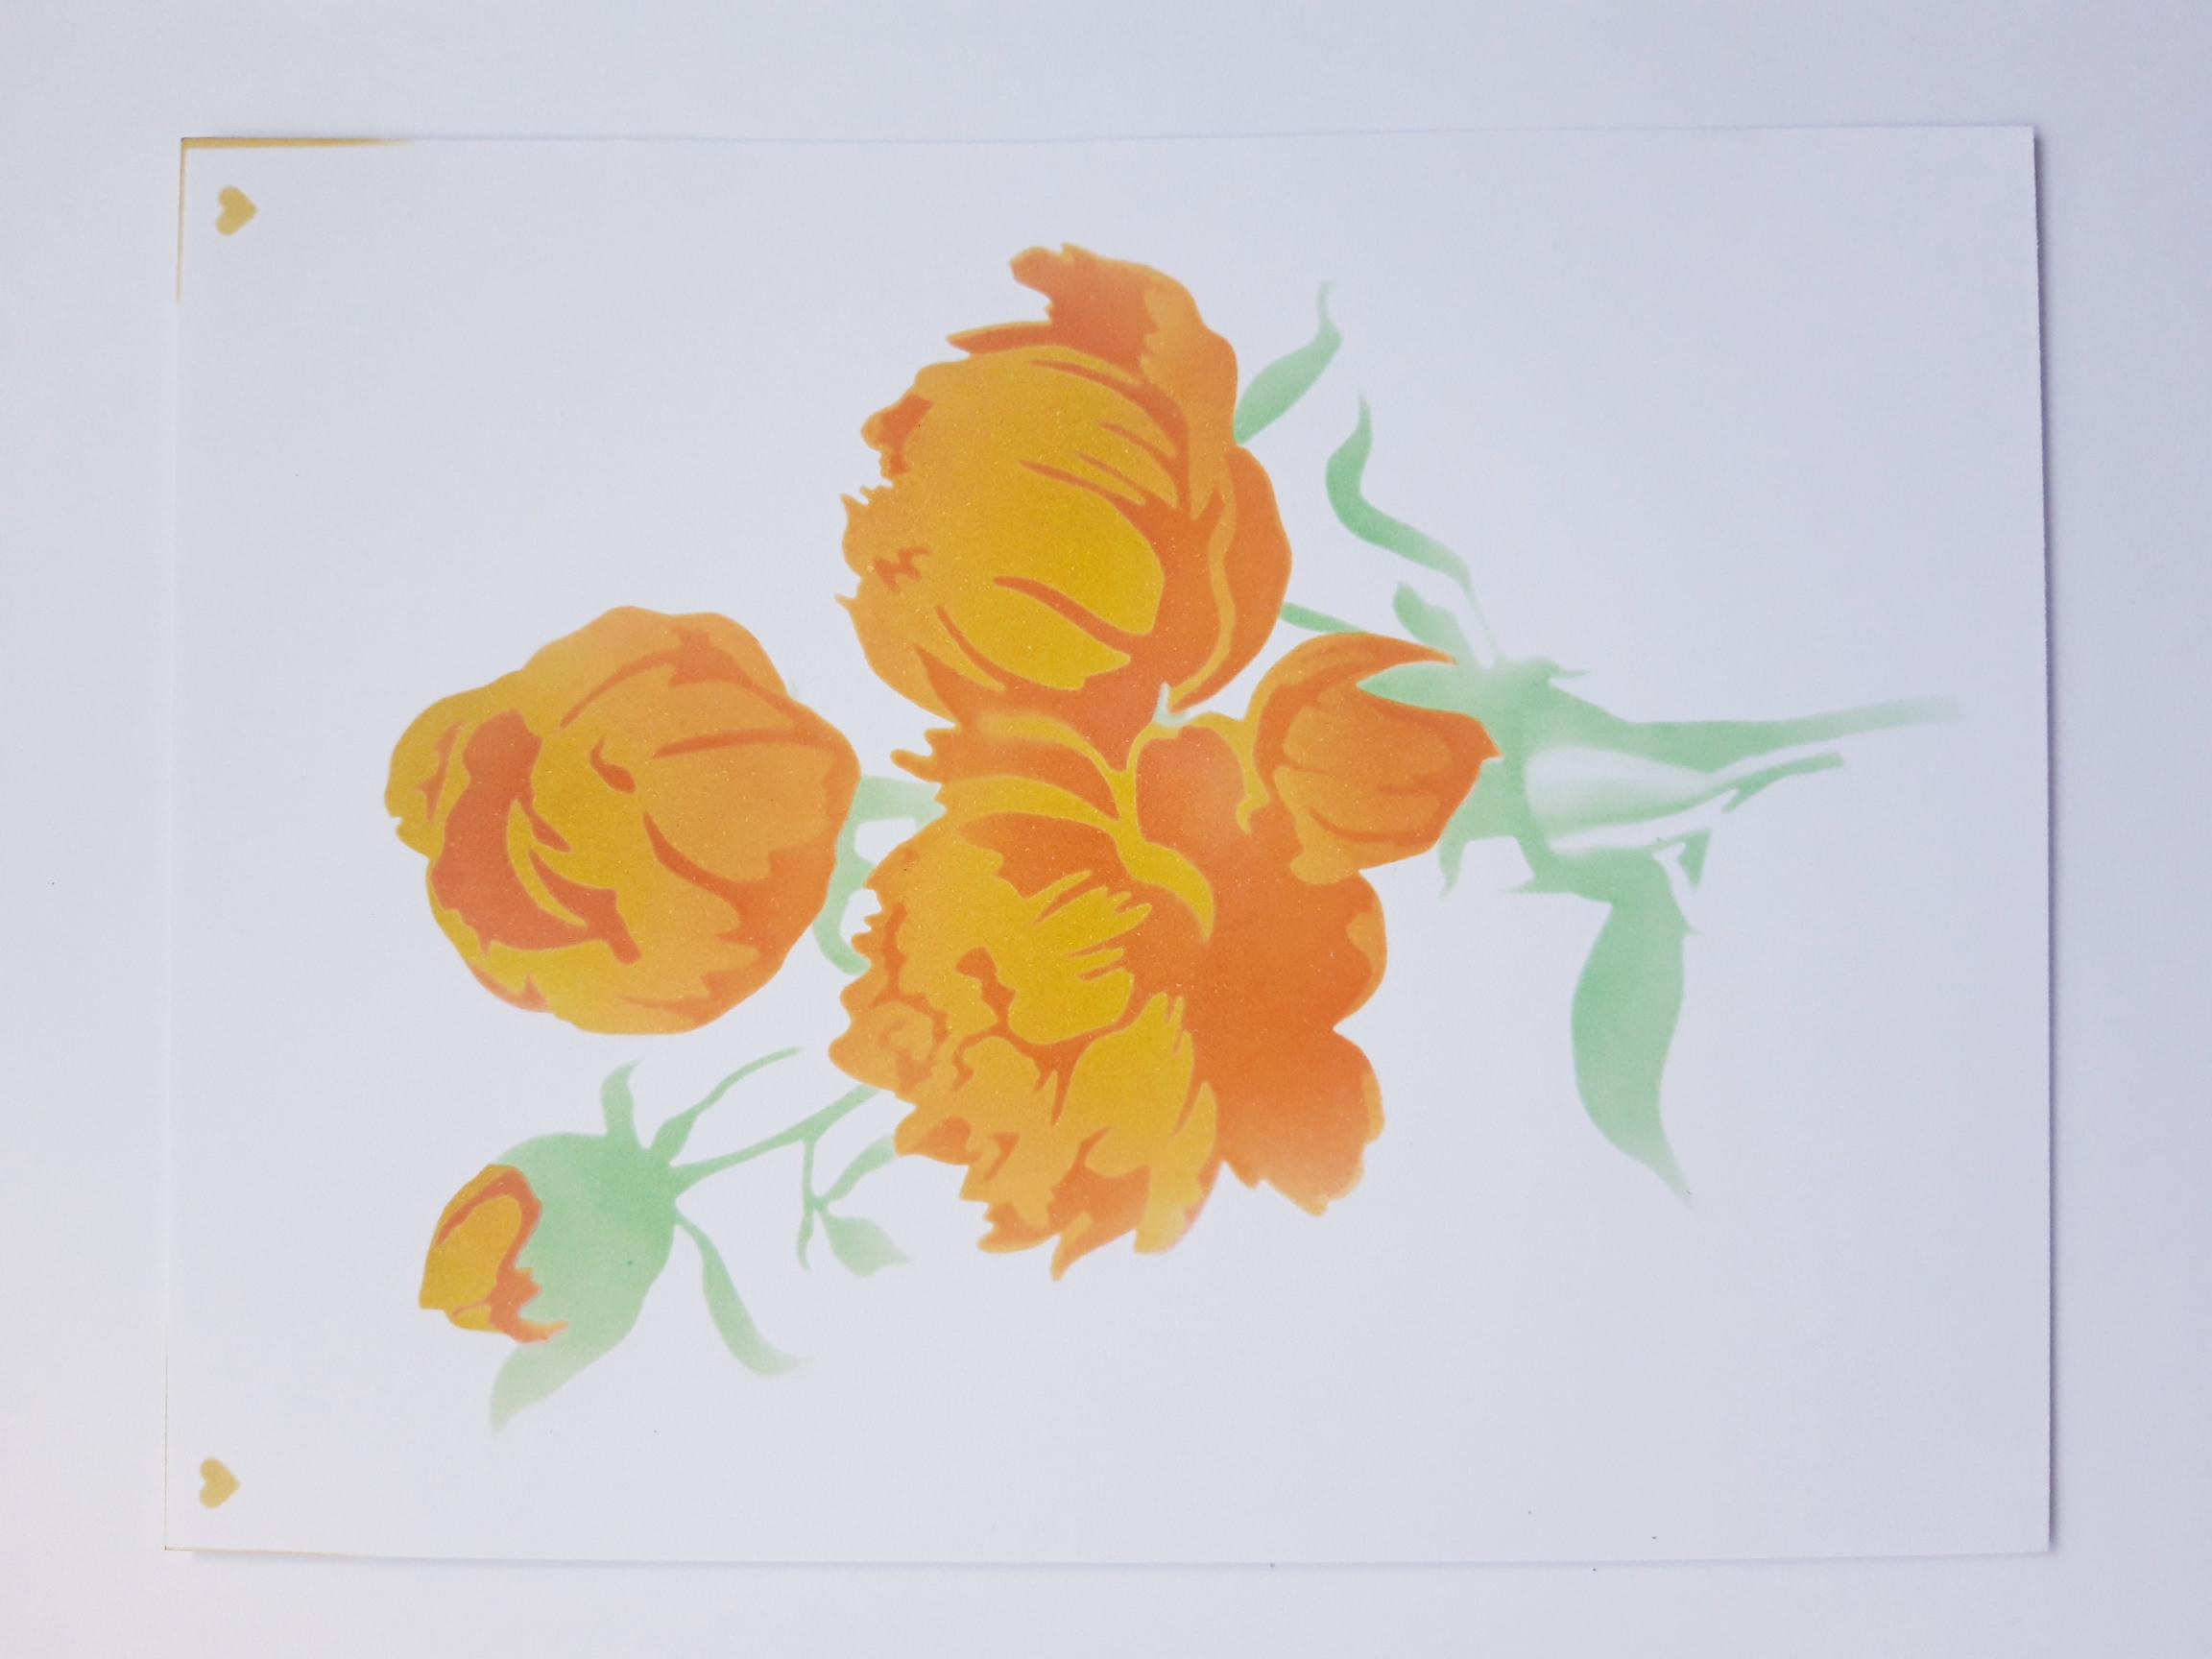
Having lined up stencil 4, blend with the Mowed Lawn. TIP: You can go back in with more colour, at any time. Just swap the stencils over as required. |
|
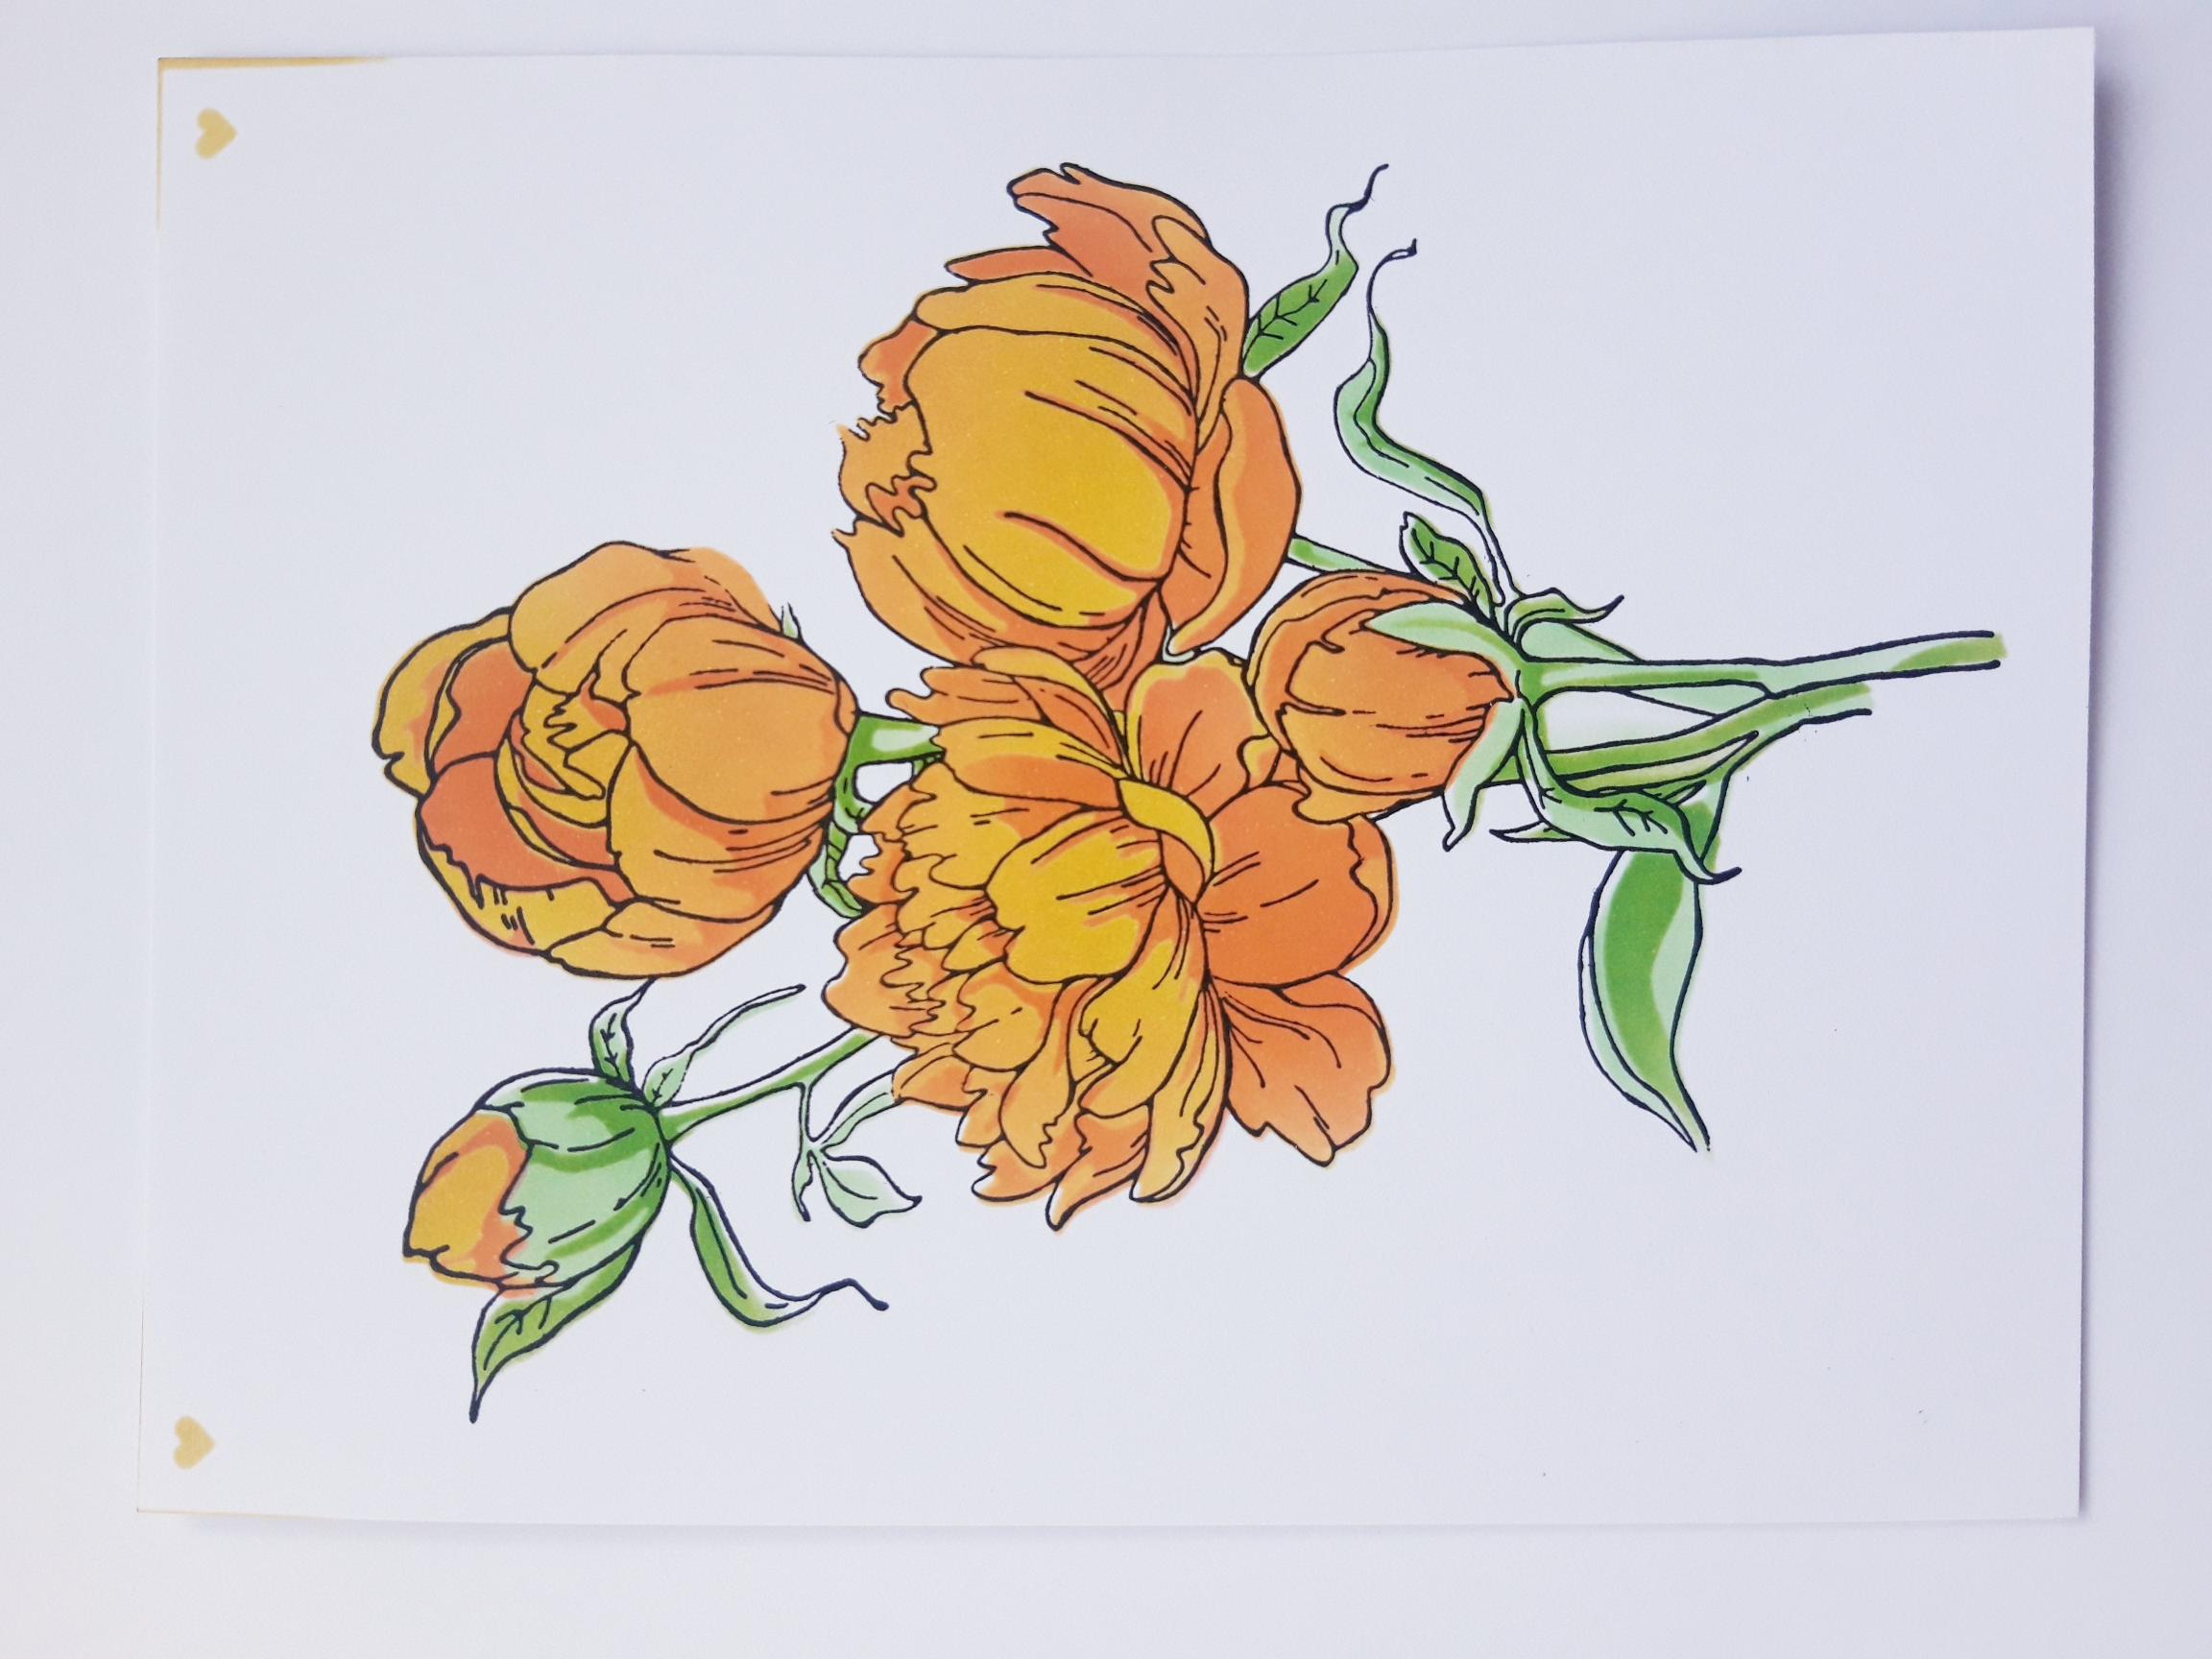
Ink up the coordinating stamp, with the Onyx Black Versafine and stamp over your stencilled image. |
|
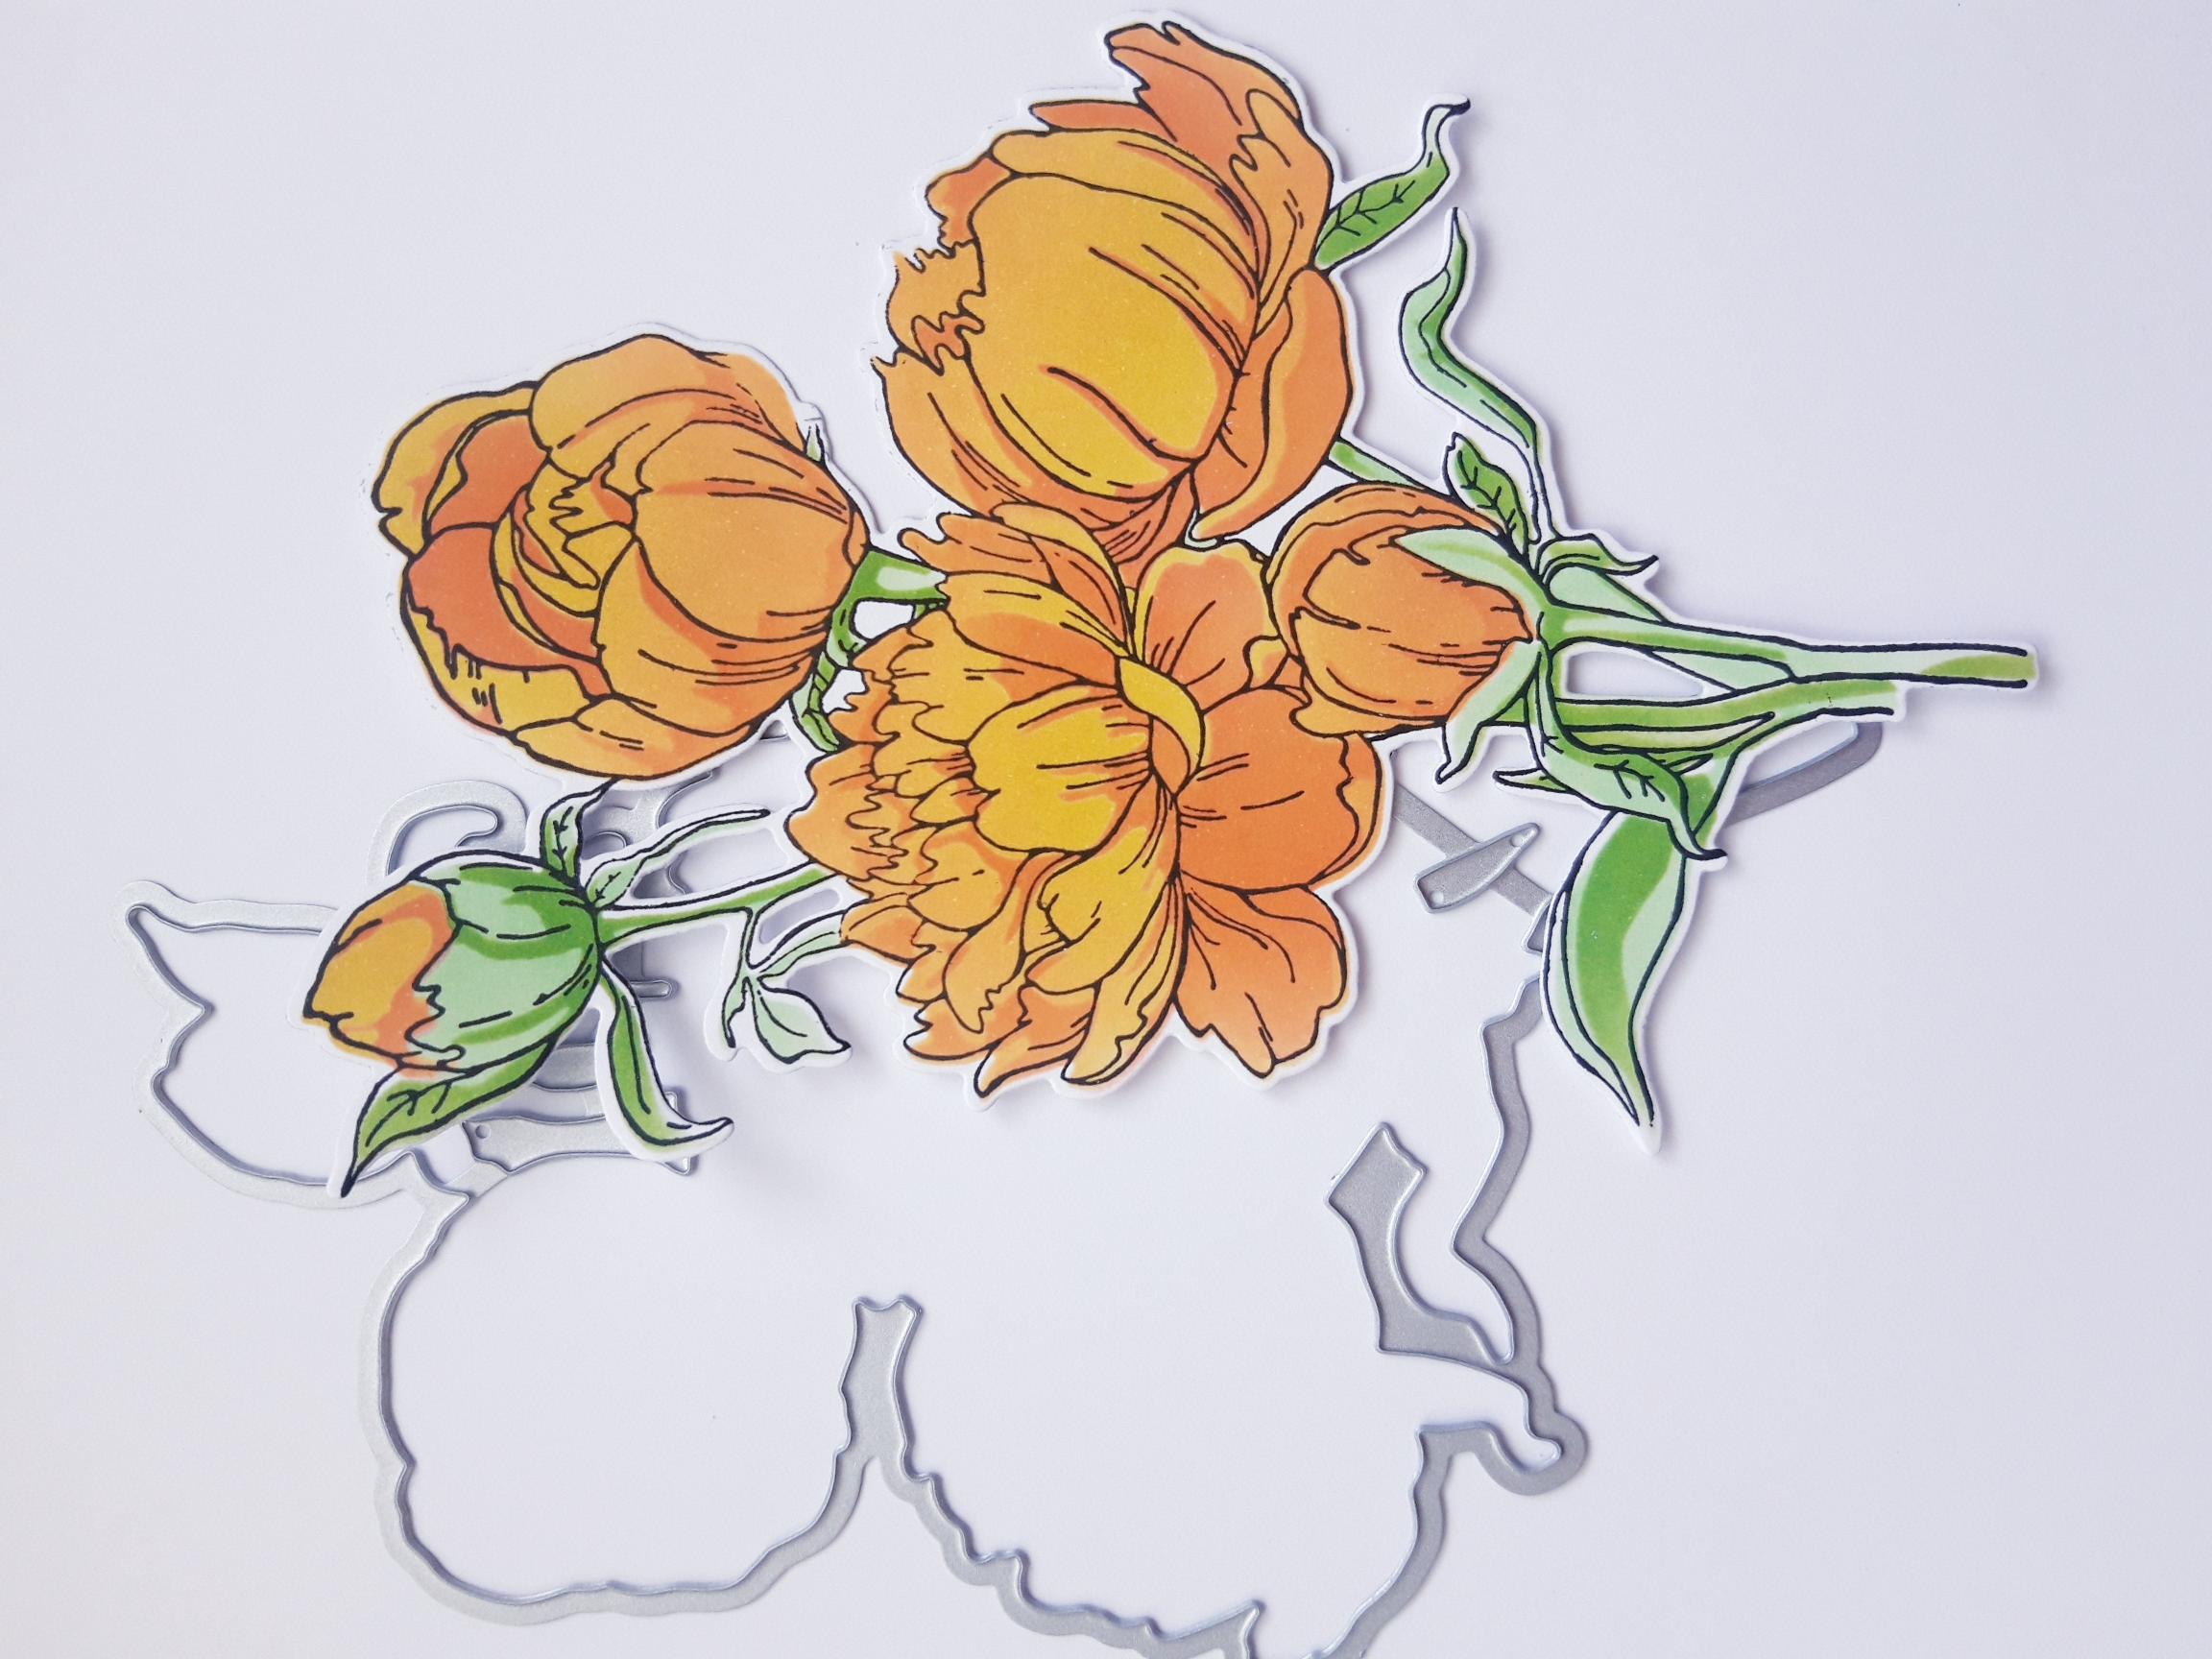
Secure the coordinating die in place over your stamped image, with low tack tape. Run it through your die cutting machine. |
|
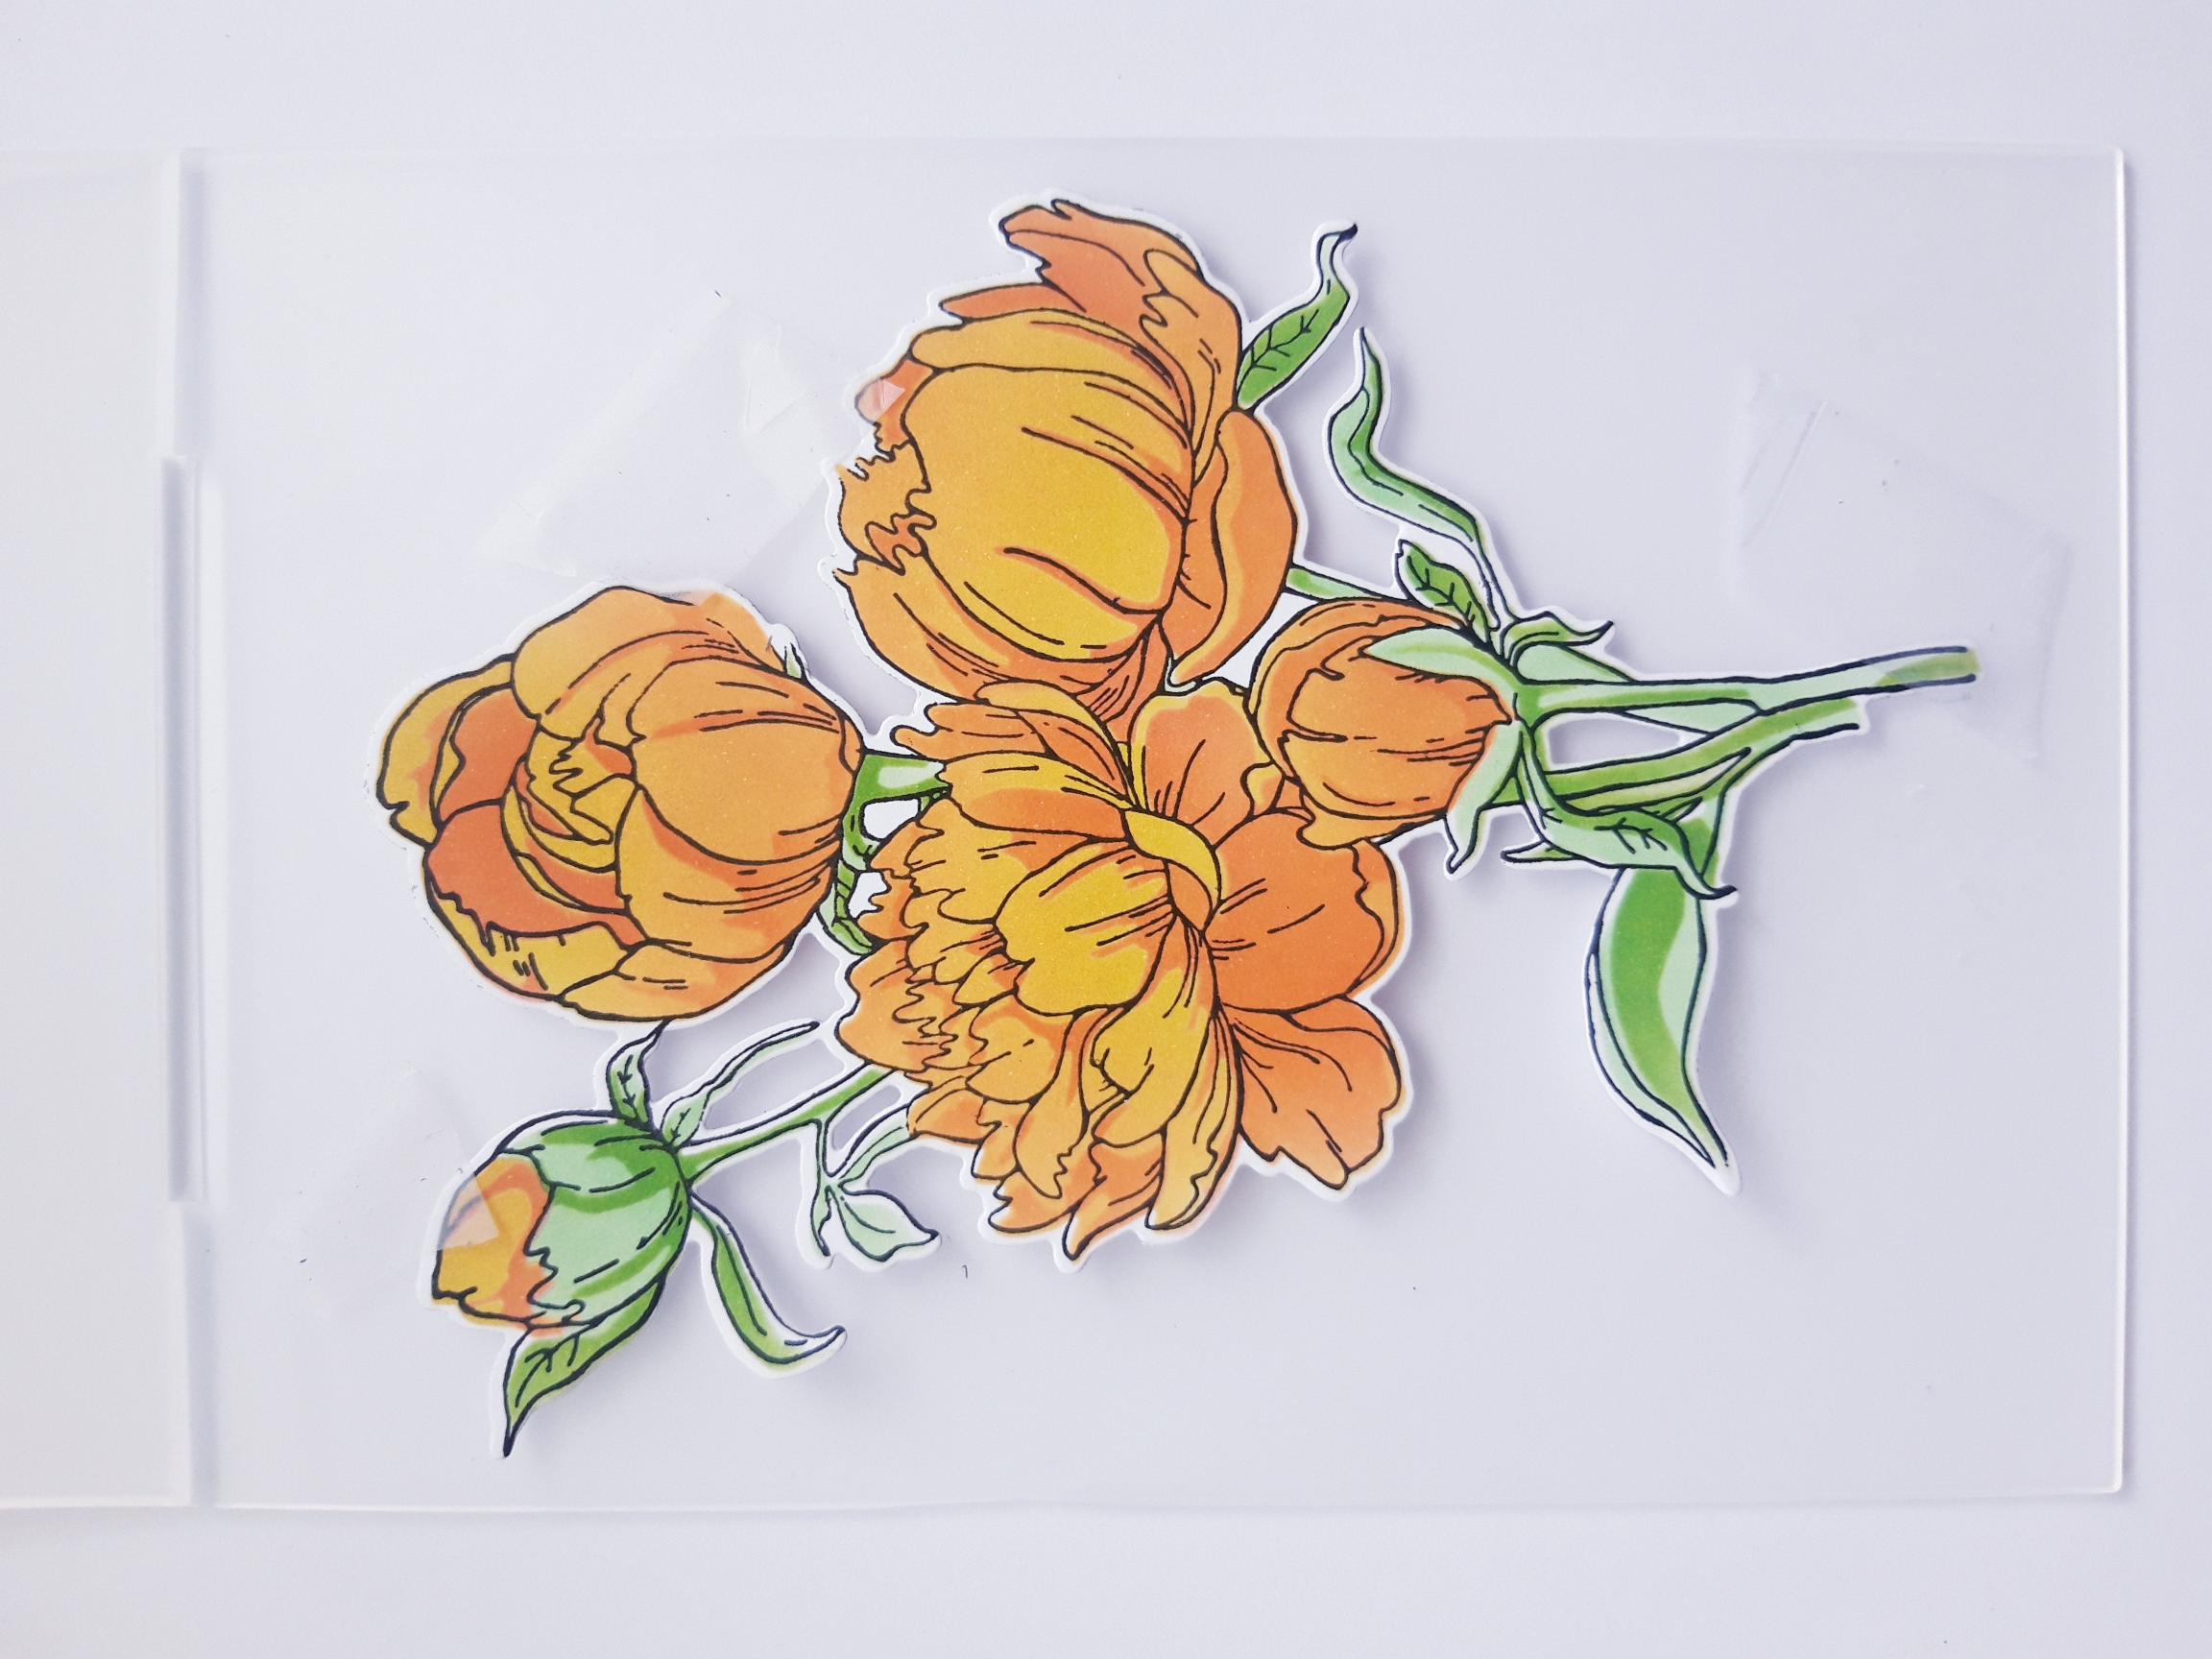
Place inside the embossing folder, with the raised, embossed side at the bottom and run it through your machine. Make sure you have the correct plates to emboss with... Set your die cut Peonies to one side. |
|
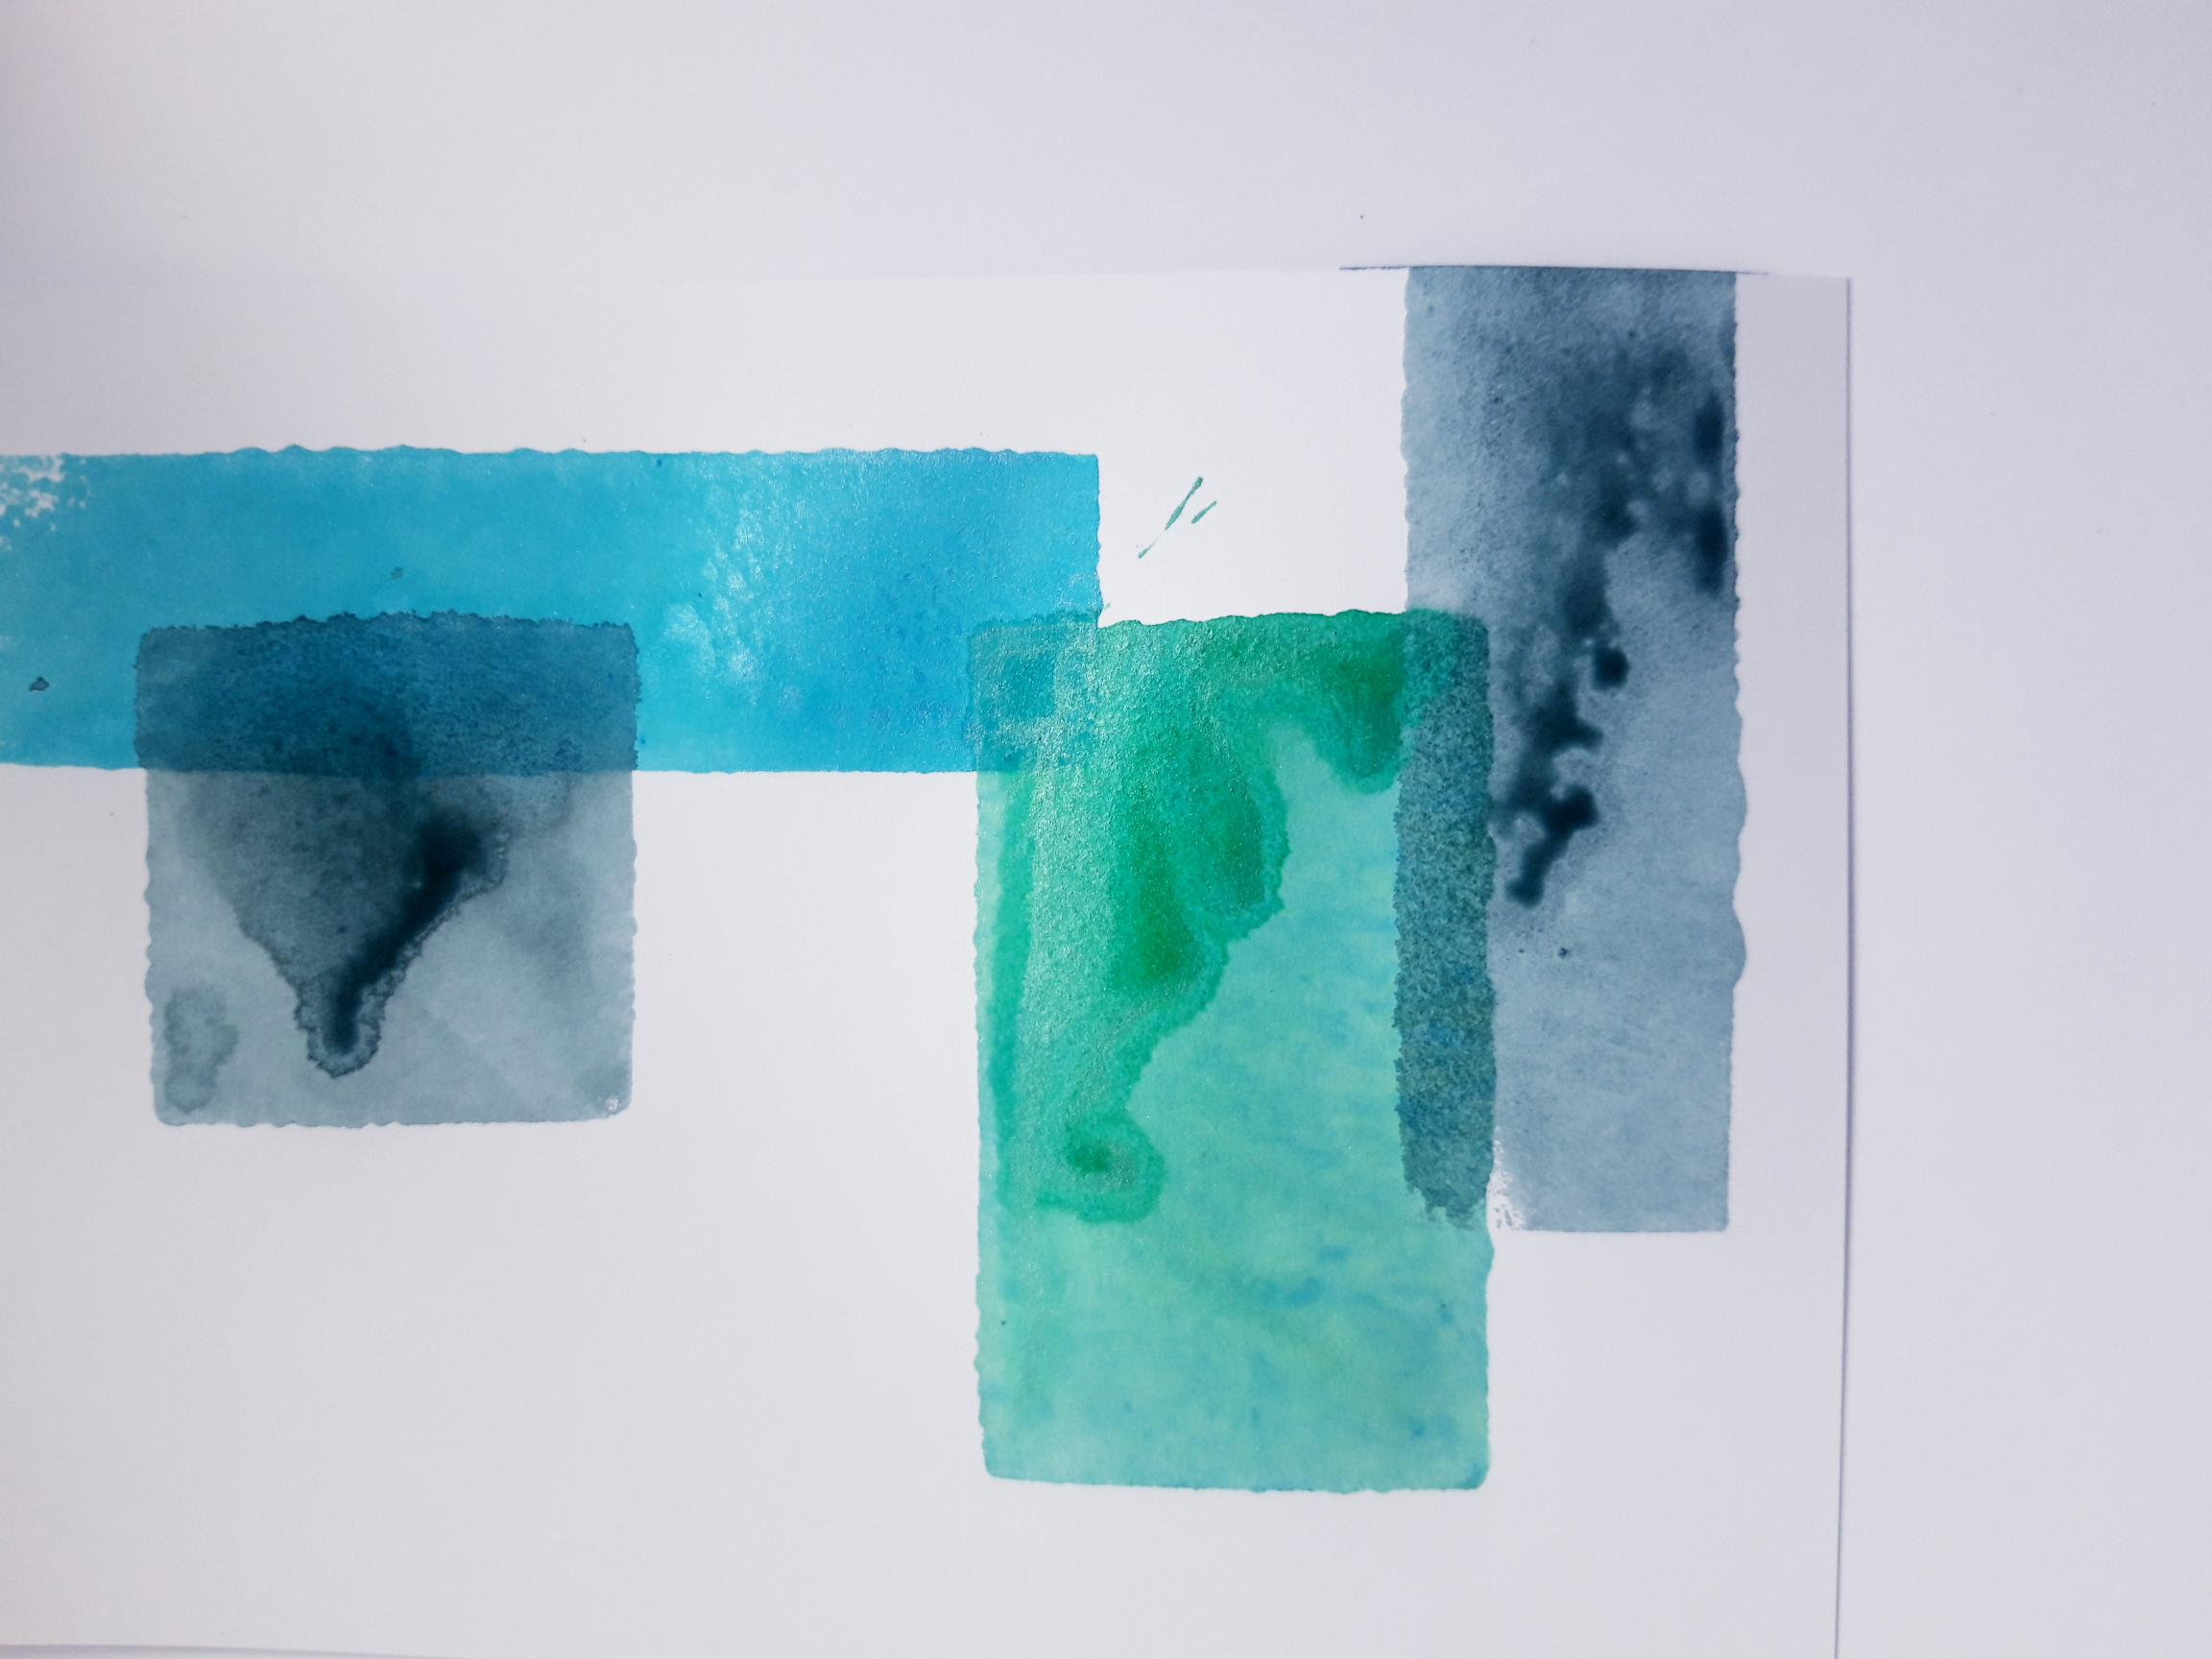
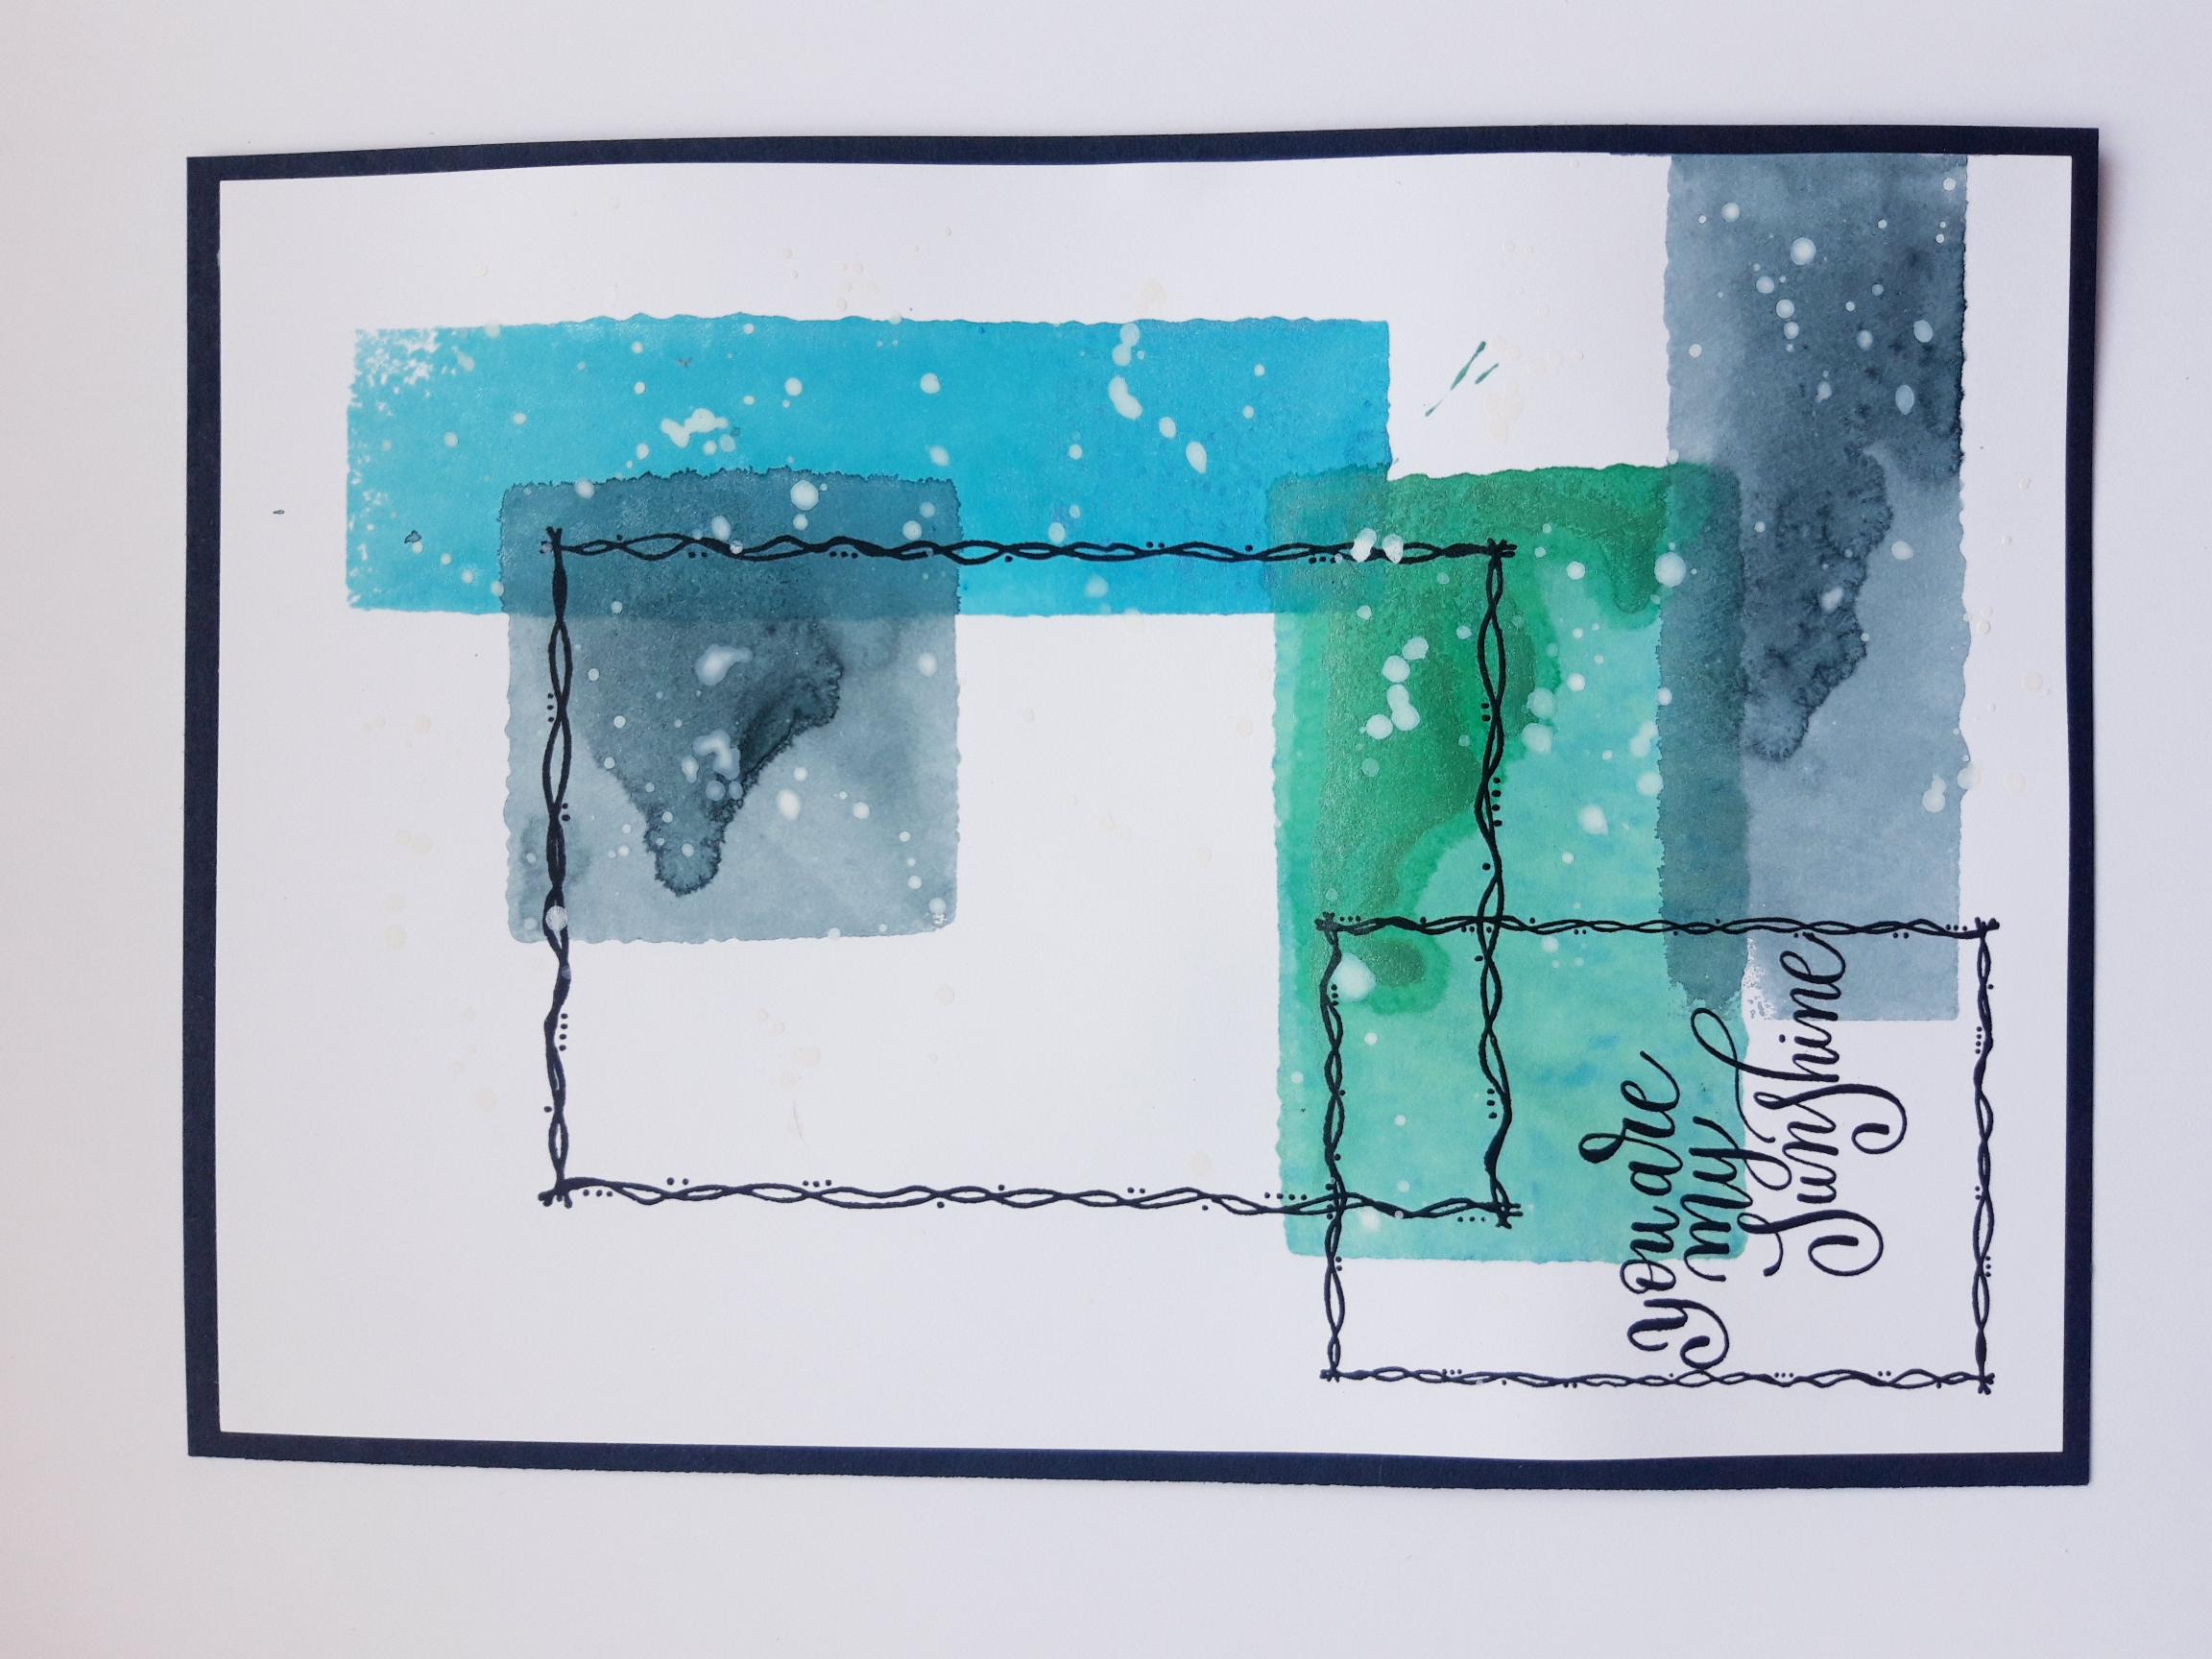
Create an acrylic block background on the white card 7 1/4 x 5". To achieve this, spray one of the Izink sprays on to an acrylic block, spritz lightly with water and press down on the right hand side of the card. Wait a few seconds for the card to "drink" the ink, then carefully lift it off. Repeat this step several times, with different coloured sprays and sized blocks, until you are happy with your background. Ensure you take your inked layout just off the right hand edge of the card. |
|
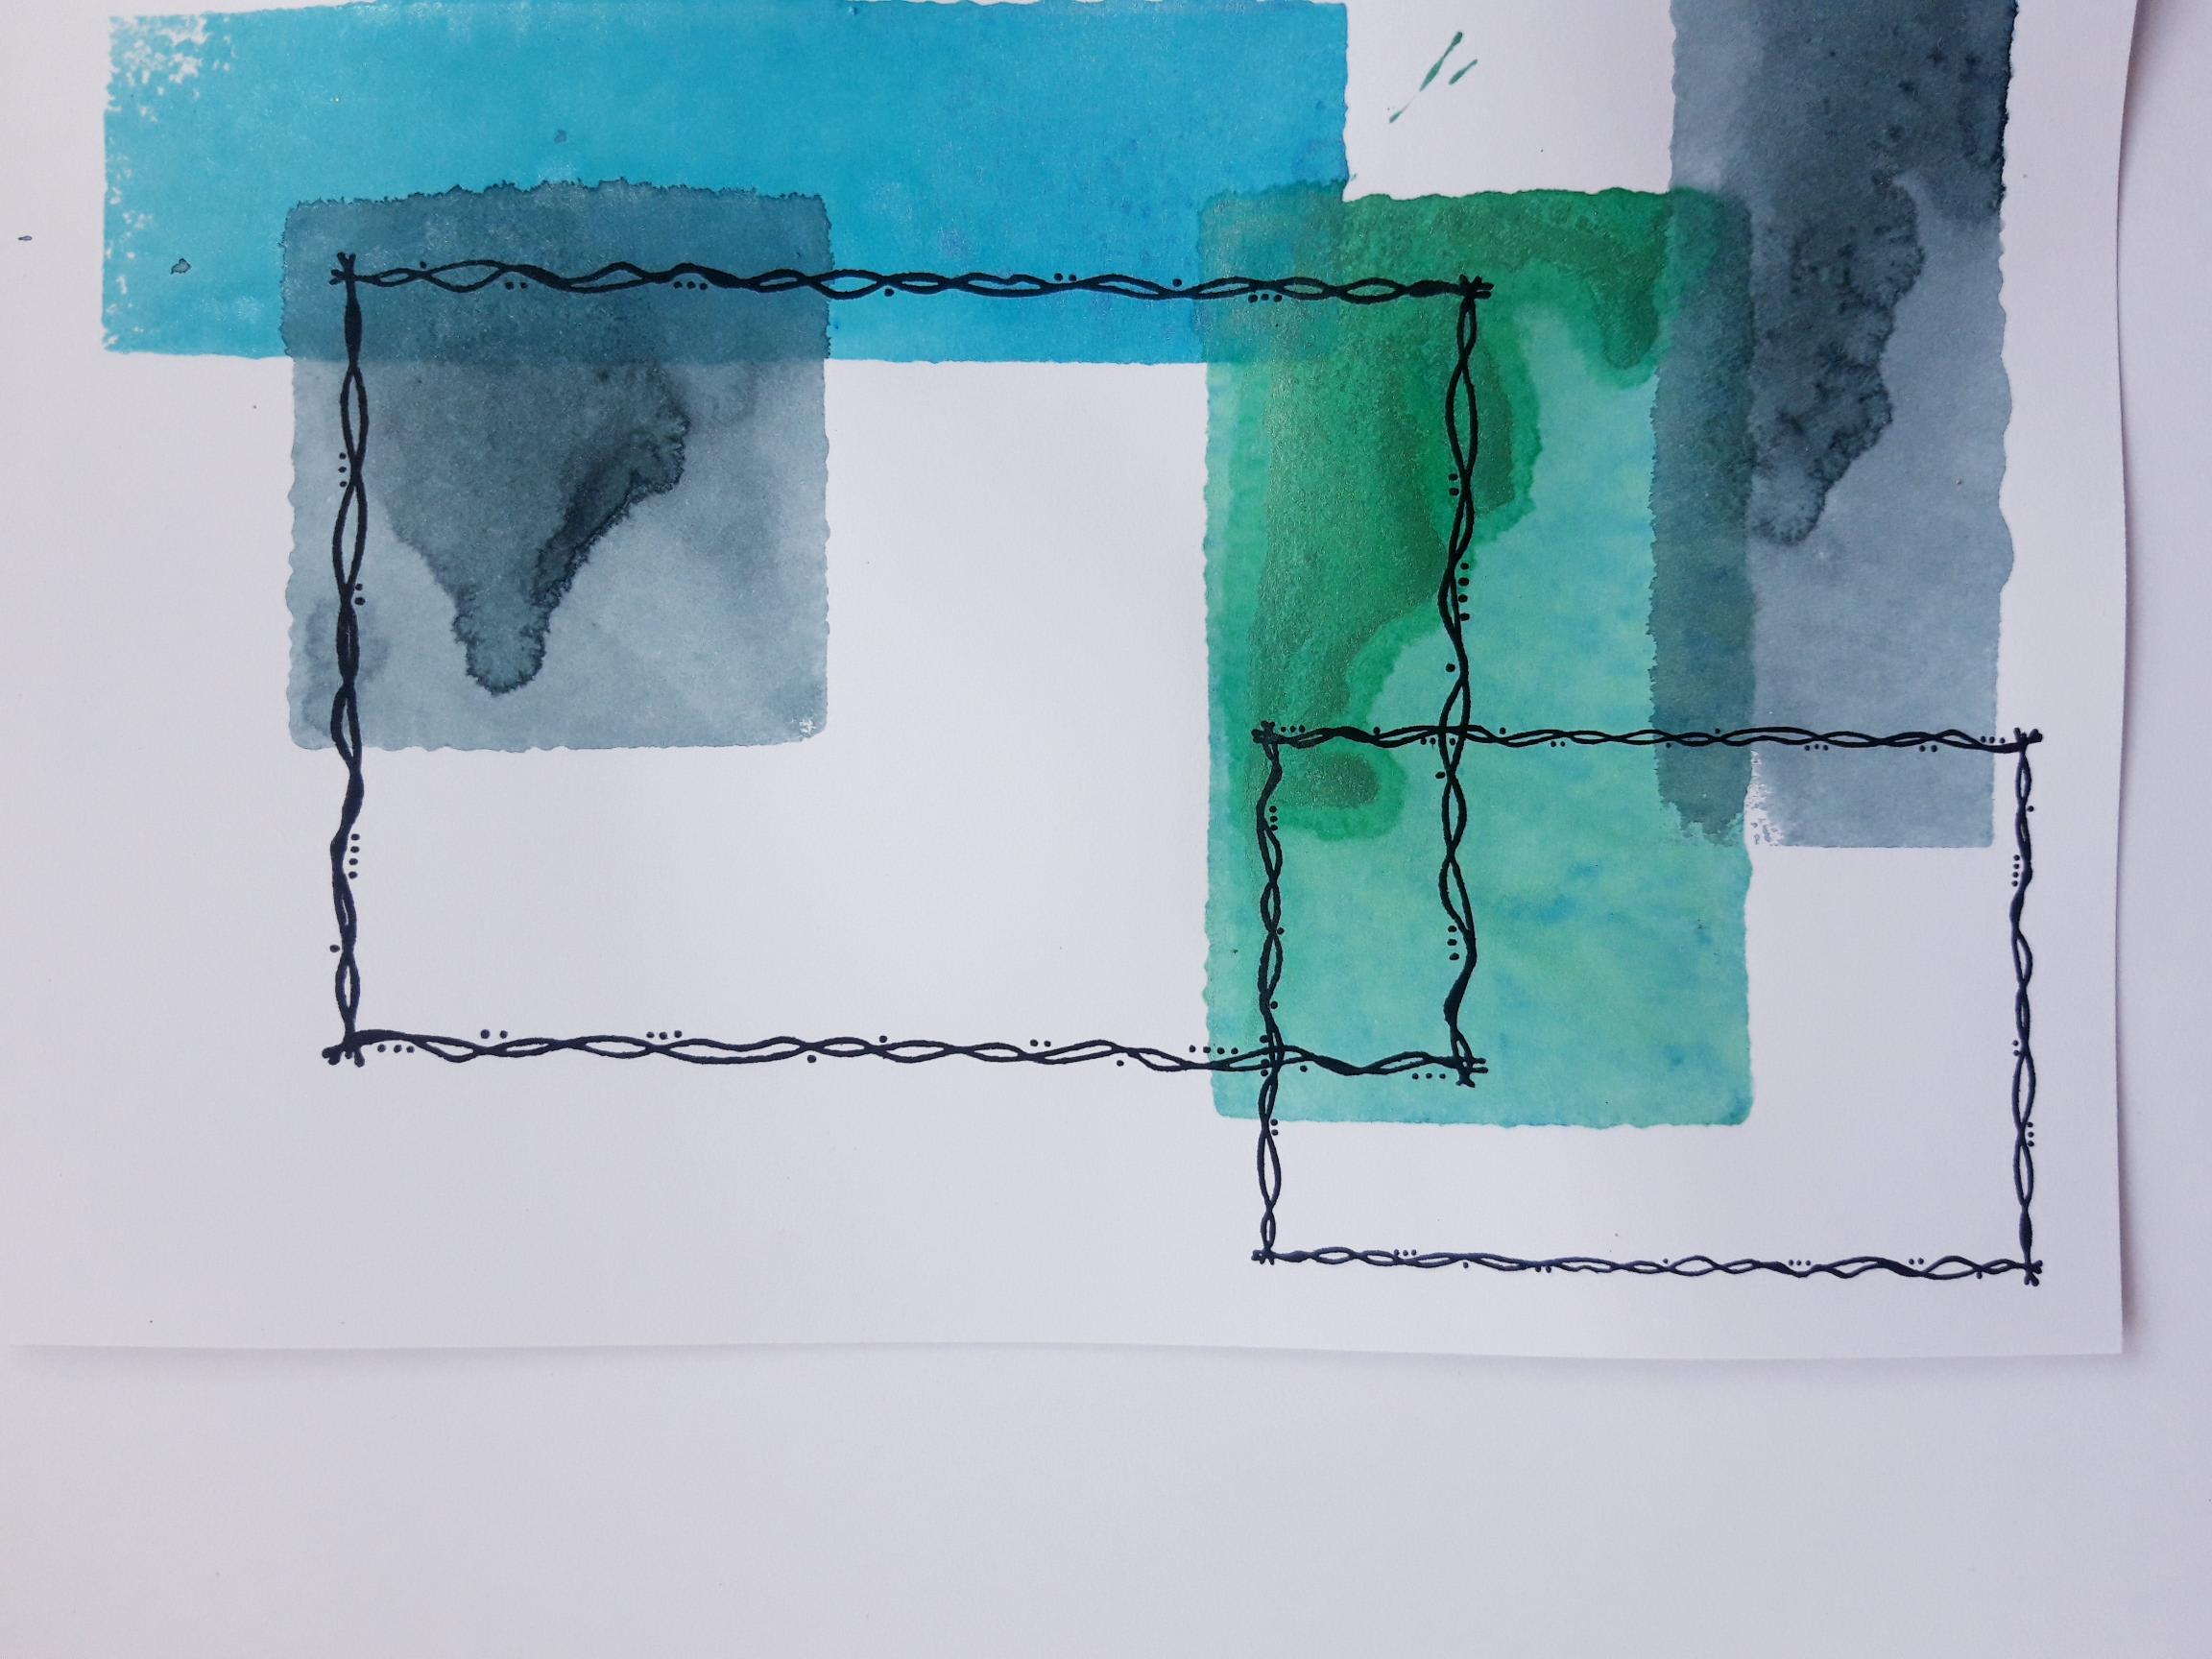
Ink up the 2 smallest frames, from the Dot Frame Stamp Collection, with the Versafine. Using your die cut Peonies as a guide, stamp your frames as shown here. NB: Your sentiment will be stamped in the smallest frame, so ensure it will be visible once you adhere your Peonies in place.
|
|
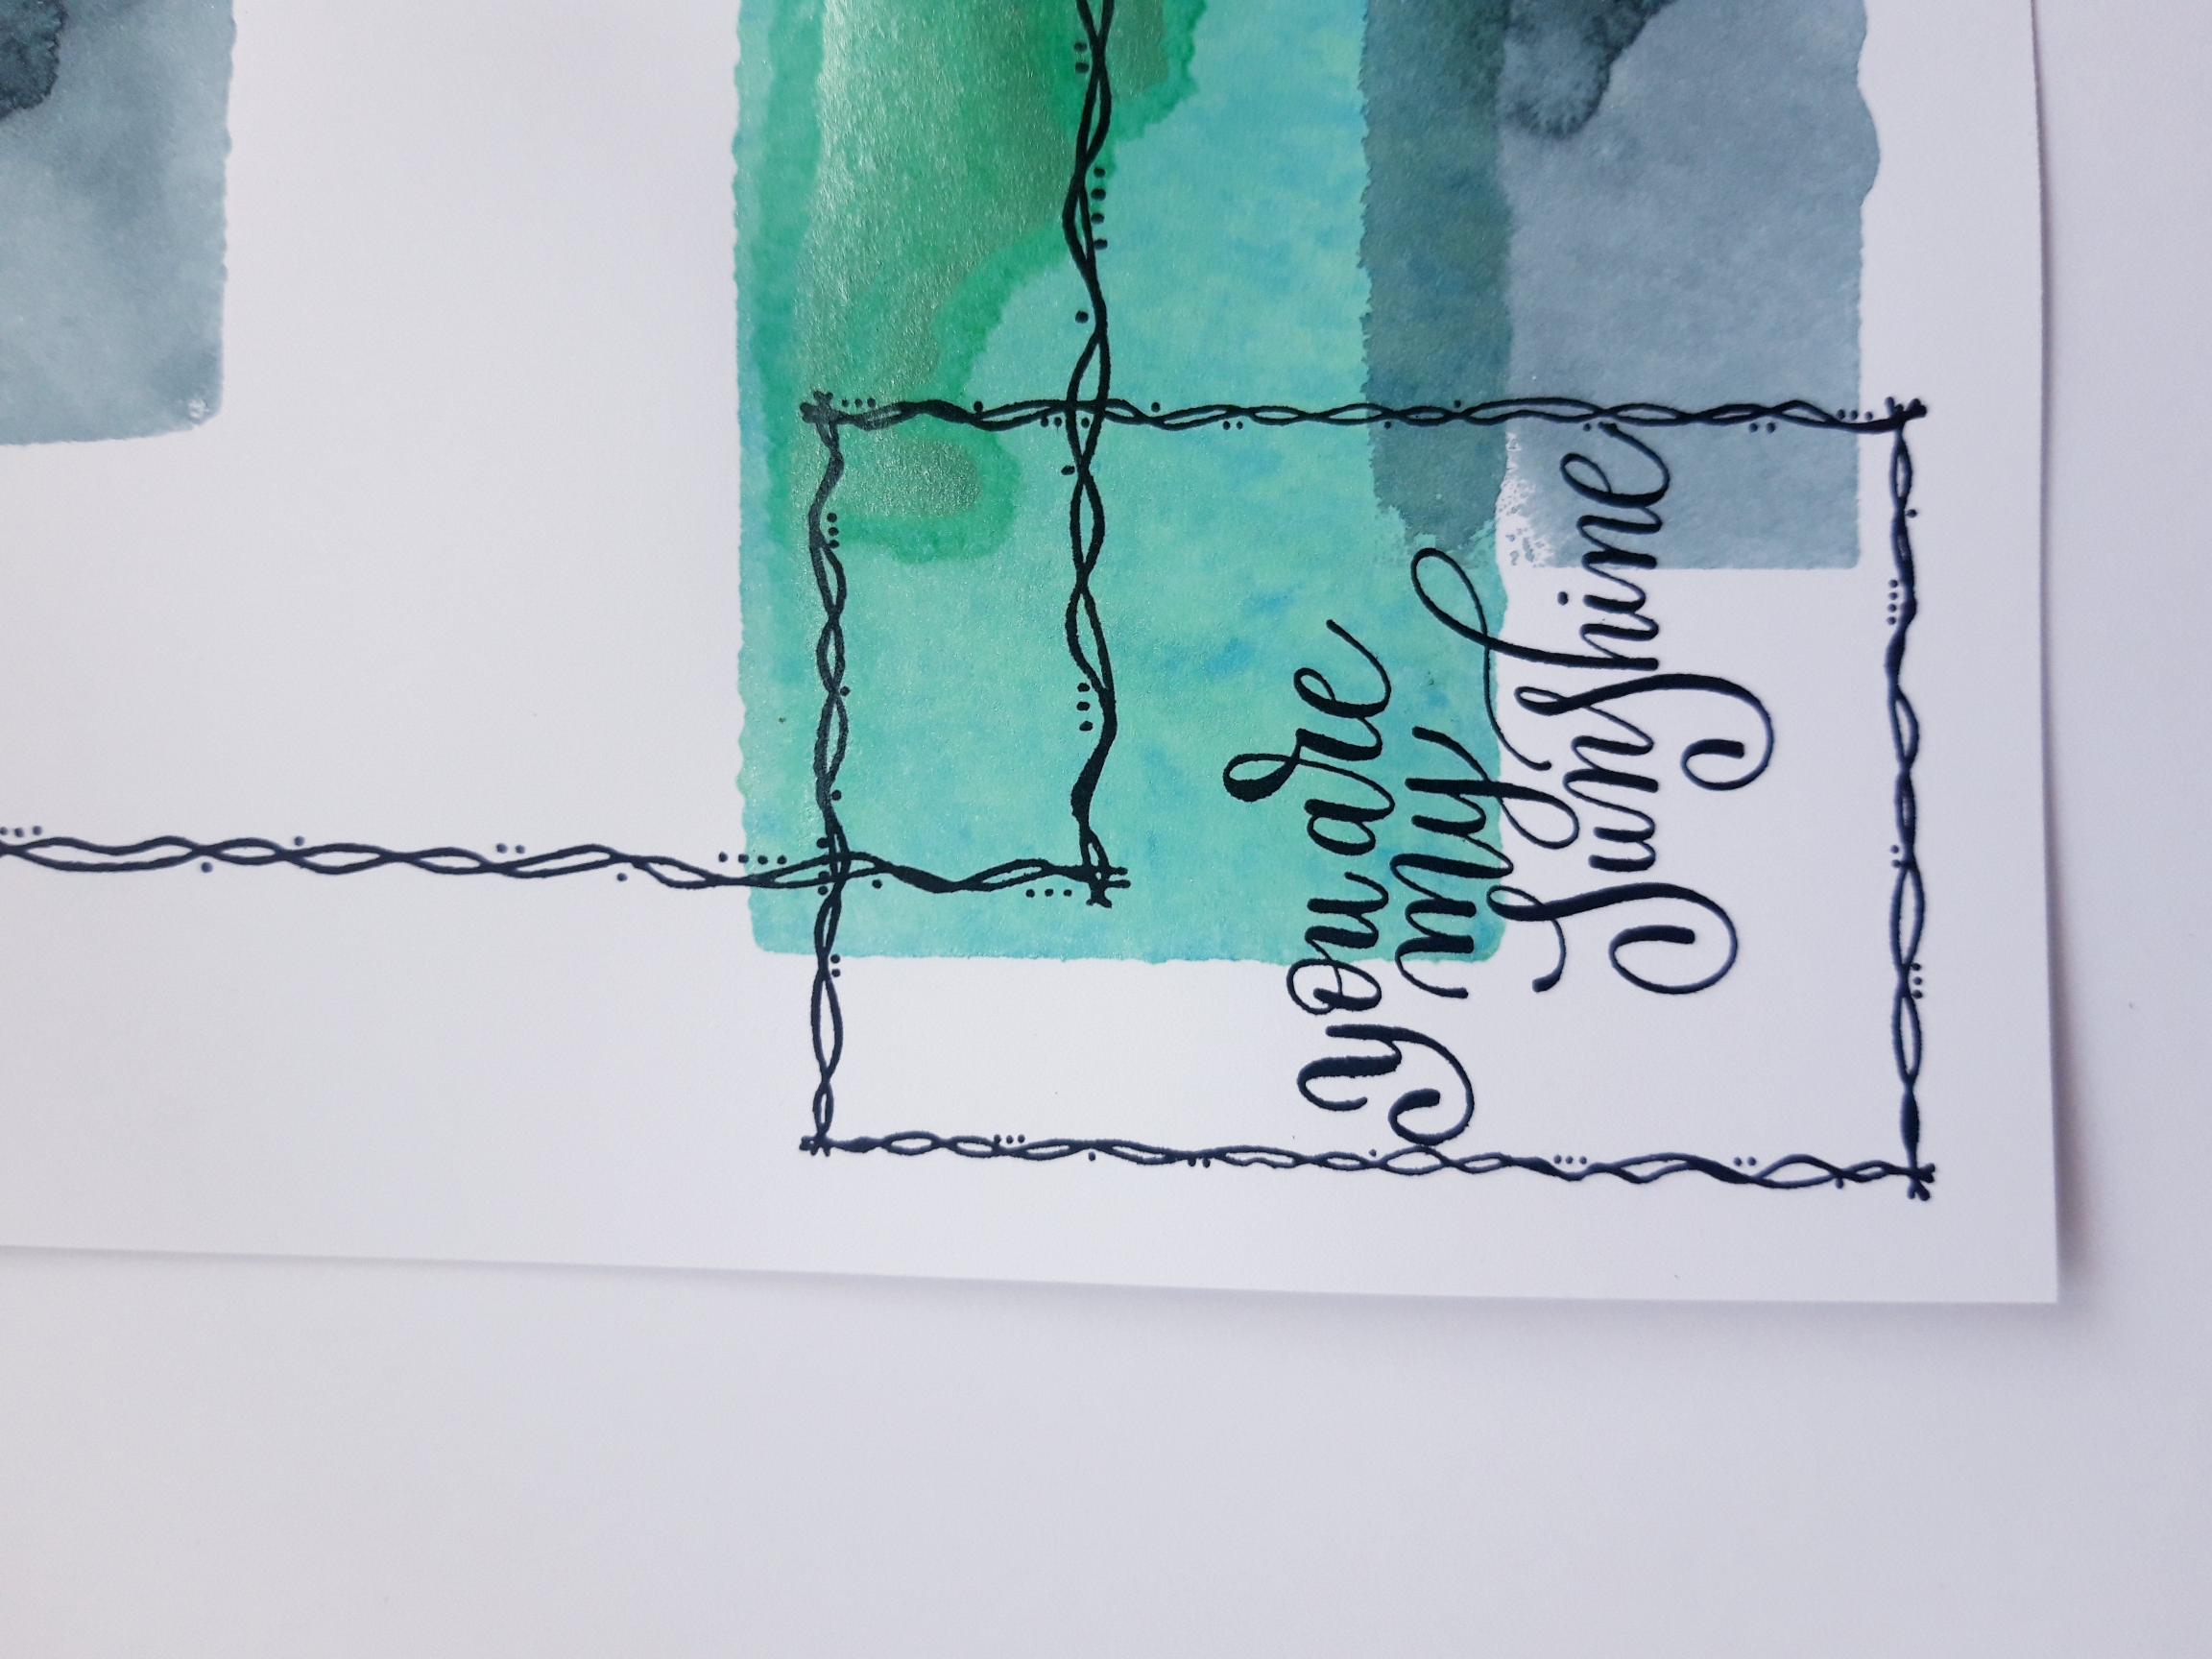
Ink up the sentiment stamp, with the Versafine and stamp within the smaller frame. |
|
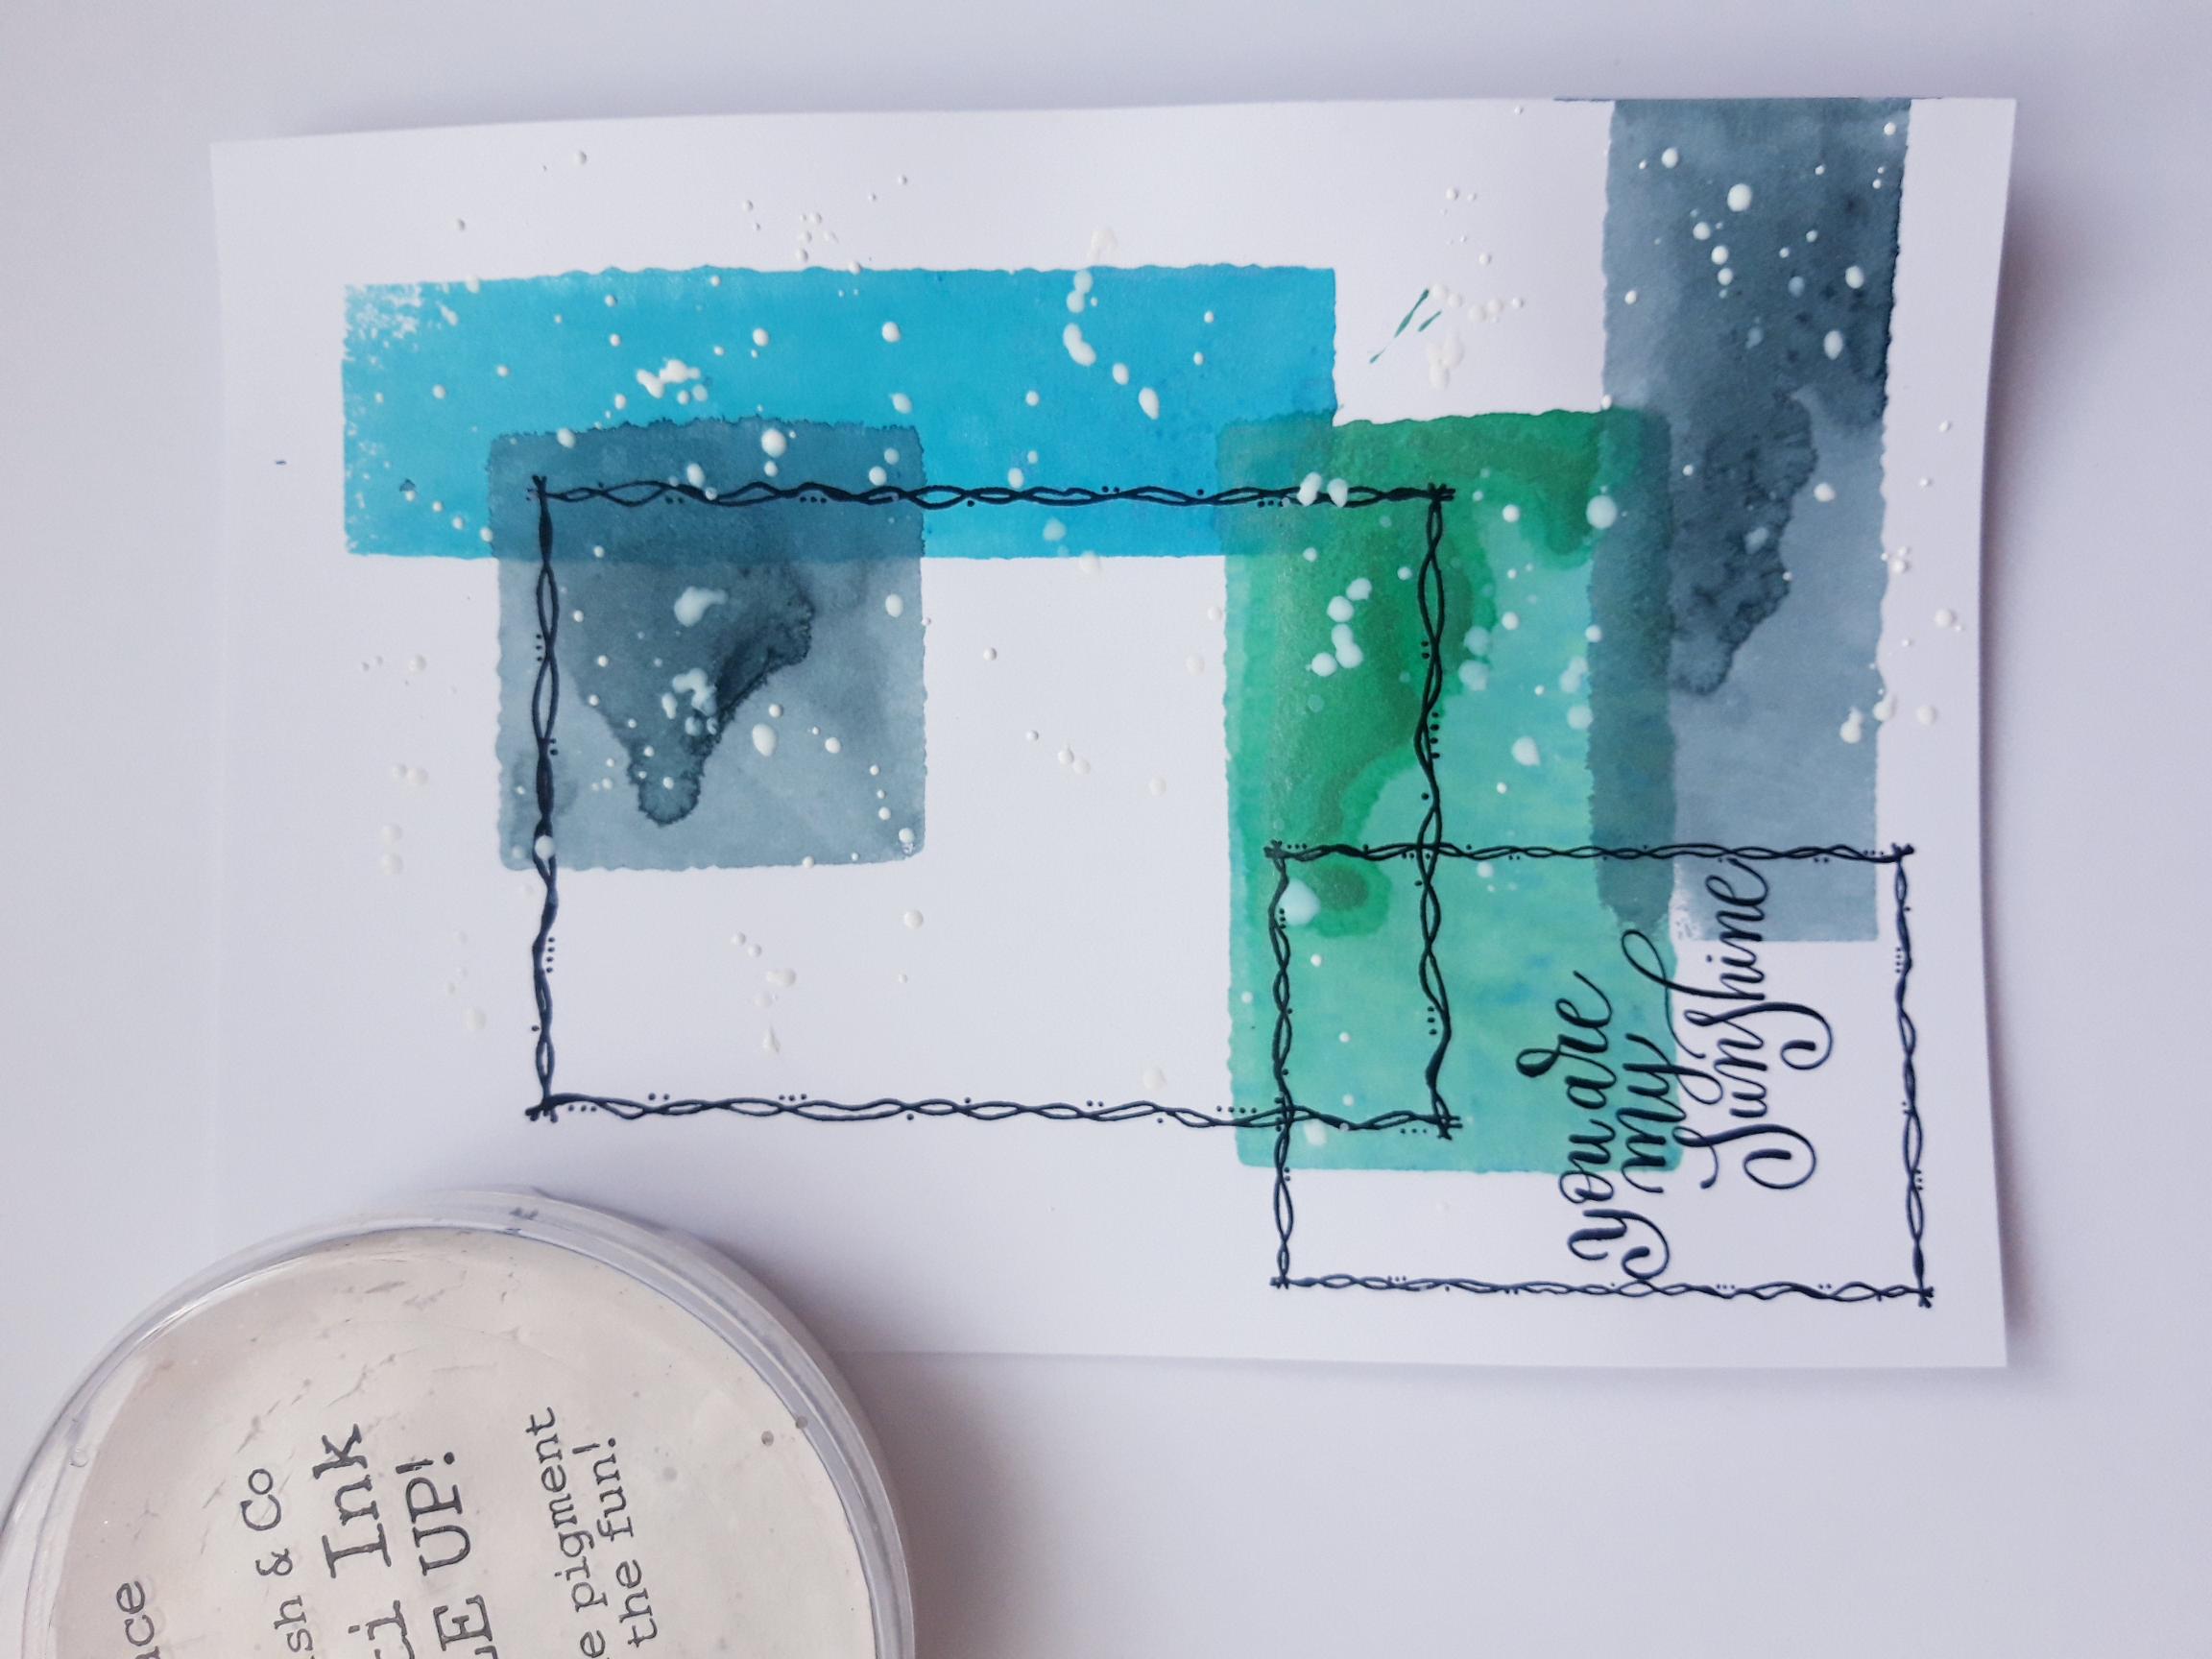
Add water to the Confetti Ink and use your paint brush to splatter the ink over your artwork, as required. I like lots of splats!! Dry off your artwork, before proceeding to the next step. |
|
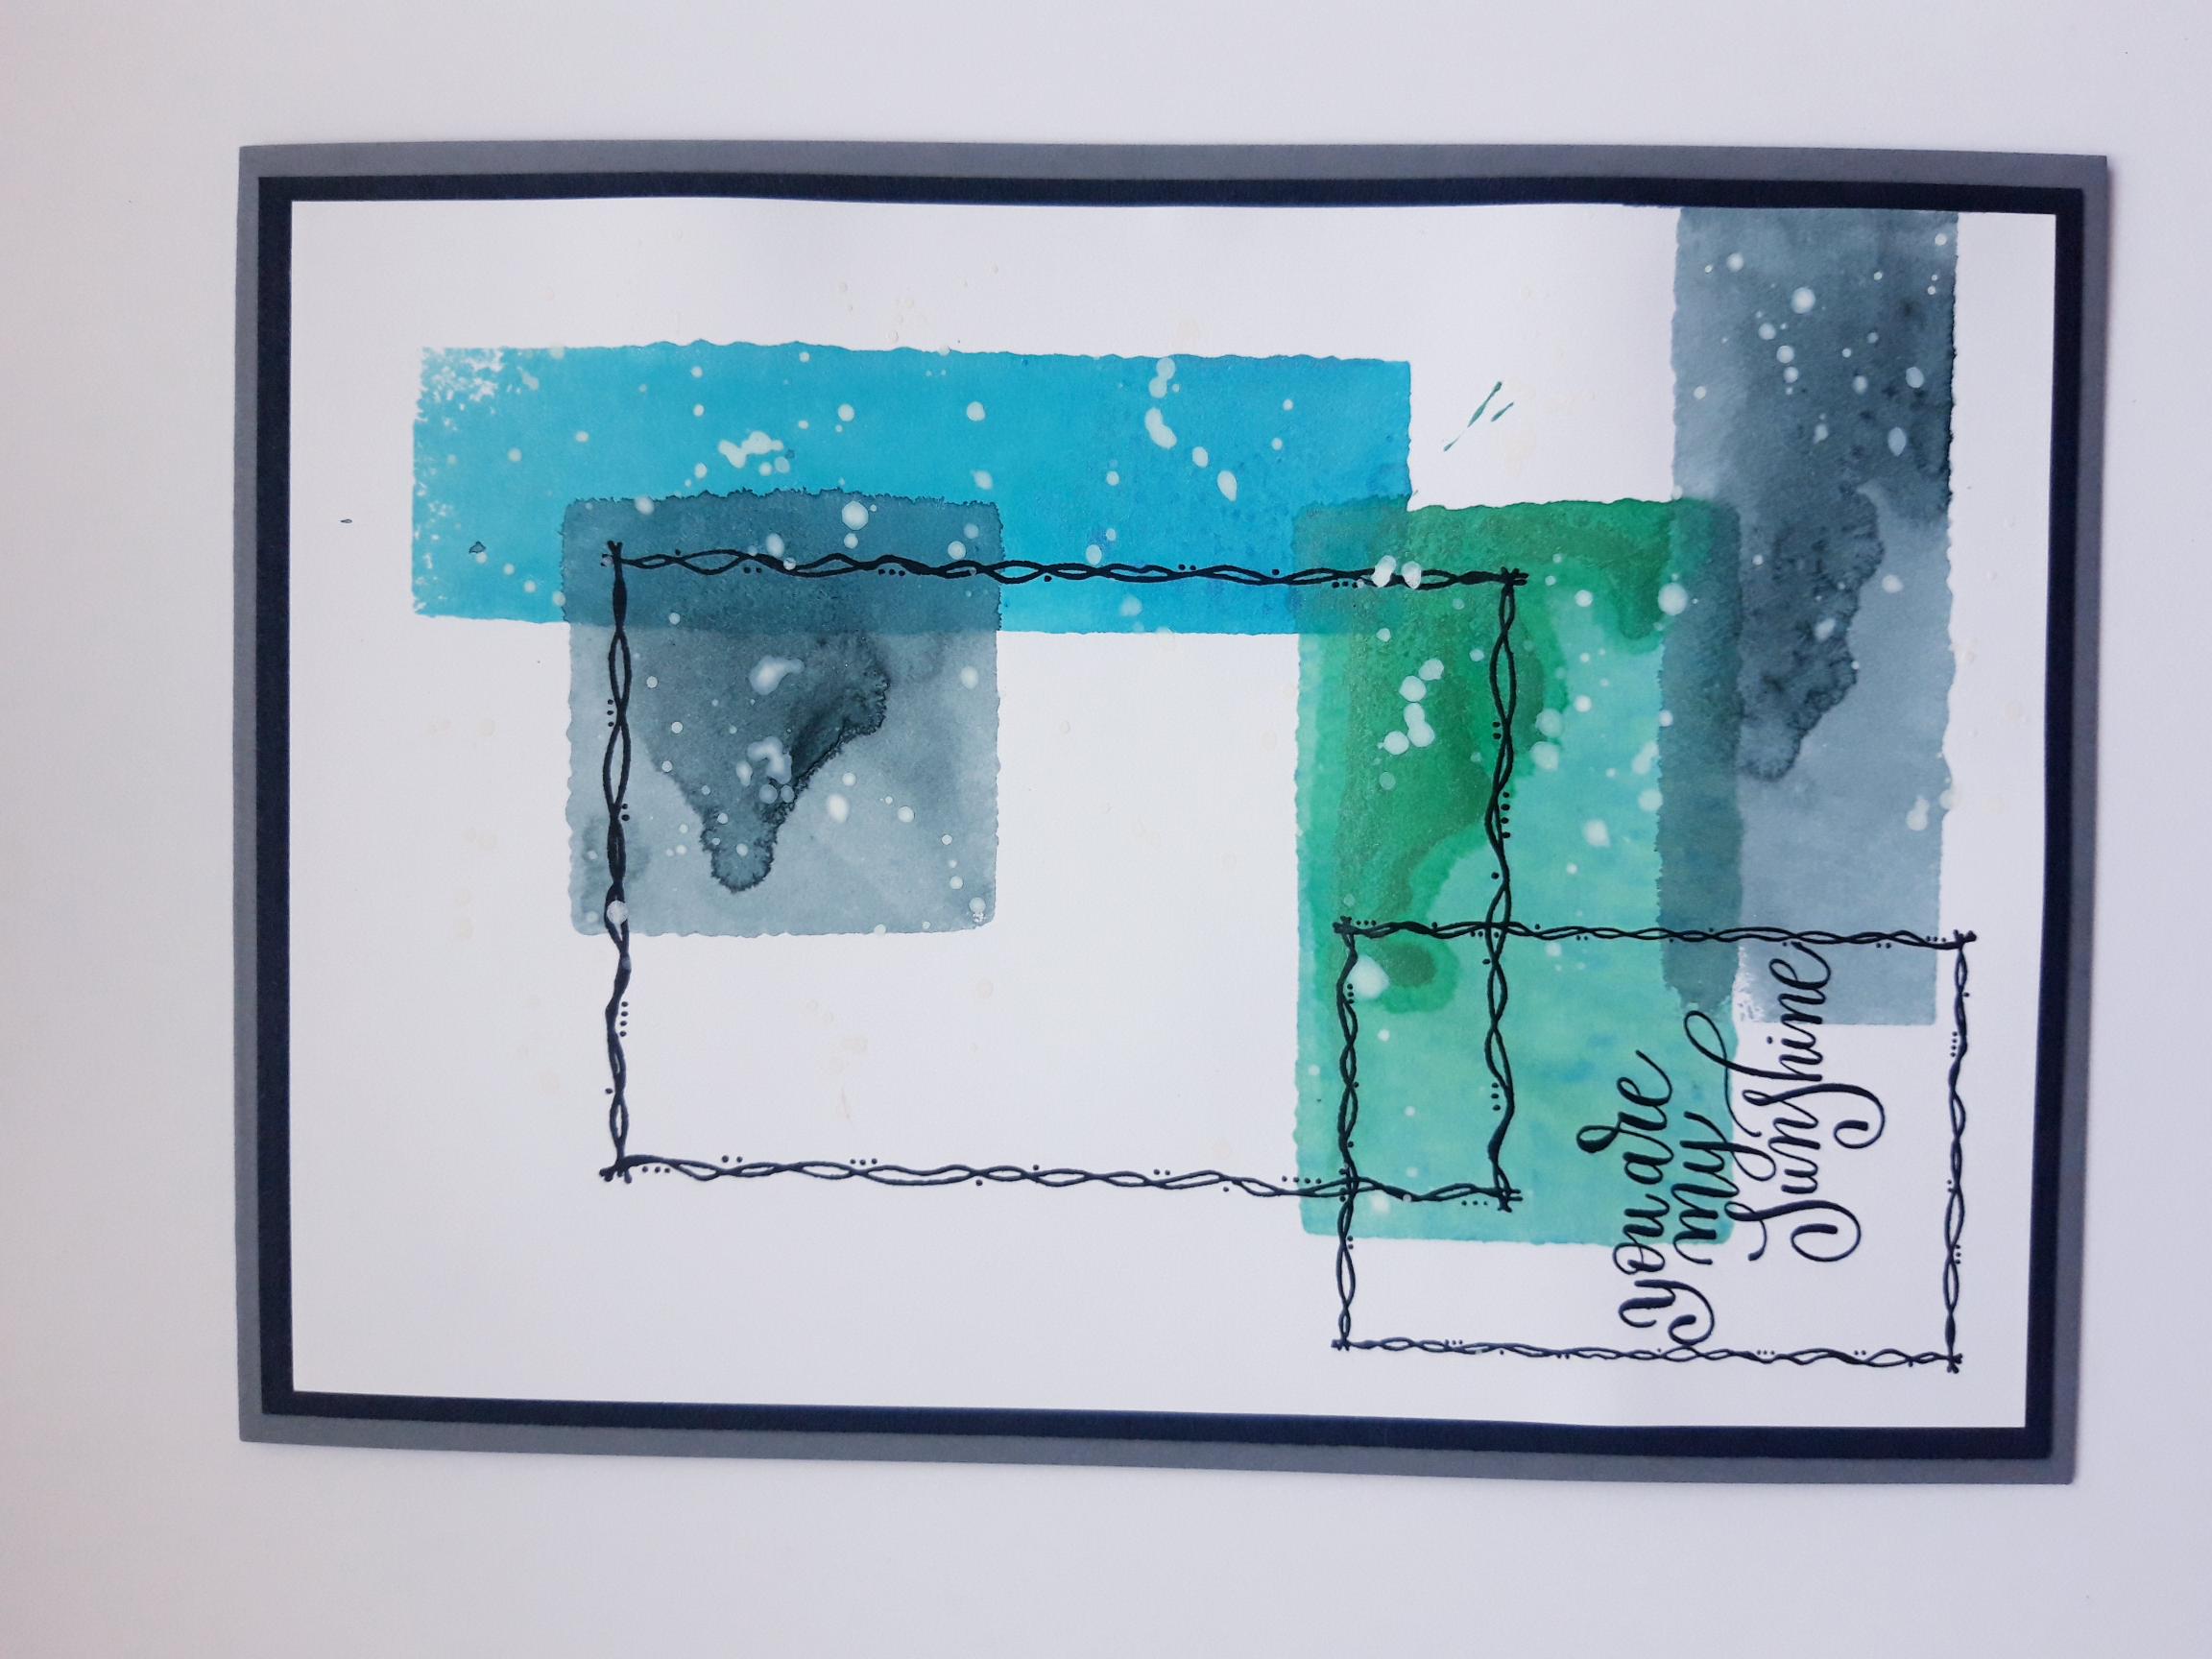
Adhere your artwork on to the black card. |
|
Adhere on to the front of your grey, top folding card blank. |
|
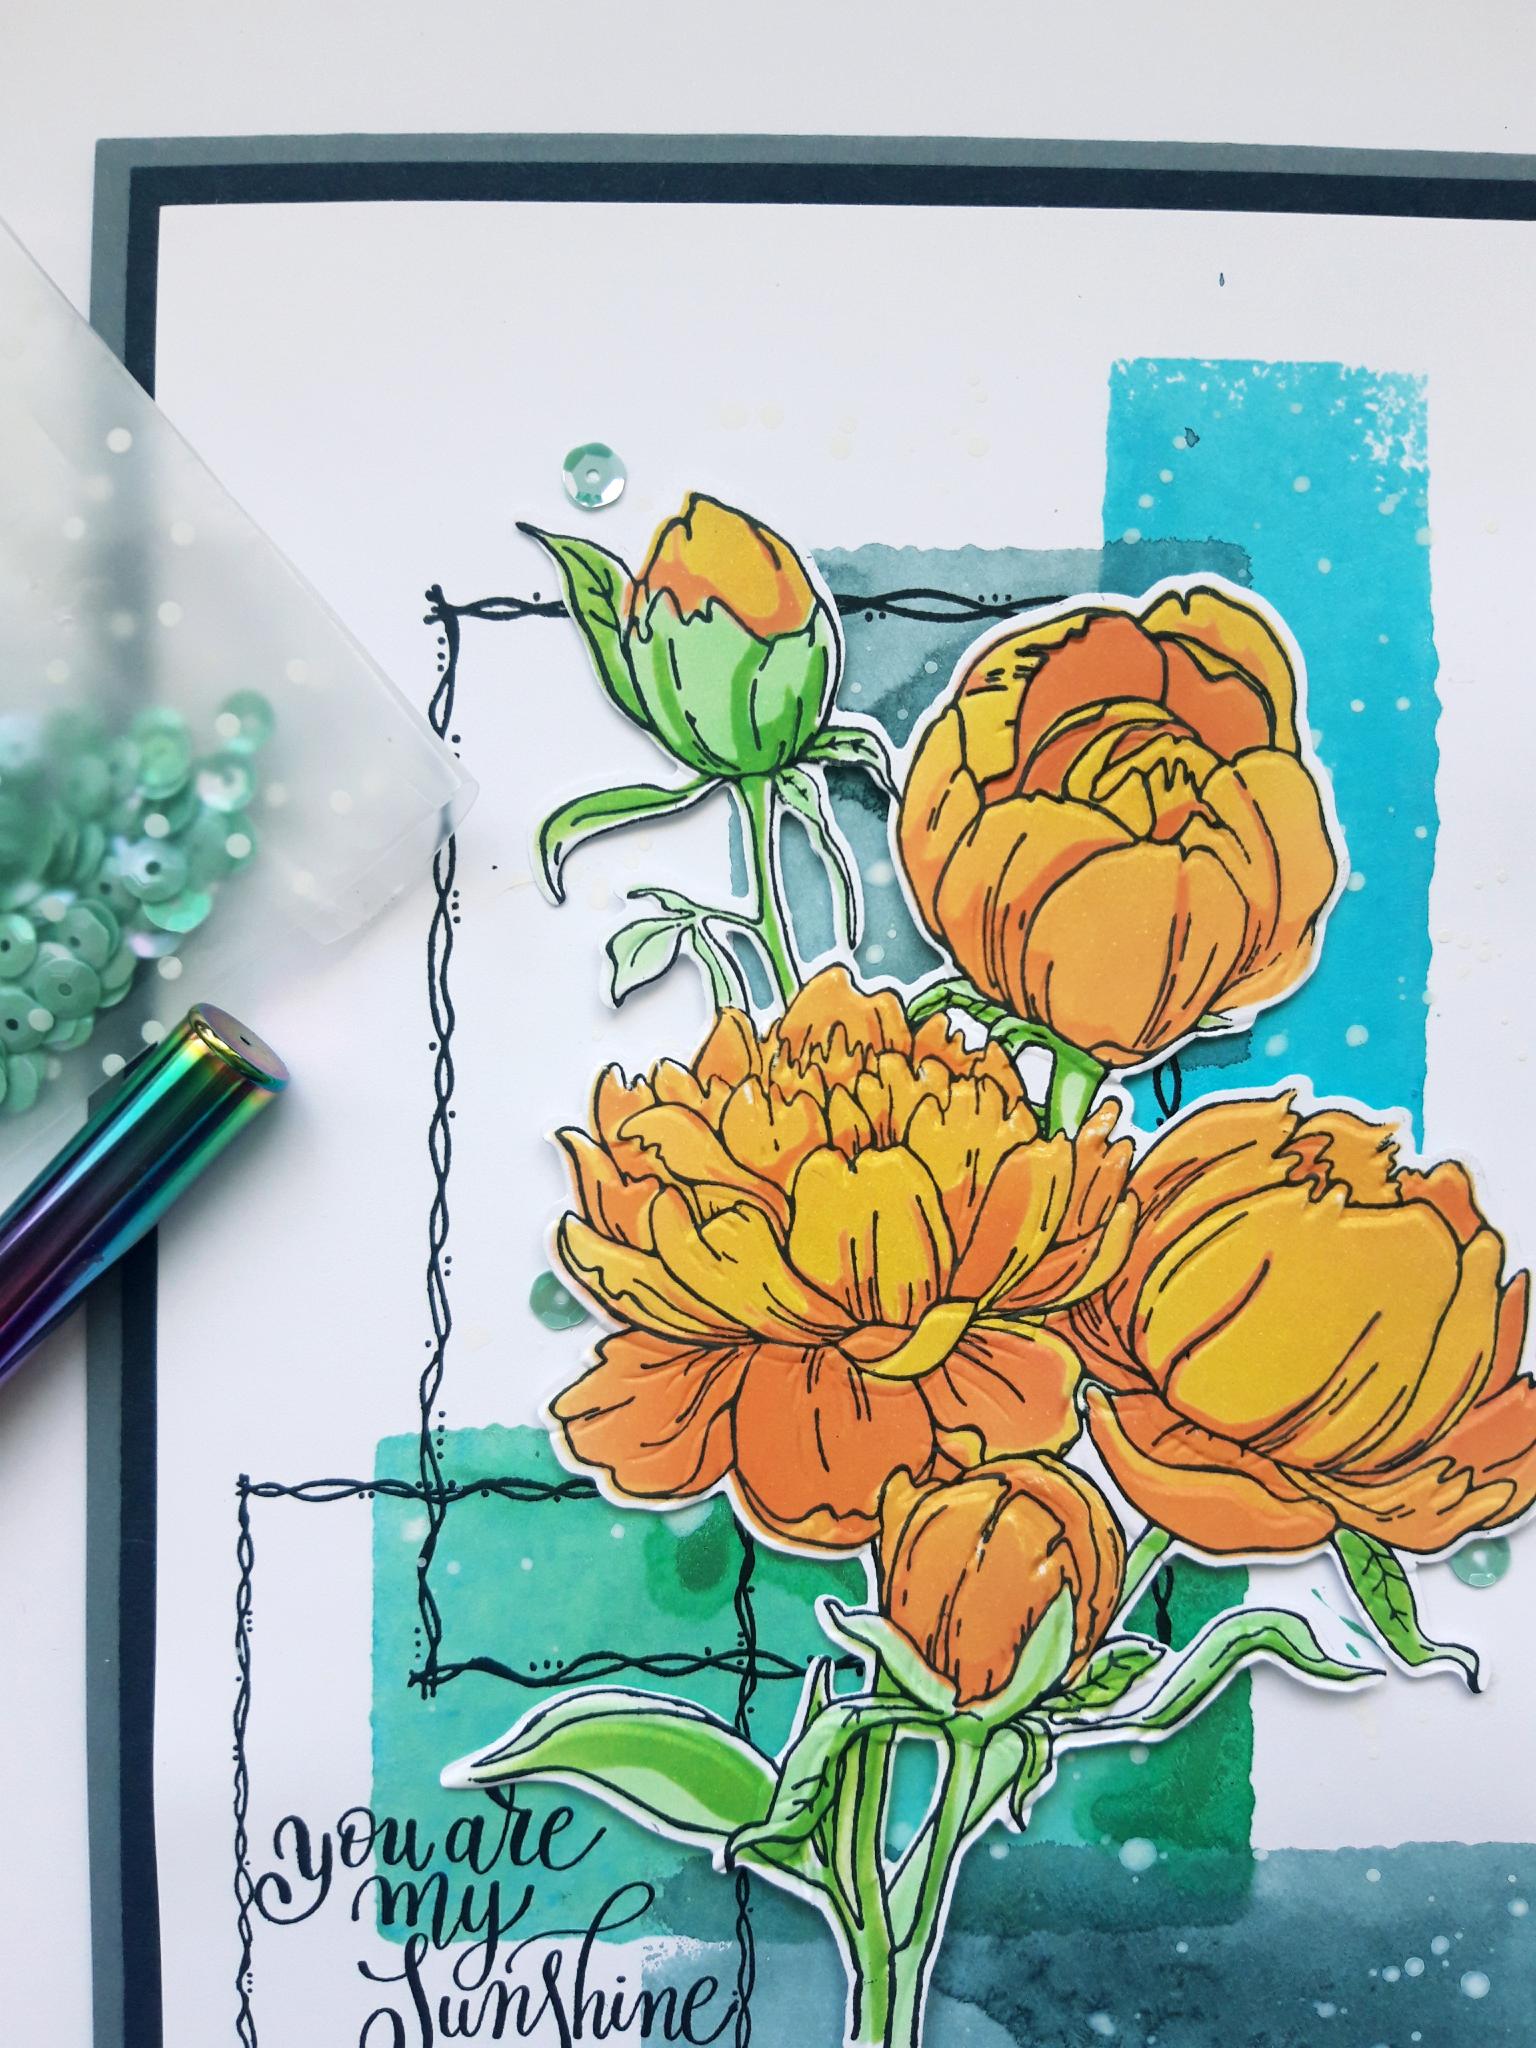
Adhere your die cut Peonies on to your artwork, using foam pads for added dimension. |
|
To finish, add sequins on, around and tucked under your artwork. |