Give your friends $10 off their first order!
Refer a FRIEND


WHAT YOU WILL NEED:
DL white card blank
6 x 2 1/2" white cardstock
A4 white cardstock
Summer Breeze Washi Tape
Summer Breeze Die collection
Sepia Tabs Washi Tape
Sepia Tabs Die collection ( die cut these out in advance, and choose your sentiments for this card)
Izink Shiny Spray: Vert D'Eau
Liquid Pearls: White Opal
Black and white Bakers Twine
Tag Punch
Die cutting machine
Foam Pads
Perfect Together Glue
Paper Trimmer
Heat Gun (optional)
[click image to enlarge] 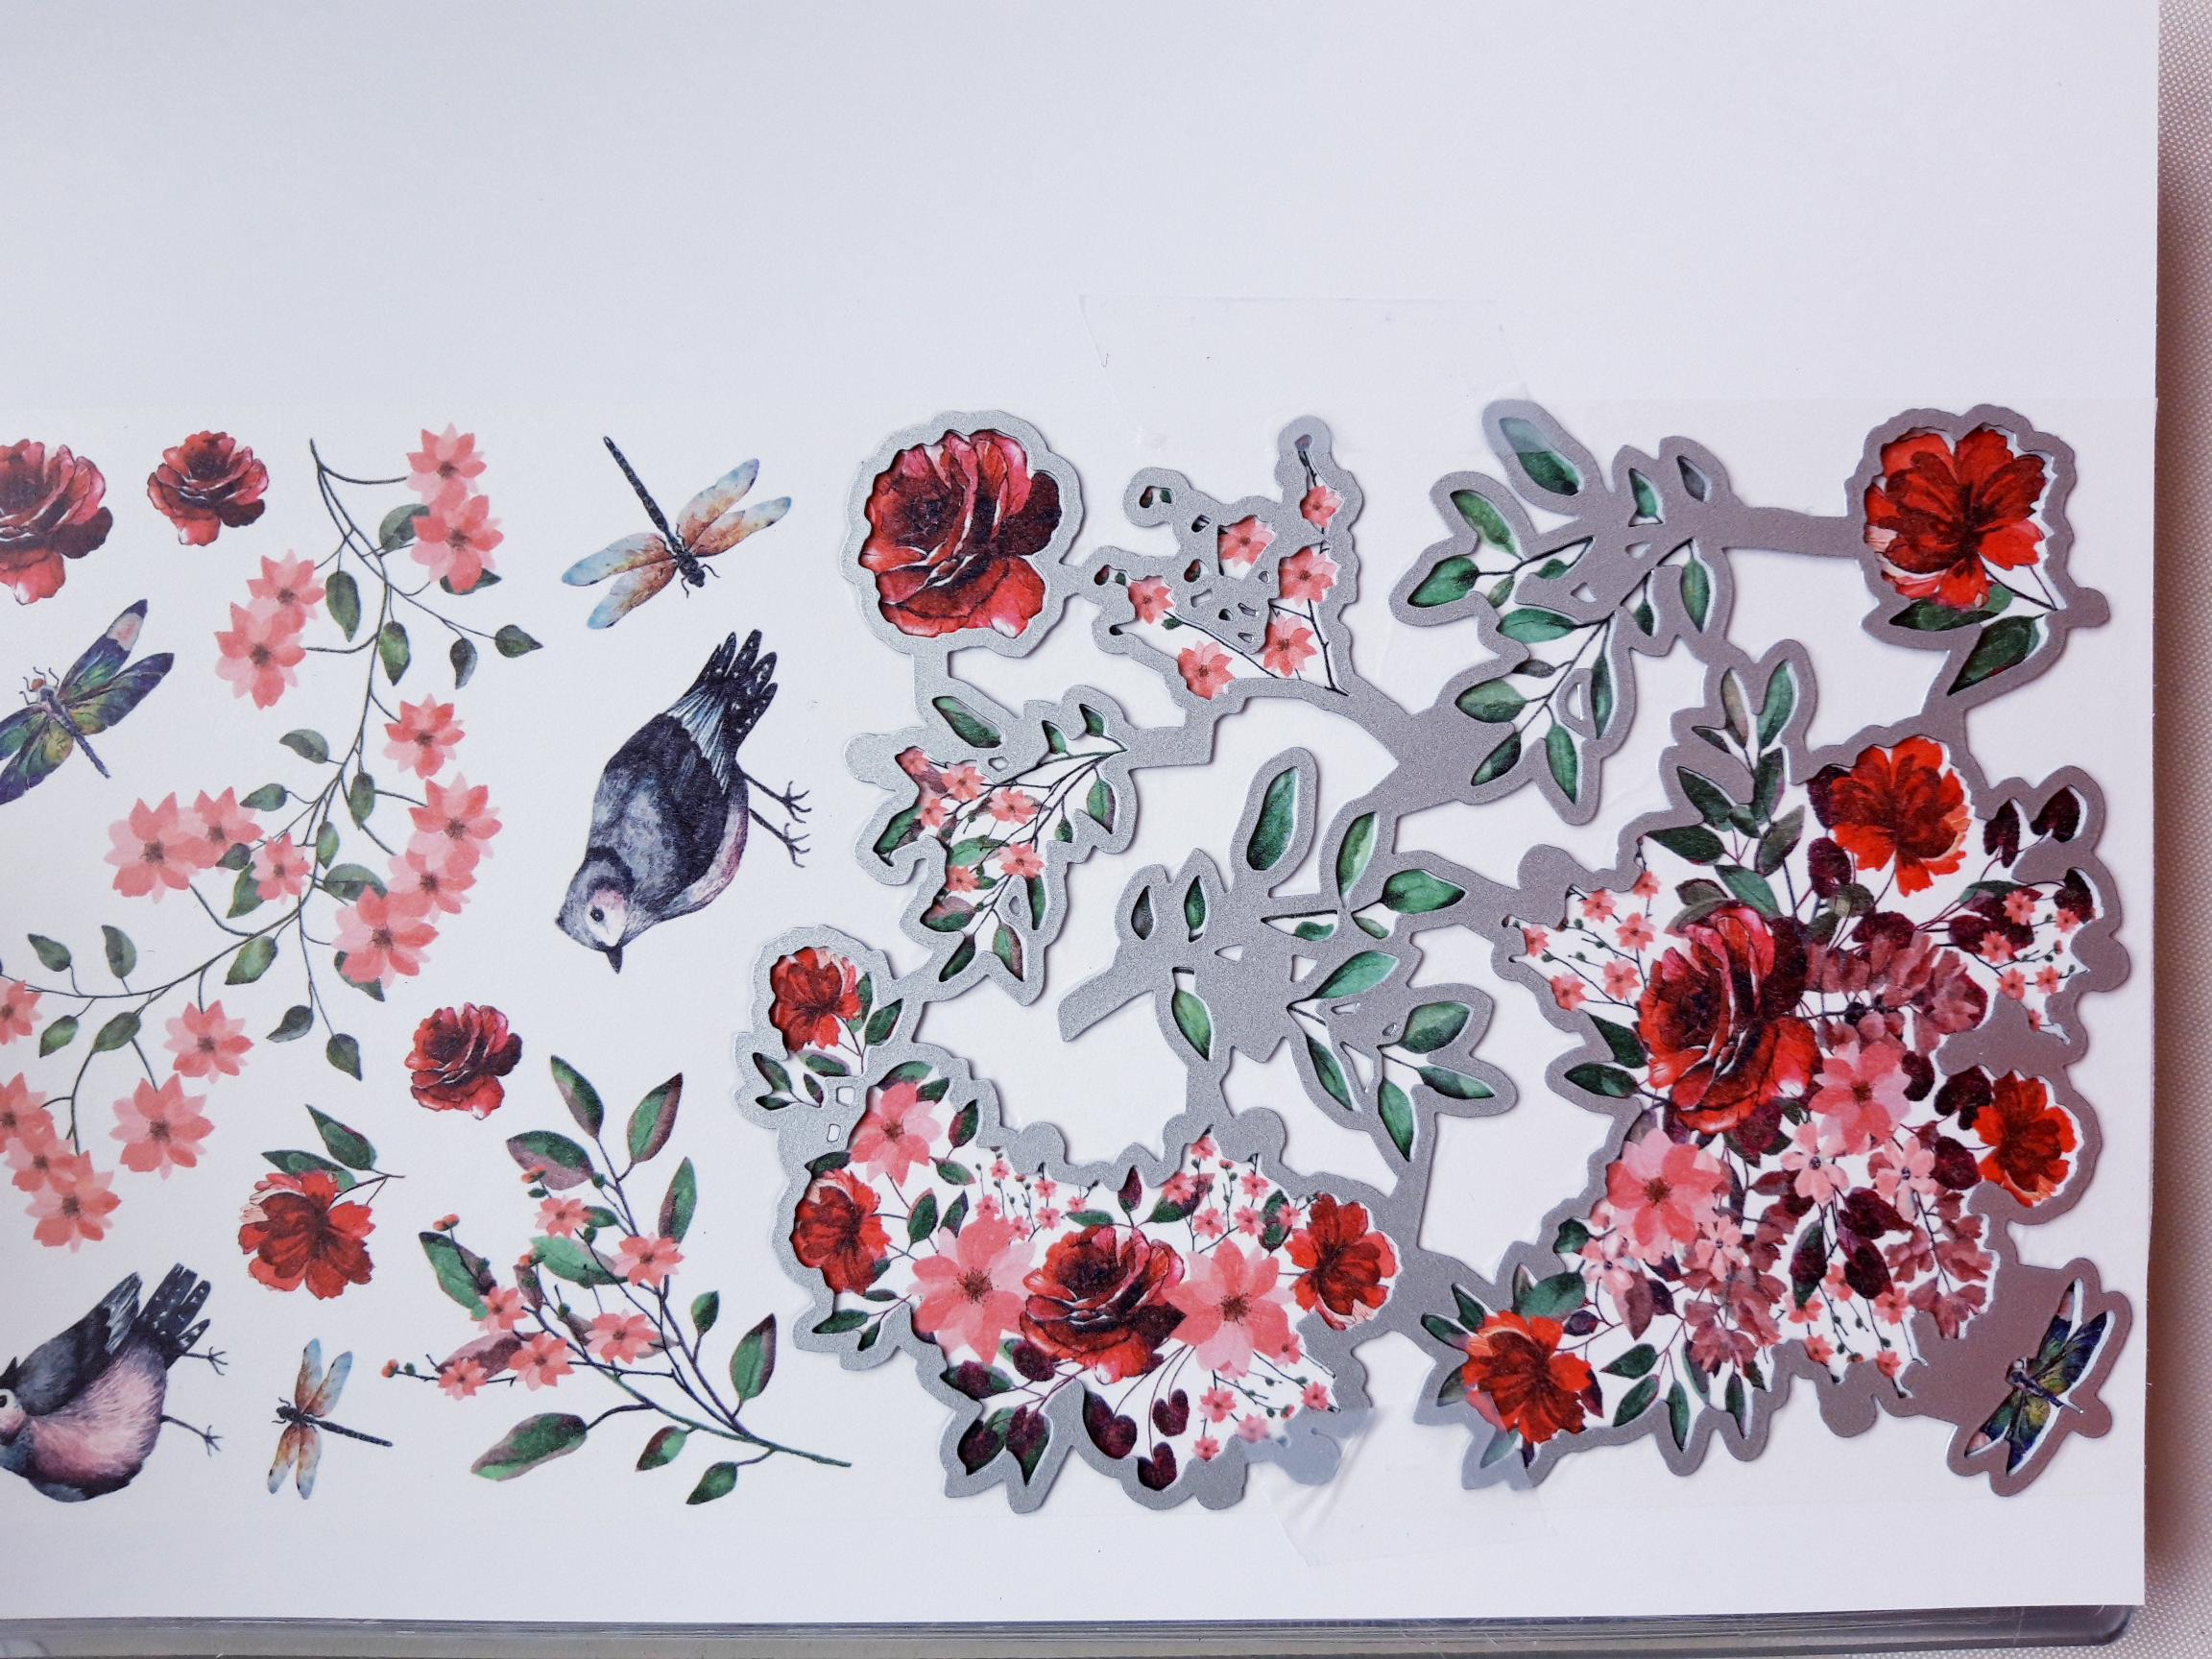
|
Cut off one full drop from the Summer Breeze Washi Tape (place both dies on the tape to work out where this will be). Peel off one corner of the backing, then carefully unroll, and smooth out the washi, from the centre outwards, as you adhere to the A4 white cardstock. Place one of the coordinating dies in place, on the washi, and run through your die cutting machine. Remove all die cuts and pop to one side. Place the second die in place, on the washi, and run through the die cutting machine. Remove all the die cuts and add to the others, ready for use. |
|
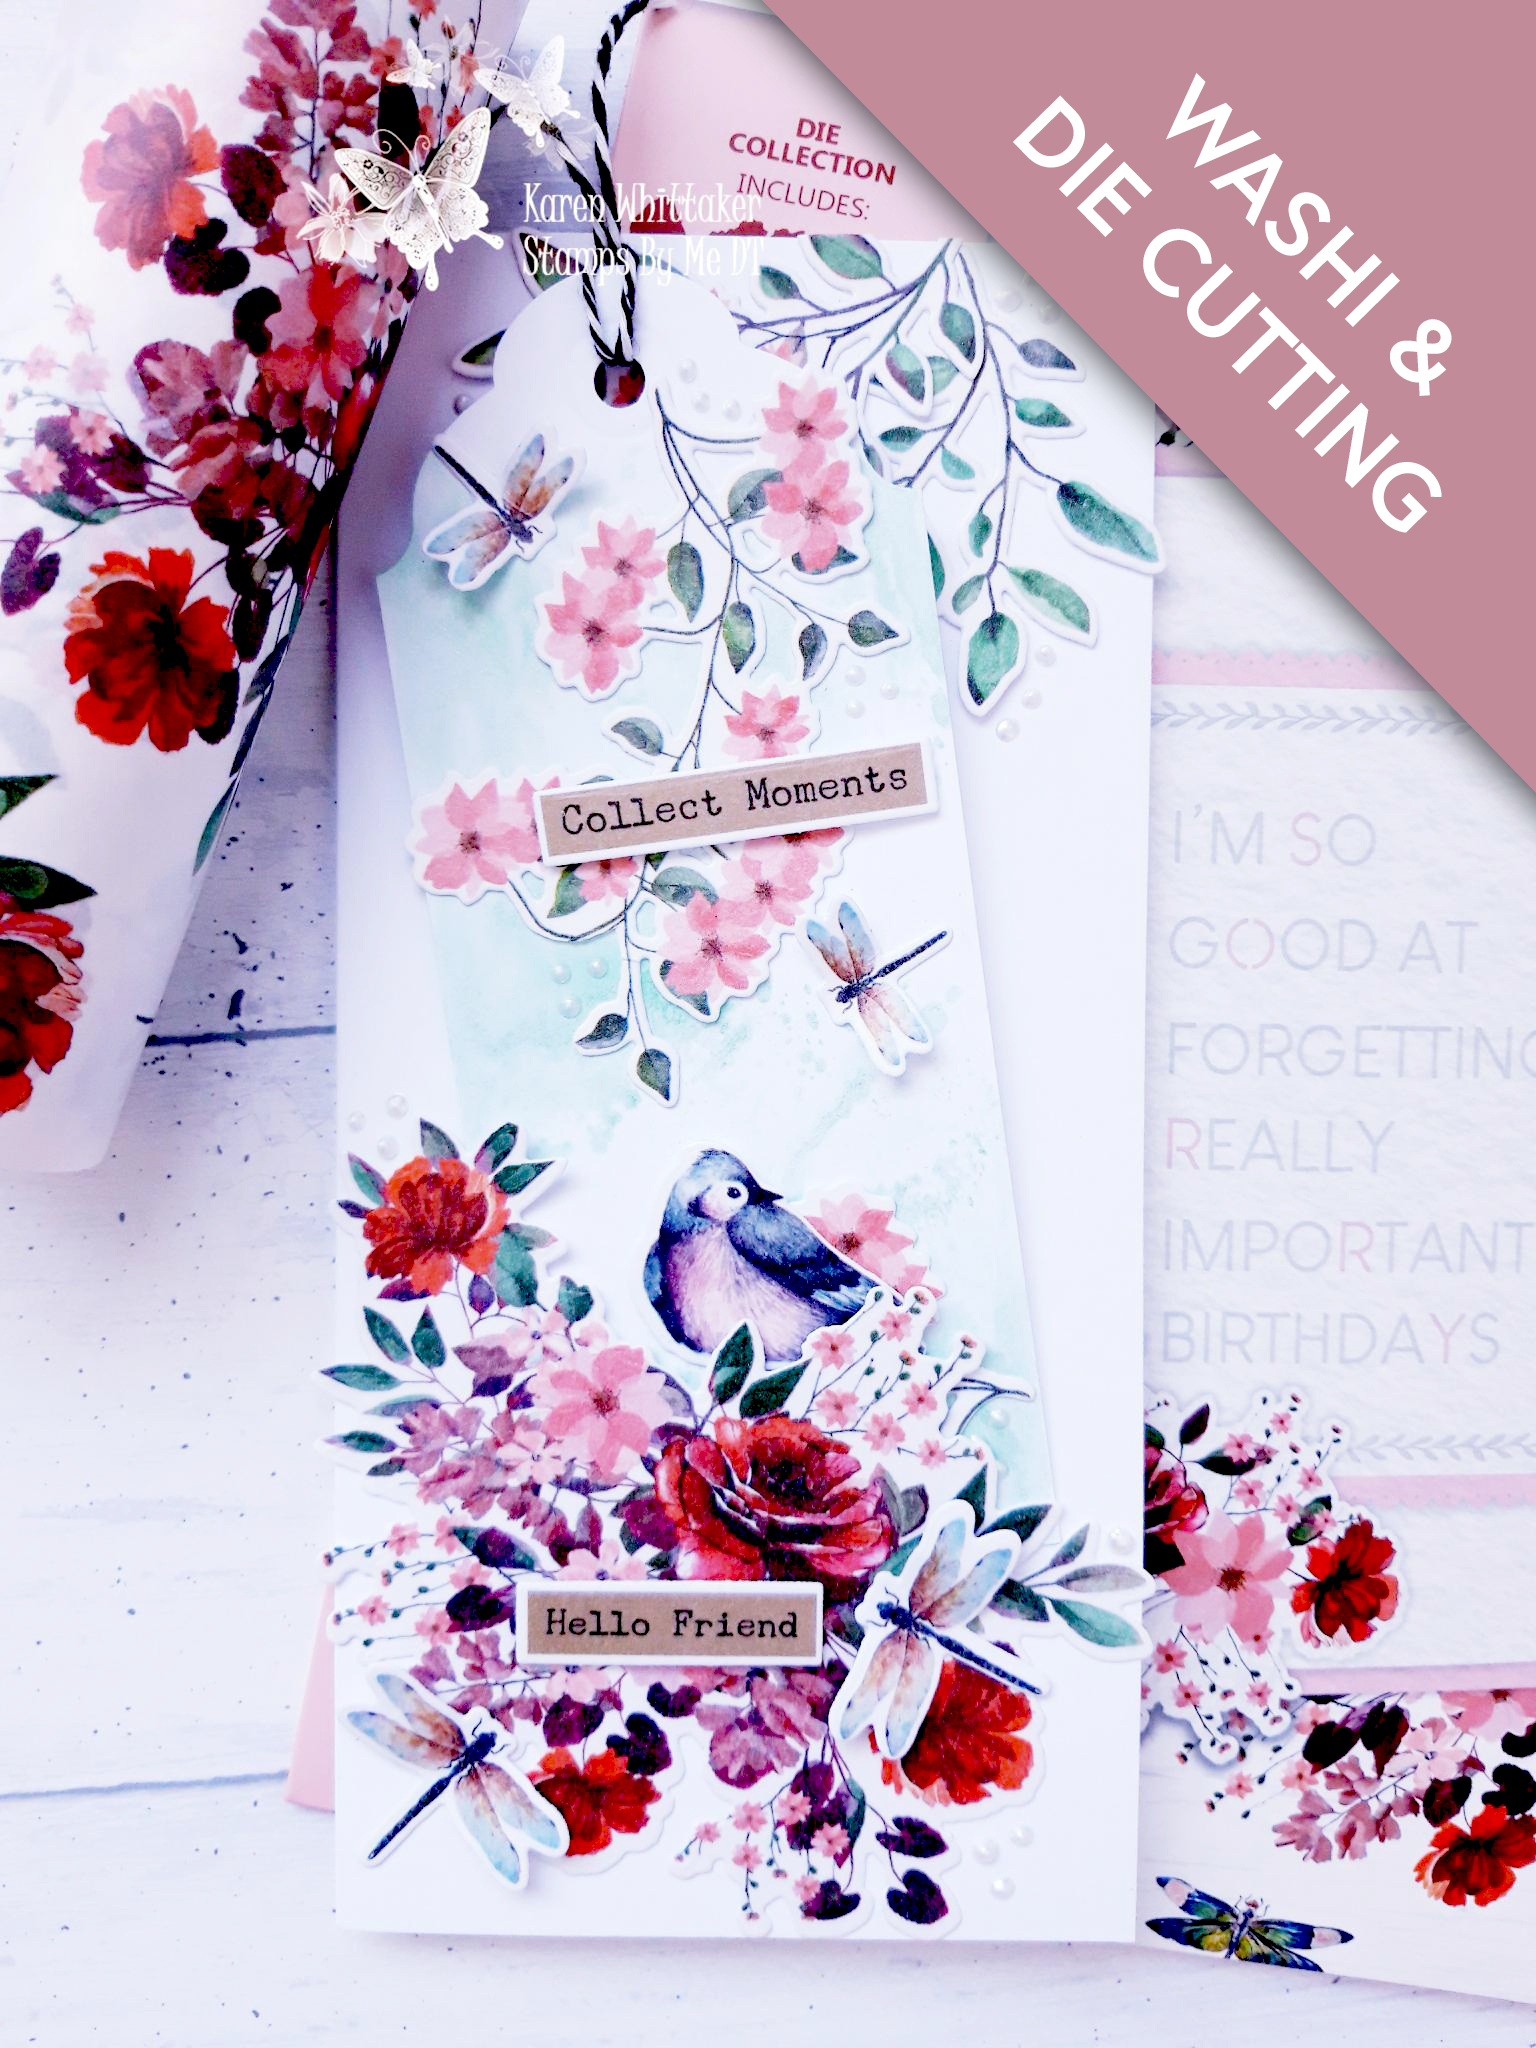
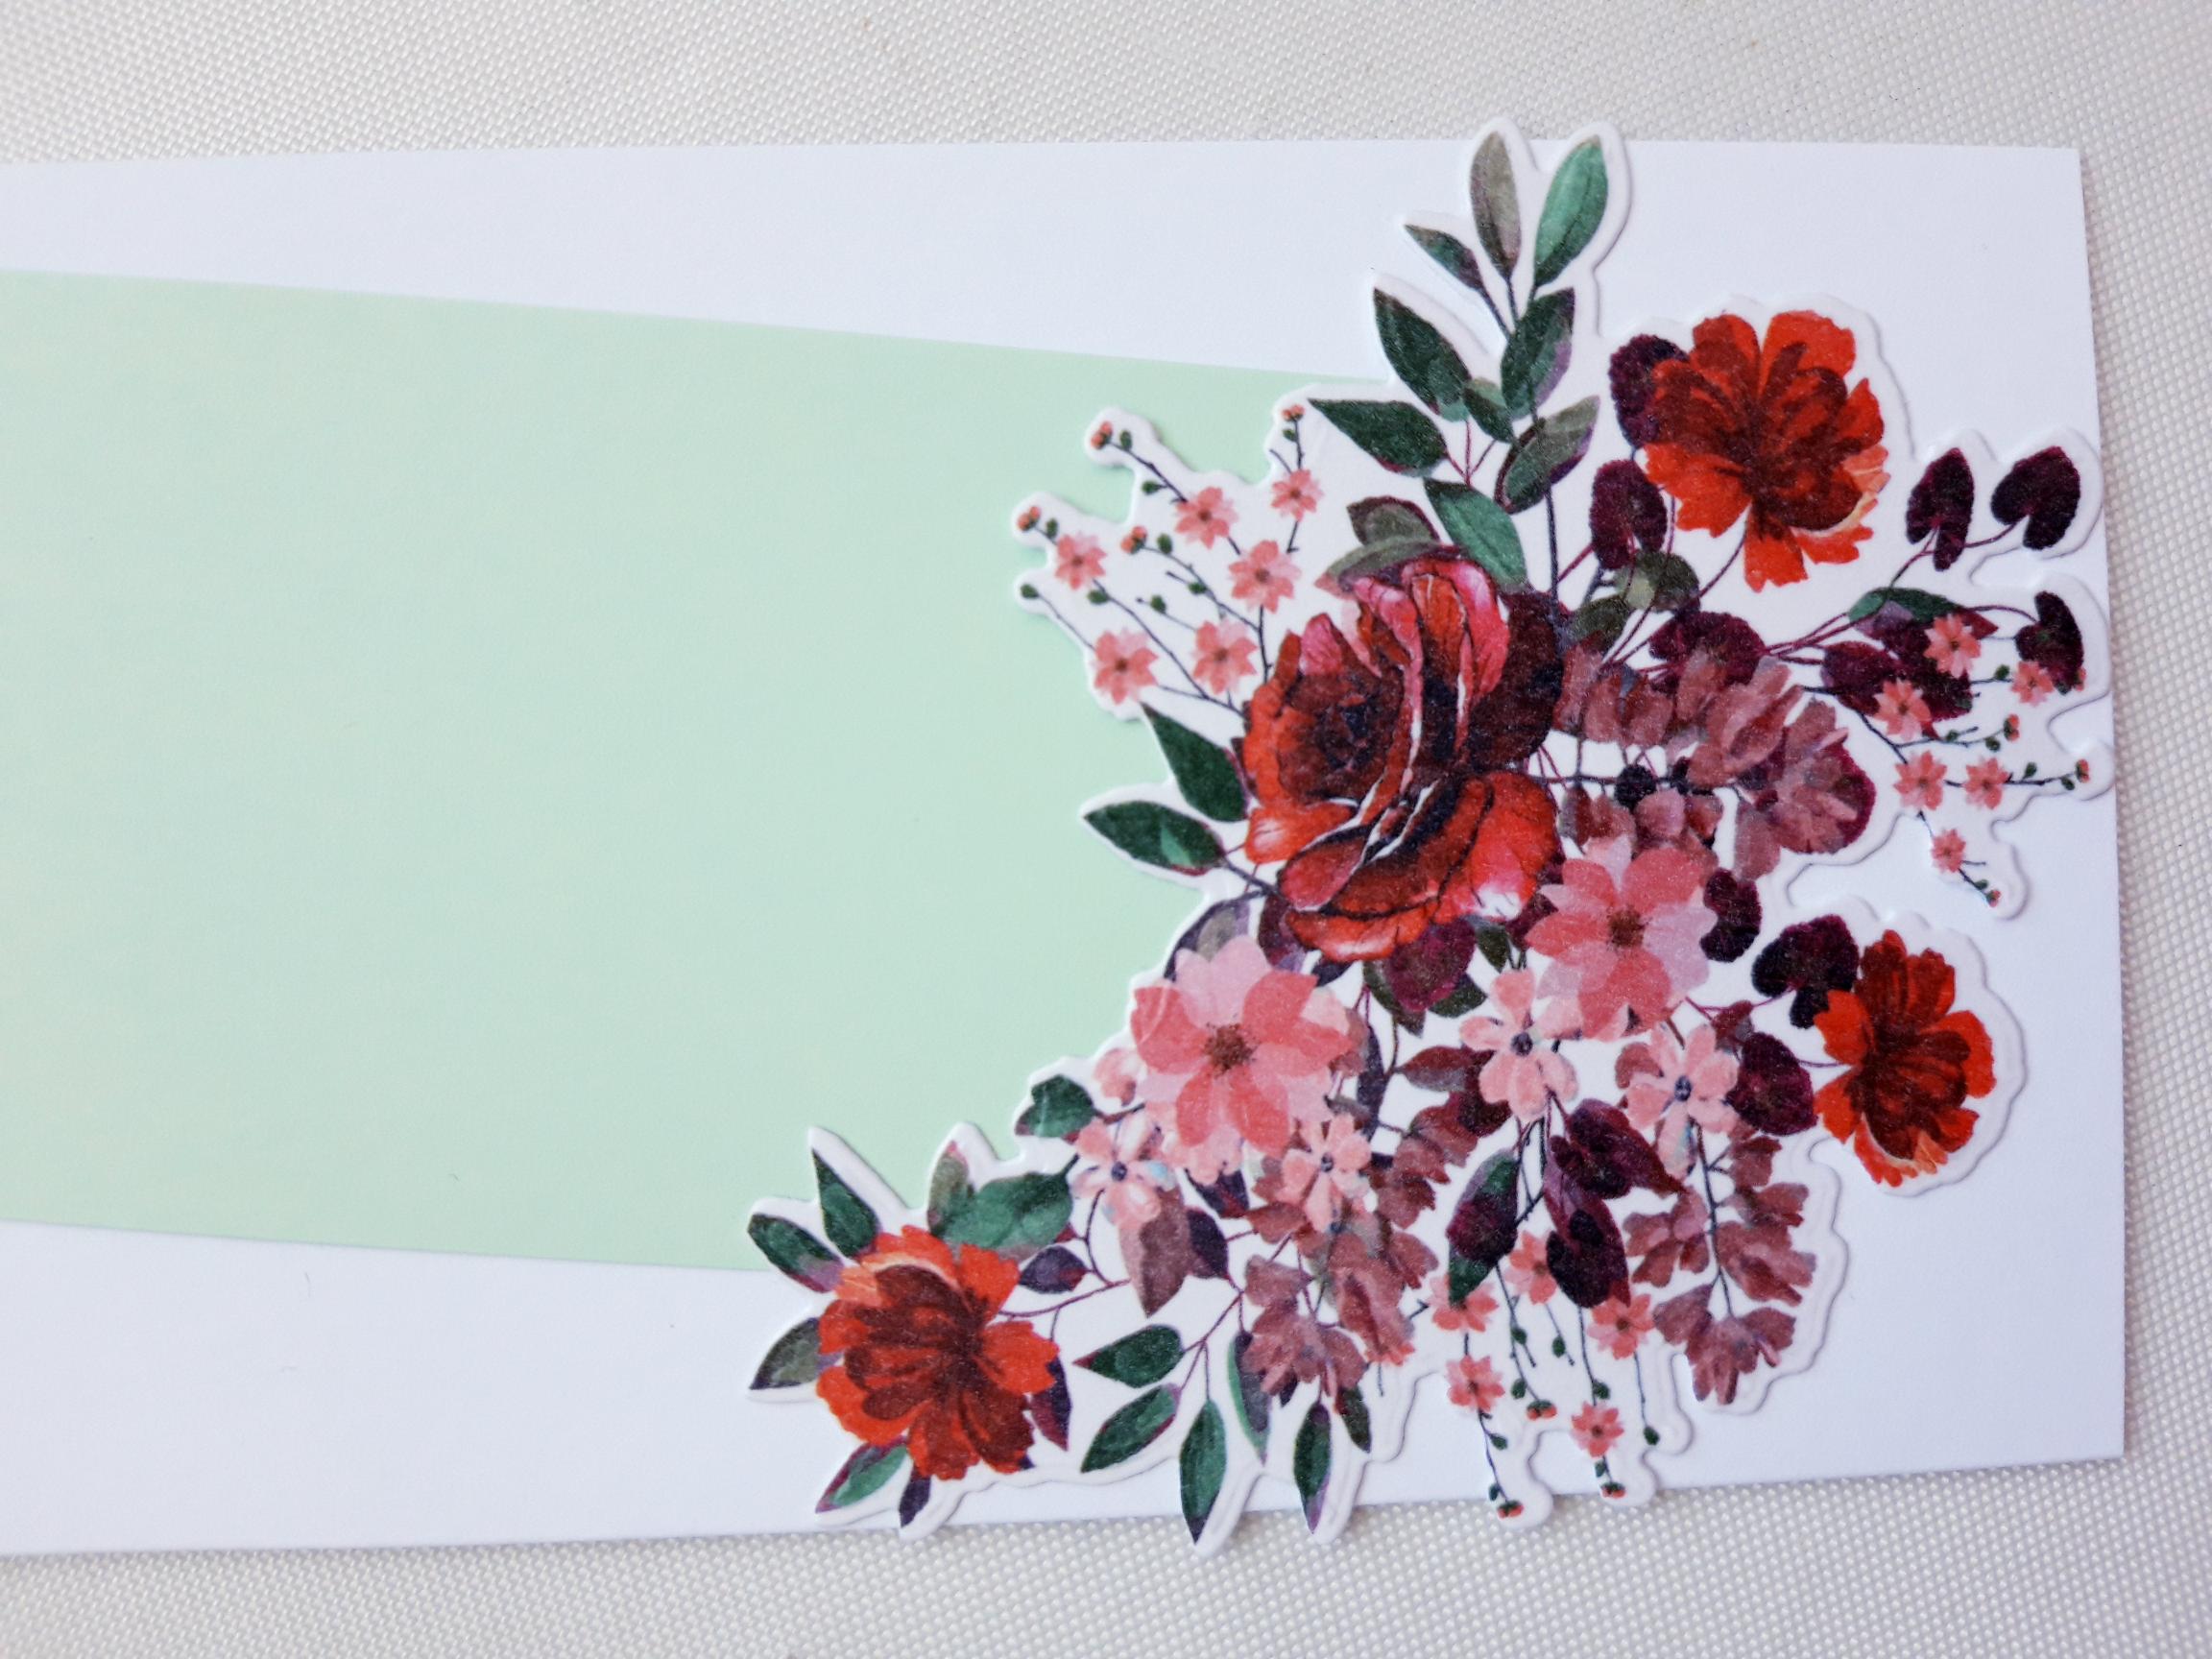
Adhere the large washi die cut, as shown in this image, on to the bottom left corner of the DL card blank. PLEASE NOTE: Only apply glue to the far left hand side, far right side and bottom of this washi die cut, as the top MUST be left open, to create a "pocket" (I have popped a piece of green card, 2 1/2" wide, in to the "pocket", on this photo, as a visual guide only). Set card blank to one side. |
|
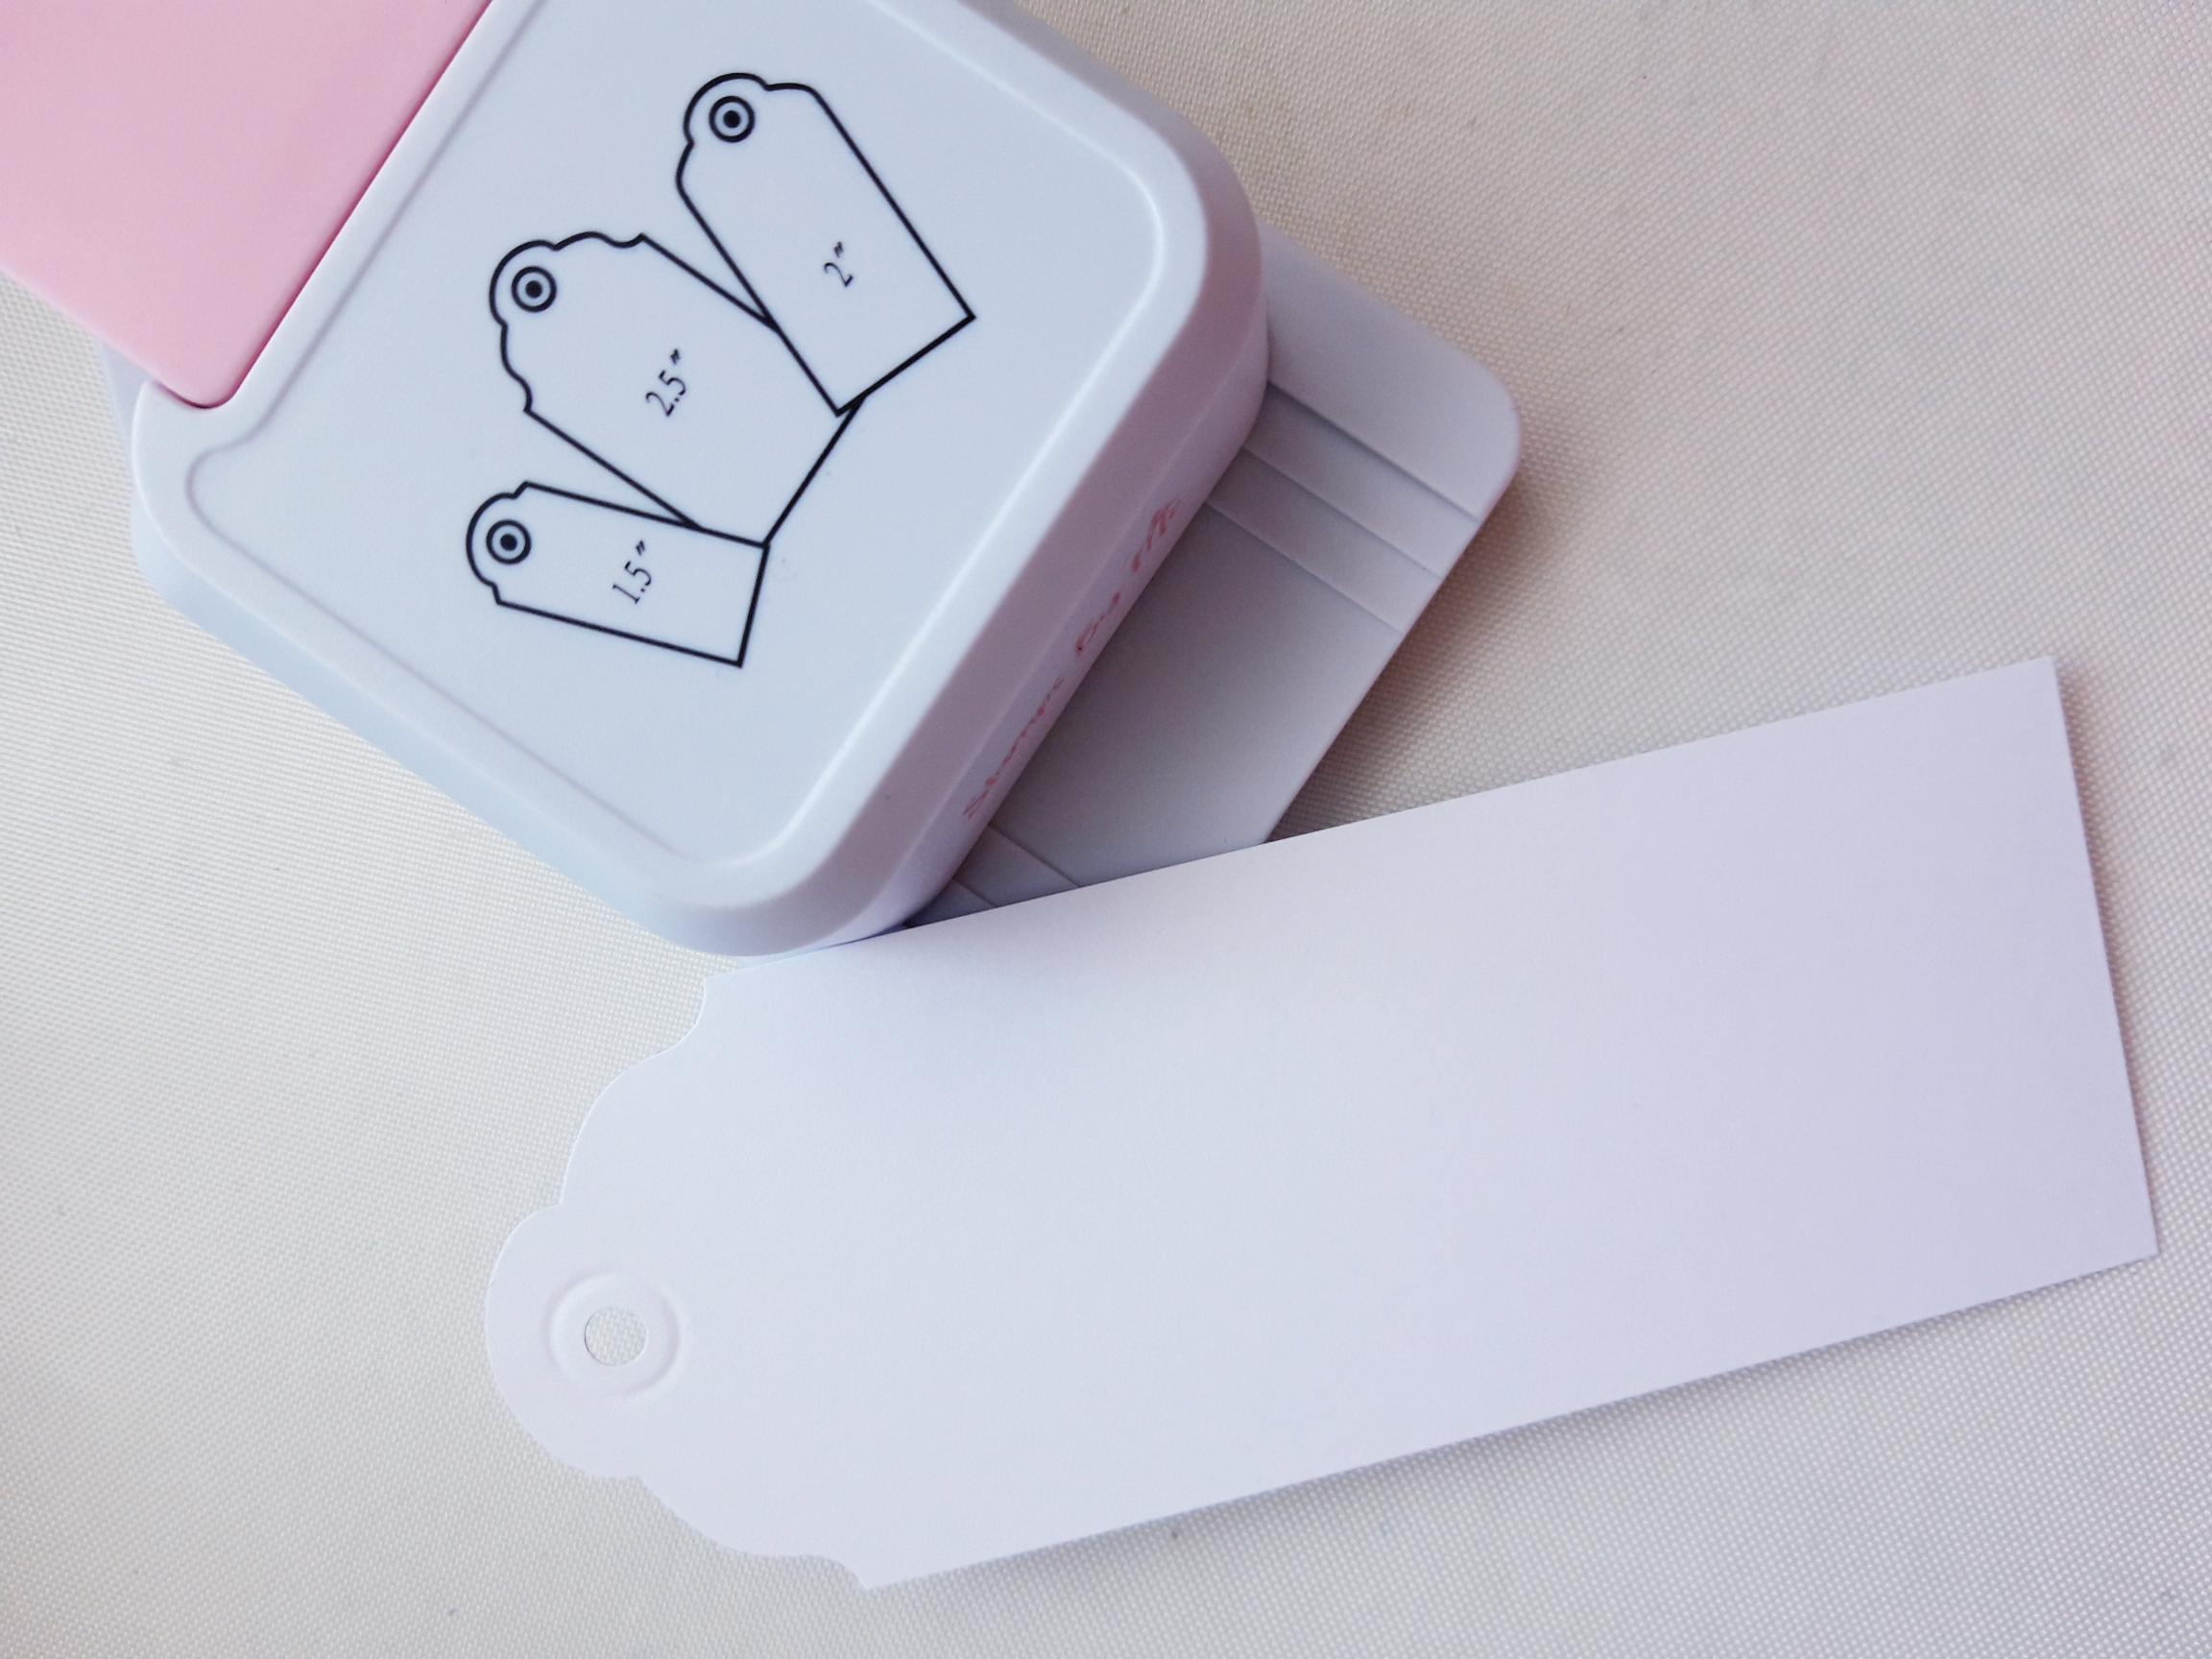
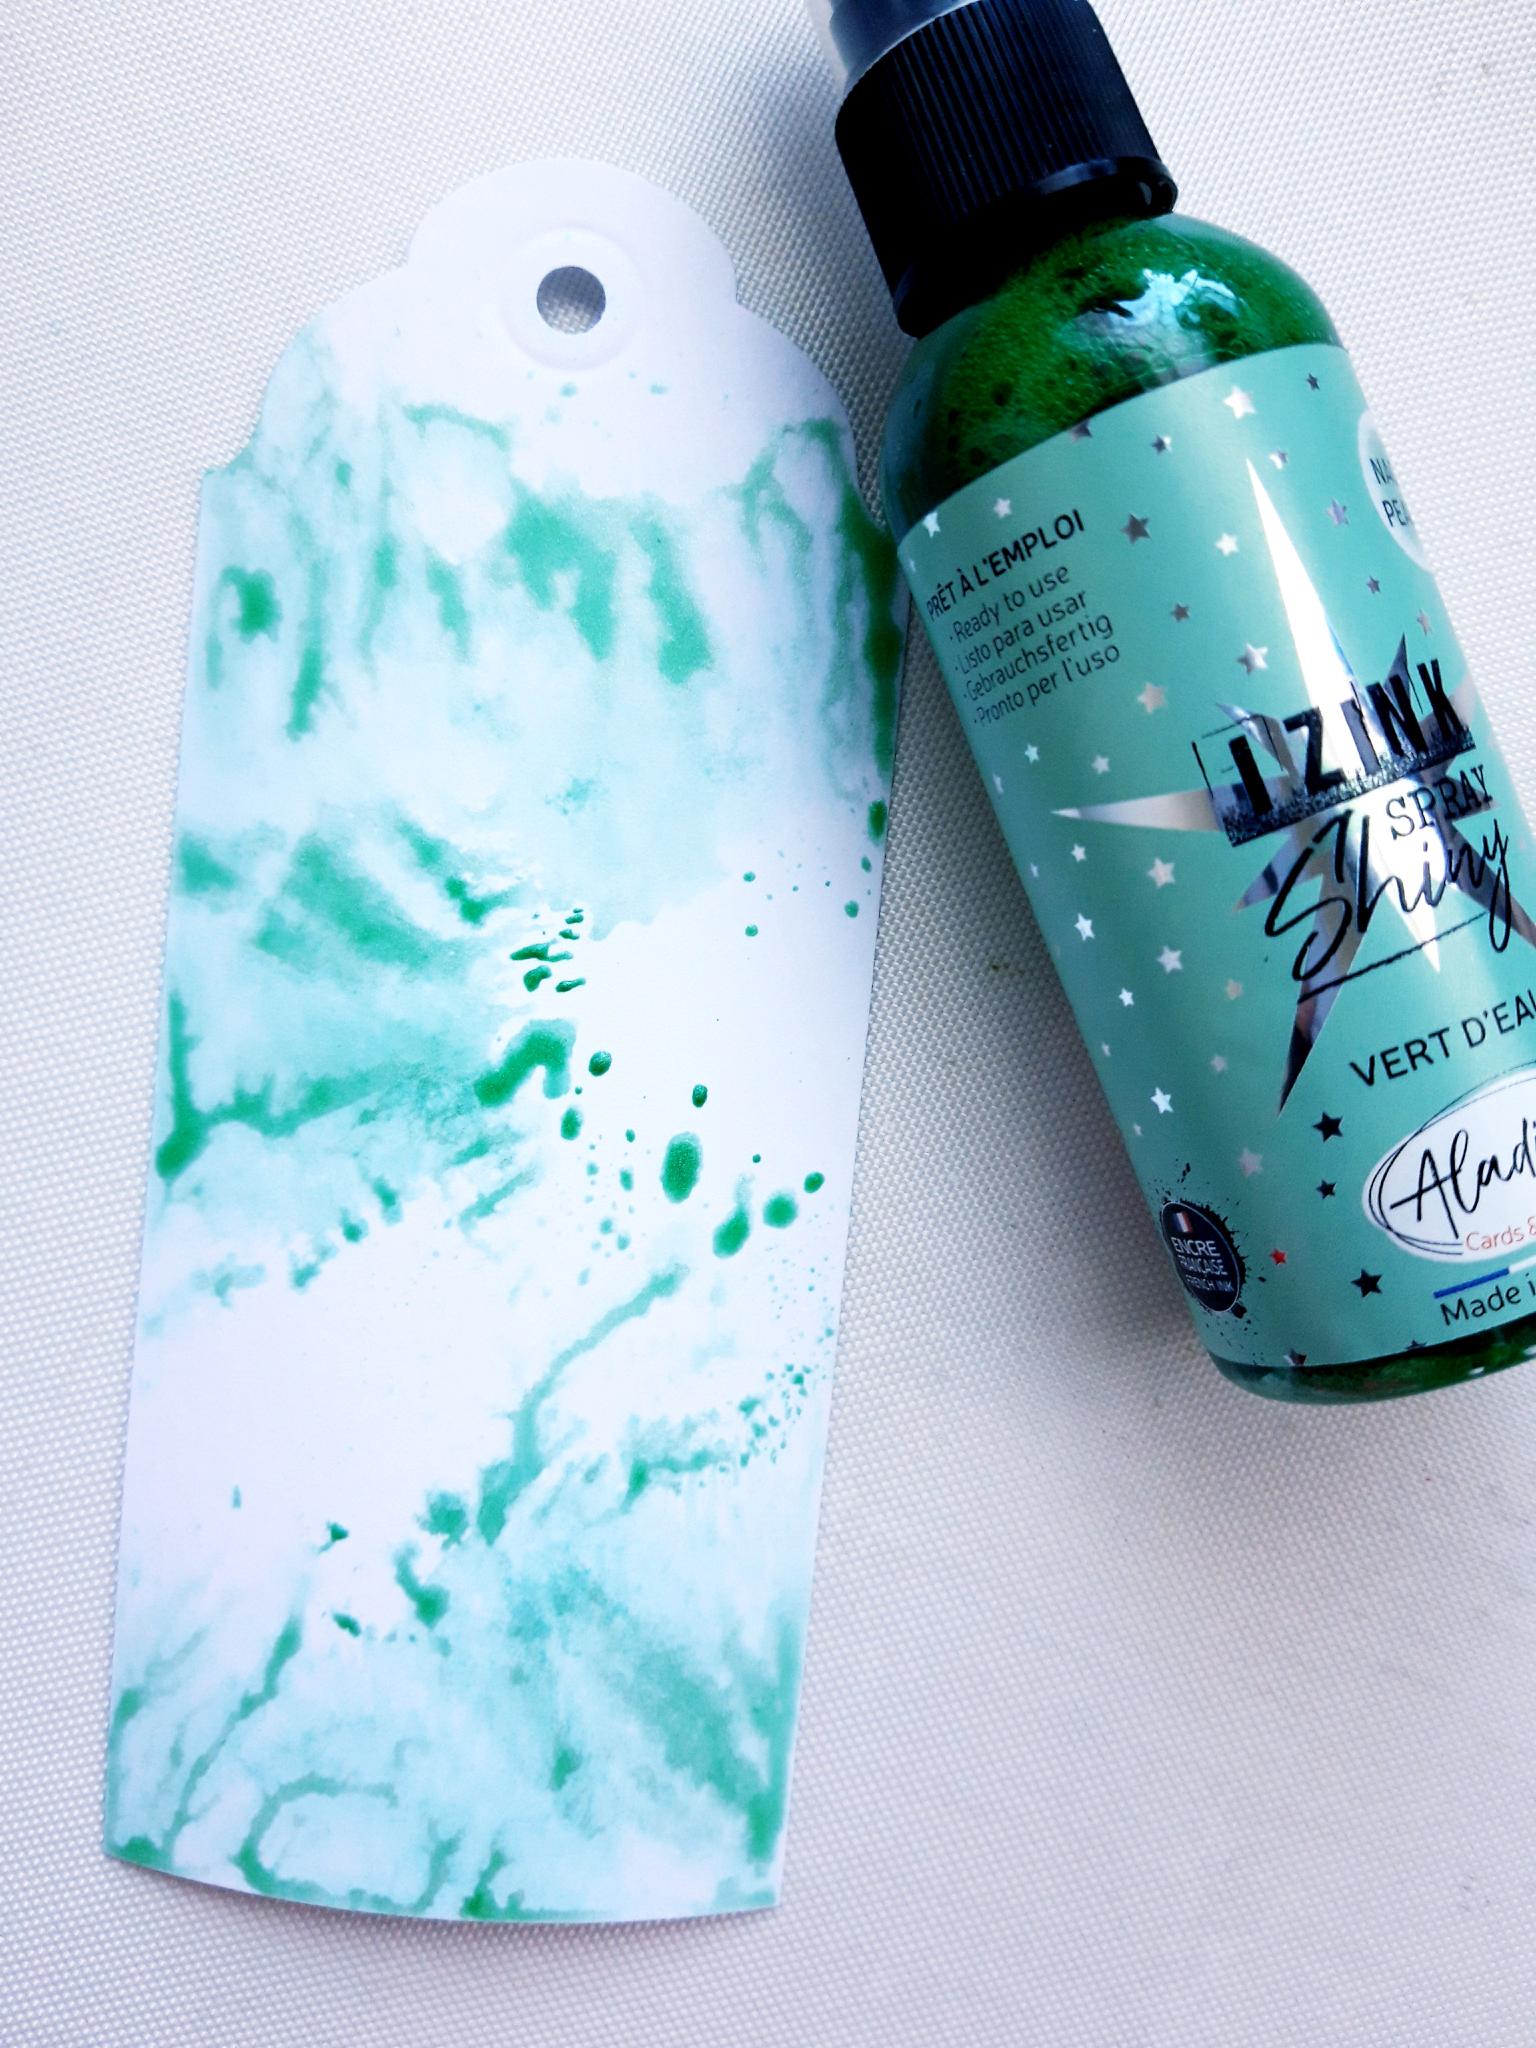
Use the Tag Punch to make a tag from the 6 x 2 1/2 " white cardstock. |
|
Spray the Izink Vert D'Eau Shiny on to a craft or glass mat, and mop up the ink on to the tag. Allow to dry, or use a heat gun, if your're impatient like me! |
|
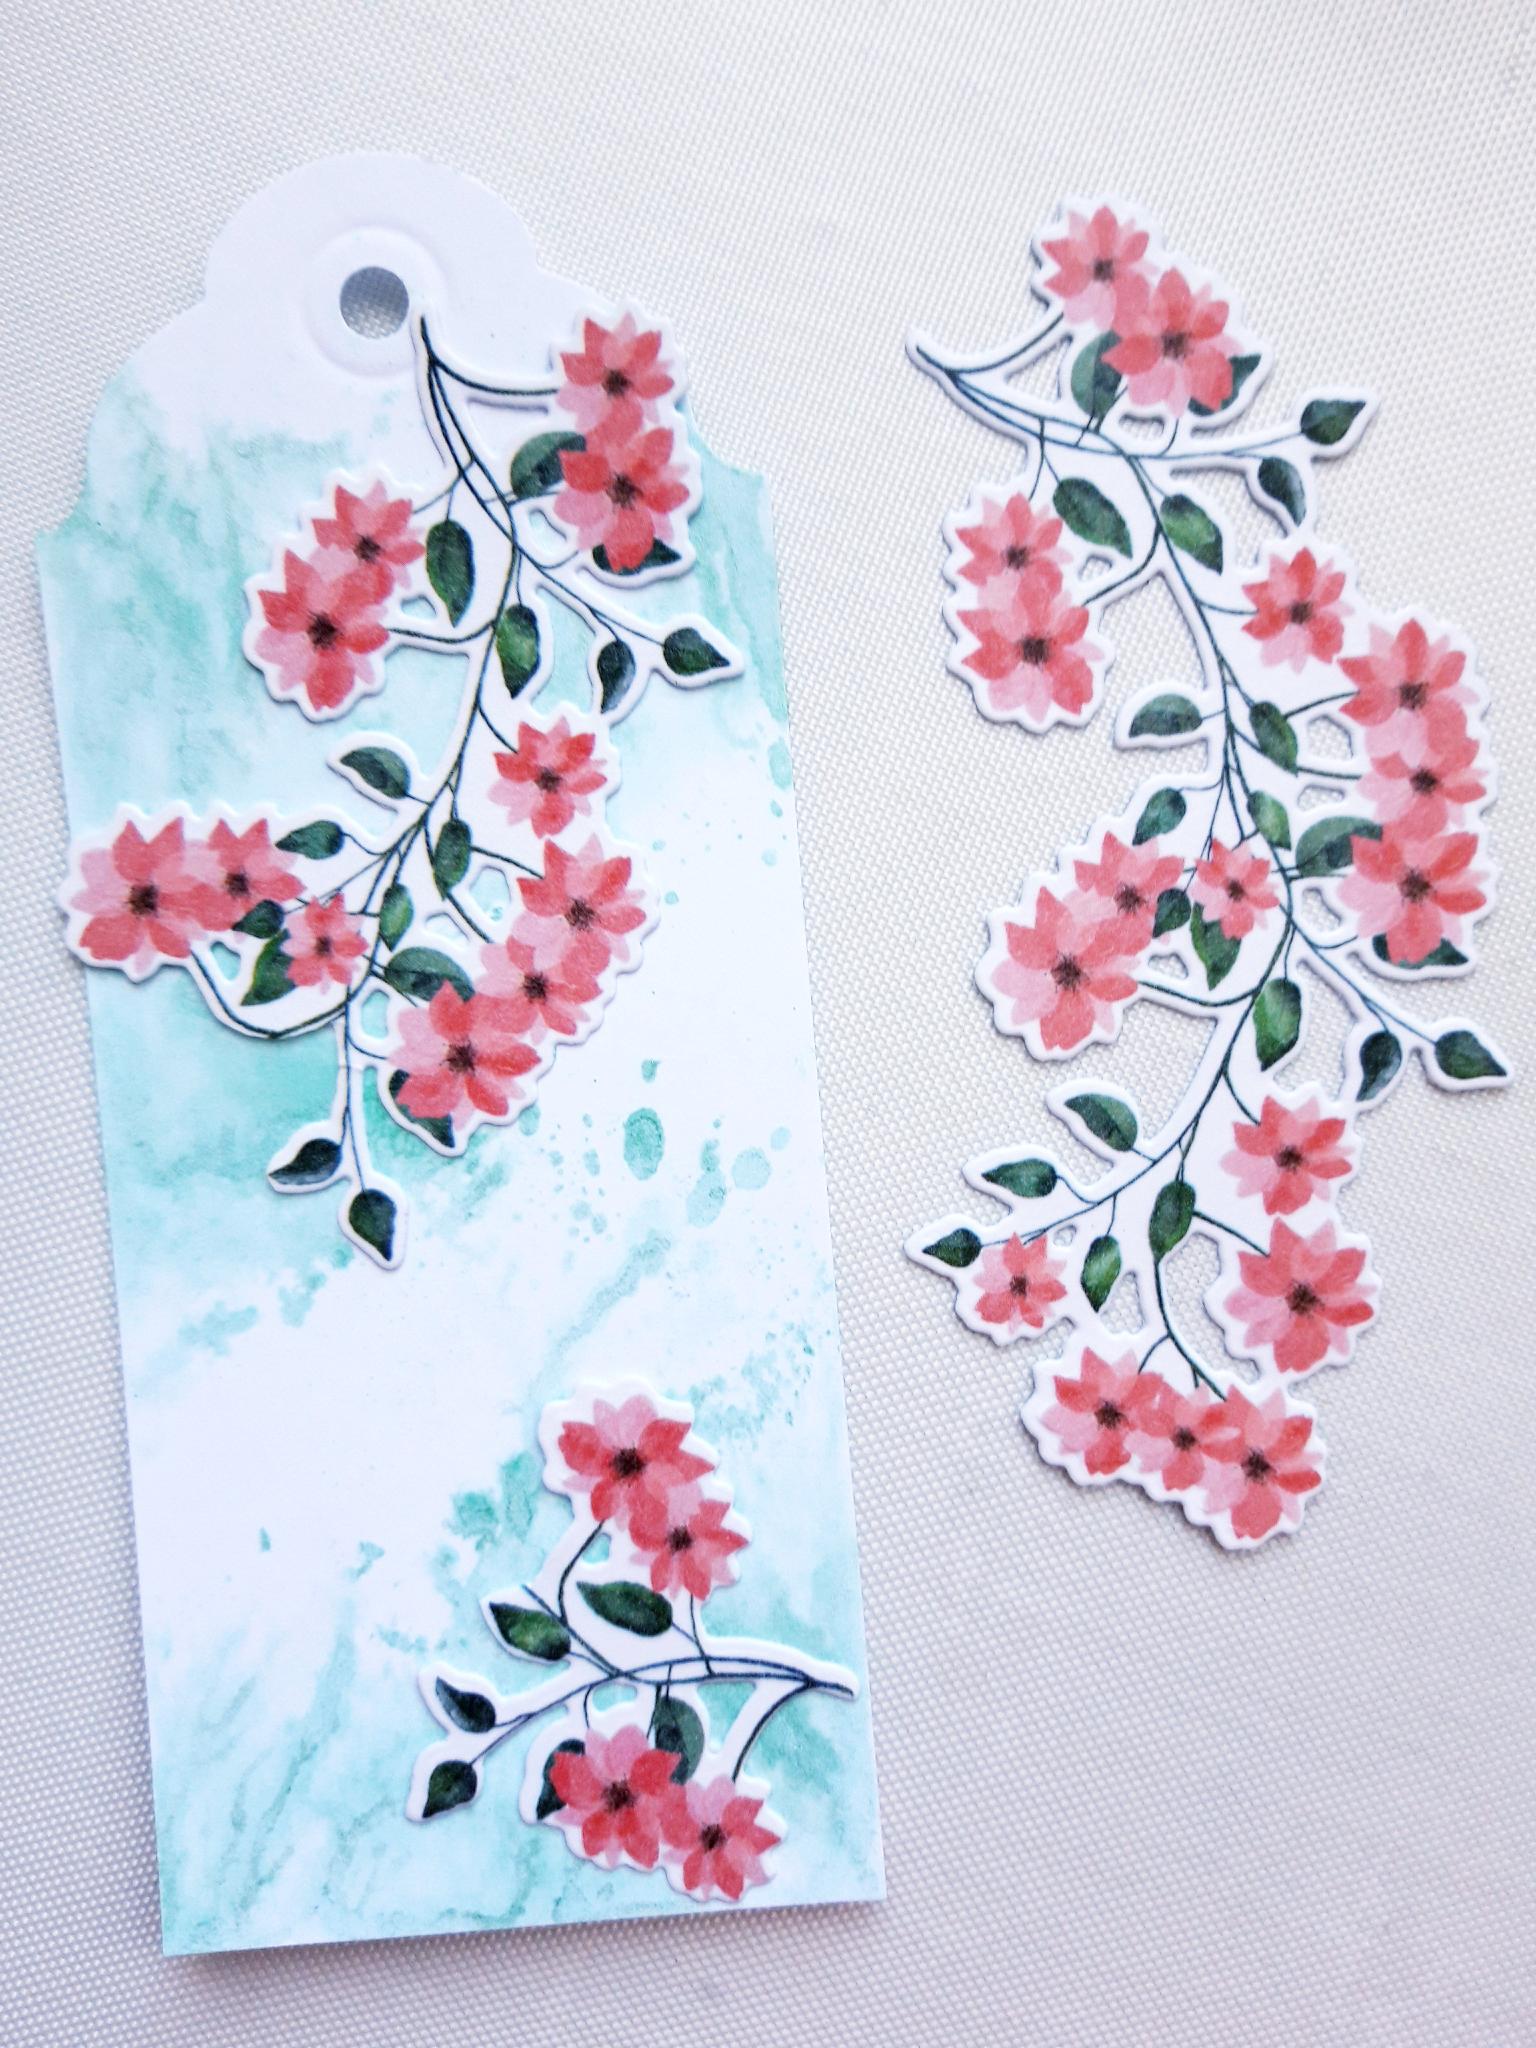
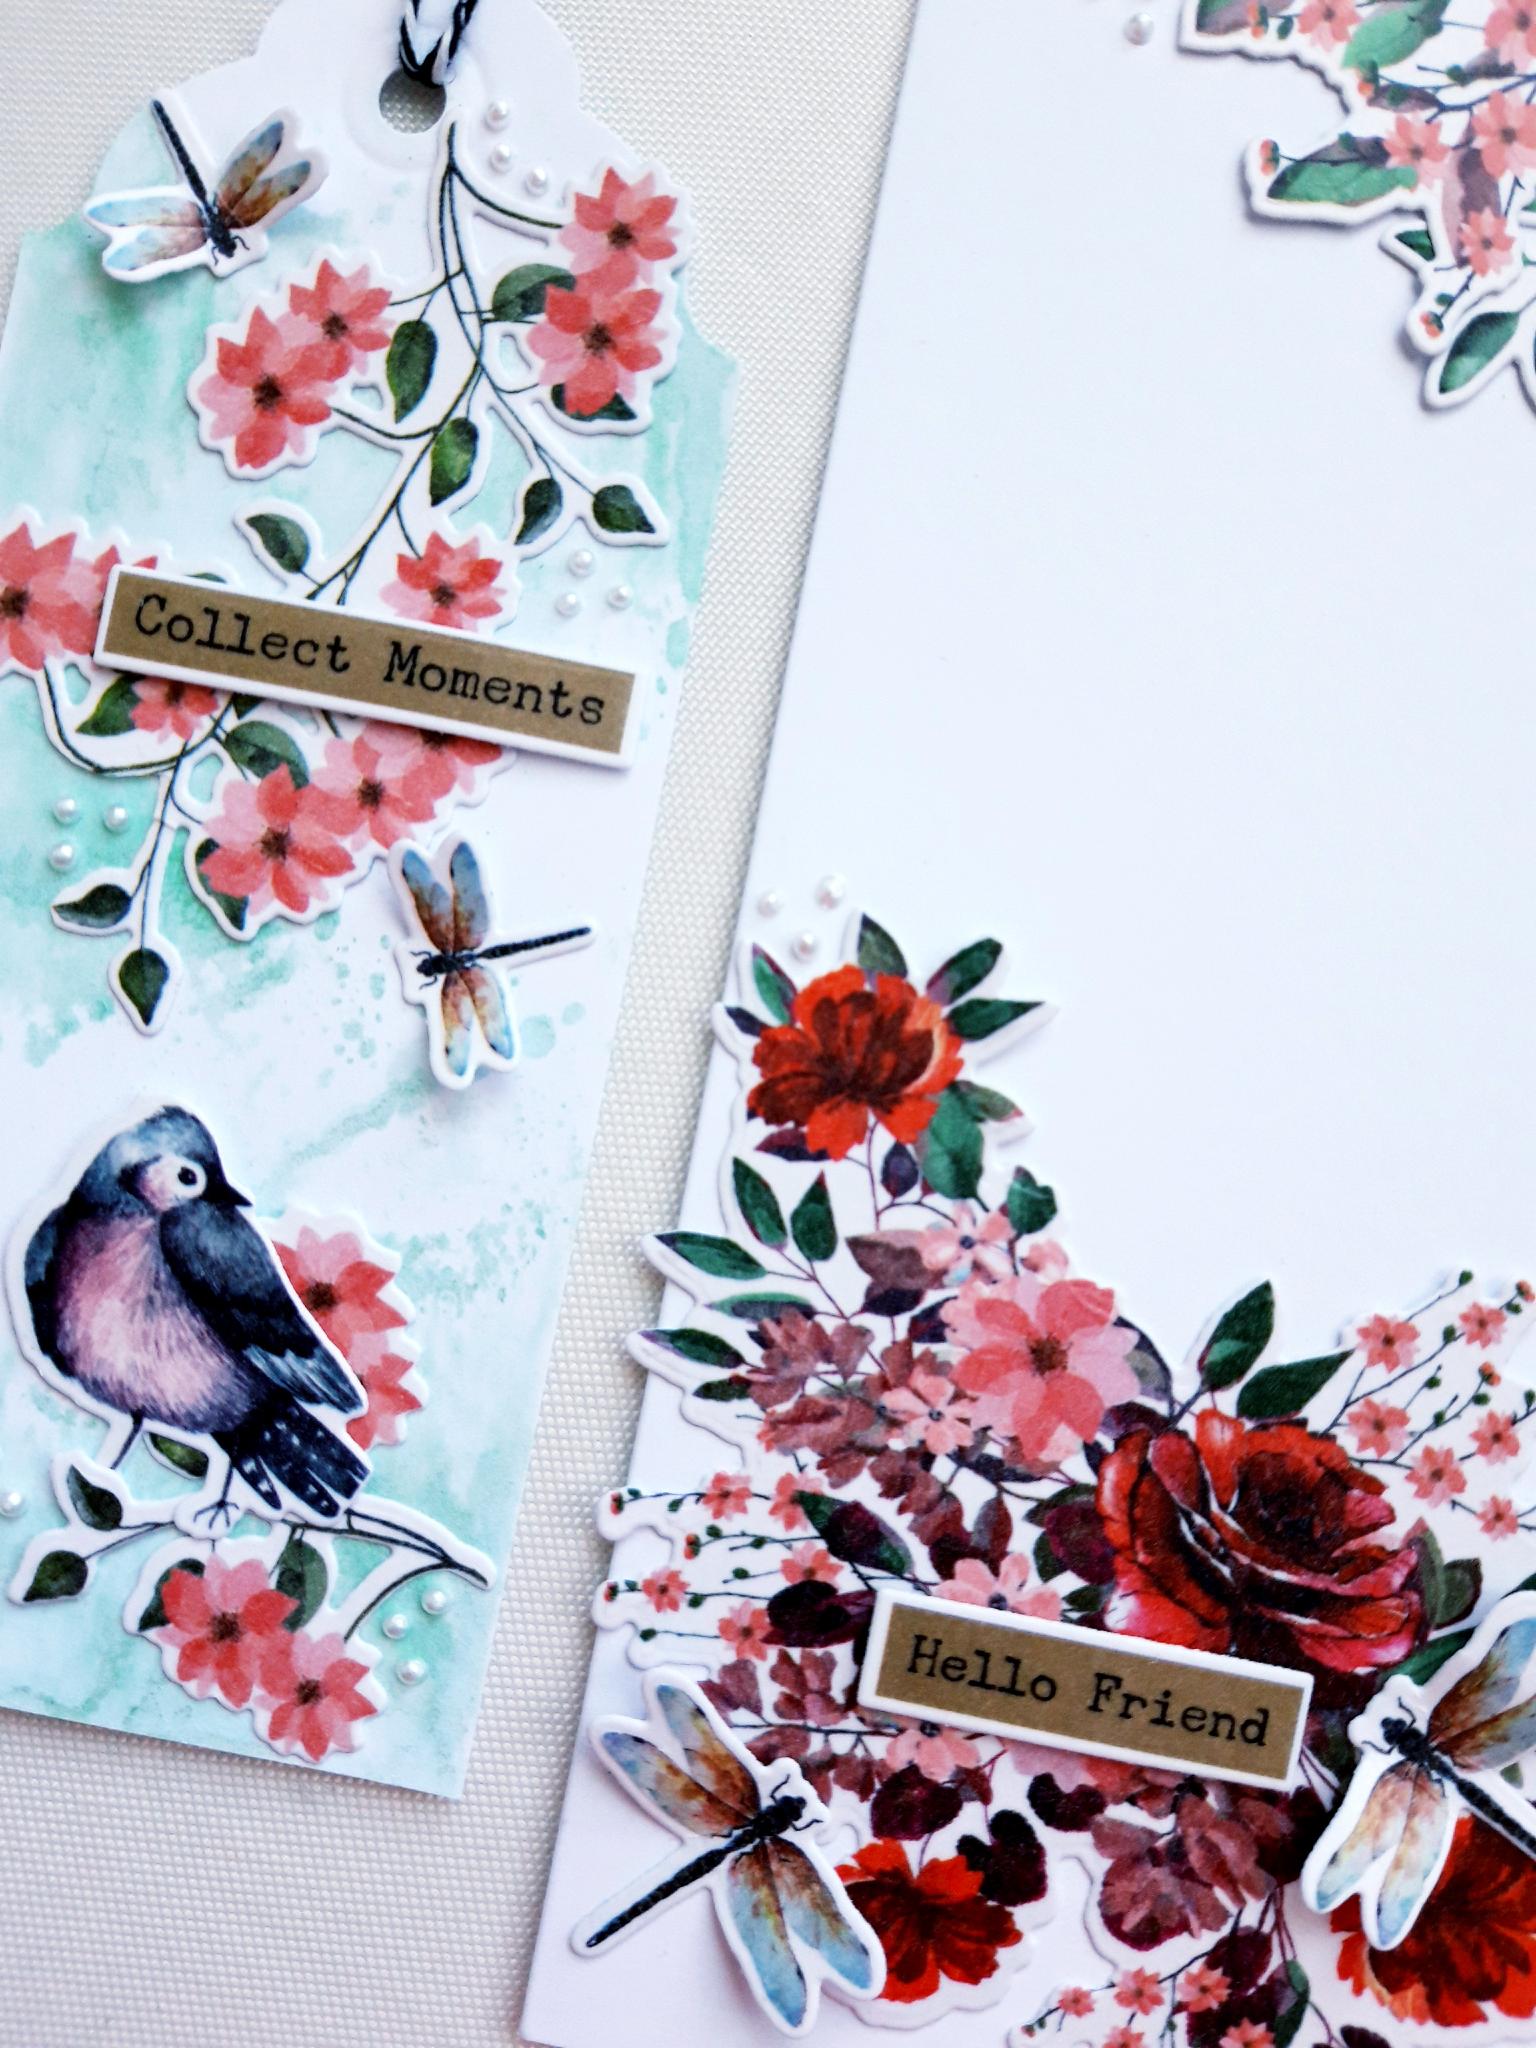
Cut up the washi die cut ive shown you, on the right of this photo, and adhere to your tag with wet glue. |
|
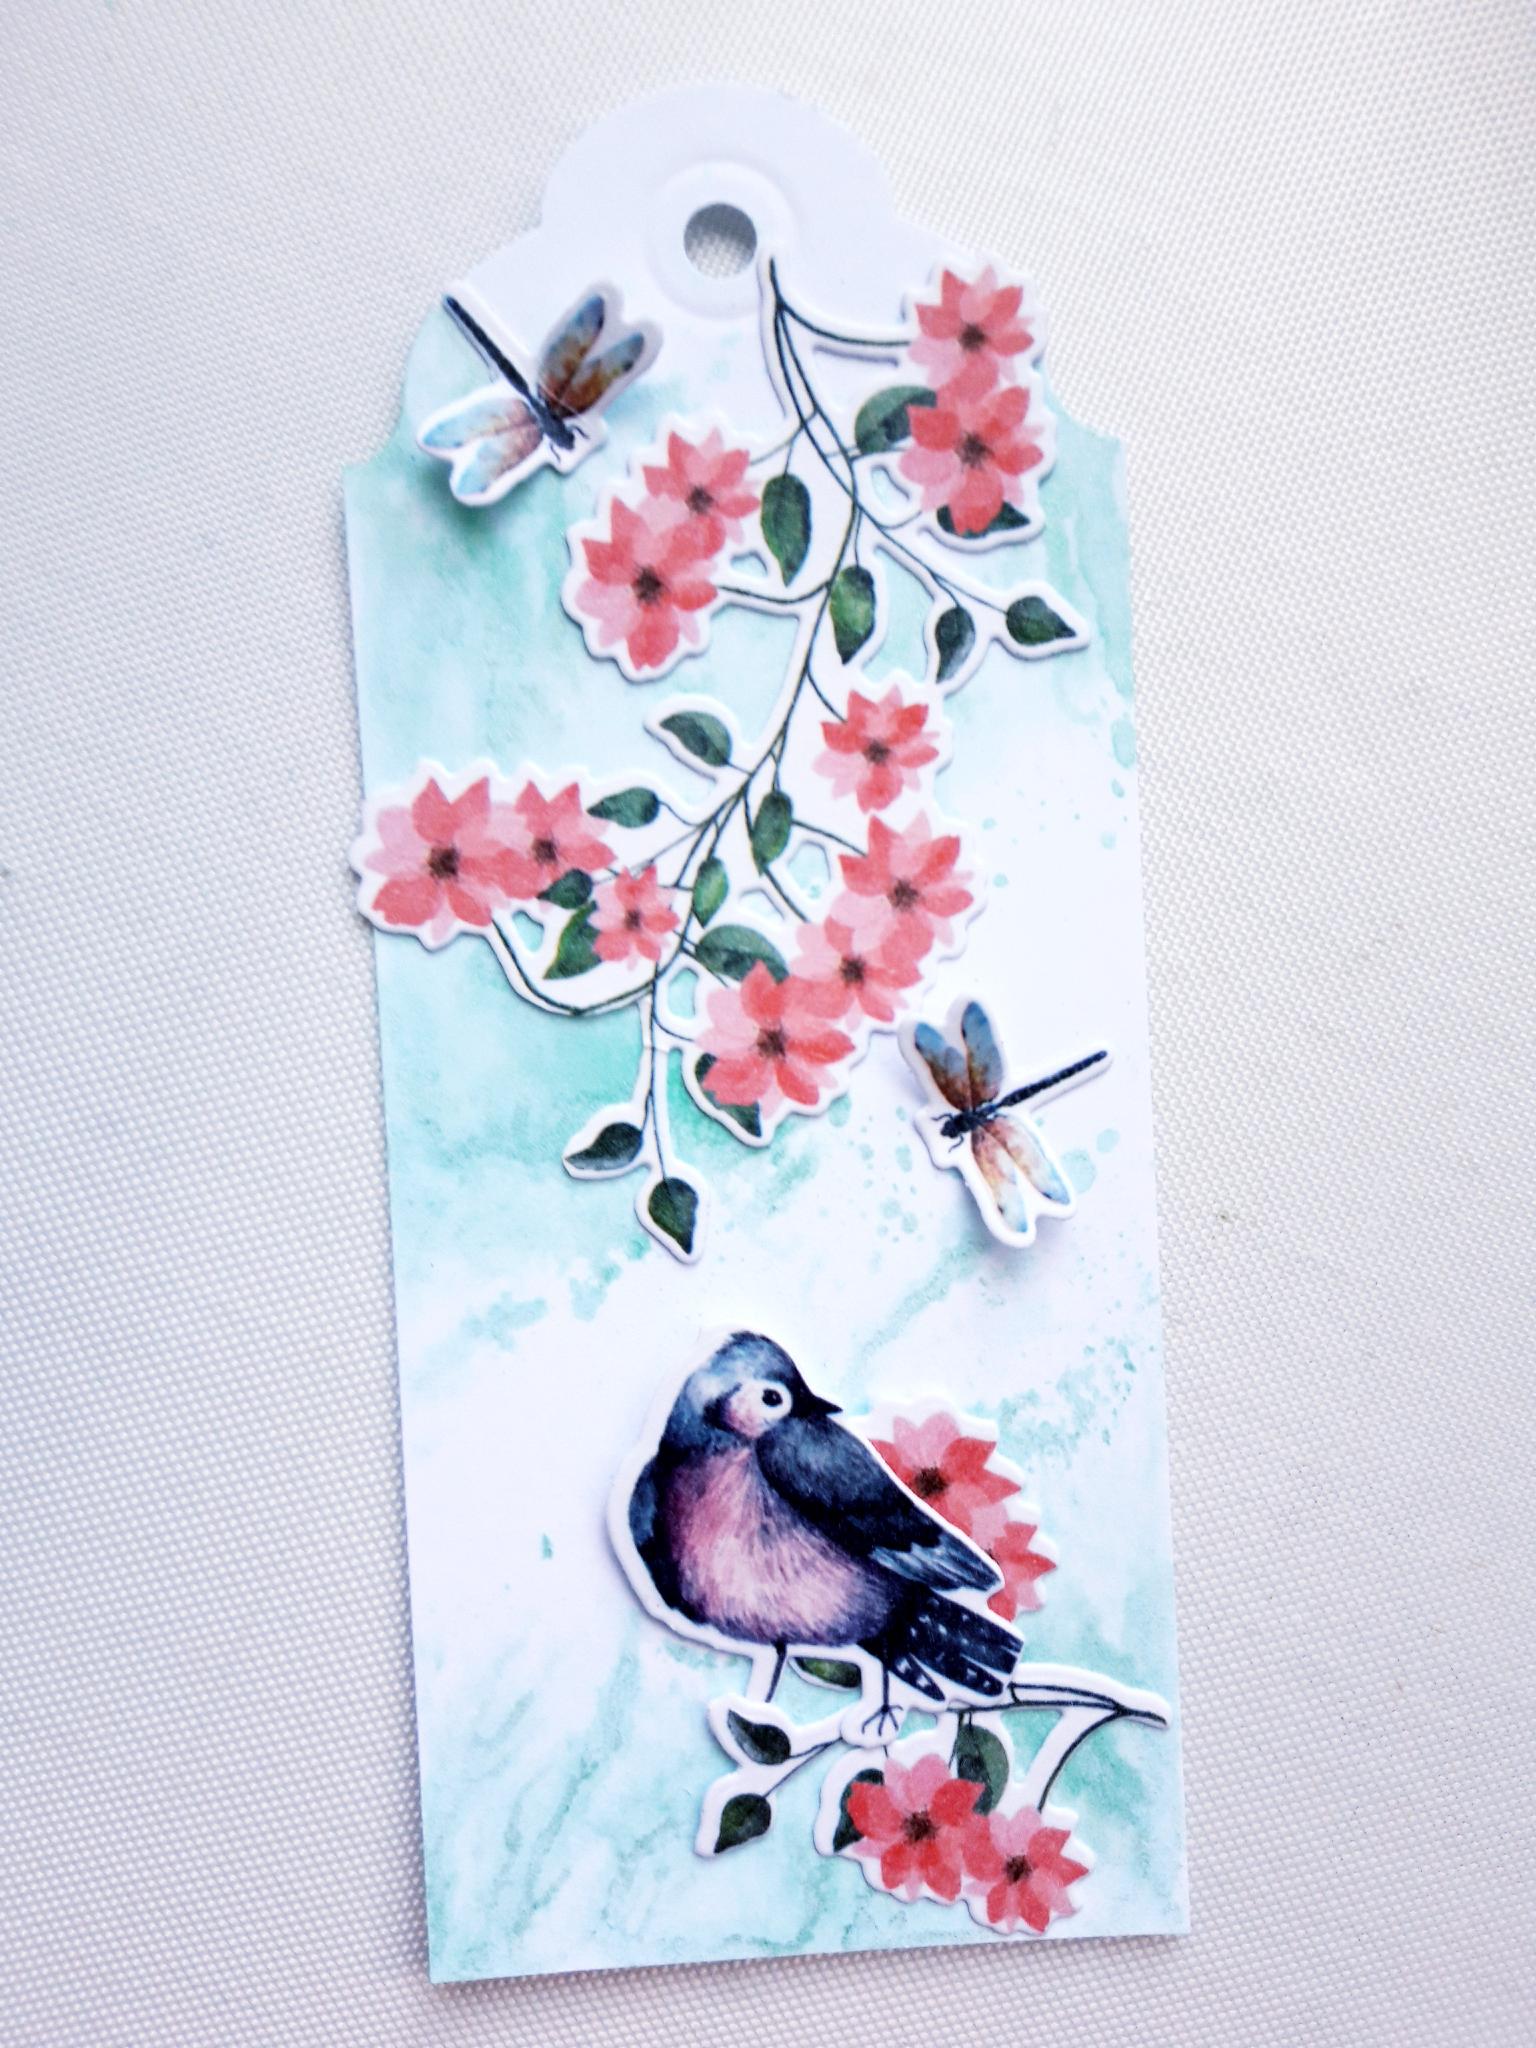
Adhere the washi bird and dragonflies, in place using wet glue, as your tag will need to be able to slide in to the "pocket". You can keep the wings of the Dragonflies loose, so the recipient can "lift" them. Set tag to one side. |

|
Add some pearl drops around the "pocket" on the card blank, as desired, but keeping the pocket opening clear. |
|
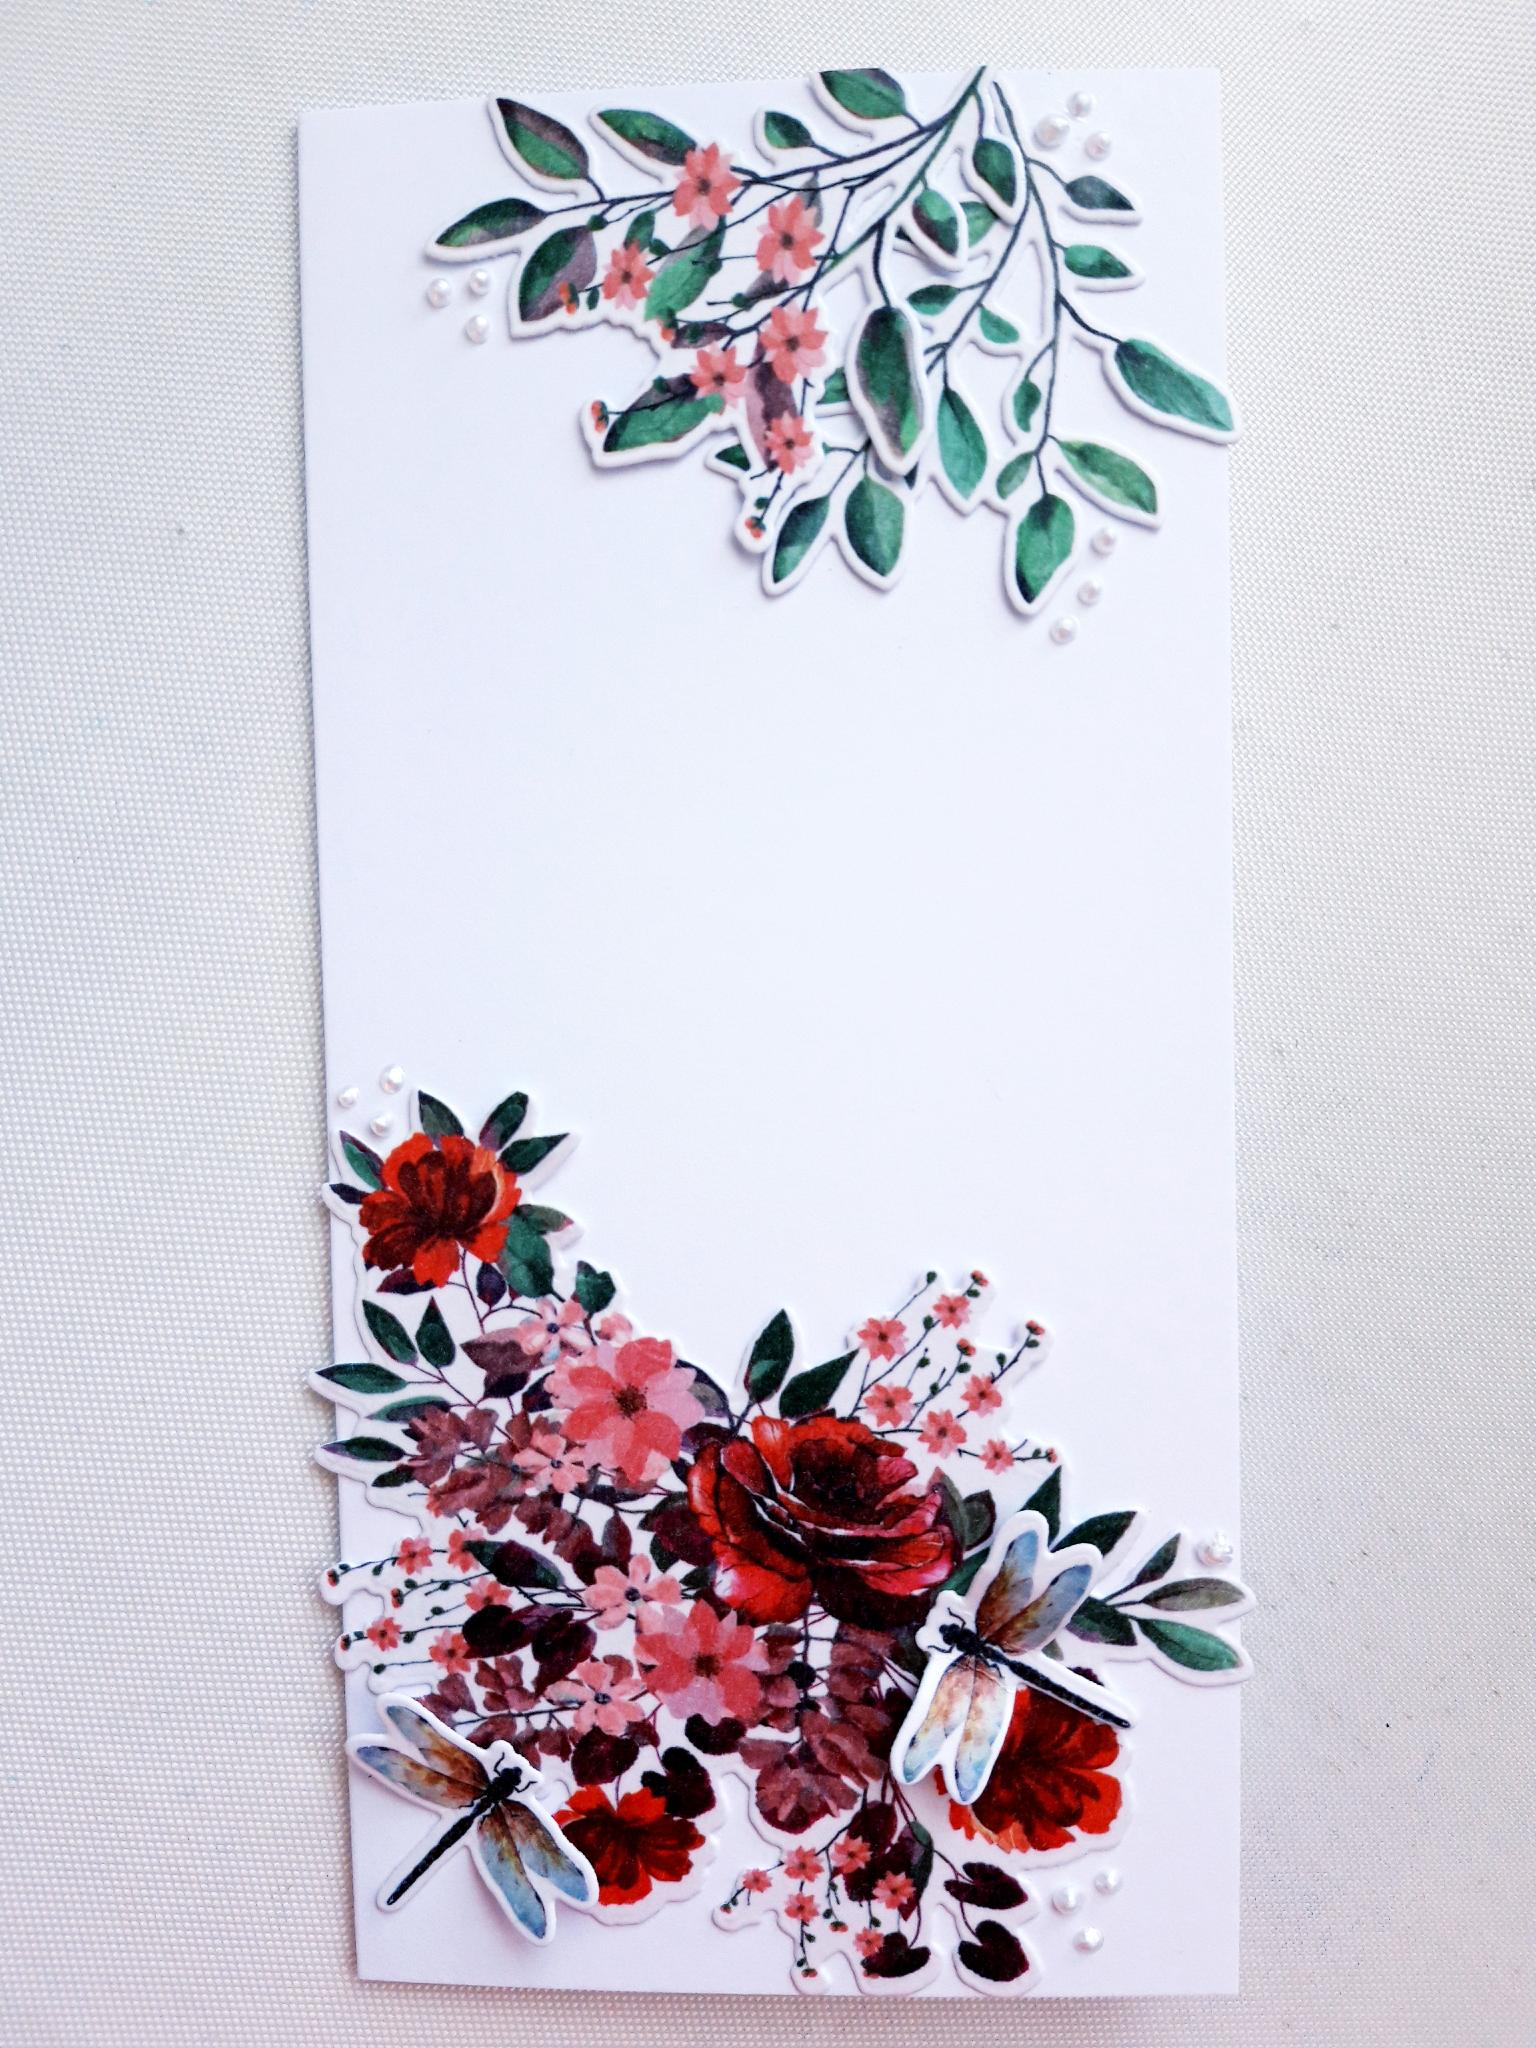
Add some of the other washi die cuts to the top of your card blank, and add liquid pearl drops around these, as desired. Add the pearl drops to your tag as desired. Set your card blank and tag to one side, to allow all the drops to dry. |
|
Once all the drops are dry, or being very careful, you can adhere your pre cut Sepia Washi Tabs in place, on the card blank and tag, using foam pads. |
|
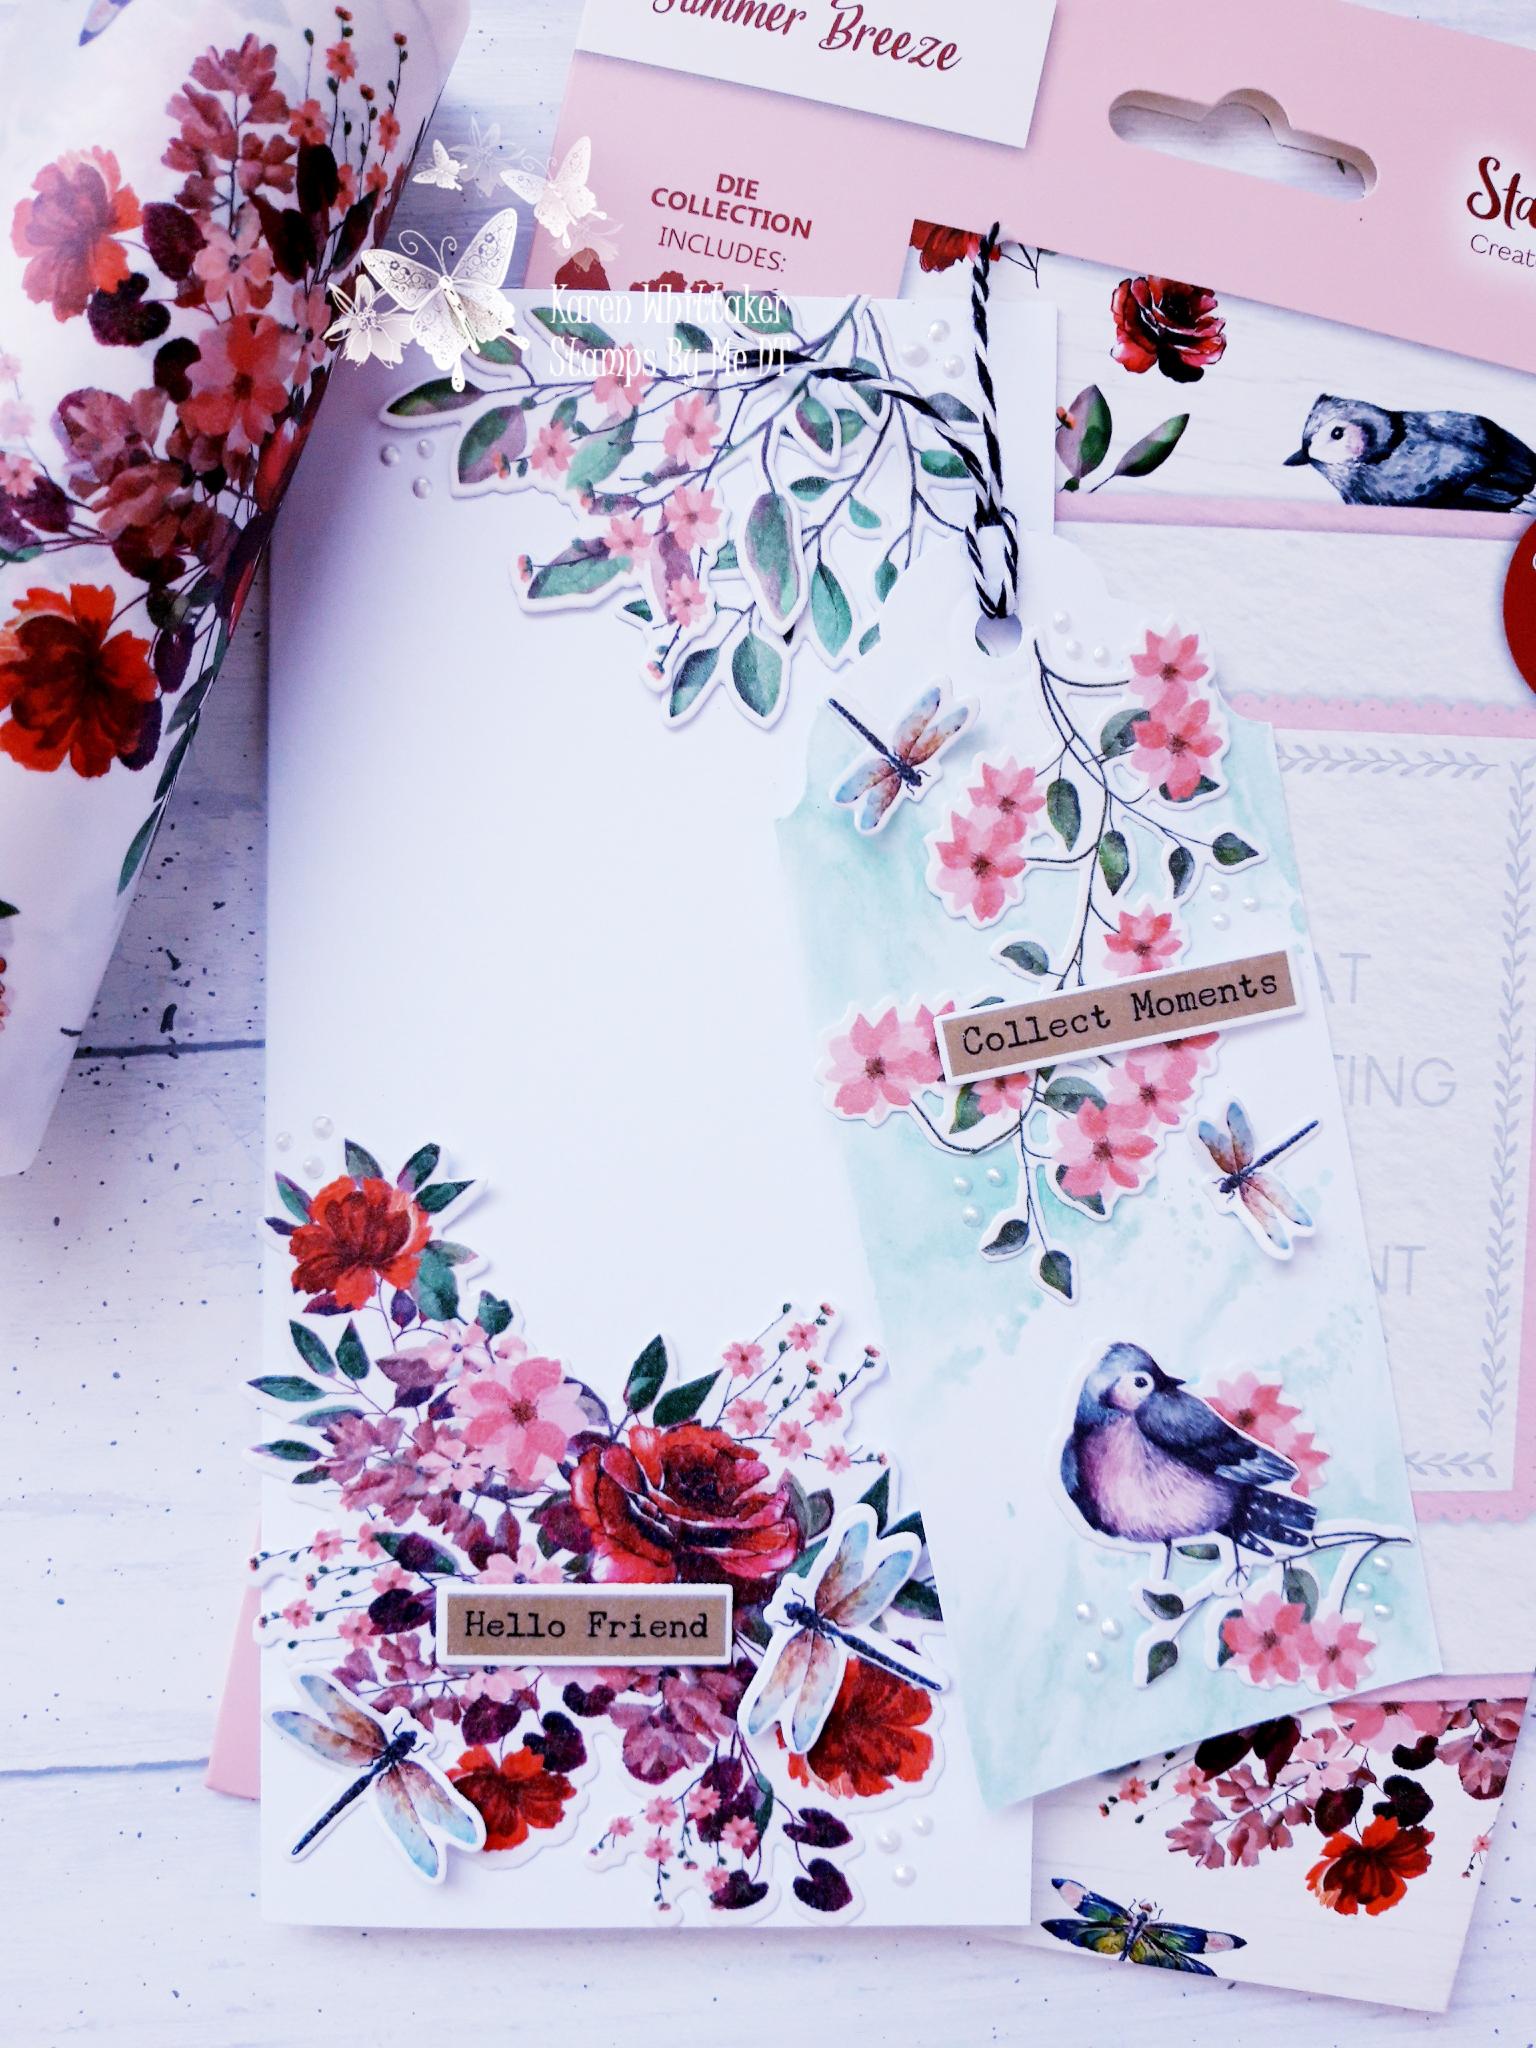
Your pocket tag card is now complete and the tag can be kept as a gift, bookmark etc. Optional: You can stamp a sentiment on the reverse of the tag, if desired, or inside the card. |