Give your friends $10 off their first order!
Refer a FRIEND


WHAT YOU WILL NEED:
White card blank 7 x 7"
White card 7 x 5"
White card 6 x 6"
White card 5 3/4 x 5 3/4" (TWO)
Vellum - tear to 7 x 1 3/4"
Signature Watercolour 3D Geometric Leaves Embossing Folder
Festive Sparkles Die Collection
Beautiful Soul Stamp Collection
WOW Summer Sun Trio Embossing Powders: Hello Summer
WOW Embossing ink pad
WOW heat tool
Anti-static bag
Gossip clear overlay sparkle pen
Eureka 101
Paper Trimmer
Perfect Together PVA Glue
Double sided adhesive tape
Foam pads
Die Cutting machine
[click image to enlarge] 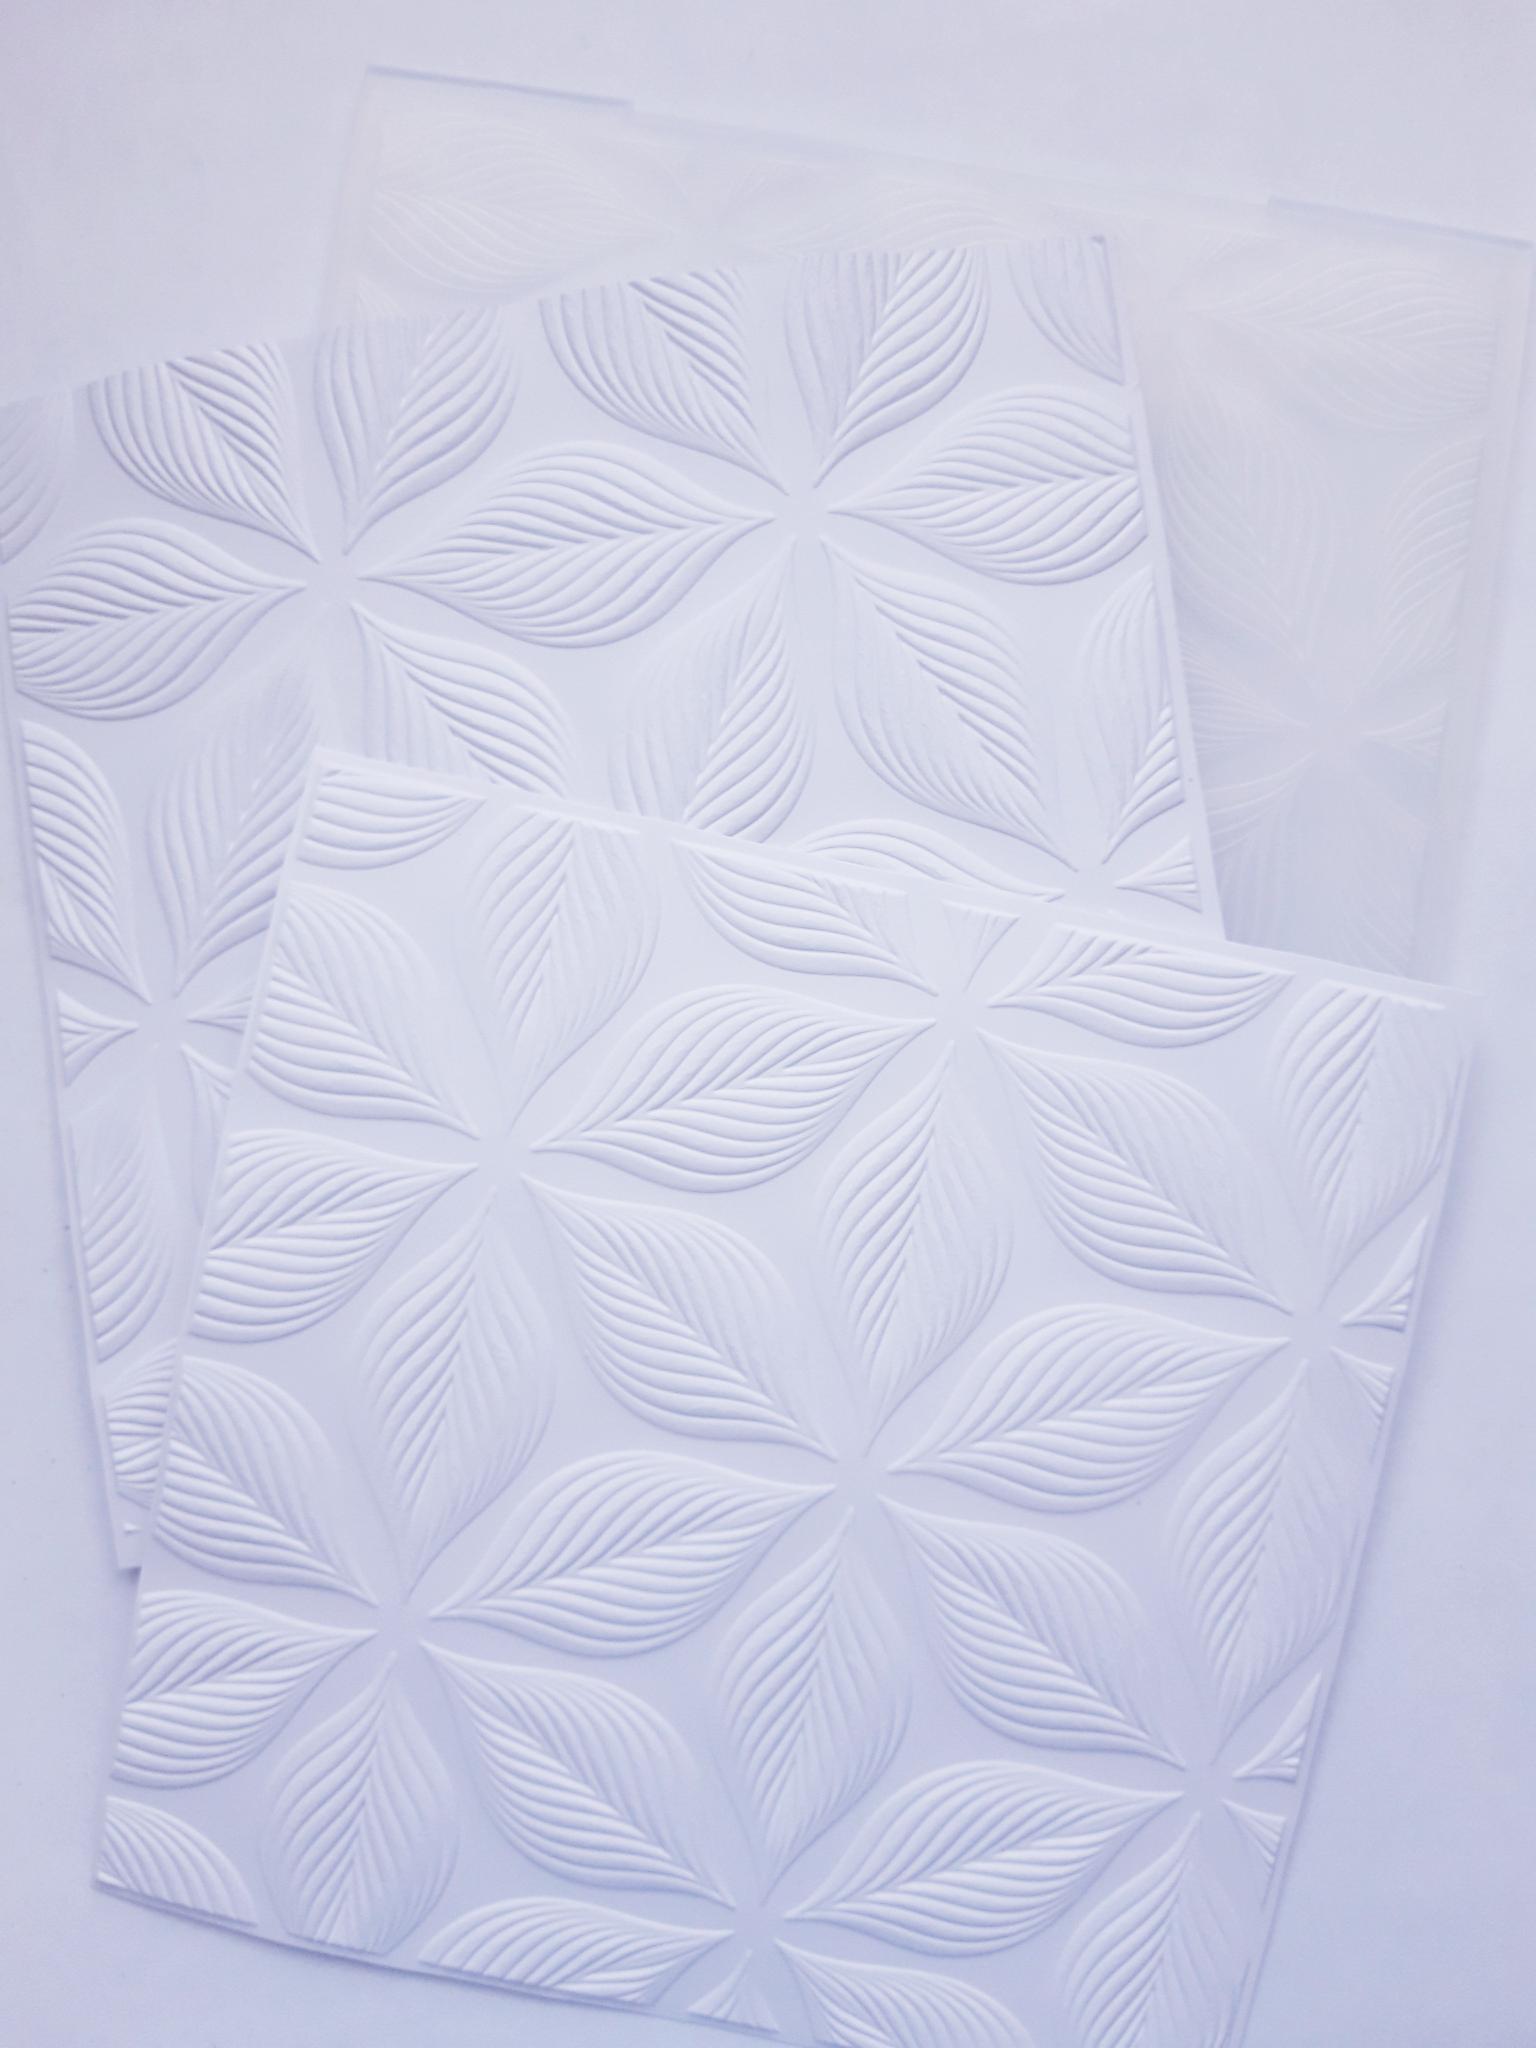
|
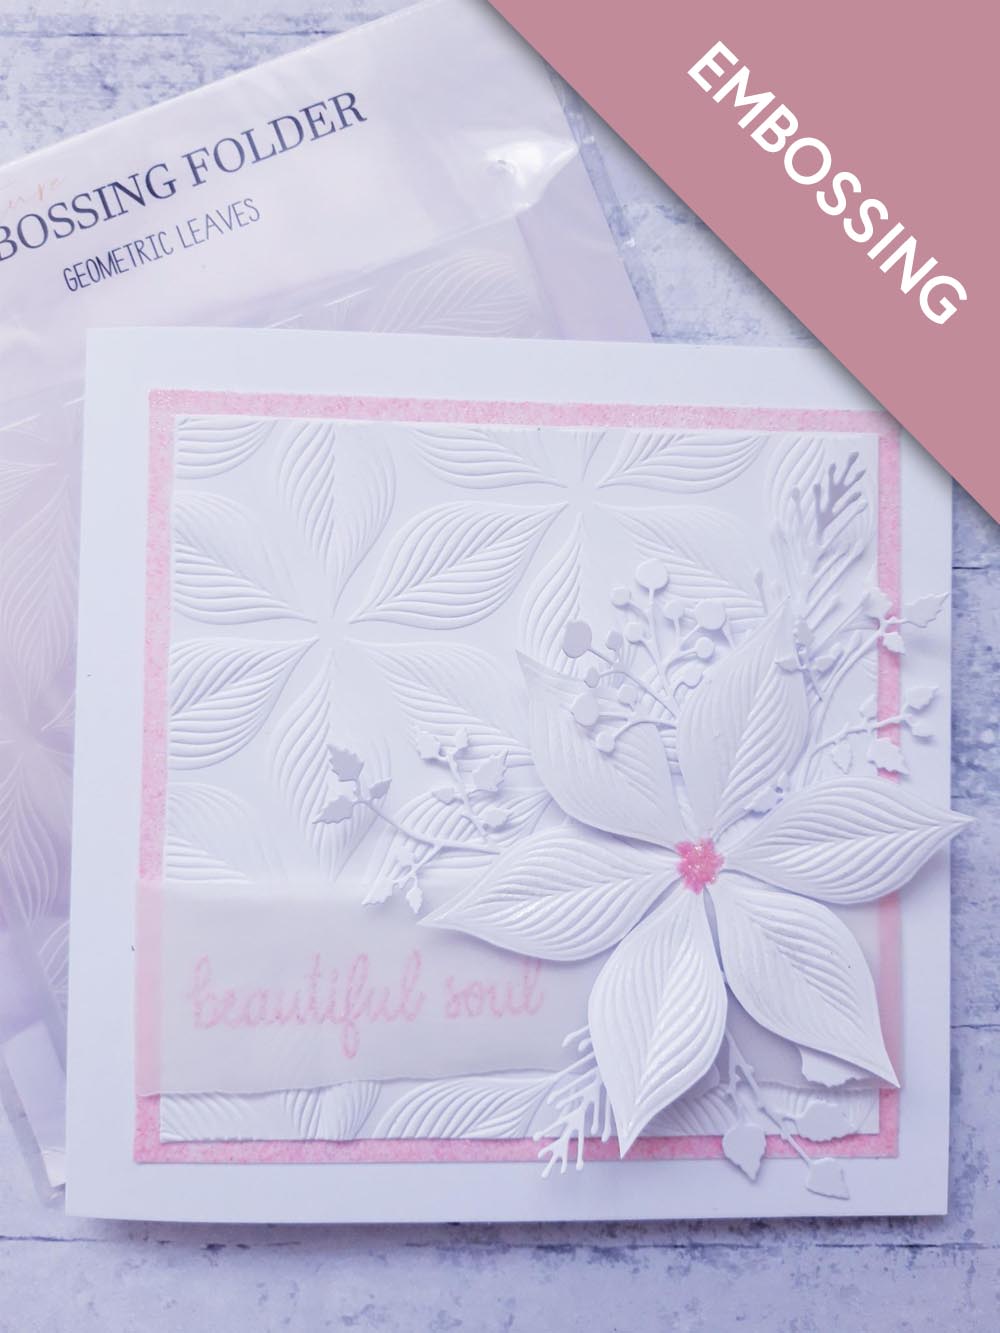
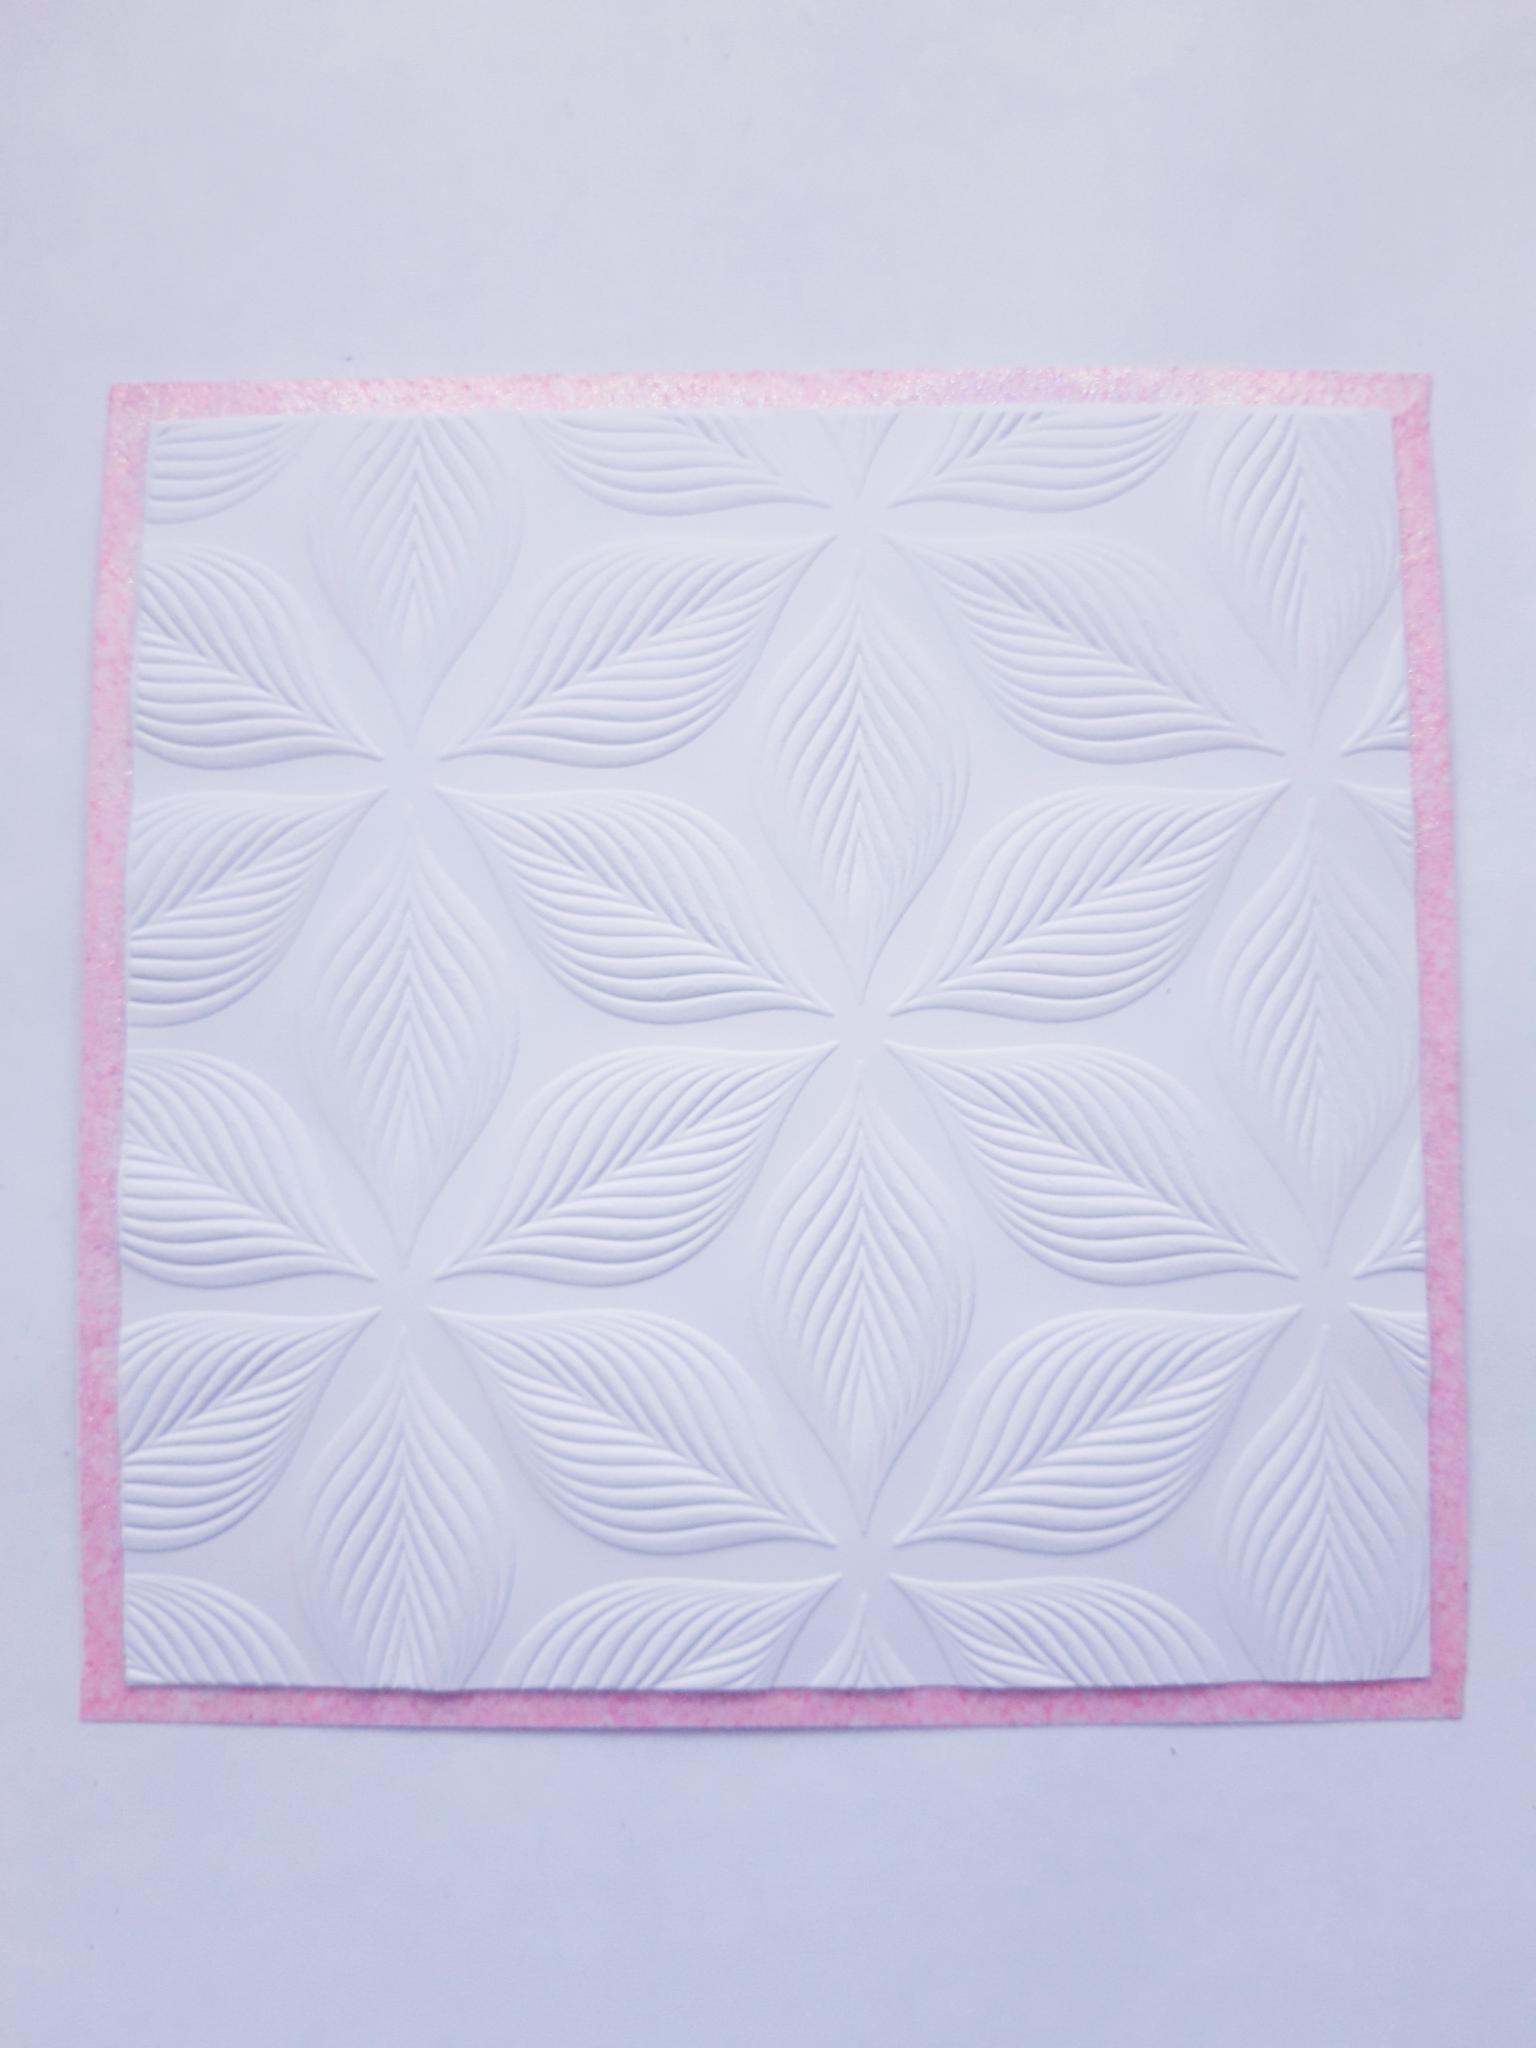
One at a time, place each piece of white card (5 3/4 x 5 3/4") inside the Geometric Leaves embossing folder and run them through your die cutting machine. Ensure the raised embossed side of the folder is at the bottom. |
|
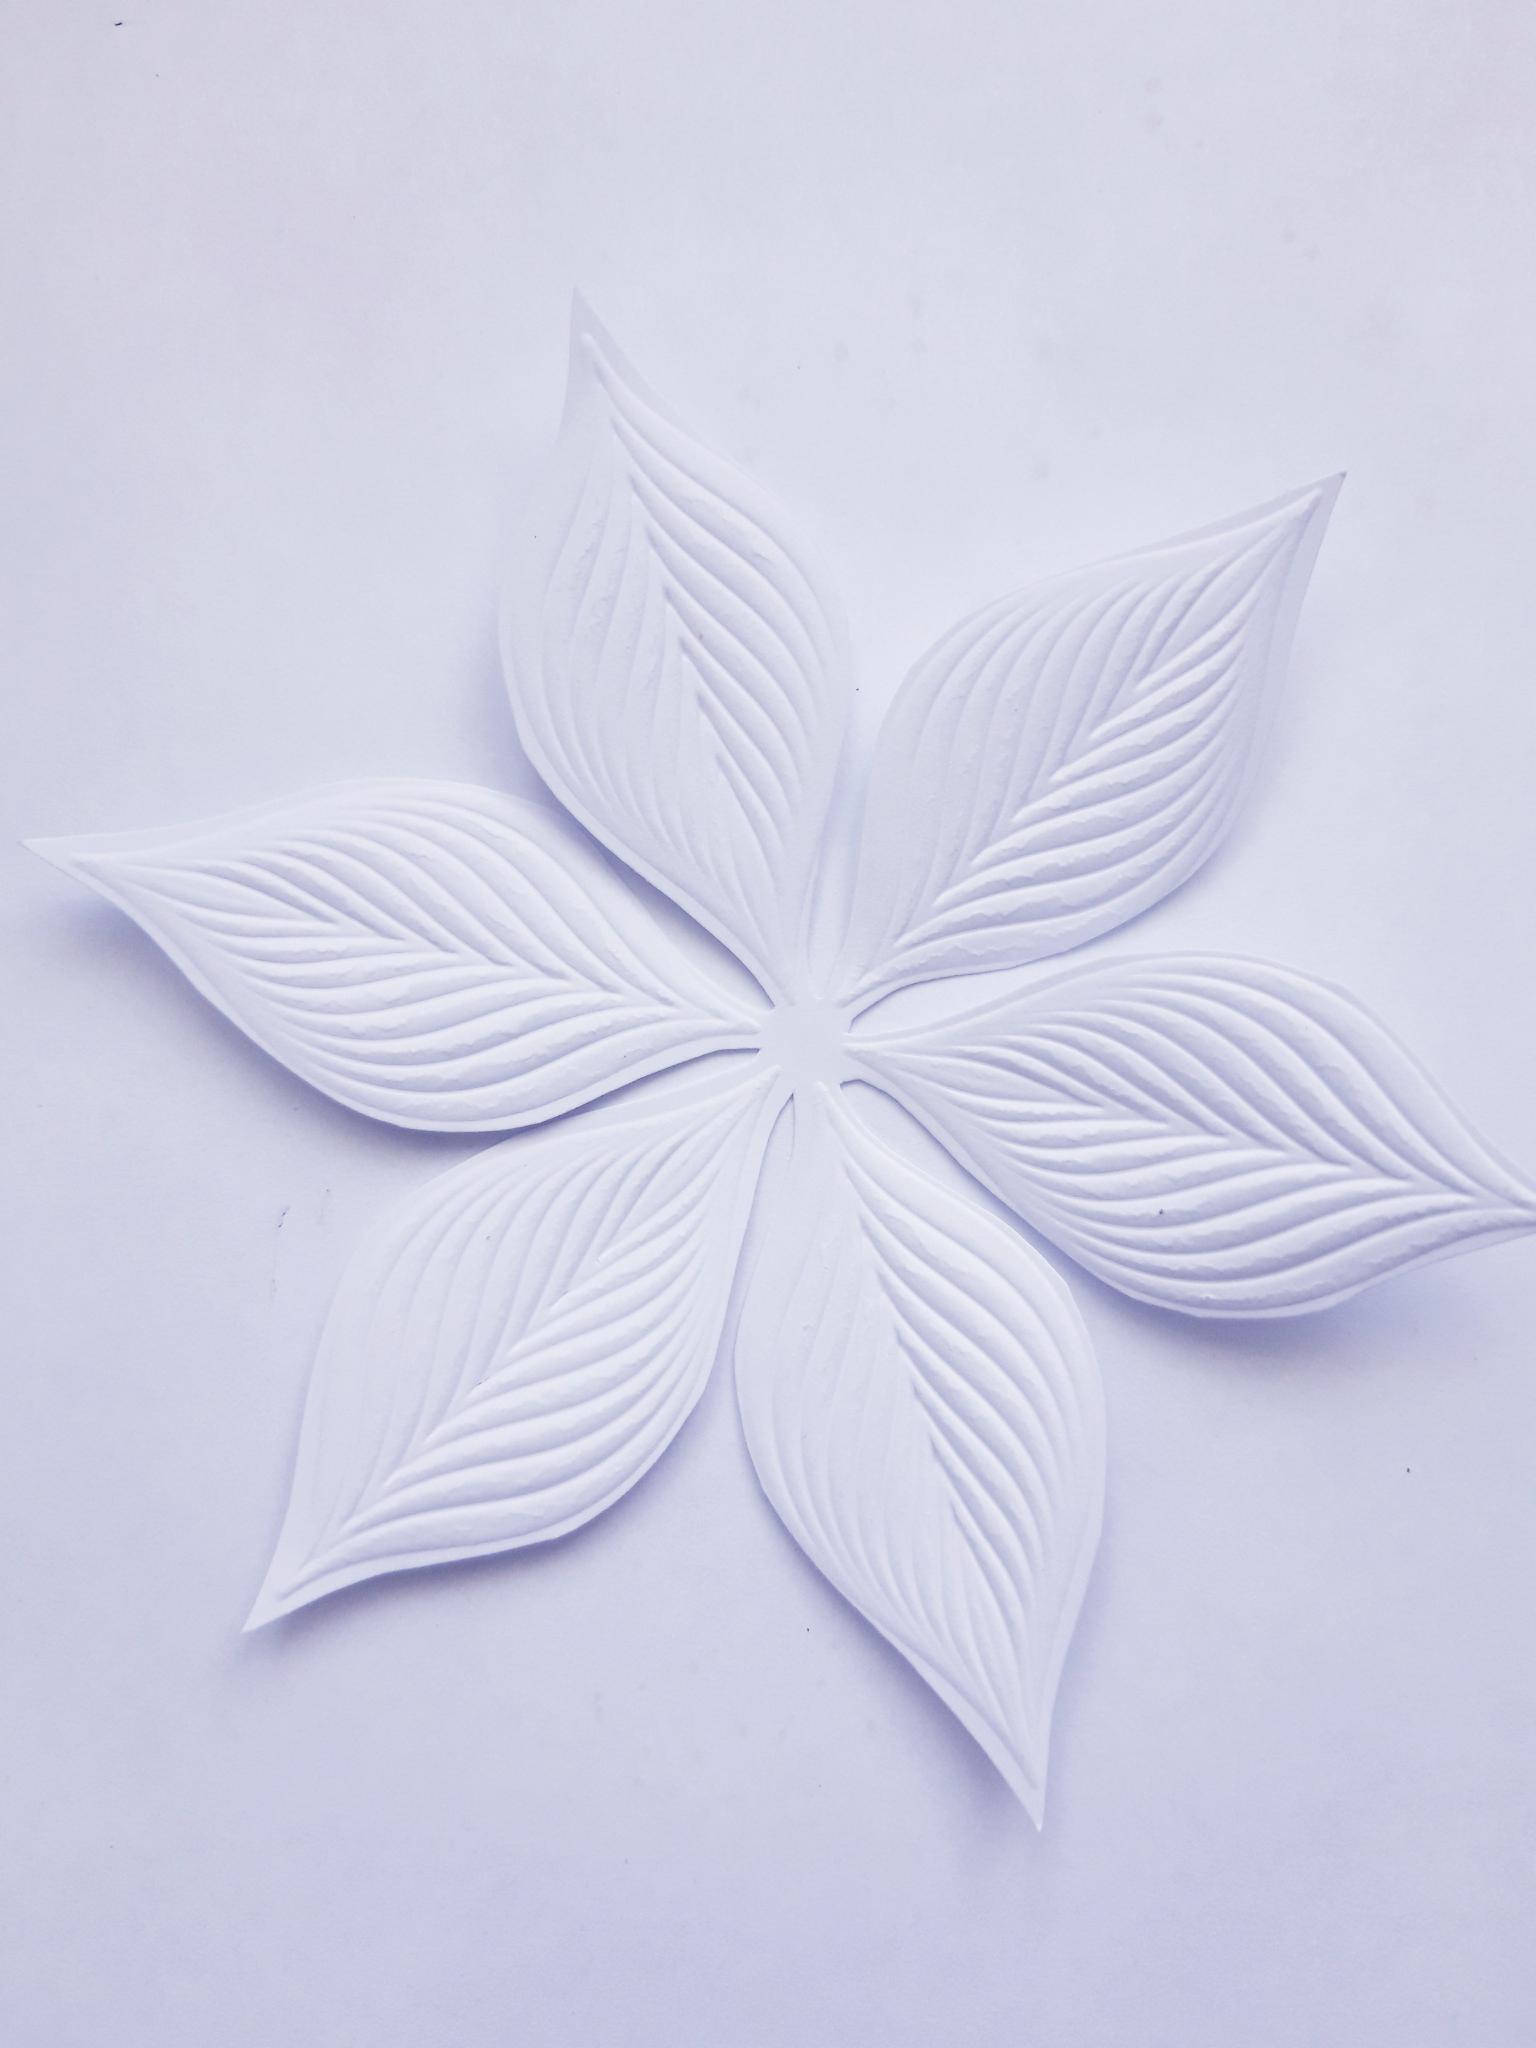
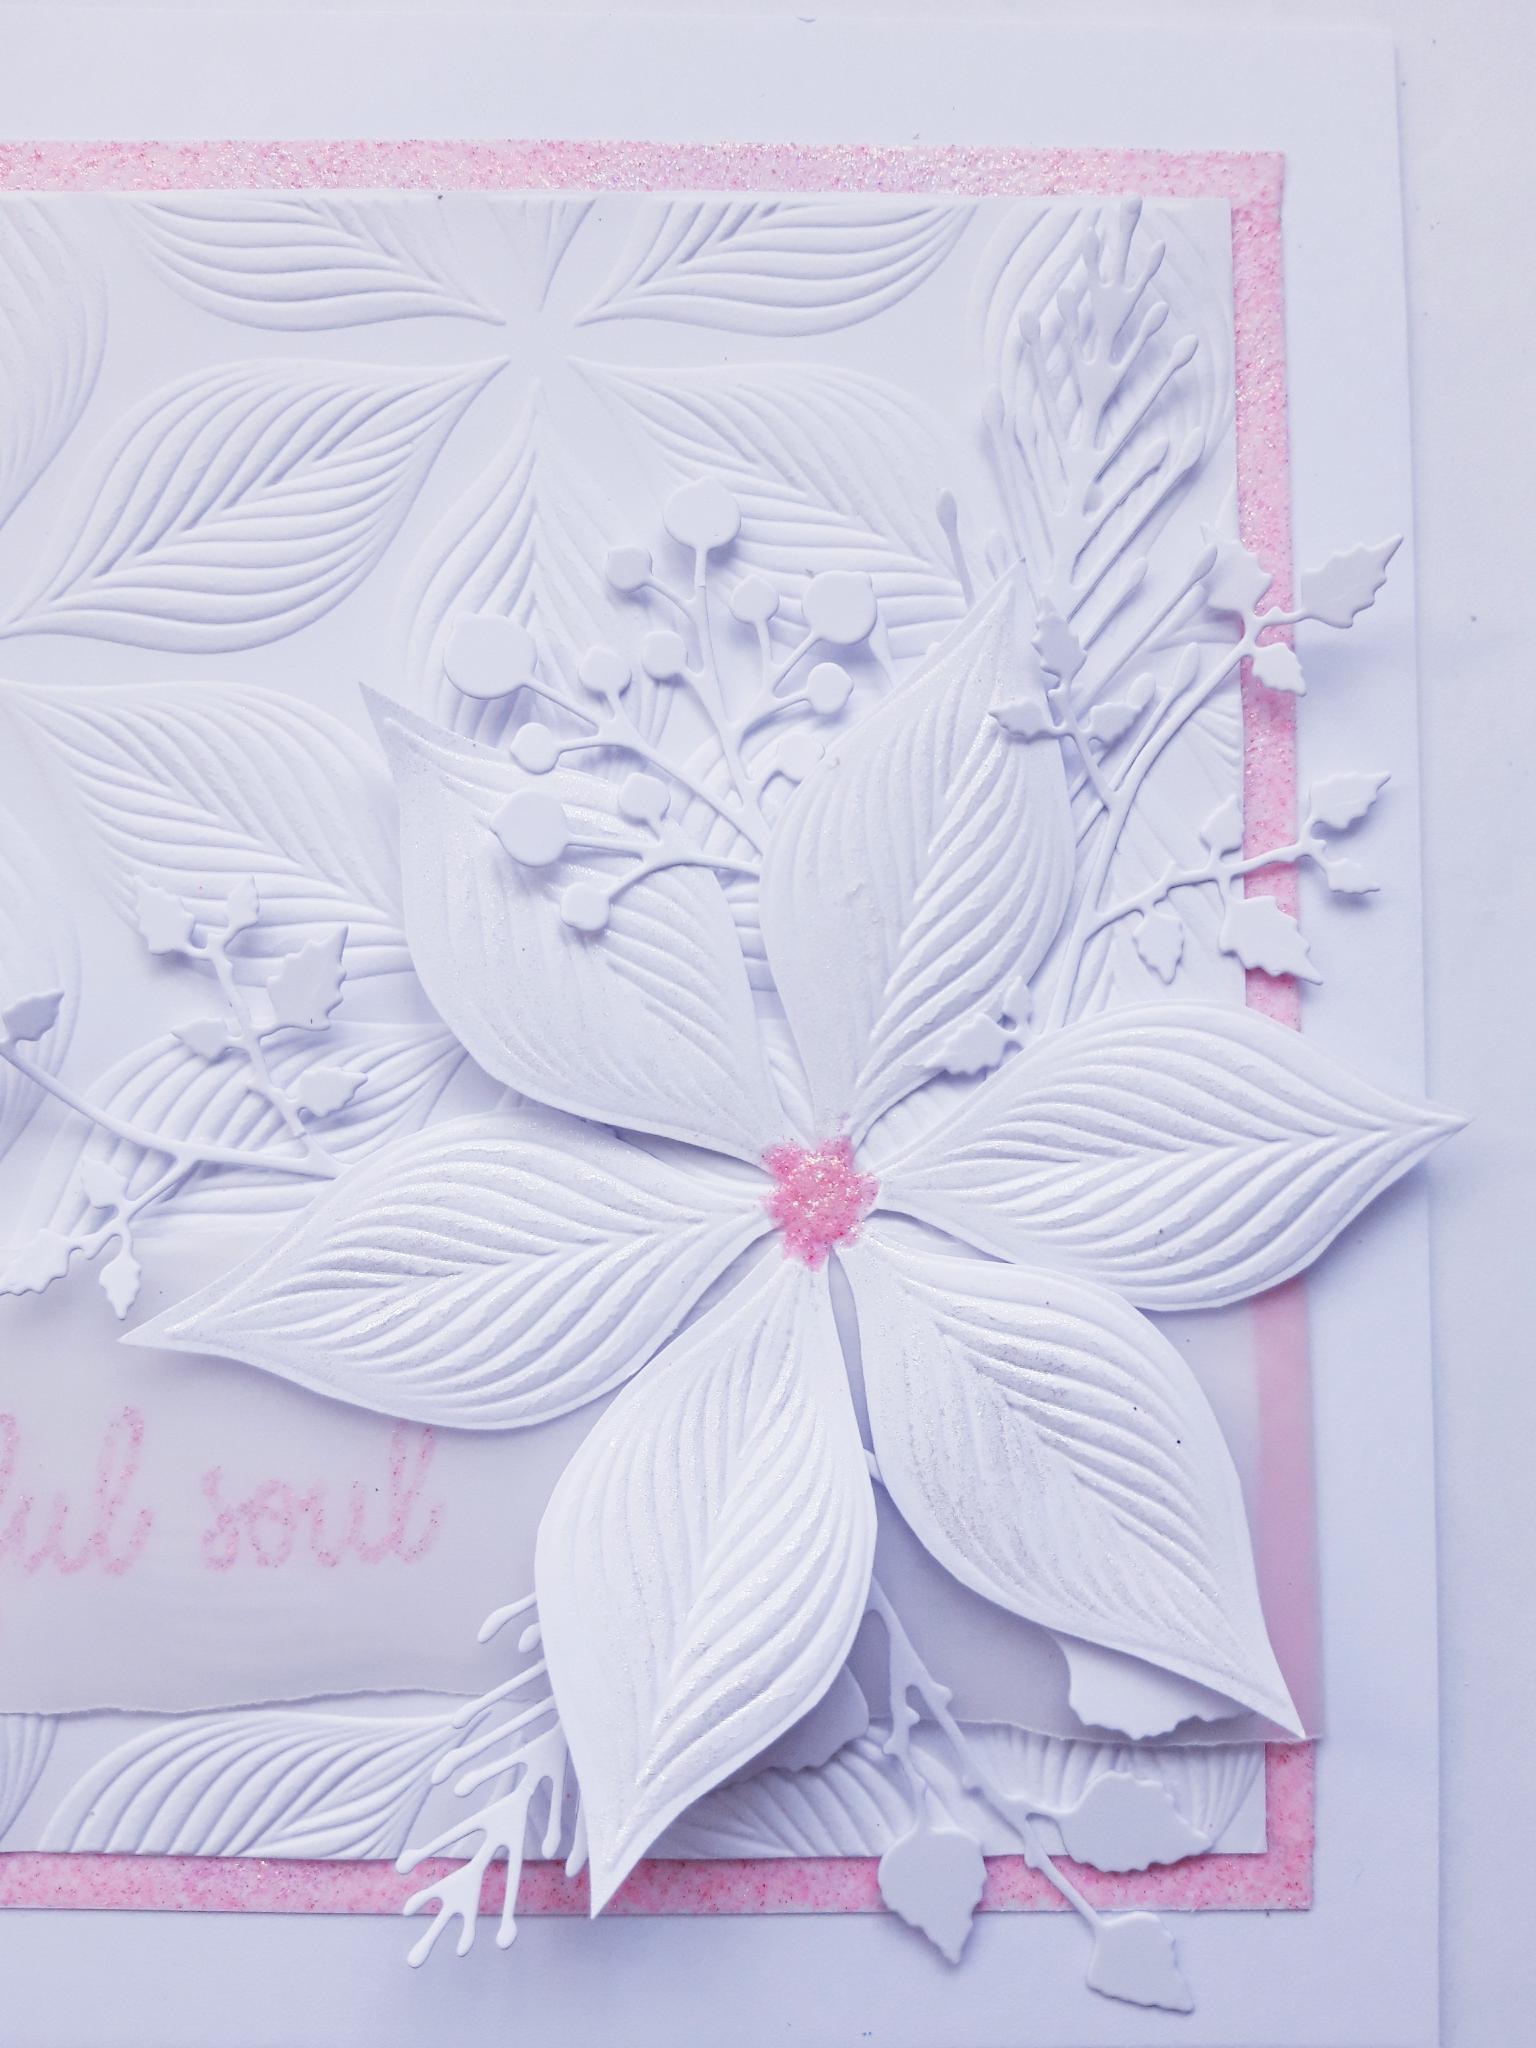
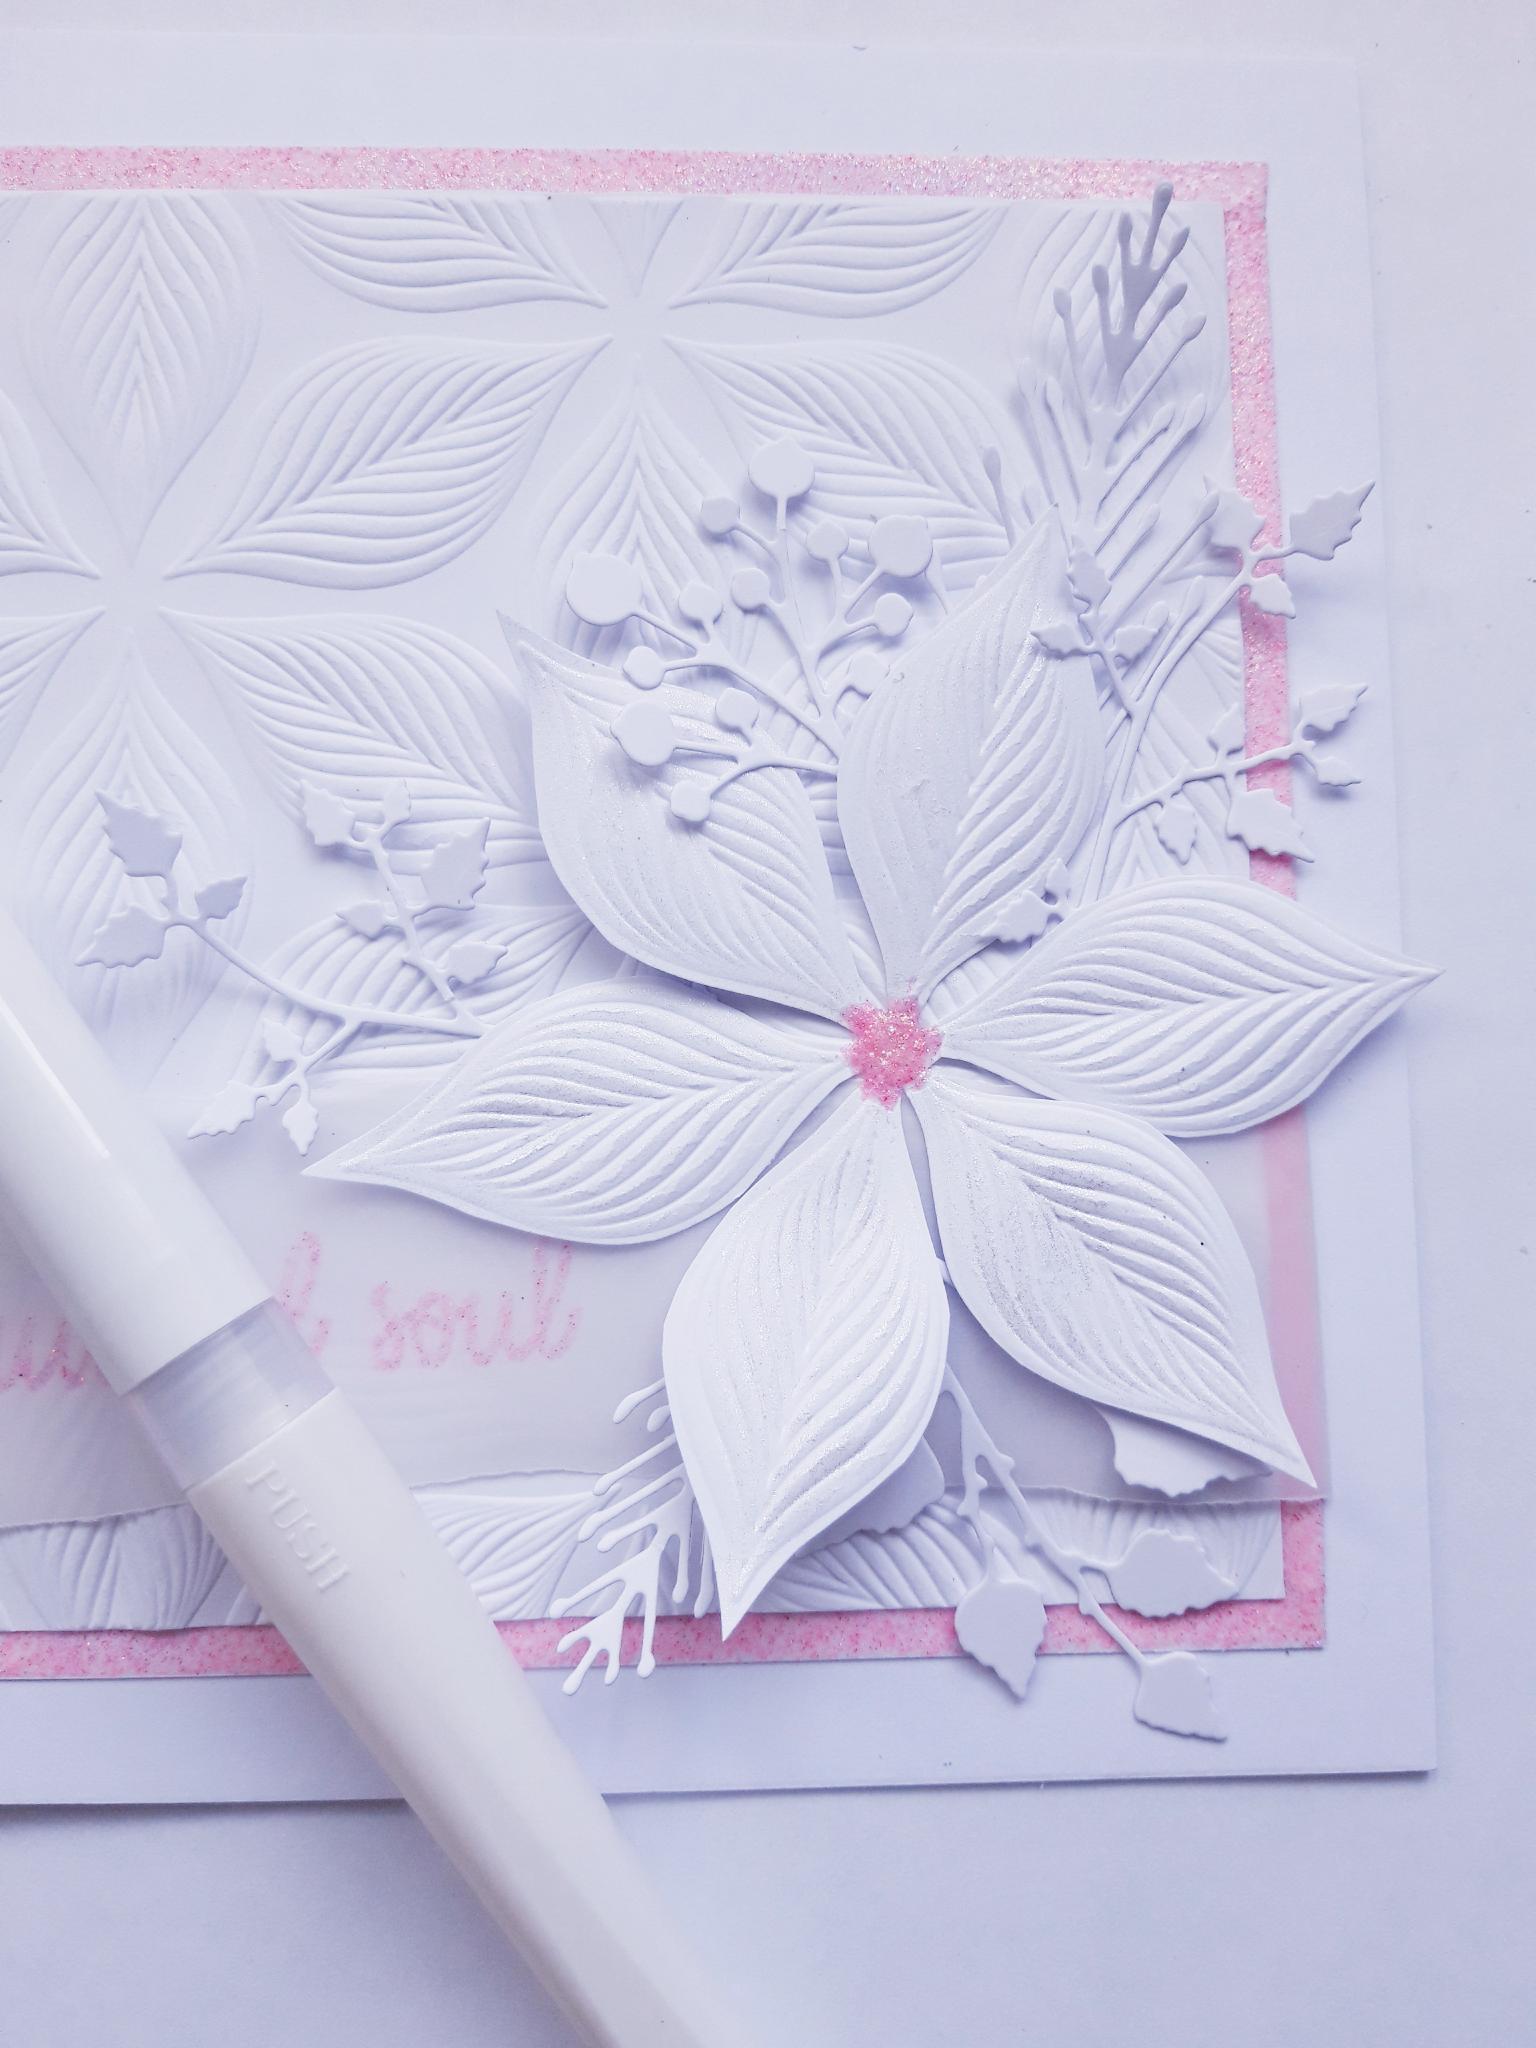
From ONE of the embossed designs, cut out this large flower. |
|
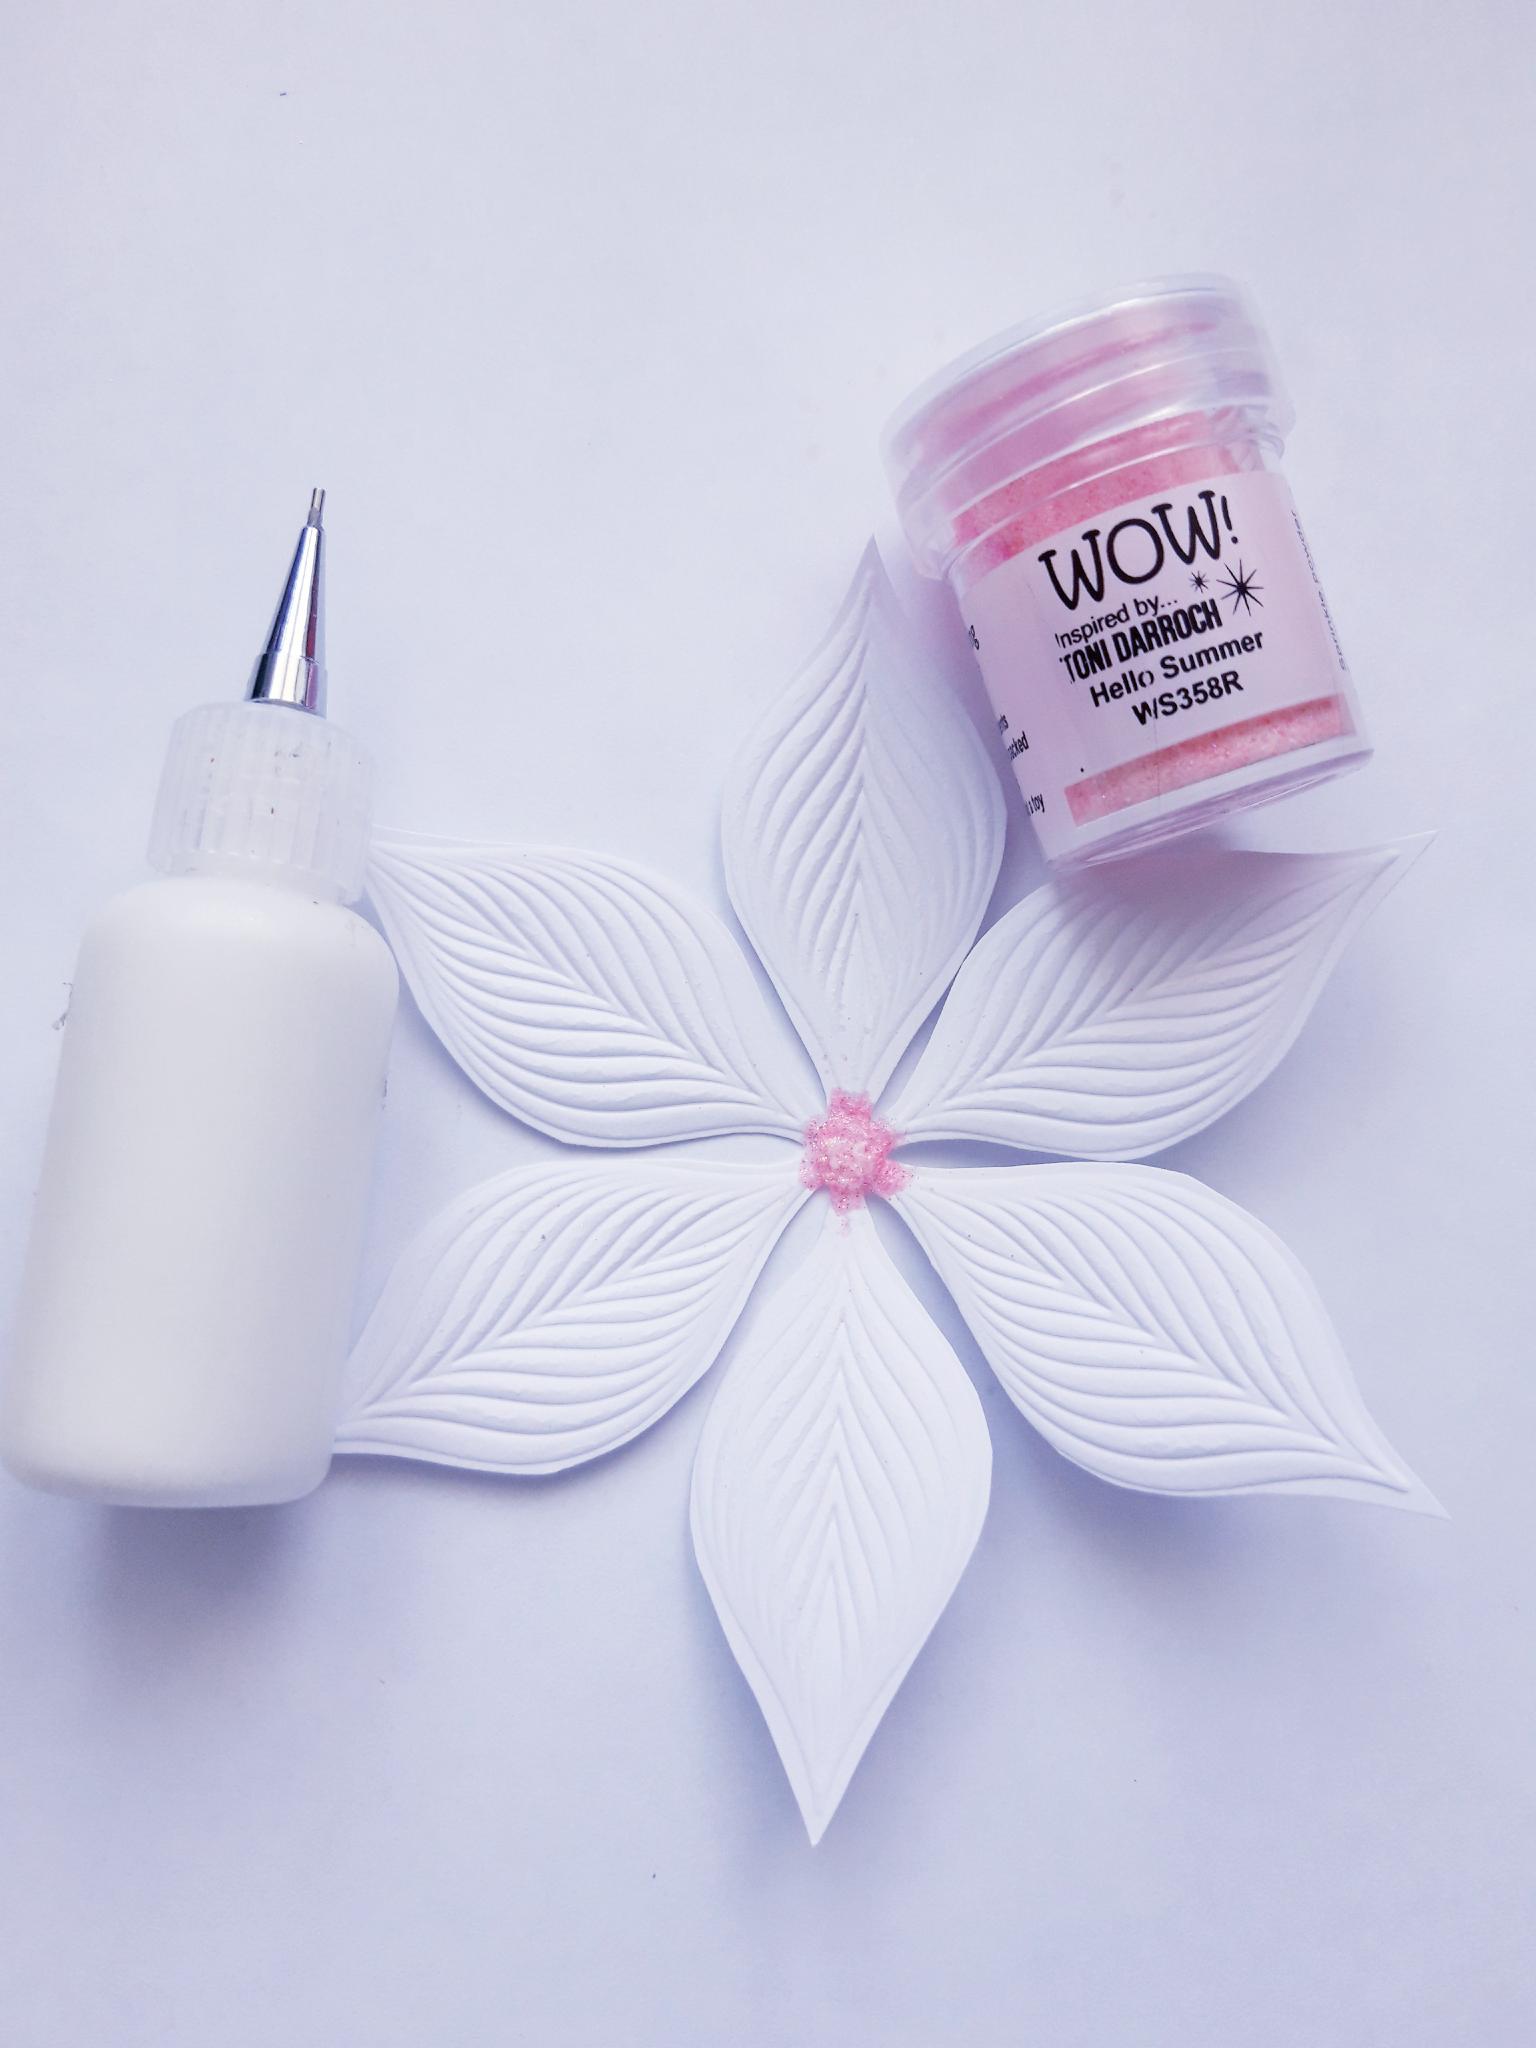
Add PVA glue to the centre of the flower, sprinkle the WOW powder over the glue, get your heat tool hot and heat set from underneath. This will prevent the powder from blowing everywhere! You can finish off setting the powder from above, once it has started to melt. Set to one side. |
|
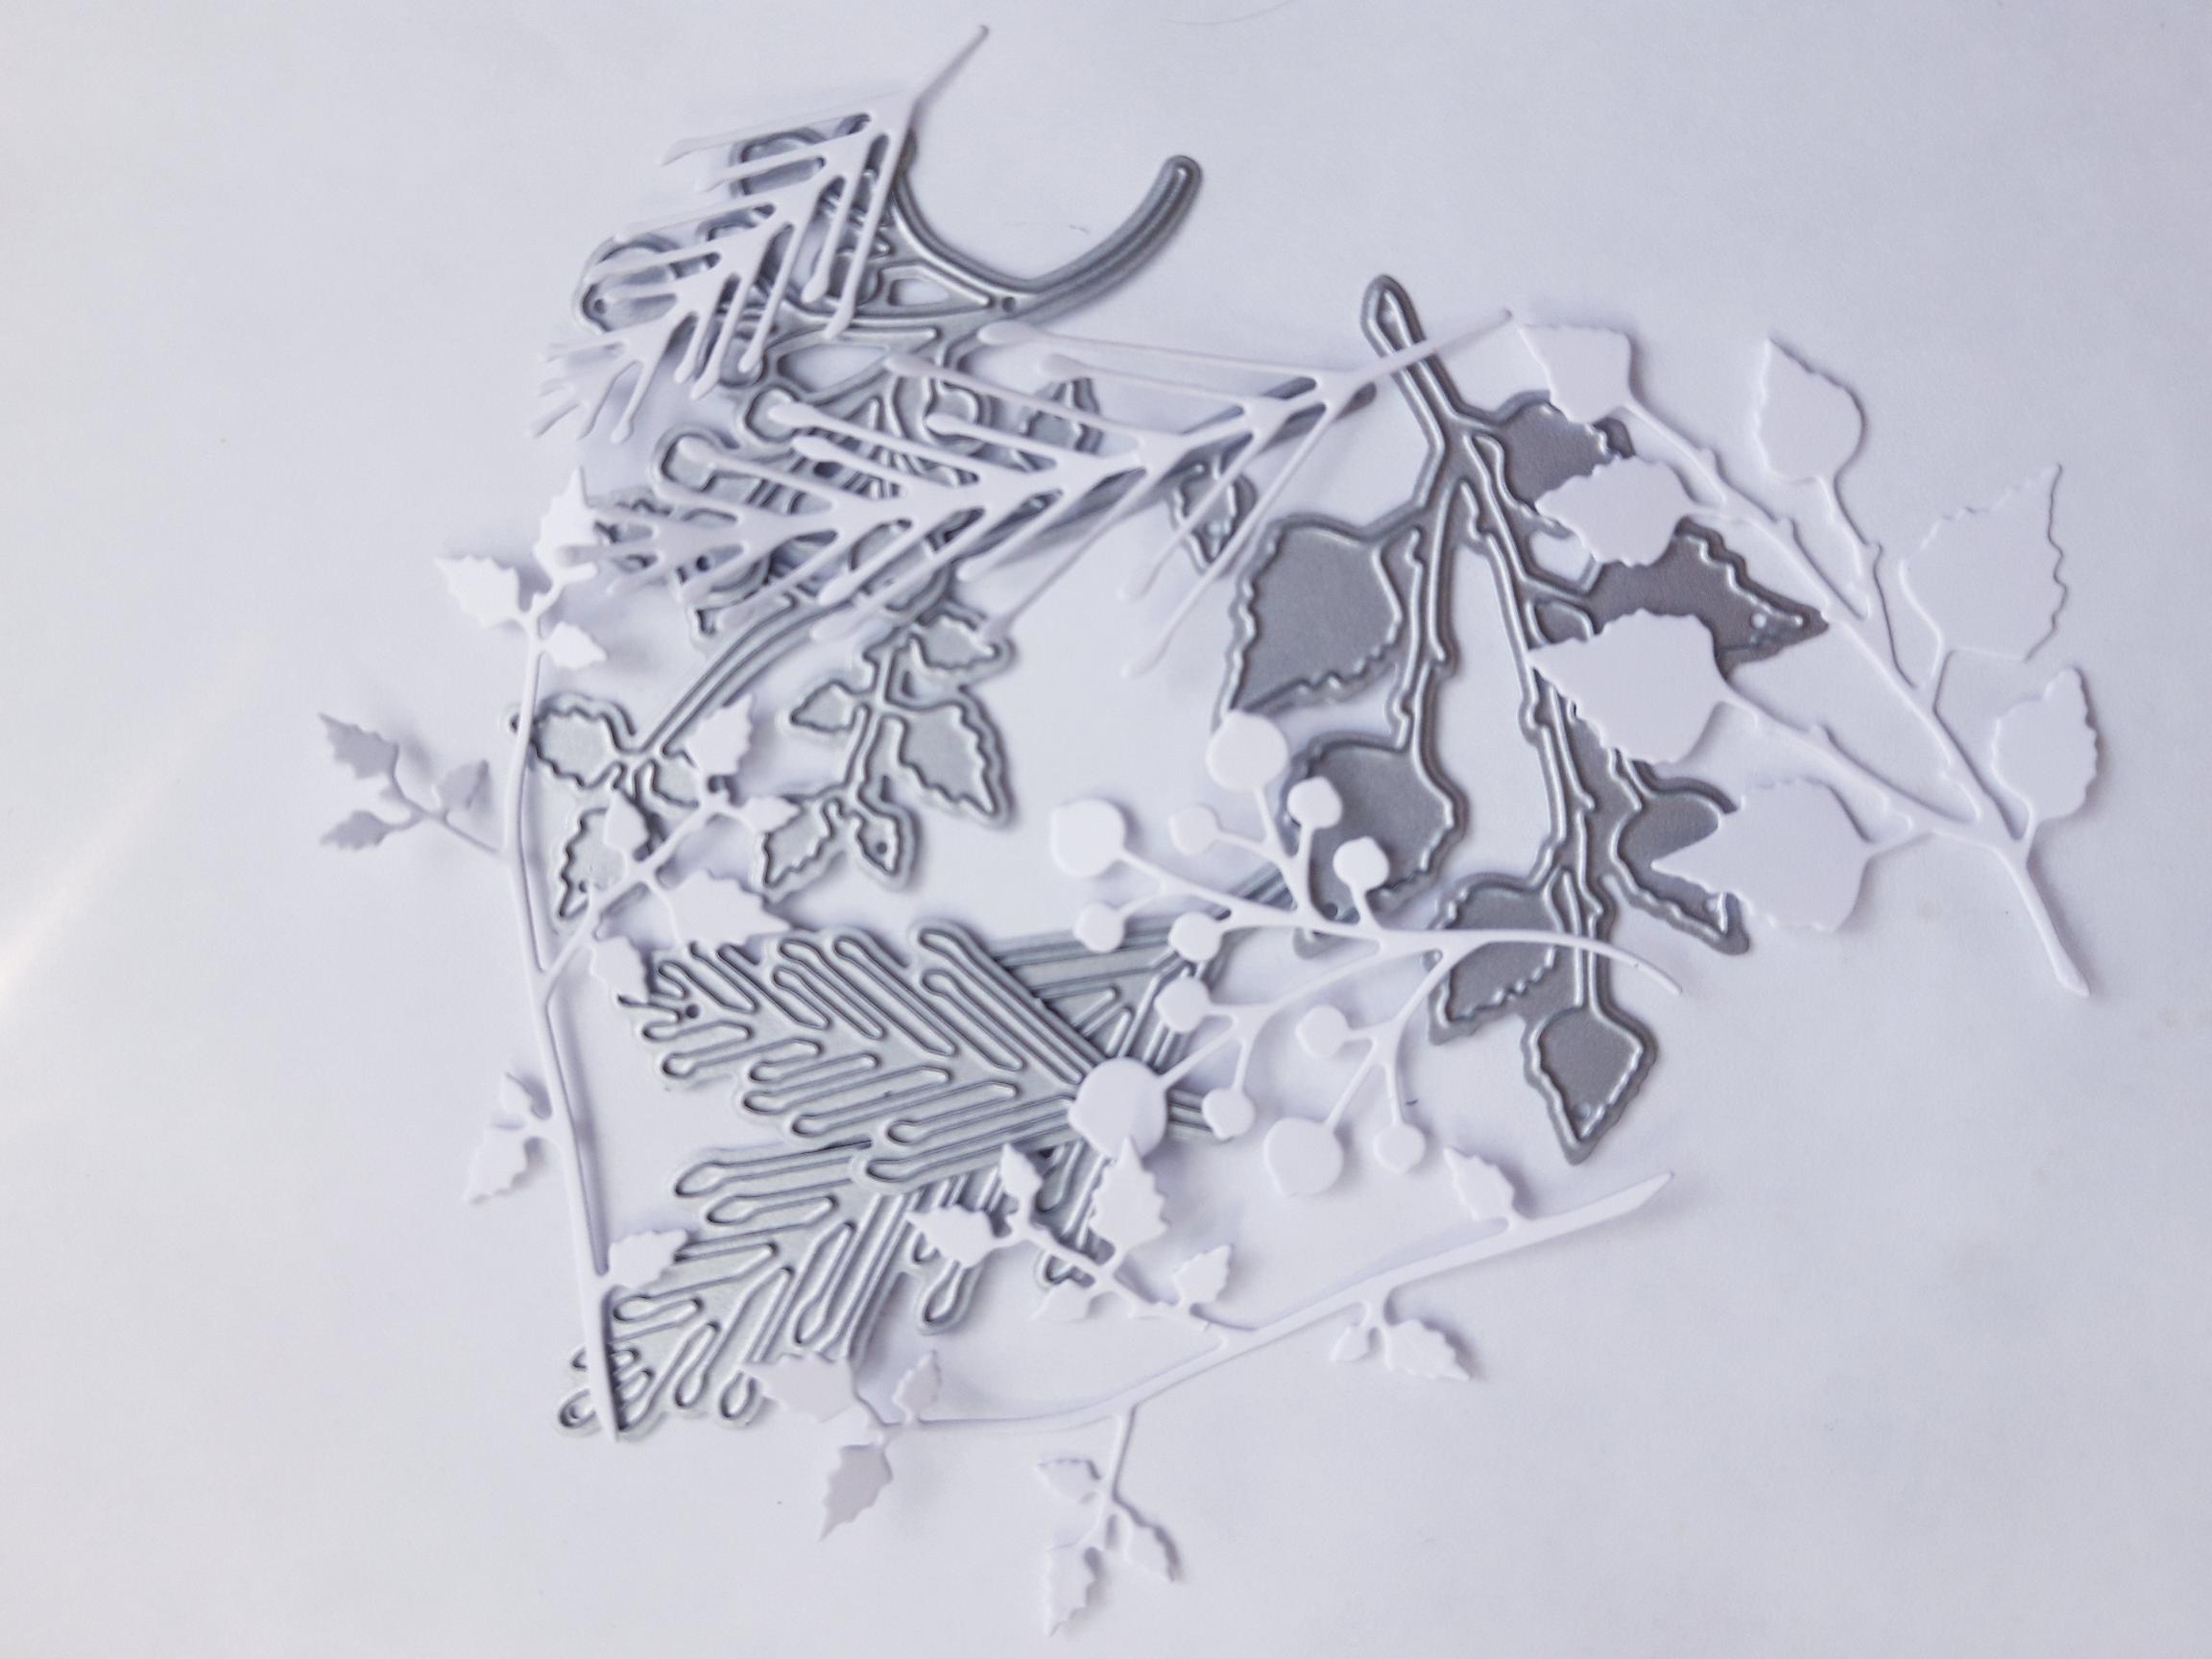
Die cut a selection of foliage and ferns, from the Festive Sparkles Die Collection, from the white card (7 x 5) and set them to one side. |
|
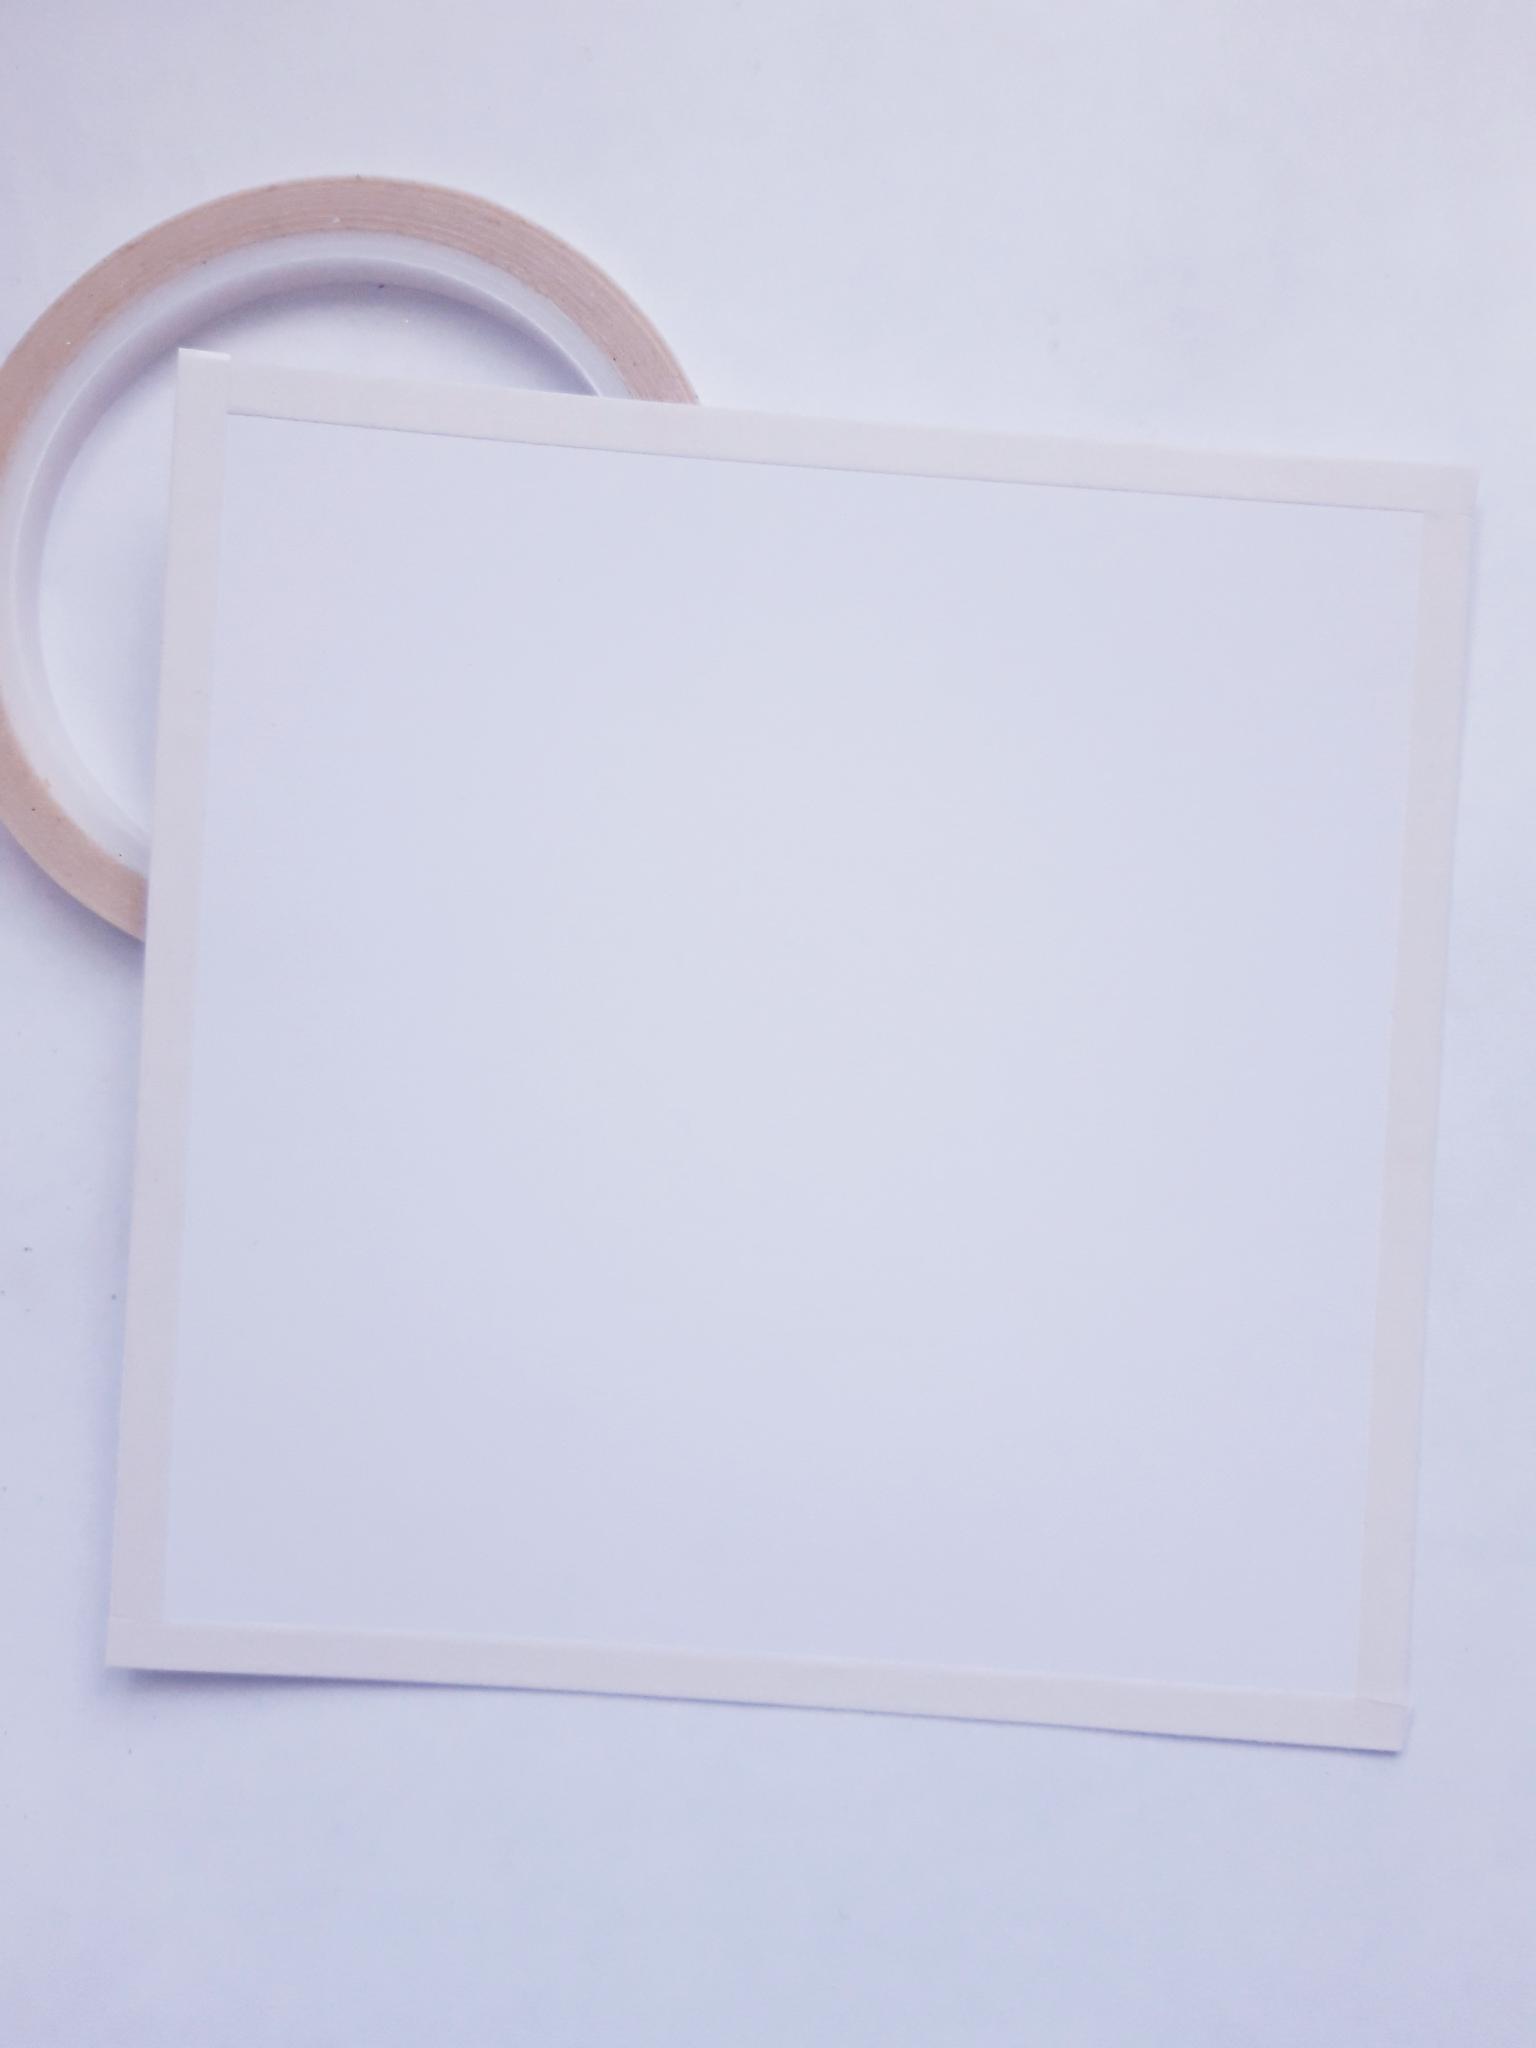
Apply double sided adhesive tape down all 4 edges of the 6 x 6" white card. |
|
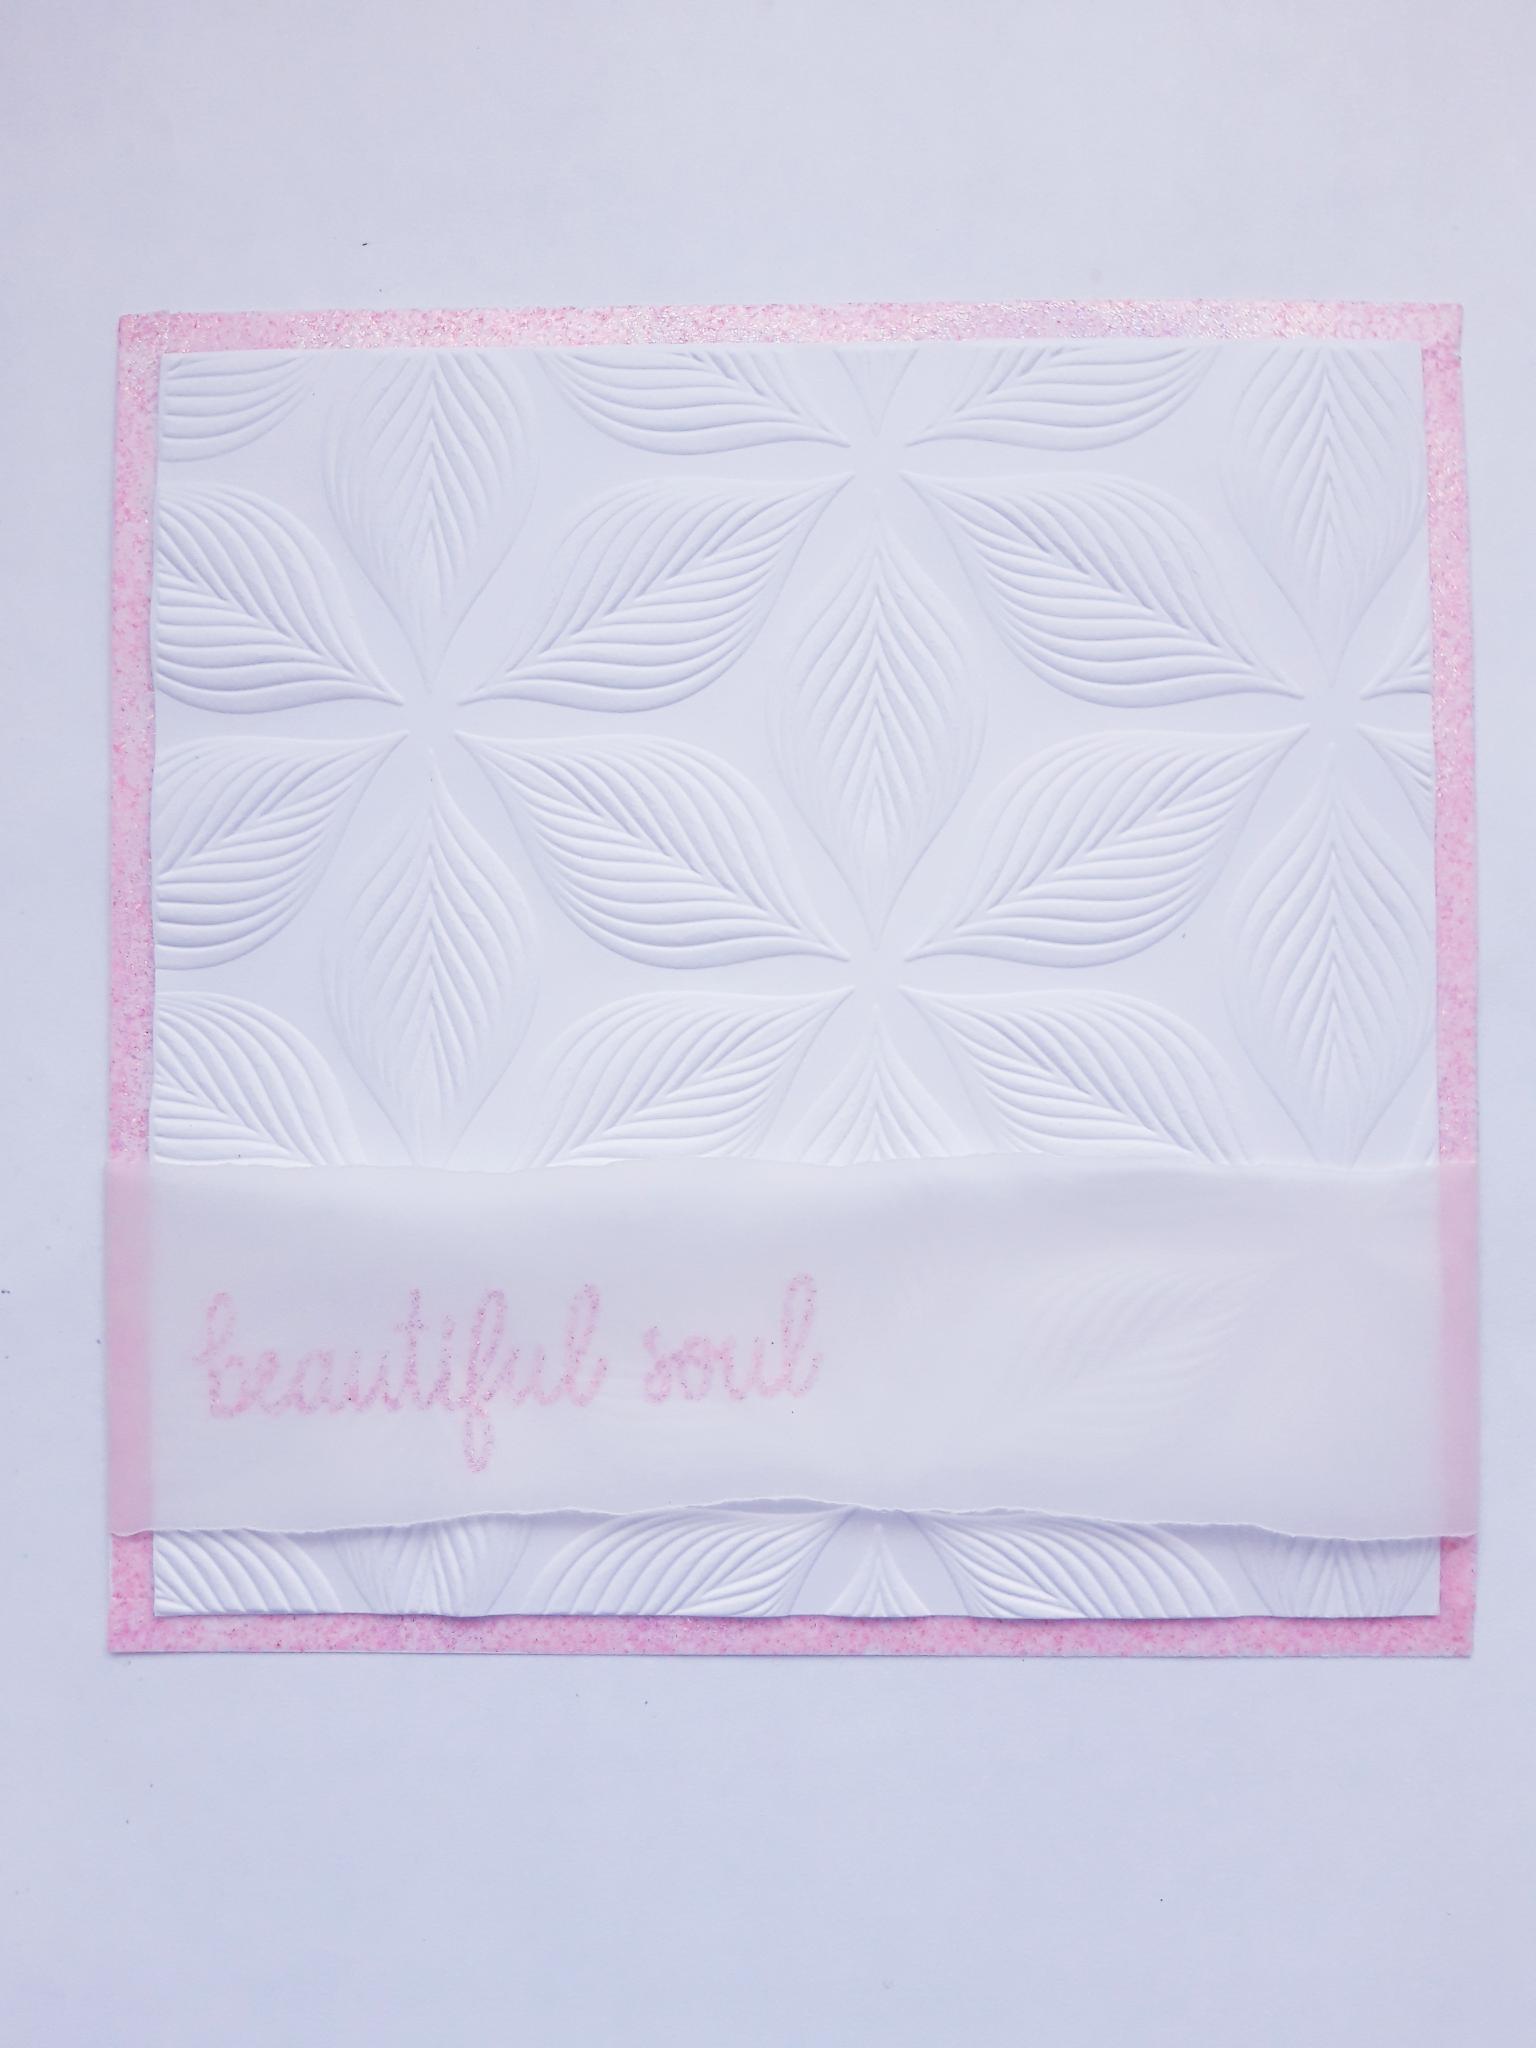
Peel of the backing, from the tape, cover with the WOW powder and heat set with your gun. You now have a coordinating "mat" to adhere your embossed card on to, as seen here. Set this to one side. |
|
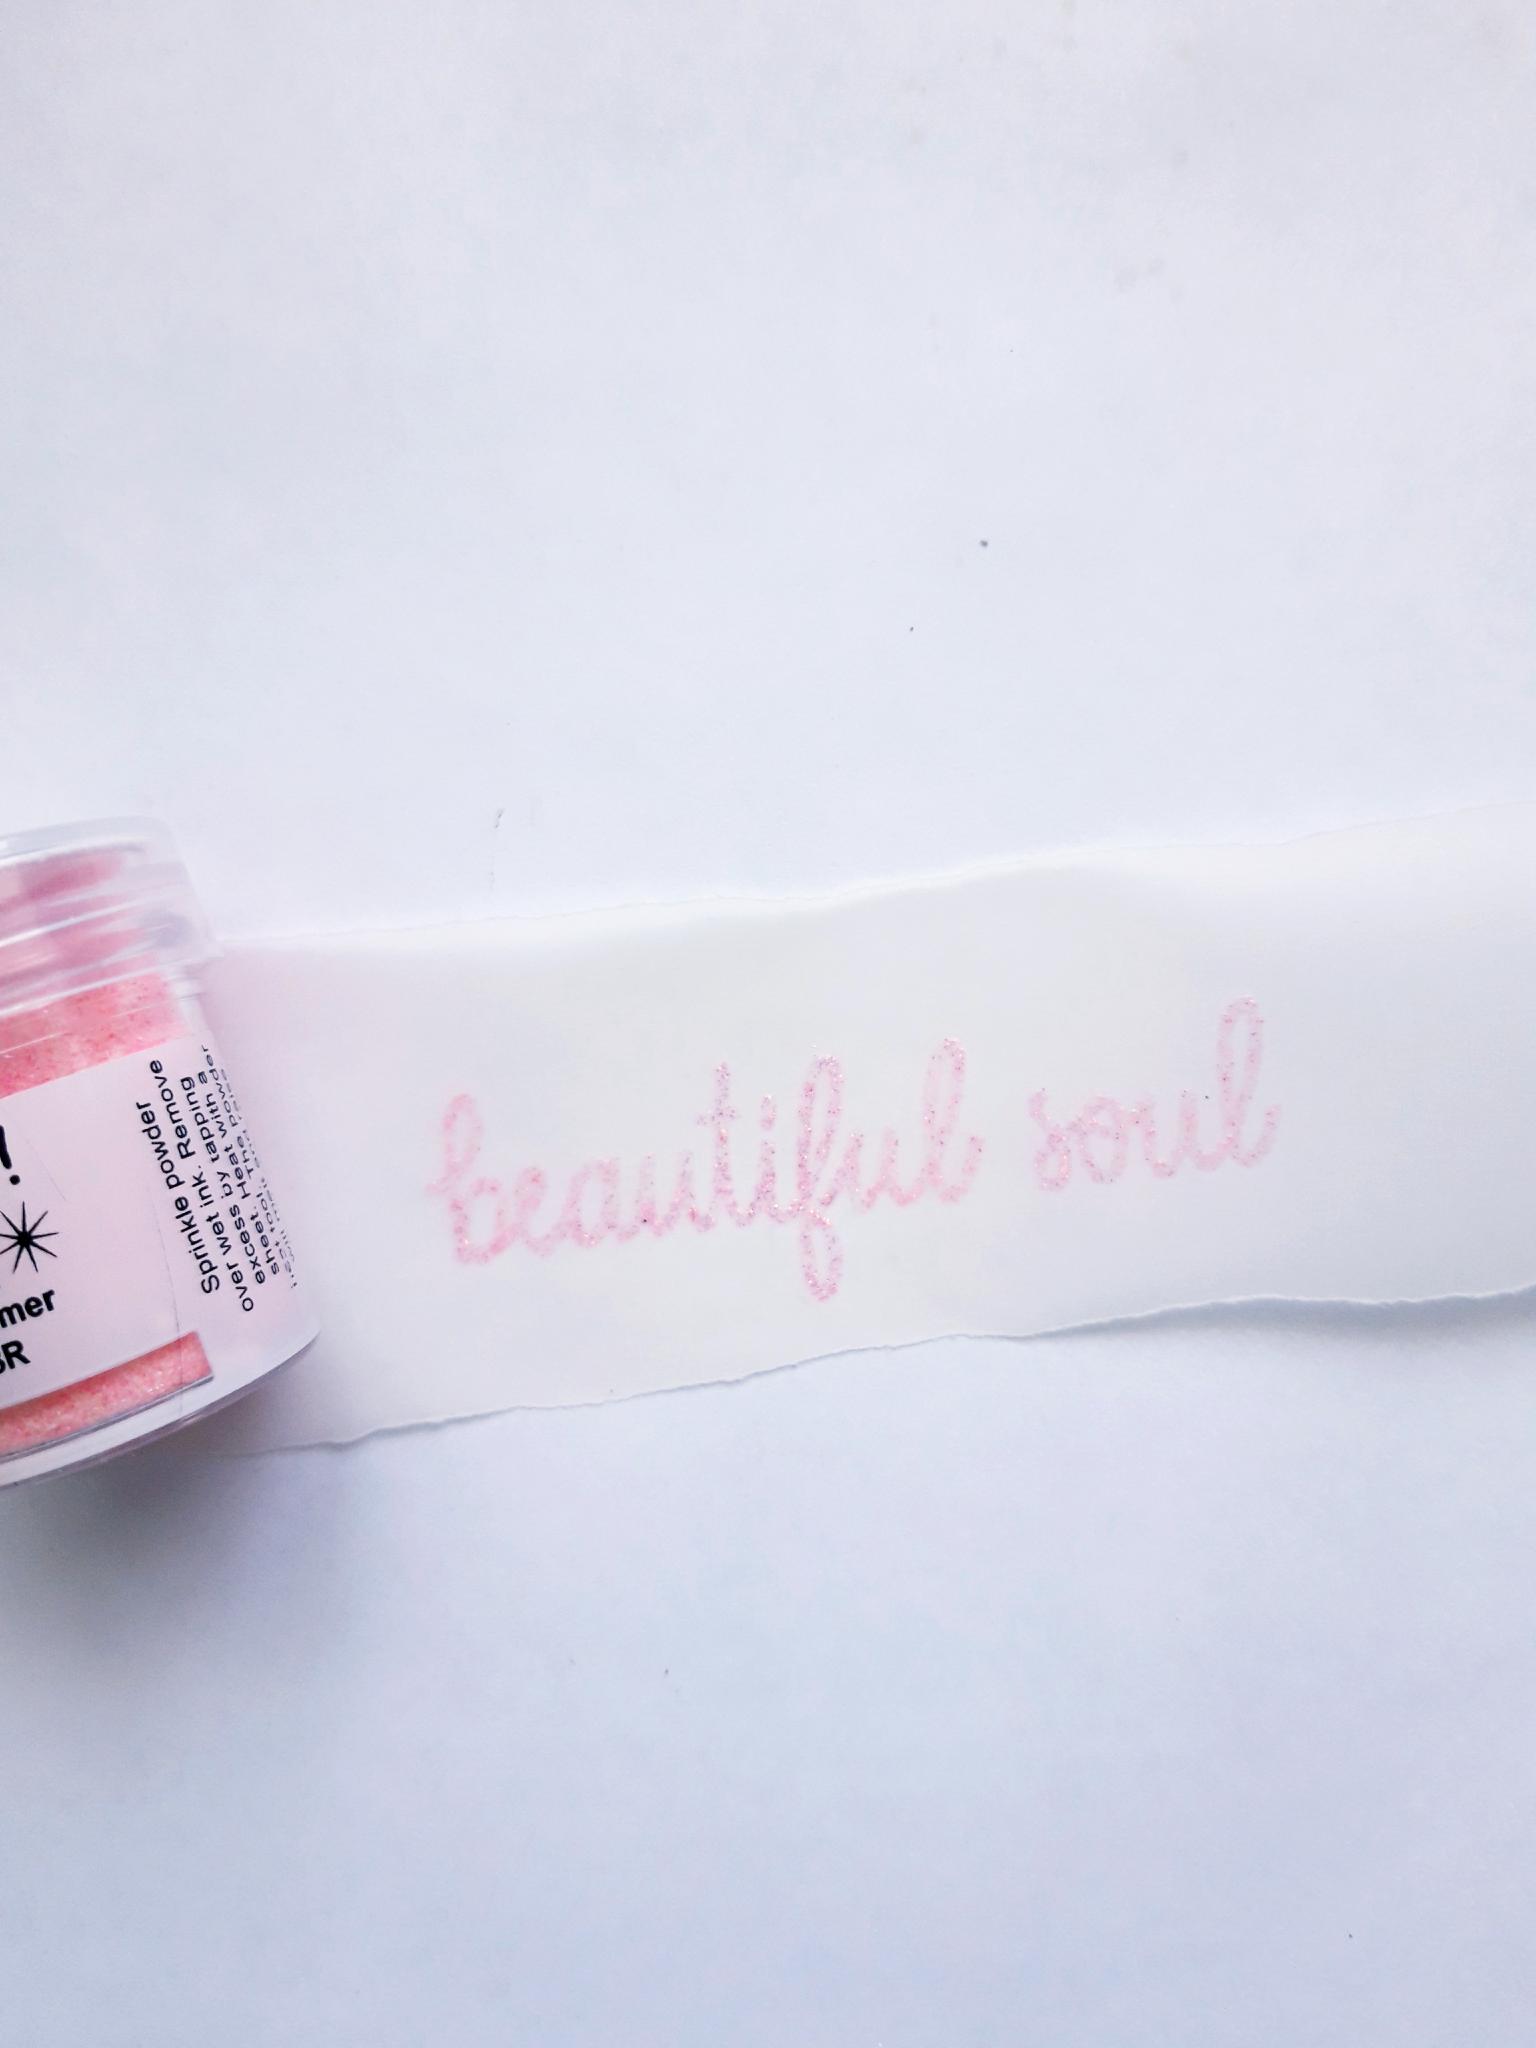
Wipe over the vellum panel with your anti-static bag. Ink up the sentiment from the Beautiful Soul Stamp collection, with the WOW embossing ink and stamp on to your vellum. Ensure your heat tool is hot before setting the powder, ensuring you move your tool as soon as the powder starts to turn. This prevents your vellum from warping and burning. |
|
Place your vellum across the bottom half of your embossed panel, tuck the overhang round the back of the card and secure in place with tape. |
|
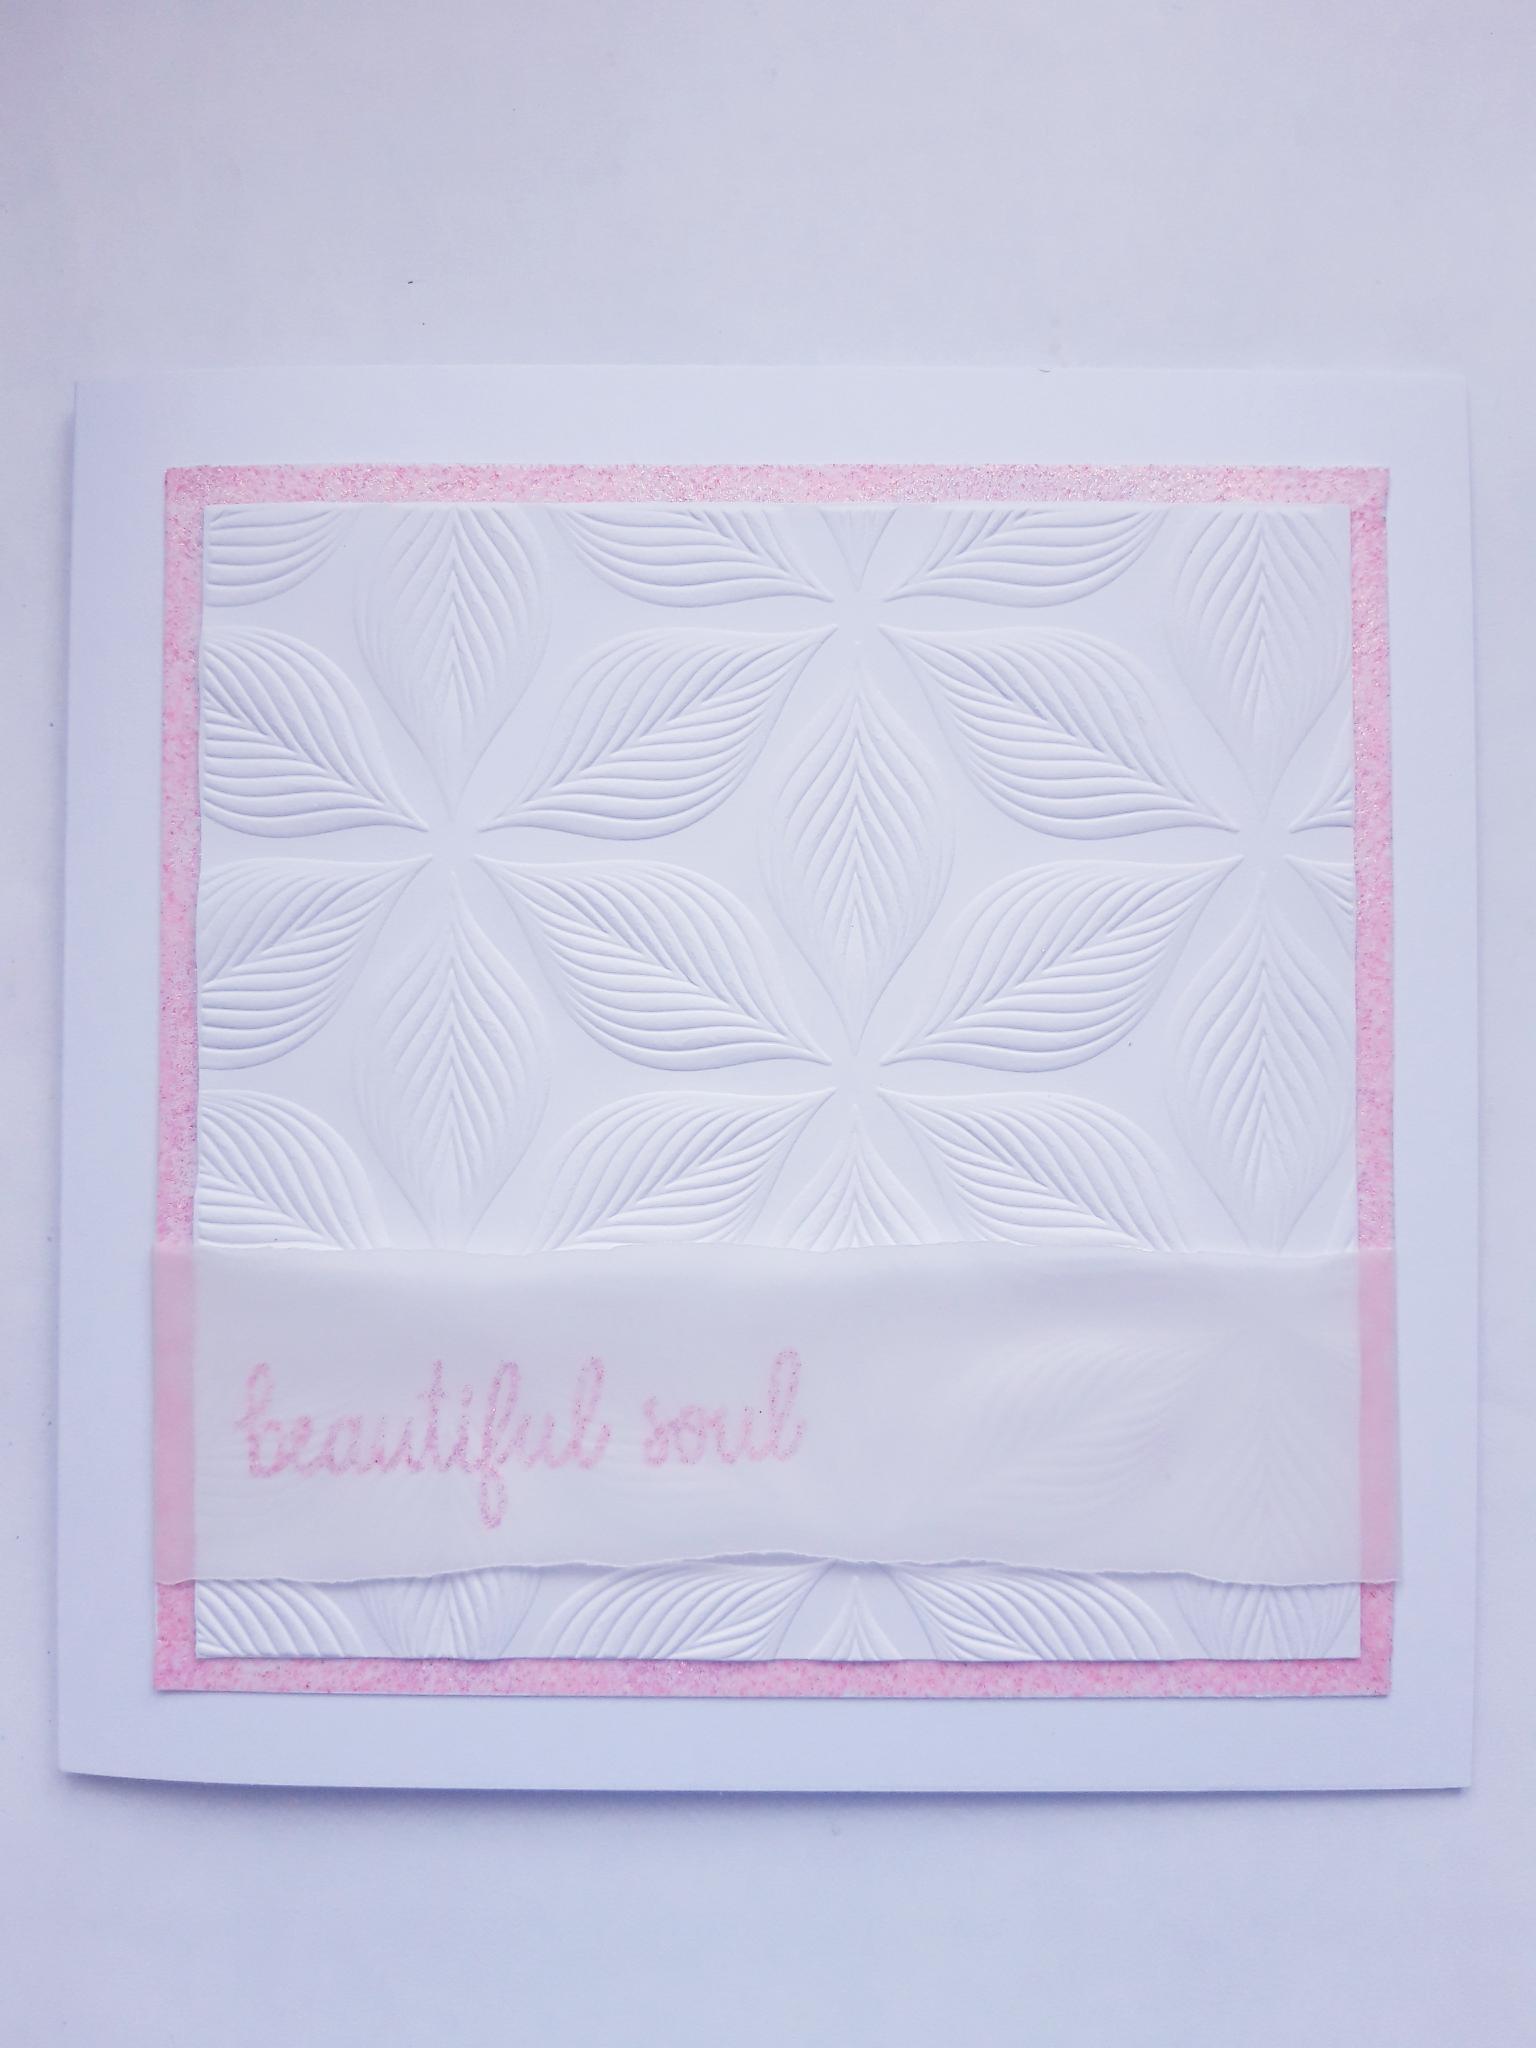
Adhere this on to your white card blank. |
|
Once you have decided how to arrange your 3D die cut elements, adhere them in place across the right hand side of the vellum panel, using both wet glue and foam pads, for depth and dimension. |
|
To finish, add the clear overlay sparkle pen to your flower and foliage elements, as required. |