Give your friends $10 off their first order!
Refer a FRIEND


WHAT YOU WILL NEED:
Black top folding card blank (7 1/2 x 5 1/2")
White card
Black card
Blossom Bunch Watercolour 3D embossing folder
Beautiful Buttercup Stamp Collection
Find The Sunshine Stamp Collection
Versafine Ink Pad: Onyx Black
Izink Dye ink spray: Misty Morning, Butterscotch
Izink Metal Gold Embossing ink pad
Pebeo Gilding Wax: Gold
Sand paper/block
Water spray bottle
Paint brush
Paper towel (faux bleach technique)
WOW heat tool
Eureka 101
Paper Trimmer
Perfect Together Glue
Foam pads
Die Cutting machine
[click image to enlarge] 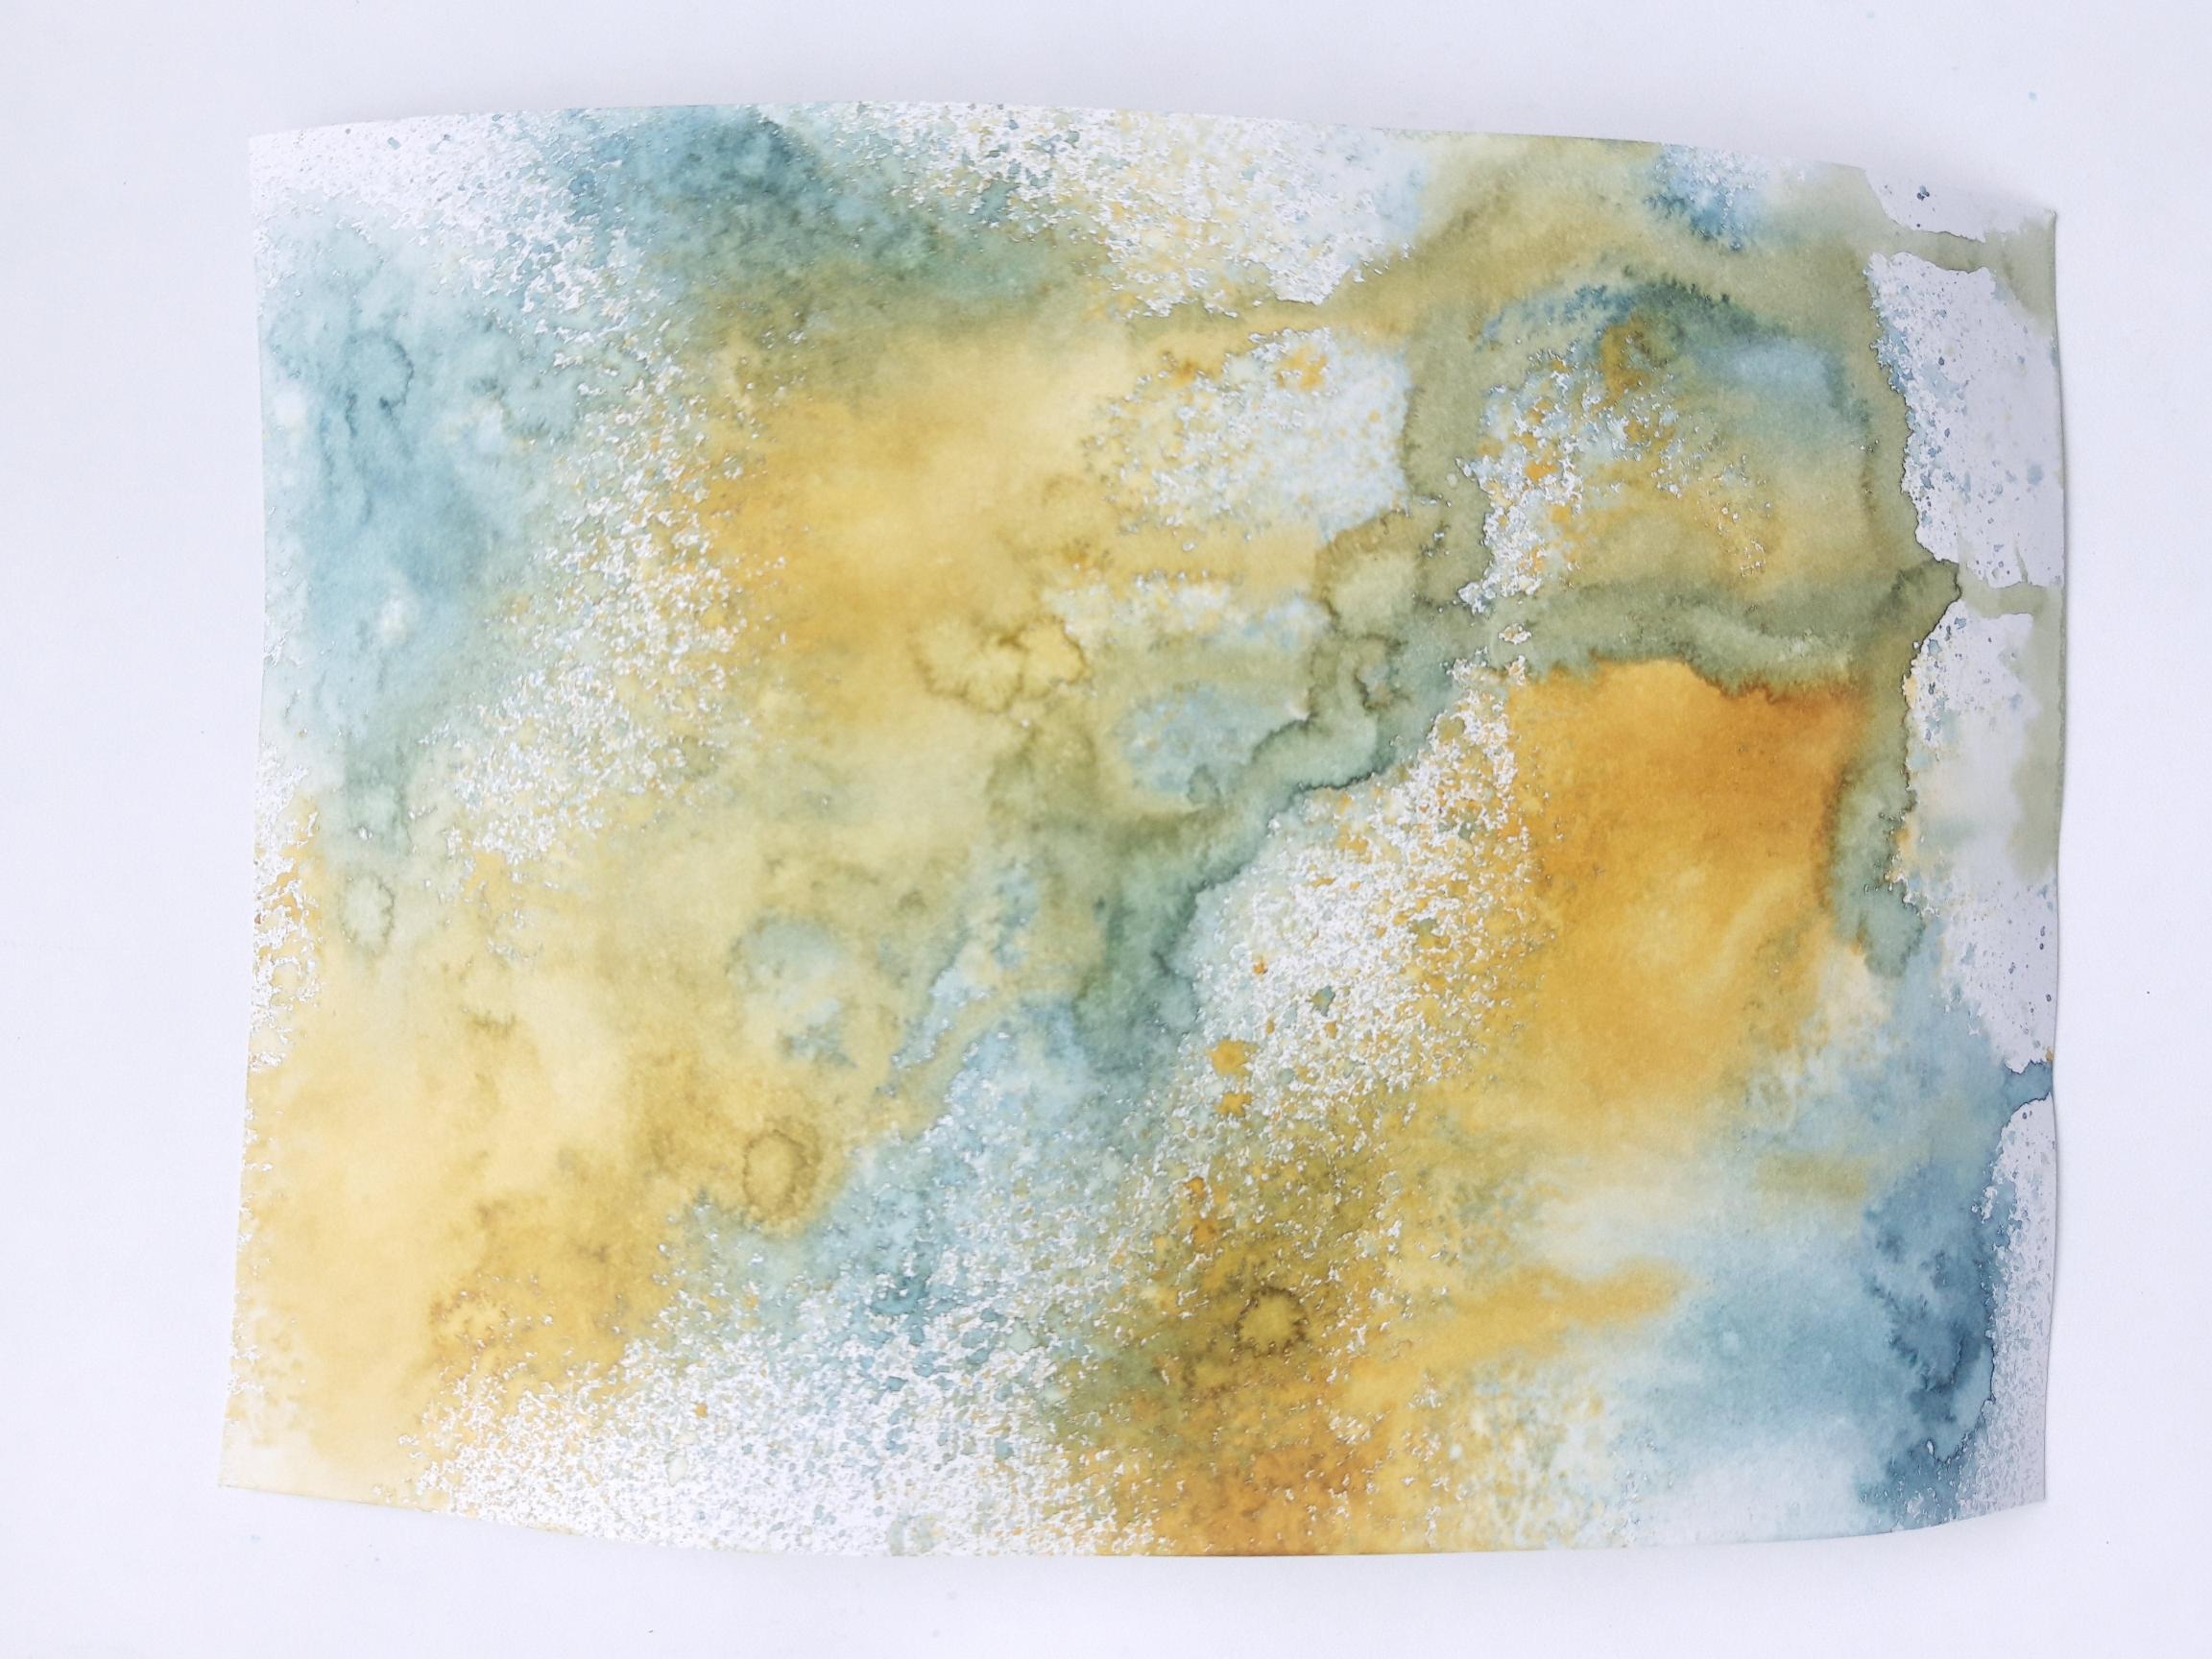
|
Spray the Izink Butterscotch on to your craft mat, spritz with water and pick up the ink on to the white card cut to 7 x 5". Repeat with the Izink Misty Morning, then dry with your heat tool. |
|
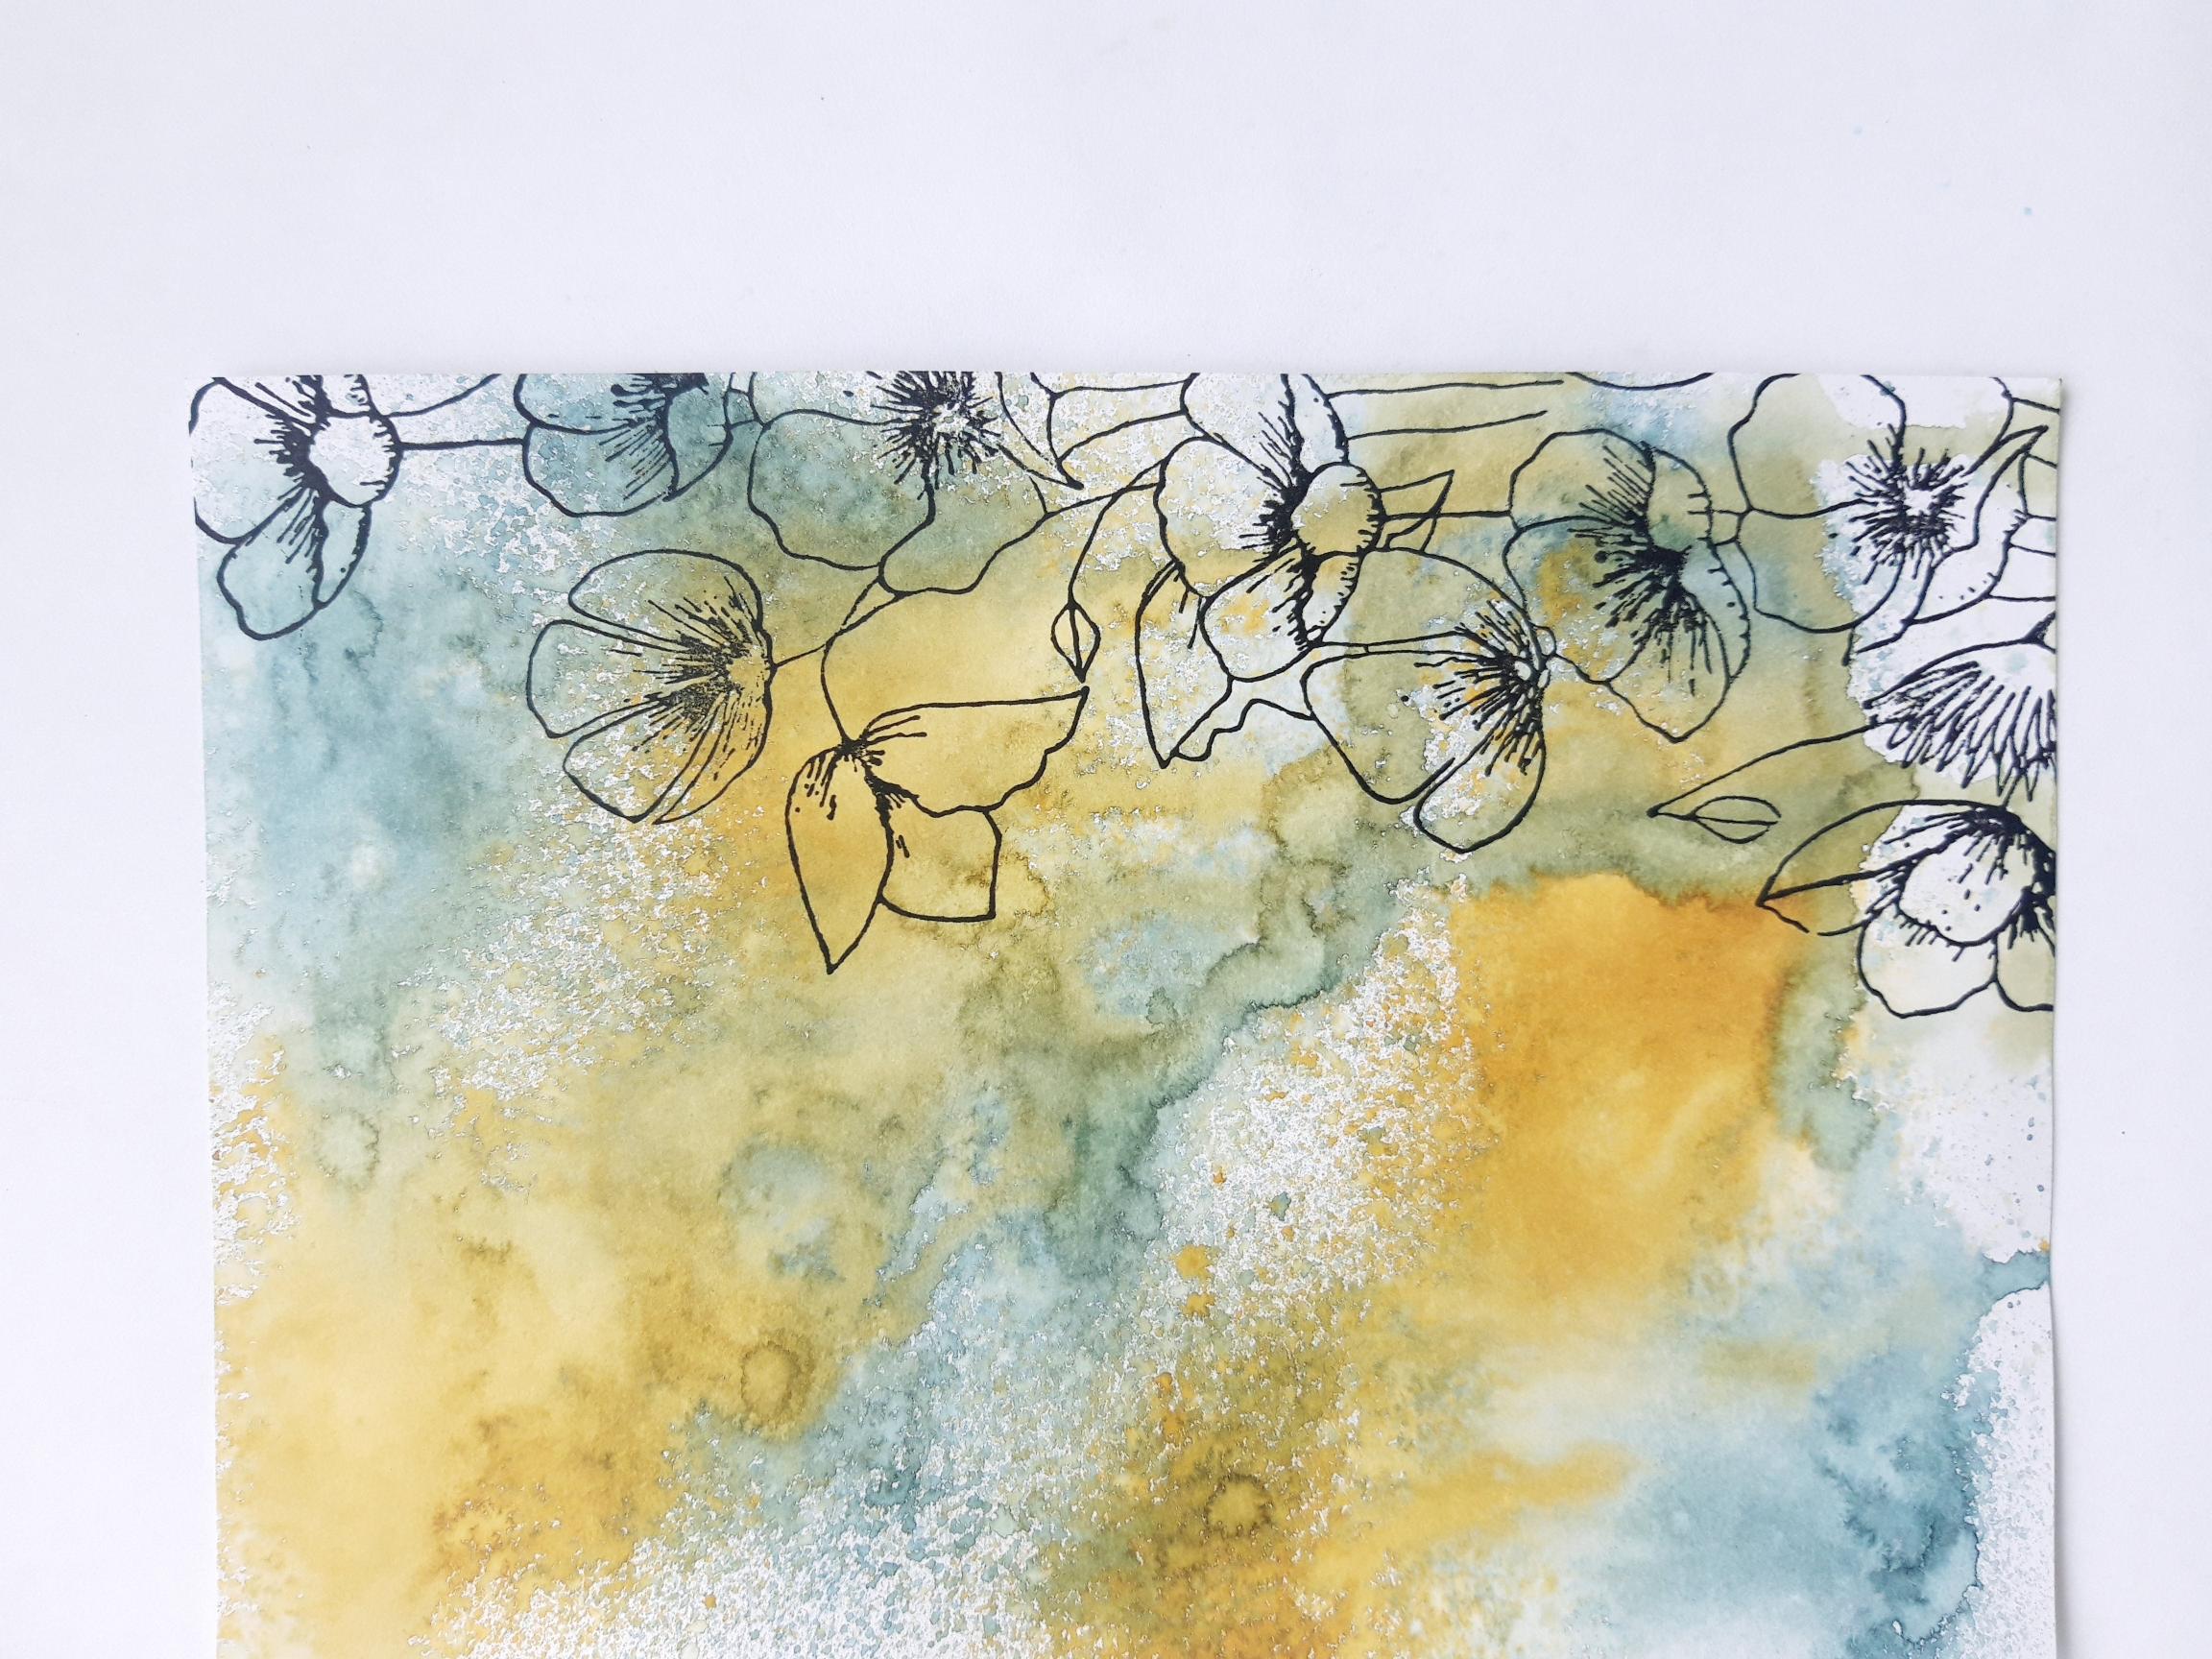
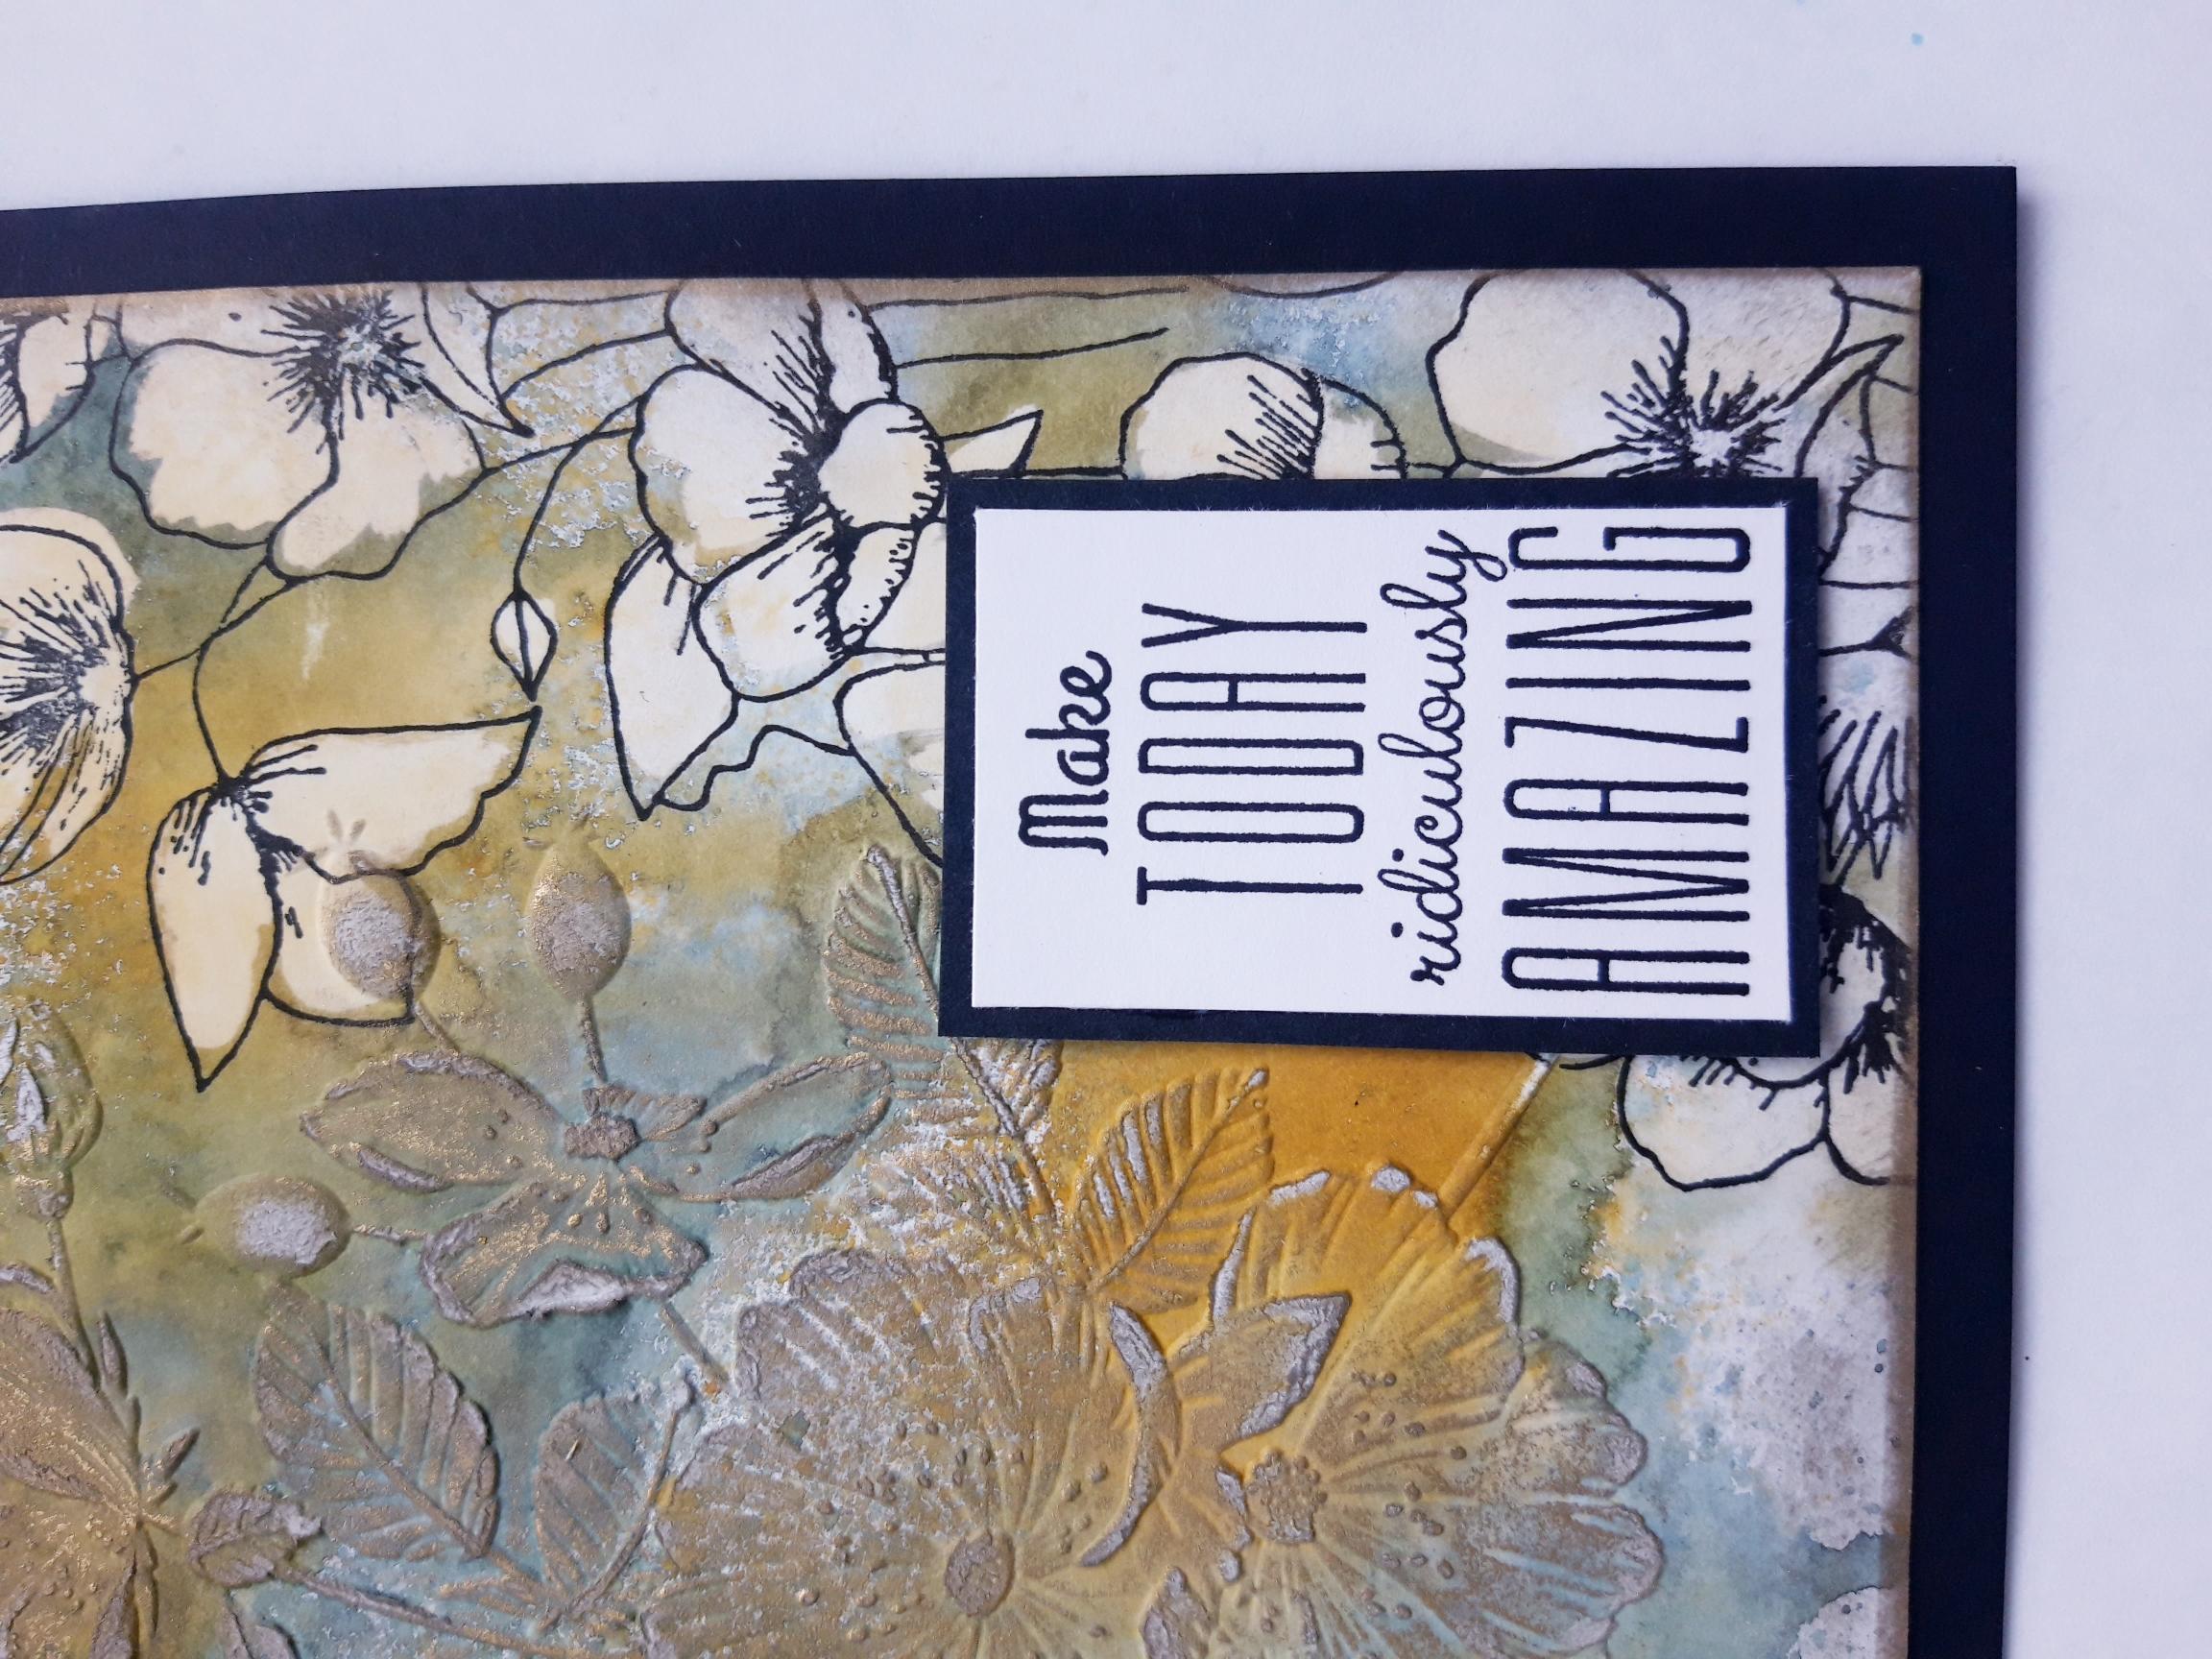
Ink up this floral stamp from the Beautiful Buttercup Stamp Collection, with the Onyx Black Versafine and stamp off the right hand edge of your inked background, as seen here. Dry your stamped image before proceeding to the next step. |

|
Using your paint brush and clear water (or diluted bleach), apply water in to each of the petals, wait a few seconds then "lift" out the ink with a paper towel. Repeat this as many times as required to achieve the effect you want. |

|
Once your artwork is dry, place it inside the Blossom Bunch embossing folder, so the raised, embossed image is on the bottom. You want the embossed design to be on the left side of your background, slightly overlapping on to your stamped image, as shown here. Place this on to your embossing plates so the edge of the folder that's positioned over the stamped image, hangs off the edge of the embossing plates....this avoids getting a "line/crease" in your artwork, when you run it through your die cutting machine. |
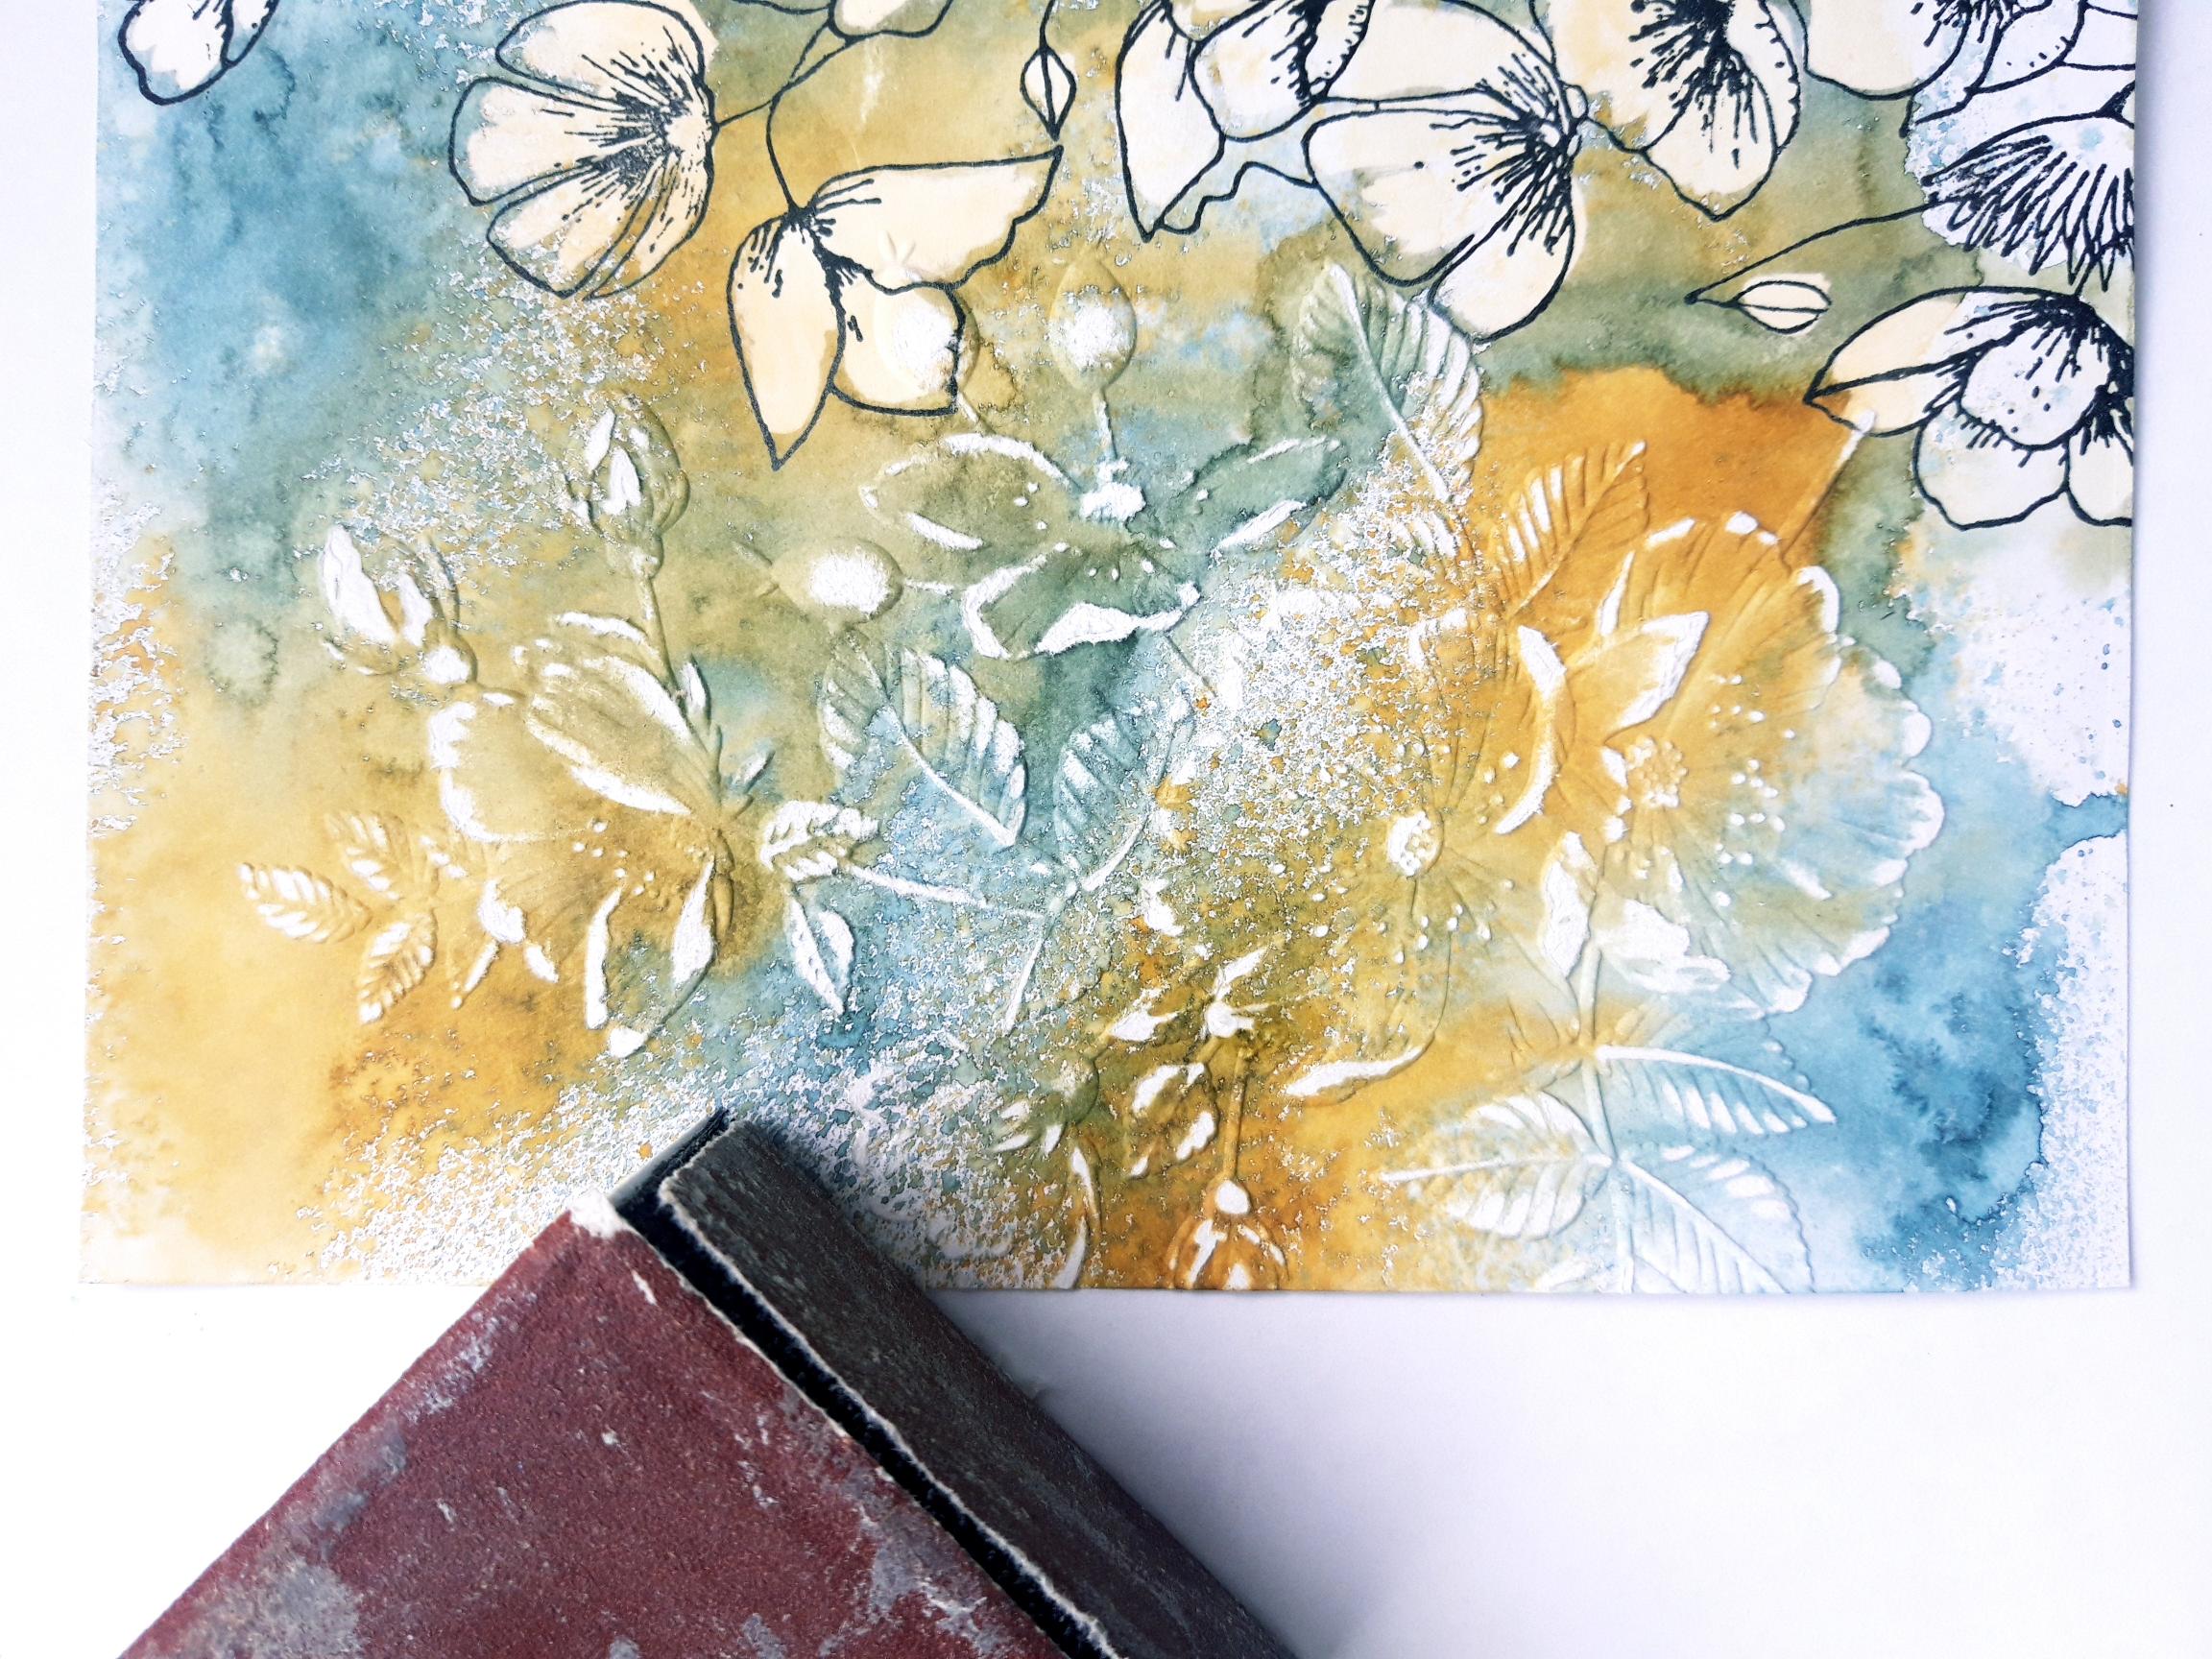
|
Rub over your embossed image with your sanding block/sandpaper, to lift the ink. |
|
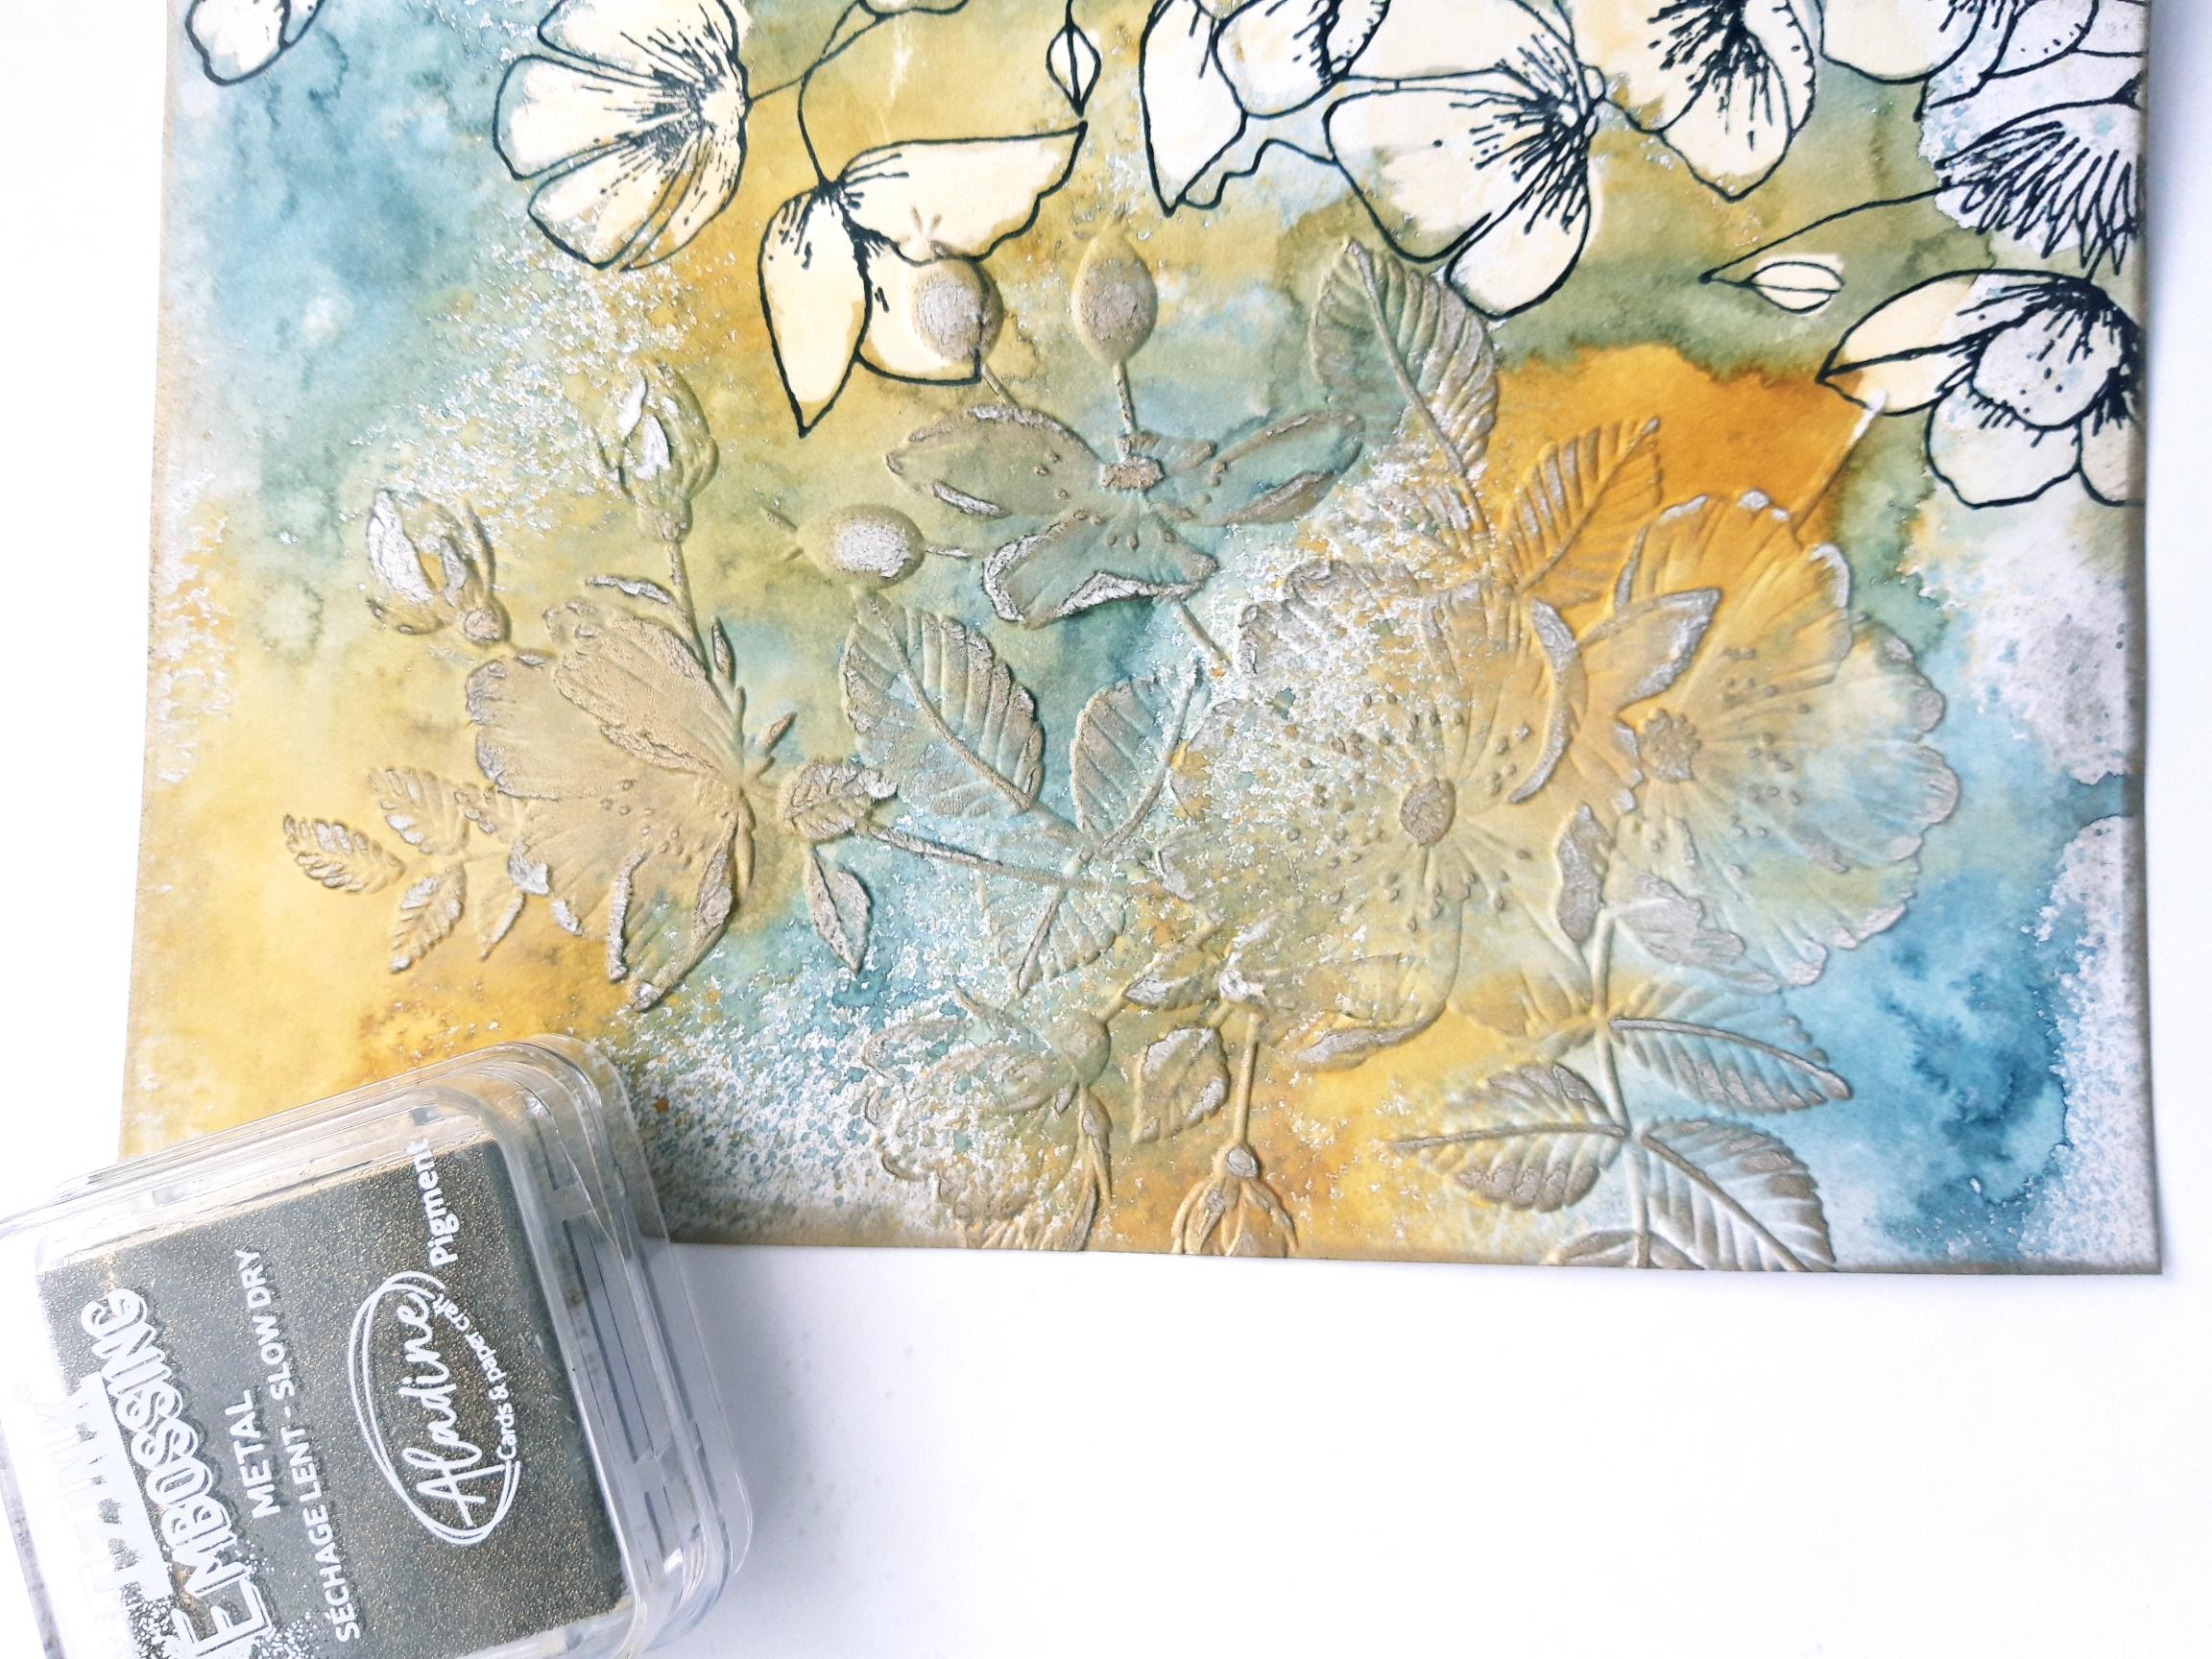
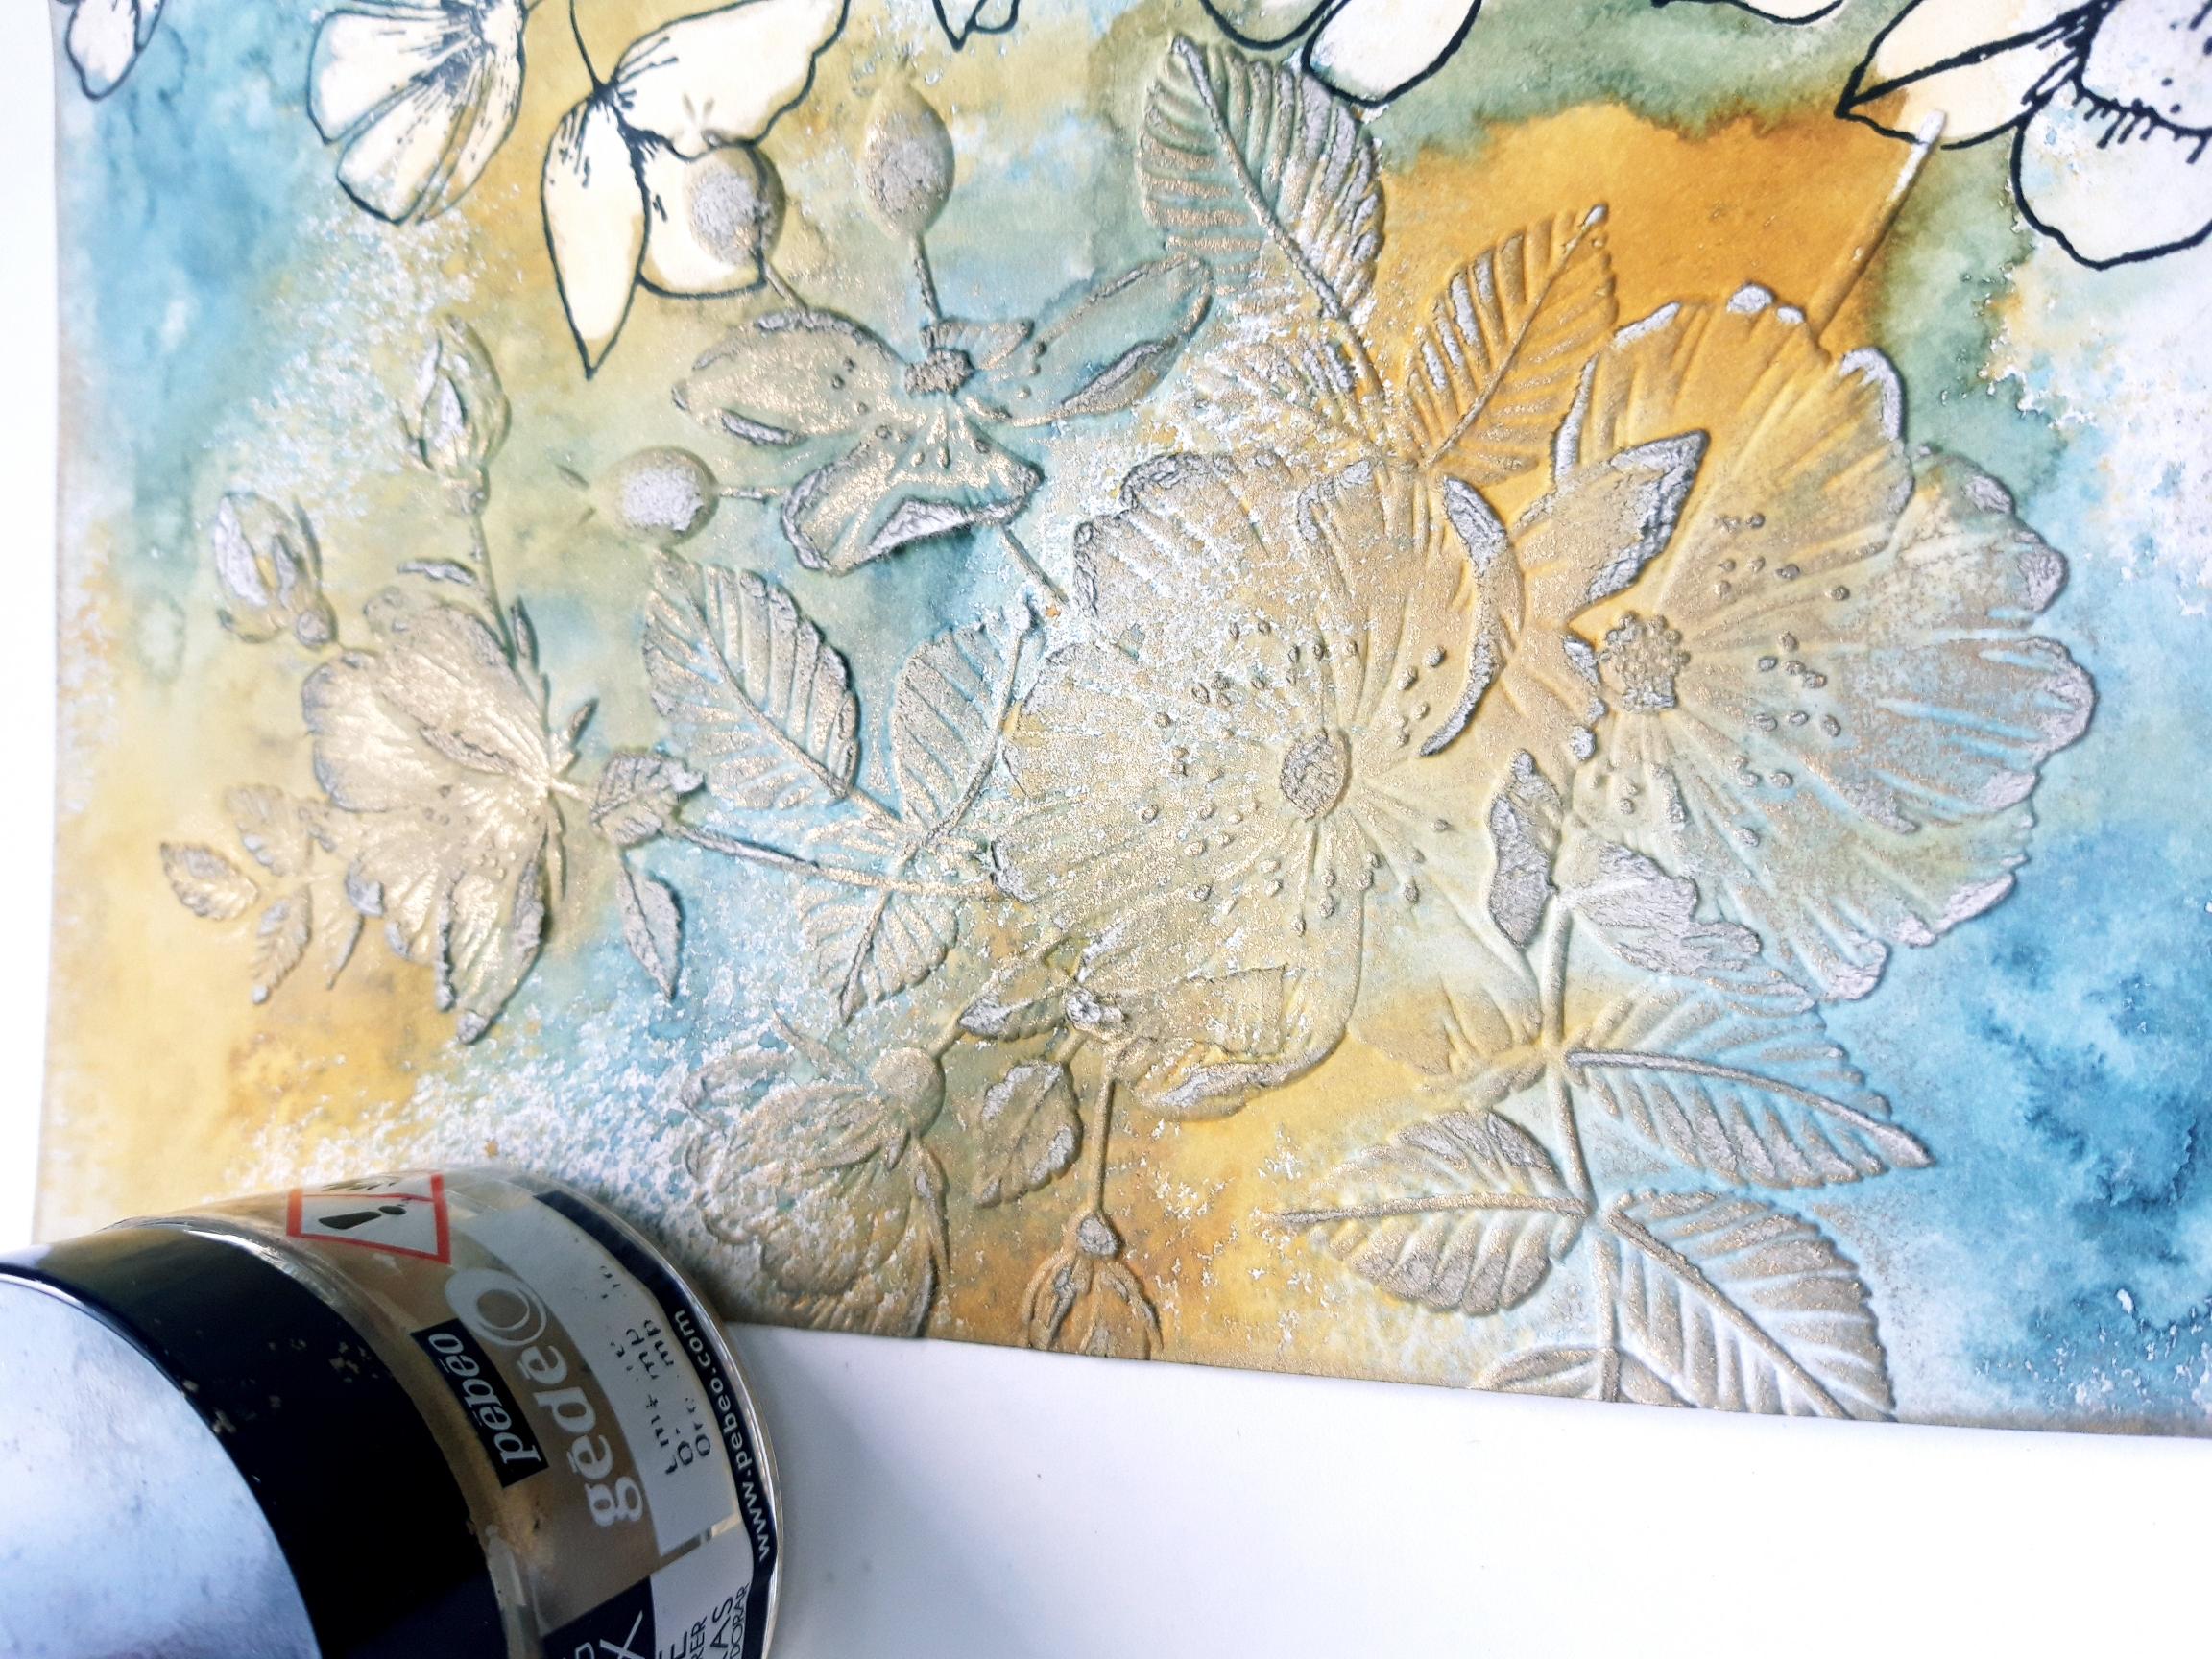
Swipe your Izink Metal Gold Embossing ink pad gently over the raised embossed design. Dry the ink, as it is slow drying and you need it to be dry before proceeding to the next step. |
|
Using your ring finger (to achieve a lighter touch), apply the Gold Gilding Wax to random areas of the embossed design. Buff over the wax with a soft cloth, to bring out the shine. |
|
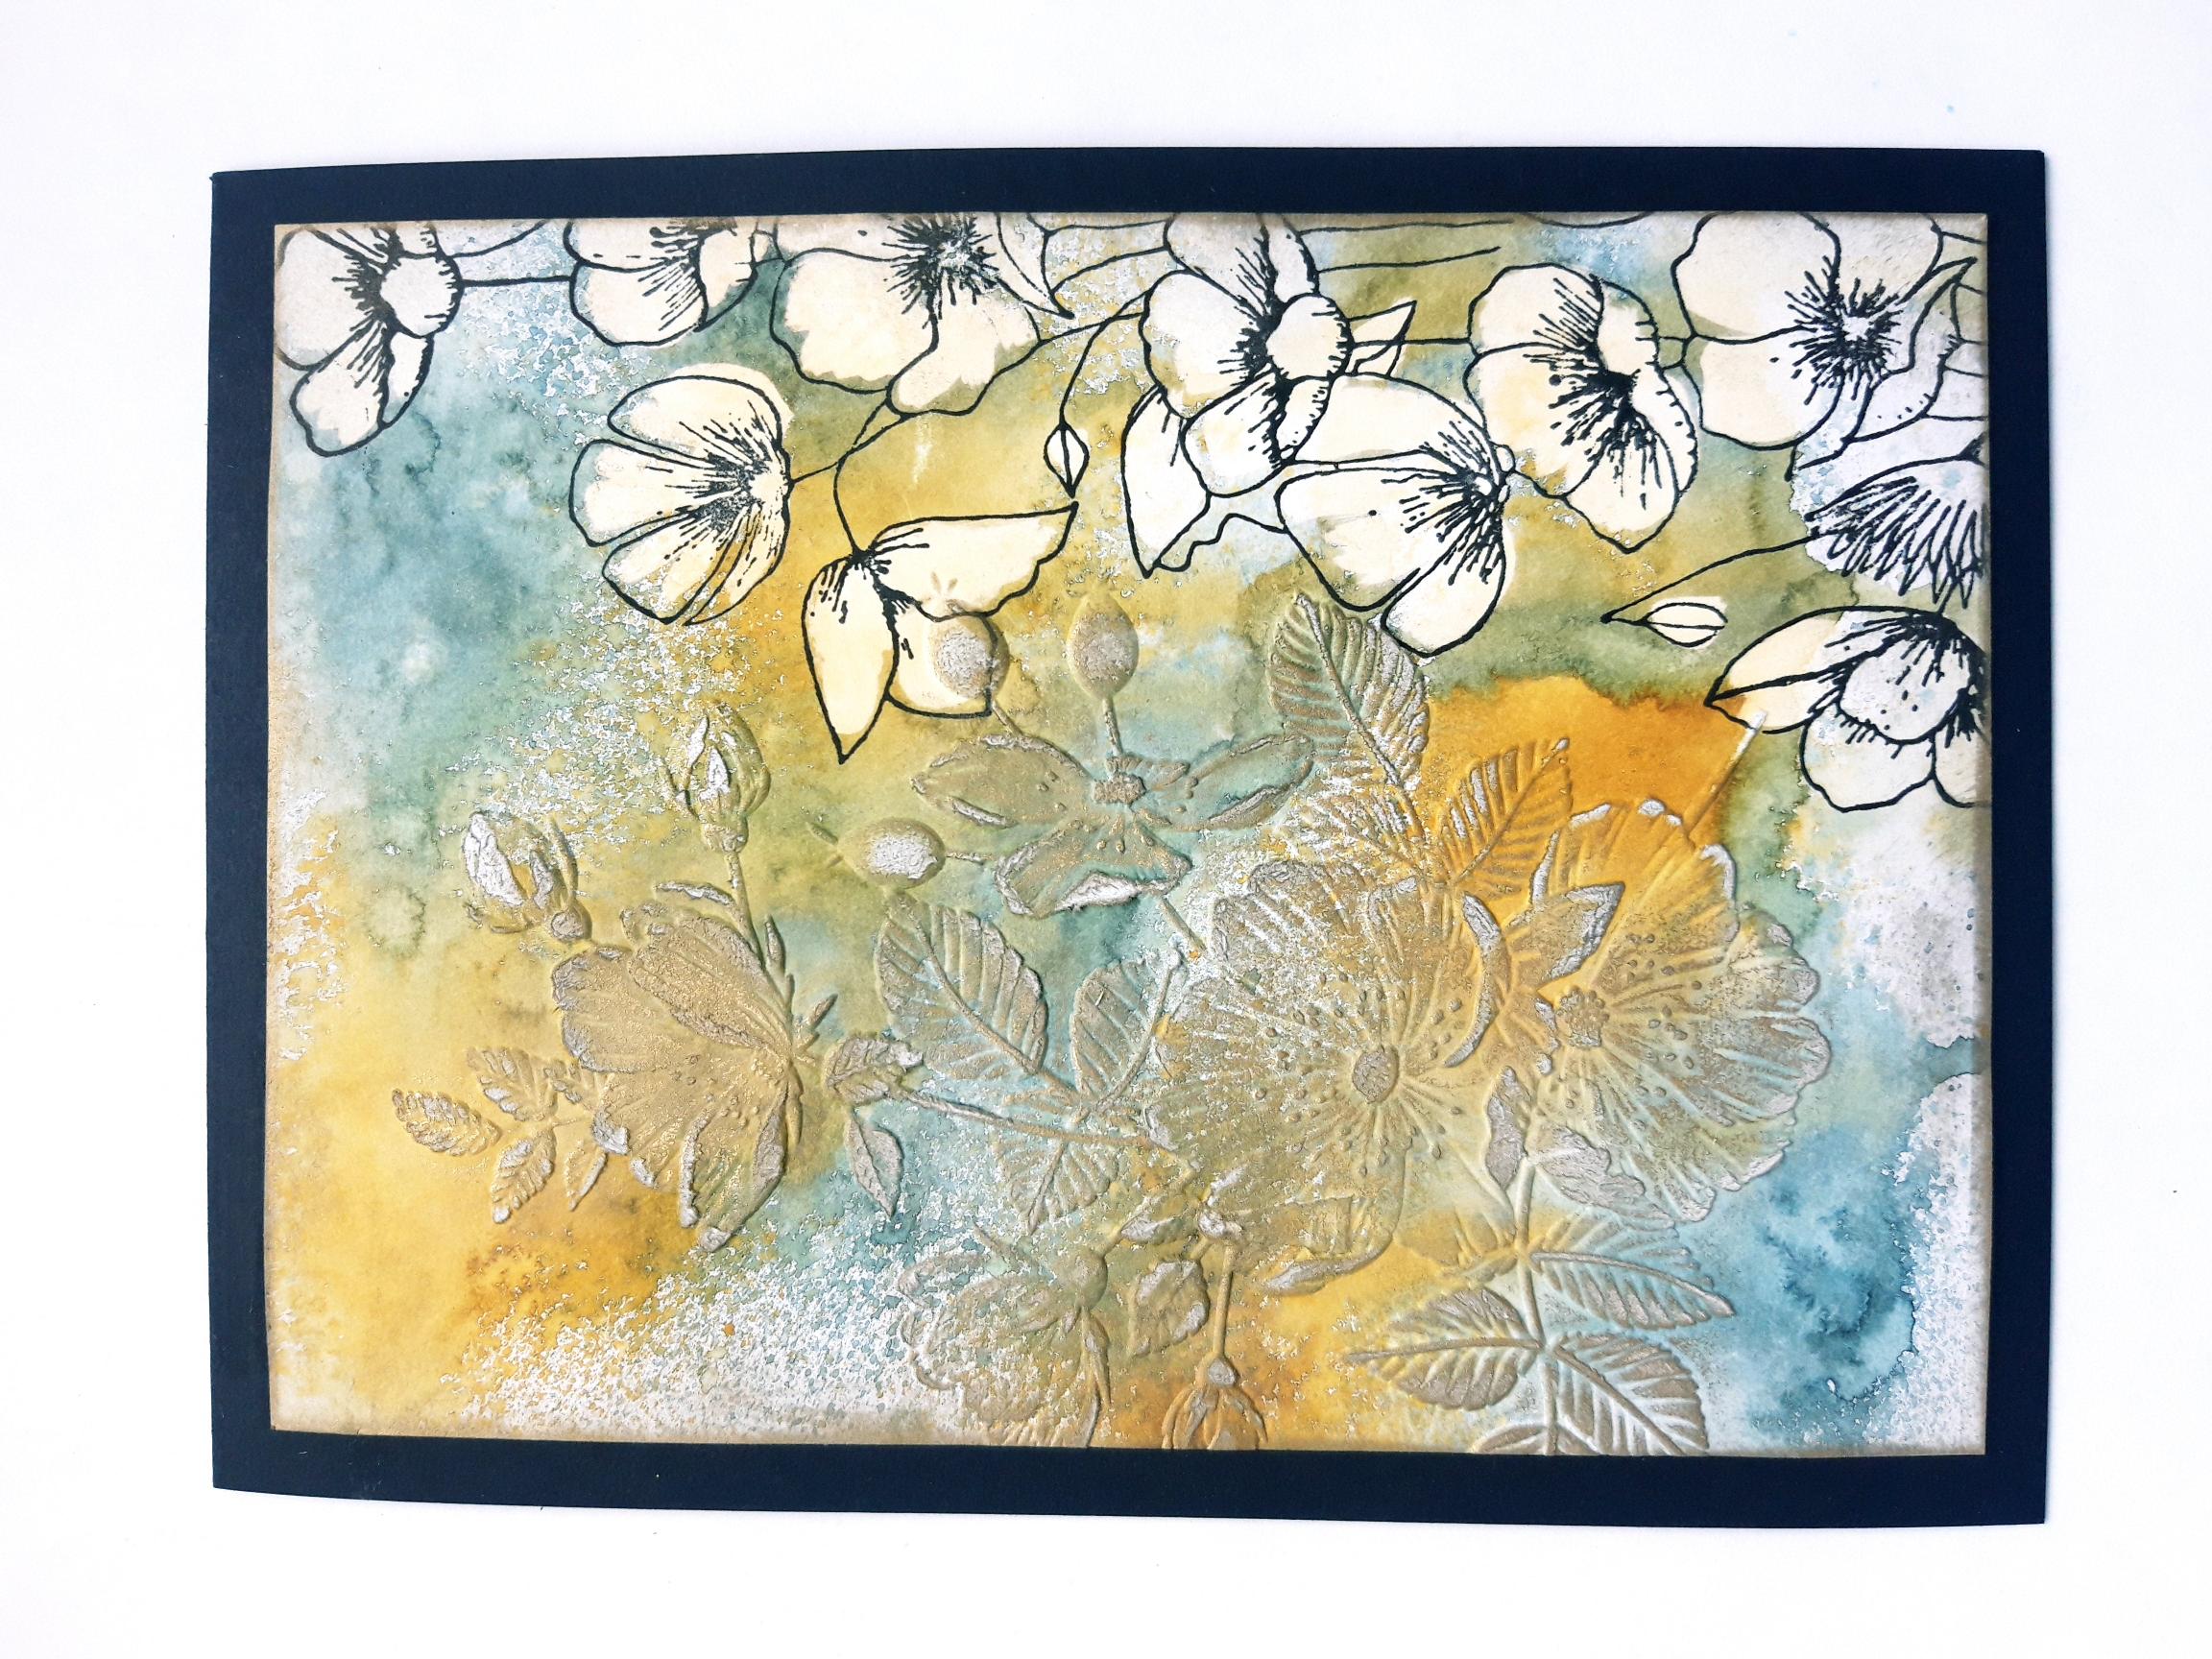
Adhere to the front of your black, top folding card blank. |
|
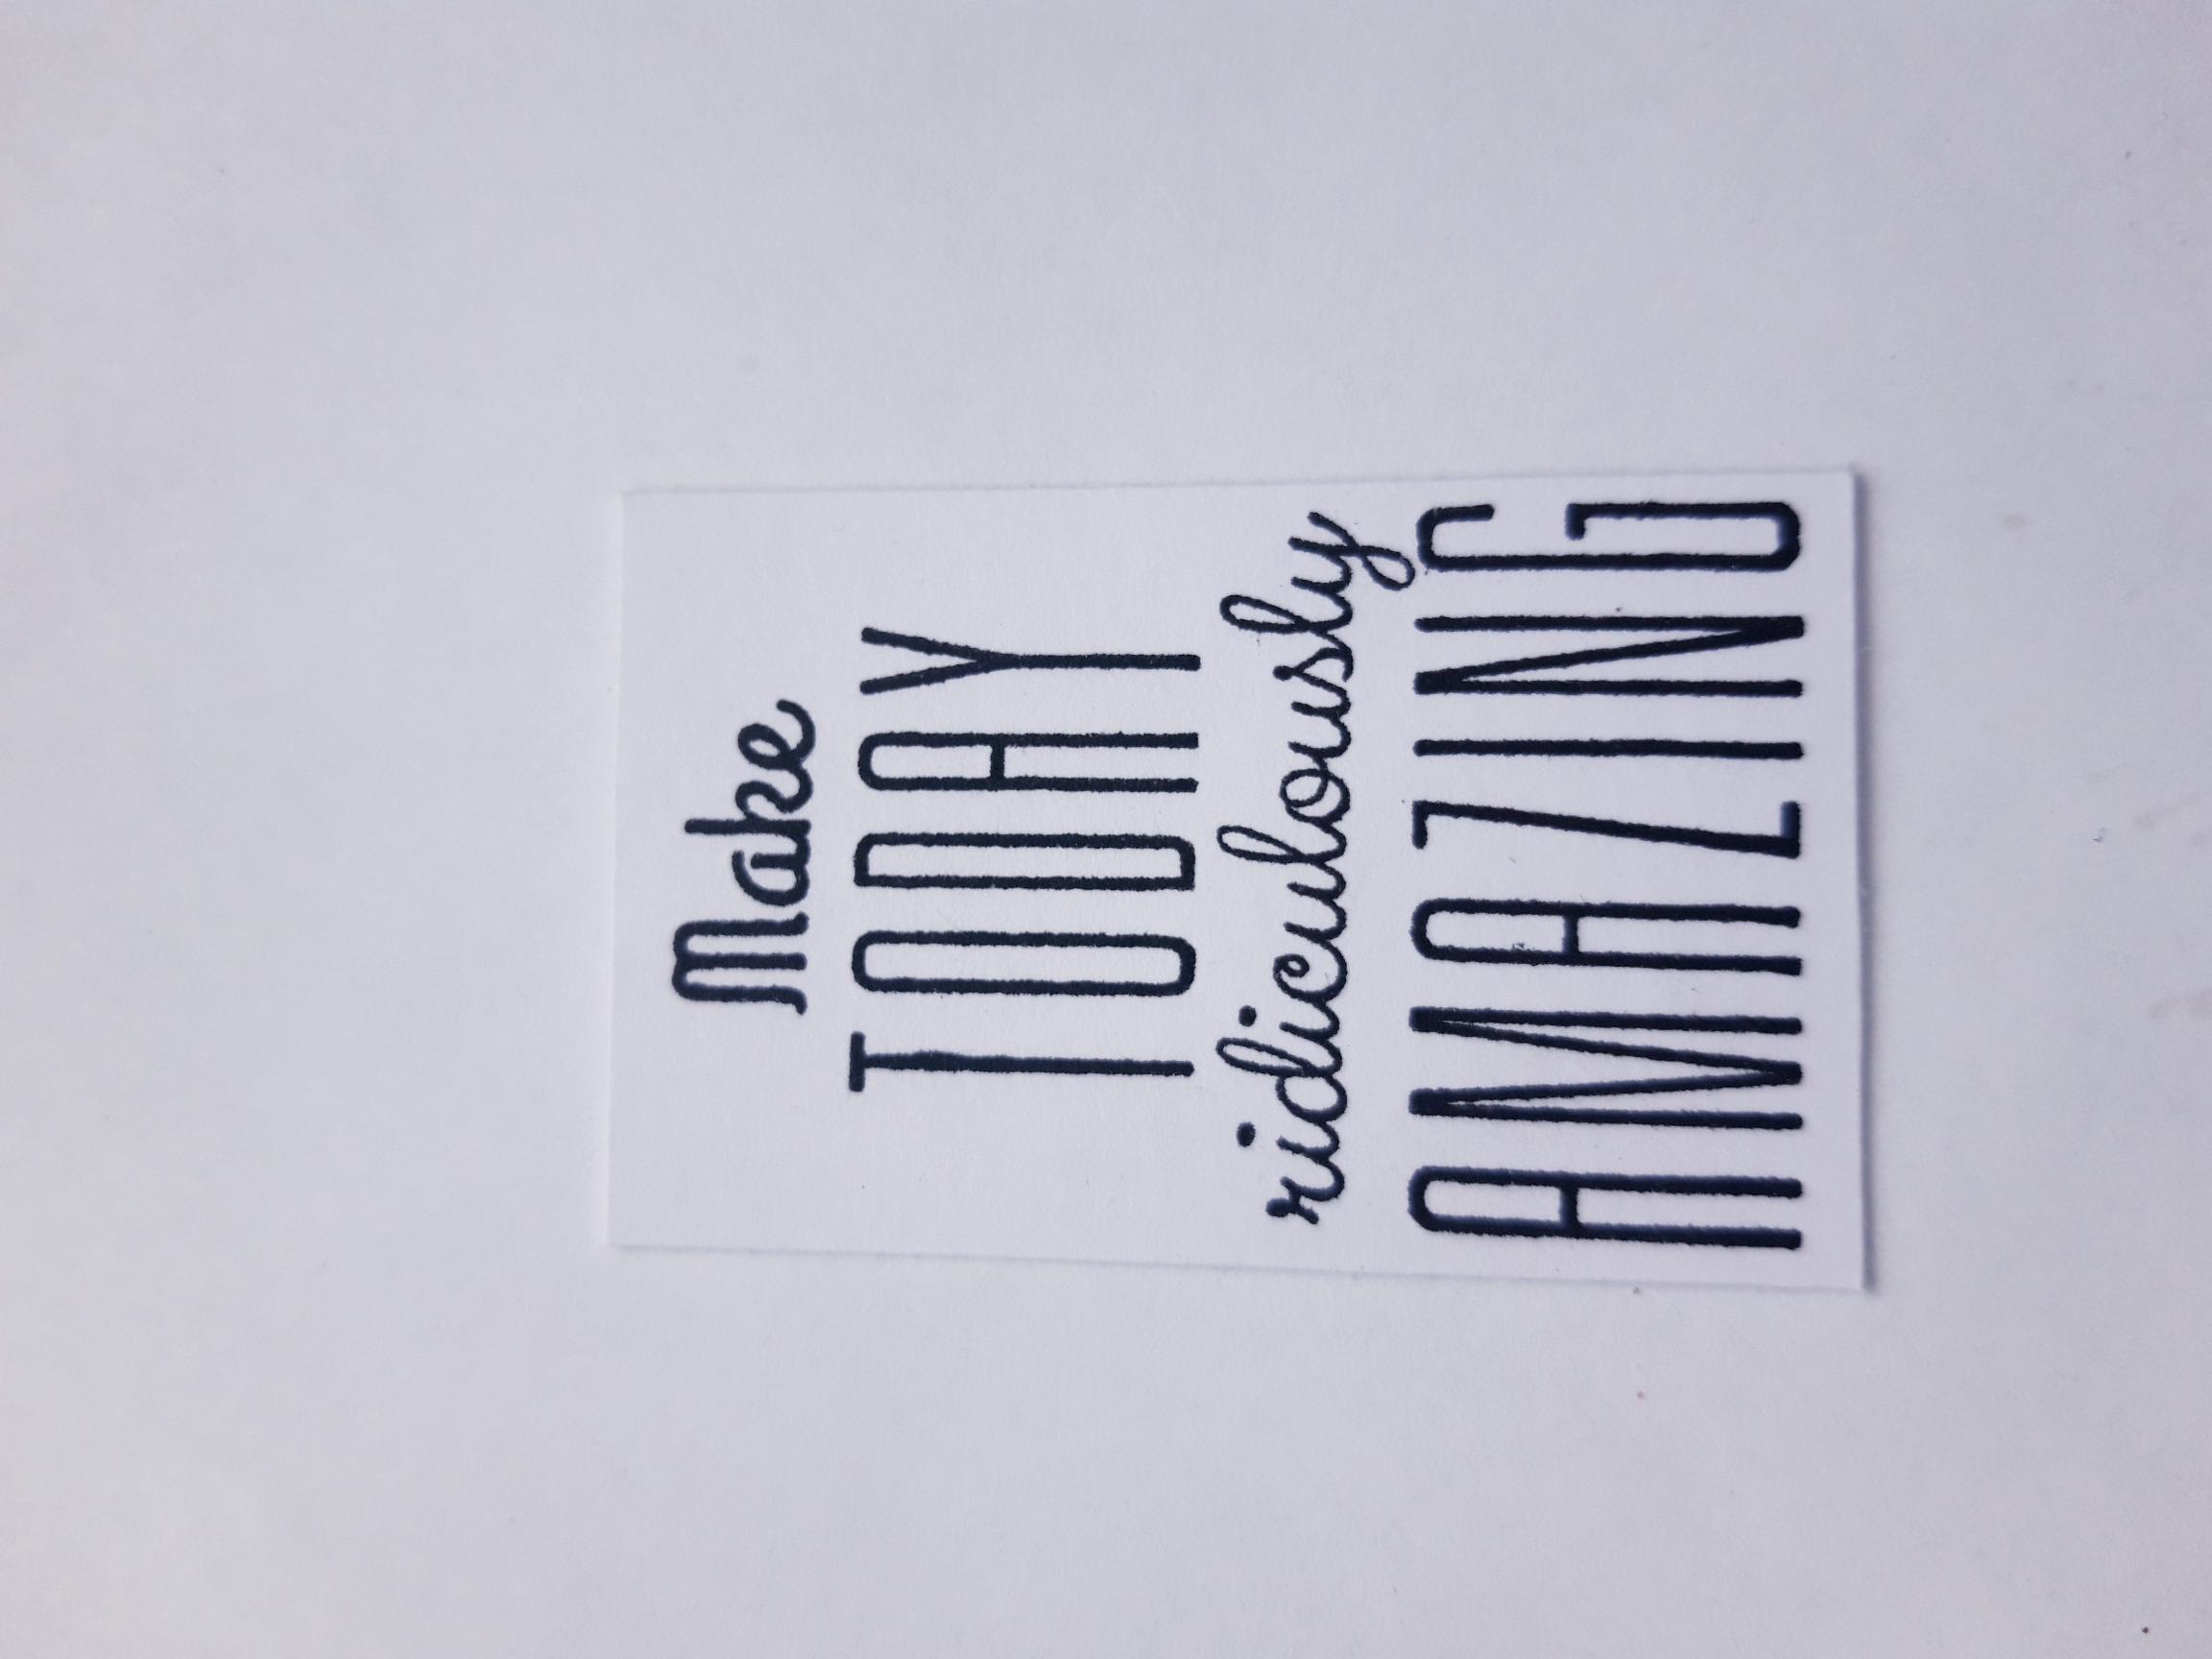
Ink up the sentiment stamp from Find The Sunshine Stamp collection, with the Versafine and stamp on to white card (3 x 2"), then trim down as required. |
|
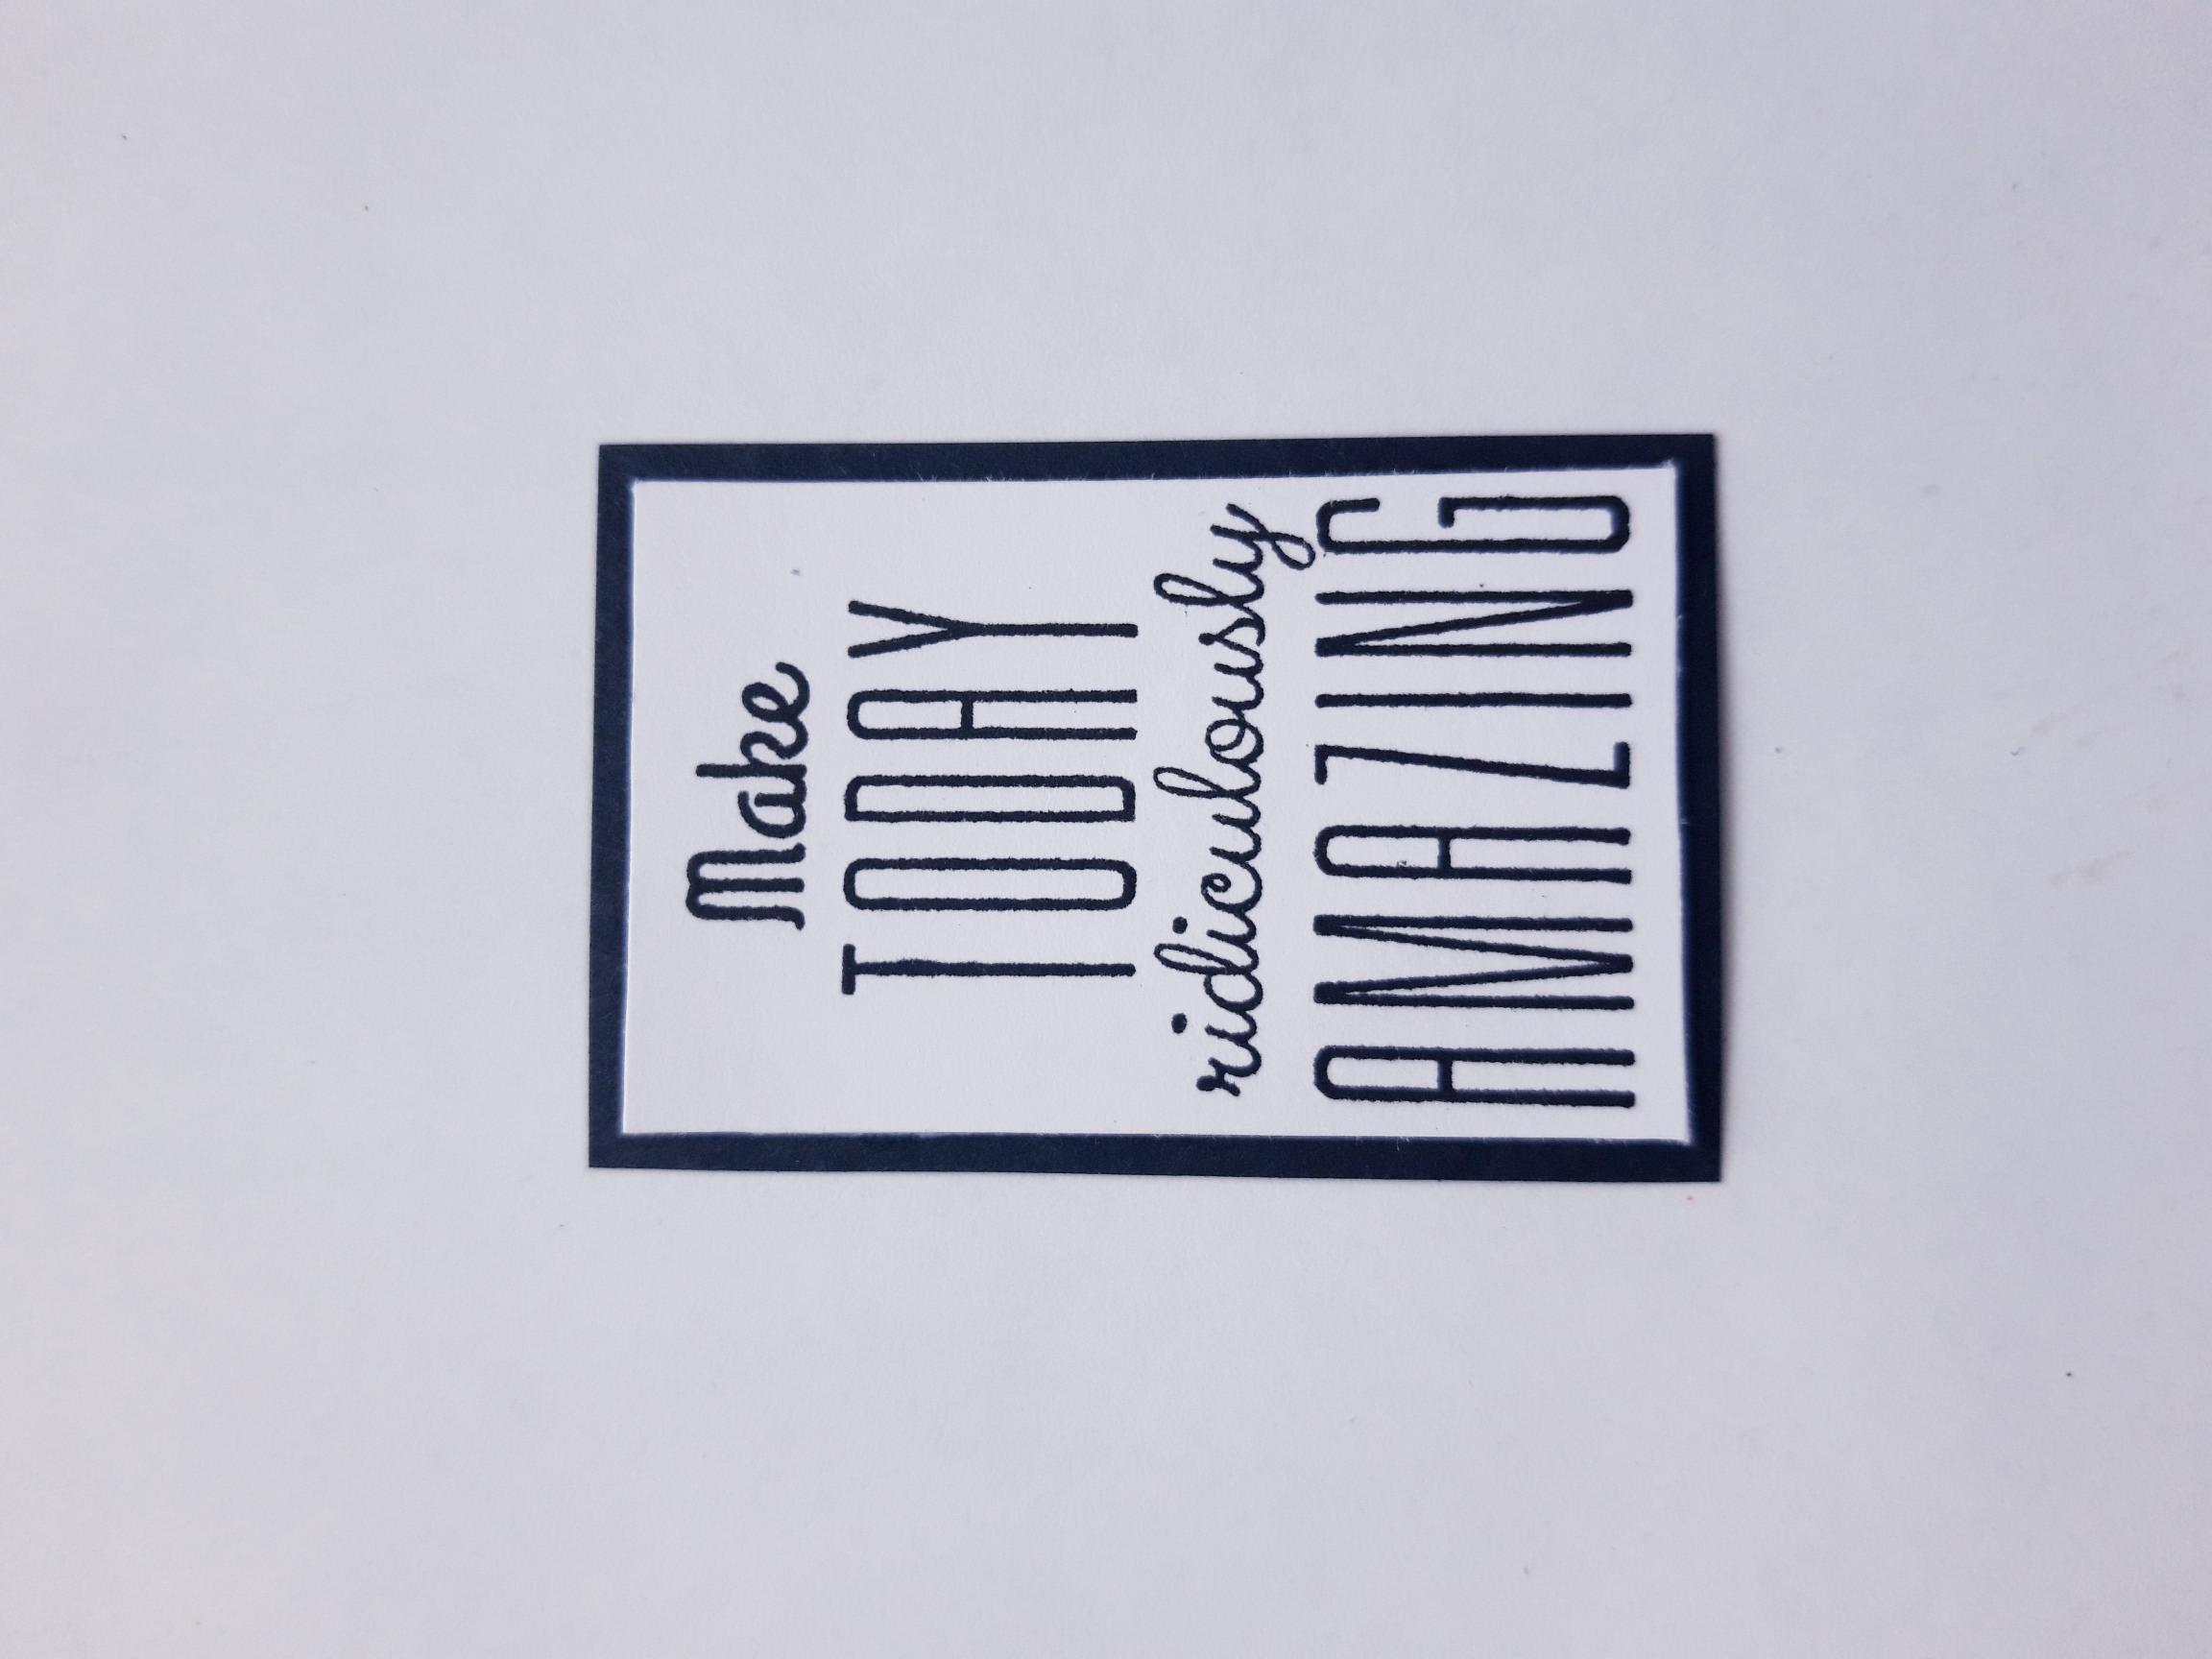
Adhere the sentiment on to the black card (3 x 2"), then trim as required. |
|
To finish, adhere the sentiment in the bottom right corner of your card, with foam pads. |