Give your friends $10 off their first order!
Refer a FRIEND


WHAT YOU WILL NEED:
White top folding note card ( 8 1/4 x 5 3/4")
A4 white cardstock
It's All About You Brights 8x8" Paper Pad
A page from any book
Dies from A Gift For You Die Collection
Dies from Creative Panels Die Collection
Sentiment stamp from Possibility stamp and Die Collection
Stamp and die from Pretty Penny Sunflower stamp and die set
Izink Pigments: Burnt Orange, Wet Meadow
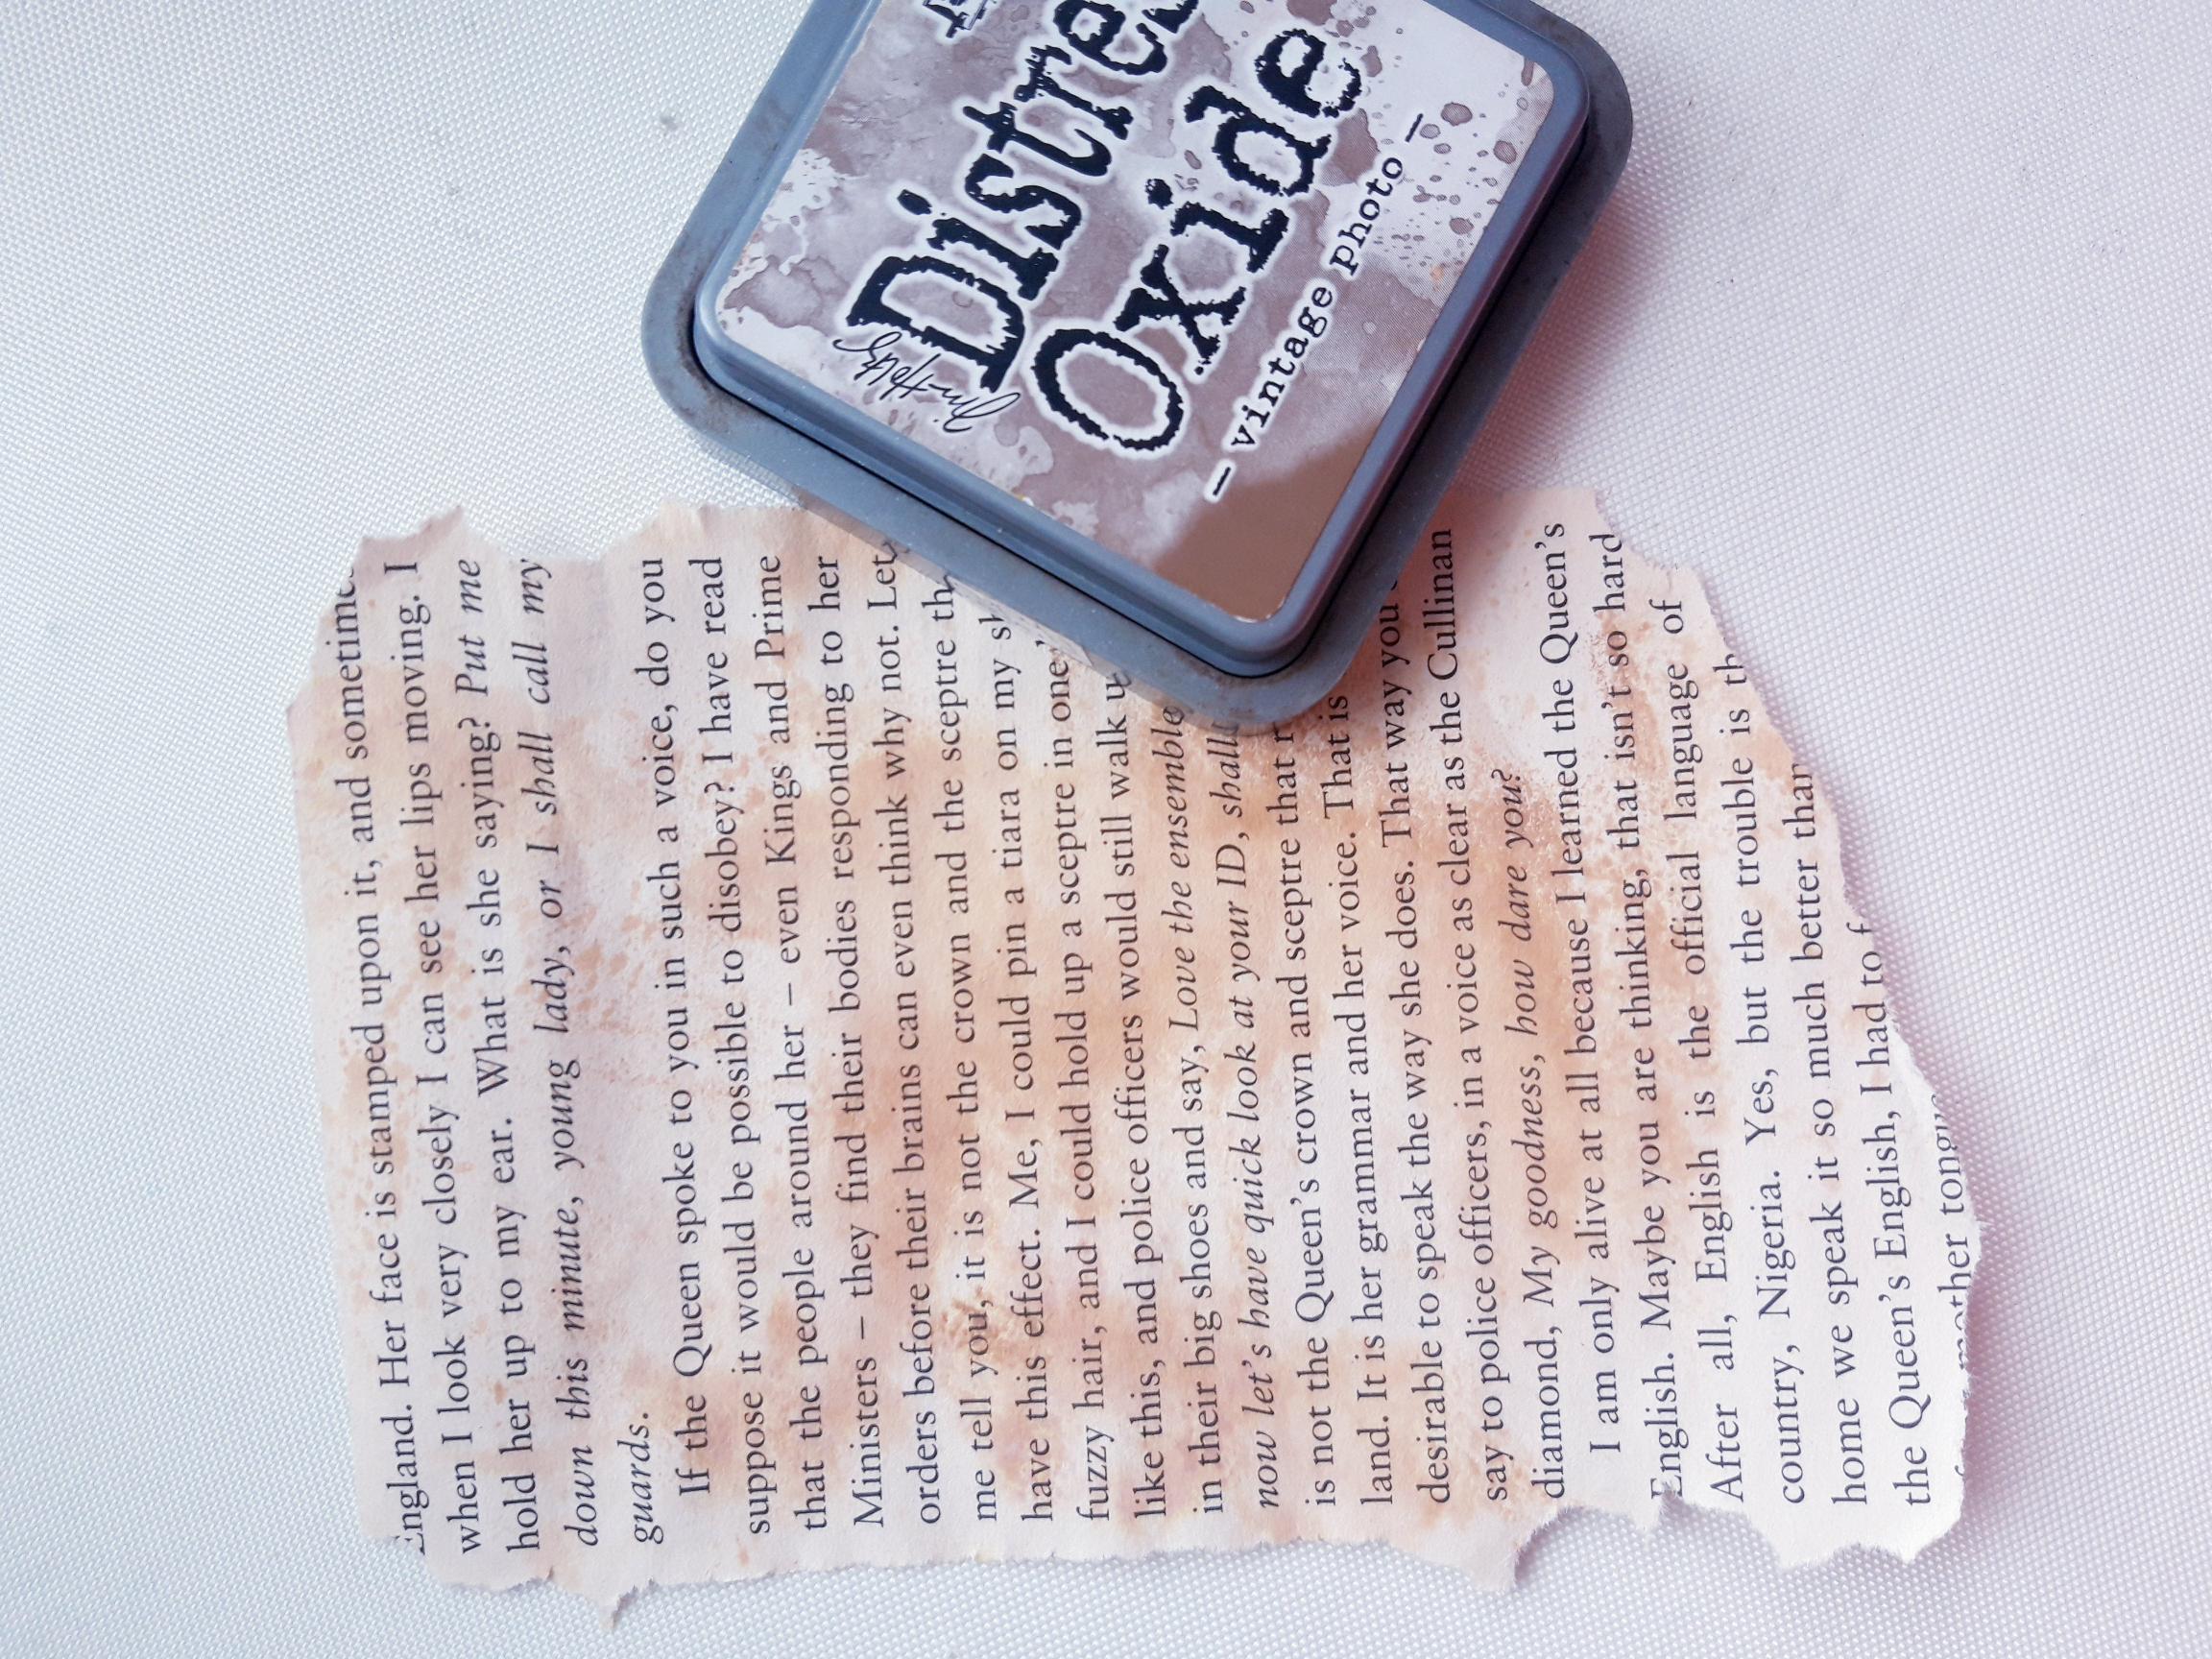
Distress Oxide: Vintage Photo, Black Soot
Onyx Black Versafine
Black fine line pen
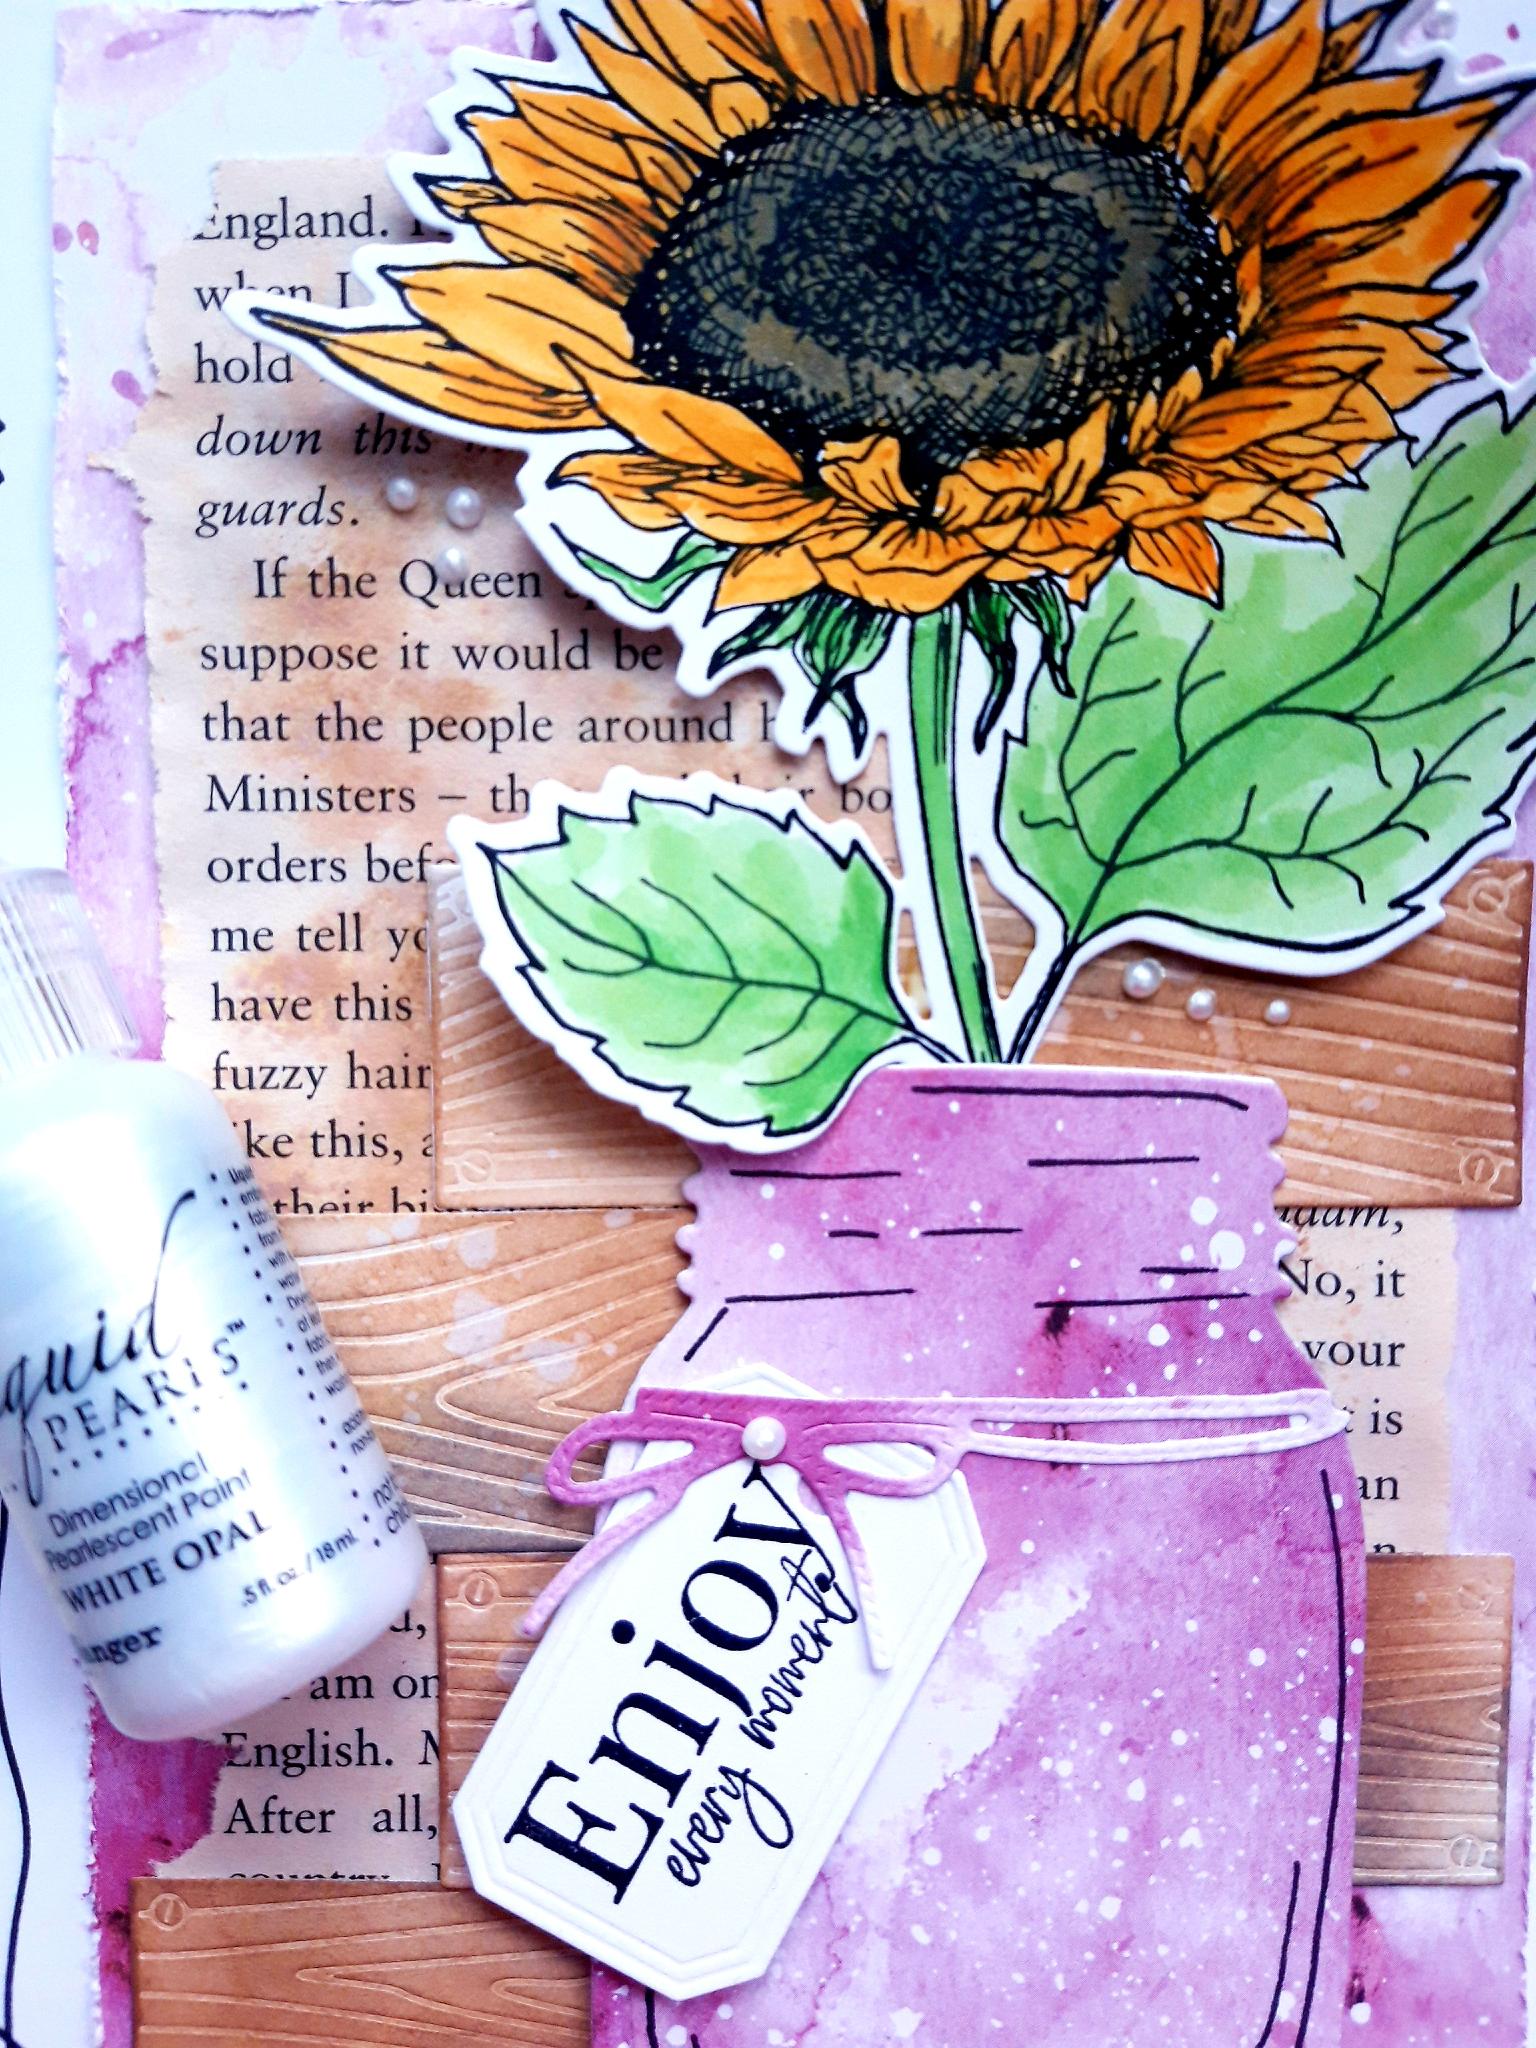
Liquid Pearls: White Opal ( or adhesive pearls, gems or sequins)
Eureka 101
Paper trimmer
Perfect Together Glue
Foam pads
Die cutting machine
Paint brush
[click image to enlarge] 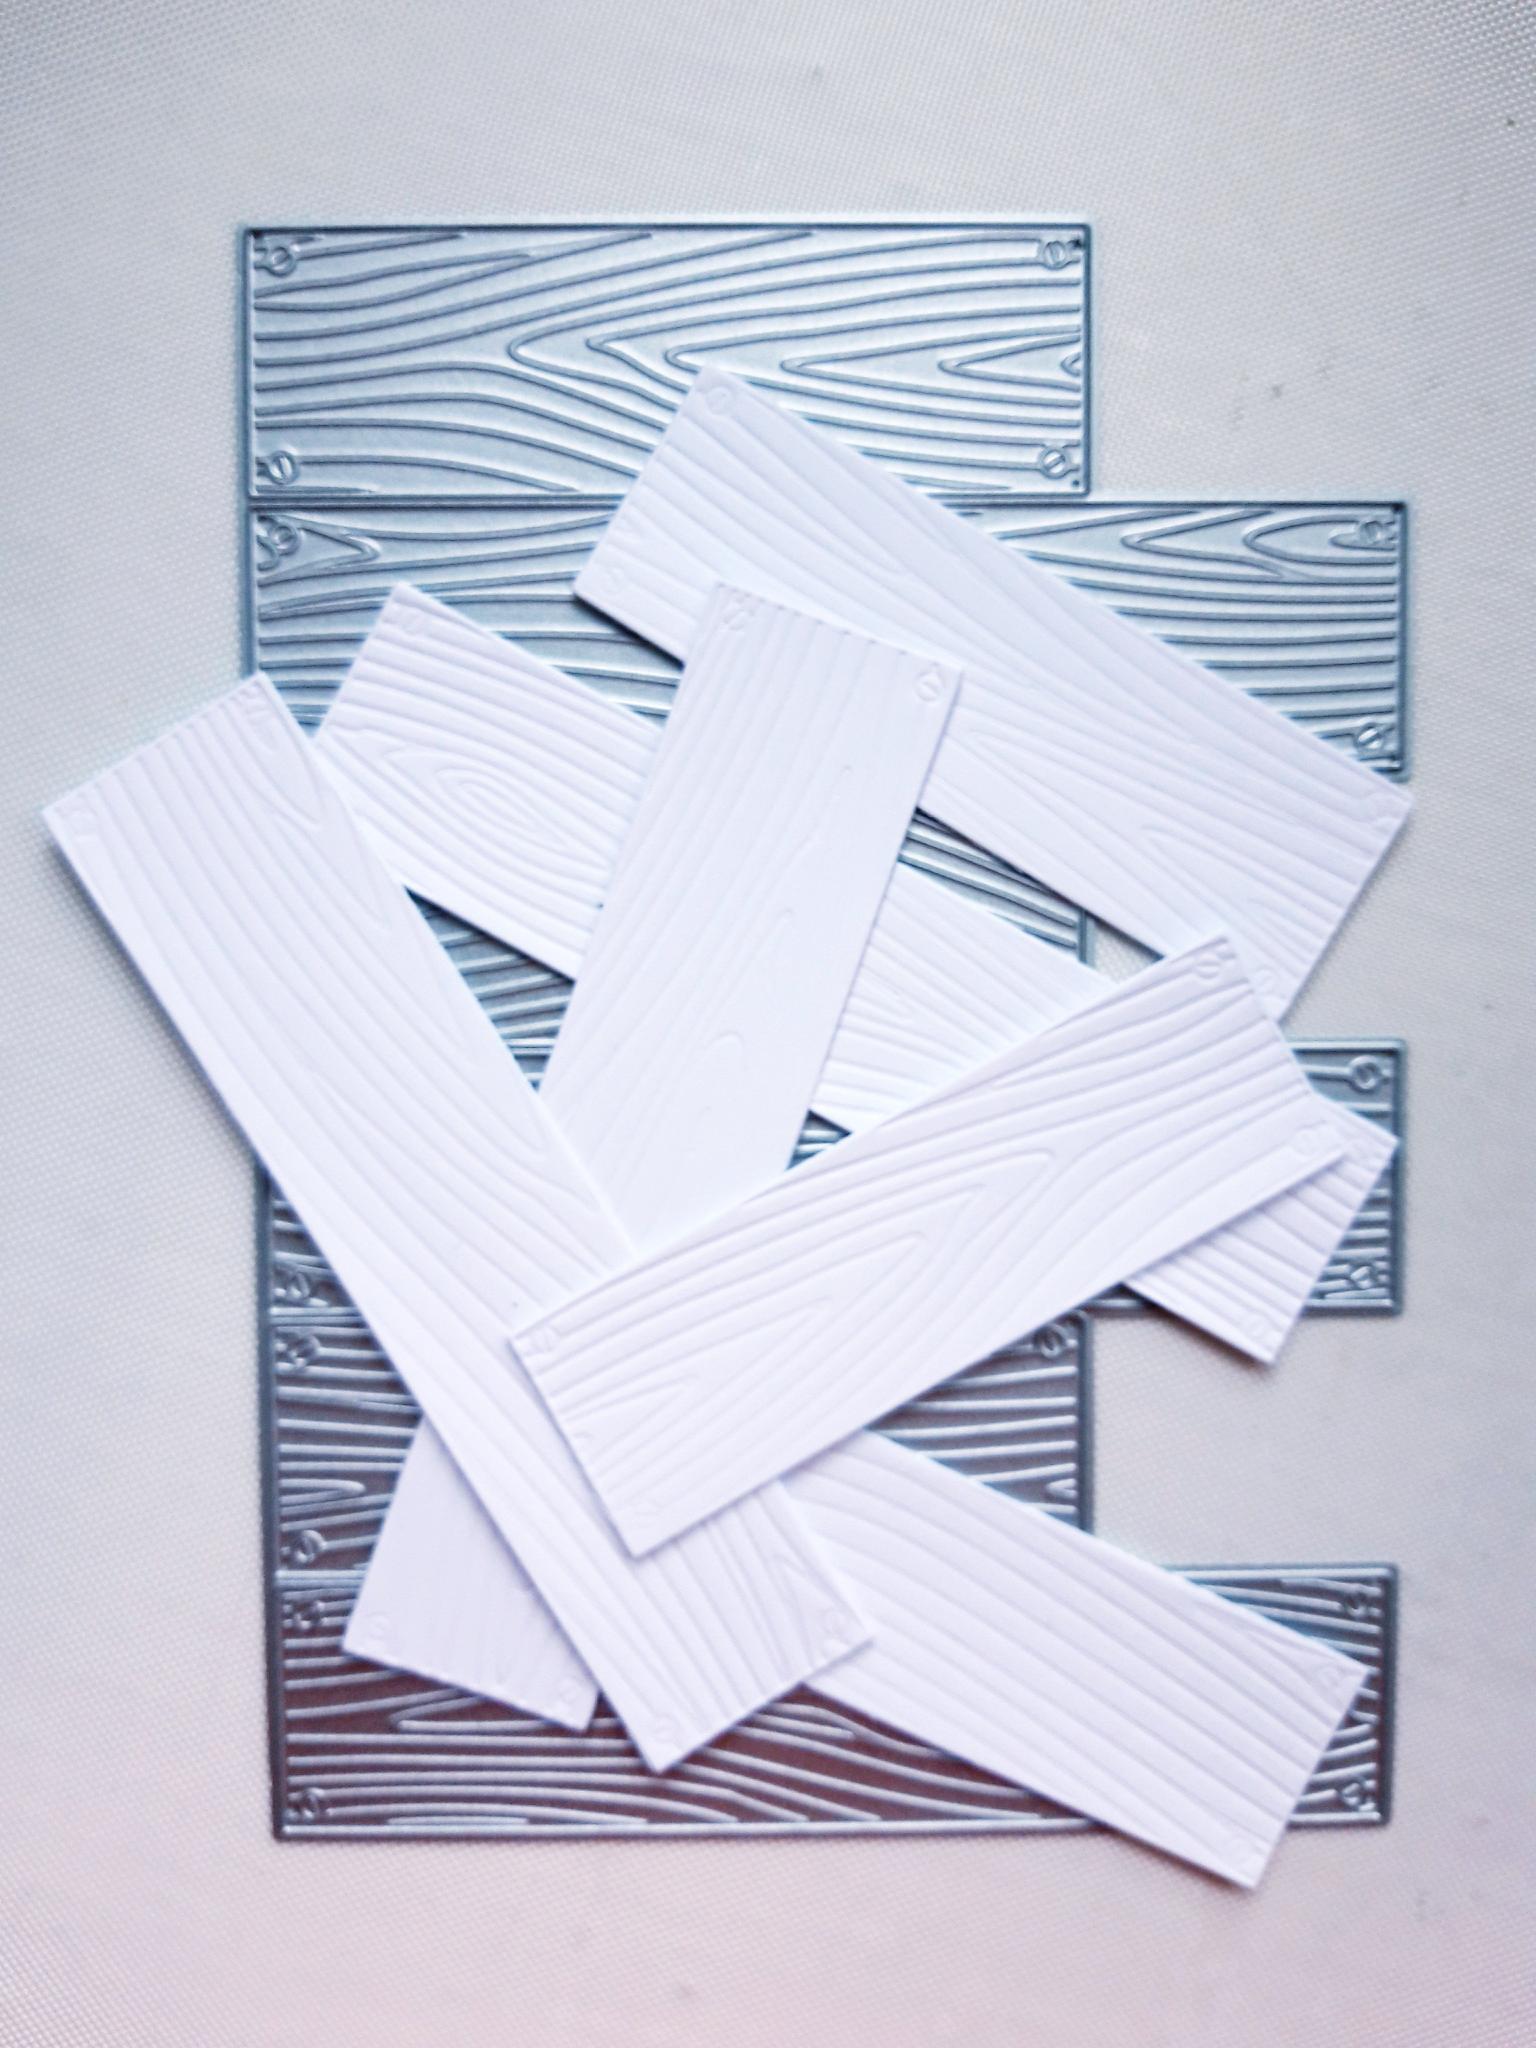
|
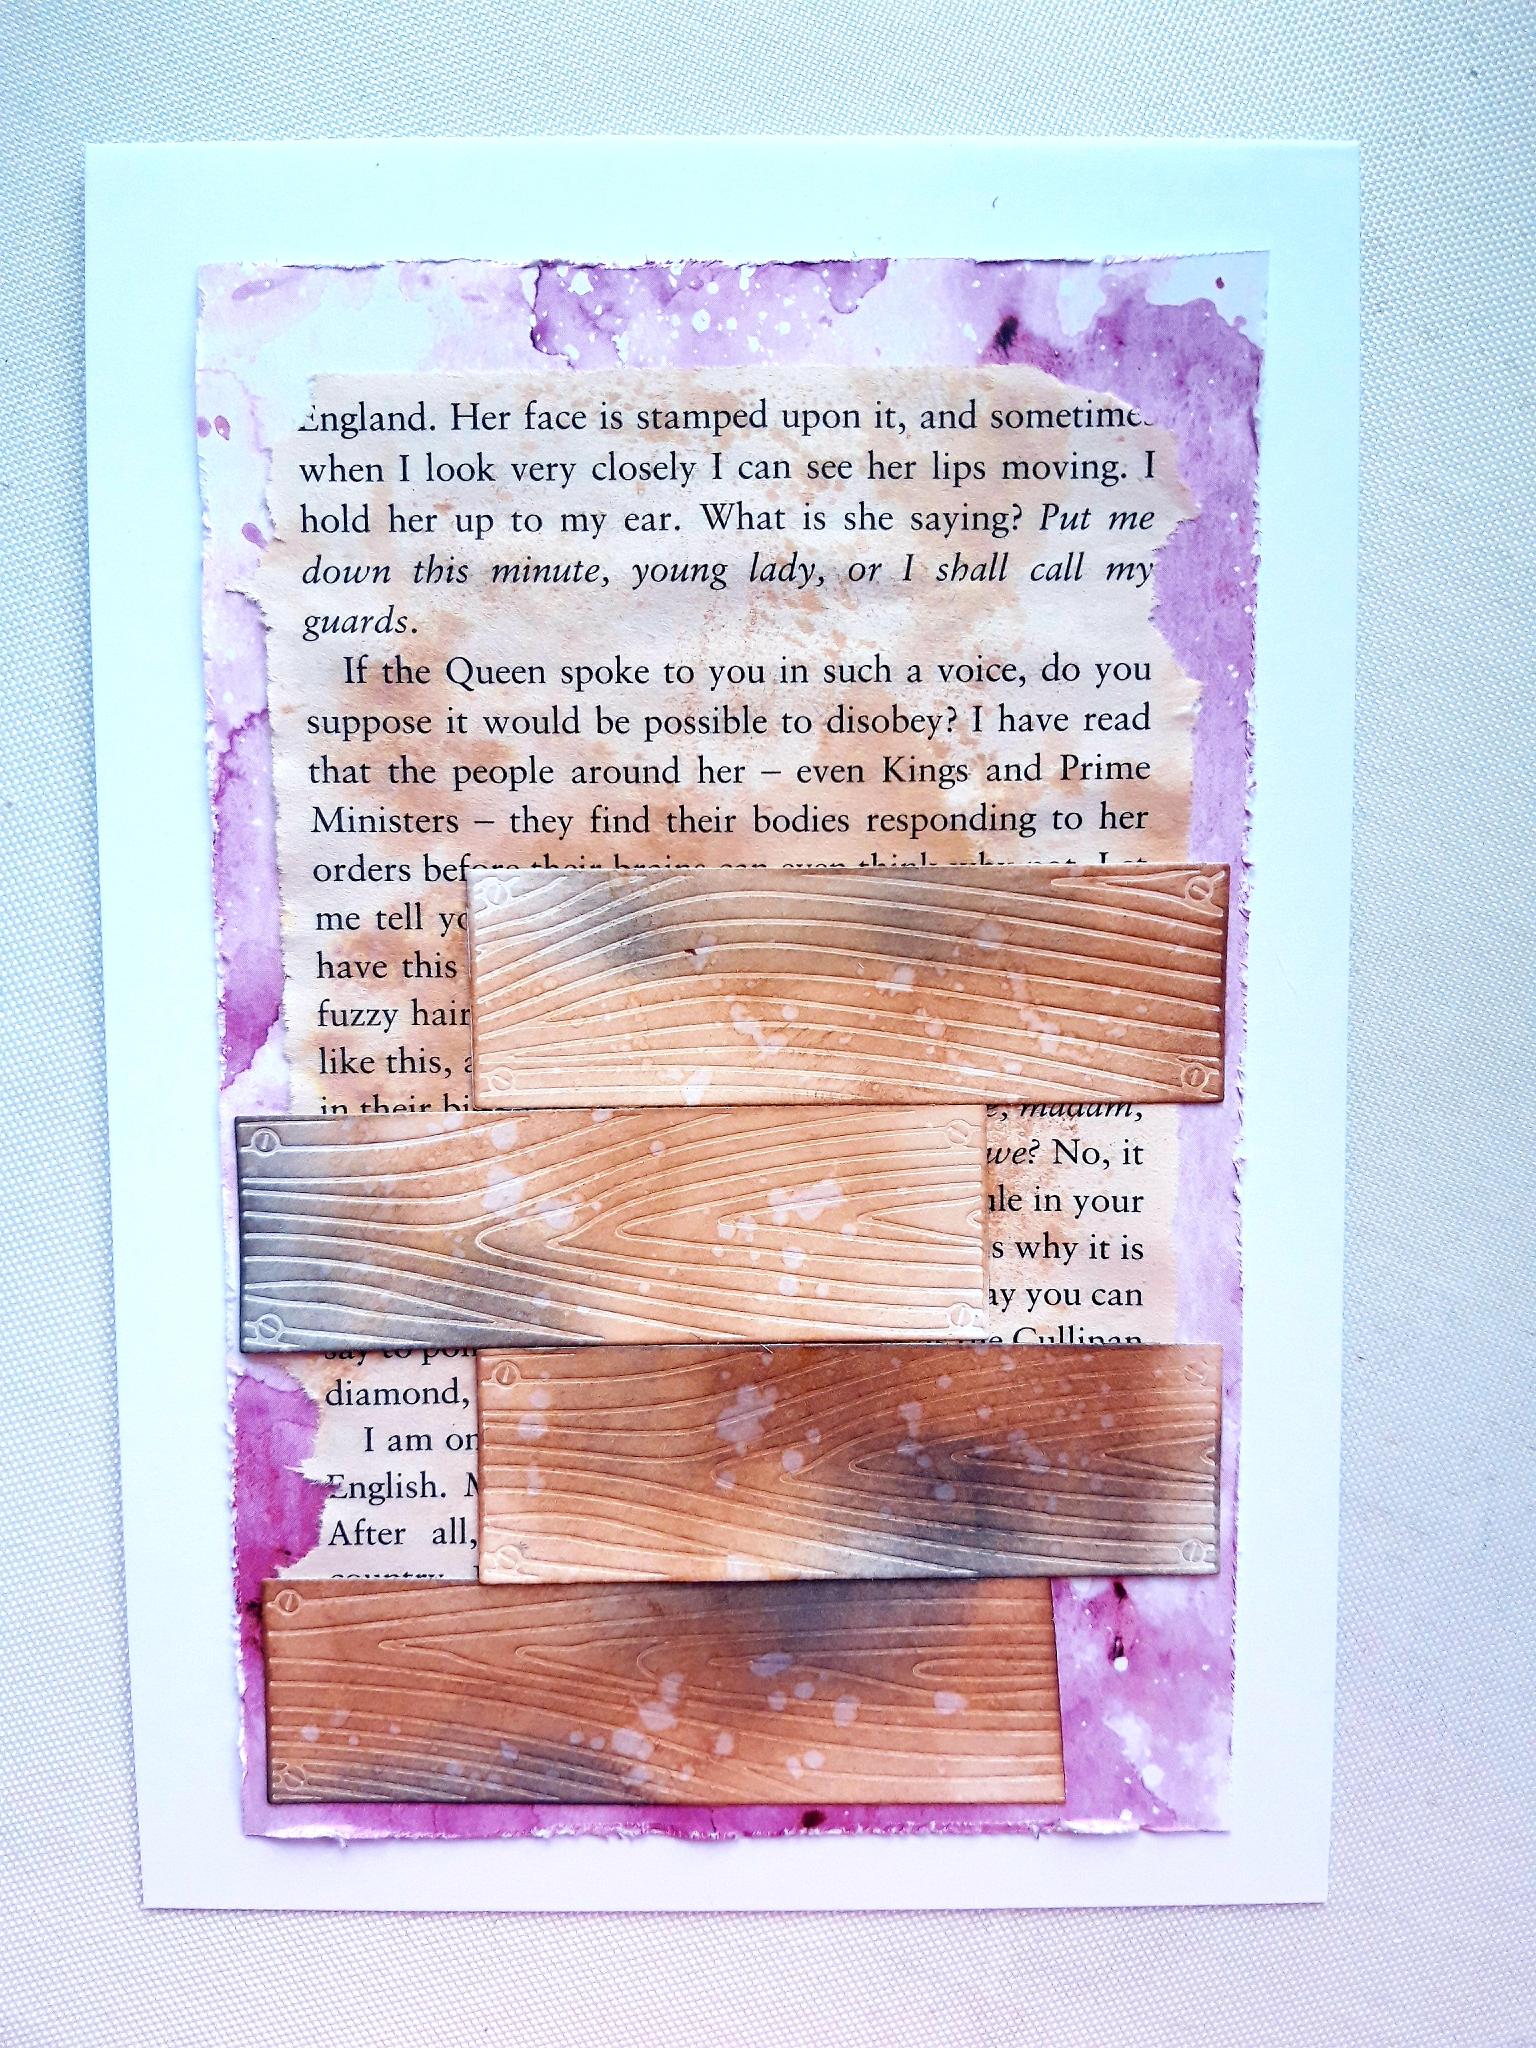
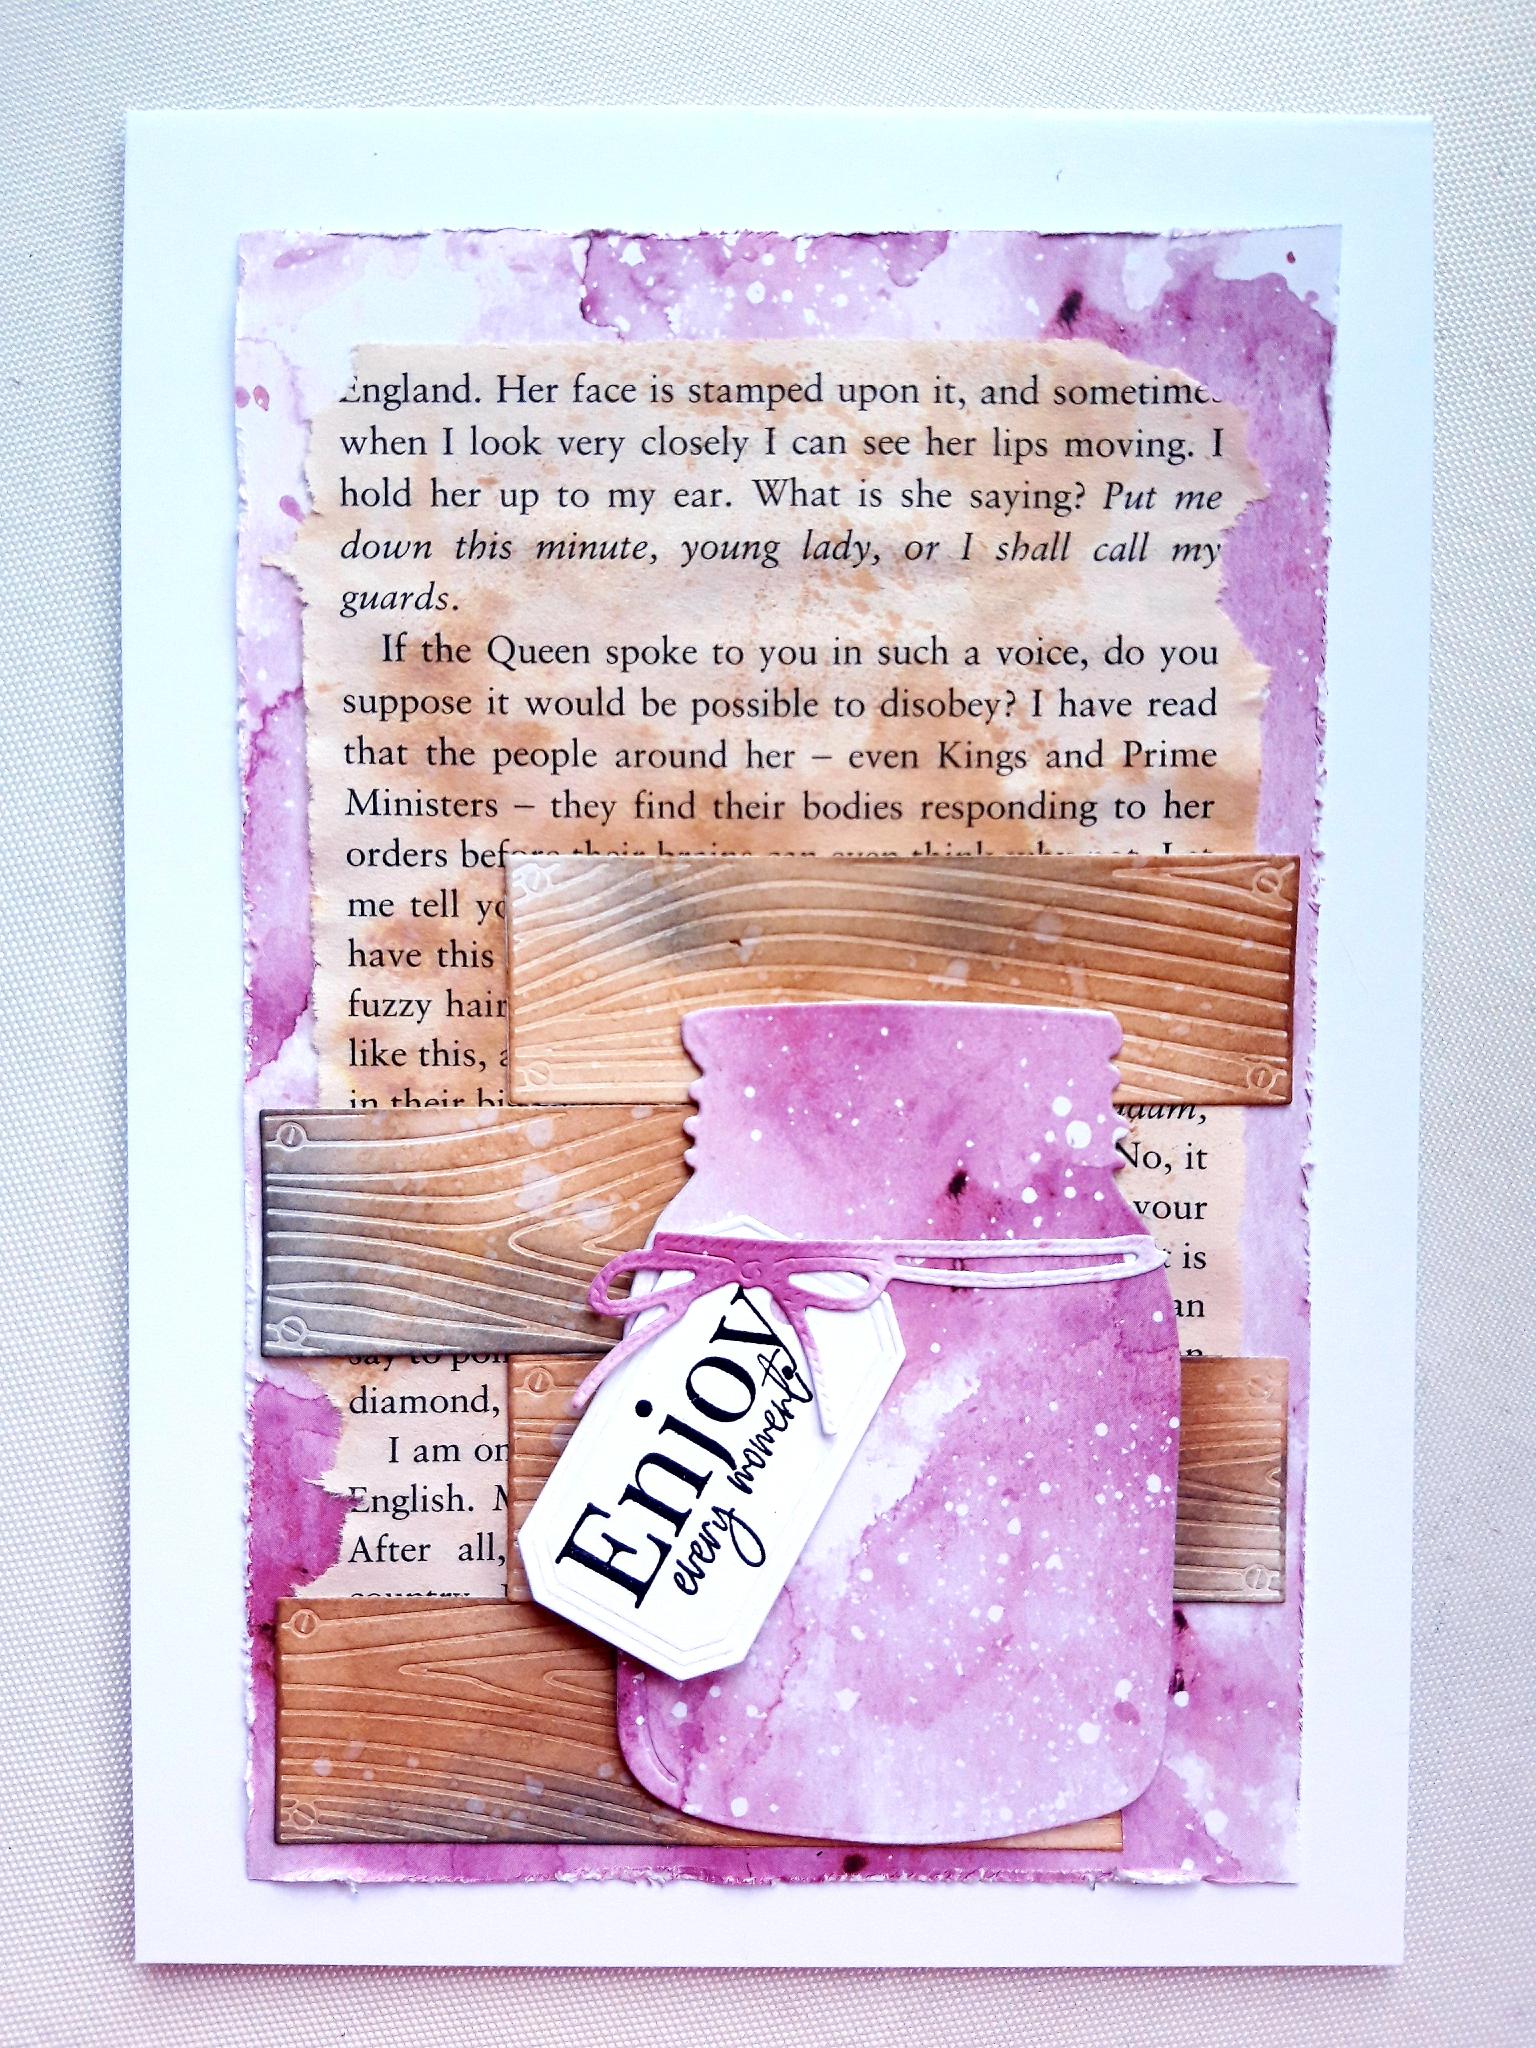
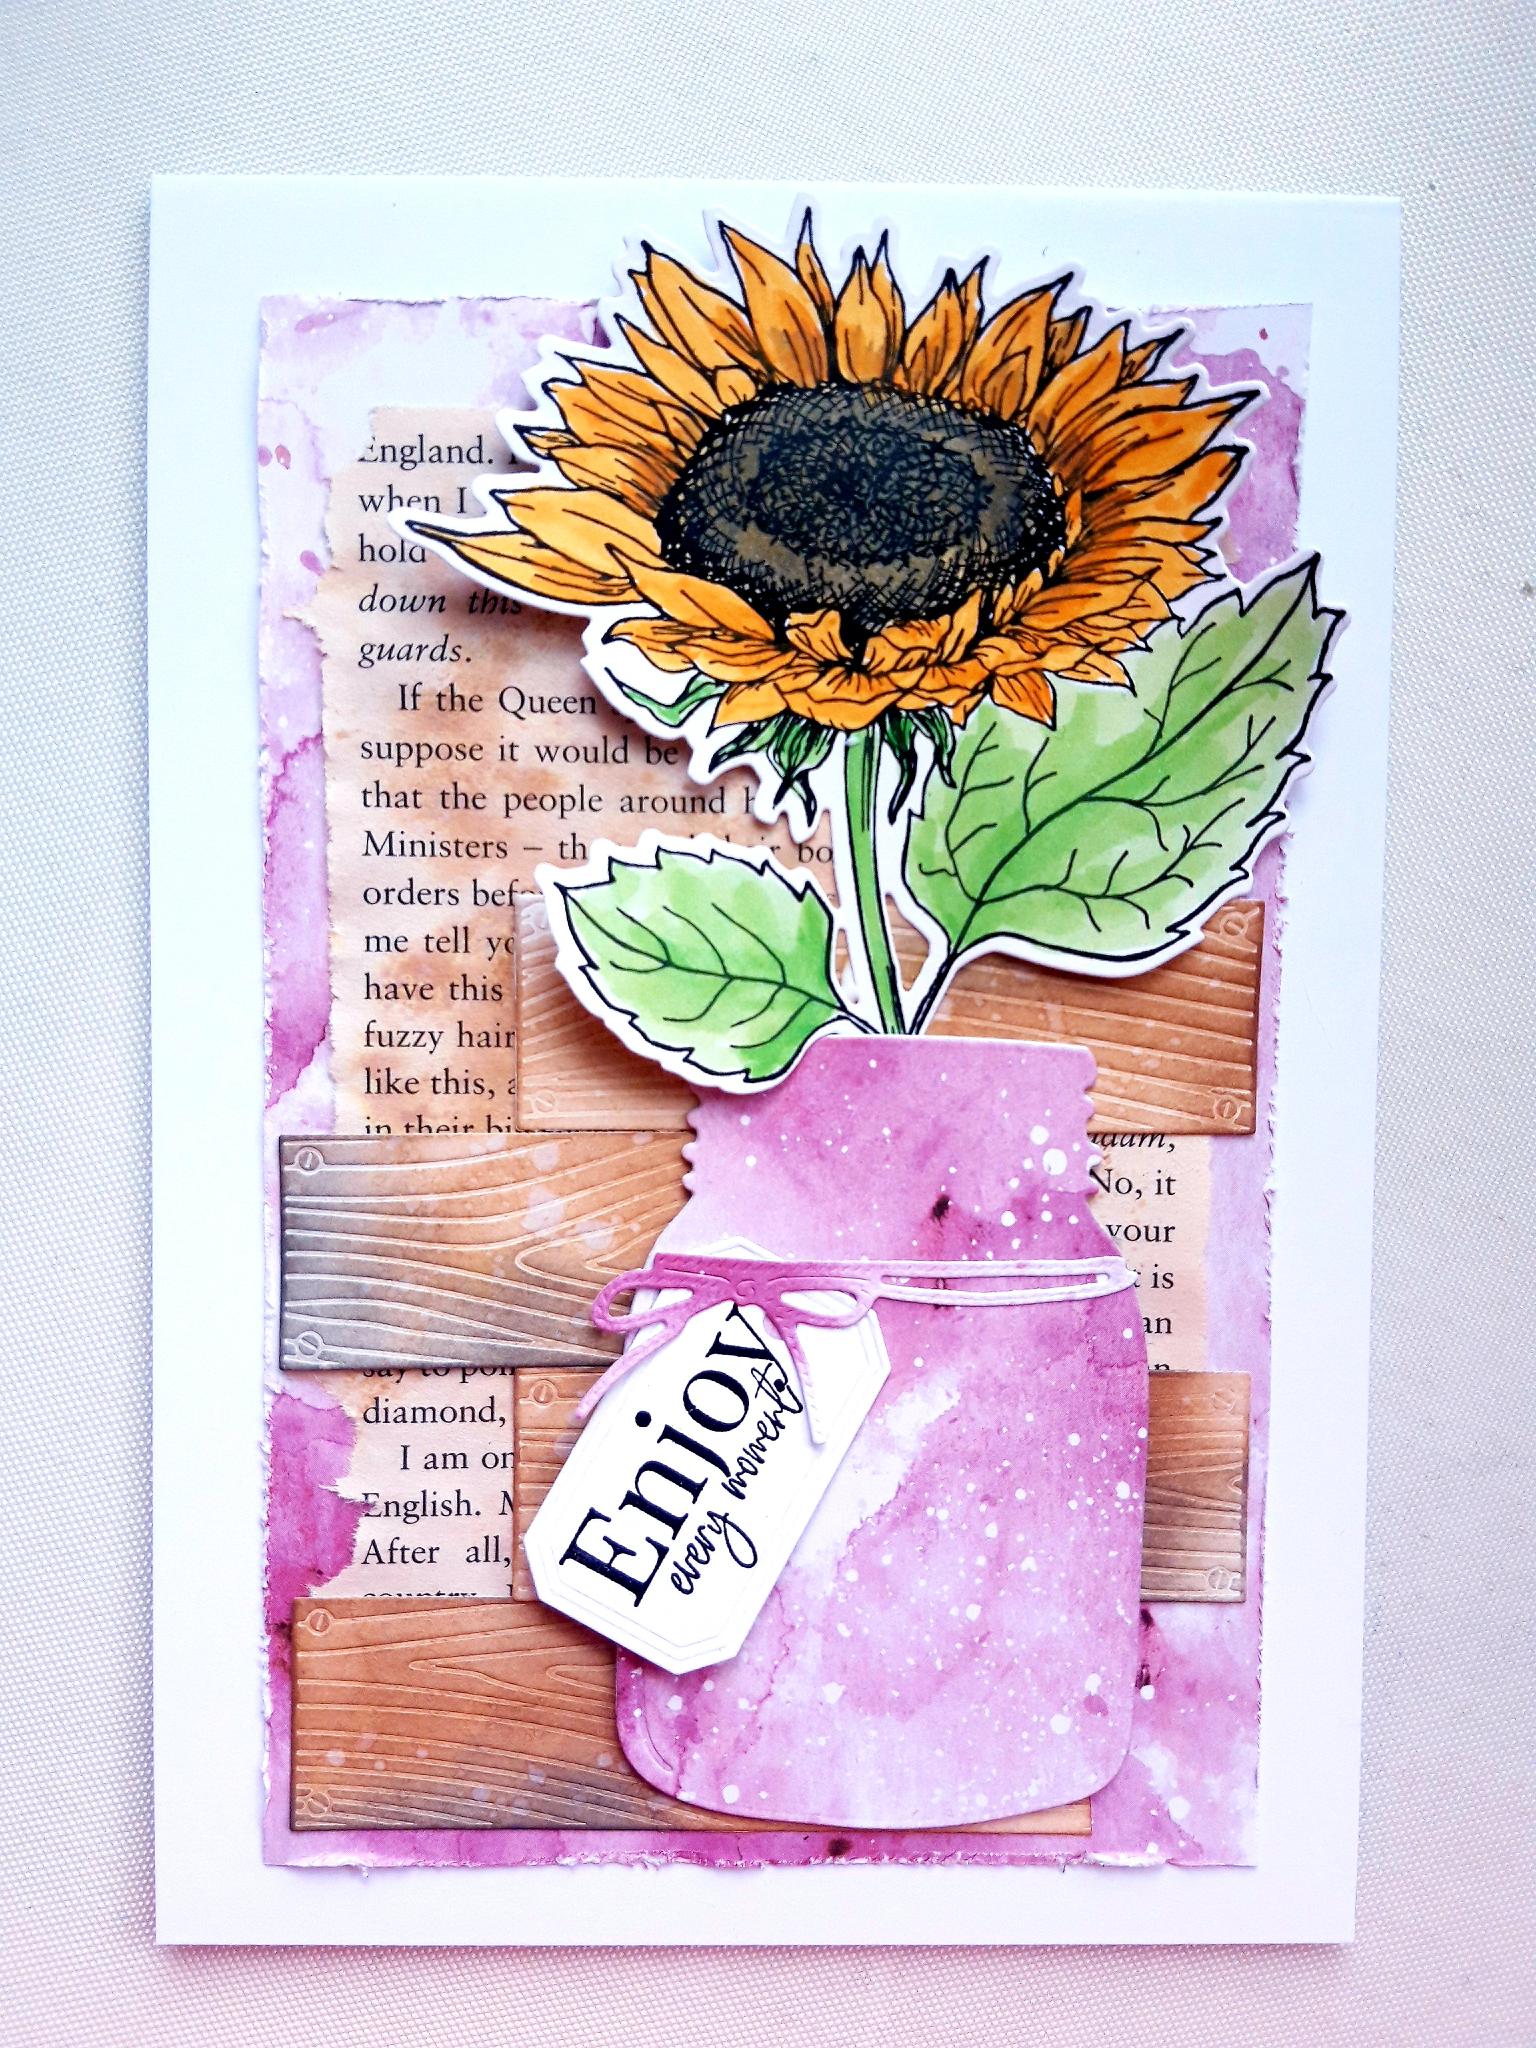
Place the Creative Panels die on the A4 white cardstock. (Postion to the side and corner, as you will need the rest of the cardstock for other stamp and die cuts). Run through your die cutting machine. |
|
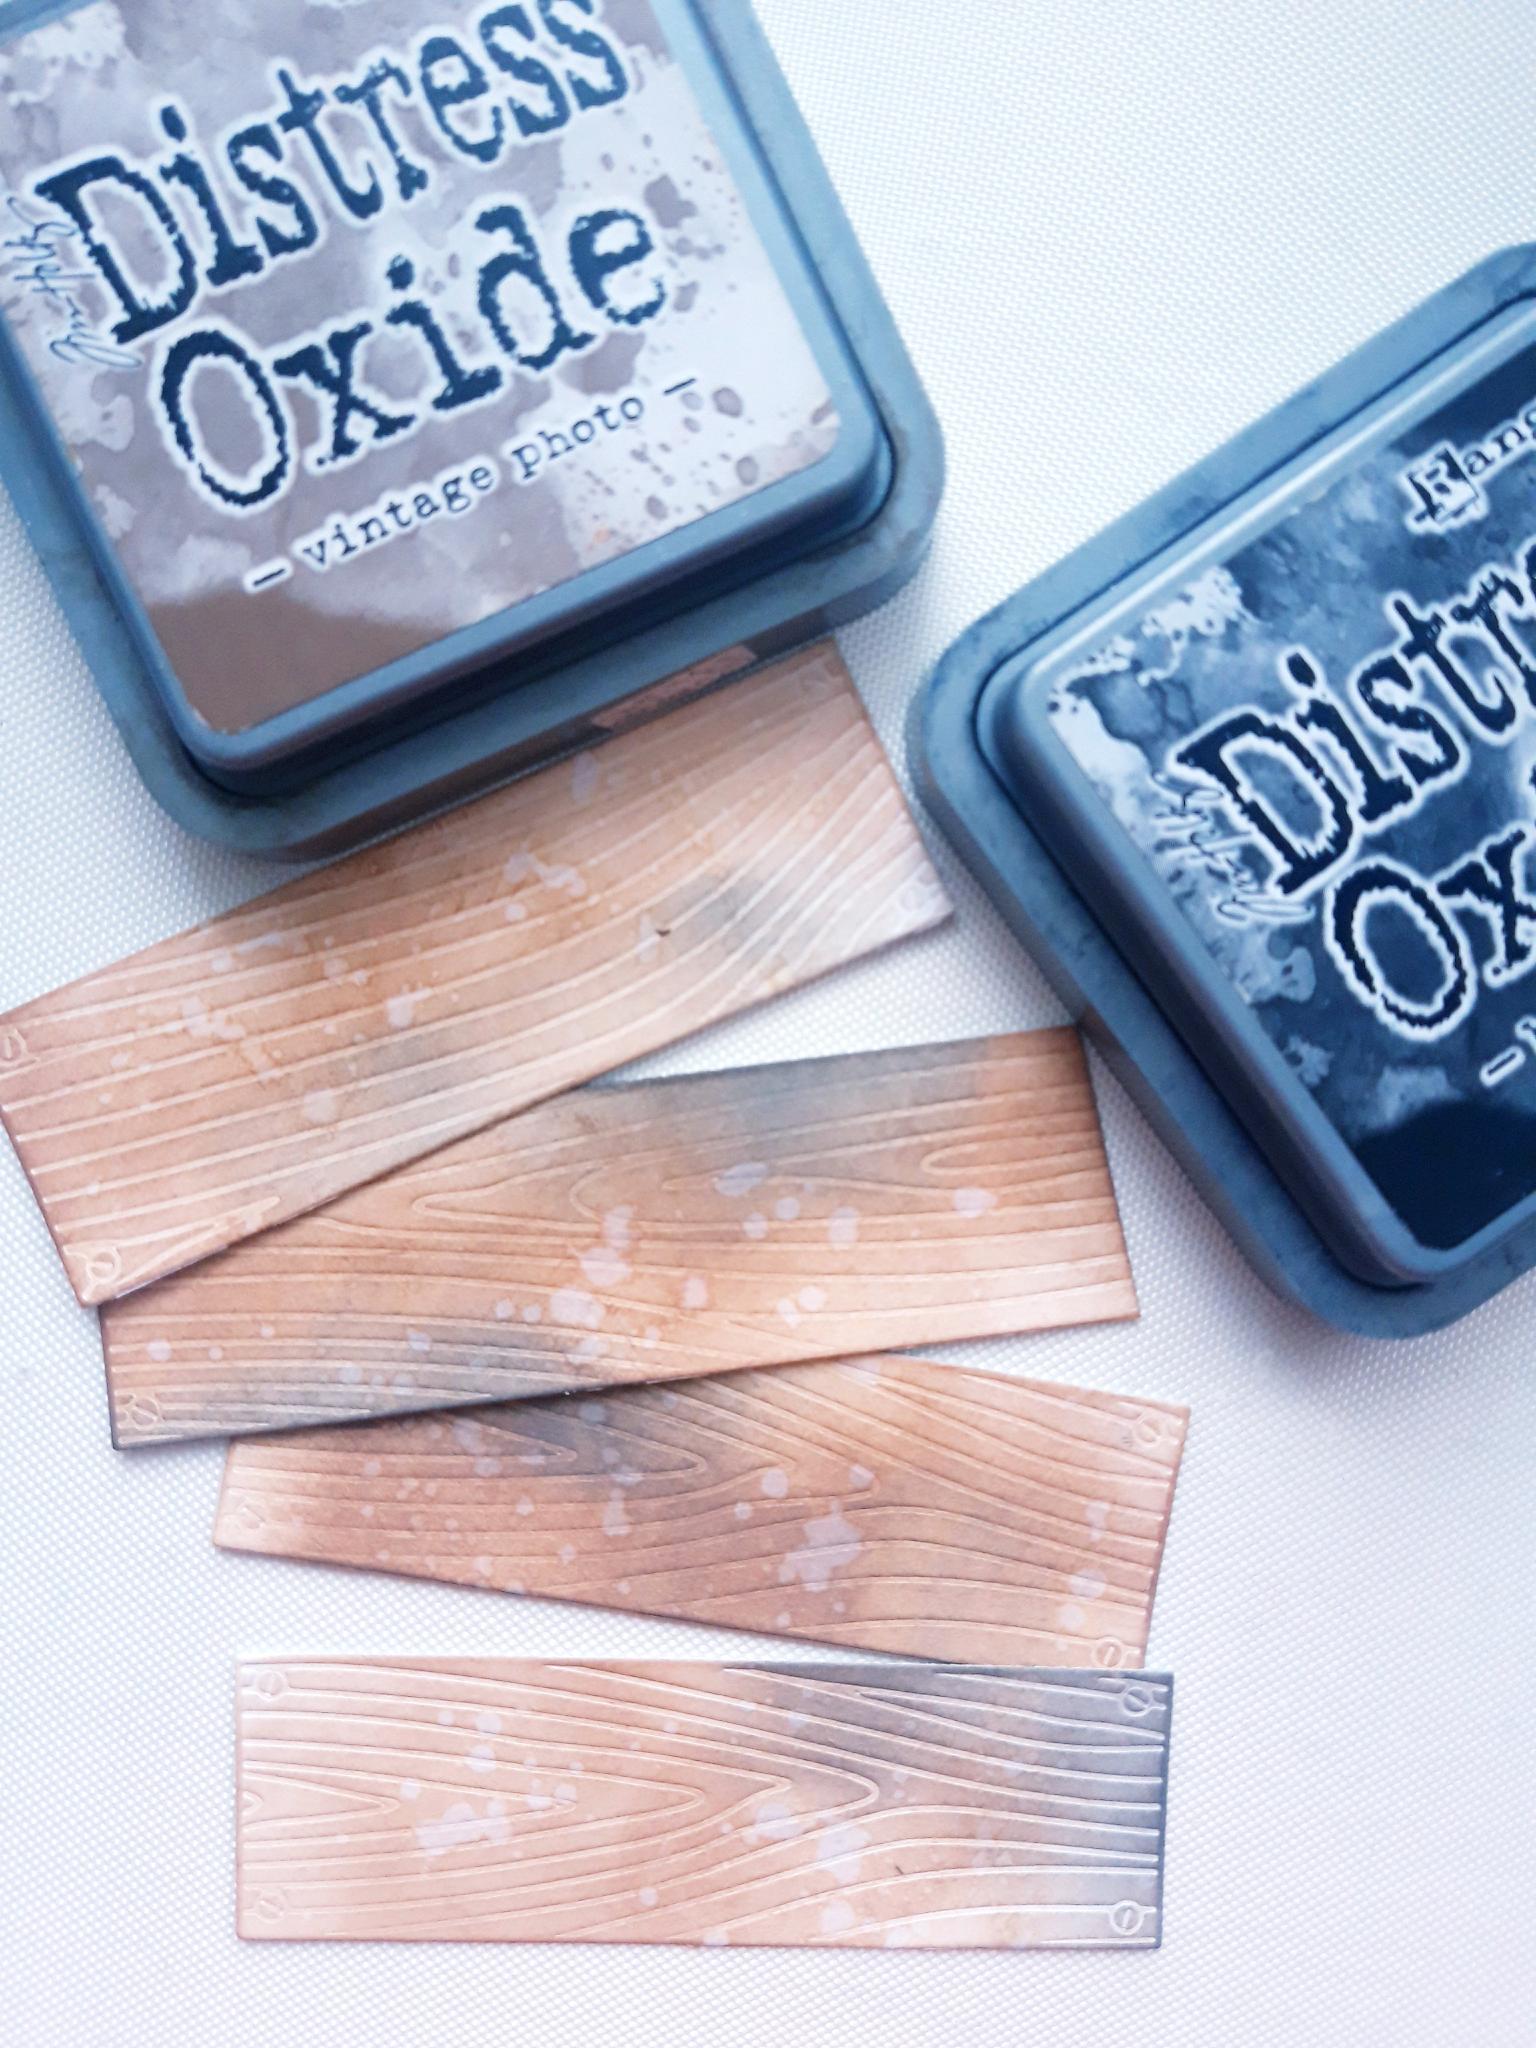
Use the Distress Oxides to colour your die cut panels. Splatter drops of water on them and mop up the water, to add to the effect. Set to one side. |
|
Tear out a sheet of the paper from the It's All About You paper pad. Cut to 7 1/4 x 4 3/4" then tear around the edges, or use scissors to scuff them up. Set to one side. |
|
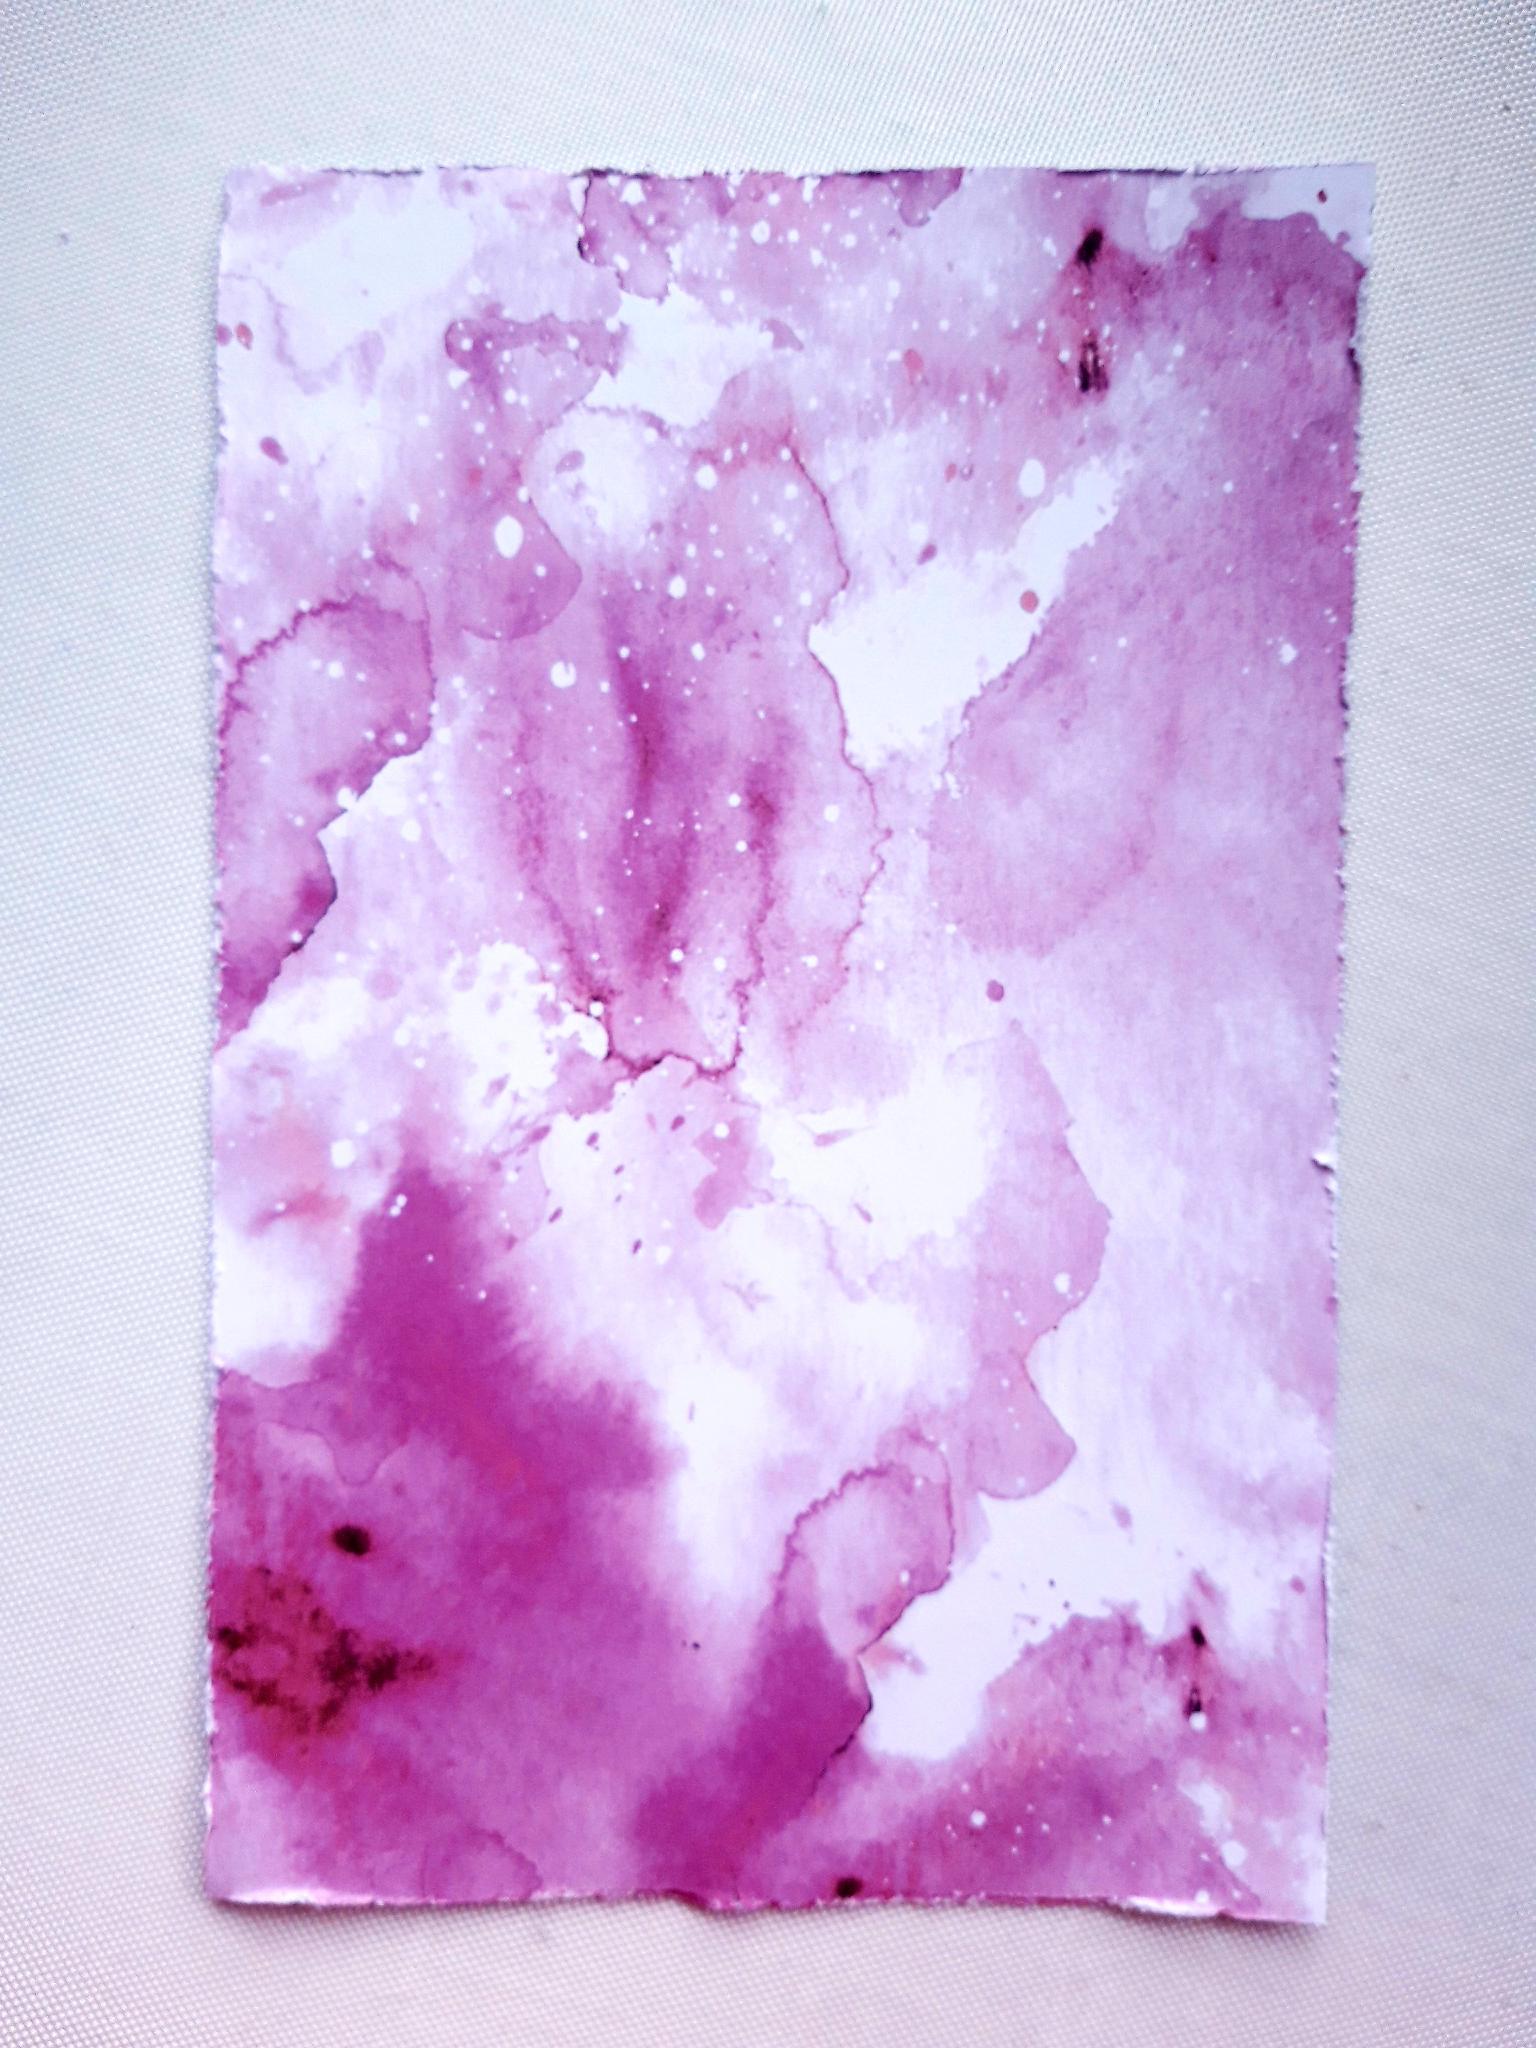
Tear out a page from your book and rip it to approx 6 x 4 1/4", making it look distressed. Apply some of the Vintage Photo Distress Oxide on to a glass or craft mat. Spritz with water then mop up the ink with your torn book page. Allow to dry. |
|
Adhere the torn paper, from the paper pad, on to the front of your white card blank. Adhere the inked torn book page on top. Adhere the inked wood panels on top of this, in your preferred layout. Set to one side. |
|
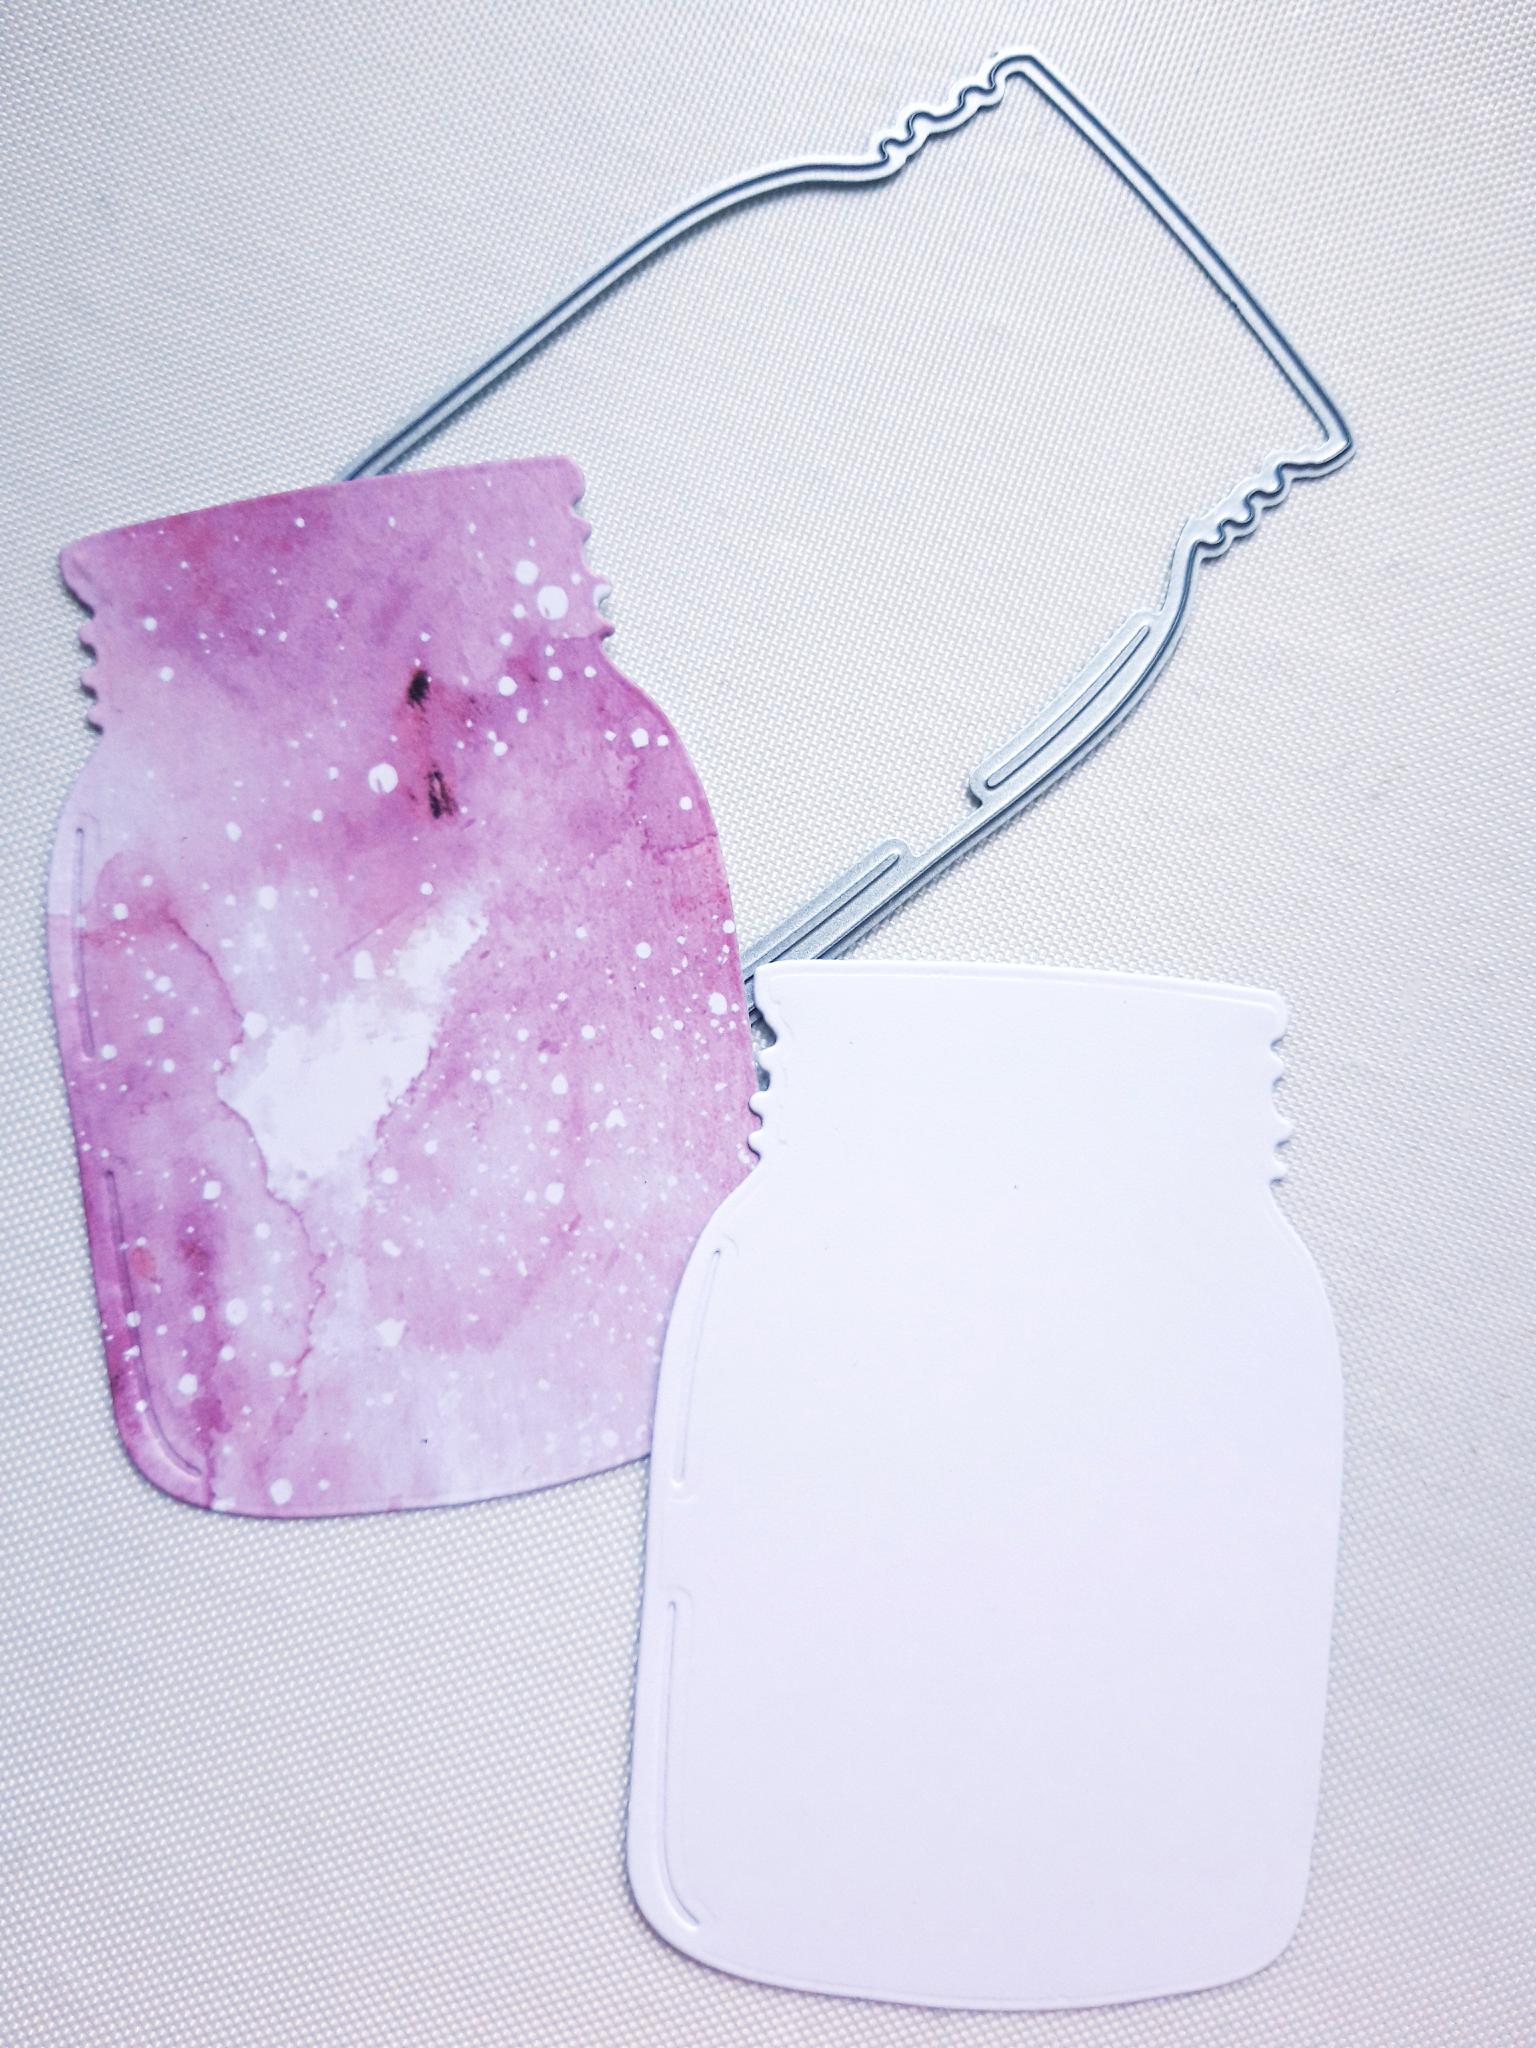
Using the Mason jar die, from the A Gift For You die collection, cut out 2 jars. One from a sheet of the It's All About You paper pad, and one from the leftover white cardstock. (Again keep the rest of the paper, and cardstock for later). Glue the paper jar on top of the cardstock jar, to create a more substantial die cut jar. |
|
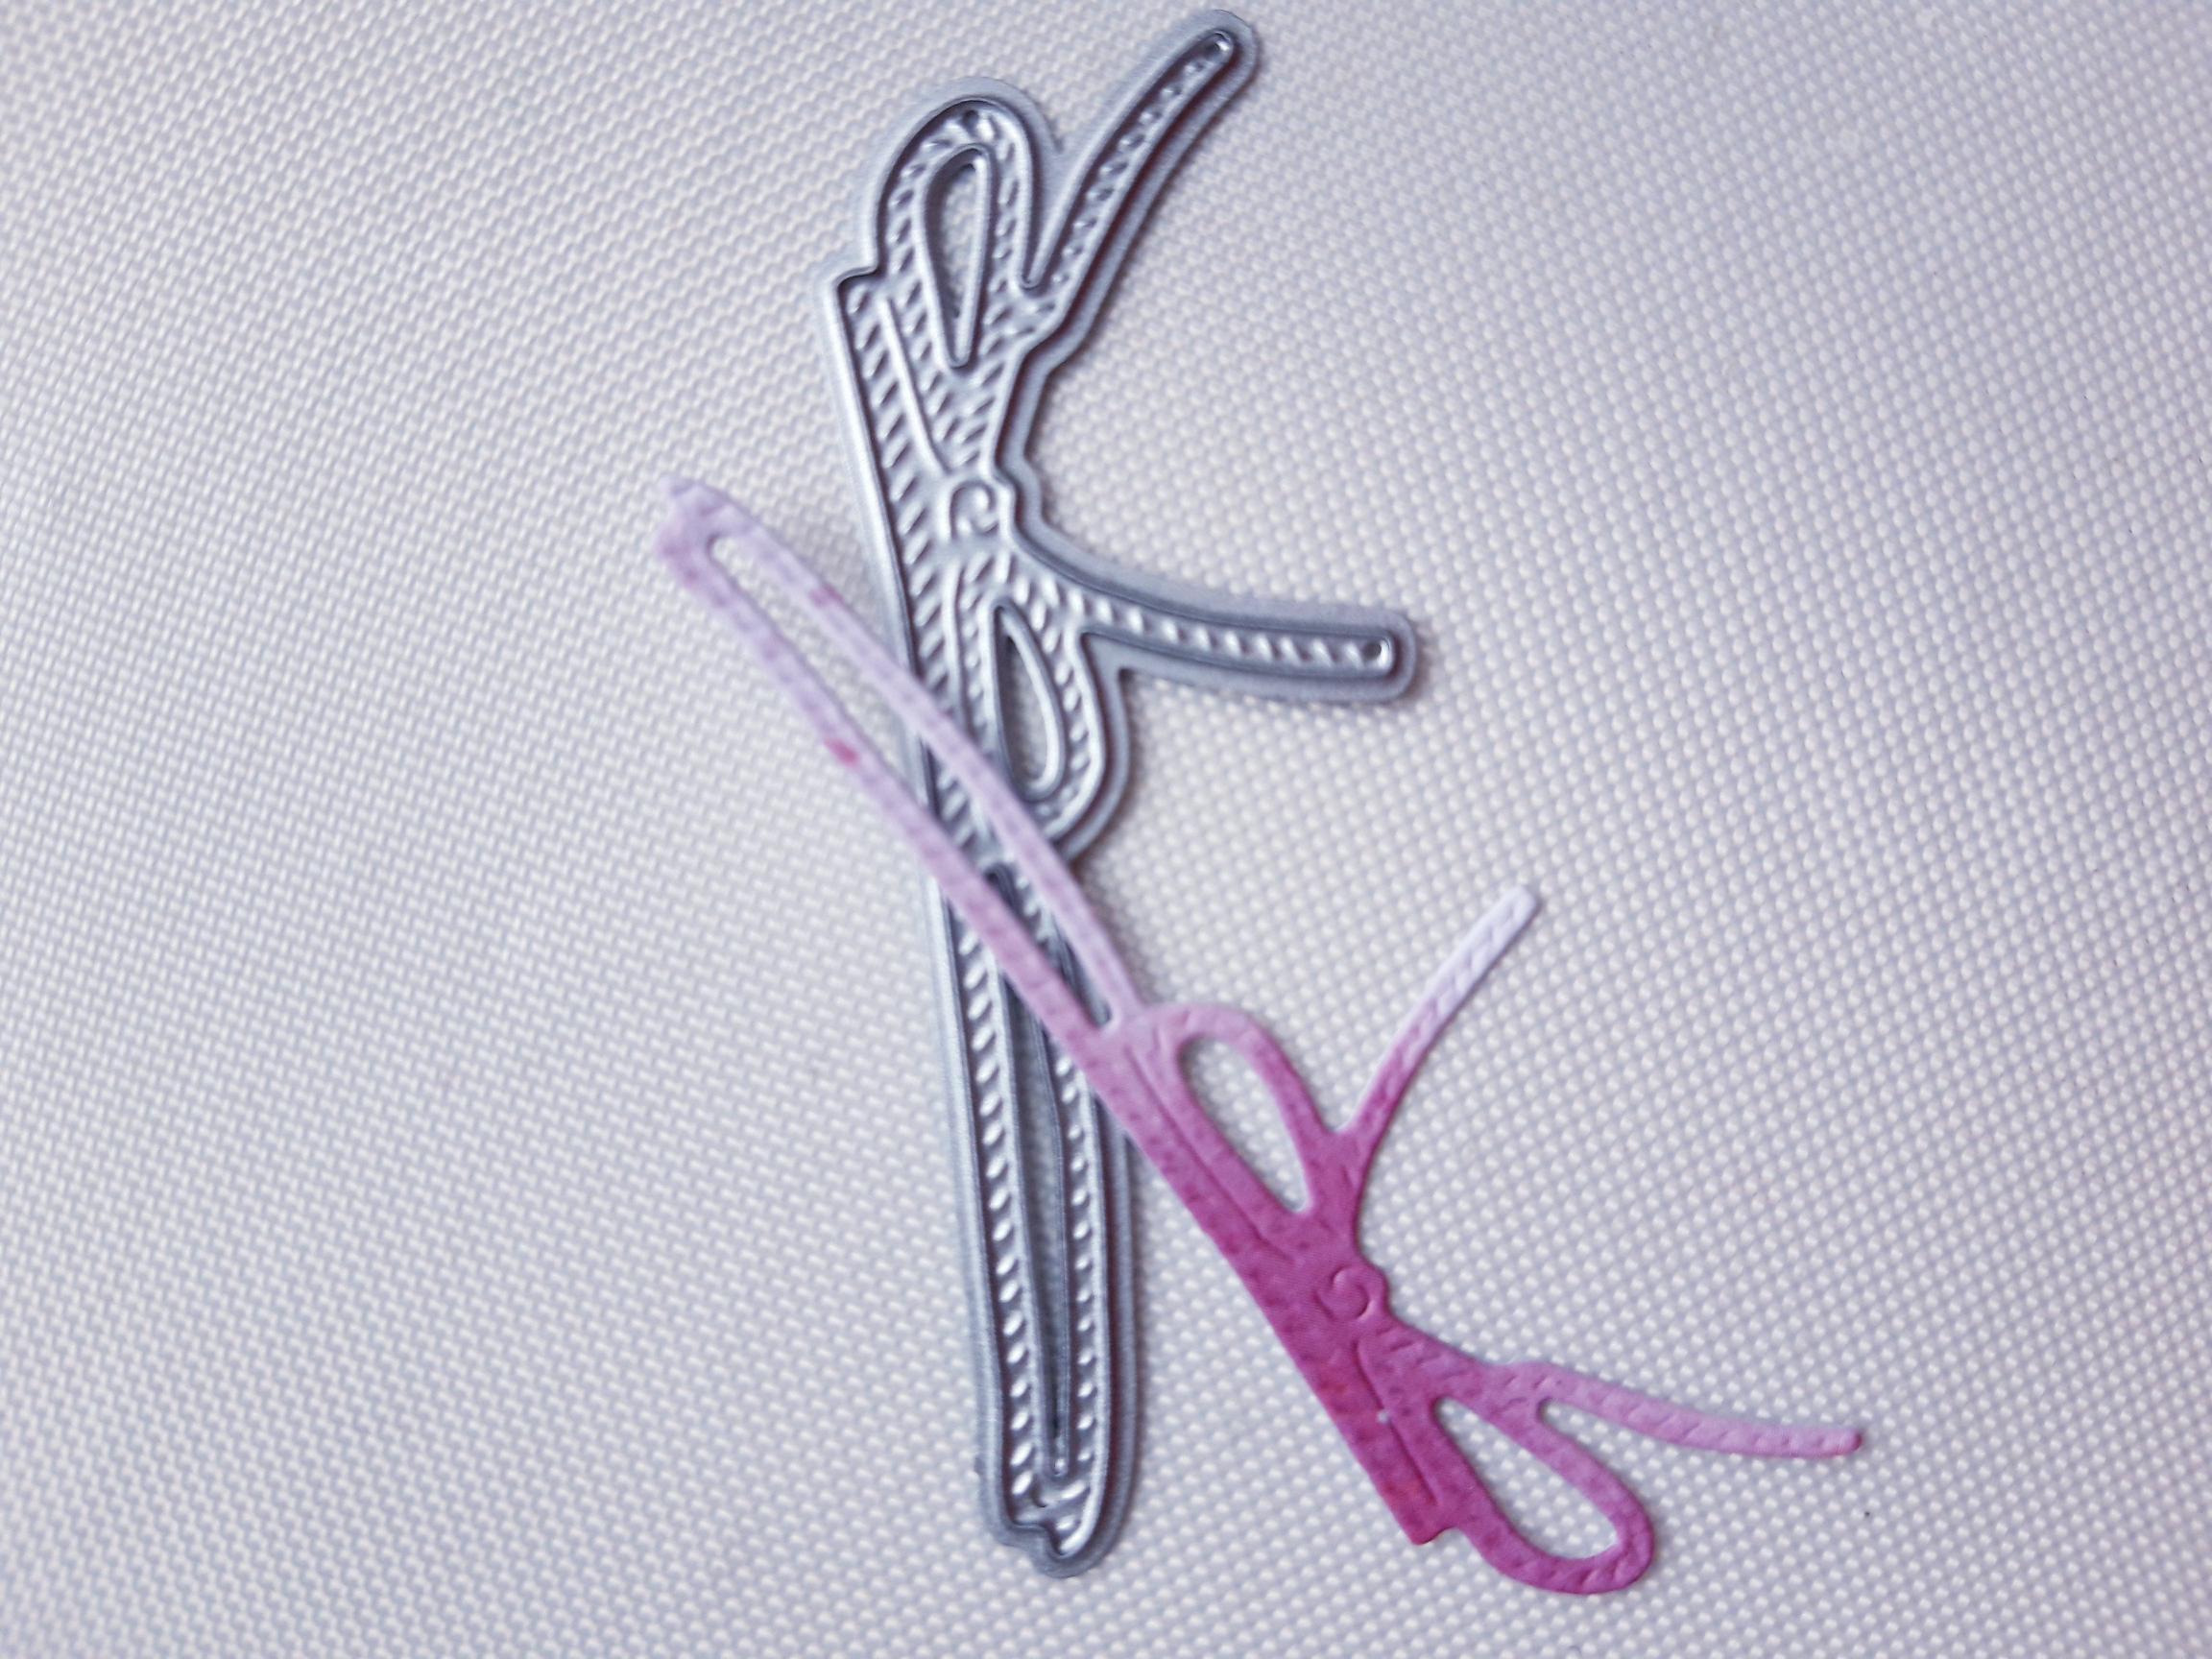
Cut out a bow from the paper, using the die from the A Gift For You Die collection. |
|
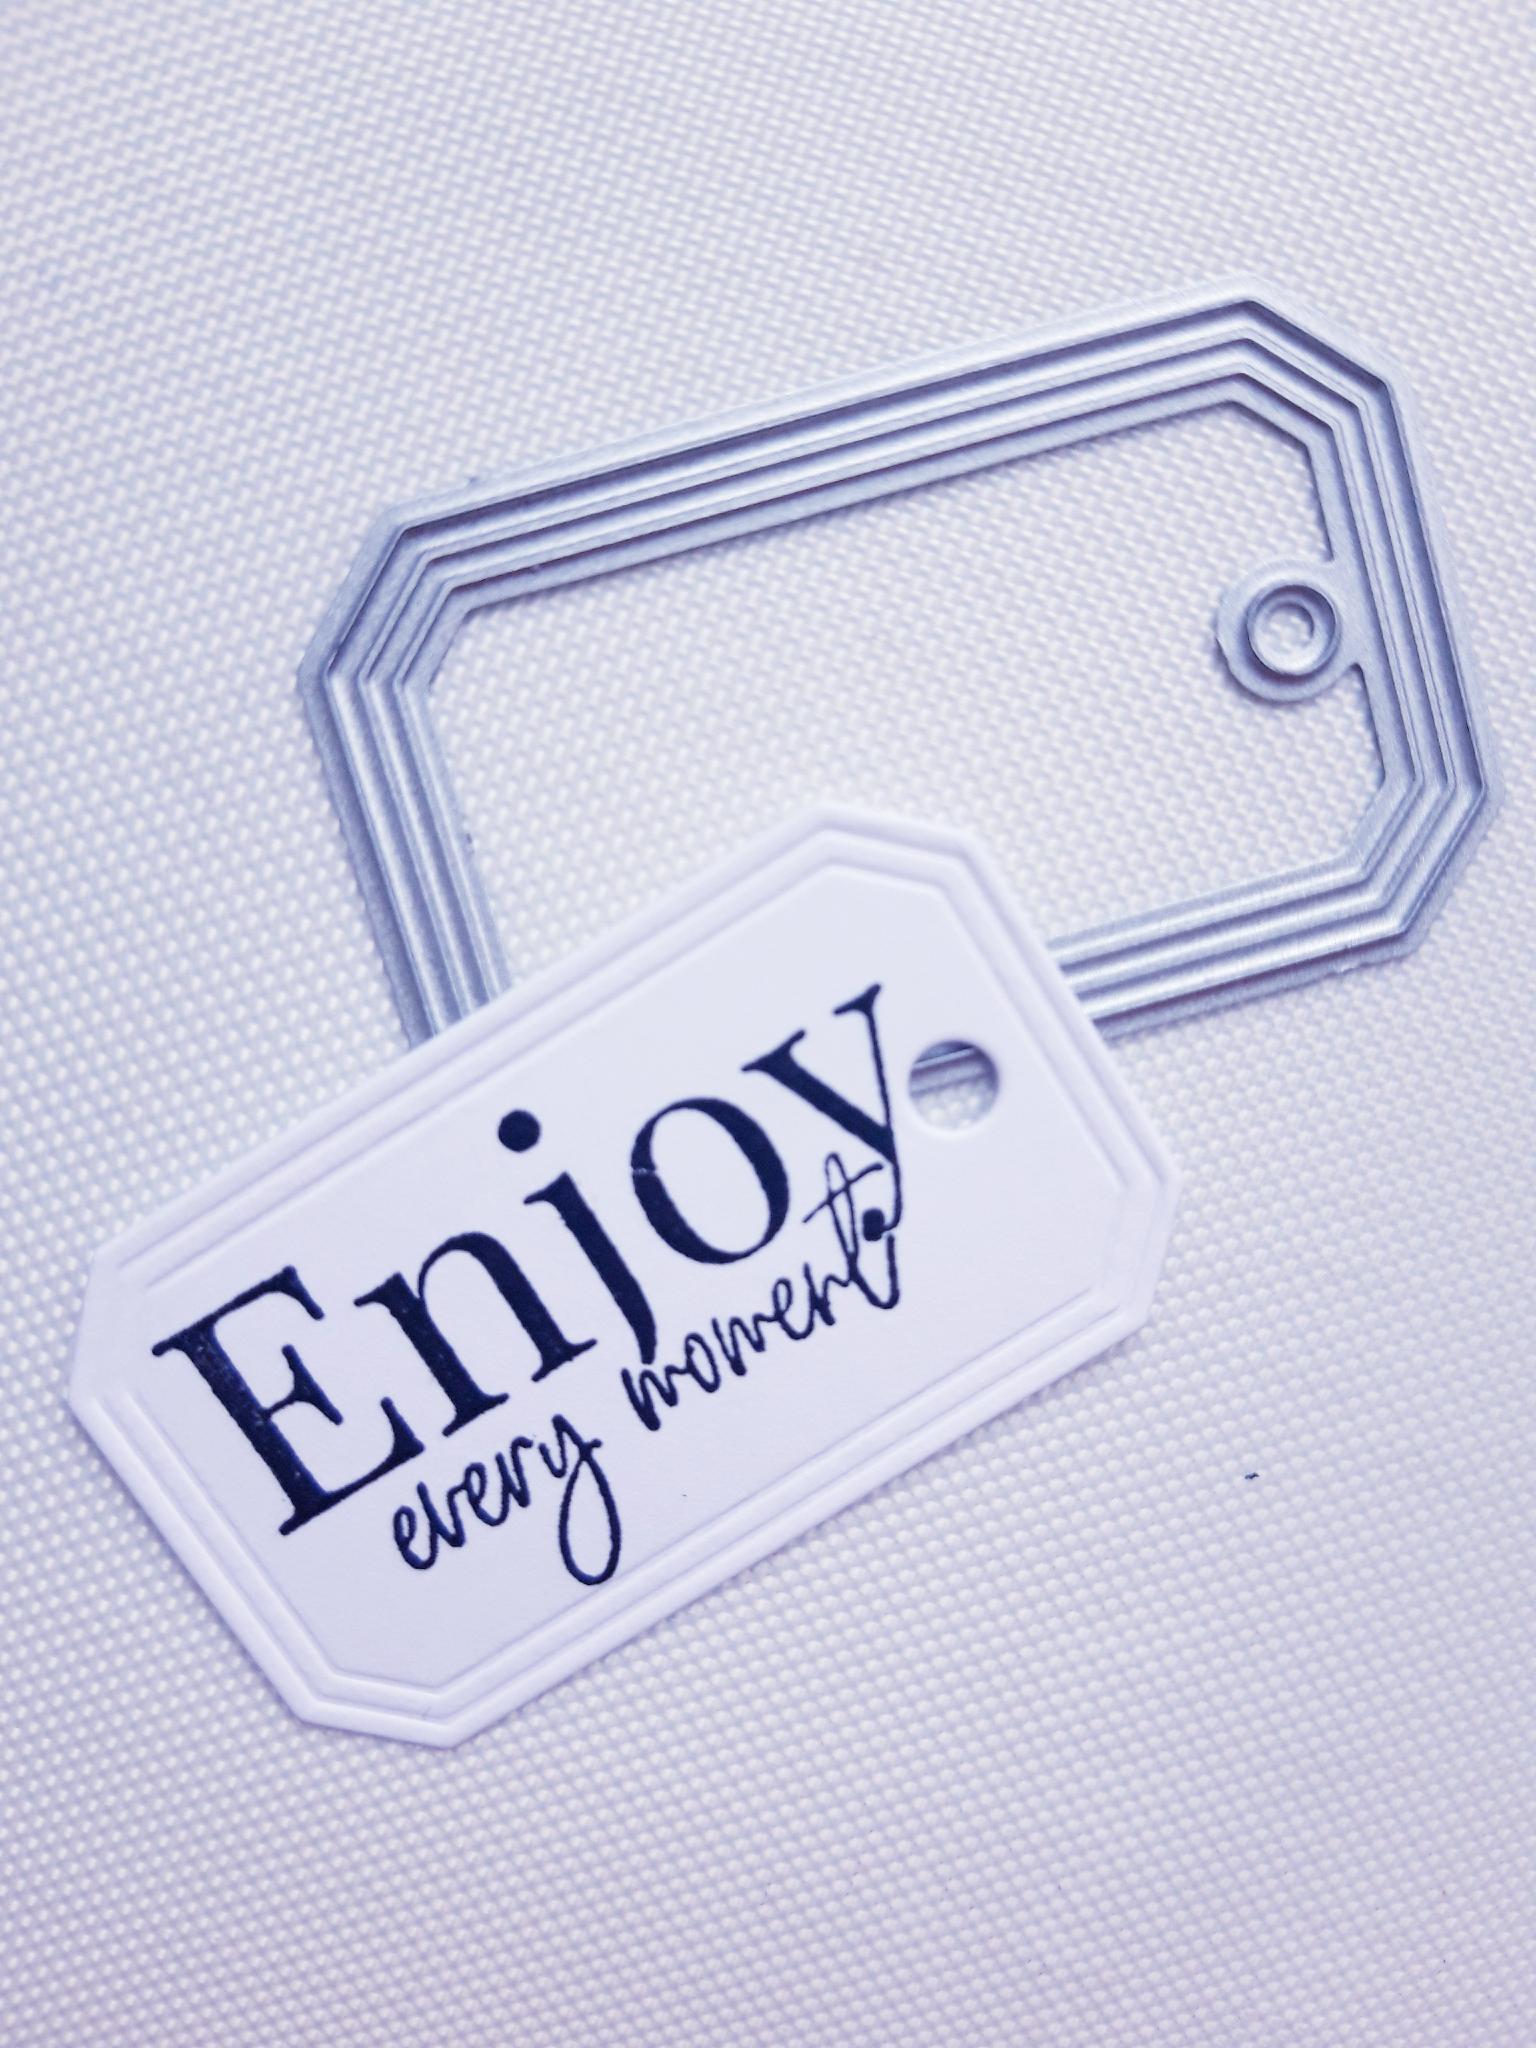
Die cut the tag die, from the same die collection, out of the white cardstock. Ink up the sentiment stamp, from the Possibility stamp and die set, in the Onyx Black Versafine. and stamp on to the die cut tag. |
|
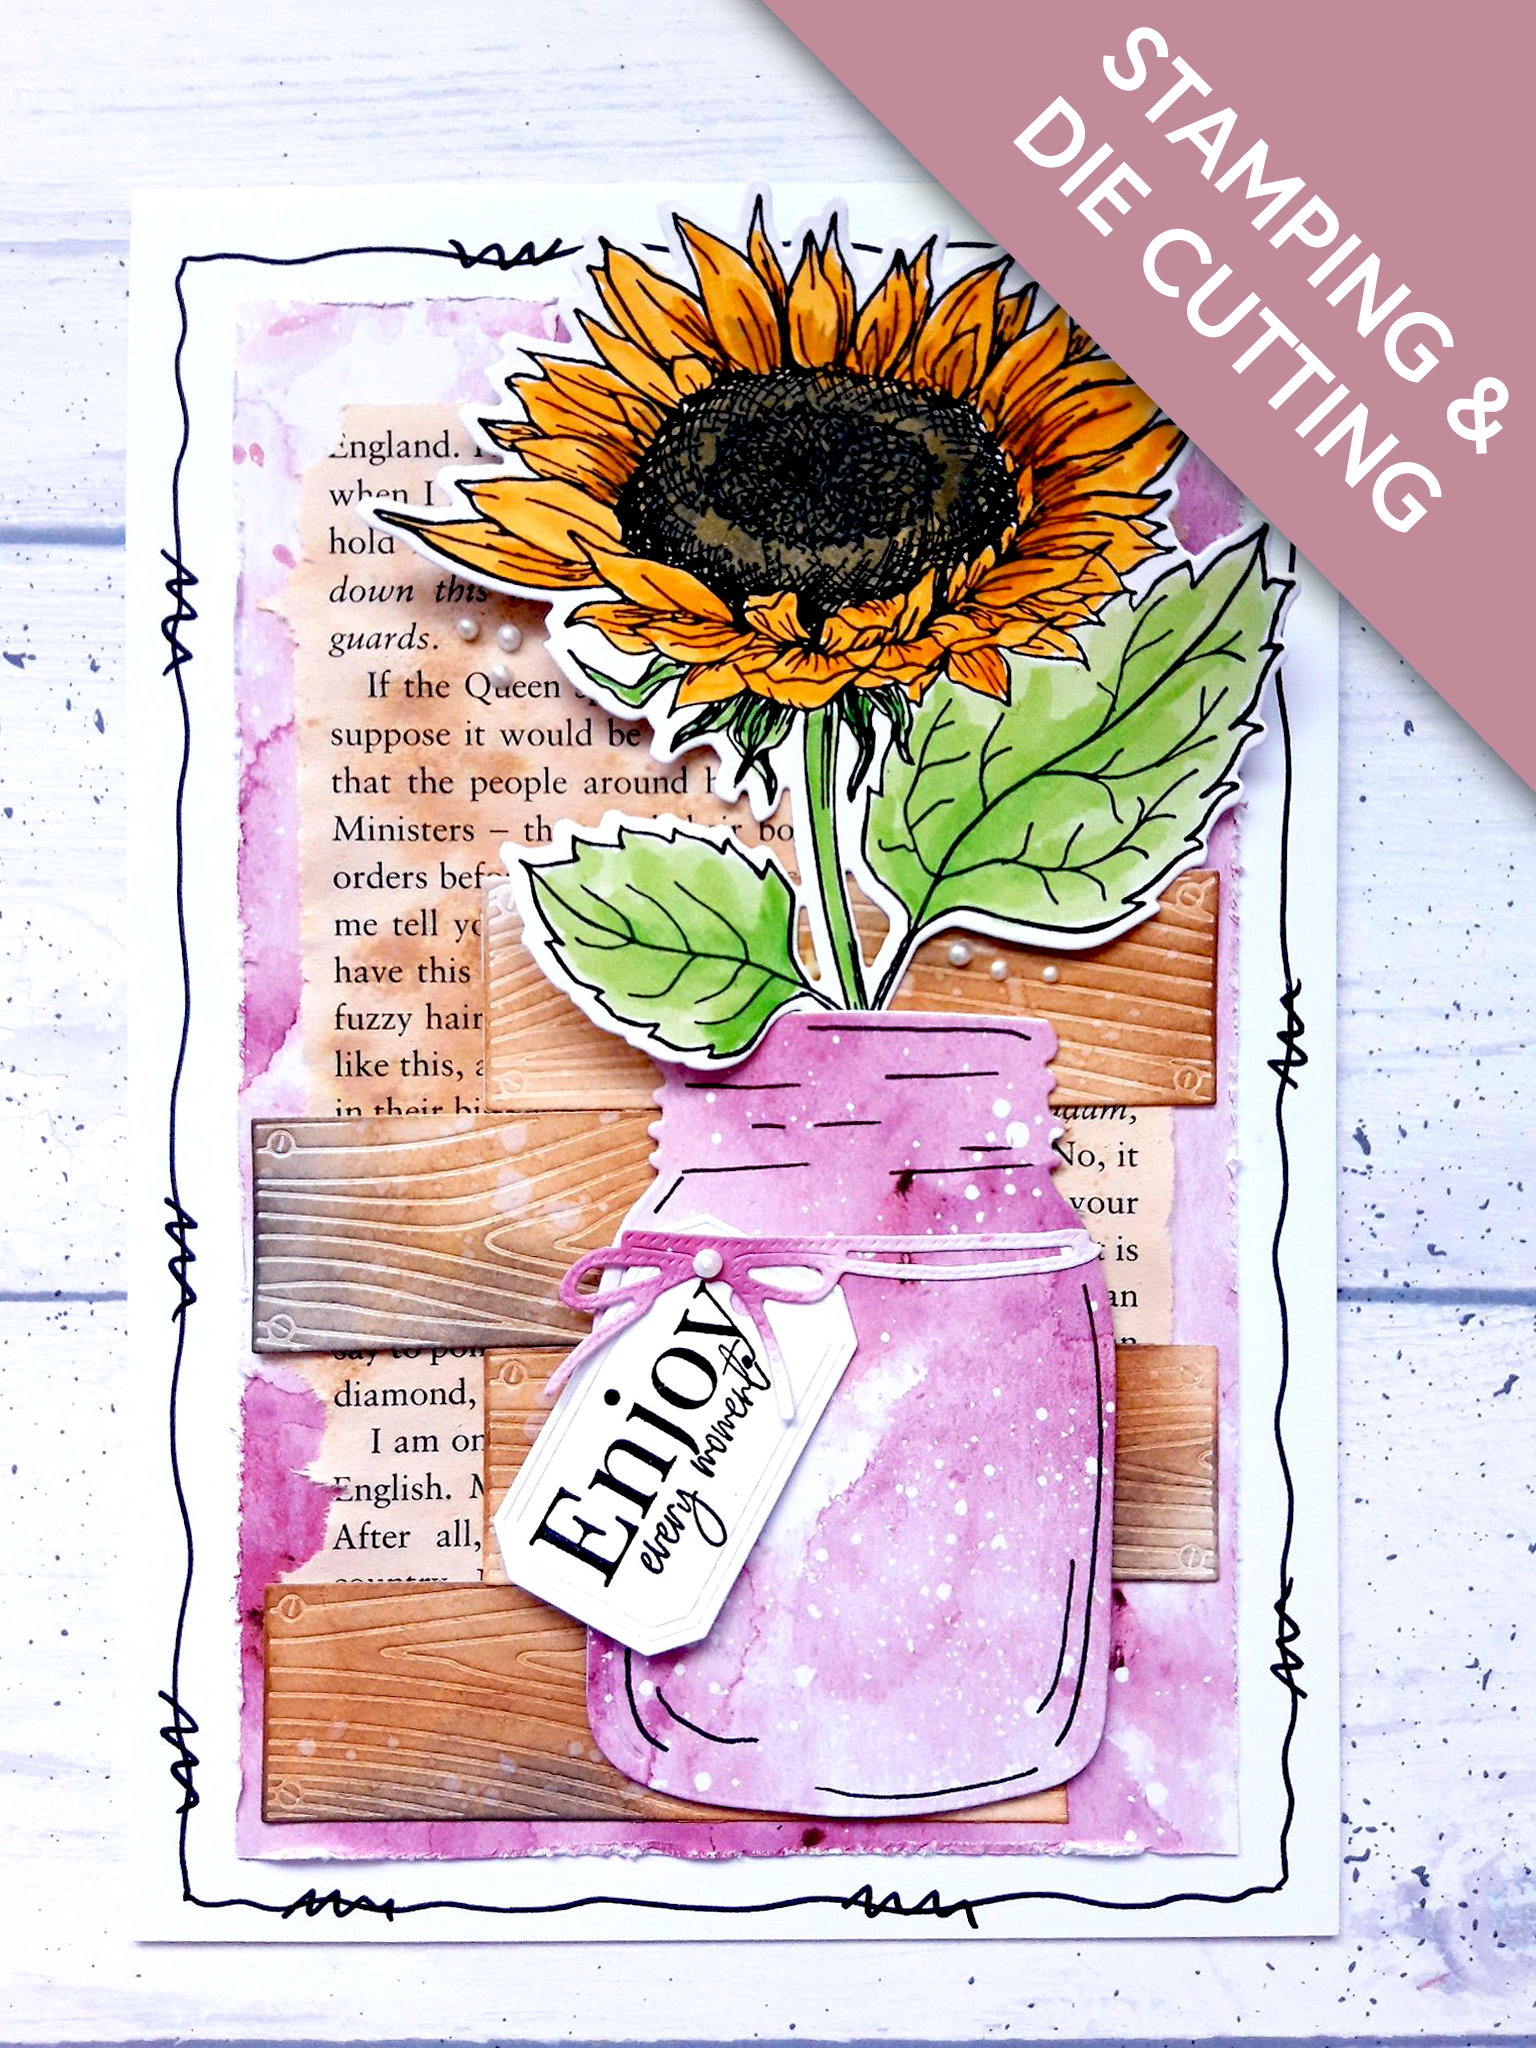
Curve your mason jar edges slightly, with your fingers. Adhere it to the bottom right of your prepped card blank, using foam pads, to give added dimension to the jar. NOTE: leave an open gap at the top of the jar, as you will be need to adhere your Sunflower later, so it sits just inside the top of the jar. Adhere the bow and tag in place. Set to one side. |
|
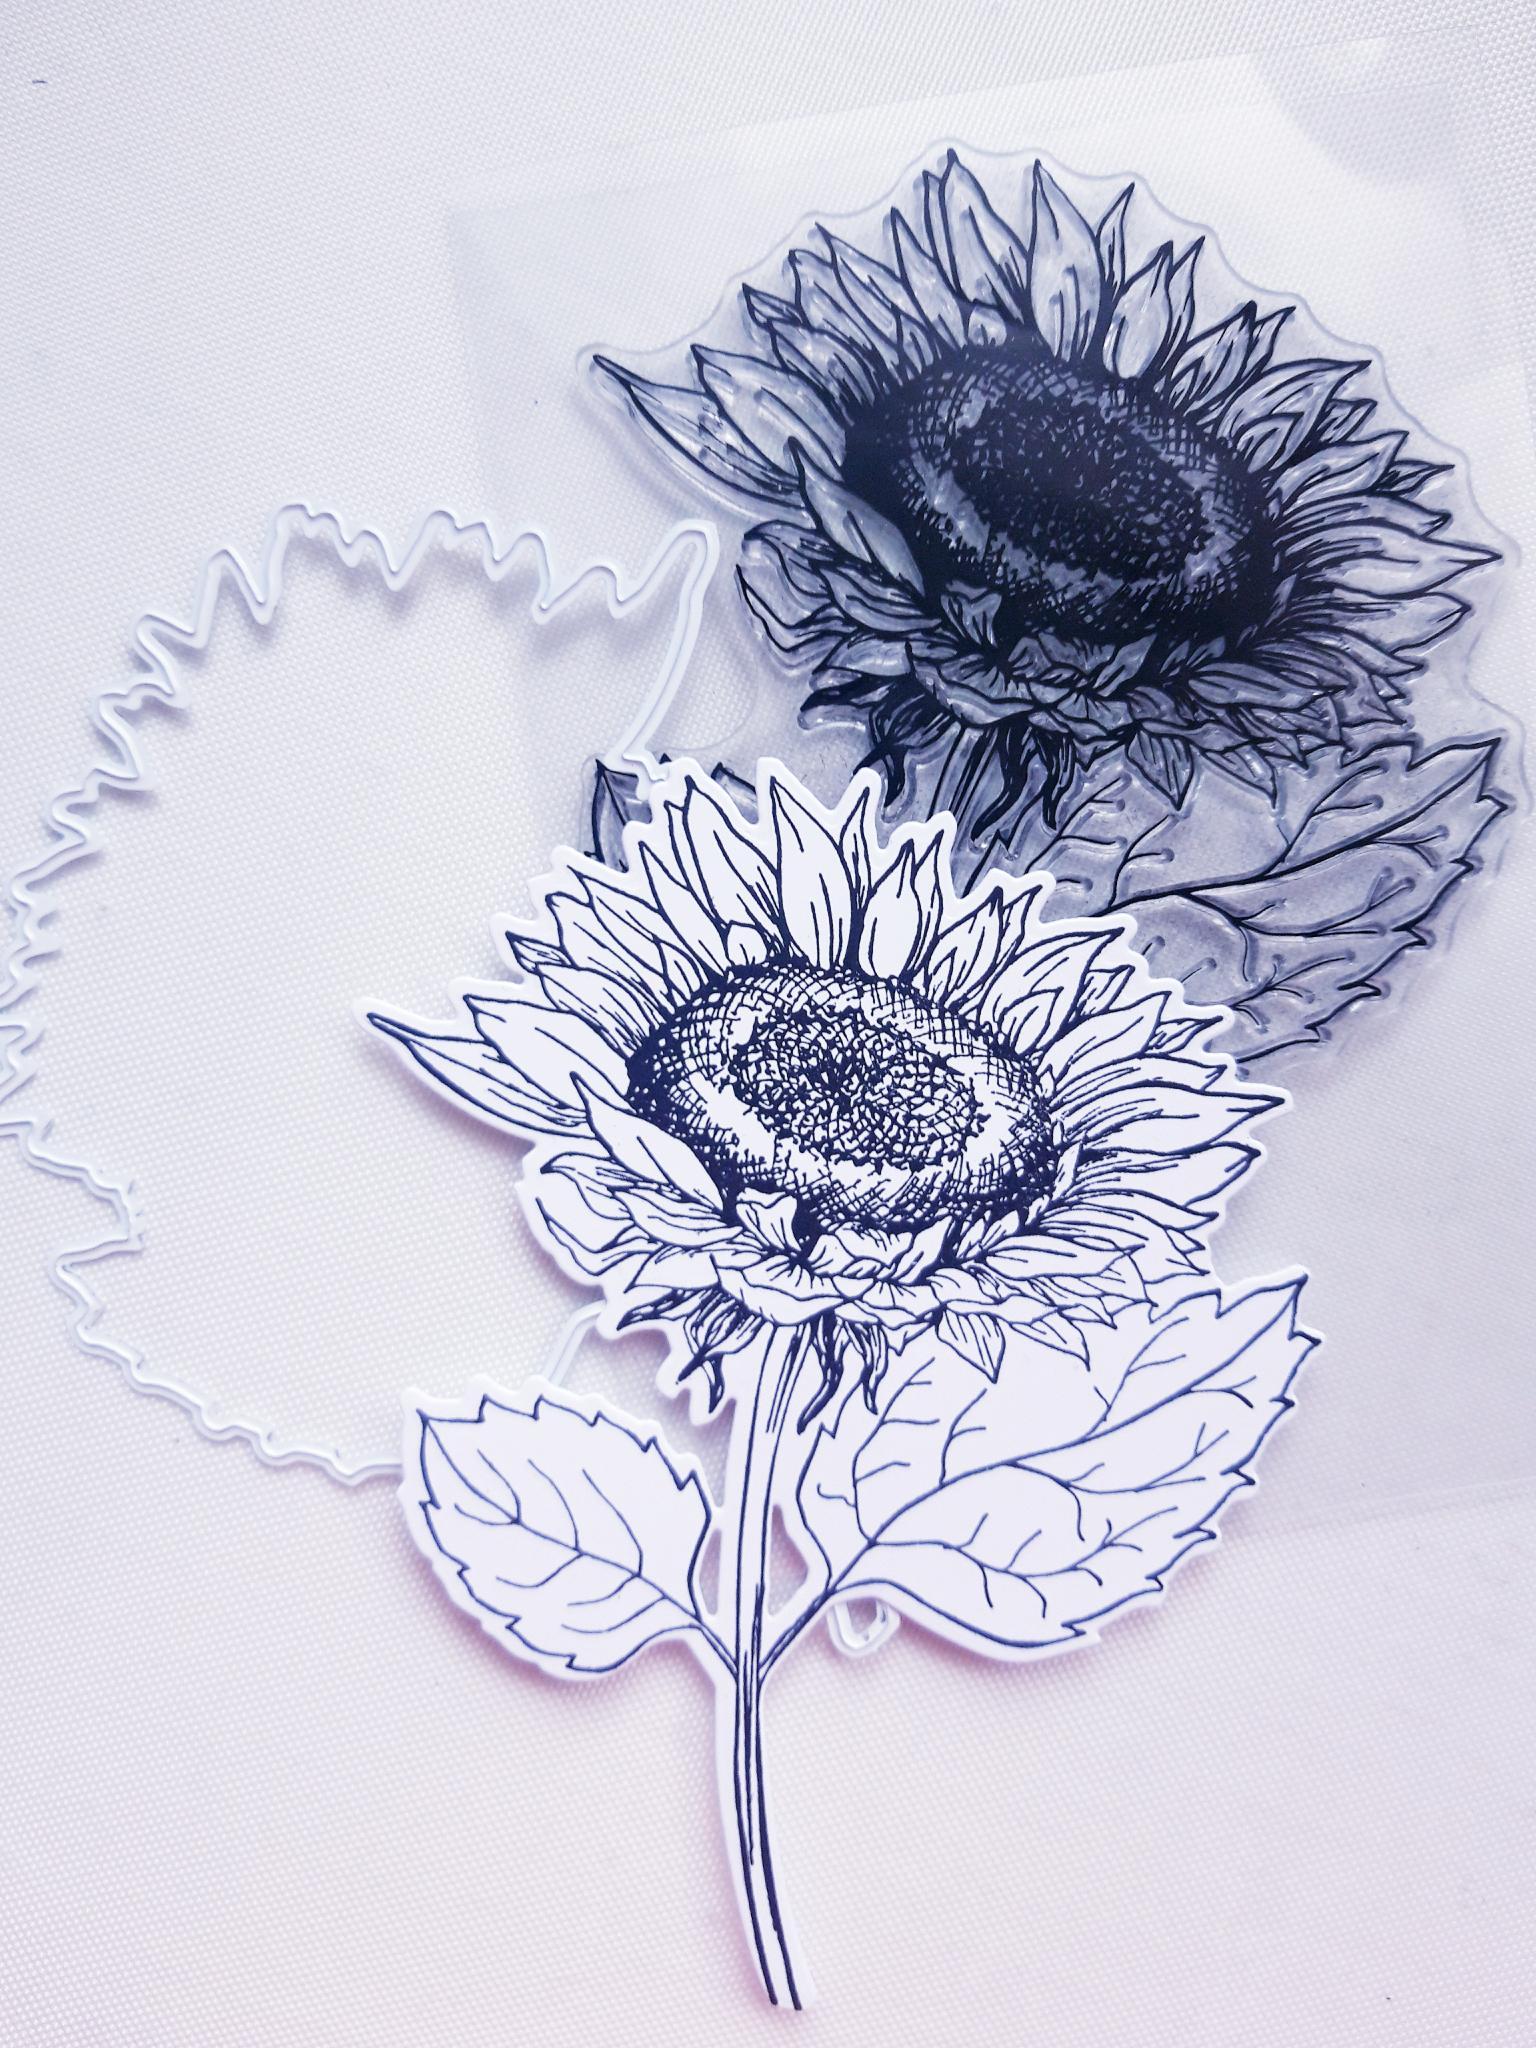
Ink up the Pretty Penny Sunflower stamp in the Onyx Black Versafine, and stamp on to the white cardstock. Use the coordinating die to cut it out. |
|
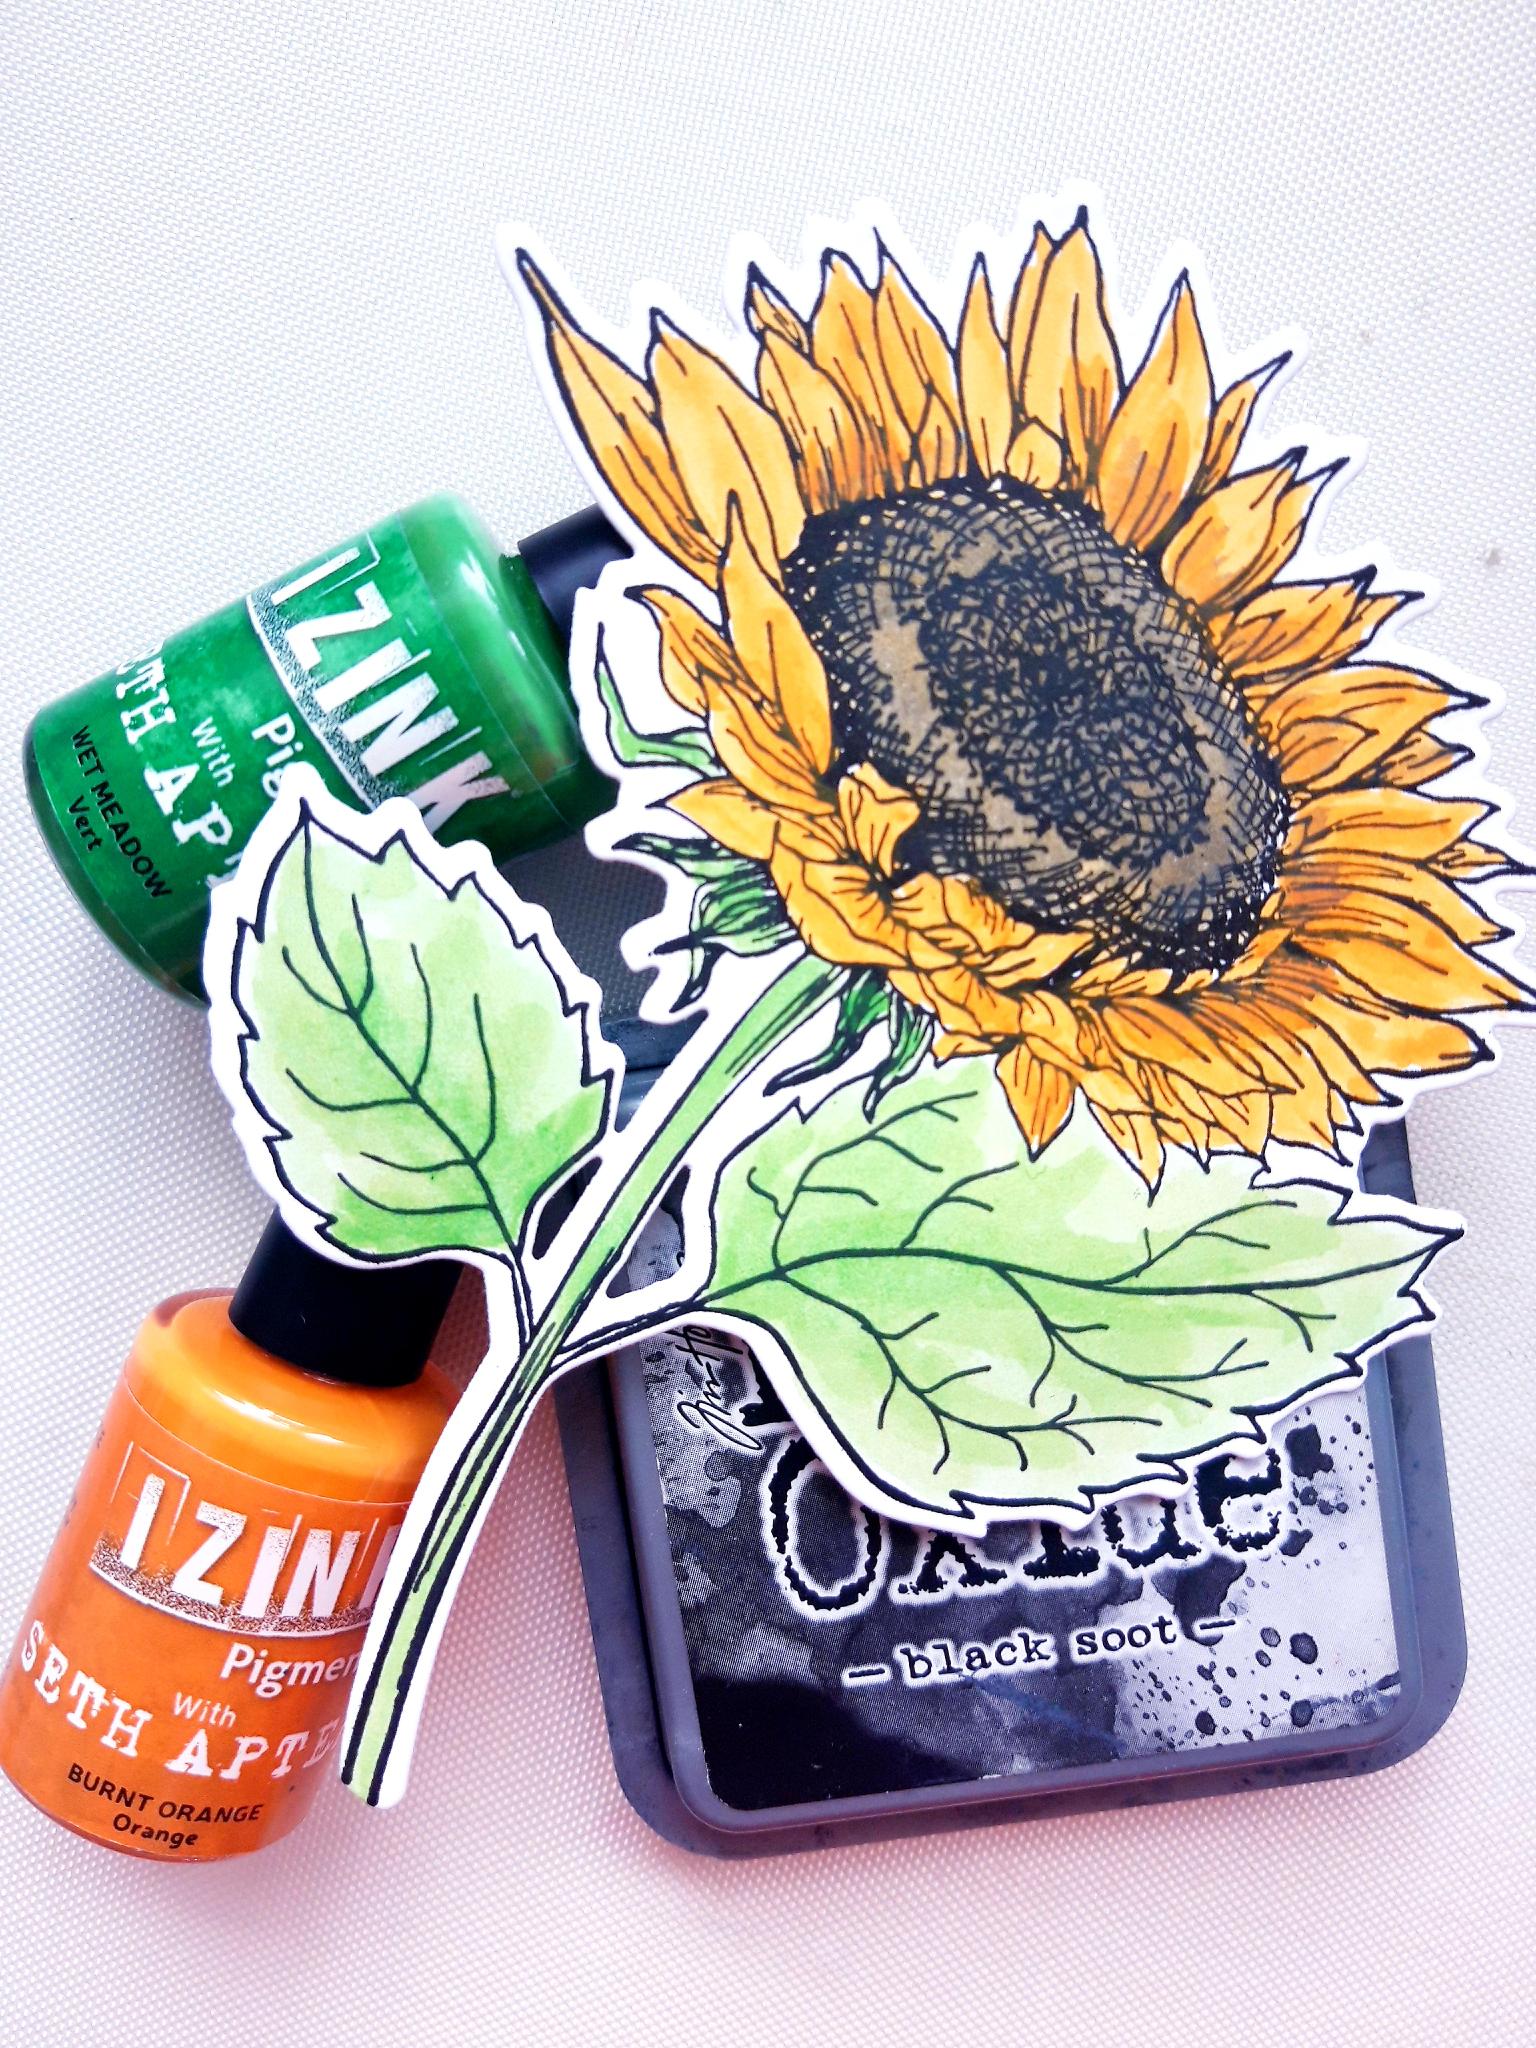
Add some of the Izink Pigments on to a glass or craft mat. Add a little water and use a paint brush to watercolour your Sunflower. Apply Black Soot Oxide on to the mat, and paint the centre of the Sunflower. |
|
Adhere the Sunflower in place, so it sits inside your jar, with one of the leaves hanging over the top edge of the jar, as shown. You may need to trim down the stem. You can use wet glue or foam pads, to add more dimension. |
|
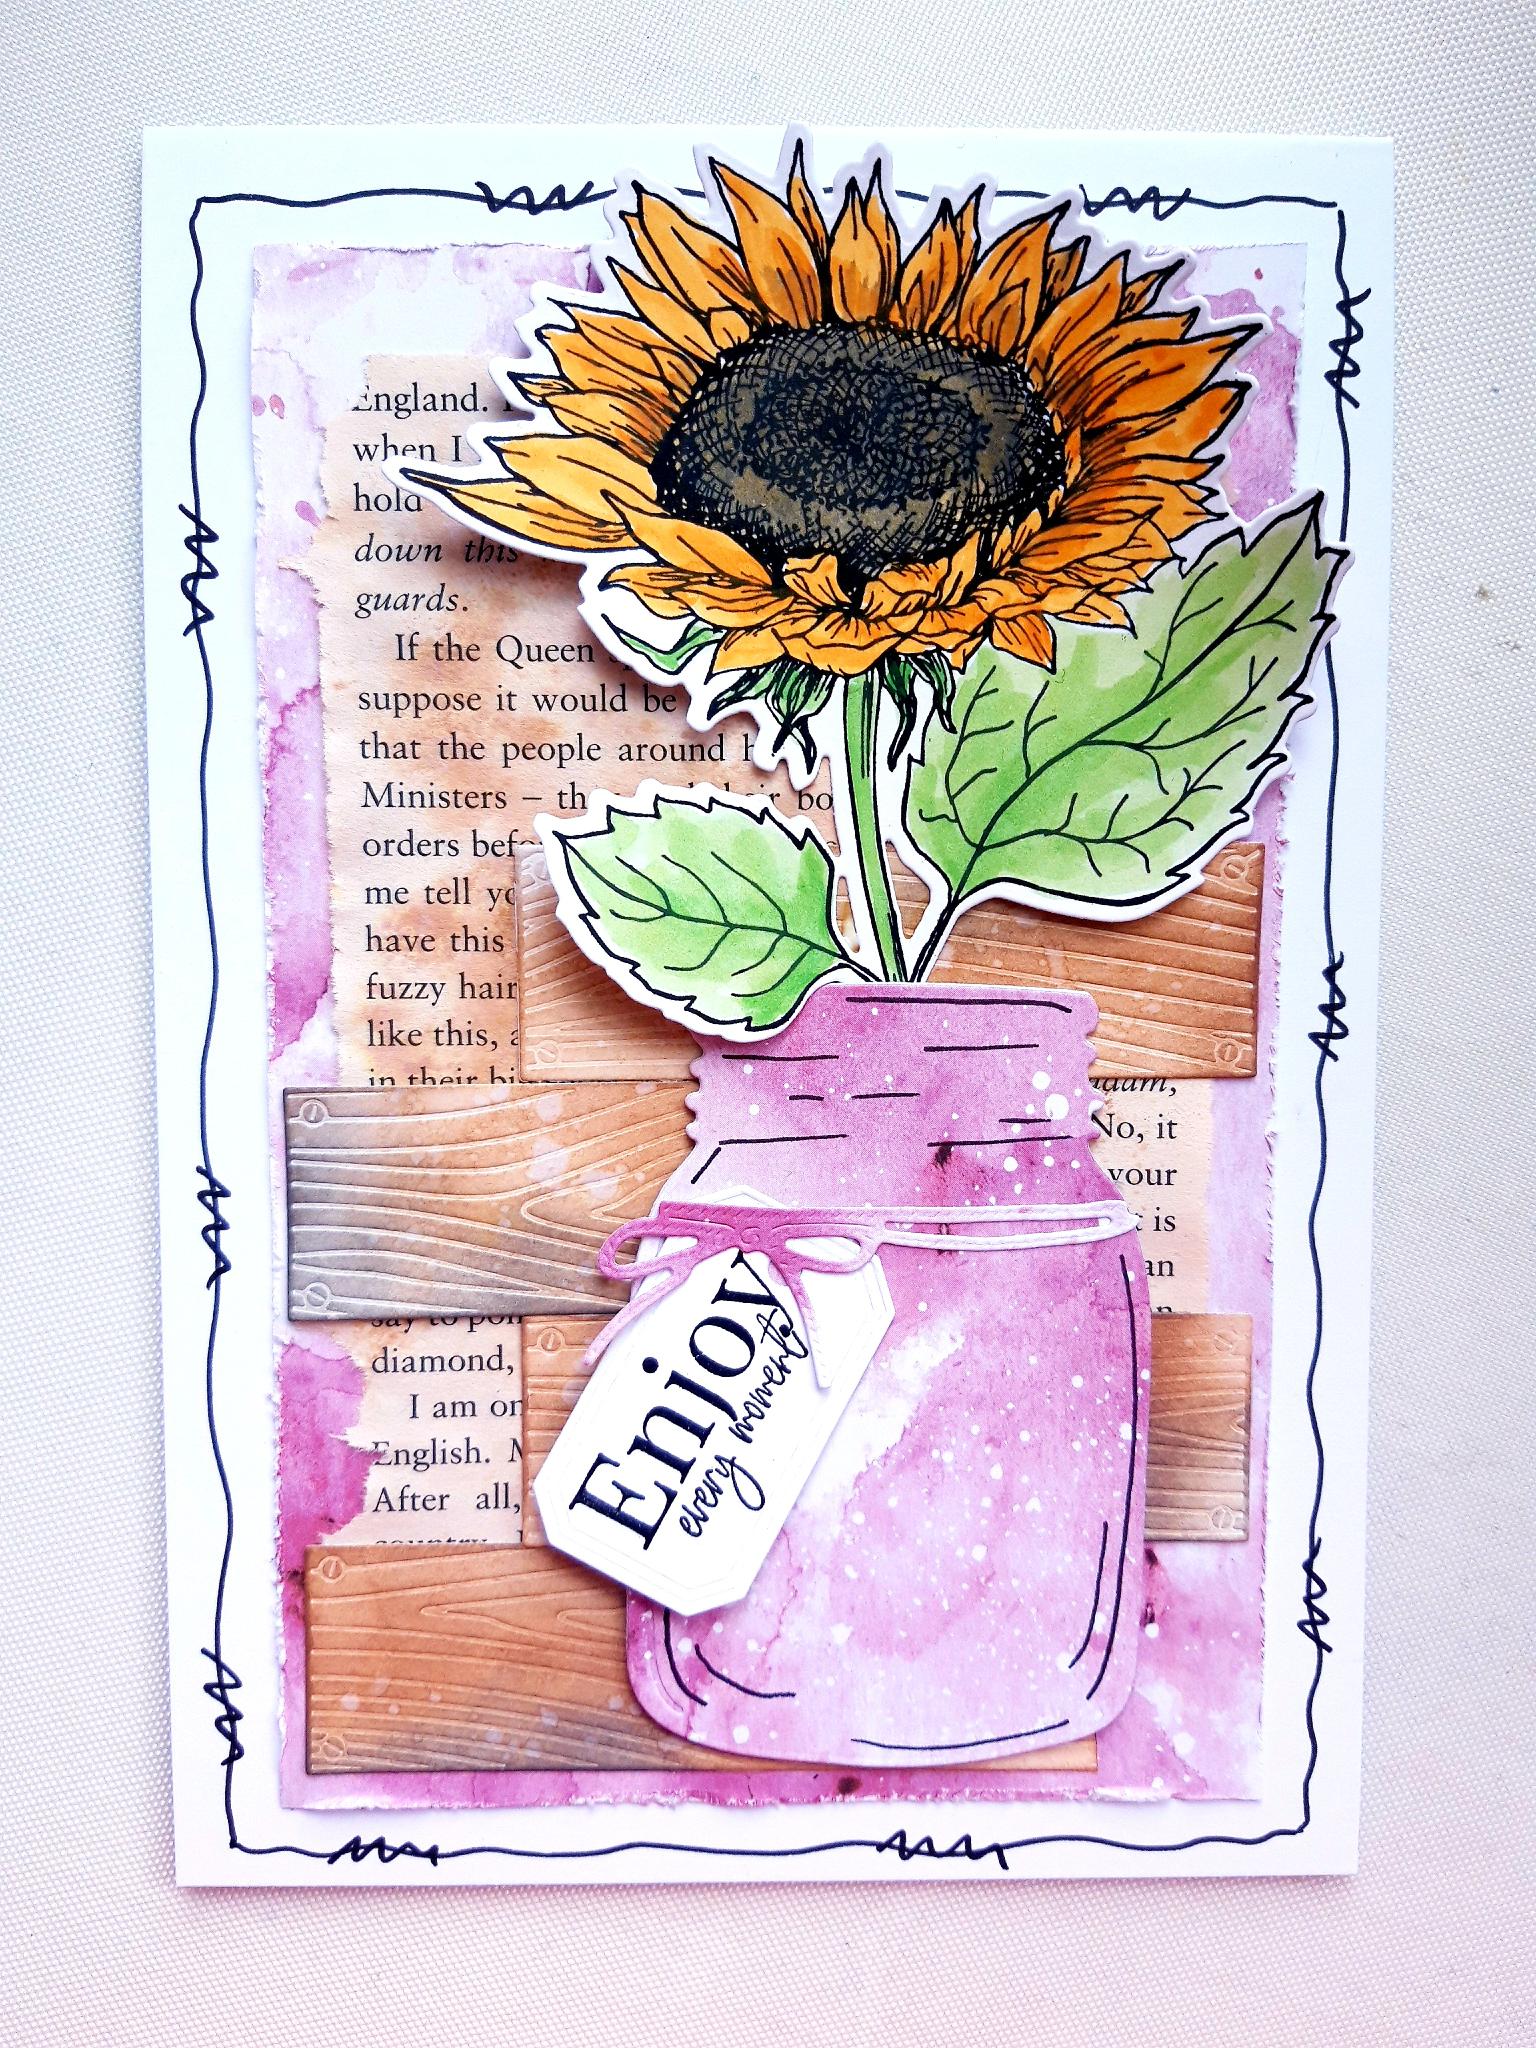
Use a black fine line pen to draw a wiggly frame around your artwork. Add any little accents to your frame, as desired. |
|
To finish off your card, add some pearl drops, where desired, using the Liquid Pearls. (Alternatively you can use adhesive gems, pearls or sequins). |