Give your friends $10 off their first order!
Refer a FRIEND


WHAT YOU WILL NEED:
Black top folding card blank - landscape (8 1/4 x 5 3/4")
White super smooth card (8 x 5 1/2")
White card A4
Black card (2 x 1 3/4")
Avago Ink Designs Joyful Journey Stamp And Die Collection
Avago Ink Designs Festive Penguins Stamp And Die Collection
Versafine Ink Pad: Onyx Black
Memento Ink Pad: Tuxedo Black
Gossip Alcohol Markers - Choose your own colour combination
Distress Oxide: Unchartered Mariner, Kitsch Flamingo, Villainous Potion
Blending tool
Pearlywinks Pearl Mist : Glitter Pearl
Izink Diamond Paint: Nacre
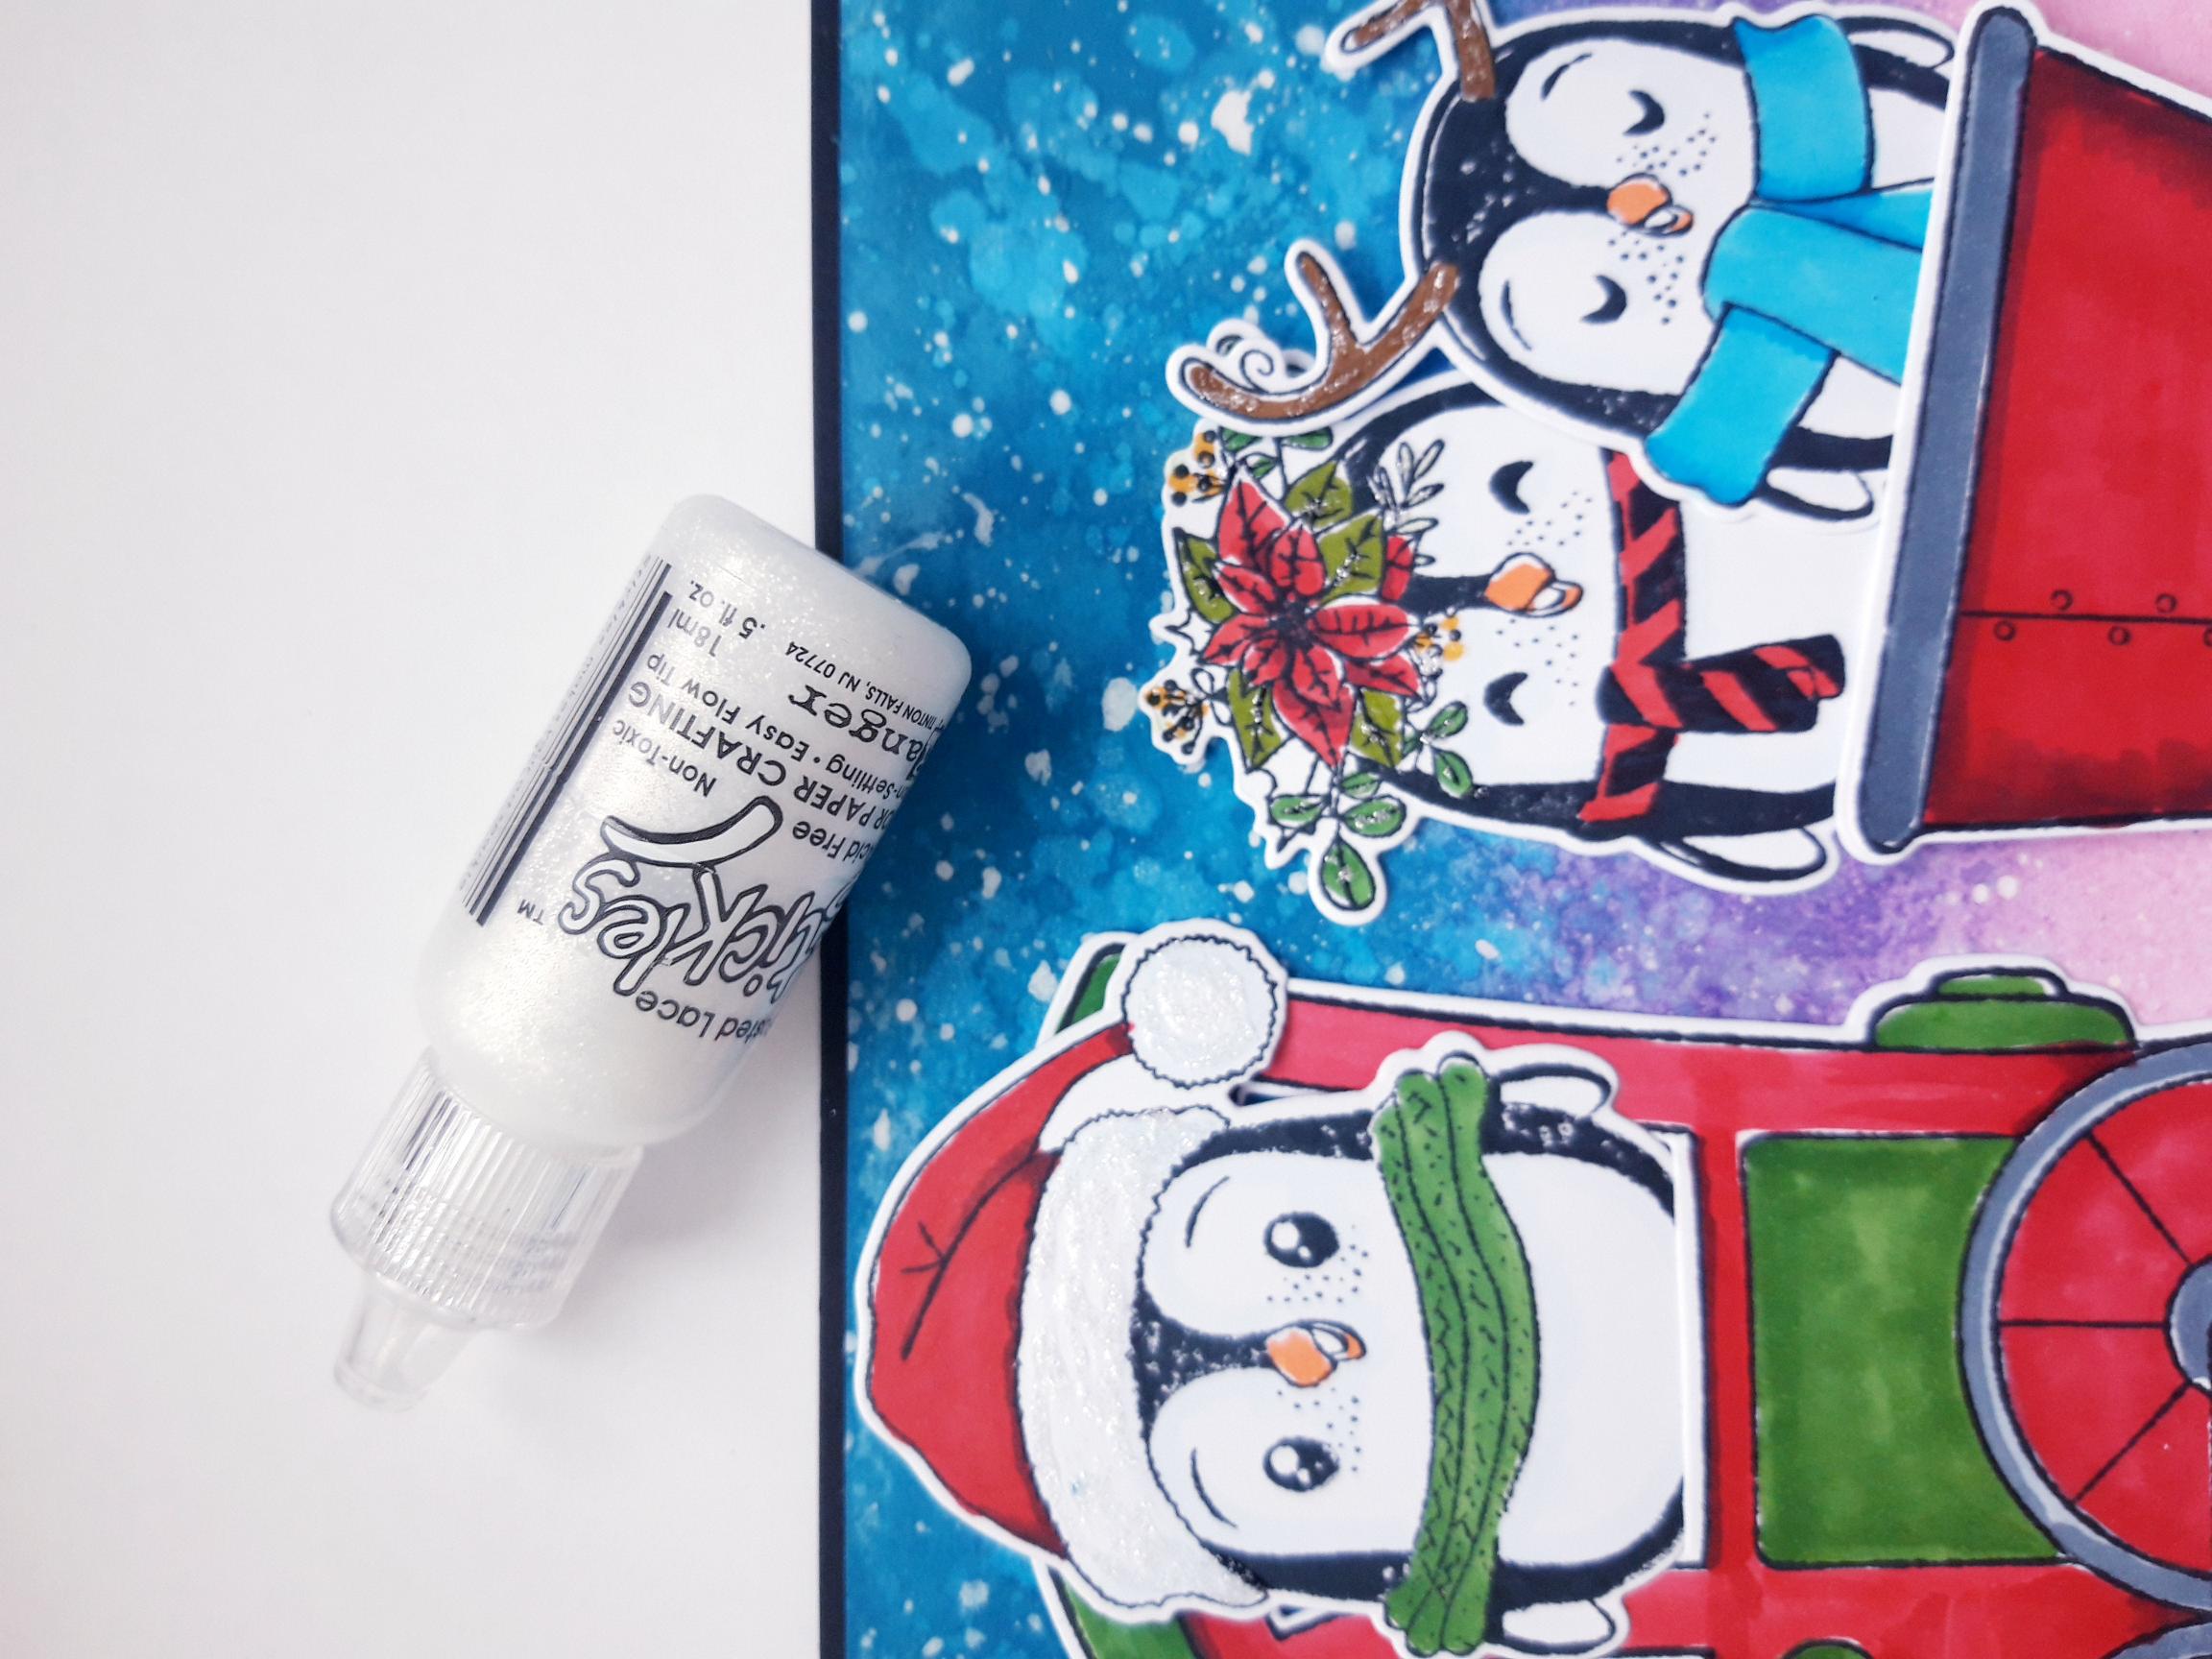
Stickles: Frosted Lace
Thirsty Brush Confetti Paint: White Lace
Eureka 101
Paper Trimmer
Perfect Together Glue
Foam Pads
Pinflair 3D glue gel (Optional)
Die Cutting machine
[click image to enlarge] 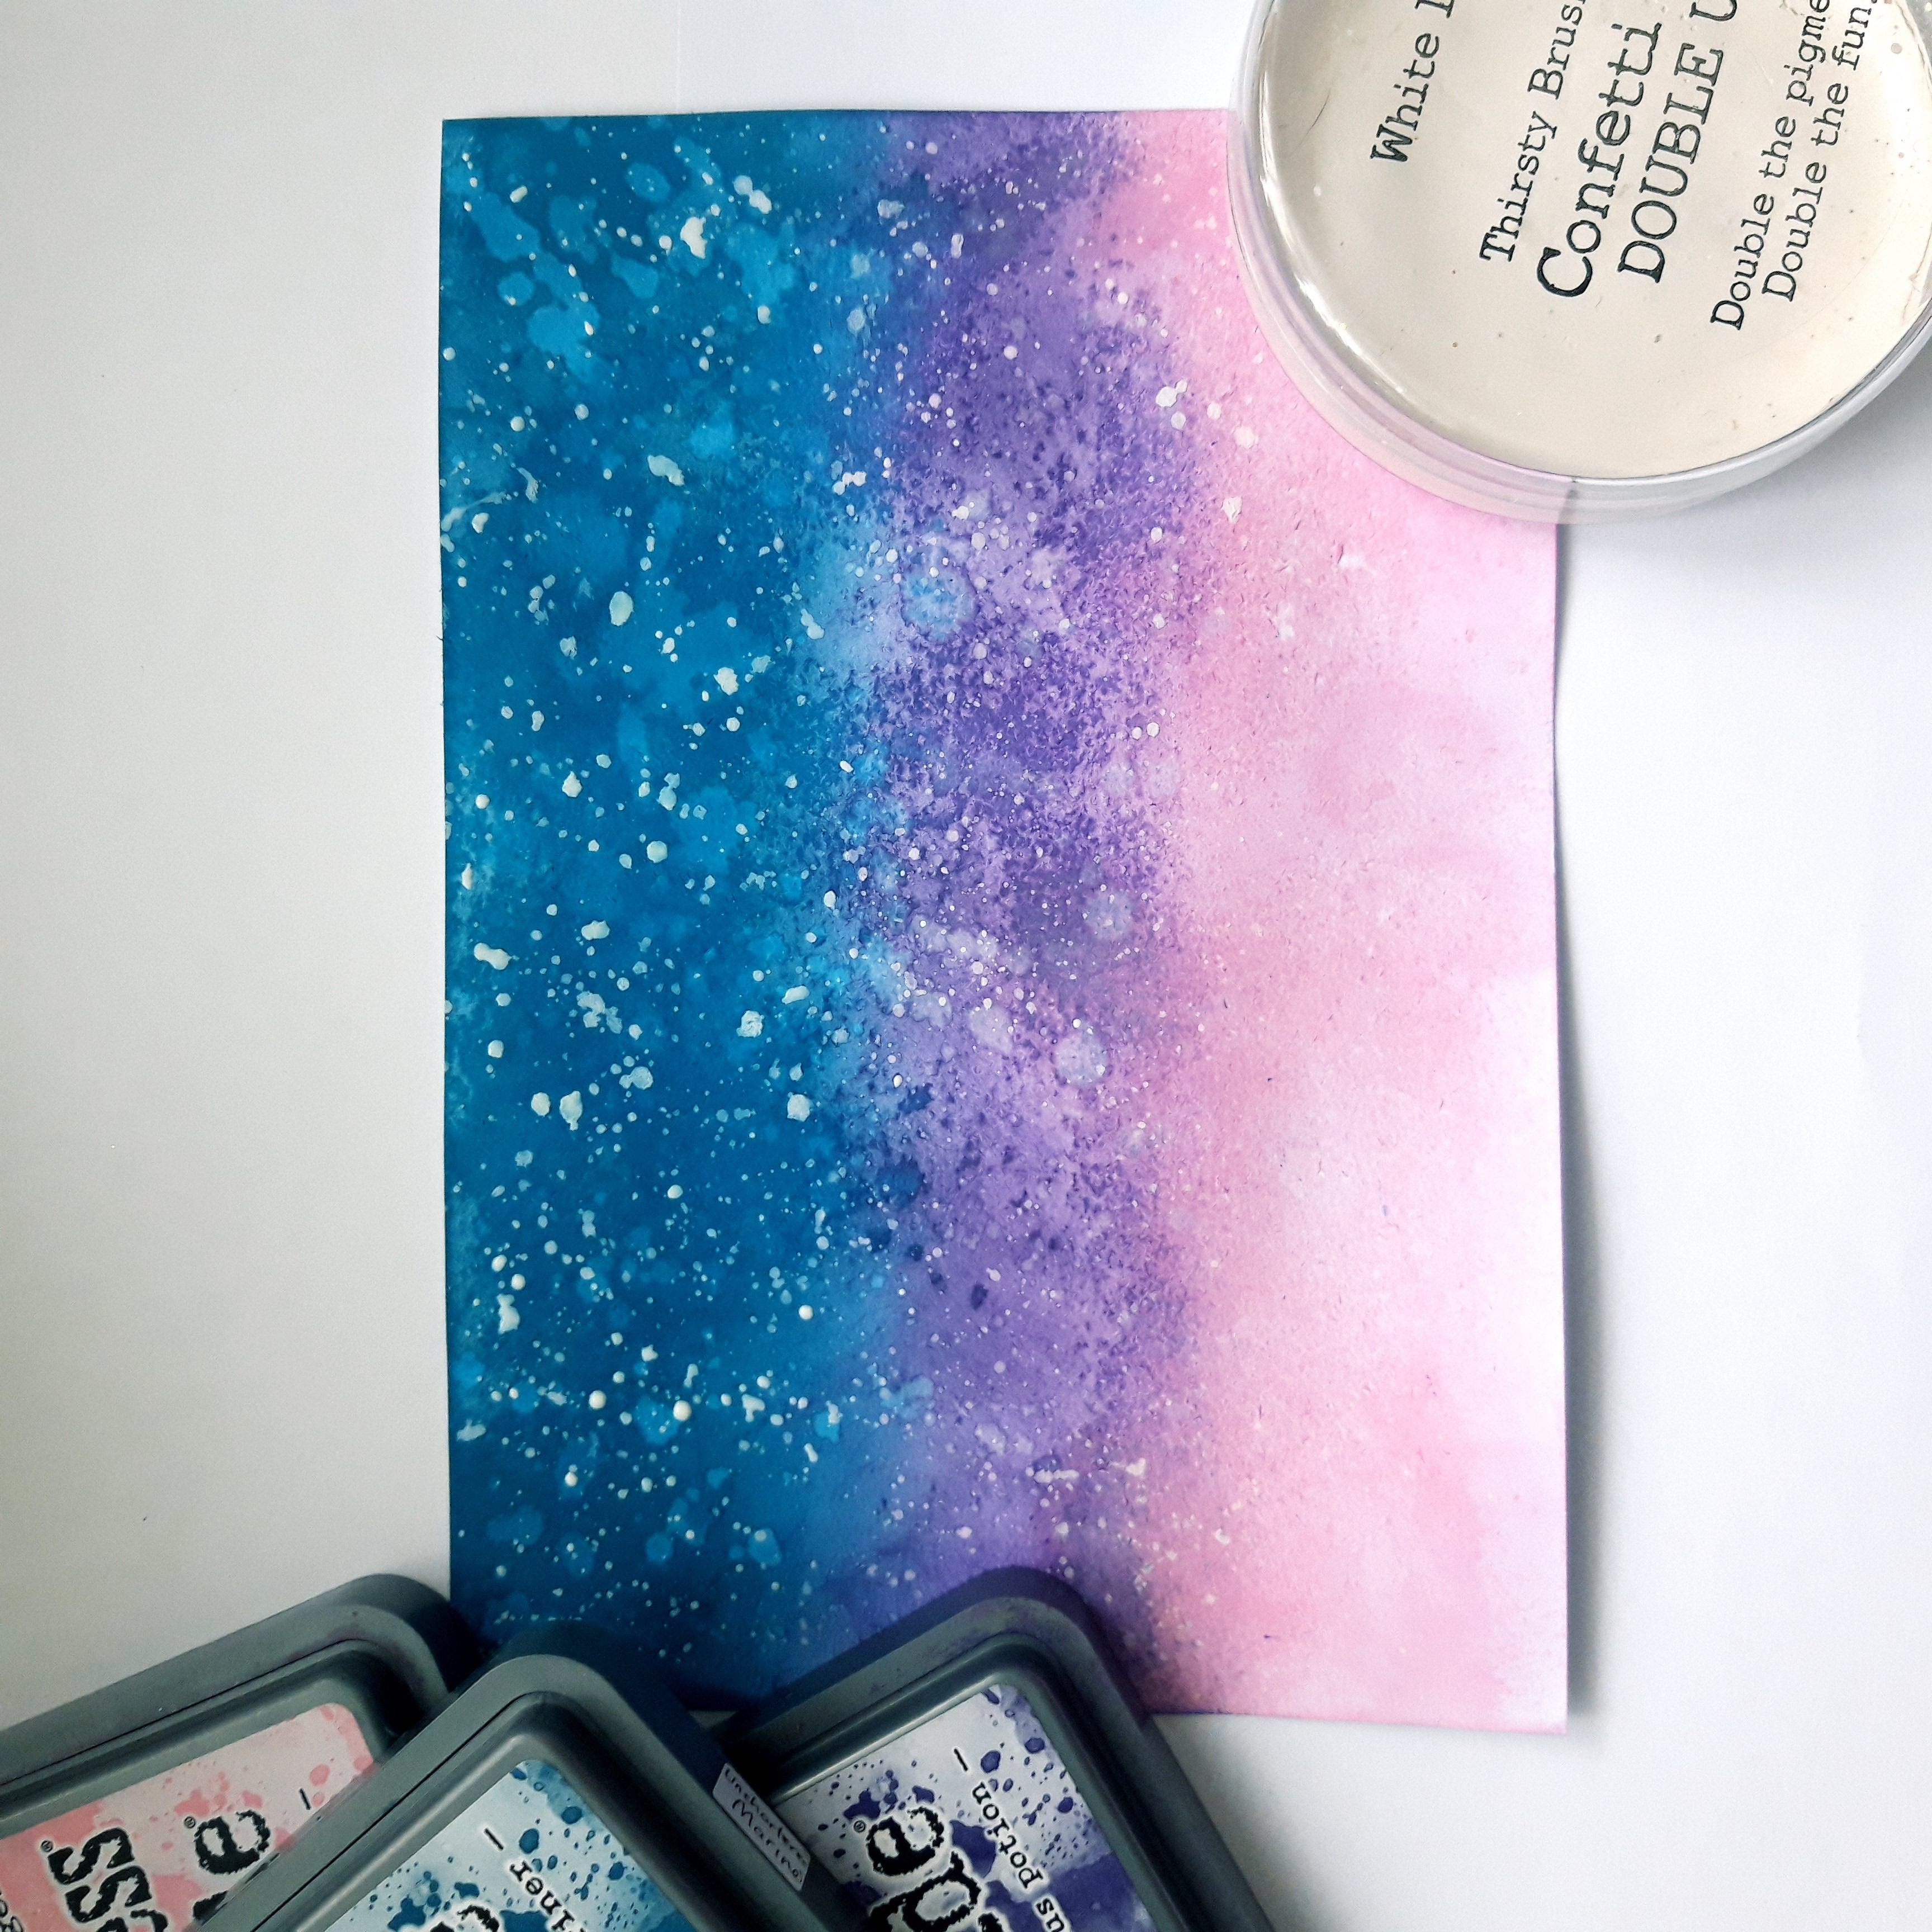
|
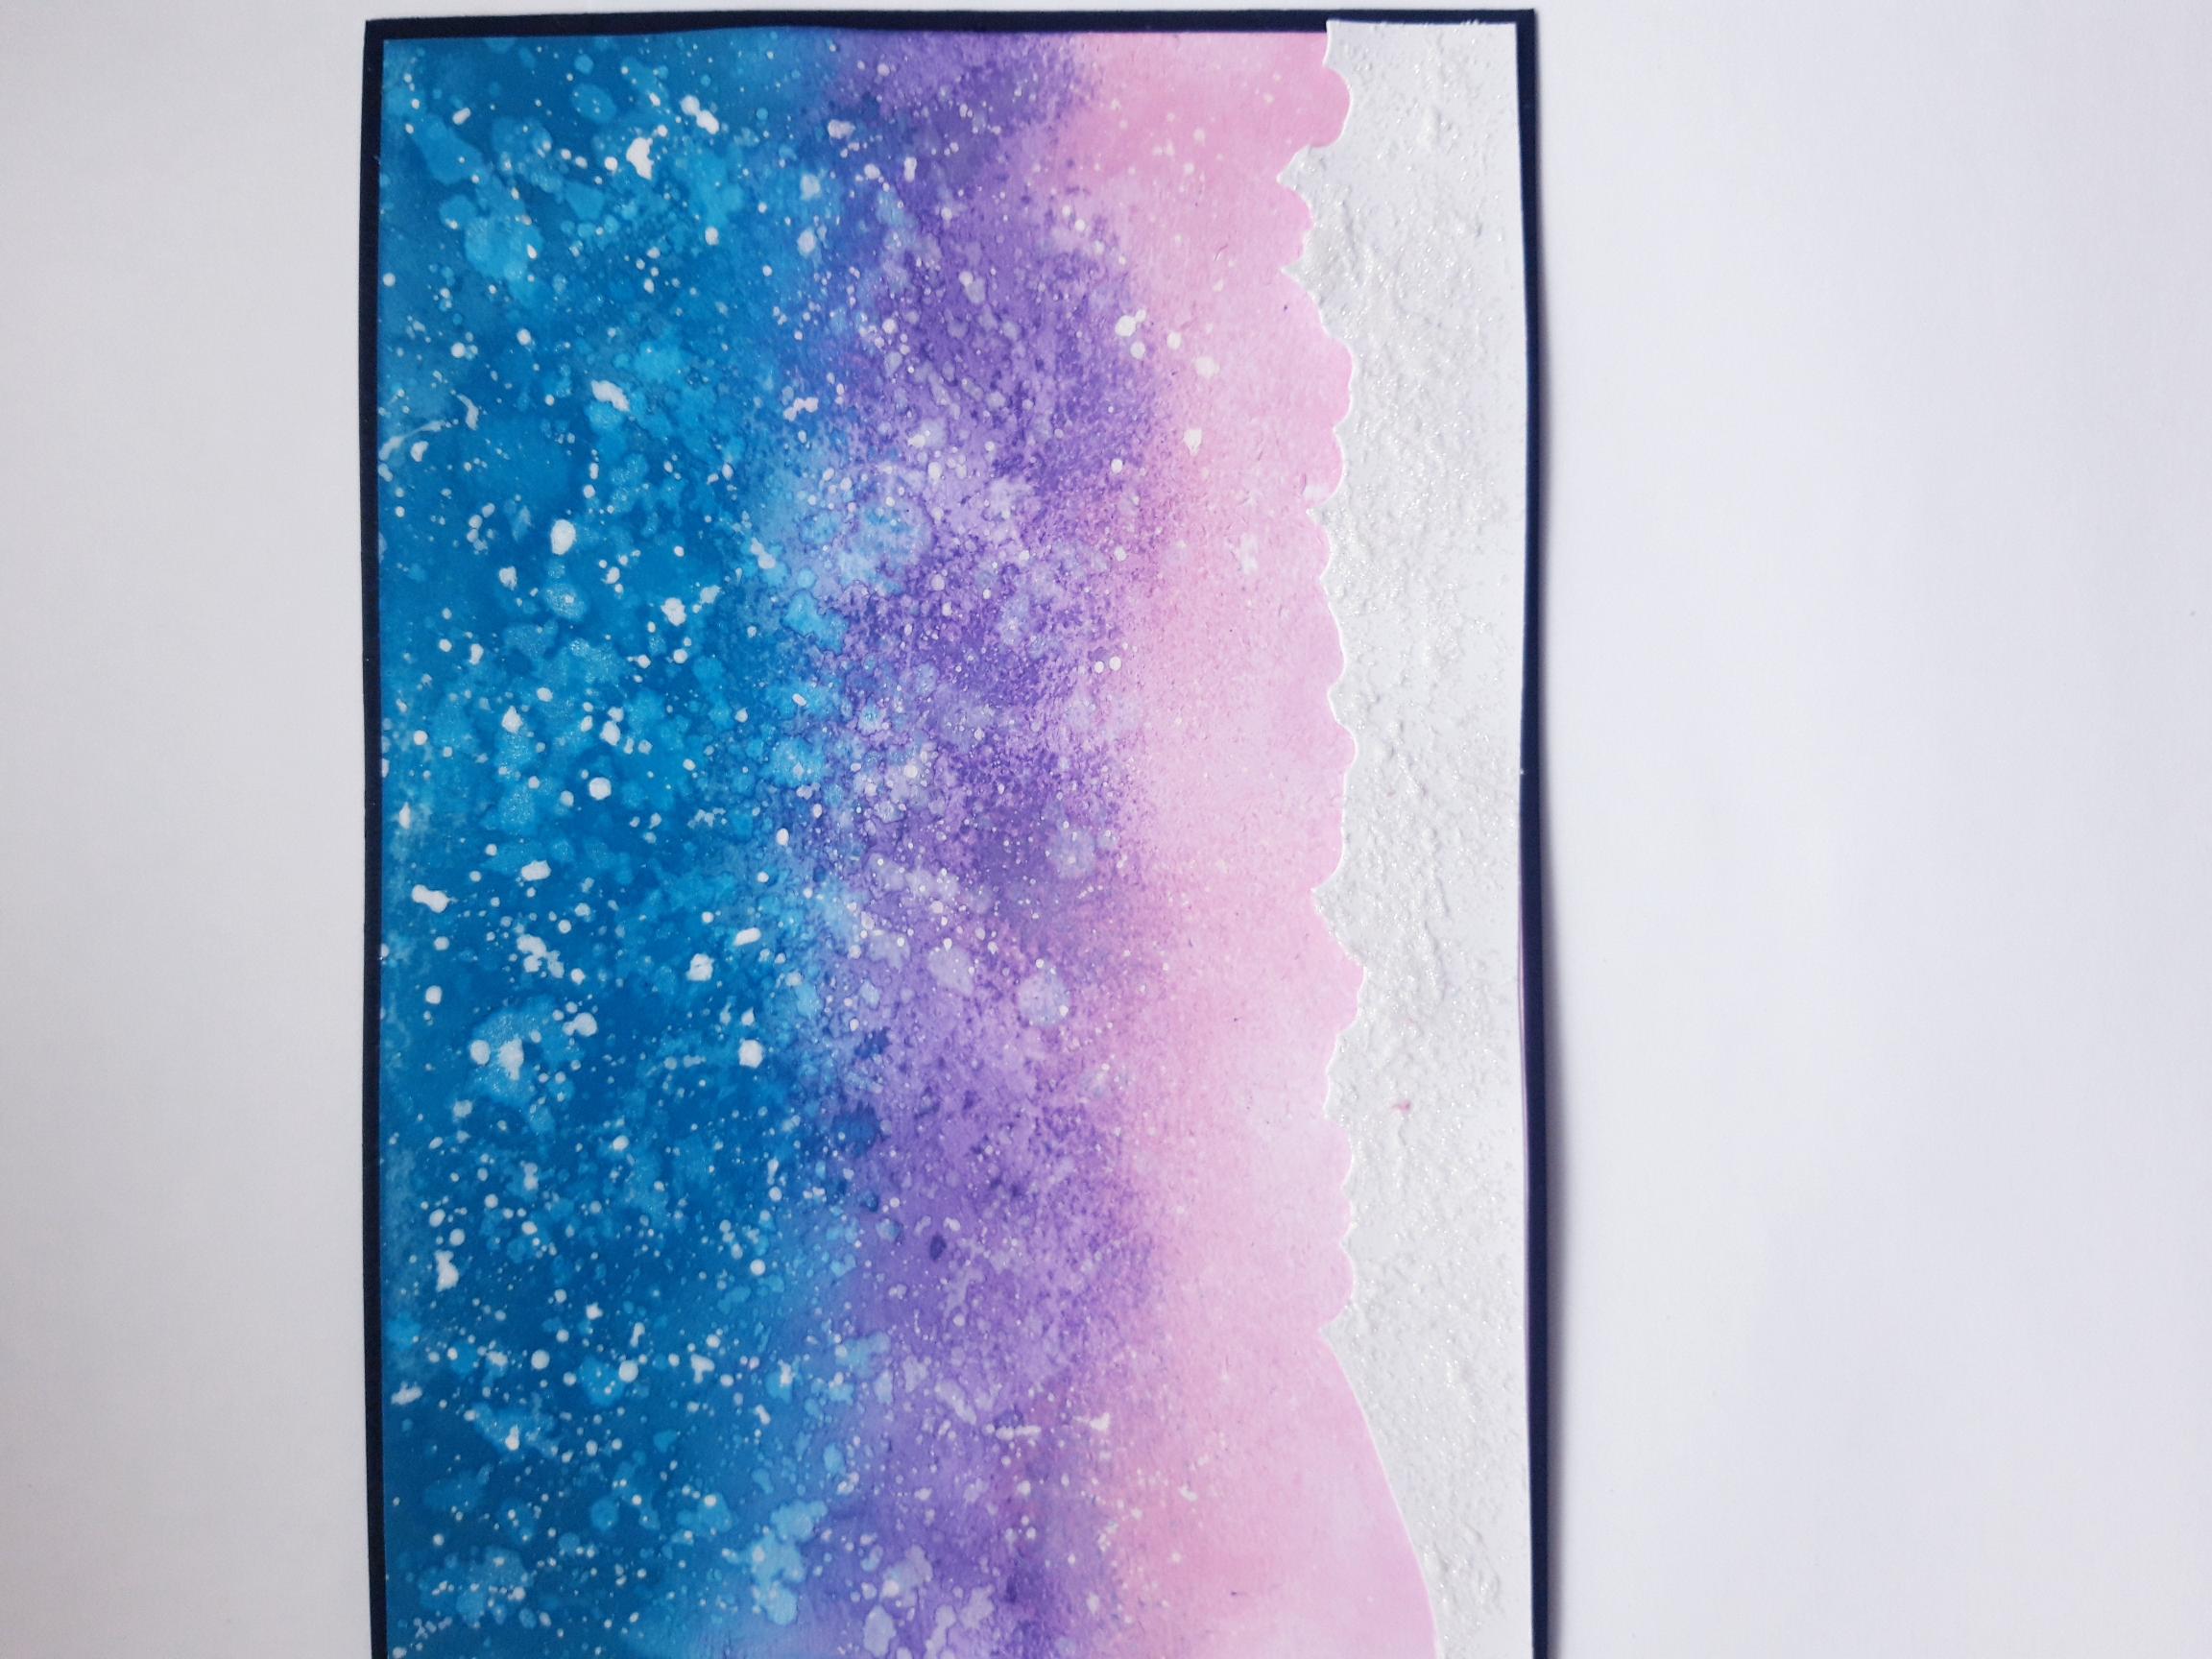
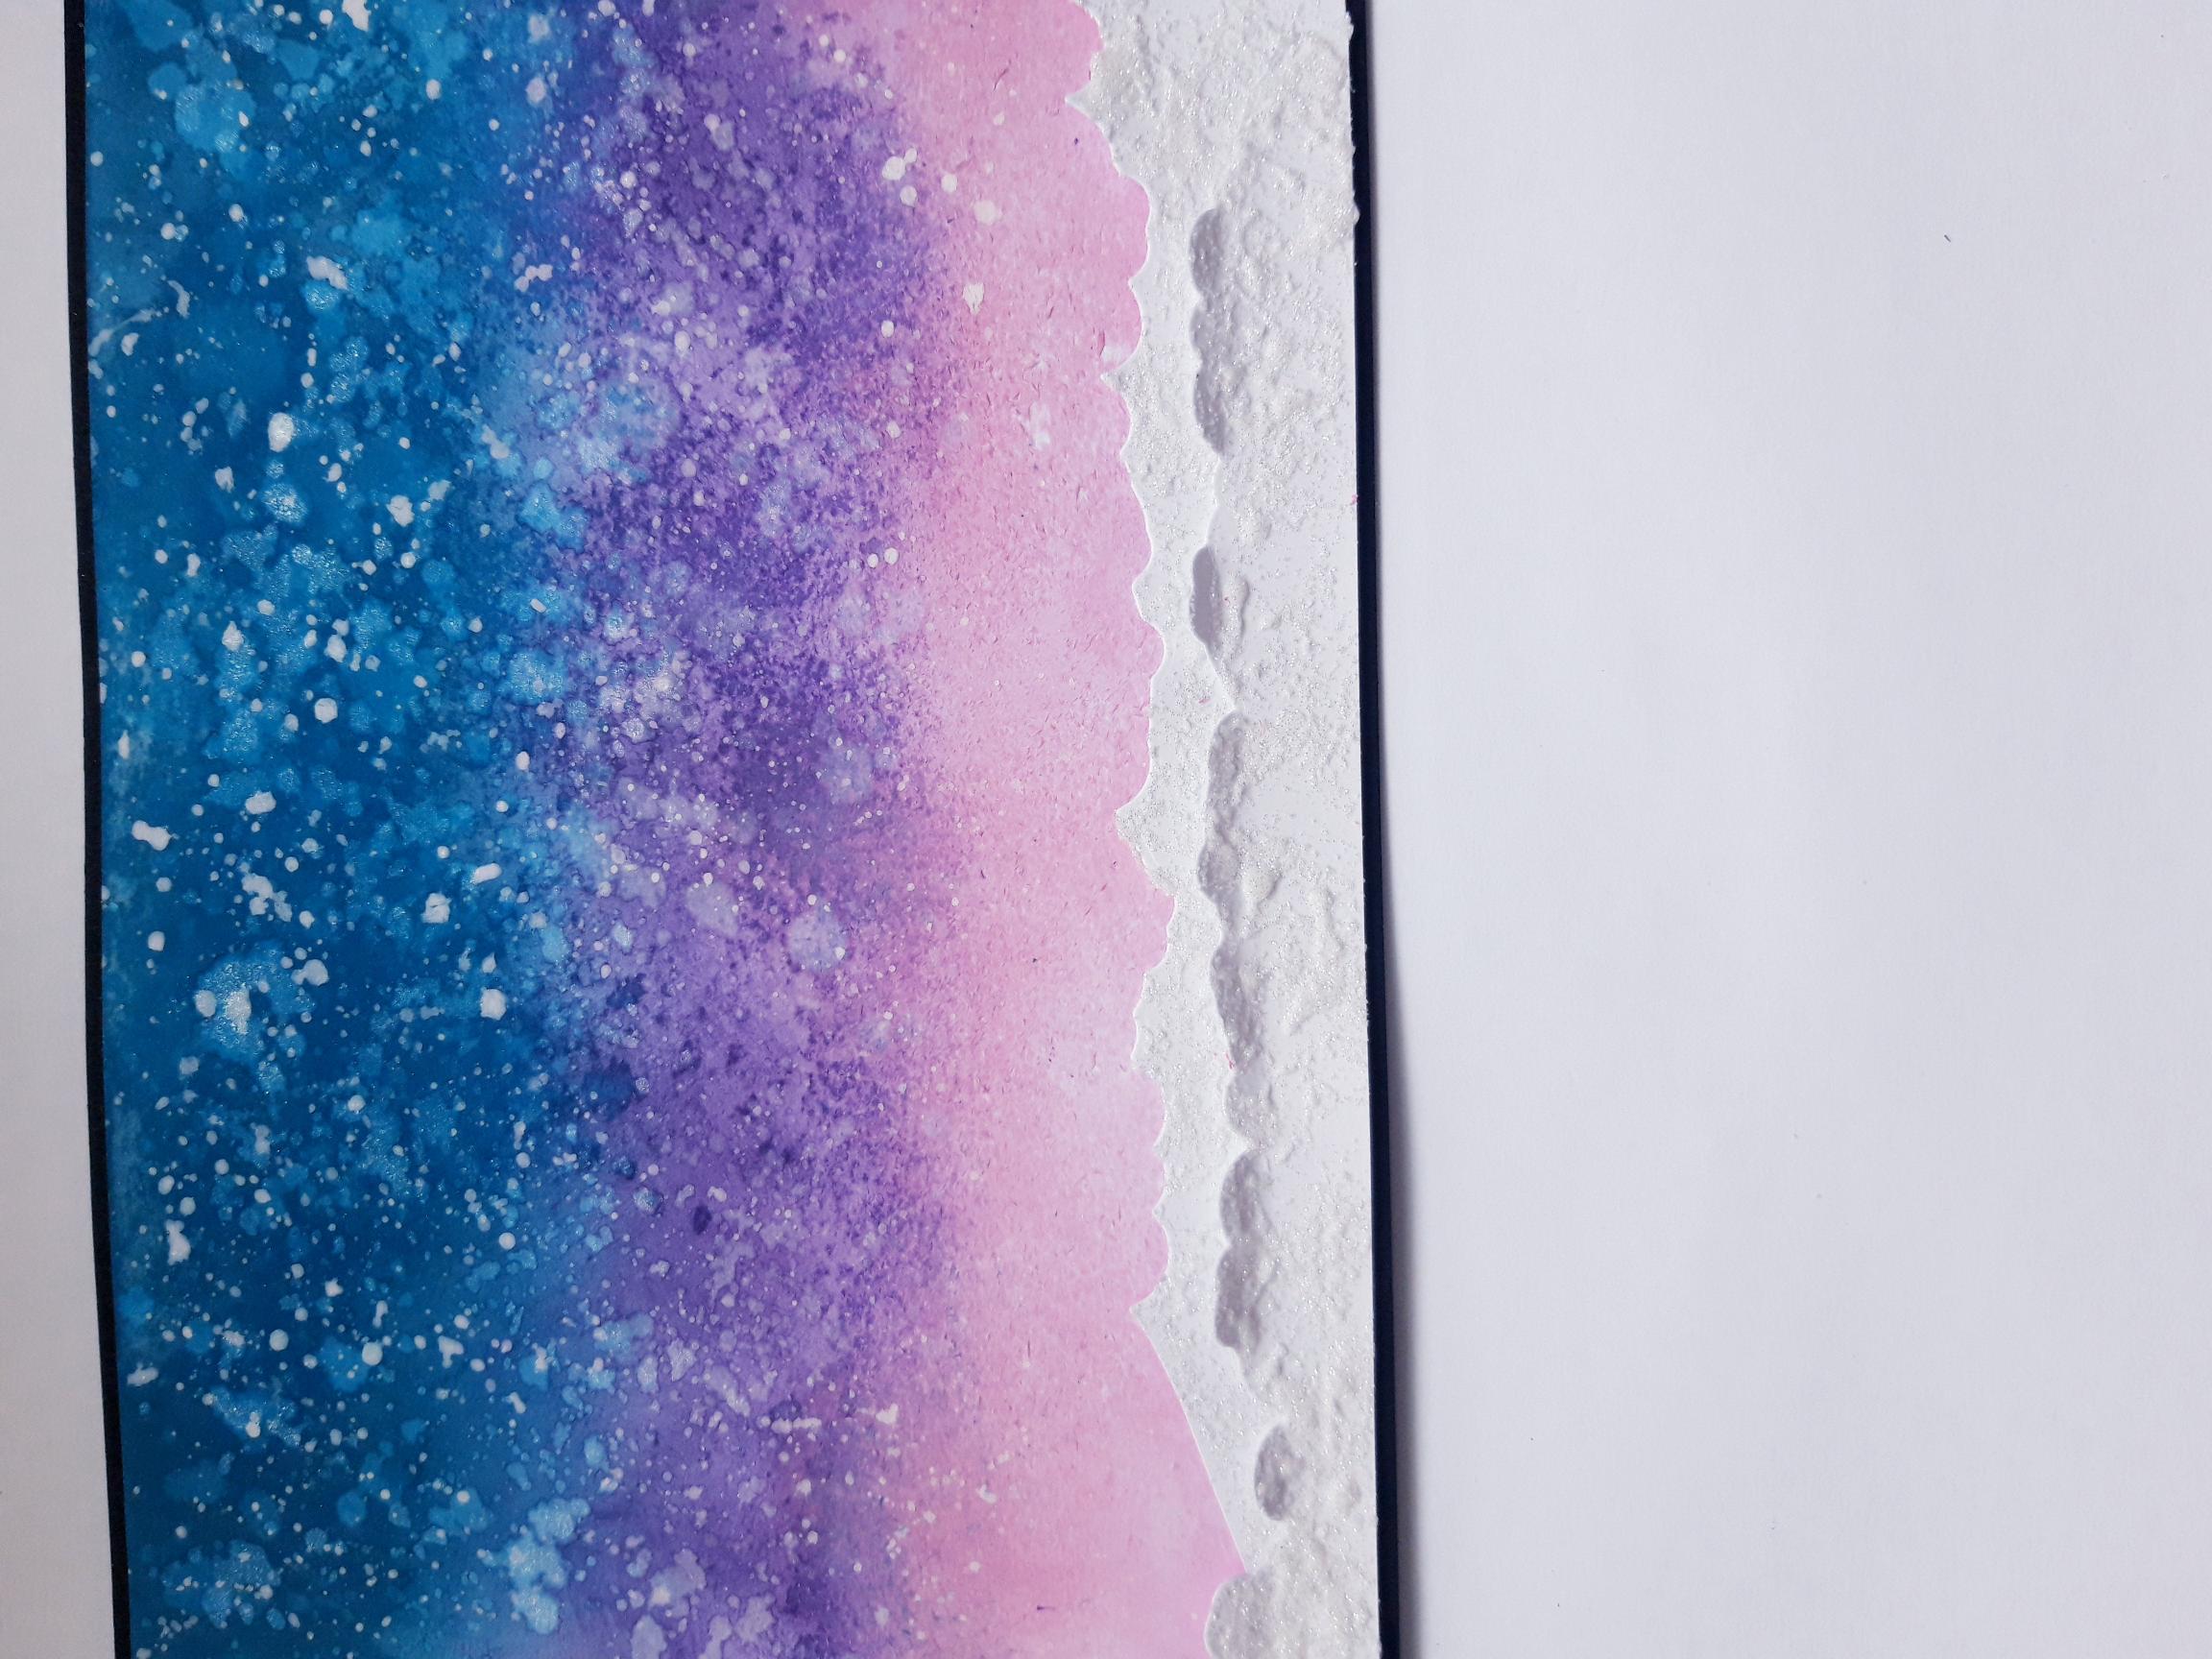
Blend the Distress Oxides horizontally across the white card (8 x 5 1/2"). Splatter water all over the wet ink, wait a few seconds then mop up the excess water and lift the ink, with a paper towel. Dry off the background, then add water to the Confetti Paint and splatter over your background, concentrating the most splats on to the top section/sky. Dry off your background. |
|
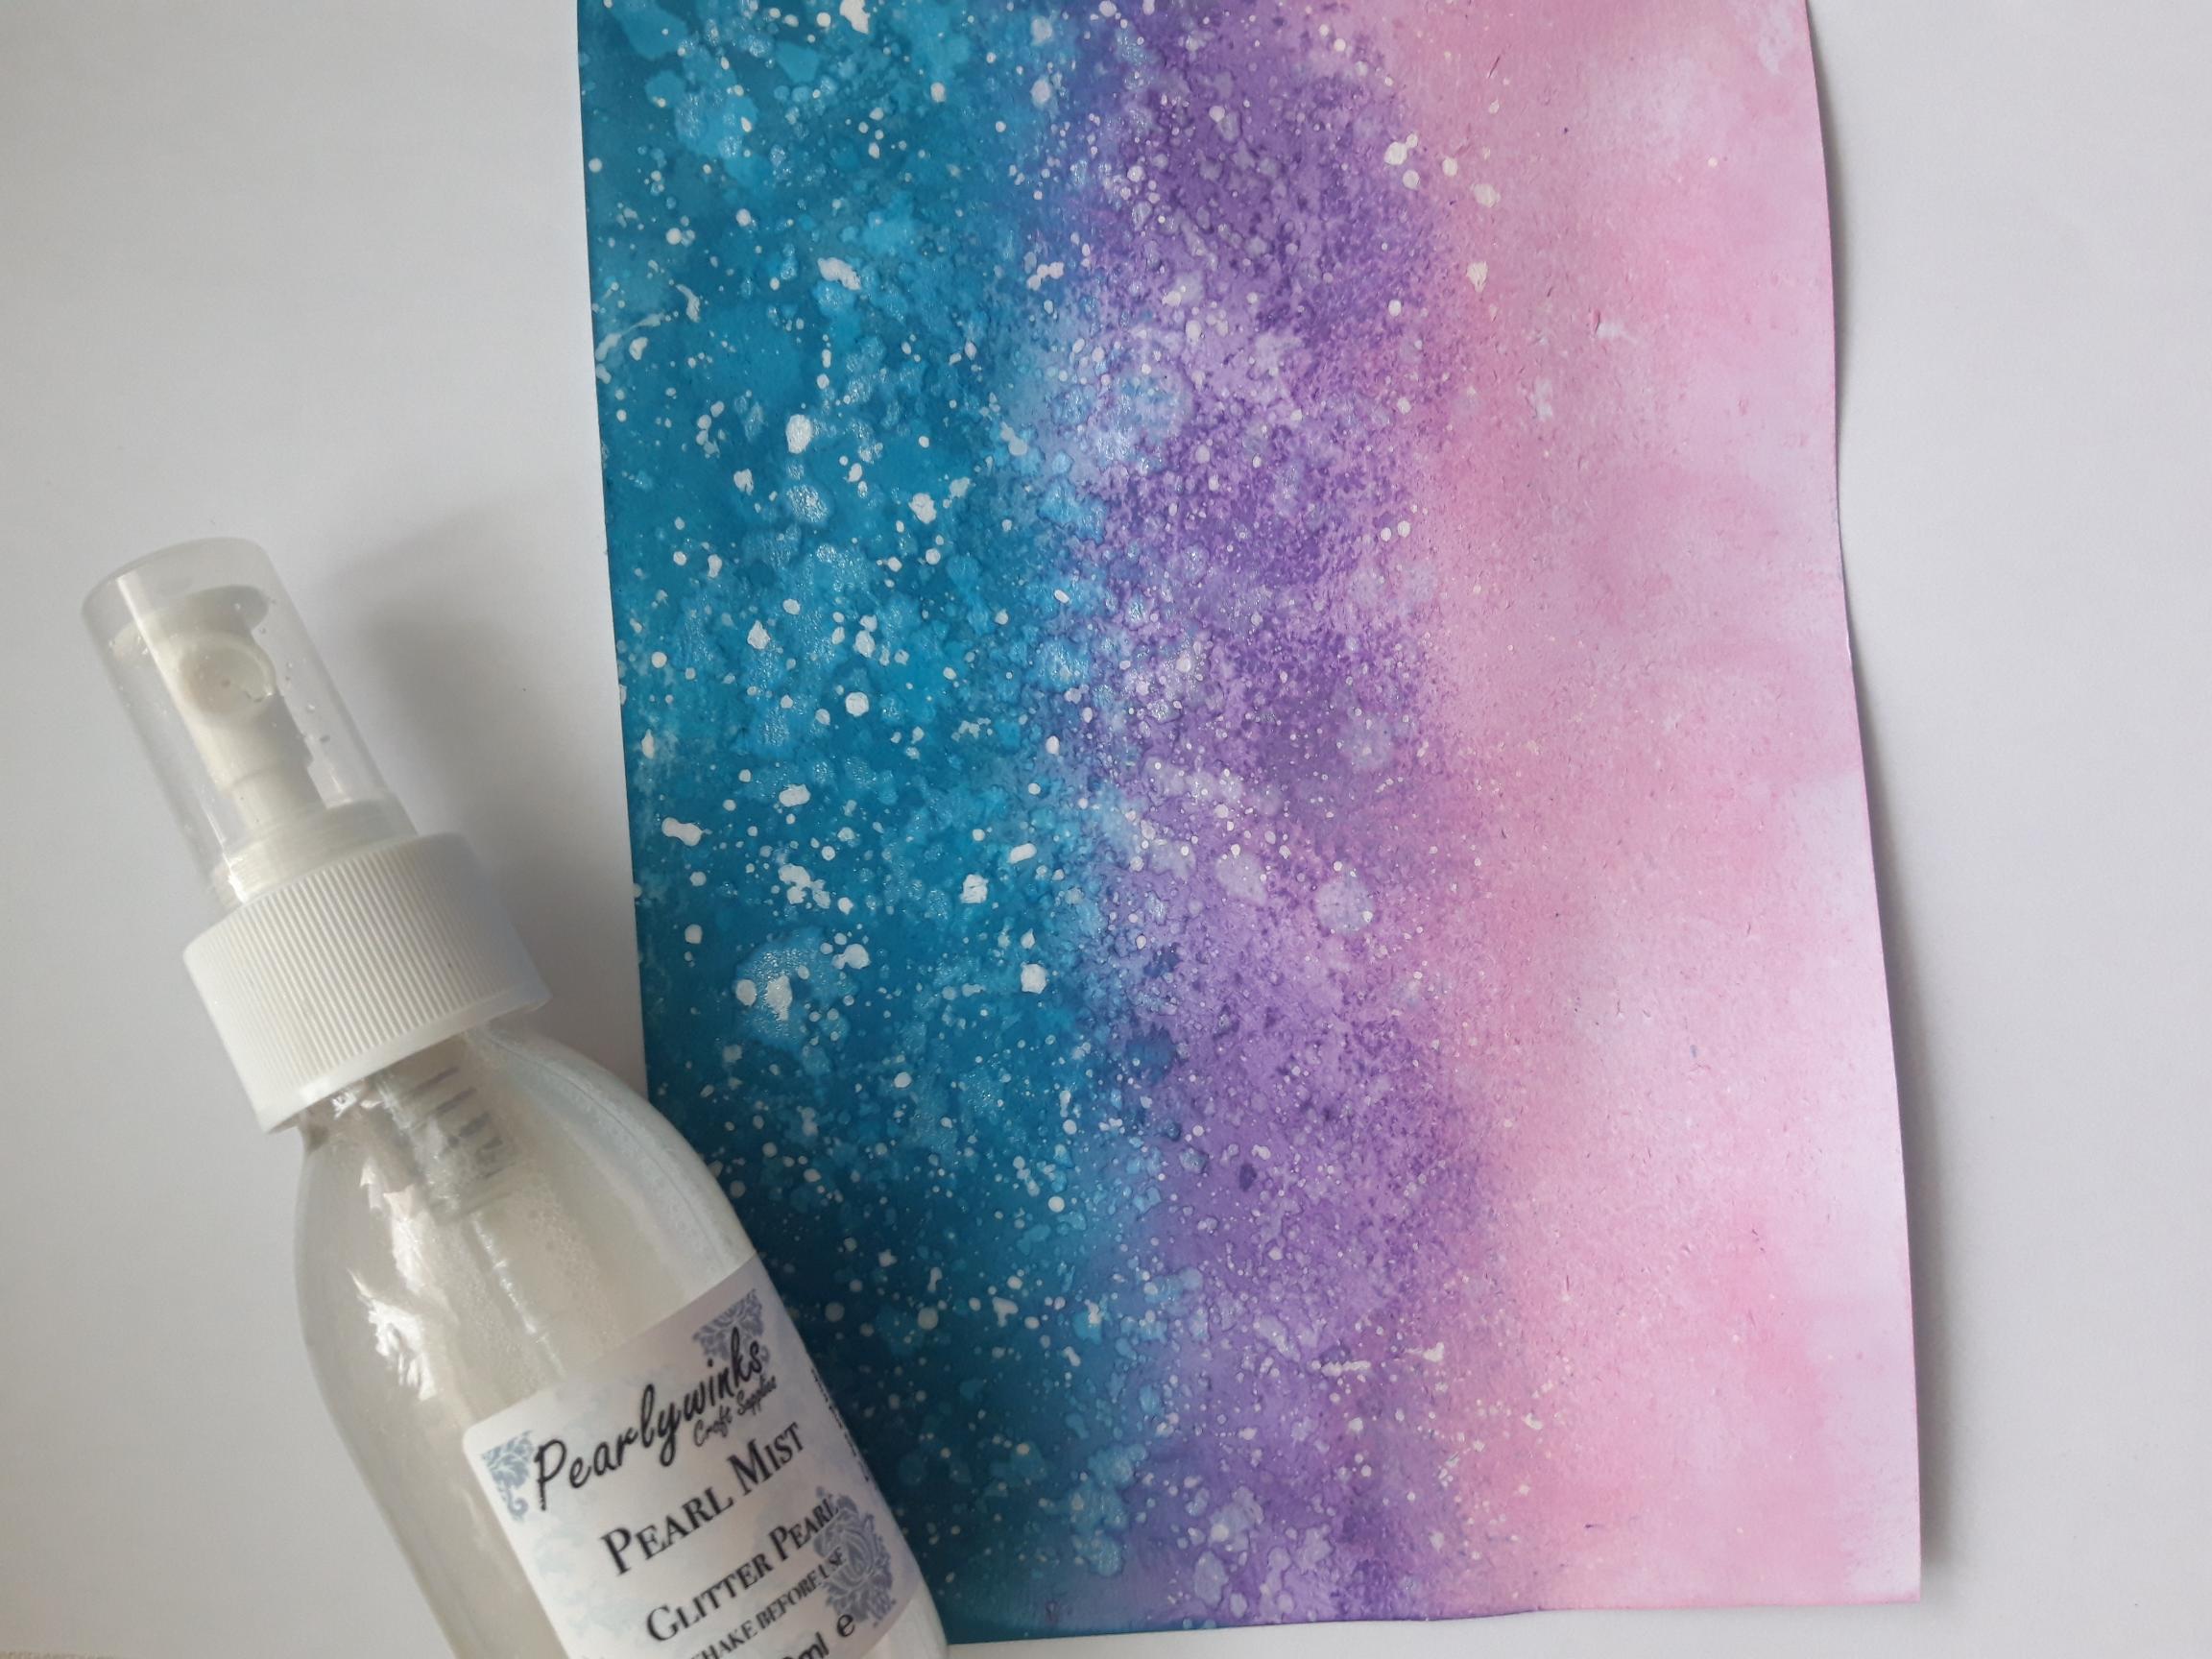
Spray the Pearlywinks Glitter Pearl Mist on to your craft mat, then splatter it all over your background with your paint brush. Dry it off. |
|
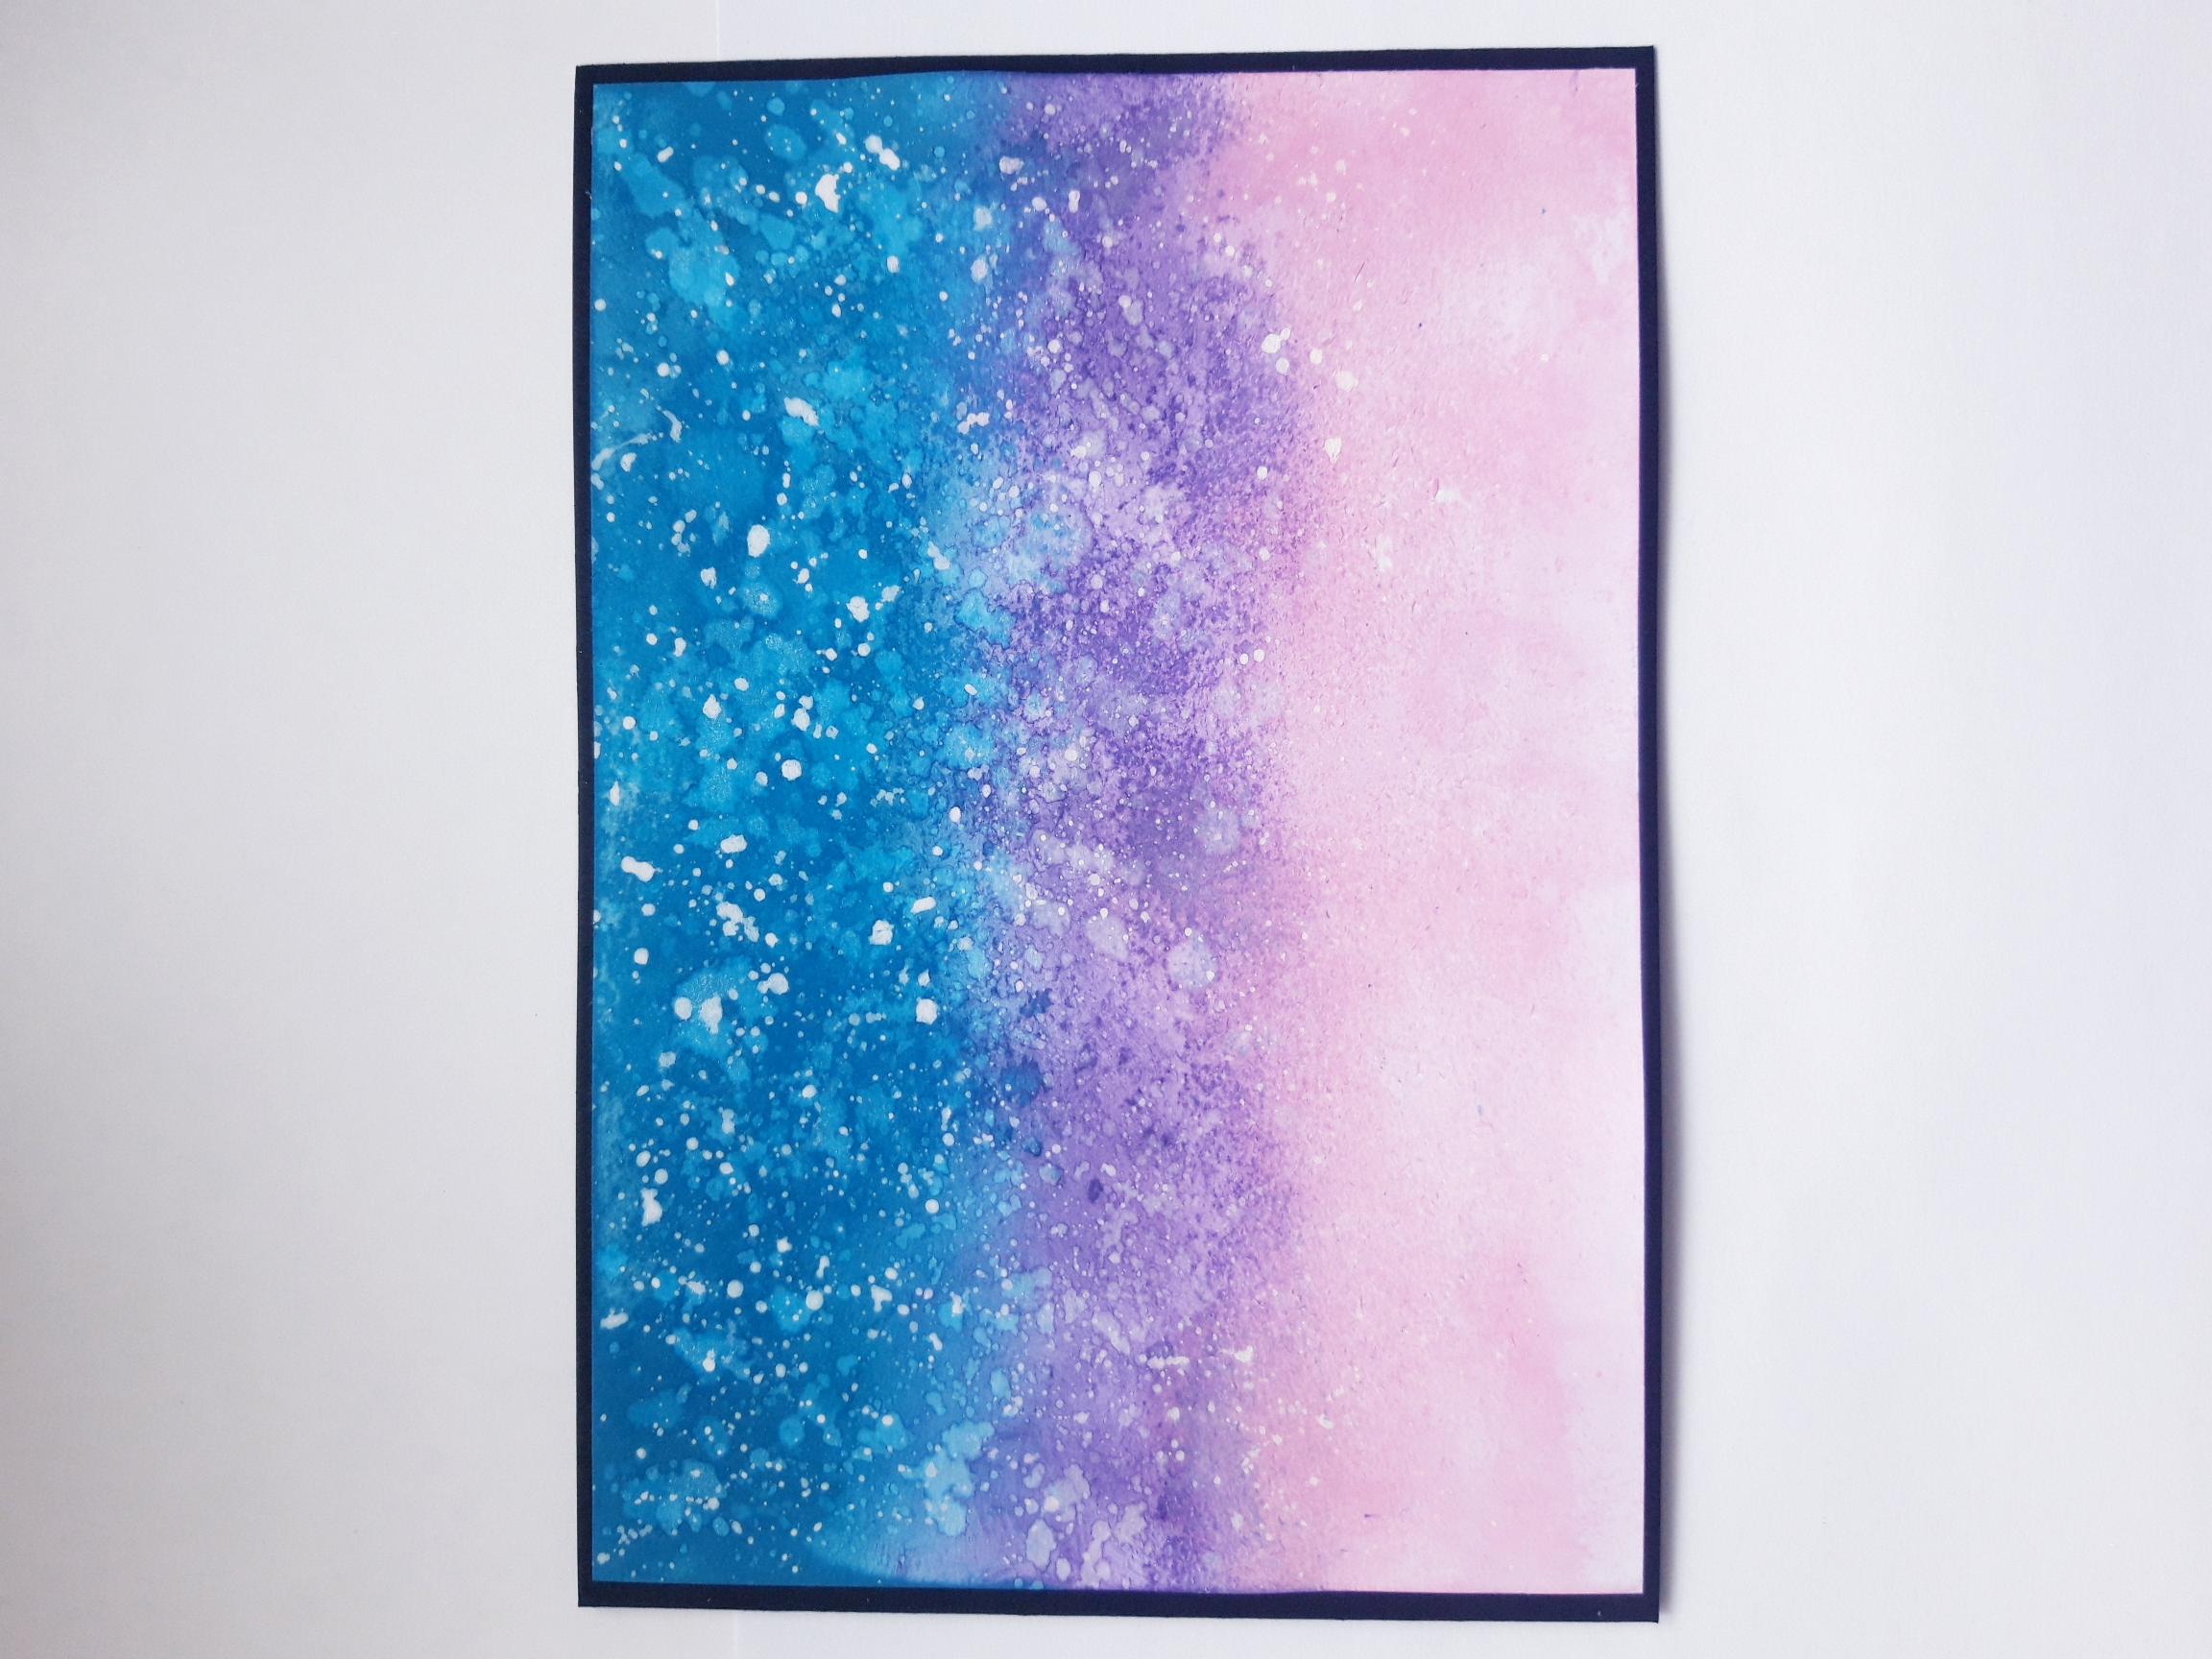
Adhere your background on to the front of your black, landscape card blank. Set to one side. |
|
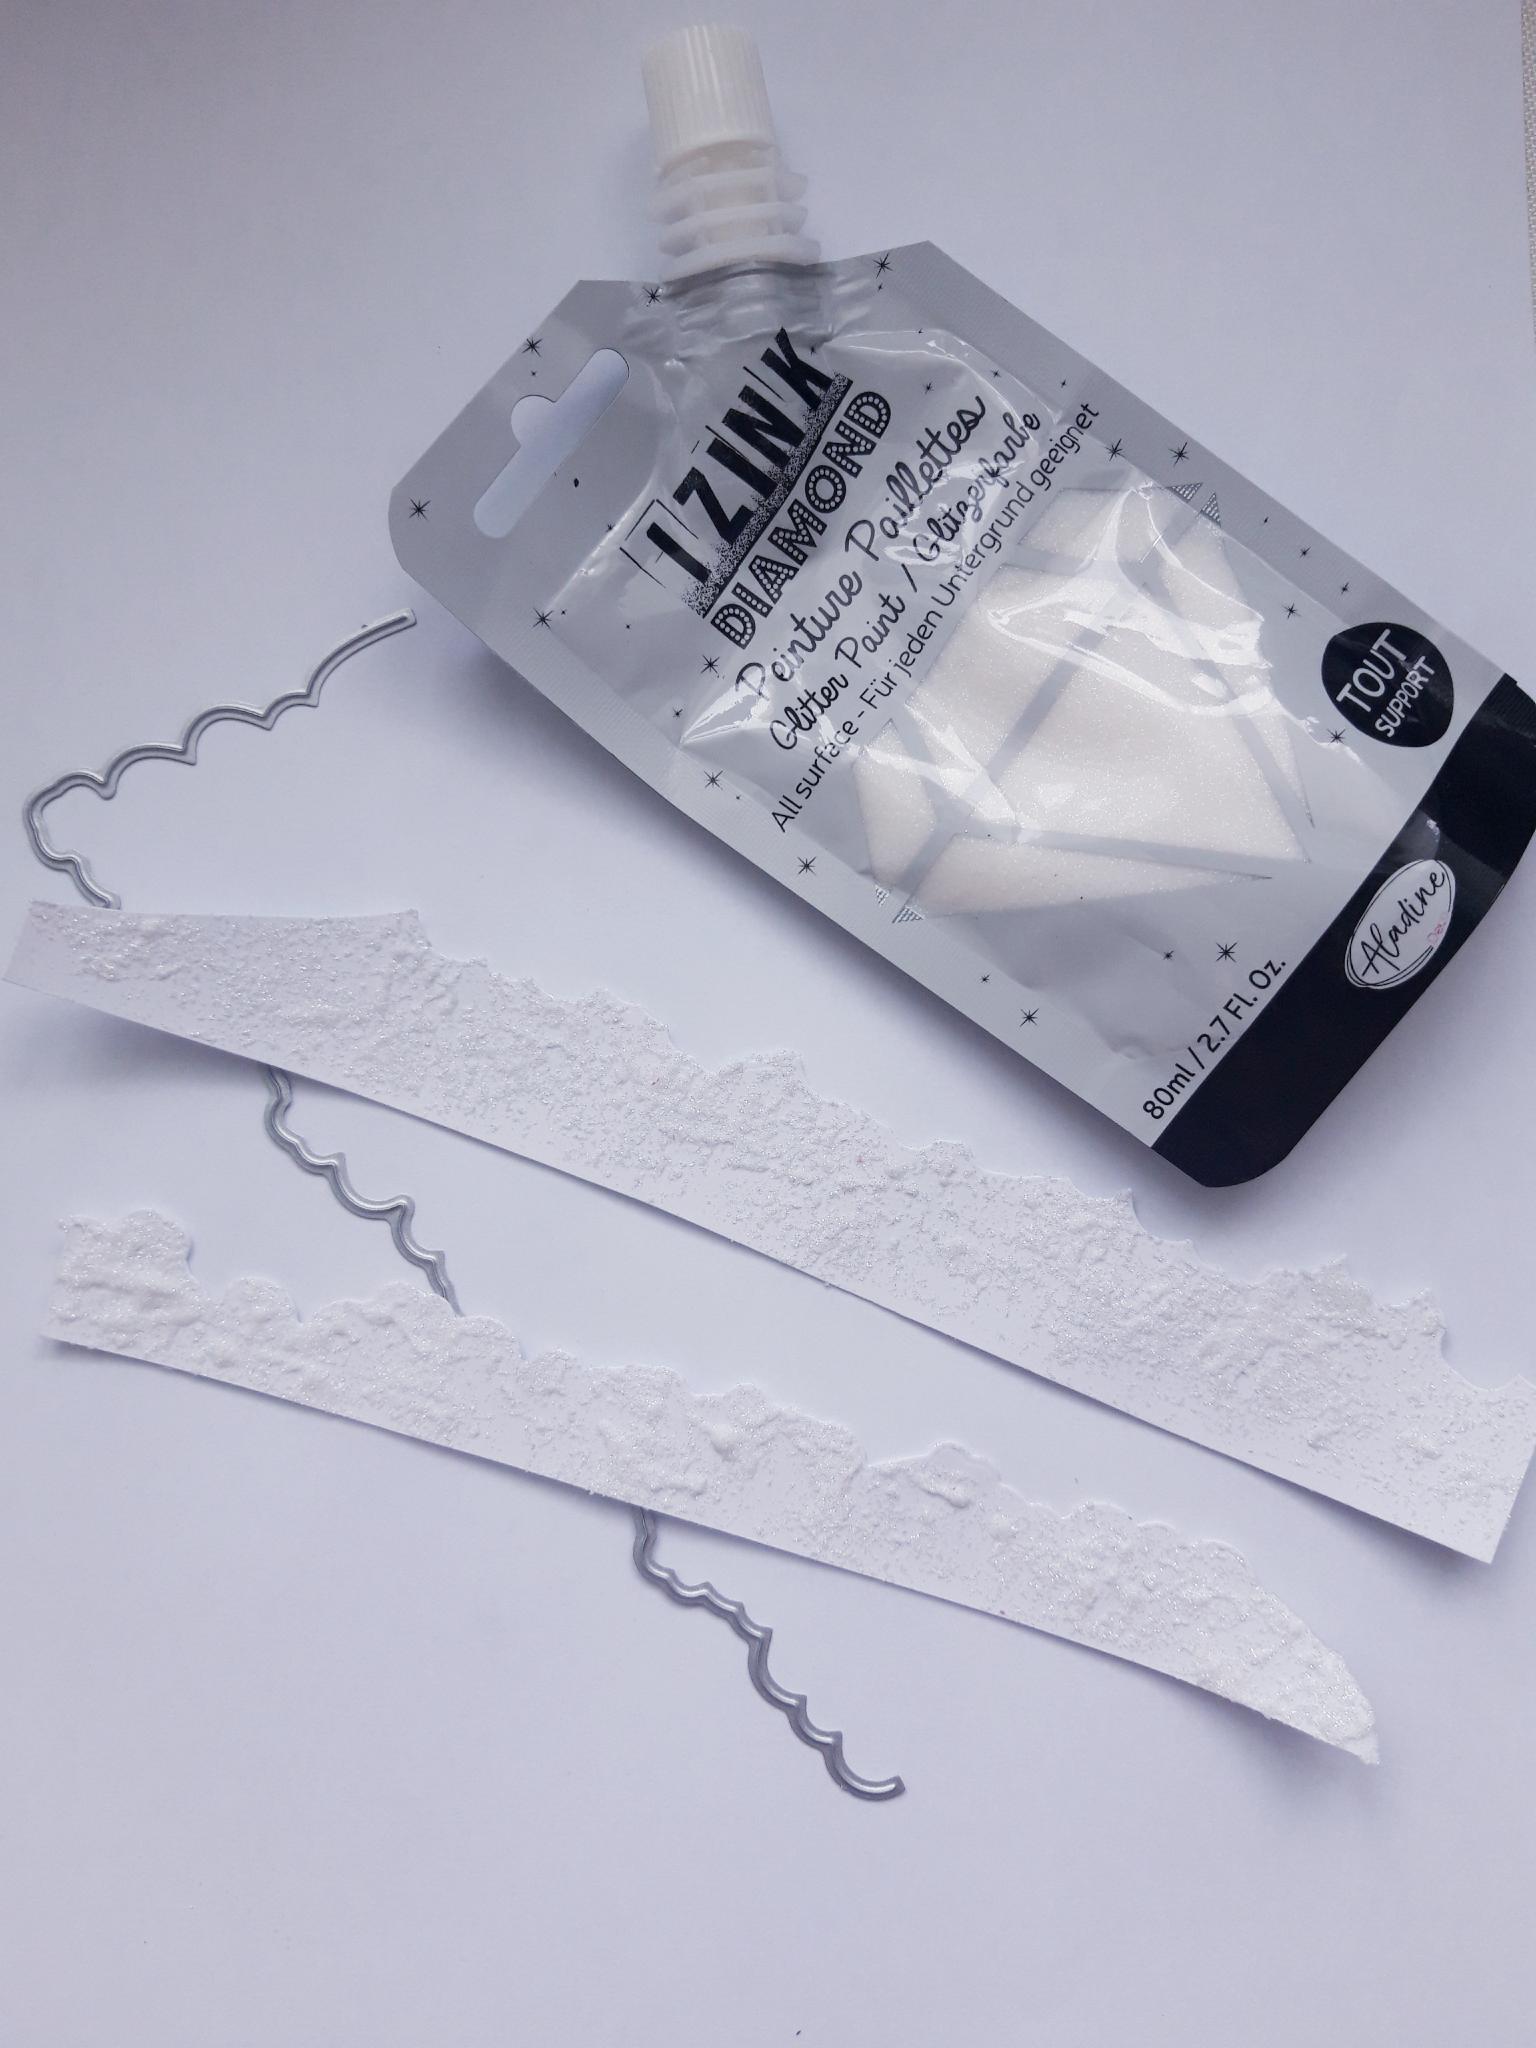
Trim off 2 narrow strips of card, different widths, from the A4 white card, and tear one edge of each, to create "hills". At least one of the torn strips needs to be the same length as your inked background (8"). I used this die, from the Terrific Trees Die set, to tear my card against. Apply the Izink Diamond Paint to your craft mat, add a little water and stipple the paint on to your "hills" with a paint brush. The more texture the better. Dry off the textured paint. |
|
Decide where you want your hills to be positioned, then apply glue to the bottom edge only, of the hill that will be BEHIND the other. Adhere in place. NB: You need to leave the top edge of the hill "open" to allow elements to be tucked behind it. |
|
Apply glue along the bottom edge of the second hill and adhere it in front, flush with the bottom of the inked background. Again ensure the top edge of the hill is "open". Manipulate the torn edges of the hills, to give them added dimension. |
|
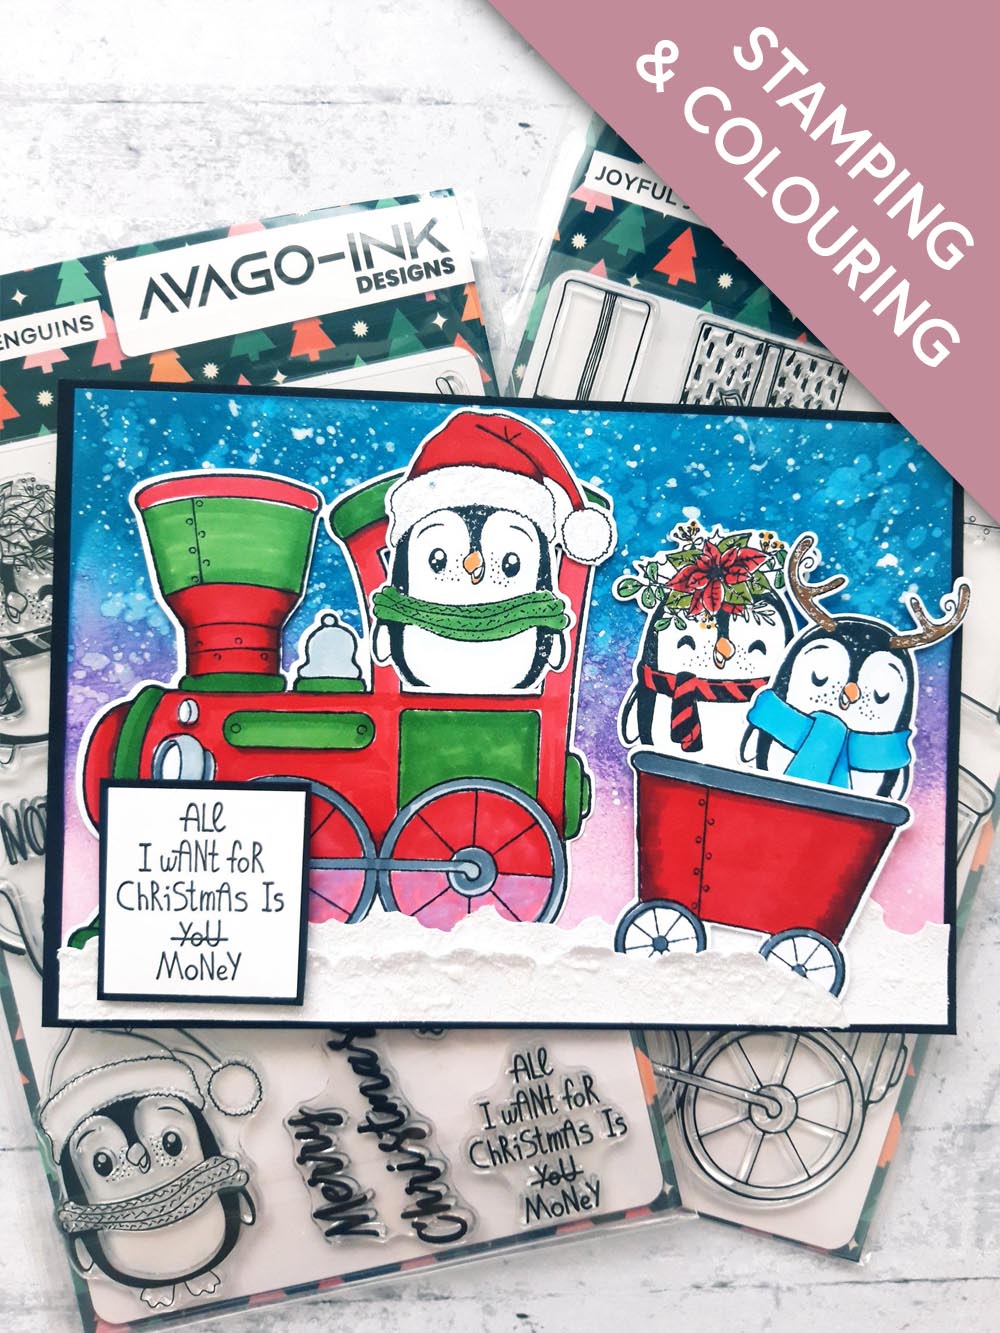
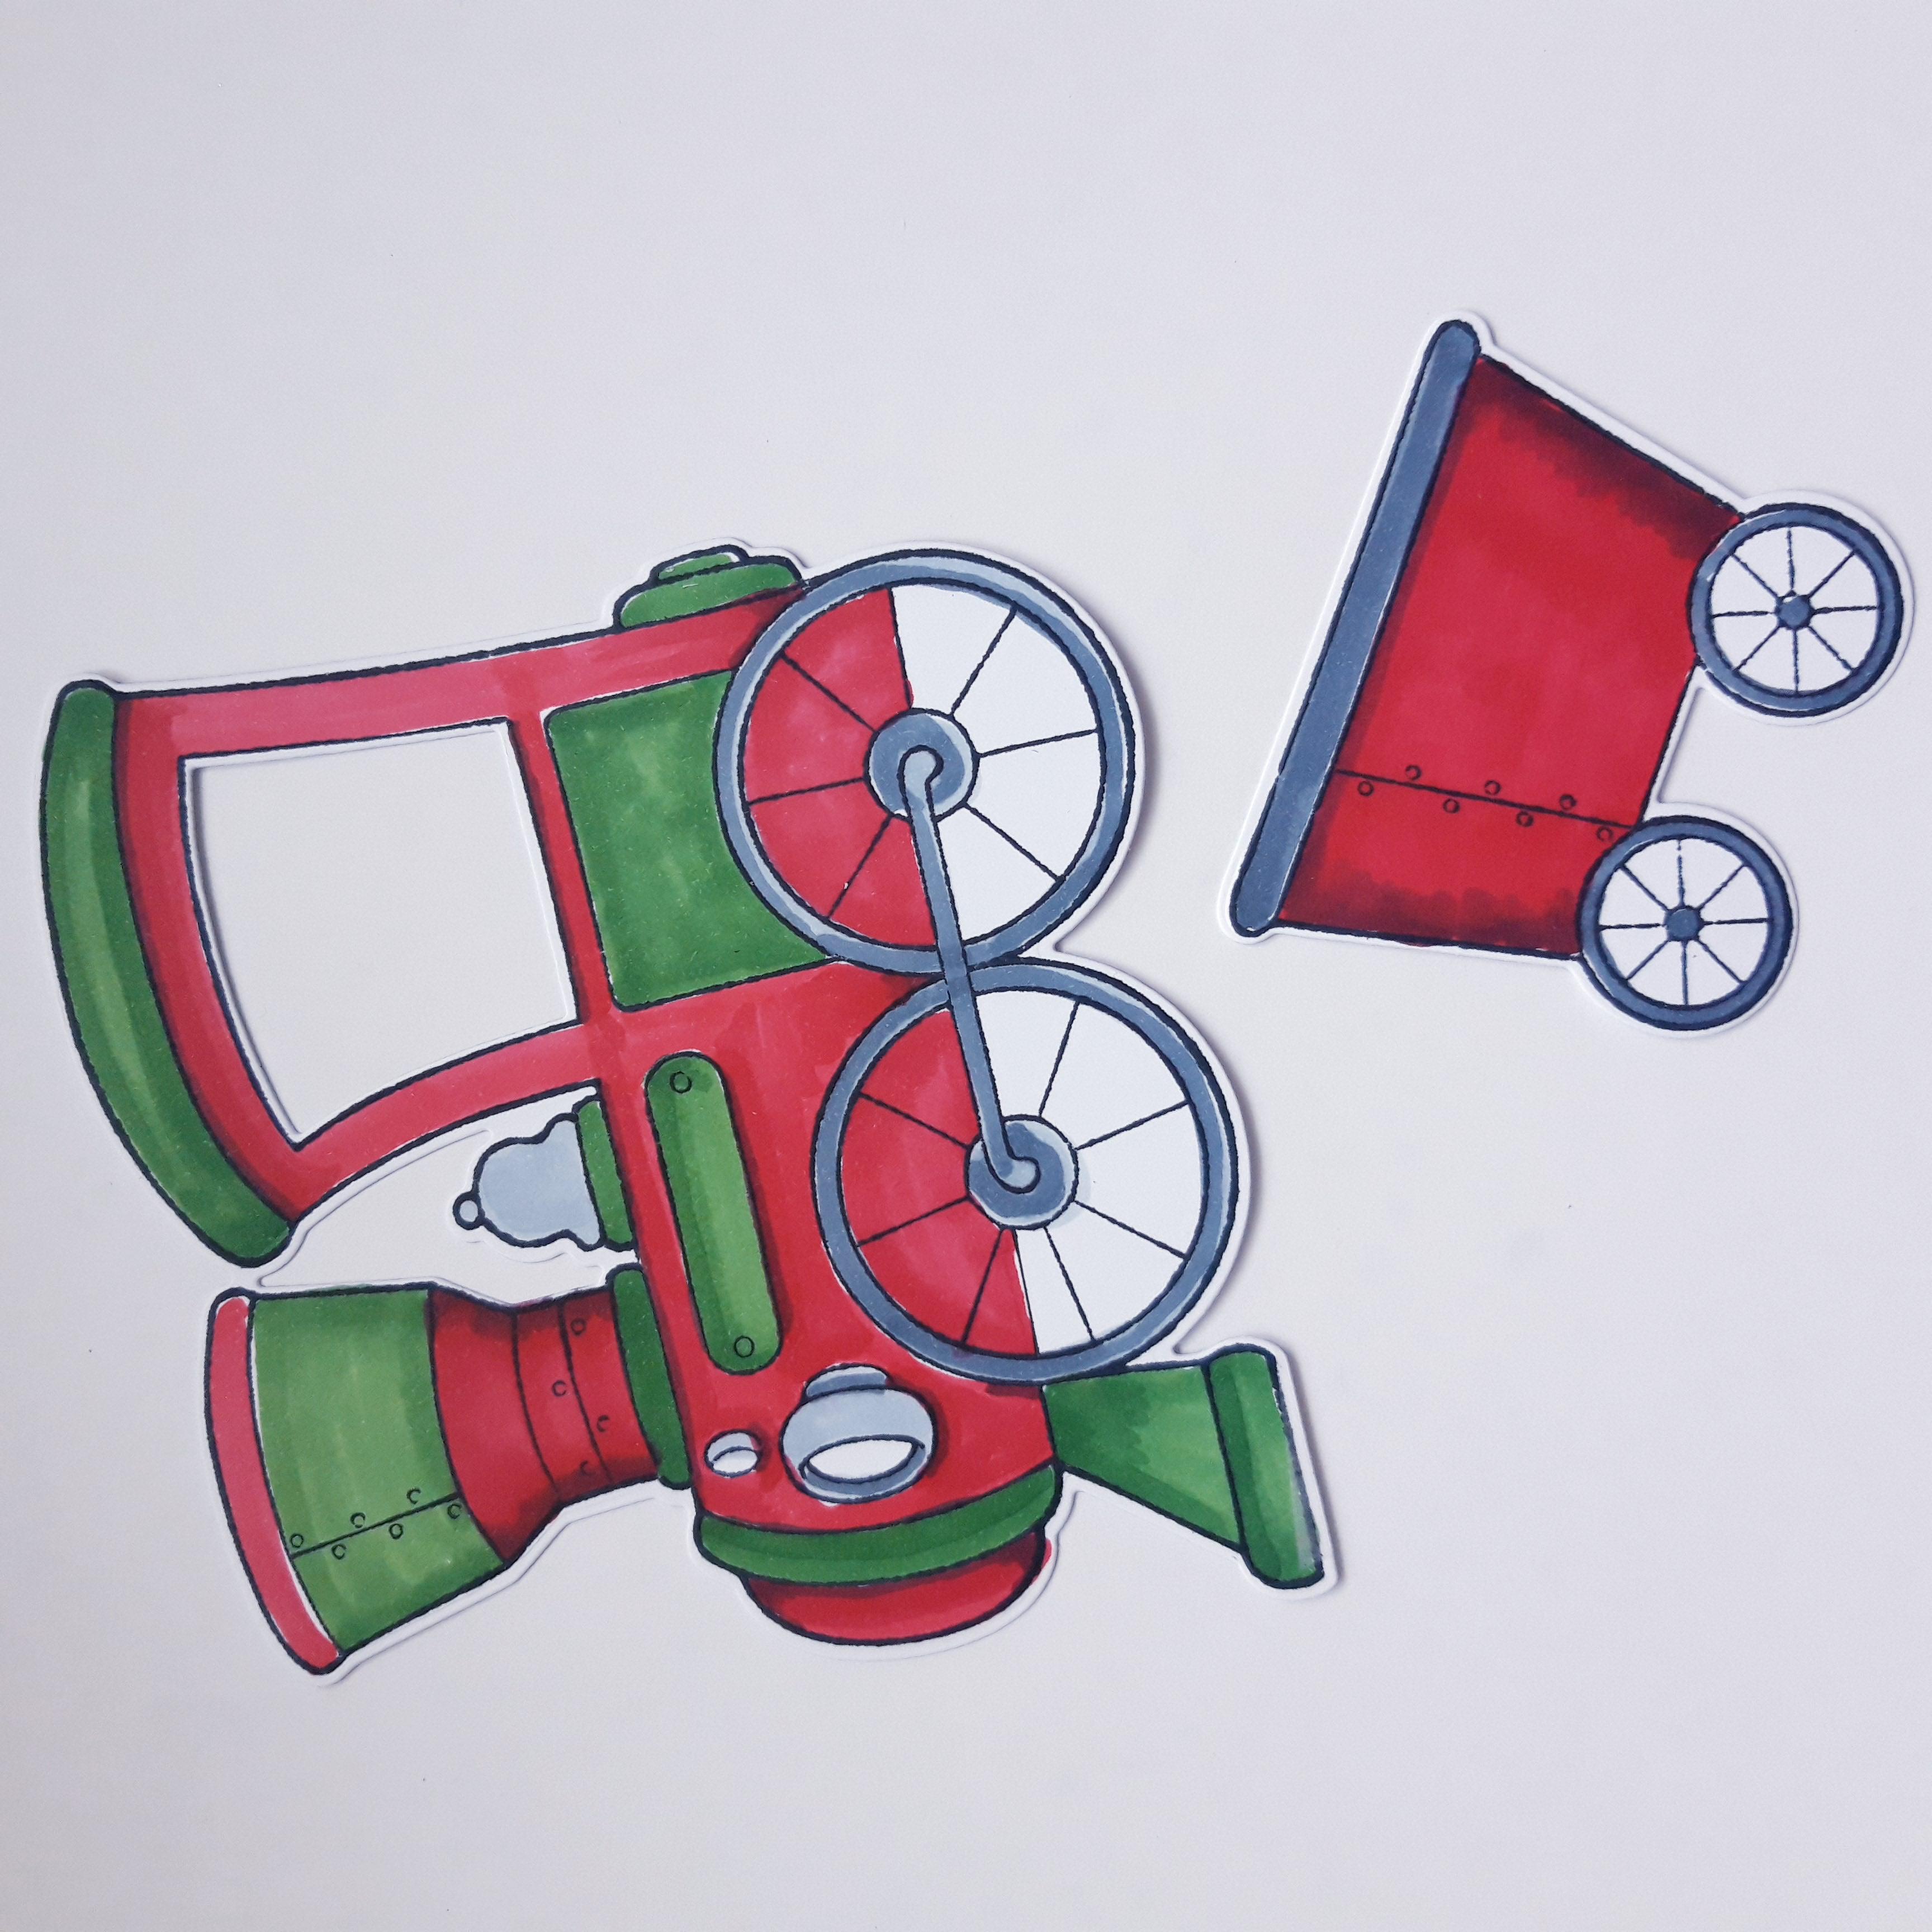
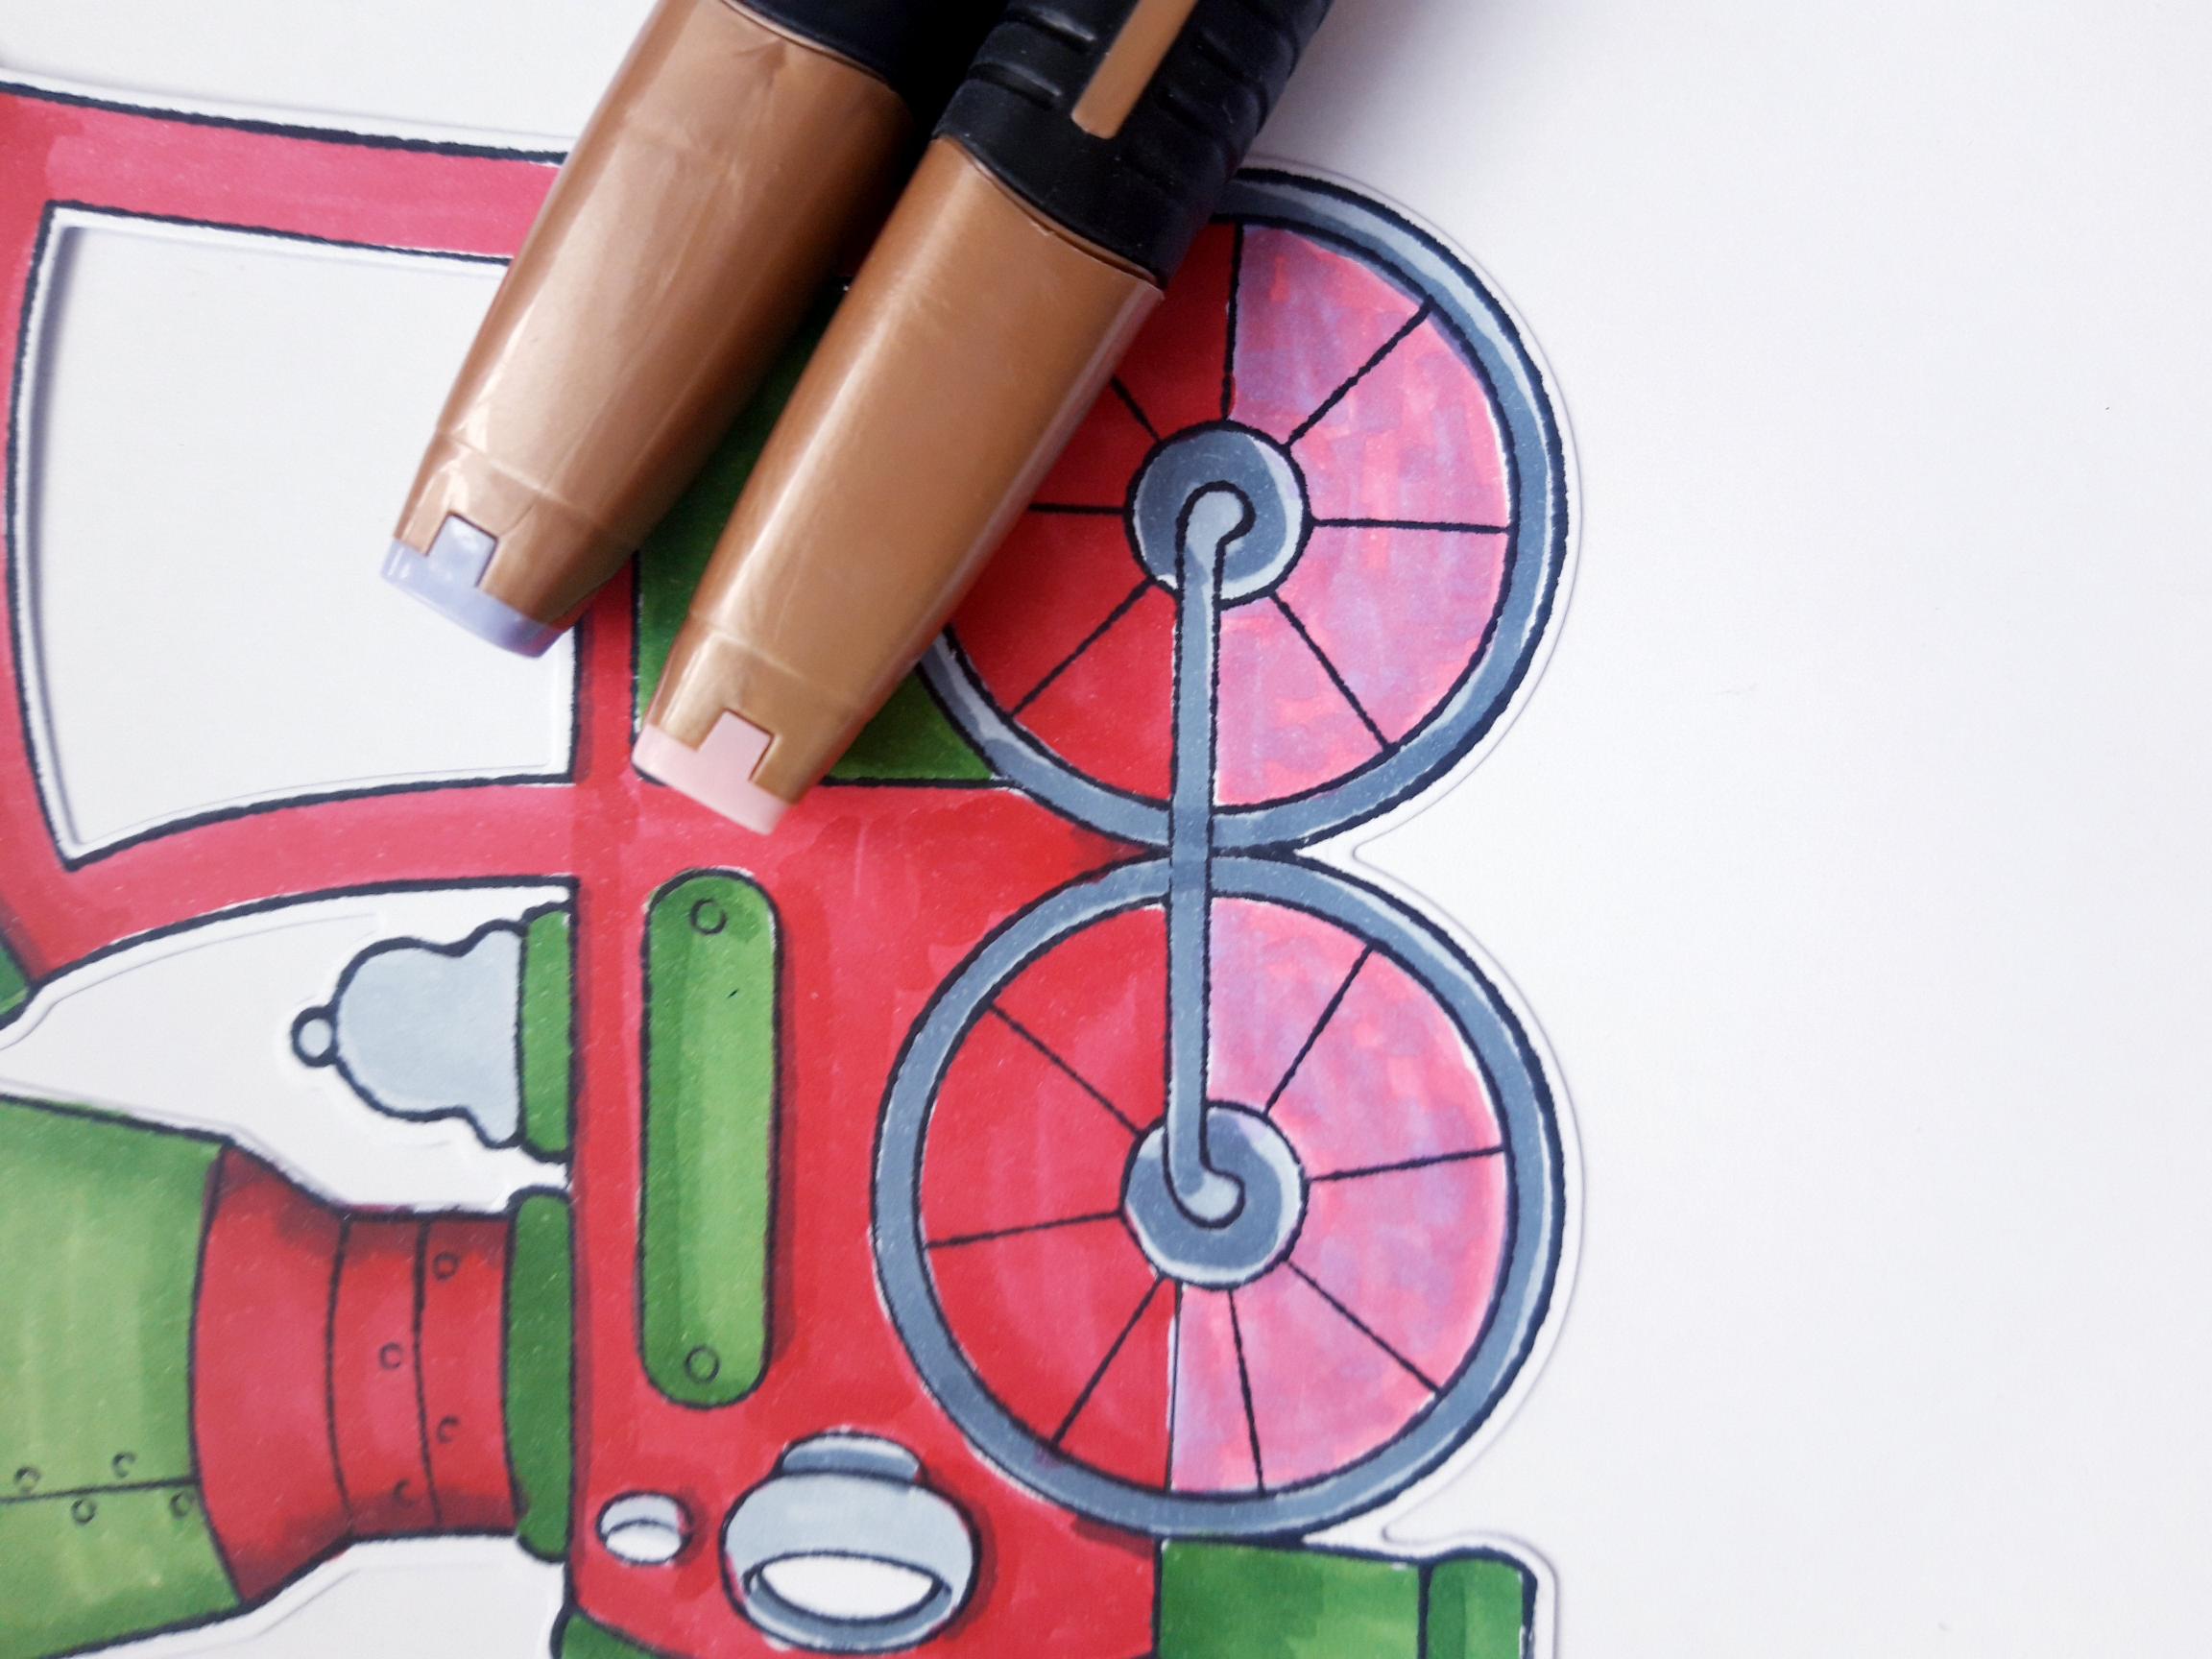
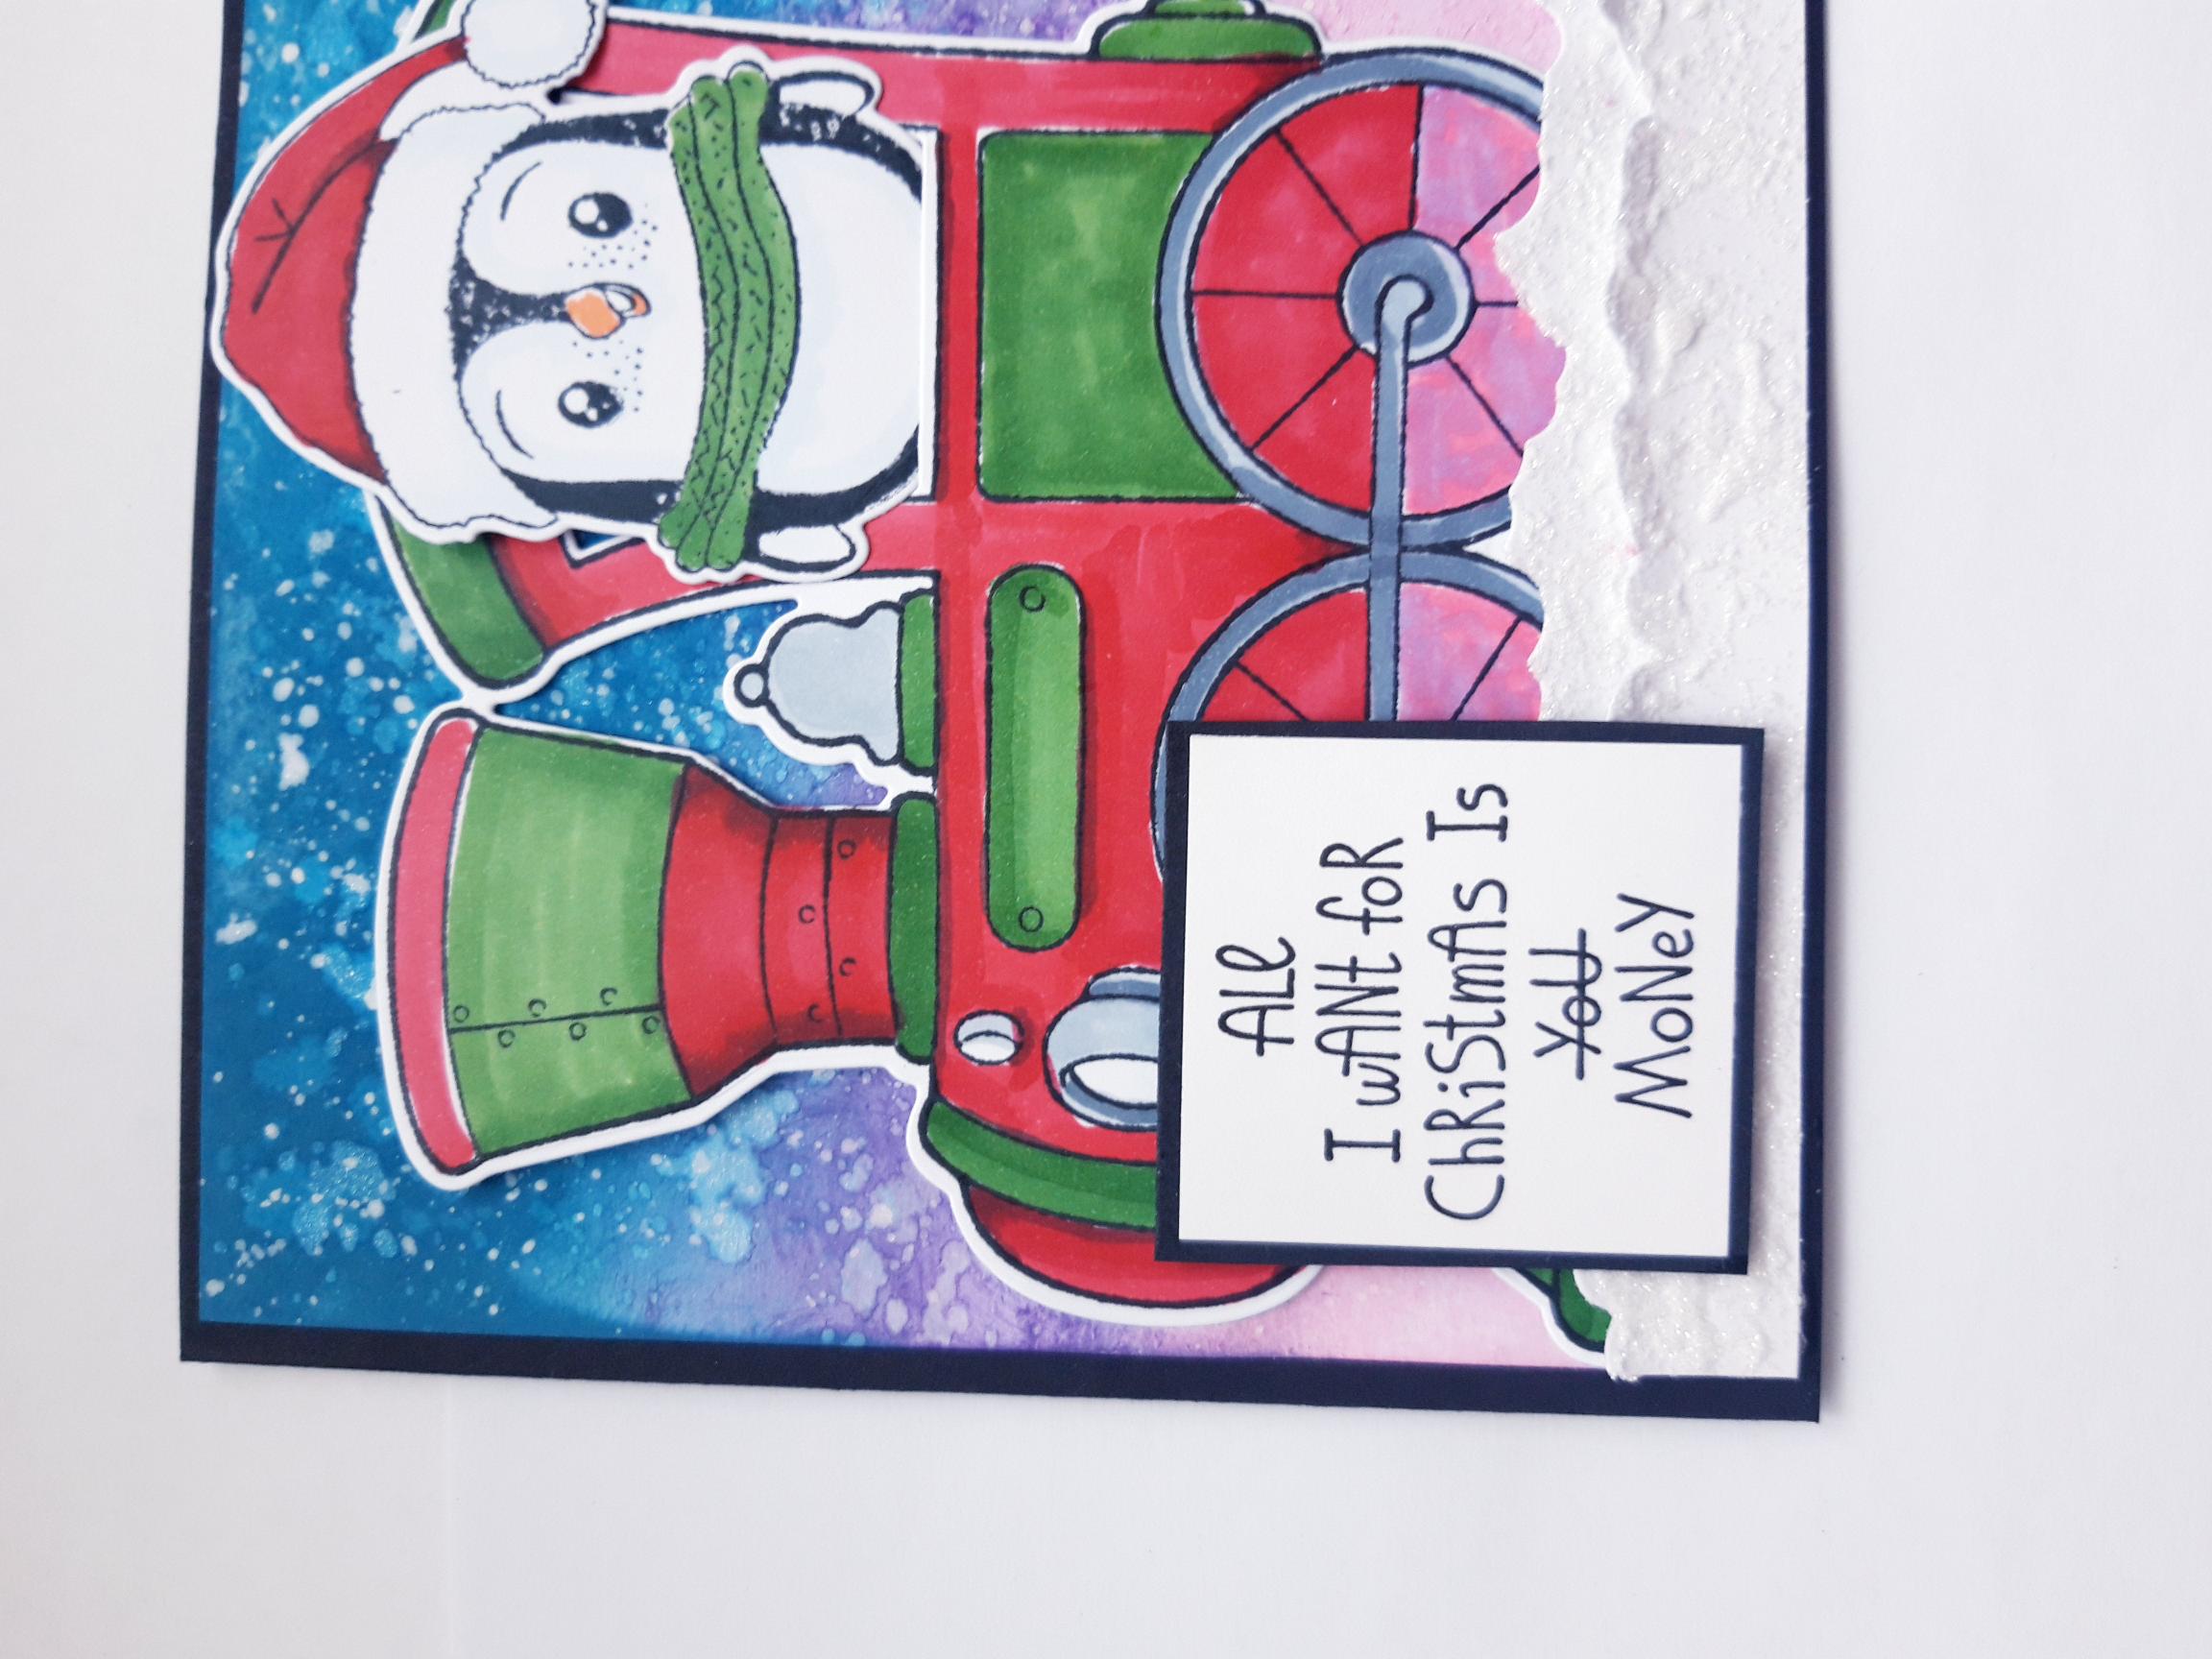
Ink up the train and carriage stamps, from the Joyful Journey Stamp And Die Collection, with the Tuxedo Black Memento Ink. Stamp on to the white A4 card, ensuring you keep enough card for the Penguins and sentiment, in later steps. Once the ink is dry, place the coordinating dies over the top, secure with low tack tape if preferred and run them through your die cutting machine. Use your Gossip Alcohol Markers to colour in your die cut elements. |
|
Having worked out where my train would eventually be placed on the card, I decided to colour in the bottom half of the train wheels, with a Gossip Alcohol Marker of a similar colour to the inked background it would be positioned against. You can leave this white if you prefer. |

|
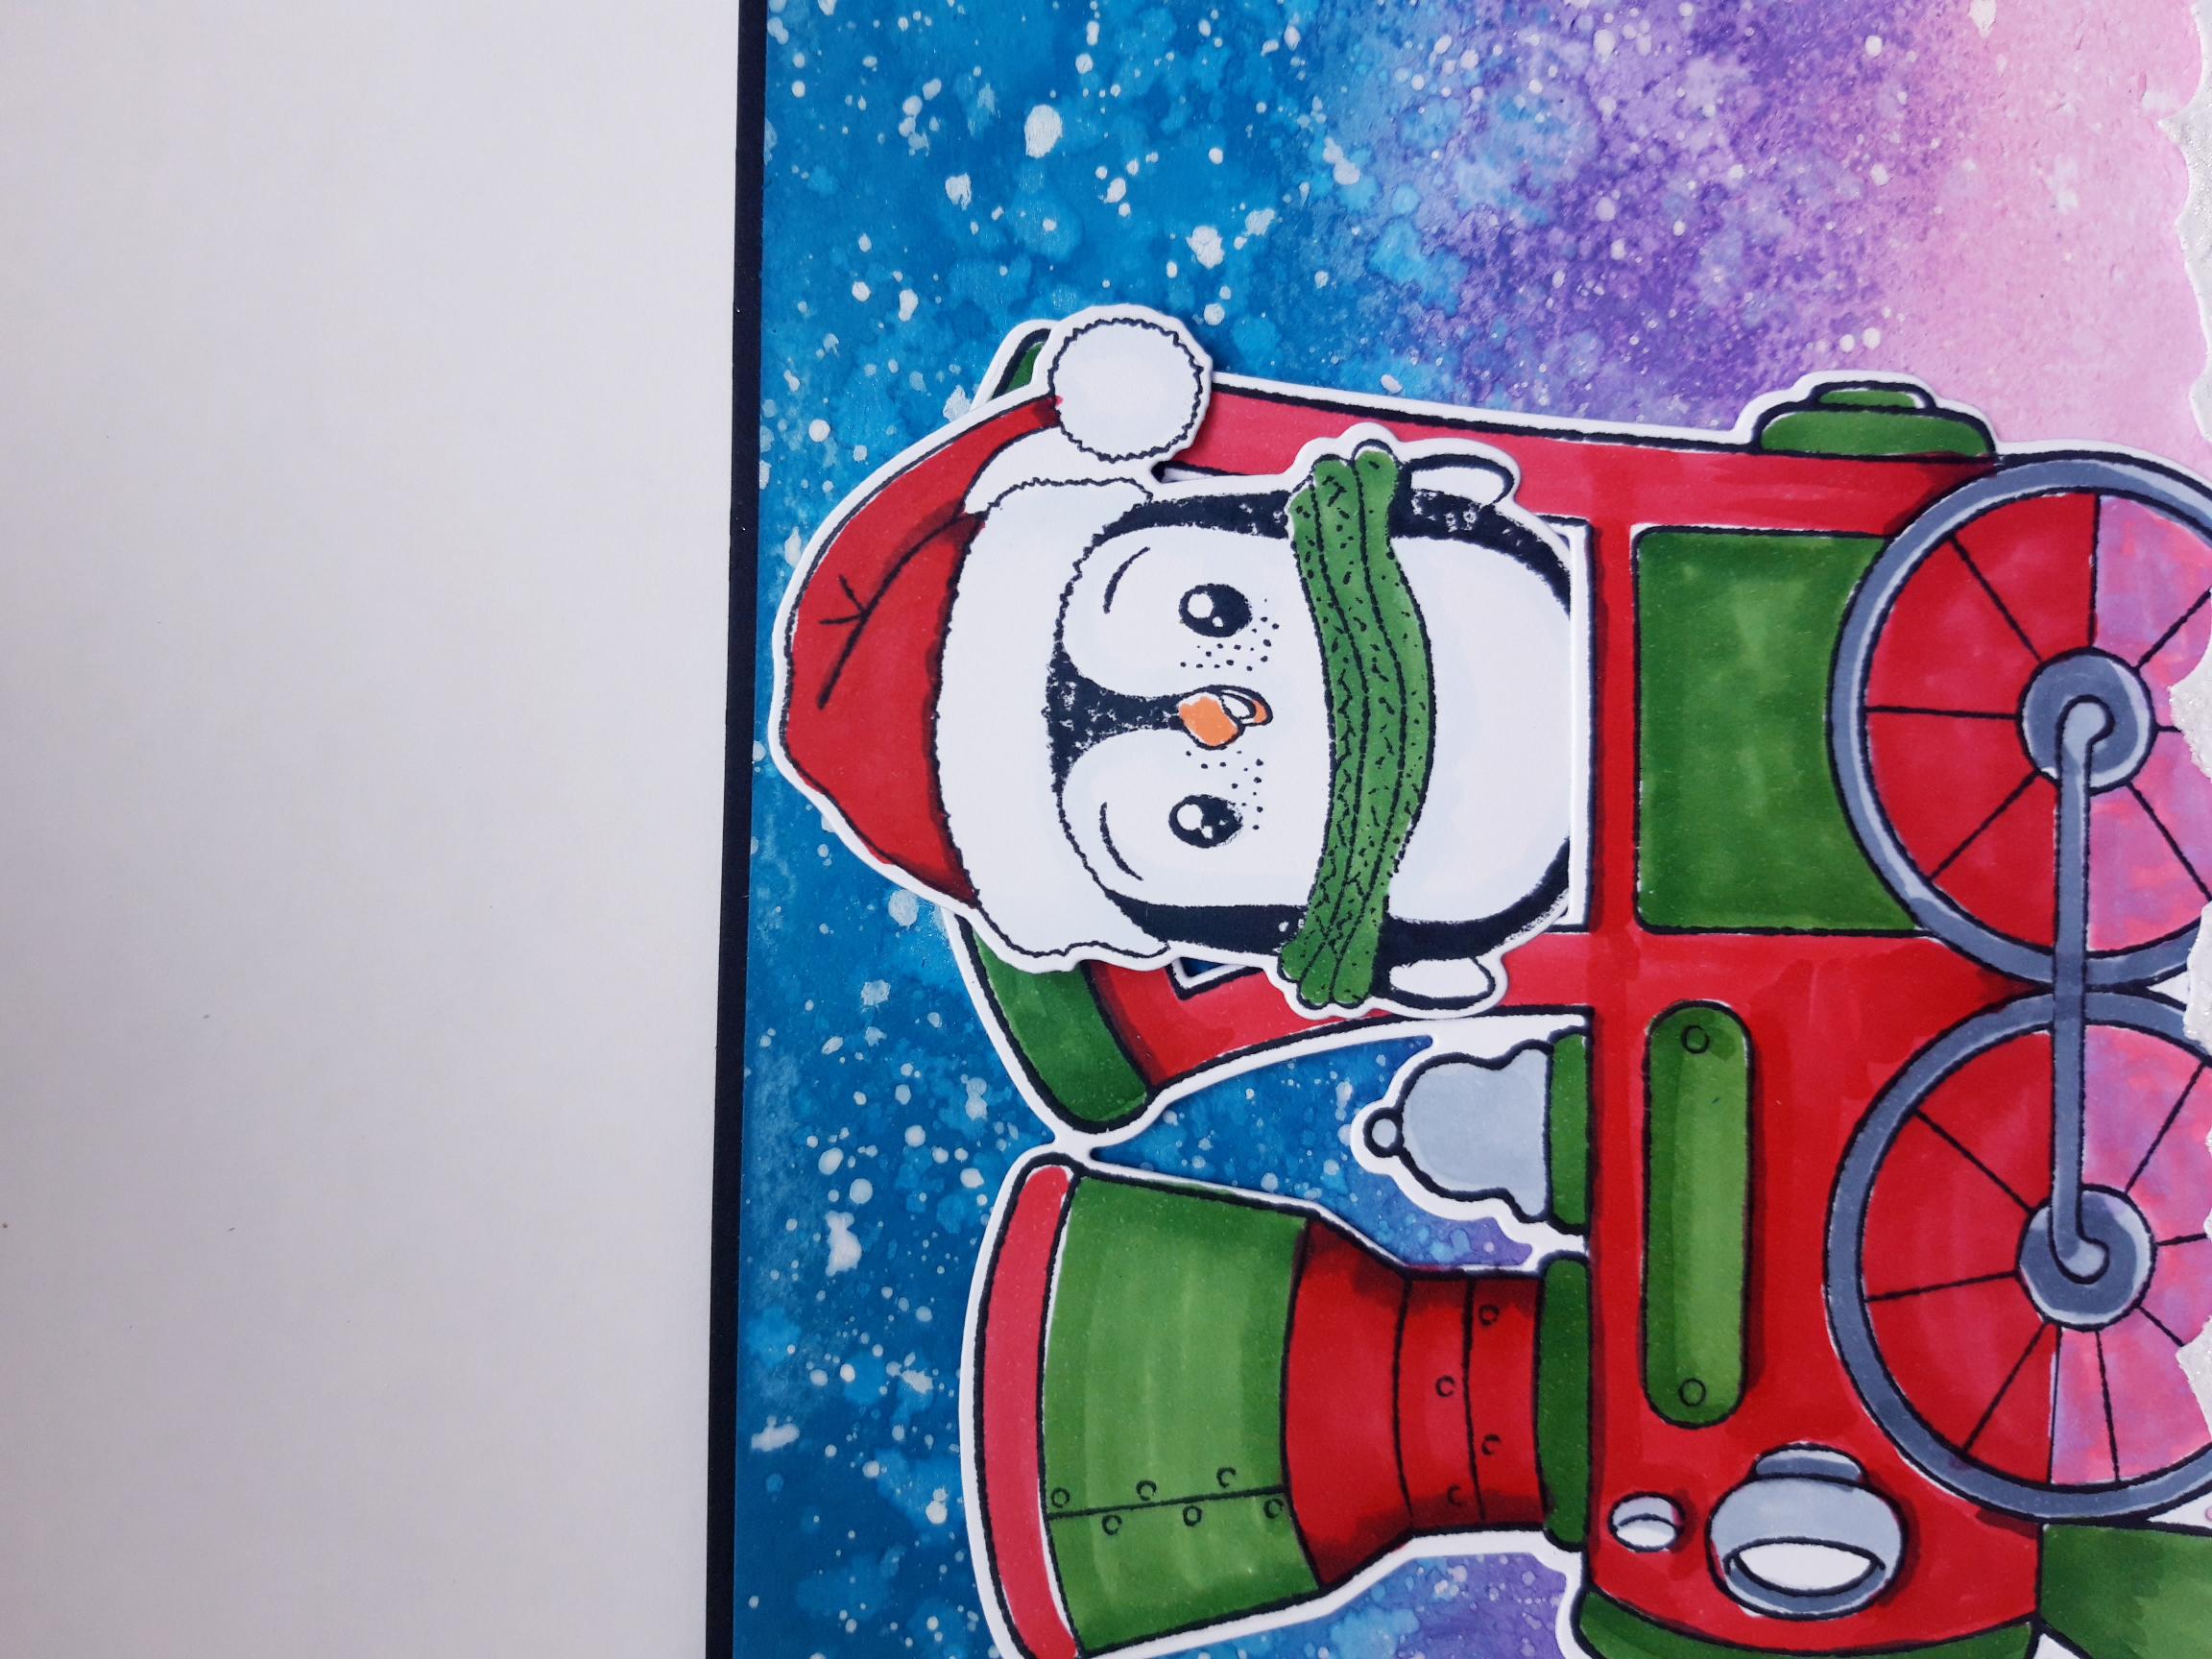
Mould the train with your fingers to give it a bit of shape, then use foam pads or 3D glue gel, to adhere it on to your card, ensuring it is tucked BEHIND the torn edge of the top "hill". Ensure that the "window" is left loose, so a die cut element can be popped inside it. Keep the train to the left of the card so that the carriage can be adhered behind it, in a later step. |
|
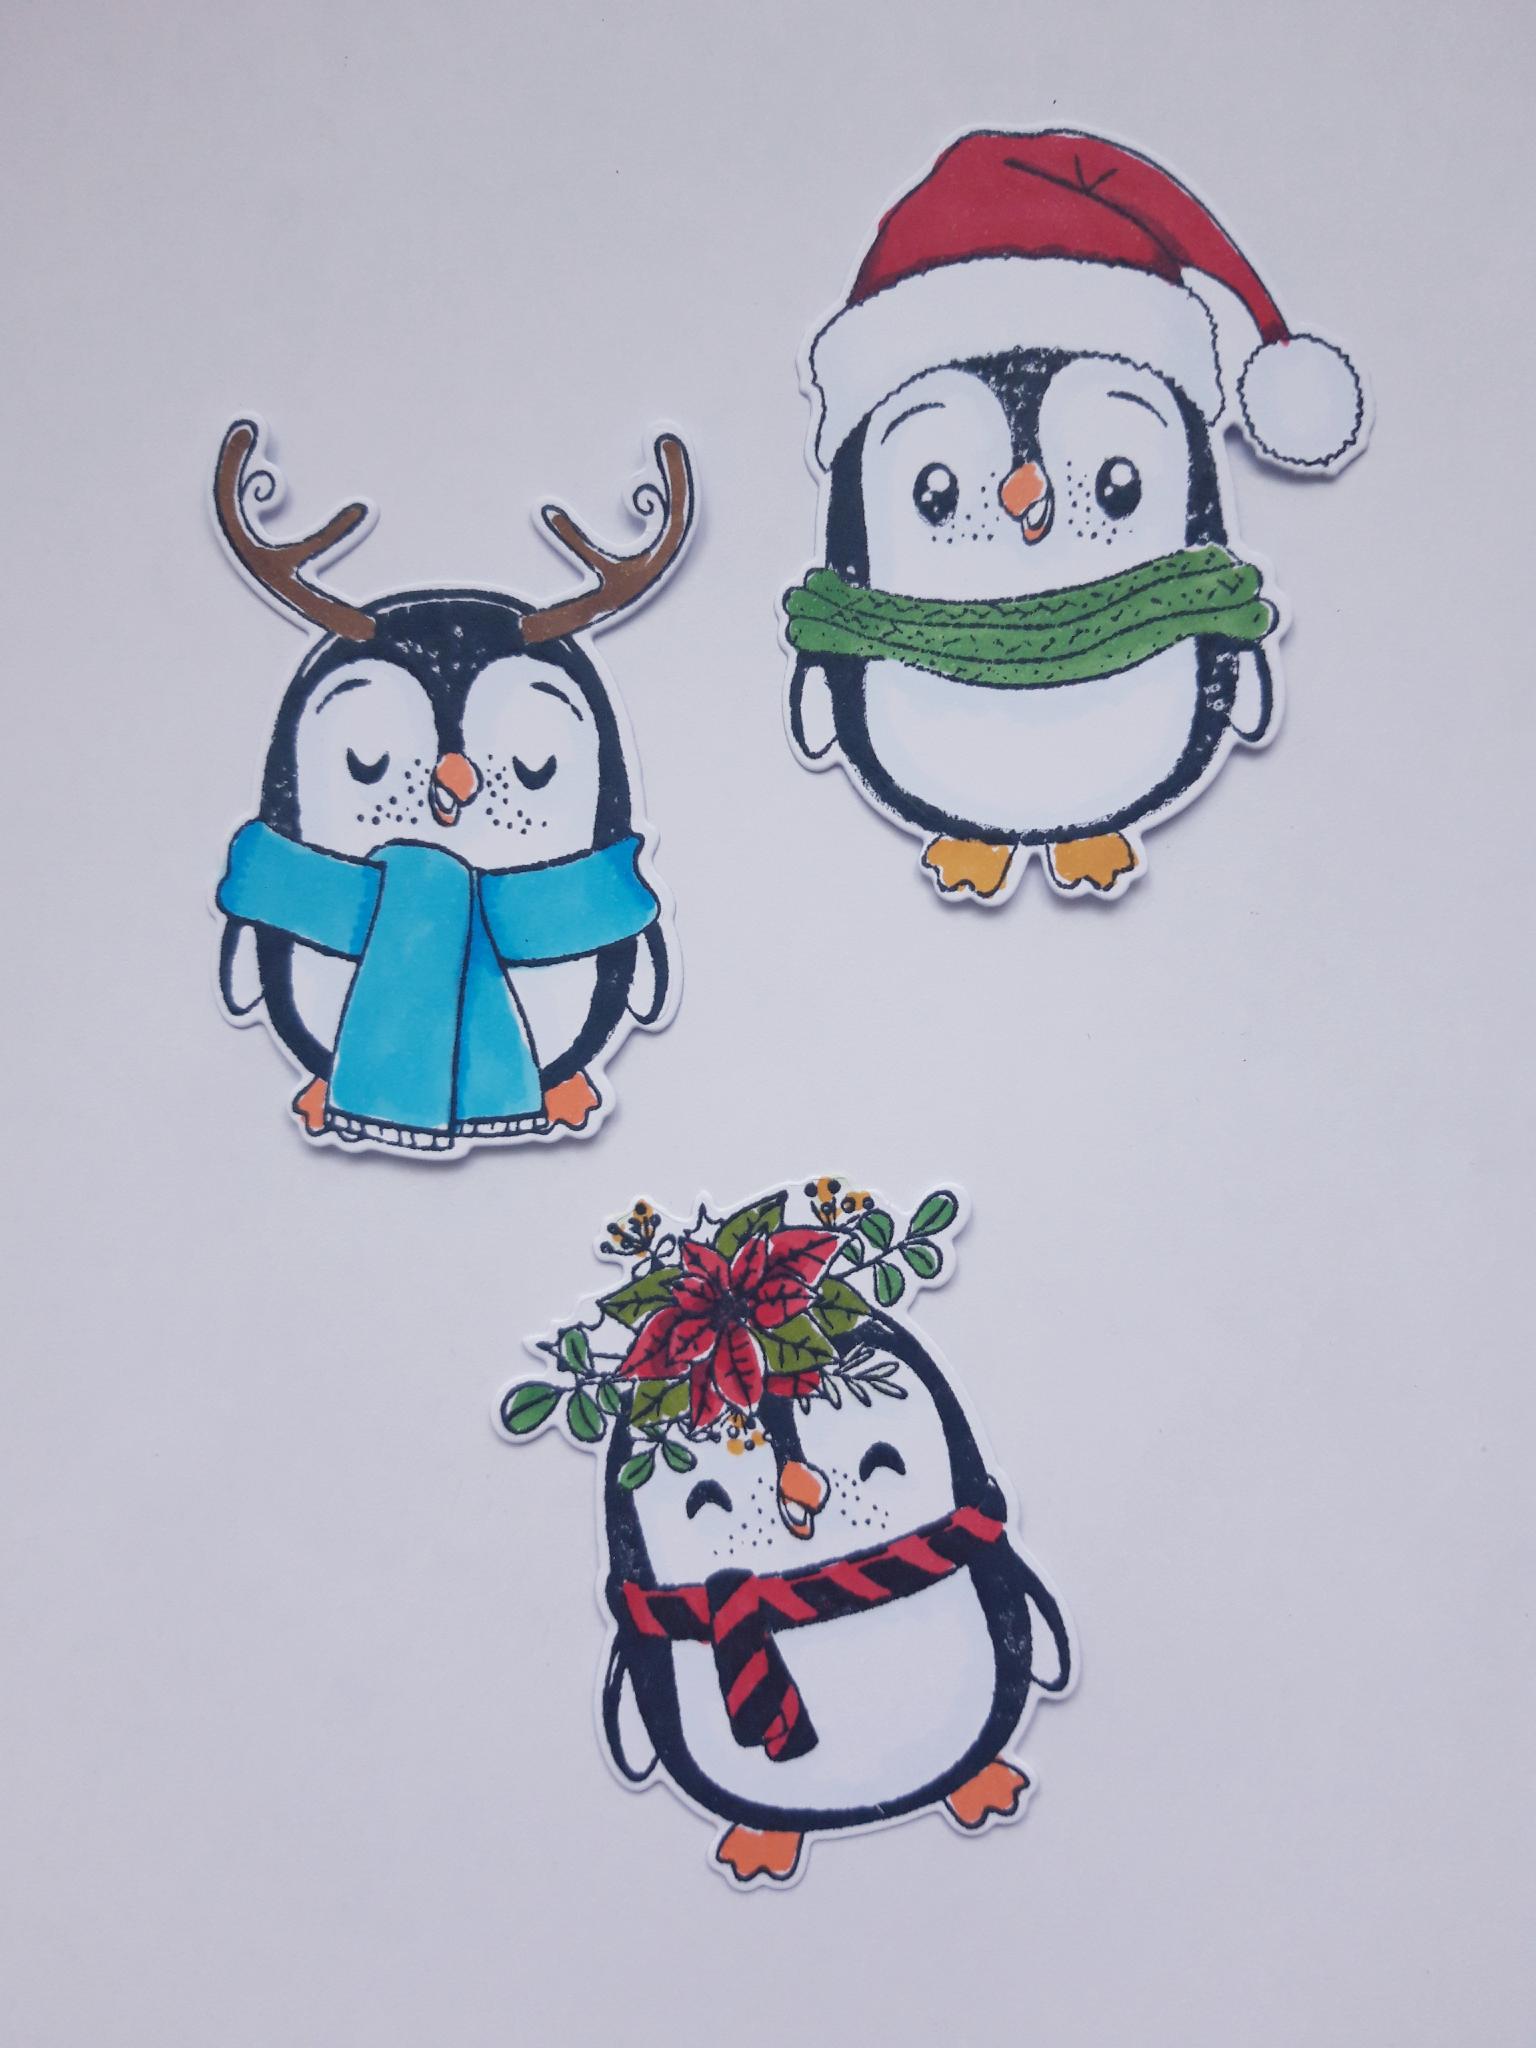
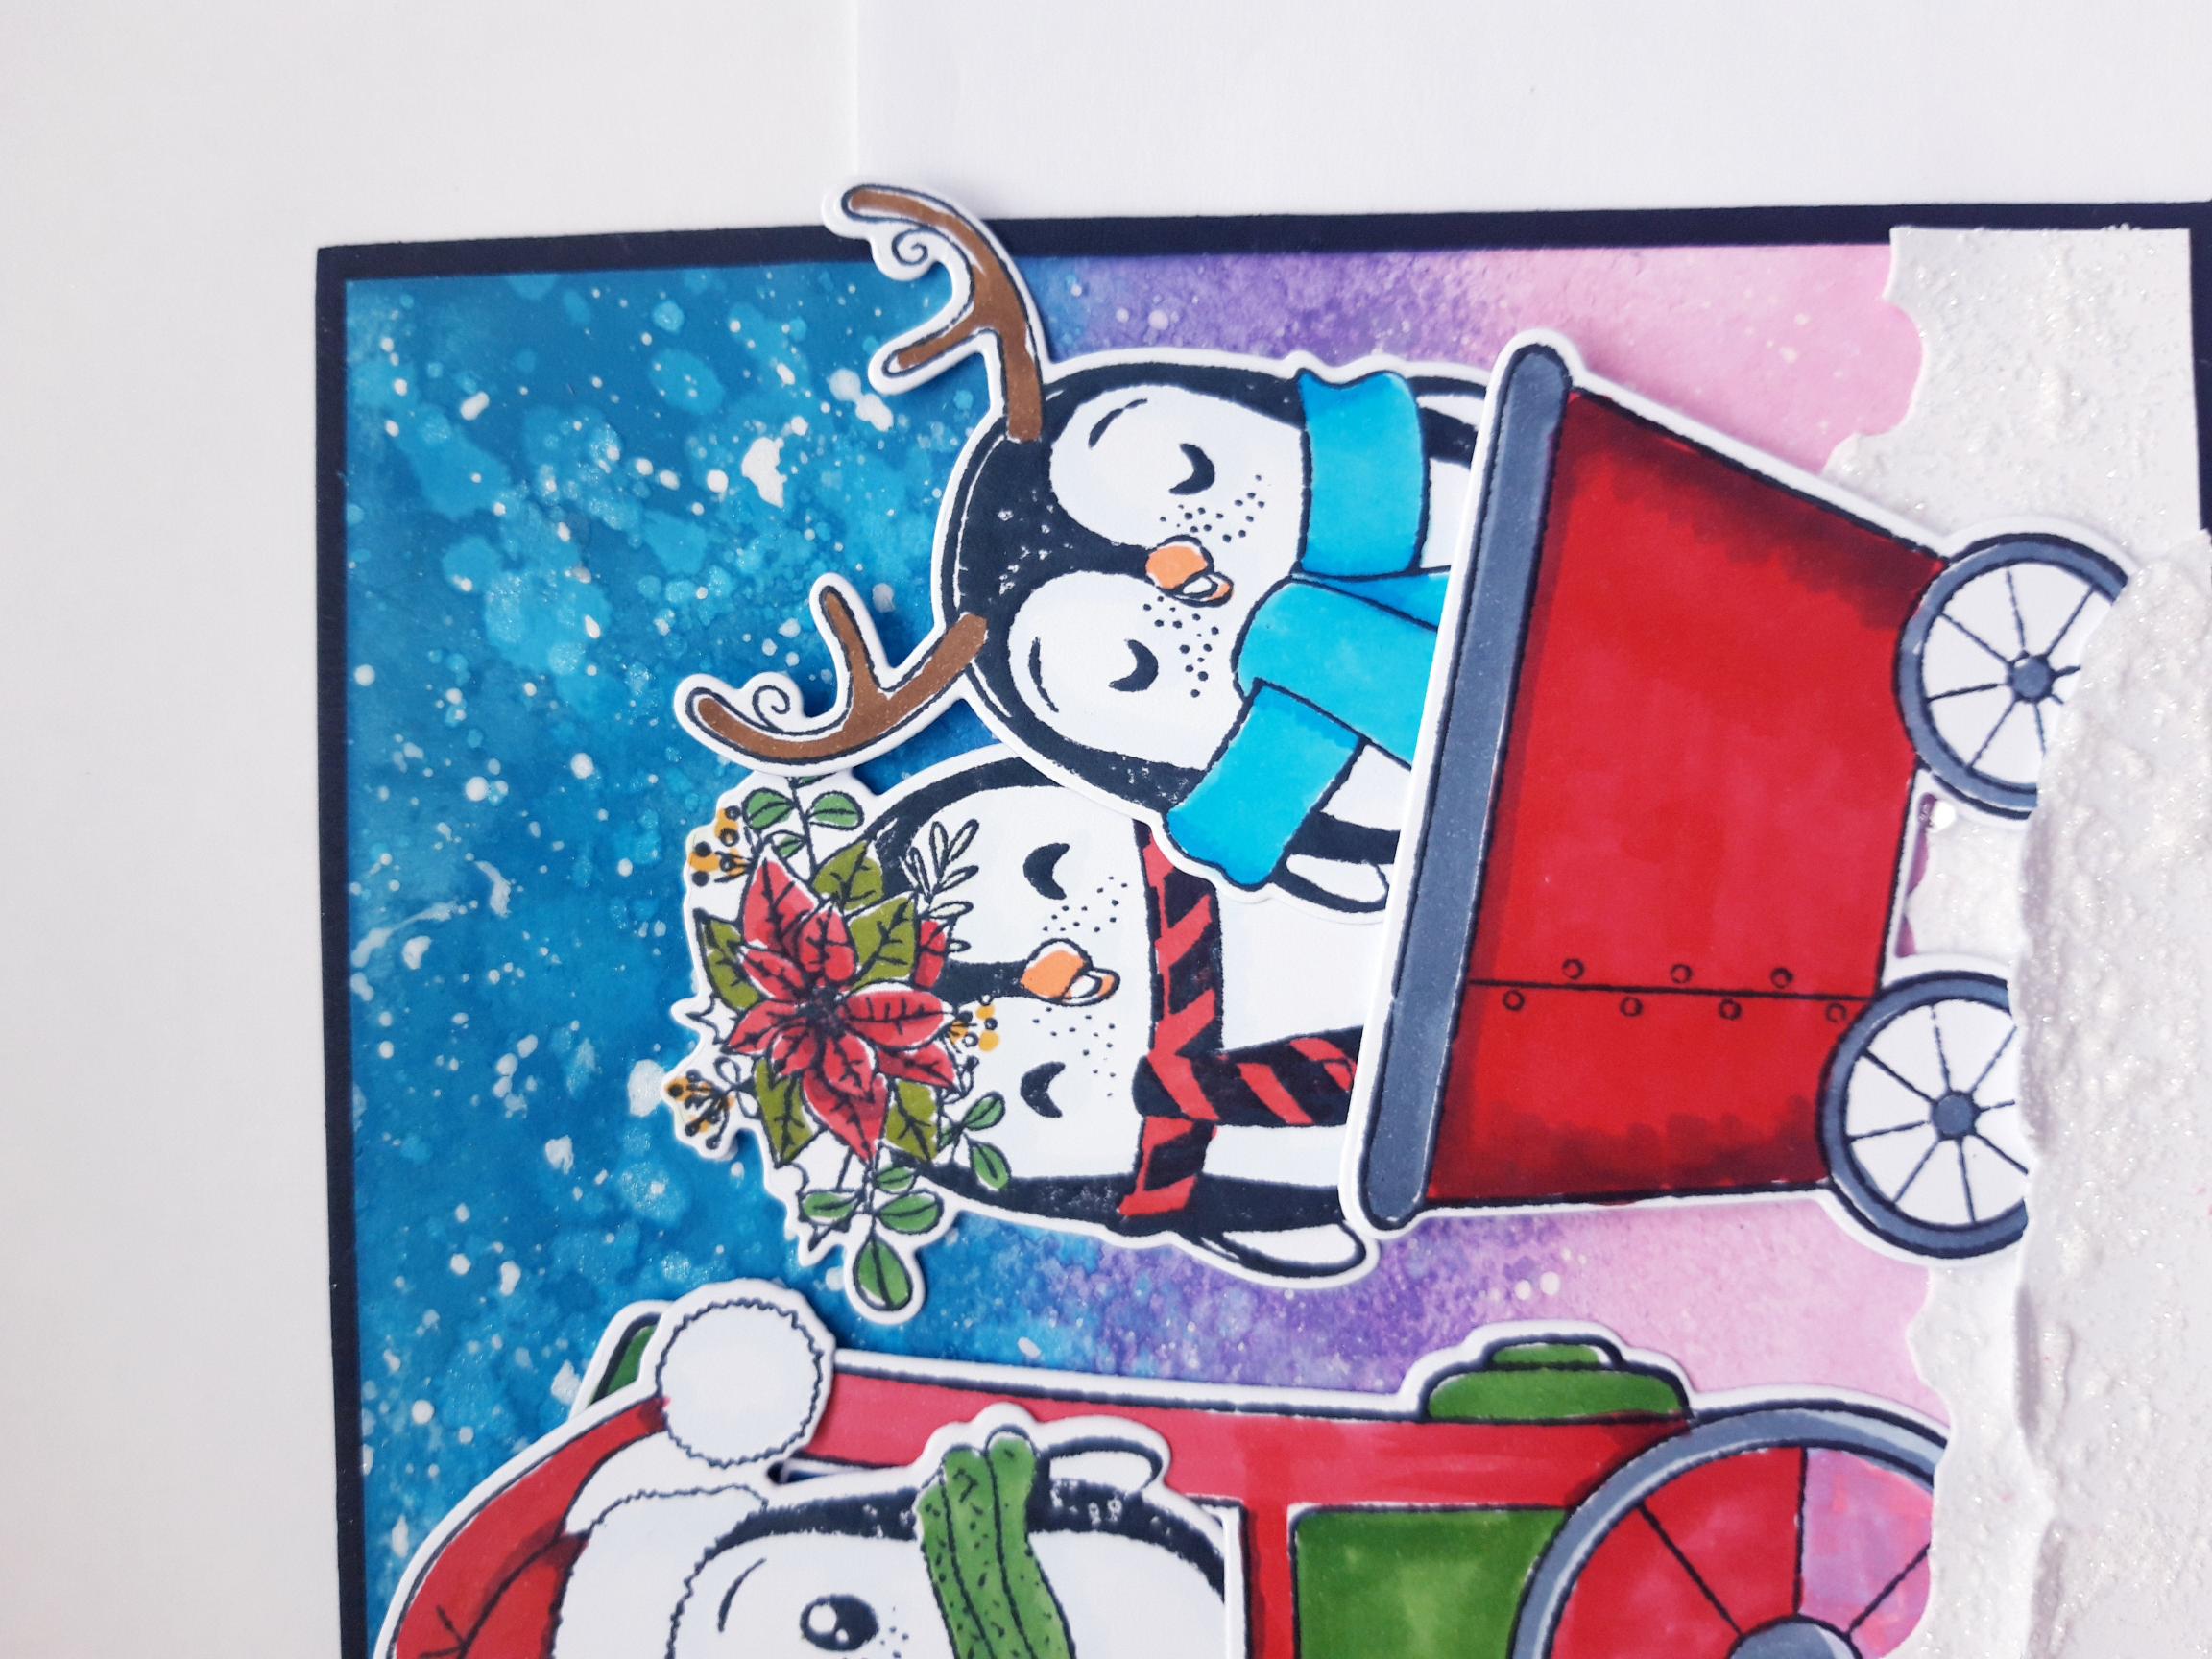
Ink up 3 of the Penguins from the Festive Penguins Stamp And Die Collection, with the Memento ink. Stamp on to the white card, put to one side earlier. Place the coordinating dies over your stamped images, secure with low tack tape, if preferred and run them through your die cutting machine. Use your Gossip Alcohol Markers to colour them in. |
|
Adhere one of the Penguins so they are sat inside the train window, as seen here. I tucked the bottom of it just inside the window, then adhered the rest with a foam pad, to give it dimension. |
|
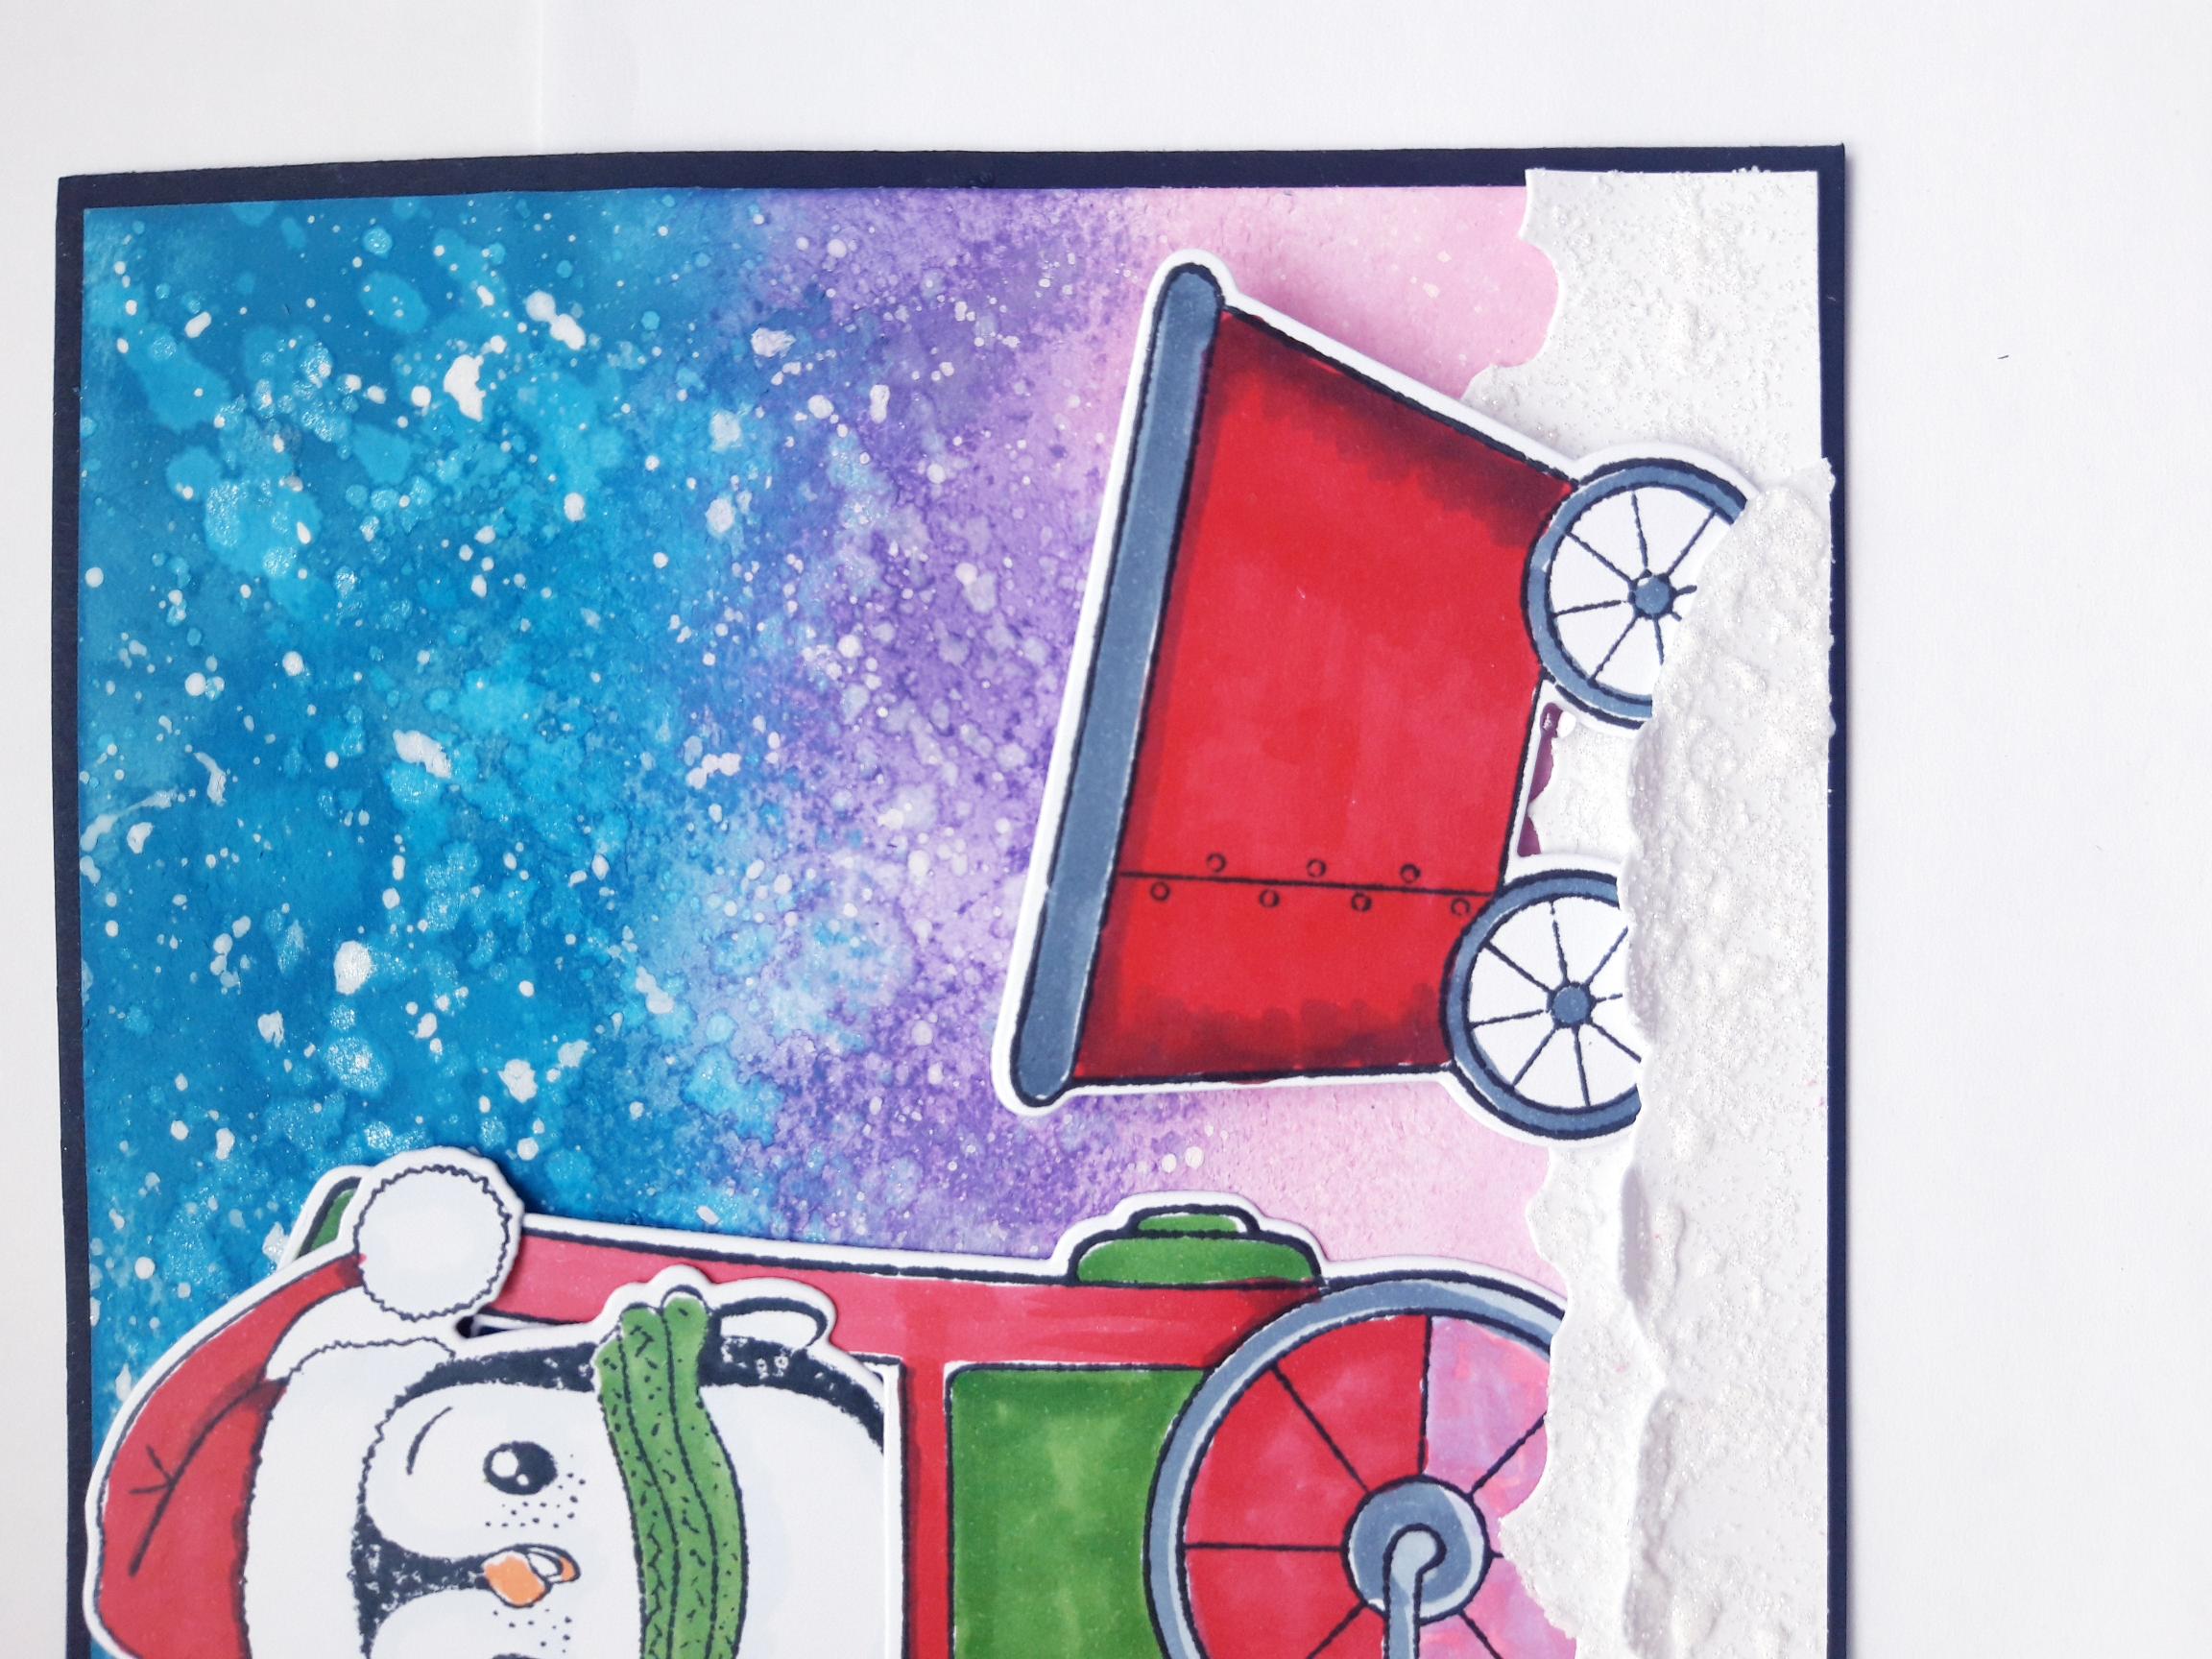
Having worked out where the other 2 Penguins would be placed inside the carriage, I adhered the carriage tucked behind the lower hill, with a small foam pad along the bottom edge of the carriage only, leaving the top of it open. |
|
Adhere both Penguins so they are sat inside the carriage, the back one using wet glue and the front with foam pads, or 3D glue gel, to create depth and dimension. |

|
Ink up the sentiment from the Festive Penguins Collection, with the Onyx Black Versafine and stamp on to the rest of the white card. Trim the card around the sentiment. Adhere on to the black card (2 x 1 3/4") and if necessary trim to create a small black edge. |
|
Adhere to the left of your card, with foam pads. |
|
To finish add your Stickles to the Penguin's Christmas hat, flowers, antlers and anywhere else you want to add a touch of glitter and sparkle!! |