Give your friends $10 off their first order!
Refer a FRIEND


WHAT YOU WILL NEED:
White card blank (7 x 7")
White card (6 x 6")
Trust Your Journey Stamp And Die Collection
Stylized Circle Stencil
Versafine Ink Pad: Onyx Black
Memento Ink Pad: Tuxedo Black
Gossip Alcohol Markers: Choose your own colour combination
Distress Oxide: Unchartered Mariner, Salvaged Patina, Fossilized Amber
Blending tool
Paint brush
Eureka 101
Paper Trimmer
Perfect Together Glue
Foam pads
Low tack tape
Die Cutting machine
[click image to enlarge] 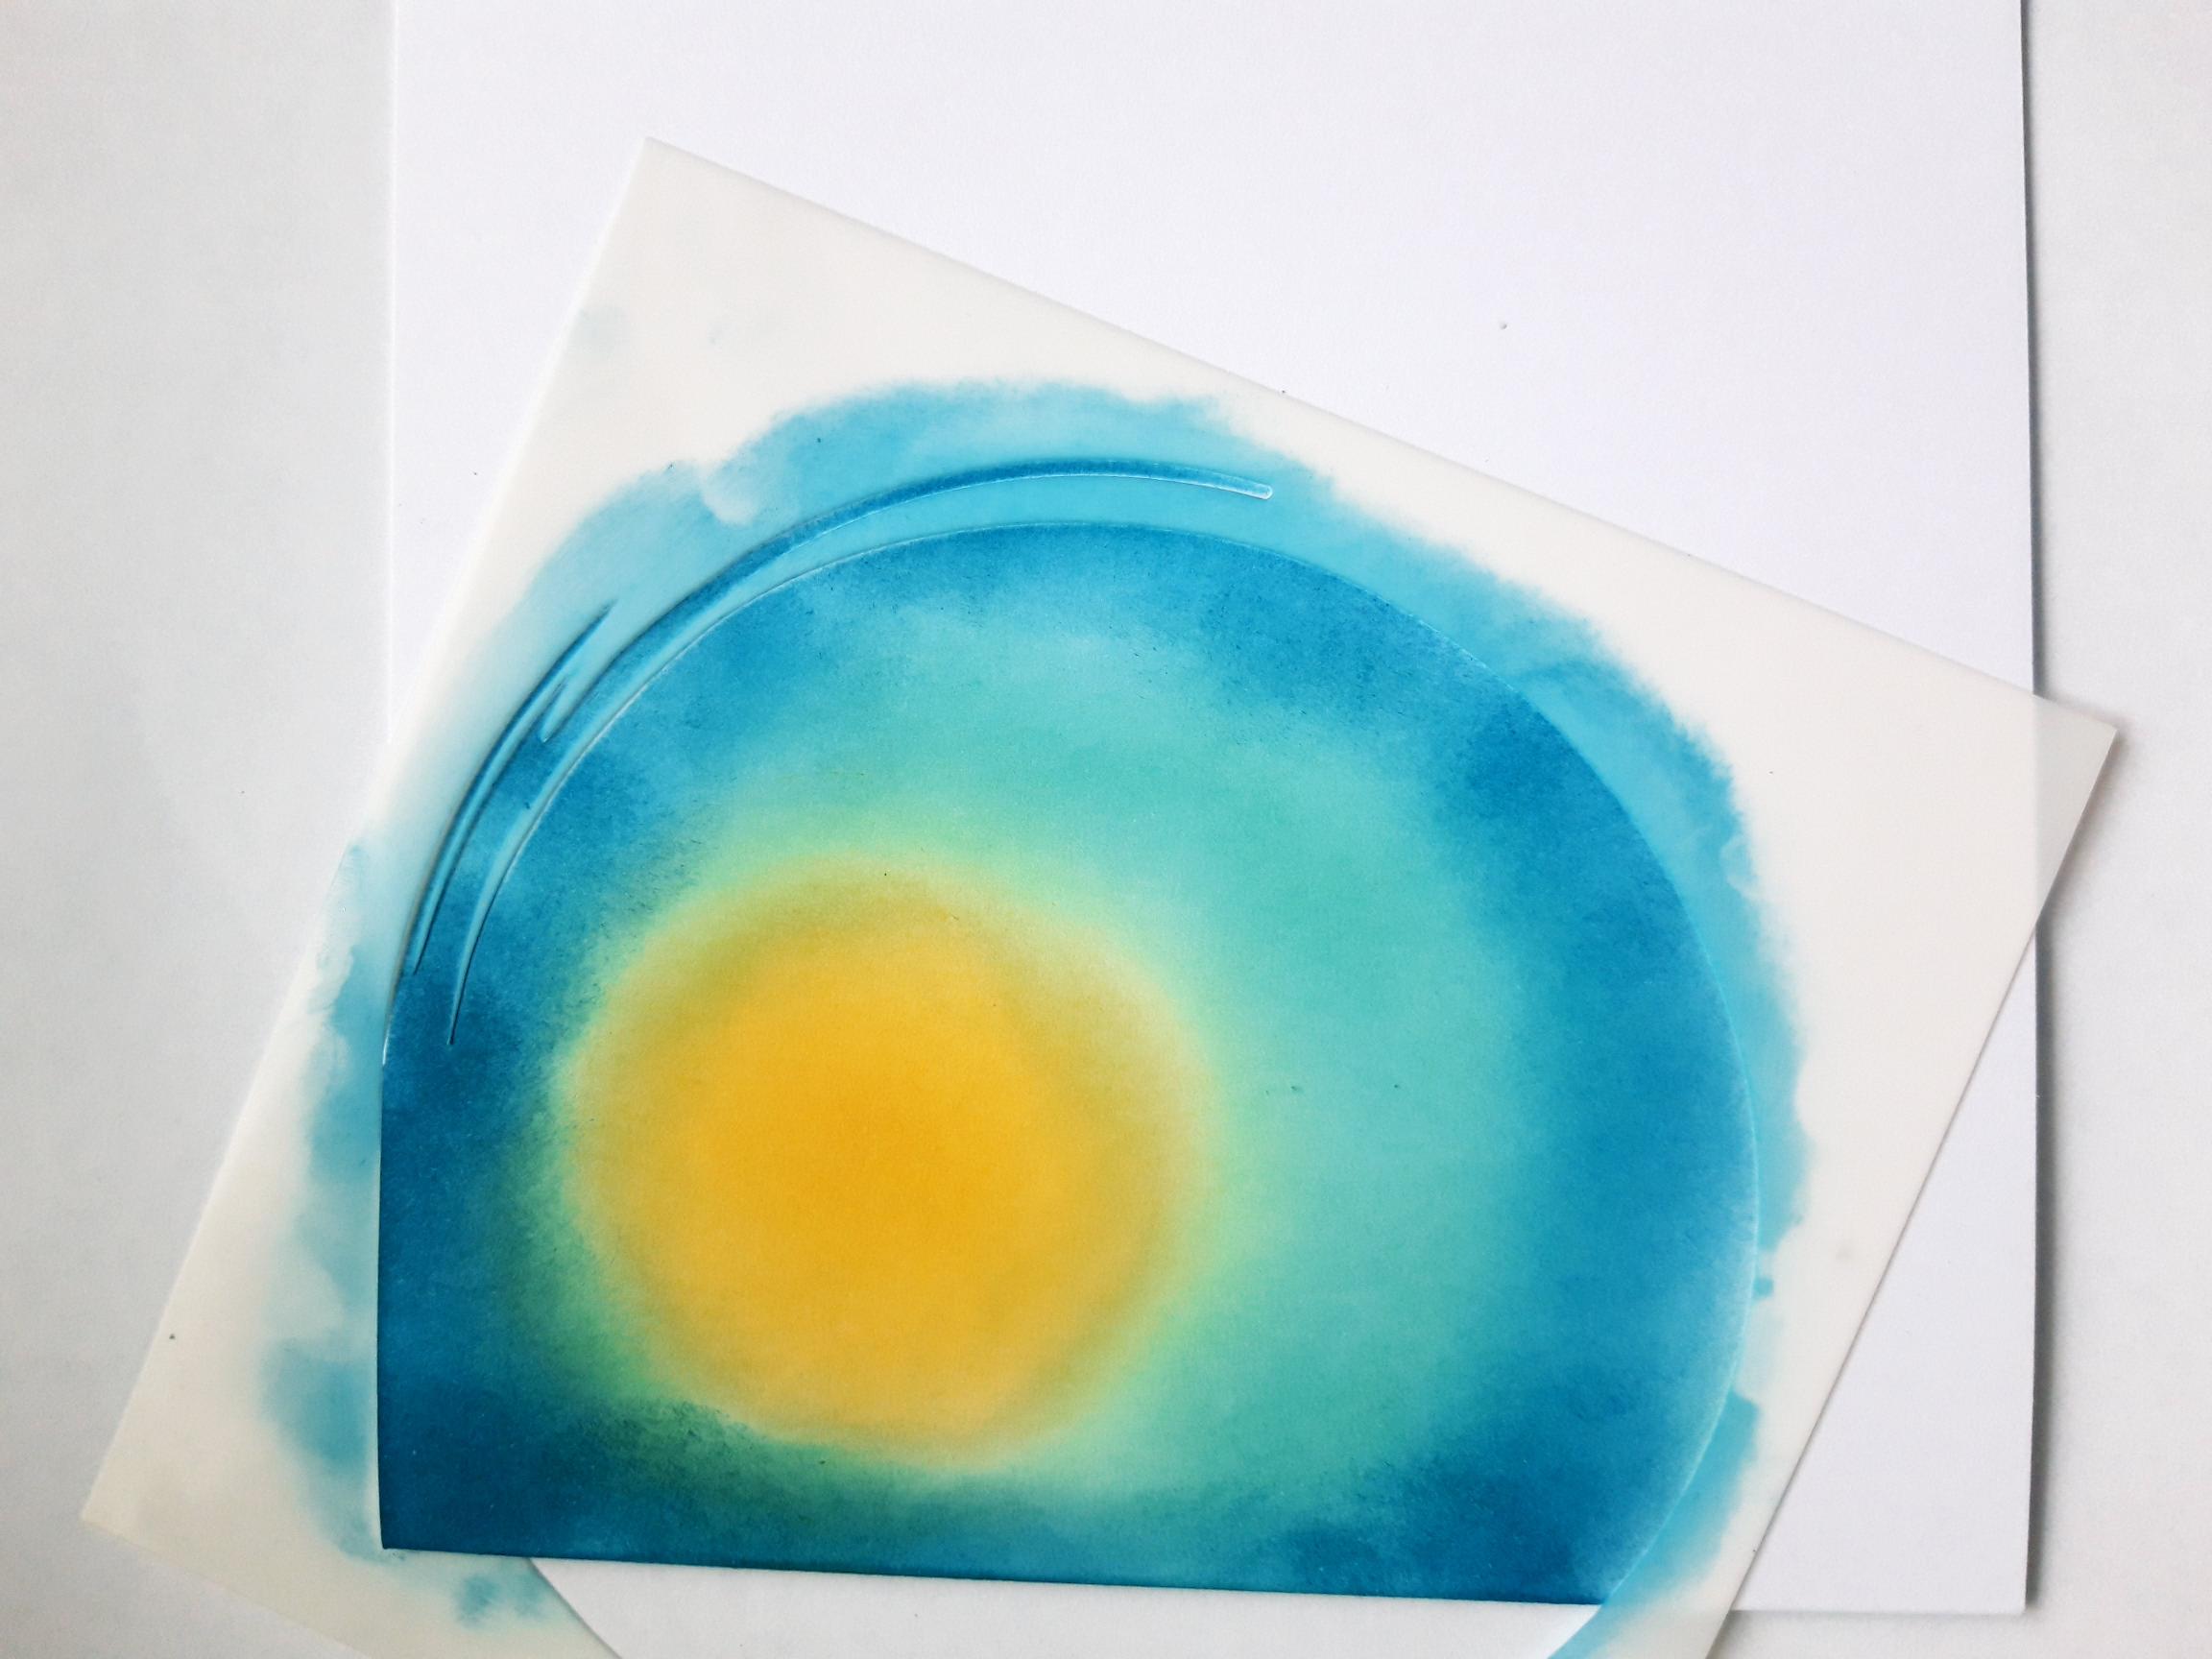
|
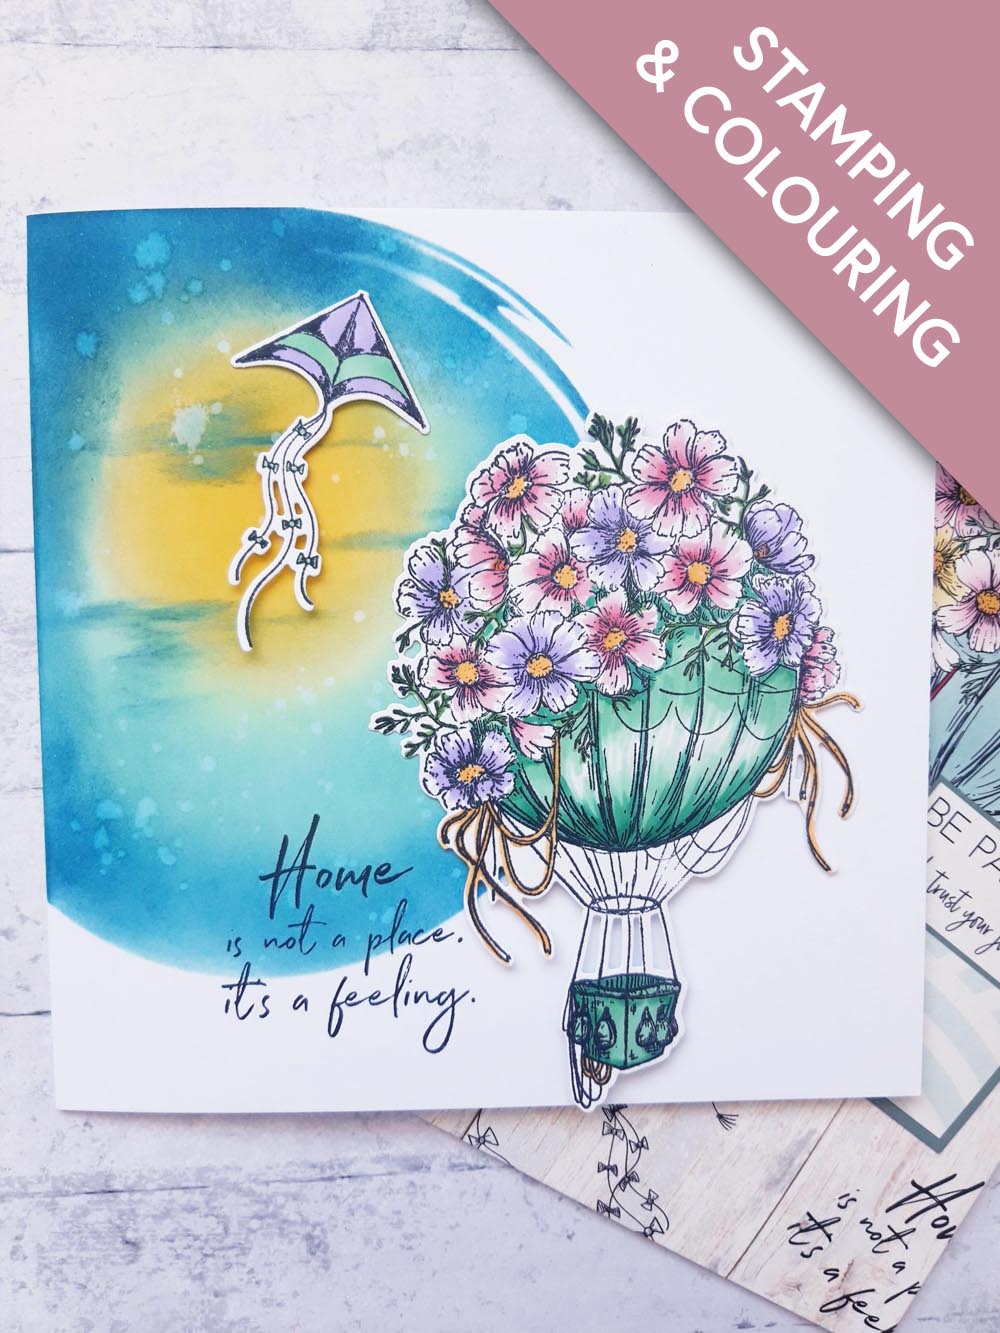
Place the Stylized Circle stencil off the top left corner of the white card blank. Blend the Fossilized Amber Oxide to create a Sun, towards the top left corner of the stencil. Blend out from the Sun with the Salvaged Patina and then with the Unchartred Mariner, taking it up to the edge of the stencil as seen here. Tip: Go back over with each colour, to blend out any harsh lines and create a softer blend. |
|
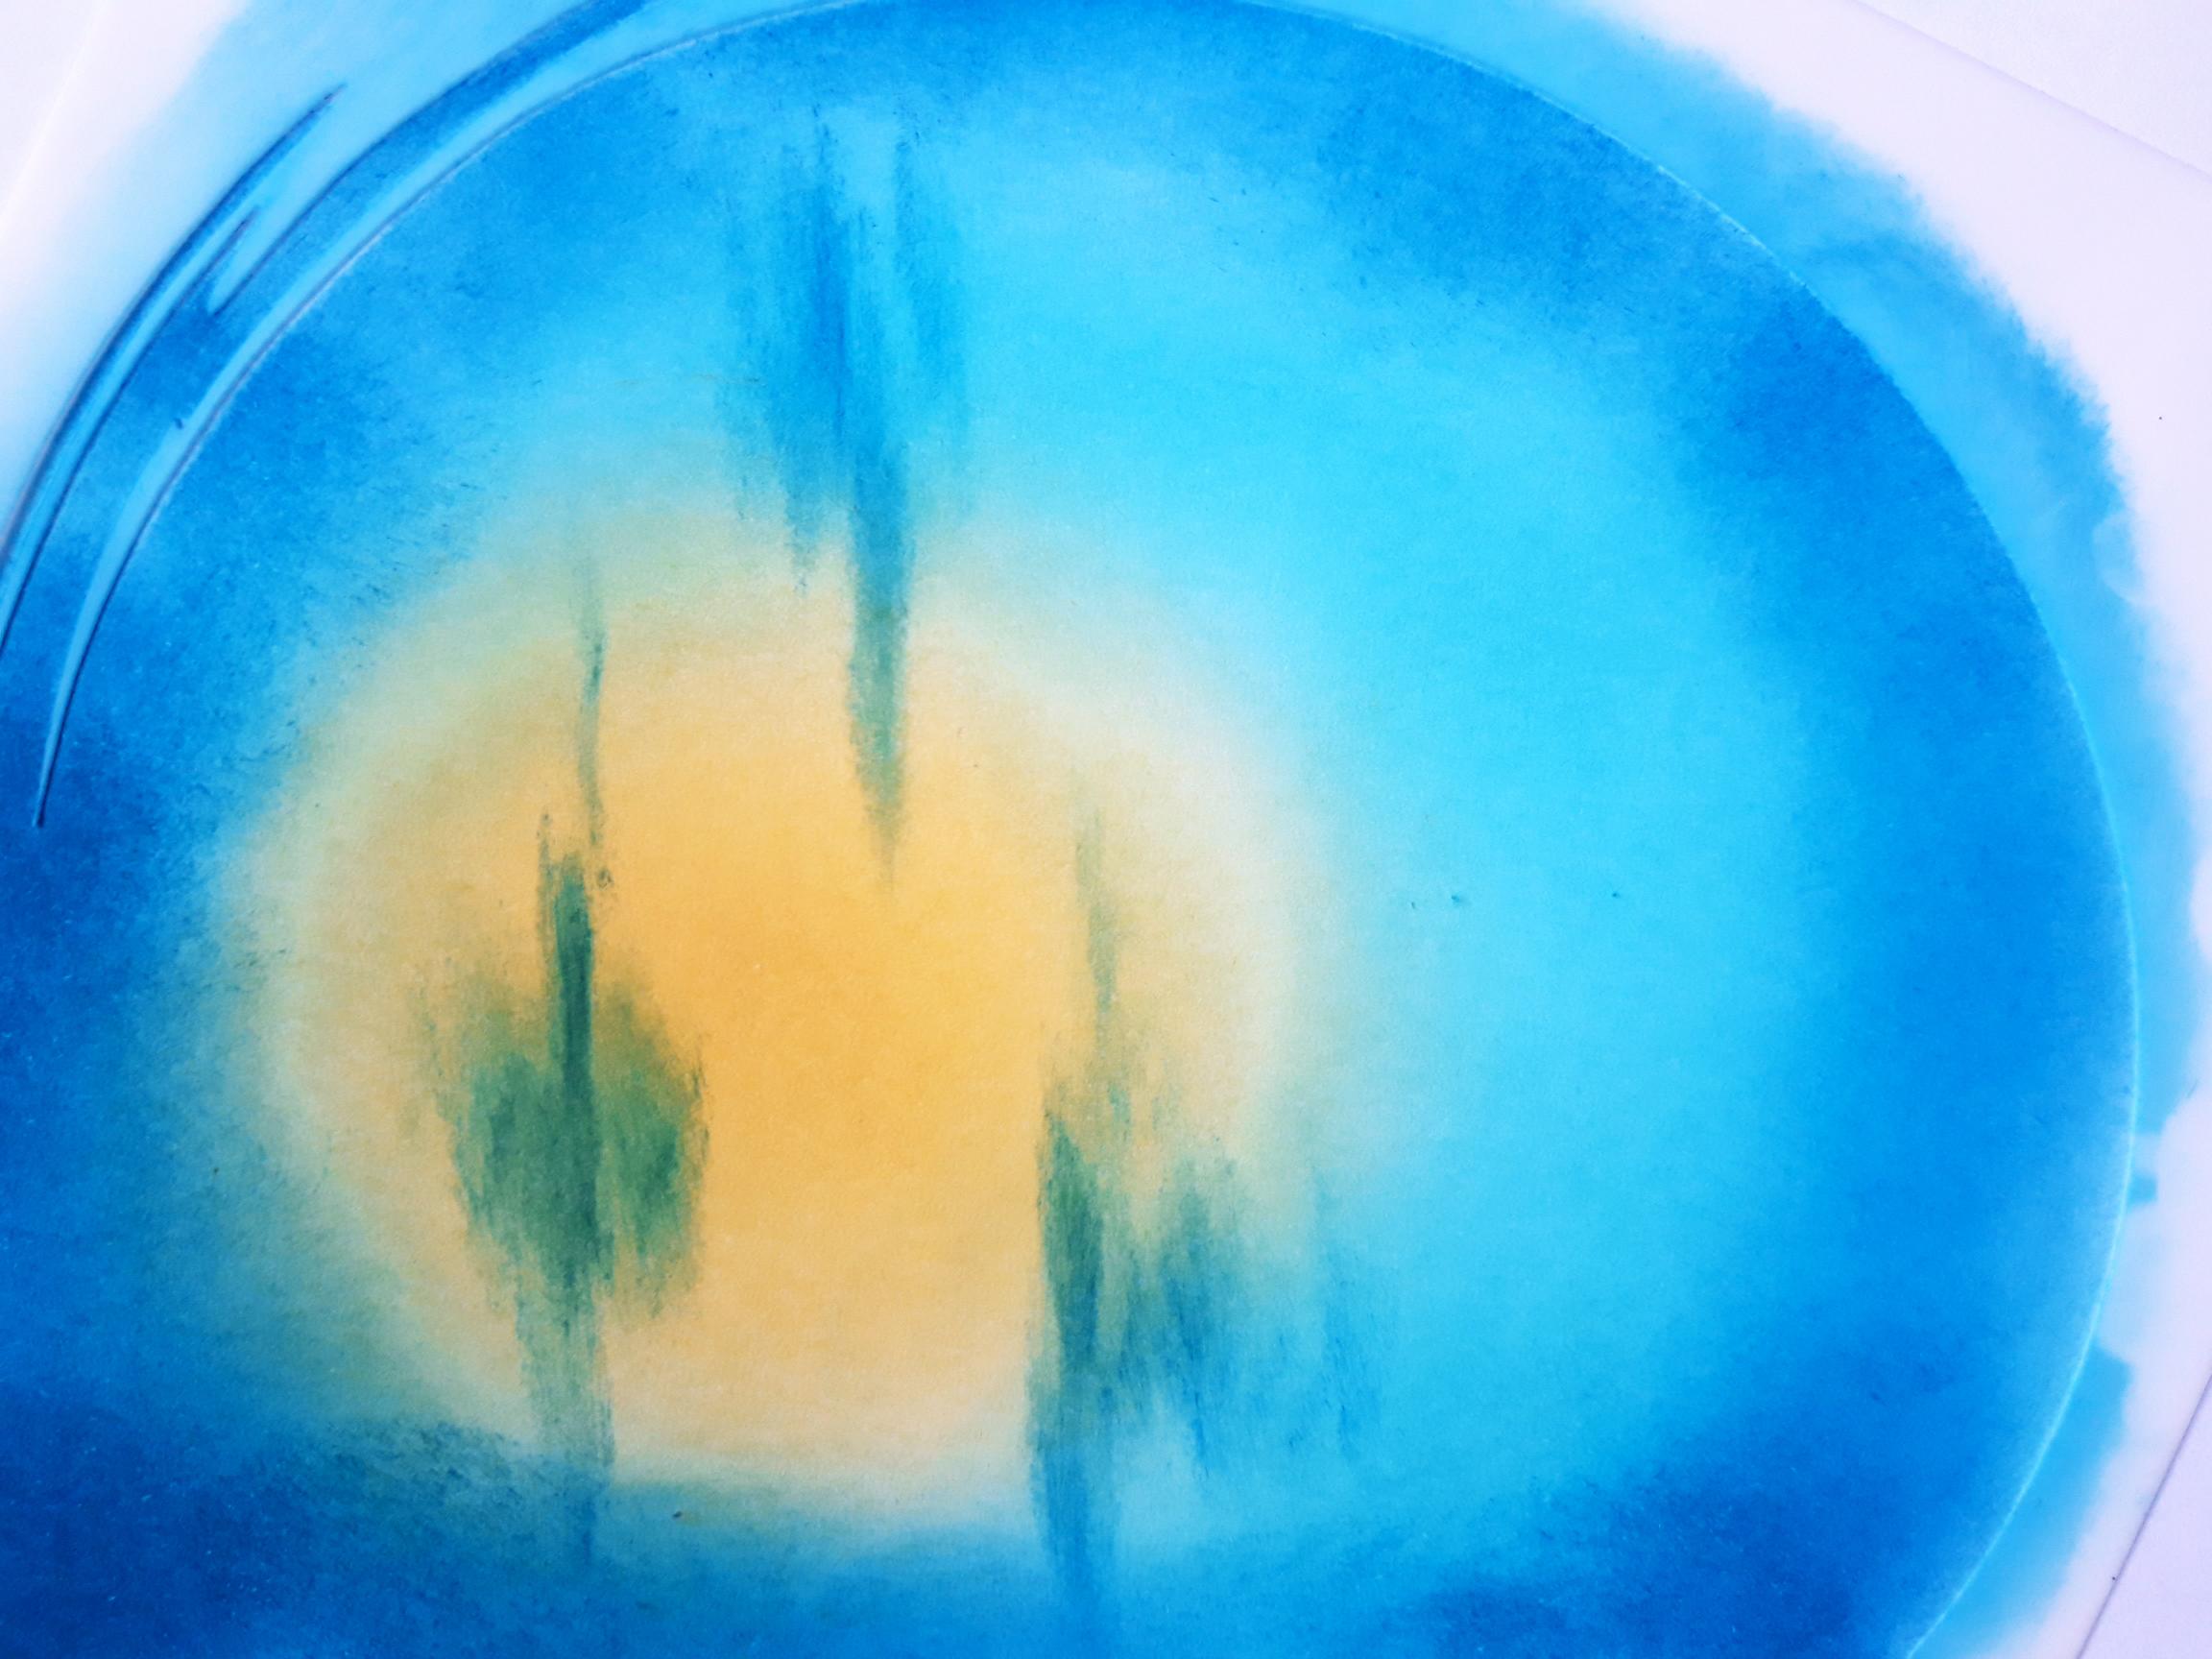
Use the edge of your blending tool to drag Unchartered Mariner Oxide across the Sun, to create the effect of wispy clouds floating by! |
|
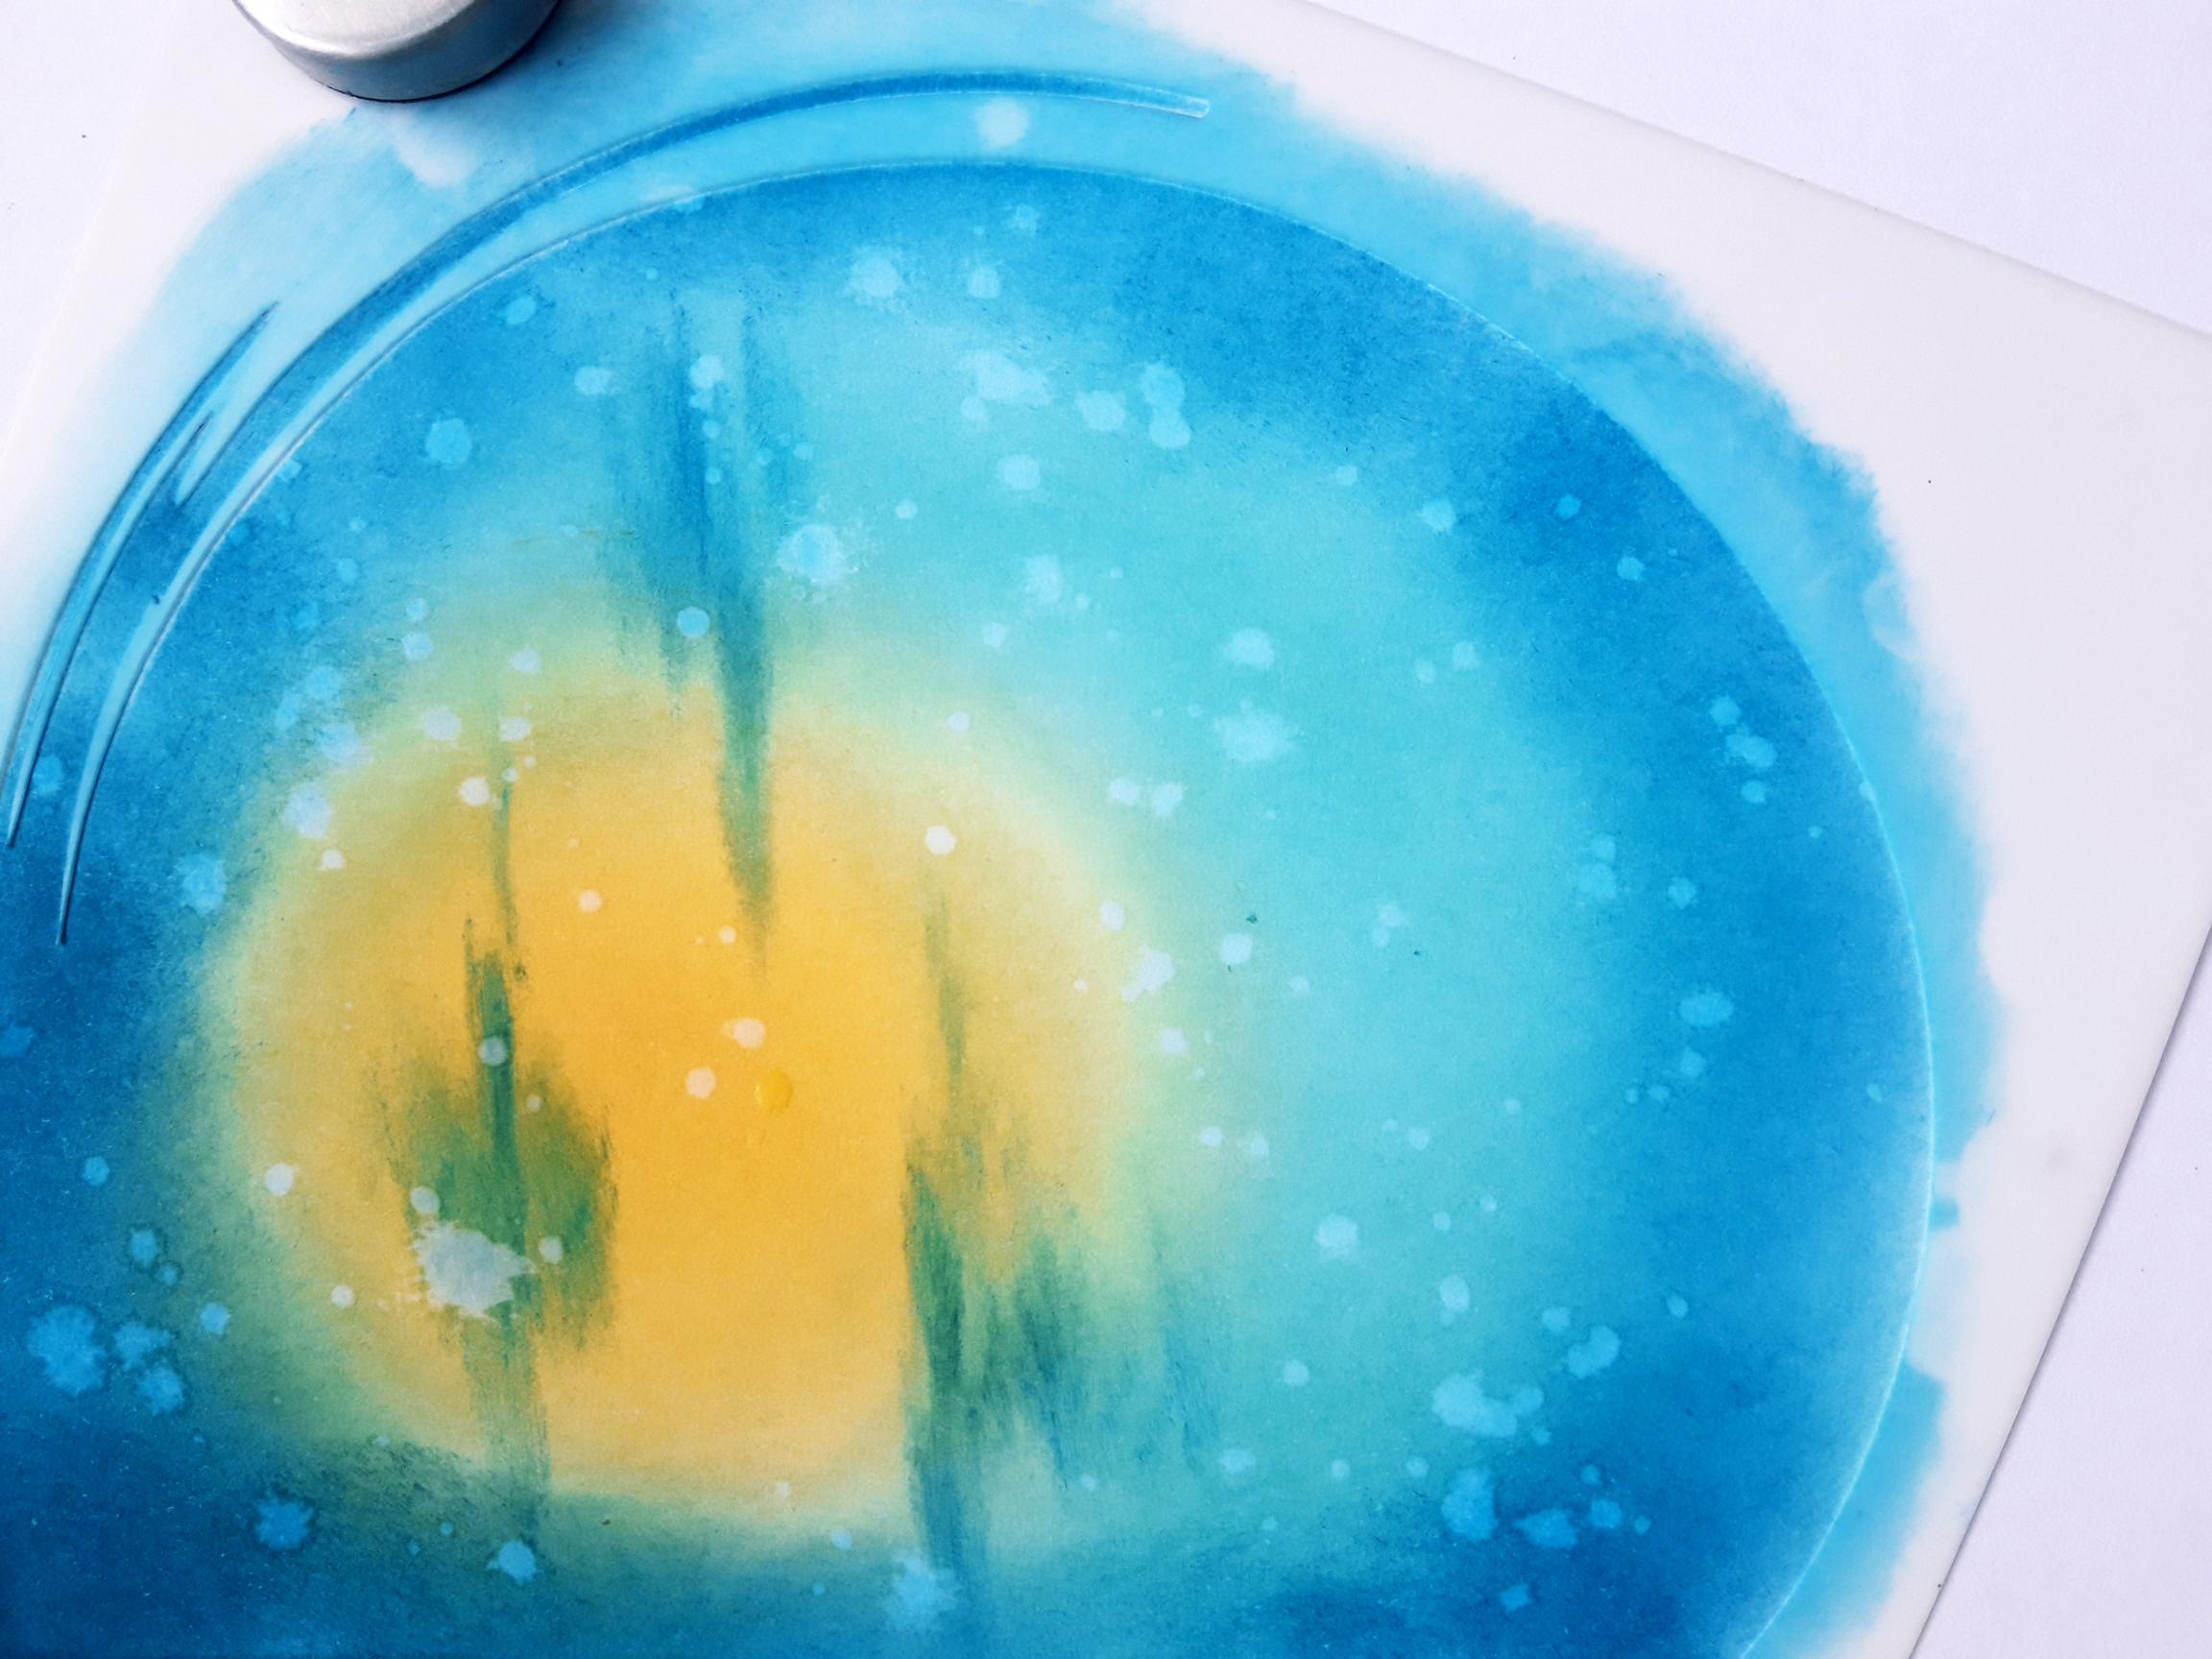
Use a paint brush to splatter water on to your background. Wait for a few seconds then lift off the excess water and ink, with a paper towel. Remove the stencil and set your card to one side to dry. |
|
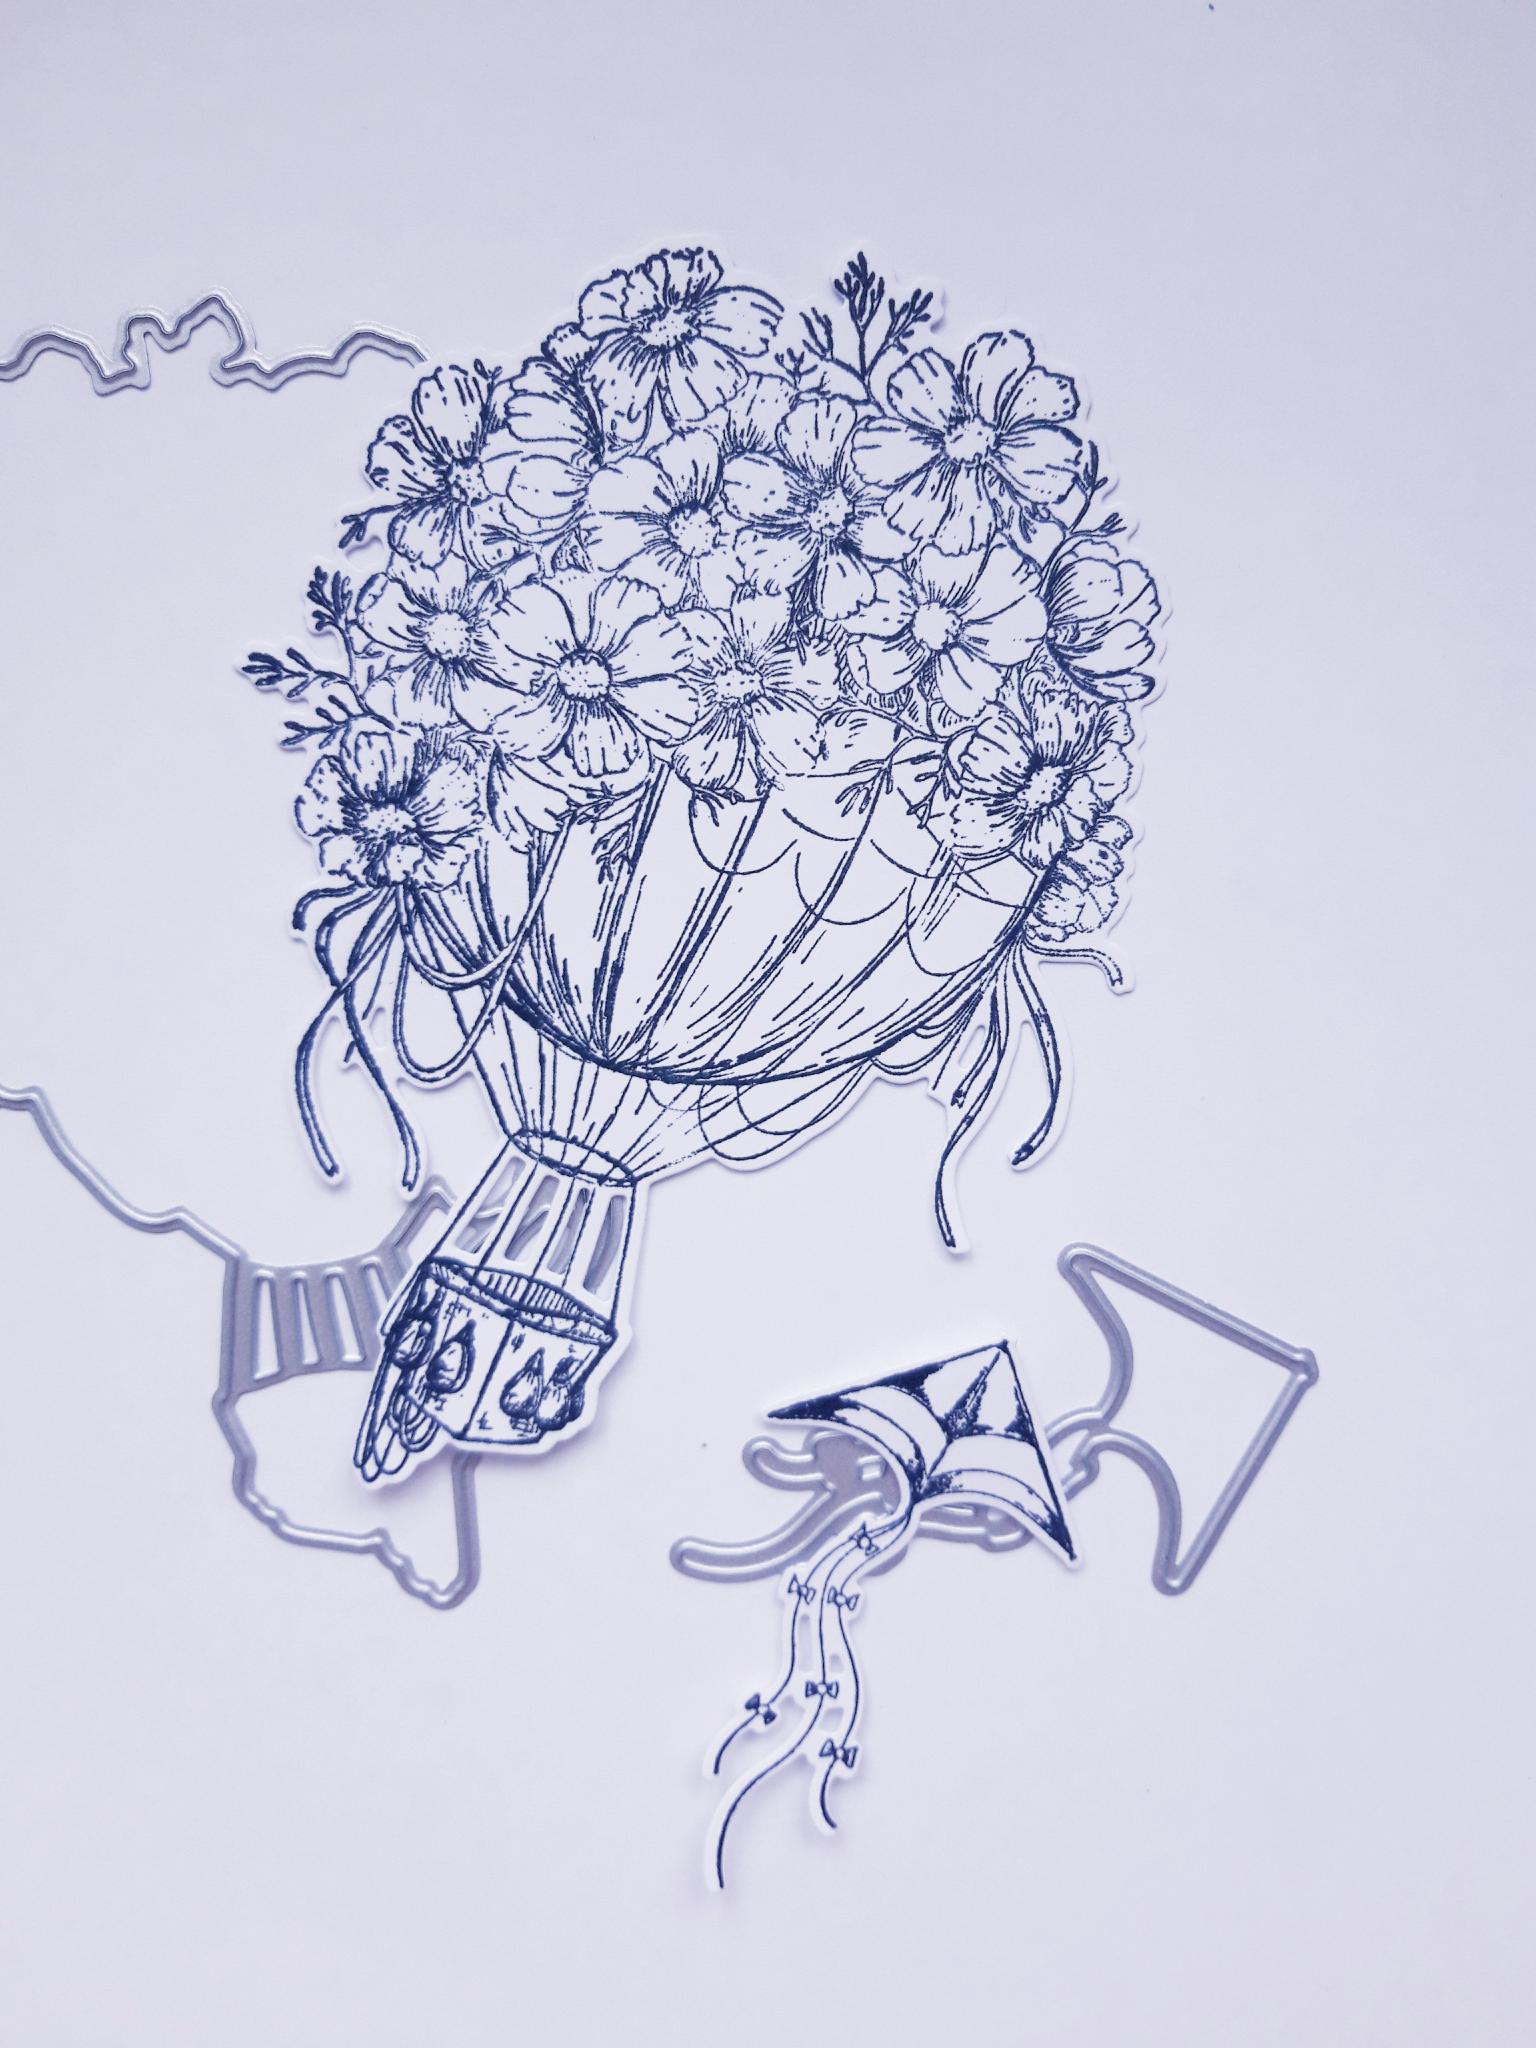
Ink up the hot air balloon stamp with the Tuxedo Black Memento Ink, and stamp on to the white card (6 x 6"). Ink up one of the kite stamps, with the same ink and stamp it on to the same card. Once the ink is dry, place the coordinating dies over the stamped images. Secure with low tack tape, if preferred and run them through your die cutting machine. |
|
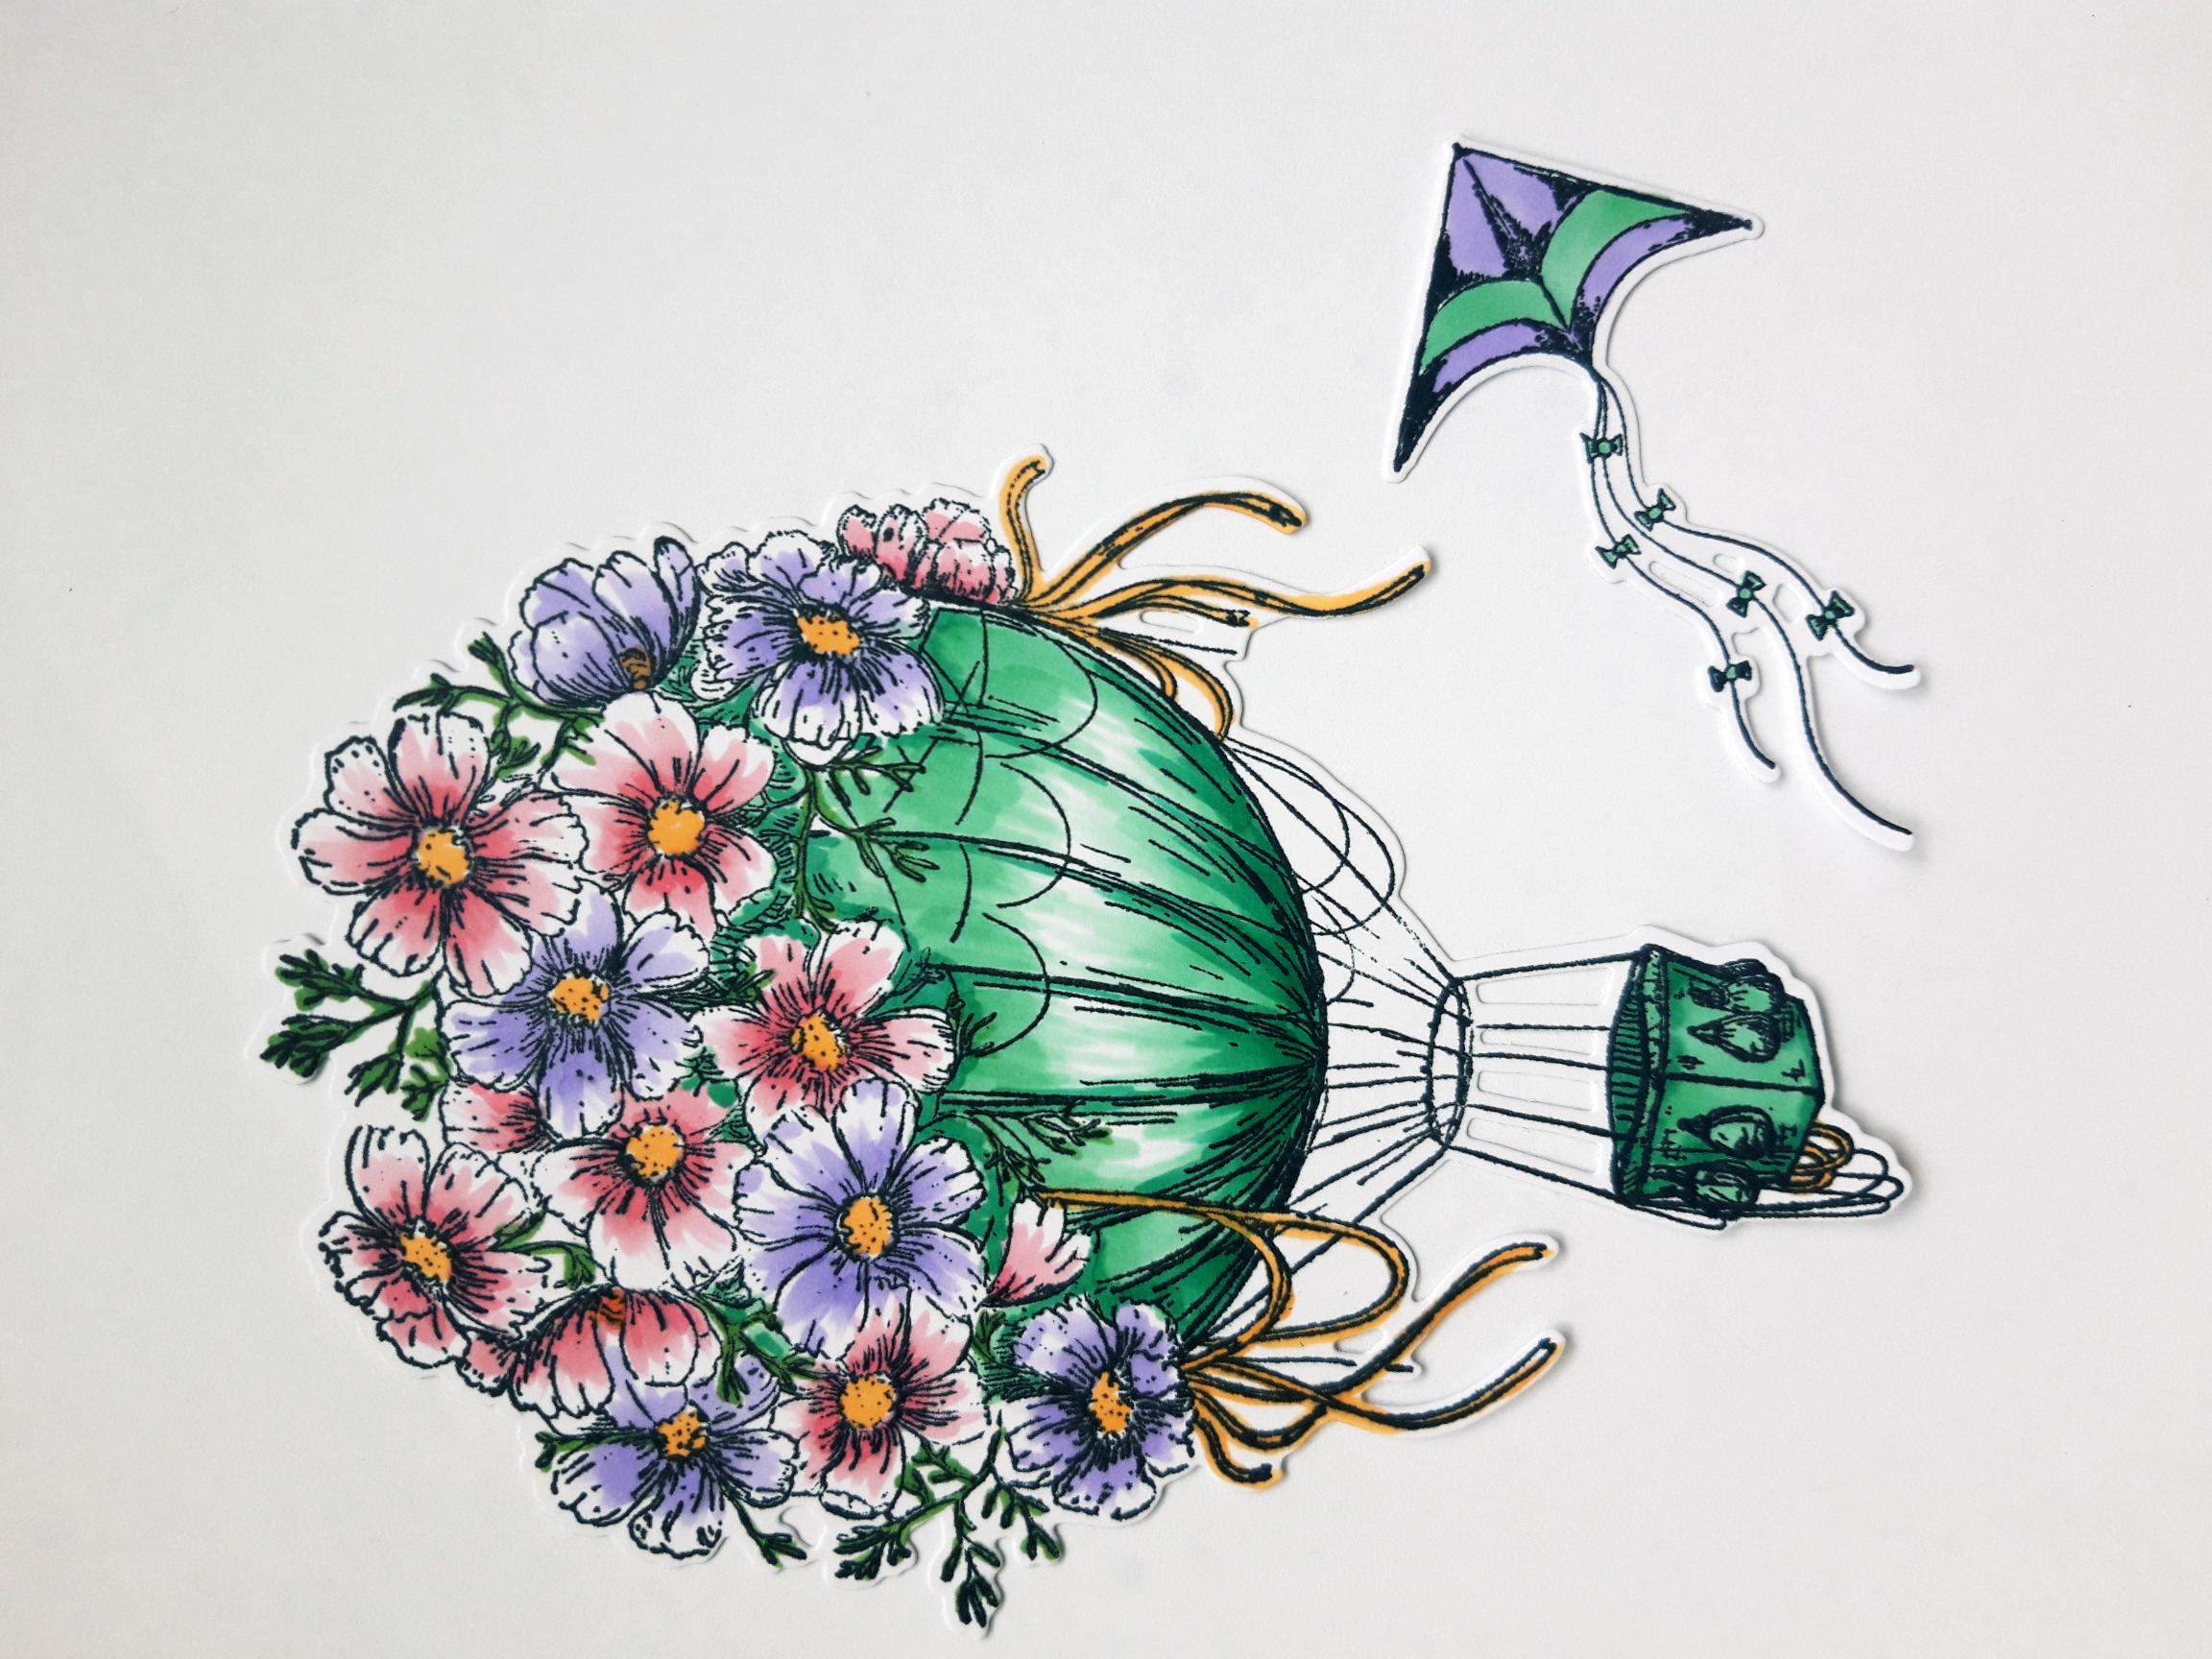
Use your Gossip Alcohol Markers to colour in your die cut elements, in whatever colours you want. |
|
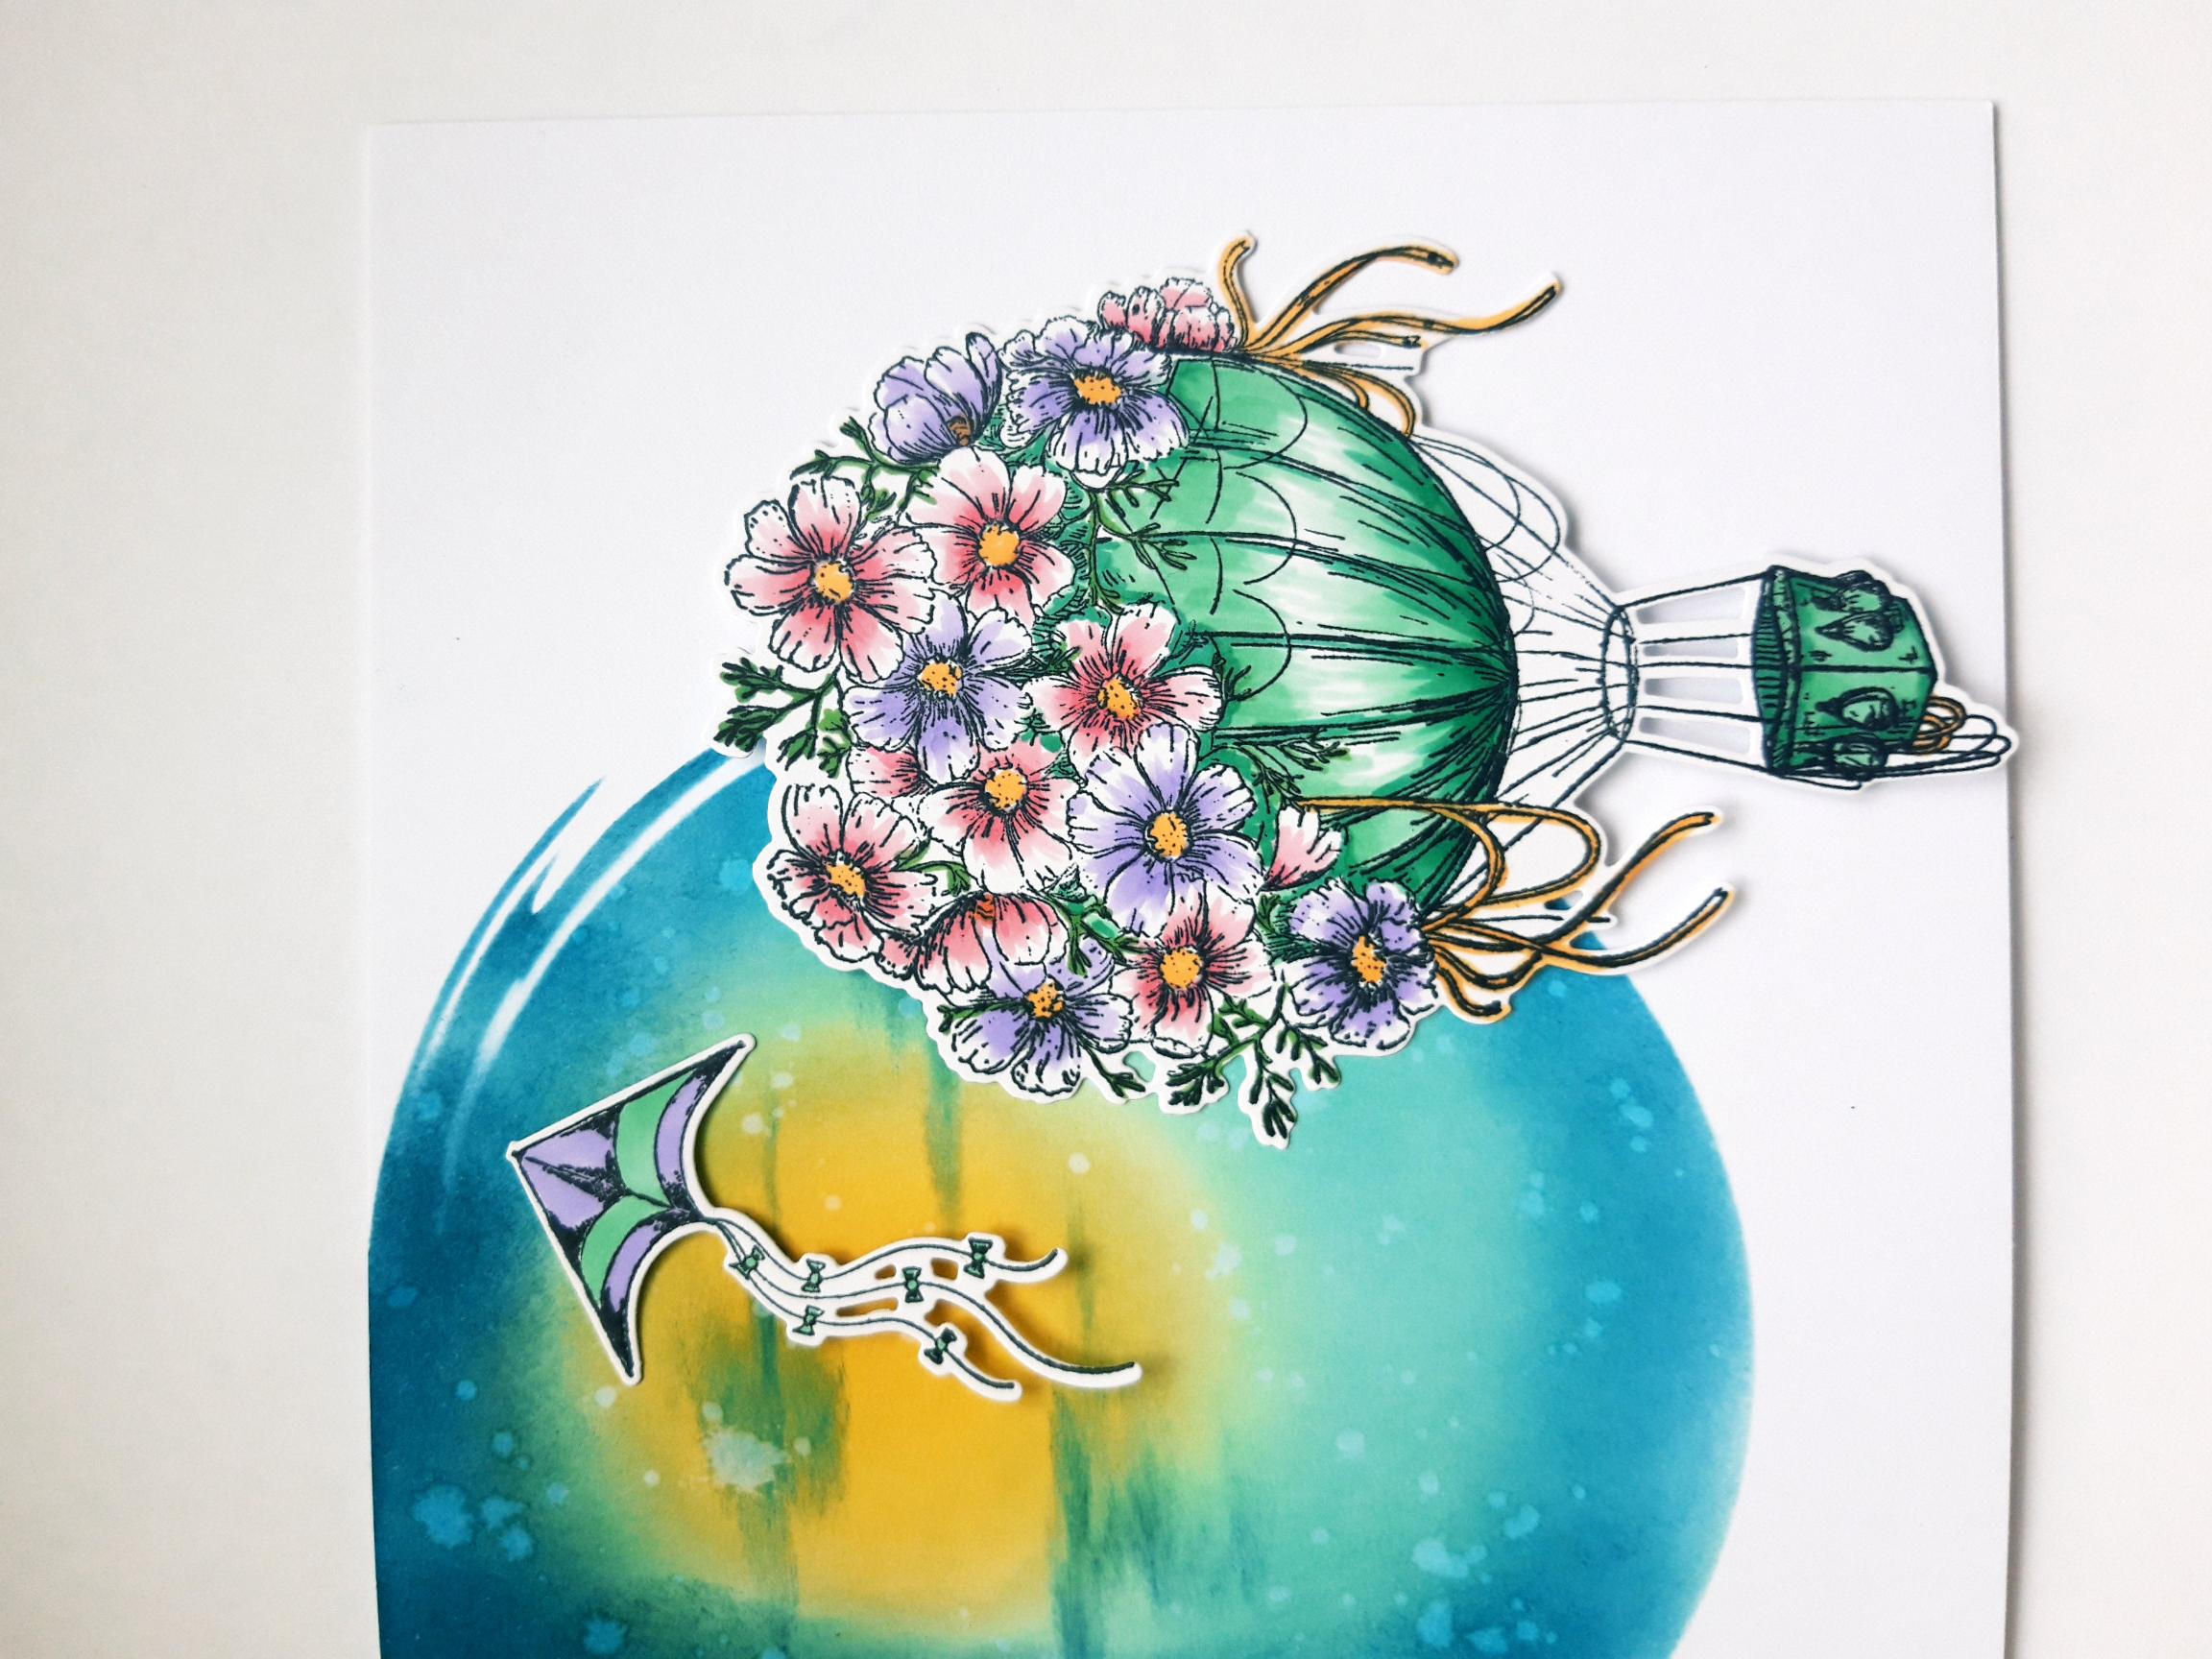
Shape the die cut, hot air balloon with your fingers, before adhering on to your card with foam pads. I used one foam pad on top of another, to create extra dimension to the balloon. Adhere the kite with wet glue or foam pads, allowing the kite strings to hang loose. |
|
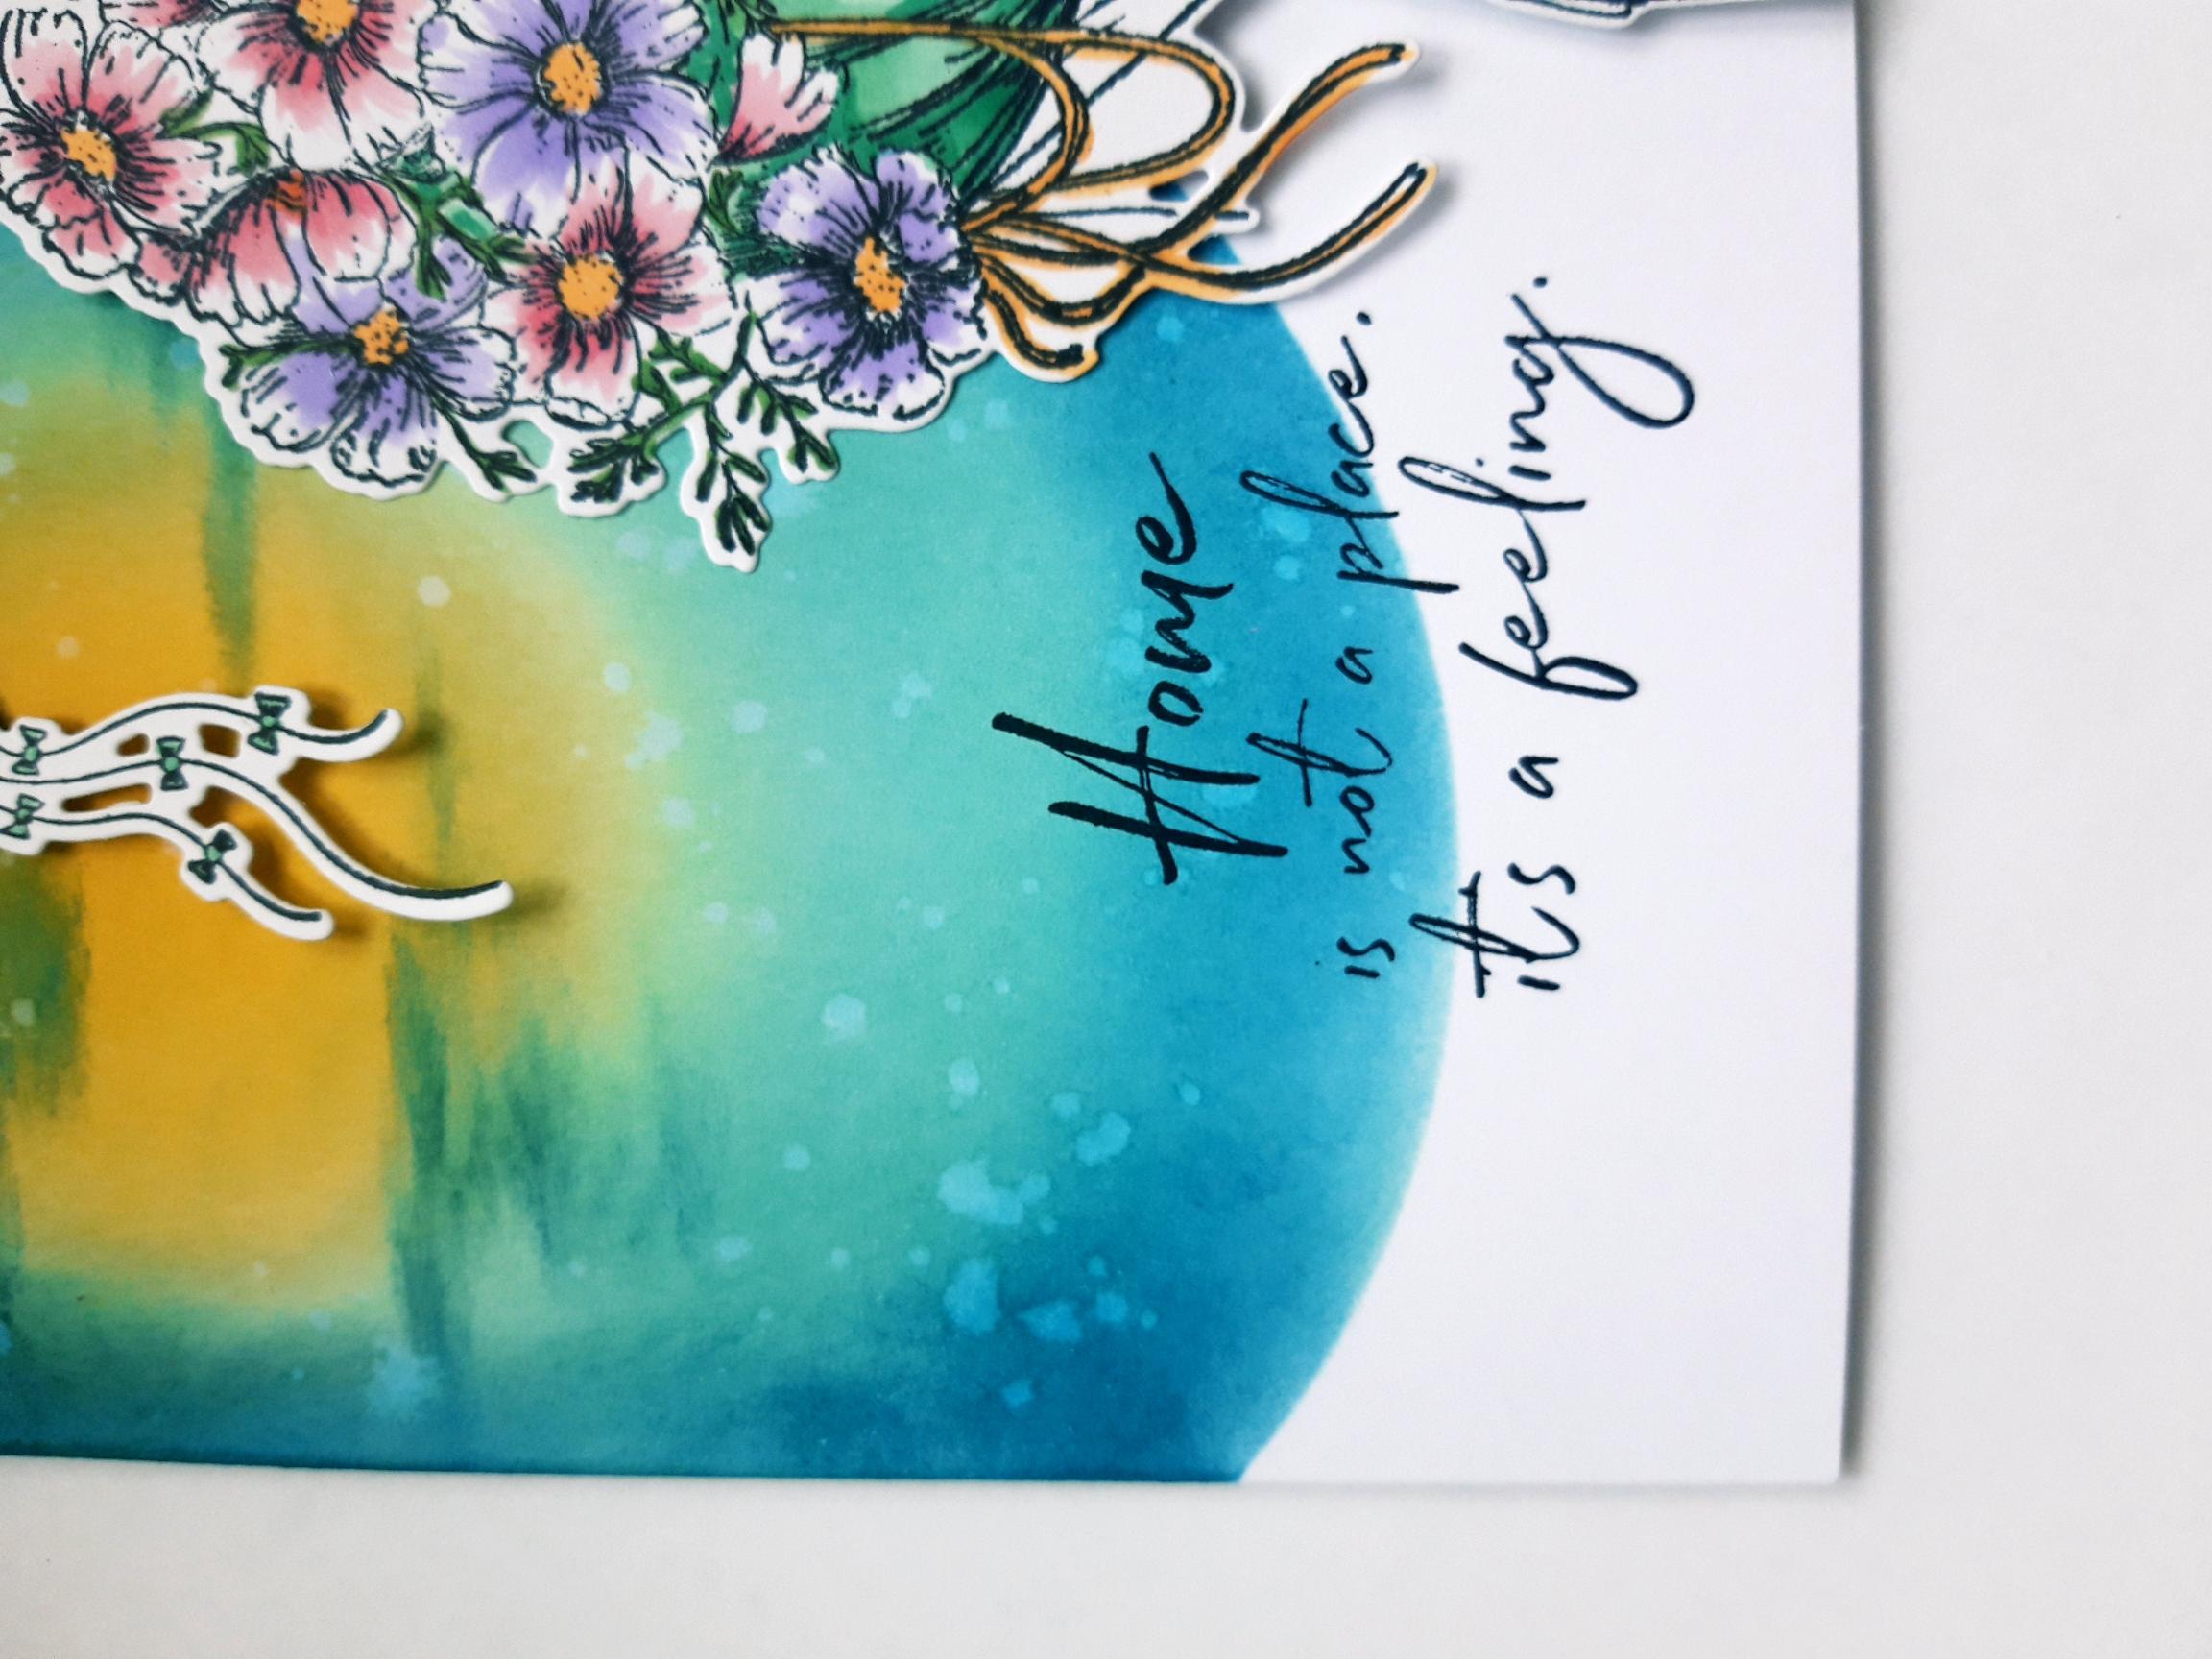
To finish, ink up the sentiment stamp with the Onyx Black Versafine and stamp to the bottom left of the hot air balloon. |