Give your friends $10 off their first order!
Refer a FRIEND


WHAT YOU WILL NEED:
White card blank (7 x 7")
Black card (6 3/4 x 6 3/4")
White card (6 1/2 x 6 1/2")
Reach For The Stars Stamp Collection
Every New Day Stamp Collection
Craft Academy Shattered Glass stencil
Versafine Ink Pad: Onyx Black
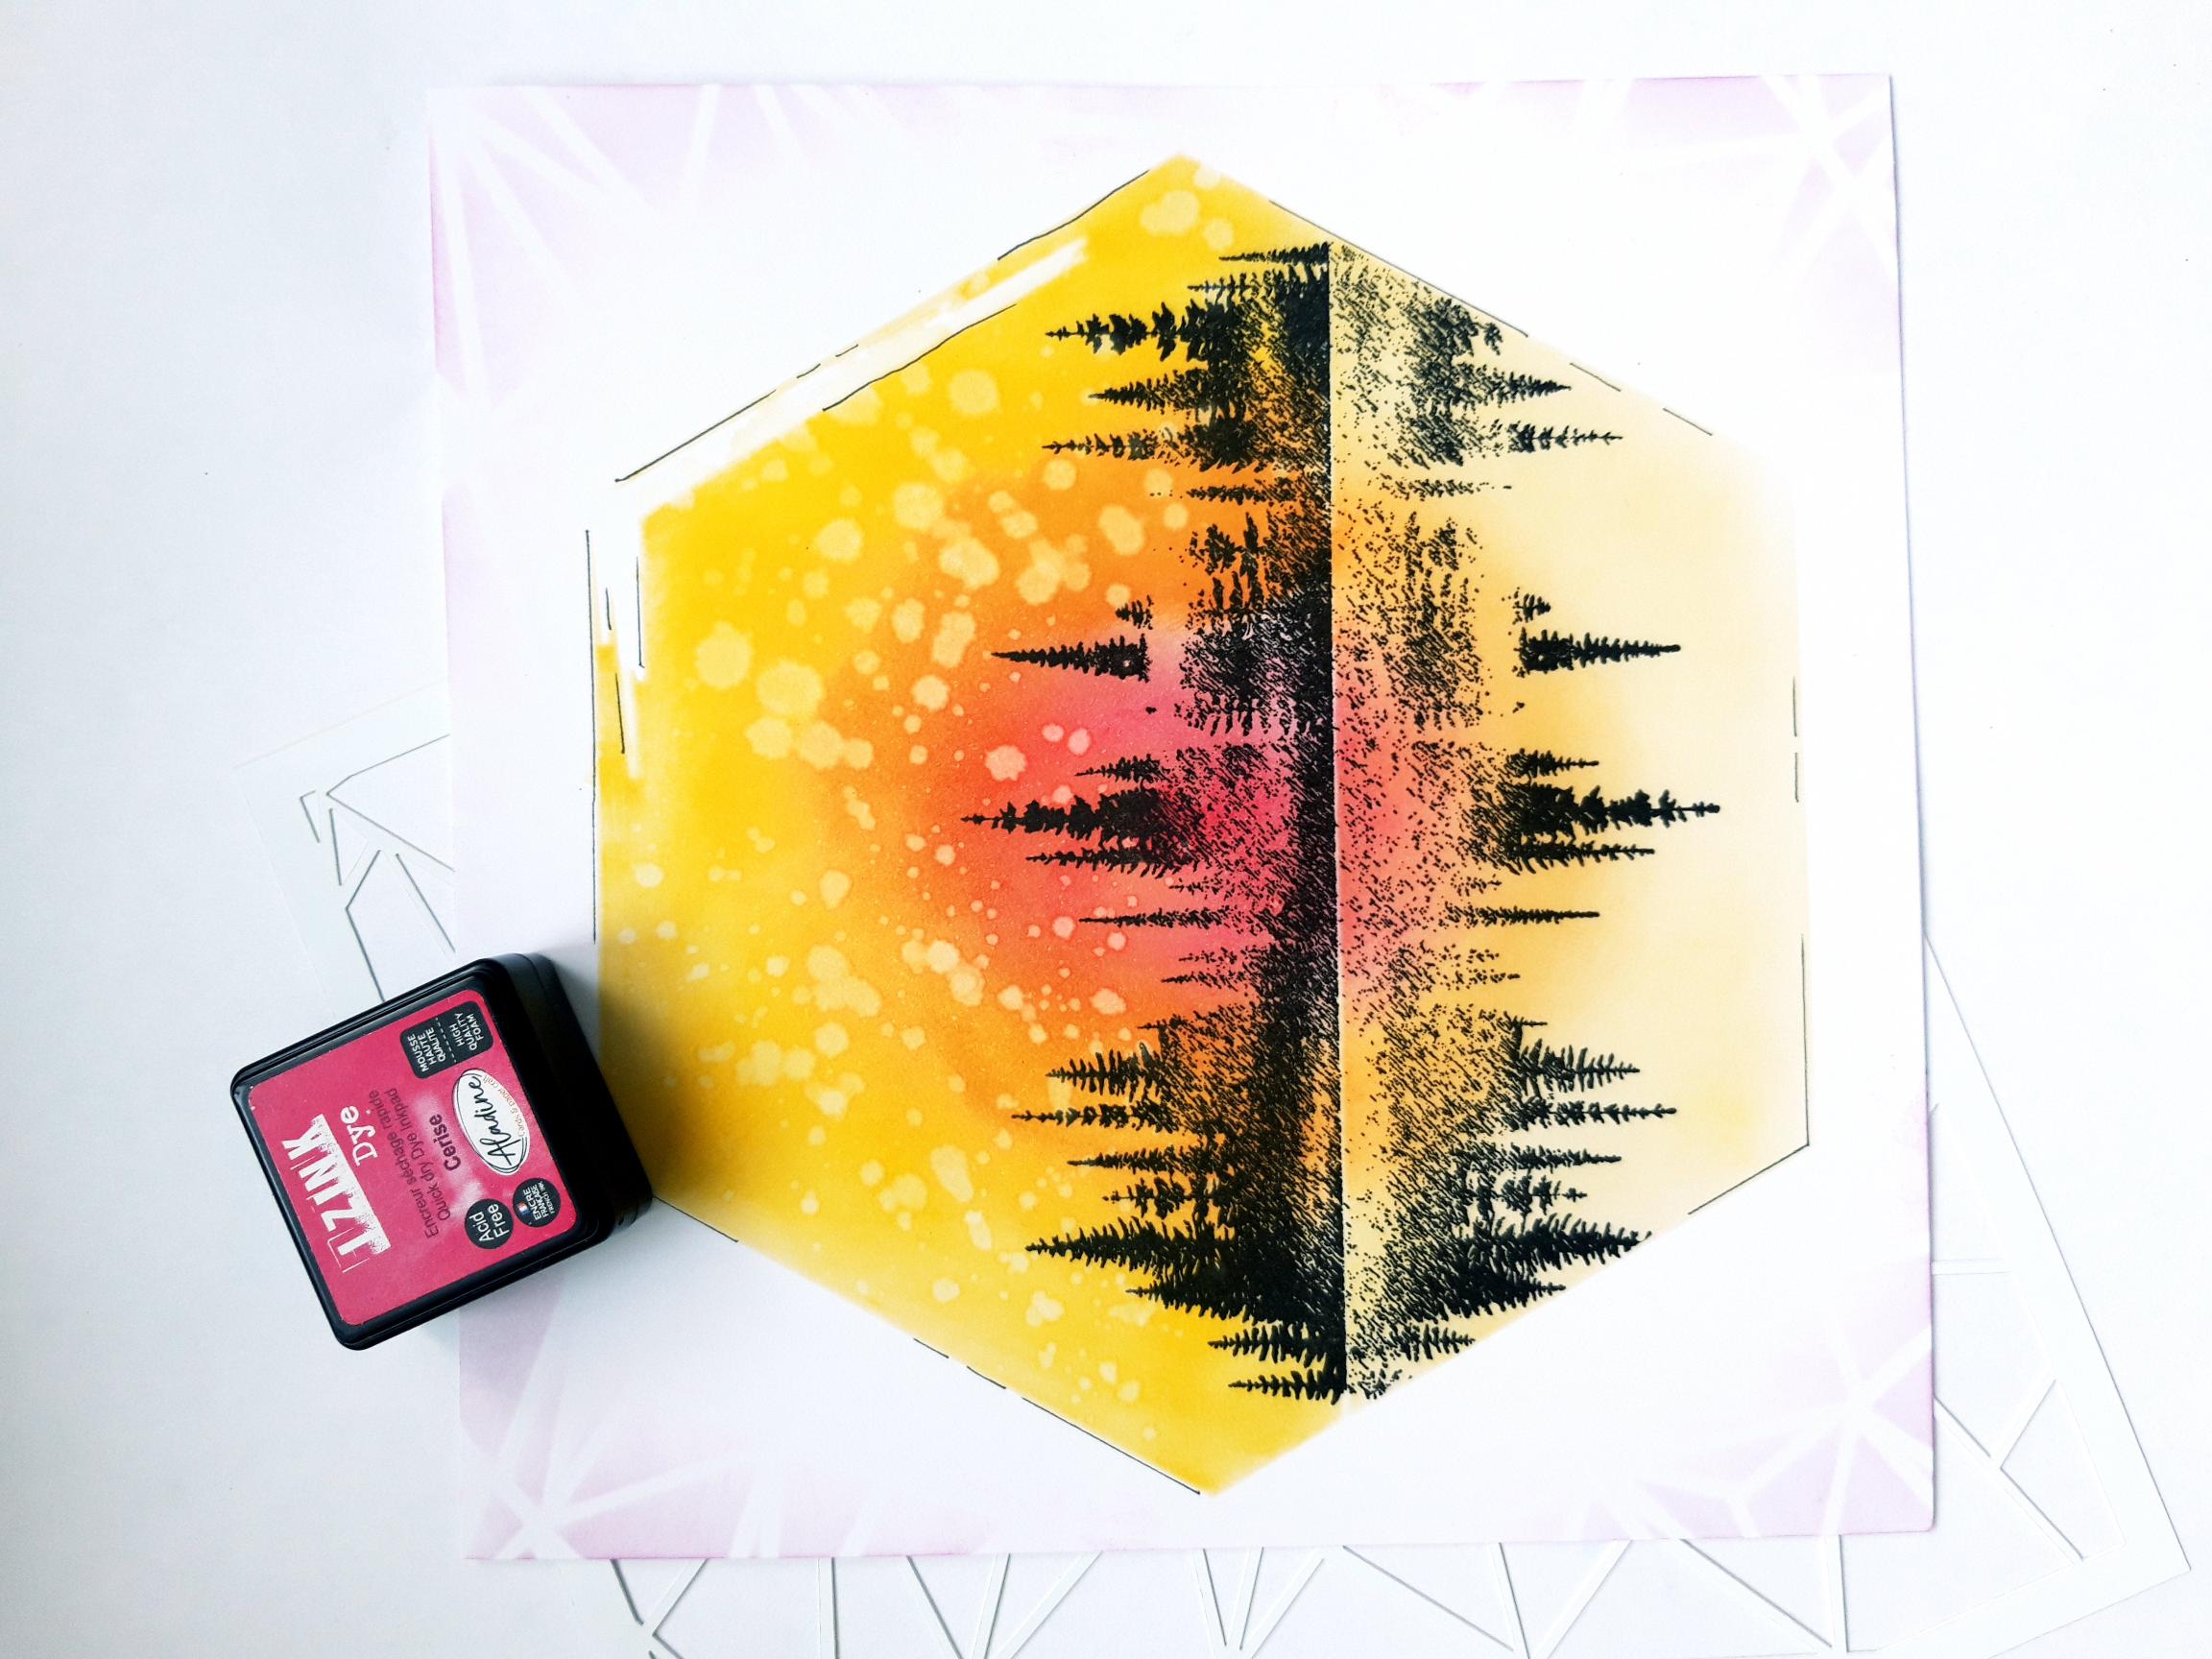
Izink Dye Ink Pad: Aurore, Cerise
Izink Dye Mini Ink Pad Collection: Miel
Paint brush
Black pen
Blending tool
Eureka 101
Paper Trimmer
Perfect Together Glue
Masking tape or sheet of copier paper
[click image to enlarge] 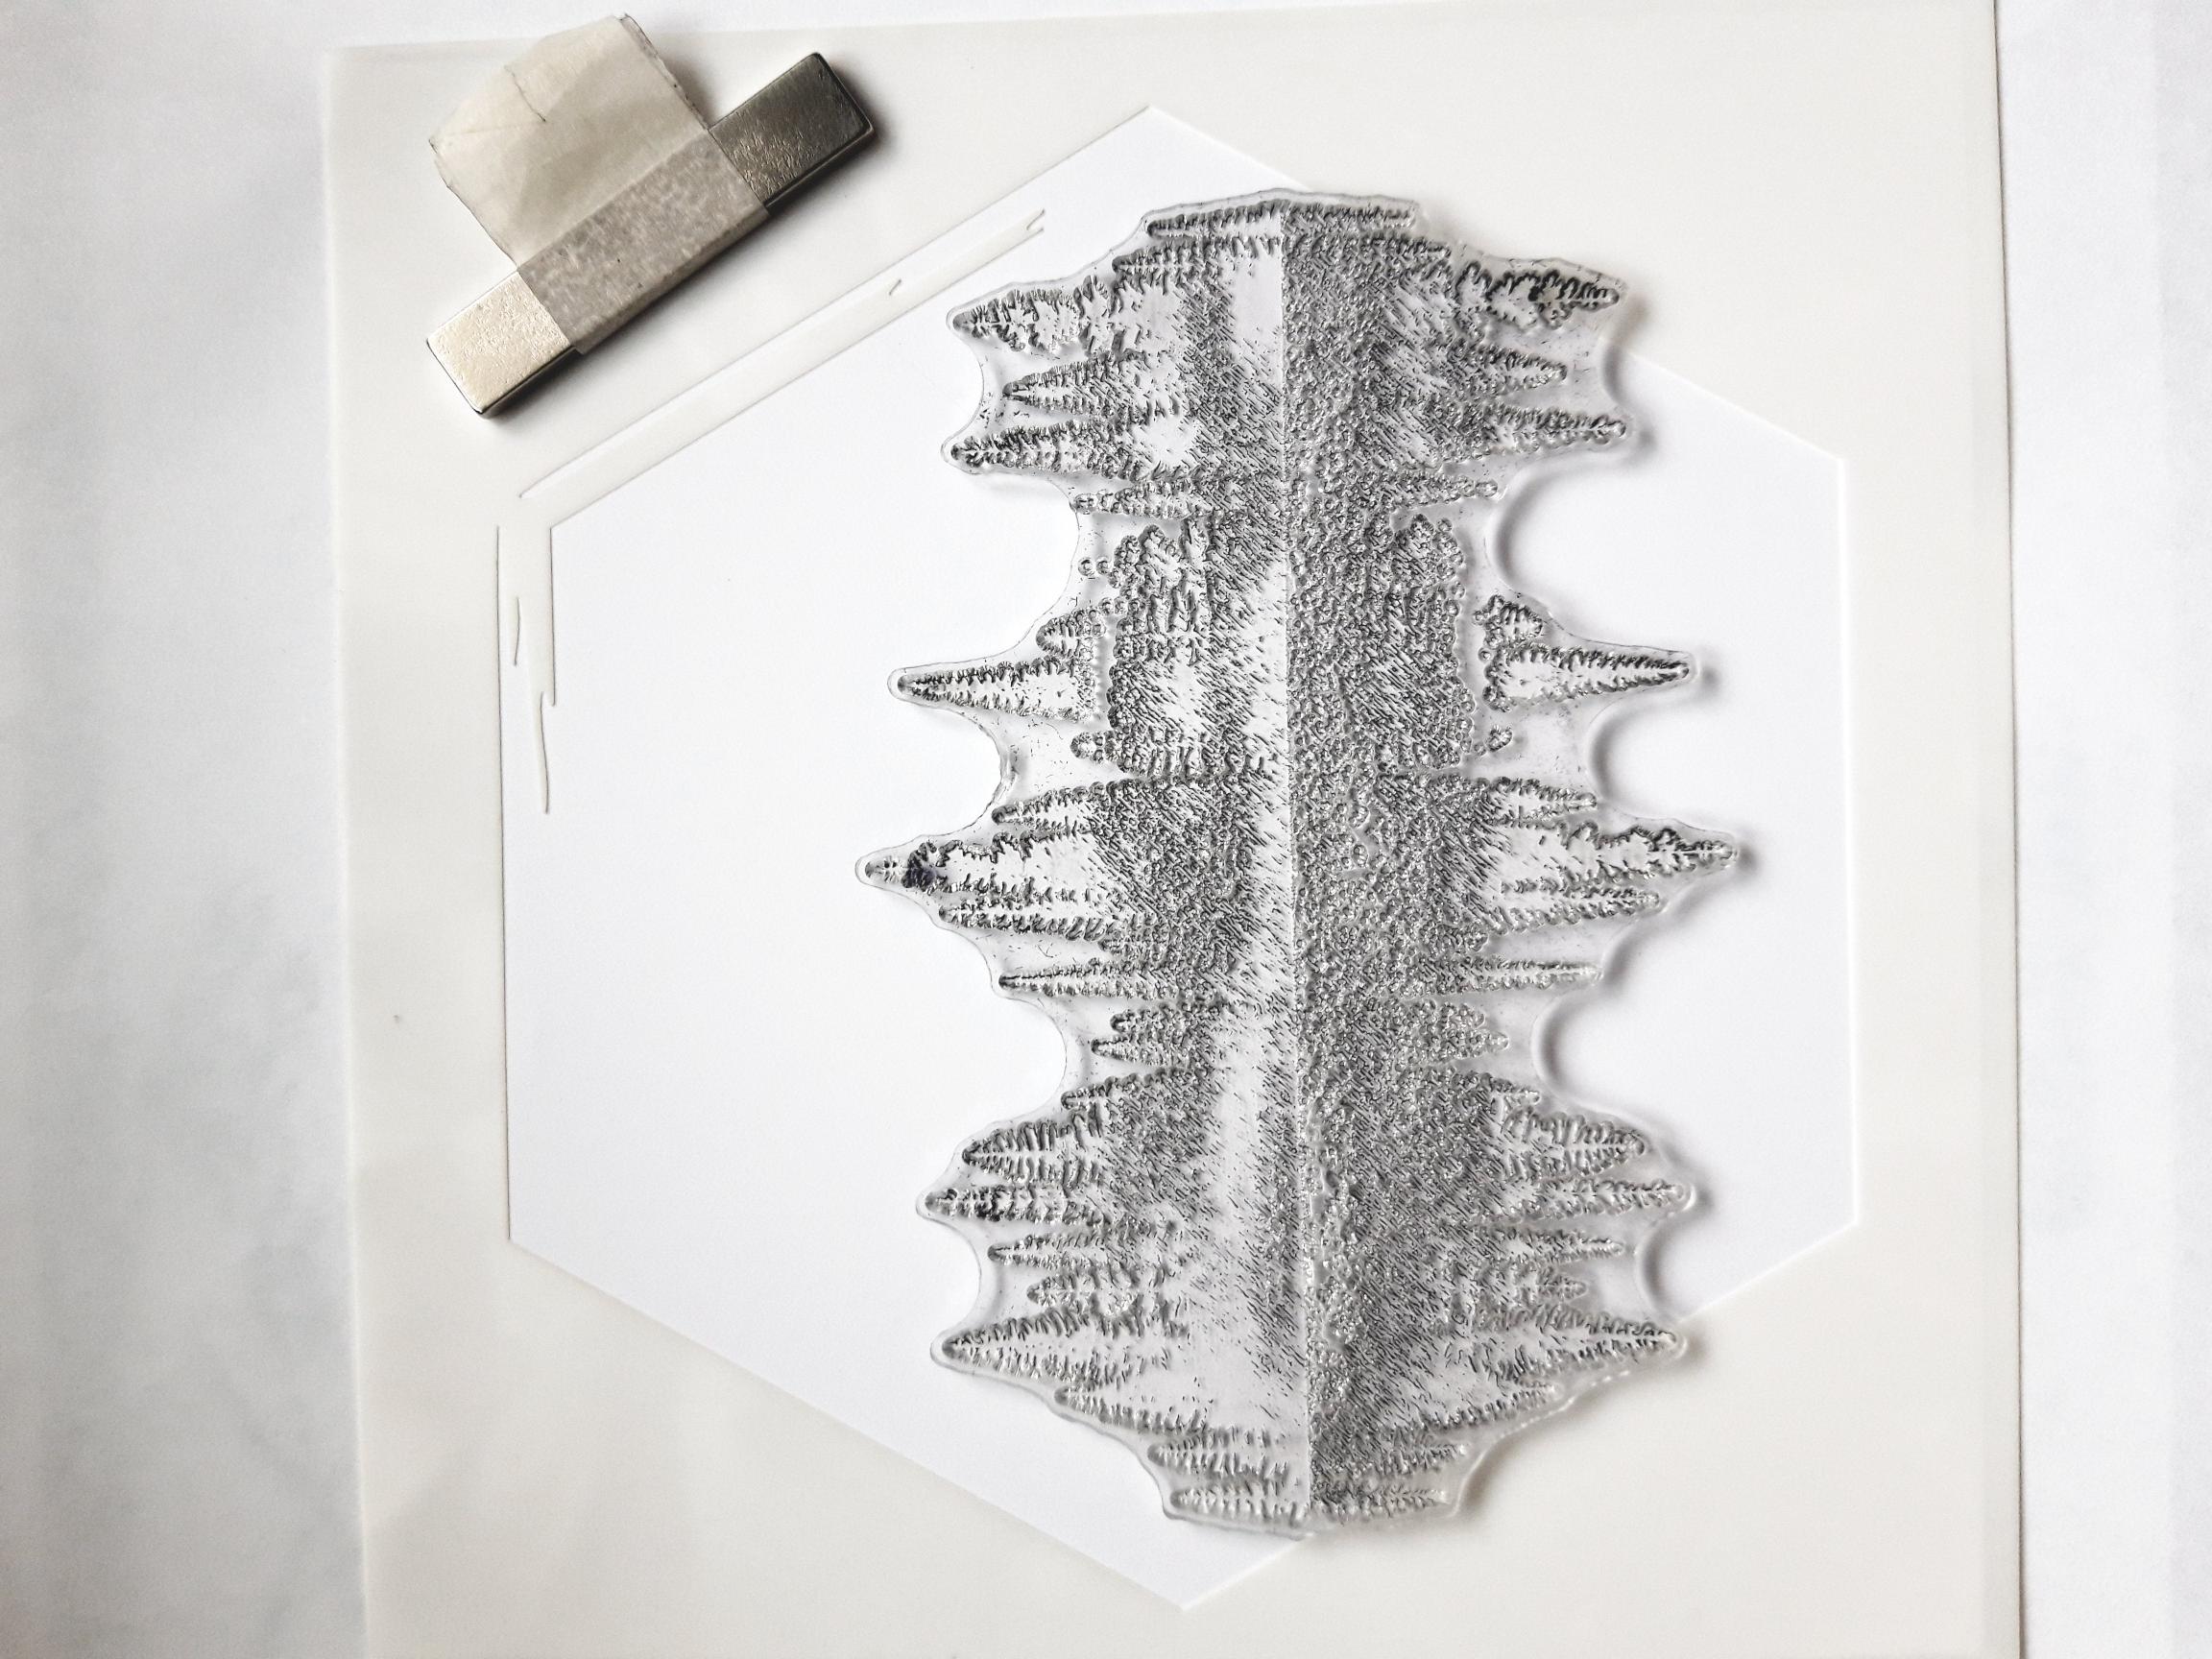
|
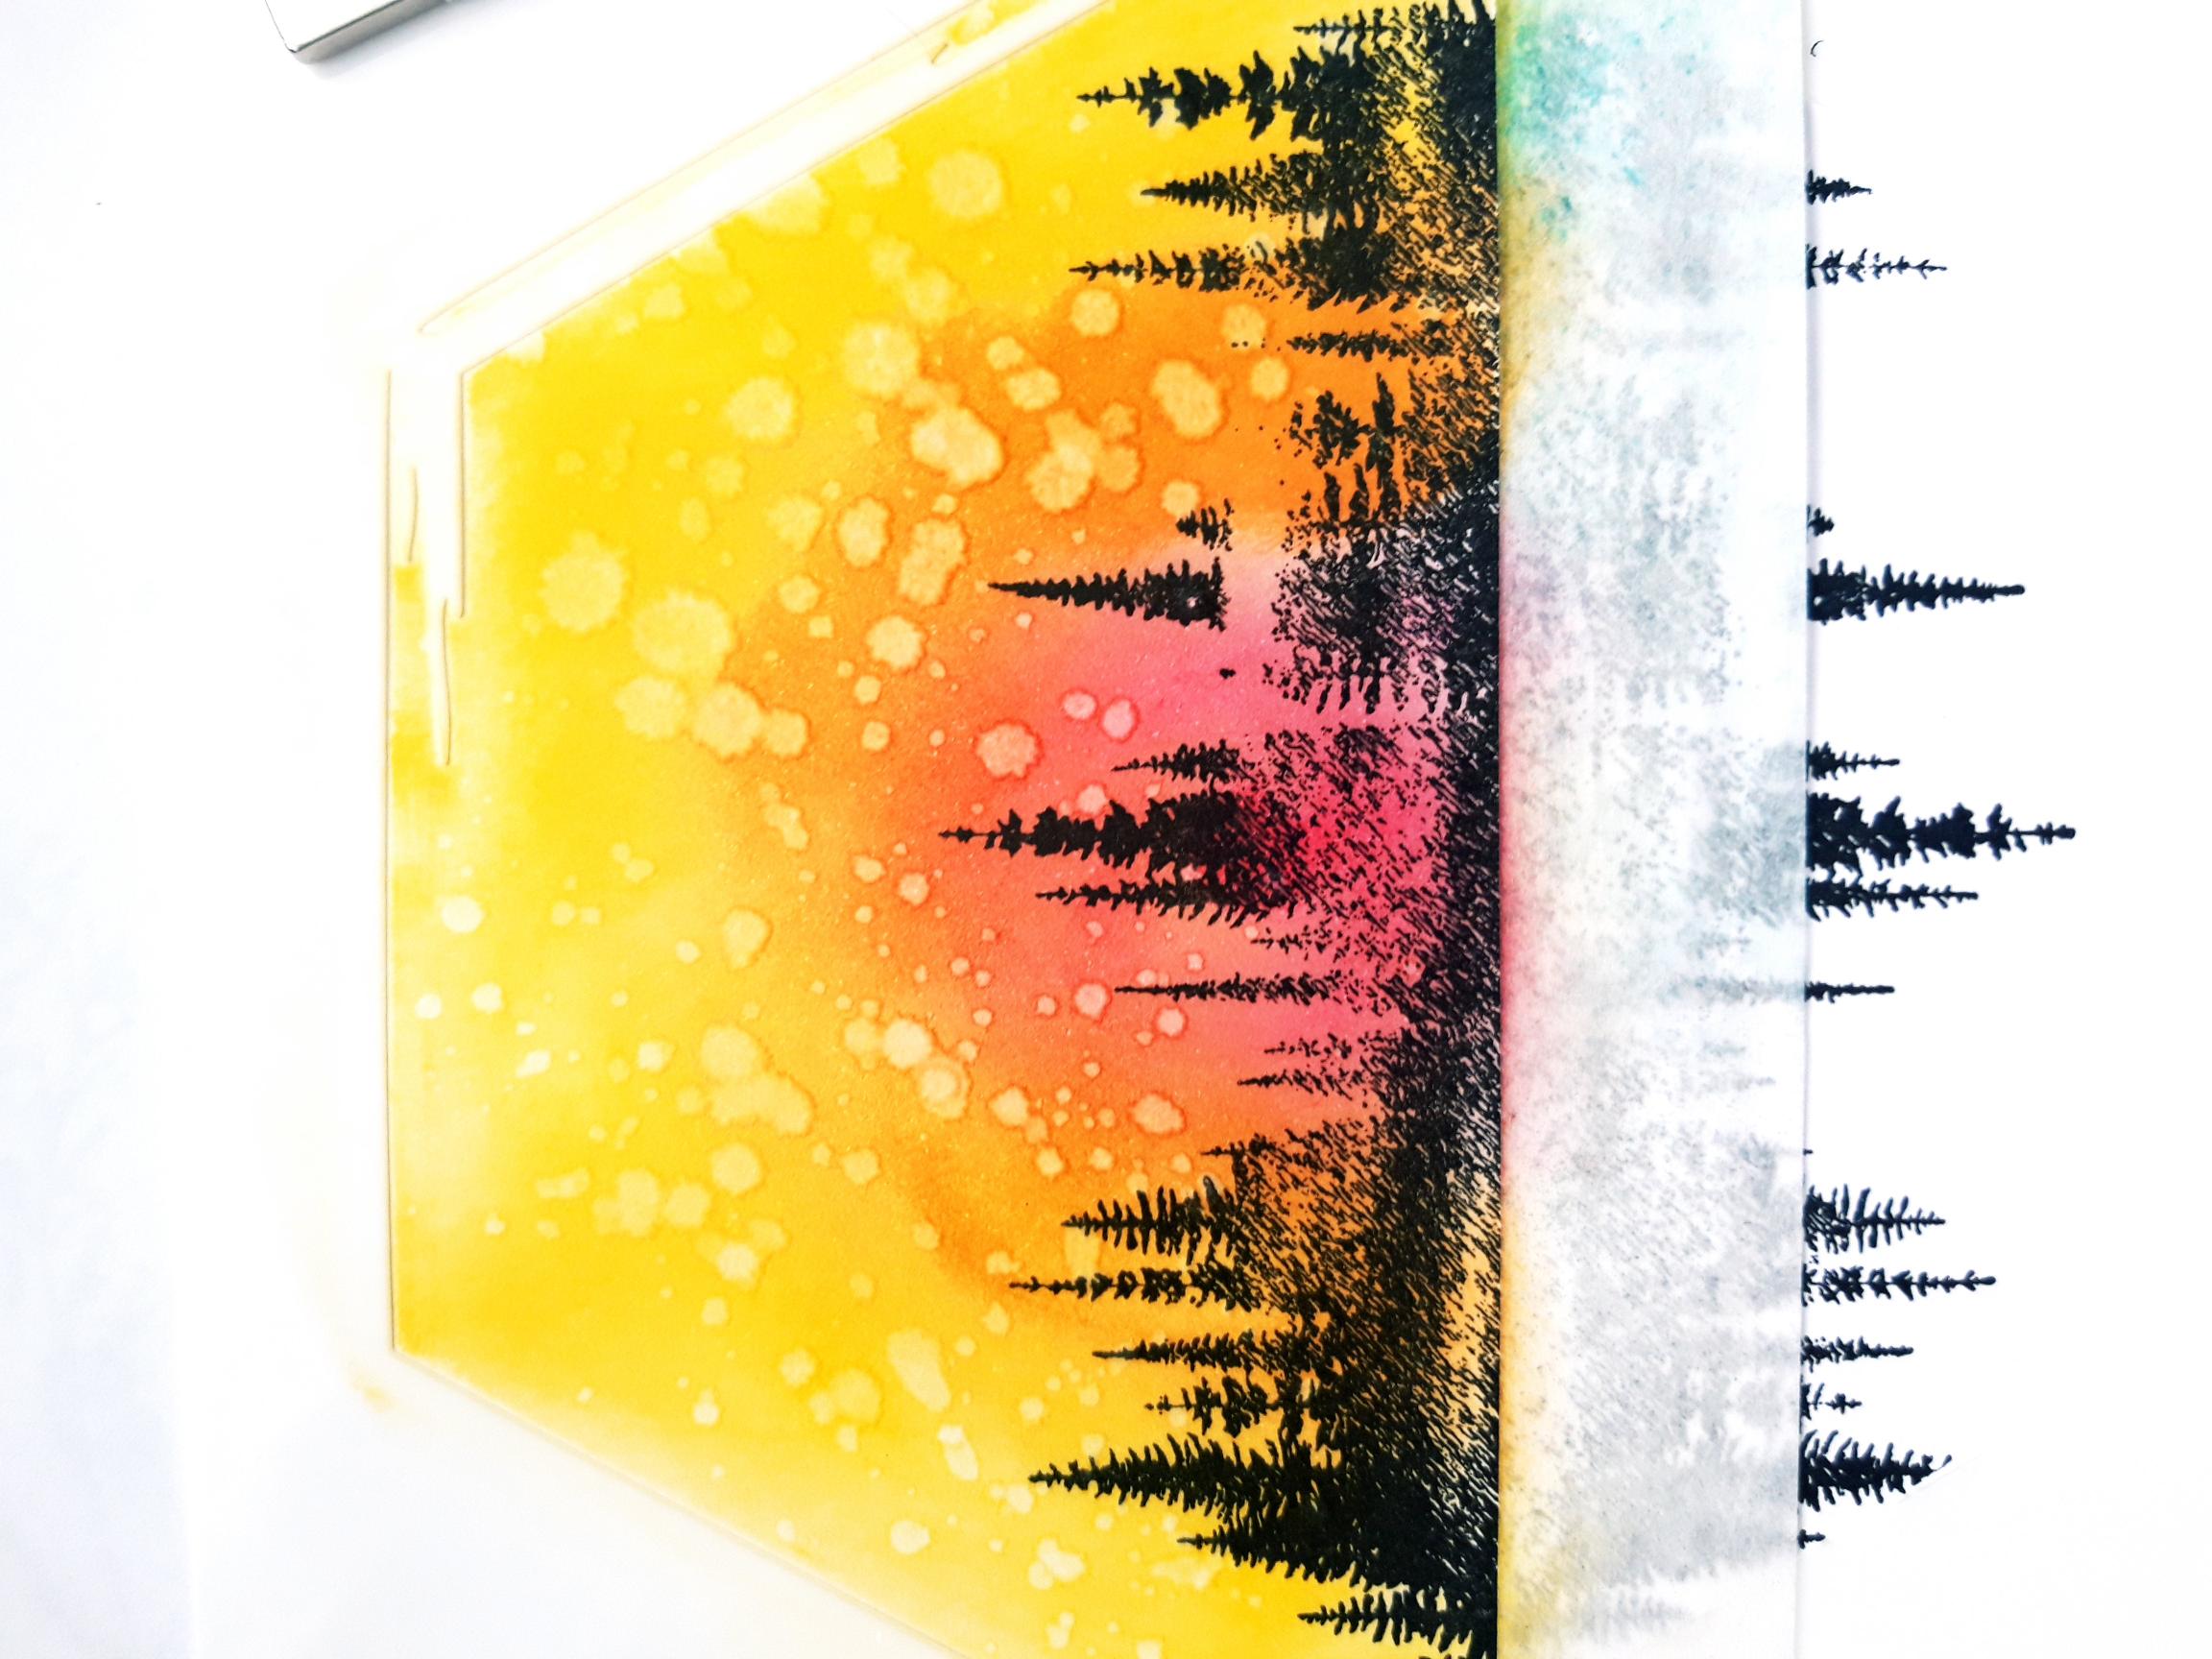
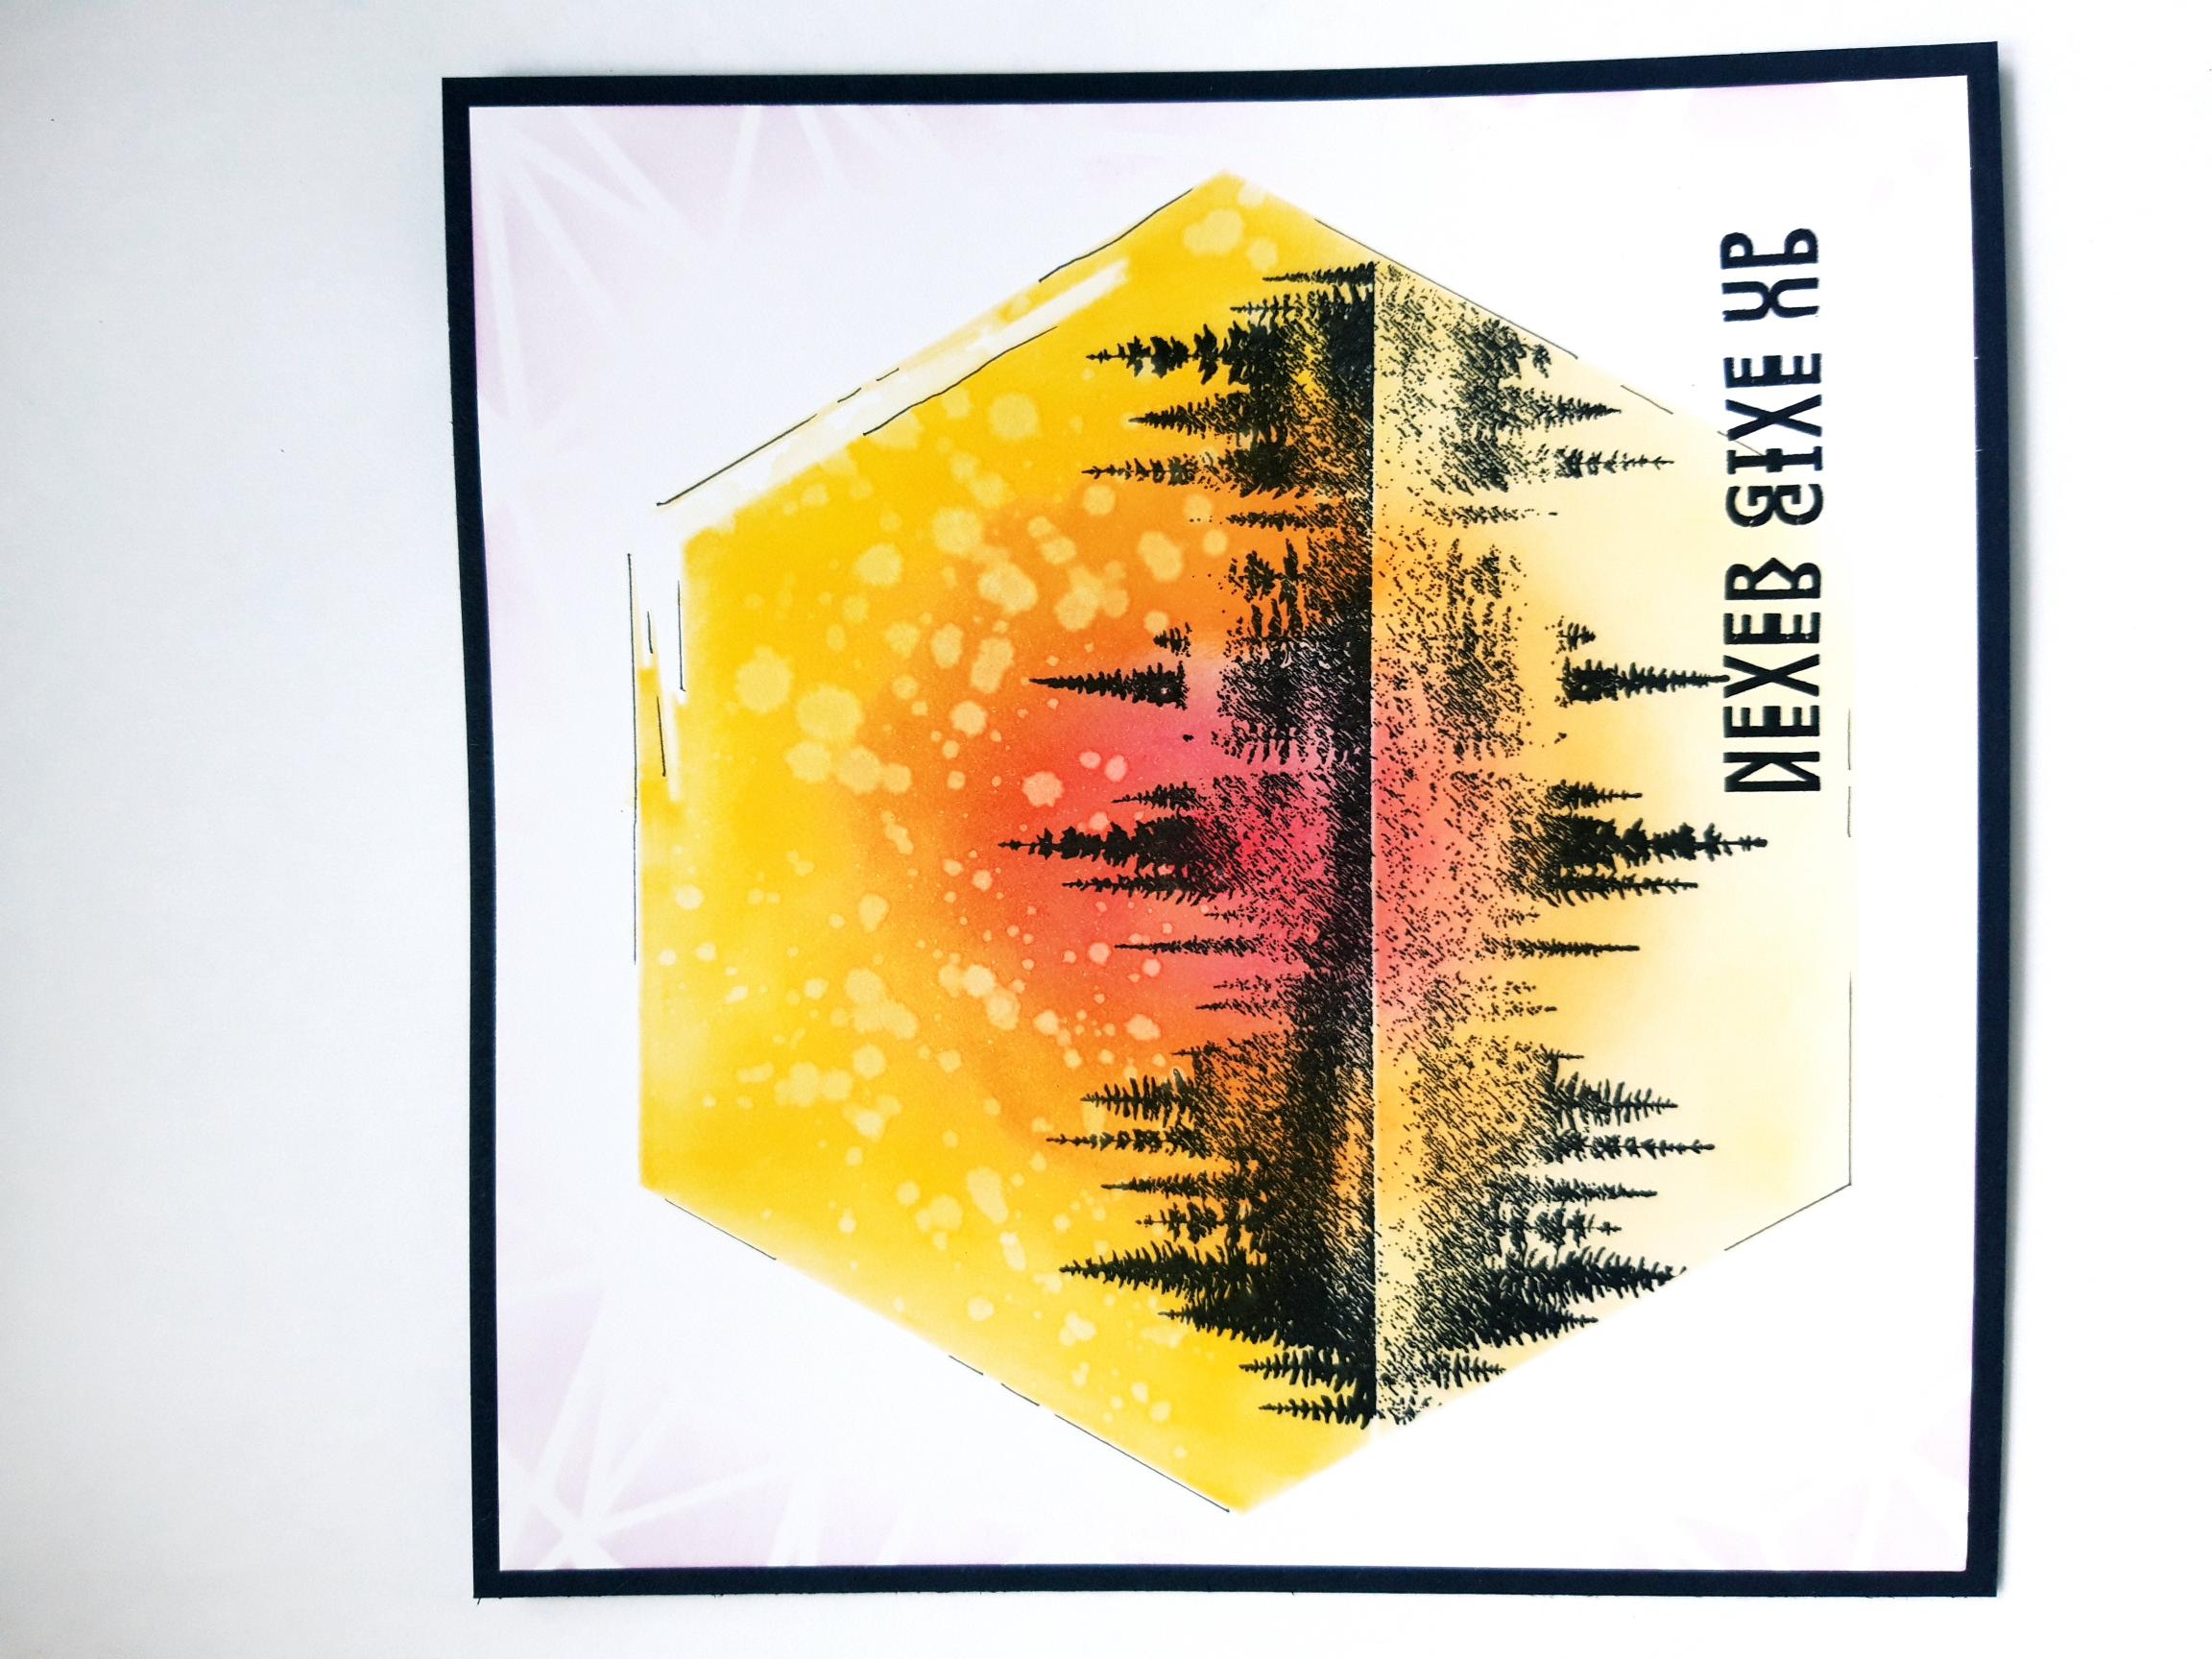
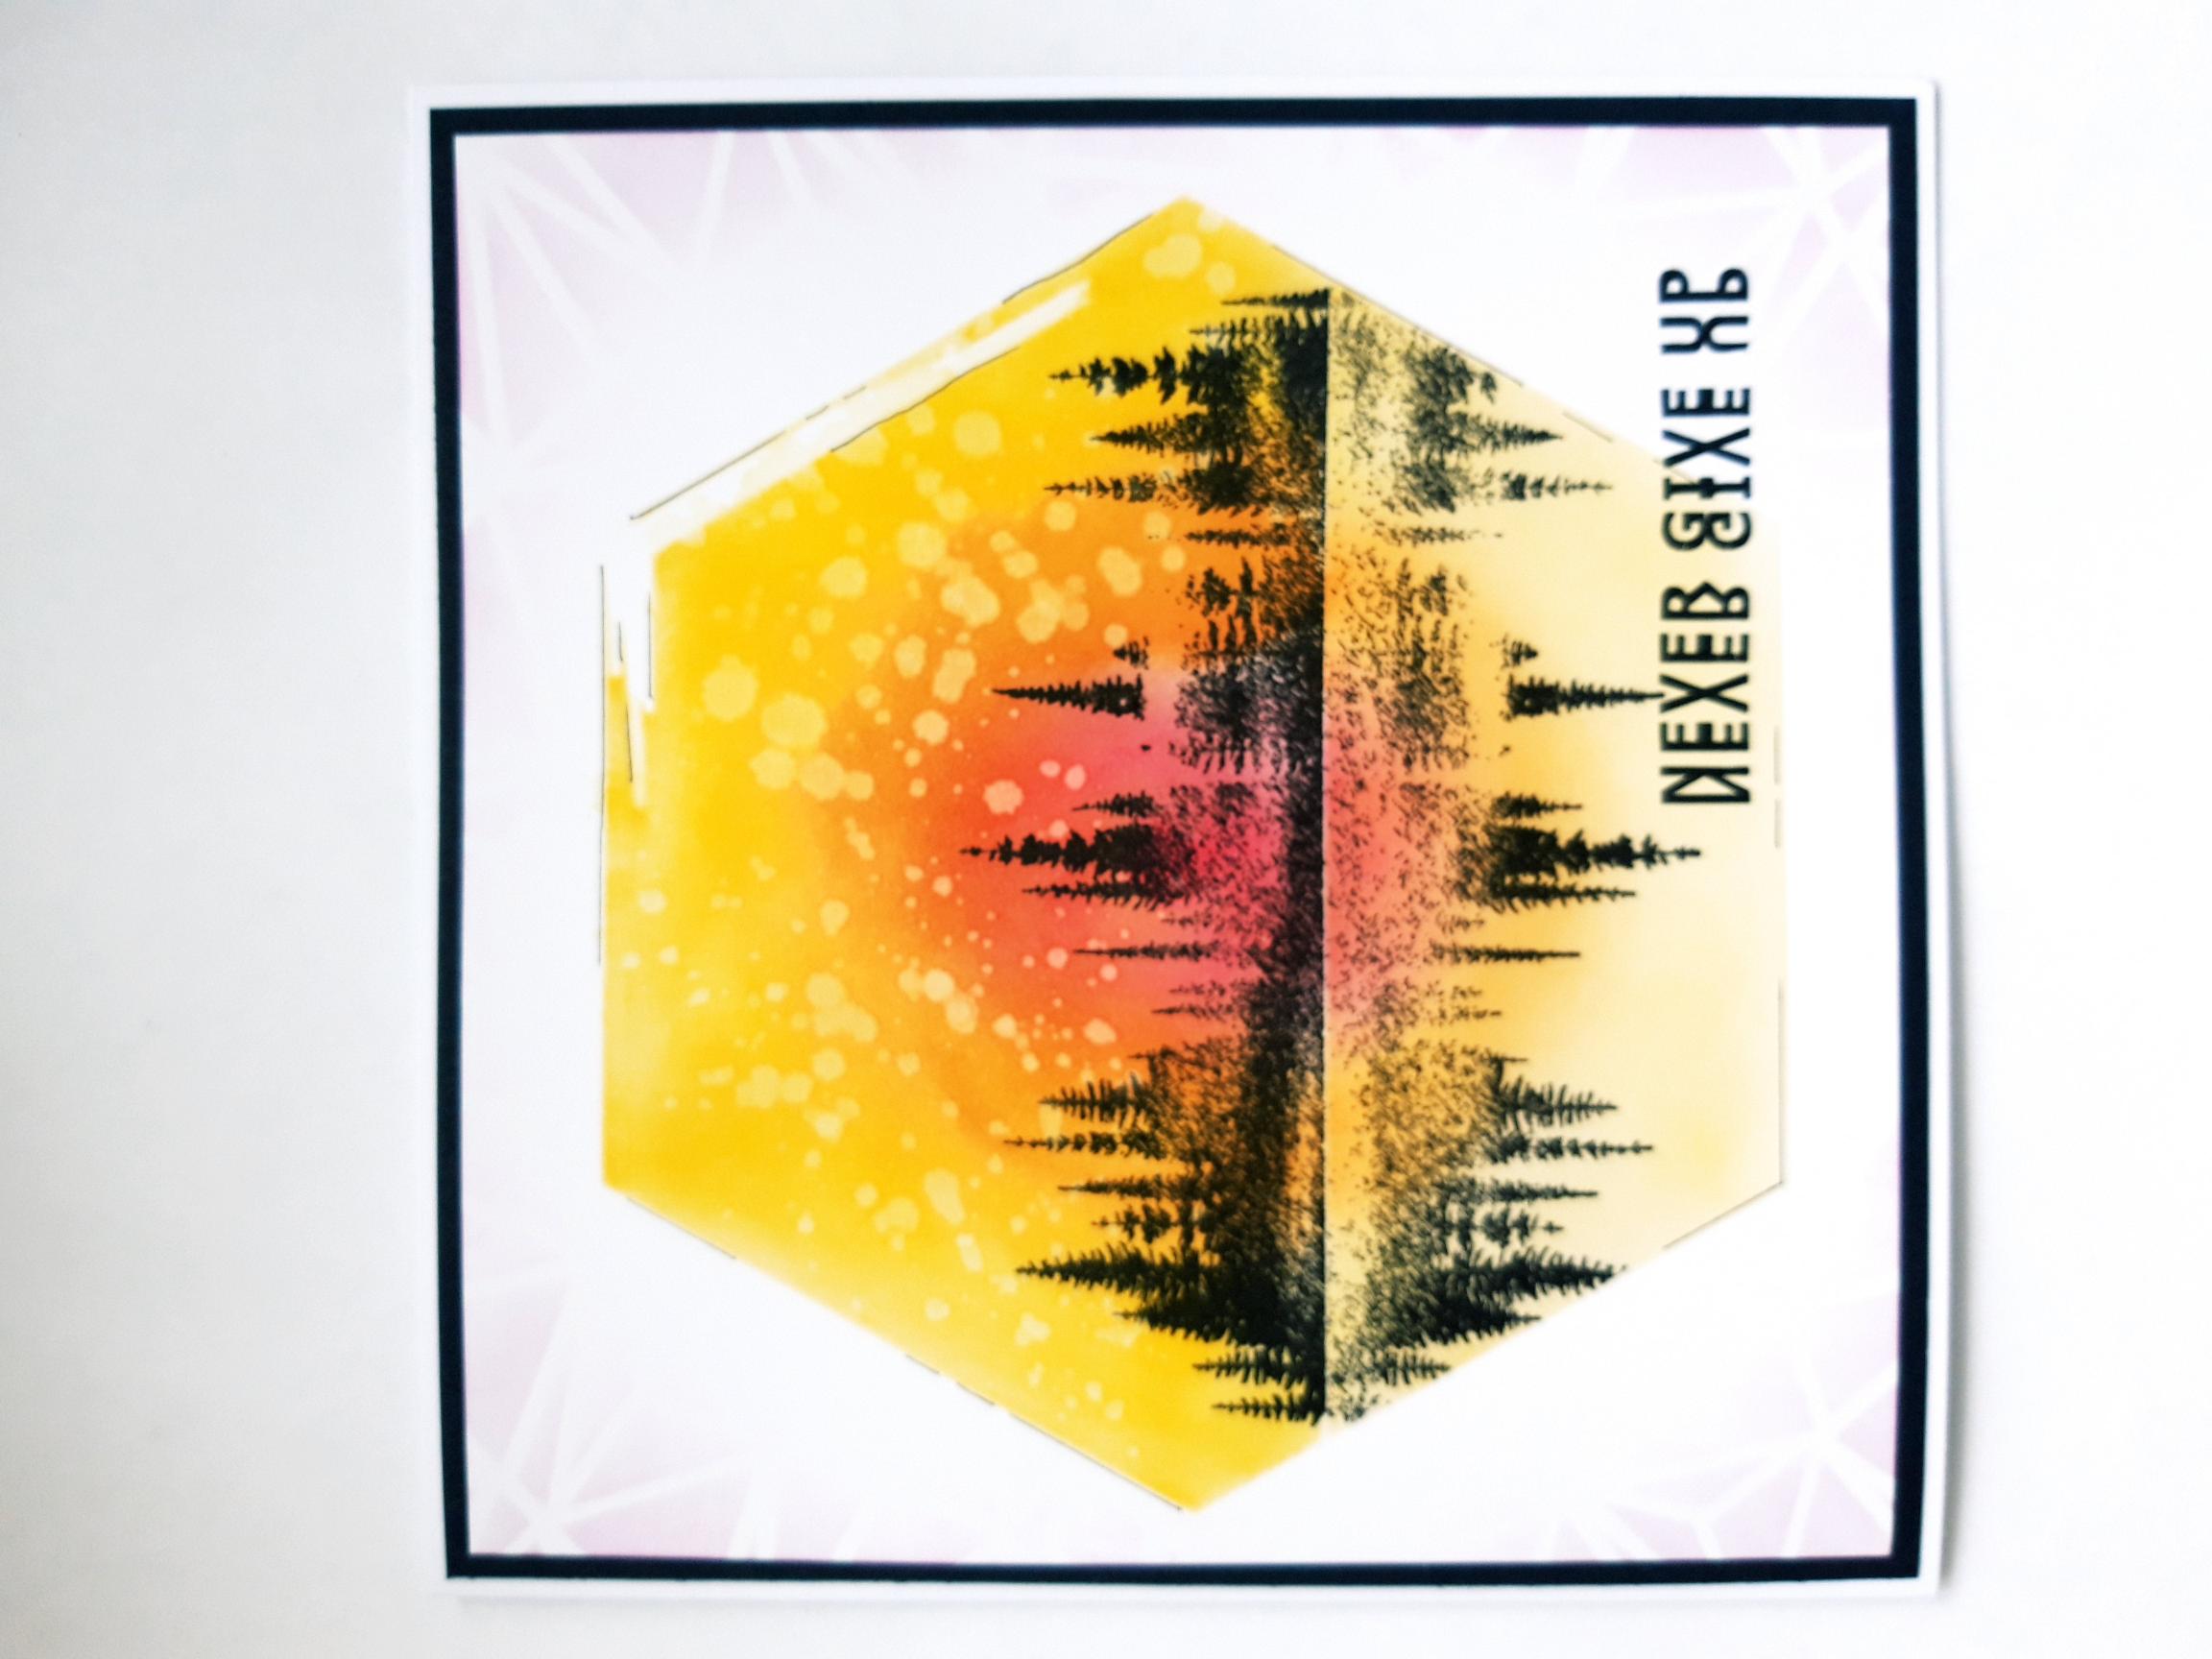
Place the Stylized Hexagon stencil on top of the white card, in your Eureka 101 and hold in place with your bar magnet. Decide where you want to stamp your image... more space for the sky or the reflection?
|
|
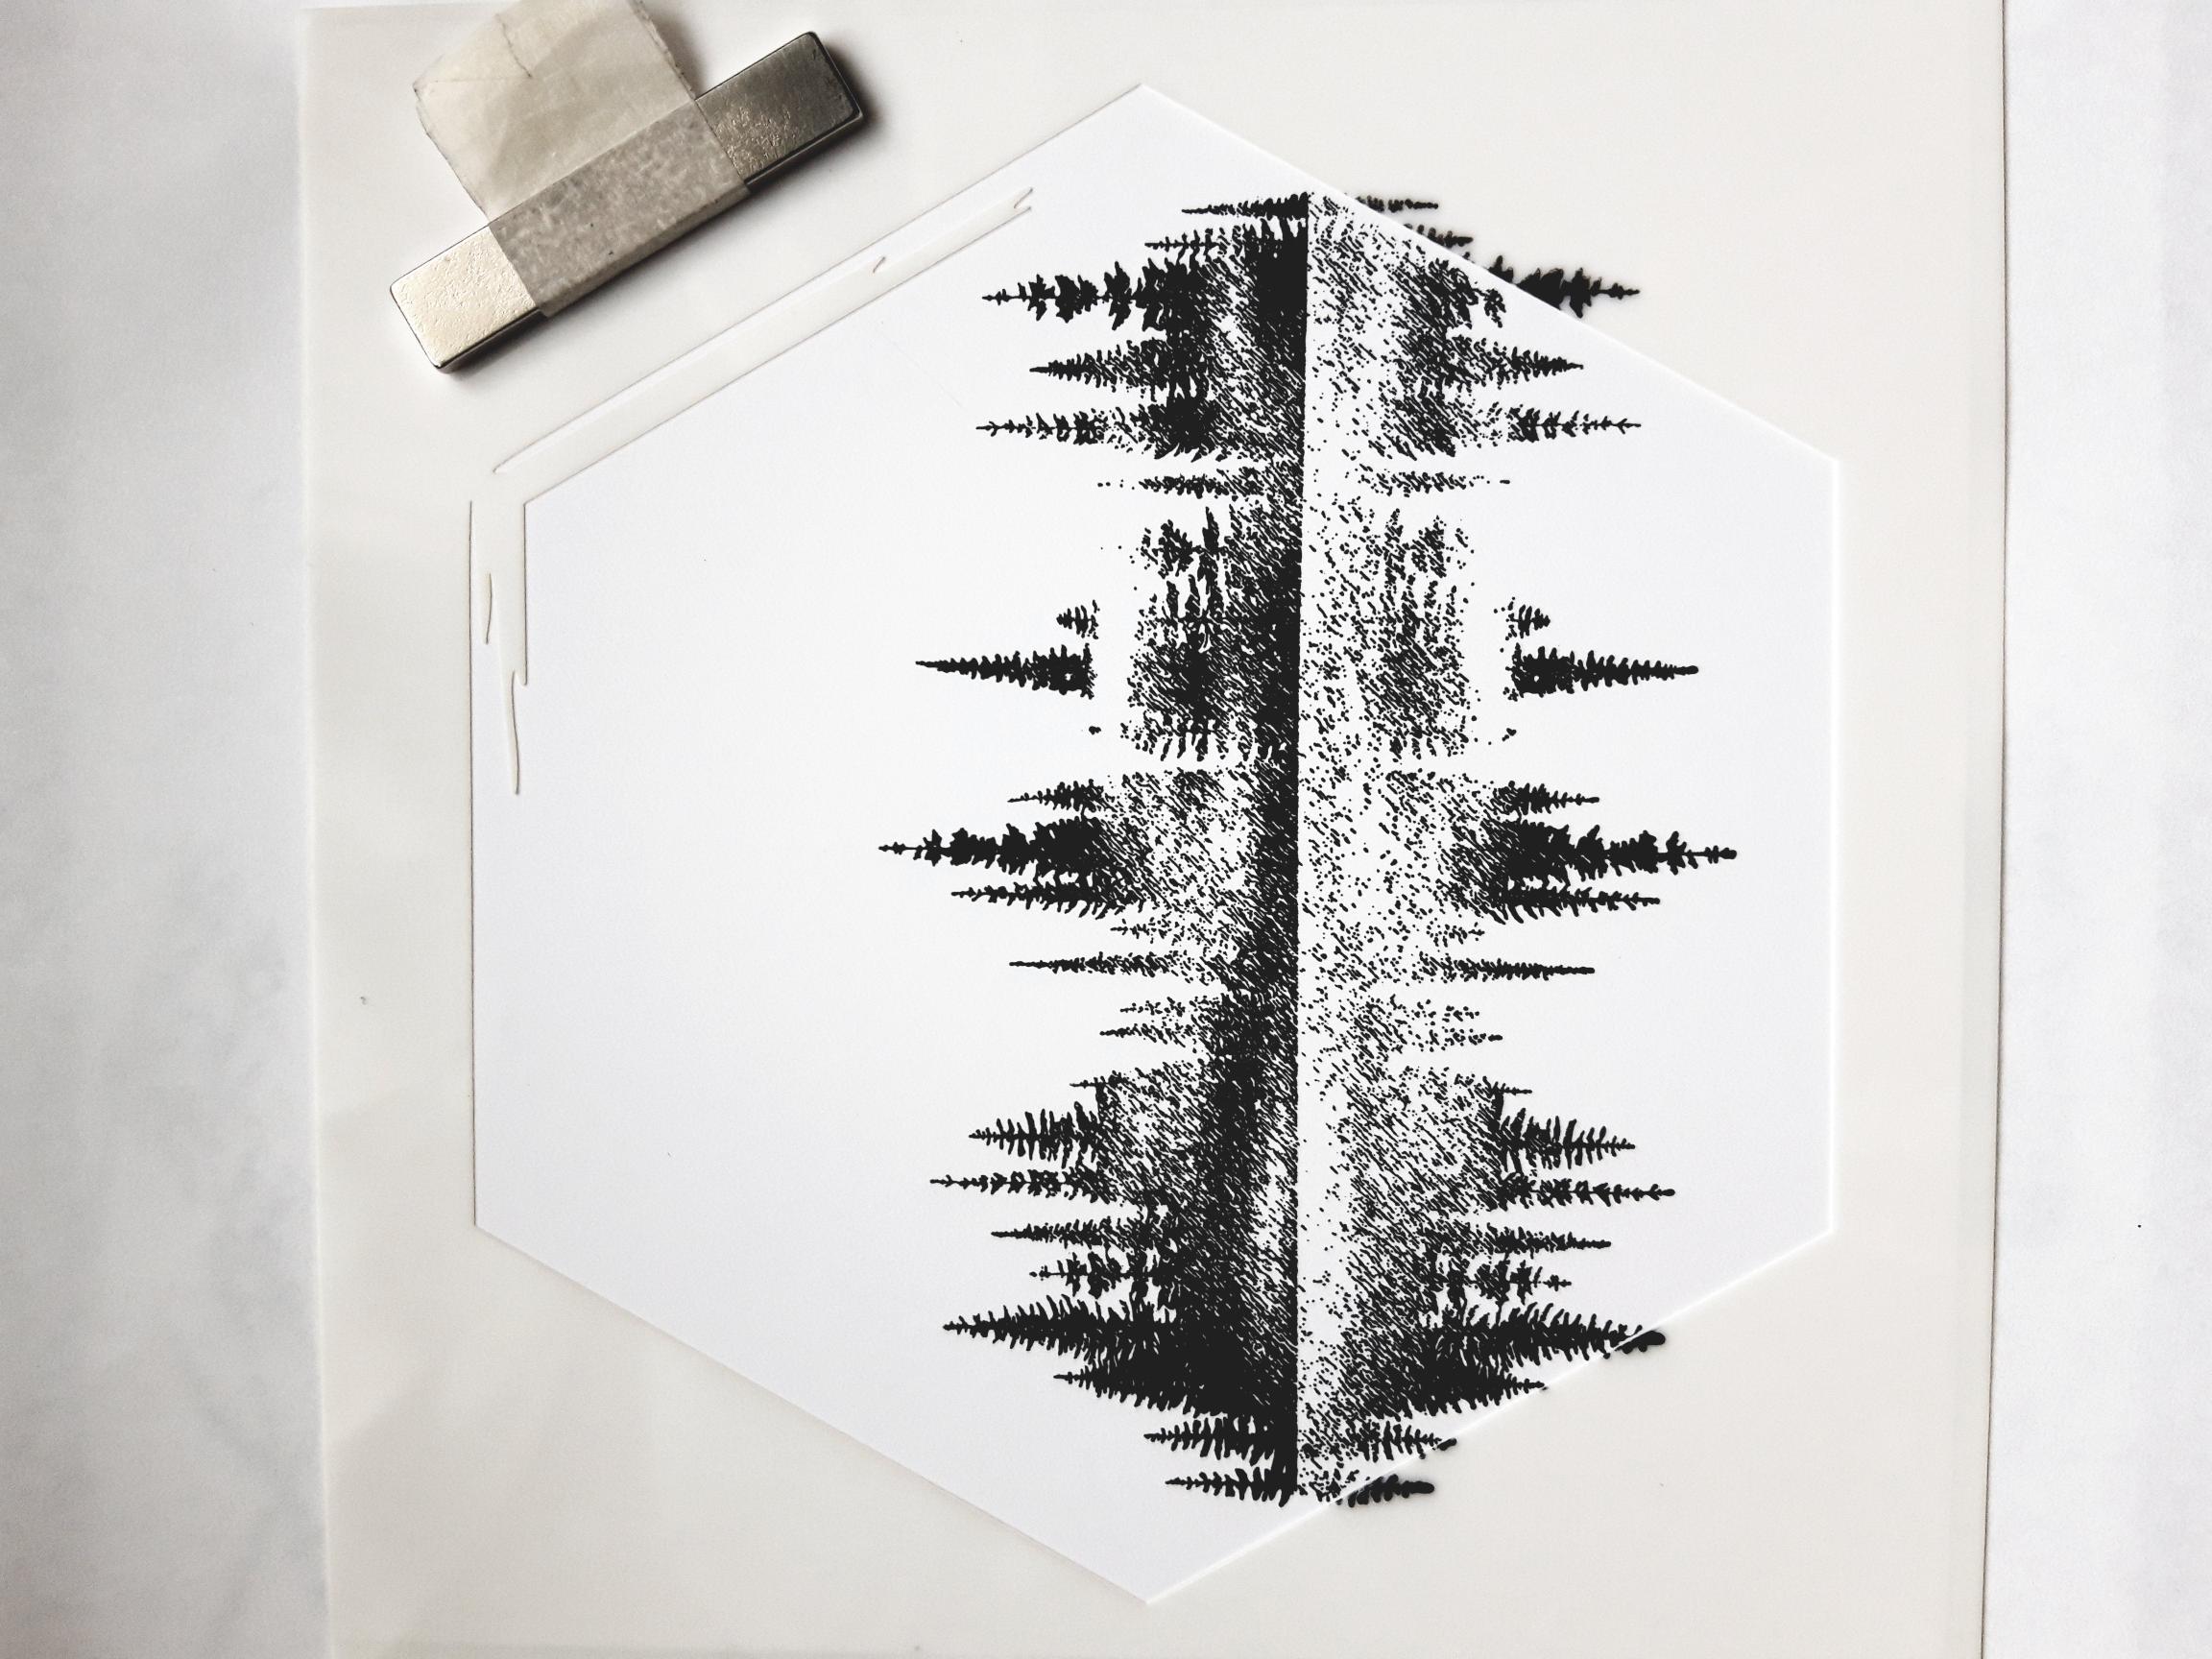
Ink the stamp up with the Onyx Black Versafine and stamp in position. You will need to apply a little more pressure where the stamp meets the stencil, to get a crisper image. |
|
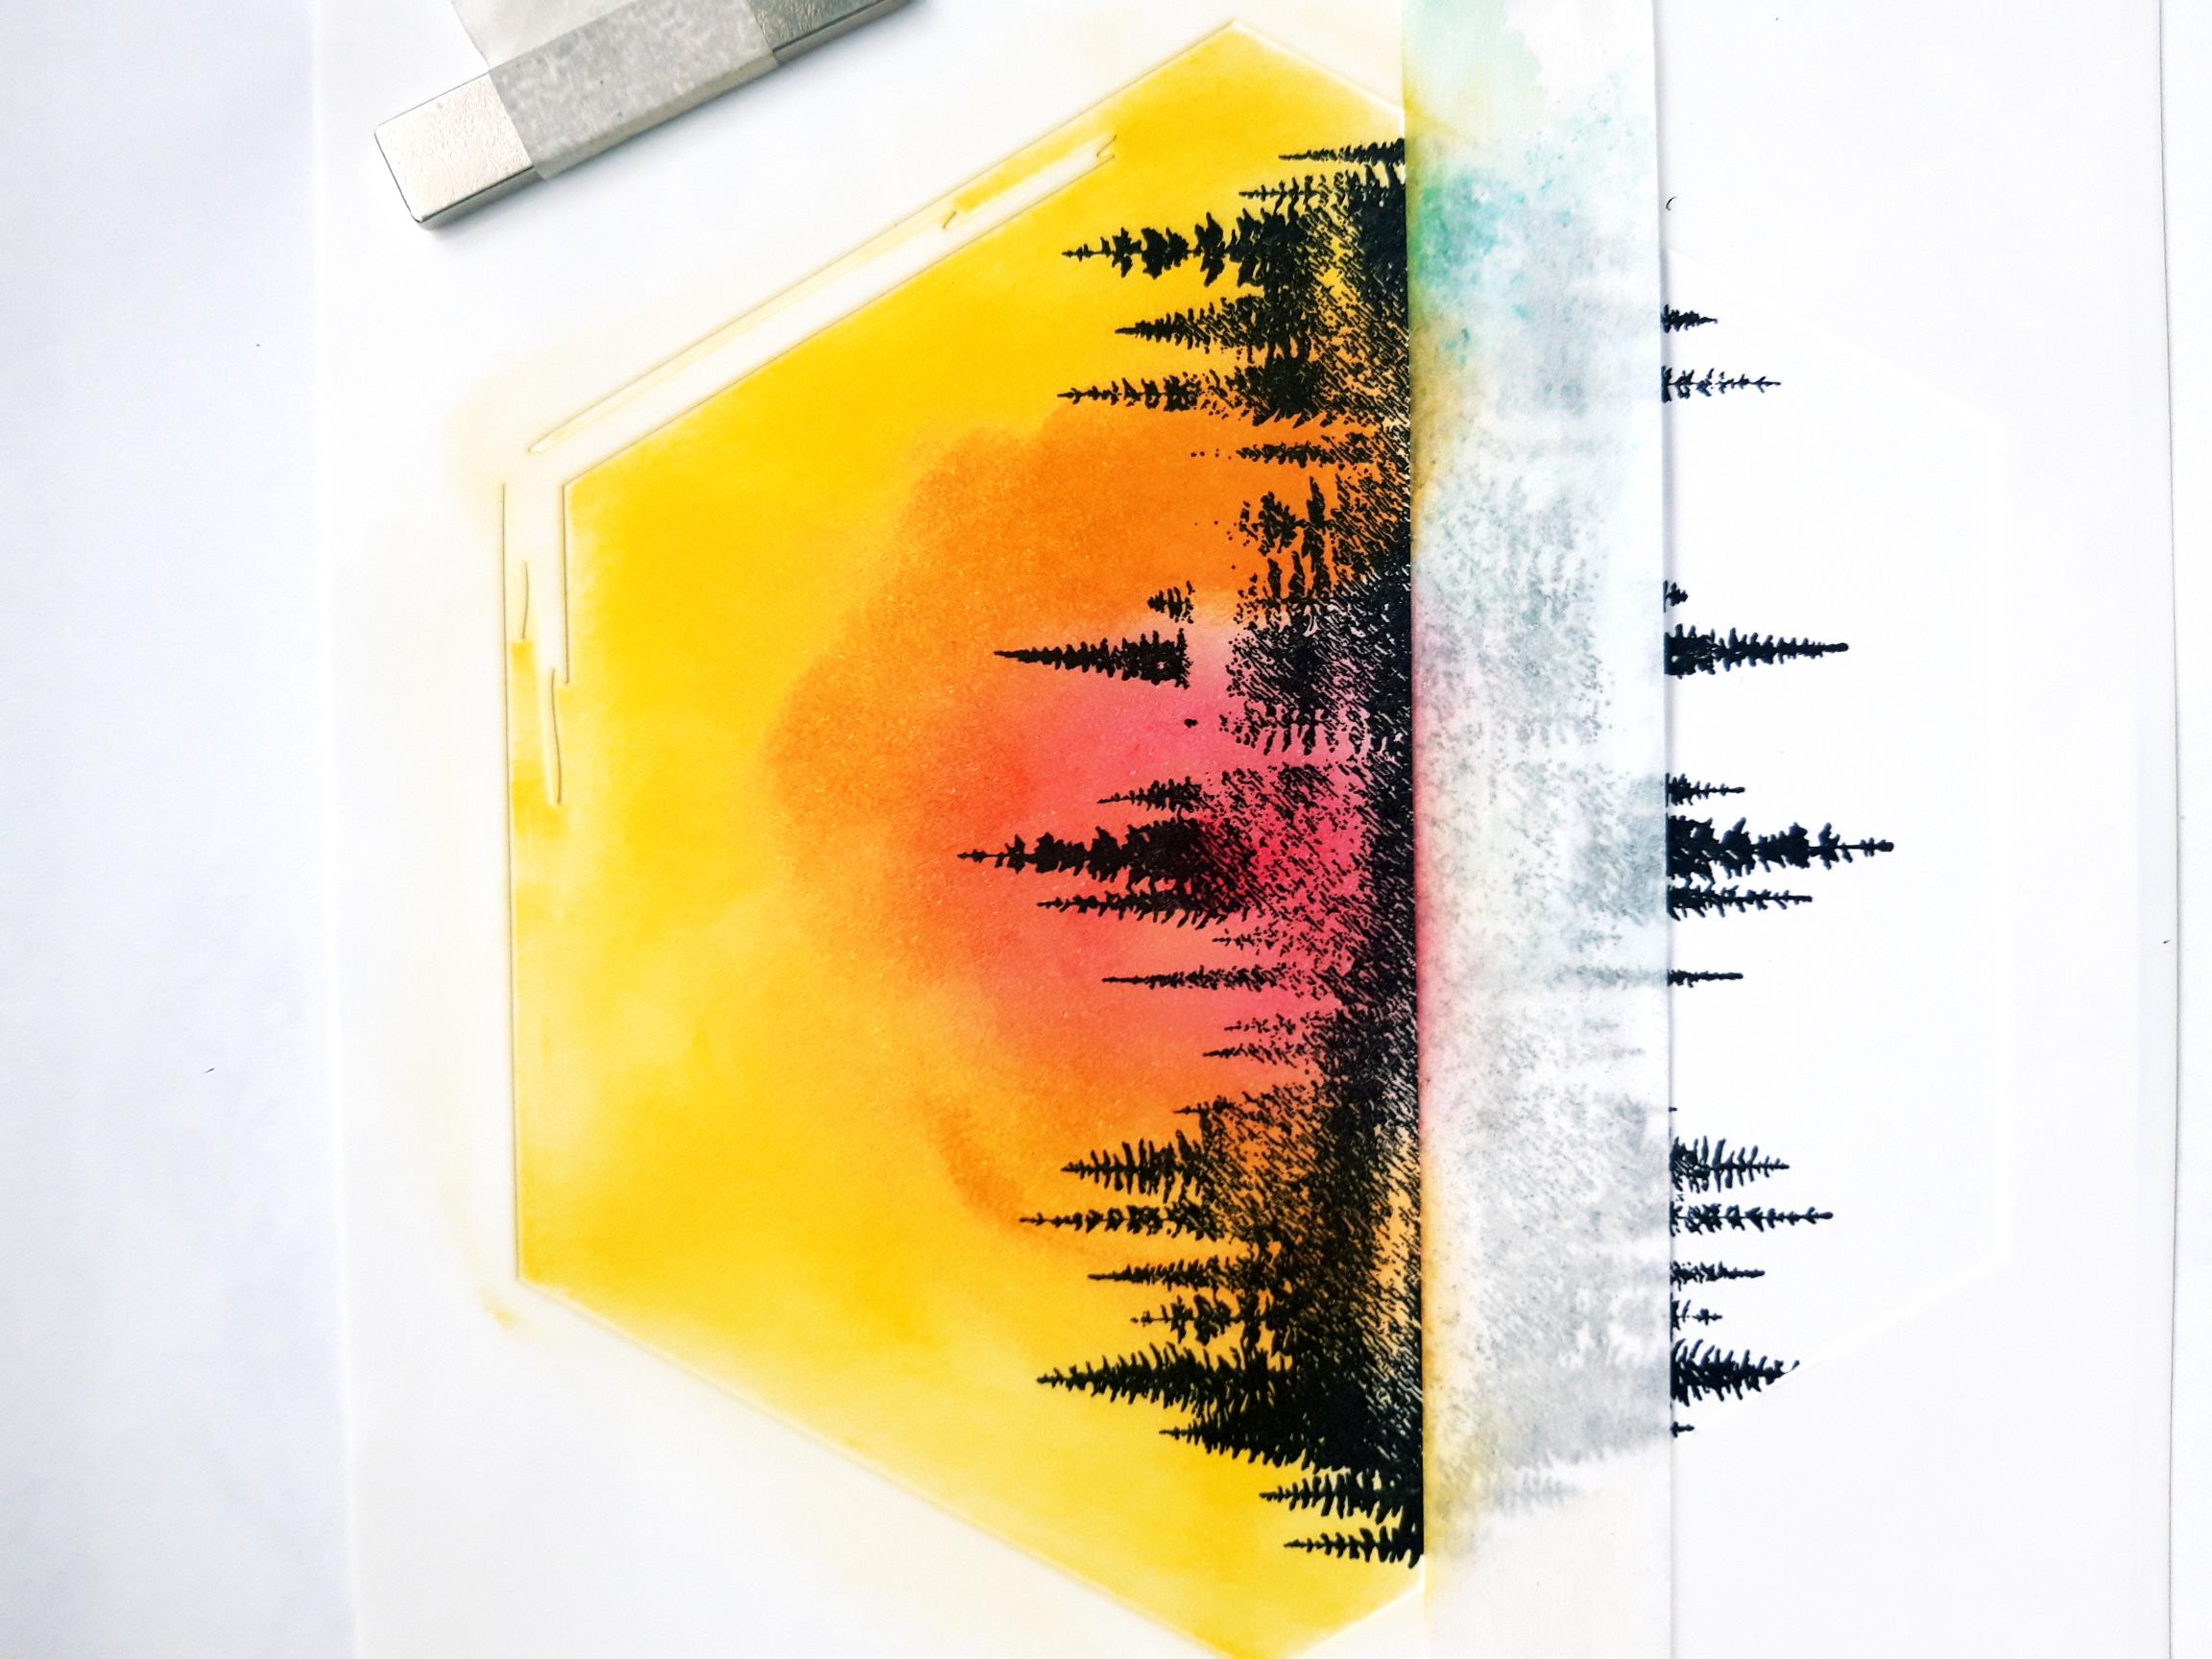
Keeping the stencil in situ, you need to mask along the reflection line, with the masking tape or you can cover with a piece of copier paper, held in place with a magnet. Blend the Izink Dye inks from the centre outwards, starting with the Cerise, followed by the Miel and finally the Aurore, as shown here. You want the colours to be as vibrant as possible. |
|
Use a paint brush to splatter drops of water over the inked sky. Leave for a few seconds before mopping up the excess water with a paper towel. Dry off the ink before moving to the next step. |
|
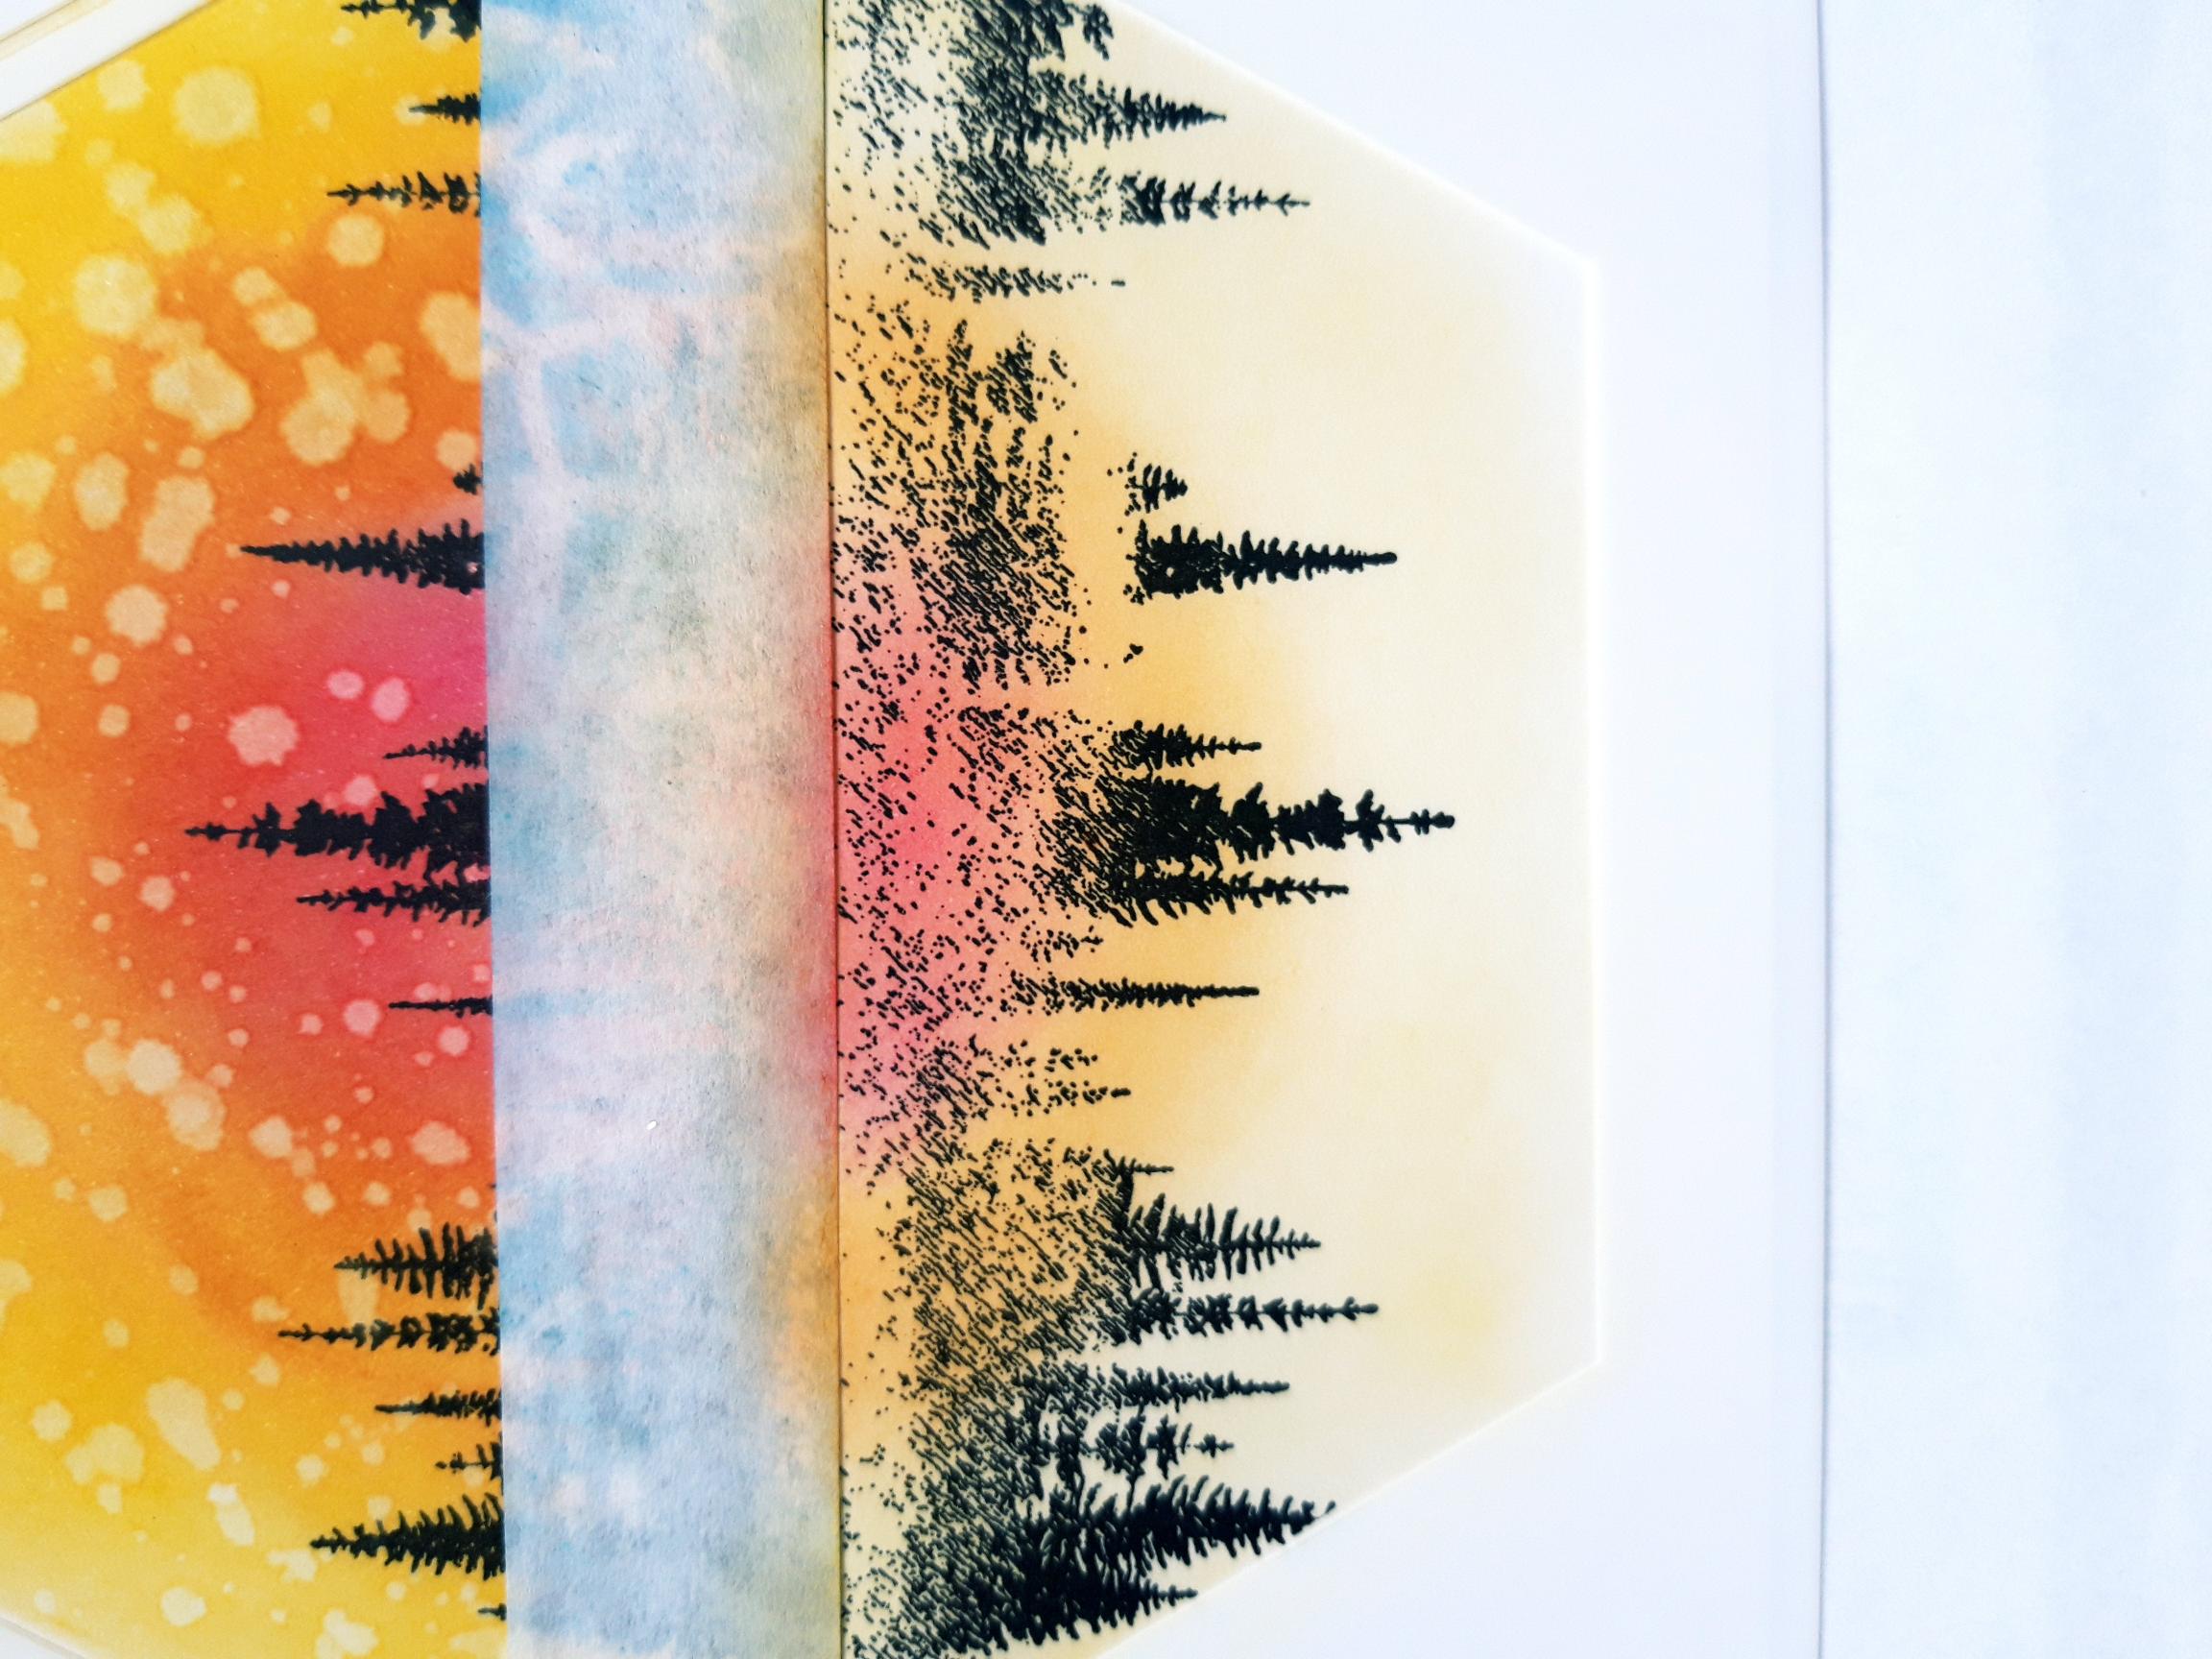
Apply masking tape along, but ABOVE the reflection line this time, or cover the inked sky with copier paper. Using the same colour inks as before, blend them in the same but reflected position, starting with the Cerise in the centre. However, this time the colours should be more muted and loose, especially the Aurore which should fade out to nothing, as seen here. |

|
Carefully remove the masking tape or copier paper and using the same inks, you can fill and blend in any little gaps, that may be along the reflection line, with a paint brush. |

|
Use a black, fine line pen, to draw randomly around the Stylized Hexagon stencil, to accentuate its shape when the stencil is removed. |
|
Blend the Izink Cerise lightly and randomly, through the Shattered Glass stencil, around the outer edges of the white card. |
|
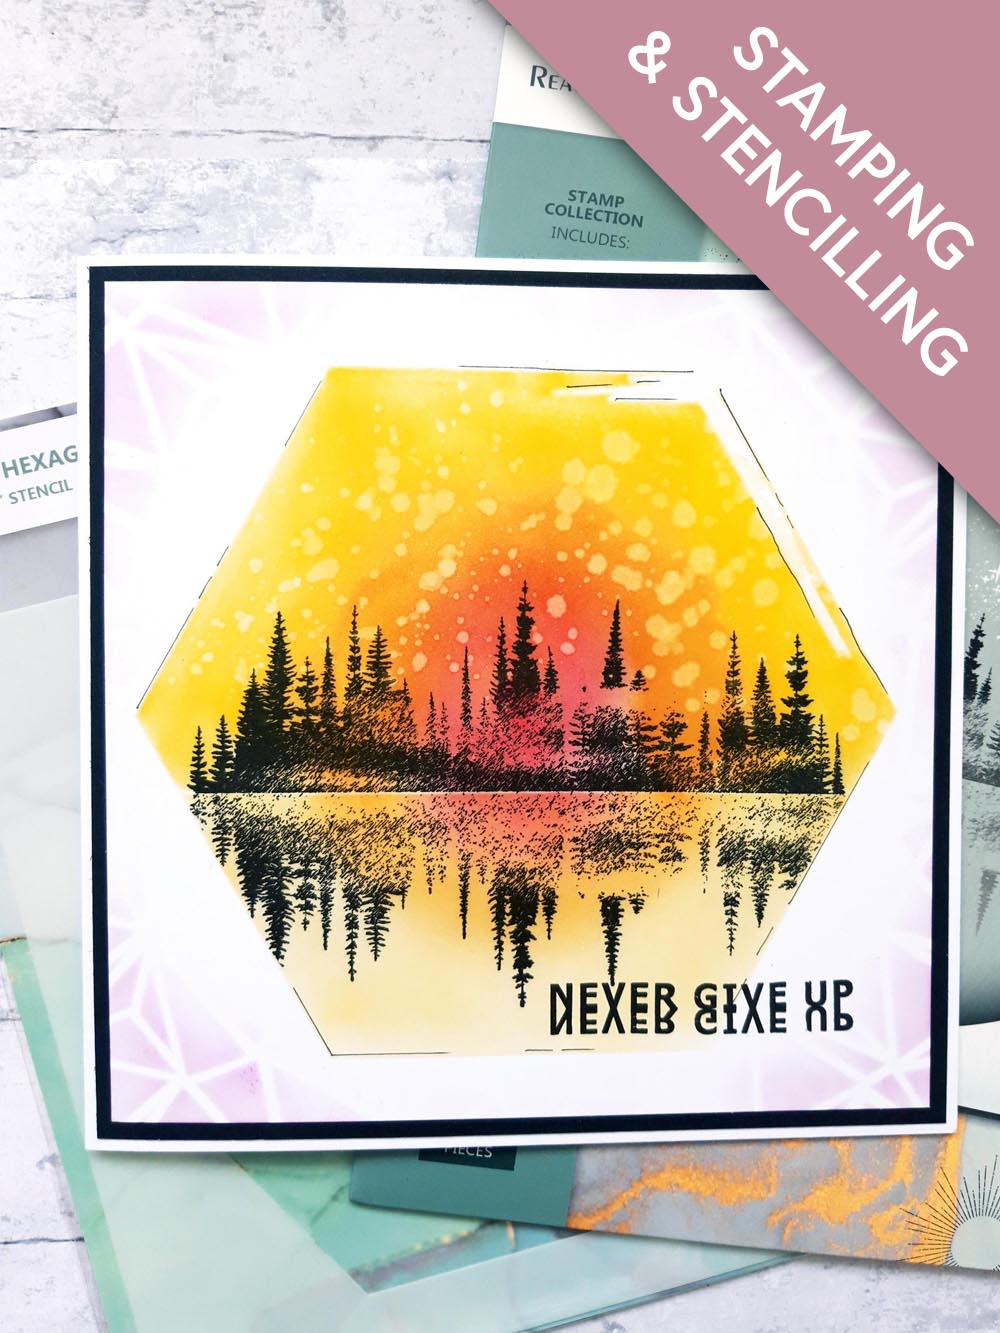
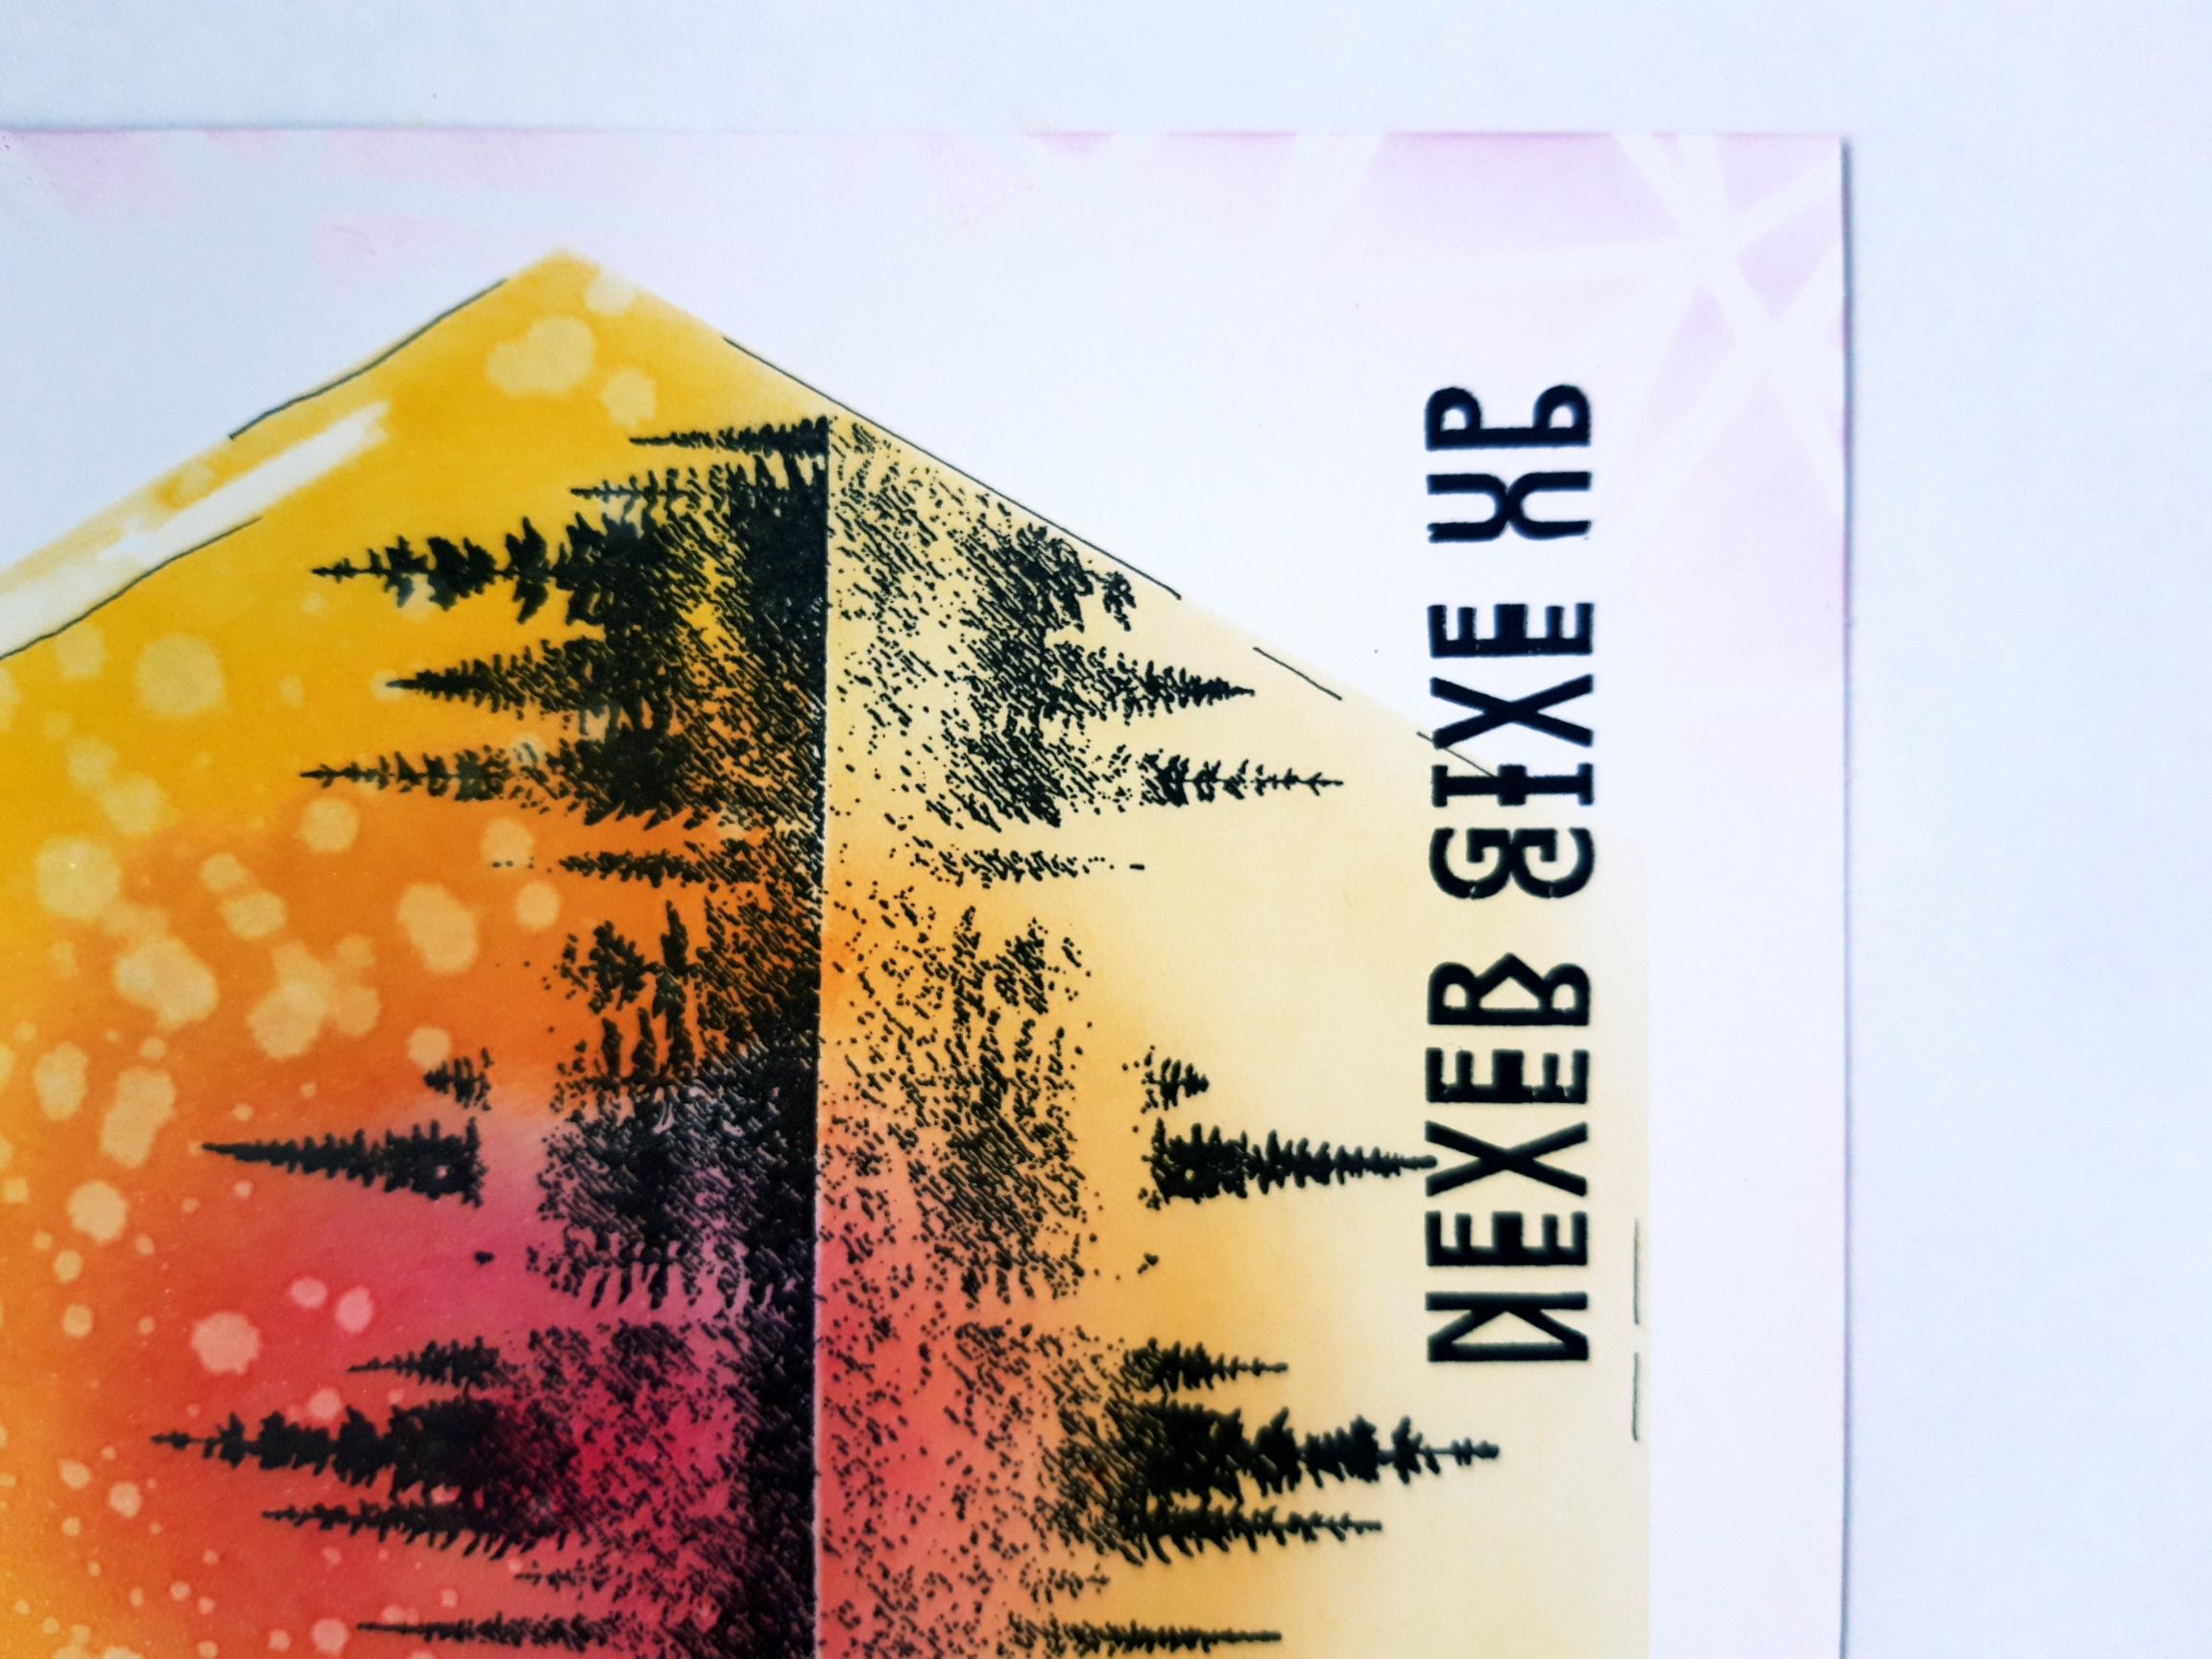
Ink up the sentiment from the Every New Day Stamp Collection, with the Onyx Black Versafine and stamp across the bottom right of your artwork. |
|
Adhere your artwork on to the black card. |
|
Adhere on to the front of your card blank. |