Give your friends $10 off their first order!
Refer a FRIEND


WHAT YOU WILL NEED:
White card blank (7 x 7")
Black card (6 3/4 x 6 3/4")
White card (6 1/2 x 6 1/2")
Every New Day Stamp Collection
Your Only Limit Is You Stamp Collection
Stylized Circle Stencil
Circle mask approx 2" diameter (or a die cut circle from copier paper)
Enchanted Collection Mandala stencil
Versafine Ink Pad: Onyx Black
Distress Oxide/Ink: Peacock Feathers, Faded Jeans, Worn Lipstick, Villainous Potion
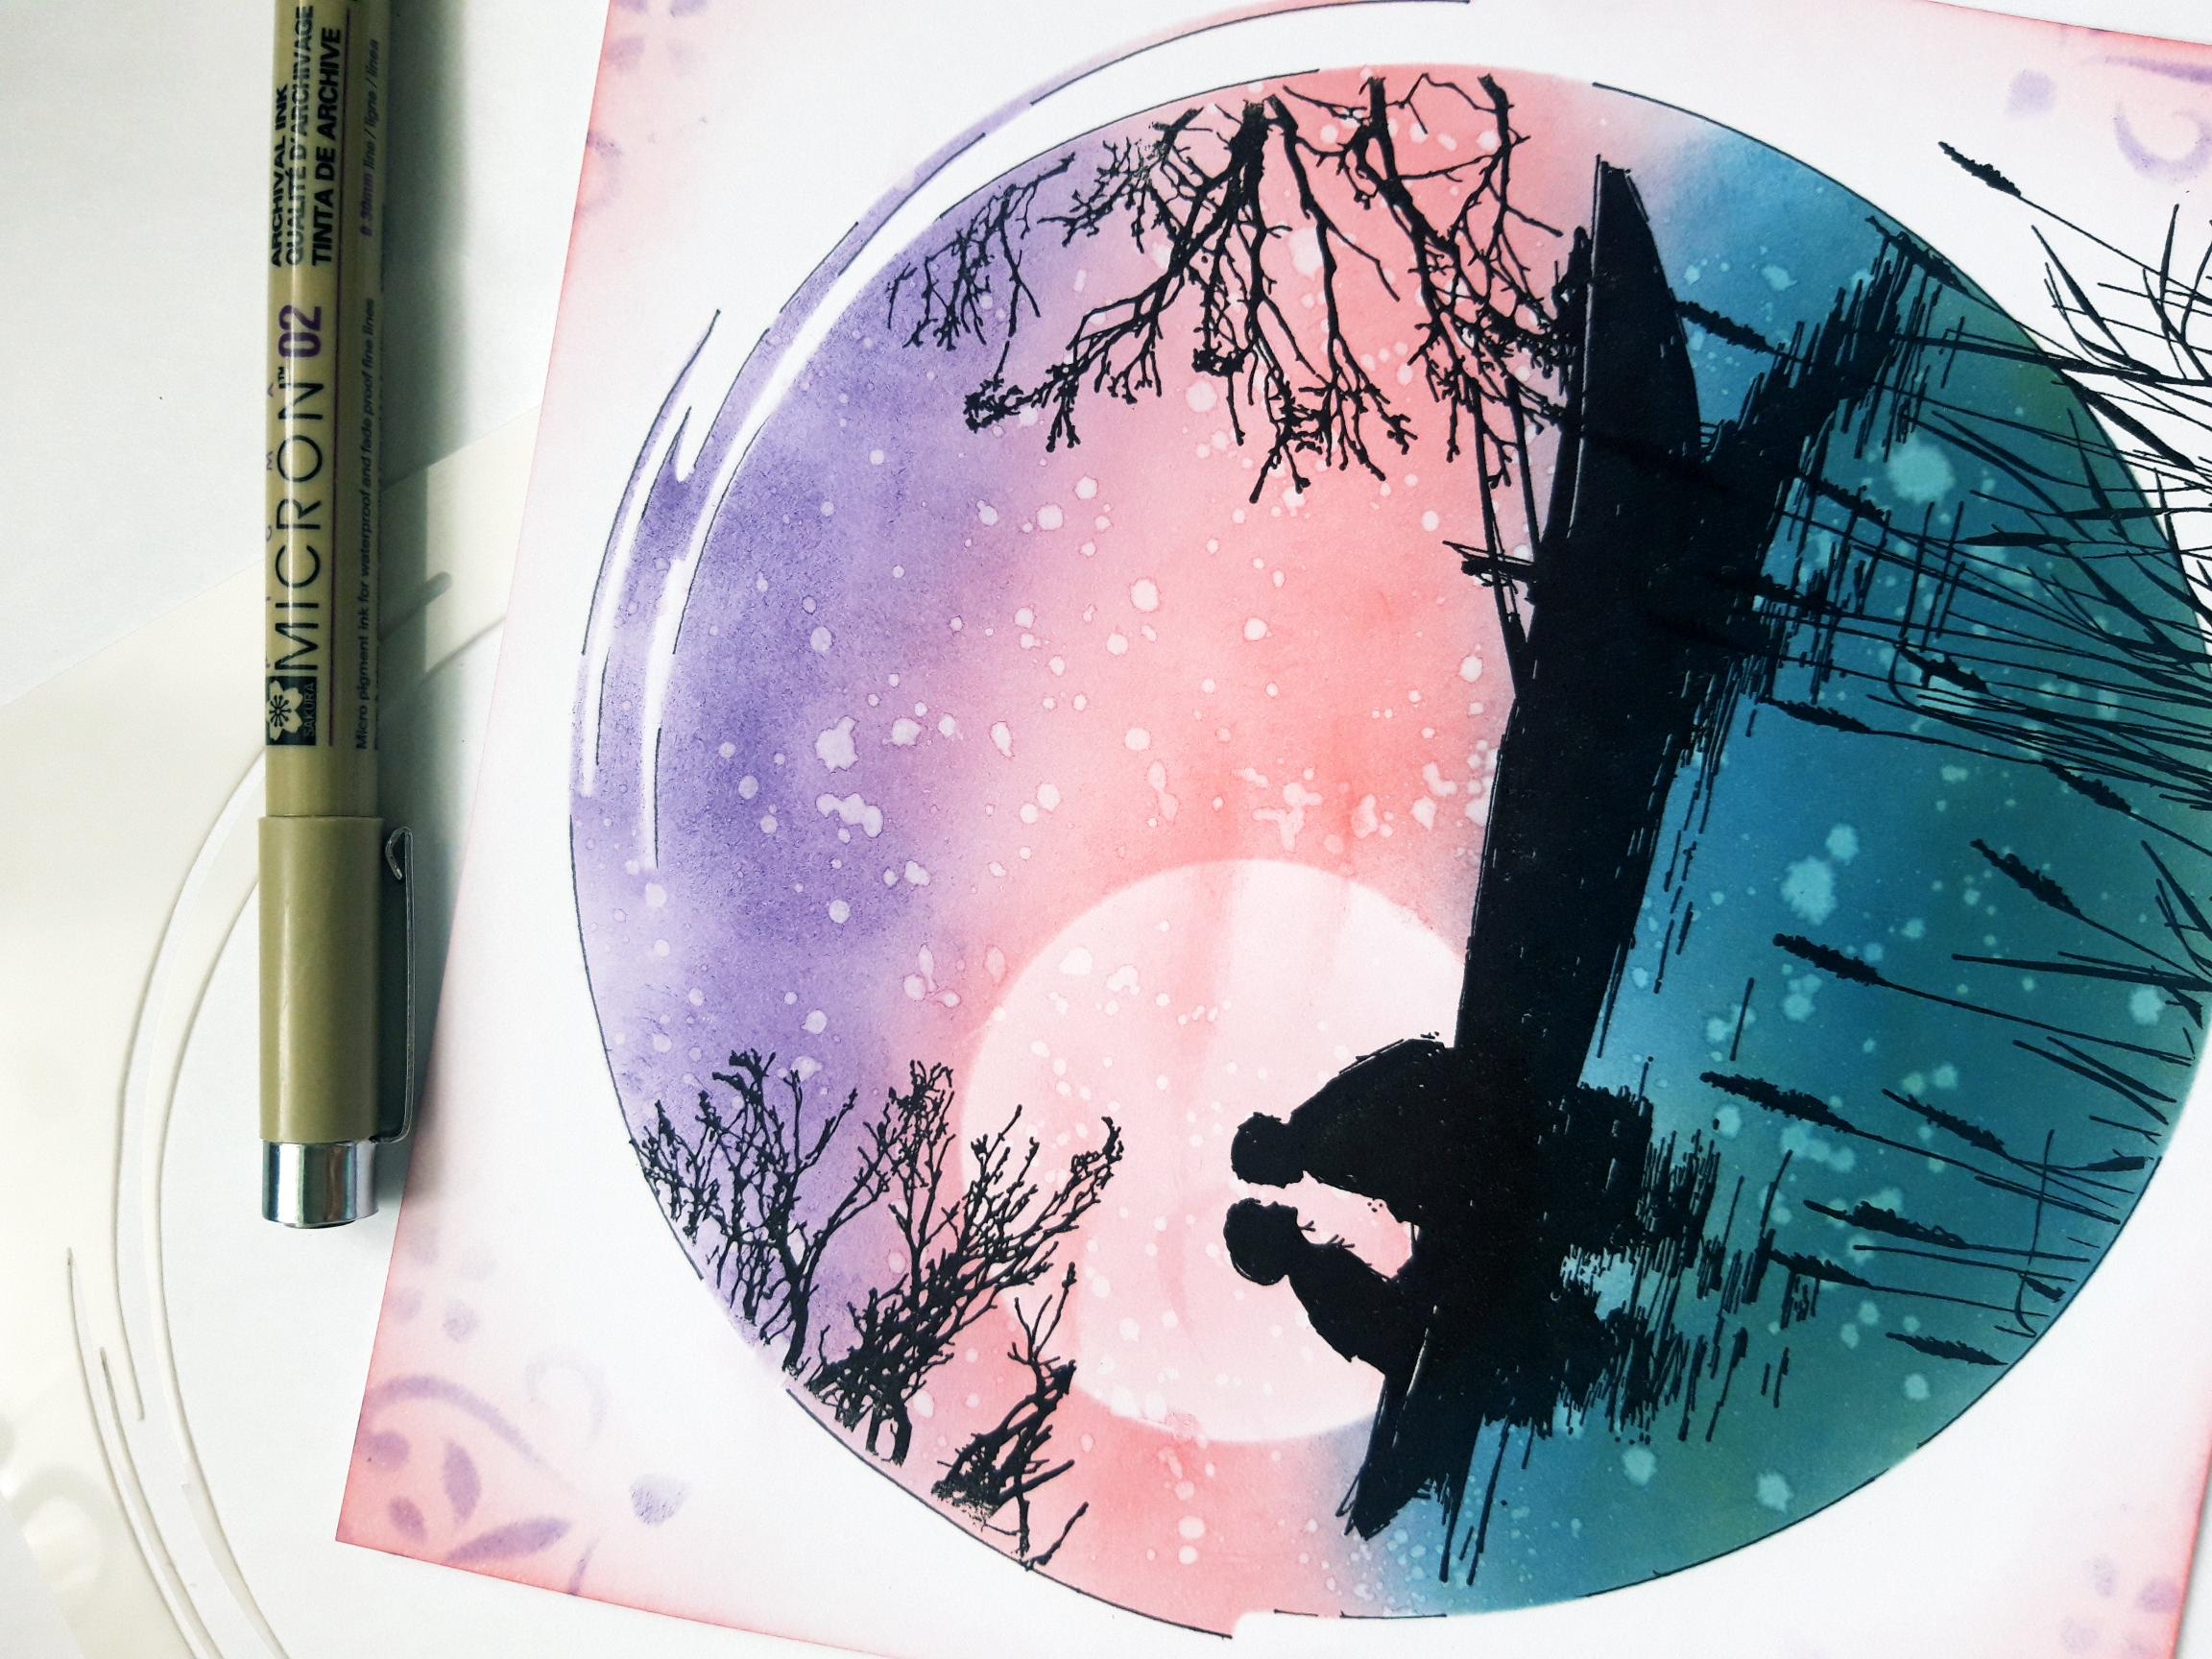
Black fine line pen
White gel pen
Paint brush
Eureka 101
Paper Trimmer
Perfect Together Glue
Low tack tape
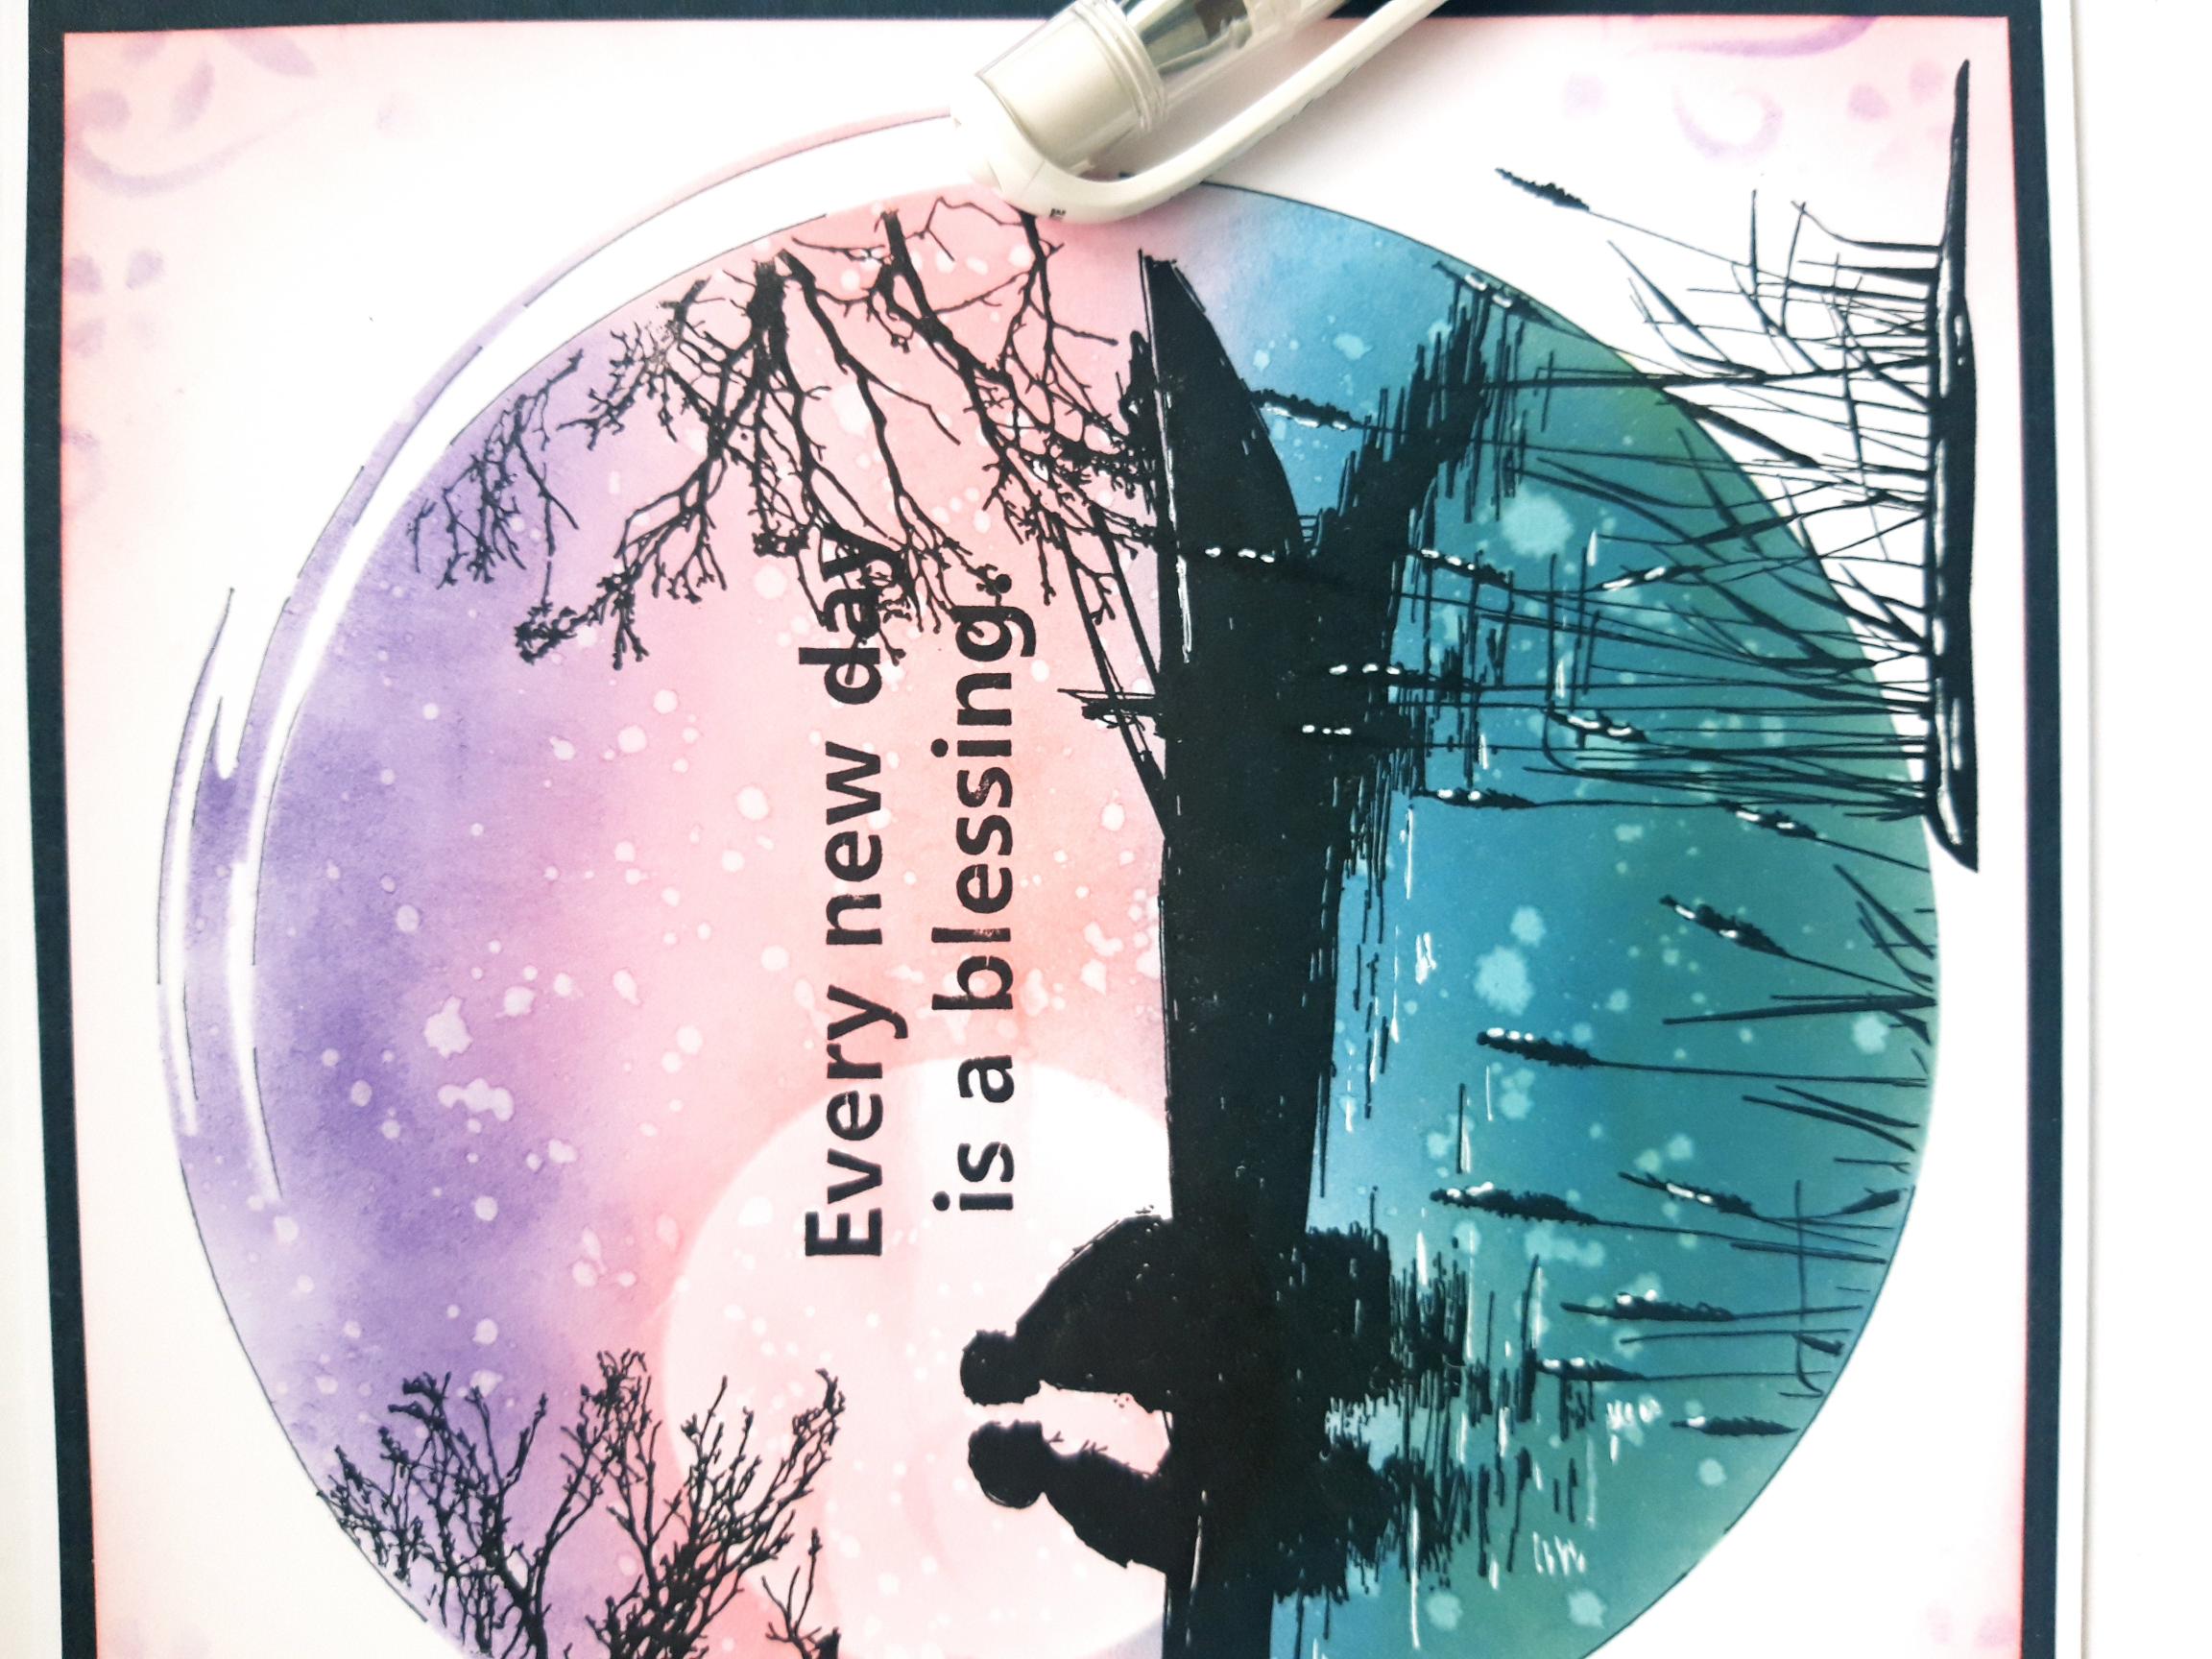
[click image to enlarge] 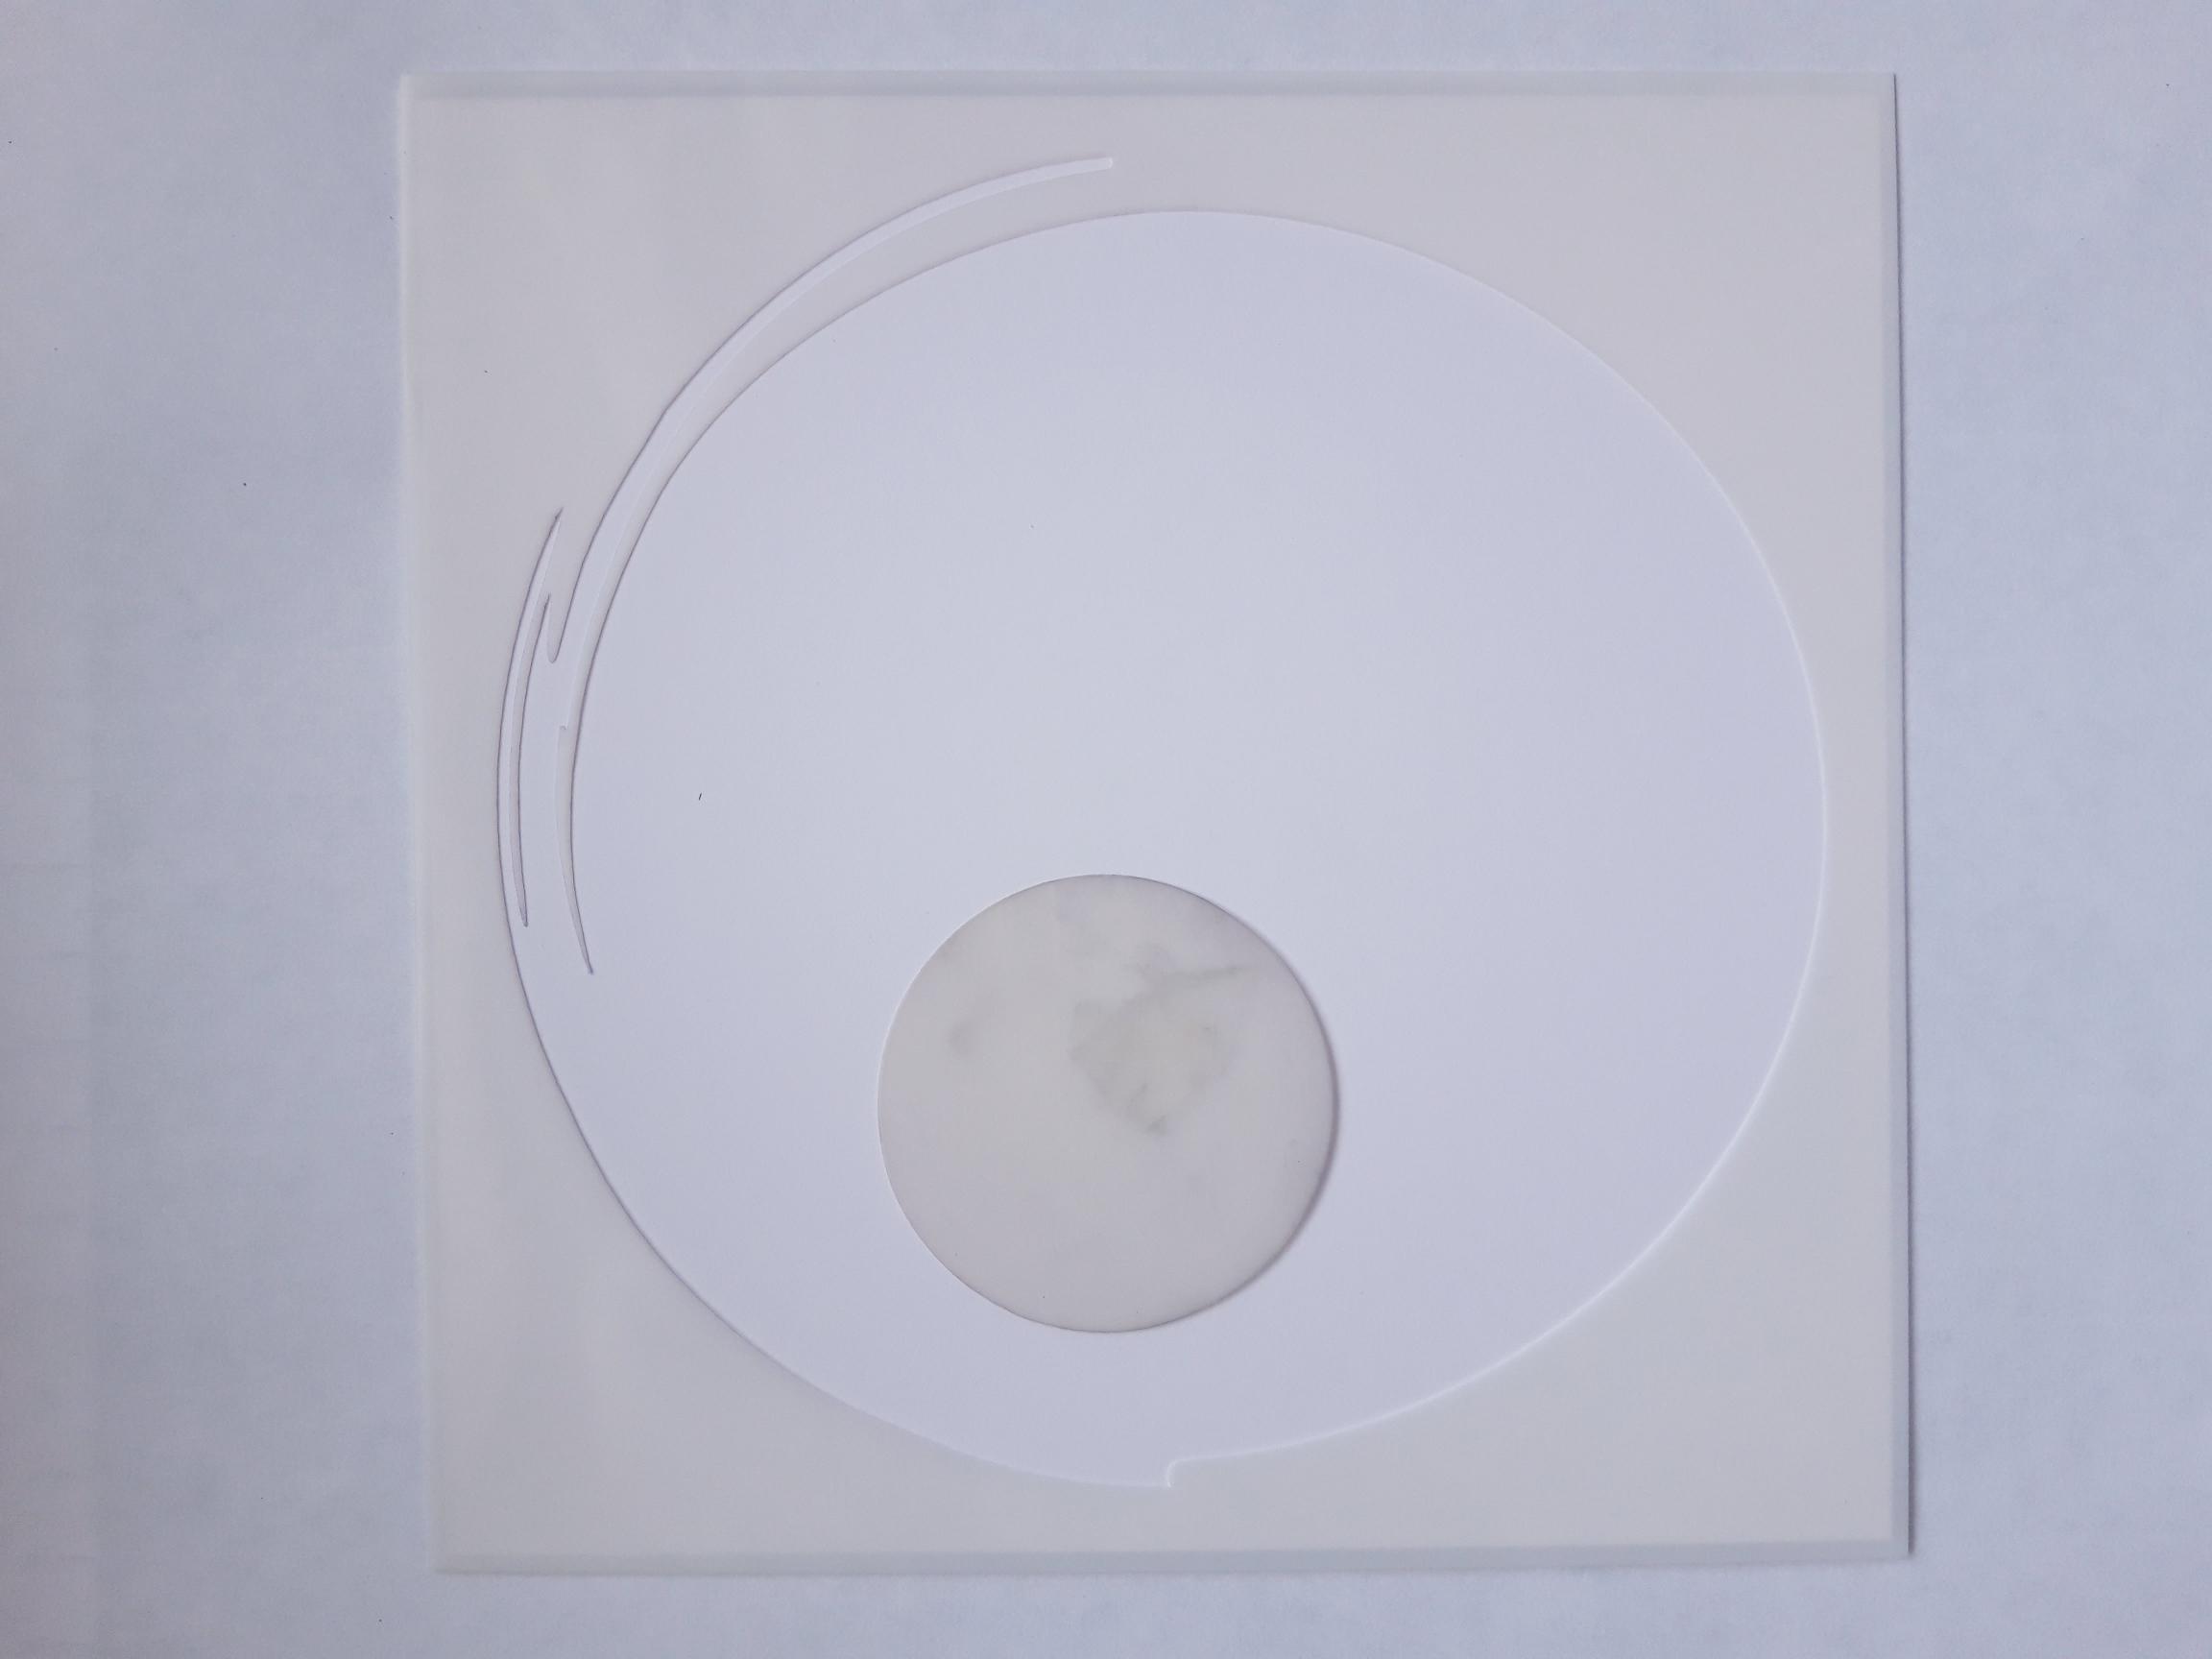
|
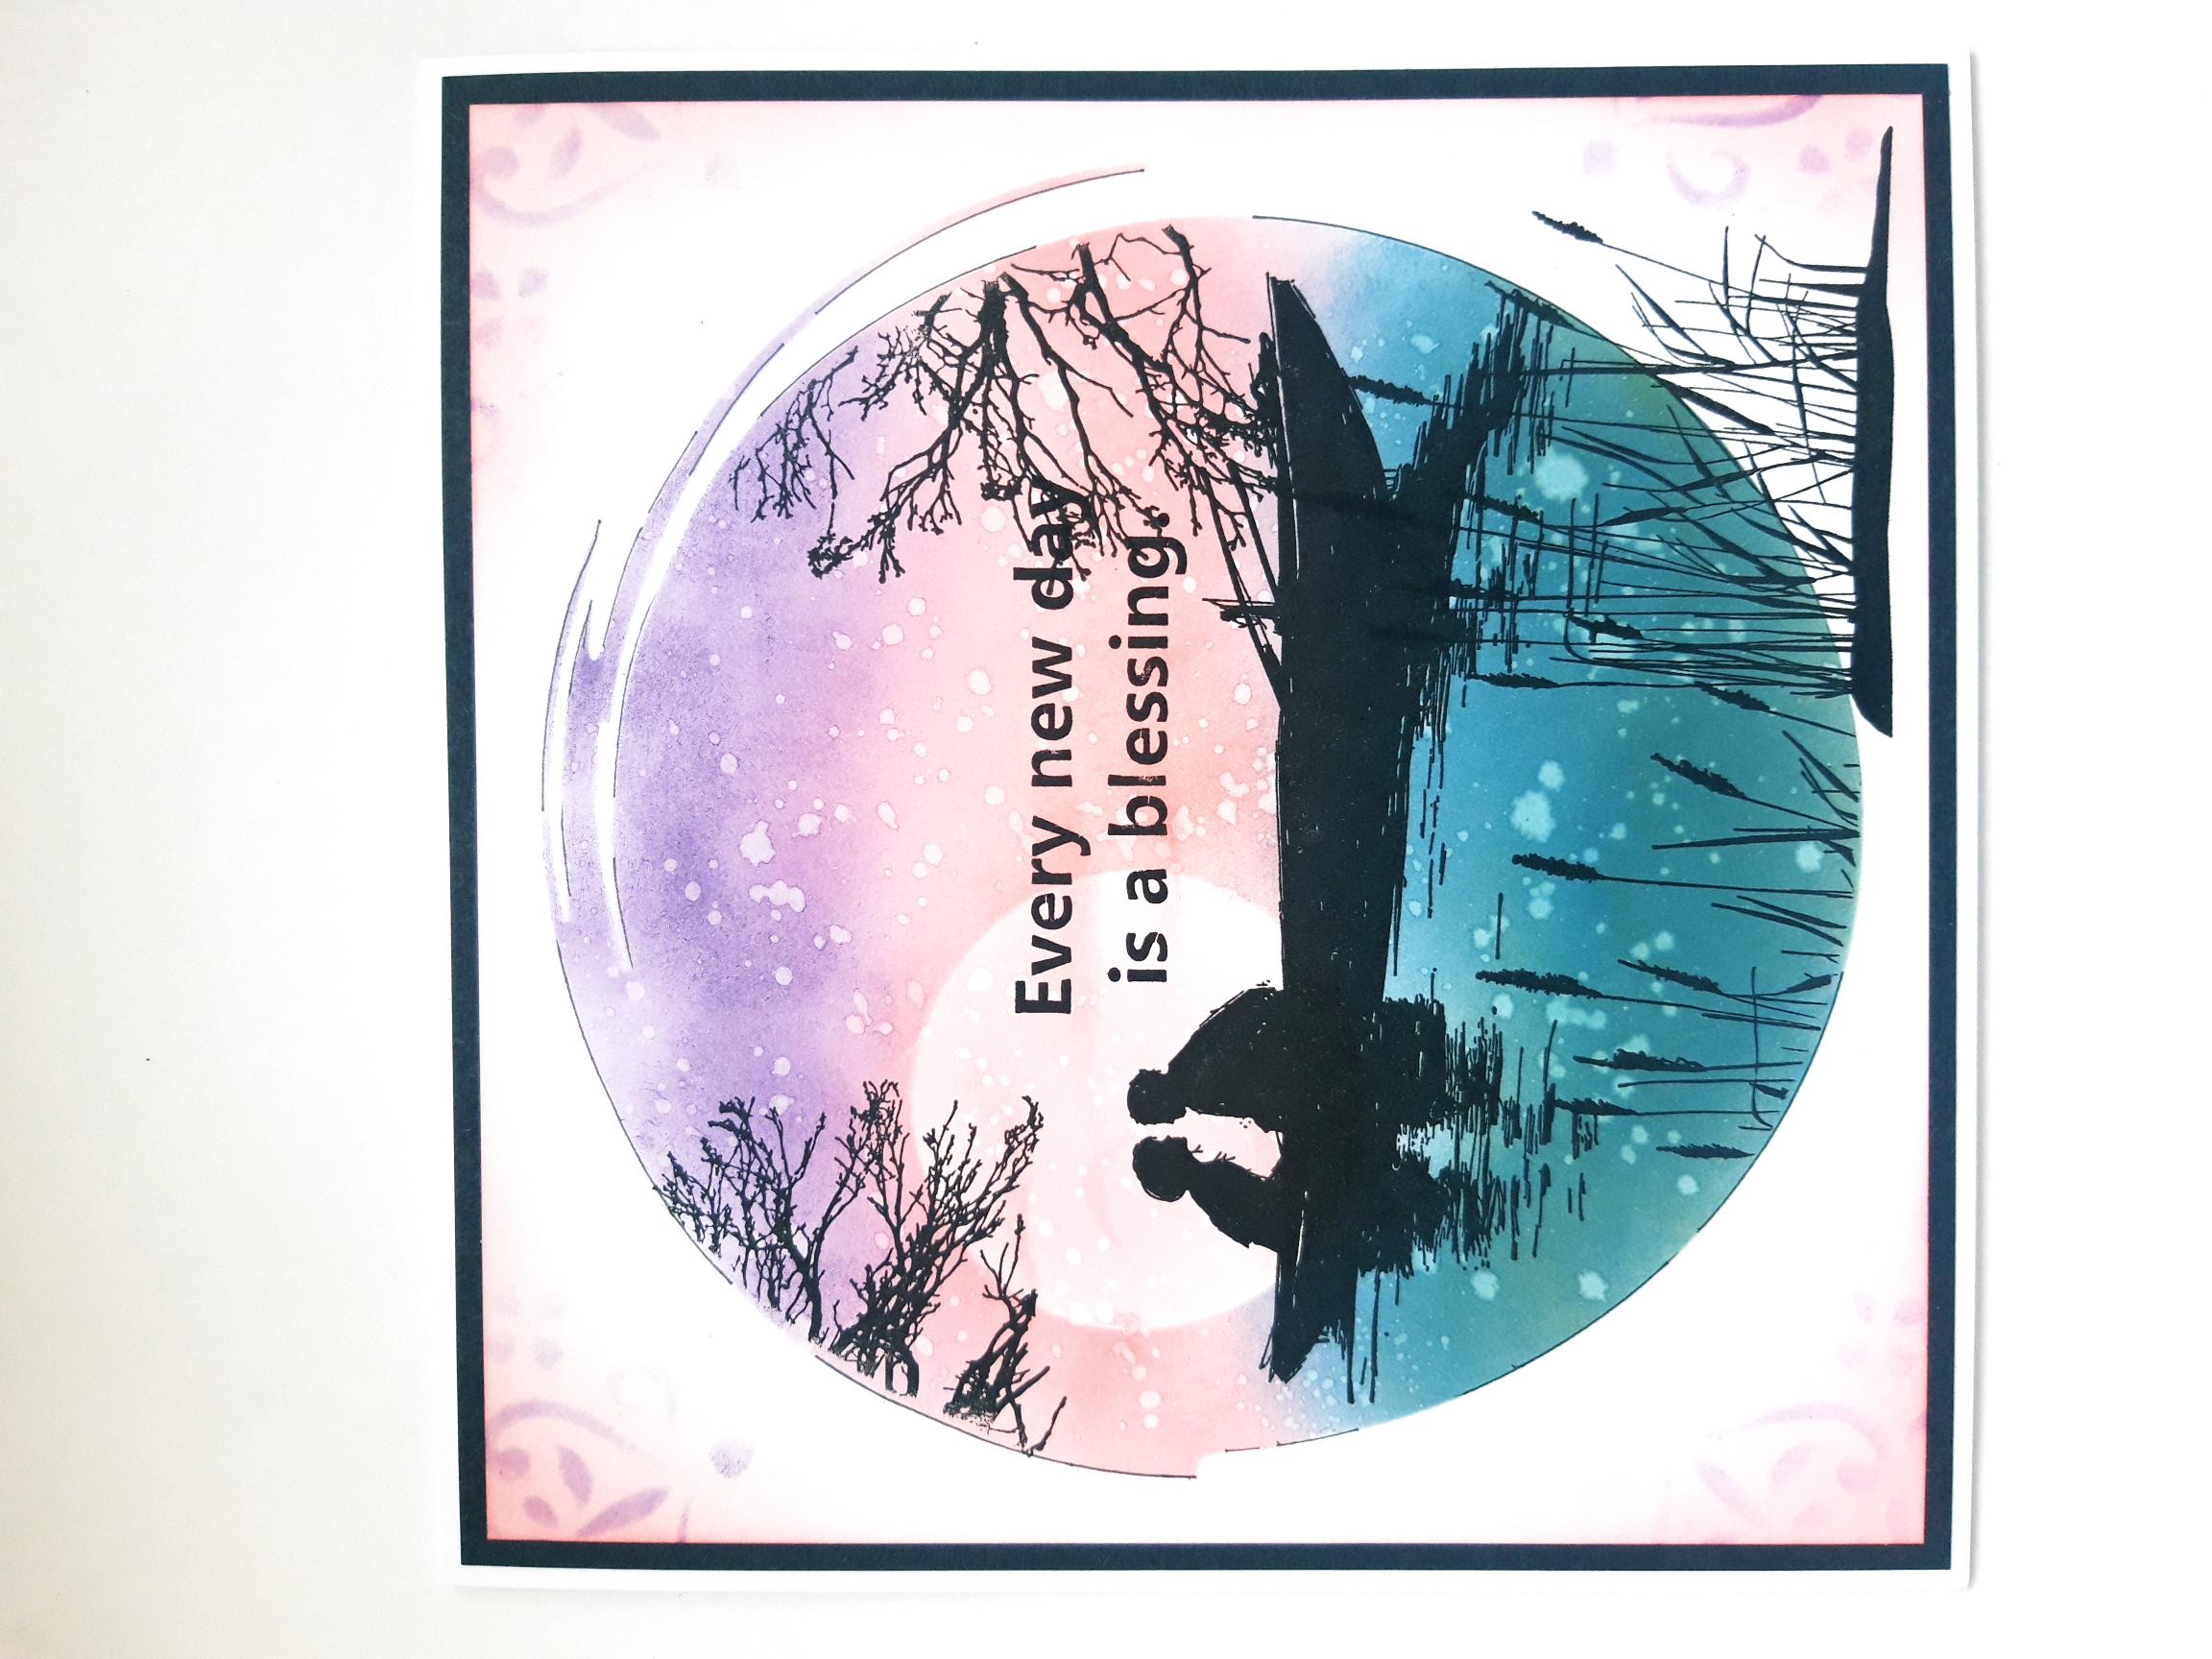
Place the Stylized Circle stencil on to your white card (6 1/2 x 6 1/2"). Place your circle mask centrally, to the left of your circle aperture, as seen here. You can secure it in place with low tack tape, if required. |
|
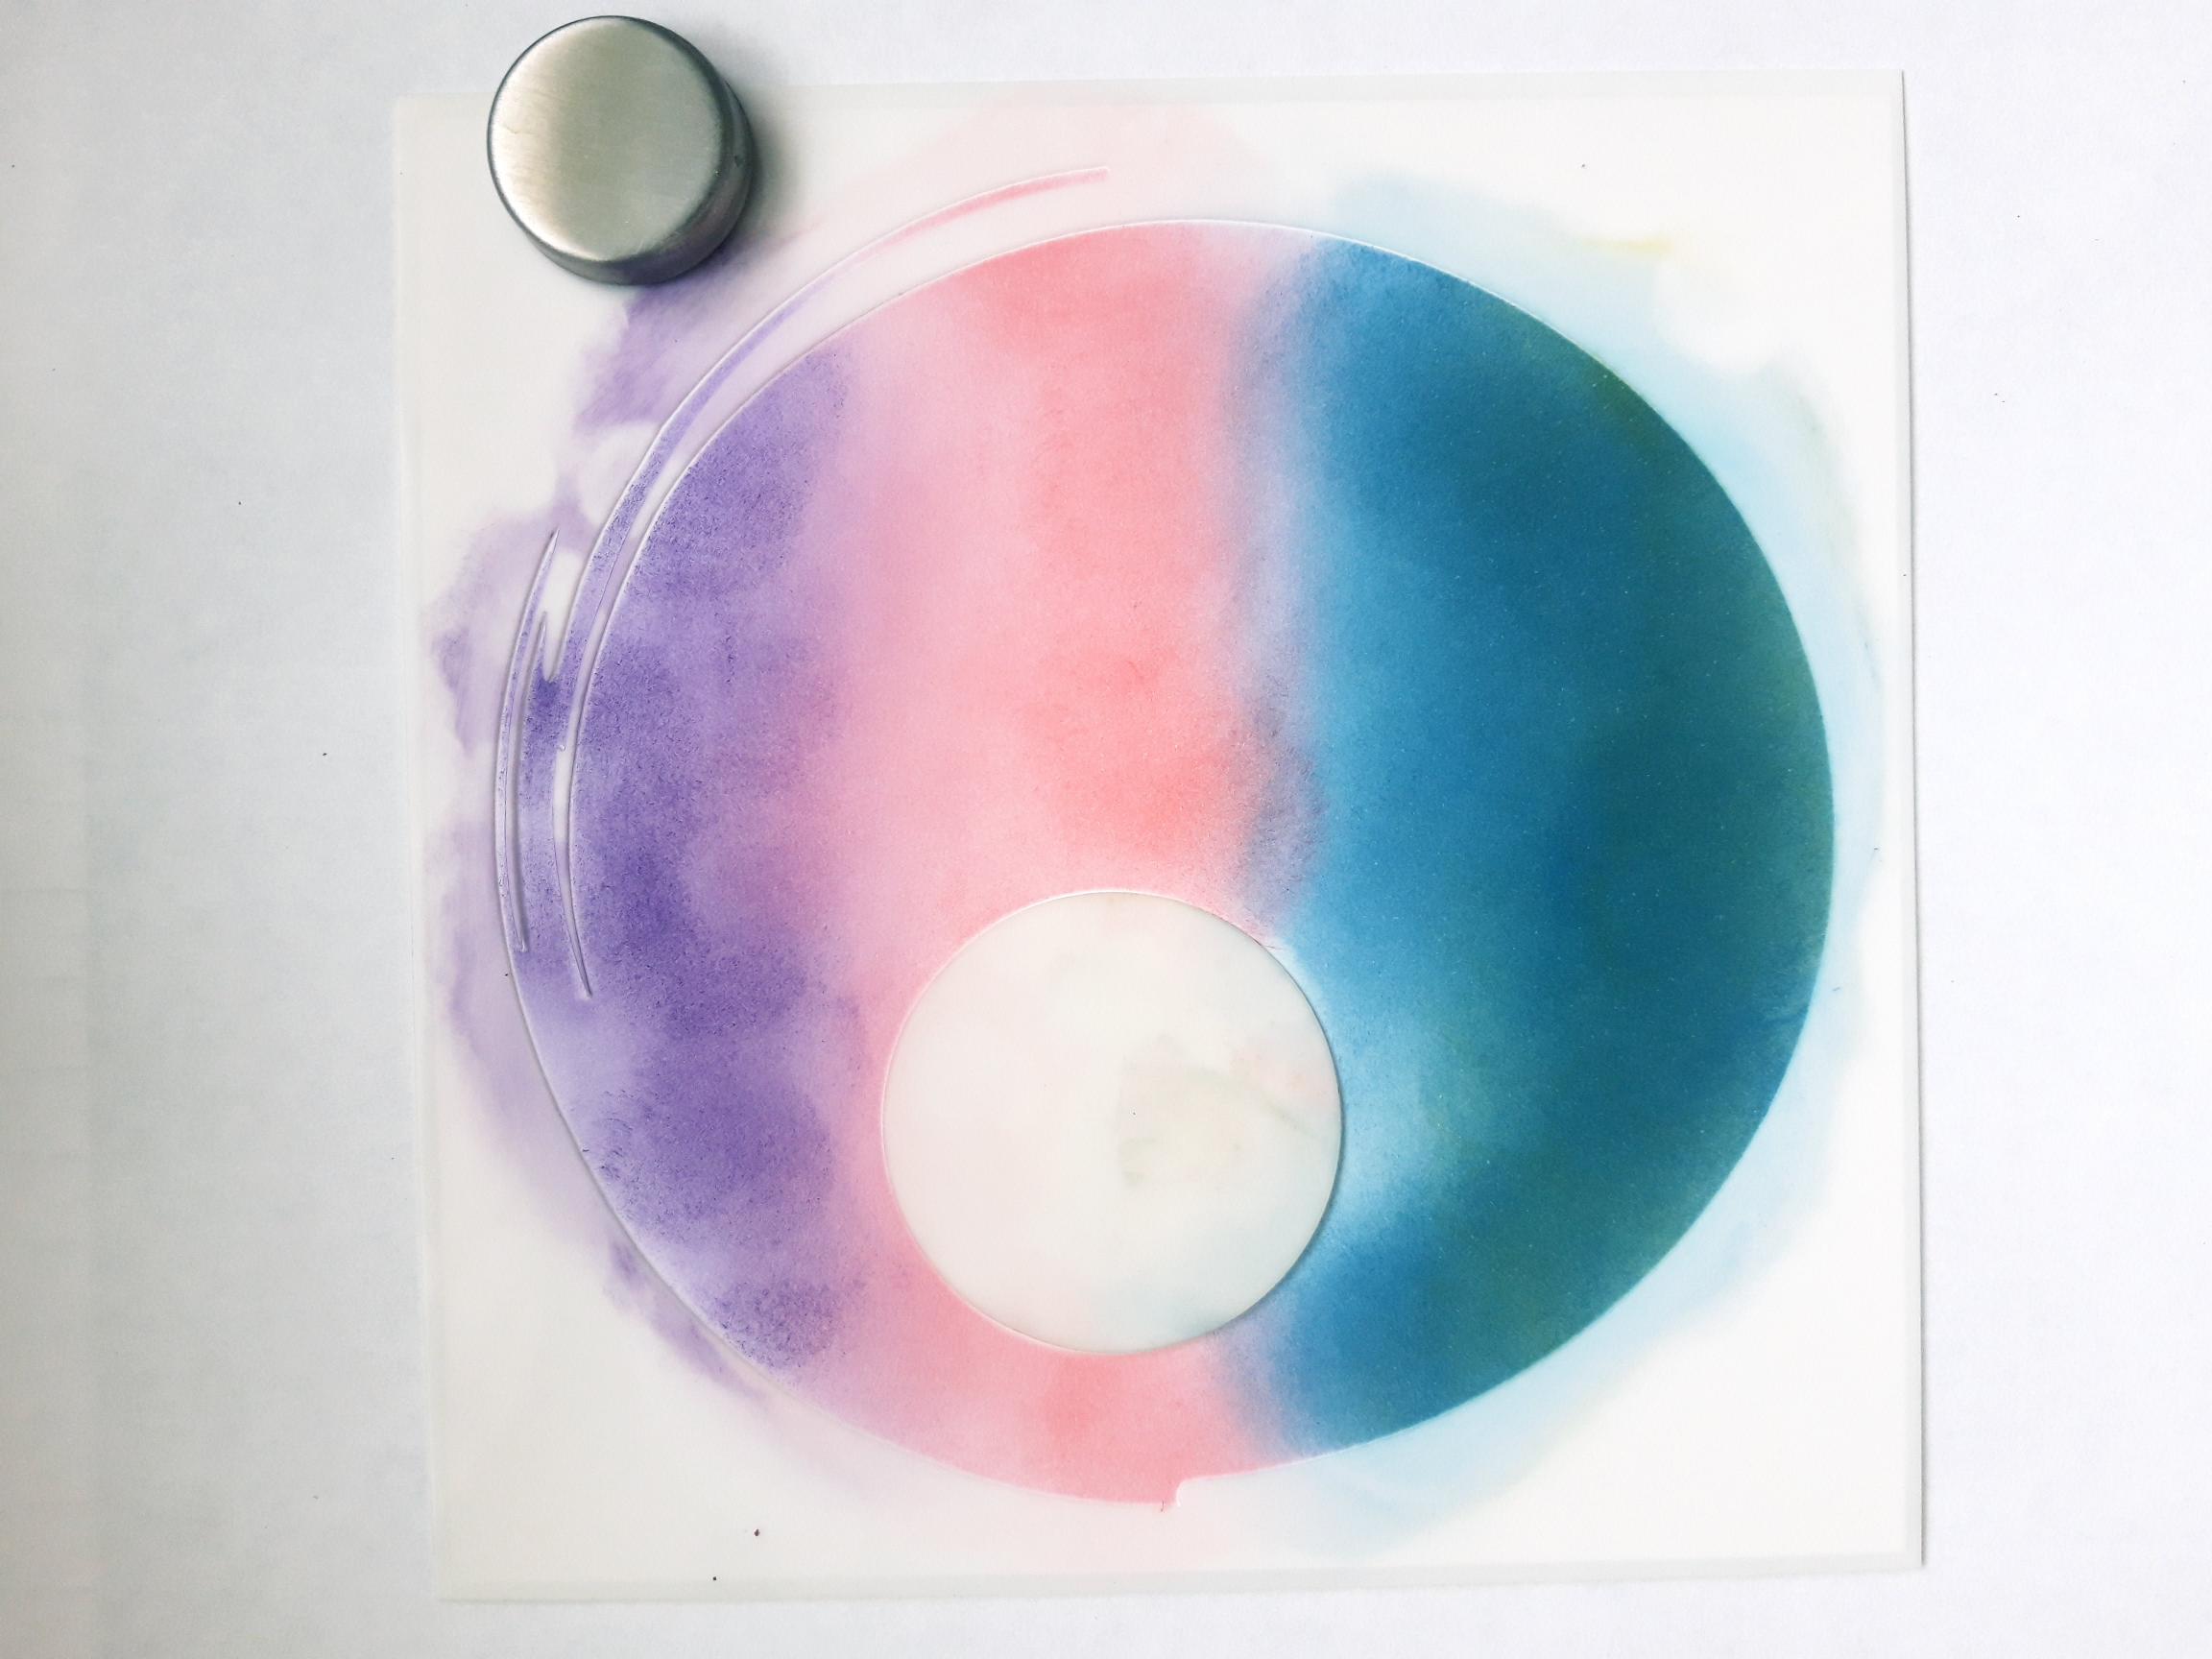
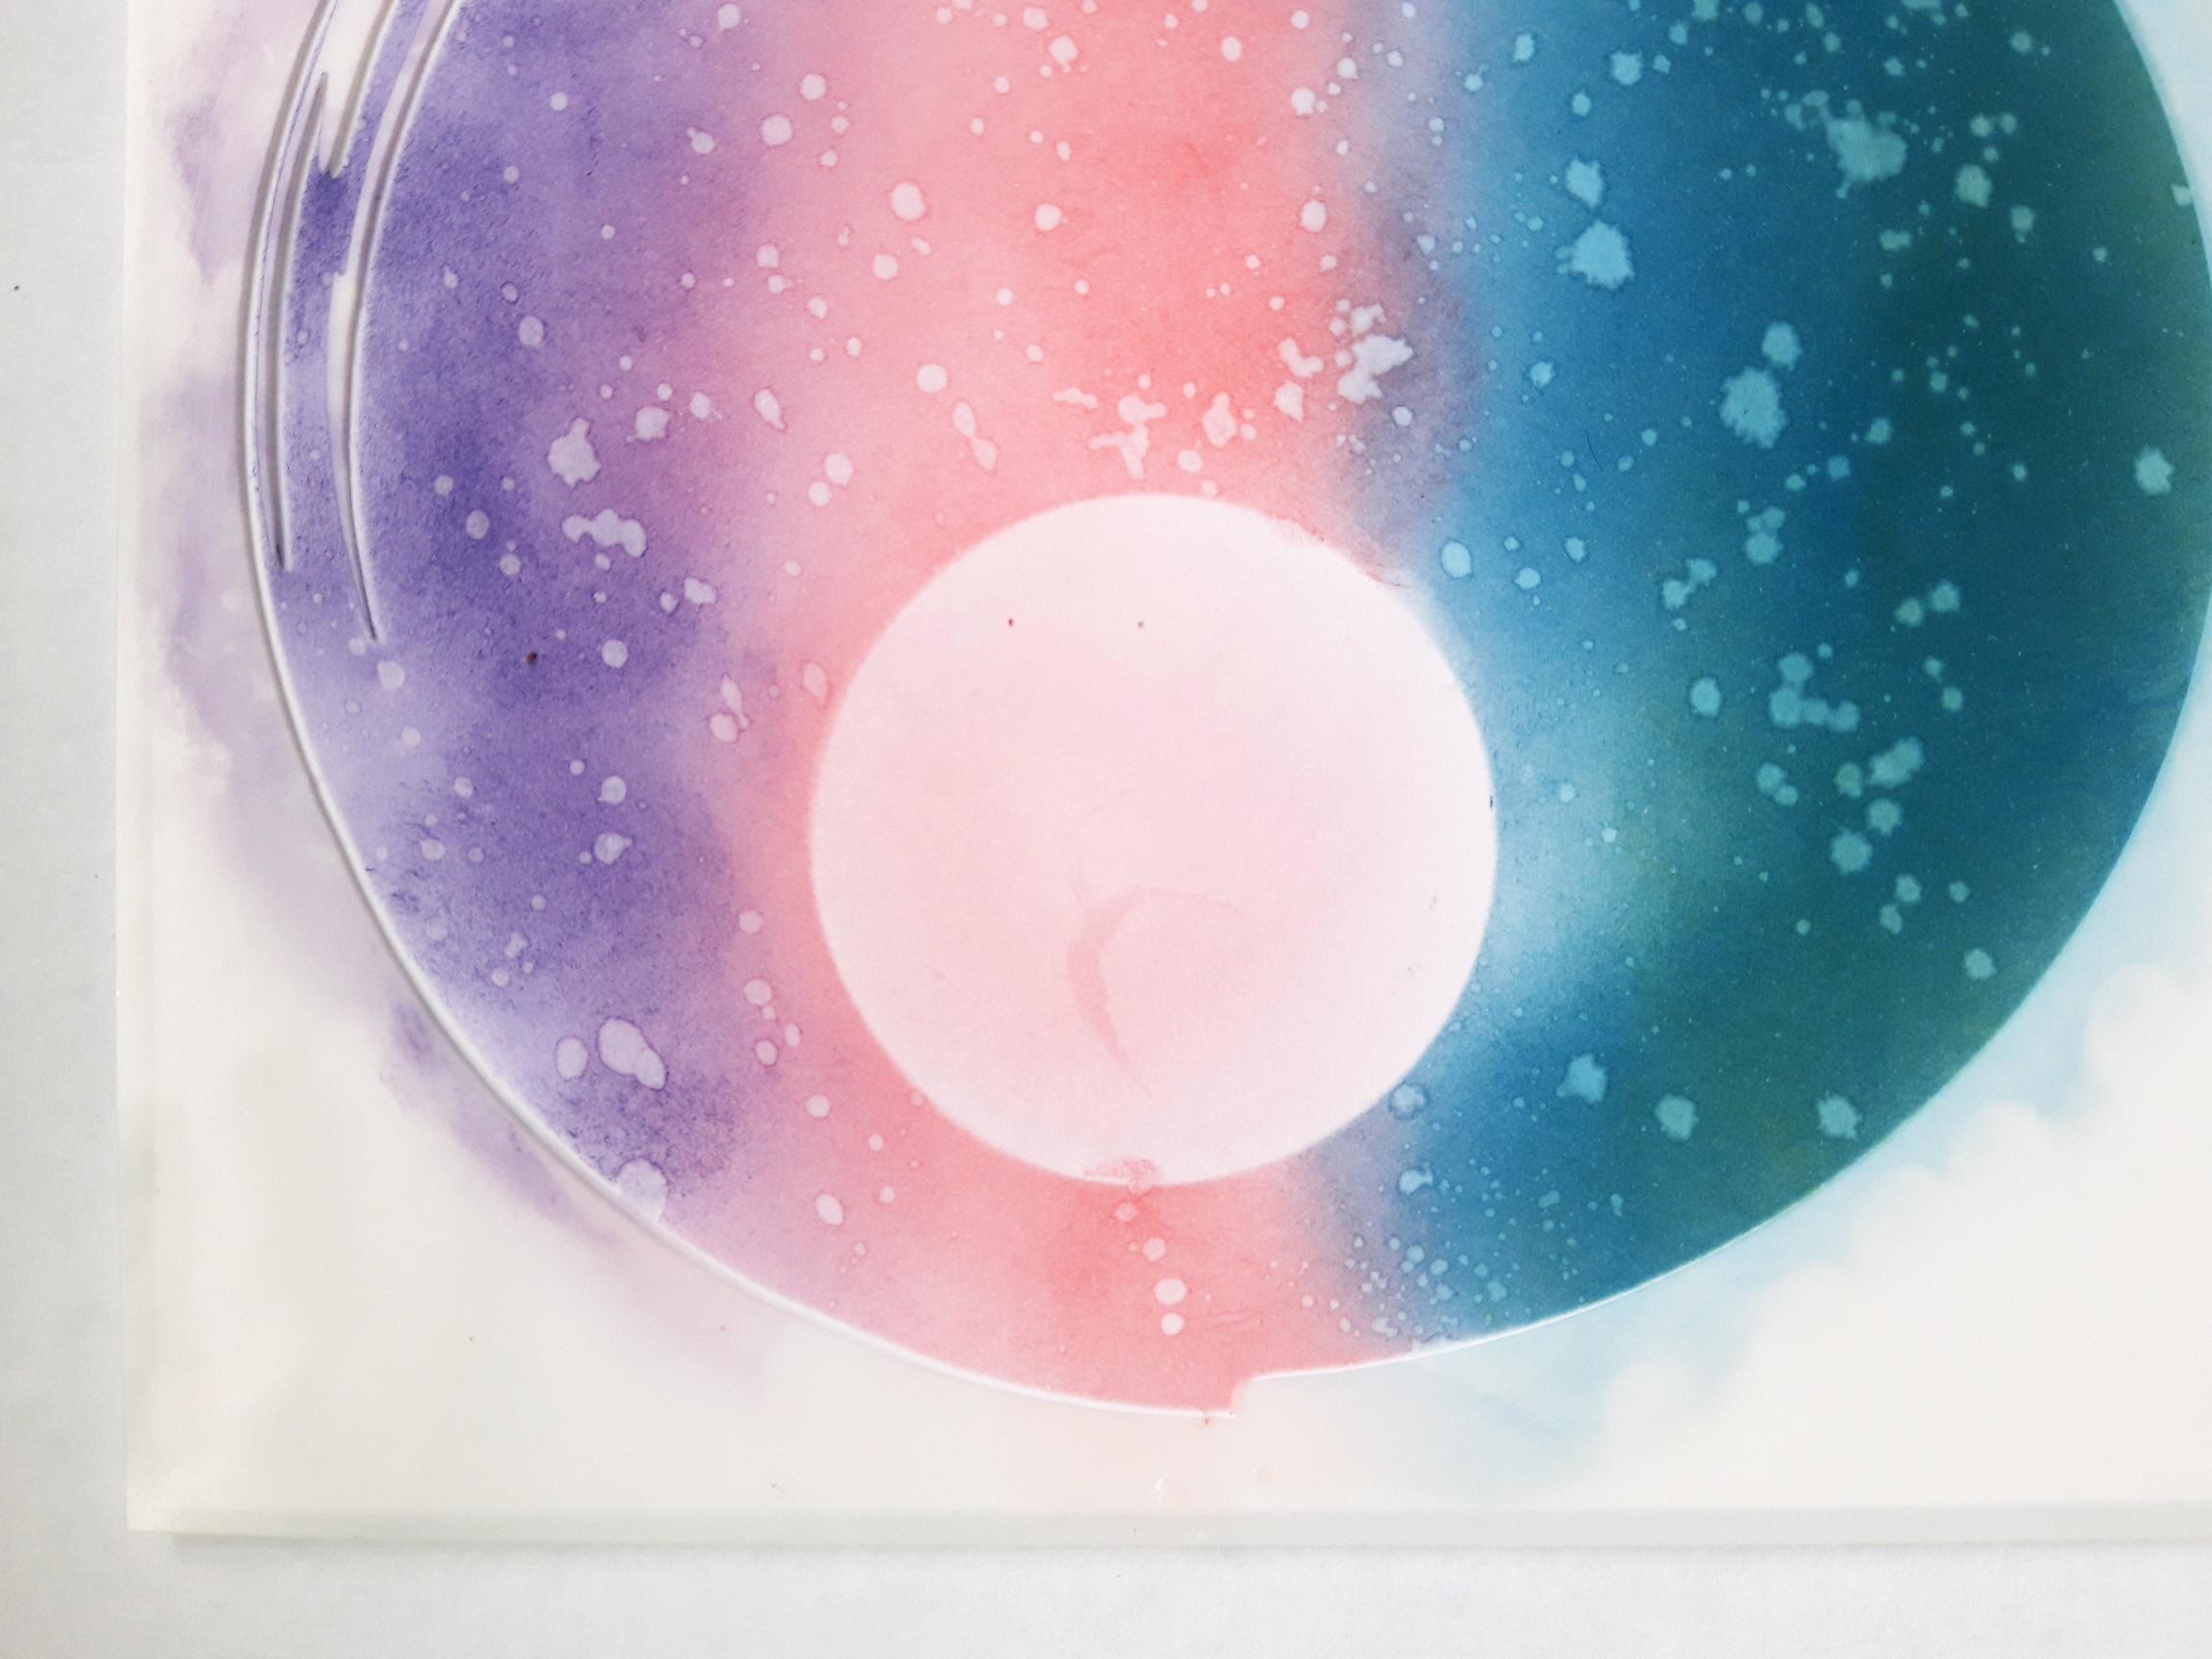
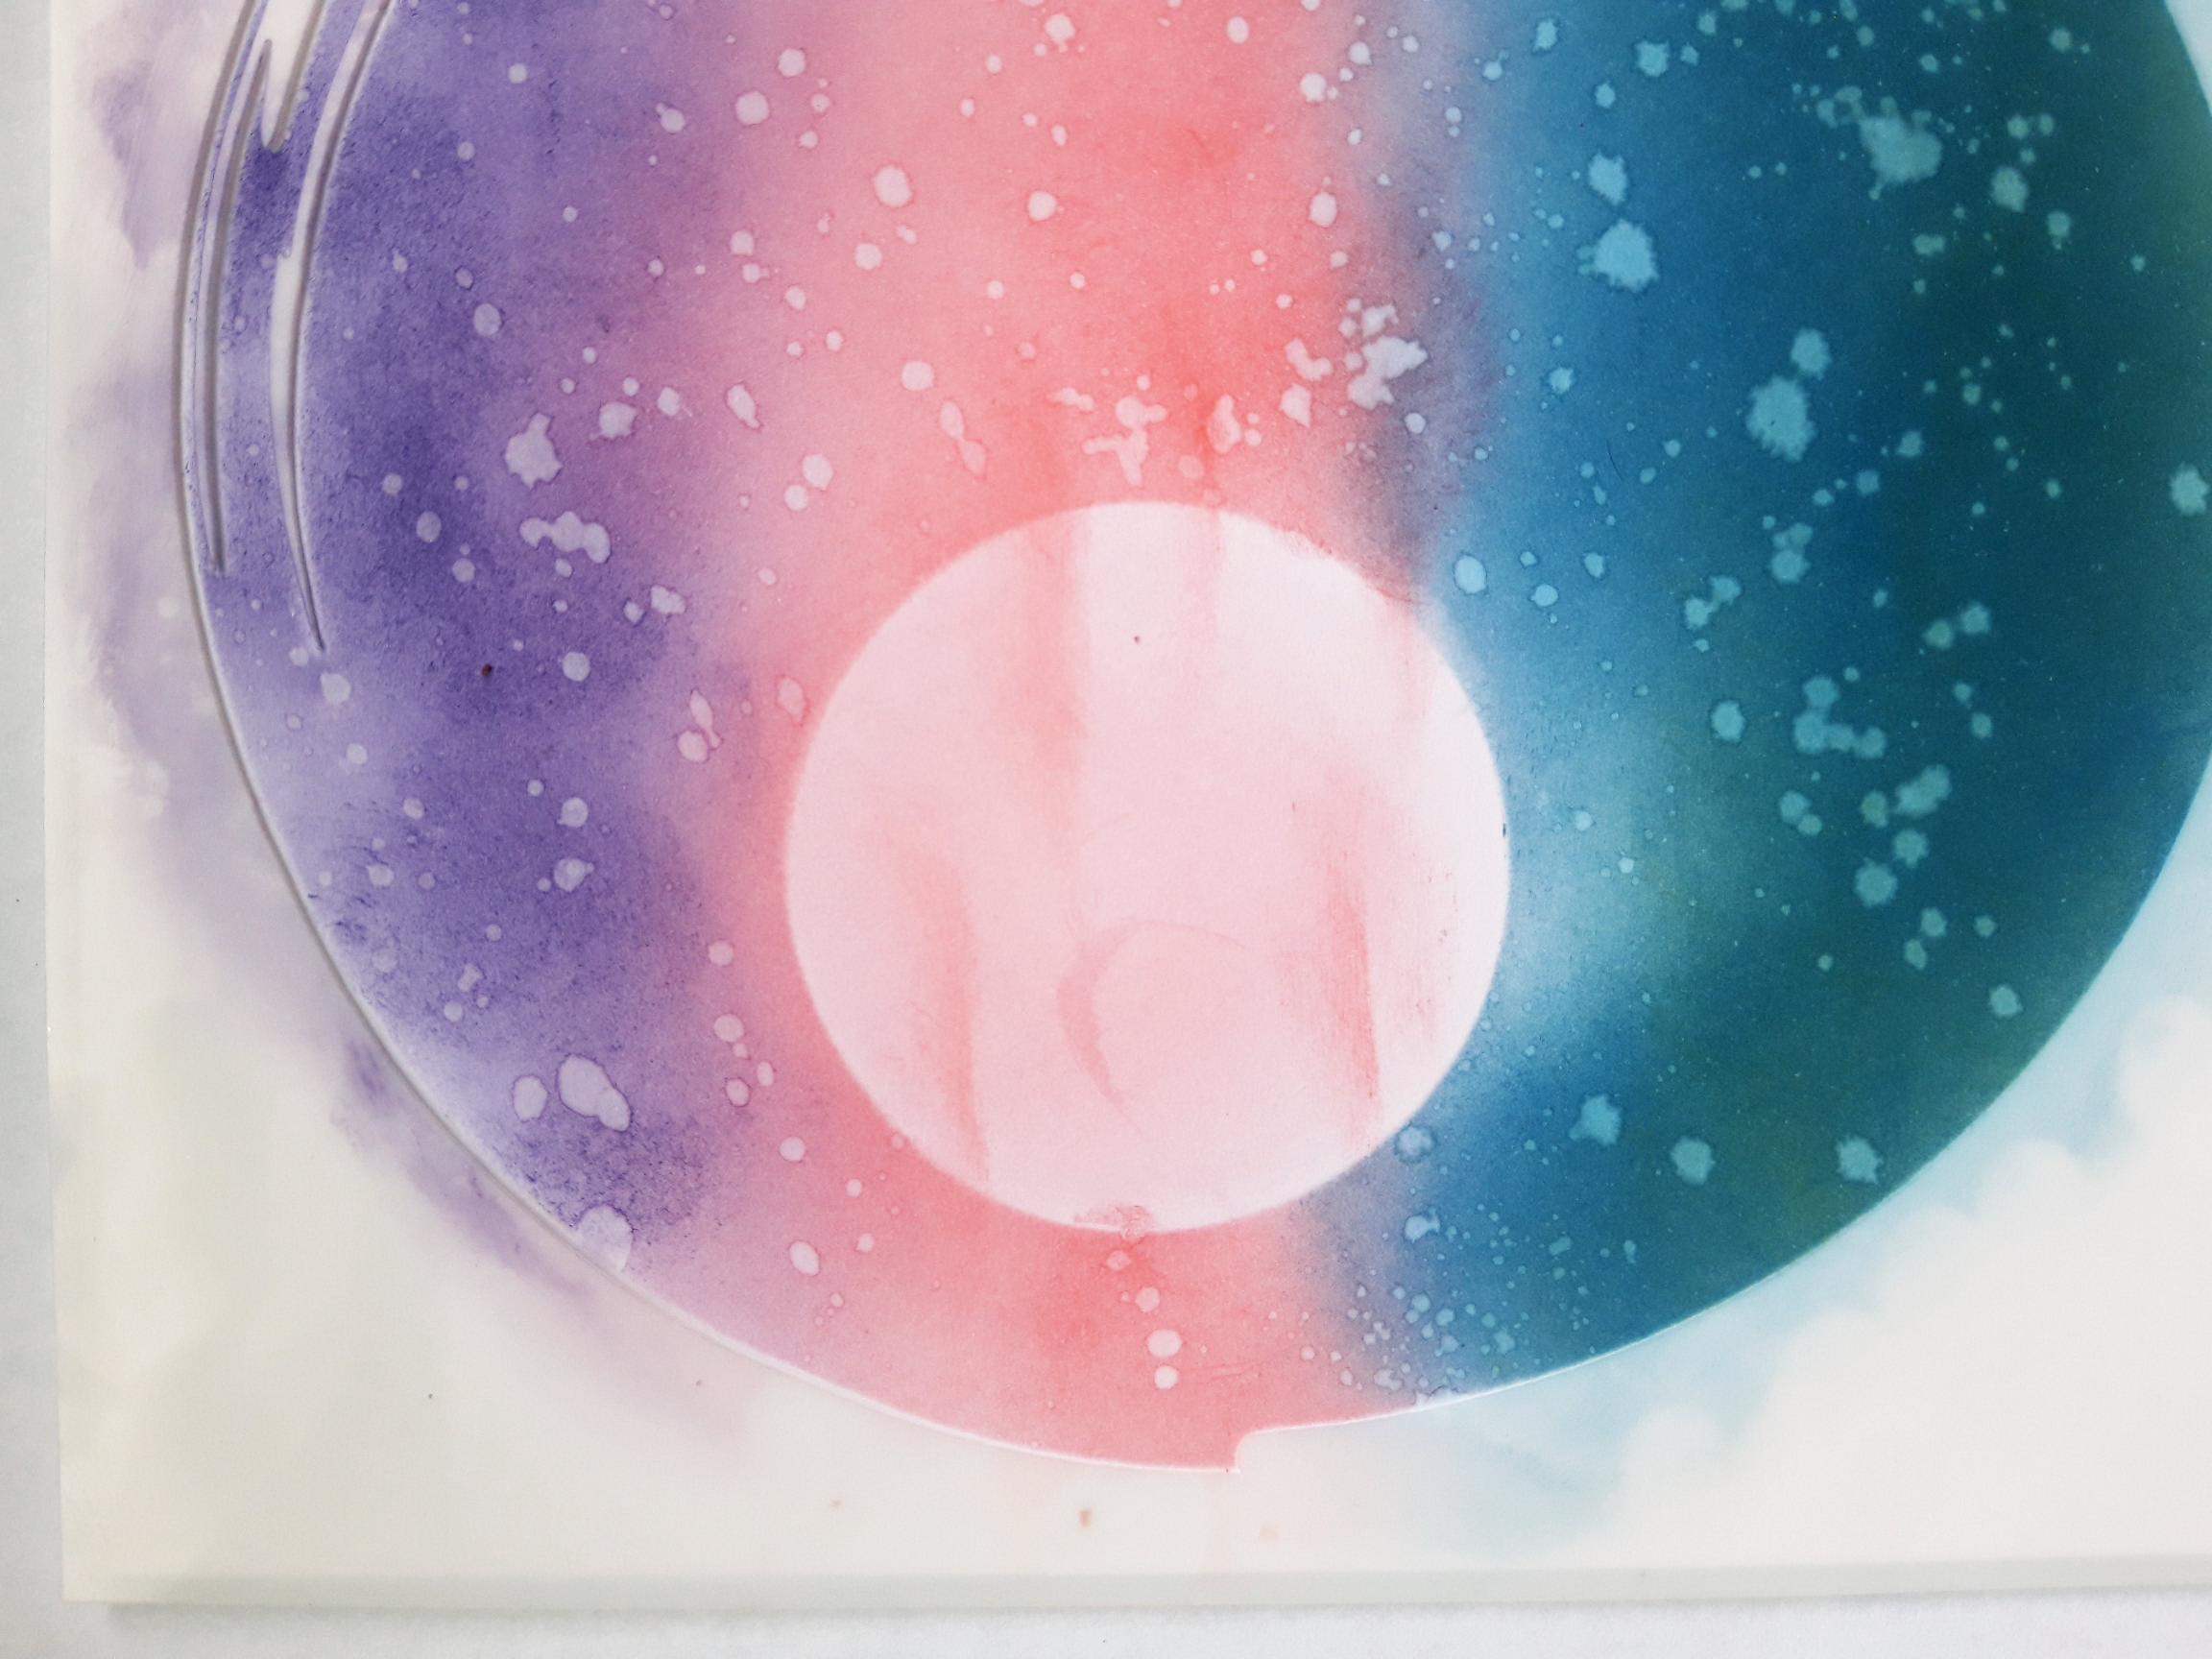
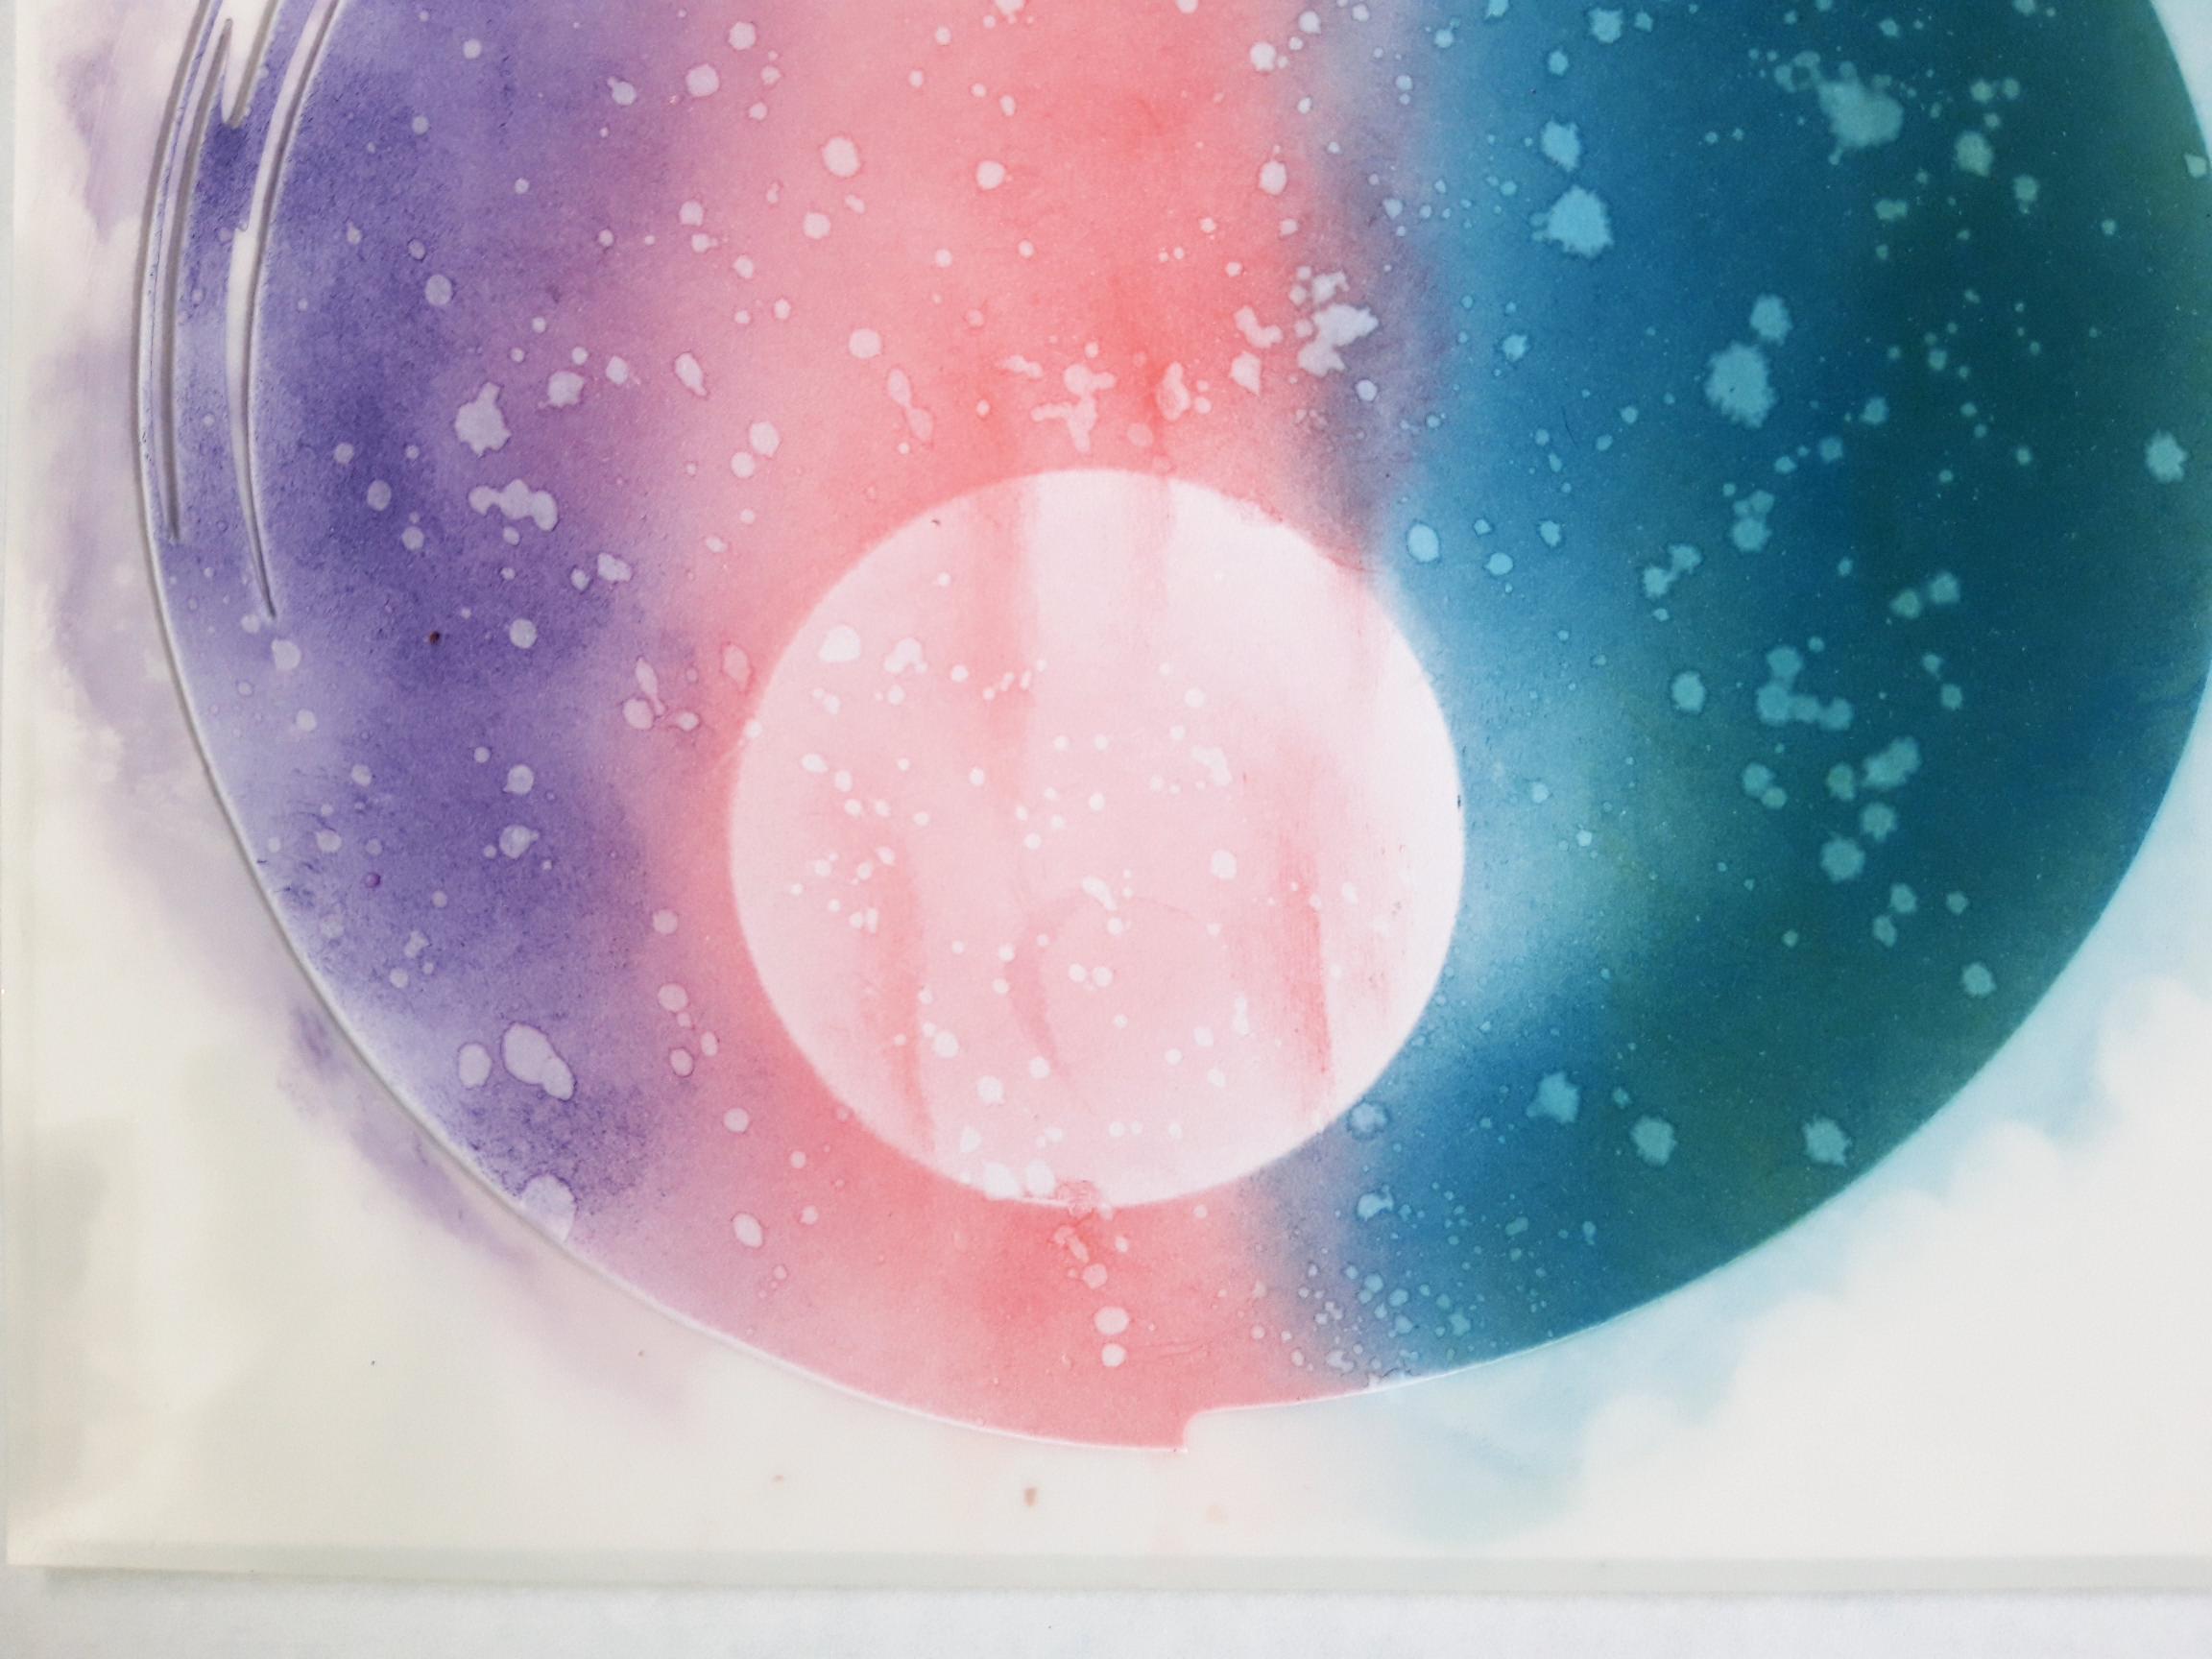
Blend your Oxides horizontally, within the circle stencil. Keep going back over each of the Oxides, until you're happy with the blend/effect. |
|
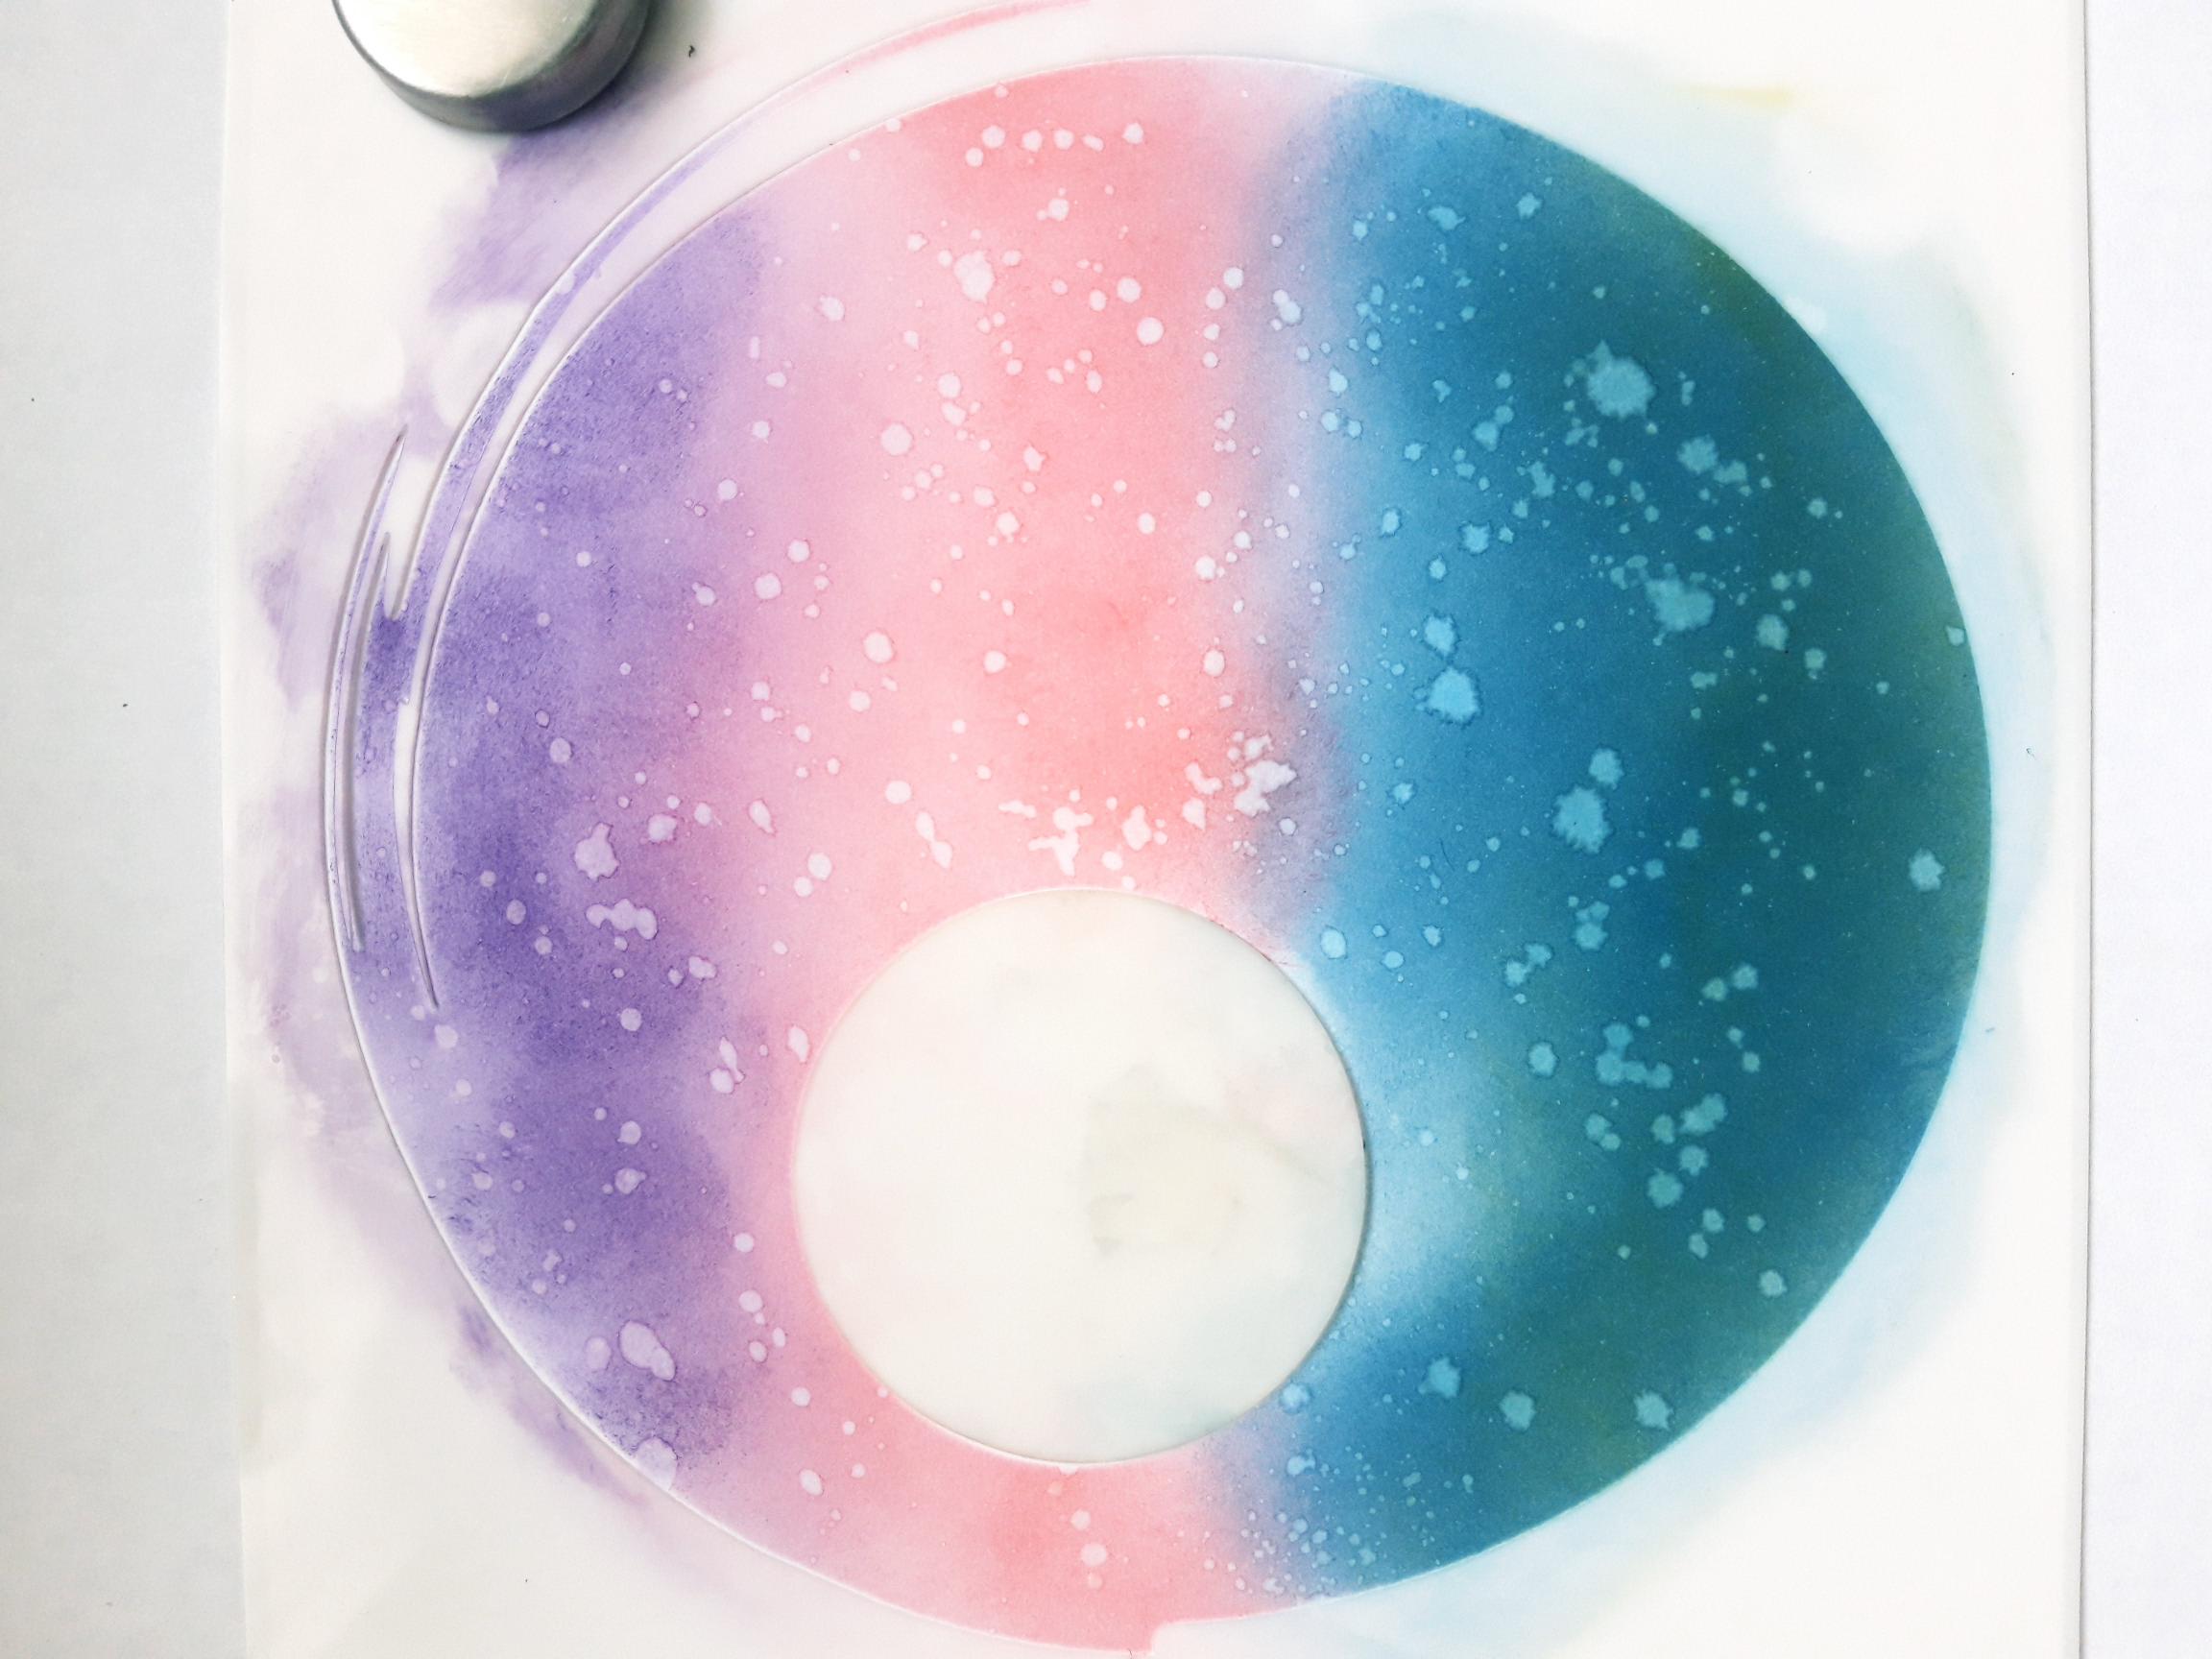
Whilst the ink is wet, splatter water all over, wait a few seconds then "lift" out the water and ink, with a paper towel. |
|
Remove the circle moon mask and lightly blend the Worn Lipstick within the moon, to take away the harsh white card. |
|
Drag some of the Worn Lipstick across the moon, to give the effect of wispy clouds floating by! I use the edge of my blending tool to achieve this effect. |
|
Splatter a few small droplets of water within the moon, then lift up the ink with your paper towel. Remove the Stylized Circle stencil and dry your artwork off thoroughly. |
|
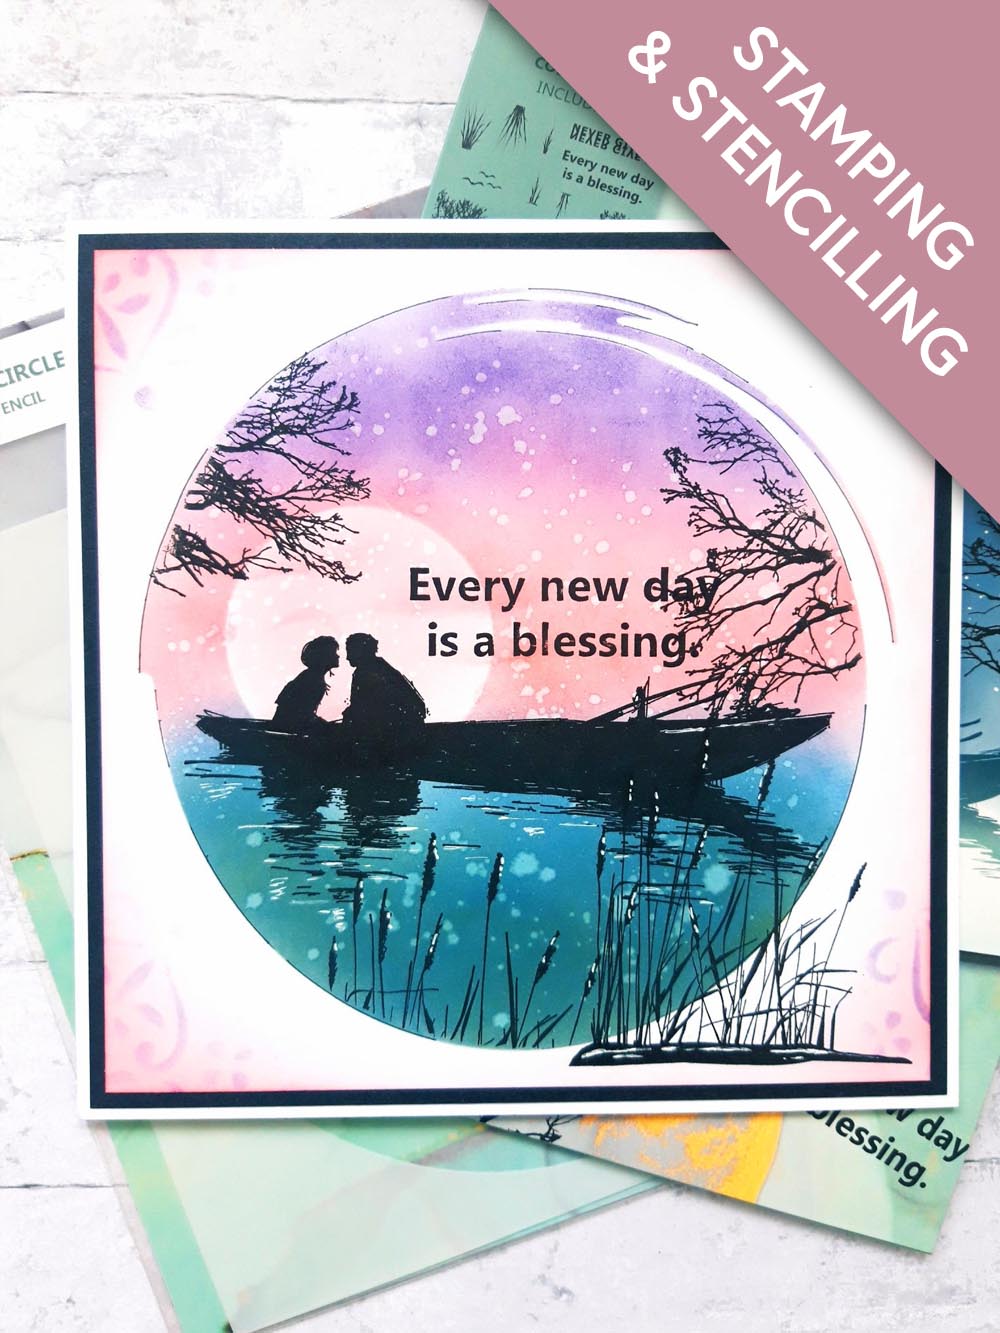
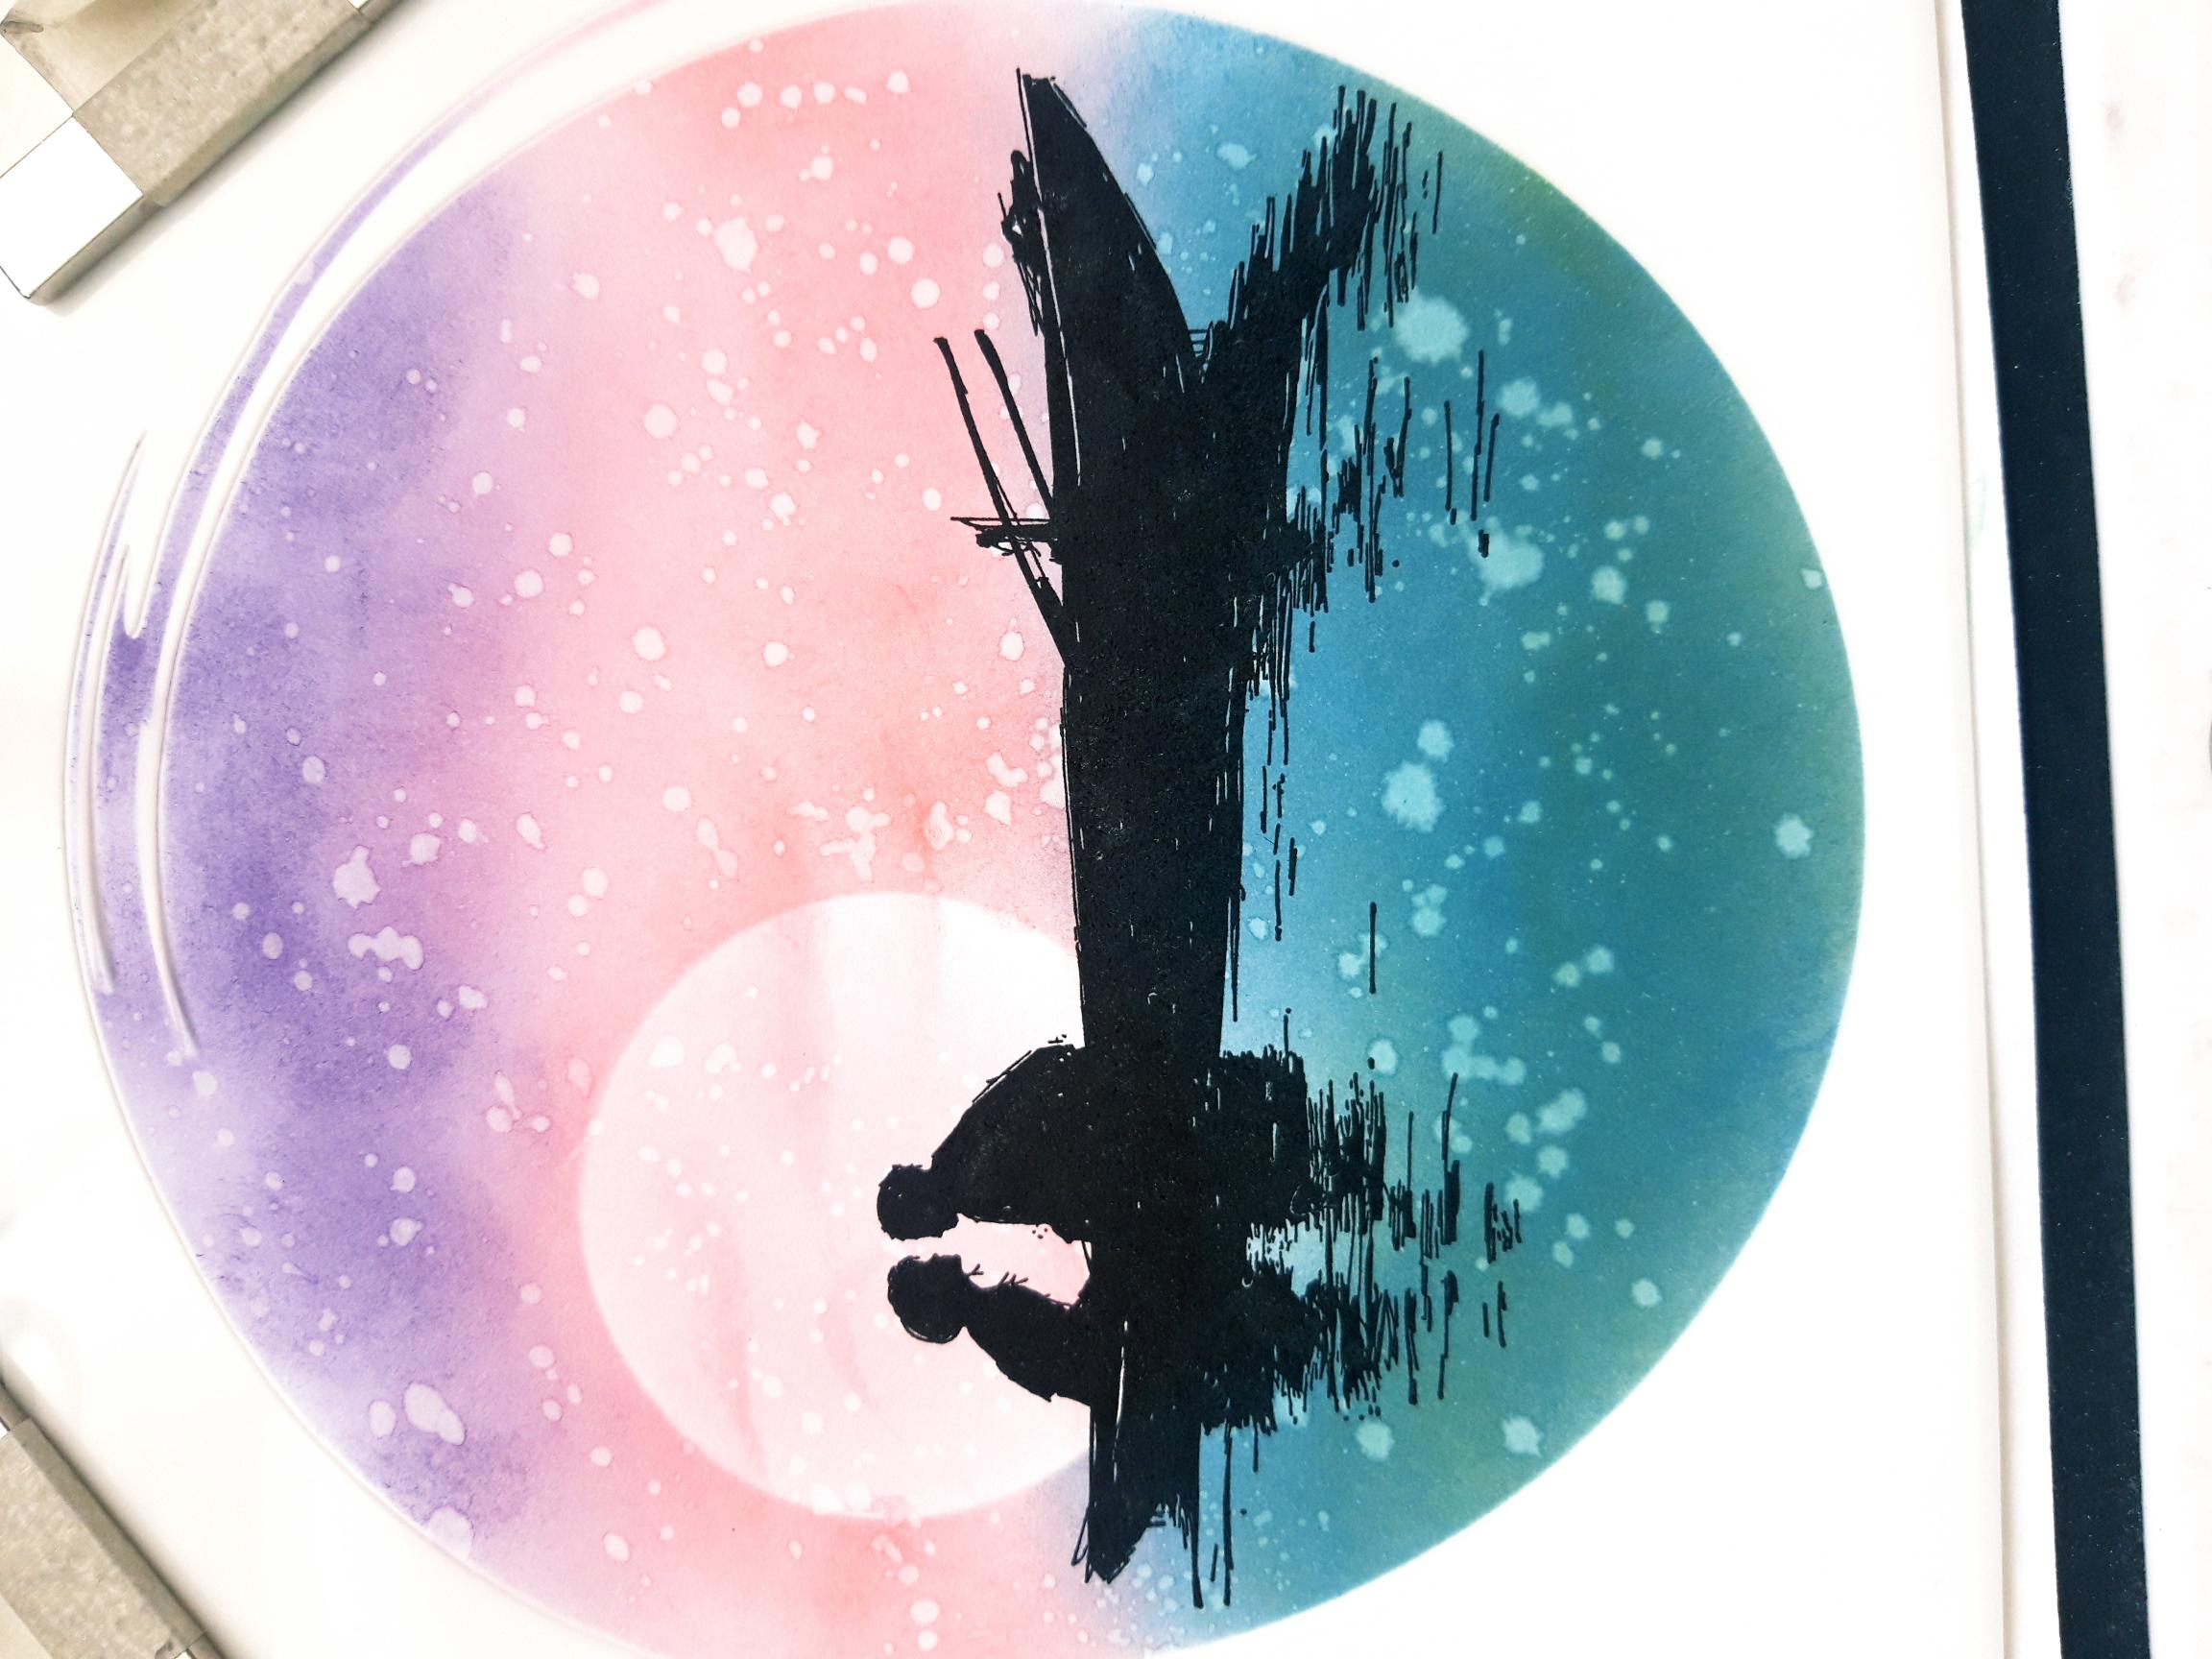
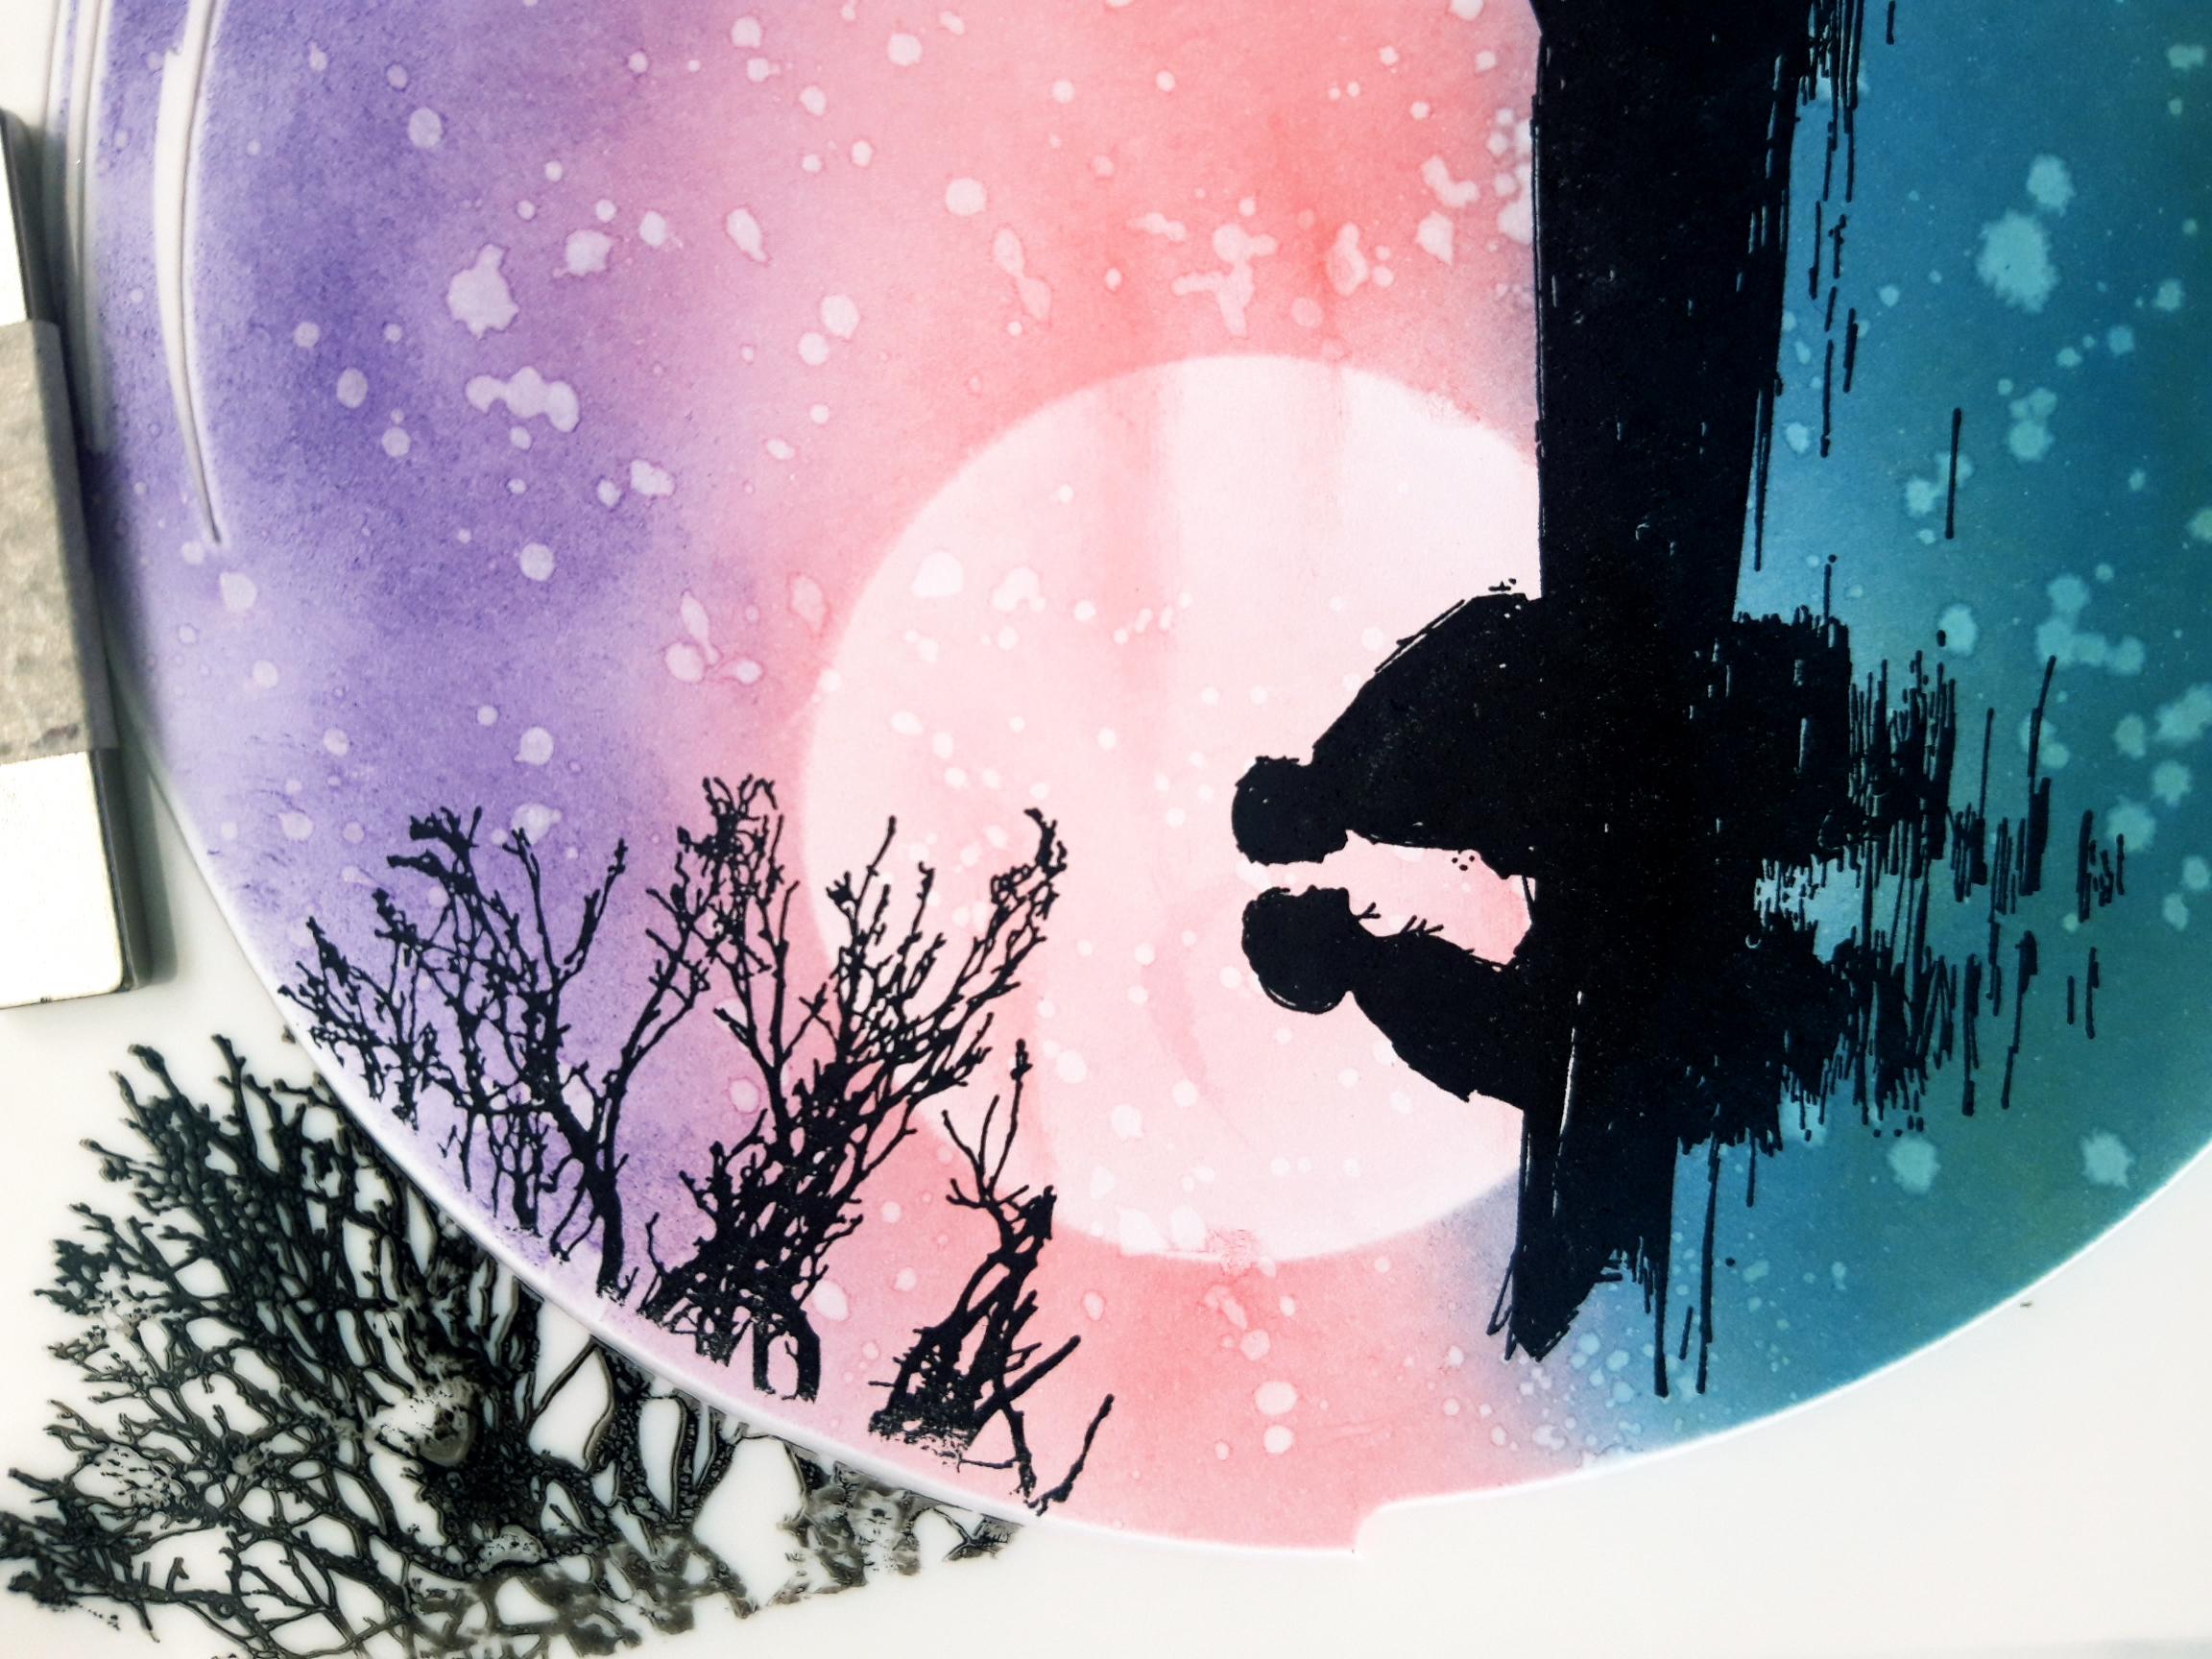
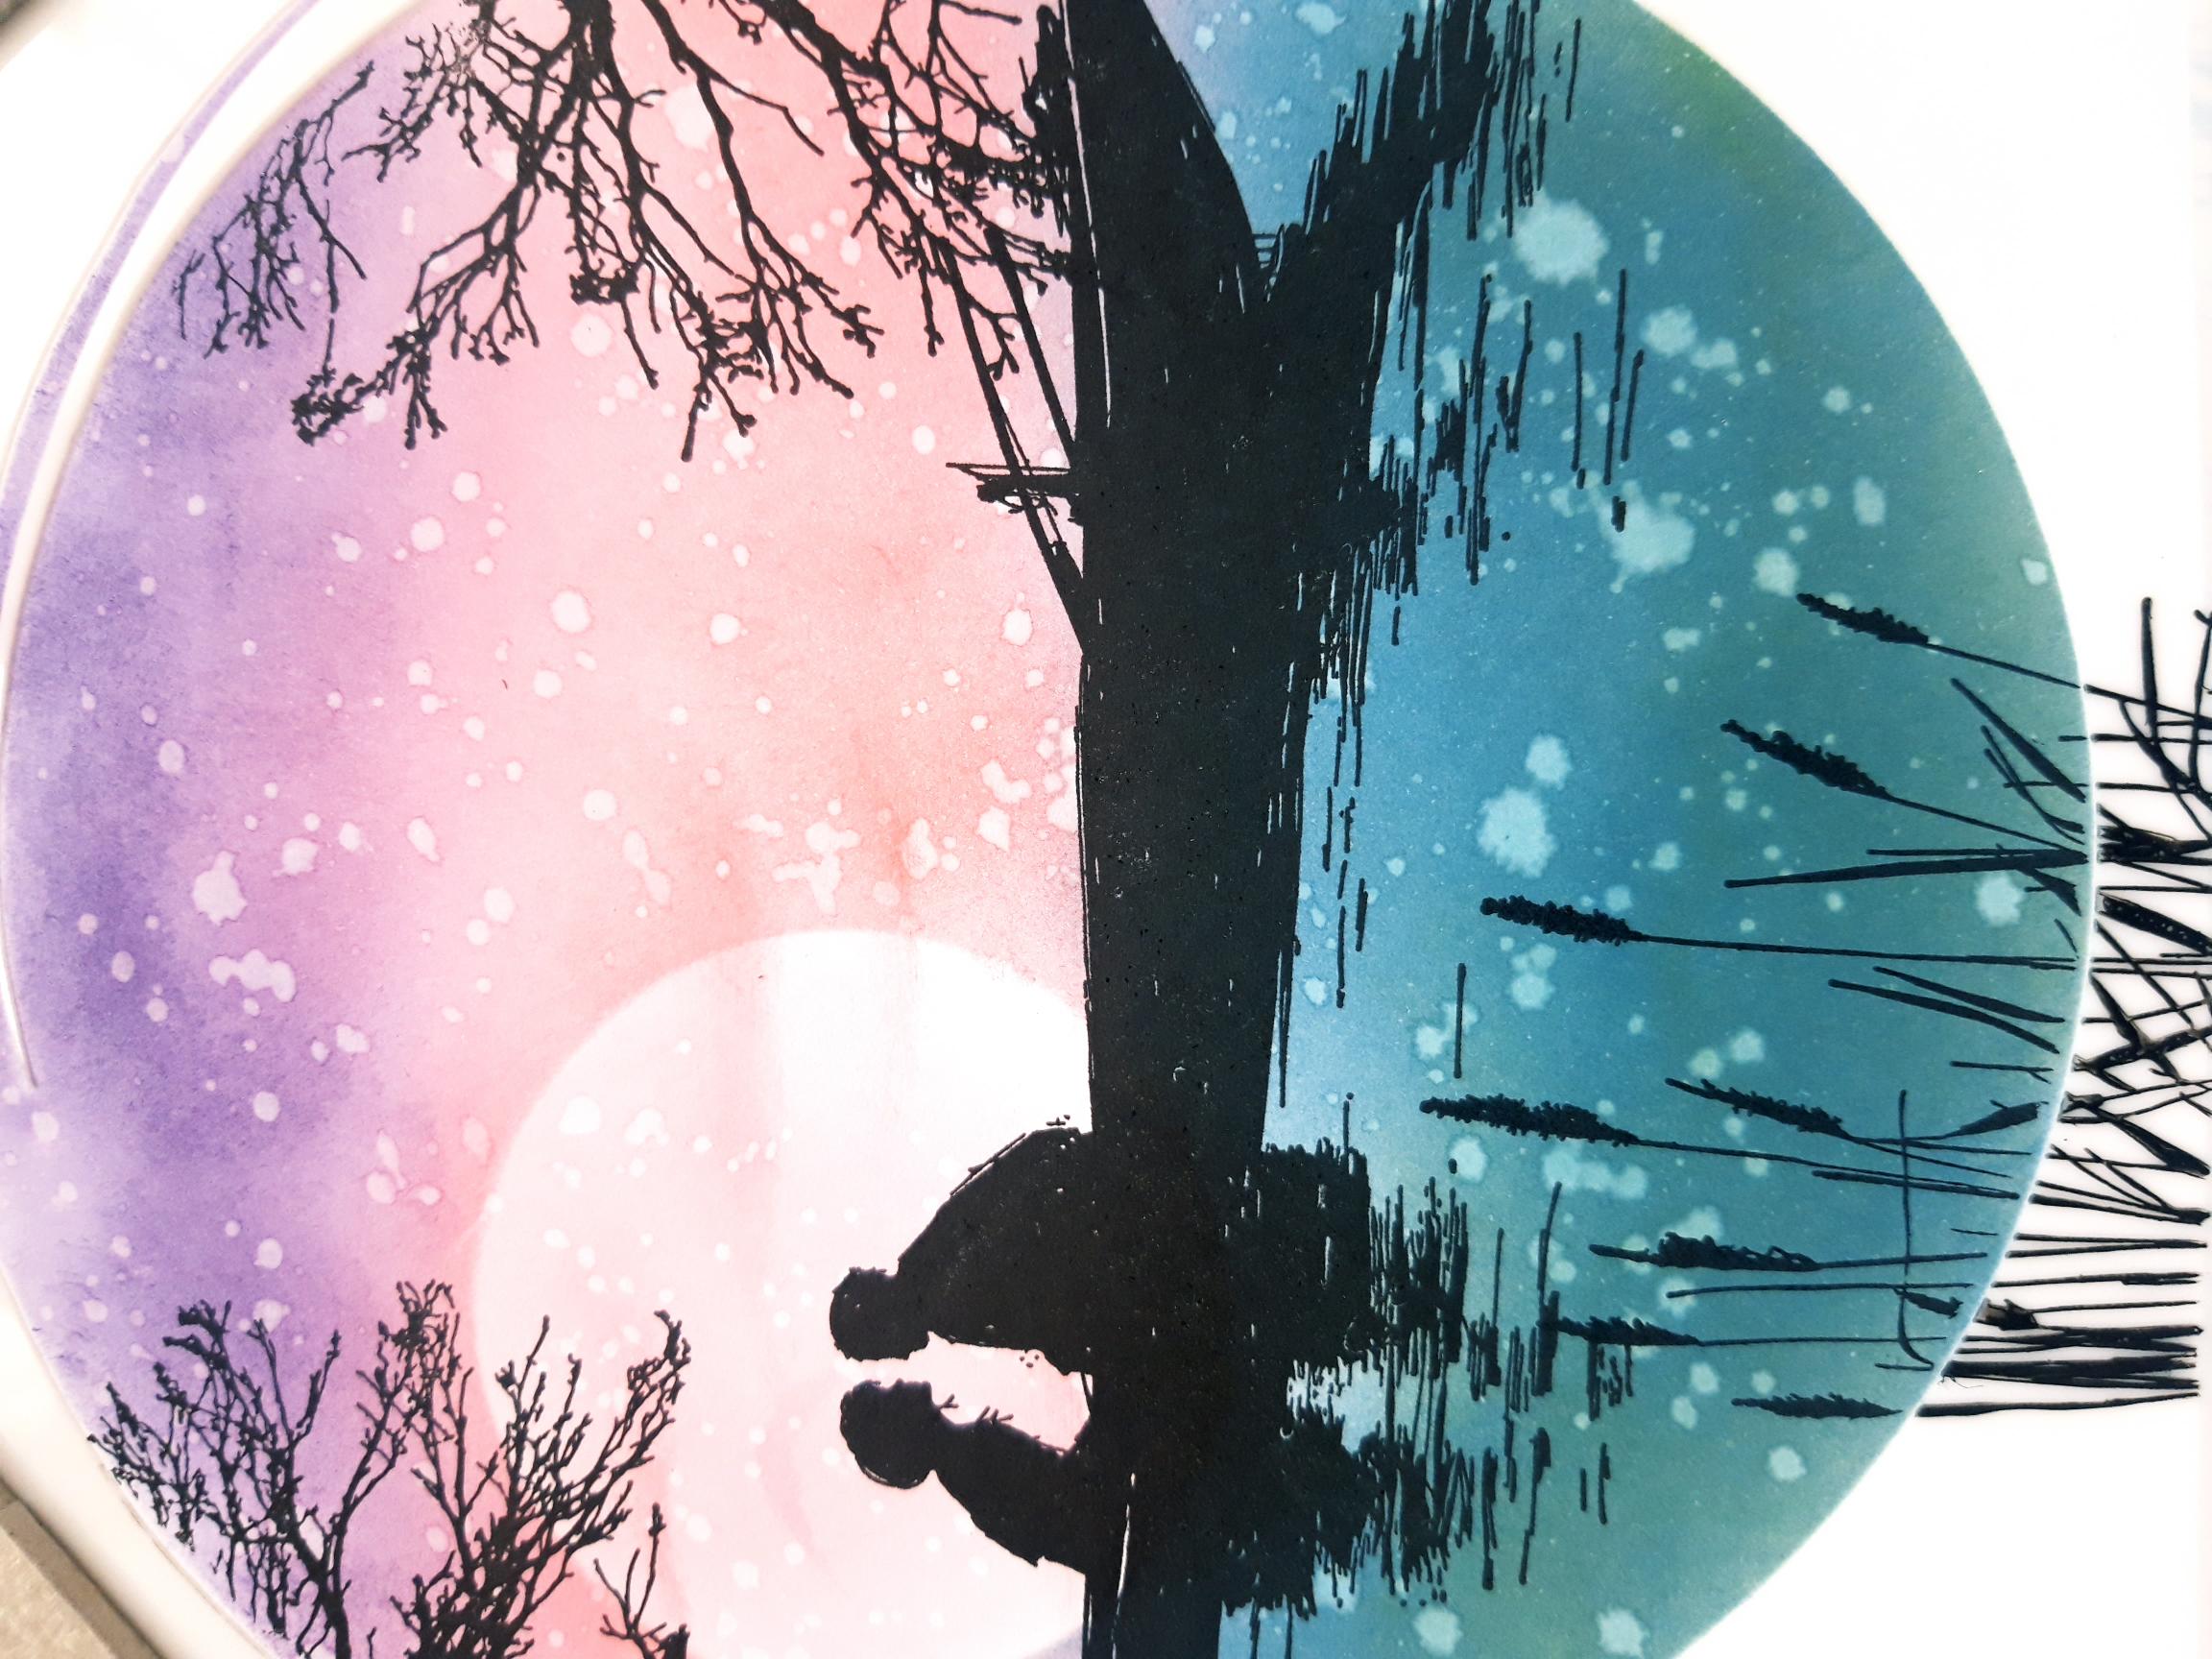
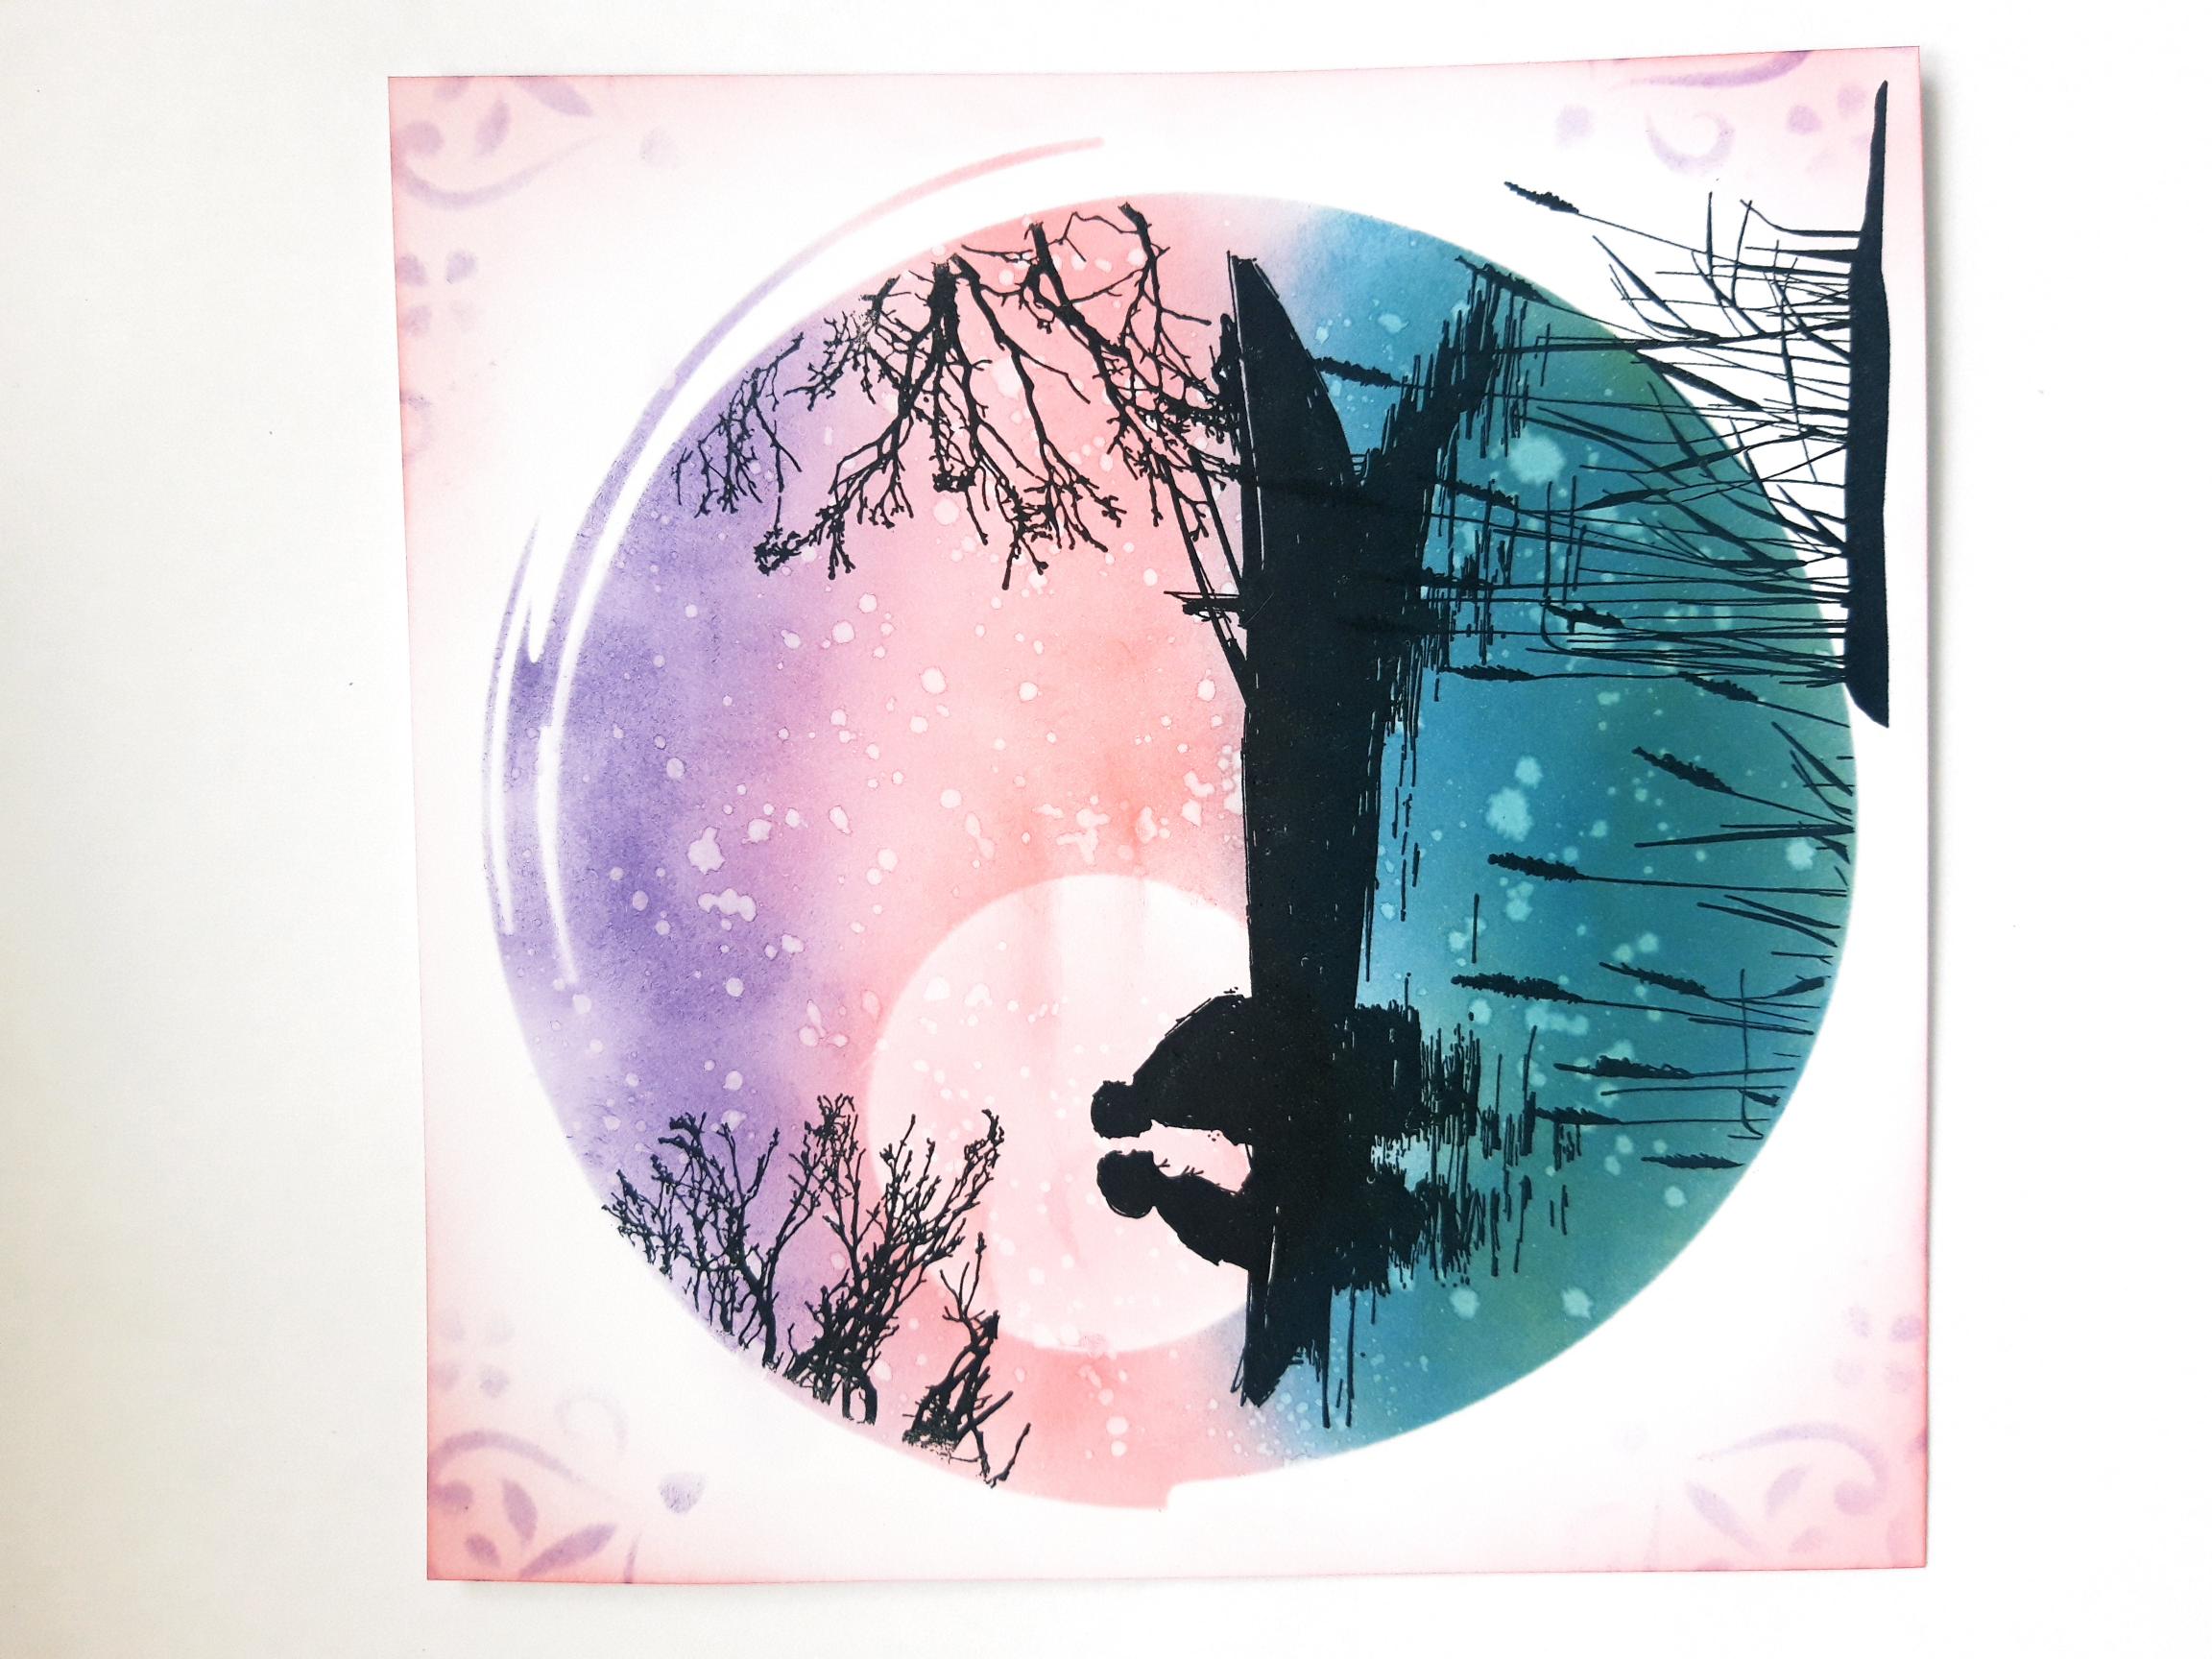
Ink up this stamp from the Every New Day Stamp Collection with the Onyx Black Versafine and stamp across your inked circle. Tip: Think about the waterline in relation to the boat, and where you want the couple's image to sit, within the moon. |
|
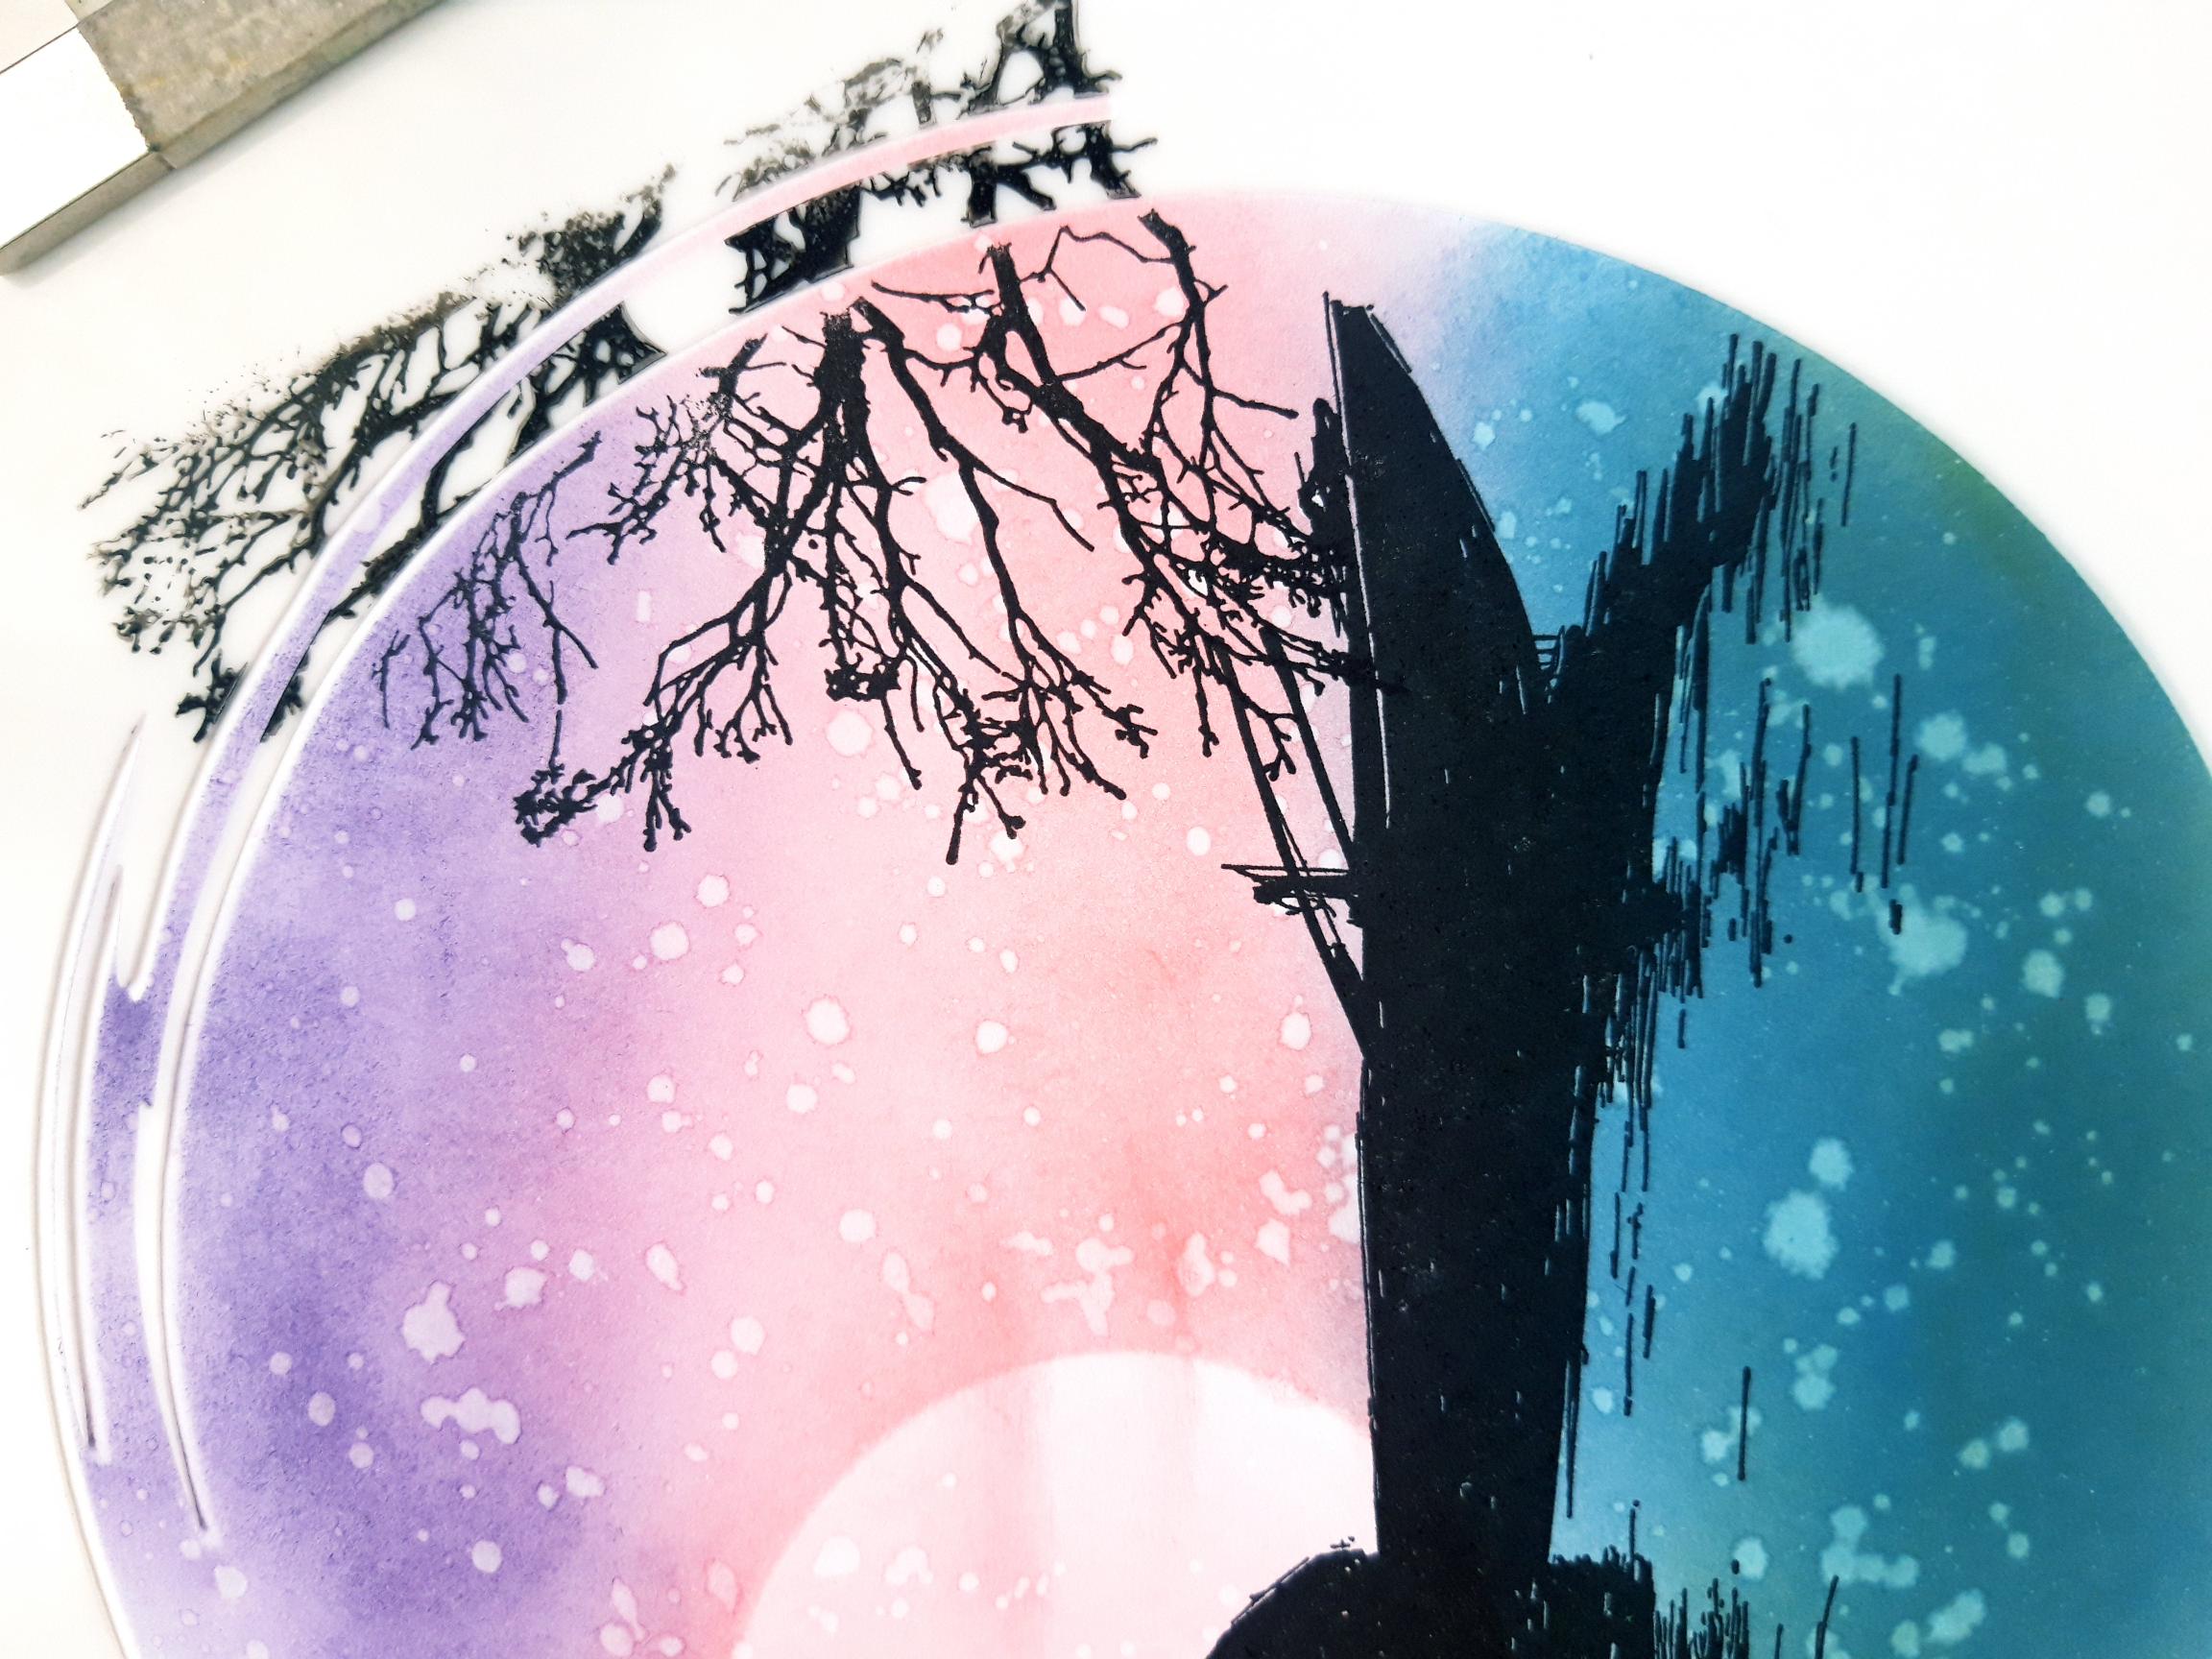
Pop the Stylized Circle stencil back in place. Ink up the tree stamp, from the same collection, with the Versafine and stamp coming down from the top left. |
|
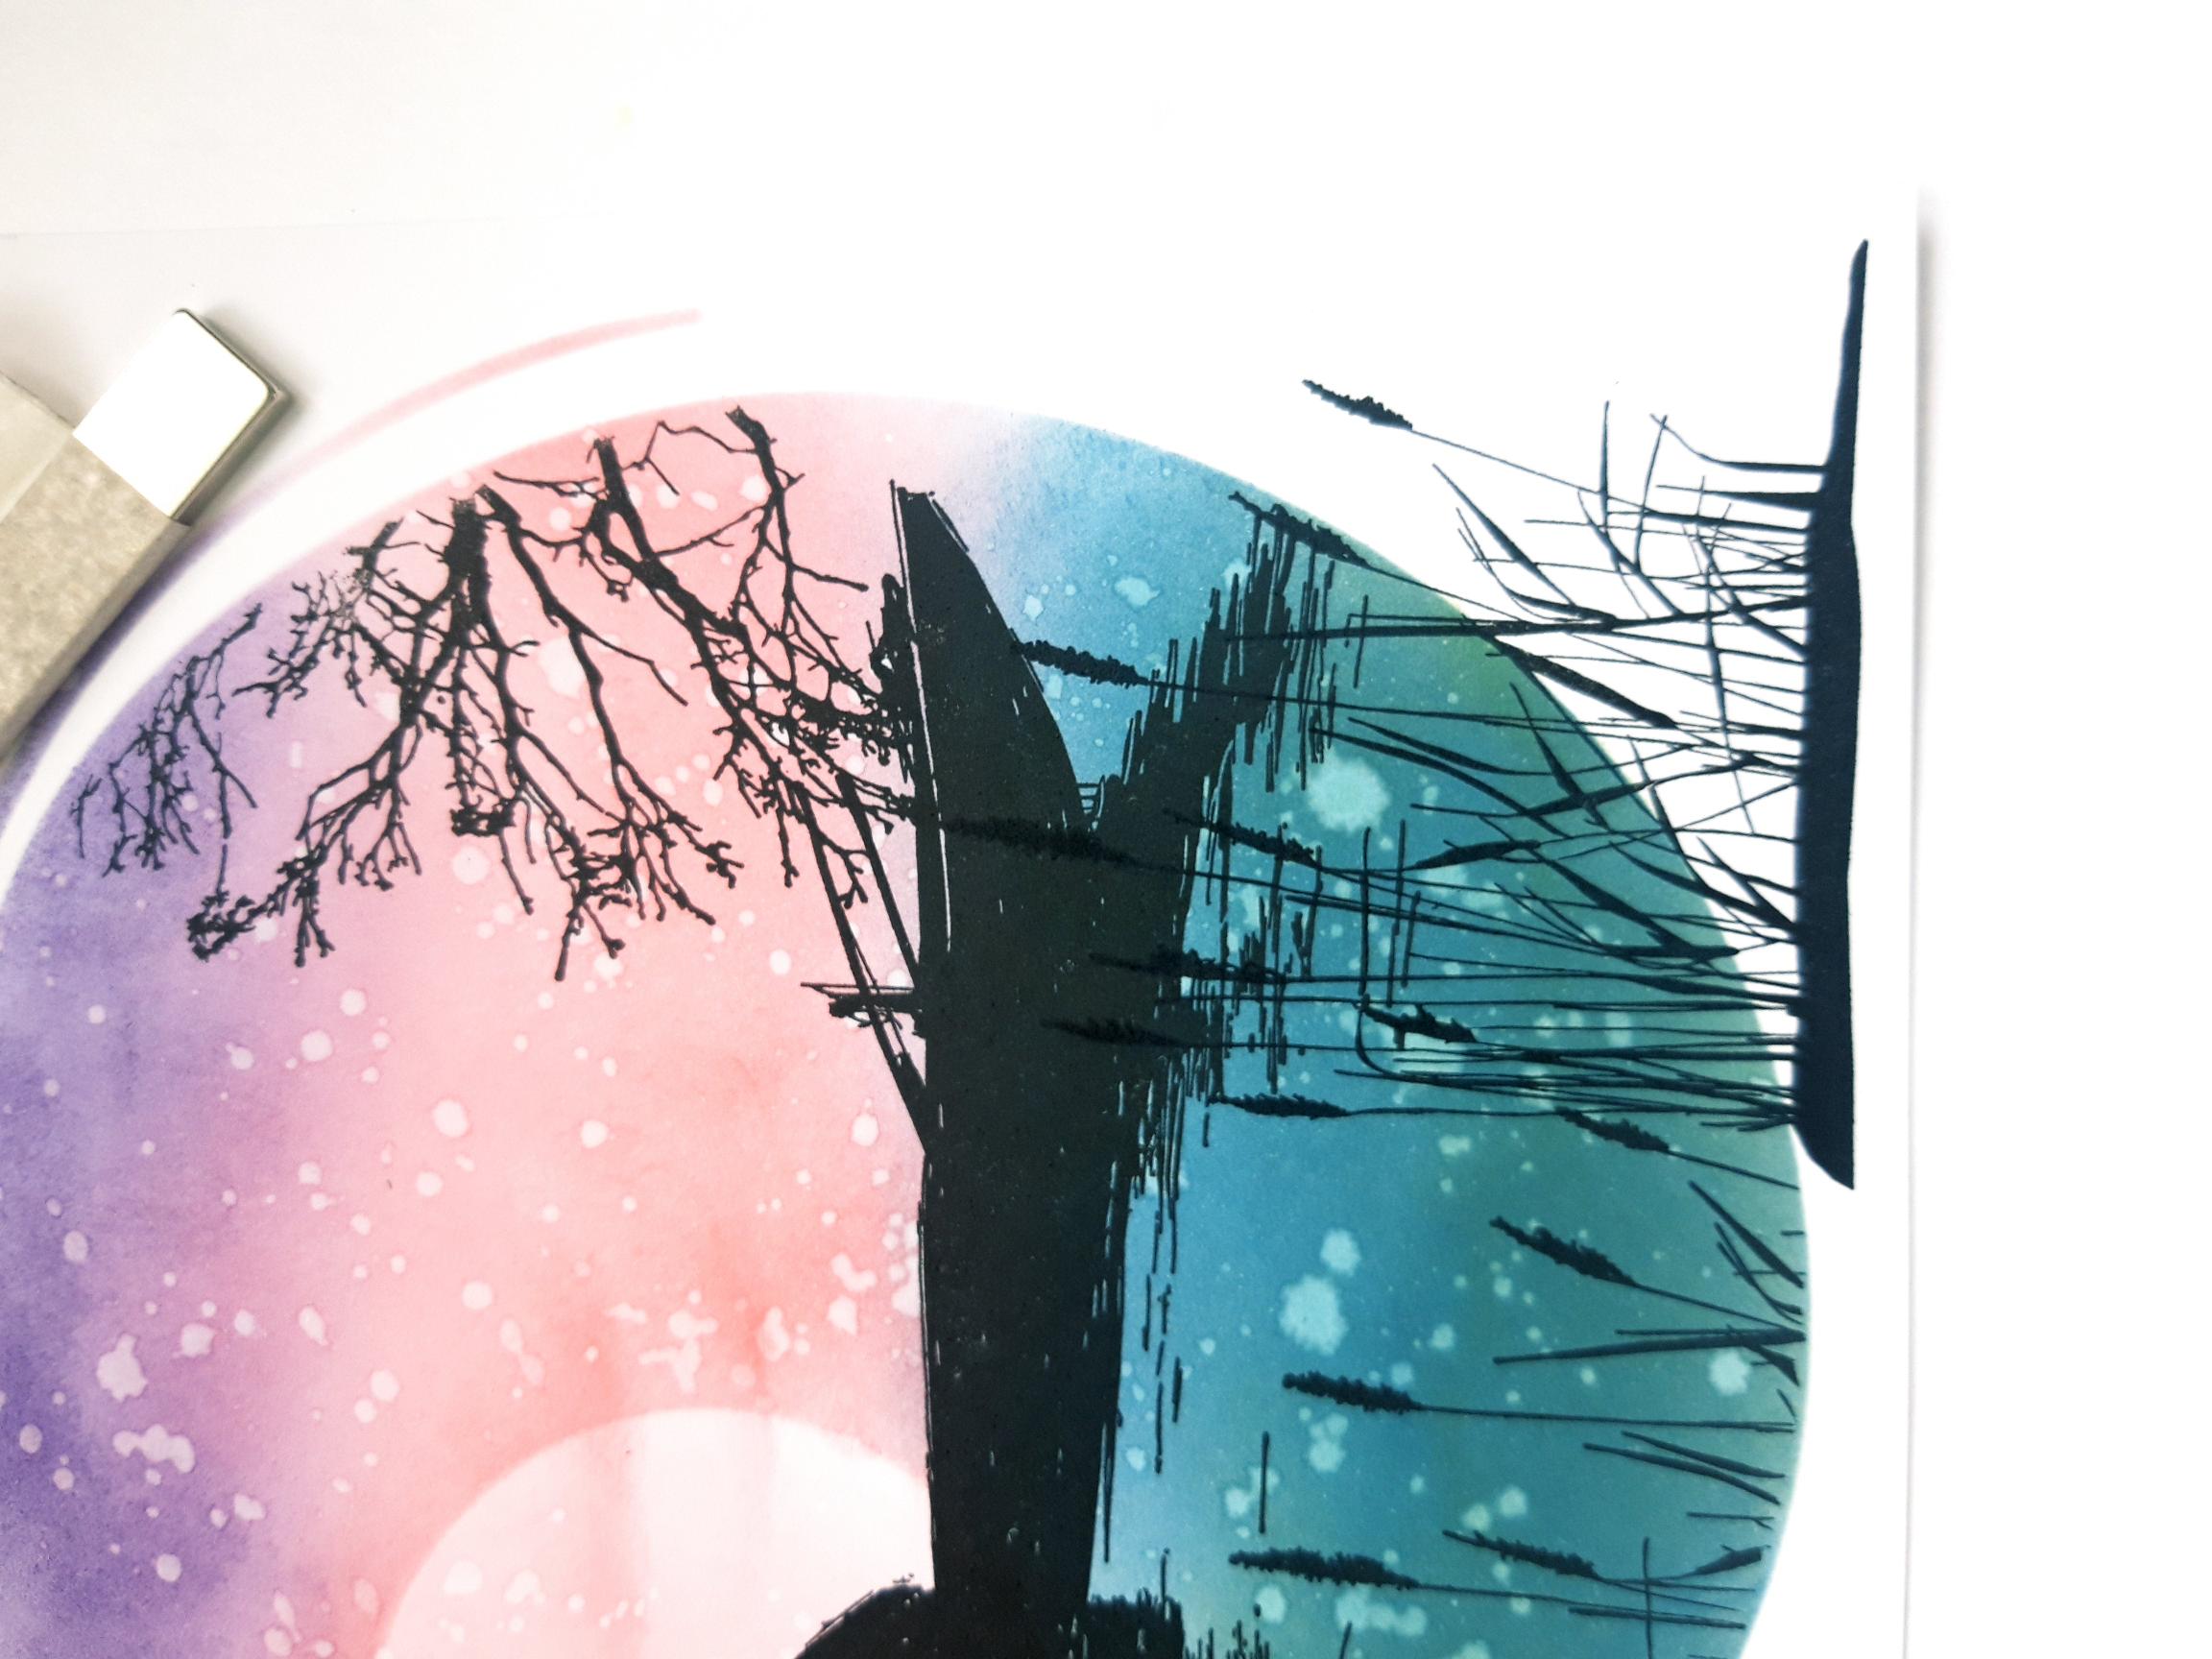
Ink up the other tree stamp and stamp creeping in, from the right hand edge. |
|
Ink up this grasses stamp, from Your Only Limit Is You Stamp Collection, with the Versafine and stamp coming up from the bottom left. |
|
Carefully remove the Stylized Circle stencil. Reink the grasses stamp and stamp to the bottom right of the card, so it blends in with the stamped grasses, as seen here. |
|
Place the Enchanted Mandala stencil just peeking on to the top left corner of the card and blend with the Worn Lipstick Oxide. Repeat in each of the corners. Blend the ink lightly around all the corners and edges of the card, fading the ink out as you move inwards towards your artwork, as seen here. |
|
Place the Stylized Circle stencil back in place, and use a black, fine line pen, to draw around random areas of the stencil, to accentuate its shape. |
|
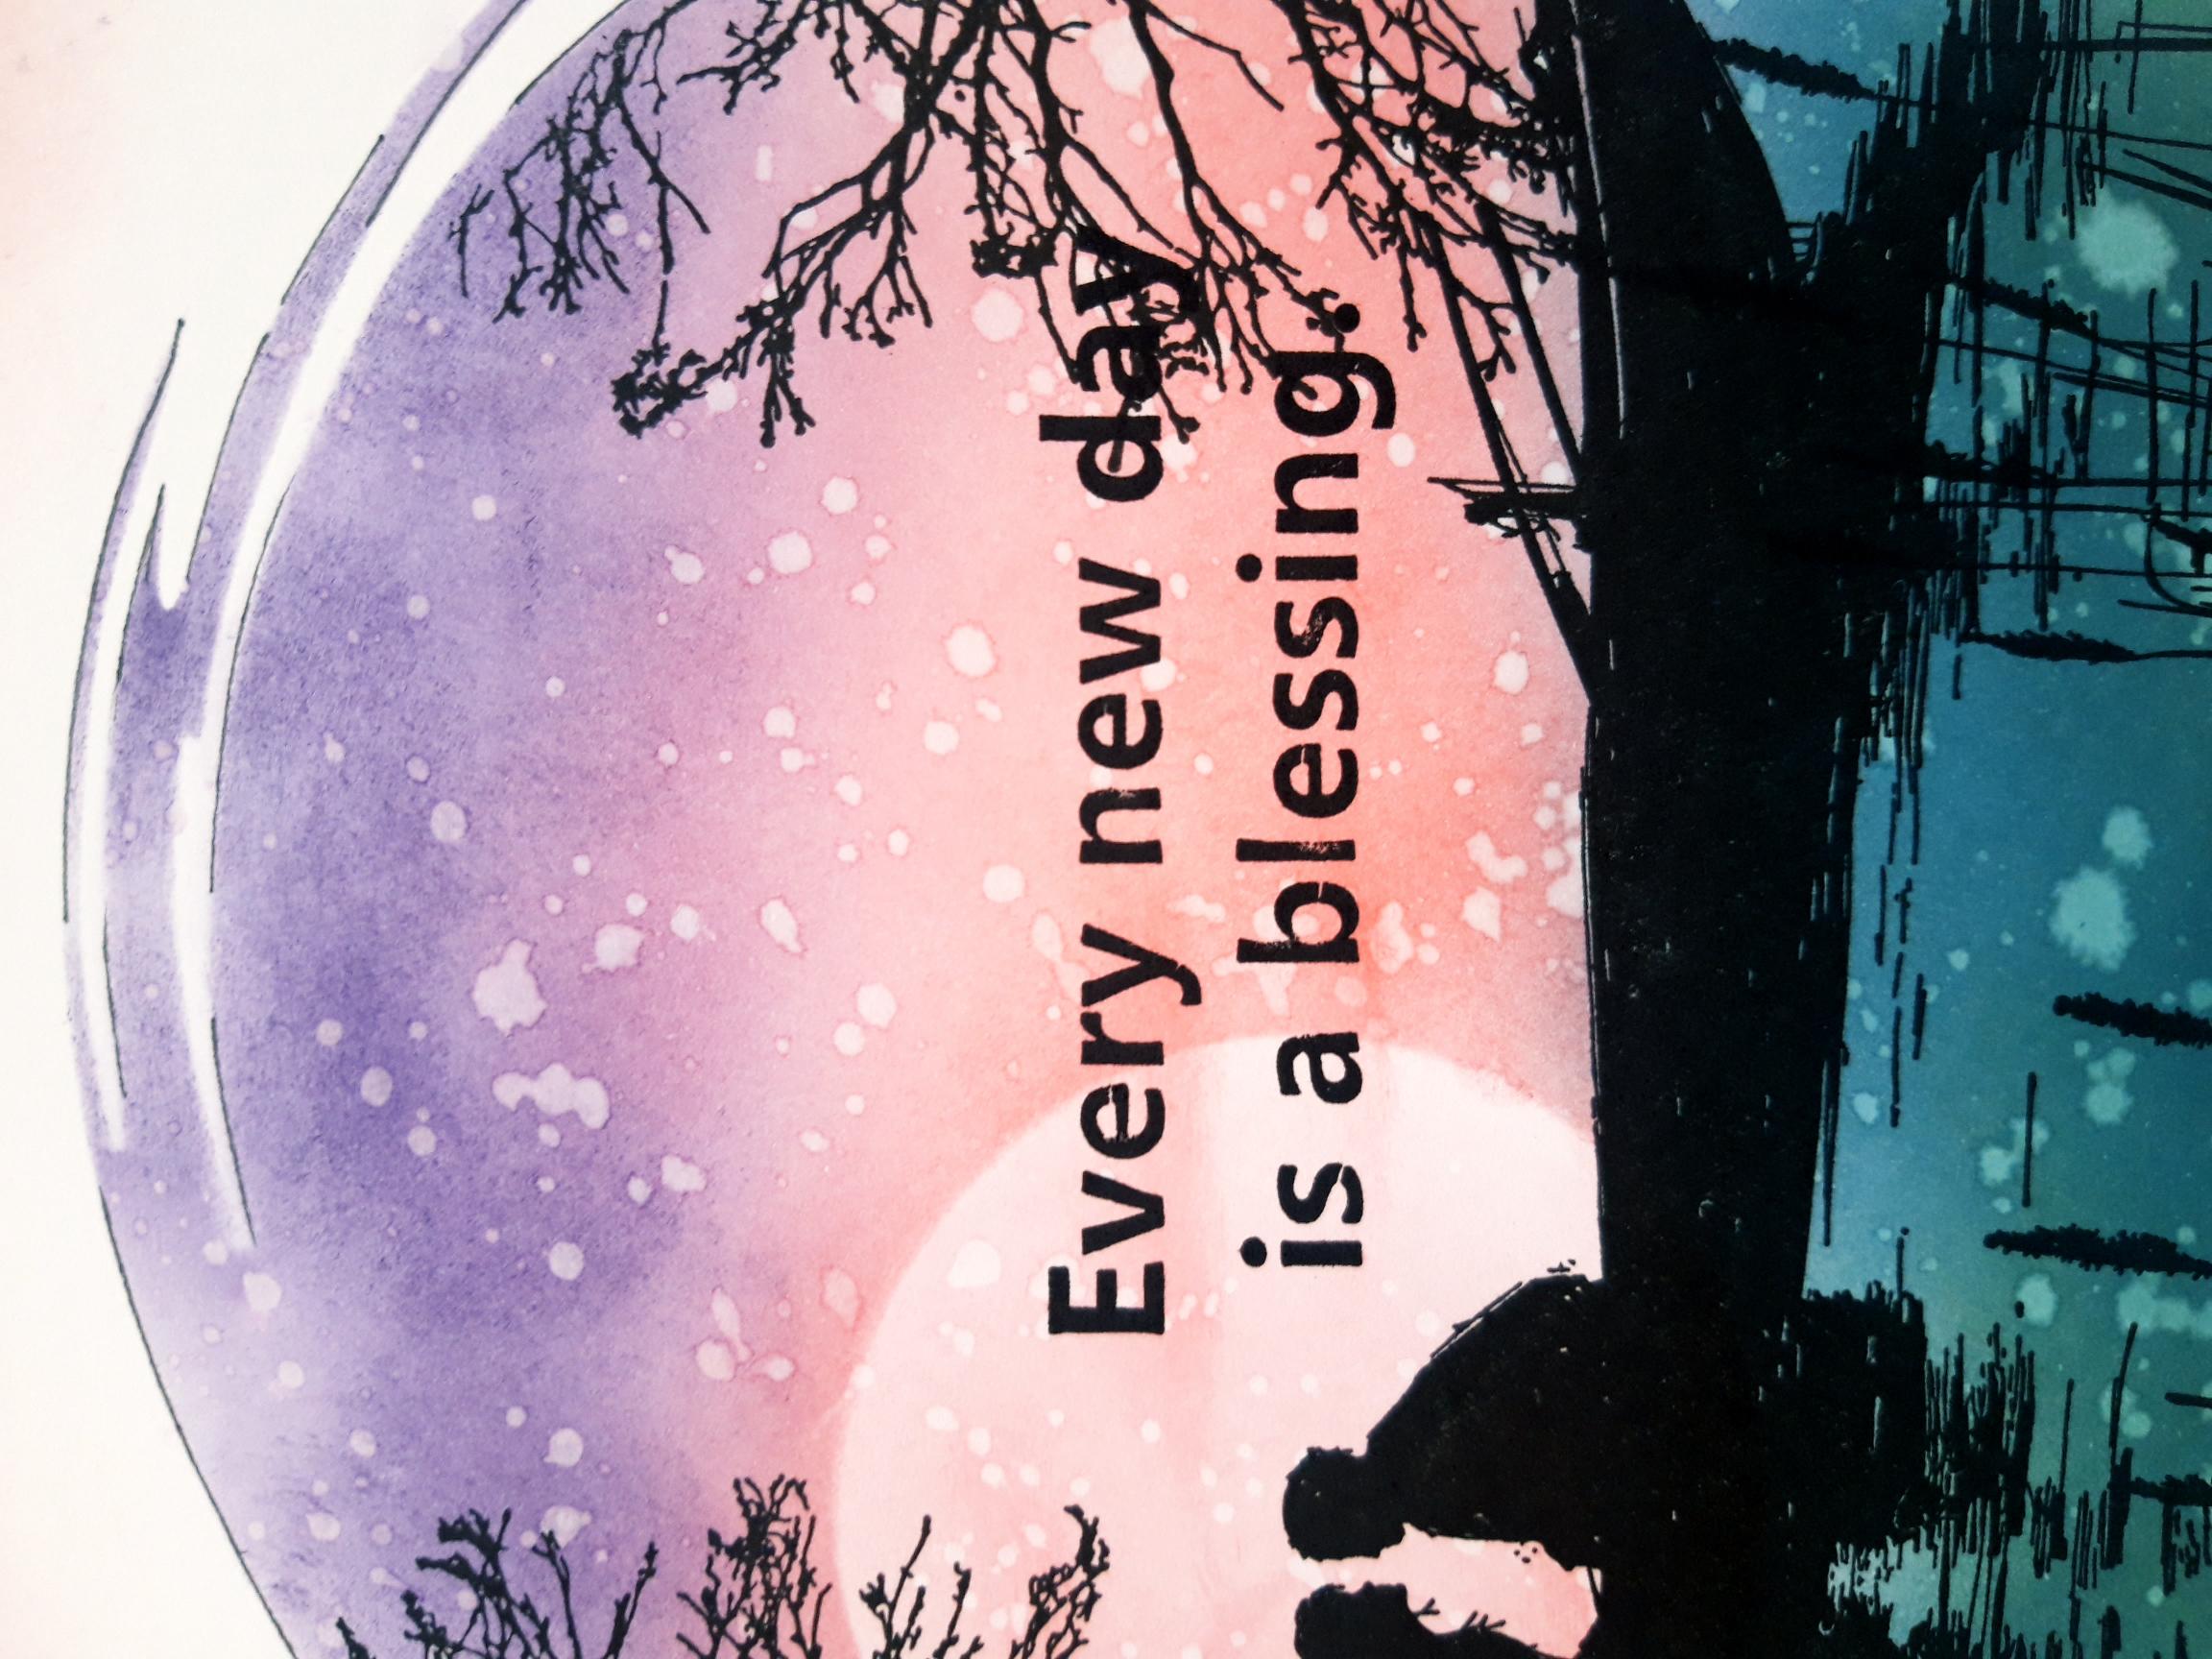
Ink up the sentiment from Your Only Limit Is You Stamp Collection, with the Versafine and stamp on to your artwork, where required. |
|
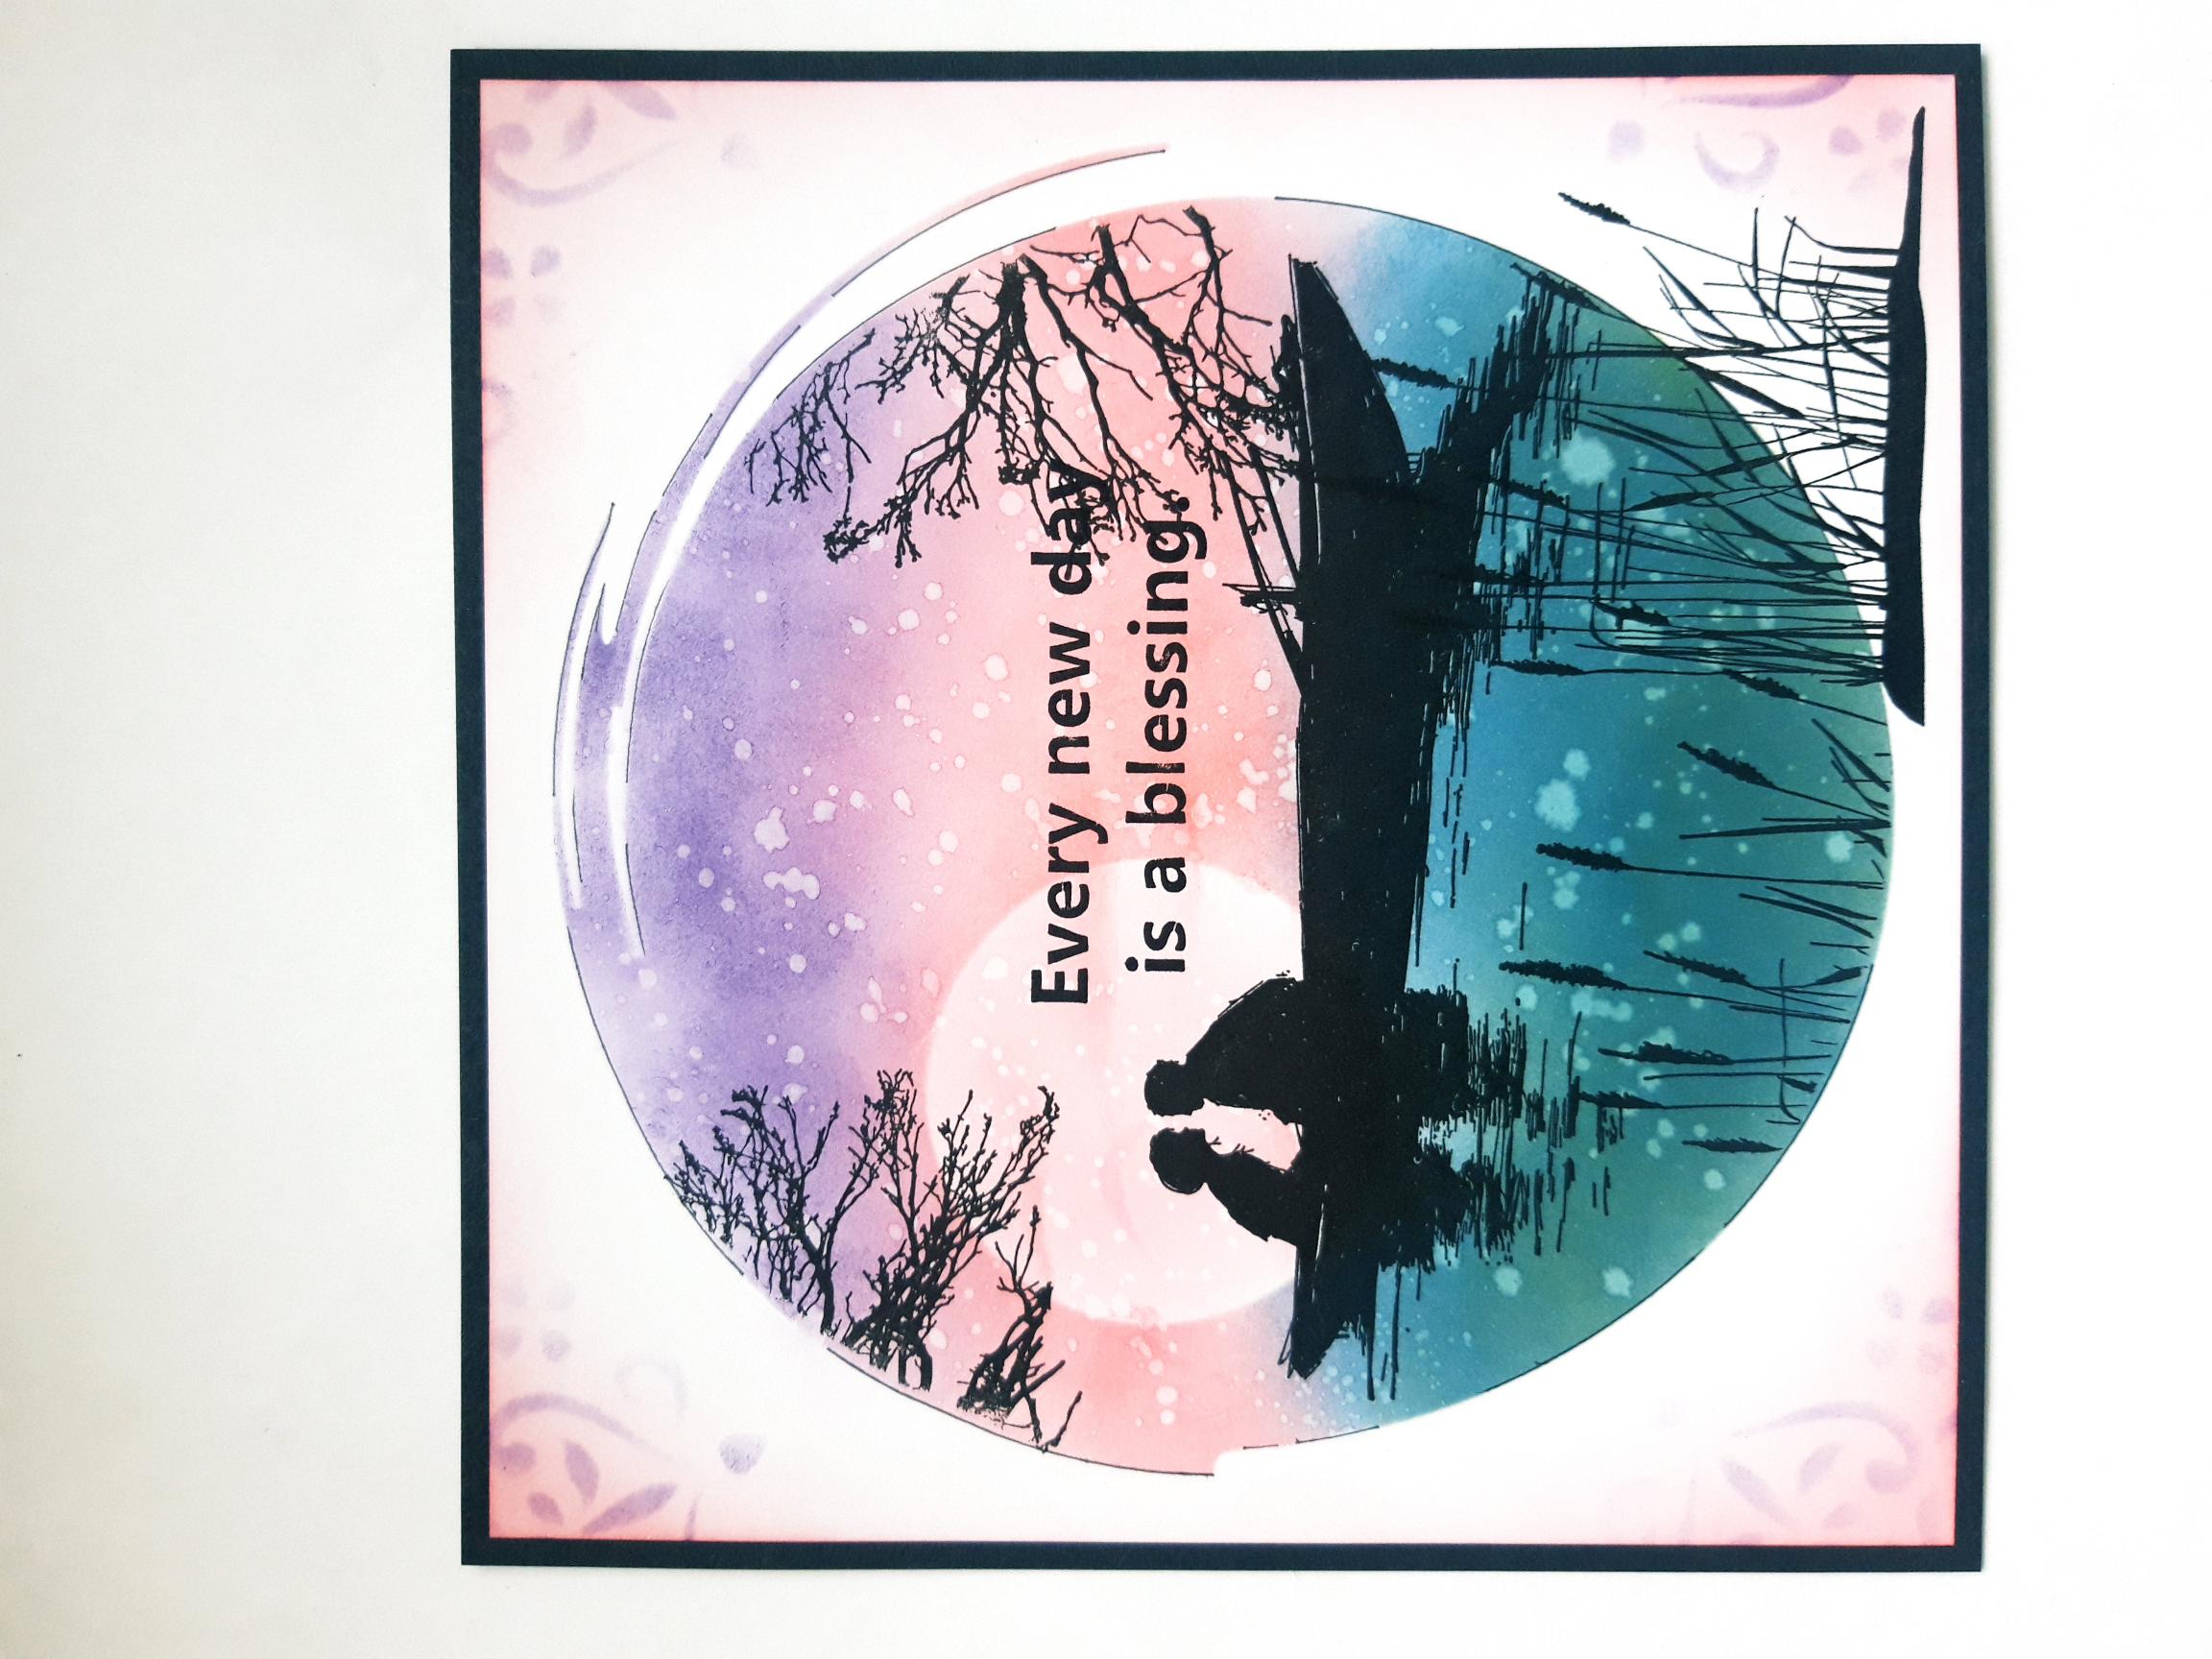
Adhere your dried artwork on to the black card. |
|
Adhere on to your white card blank. |
|
To finish, use a white gel pen to add accents and highlights to your artwork. |