Give your friends $10 off their first order!
Refer a FRIEND


WHAT YOU WILL NEED:
White card blank (7 x 7")
Black card (5 1/2 x 5 1/2")
Subtle Tranquility 8 x 8" Paper Pad
Your Only Limit Is You Stamp Collection
Stylized Circle Stencil
Versafine Ink Pad: Onyx Black, Smokey Gray
Izink Pigment Ink Pad Vintage Collection: Rose pink
Izink Pigment Ink Pad Classic Collection: Mint green
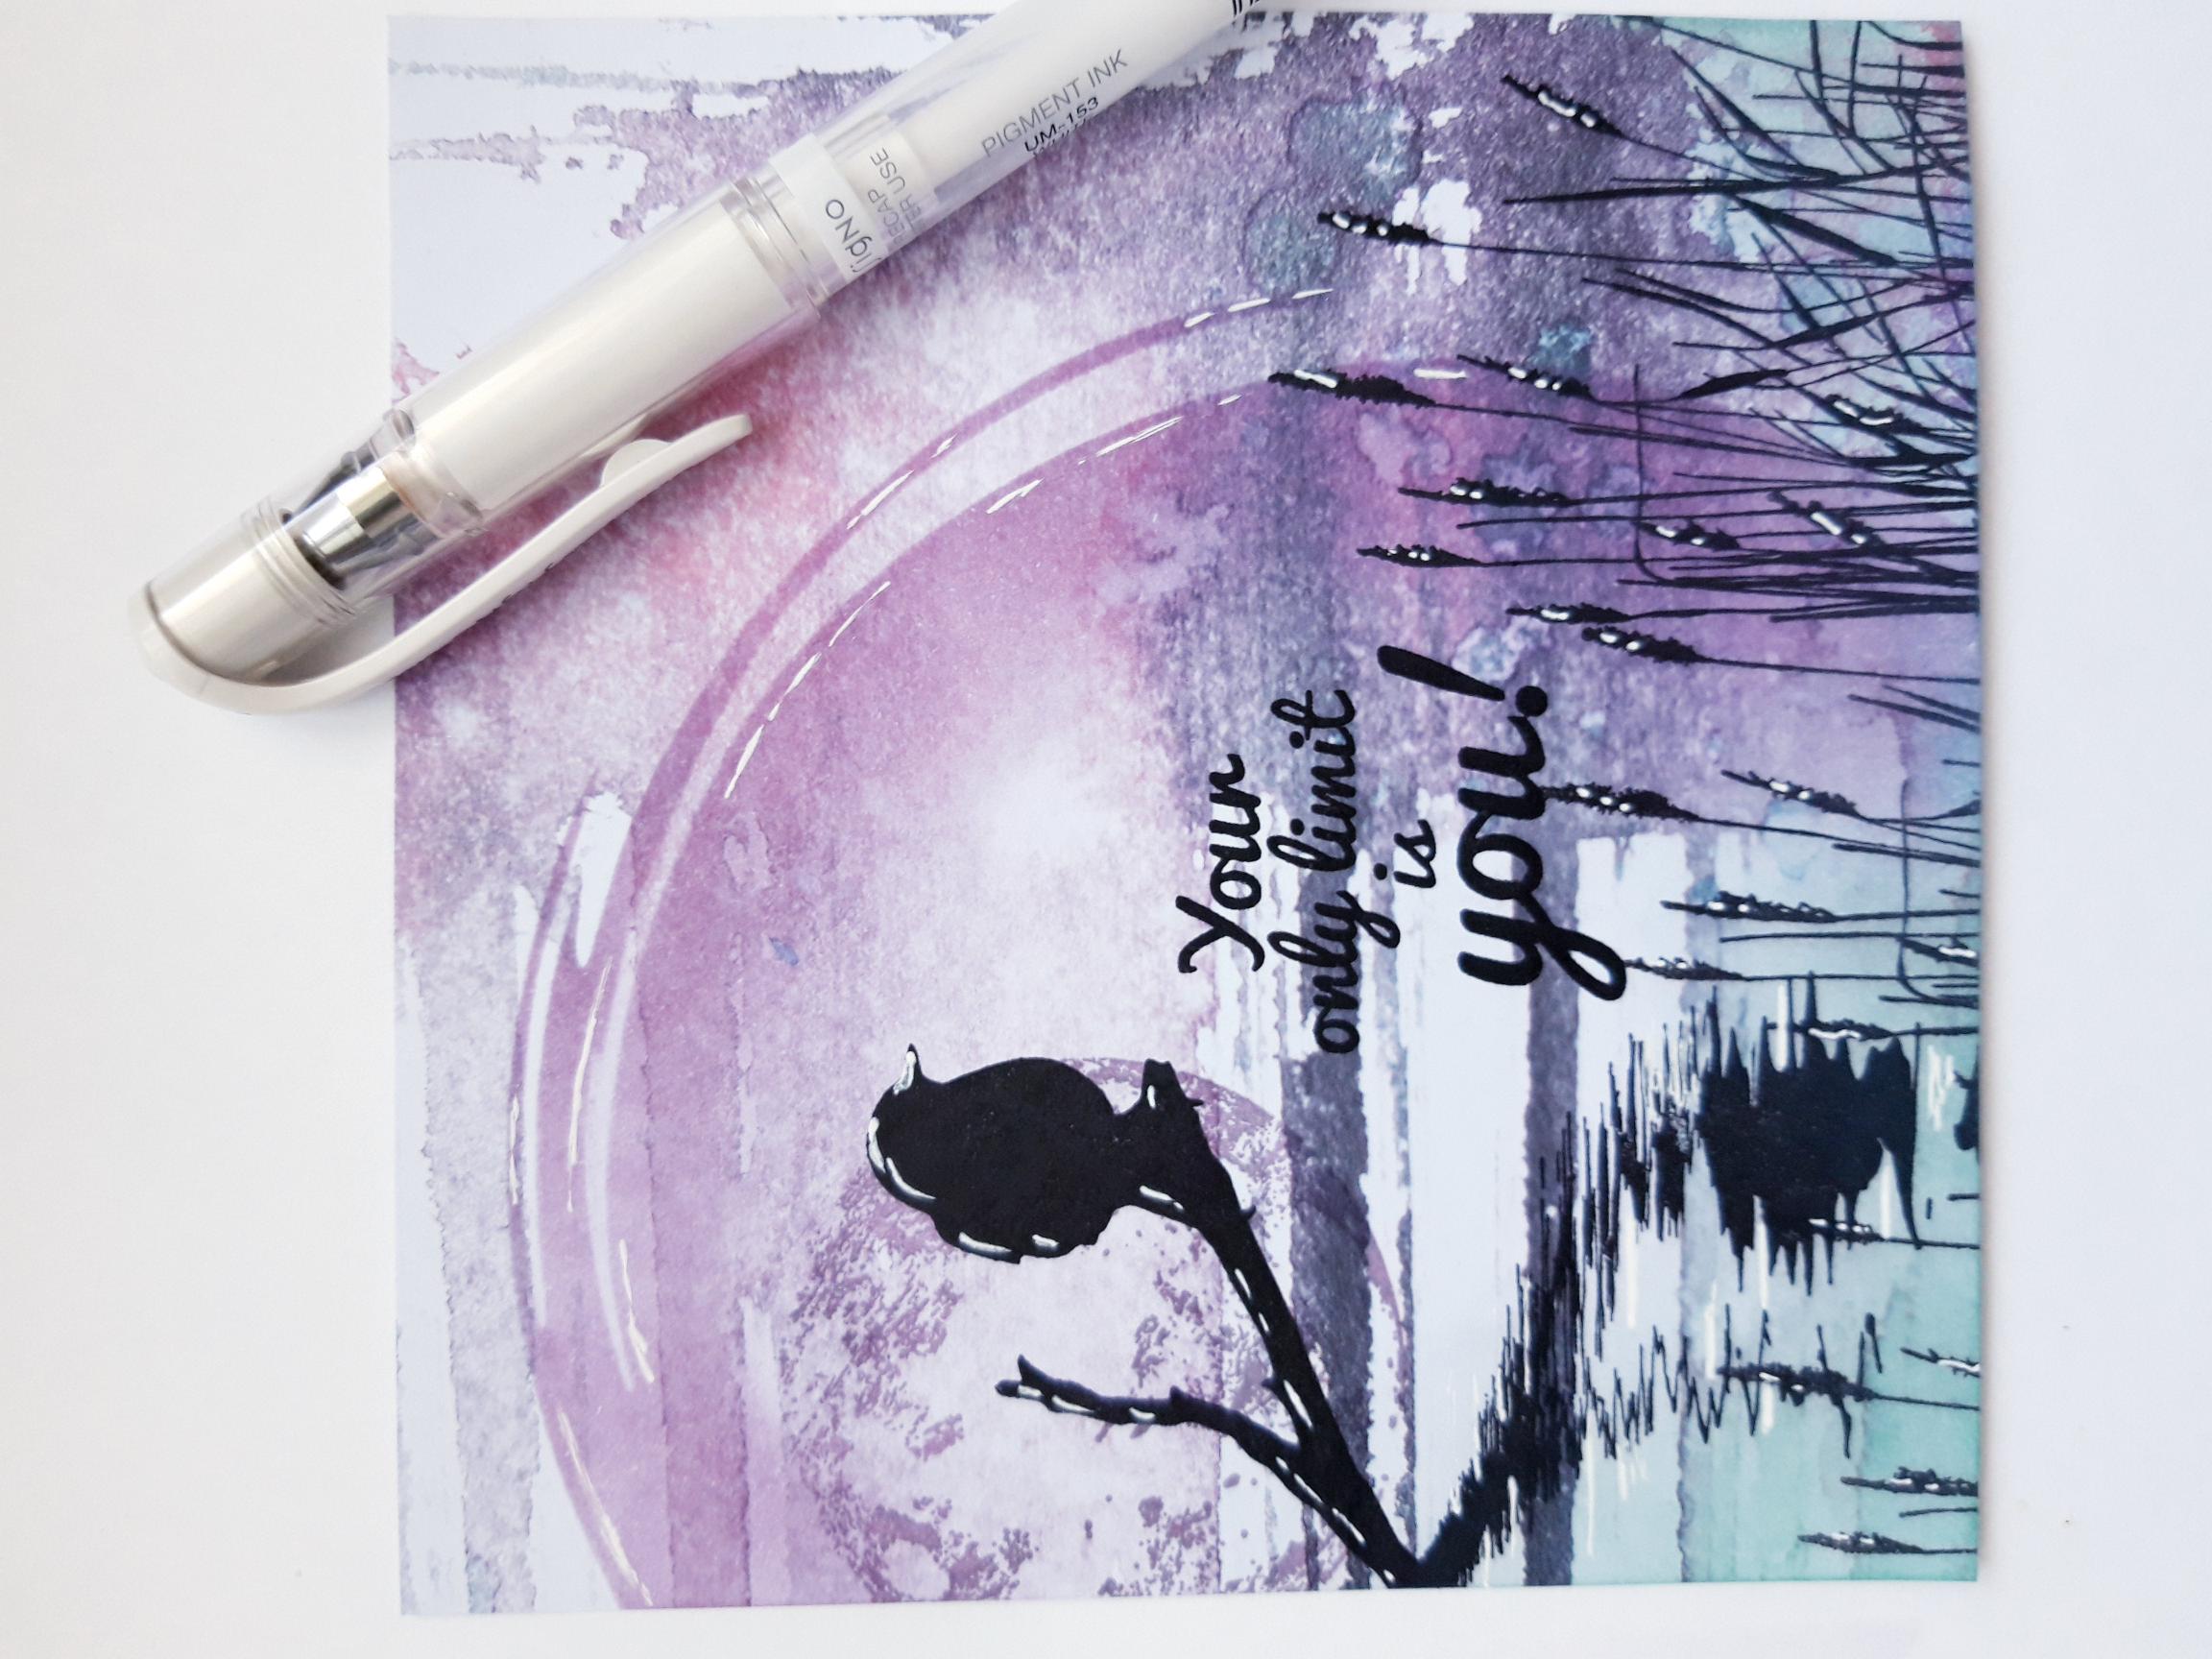
White gel pen
Blending tool
Eureka 101
Paper Trimmer
Perfect Together Glue
[click image to enlarge] 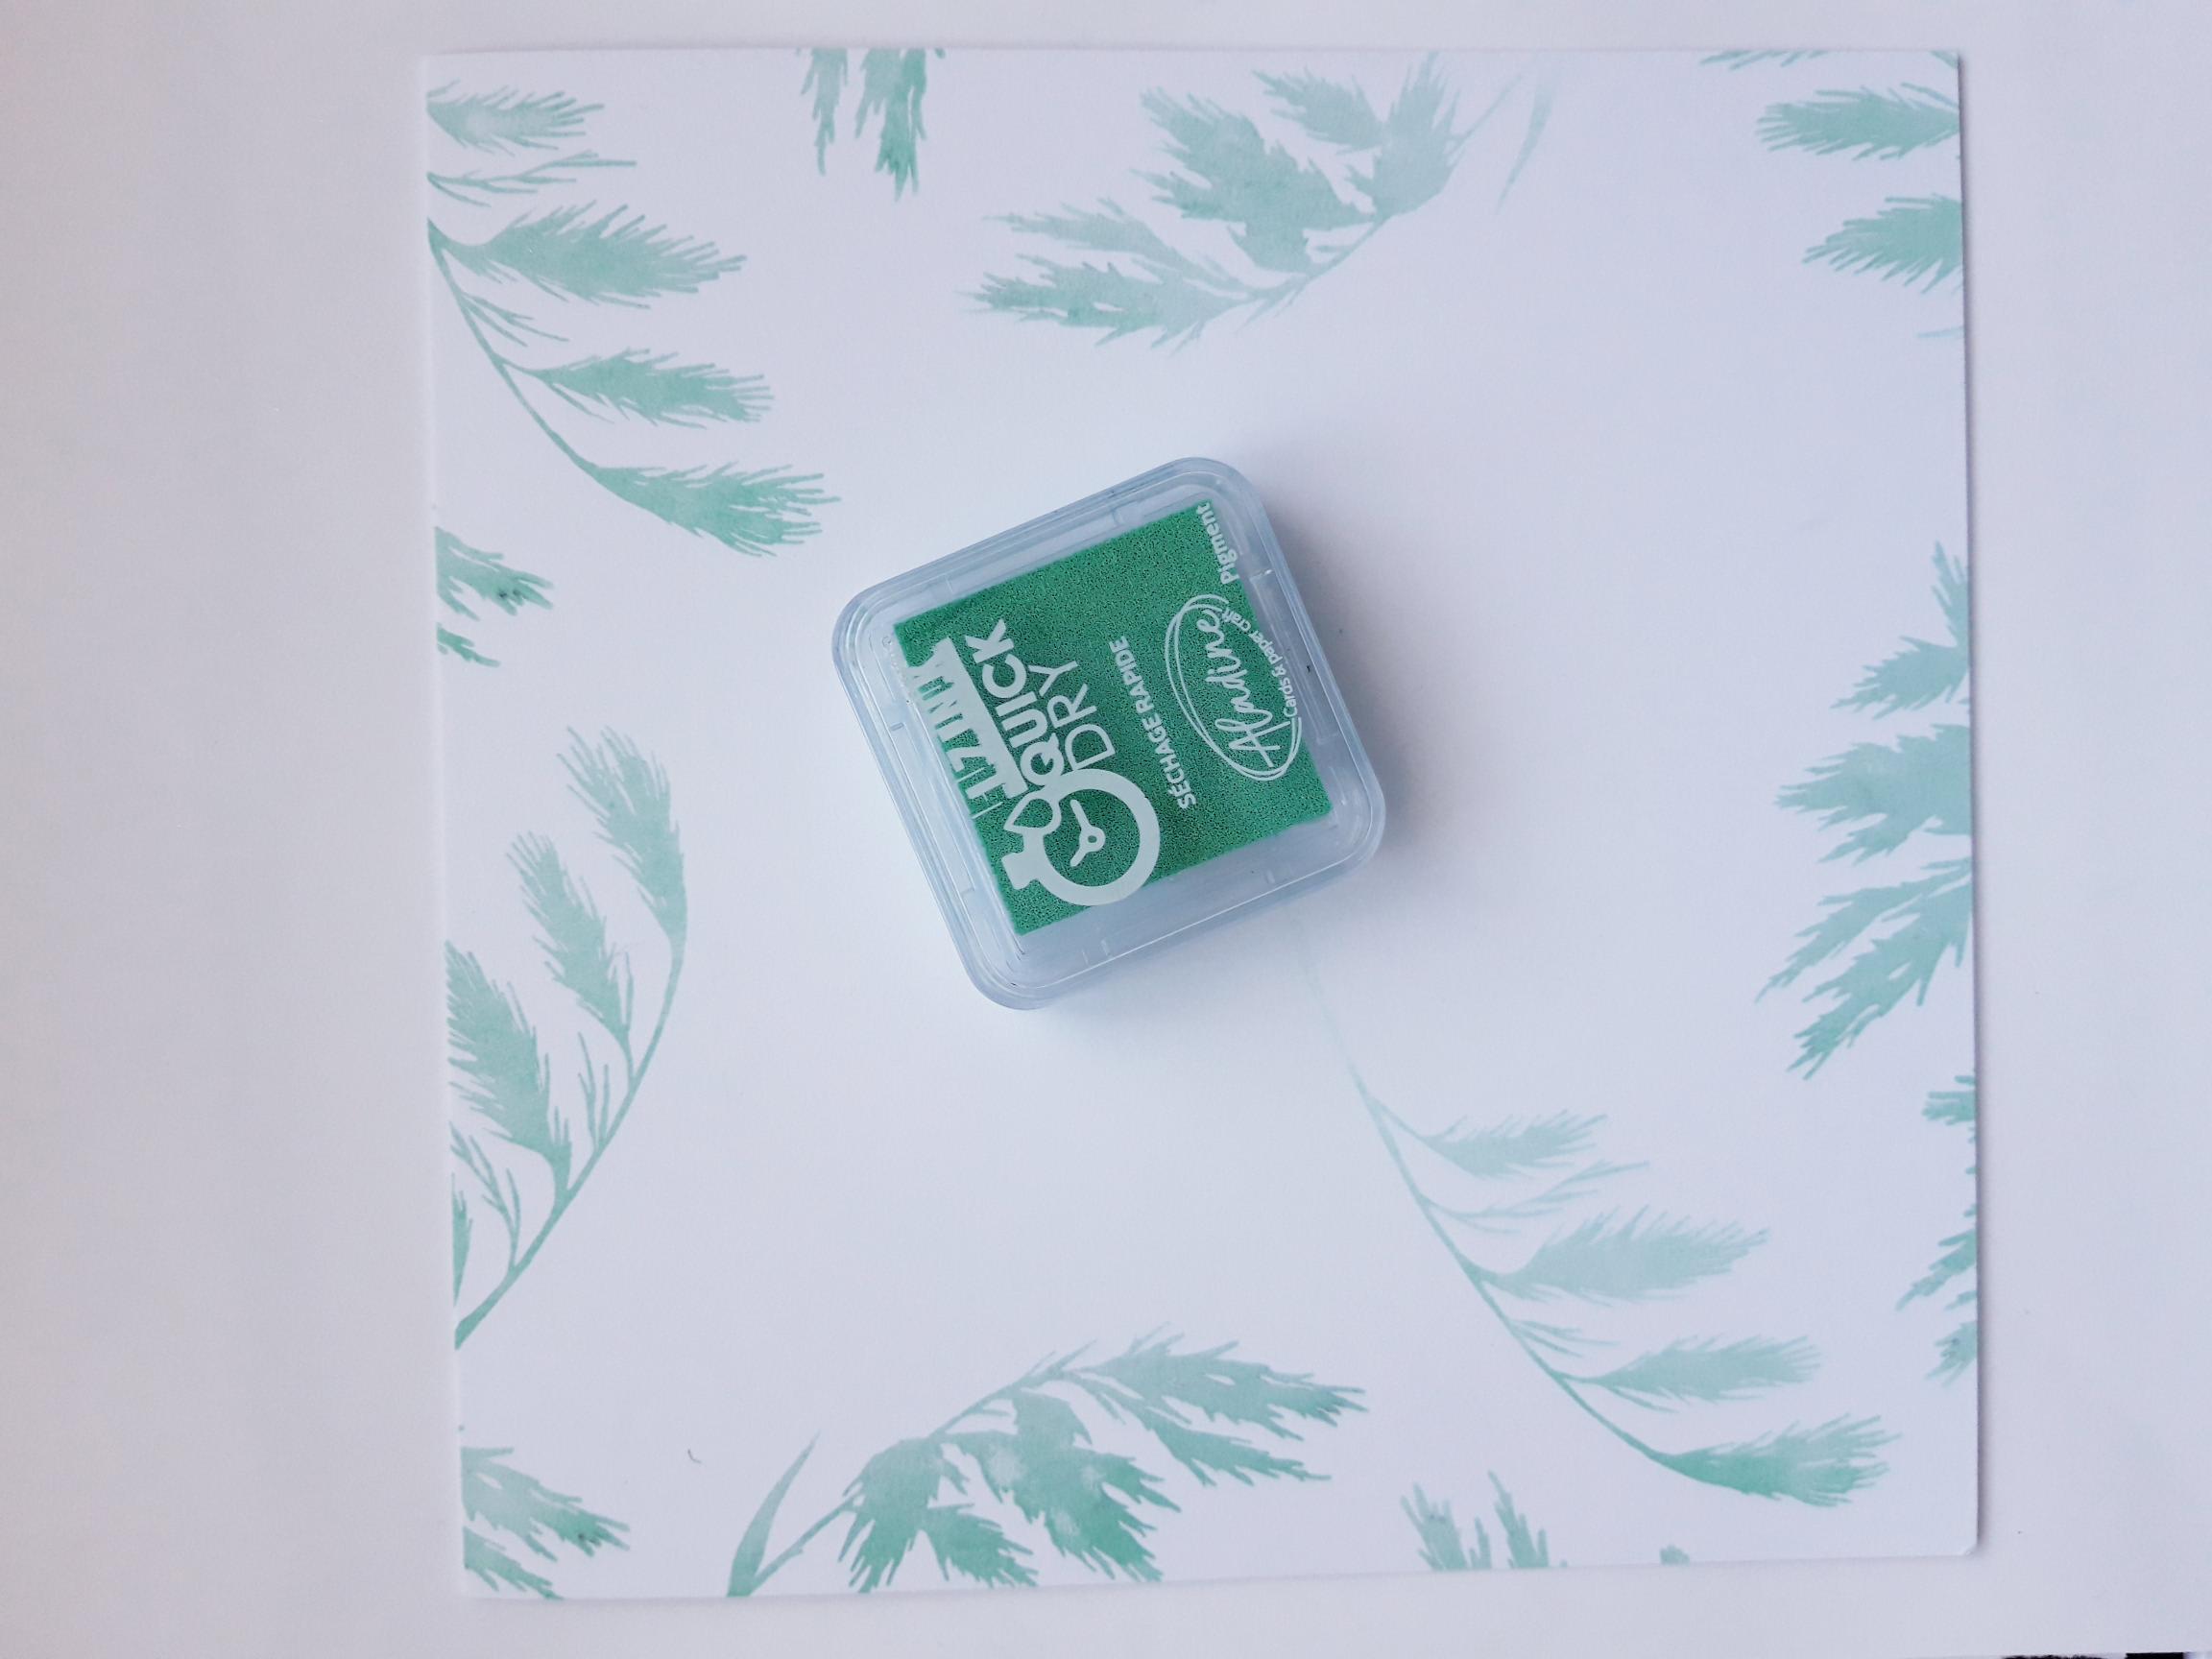
|
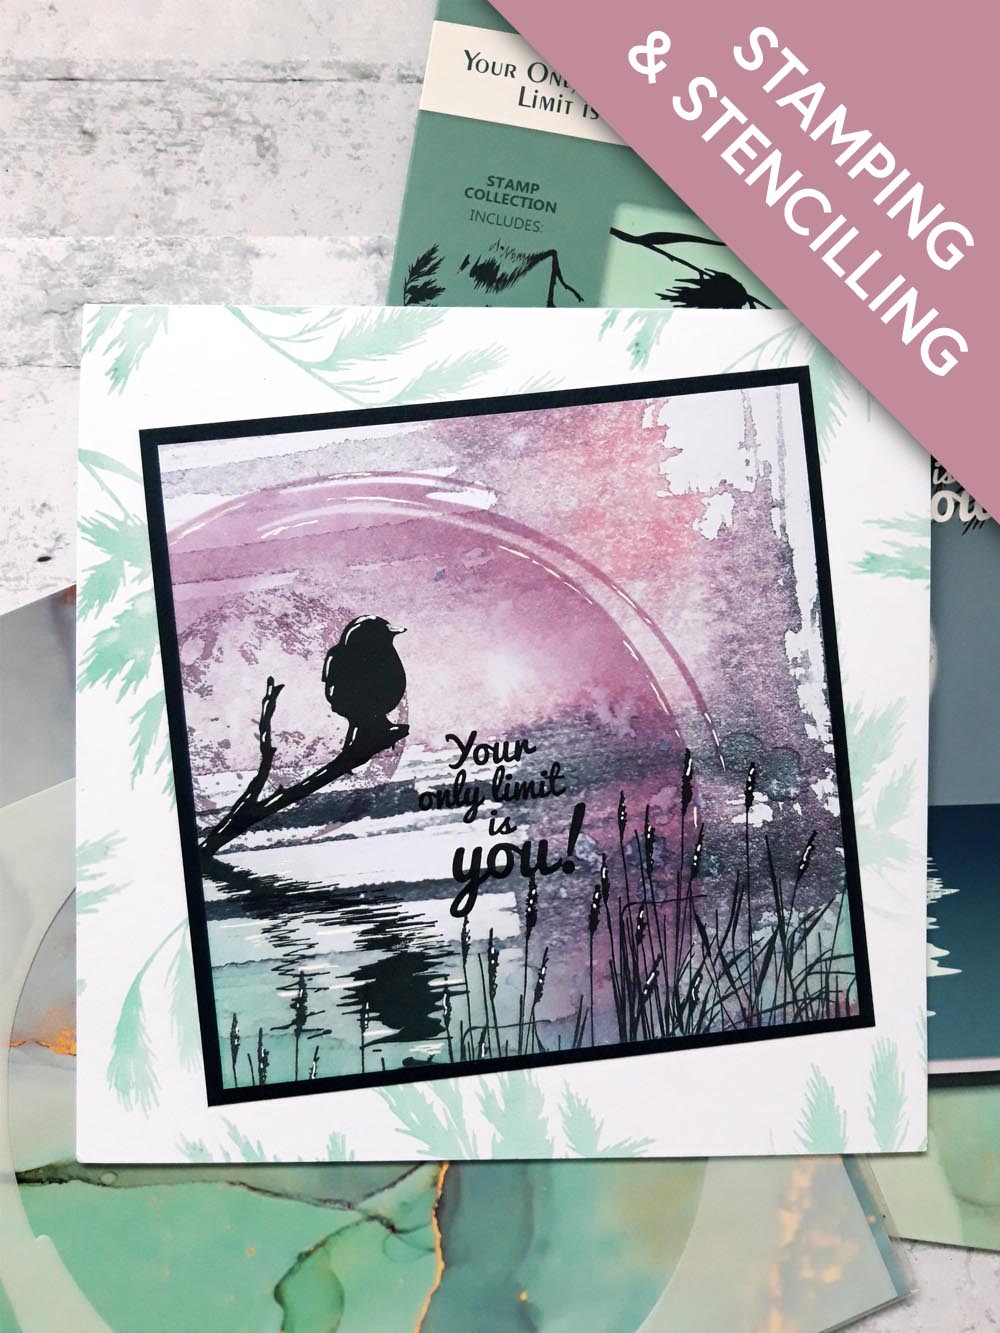
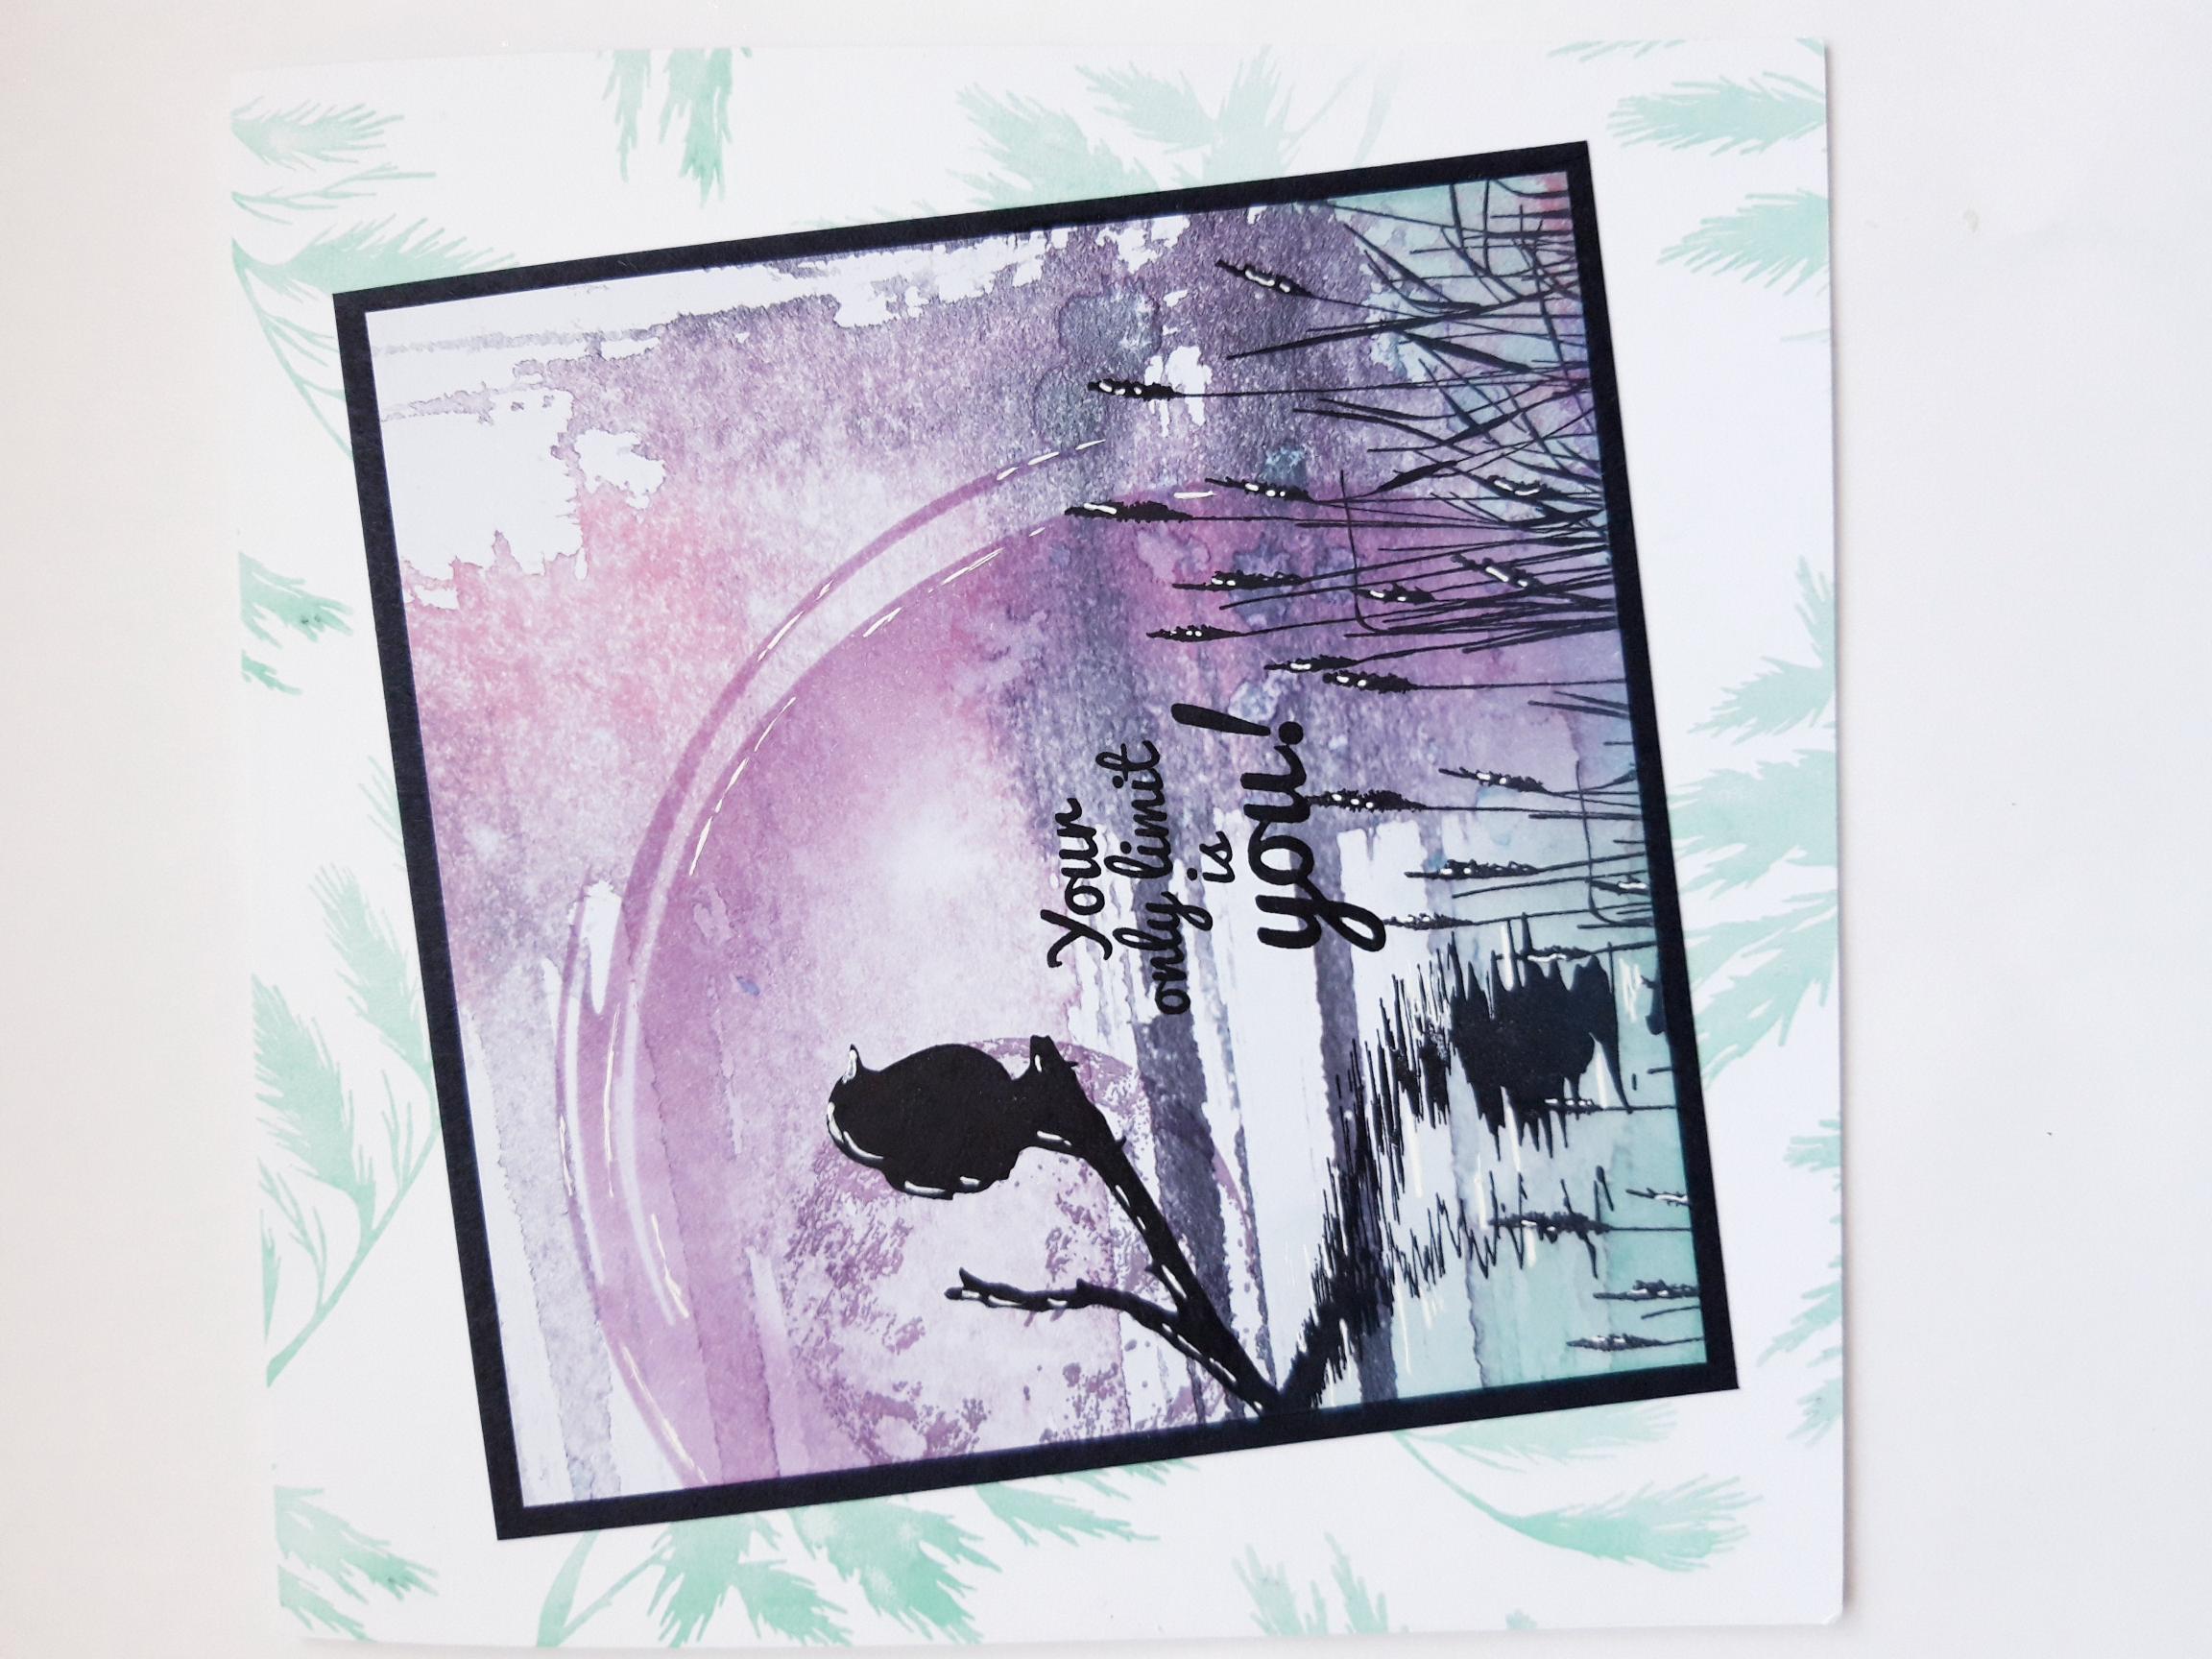
Ink up this leafy stamp from Your Only Limit Is You Collection, with the green Izink Pigment ink pad, and stamp randomly around the edges of your card blank. Ensure some are stamped off the edge, and you can incorporate the other leafy stamps from the set, if you prefer. Set your card blank to one side to dry, as the pigment ink is a slow drying ink and can smudge easily. |
|
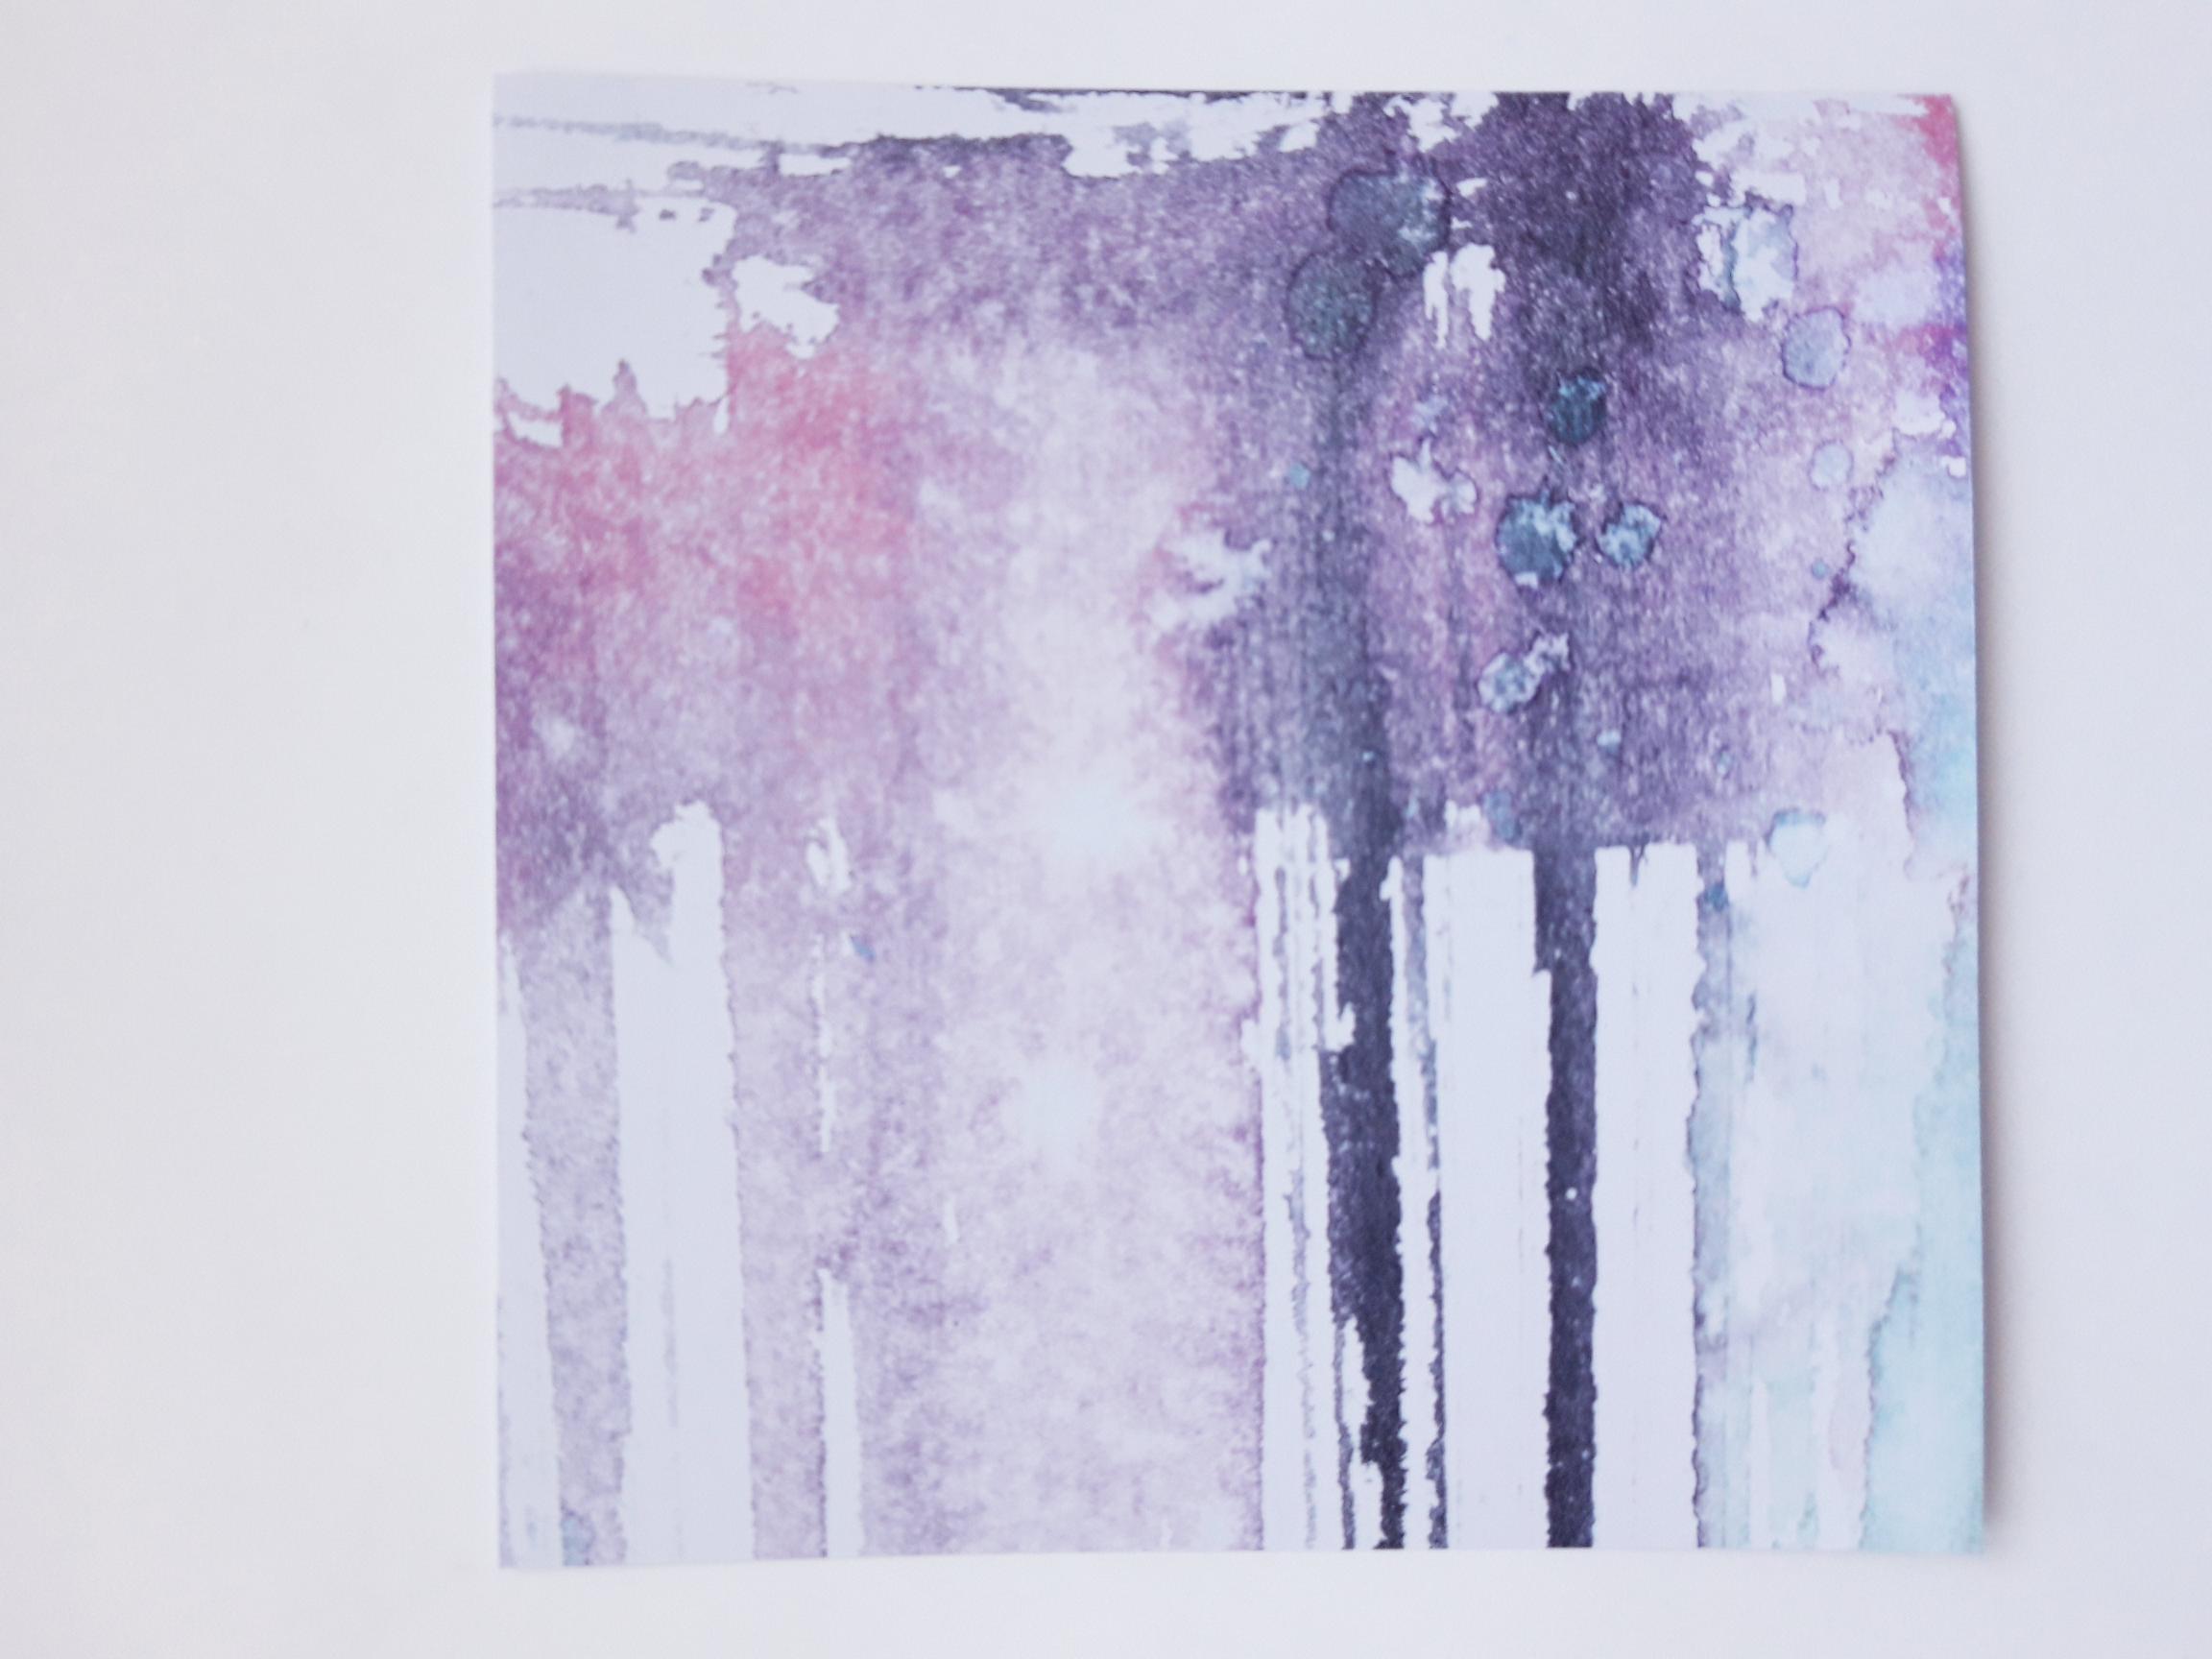
Tear out this decorative sheet from the Subtle Tranquility paper pad, and trim to 5 1/4 x 5 1/4". |
|
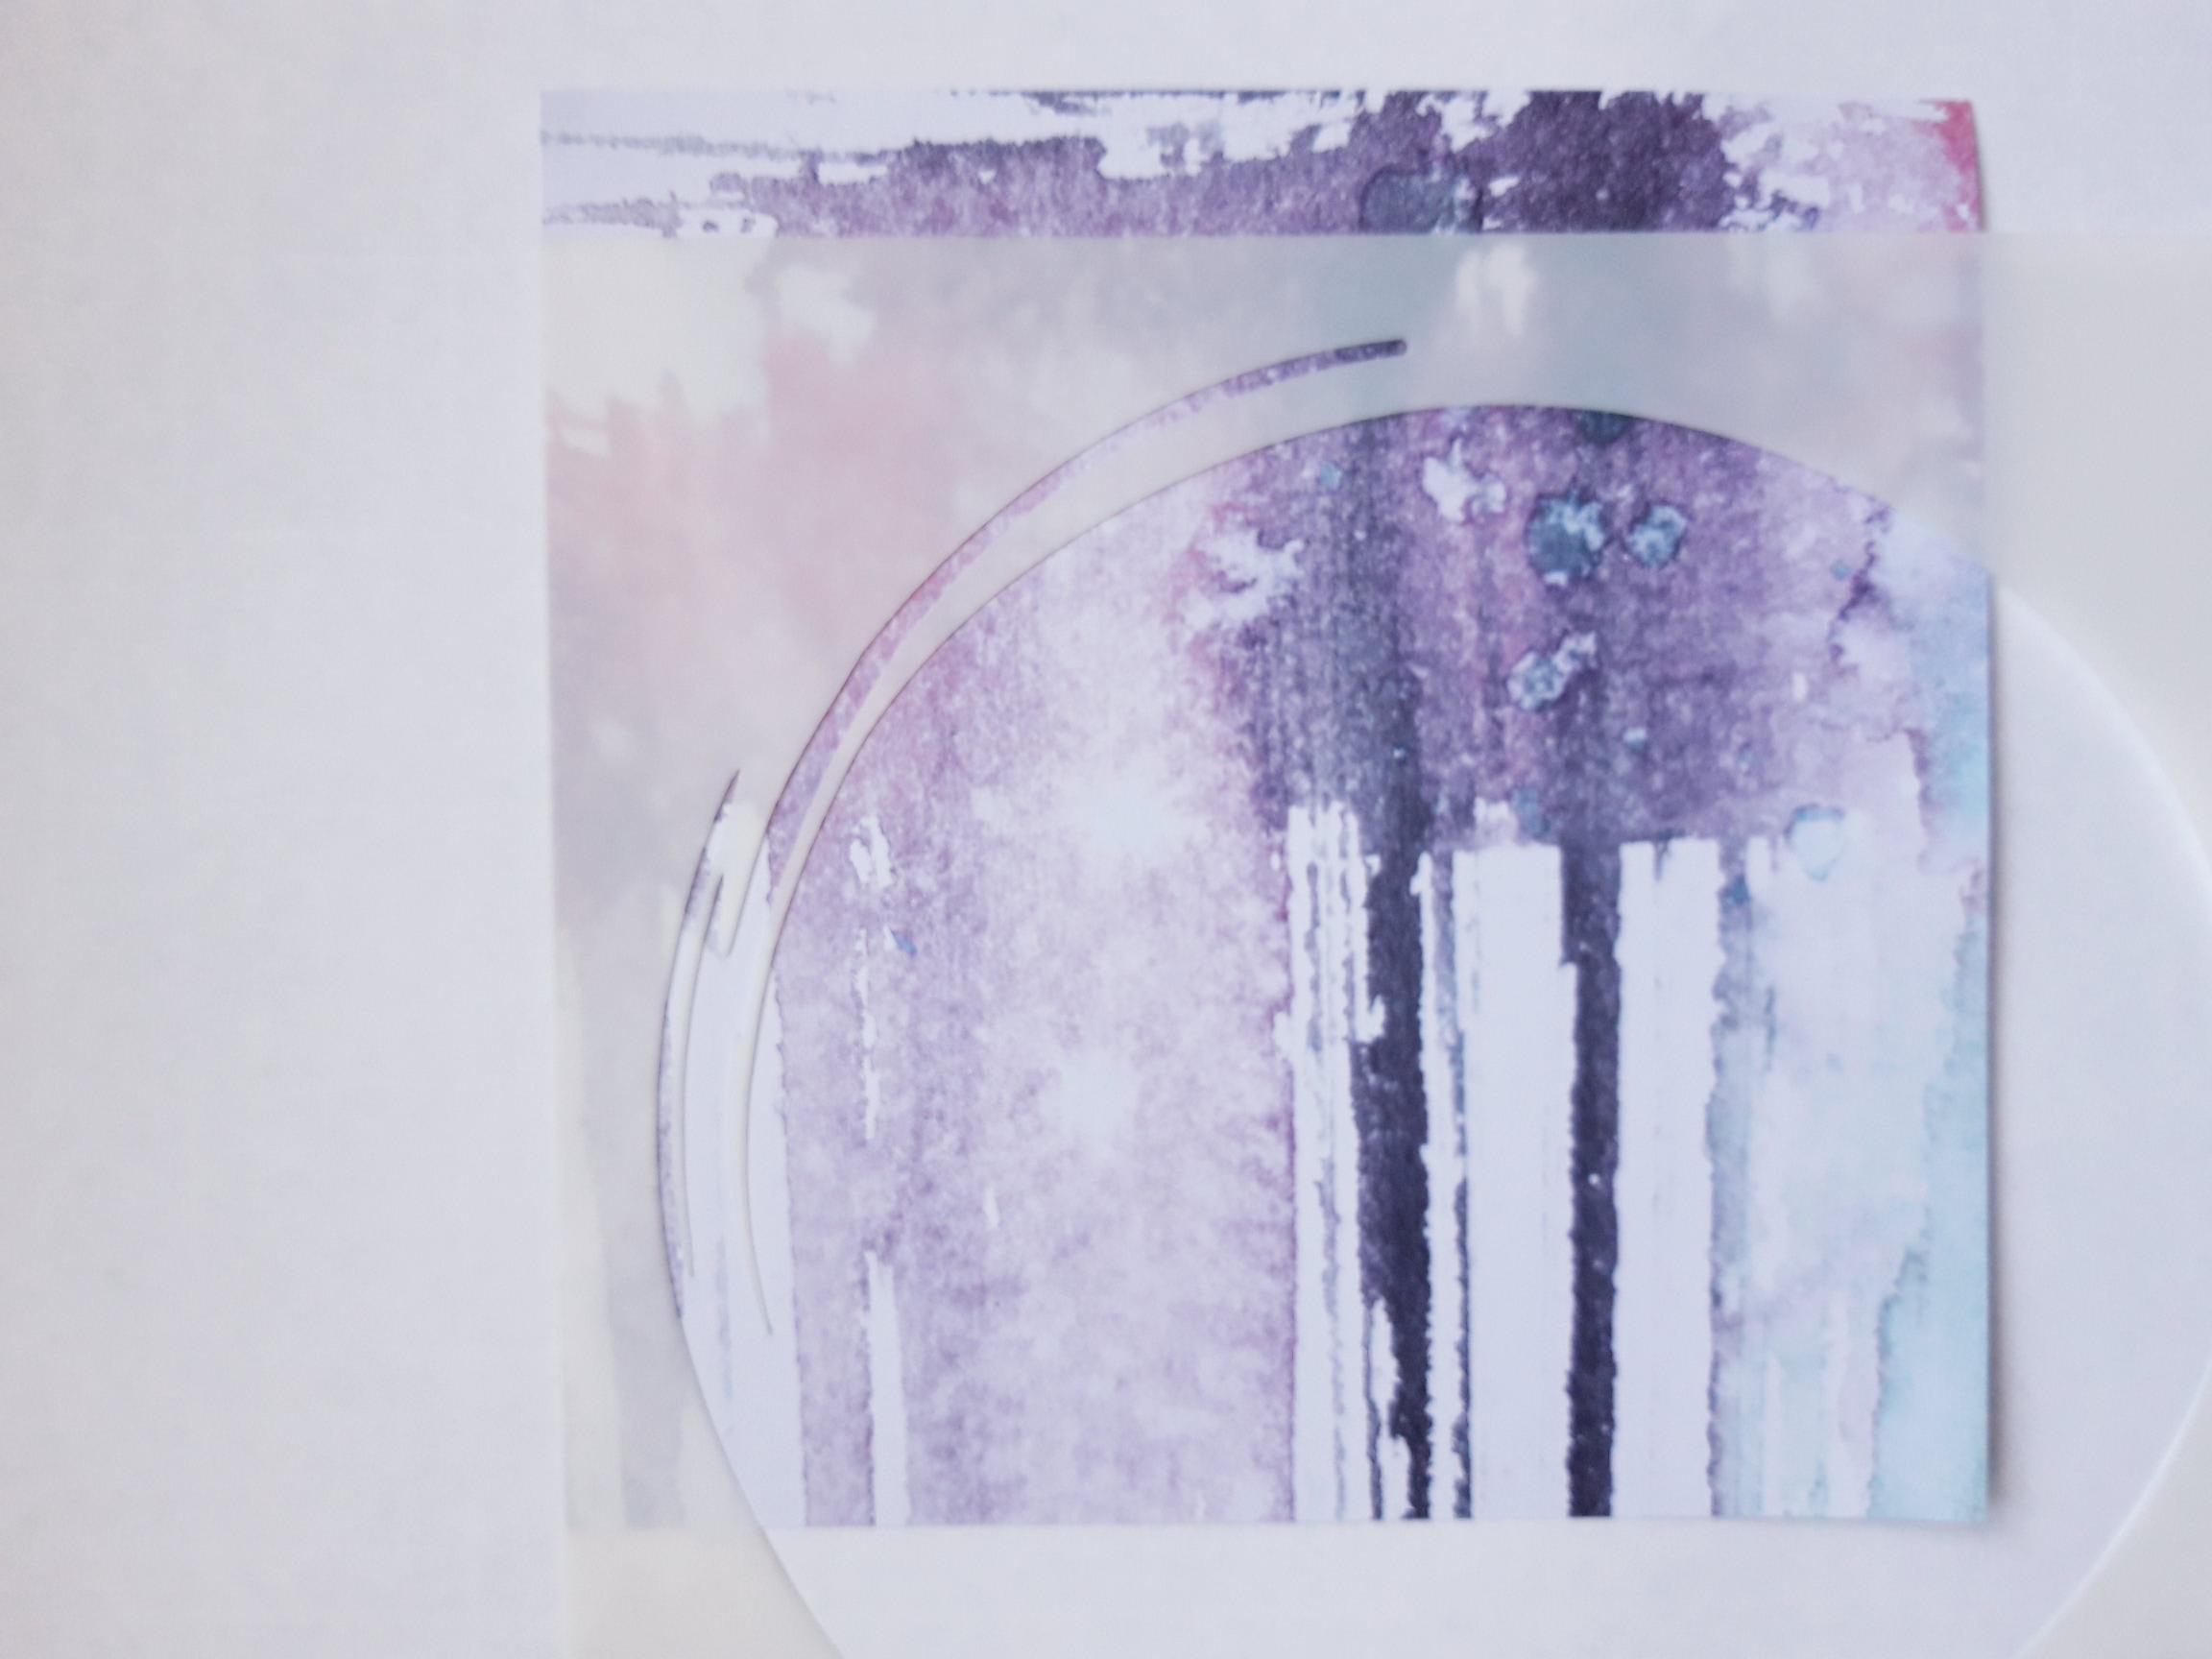
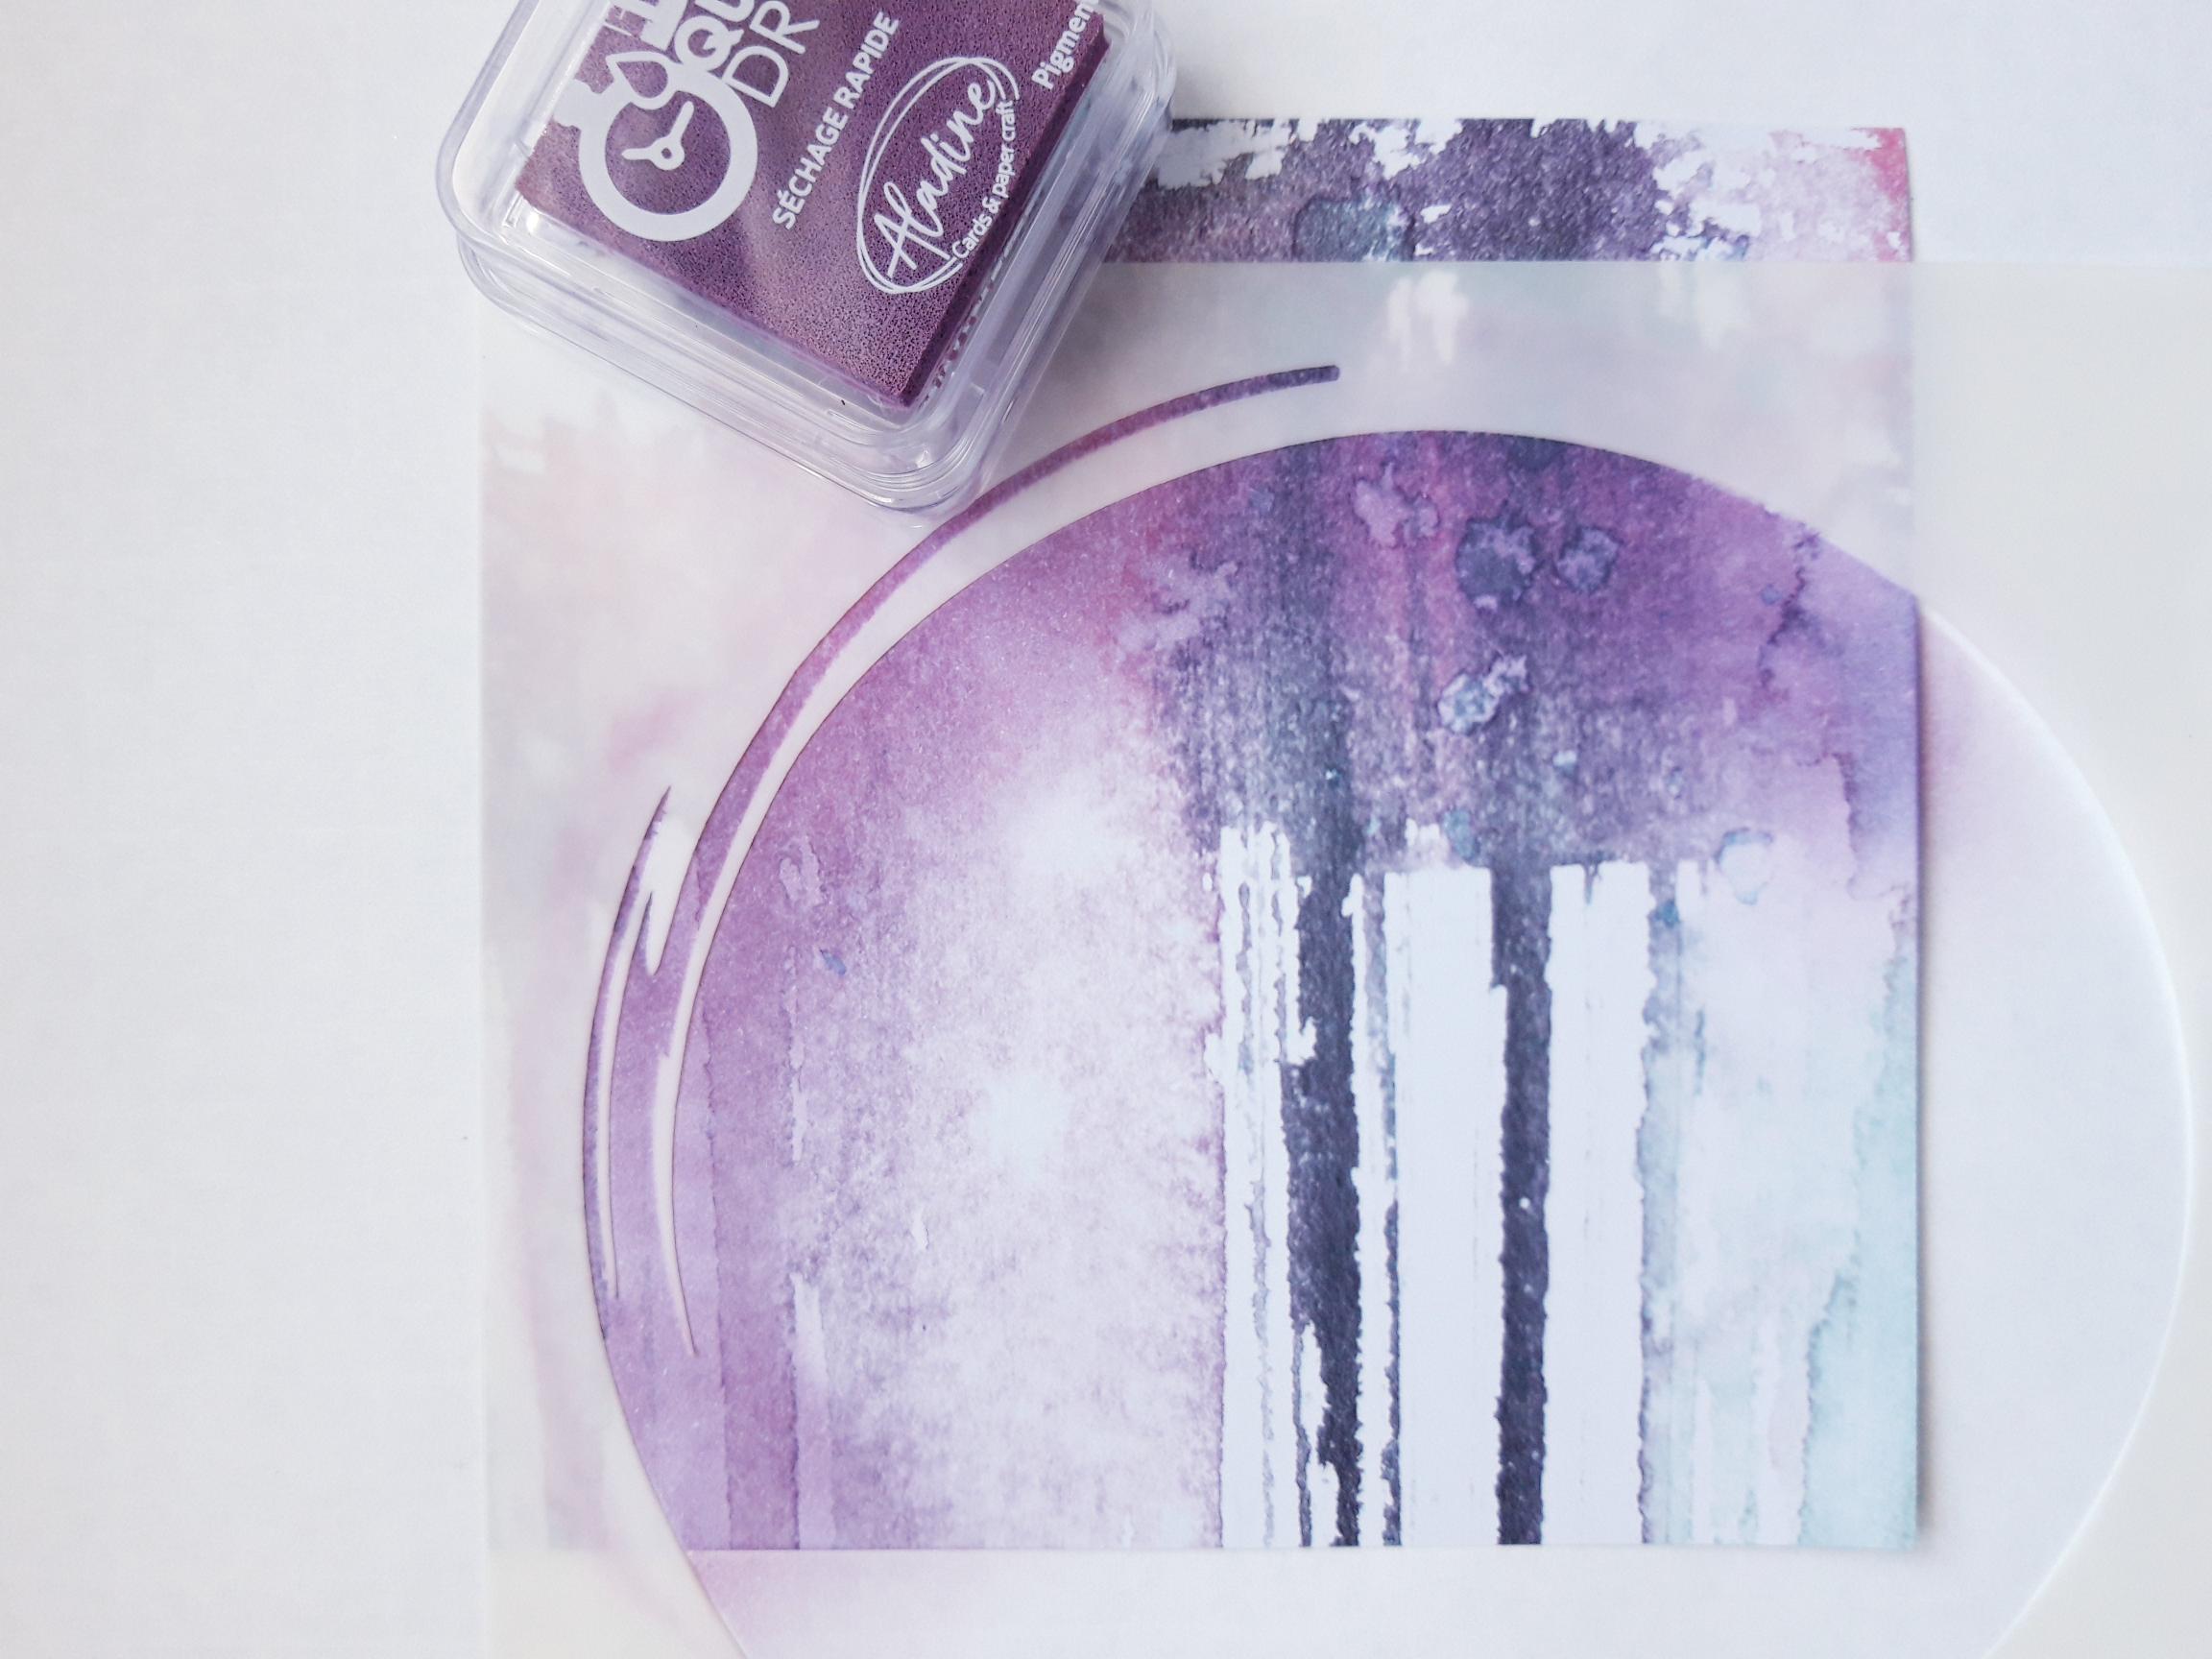
Place the Sylized Circle stencil off the left hand edge of the paper, as required. Tip: If your are worried about the stencil moving, you can secure it in place with low tack tape. Alternatively, take the foam mat out of your Eureka 101, and use the bottom as a magnetic stencil mat, holding the stencil in place with your bar magnet. |
|
Blend the Izink rose pink pigment ink, within the stencil, keeping the colour more intense around the edges, fading it out as you blend inwards. |
|
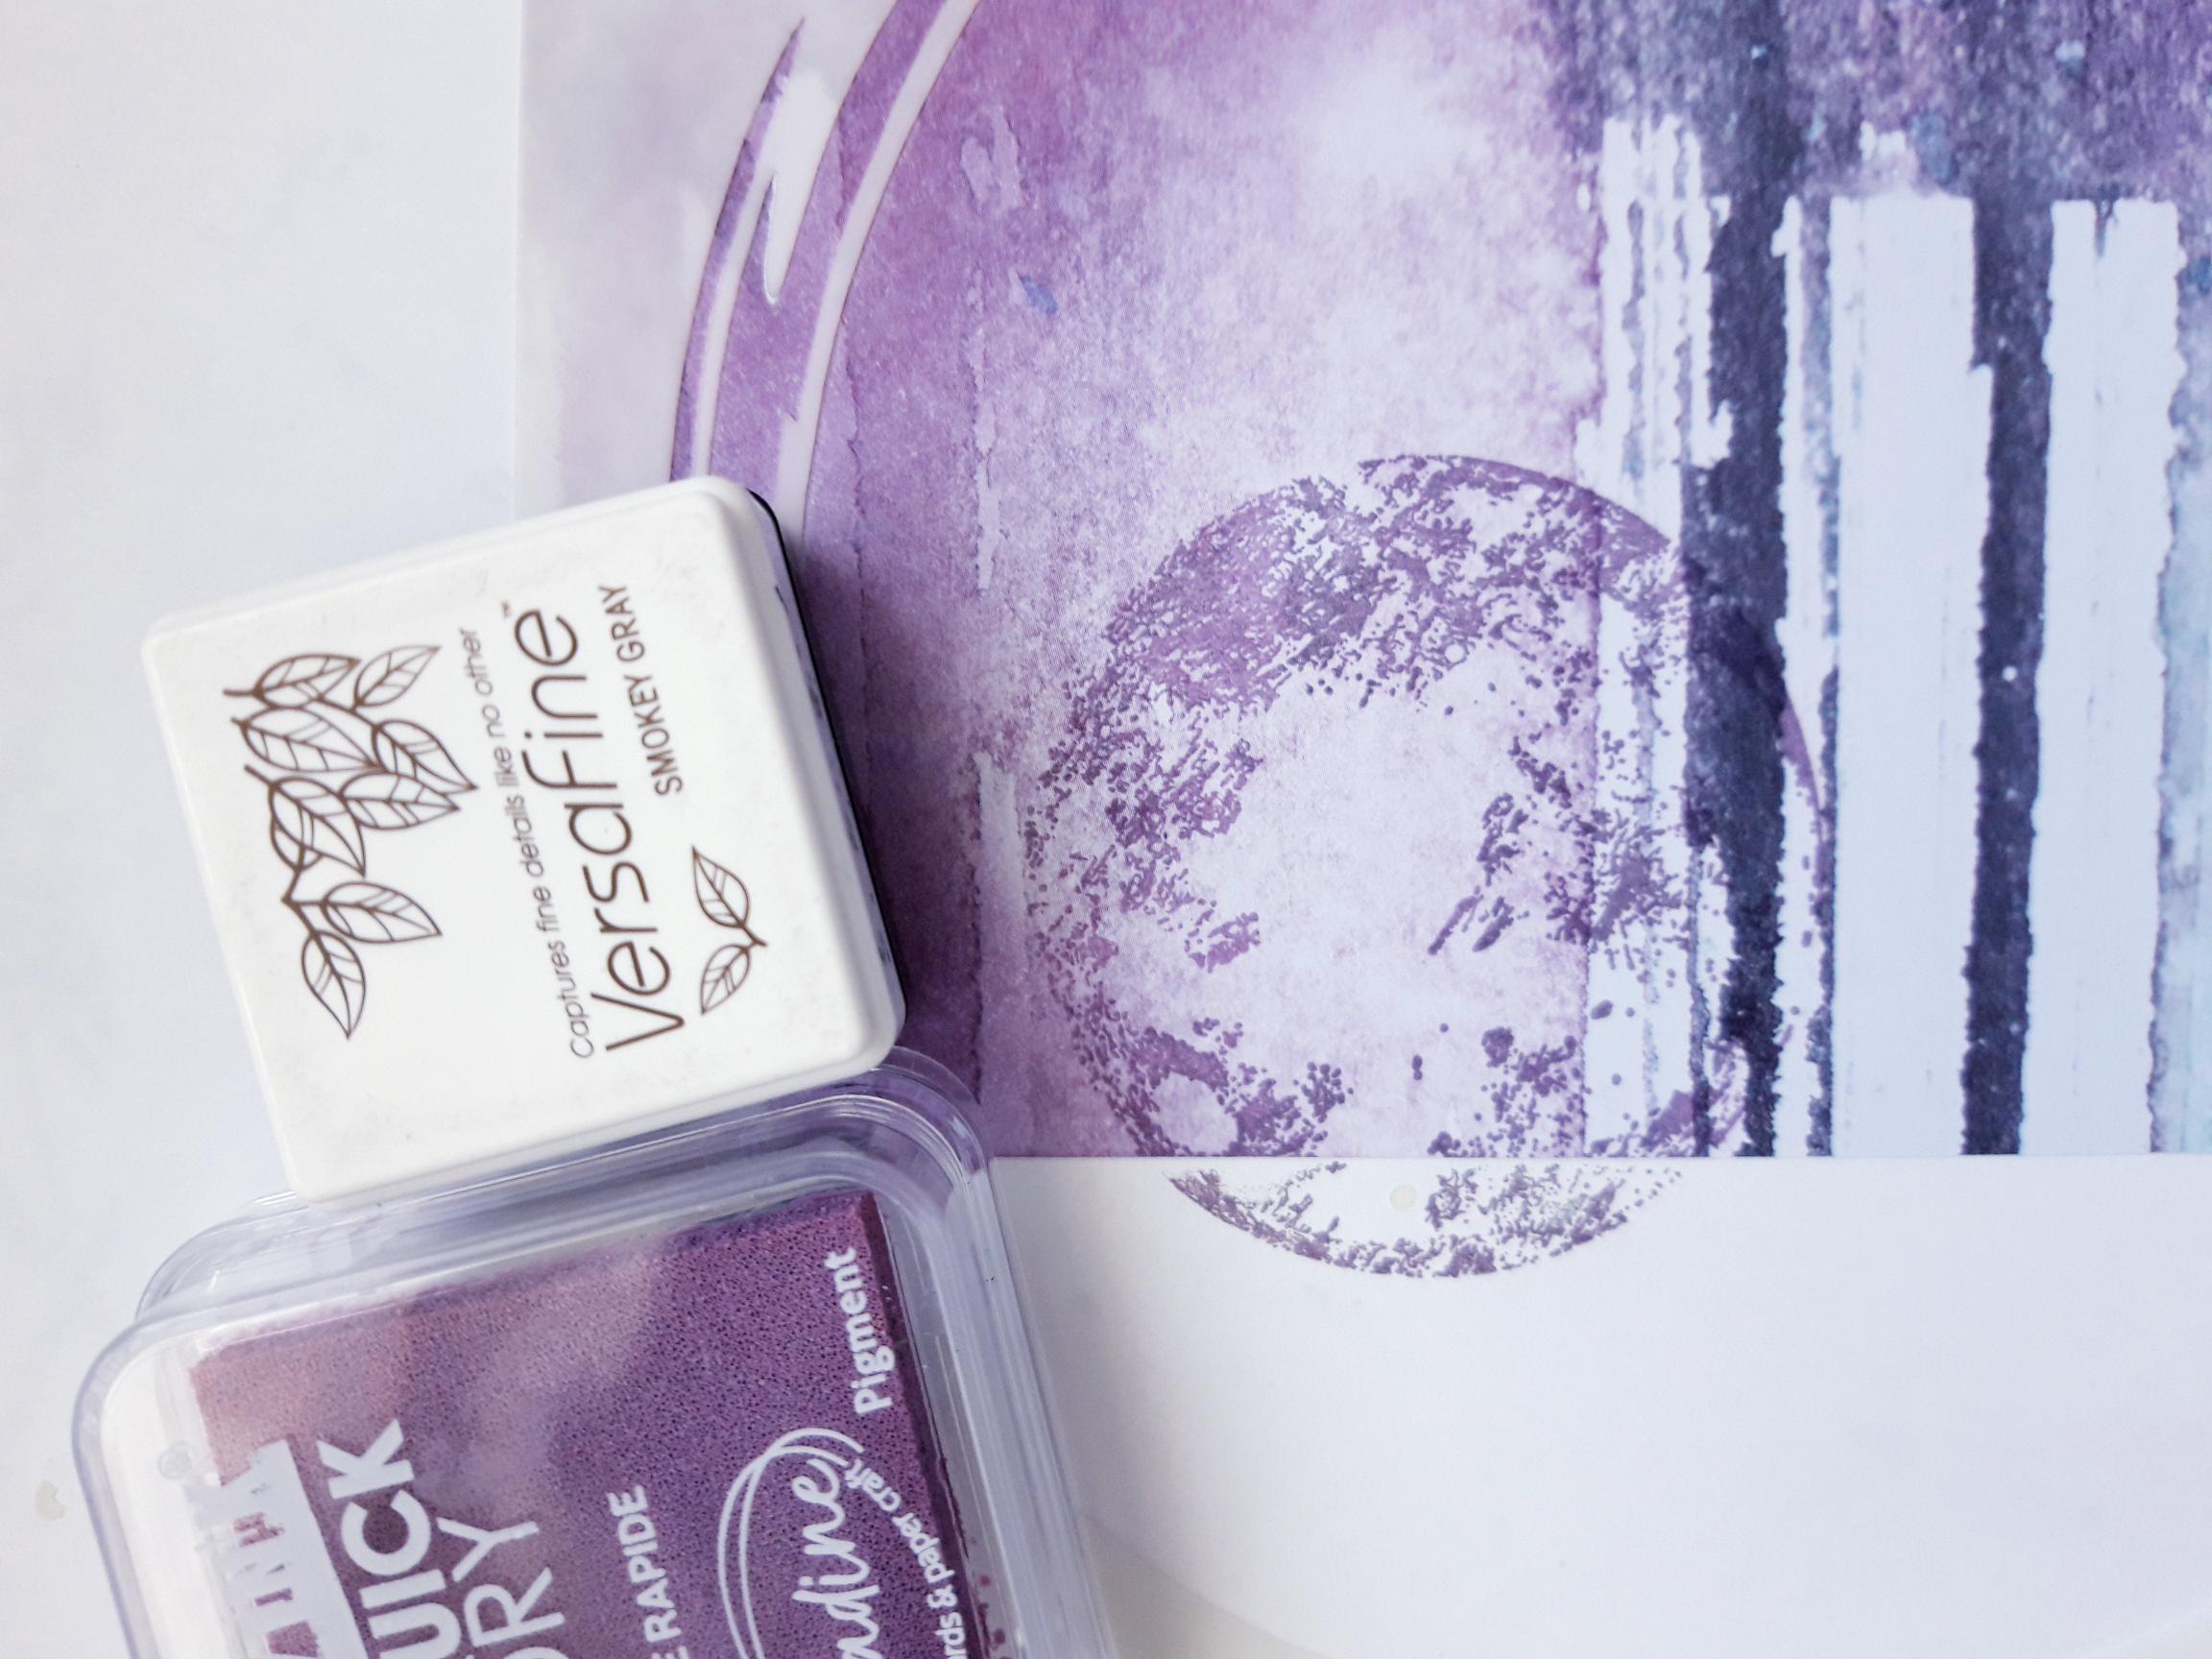
Ink up the moon stamp, with the same ink and stamp within the stencil, off the left hand edge of the paper. Reink the stamp randomly with the Smokey Gray Versafine, and restamp over your moon. This adds definition and gives the appearance of shadow. Remove the stencil. |
|
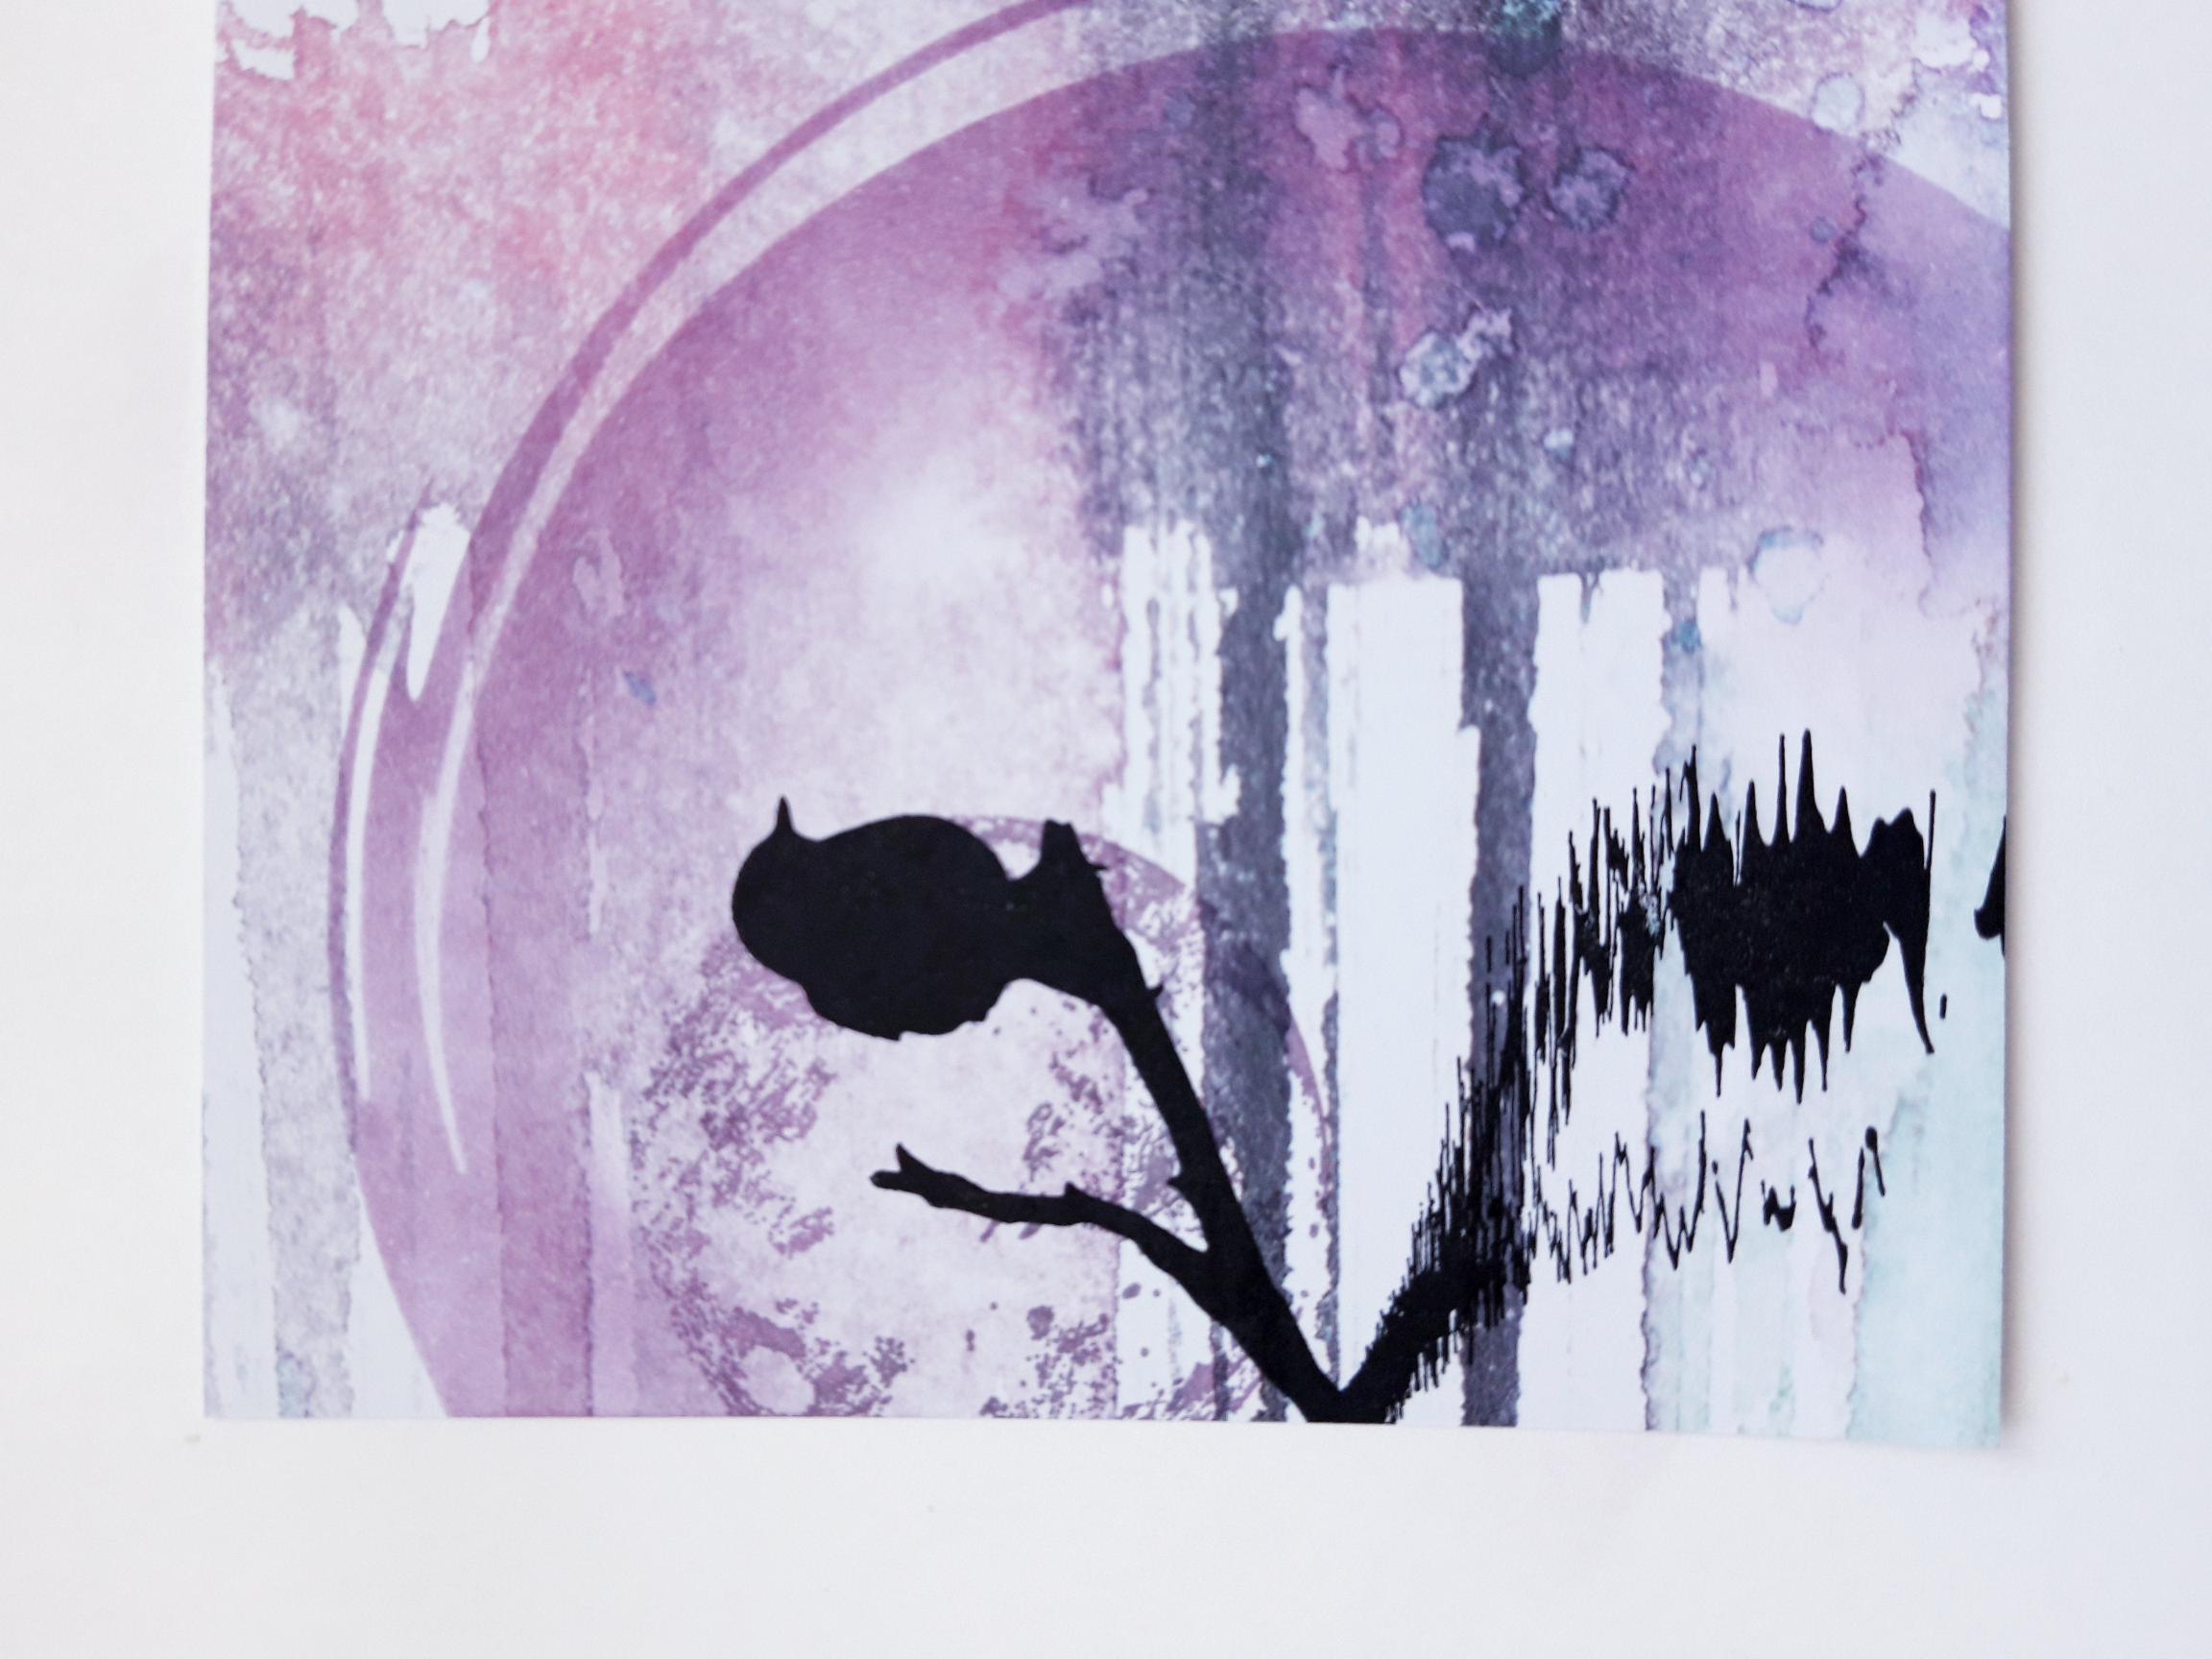
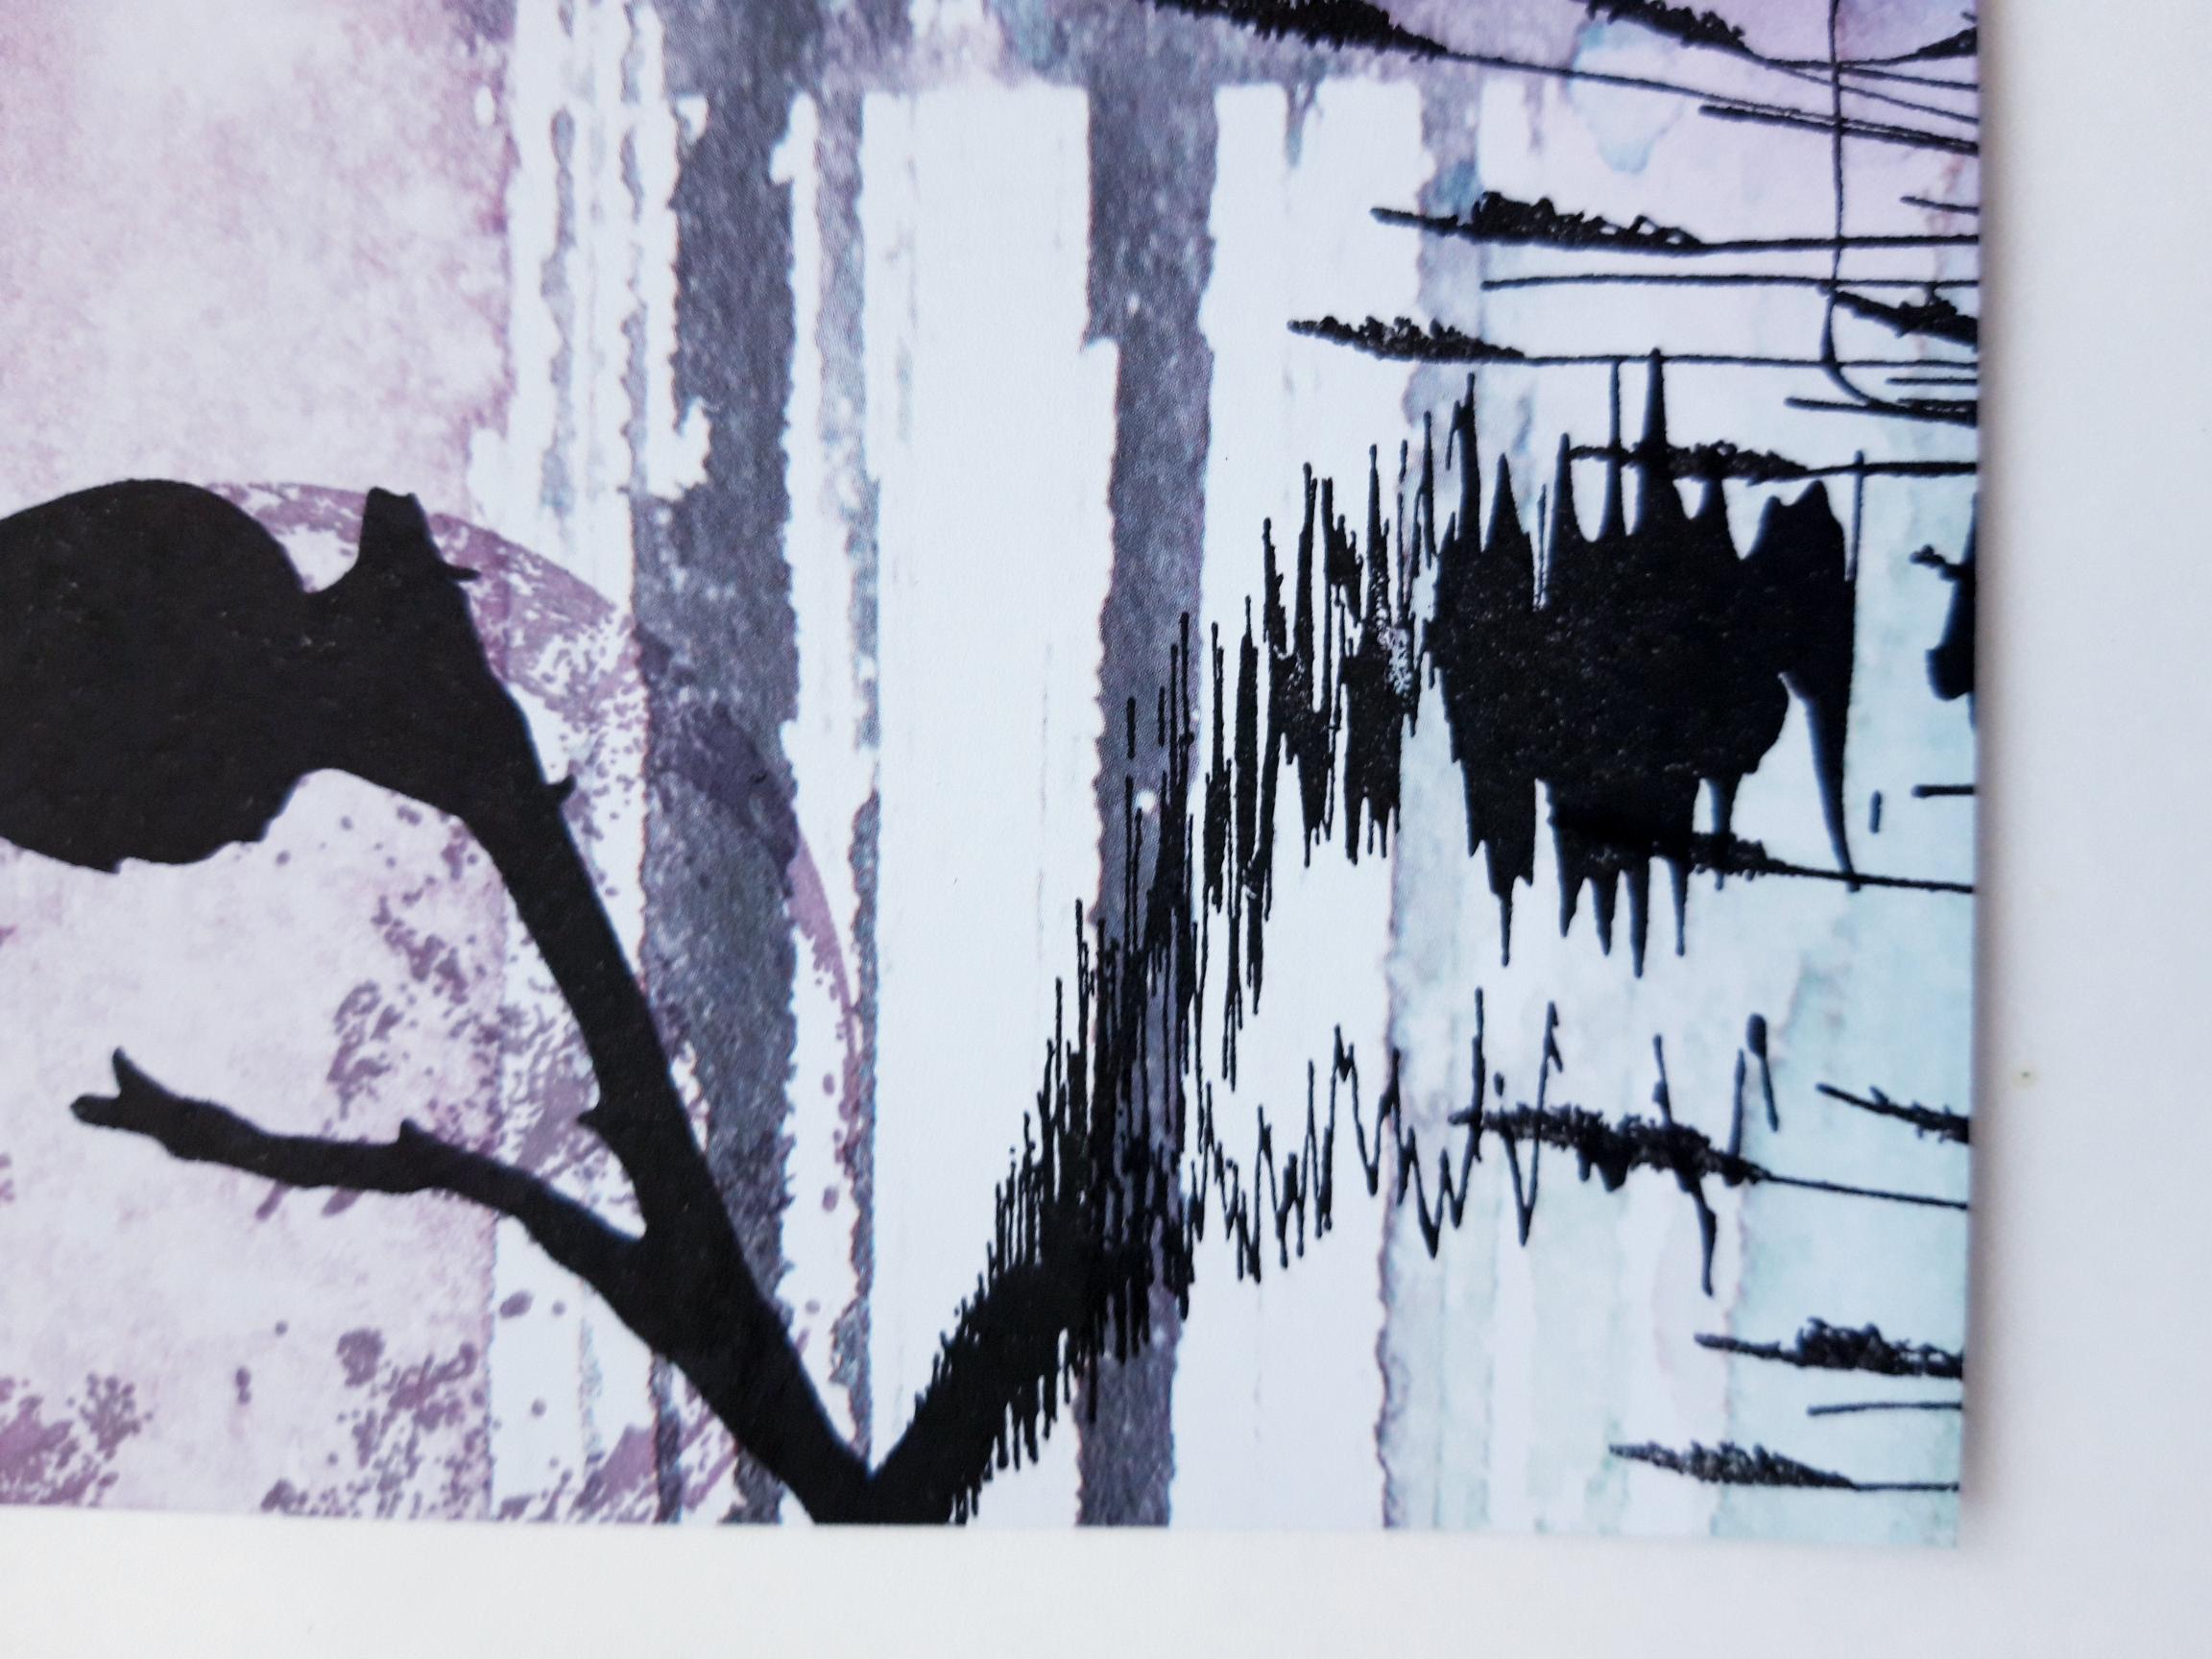
Ink up the bird reflection stamp with the Onyx Black Versafine, and stamp centrally, within your inked circle, just off the left edge of the paper. |
|
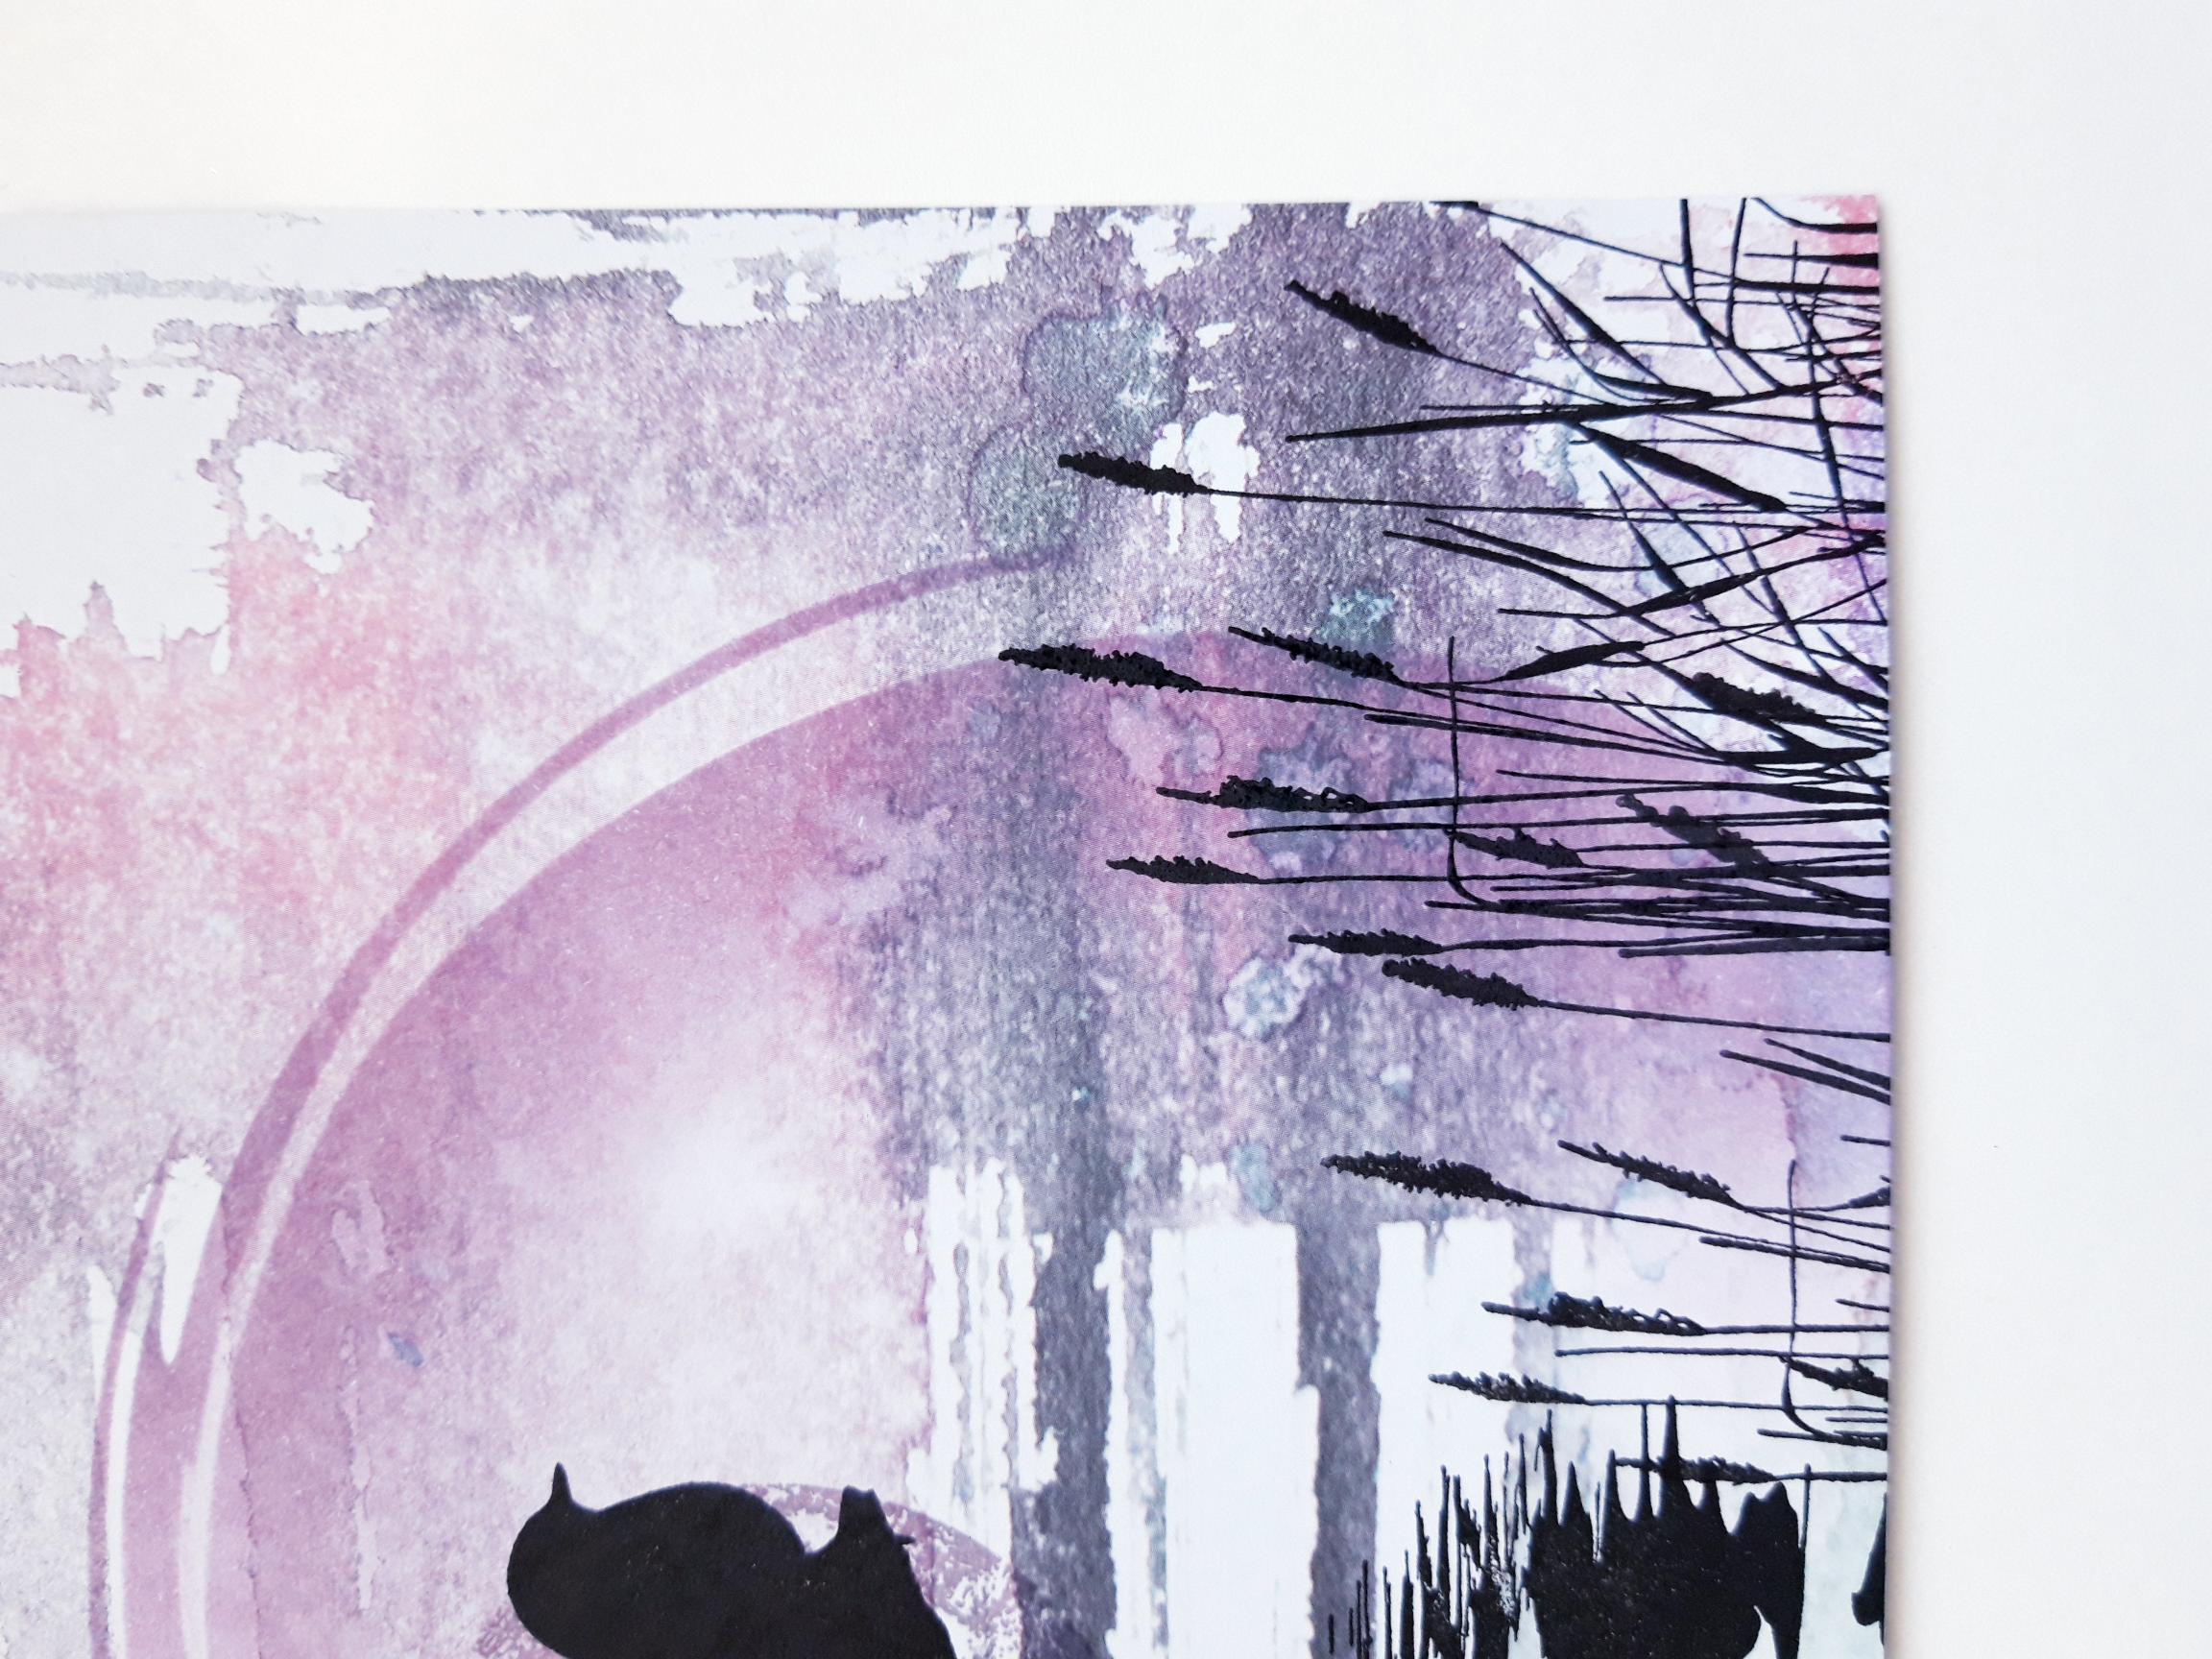
Ink up the grasses stamp with the Onyx Black Versafine and stamp coming up from the bottom, right hand corner. Reink and stamp to the left of this, at a different height. You can also use first and second generation stamping, to add dimension. |
|
Reink and stamp it just peeking up, from the bottom left of the paper. |

|
Blend the Izink green Pigment ink around the bottom left and right hand corners of the paper, to make the green in the paper, more intense and vibrant. |
|
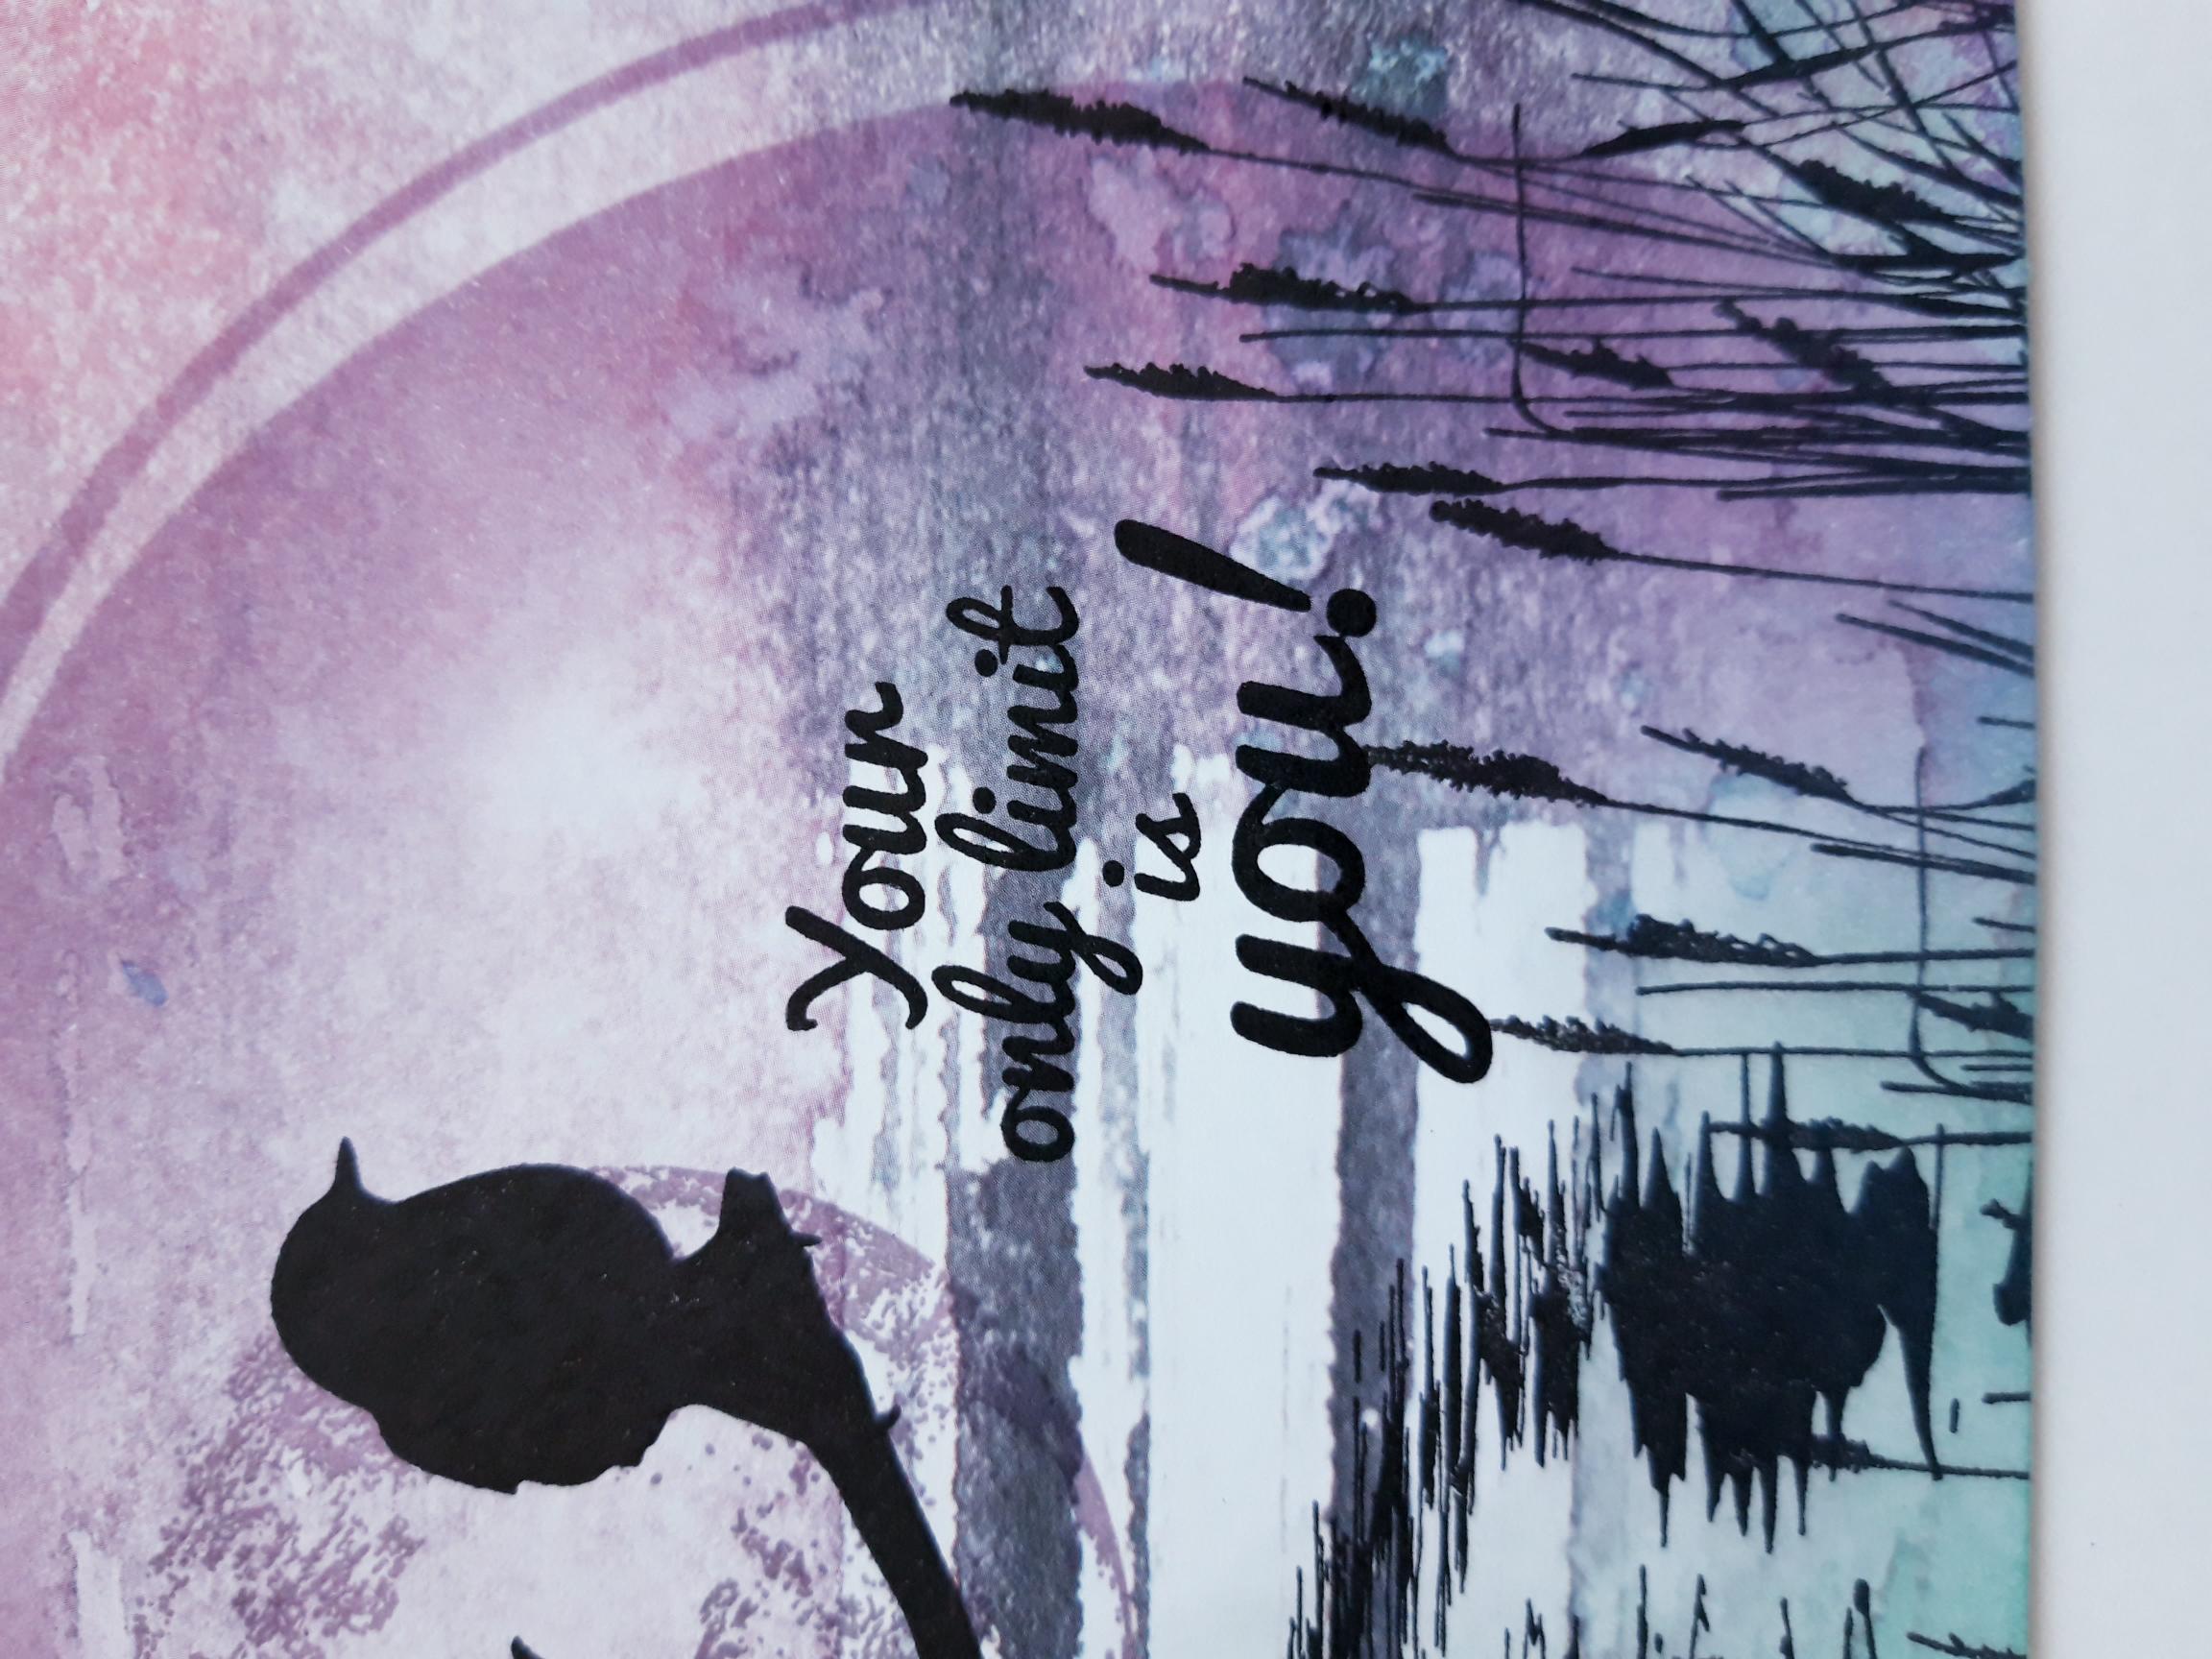
Ink up the sentiment with the Onyx Black Versafine and stamp to the right of your artwork. |
|
Use a white gel pen to add accents and highlights, to your artwork. On the grasses, bird, reflection, and around areas of the inked circle. |
|
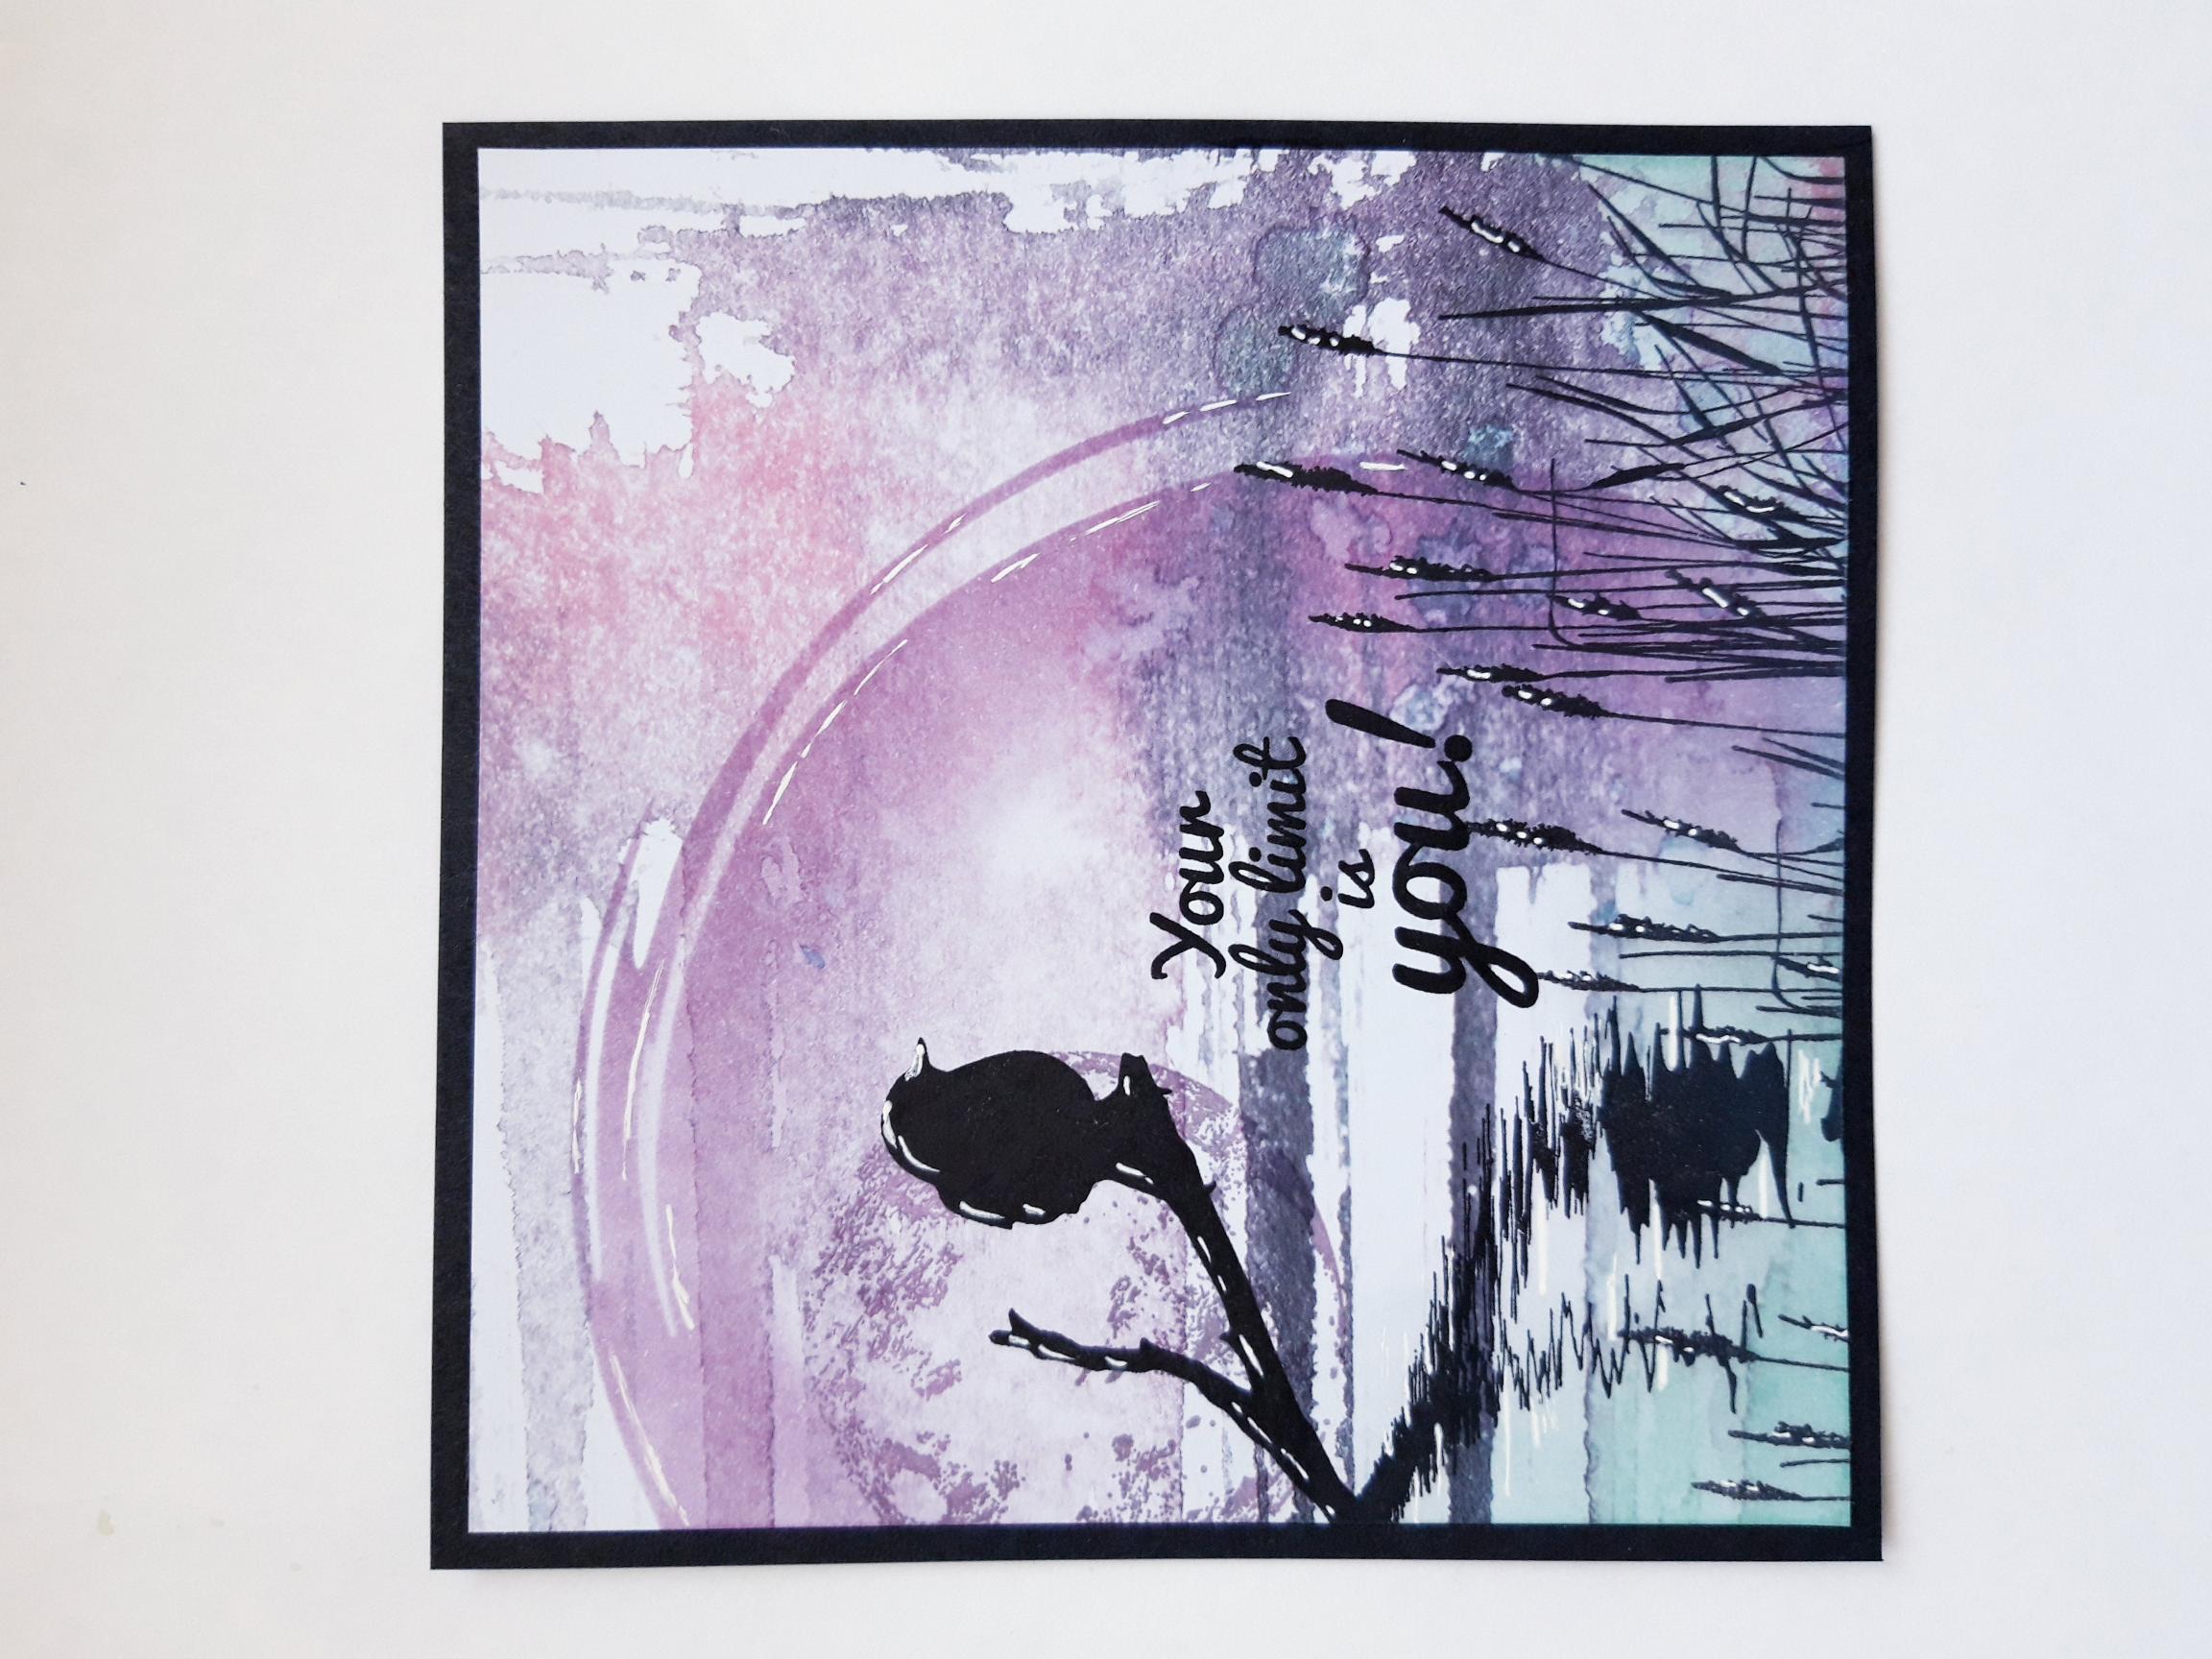
Adhere your dried artwork on to the black card. |
|
To finish, adhere on to the front of your stamped card blank. I chose to adhere mine at an angle, but you can do yours straight, centrally, as preferred. |