Give your friends $10 off their first order!
Refer a FRIEND


WHAT YOU WILL NEED:
White card blank 7 x 7"
White cardstock 6 x 6"
Black cardstock 3 x 1"
Book page
Stamps from the set Thirsty Brush Blooming Fantastic
Stamps from the set Thirsty Brush No Rules
Stamps from the set Thirsty Brush Blooming Foliage
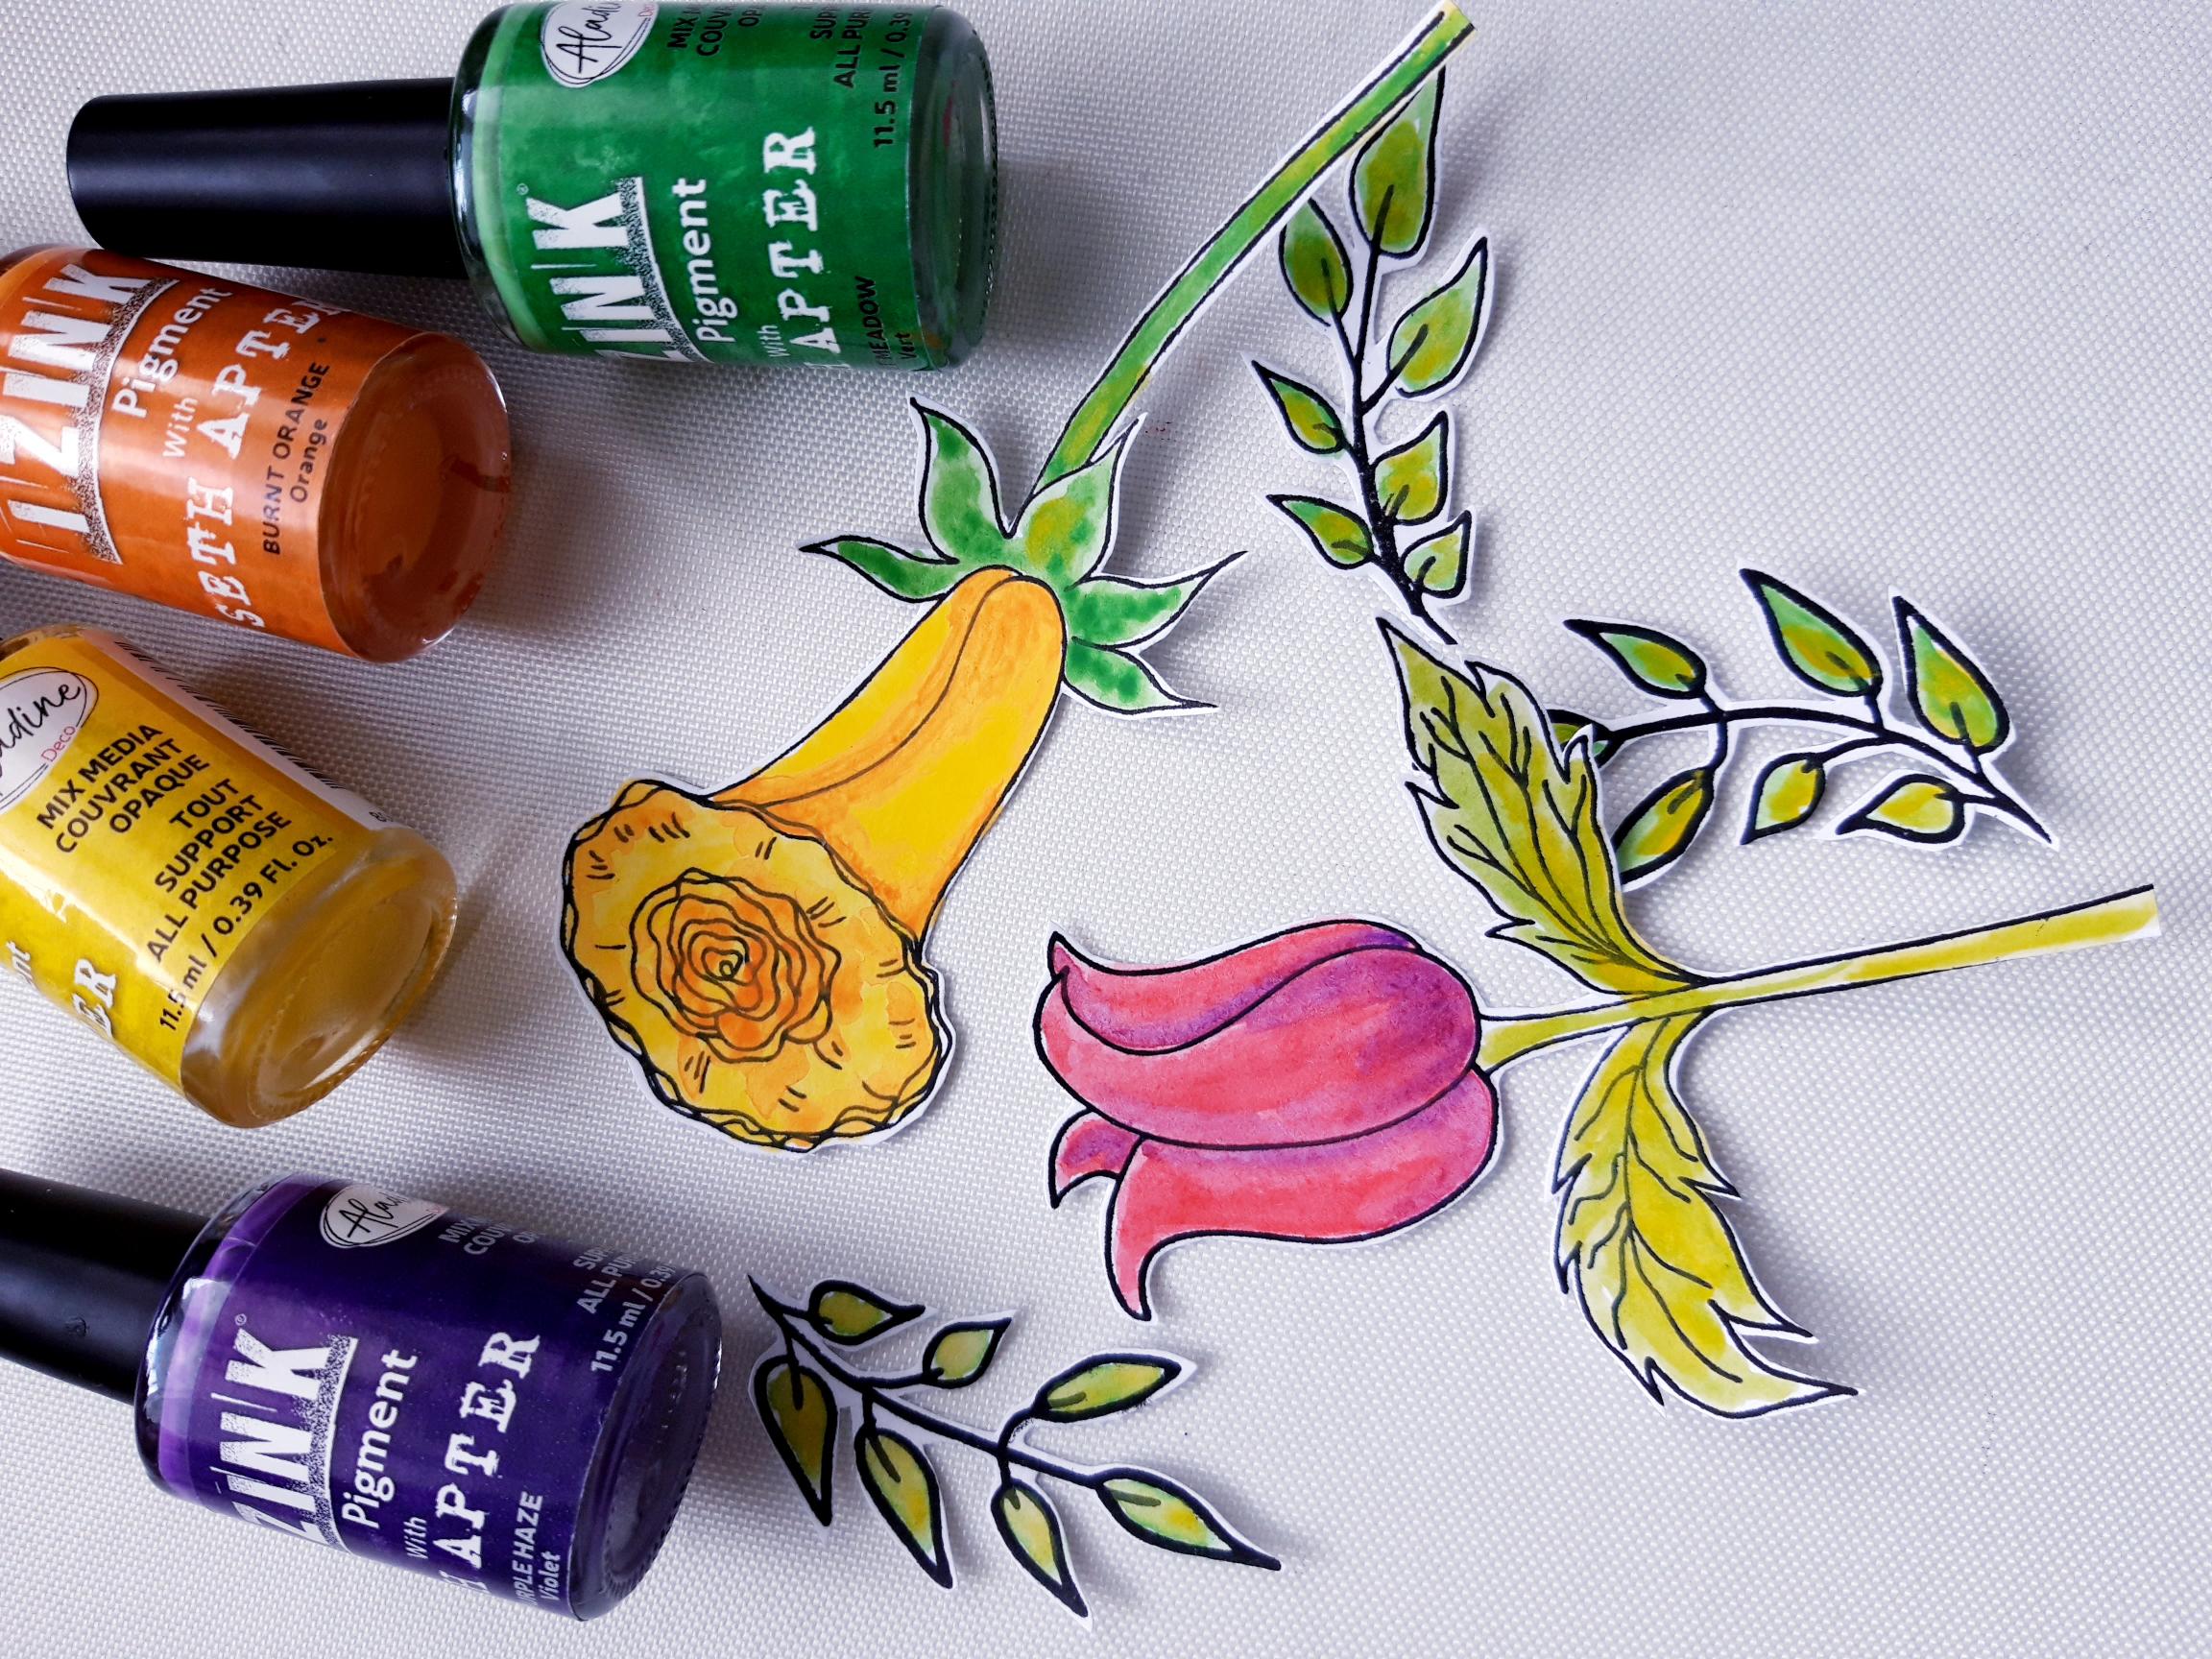
Izink Pigments: Burnt Orange, Mimosa, Rouge, Purple Haze, Wet Meadow
Onyx Black Versafine
Sequins: Down The Bay
White gel pen
Black fine line pen
Eureka 101
Foam Pads
Perfect Together Glue
Paper Trimmer
Paint brush
[click image to enlarge] 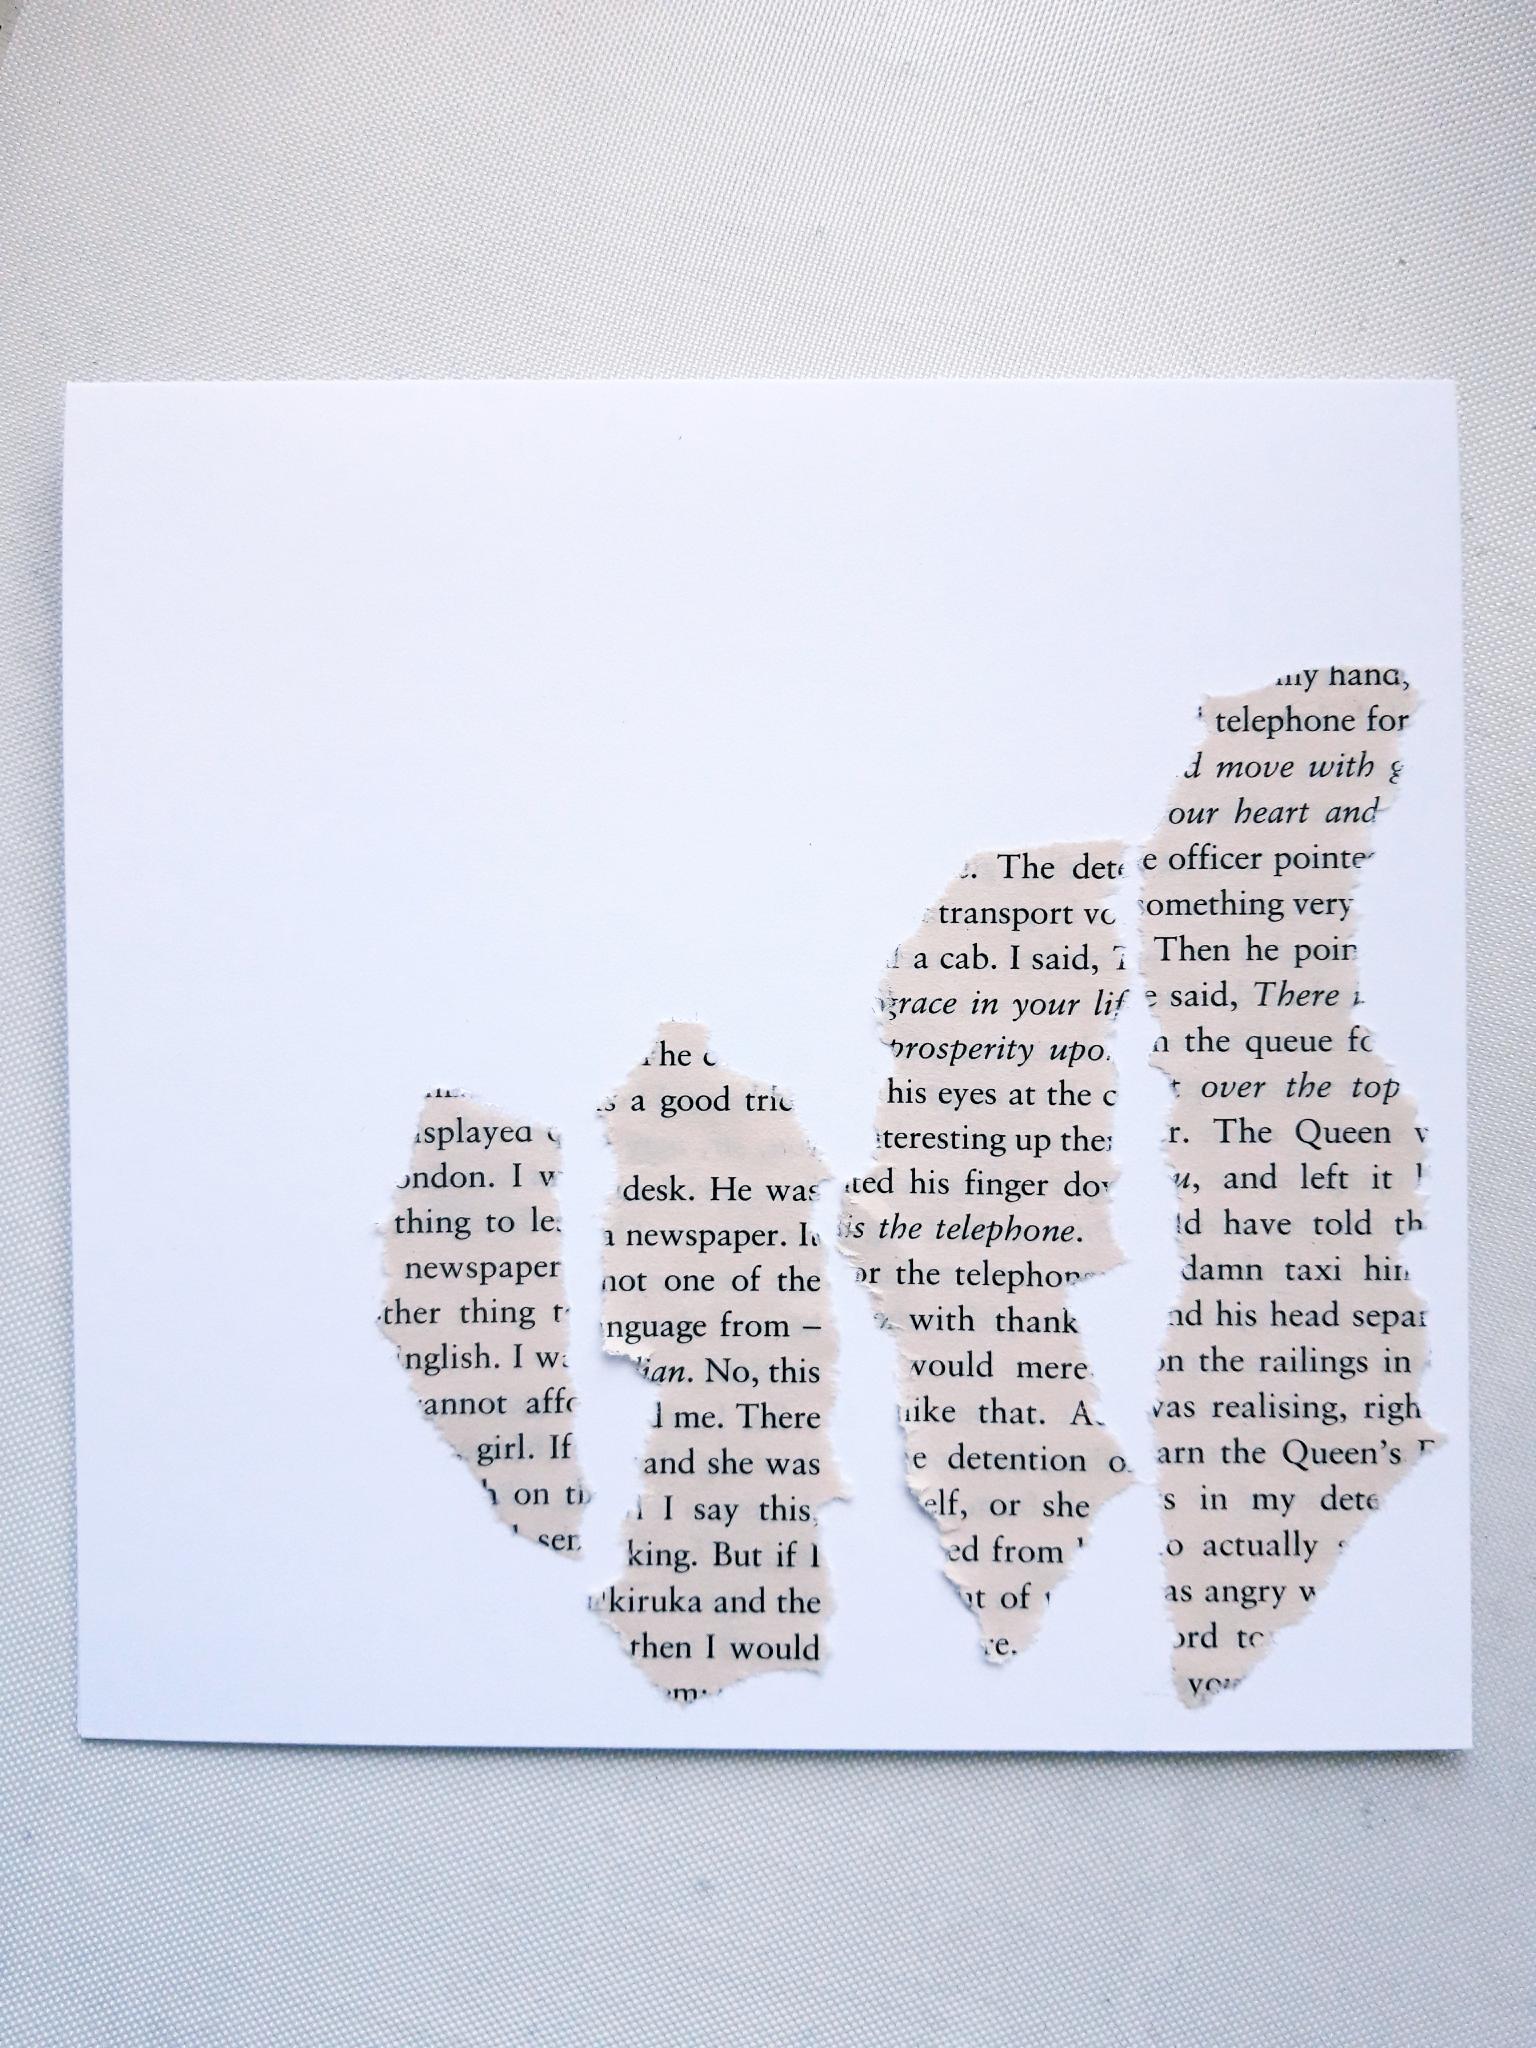
|
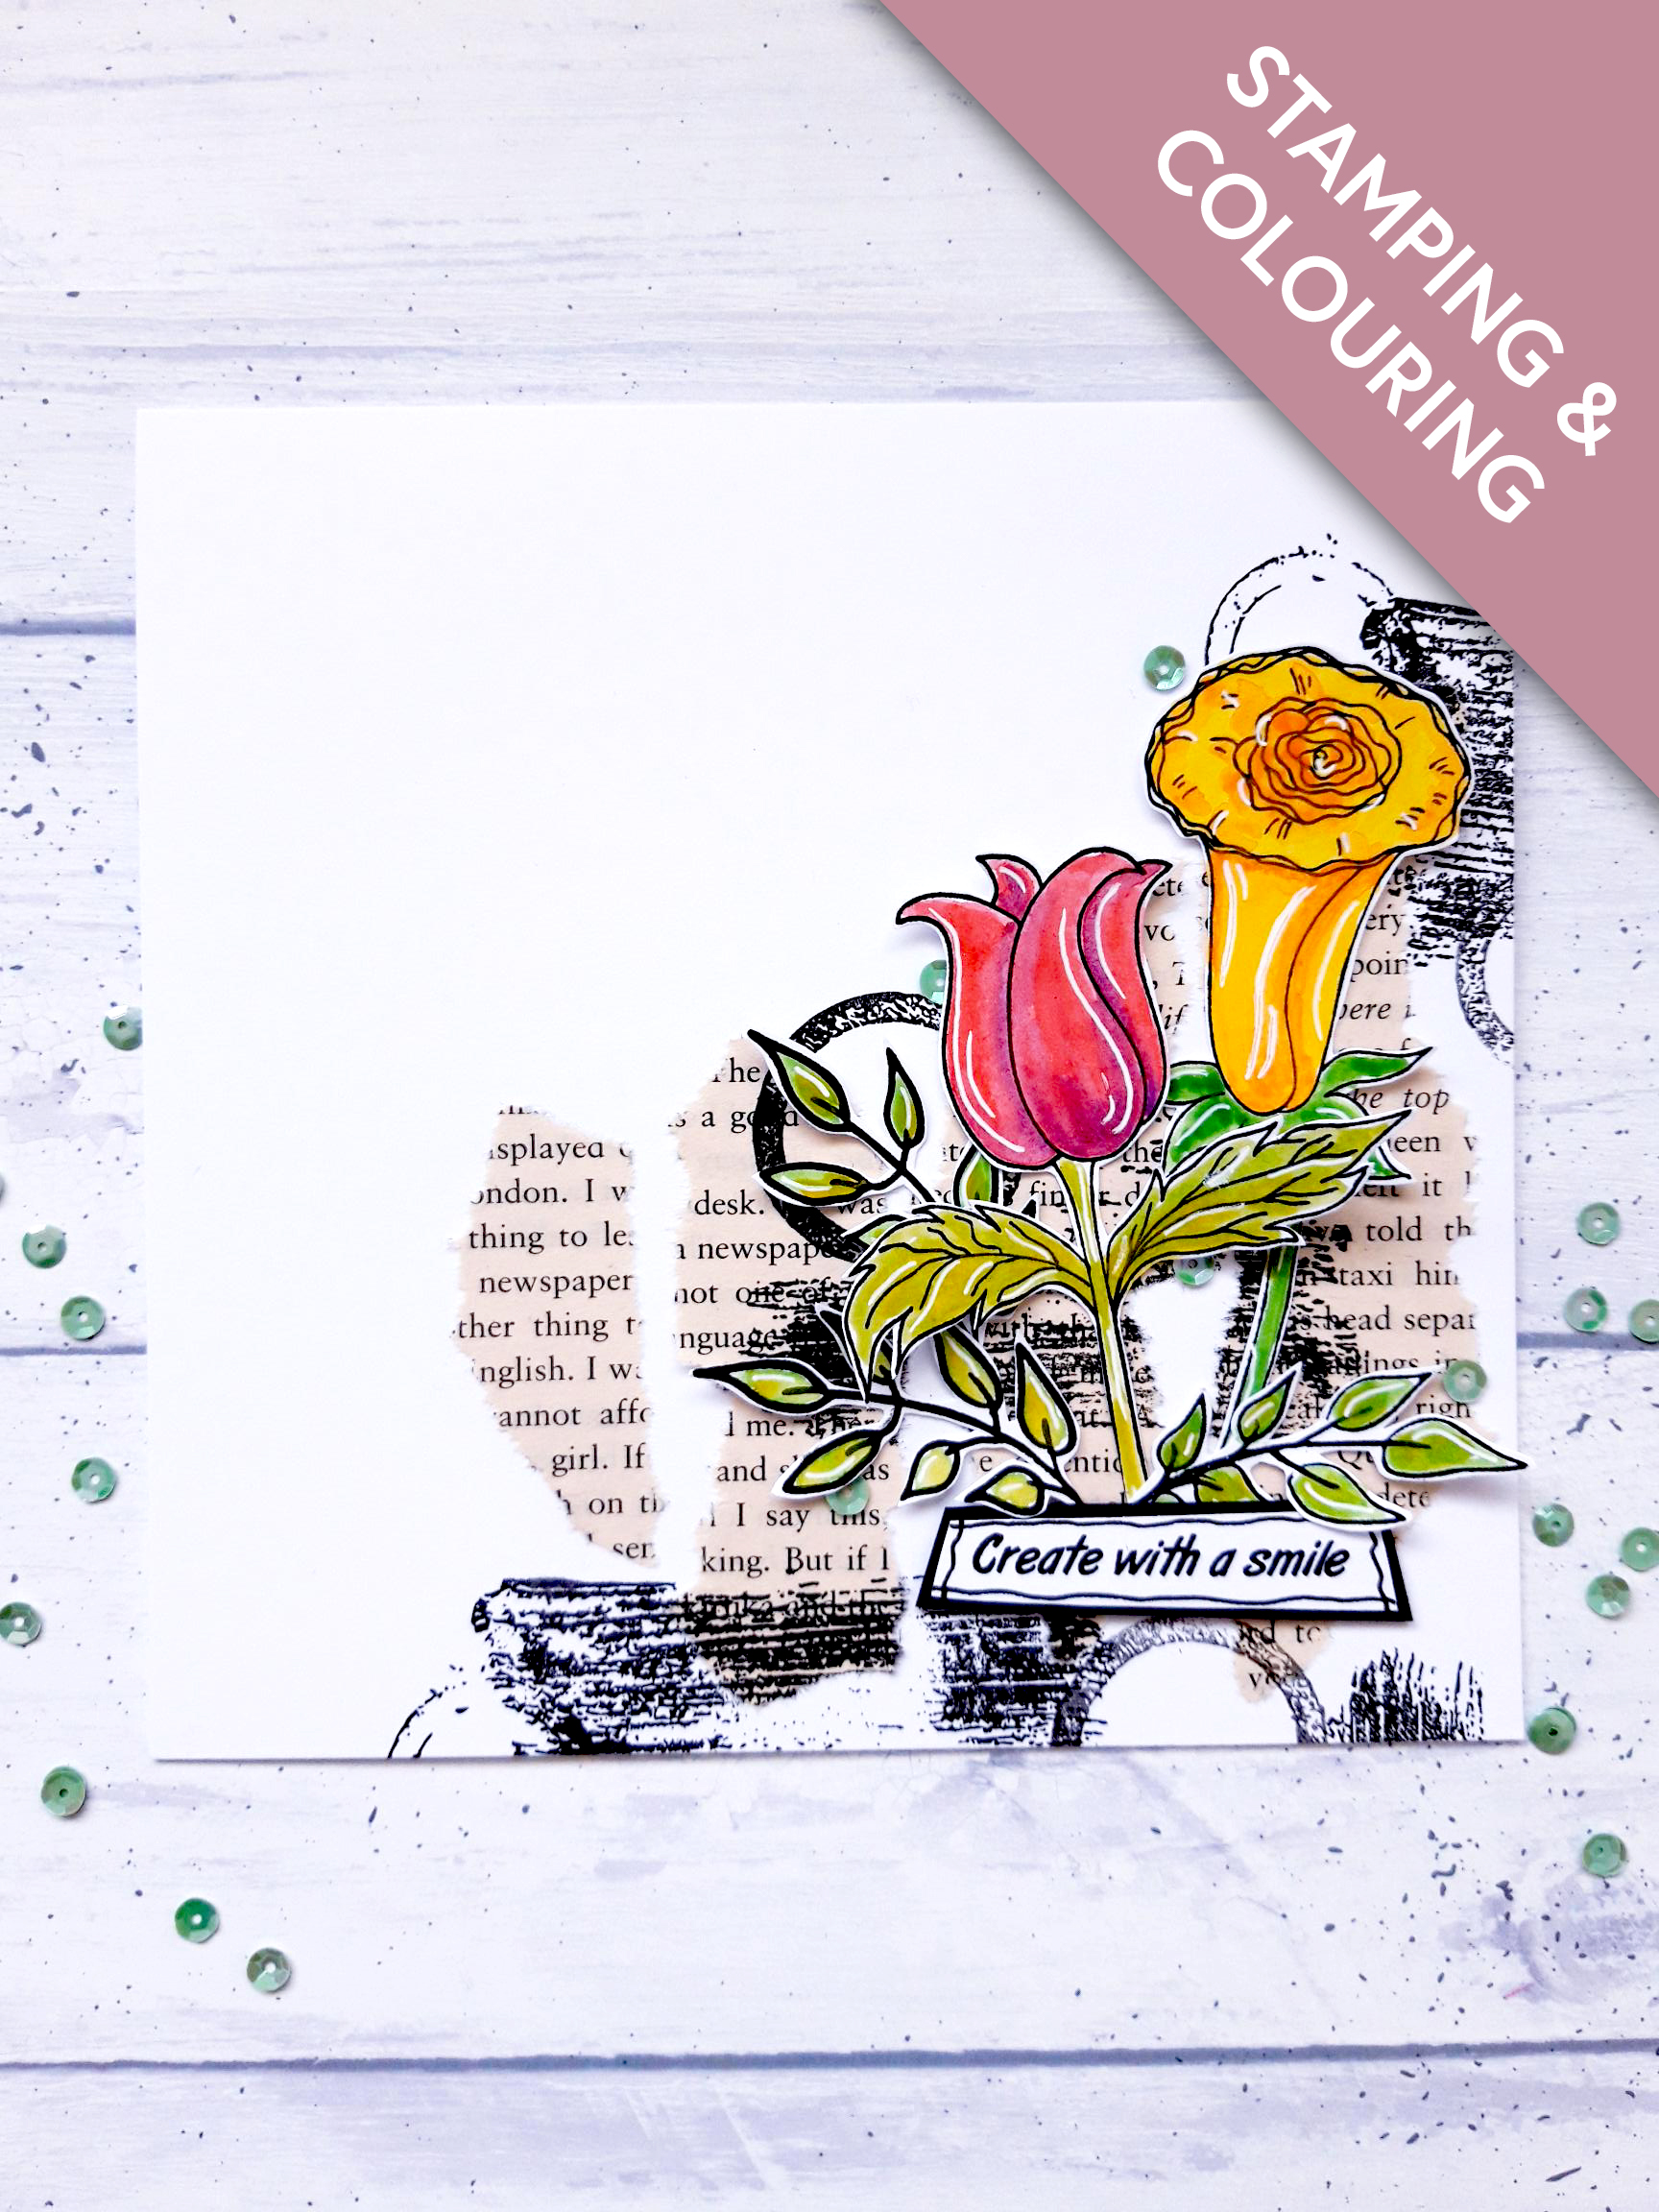
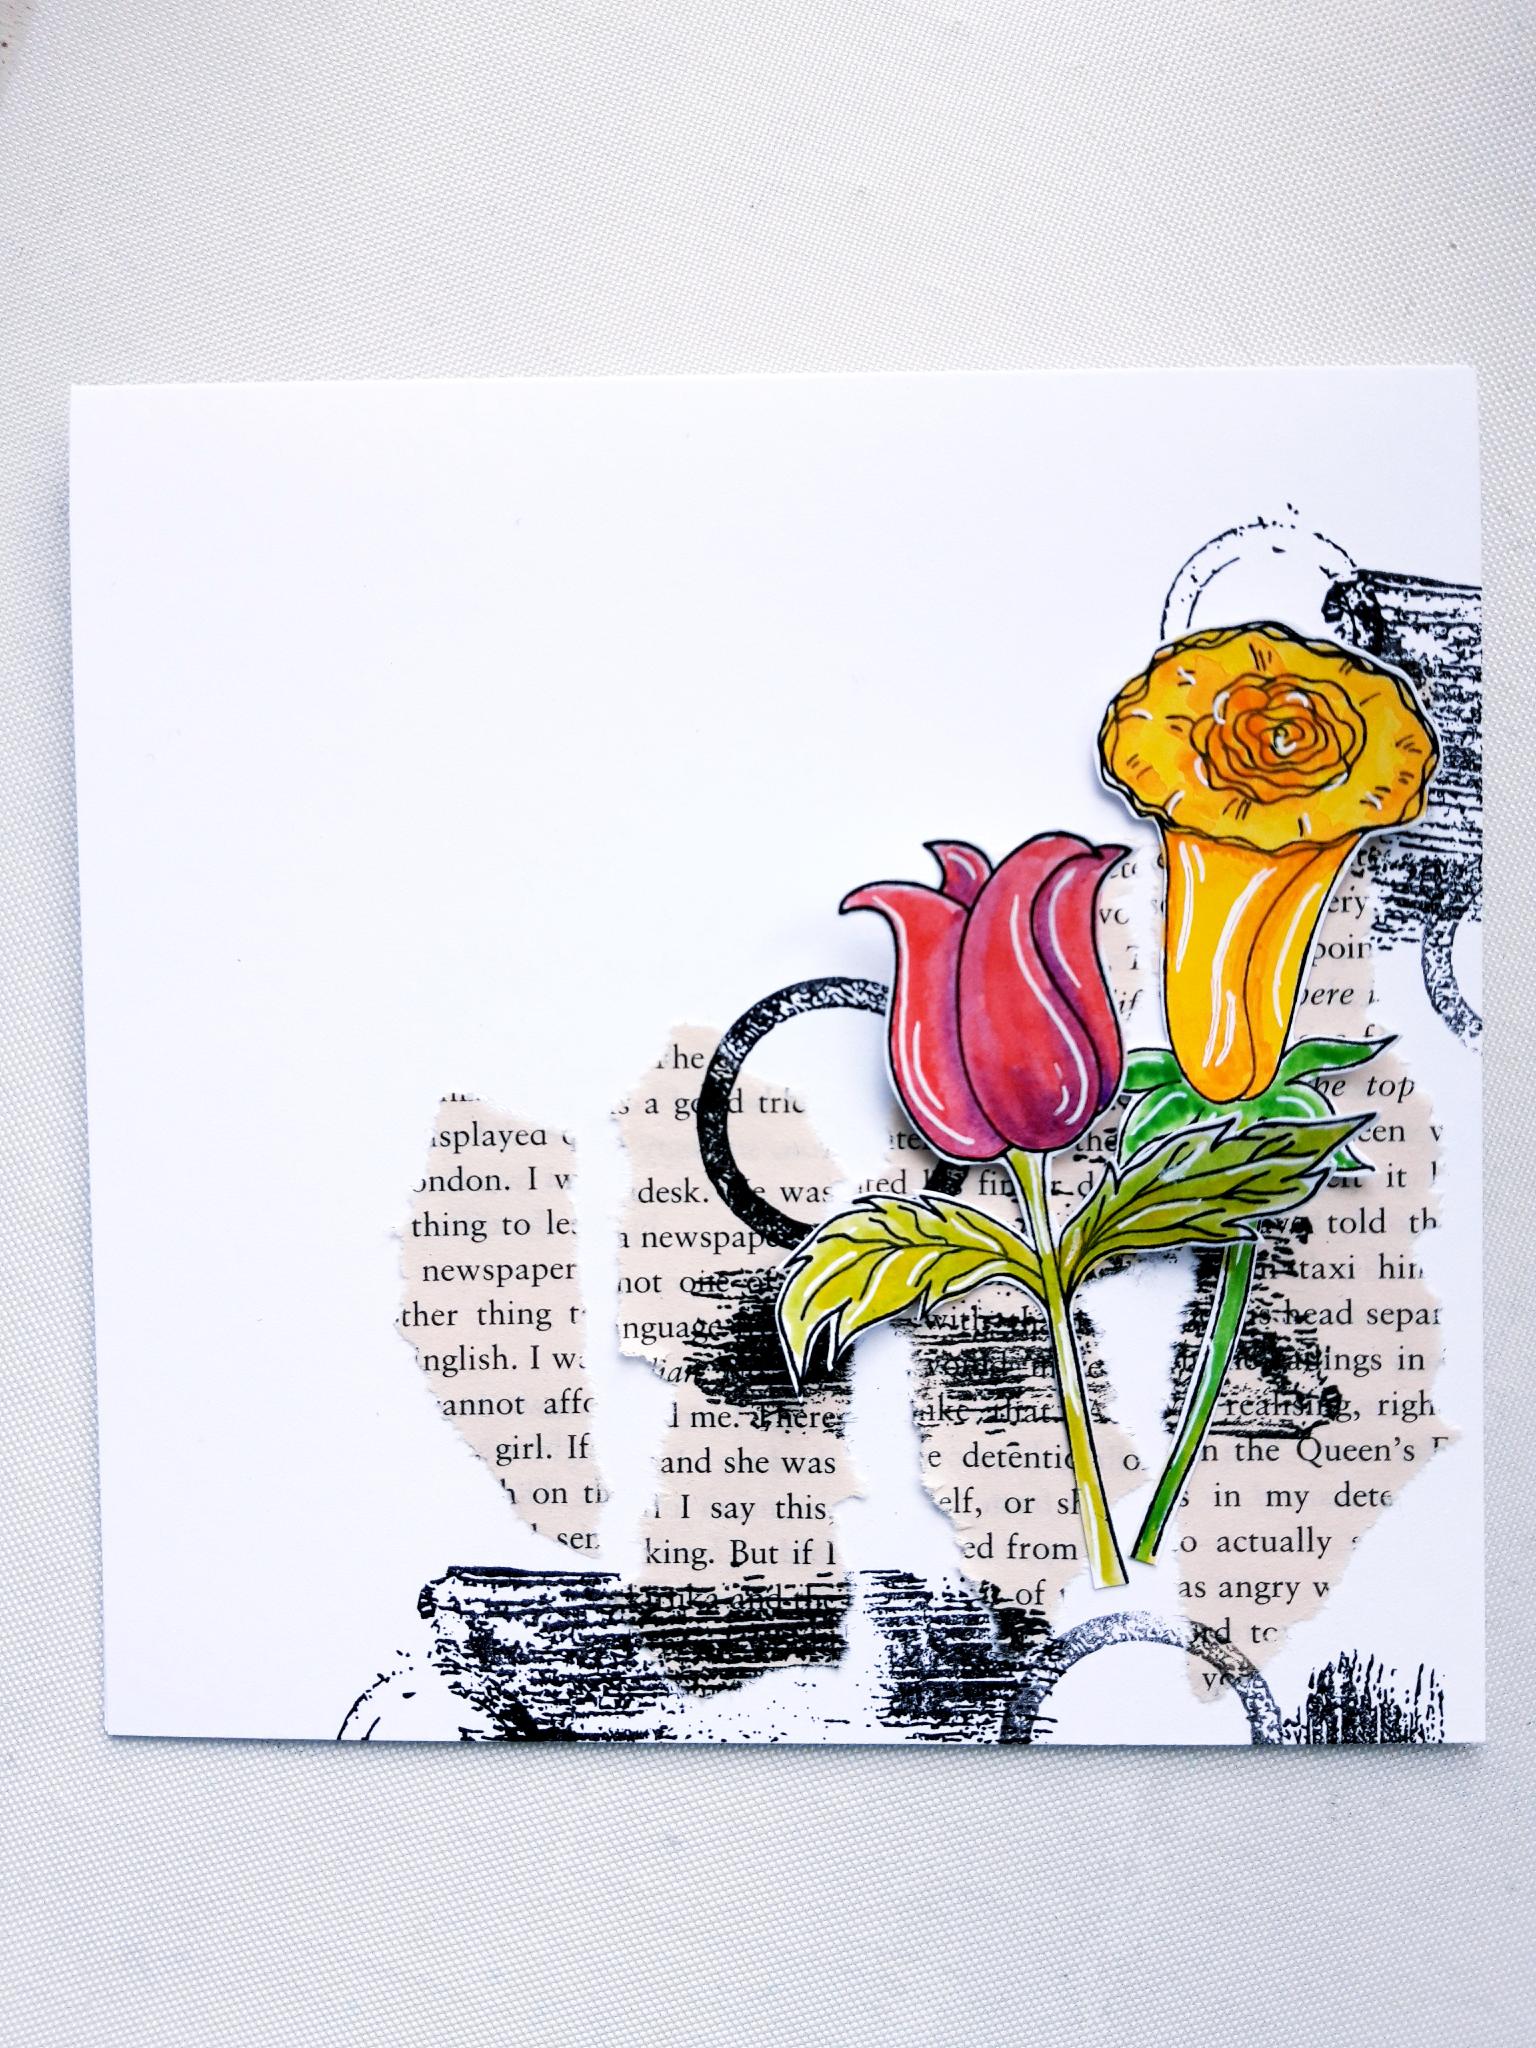
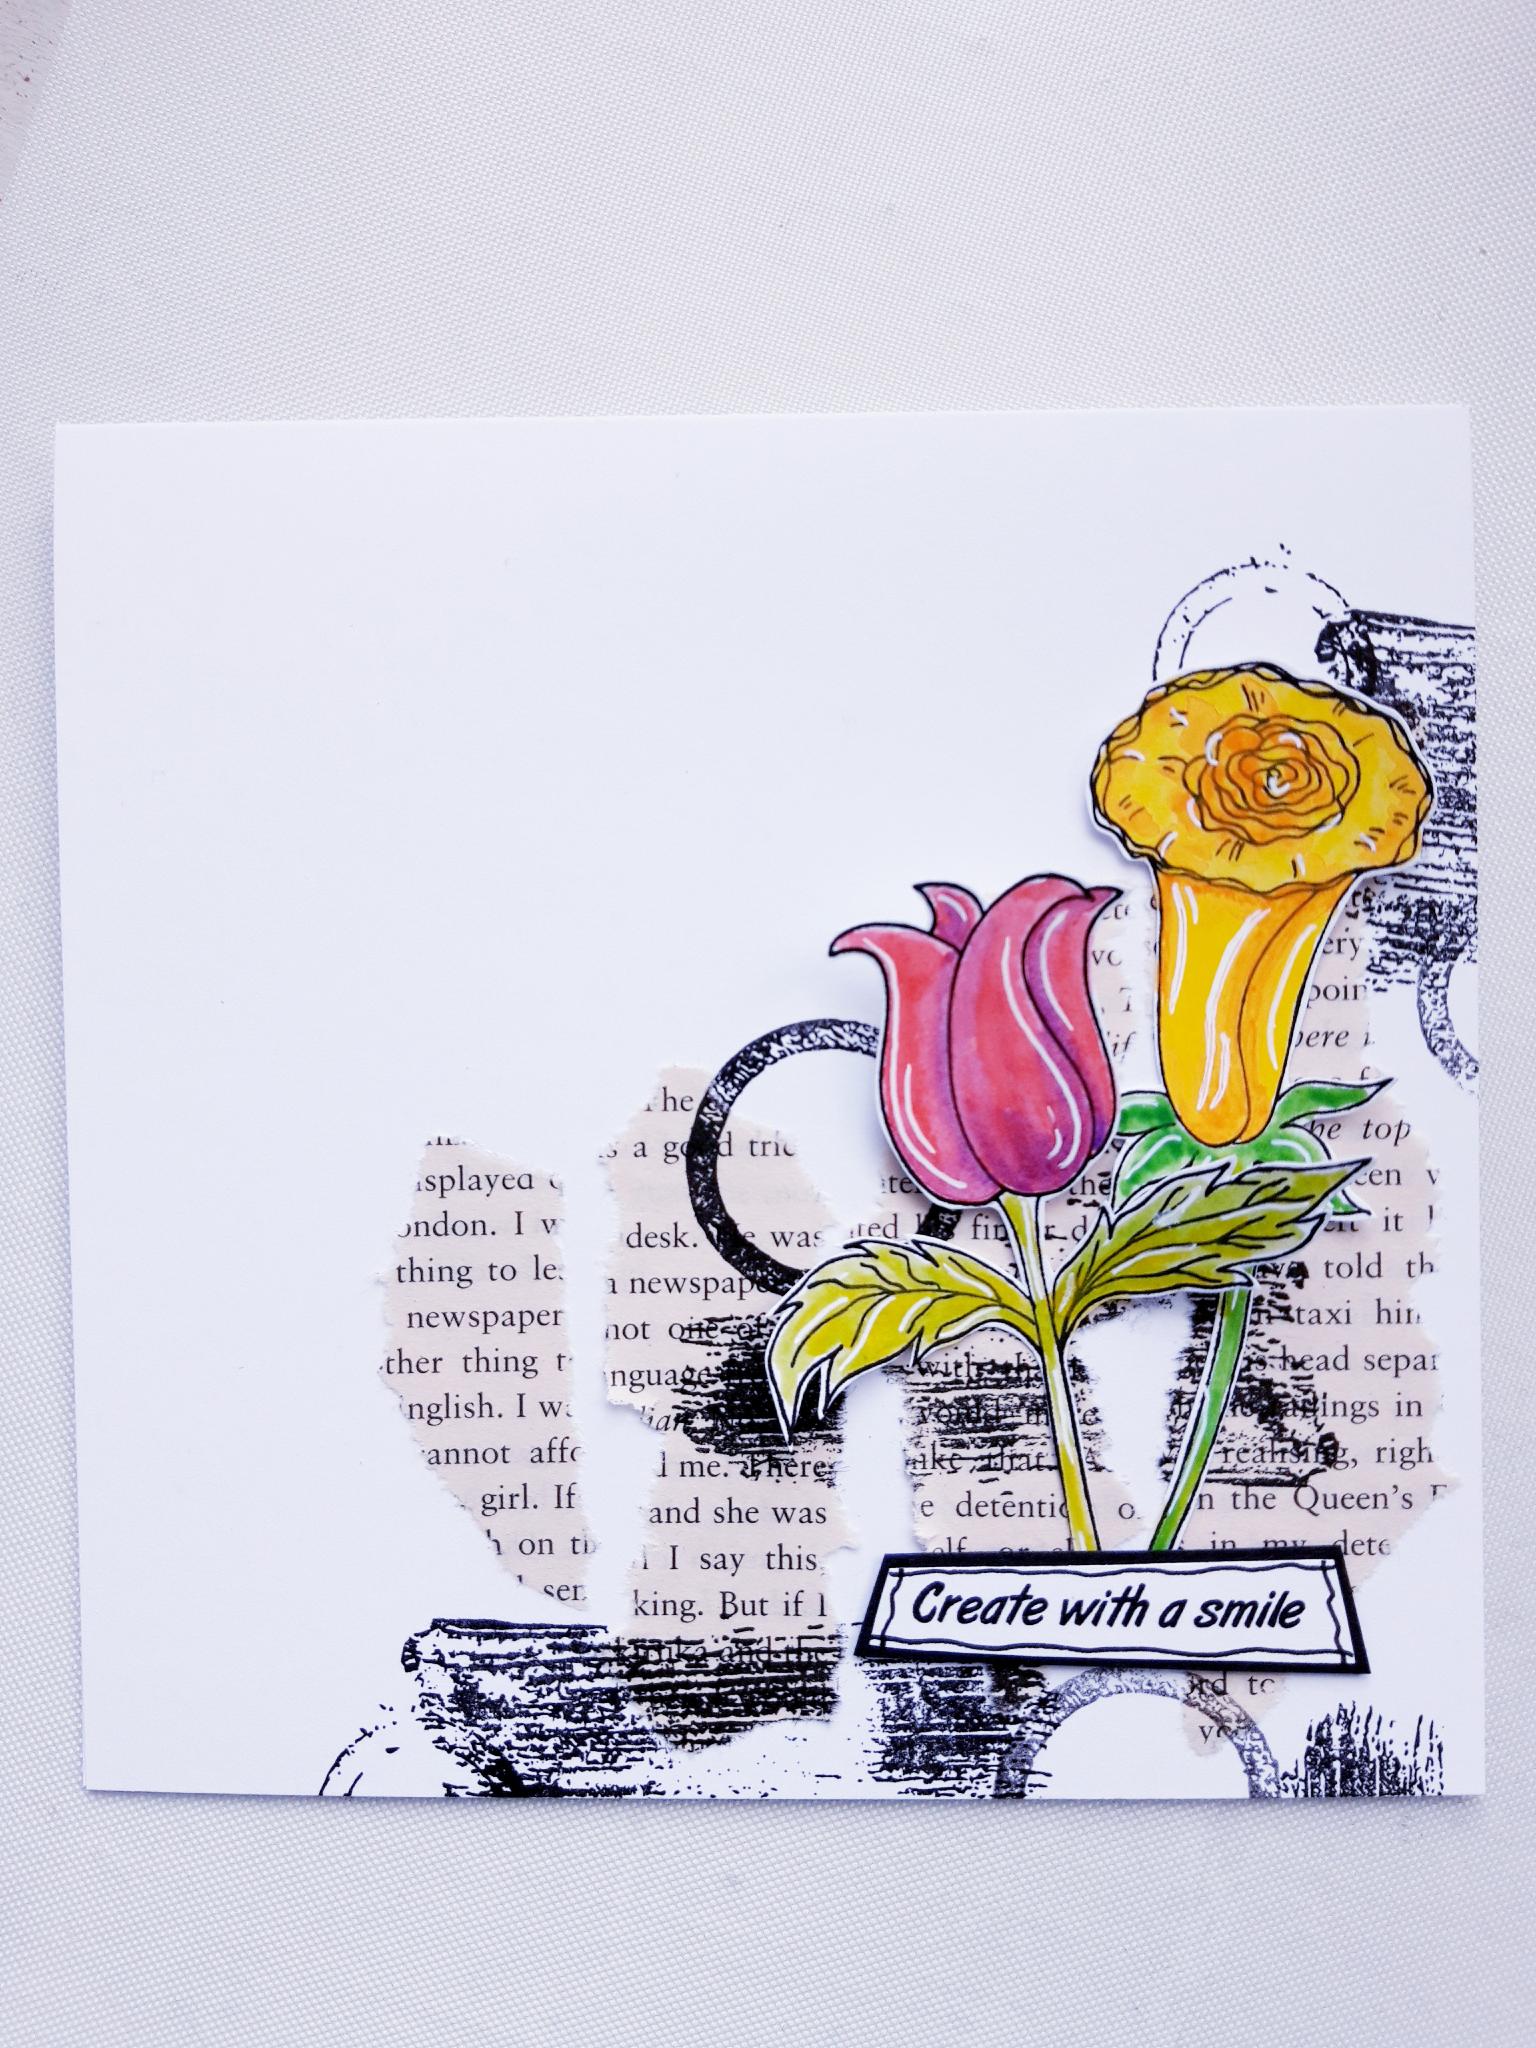
Tear the book page in to 4 strips, of random sizes, and glue them on to the front of your card blank. |
|
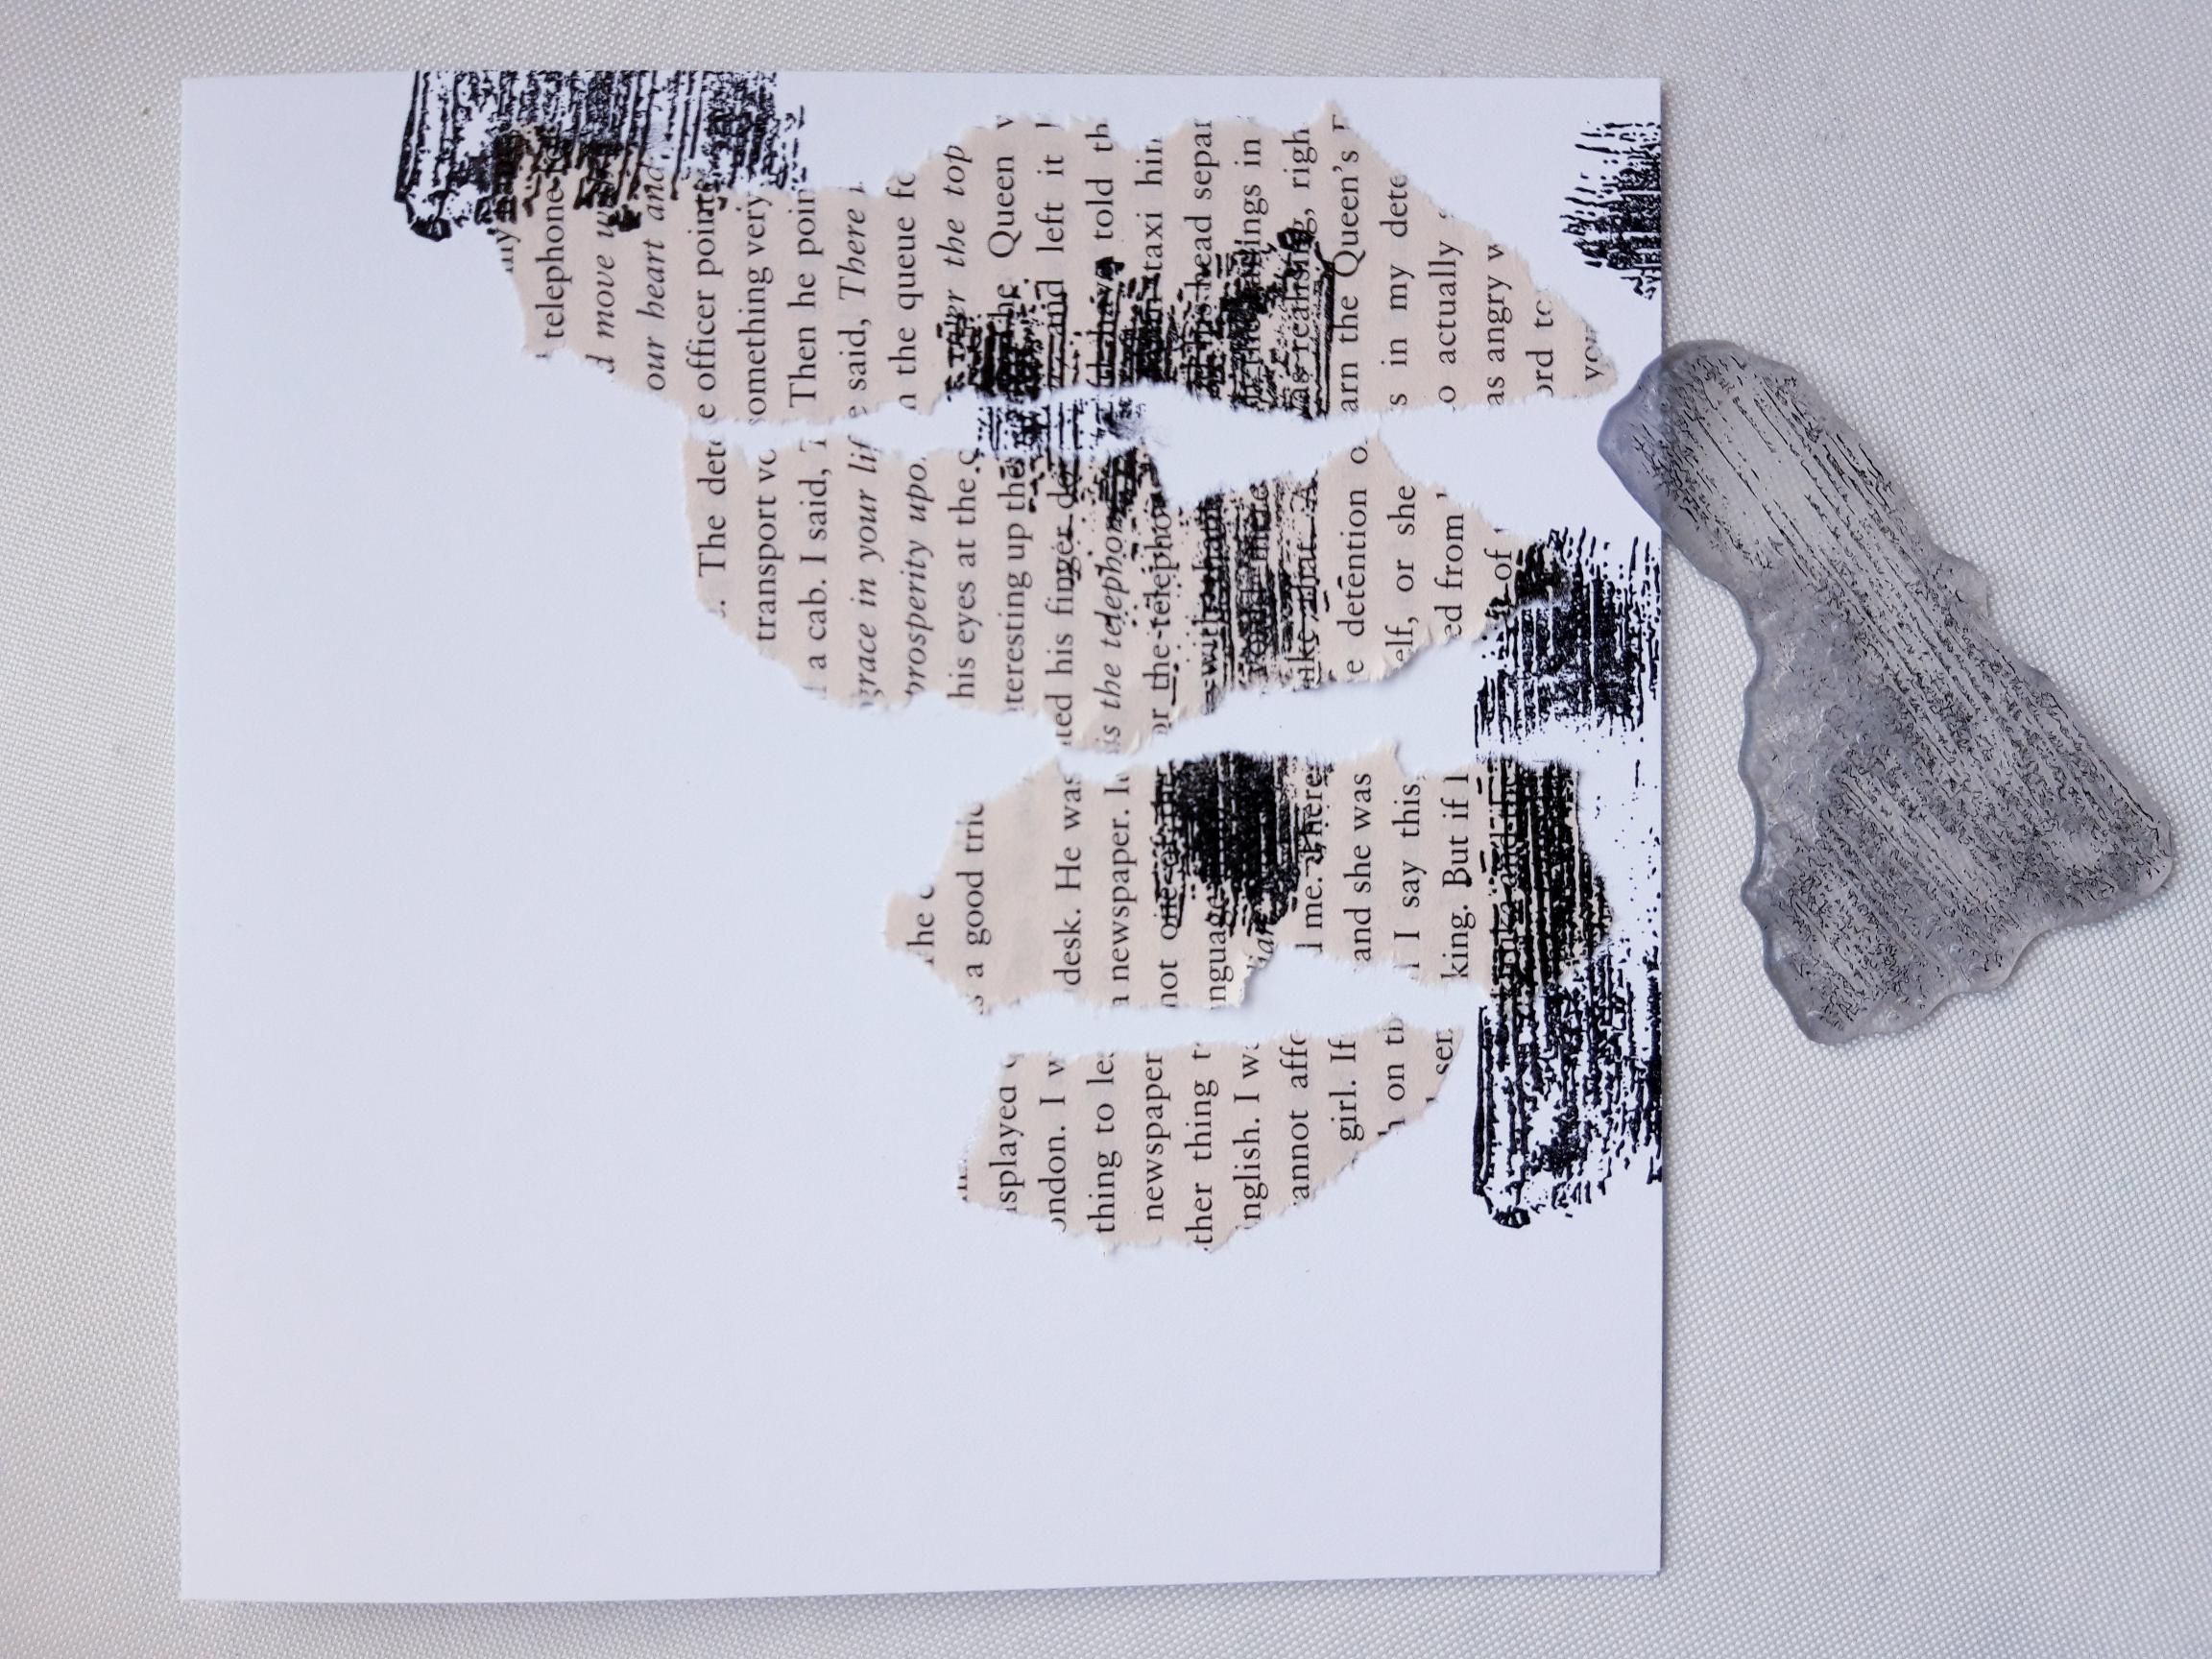
Ink up the texture stamp, from the No Rules stamp set, in the Onyx Black Versafine. Stamp randomly over the strips of book page, to the right and bottom edge of your card. Don't be precise. You want to achieve a random, distressed effect. |
|
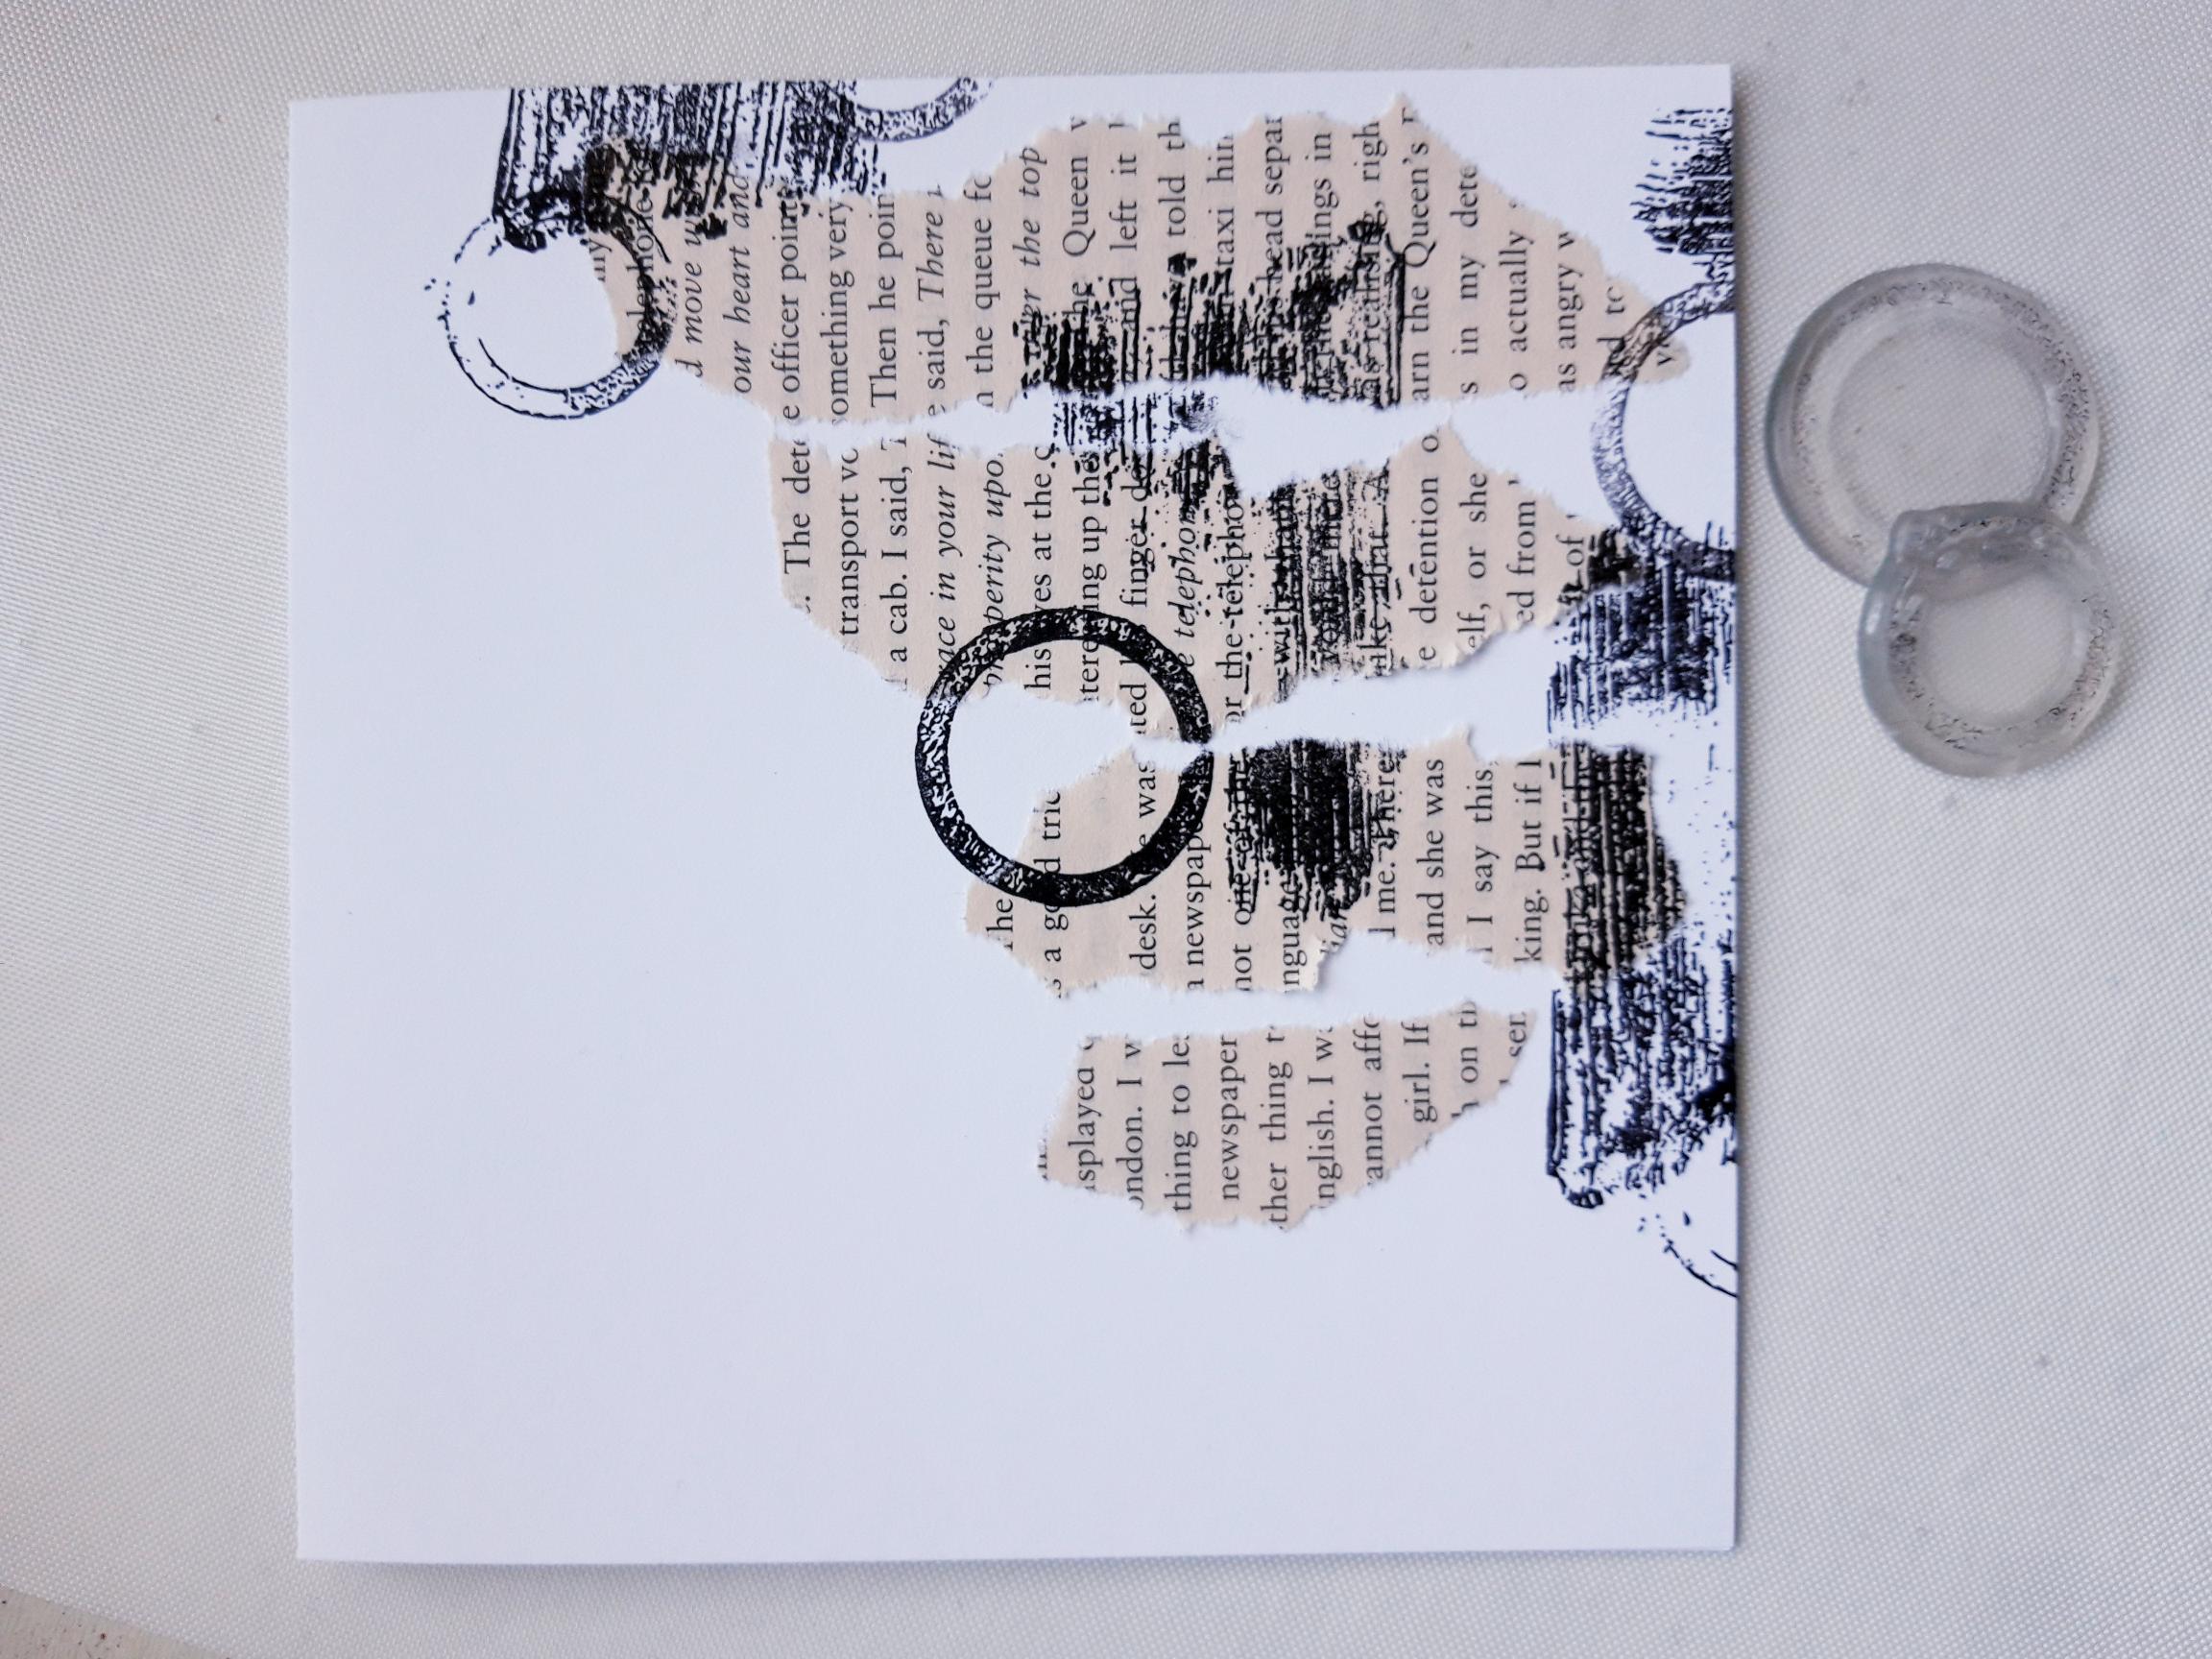
Ink up the circle stamps, from the same set, in the Versafine, and stamp randomly on to your background. |
|
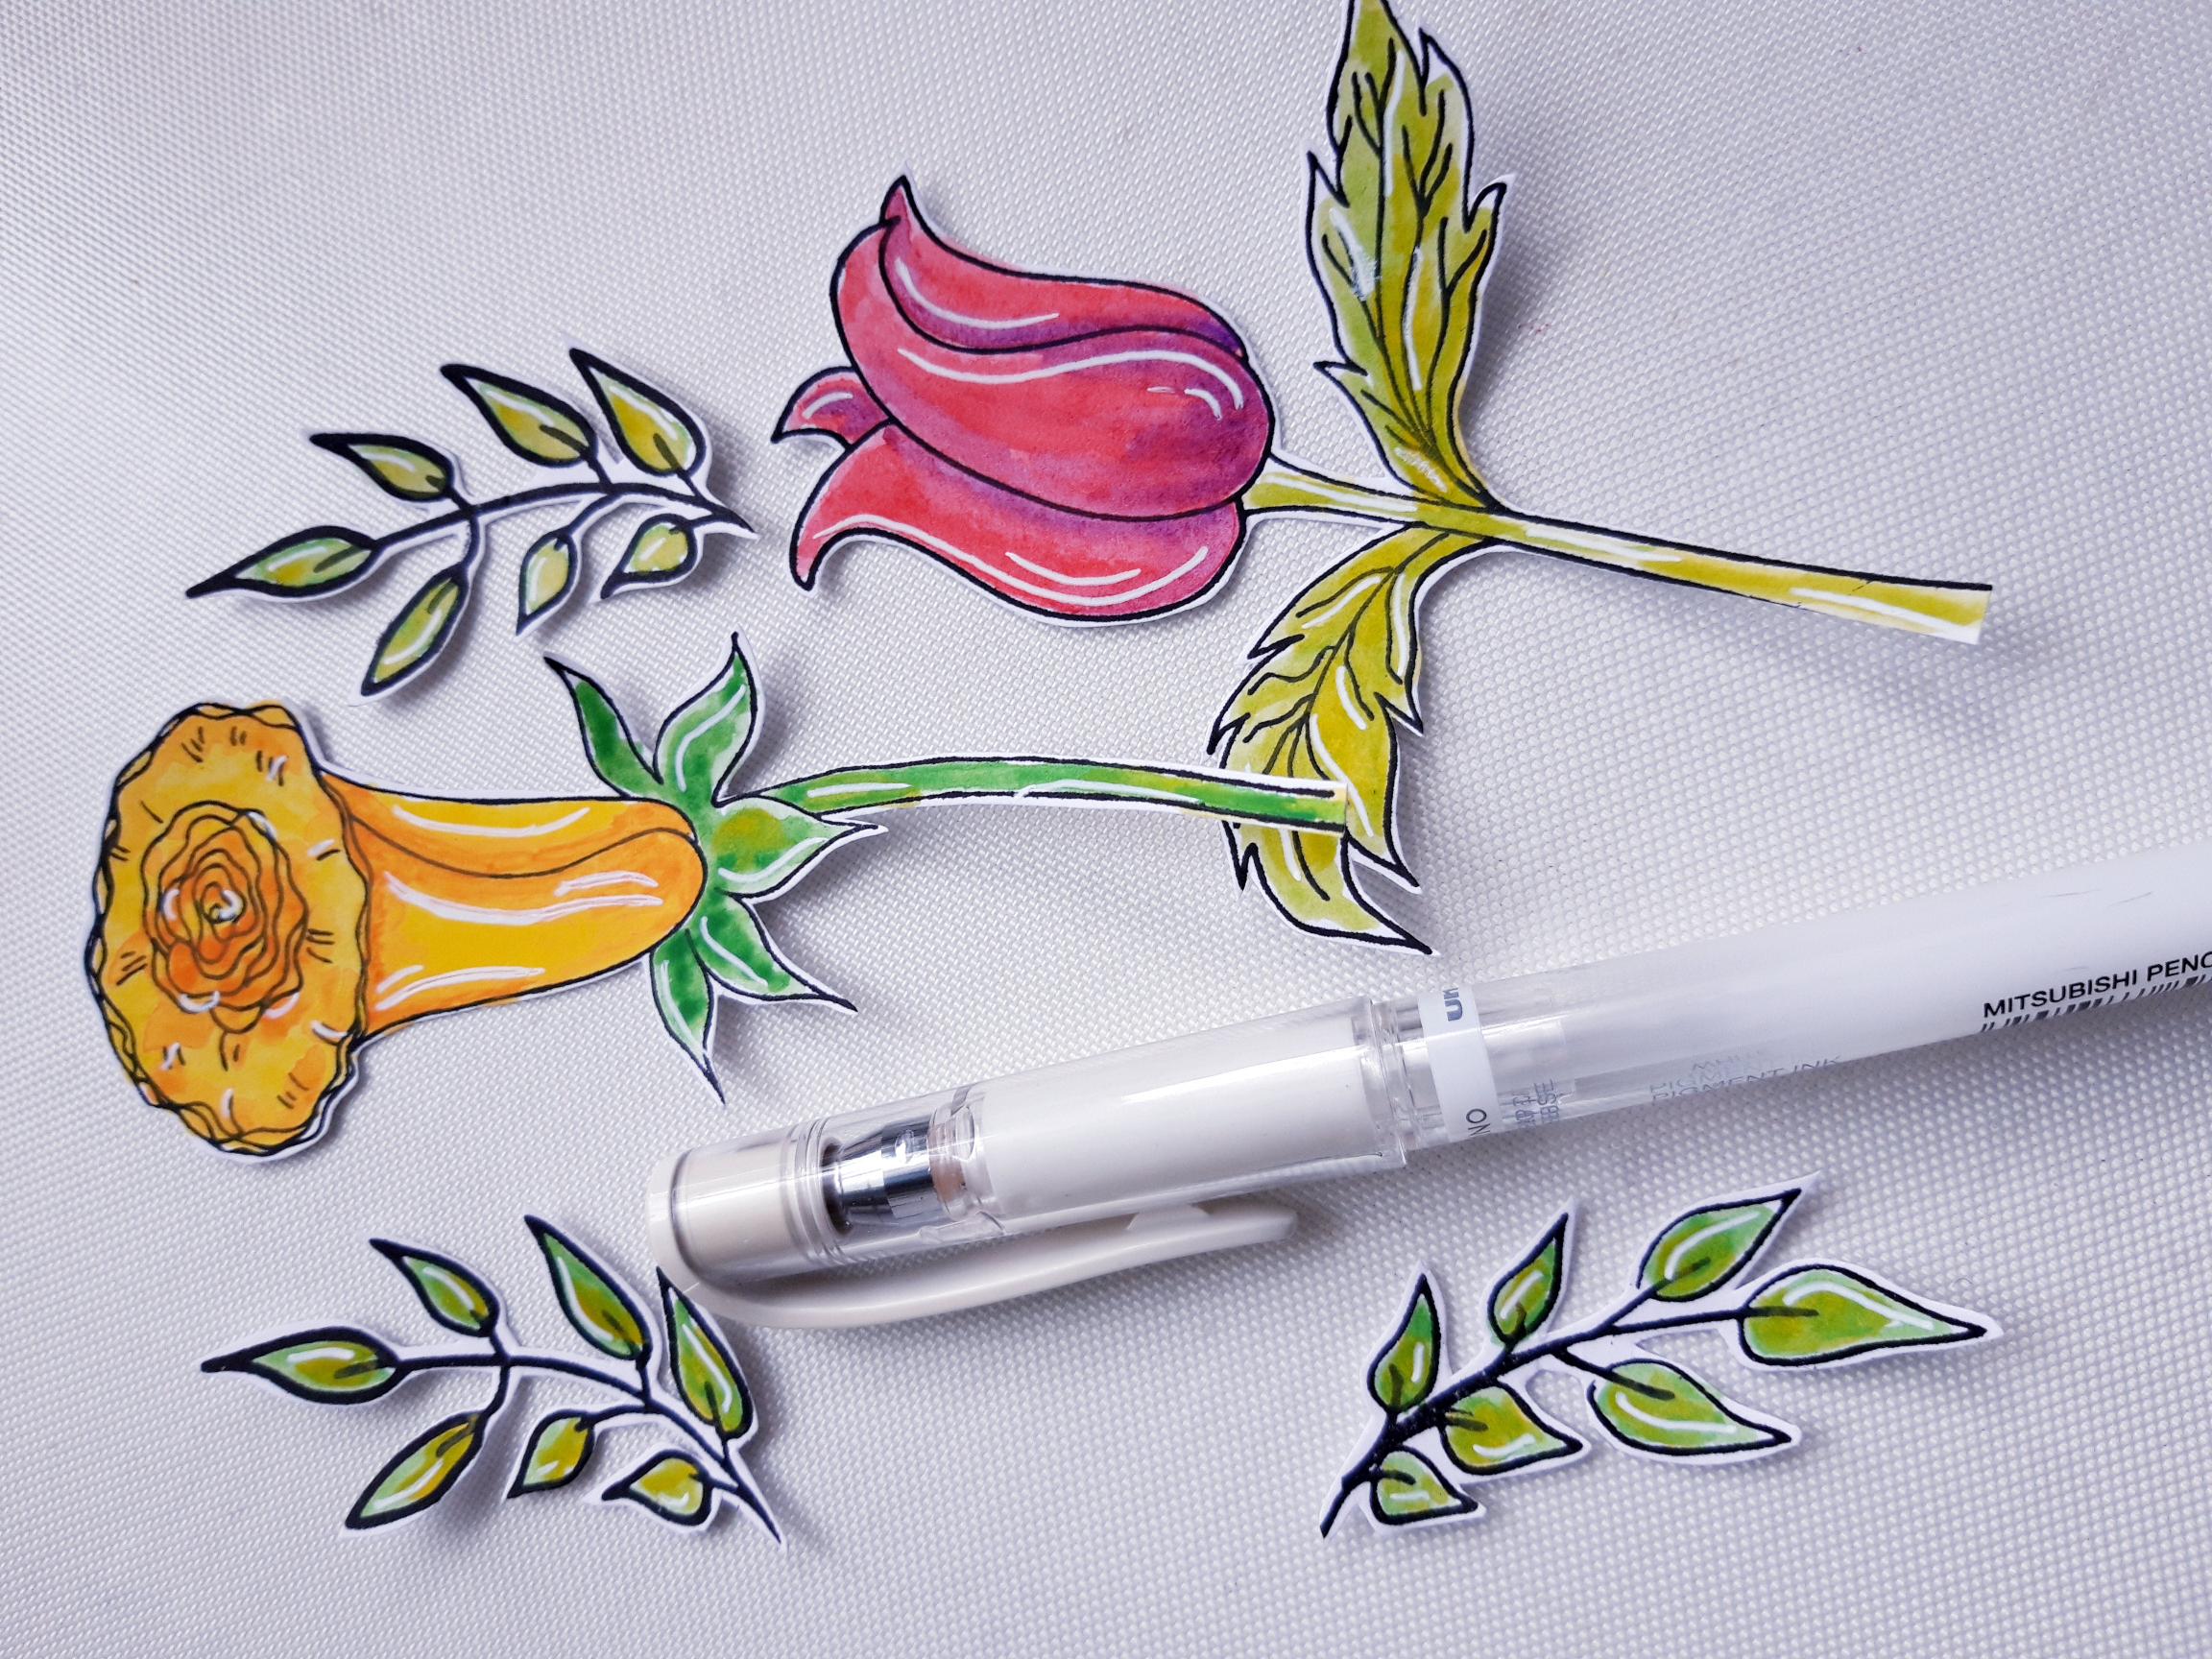
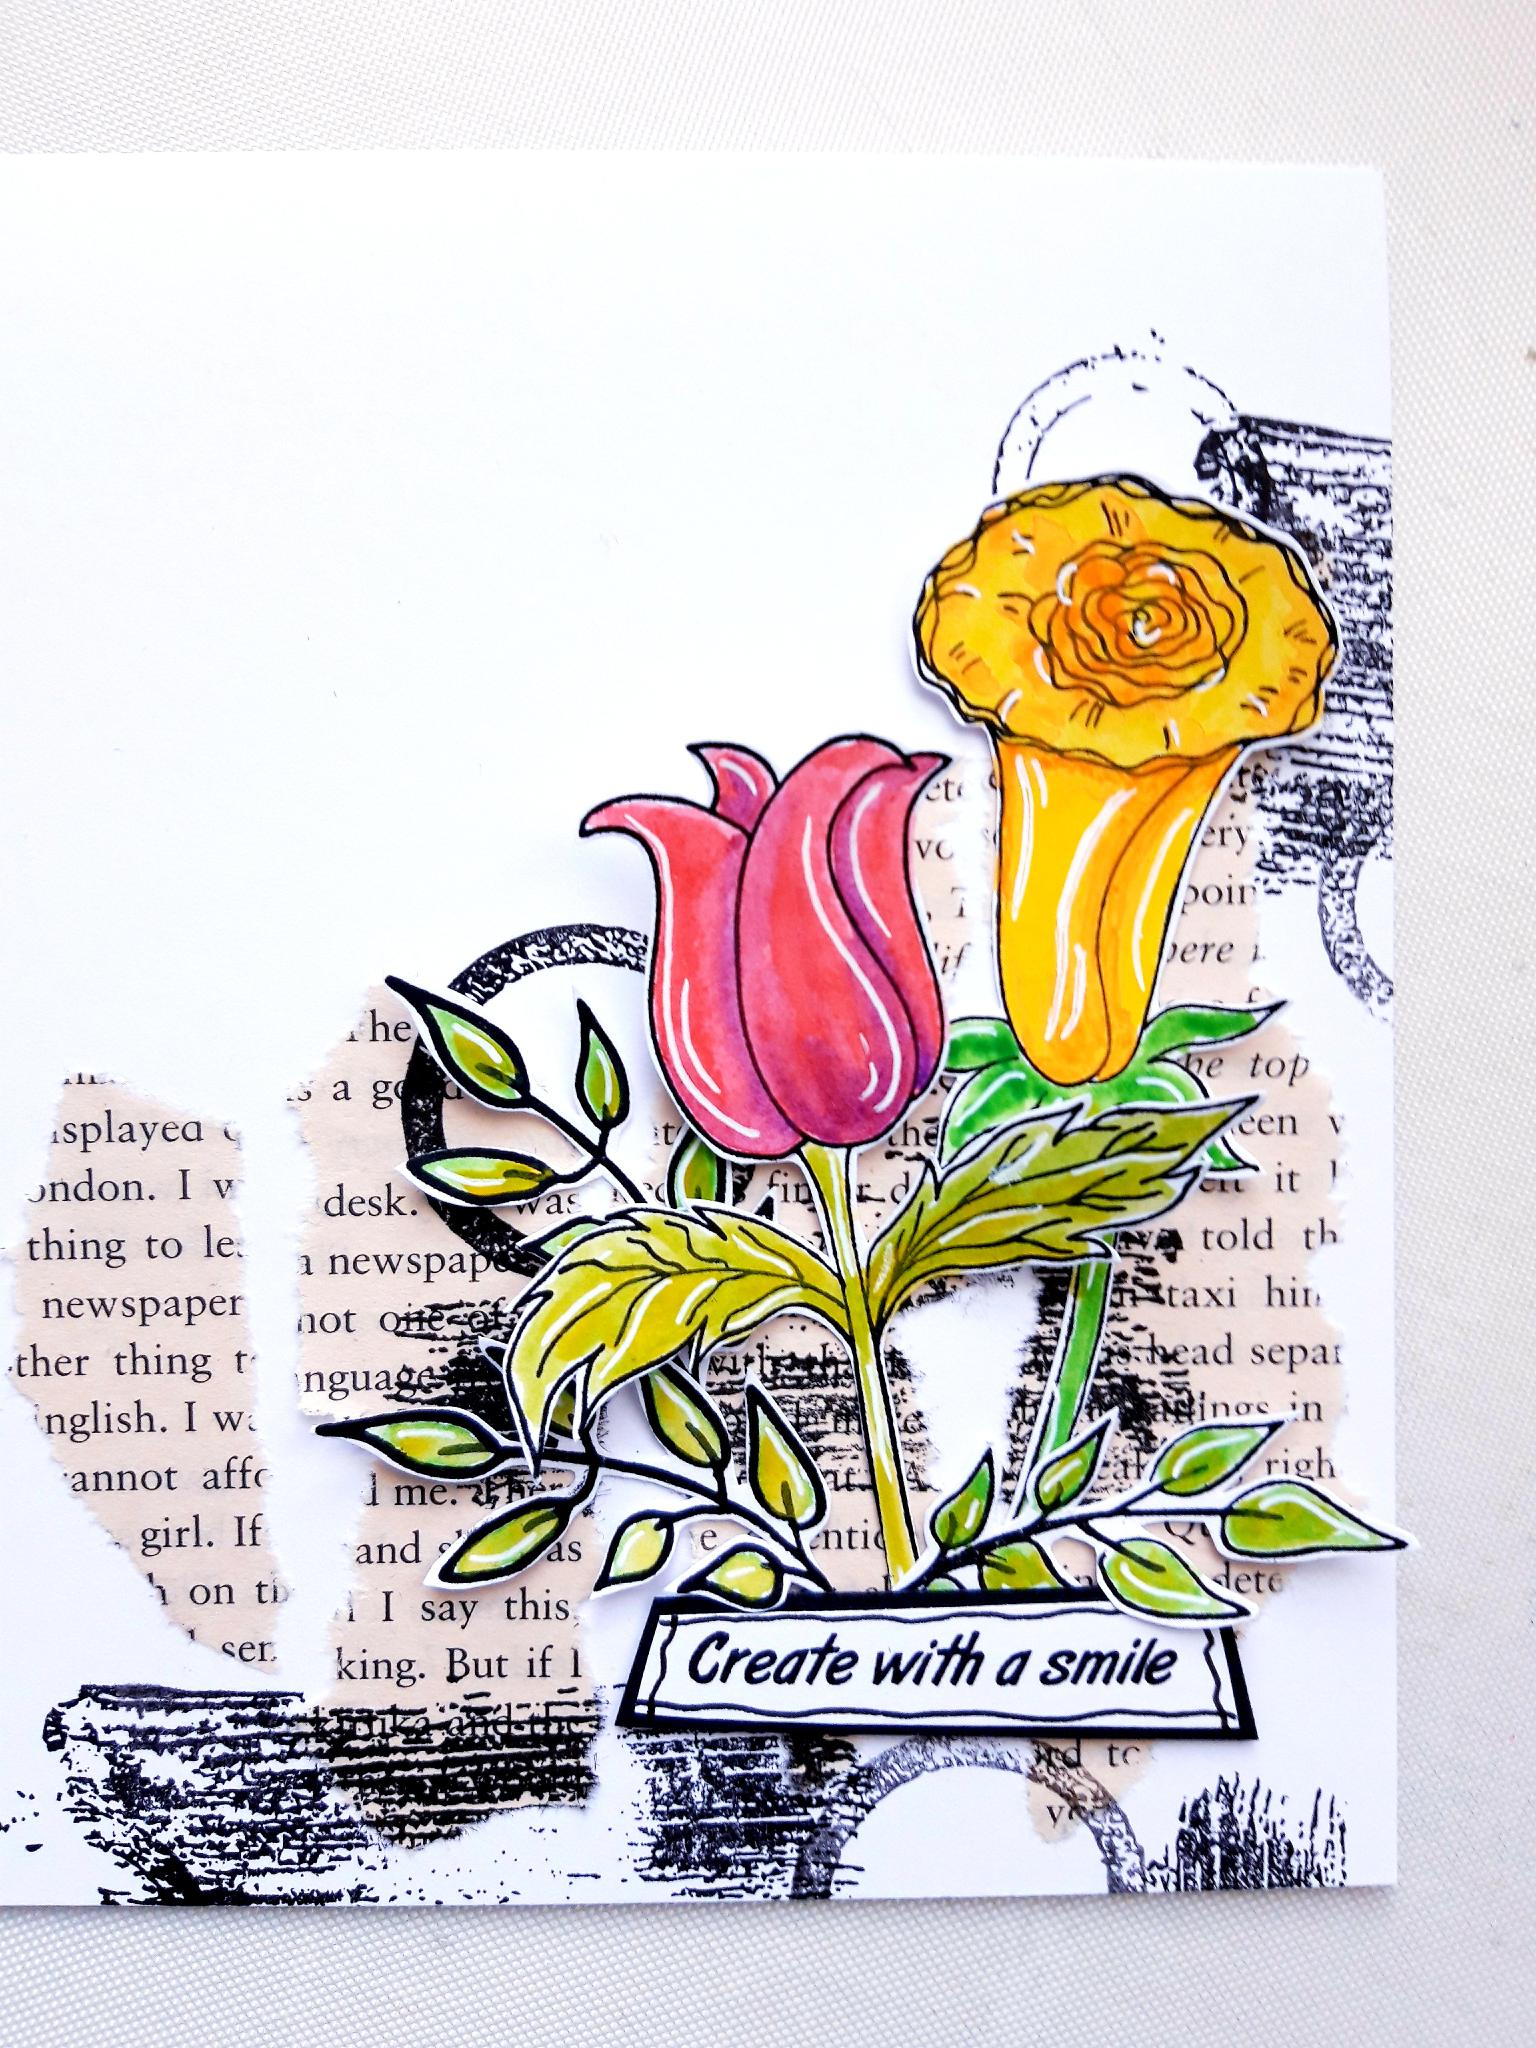
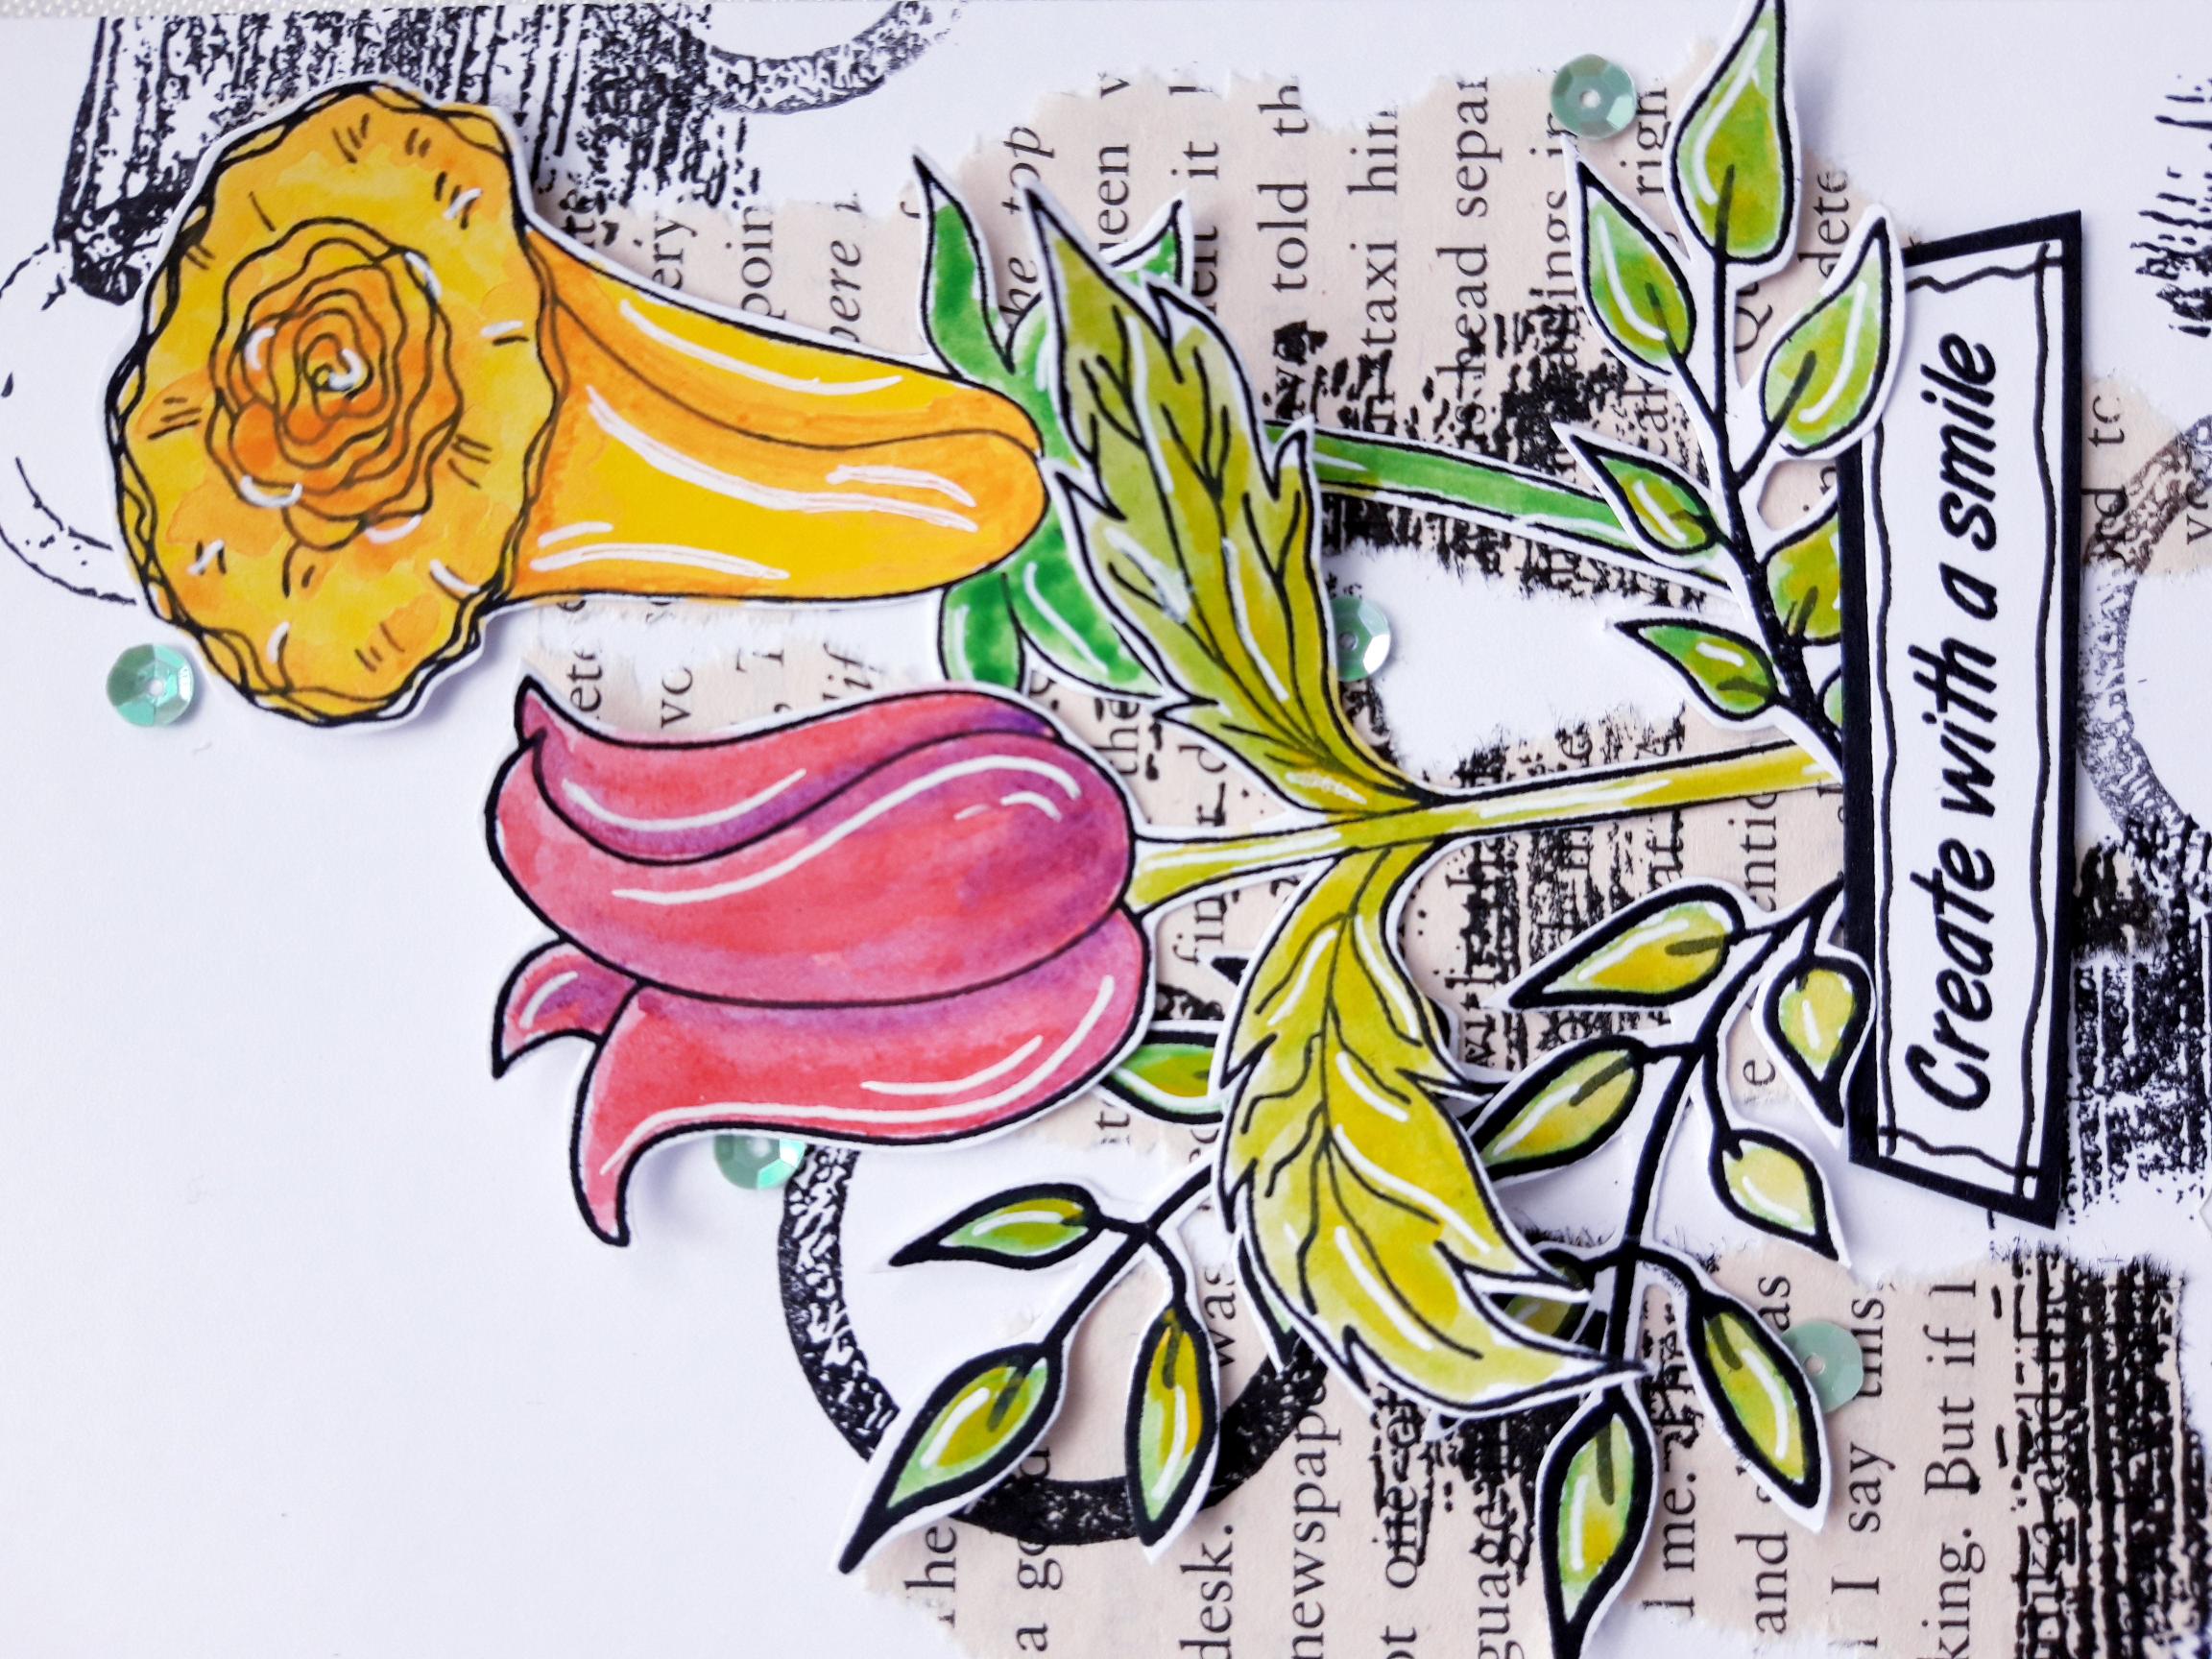
Ink up two of the large floral stamps from the Blooming Fantastic stamp set, and the foliage stamps, from the Blooming Foliage stamp set, in the Onyx Black Versafine. Stamp them on to your 6 x 6" white cardstock ( save any spare card to stamp your sentiment on later). Pop a little of each of the Izink Pigments on to a glass or craft mat. Add a little water and use a paint brush to paint your stamped images. Mix and blend different colours to create light and shade. Fussy cut all your images, either before, or after you paint them, depending on your preferred method. |
|
Use a white gel pen to draw highlights and accents on to your die cut images. Don't be exact or precise, just go for it!! Pop them to one side. |
|
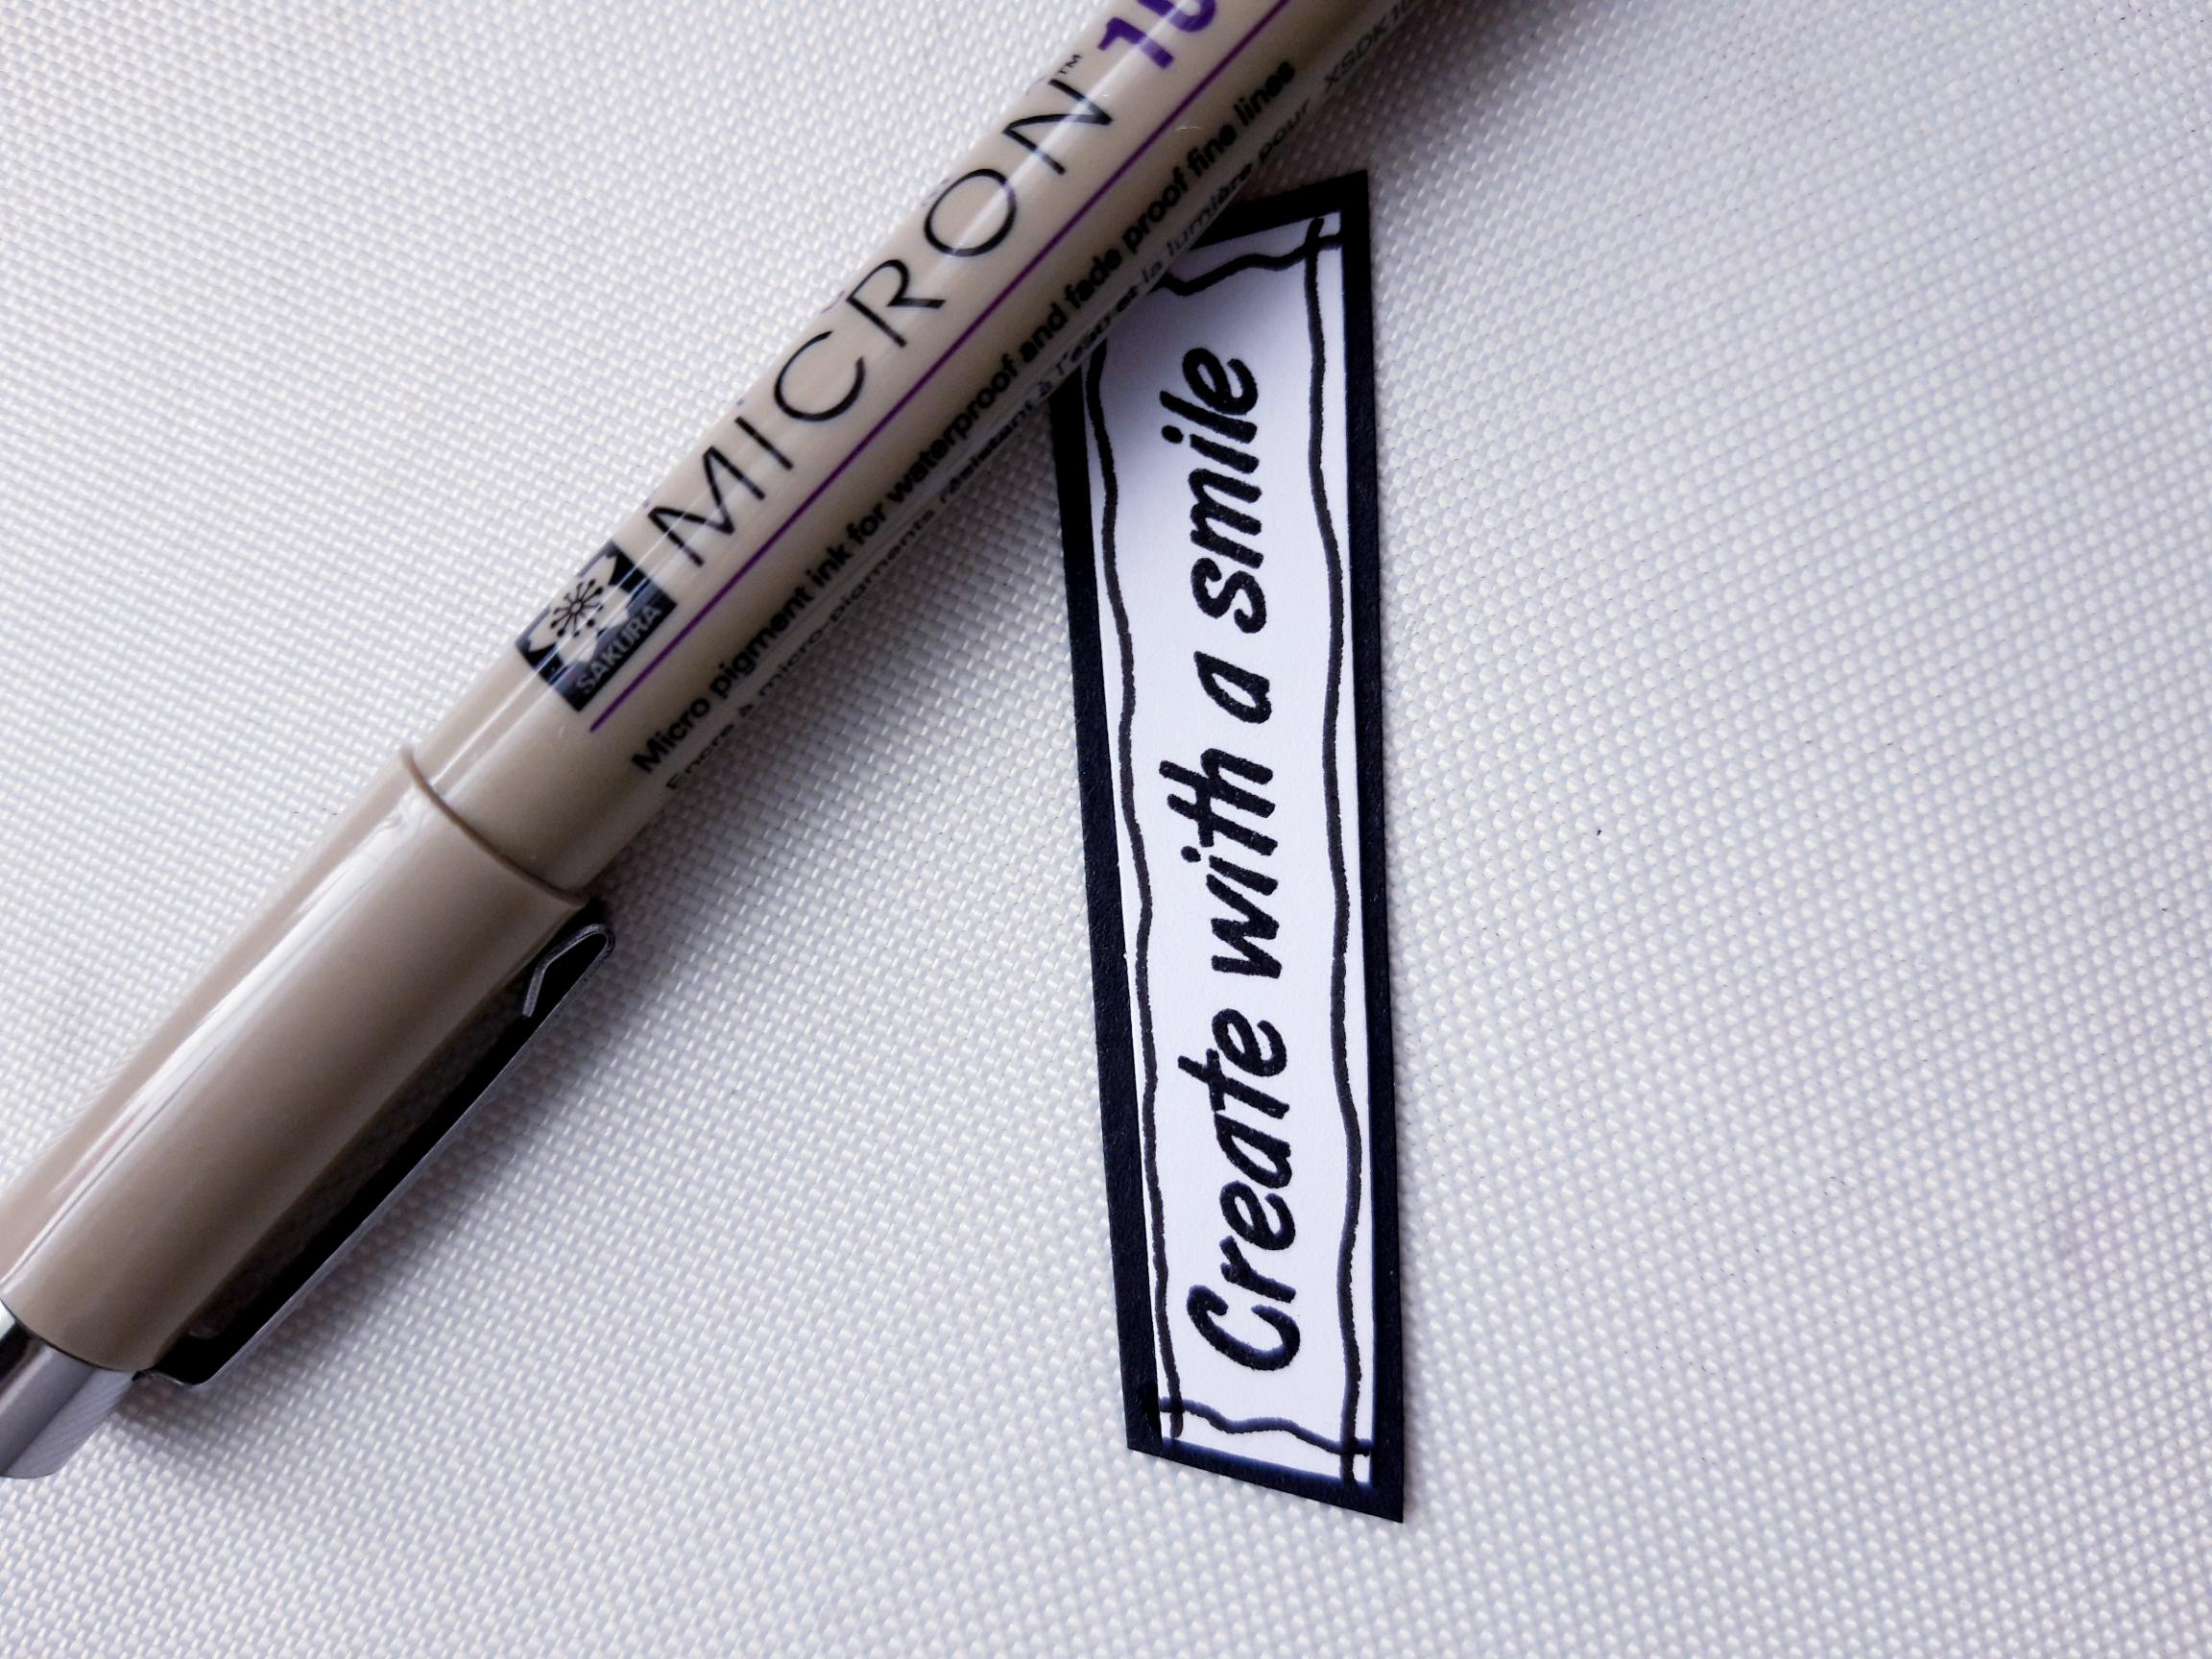
Ink up the sentiment, from the No Rules stamp set, in the Versafine. Stamp on to a piece of the leftover white card. Cut around the sentiment, either straight, or with jaunty angles, like me!! Use a black fine line pen to add a wiggly frame around the sentiment. Mat this on to a piece of black card, and trim off the excess, to create a black mat.
|
|
Adhere the 2 large painted die cut flowers on to your background, using wet glue or foam pads. I held my sentiment in place, as a guide, to decide where I wanted my flowers to be, before I glued them in position. |
|
Adhere your sentiment in place, using foam pads, as you will be tucking the foliage under the sentiment, in the next step. |
|
Adhere the painted foliage where desired, using wet glue, to give you wiggle time. Arrange them so some are tucked under the sentiment, and some are behind, and in front of the 2 larger flowers. This all adds depth and perspective to your artwork. |
|
To complete your card, add the sequins as desired, again tucking some just under your die cuts, to add a hint of sparkle. |