Give your friends $10 off their first order!
Refer a FRIEND


WHAT YOU WILL NEED:
White card blank (7 x 7")
Black card (6 3/4 x 6 3/4")
White card (6 1/2 x 6 1/2")
Black card (7 x 5")
White card (4 x 4")
Thirsty Brush UnLtd WISH Creative Dies
Thirsty Brush UnLtd Mixed Up Hearts Creative Dies
Thirsty Brush UnLtd Flower Frenzy Creative Stamps
WOW embossing ink pad
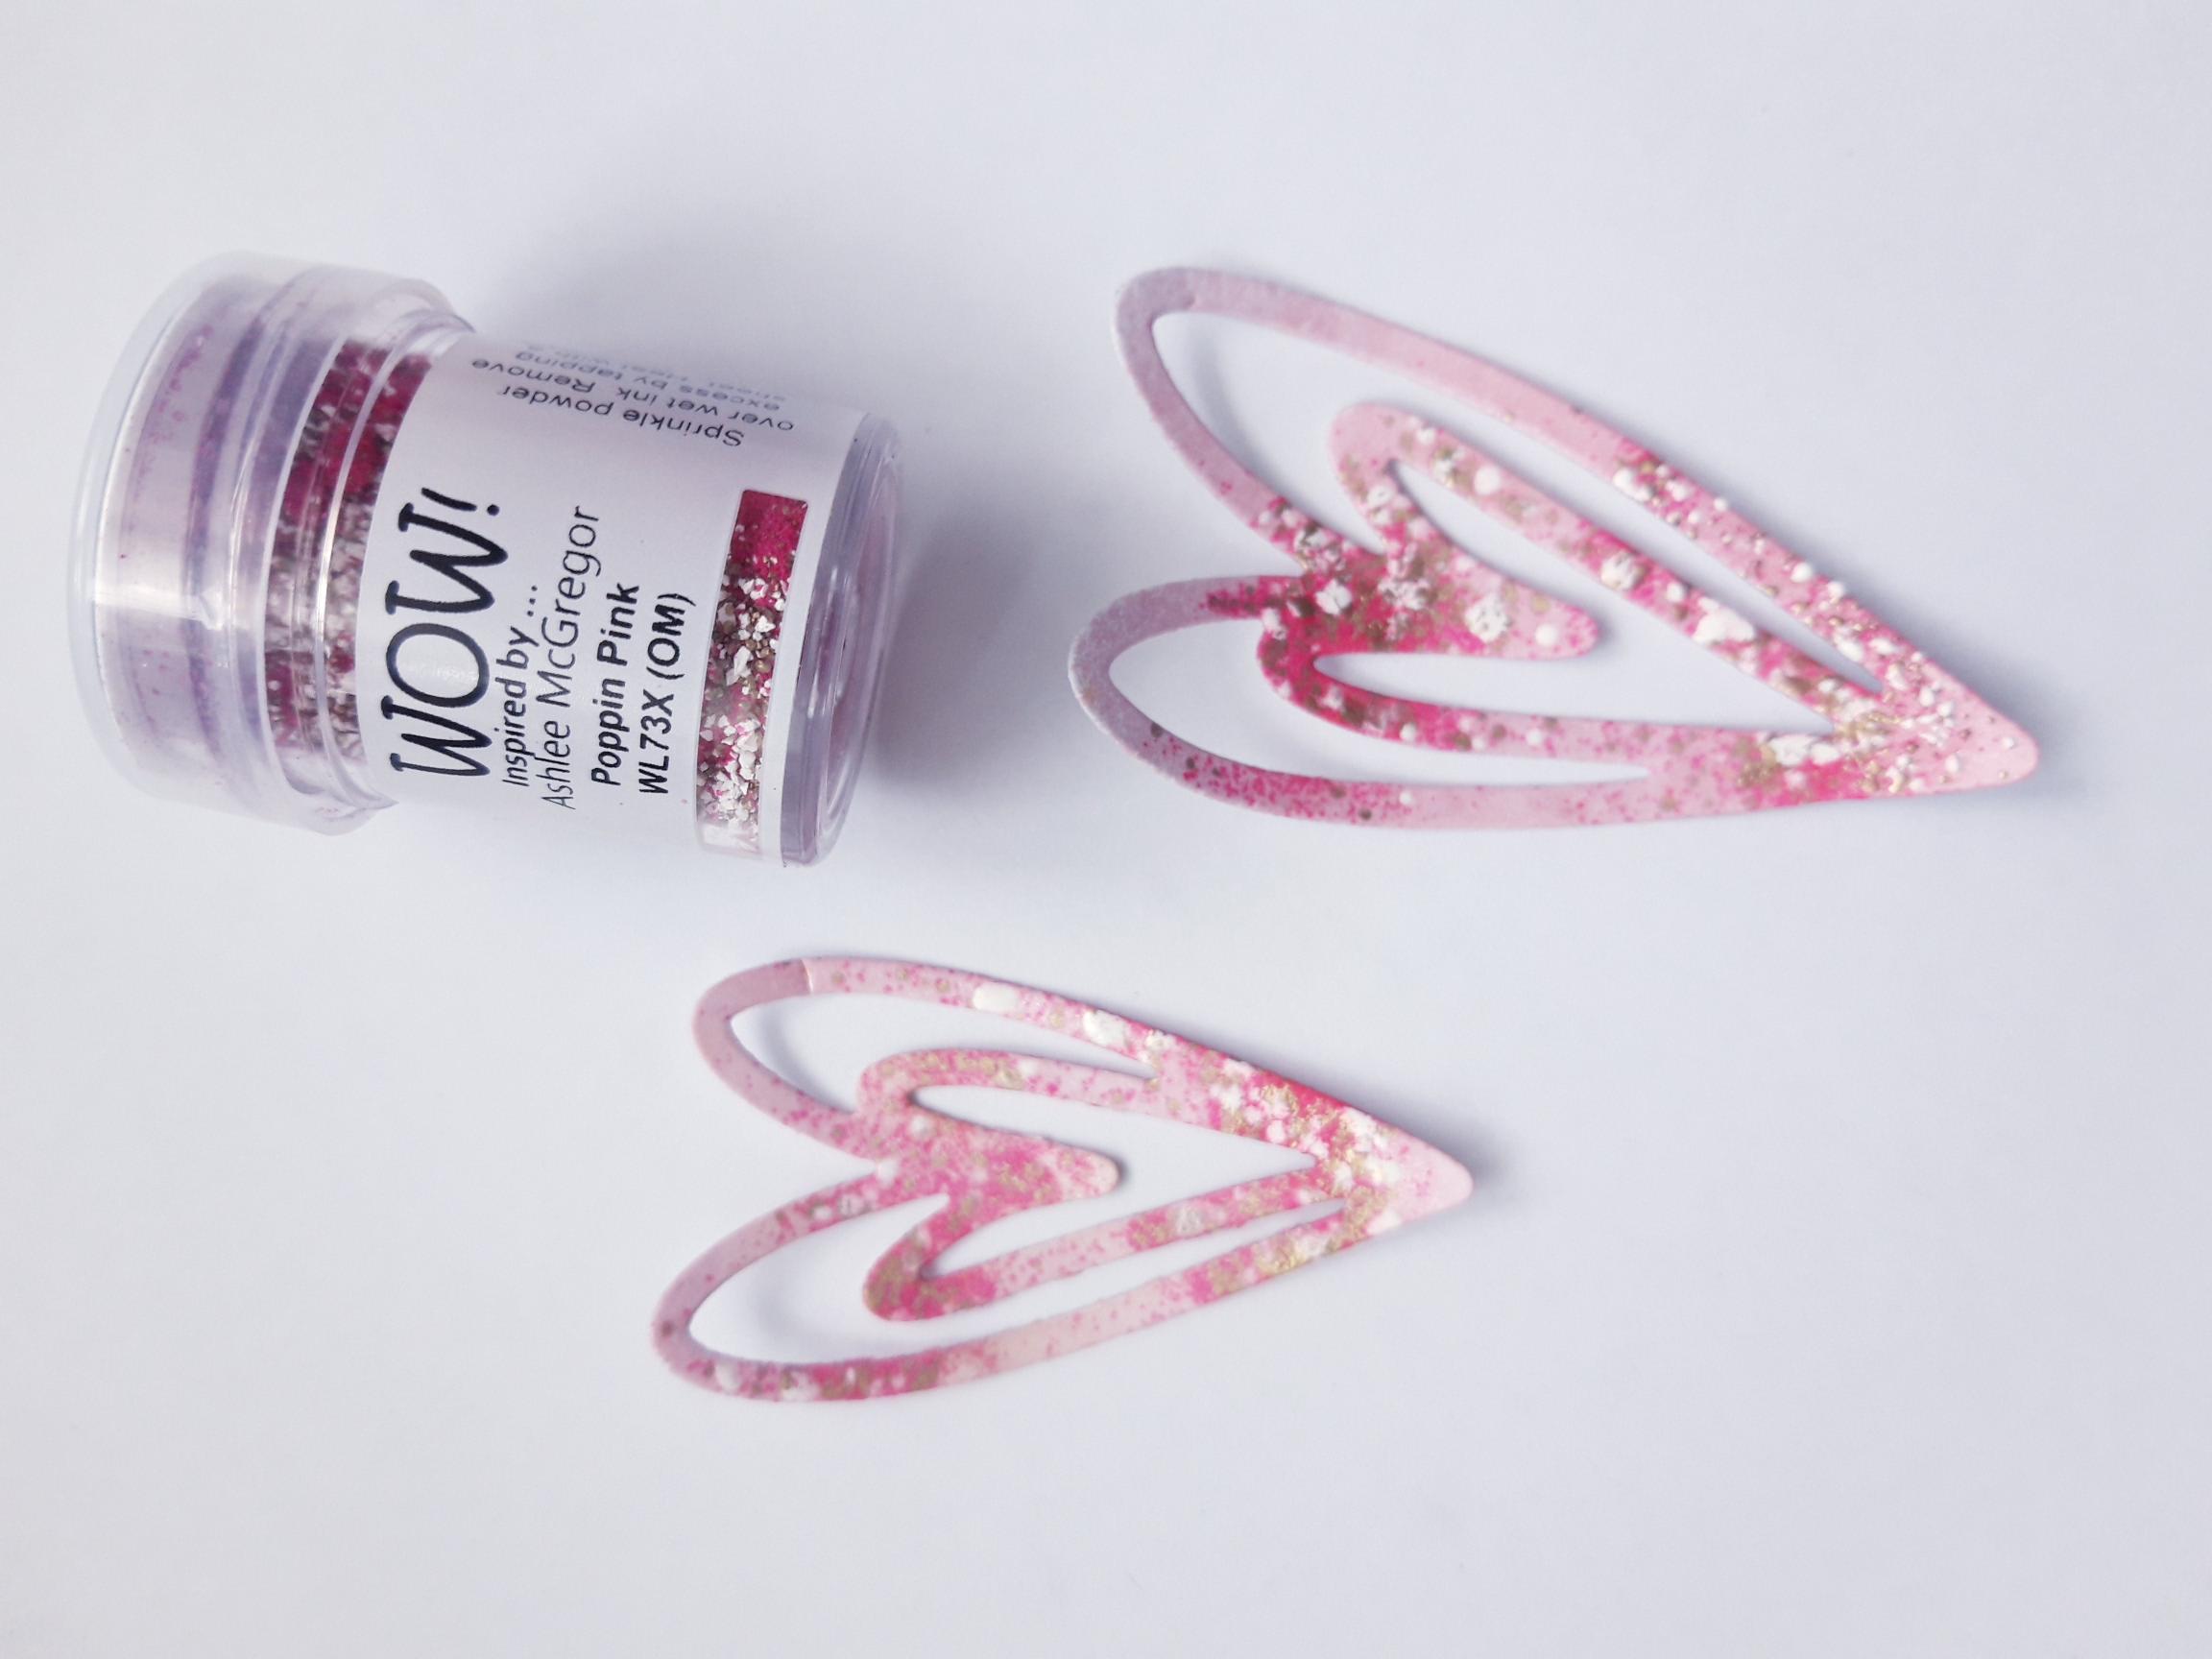
WOW Poppin Pink Embossing powder
WOW heat tool
Izink Pigment Ink Vintage Collection: Pink, brown
Blending tool
Eureka 101
Paper Trimmer
Perfect Together Glue
Die Cutting machine
[click image to enlarge] 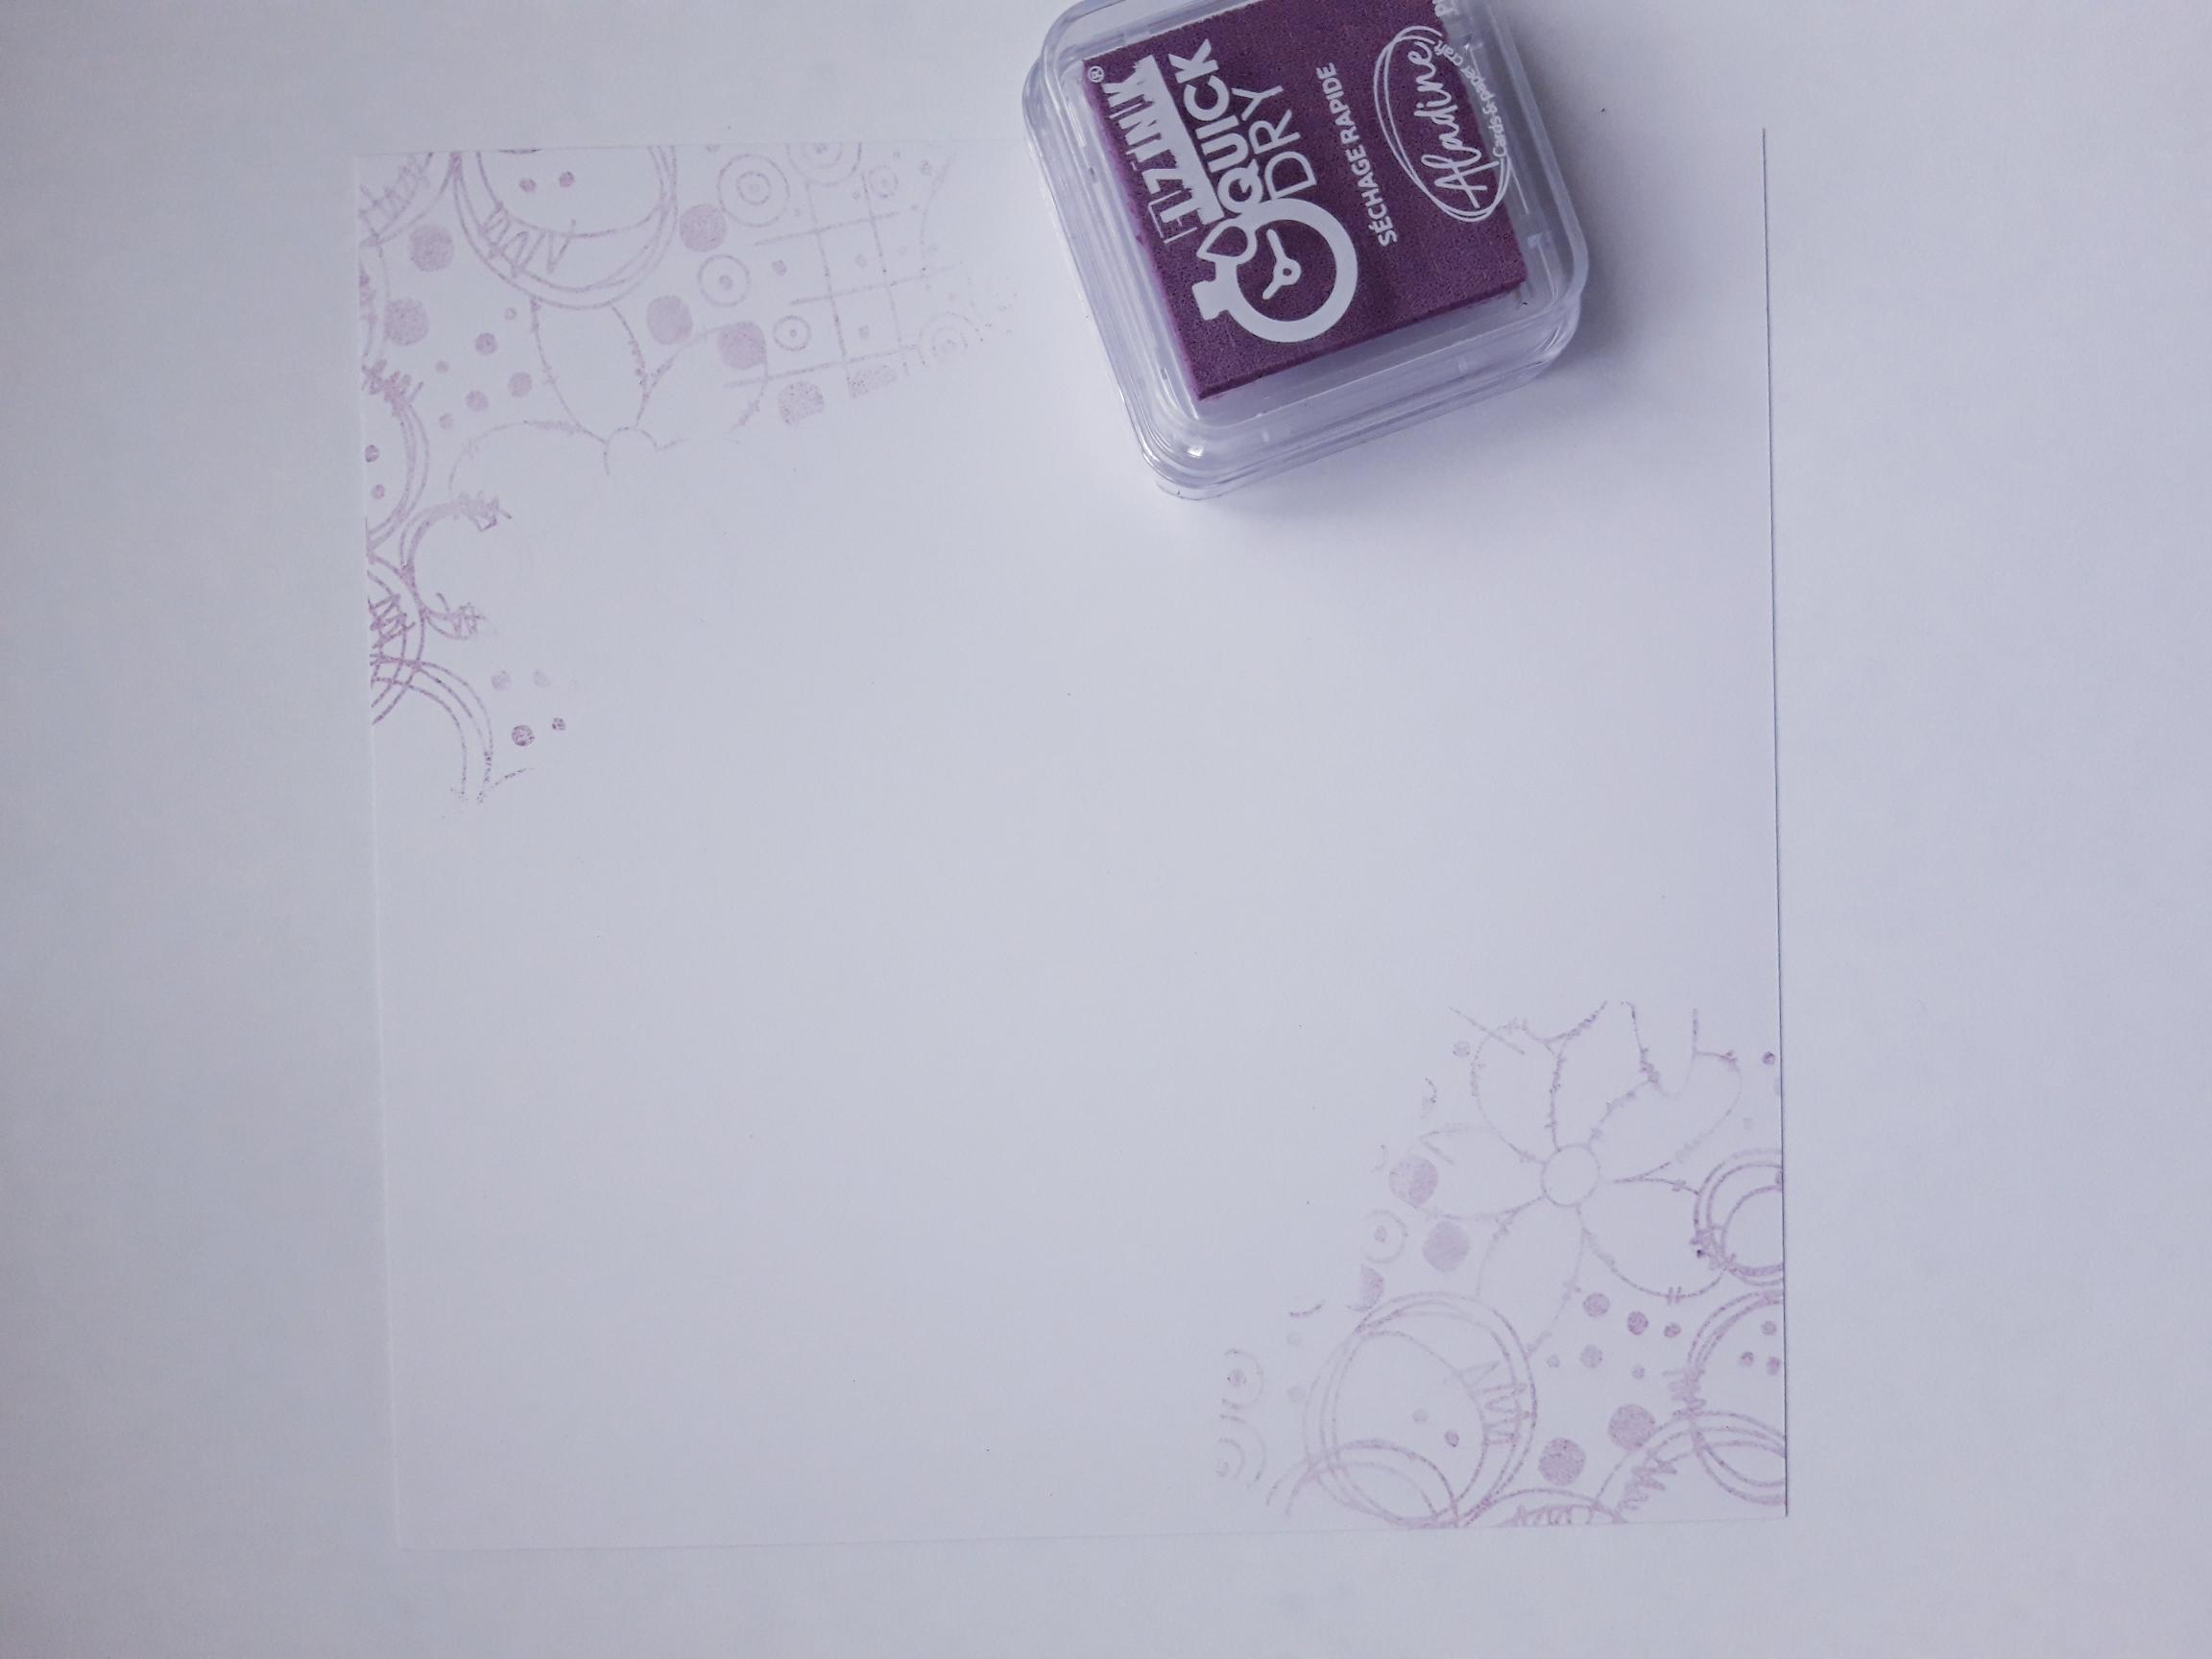
|
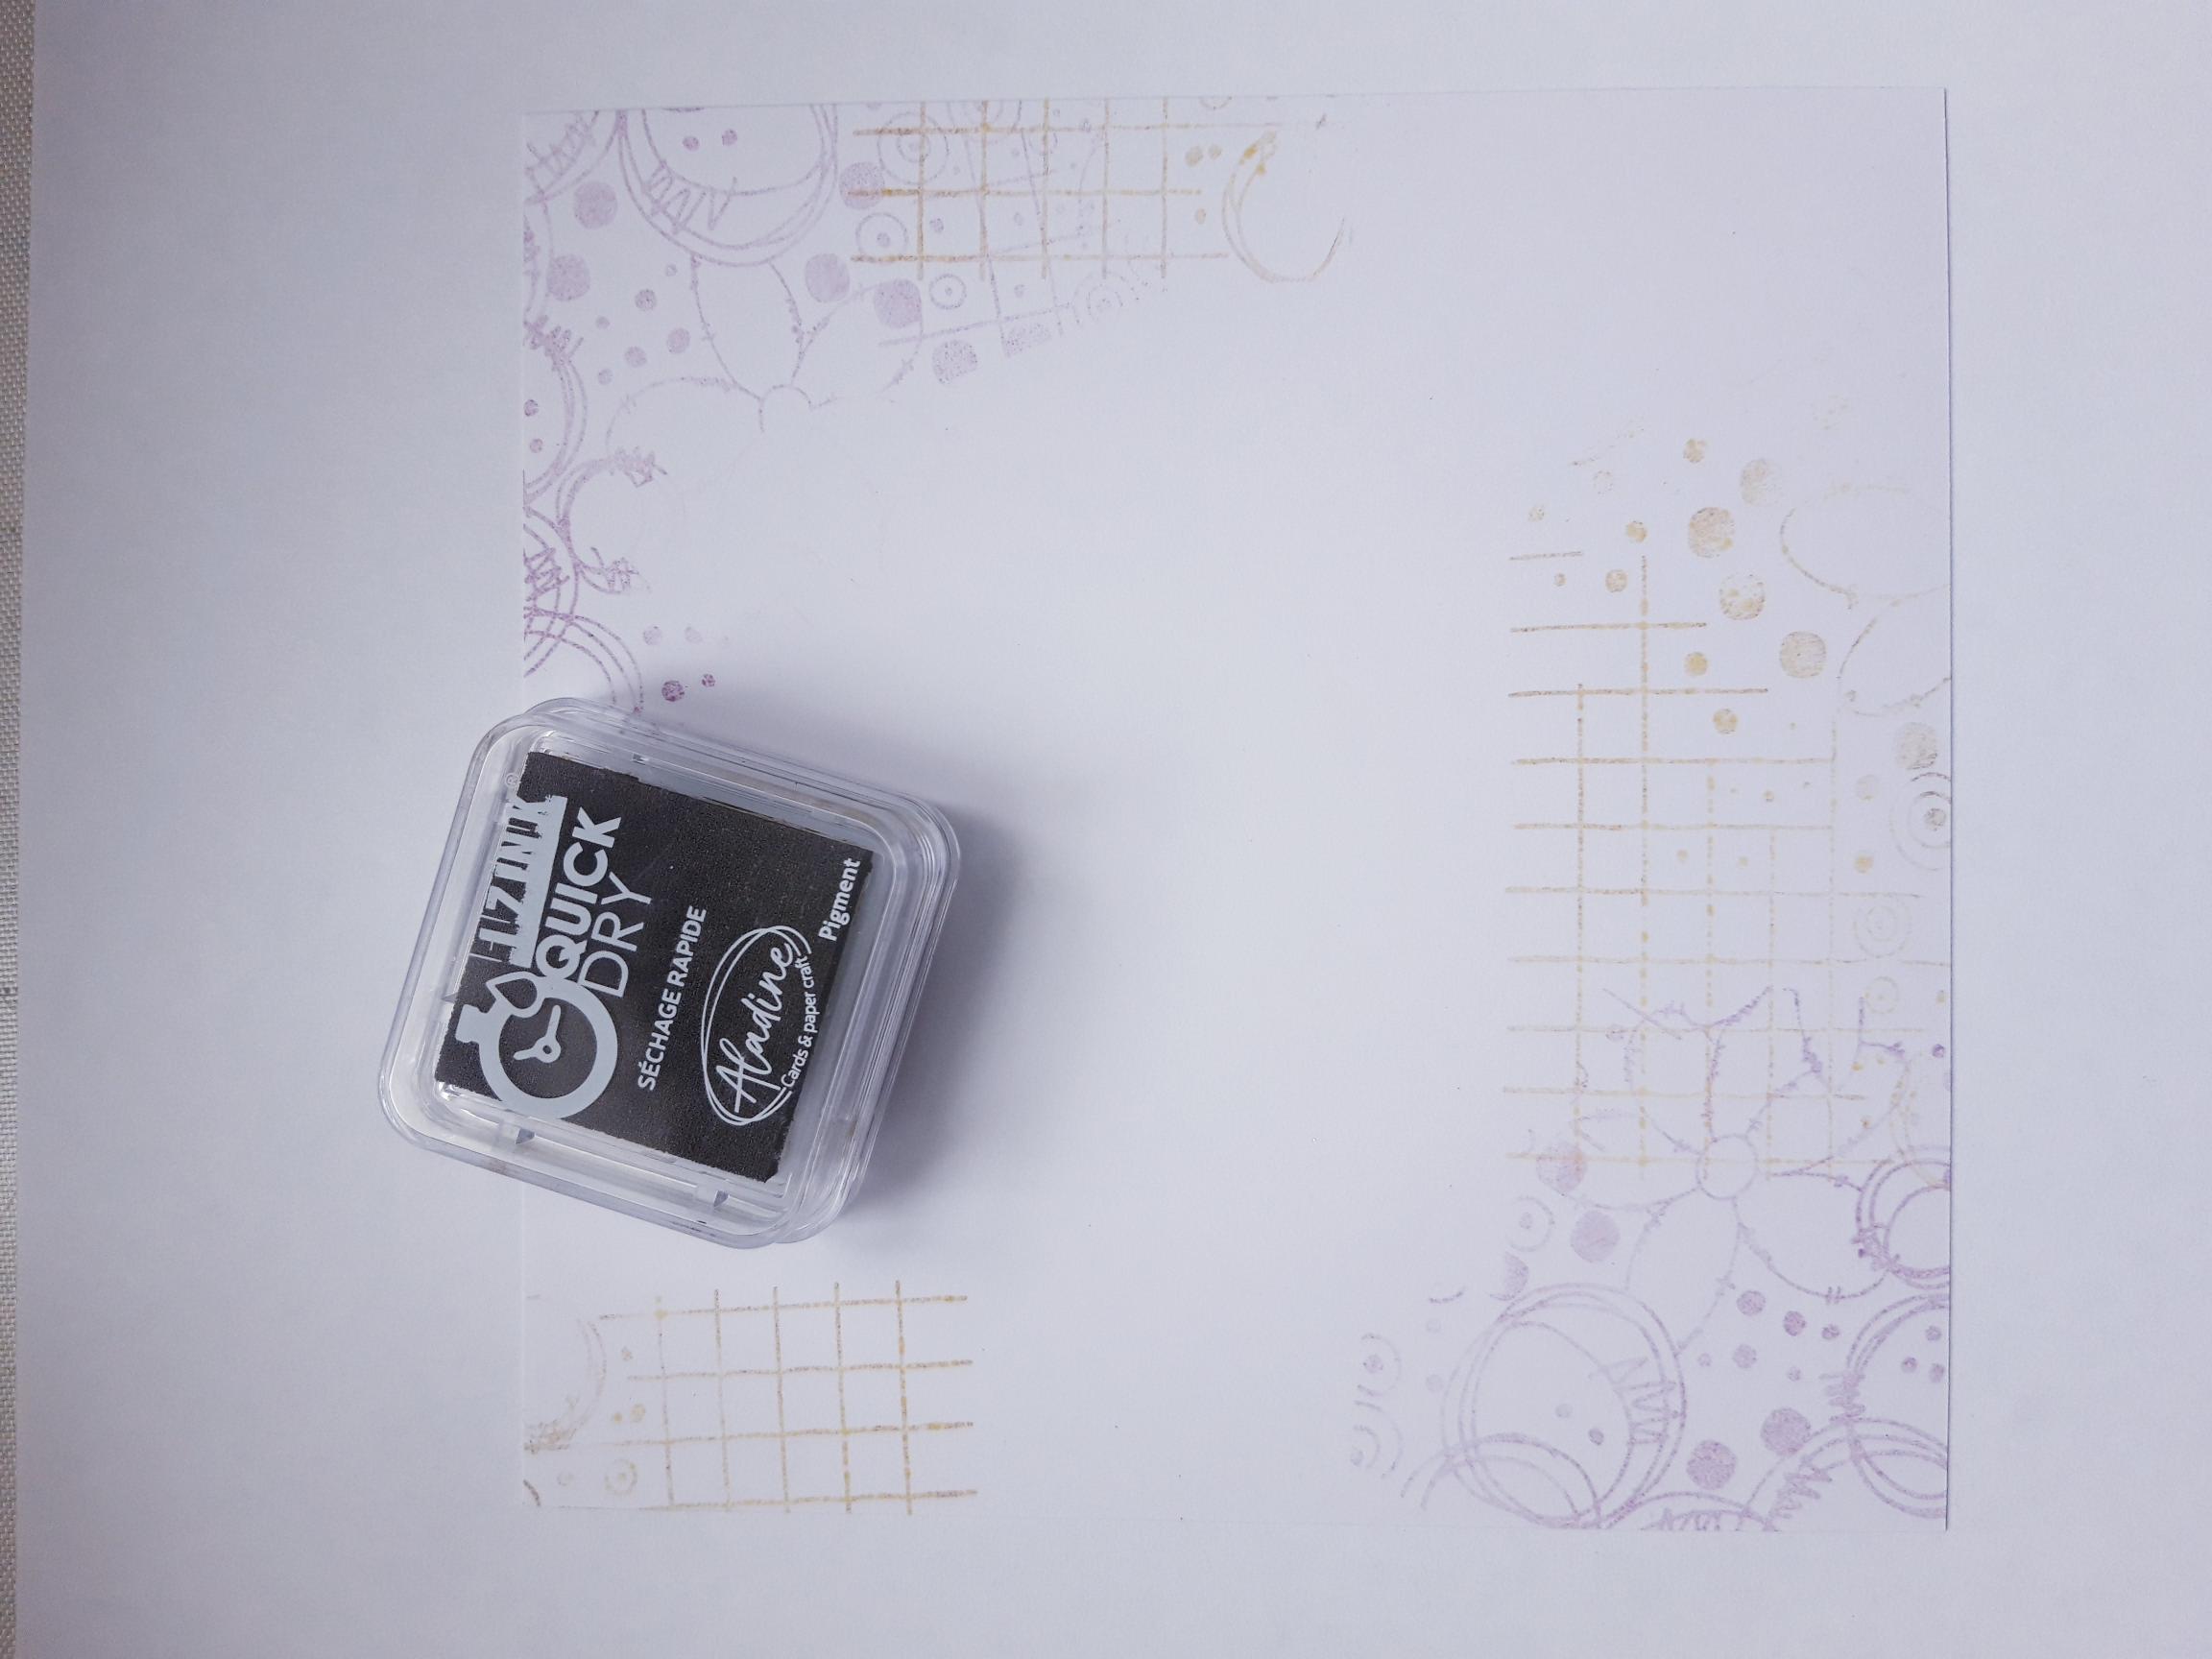
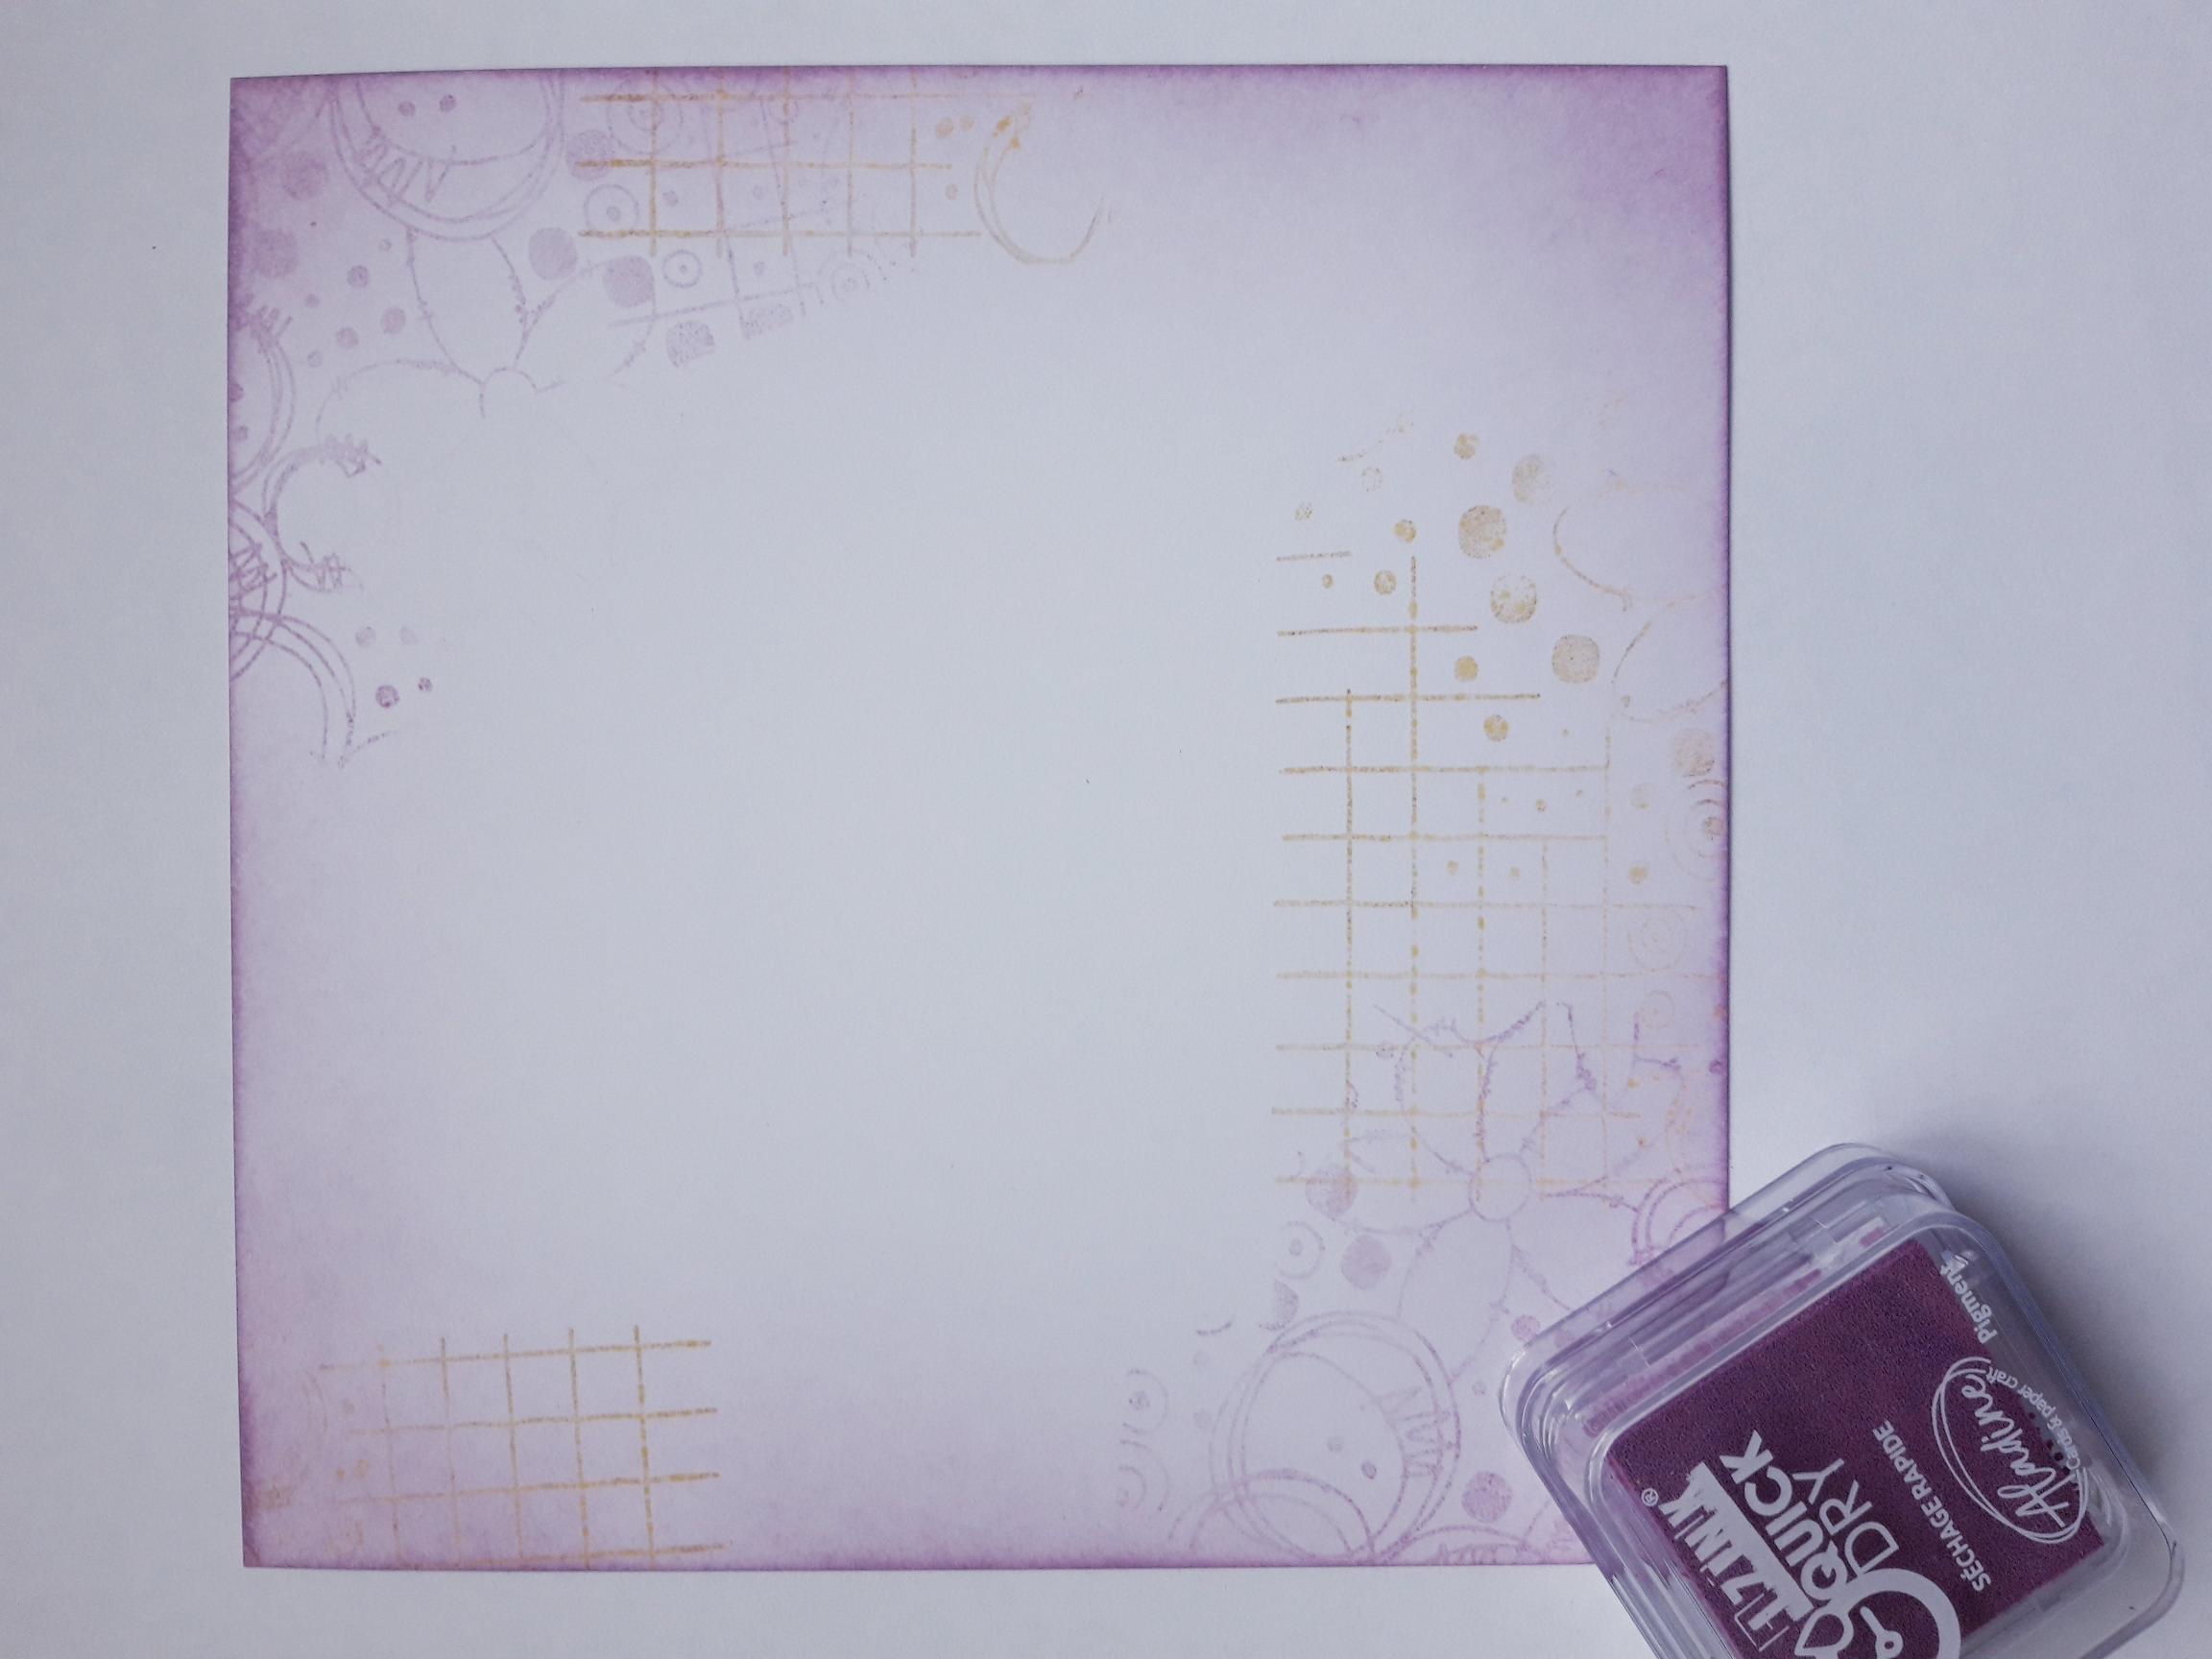
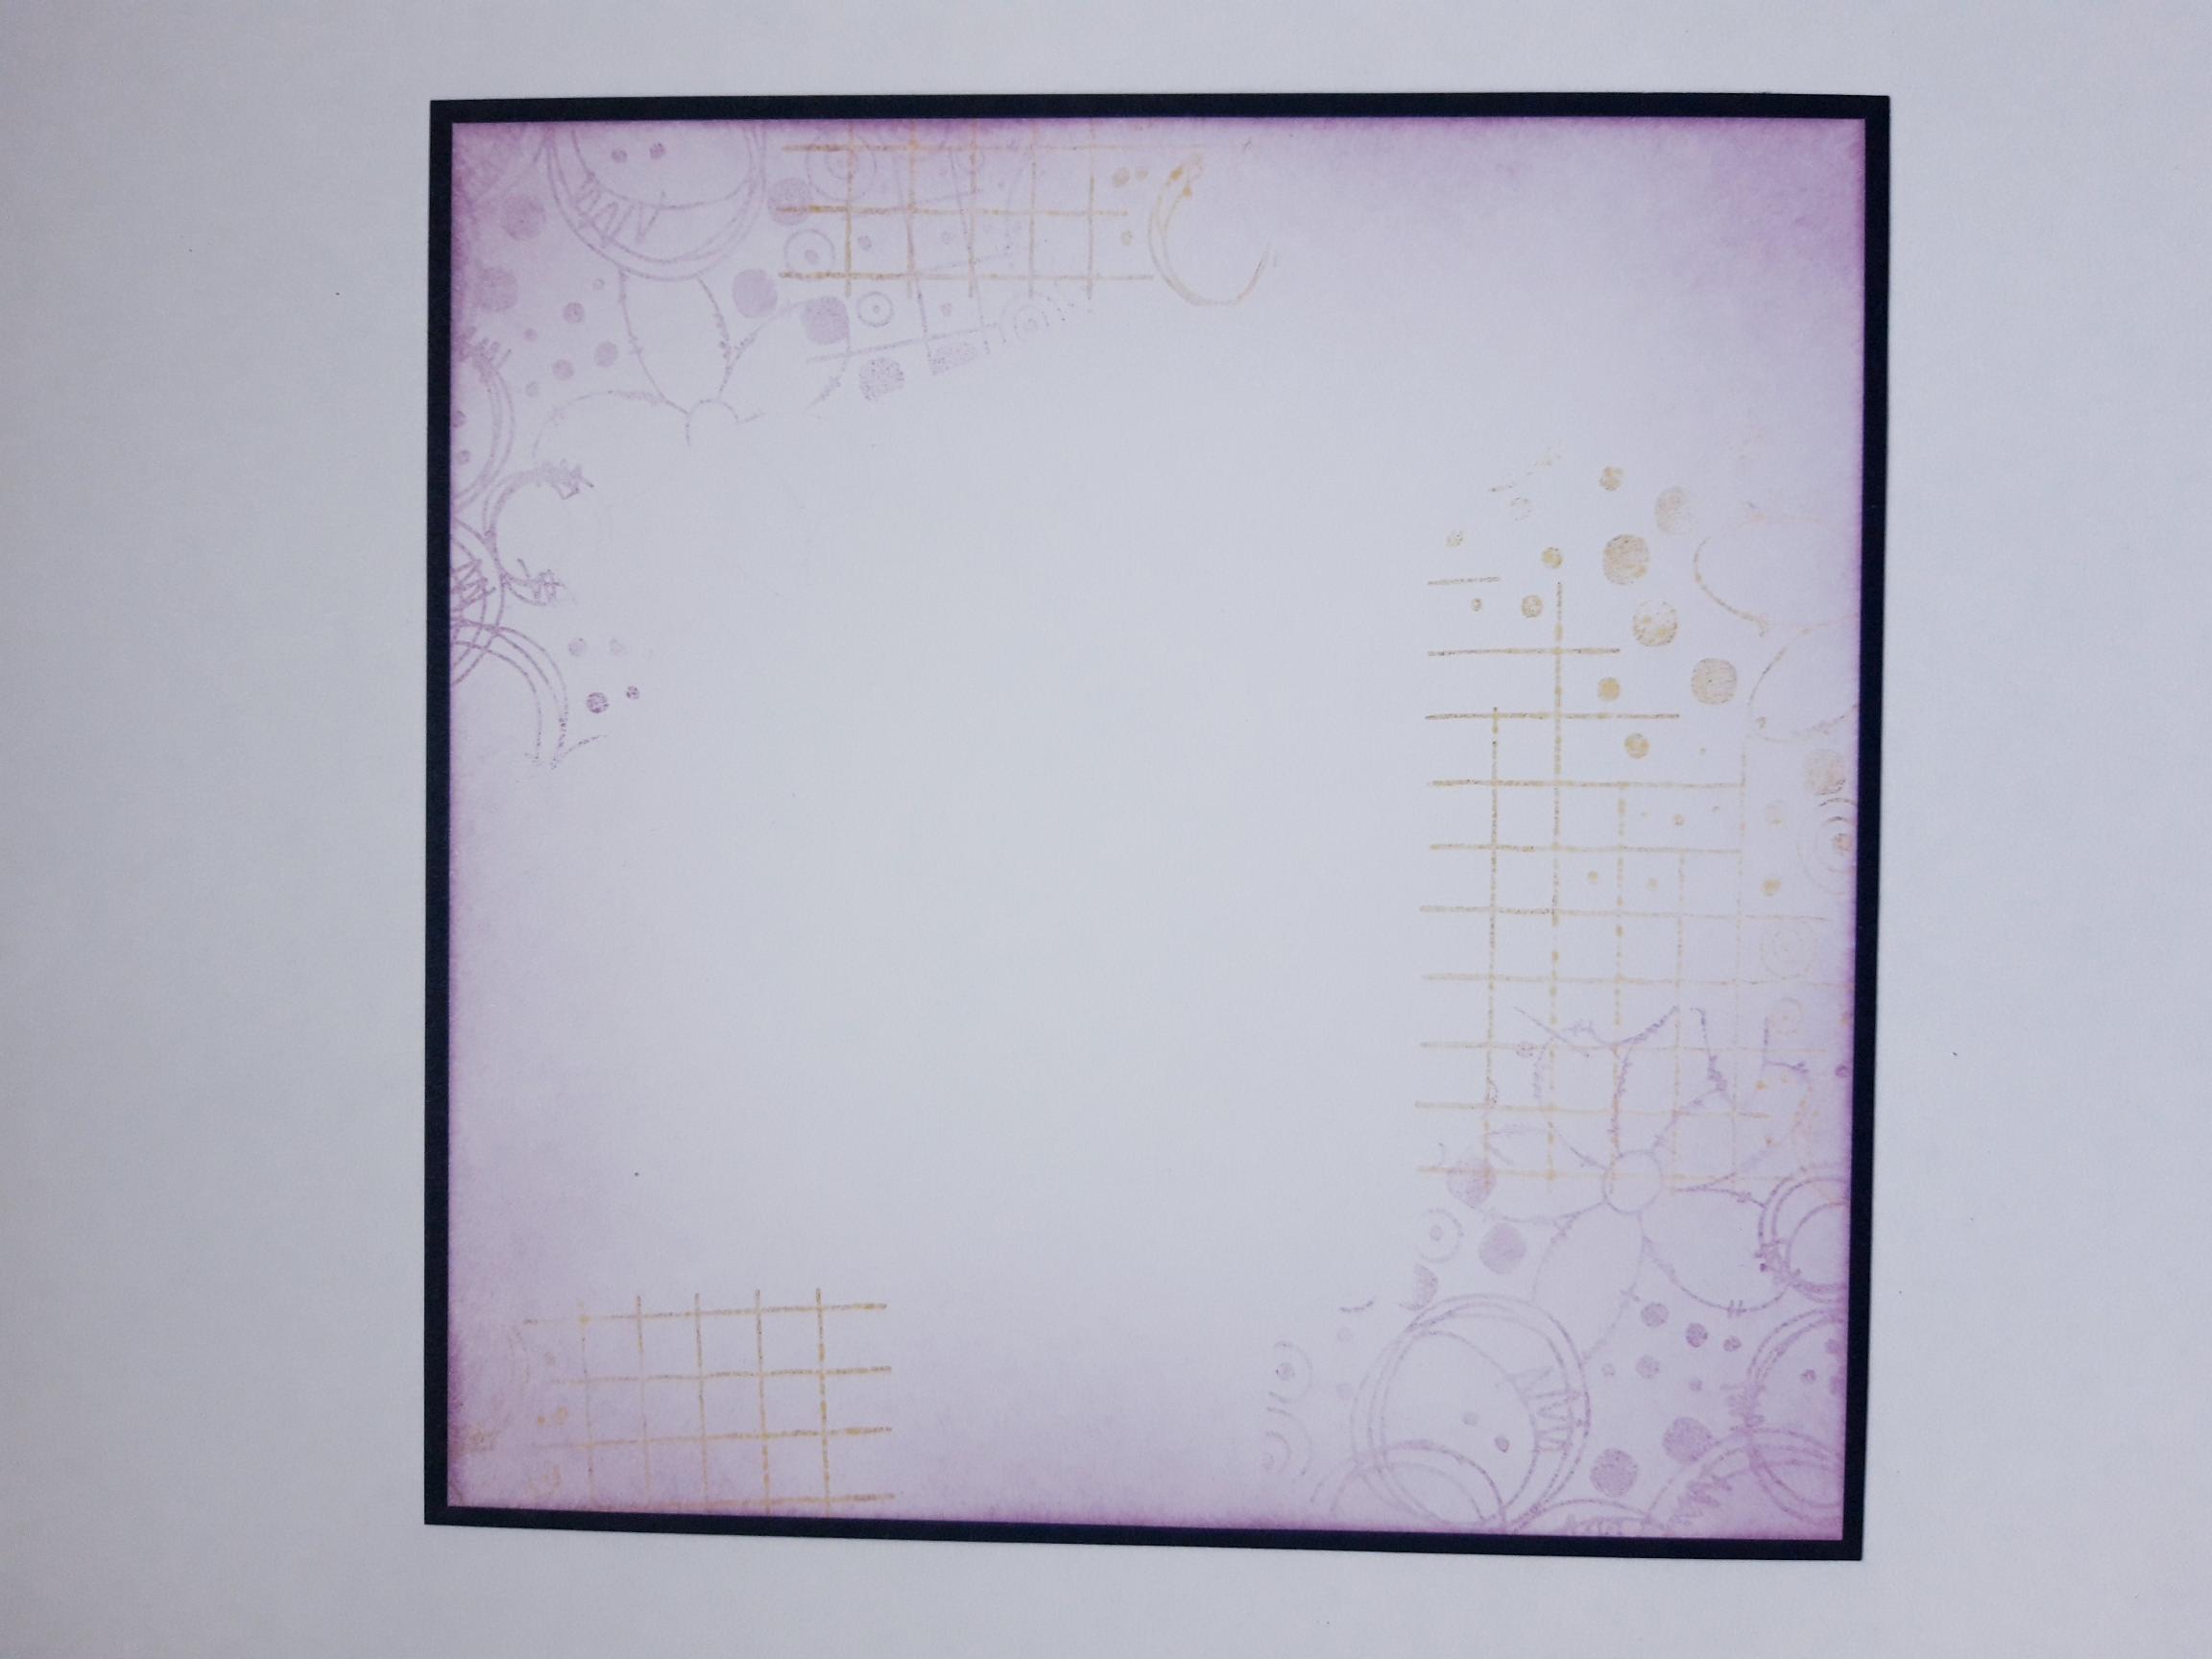
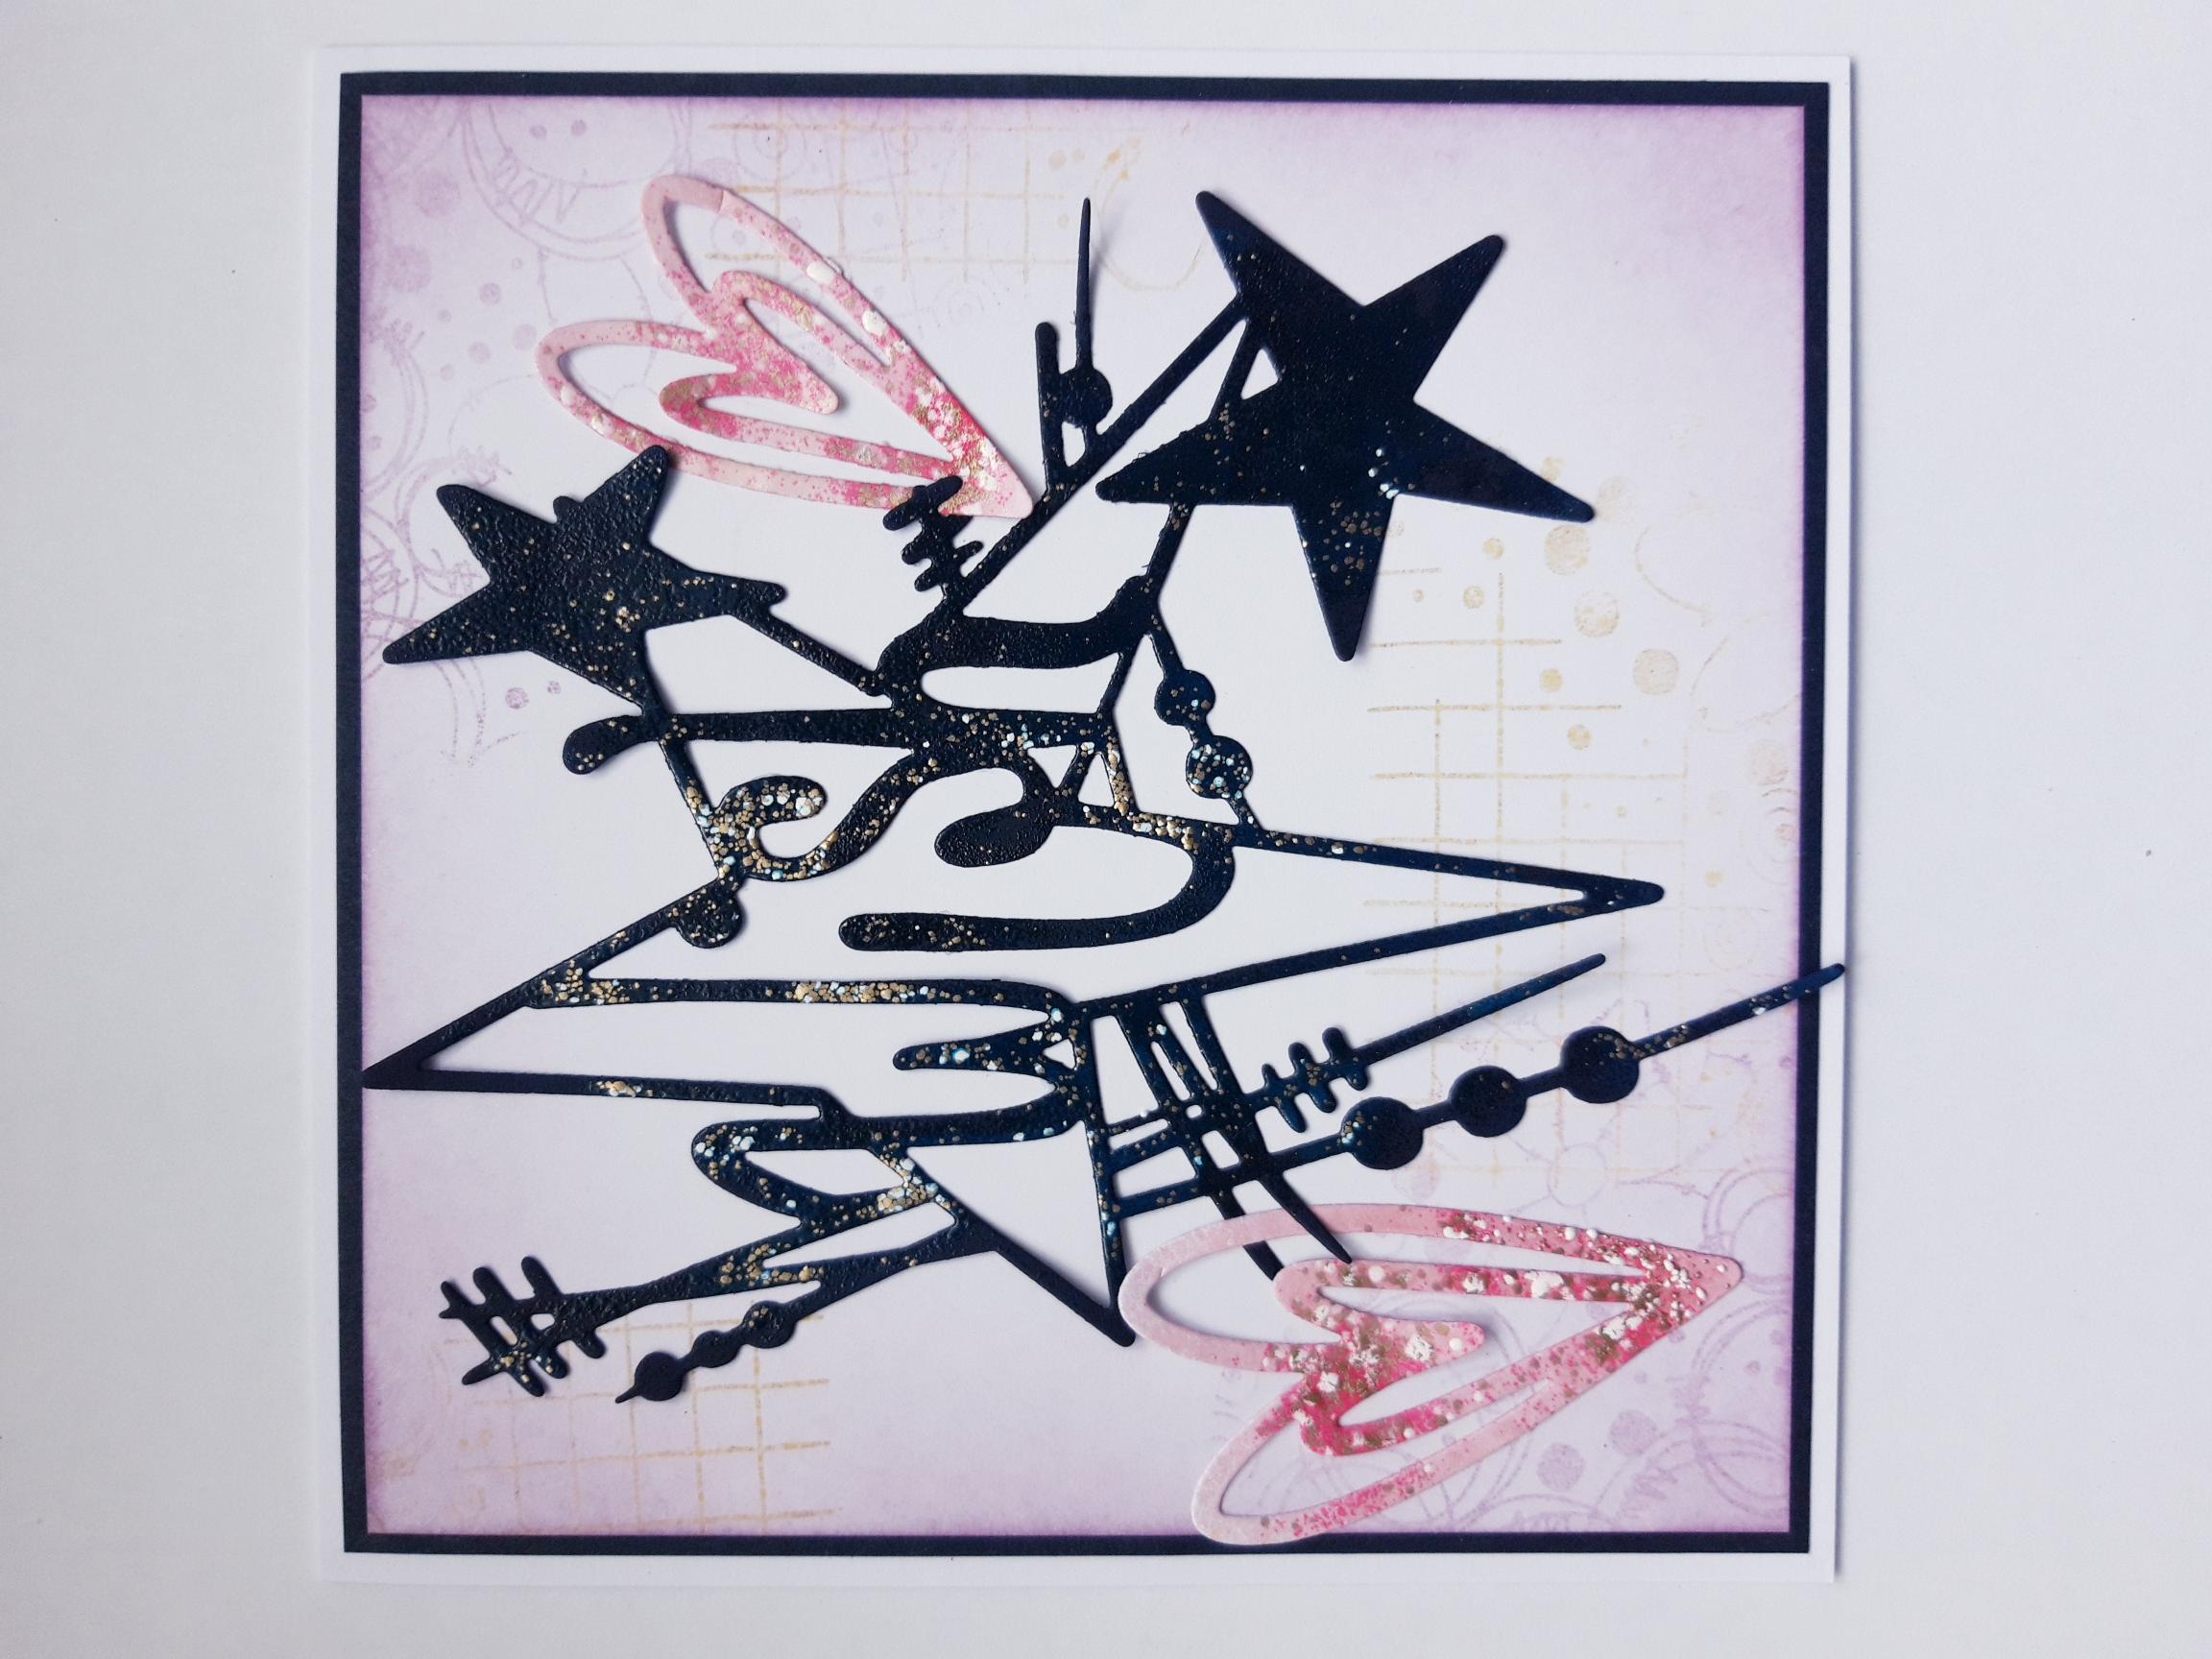
Ink up the Flower Frenzy stamp, with the Izink pink pigment ink, and randomly stamp on to the white card (6 1/2 x 6 1/2"). |
|
Ink up the same stamp, with the Izink brown pigment ink, and continue to stamp randomly on your card. |
|
Blend the pink ink, around the edges of your card. |
|
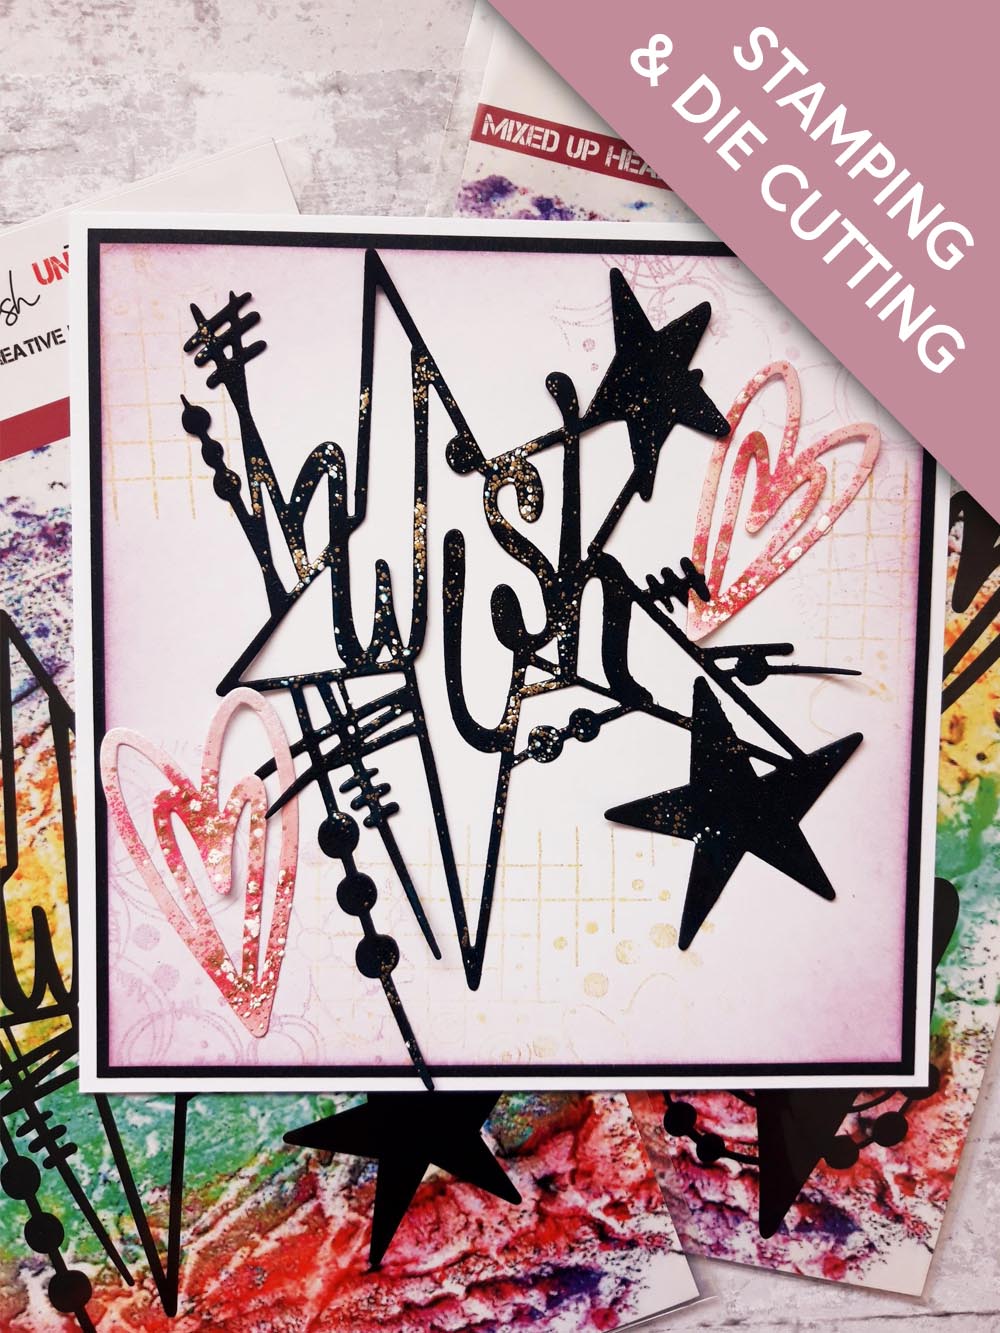
Once the ink is dry, adhere on to the black card (6 3/4 x 6 3/4"). Set this to one side. |
|
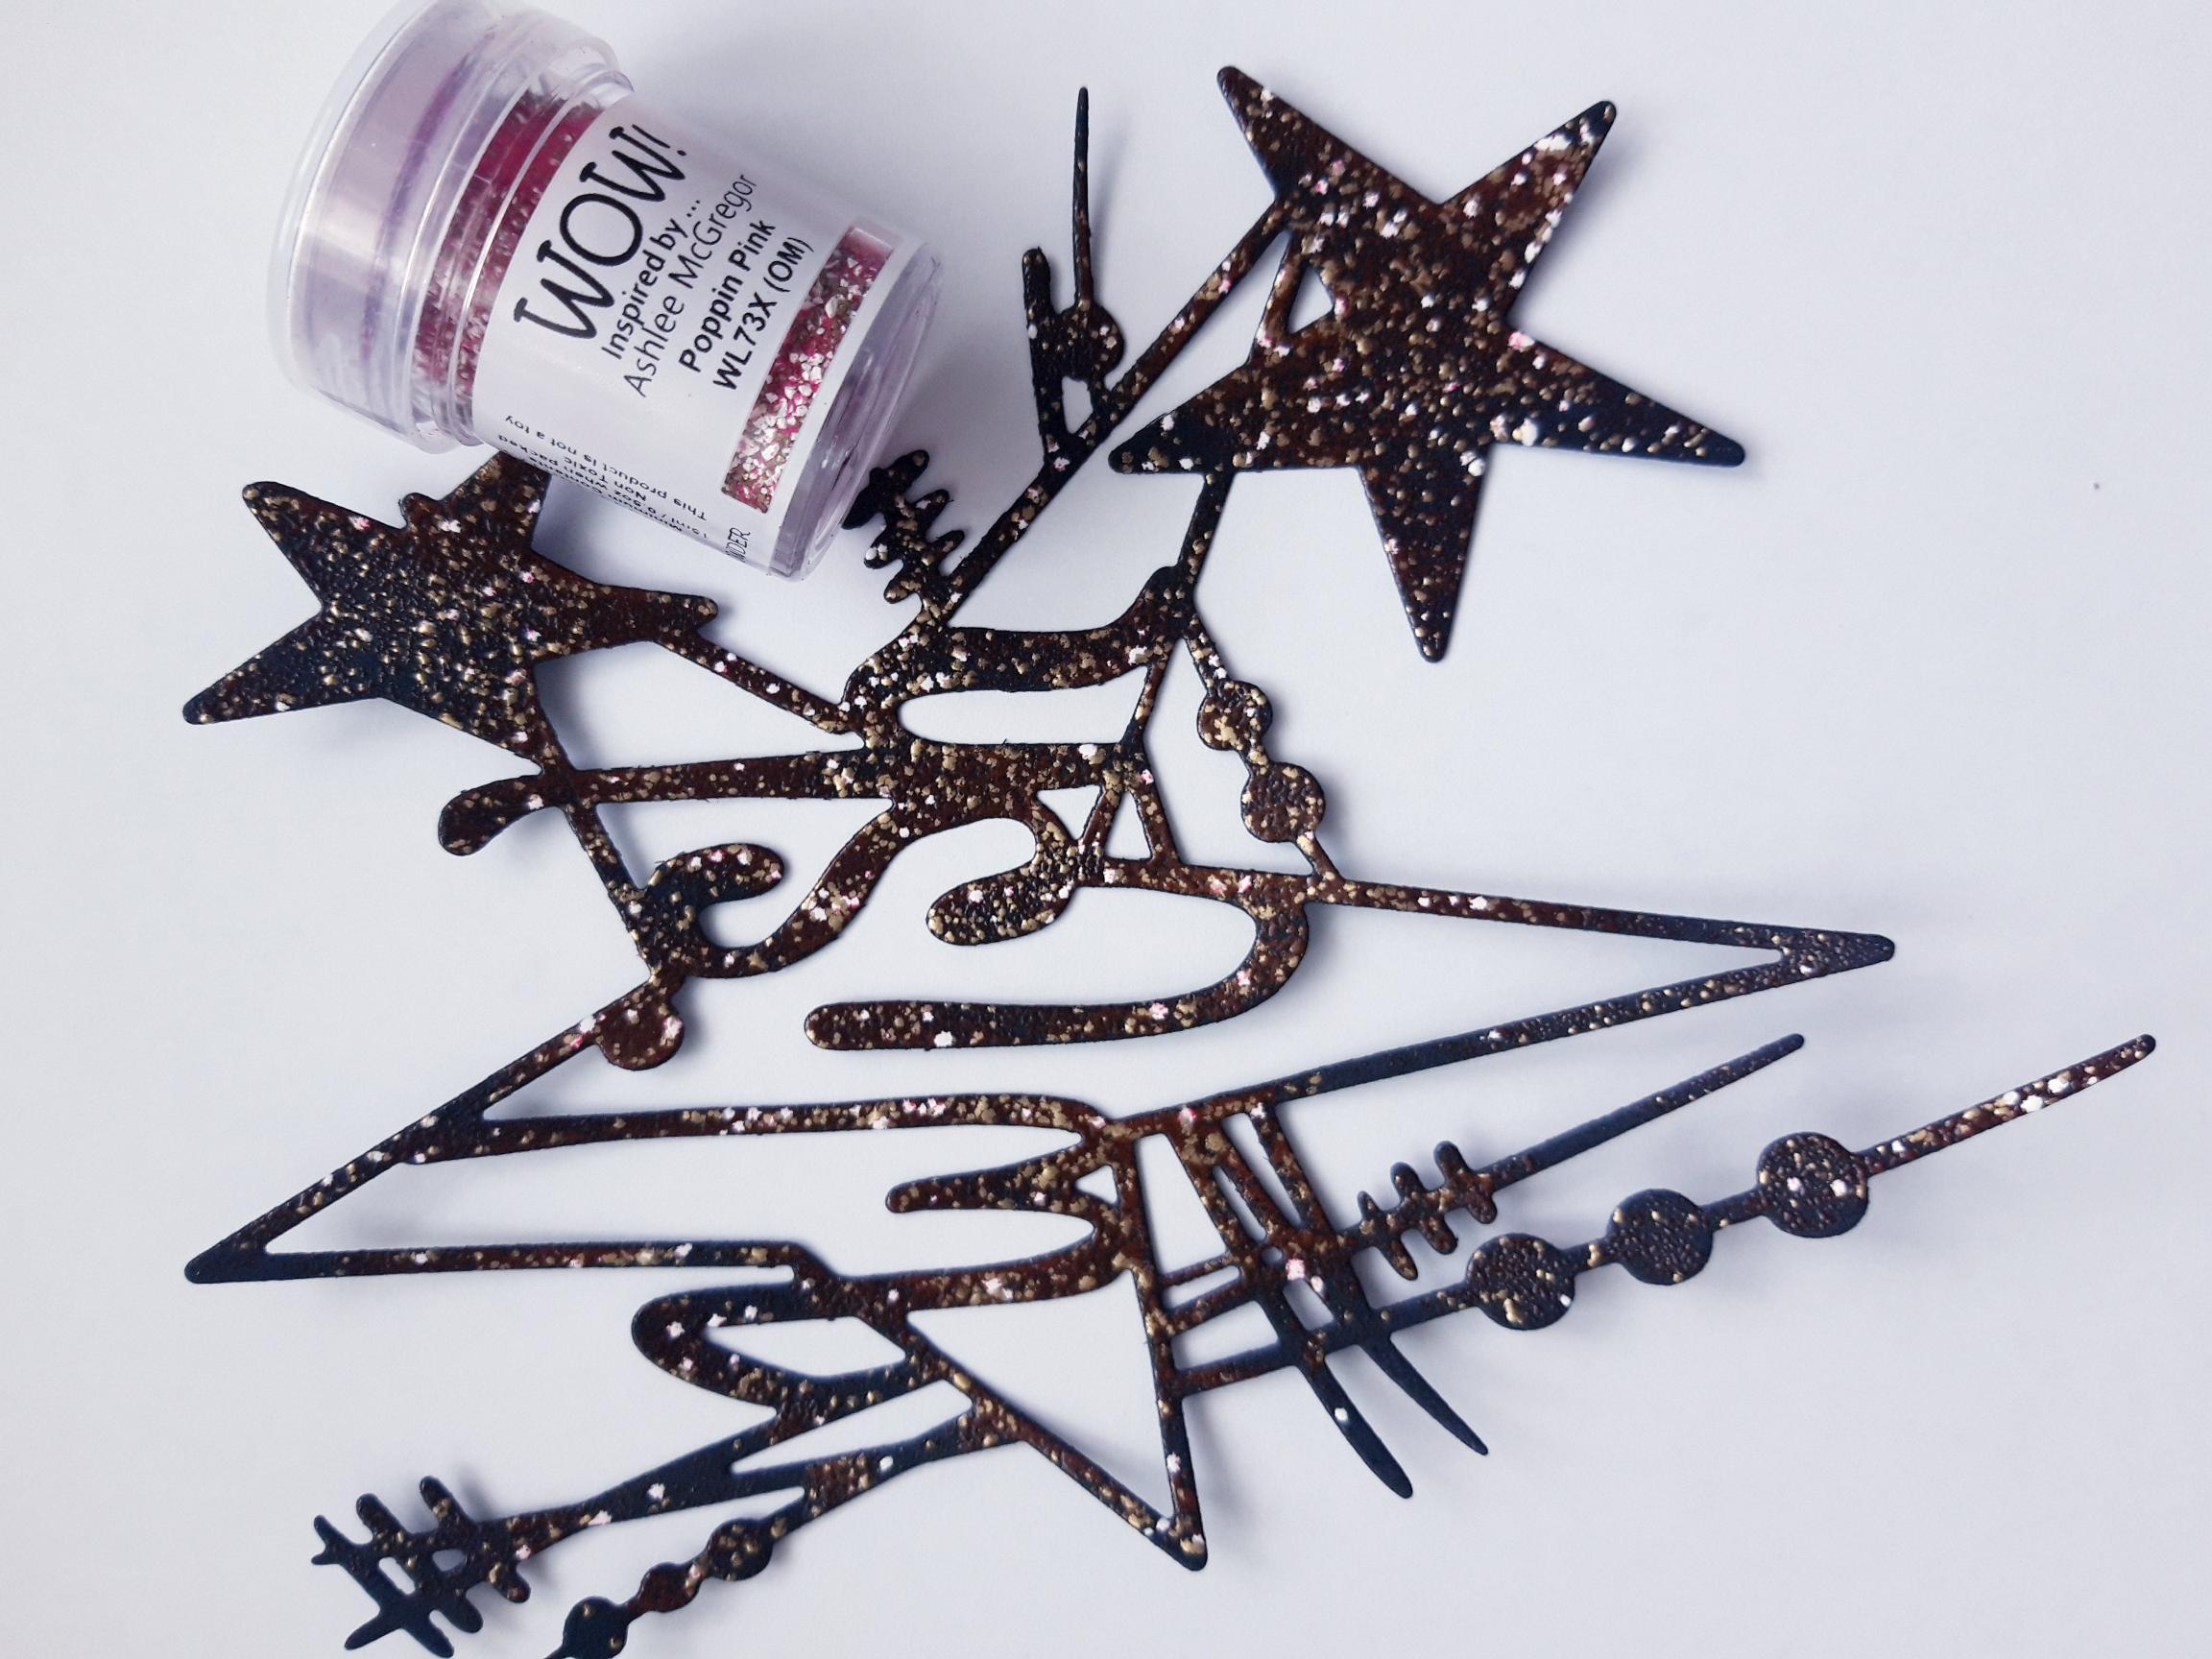
Place the WISH die on to the black card (7 x 5"), and run it through your die cutting machine. Ink it up with the WOW embossing ink, and cover with the WOW Poppin Pink embossing powder. Once your heat tool is hot, heat set the powder. |
|
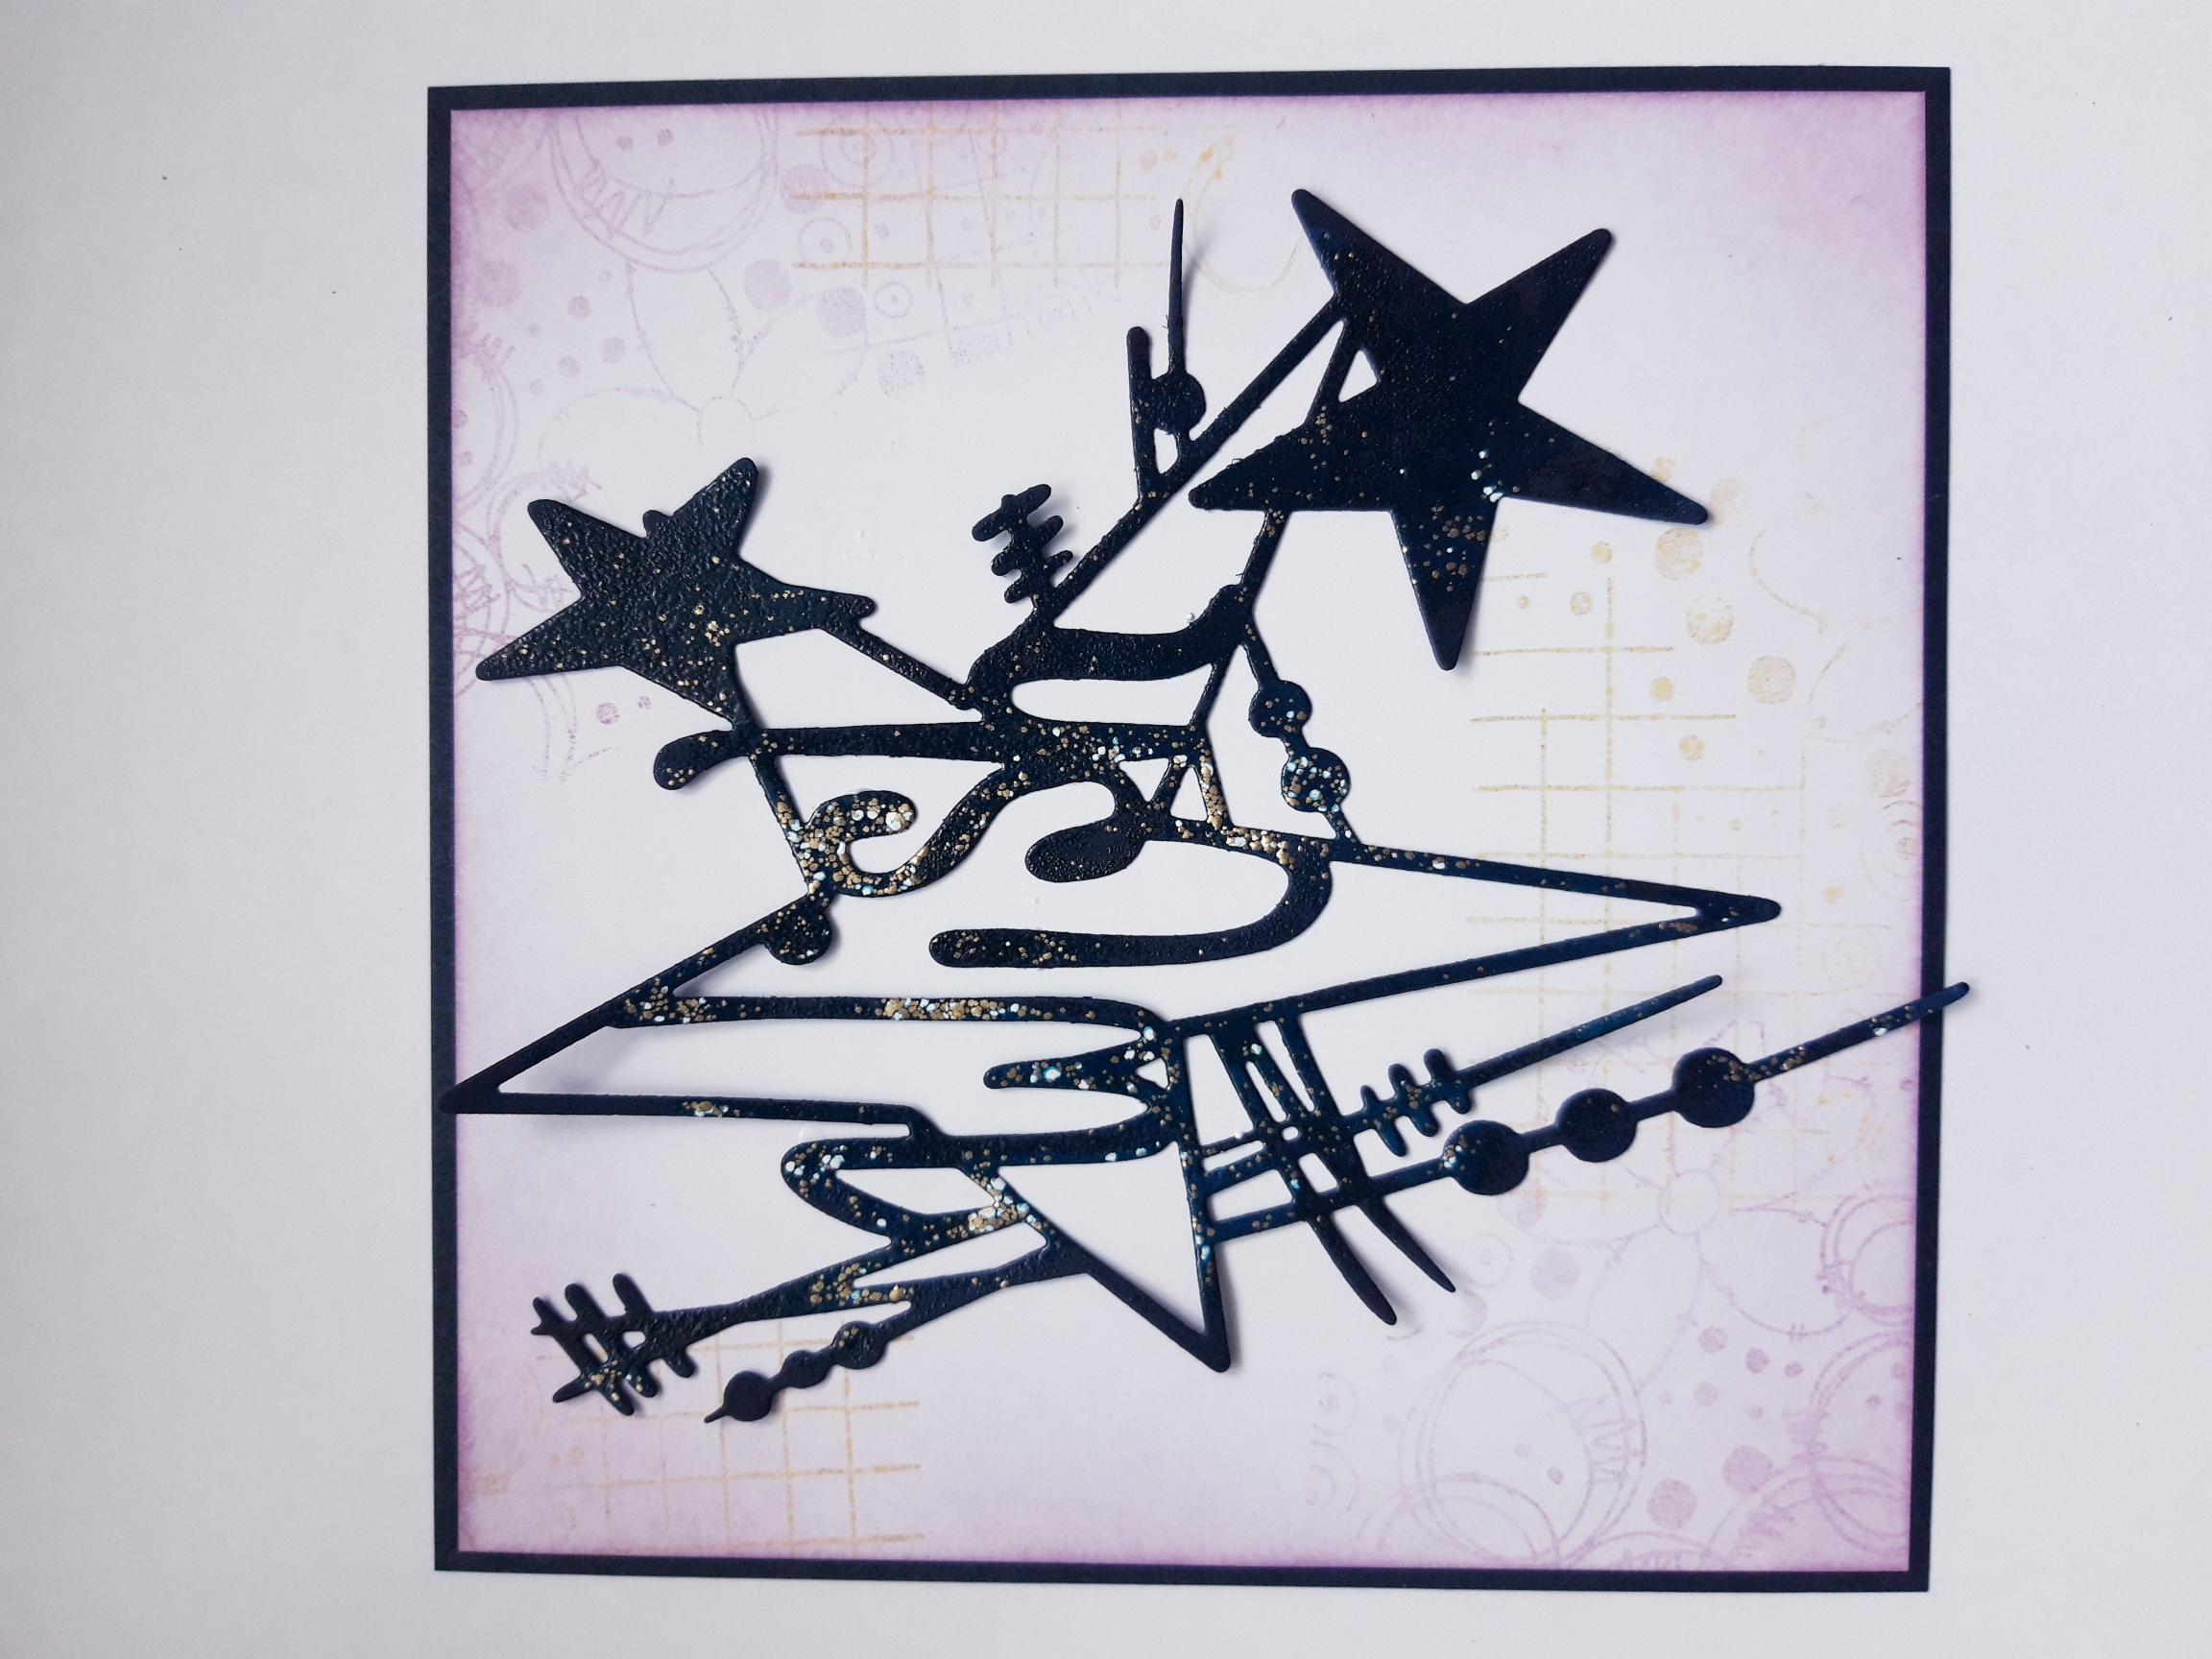
Adhere your embossed WISH element, on to your inked background. |
|
Adhere this on to your white card blank, and set to one side. |
|
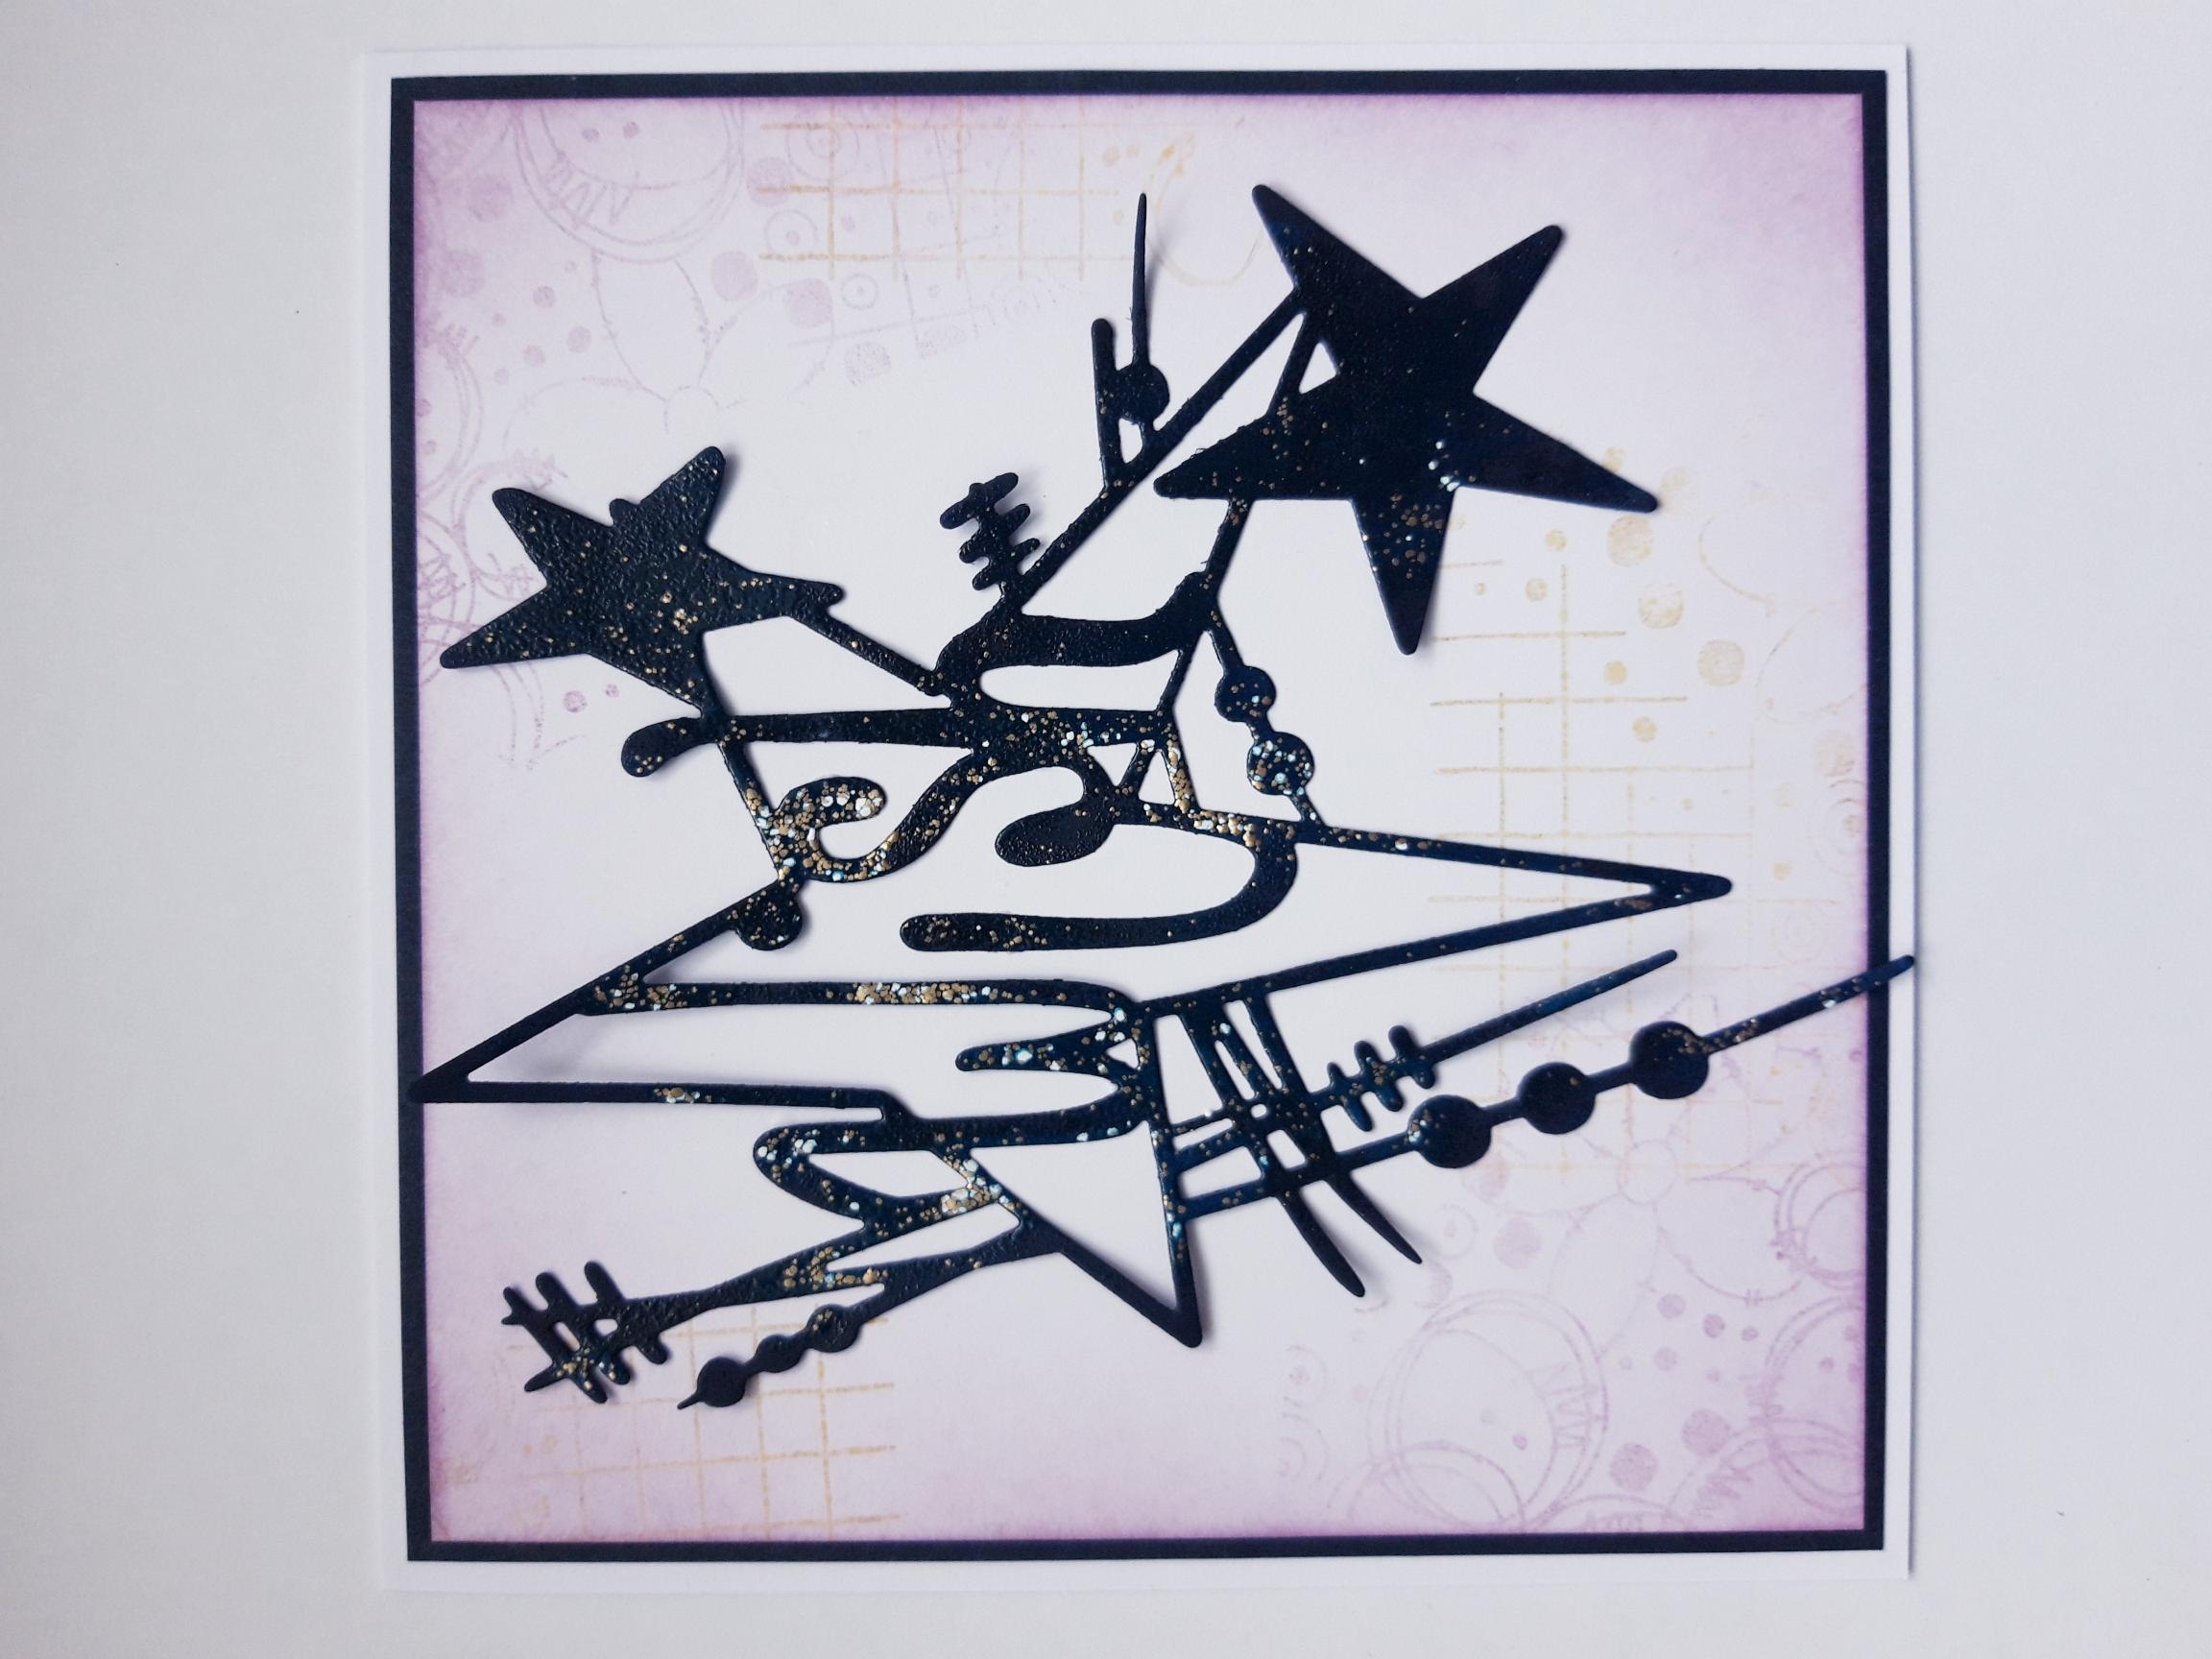
Place the 2 heart dies, from the Mixed Up Hearts Creative Dies set, on to the white card (4 x 4"), and run it through your die cutting machine. Cover the hearts with the WOW embossing ink, and apply the WOW Poppin Pink embossing powder over the top. Heat set as before. |
|
Adhere this, tucked within your design, where desired. |