Give your friends $10 off their first order!
Refer a FRIEND


WHAT YOU WILL NEED:
White DL card blank (8 1/4 x 4")
Gossip Glitter Card: Red
White card (7 3/4 x 3 1/2")
Vellum- tear to approx 5 x 2 1/4"
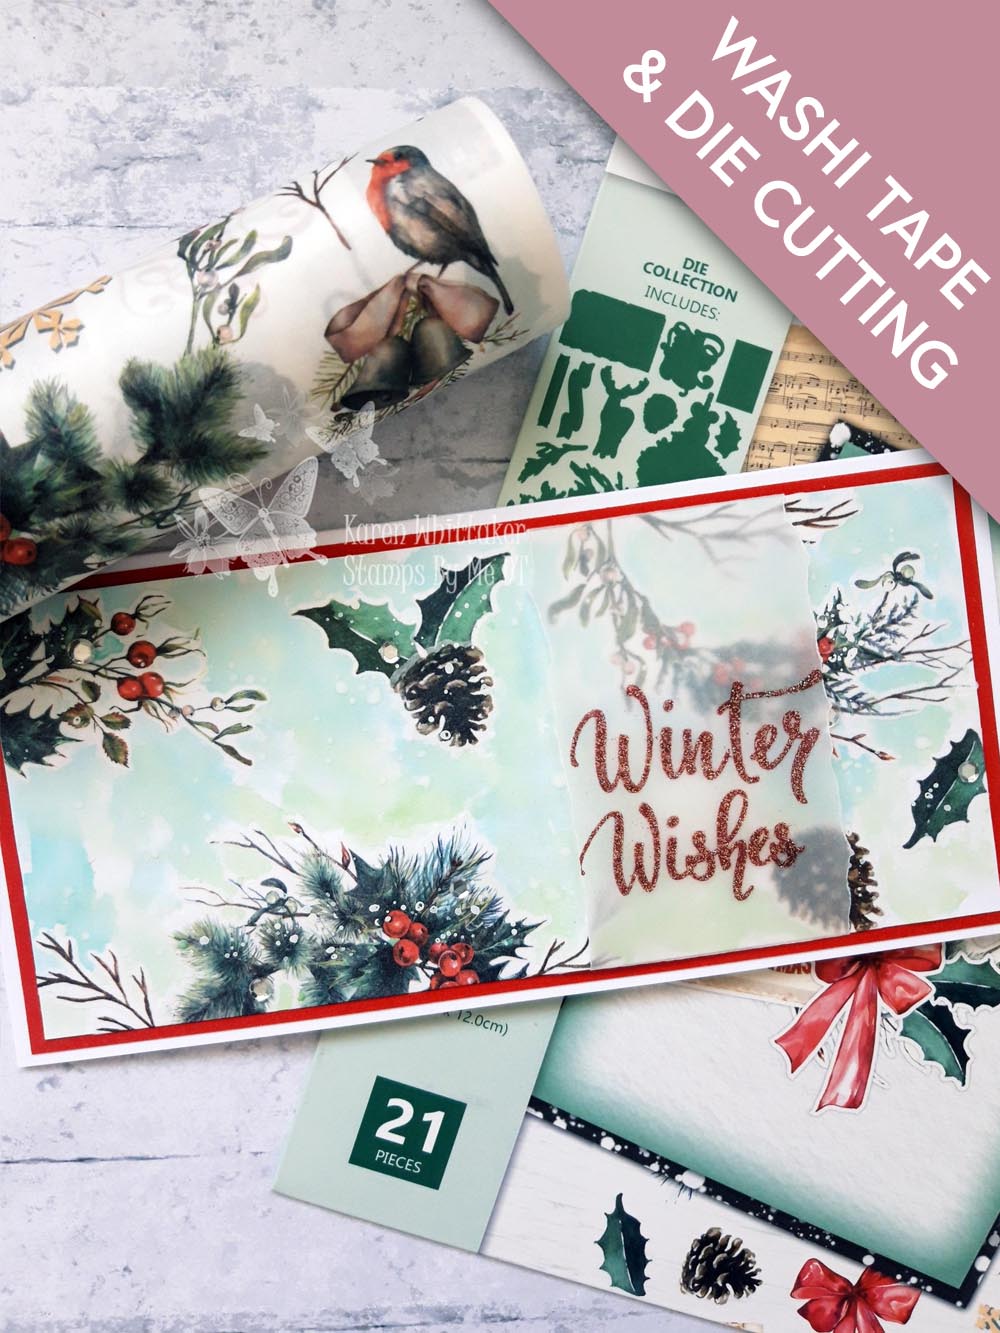
Happy Holidays Washi Tape Roll and Die Collection
Stamps from Christmas Blessings Stamp Collection
WOW Embossing Powder Don't Be Fooled collection: Hey You
WOW heat tool
Anti static bag
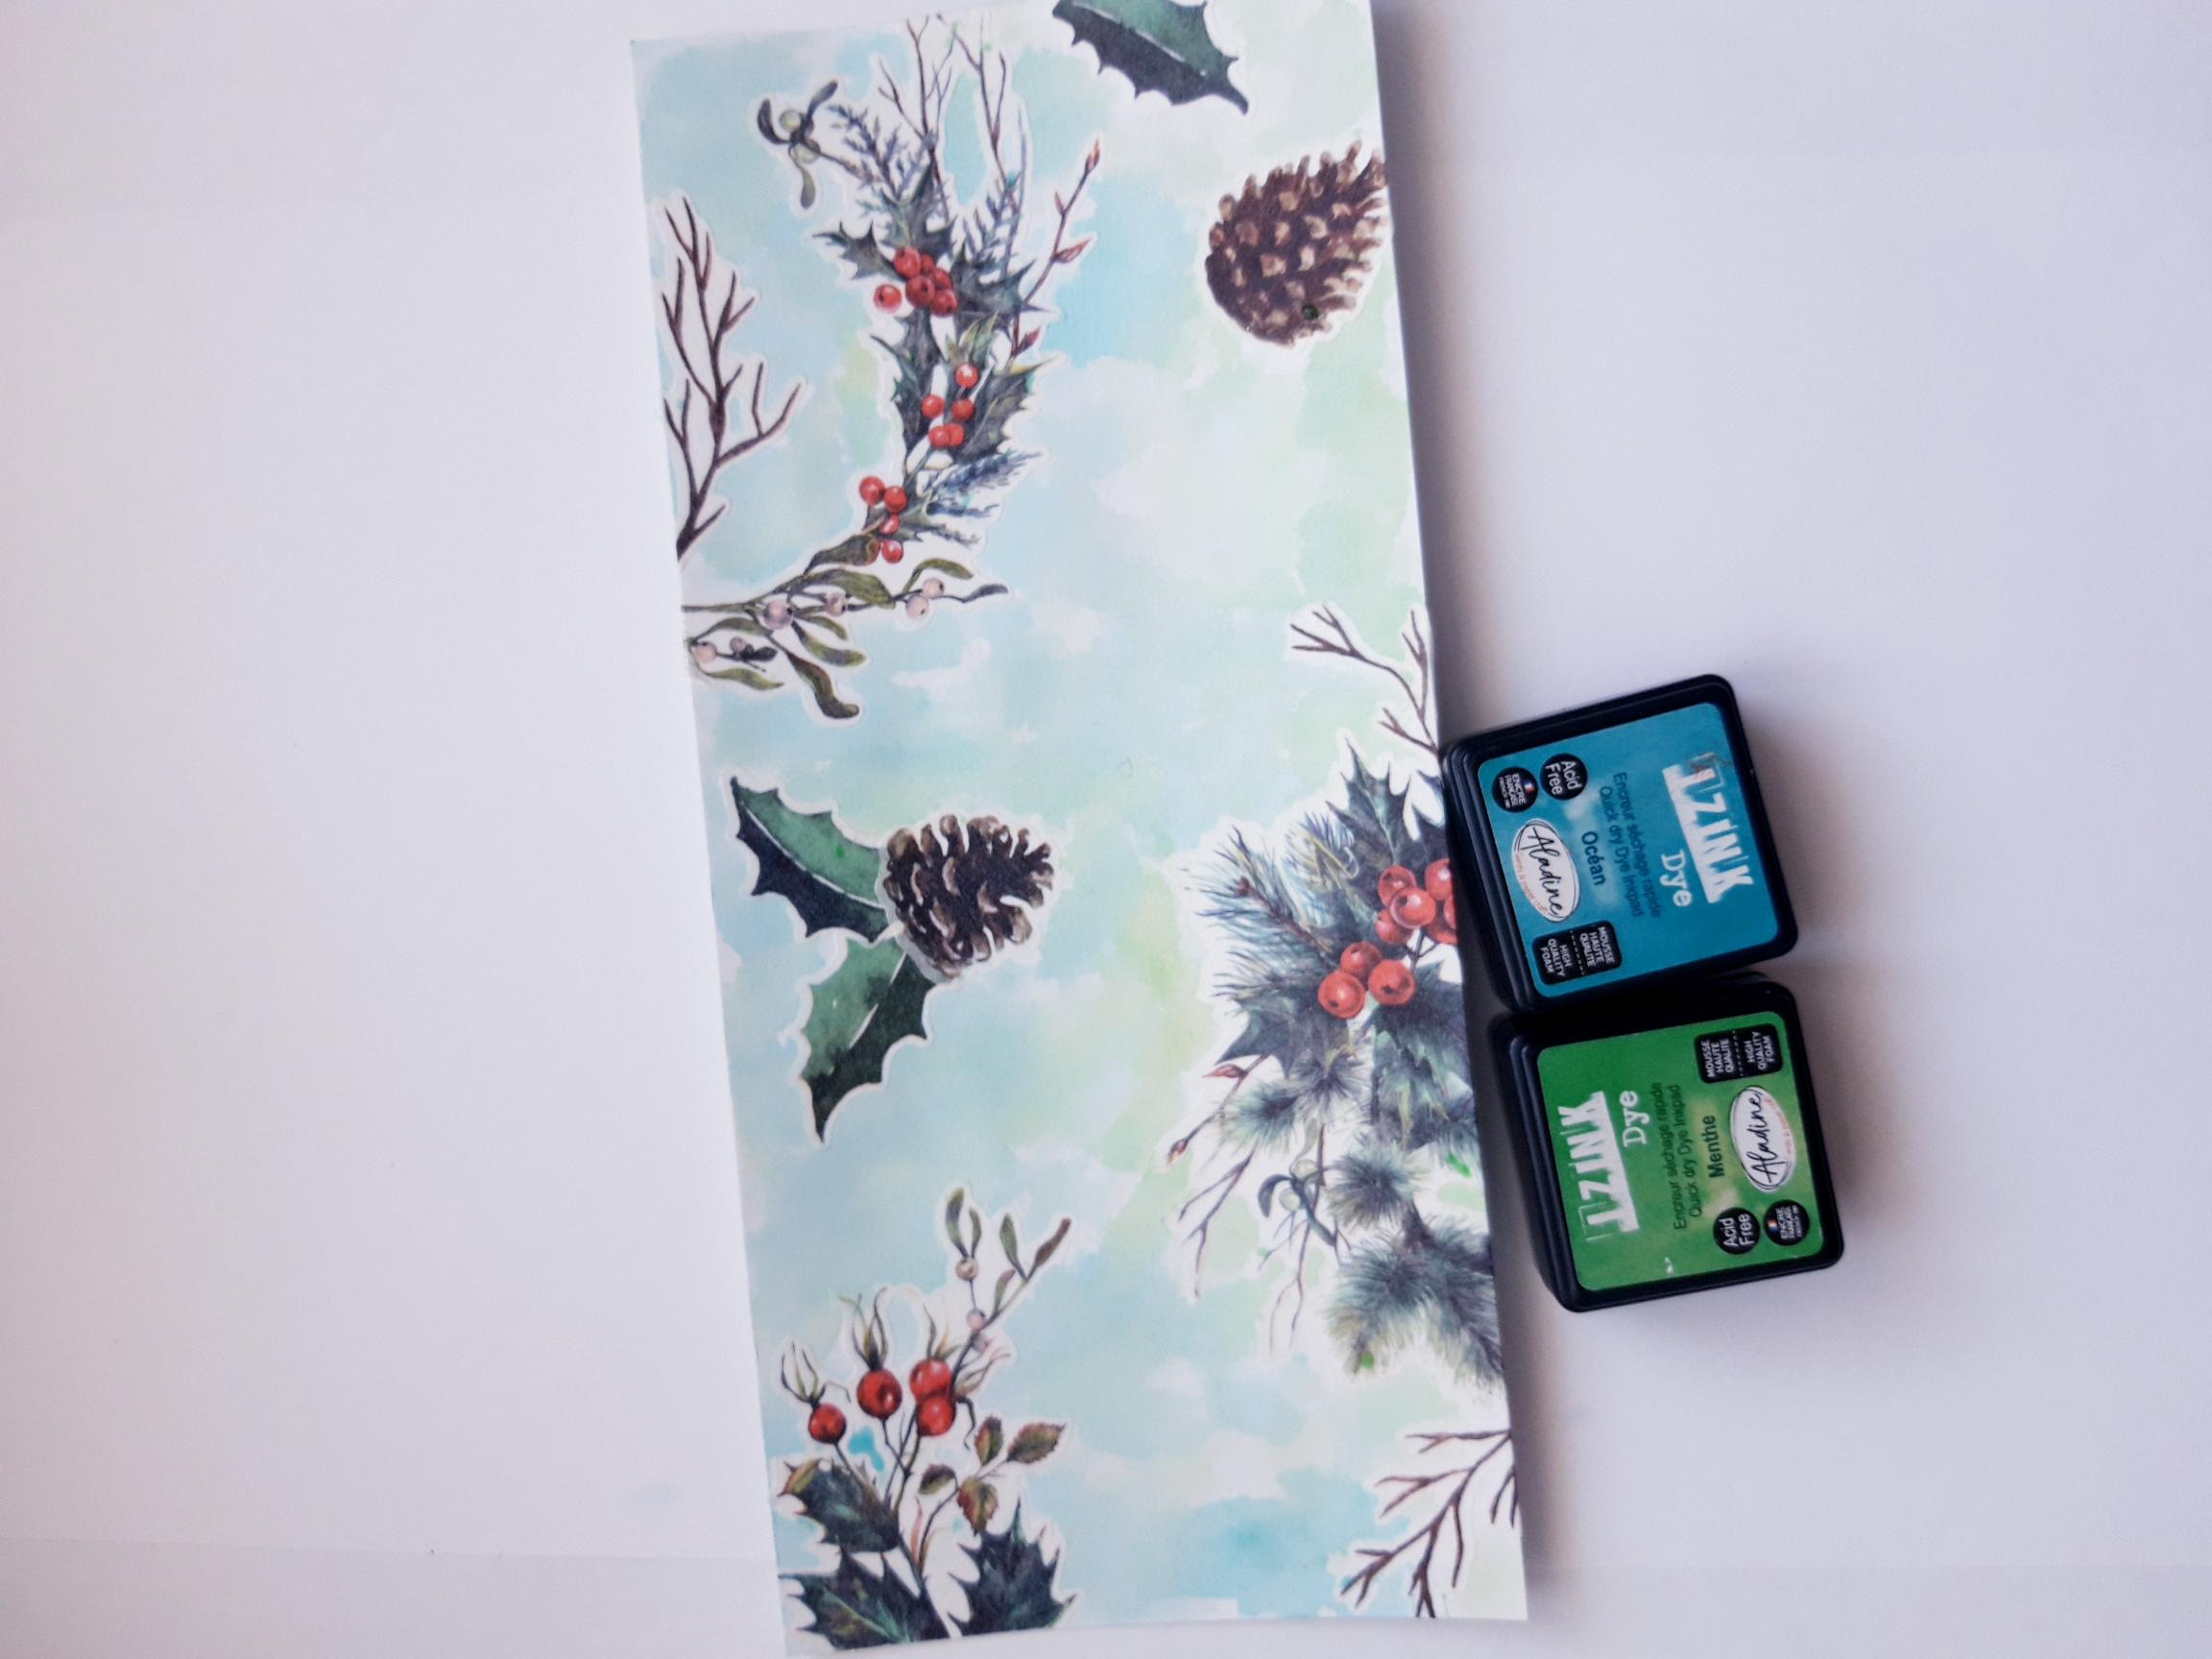
Izink Dy ink pad: Ocean, Menthe
Izink Pigment Classic Collection: Red
Paint brush
Thirsty Brush Confetti paint: White Lace
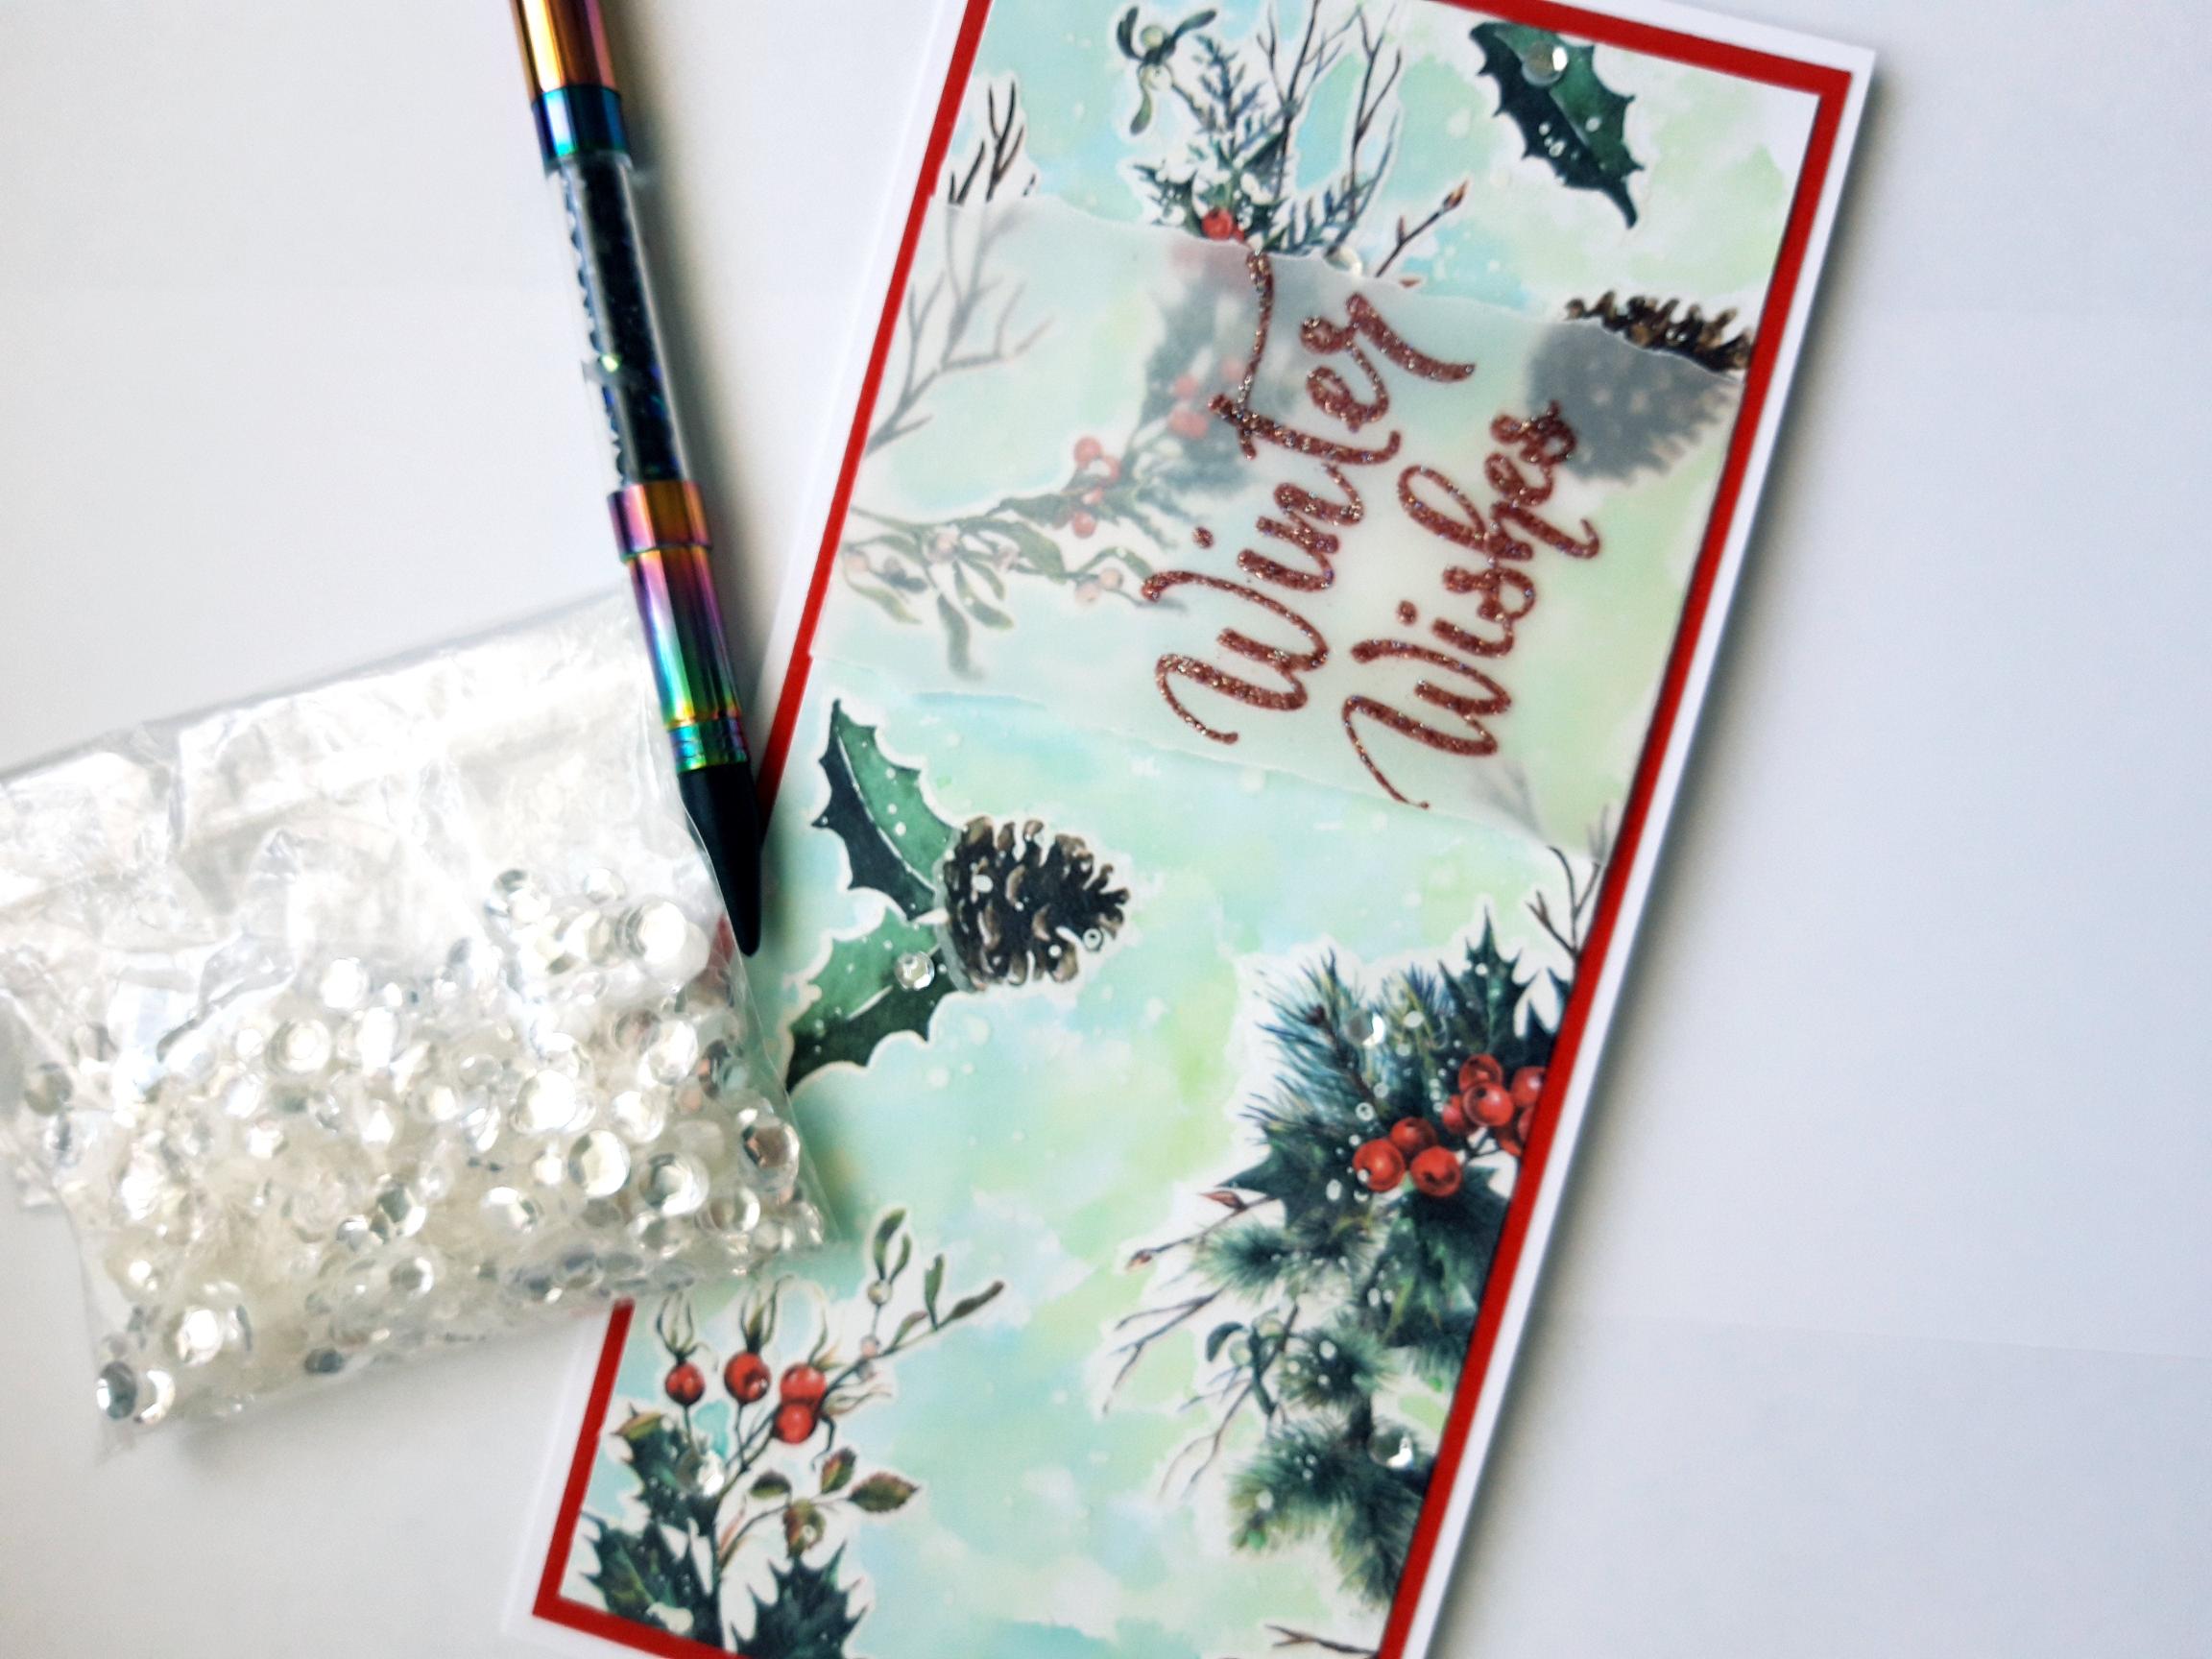
Sequins
Gem pick up and pokey tool
Eureka 101
Paper Trimmer
Perfect Together Glue
Double sided tape
Low tack tape
Foam Pads
Die Cutting machine
[click image to enlarge] 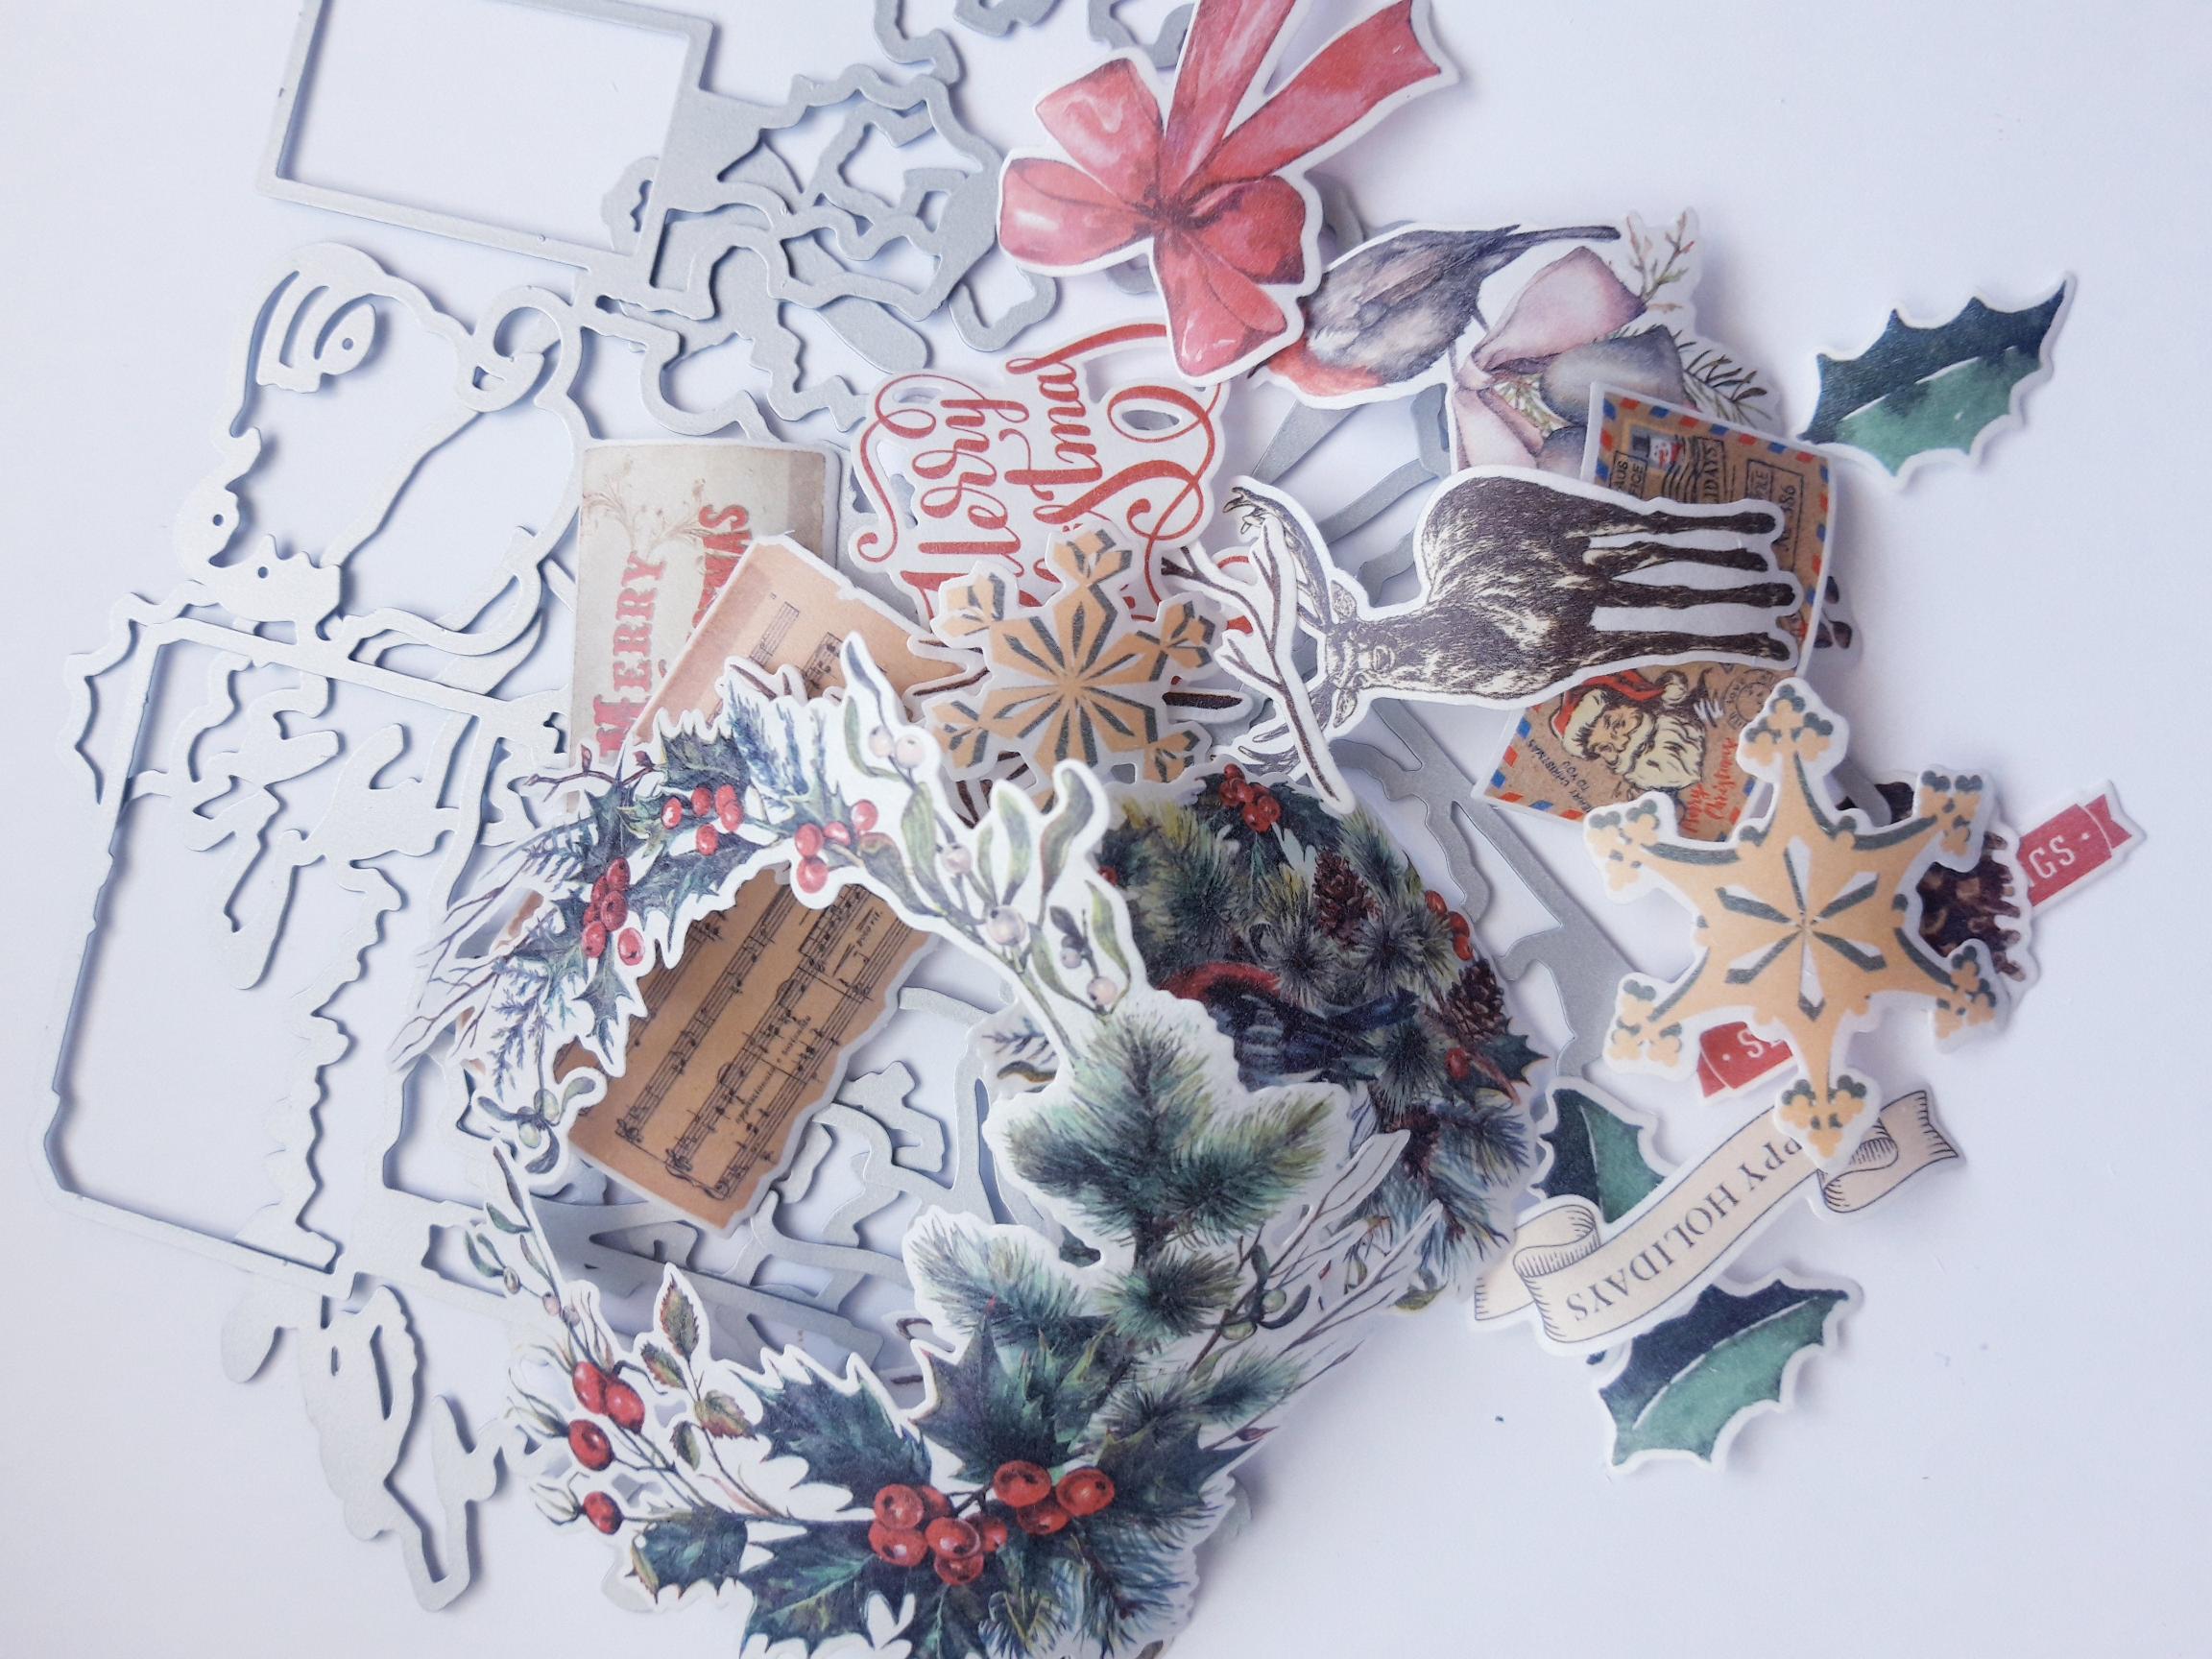
|
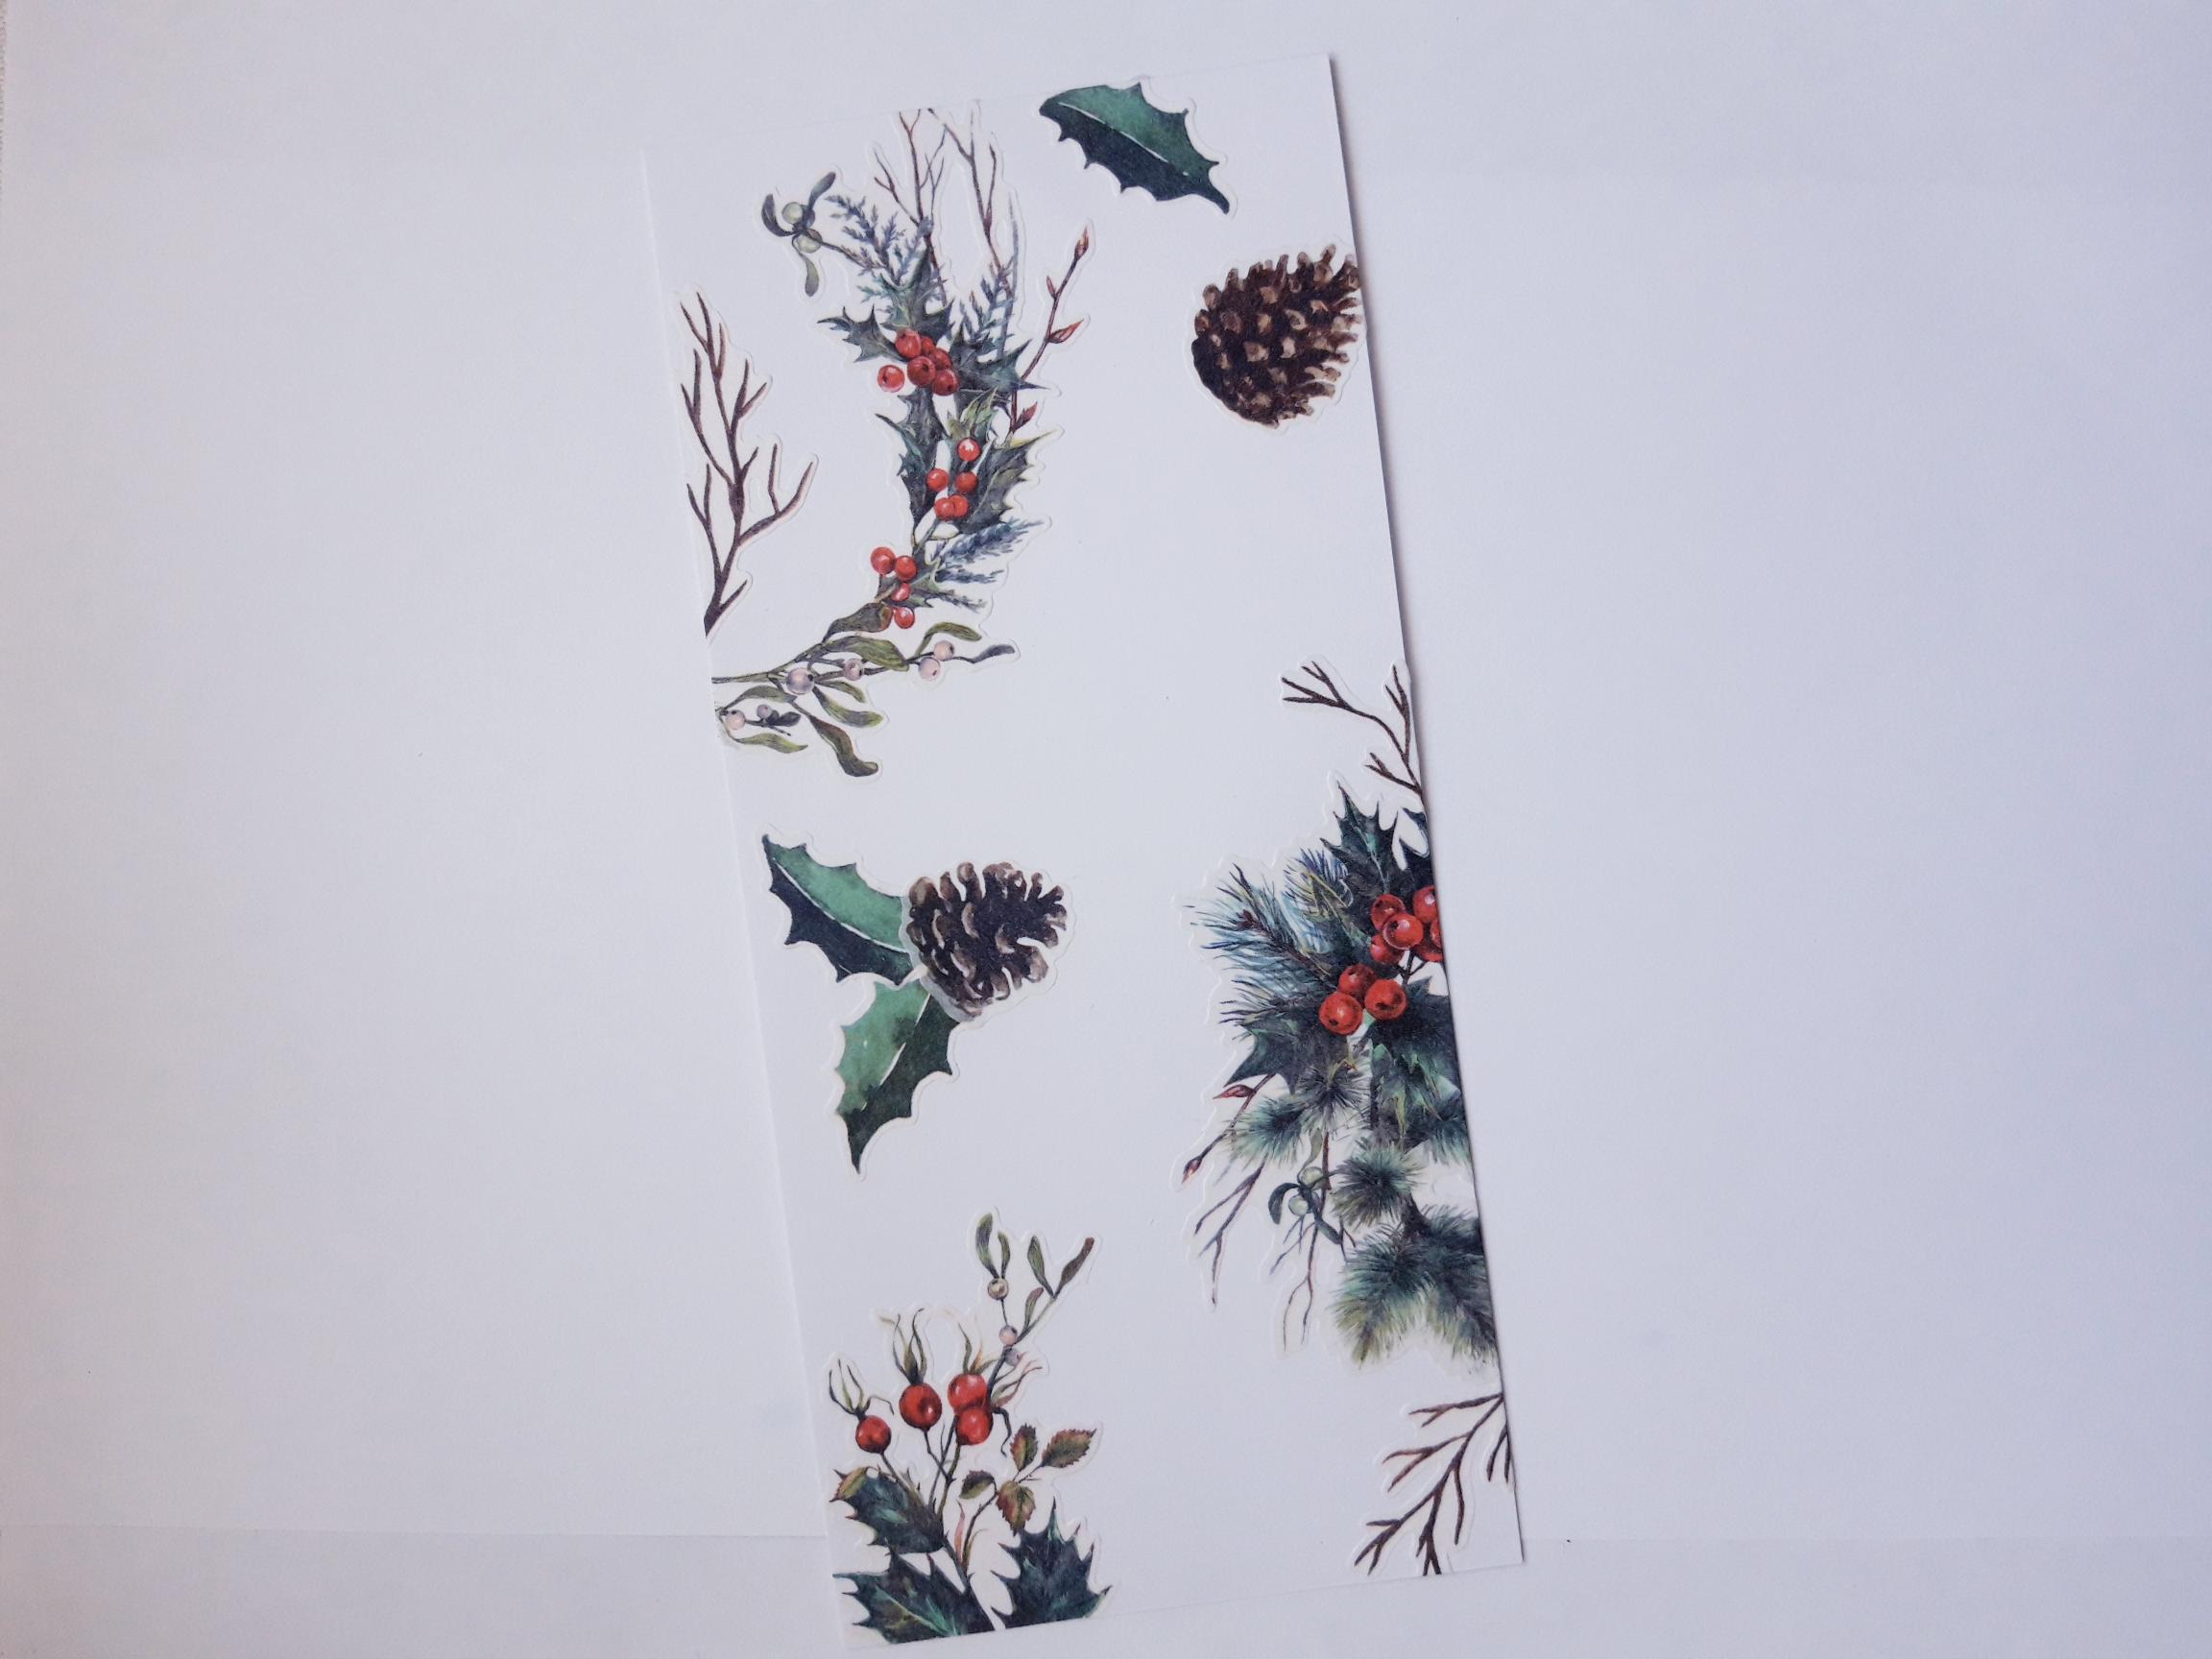
Unroll the Happy Holidays Washi Tape, and using the 2 coordinating dies as a guide, cut off the 2 drops, with scissors. Line the first die up on the washi, hold in place with low tack tape, and run it through your die cutting machine. Repeat this step with the second die, and you now have "stickers" ready for your project. |
|
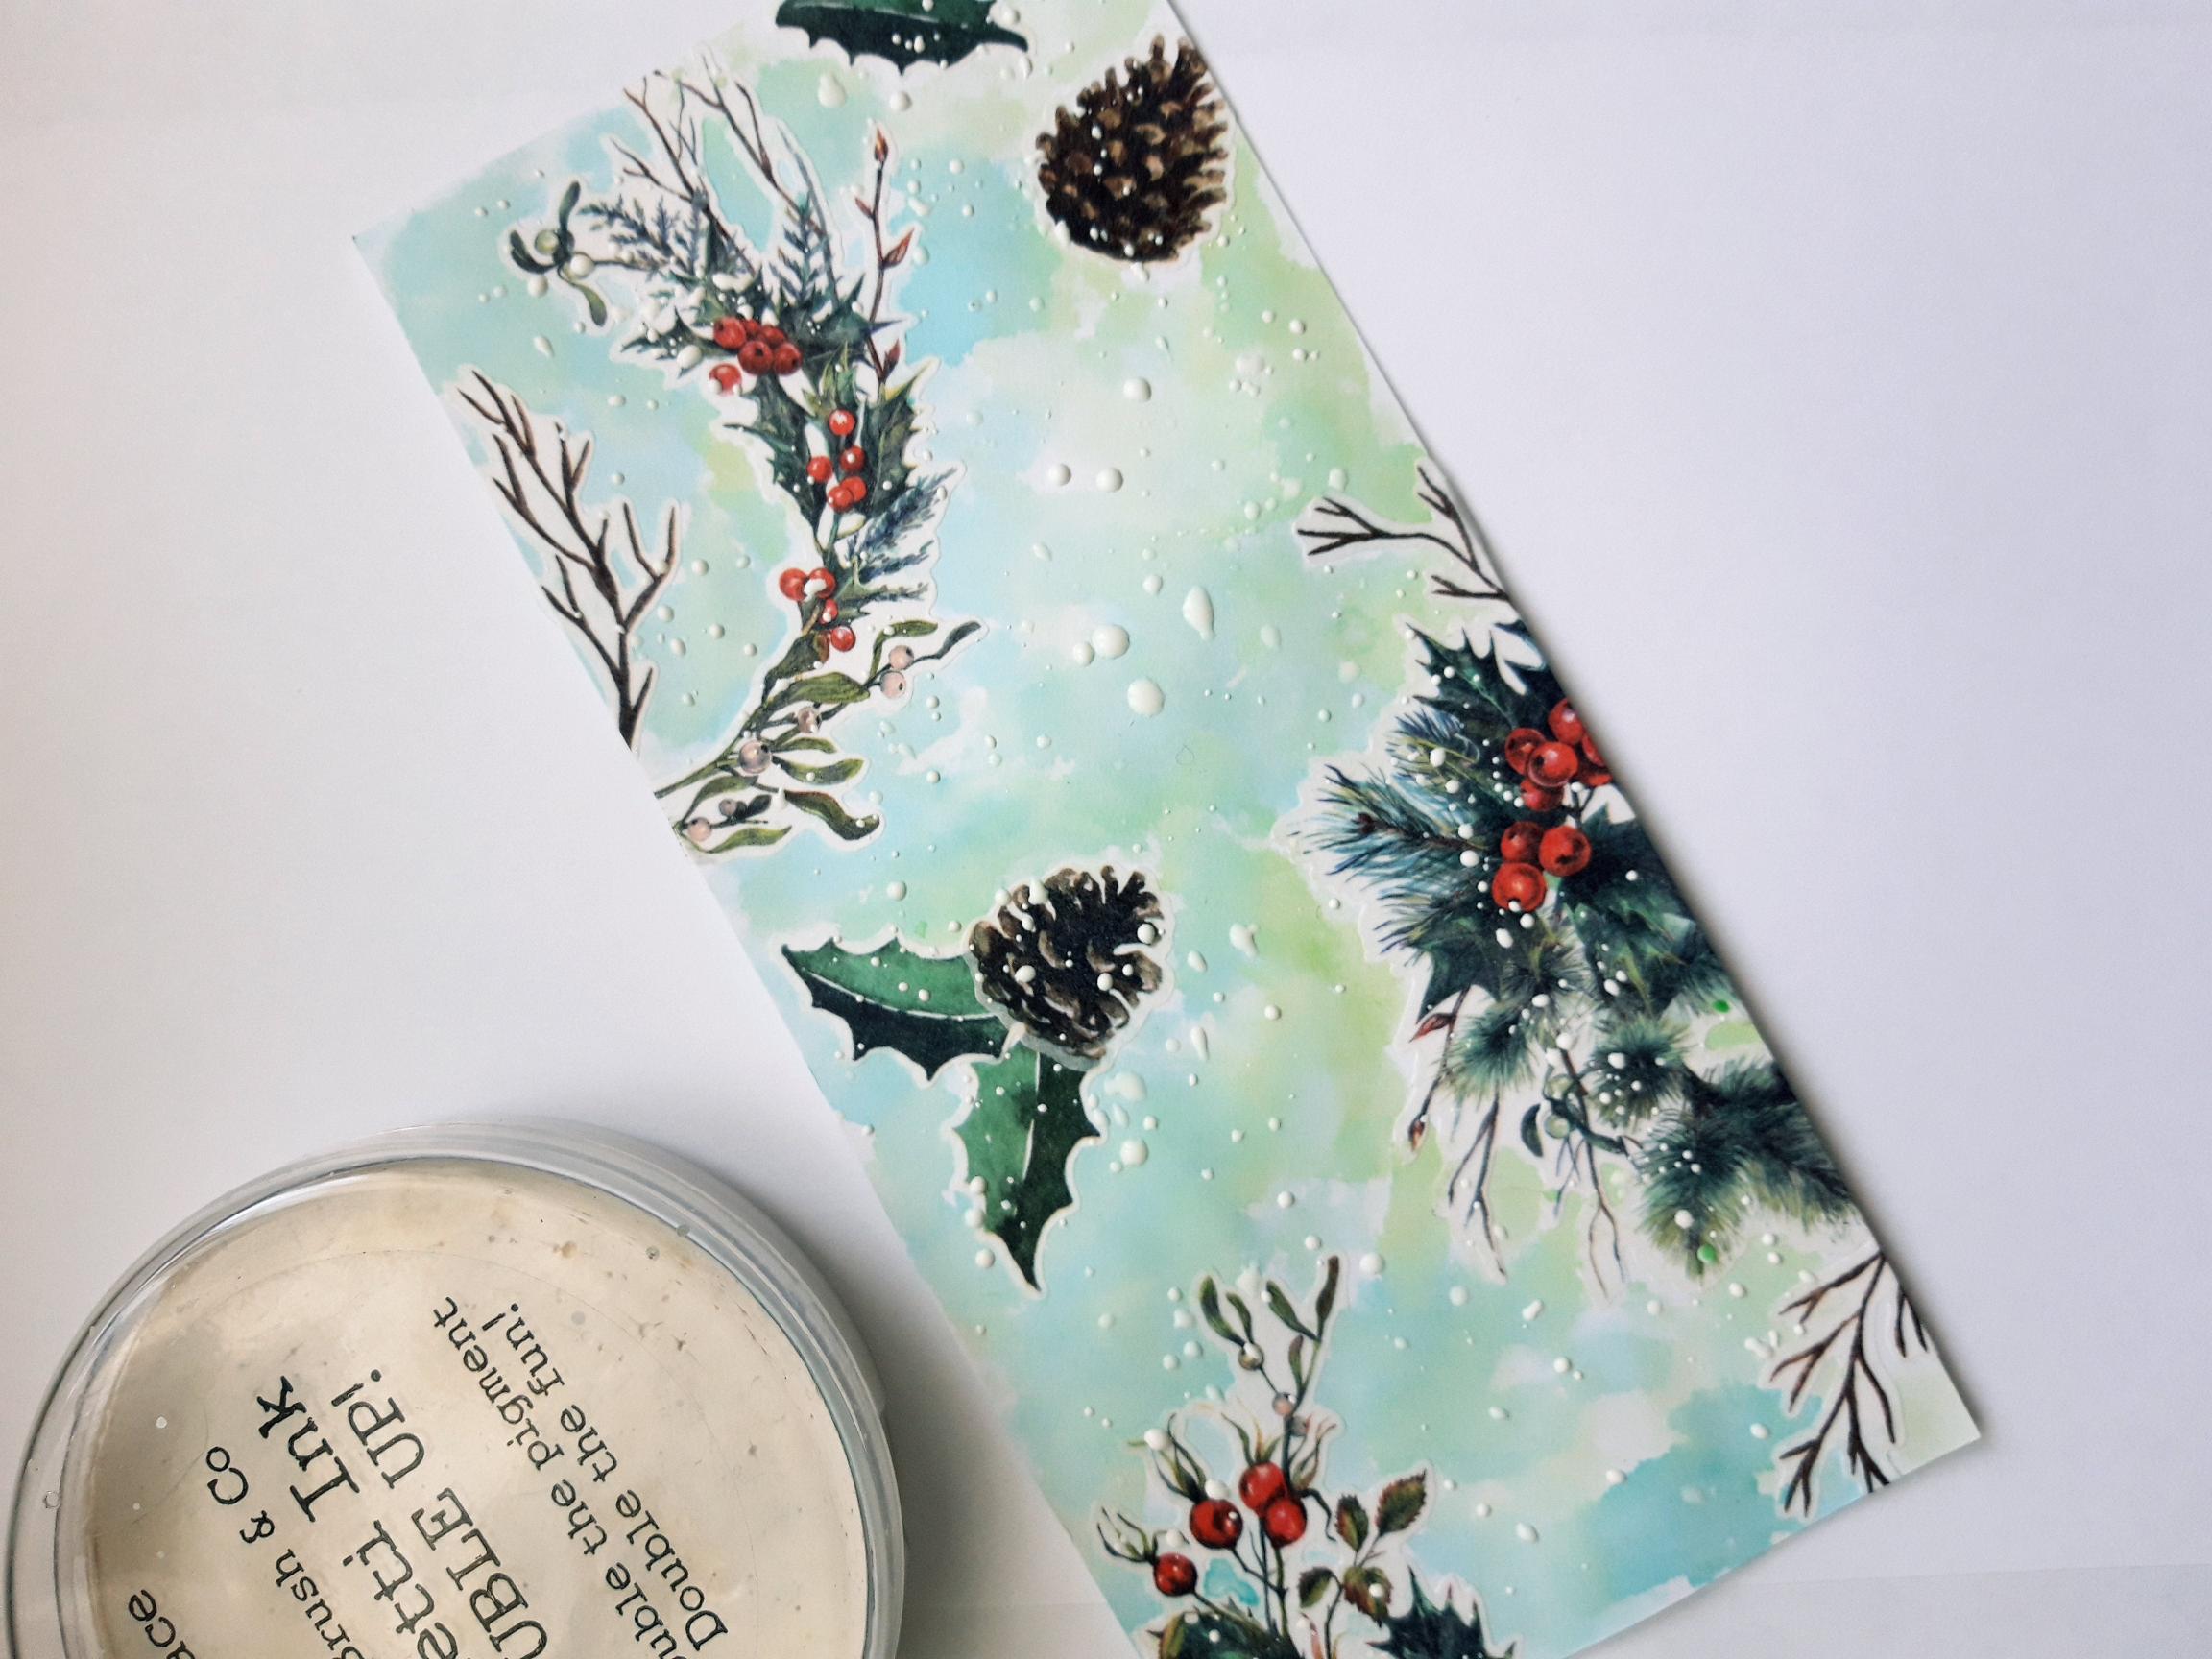
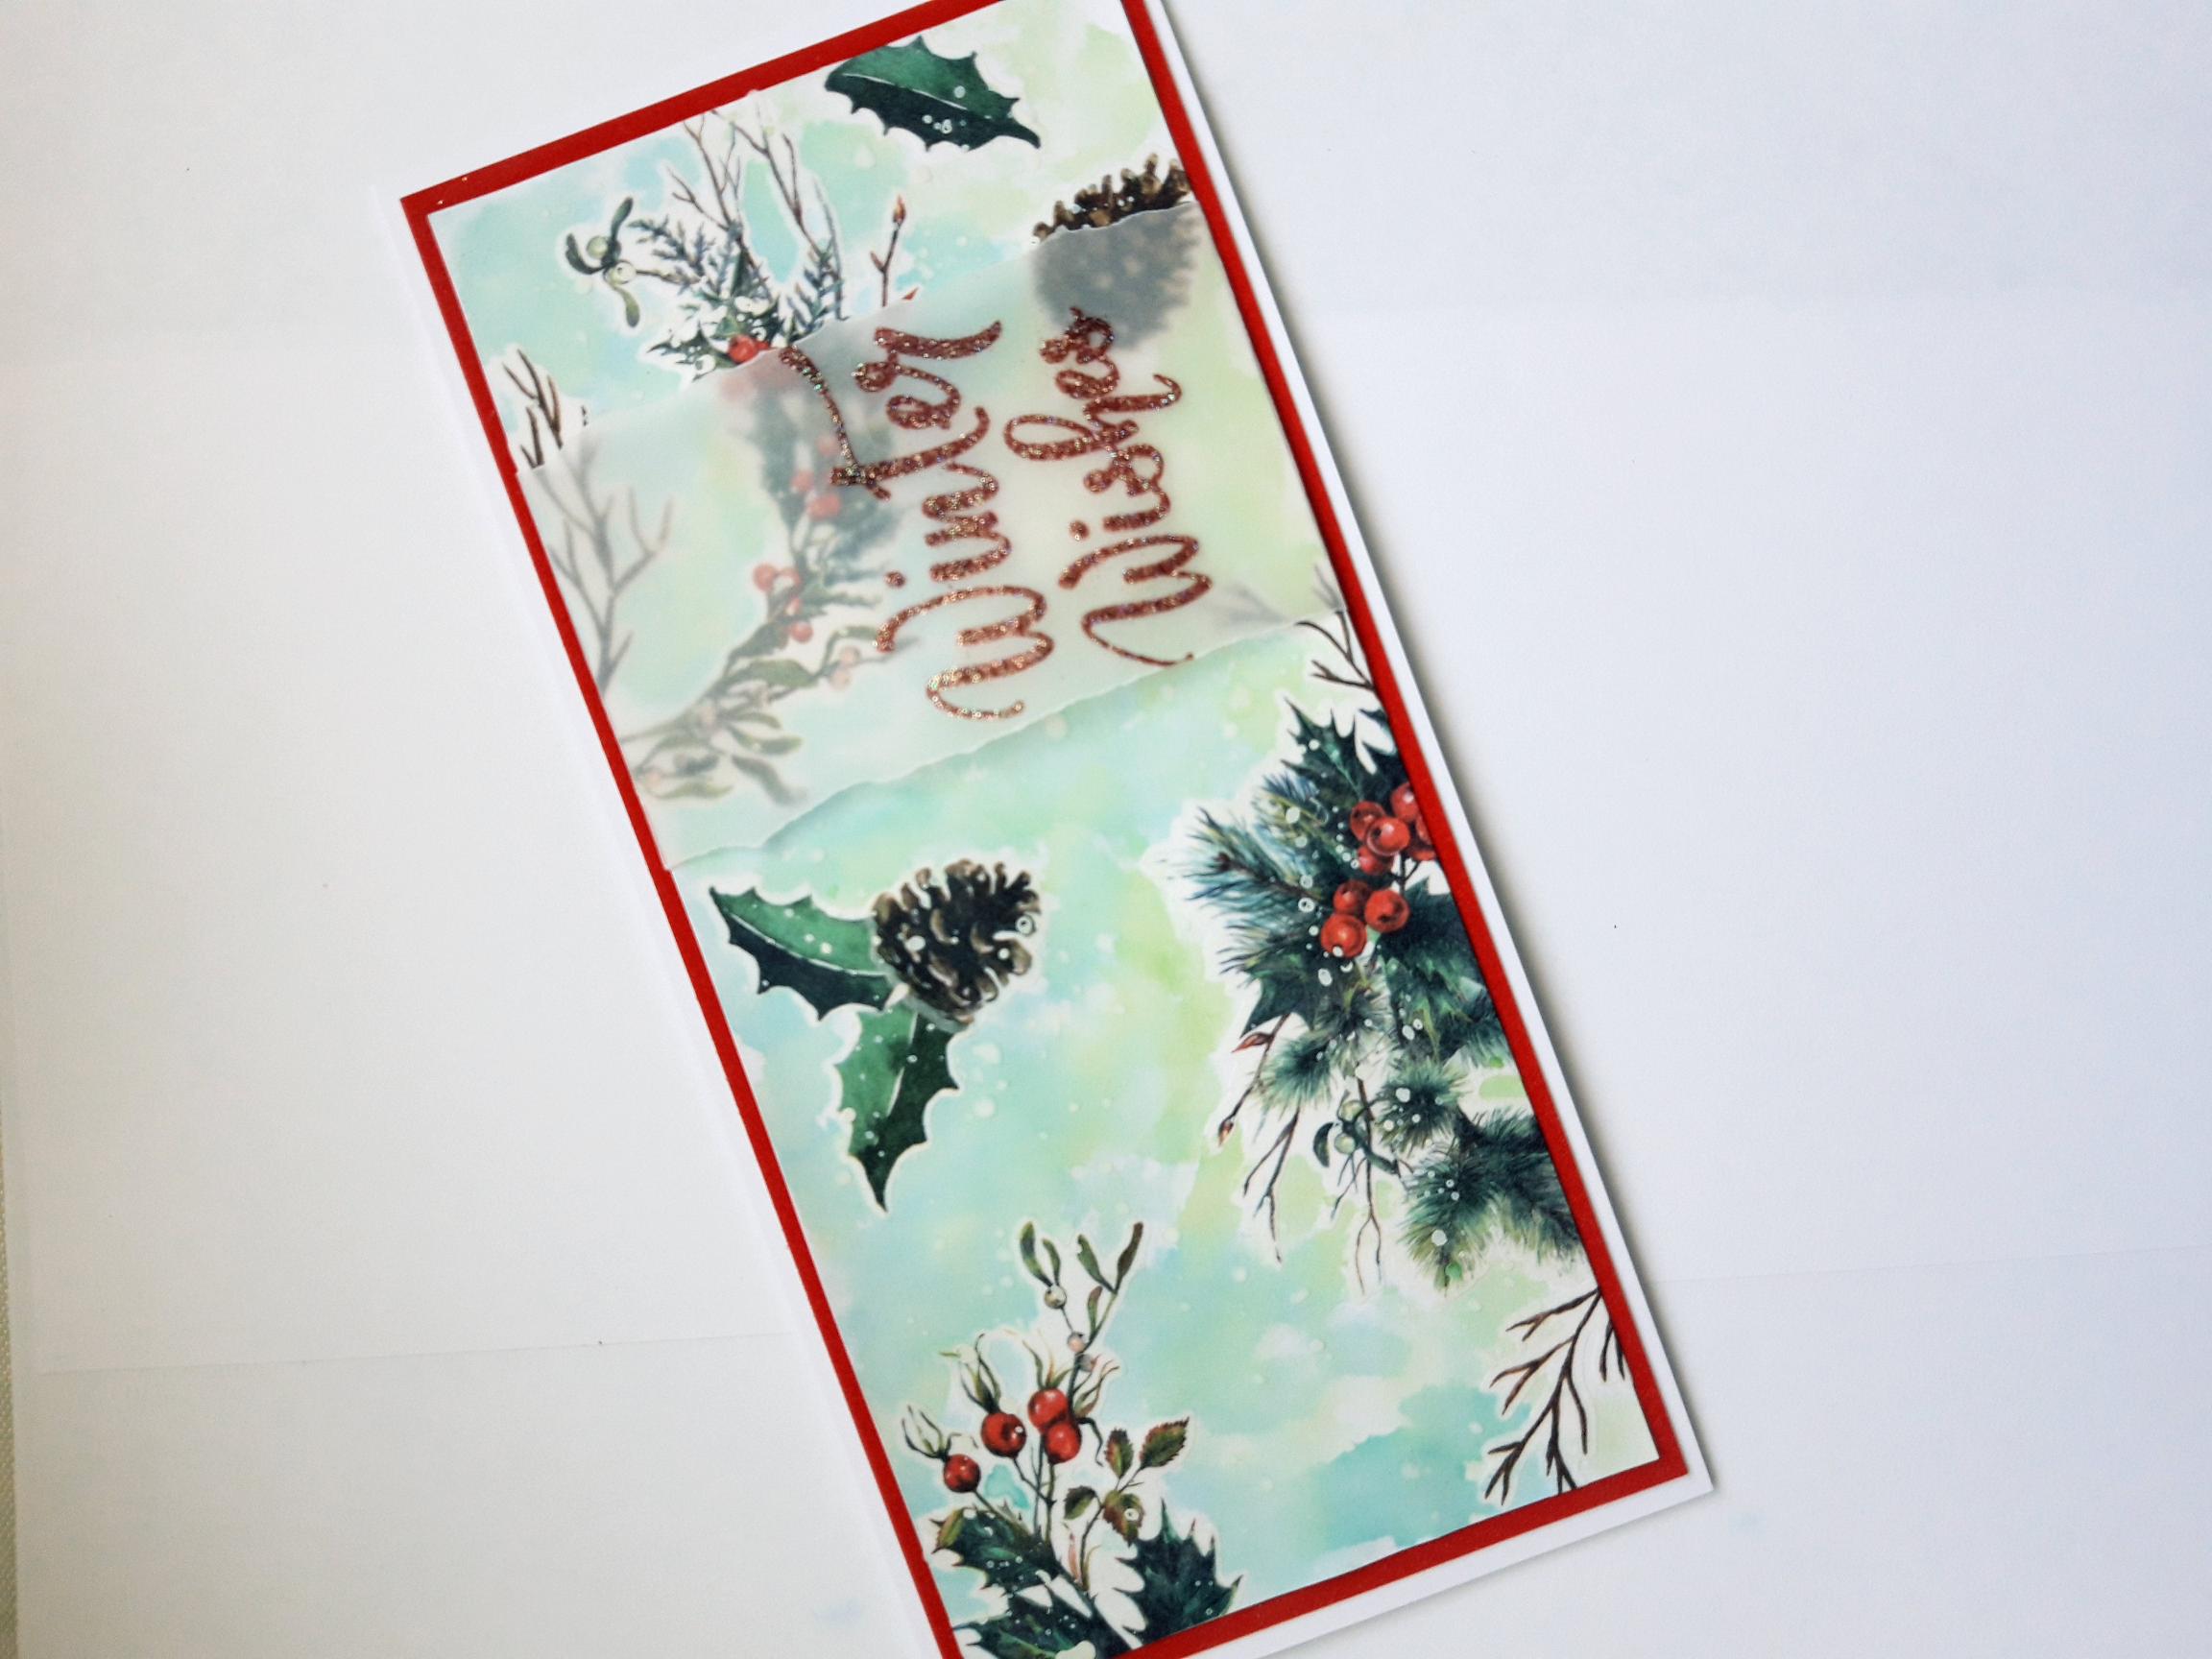
Use your washi stickers to create a background, on your white card (7 3/4 x 3 1/2"), which is placed in landscape view. |
|
Wet the cardstock around your stickers, and drop in the Izink Ocean and Menthe, using a paint brush. This is called the "wet in wet" technique. You can keep going back in and adding more colour, until your are happy with the effect. Dry off the ink, although allowing it to dry naturally will give a more vibrant depth of colour. |
|
Once the ink is dry, add some water to your Confetti Paint, and splatter it all over your artwork. Set this to one side to dry naturally, if possible. |
|
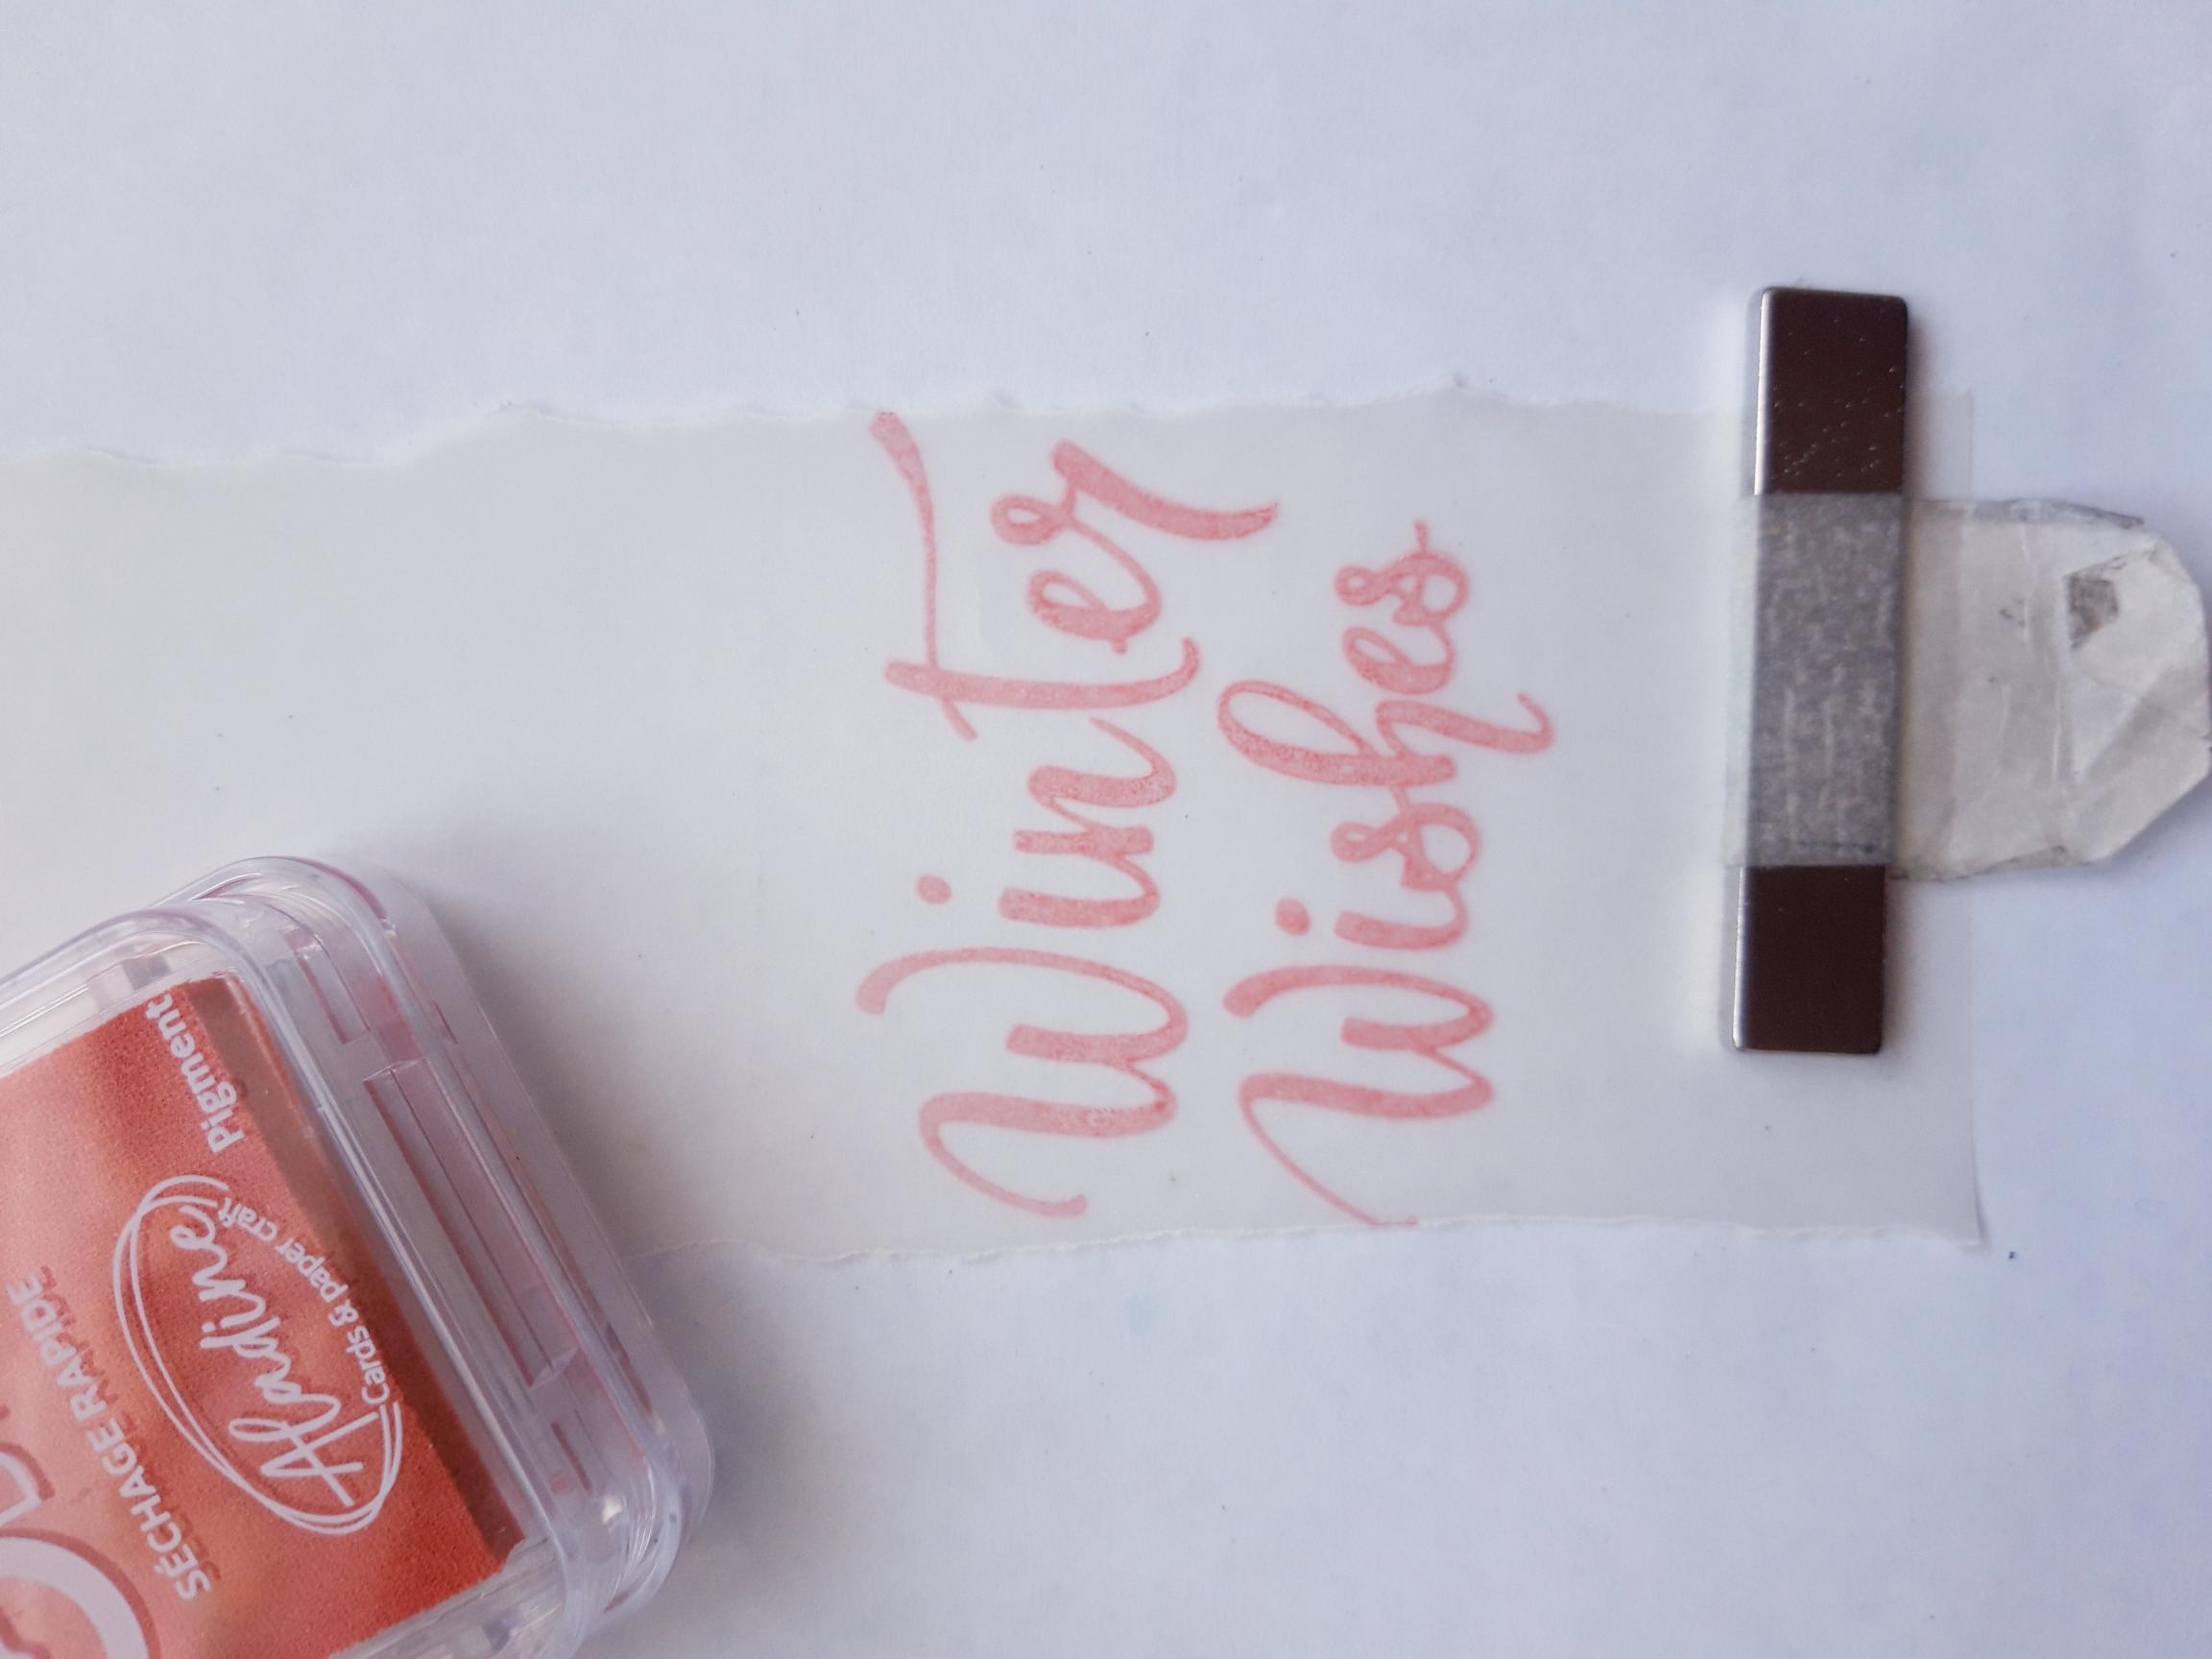
Wipe over the torn vellum strip with your anti static bag. Ink up your sentiment, from the Christmas Blessings Stamp Collection, with the Izink red Pigment ink. Stamp the sentiment on to the vellum, allowing enough vellum to fold over the back of your card, top and bottom. |
|
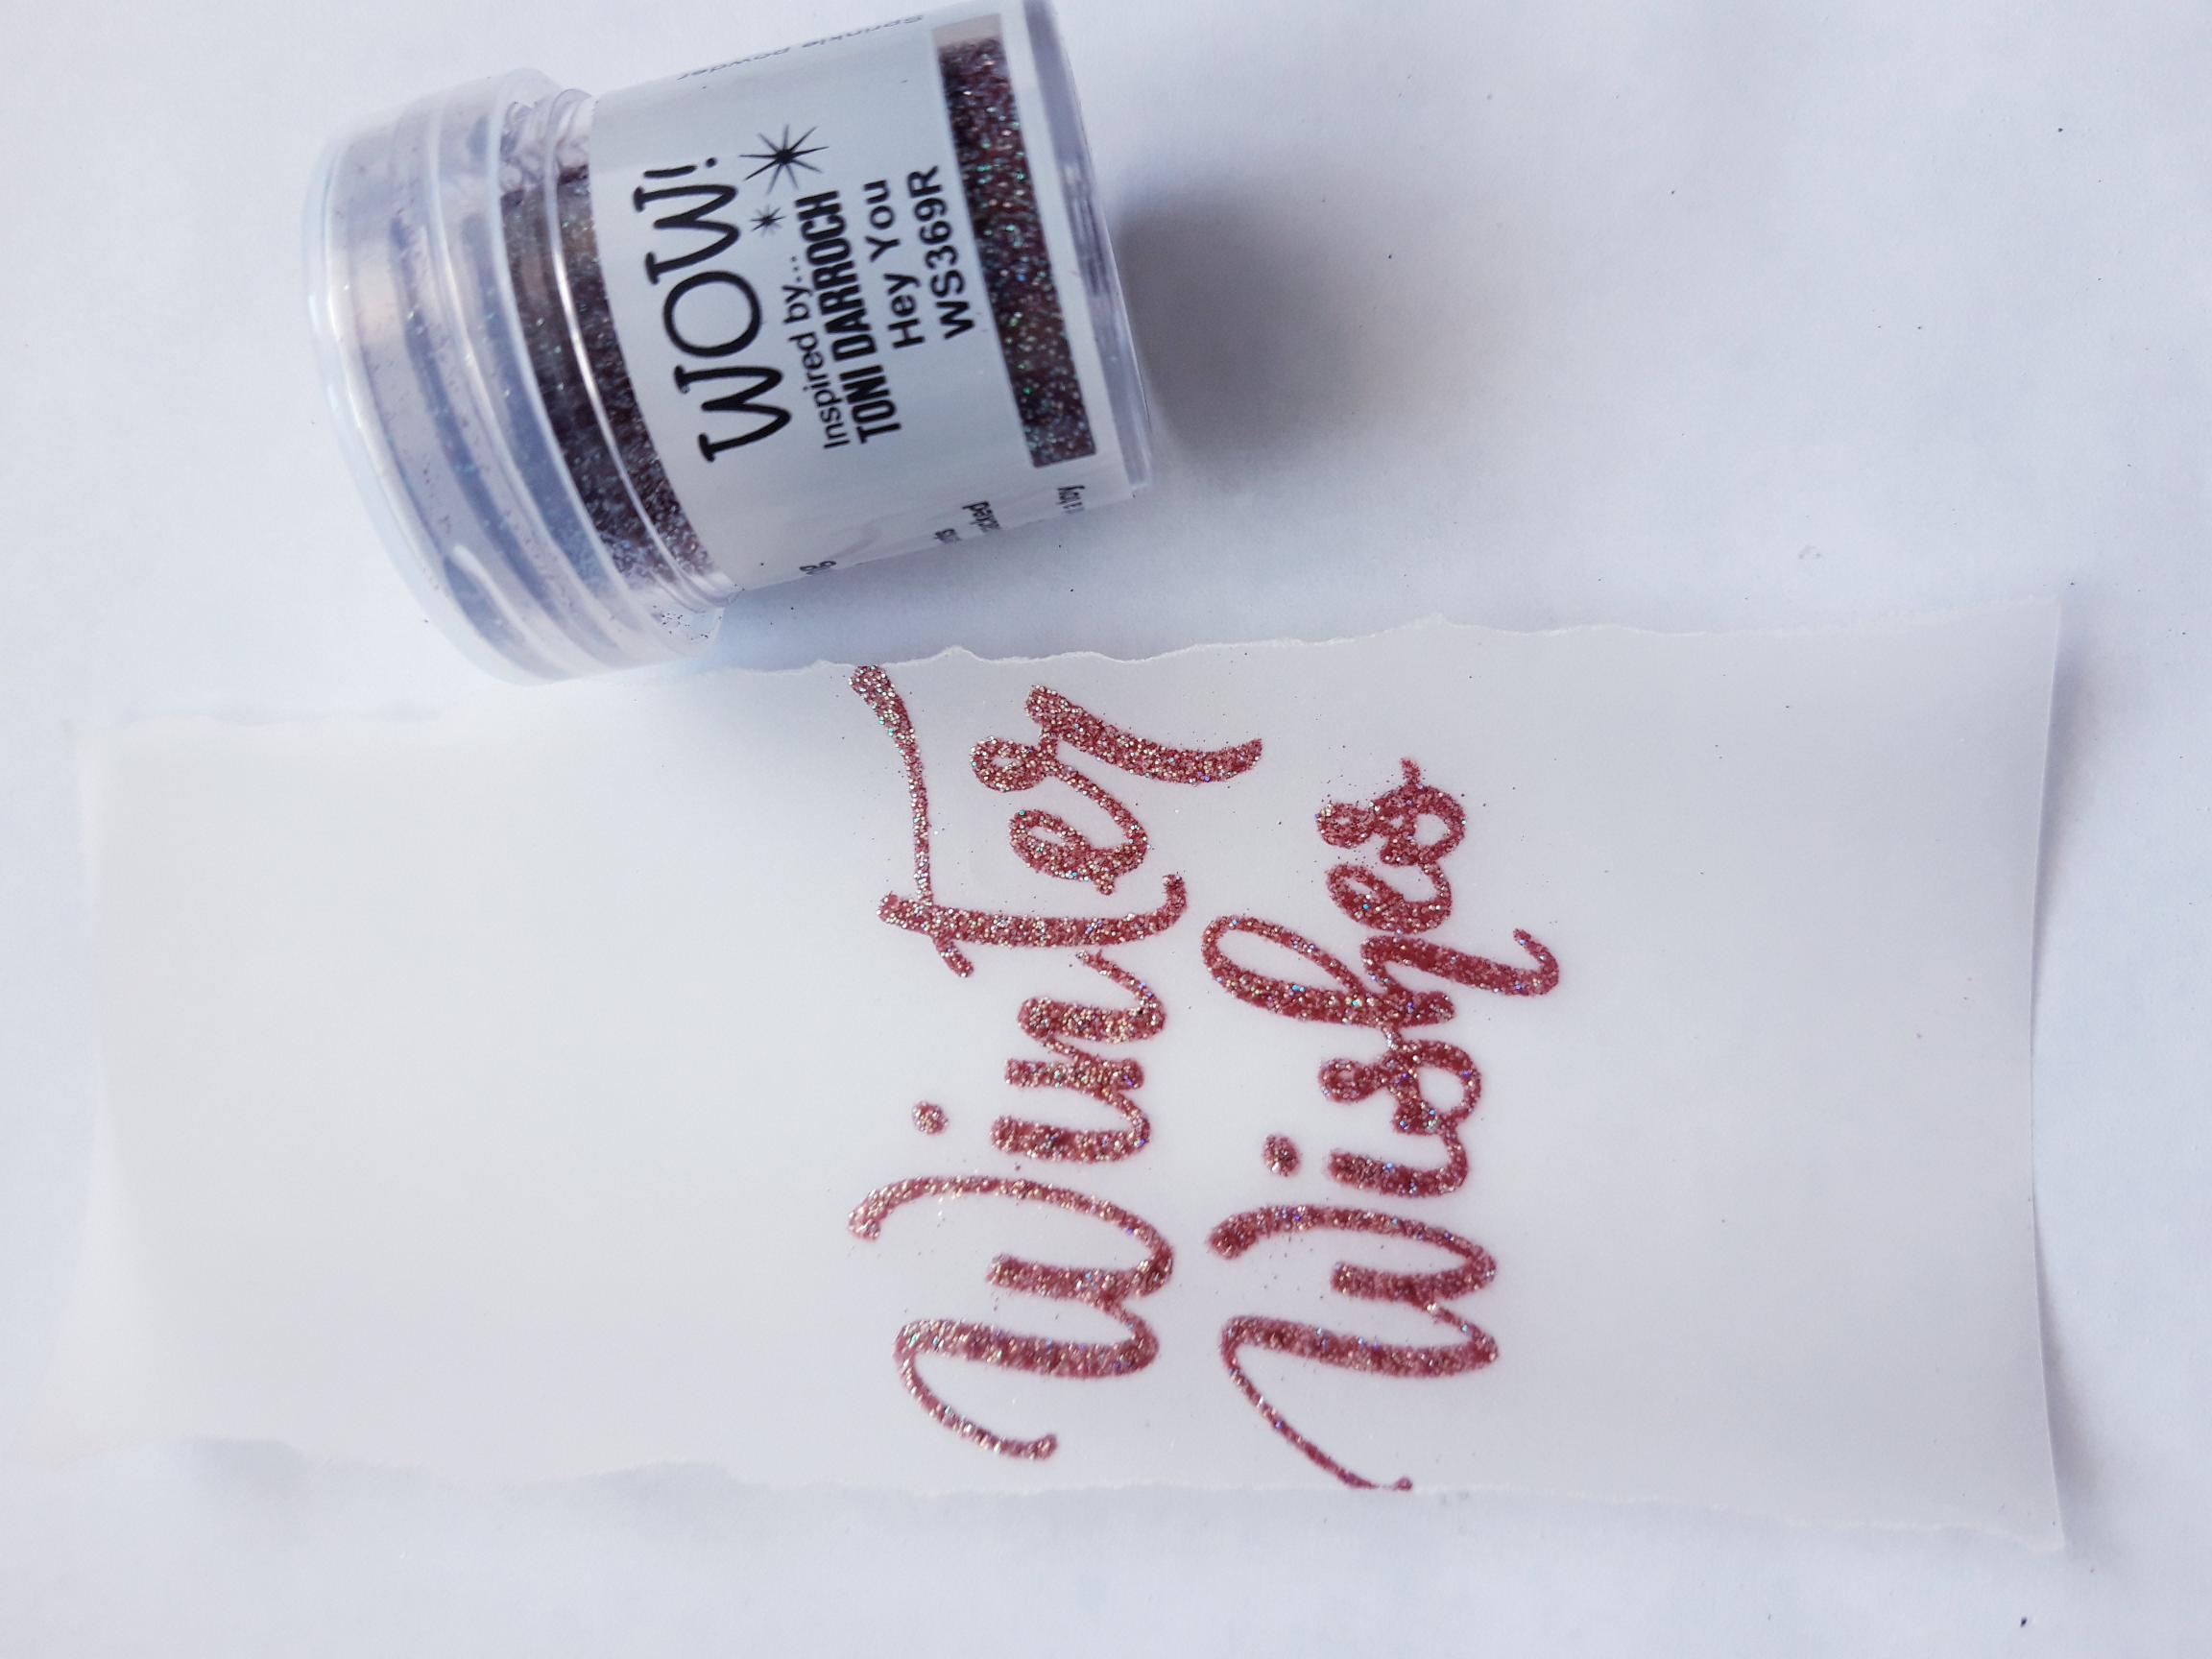
Apply the WOW Hey You embossing powder over the sentiment, whilst the Pigment ink is still wet (it is a slow drying ink, so brilliant for heat embossing). Allow your heat tool to get hot, before heat setting the powder. Move the heat tool as soon as the powder starts to turn, to avoid burning the vellum. |
|
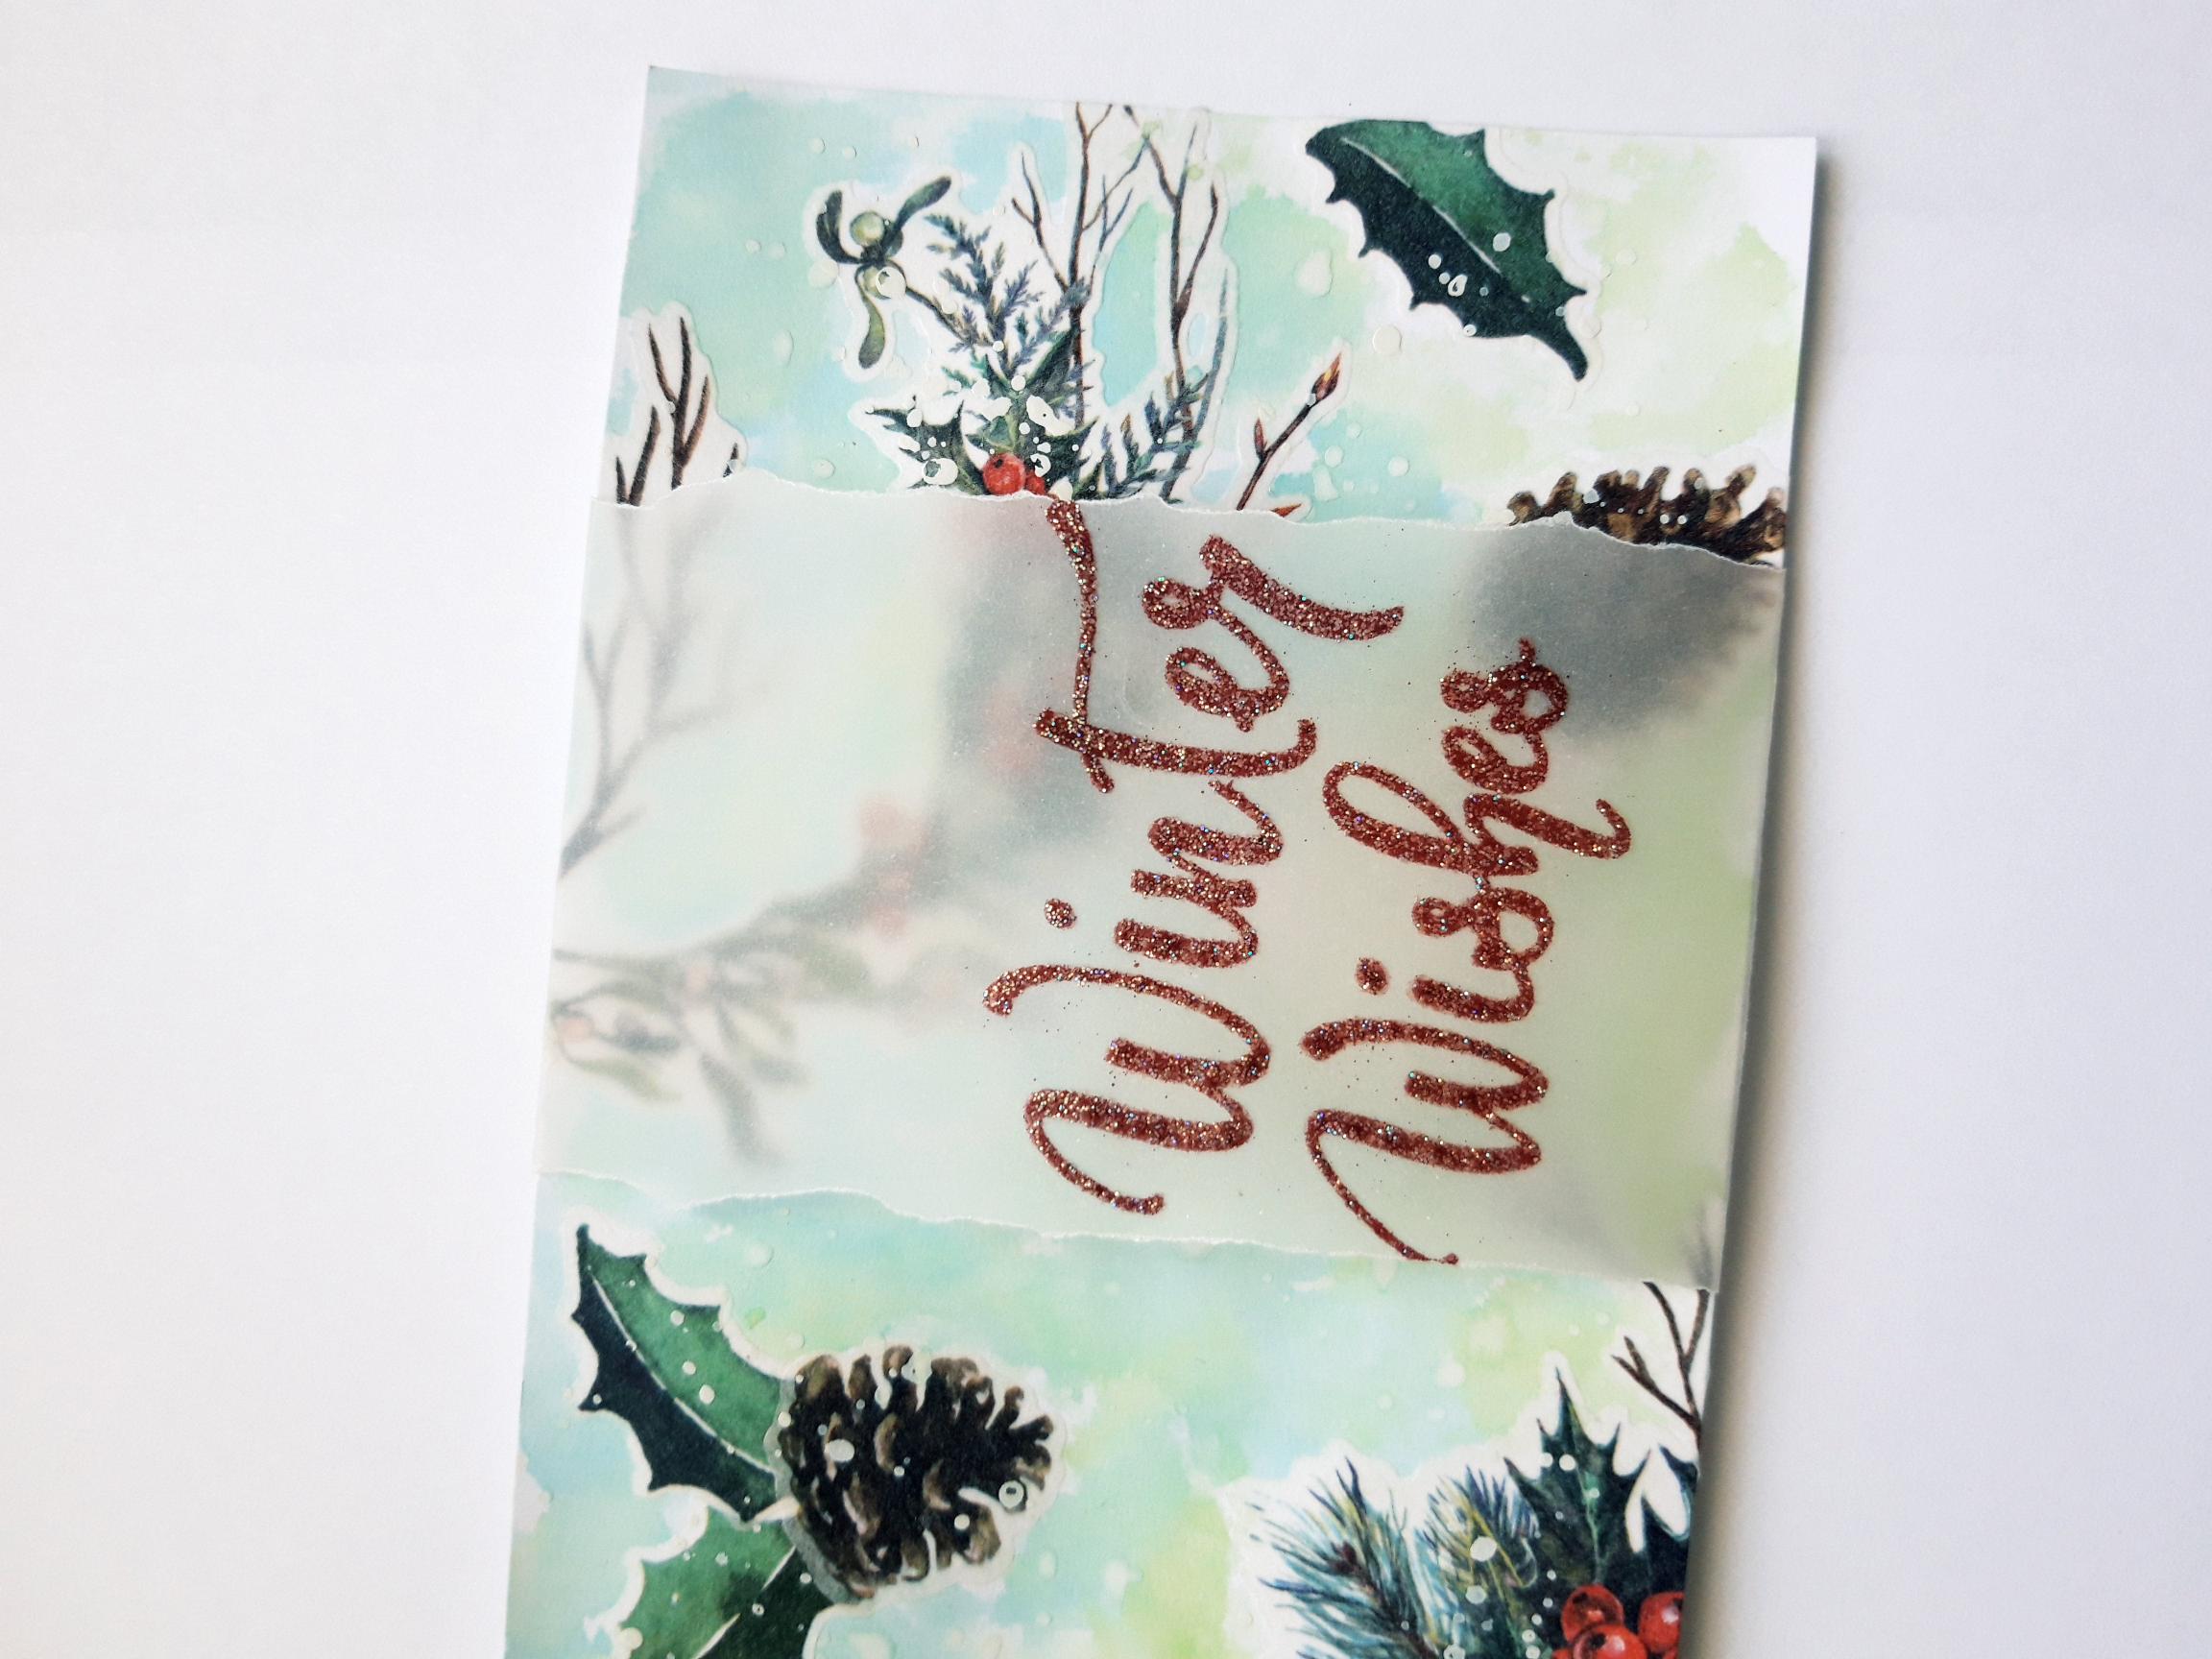
Decide where you want the embossed vellum to go, fold over the excess vellum top and bottom, and secure on the reverse of the card, with double sided tape. |

|
Adhere your artwork on to the red glitter card. |
|
Adhere on to your DL white, landscape view, card blank. |
|
To finish add sequins on your artwork, as required. I used silver ones, but you can use any in your crafty stash. |