Give your friends $10 off their first order!
Refer a FRIEND


WHAT YOU WILL NEED:
White card A4 (300gsm)
Gold Mirri card (6 x 6")
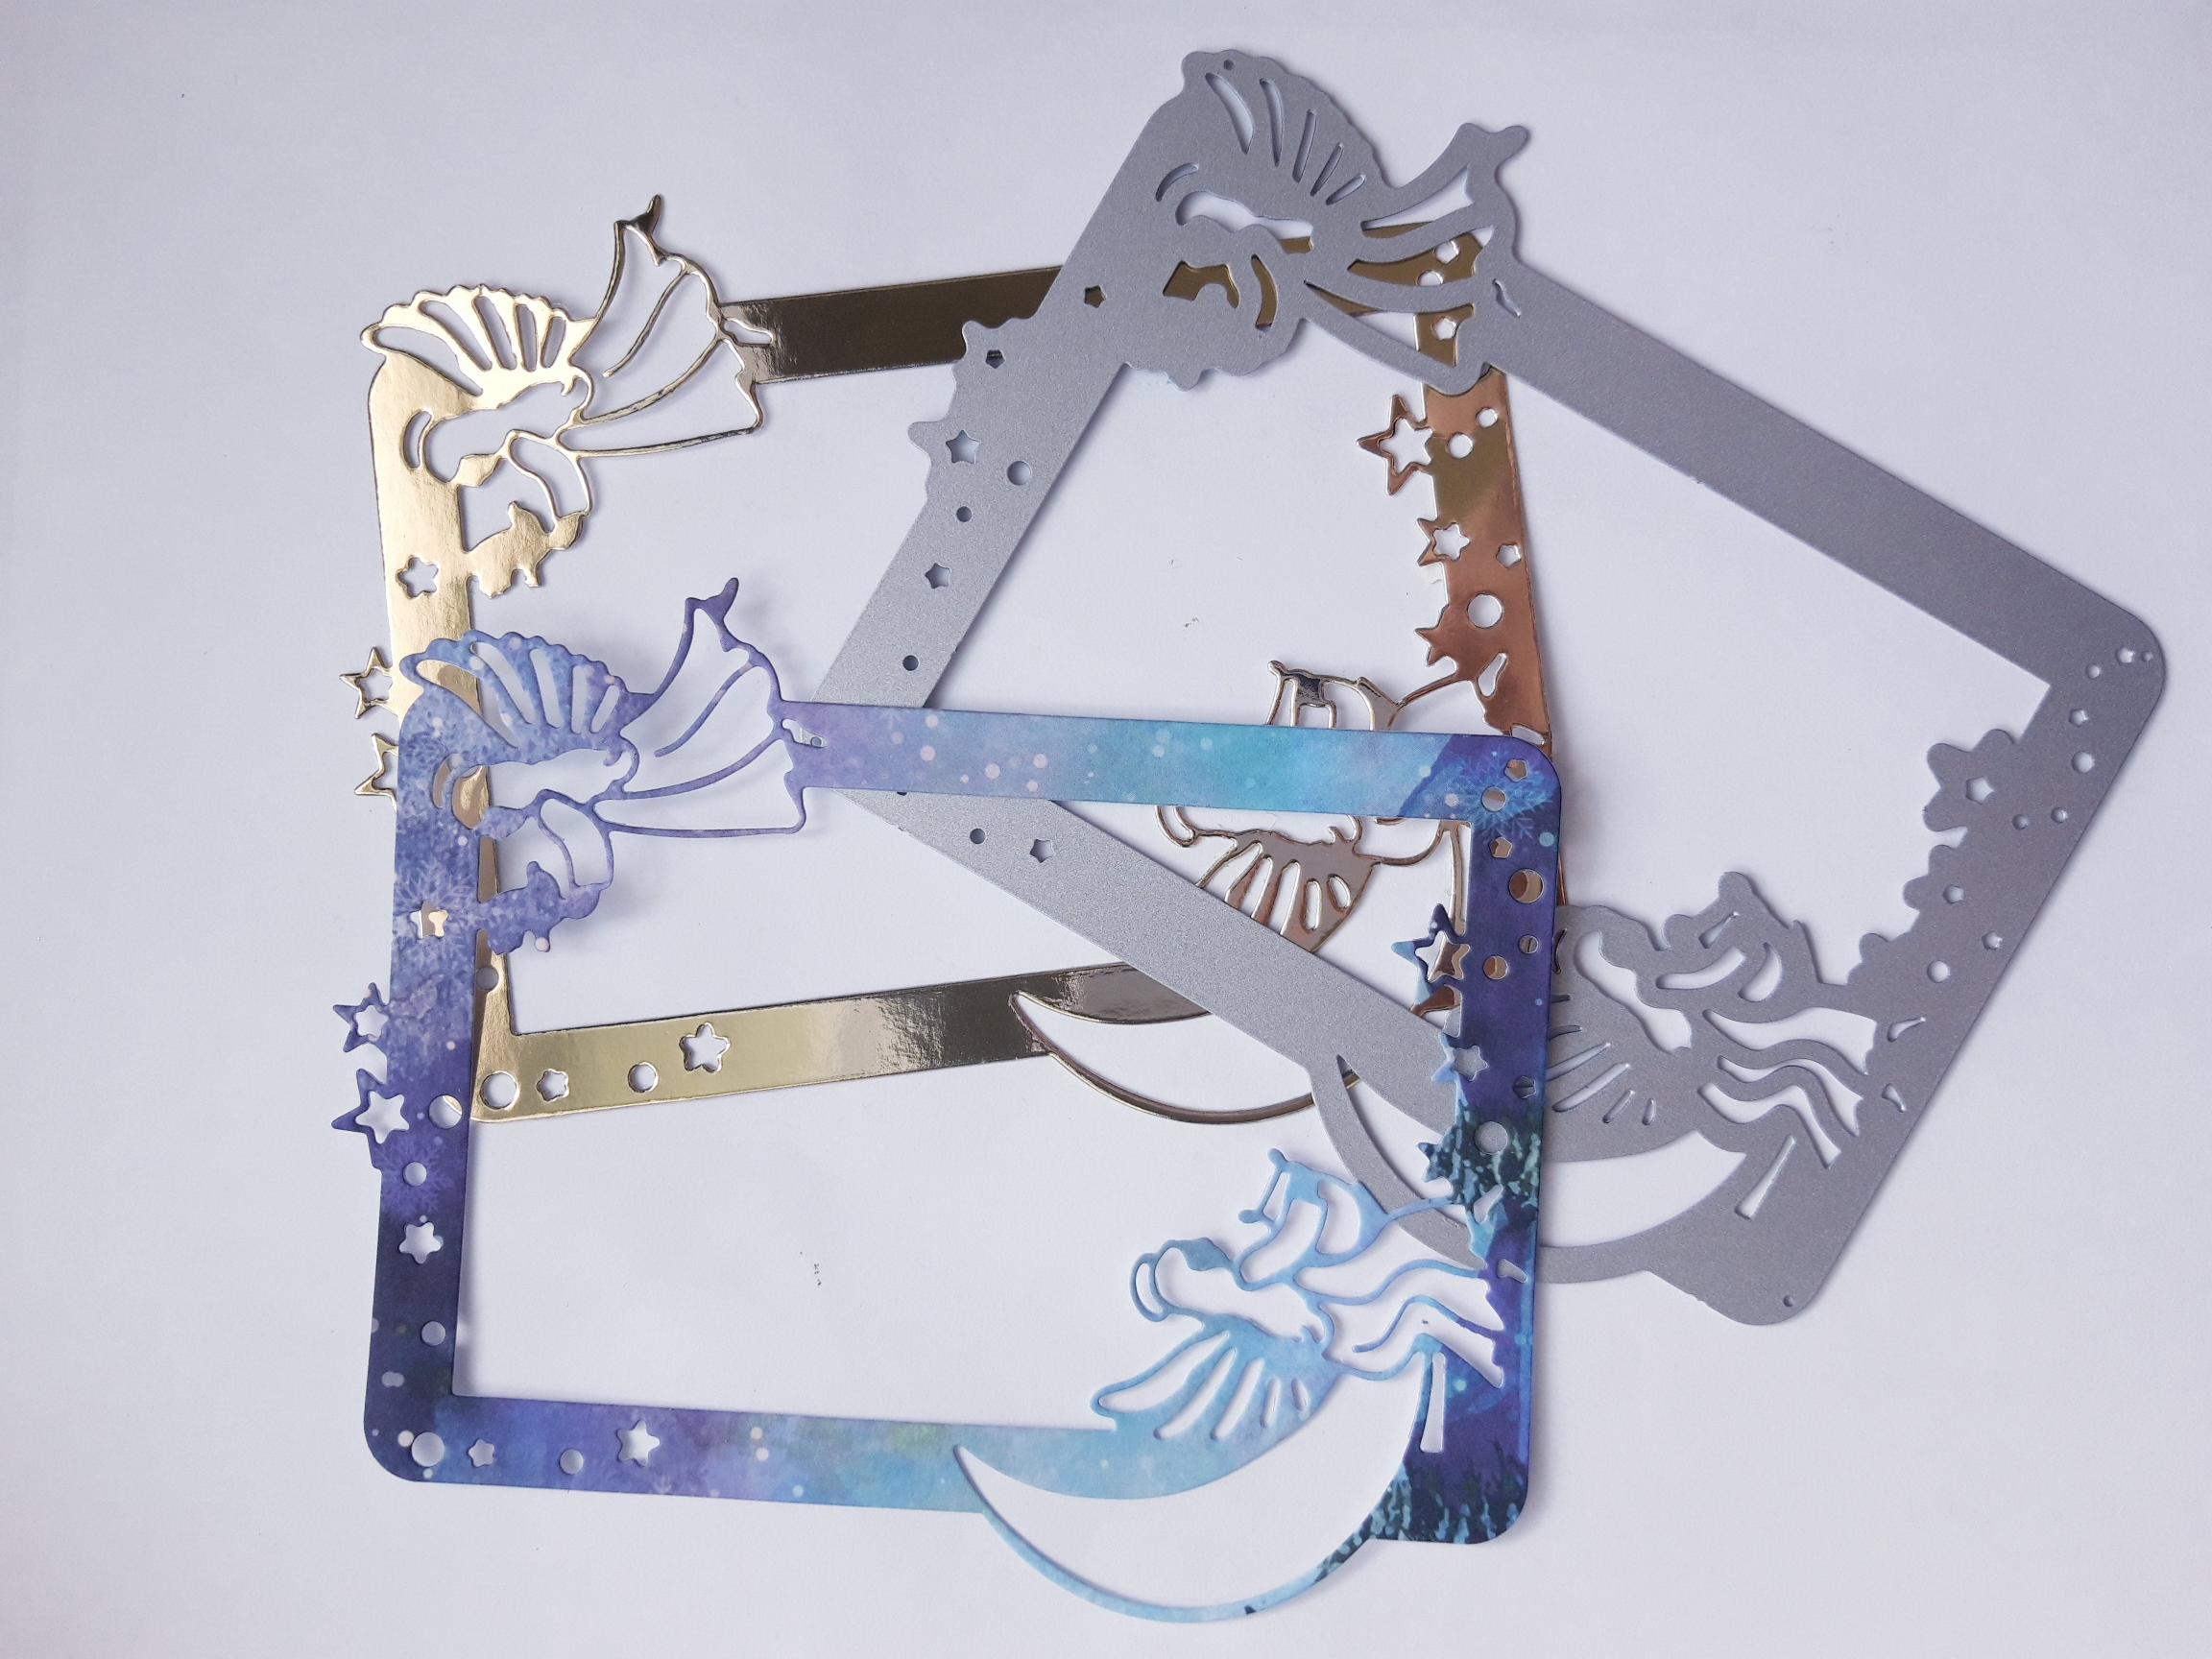
Dies from Angelic Frame Die Collection
Dies from JOY Die Collection
Winter Pines Signature Embossing Folder
Thirsty Brush Northern Lights 8 x 8" paper pad
Izink Pigment Classic ink pad collection: Dark green, light green
Blending tool
Water spray bottle
Thirsty Brush Confetti Paint: White Lace, Goldmine
Gossip clear overlay glitter pen
Paint brush
Score board
Bone folder
Paper Trimmer
Red liner tape
Perfect Together Glue
Die Cutting machine
[click image to enlarge] 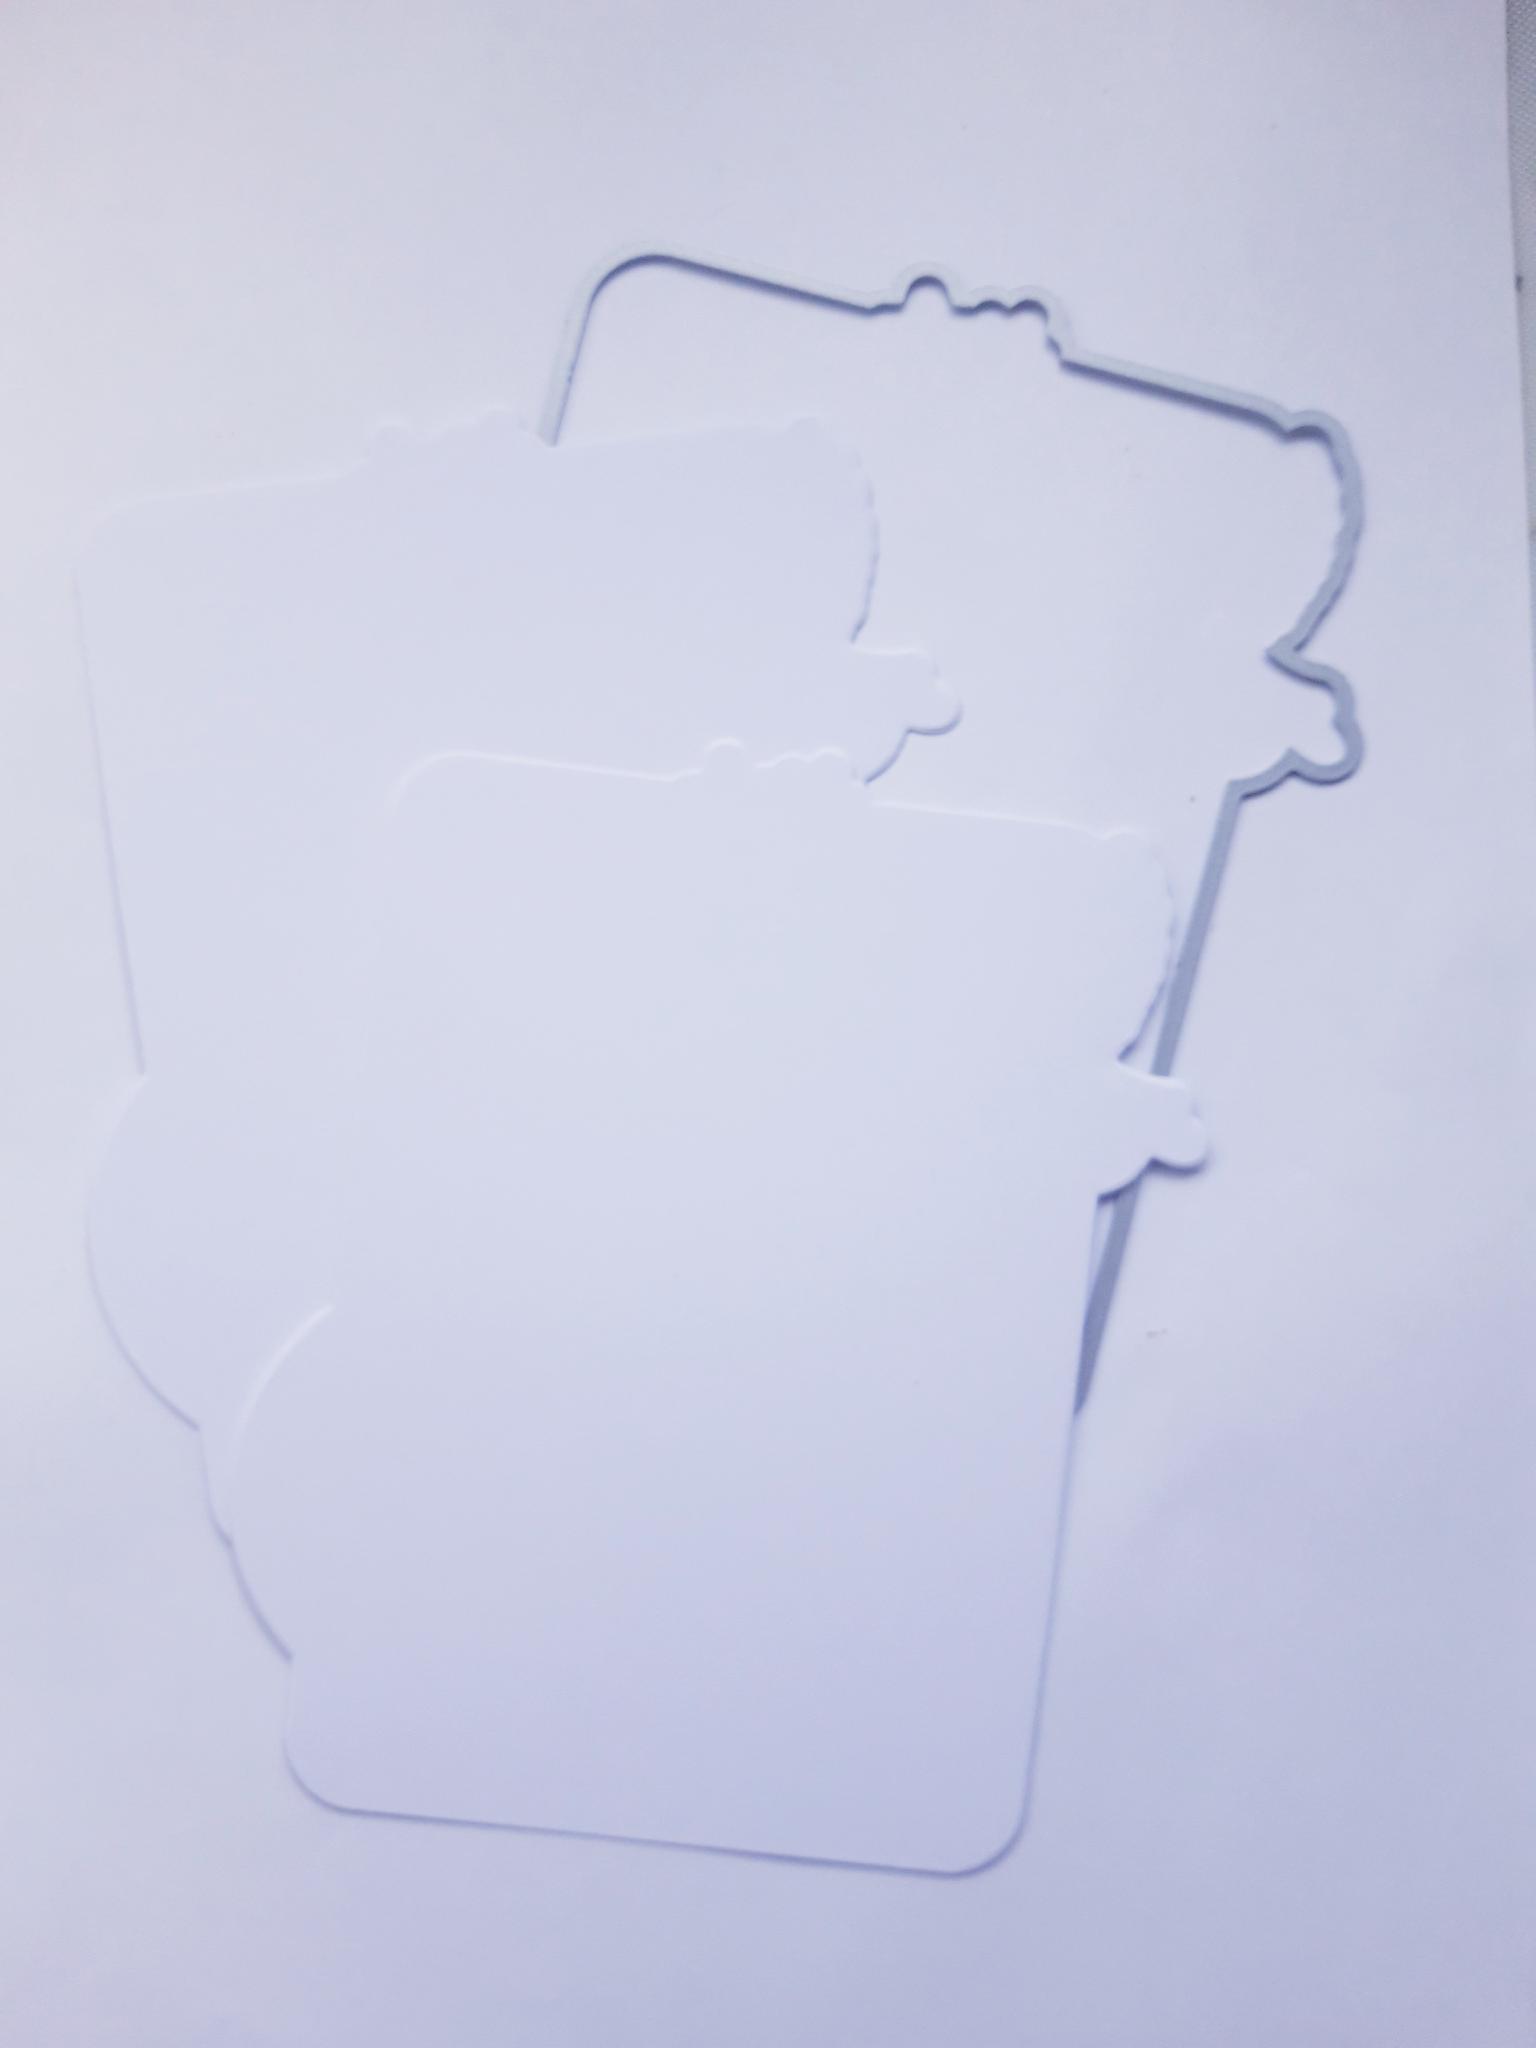
|
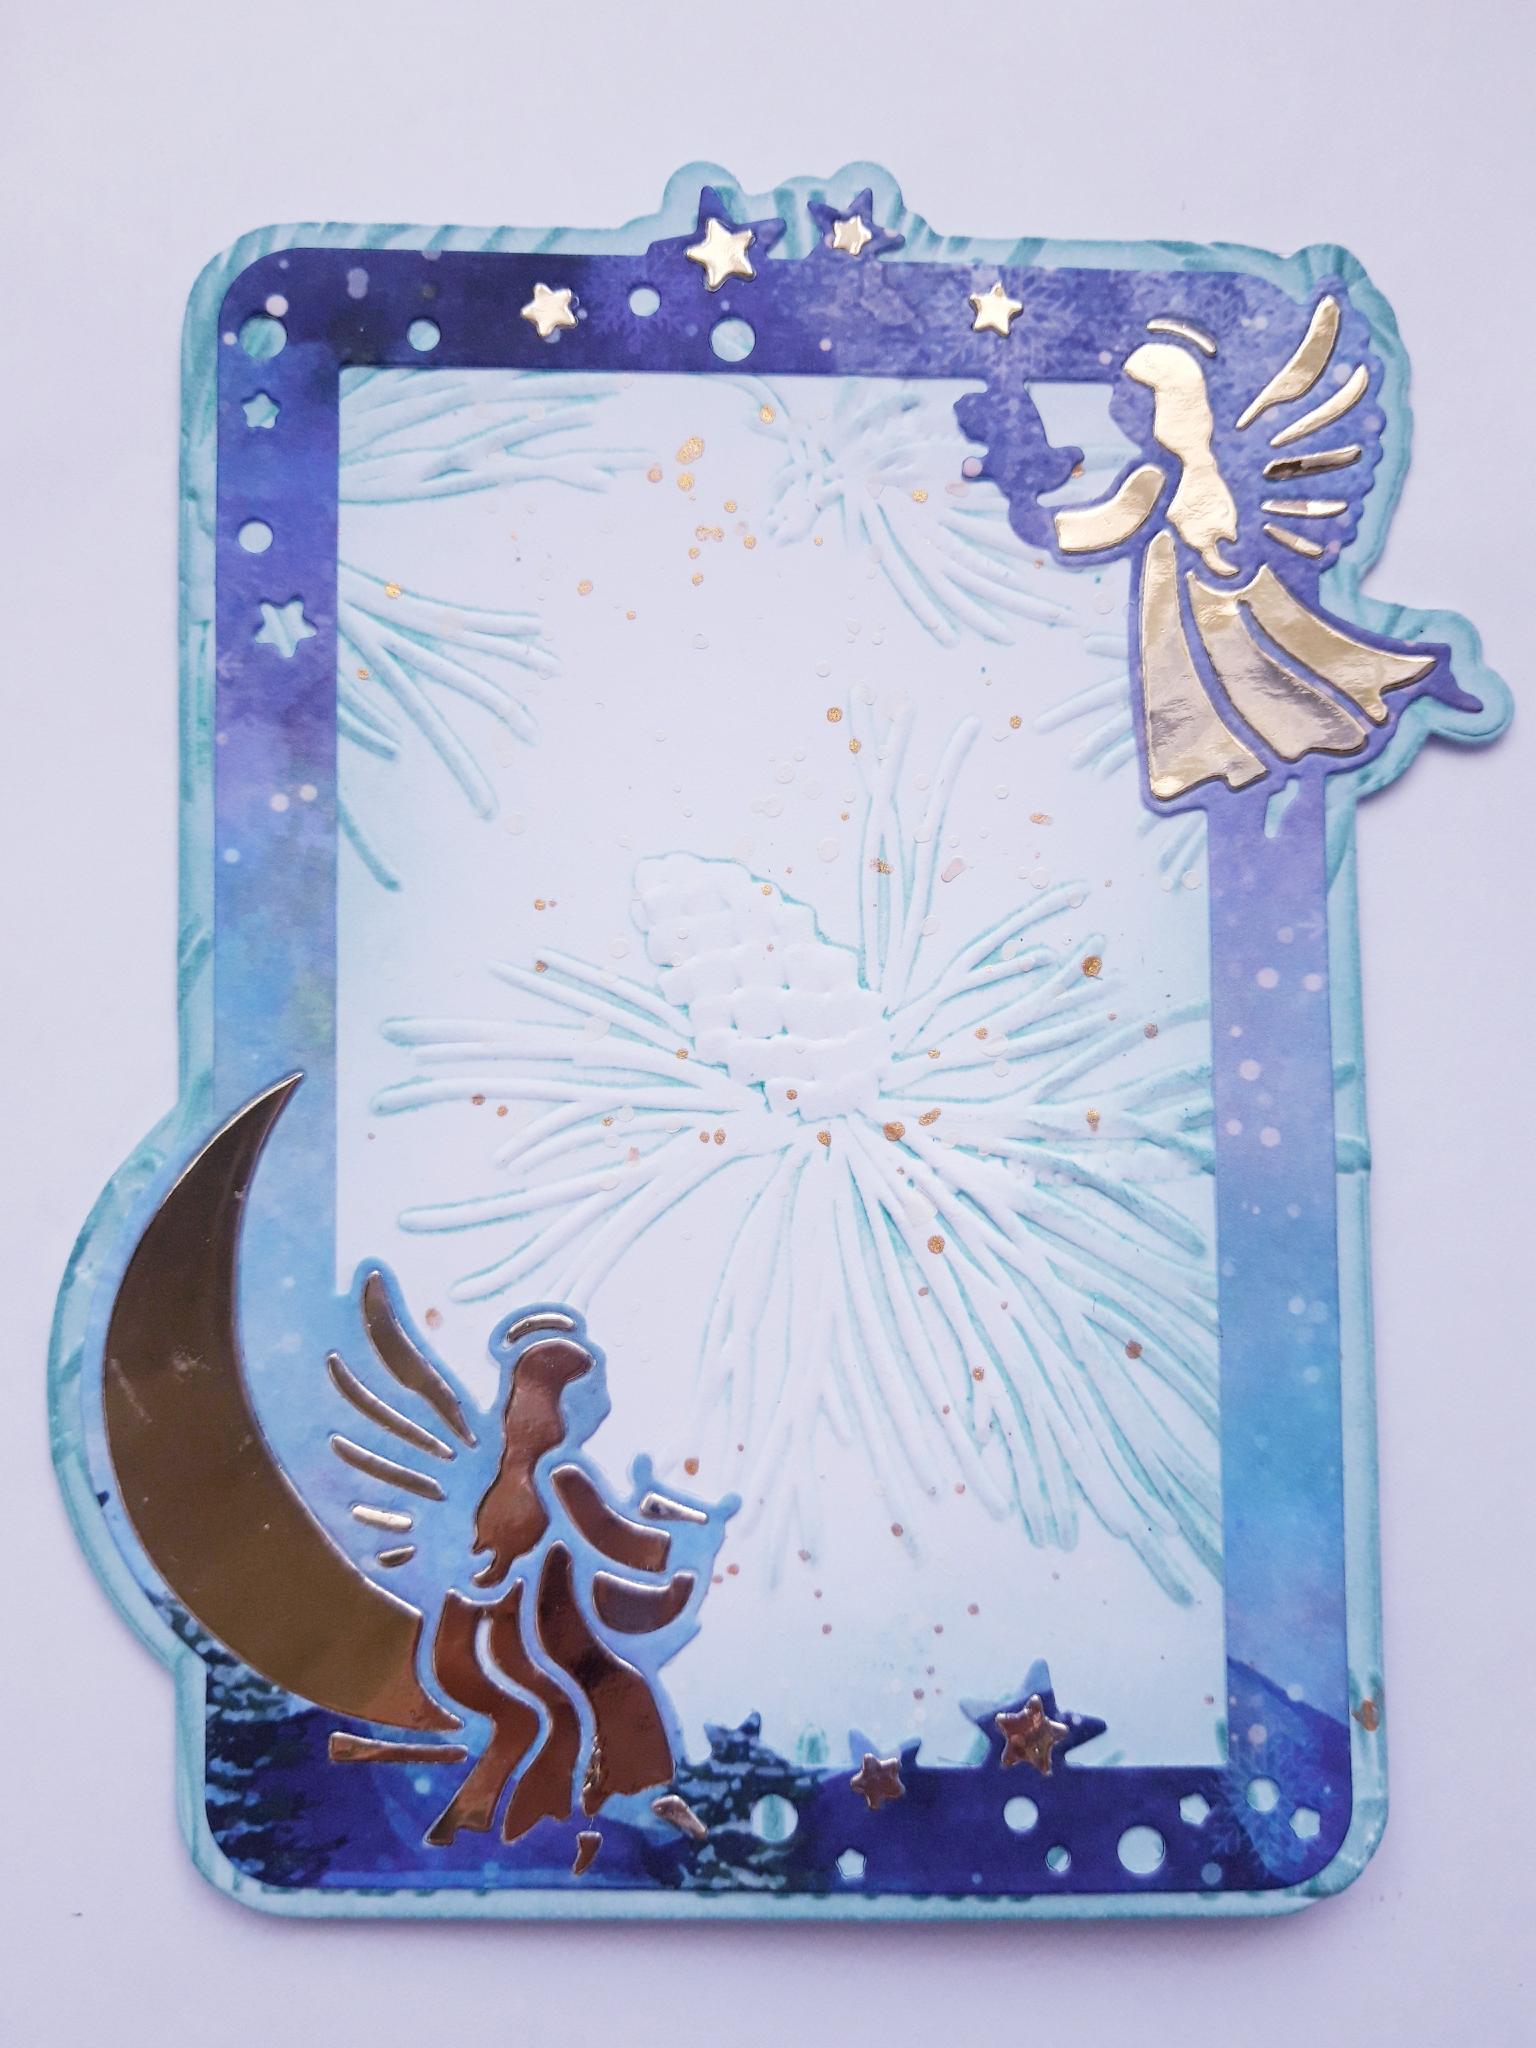
Using the solid mat die, from the Angelic Frame Die Collection, cut TWO mats, out of the A4 white card. |
|
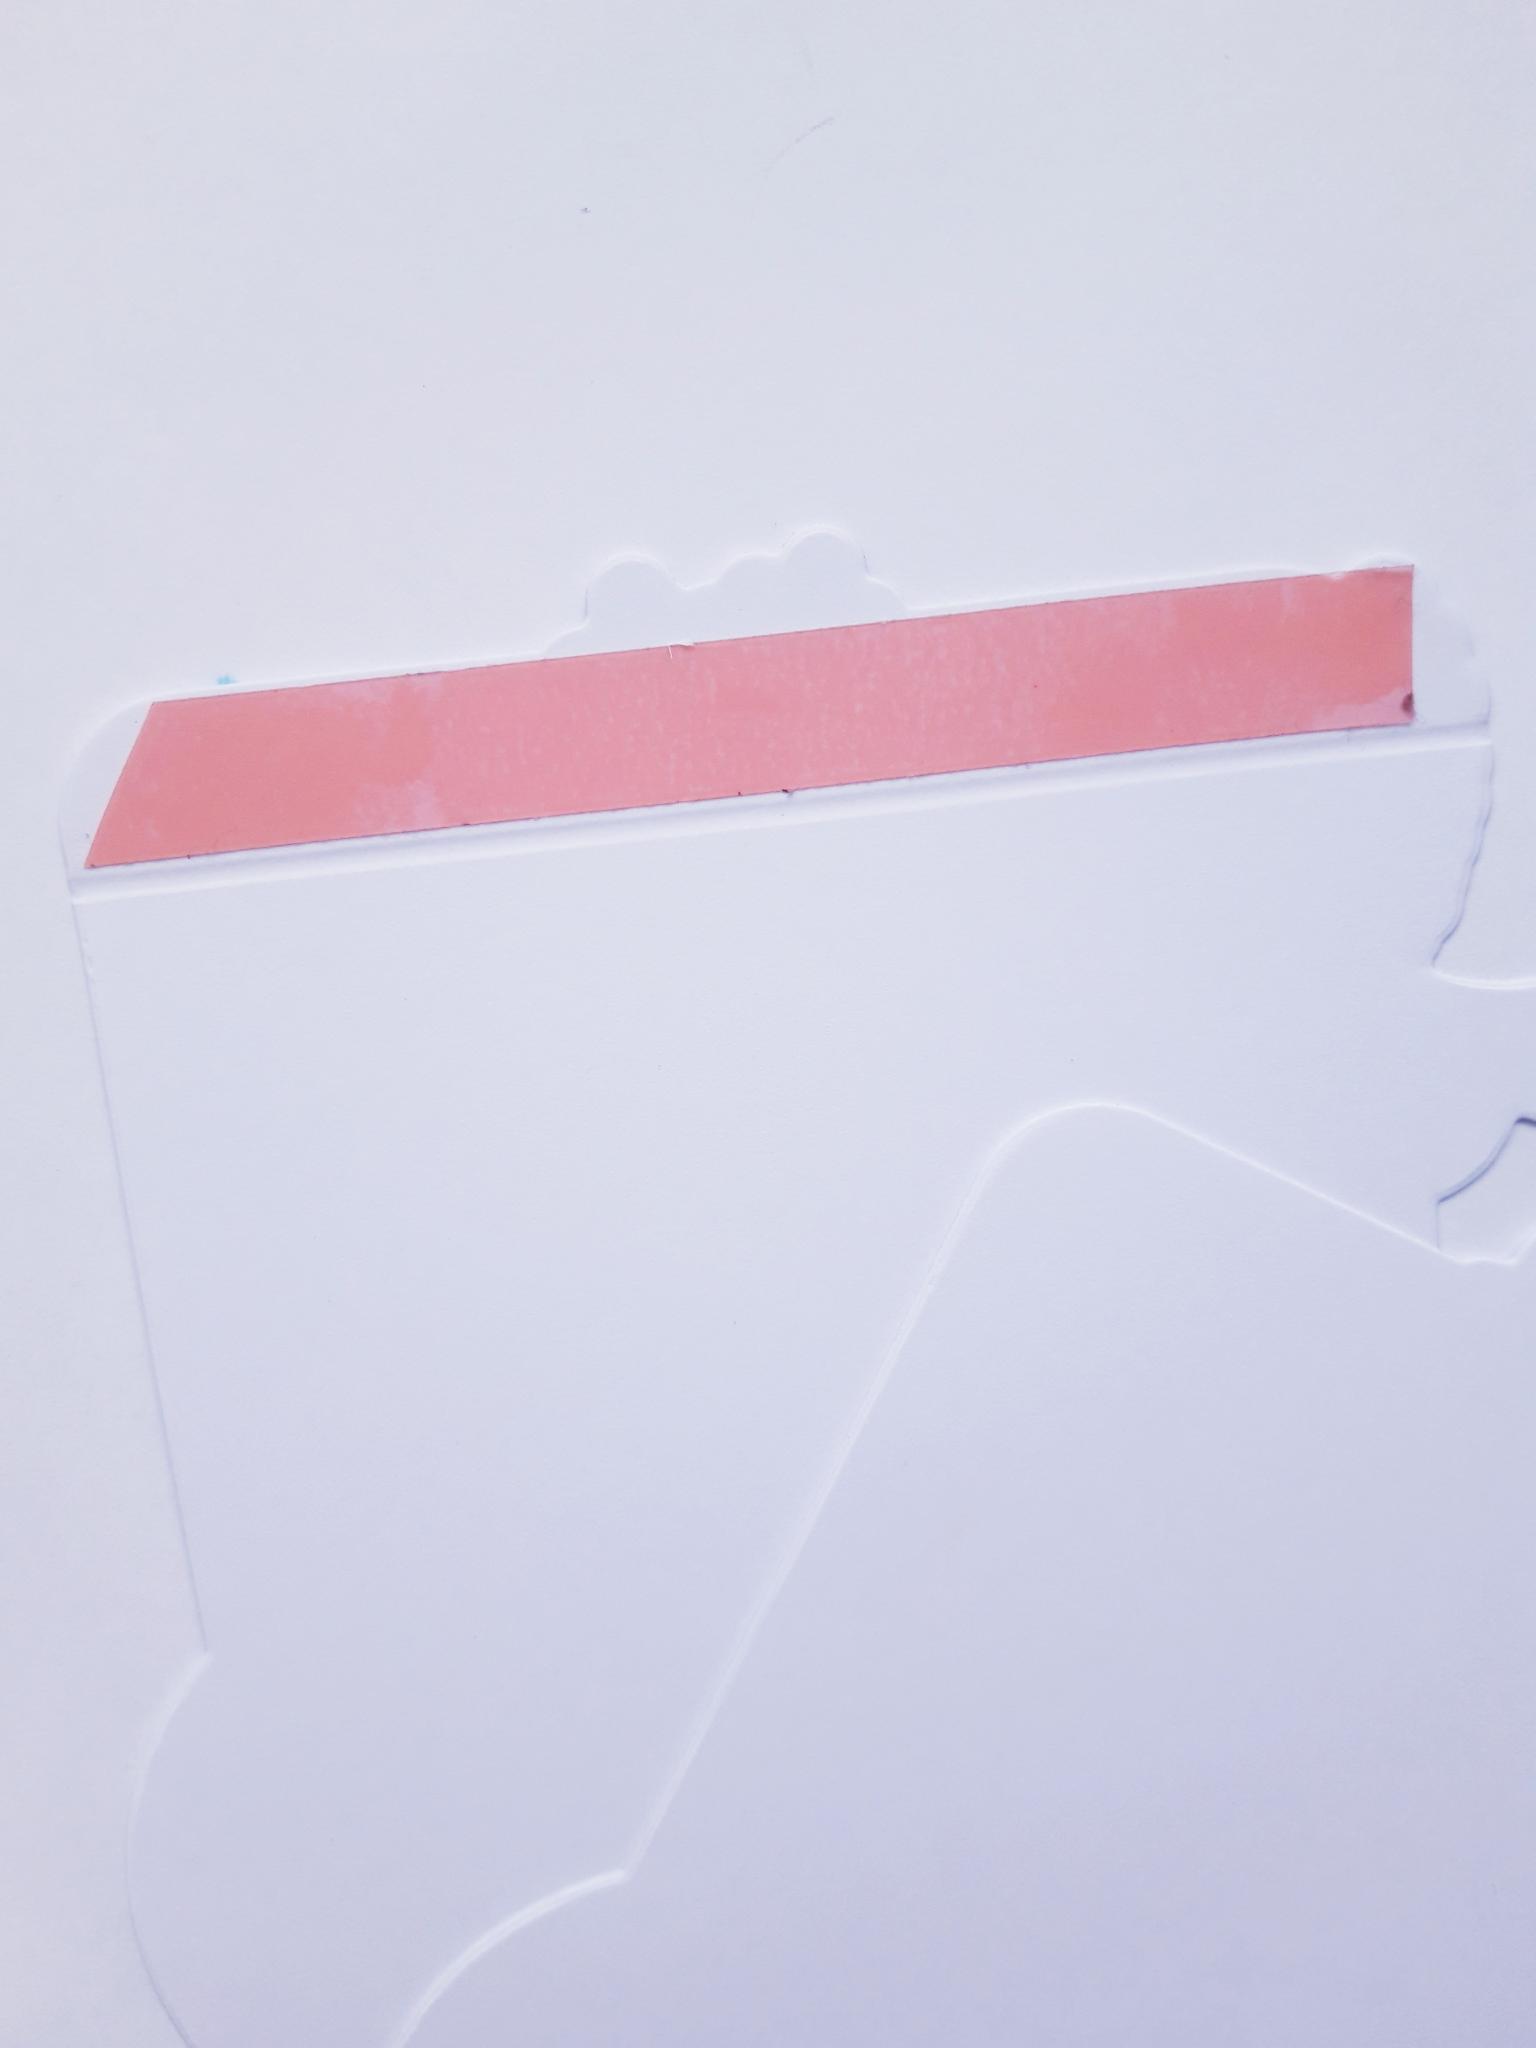
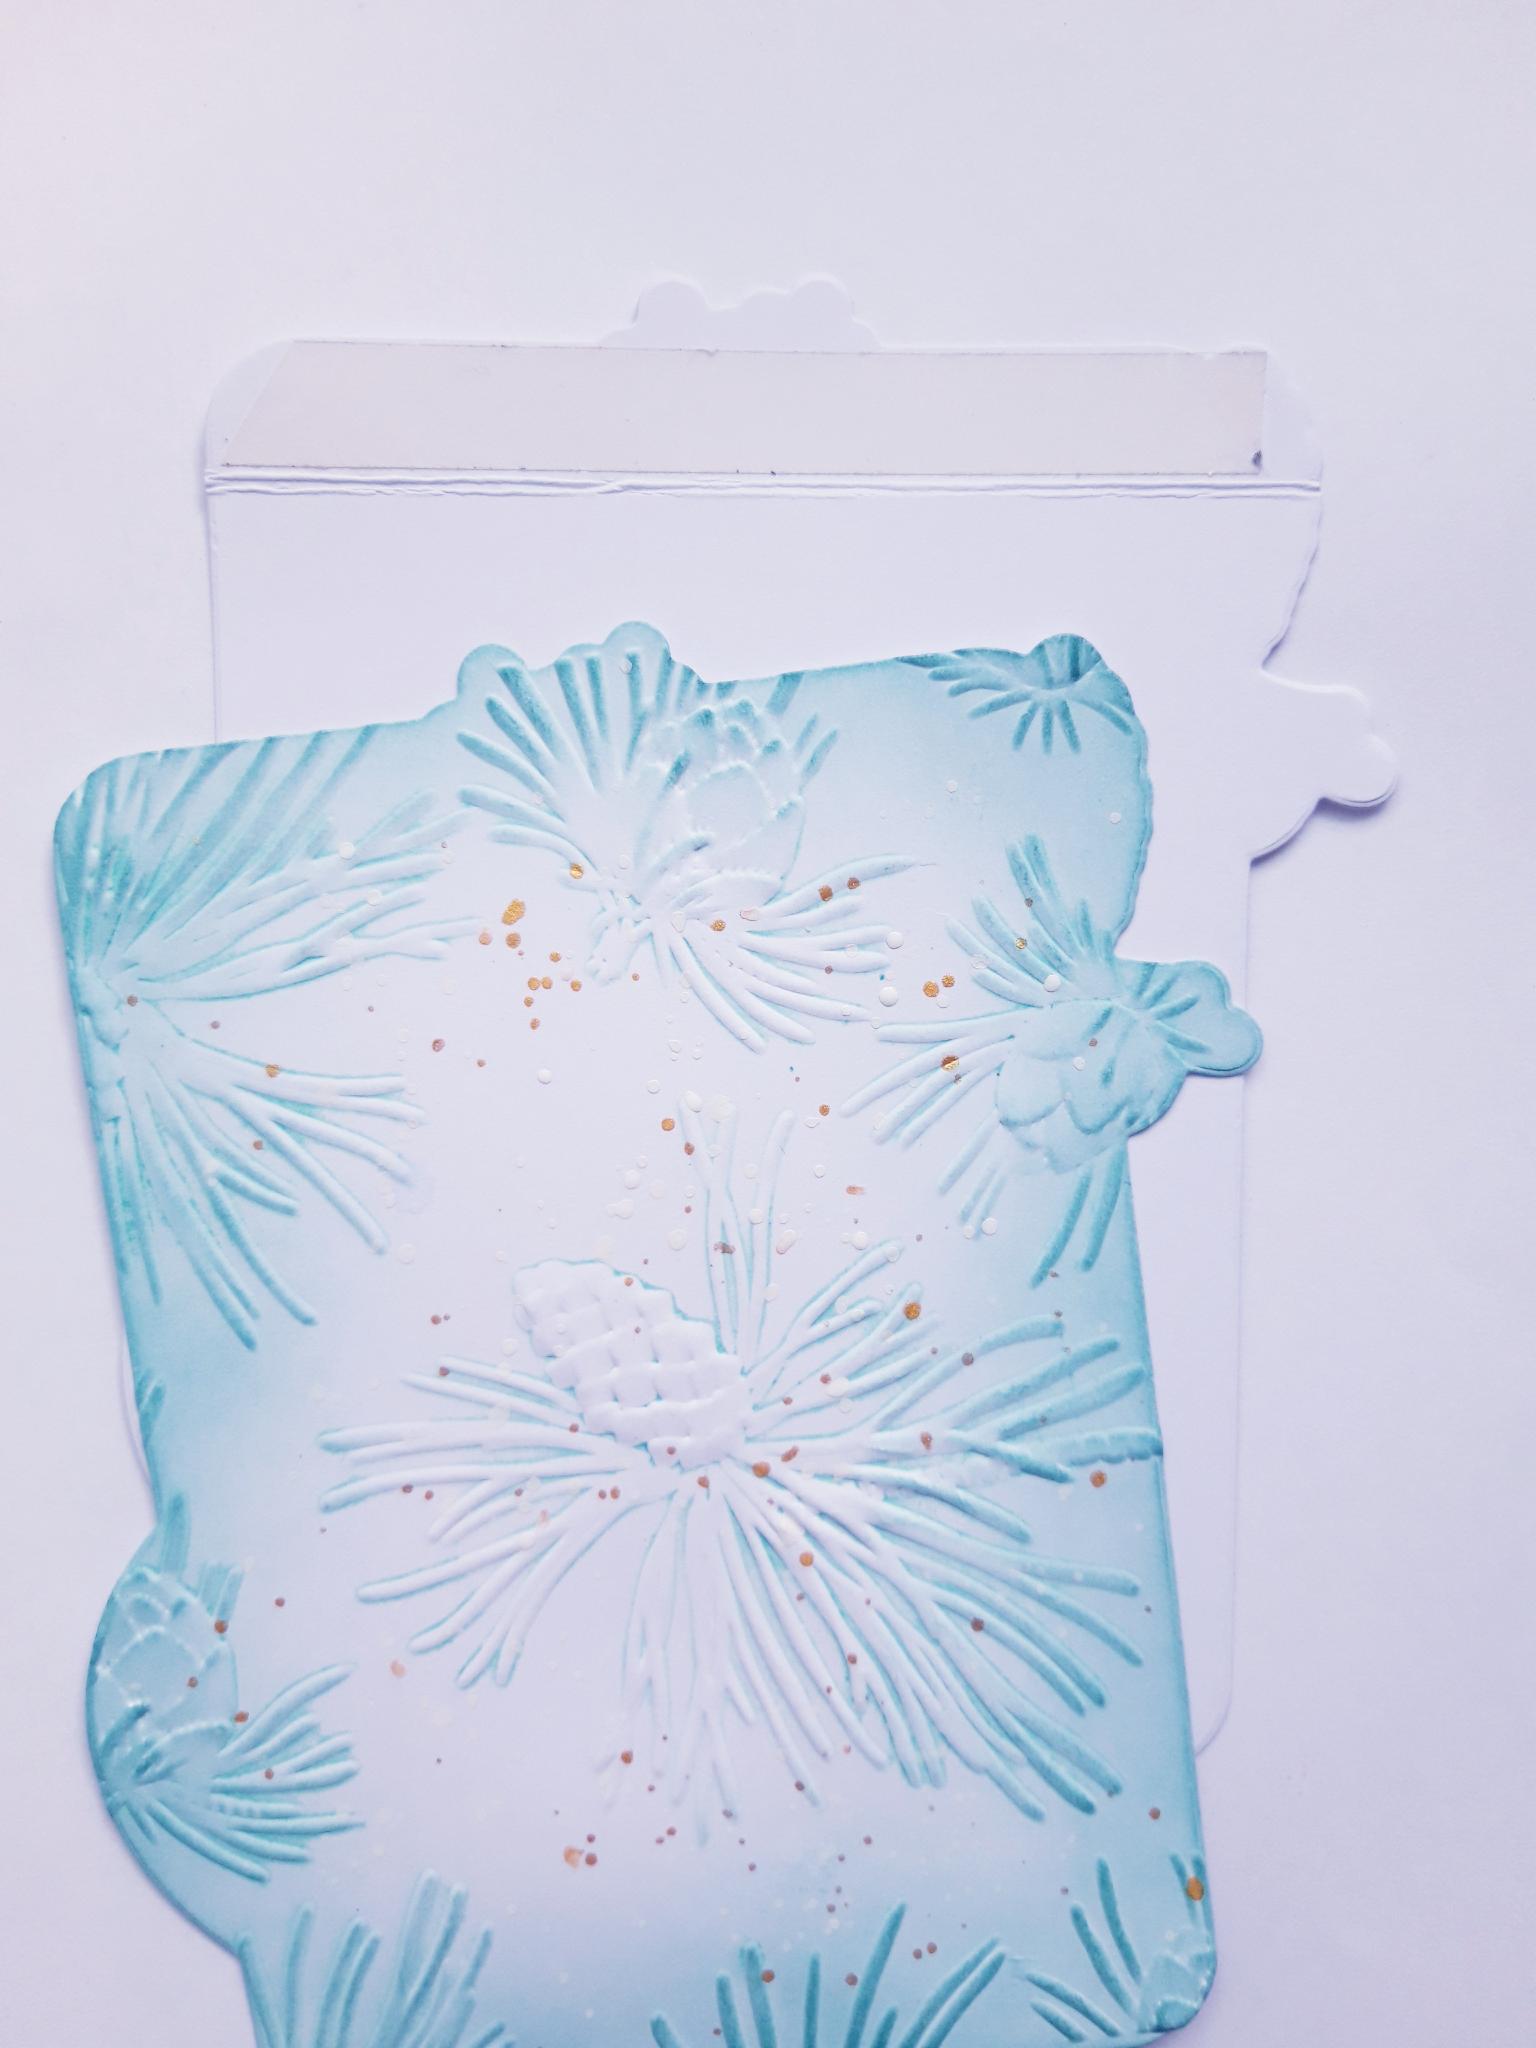
Score across the top of ONE of the white mats, approx 1 1/2cm down from the top. Apply red liner tape above the score line. Set this mat to one side. |
|
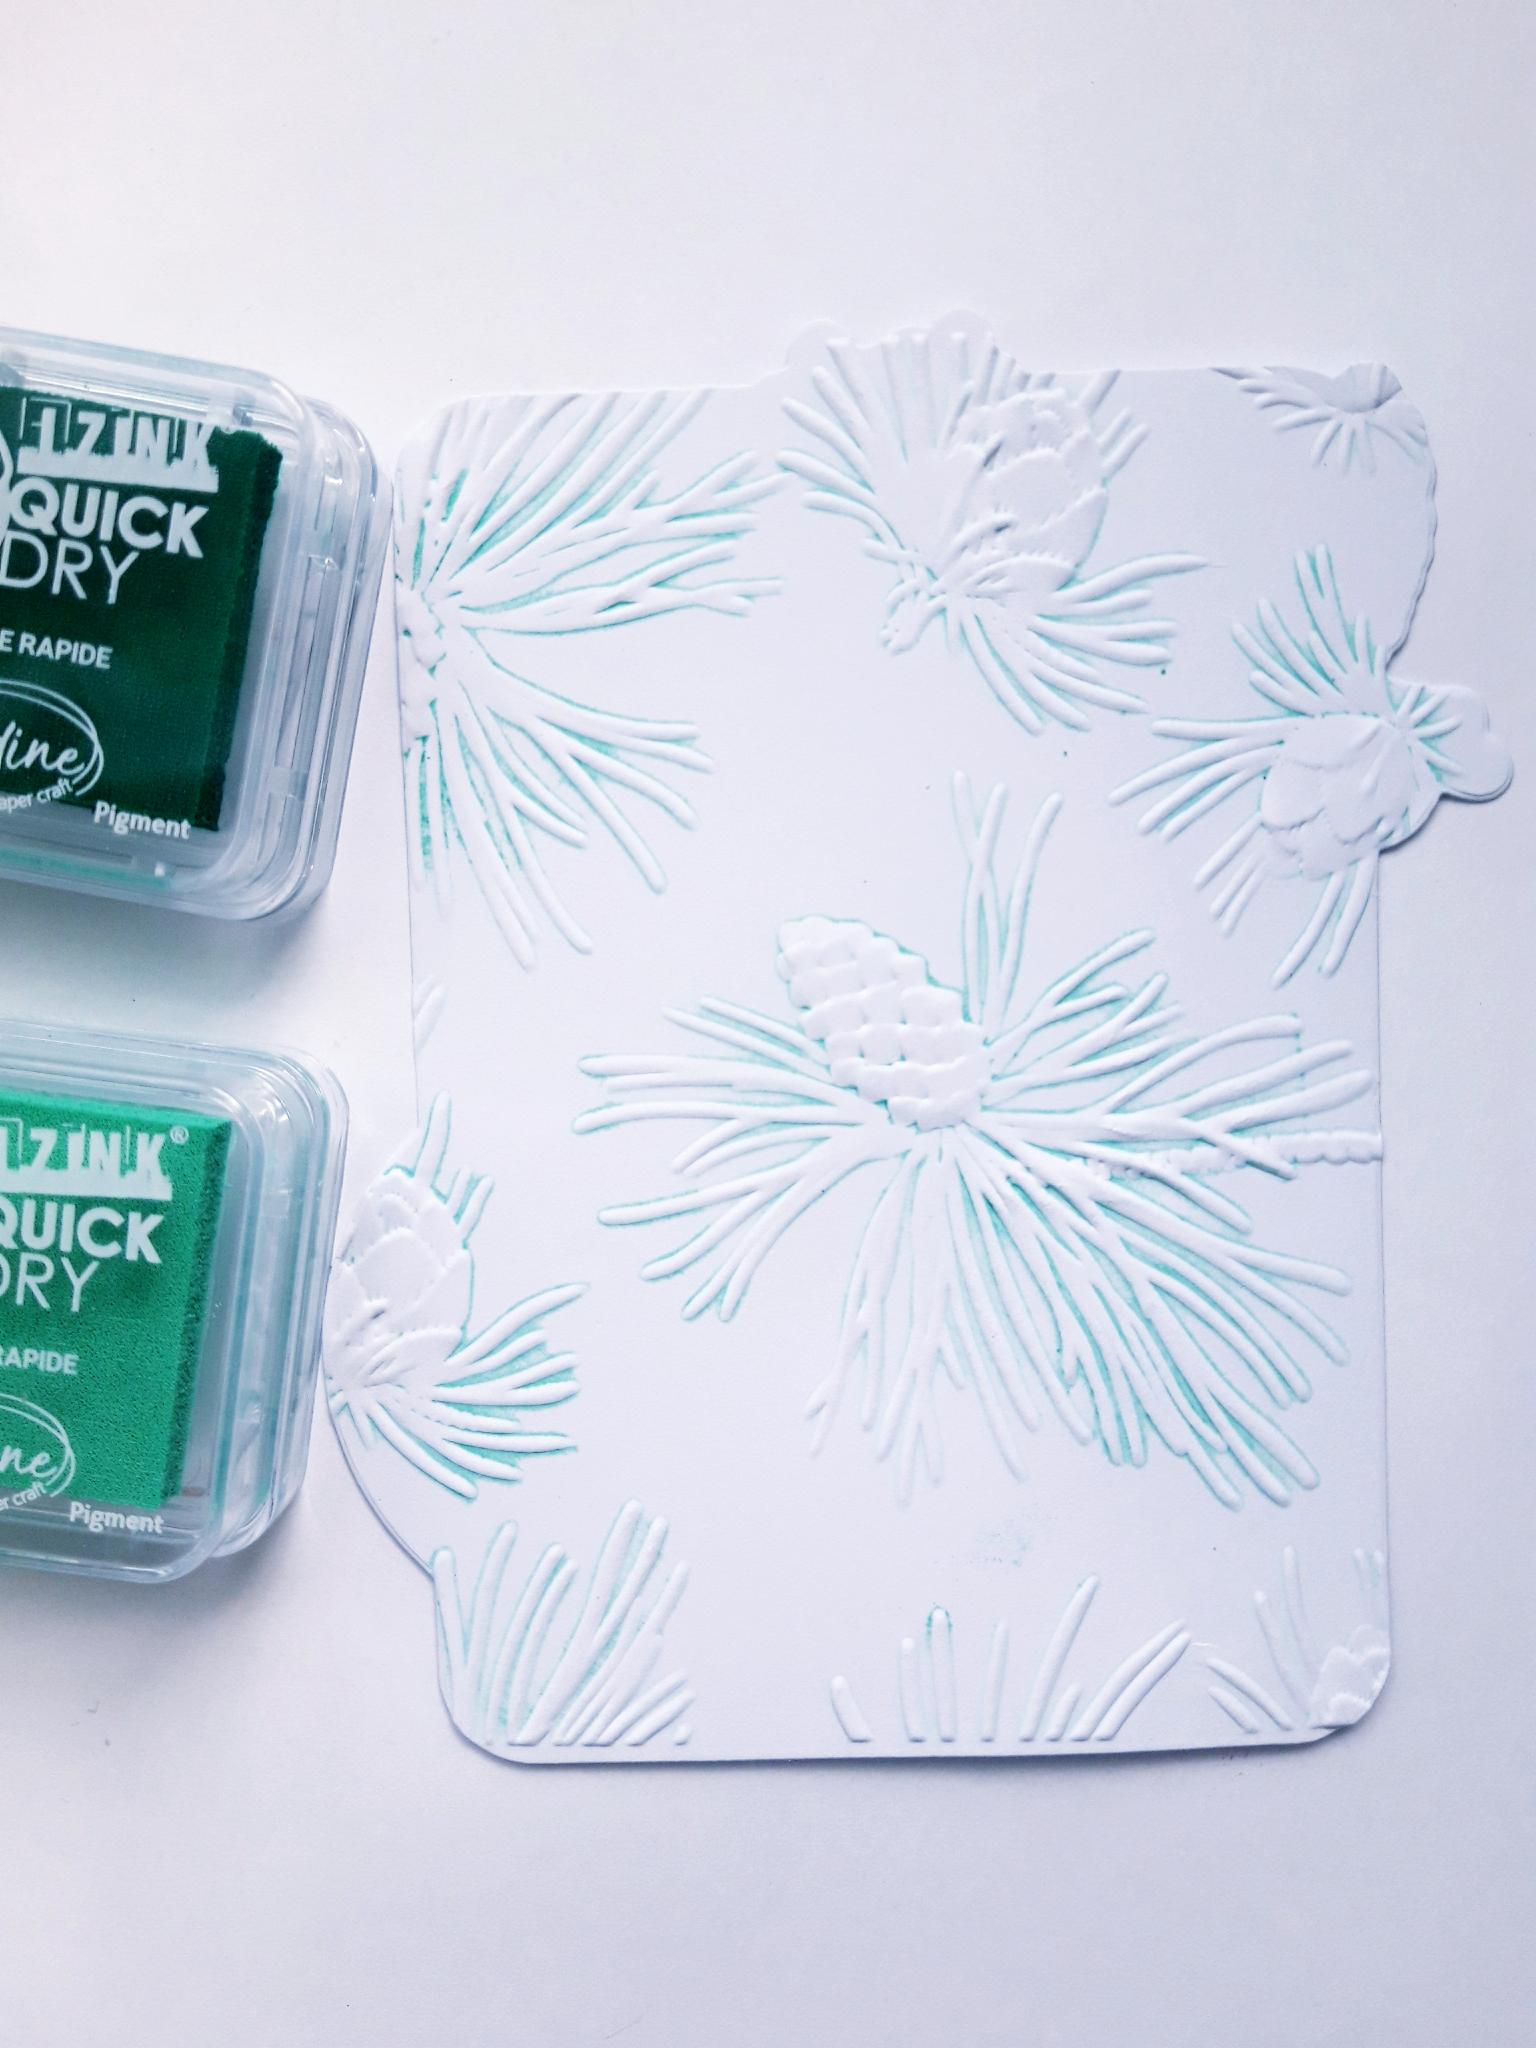
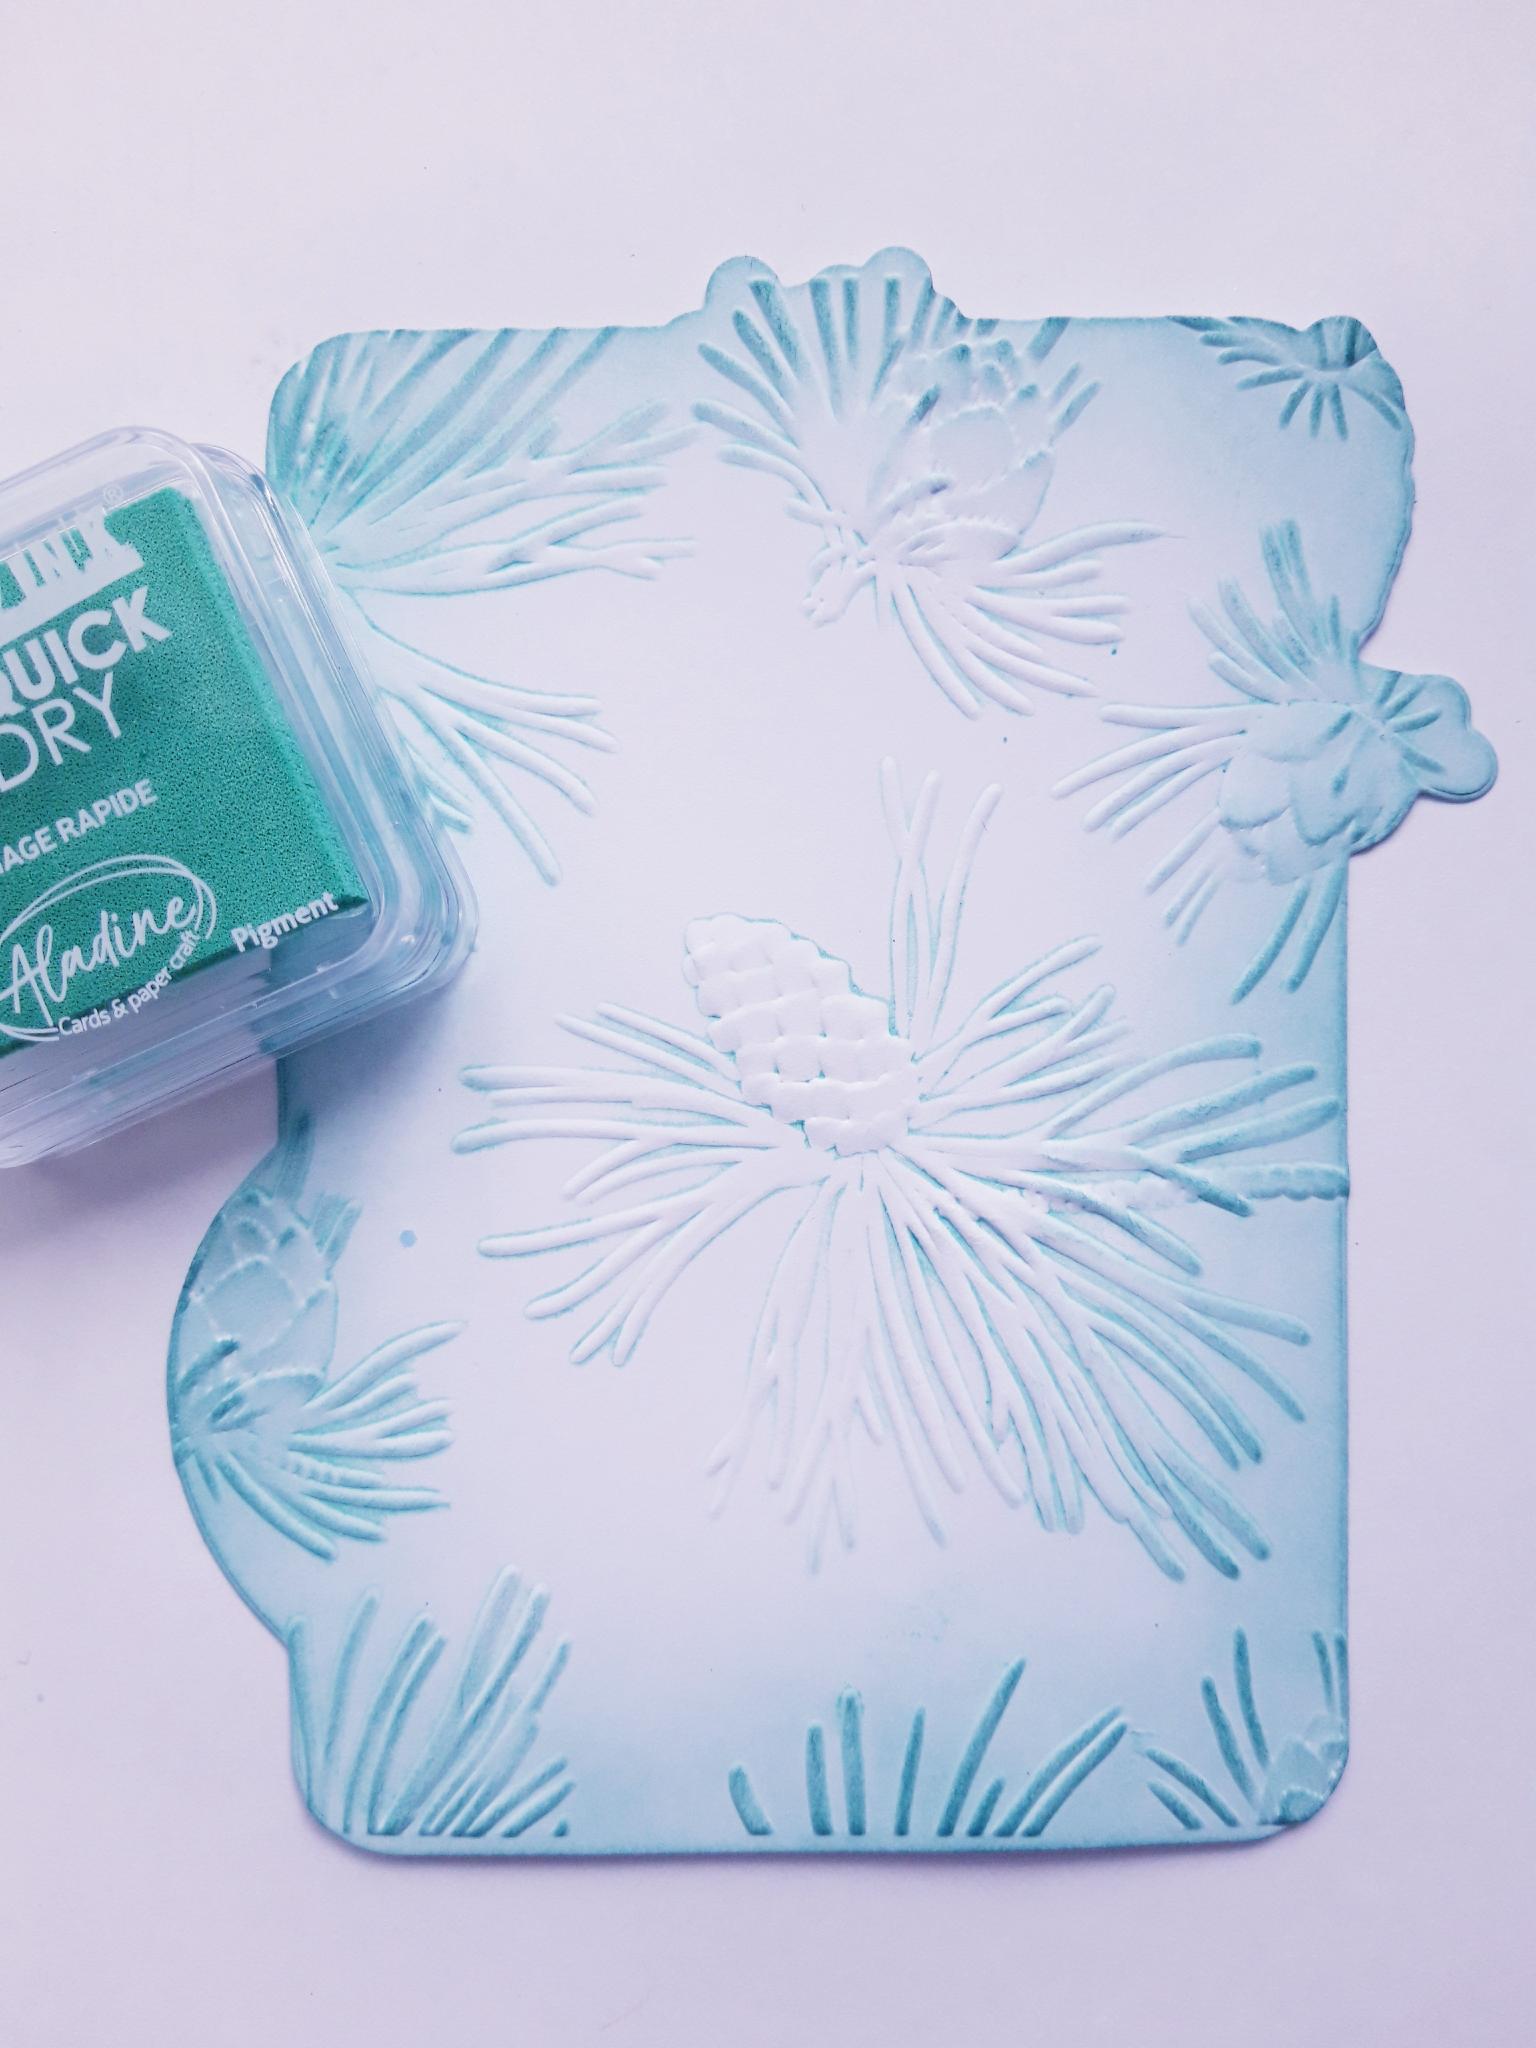
Place the Winter Pines Embossing Folder embossed side down, at the bottom. Ink up the DEBOSSED side of the folder with the Izink Pigment ink pads, applying plenty of ink. Place the white die cut mat in the folder, on the bottom embossed side, and close the inked side down on to the card, before running it through your embossing machine. Remove the card to reveal an inked embossed image, as seen here.
|
|
Blend the Izink light green pigment ink, around the edges of your embossed mat. |
|
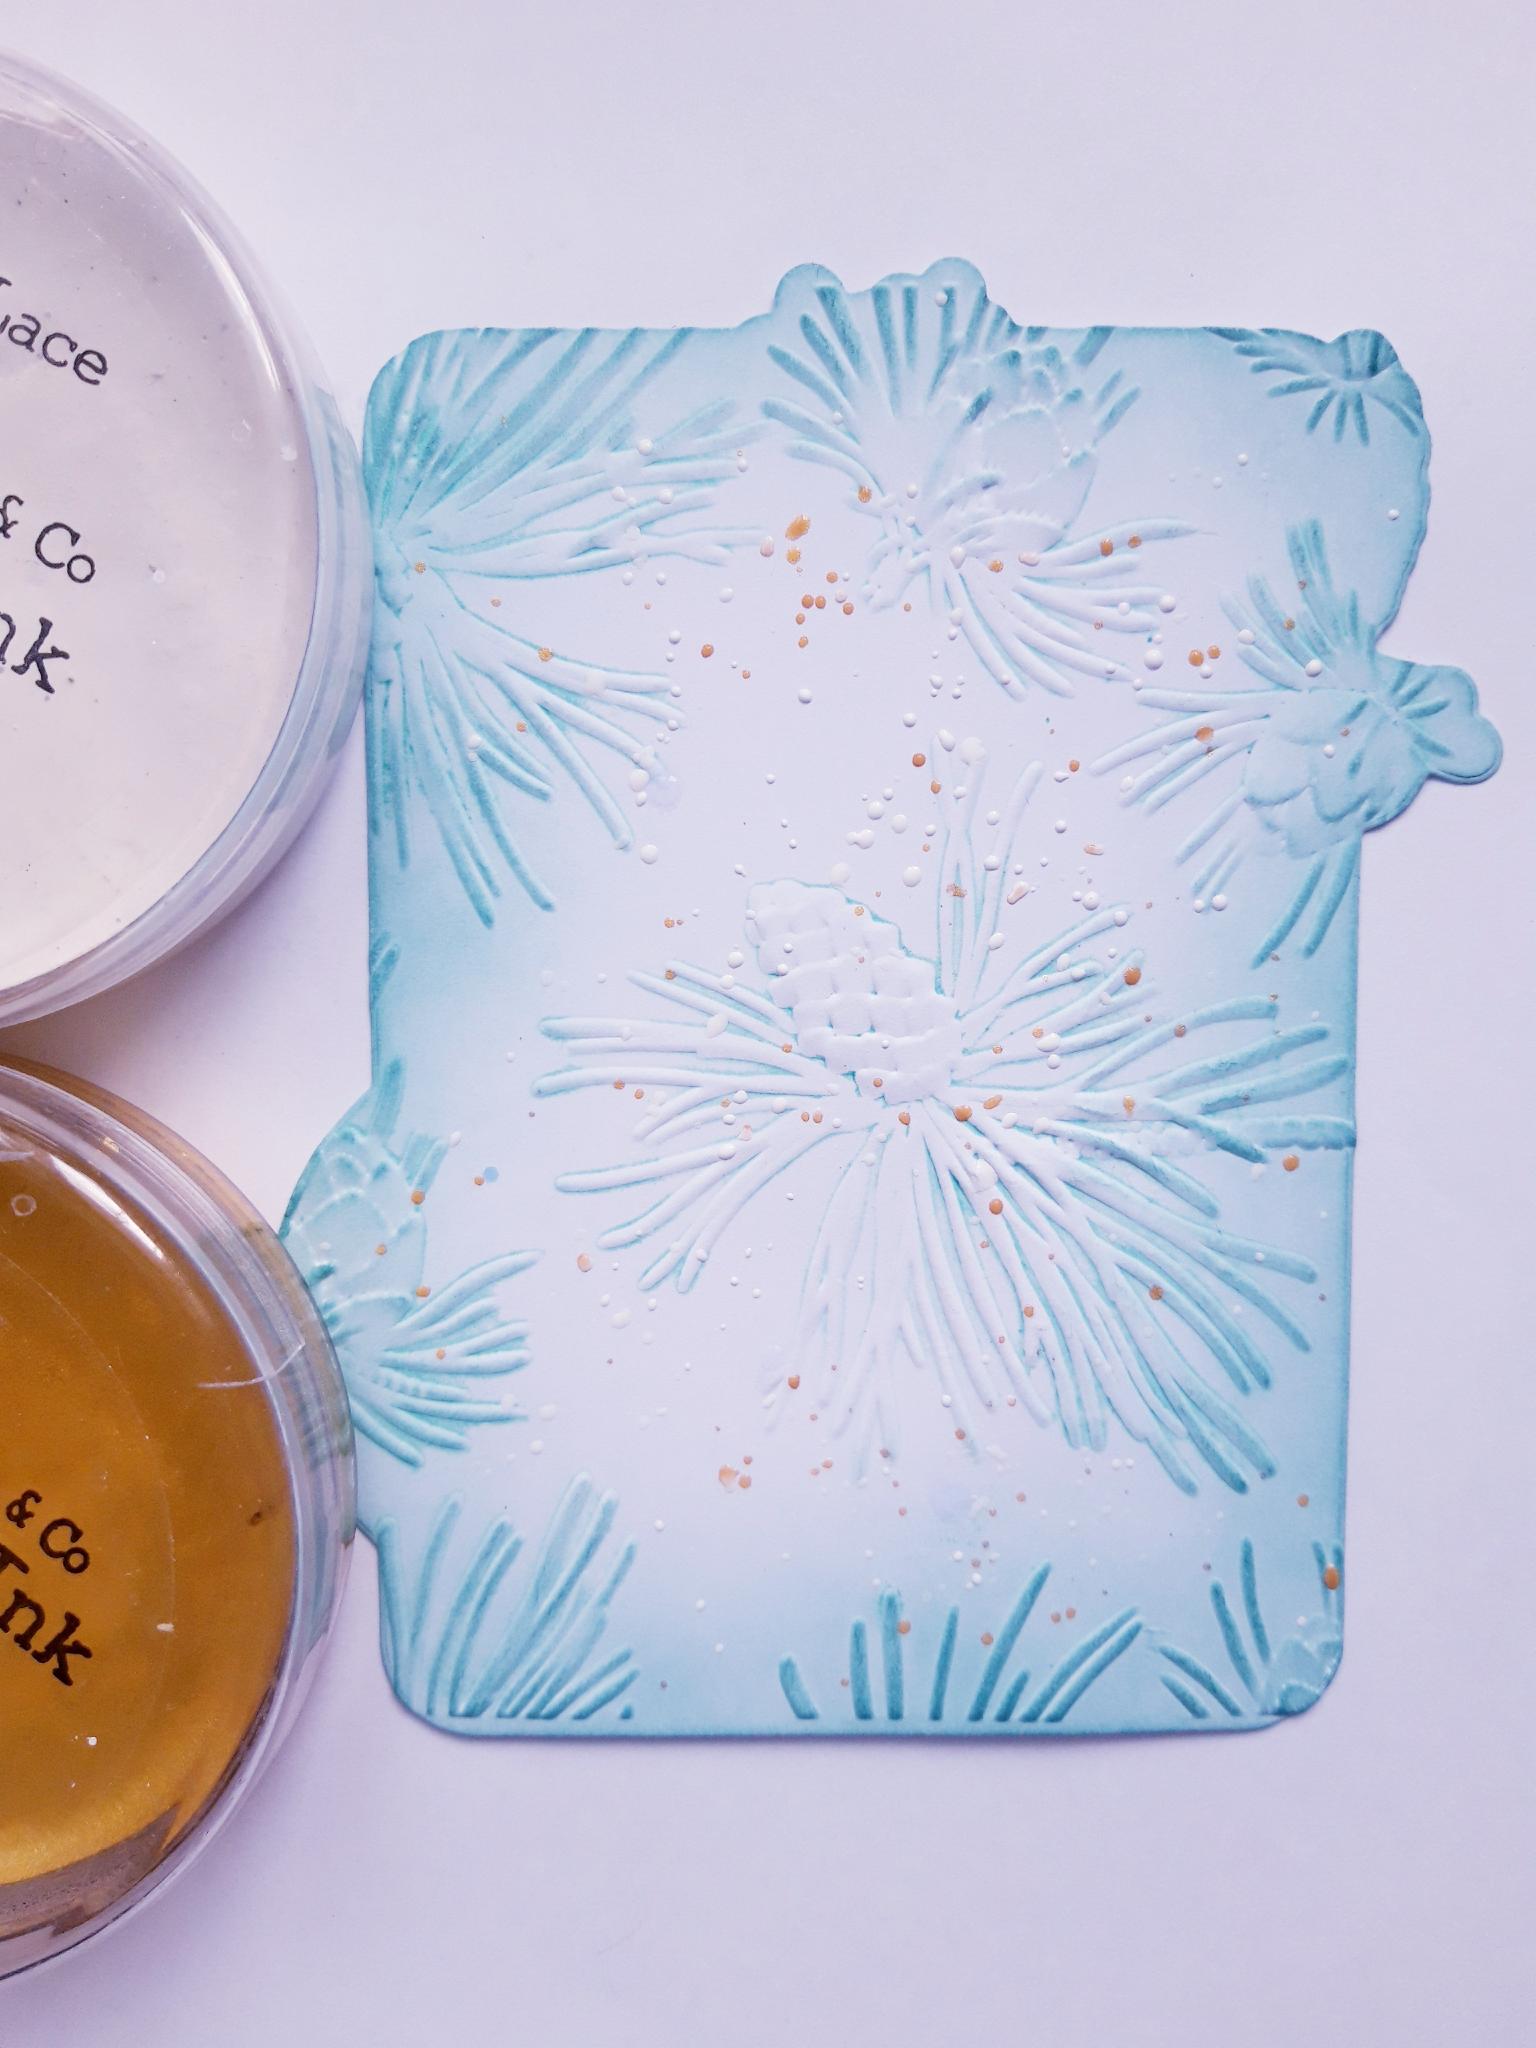
Spray water on to the Confetti White Lace, and Goldmine Paints, and splatter both over your embossed card. If possible allow to dry naturally, to give a stronger effect. |
|
Remove the red liner tape from the other white, die cut mat. Line this up, with the embossed die cut mat, then push, and adhere together, thus creating an embossed card blank. Set this to one side. |
|
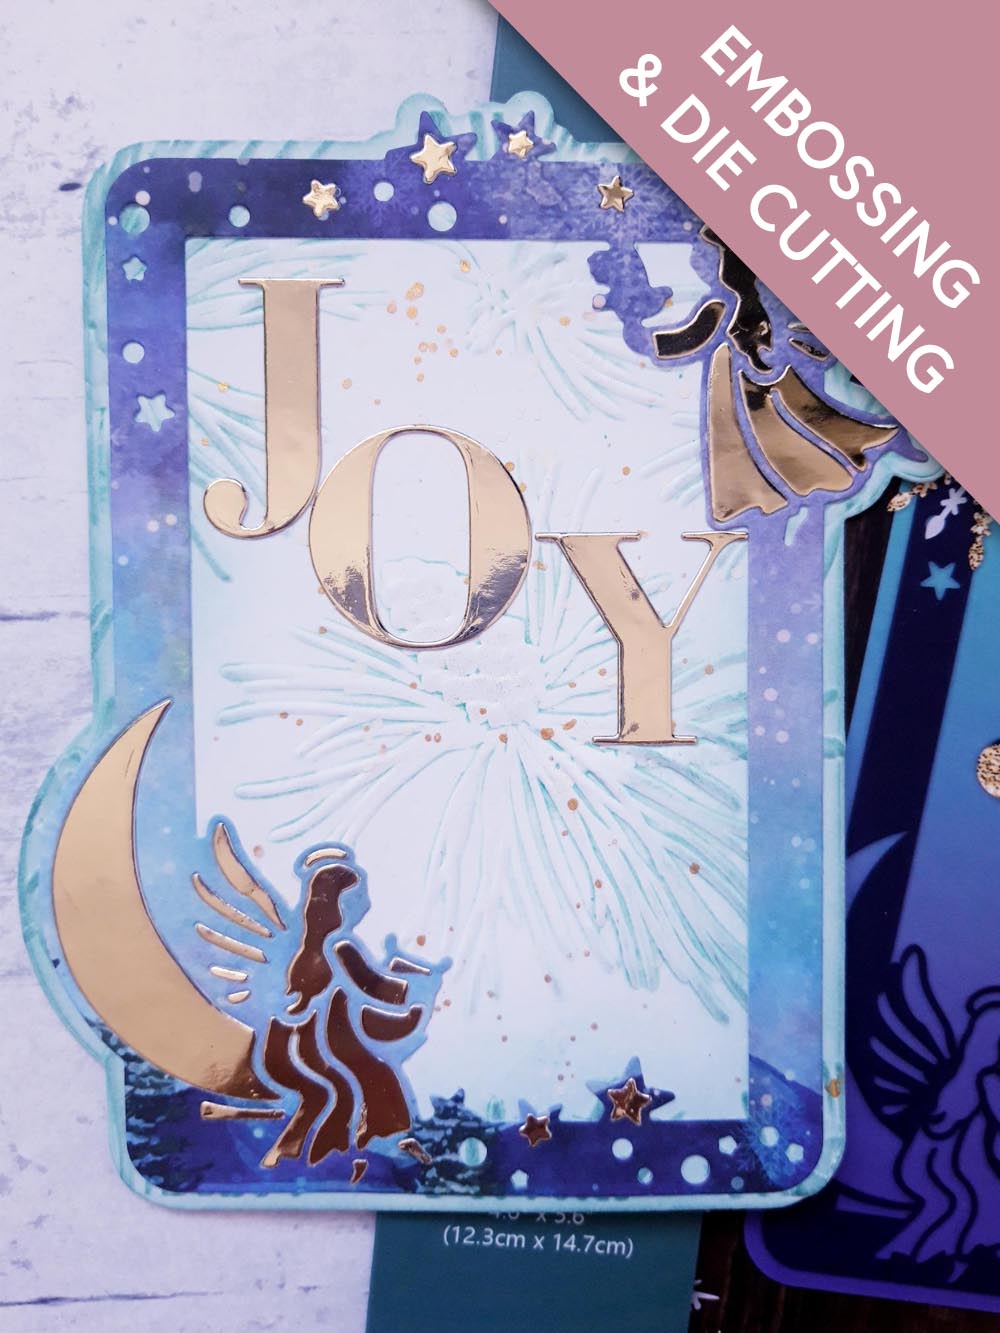
Place the detailed frame die, from the same set, on to the gold mirri card, and run it through your die cutting machine, keeping the leftover card to one side, to die cut the JOY letters later. NB: Keep all the pieces that come out of the frame, to paper piece back in later. However you will NOT be using the die cut gold frame, so you can put this aside for another project. Place the same die on a decorative sheet, you have chosen from the Thirsty Brush Northern Lights paper pad, and run it through your machine. You do NOT need to keep all the bits that fall out, only the die cut frame itself. |

|
Adhere the decorative paper, die cut frame, on to your embossed, shaped card blank. |
|
Paper piece back in the gold mirri die cut elements, that you set aside earlier. You can paper piece some of the elements, or all of them...the choice is yours. Set your card to one side. |

|
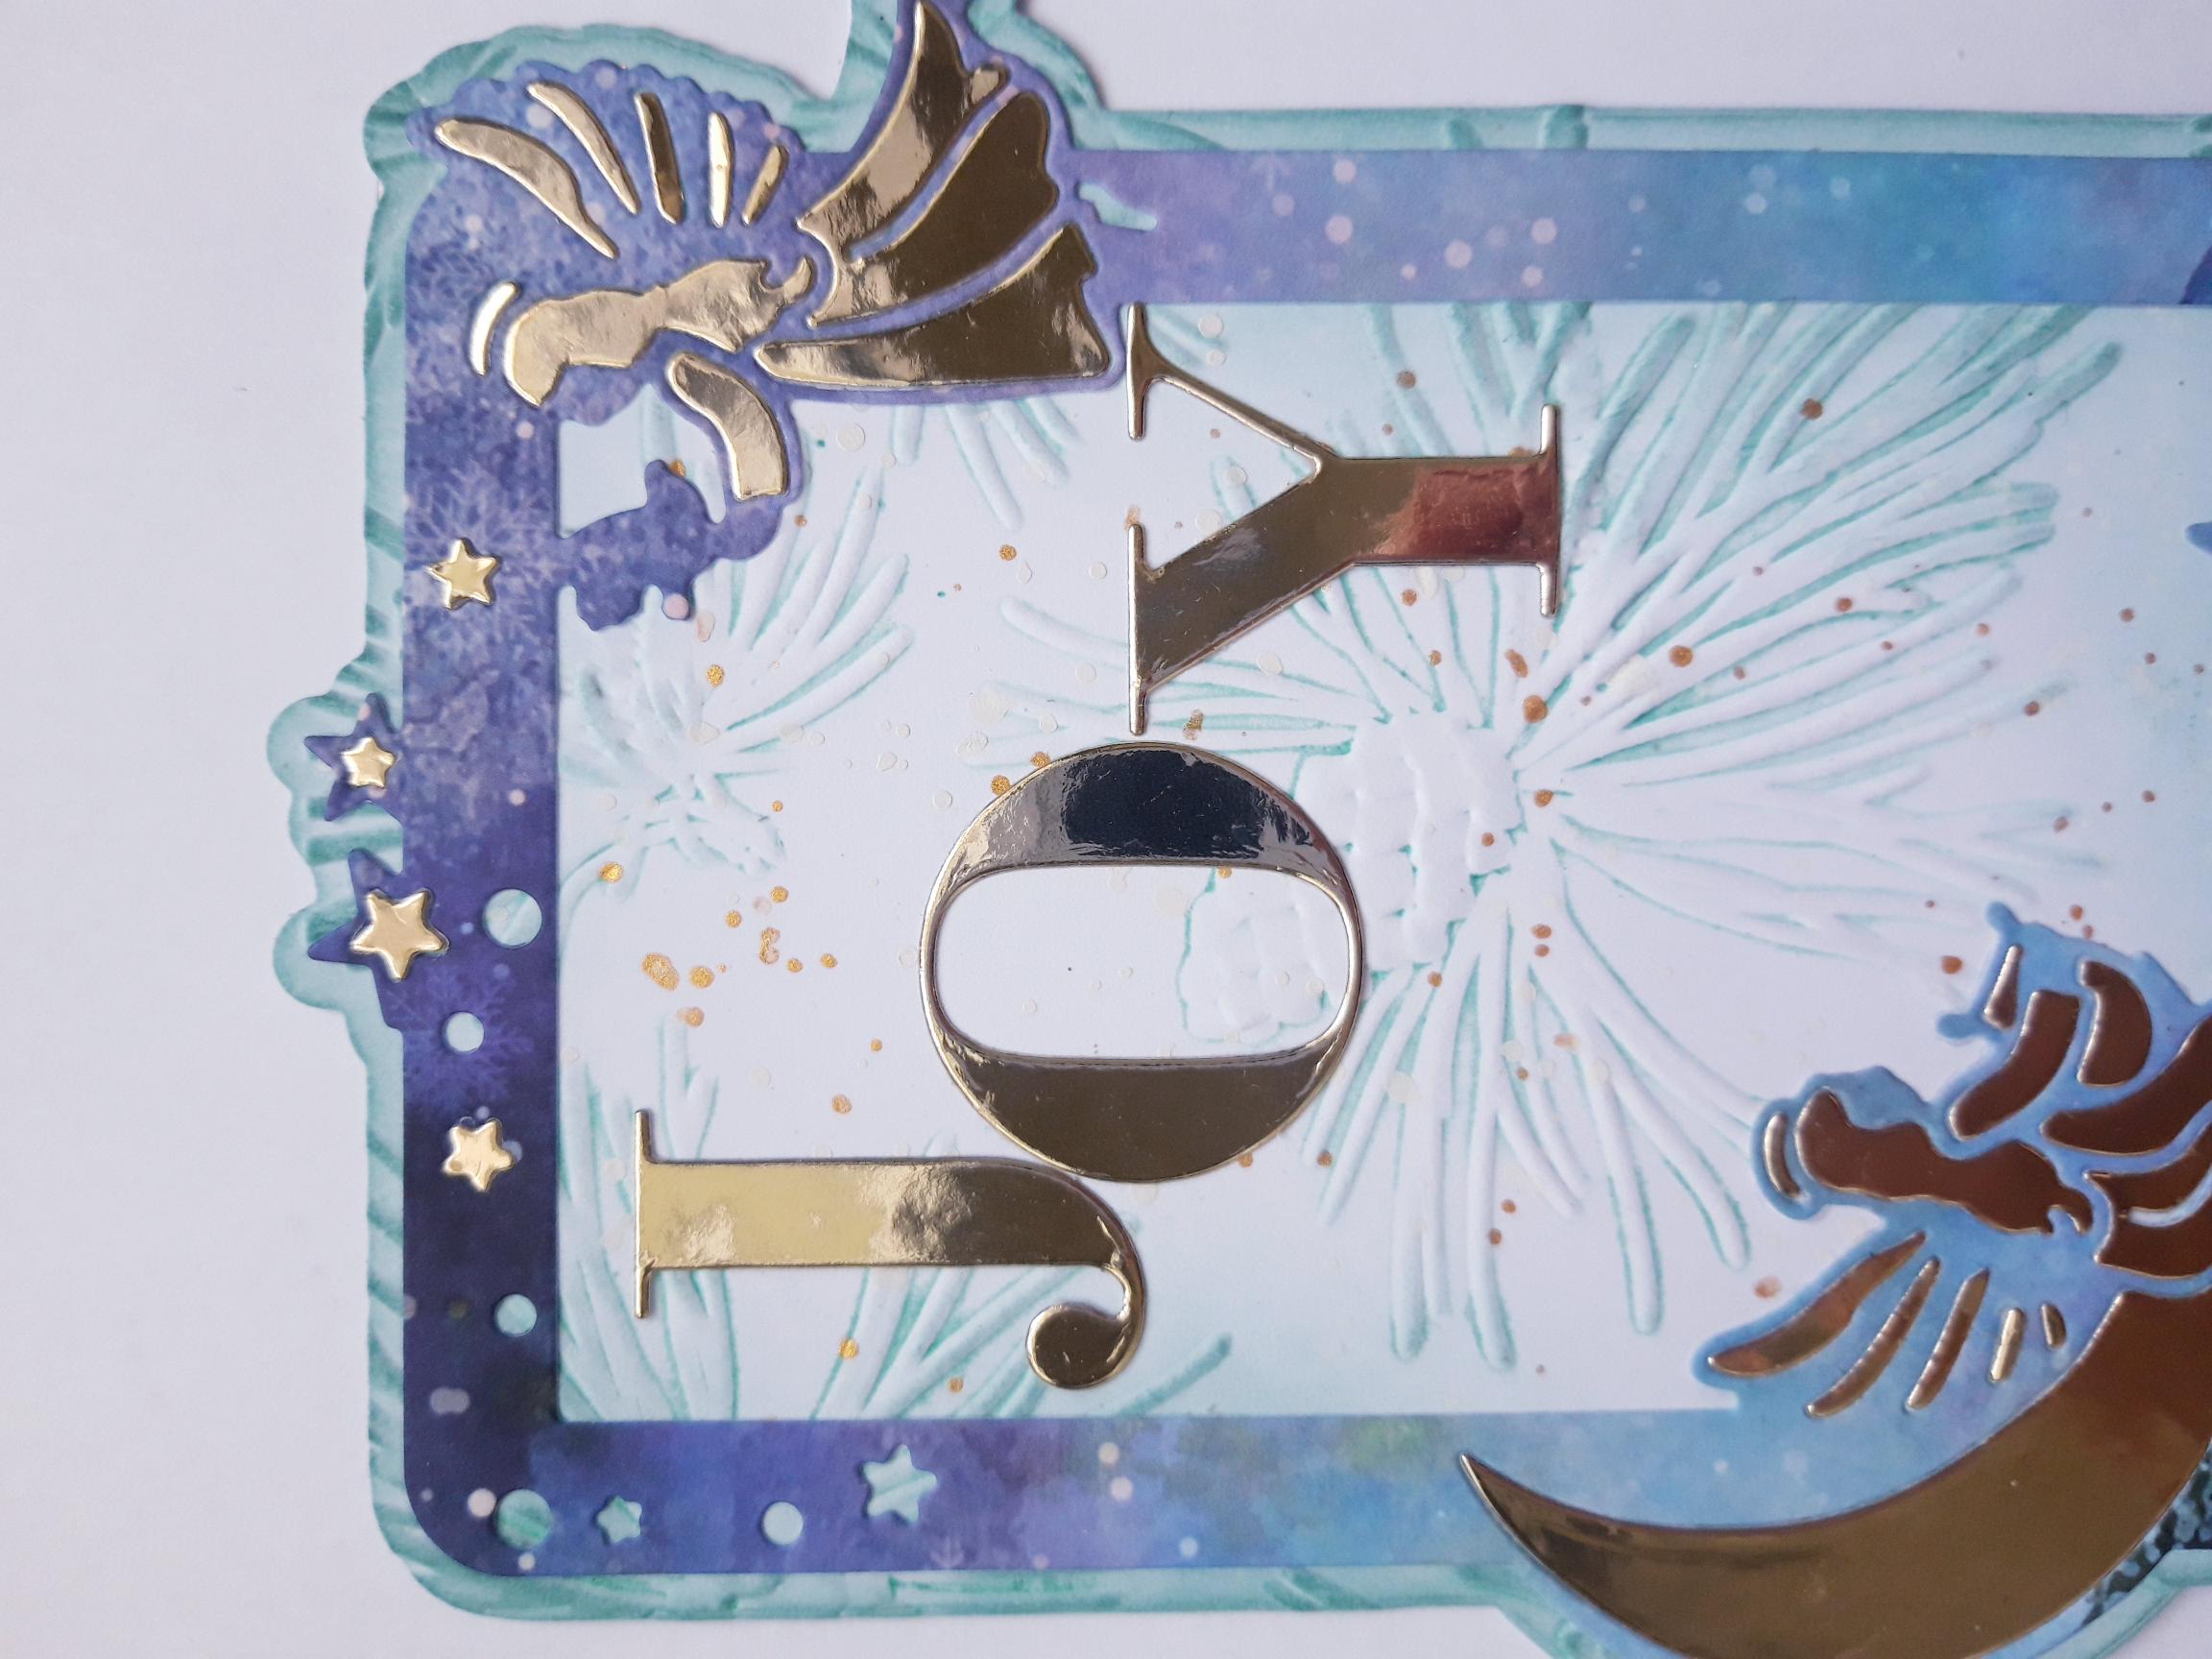
Place the JOY letter dies on to the gold mirri card set aside earlier, and run it through your die cutting machine. |
|
Adhere the die cut letters on to your card. |
|
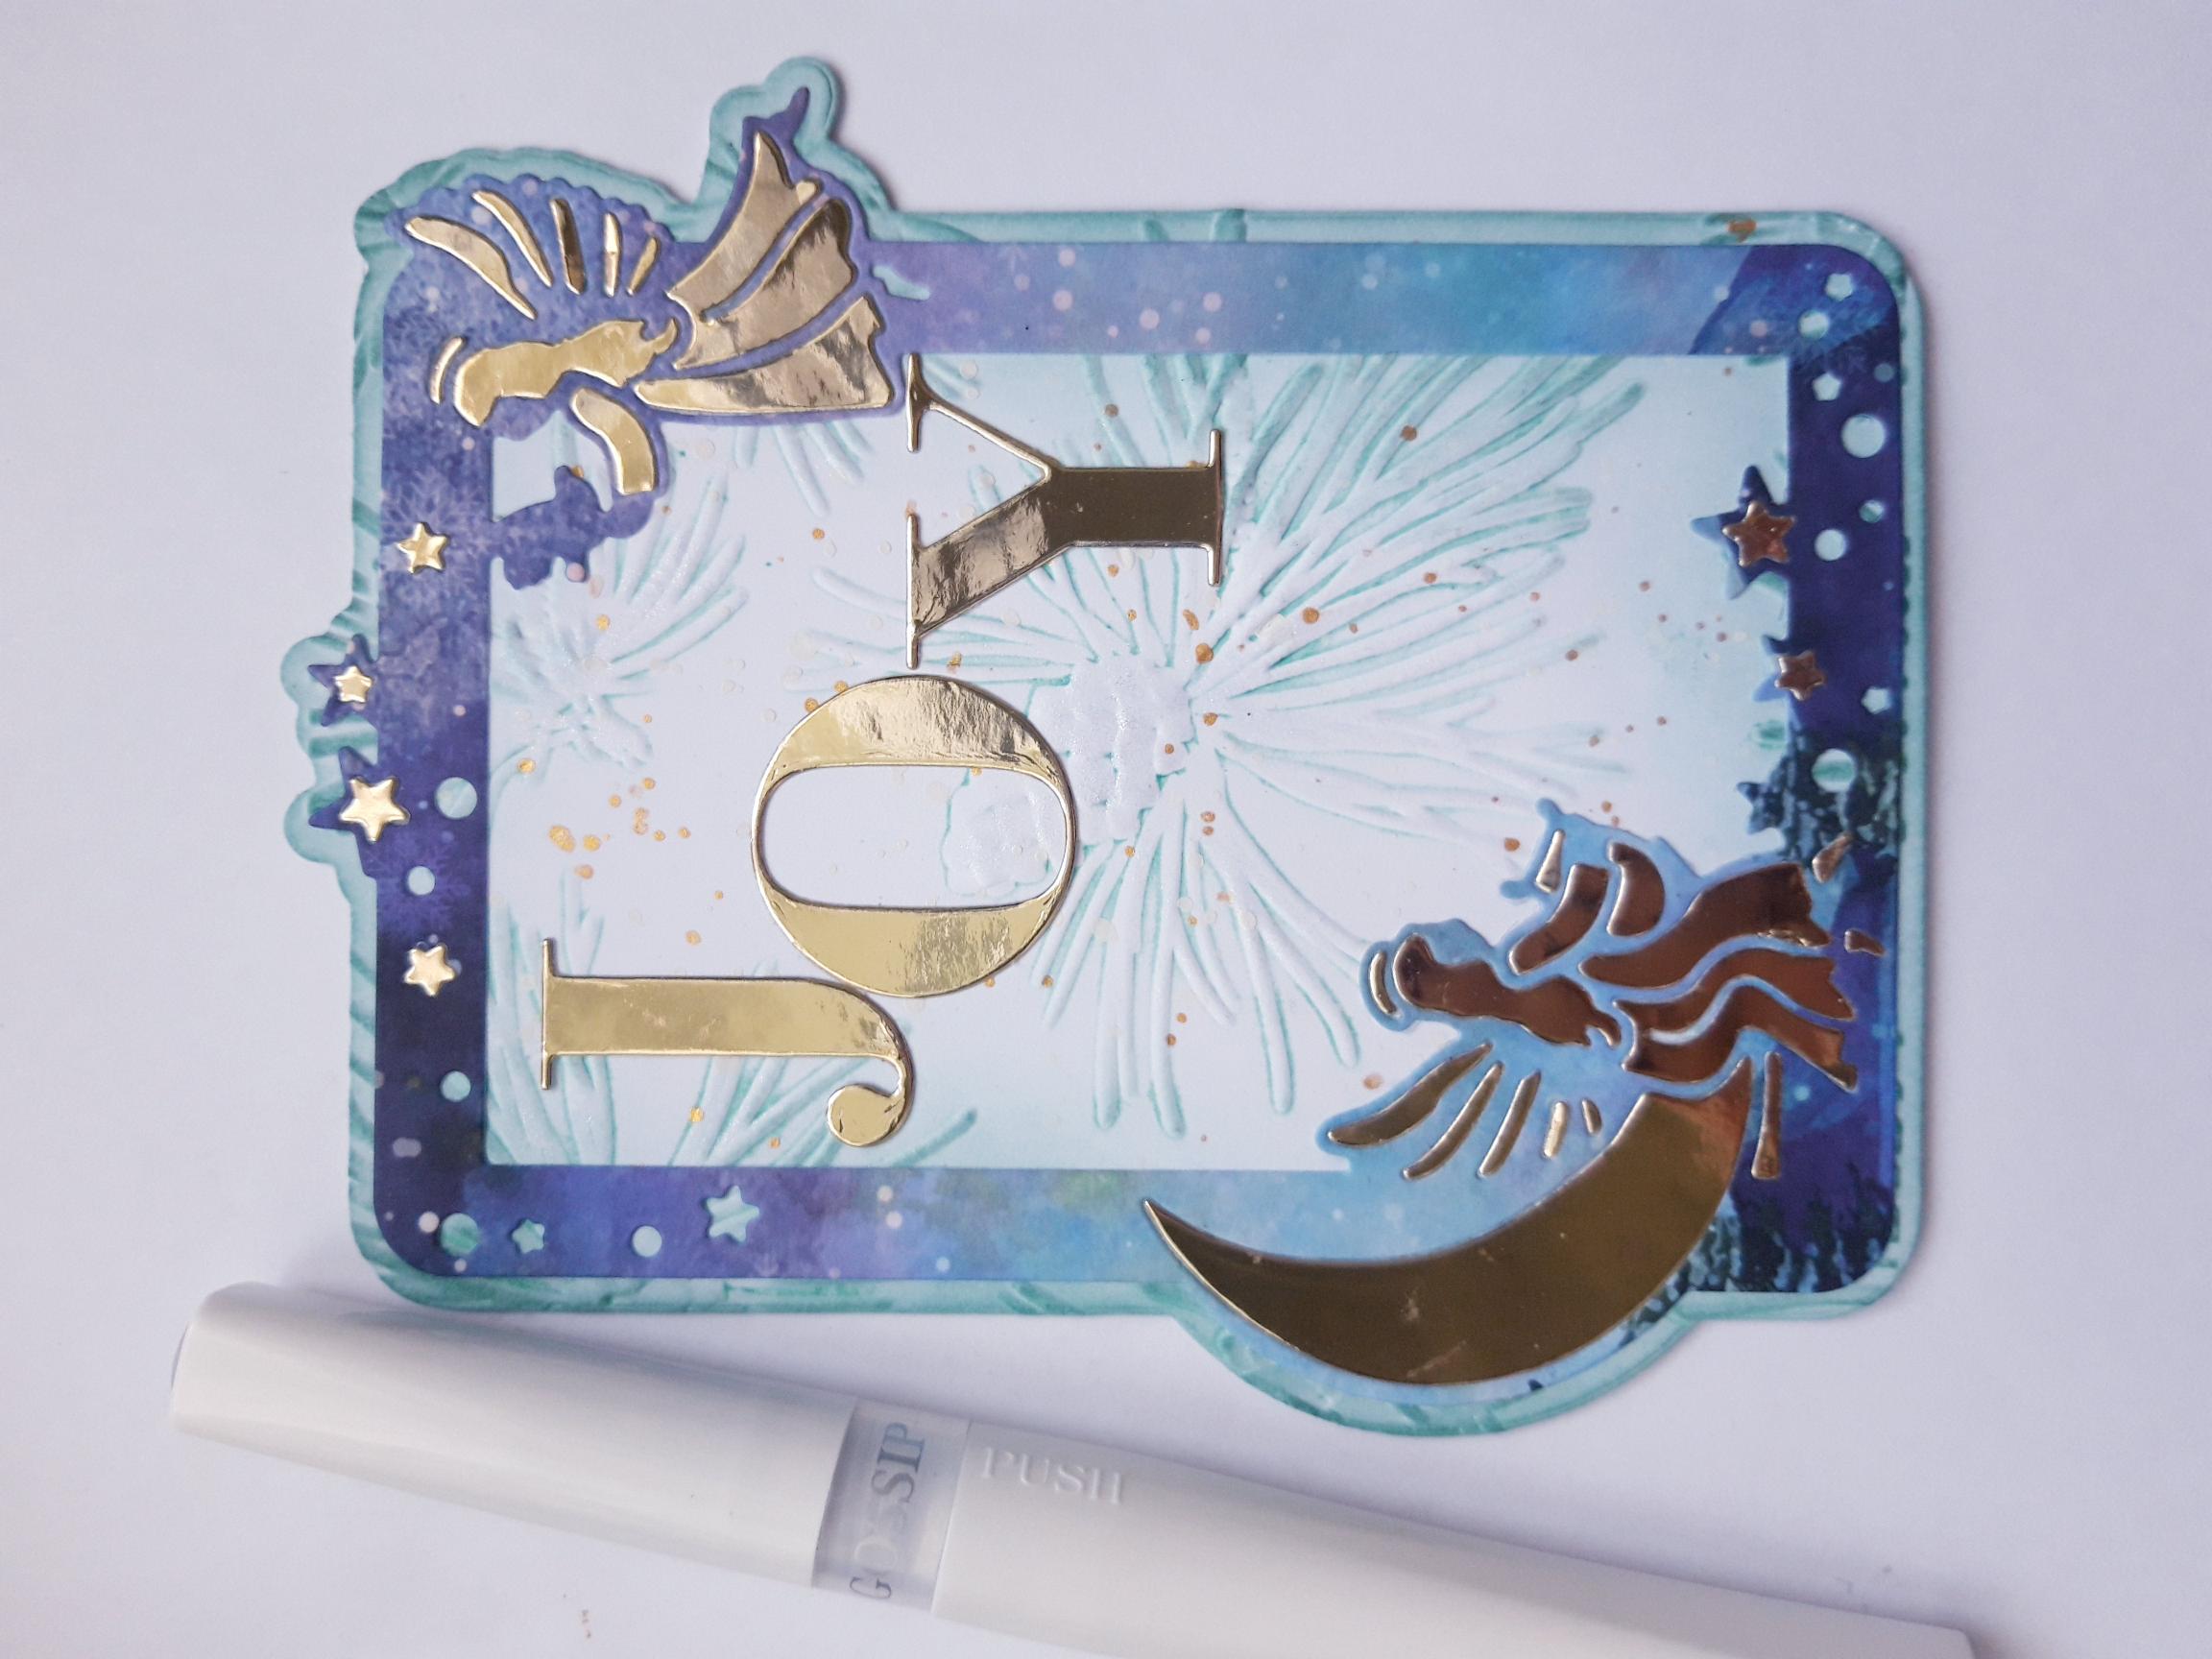
To finish your card, apply the Gossip clear overlay glitter pen randomly over your embossed images, to add a touch of sparkle. |