Give your friends $10 off their first order!
Refer a FRIEND


WHAT YOU WILL NEED:
White card blank (7 x 7")
Black card (6 1/4 x 6 1/4")
White card (5 3/4 x 5 3/4")
White card (5 x 5")
White card (4 x 4")
Glitter card (8 1/4 x 3 1/2") silver, rainbow, holographic..whatever you prefer
Dies from Rejoice Die Collection
Die from Winter Sparkles Die Collection
Dies from Festive Sparkles Die Collection
Stamps from Sending Christmas Cheer Stamp Collection
Time To Grow 8 x 8" paper pad
Versafine Ink Pad: Onyx Black
Izink Dye Spray: Morning Mist
Izink Texture Paste: Beads
Izink Dye ink pads: Ocean, Cassis, Reglisse
Palette knife
Water spray bottle
Sequins: Amethyst
Gem pick up and pokey tool
Eureka 101
Paper Trimmer
Perfect Together Glue
Foam Pads (optional)
Die Cutting machine
[click image to enlarge] 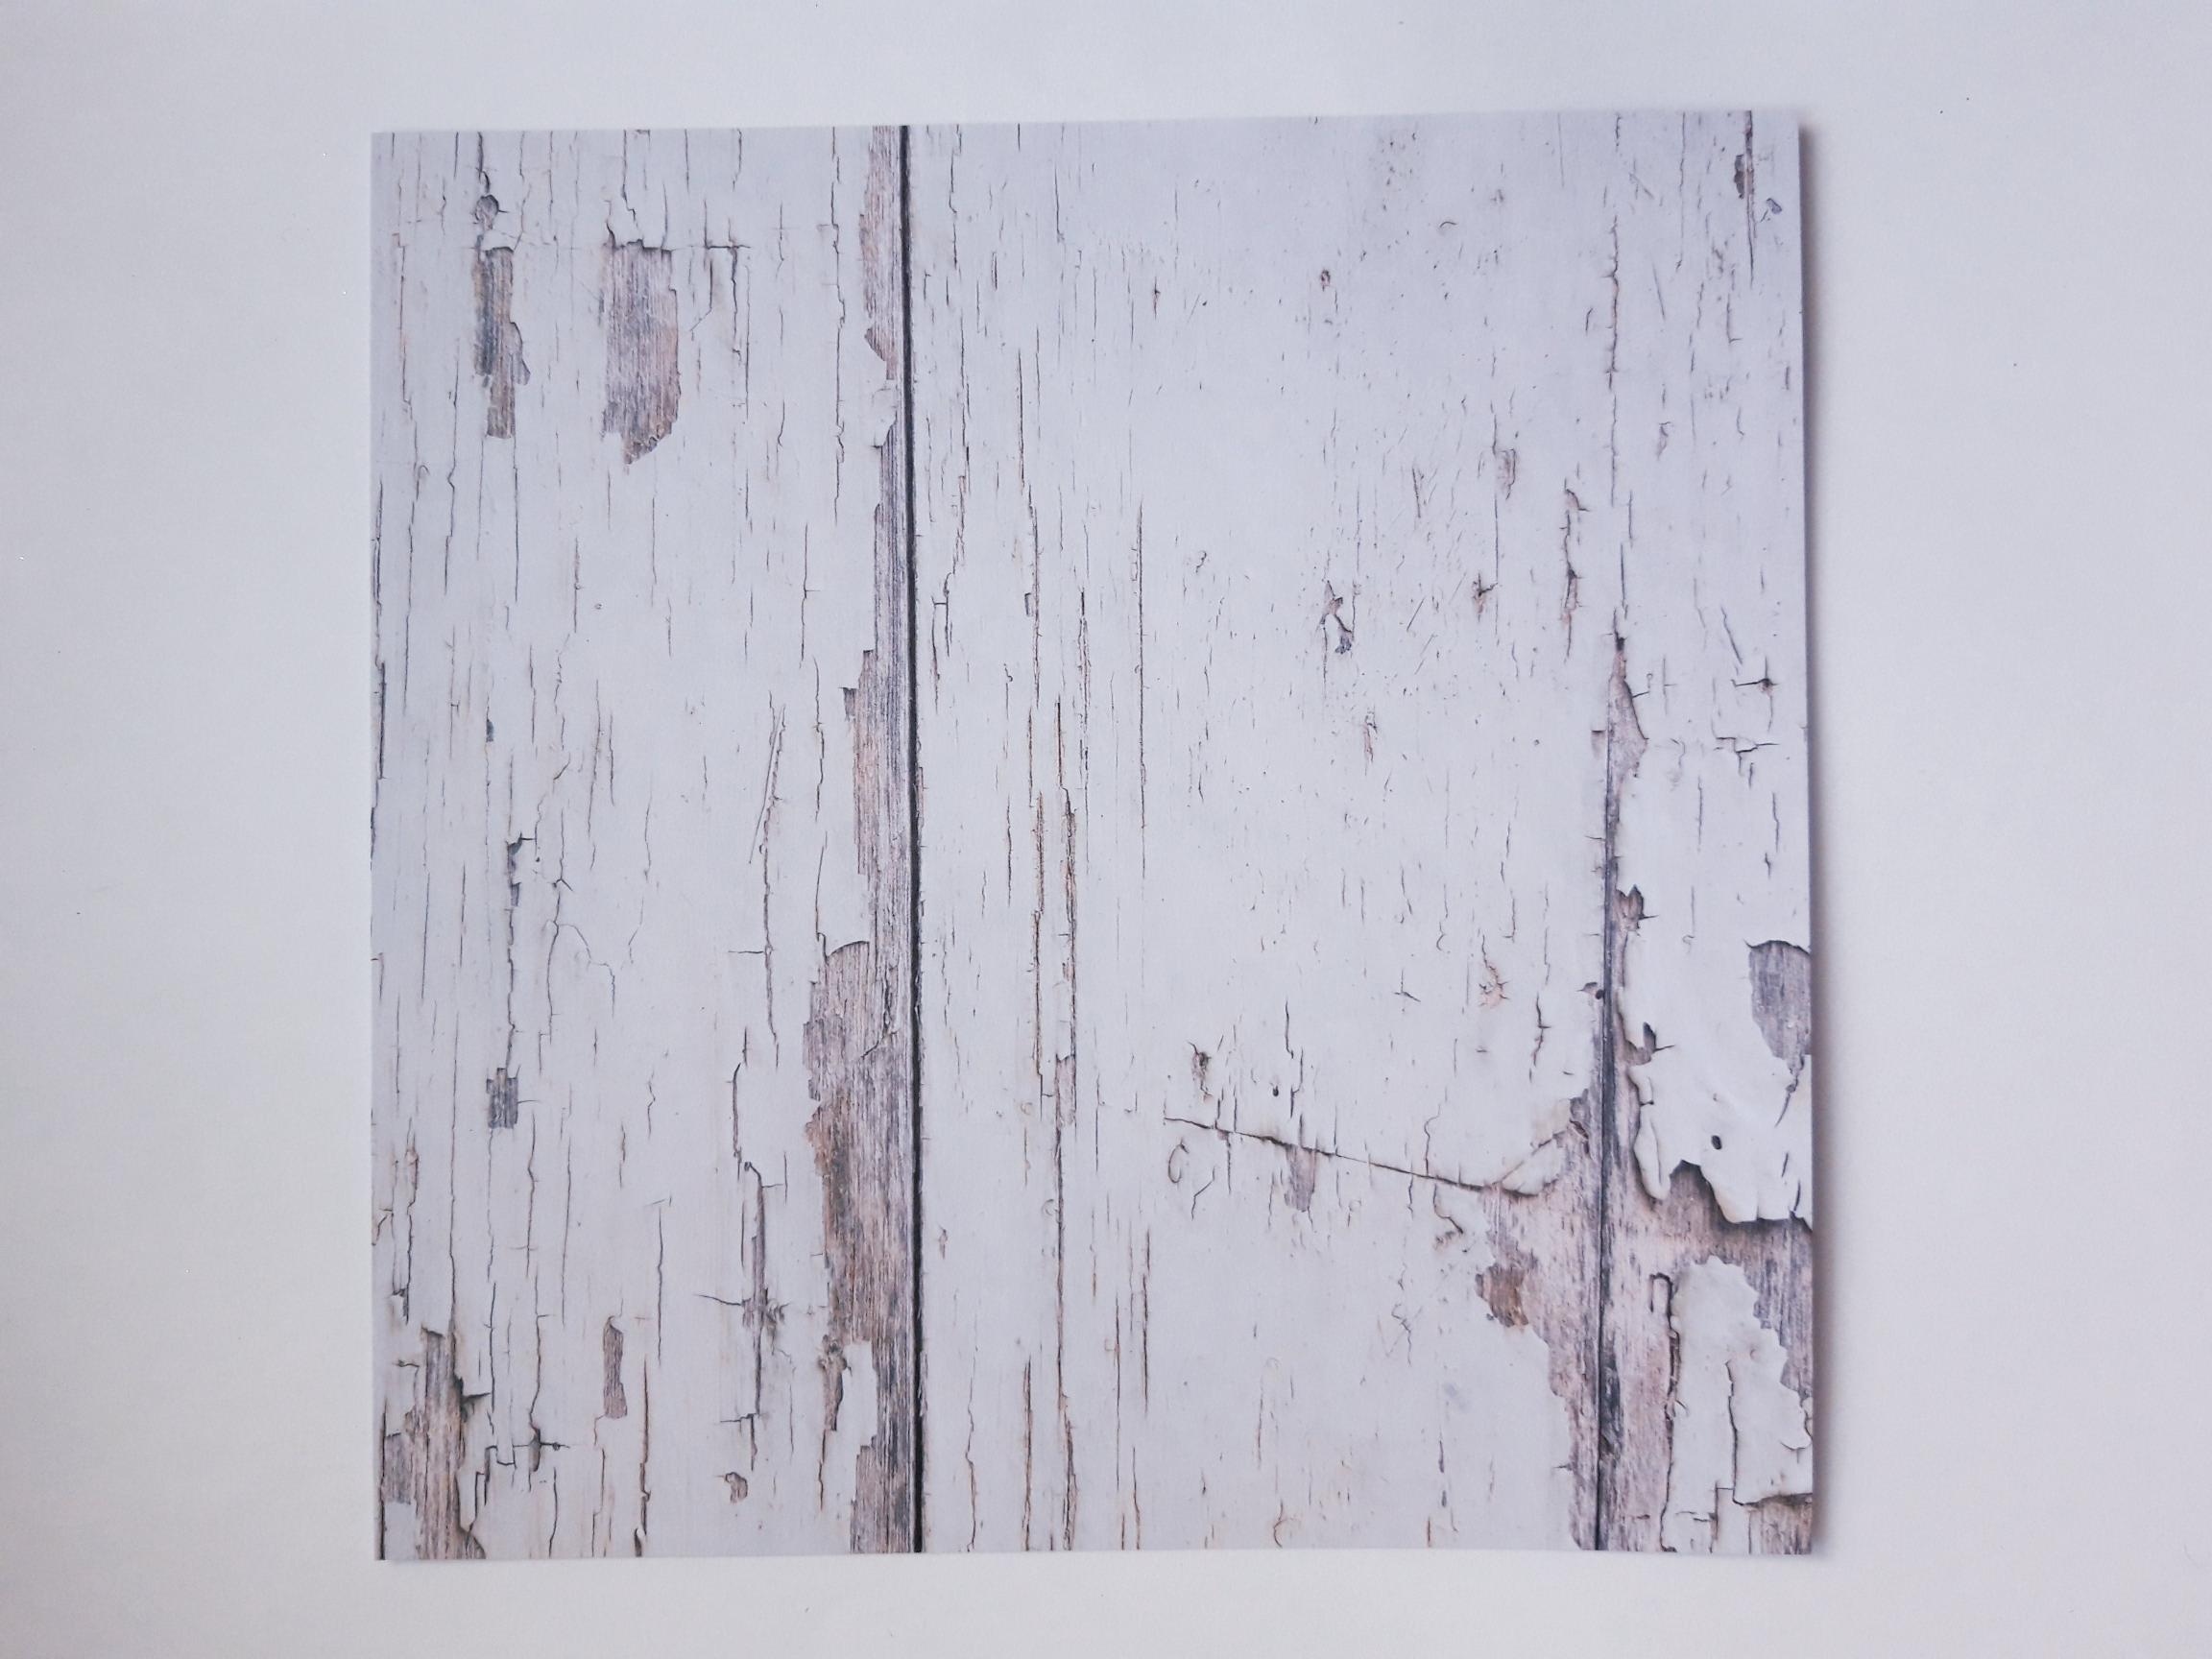
|
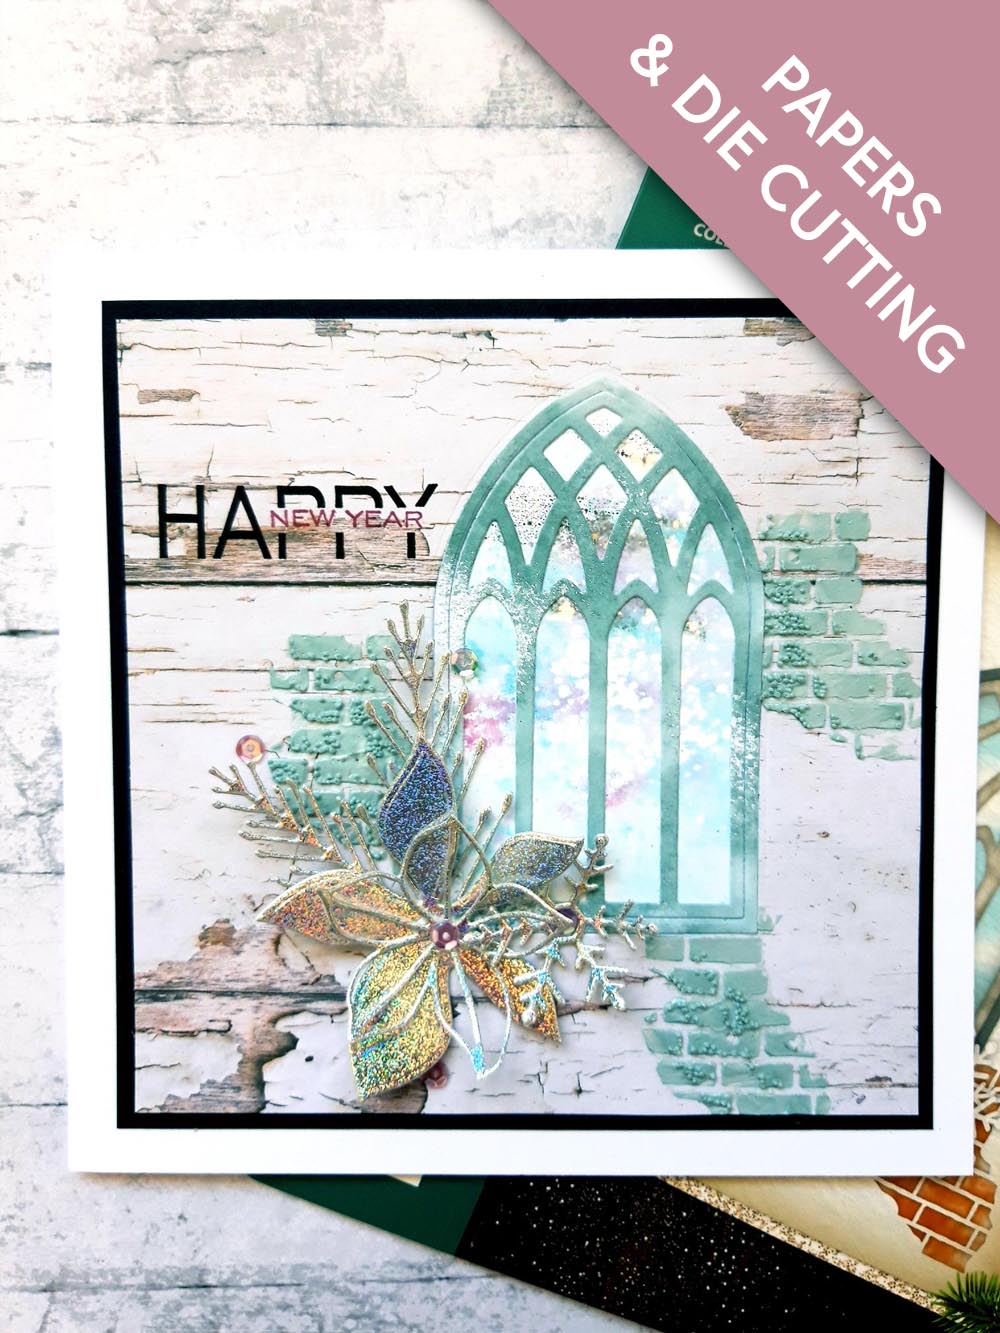
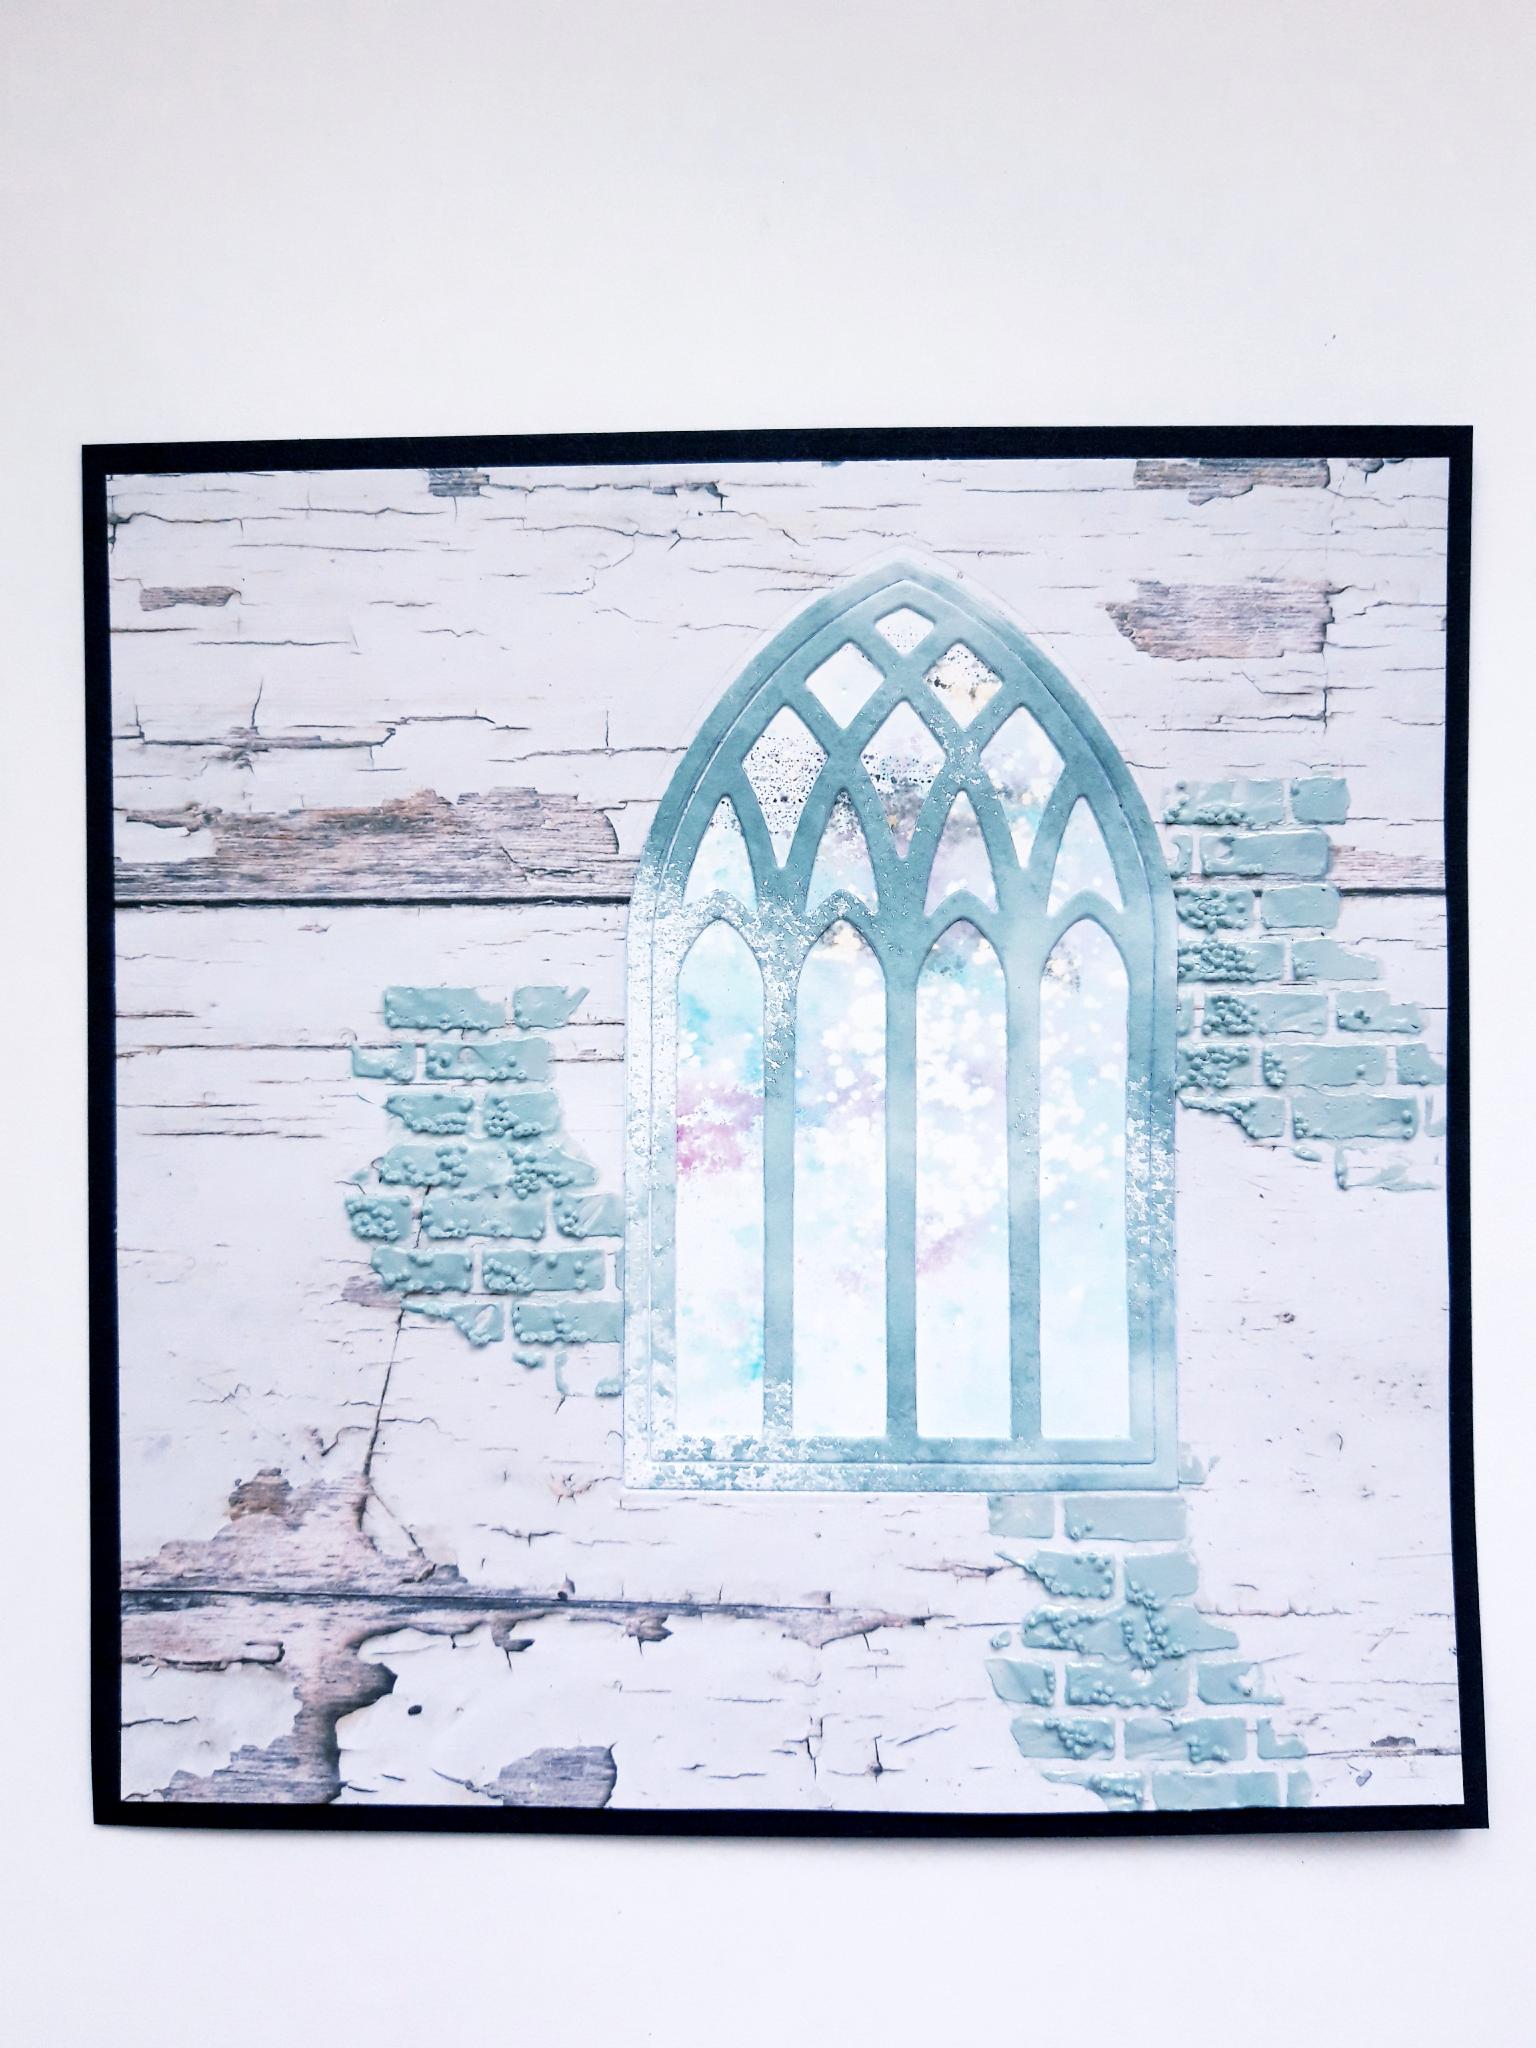
Remove this sheet from the Time To Grow paper pad, and trim to 6 x 6" |
|
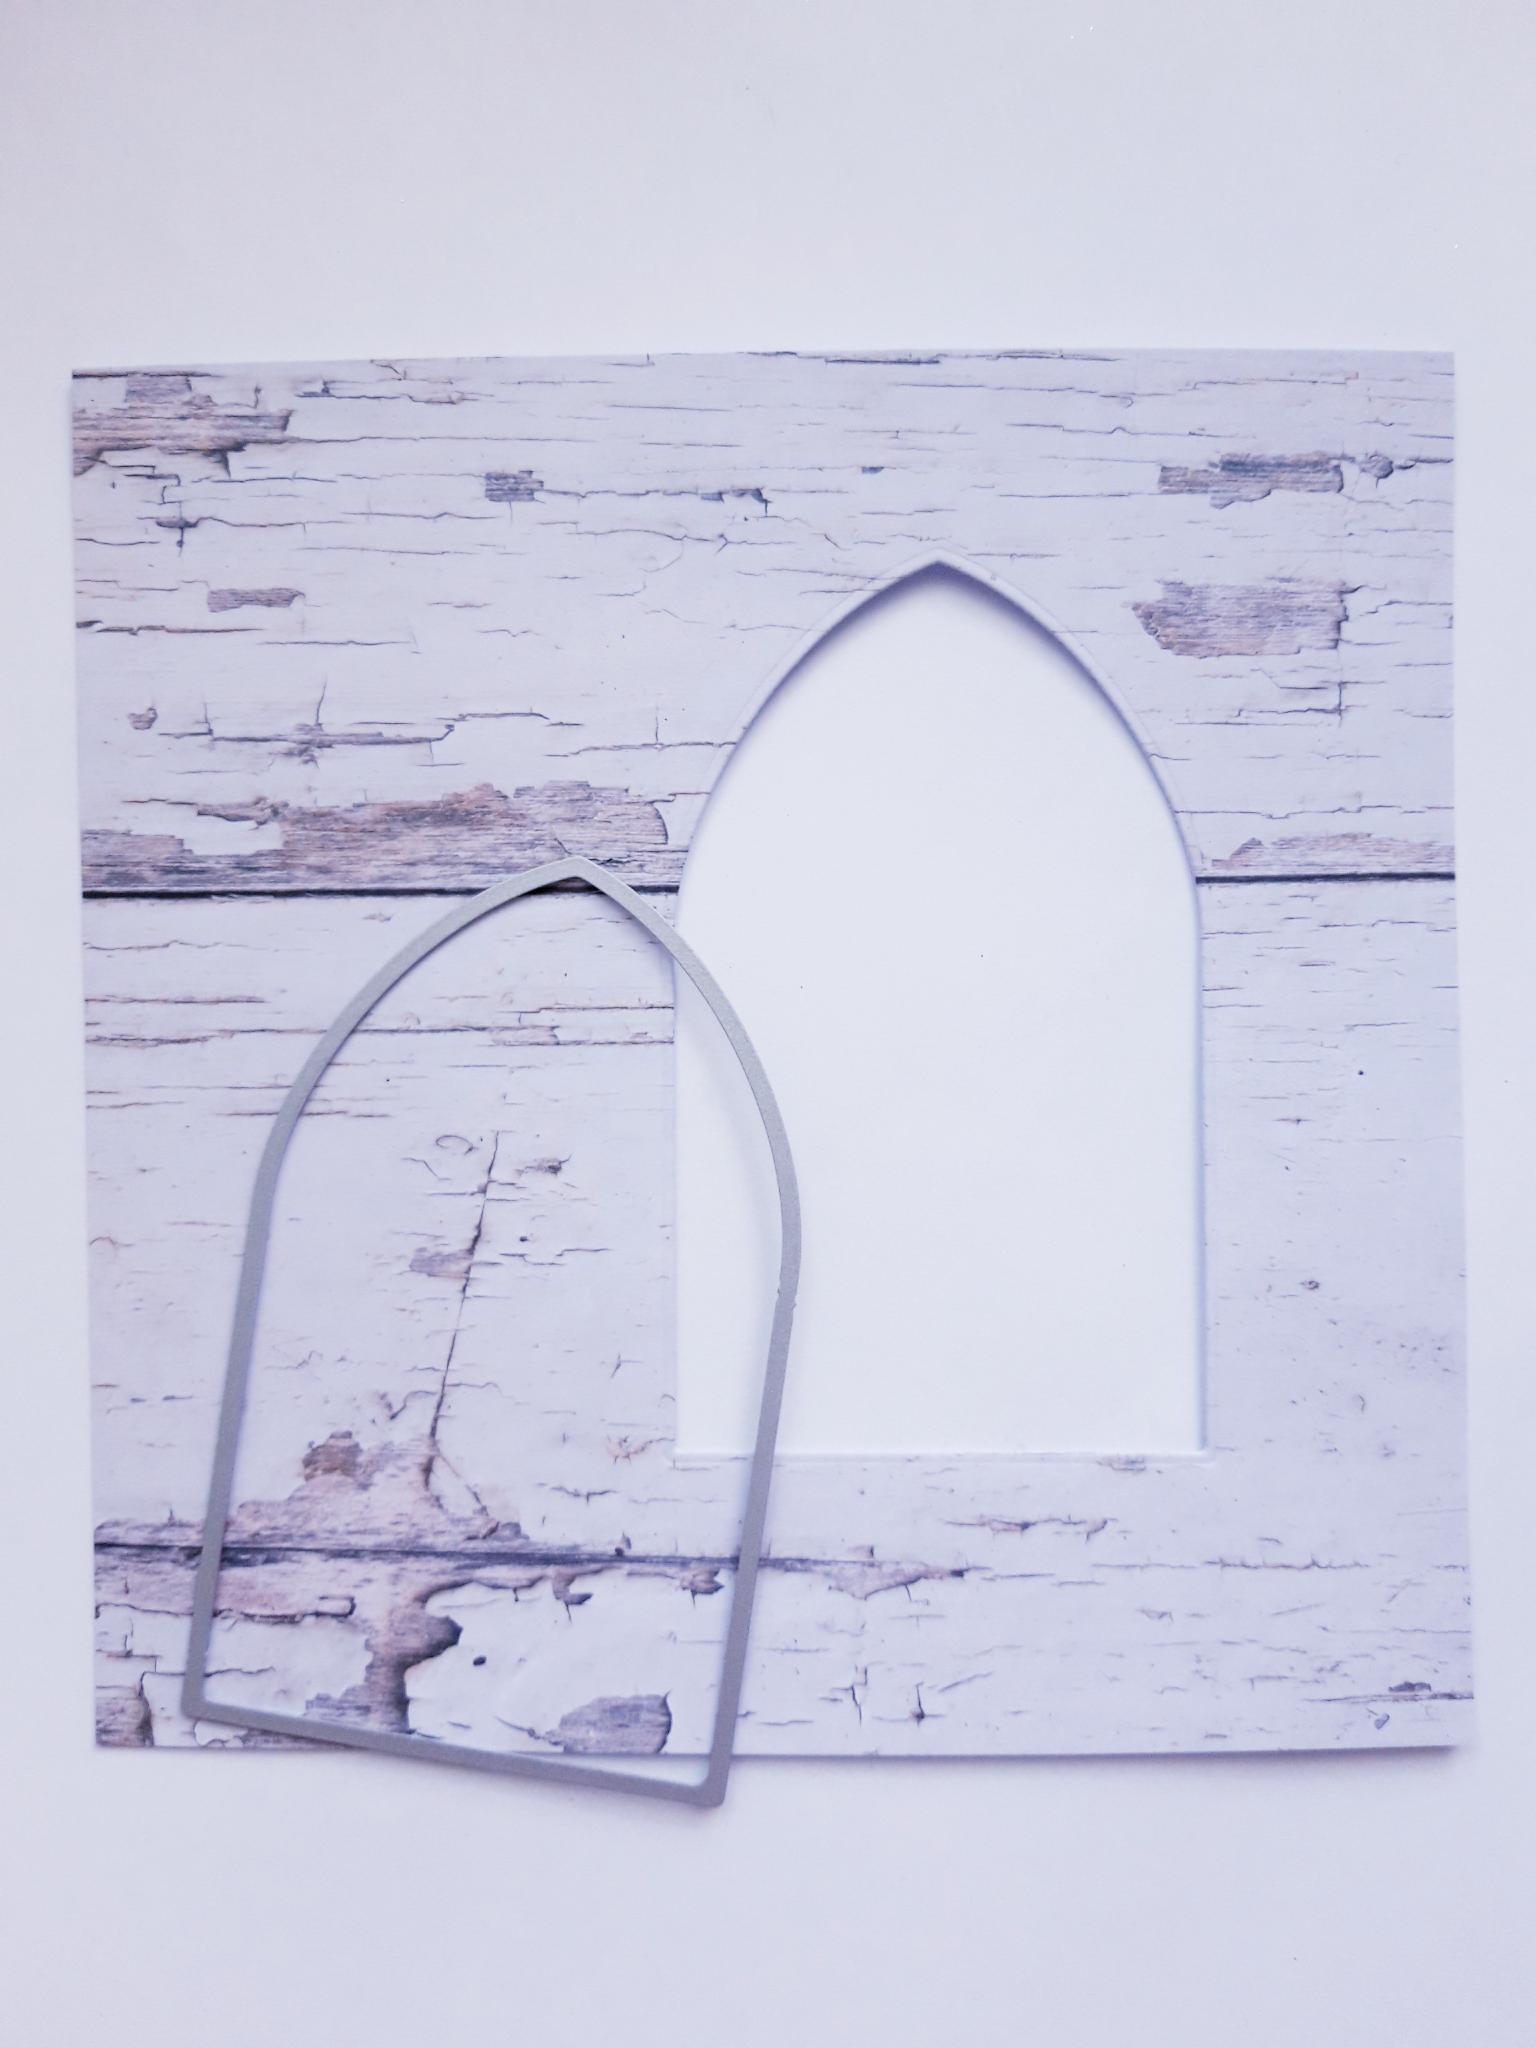
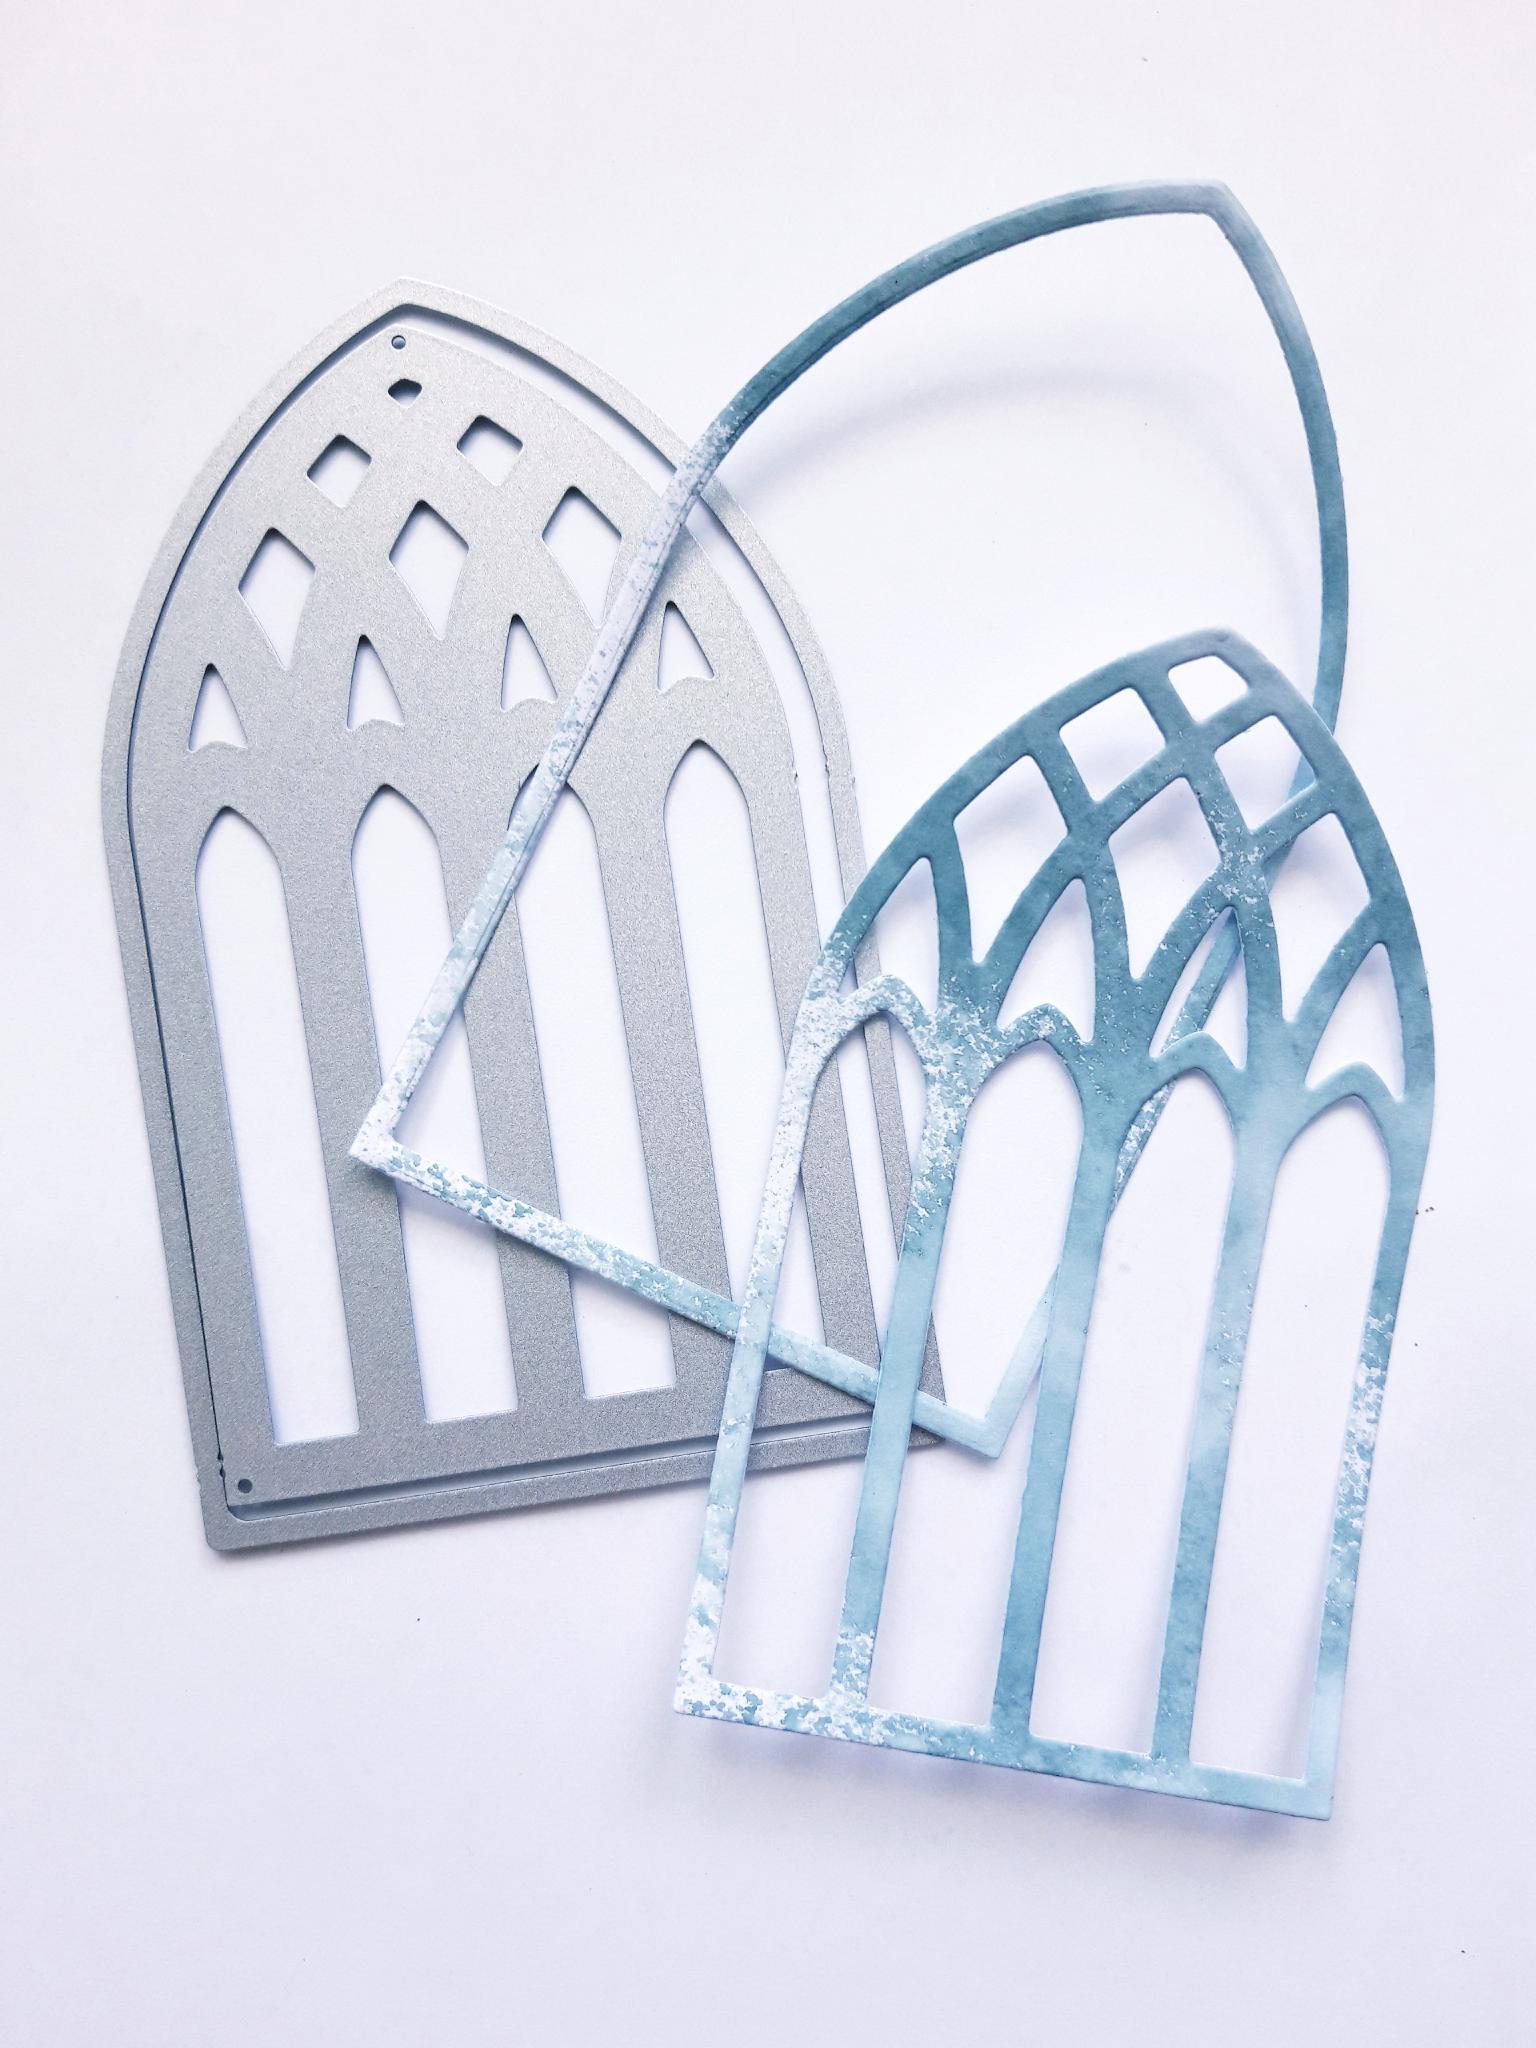
Place this die, from the Rejoice Die Collection, to the right of the woodgrain paper, and run it through your die cutting machine. |
|
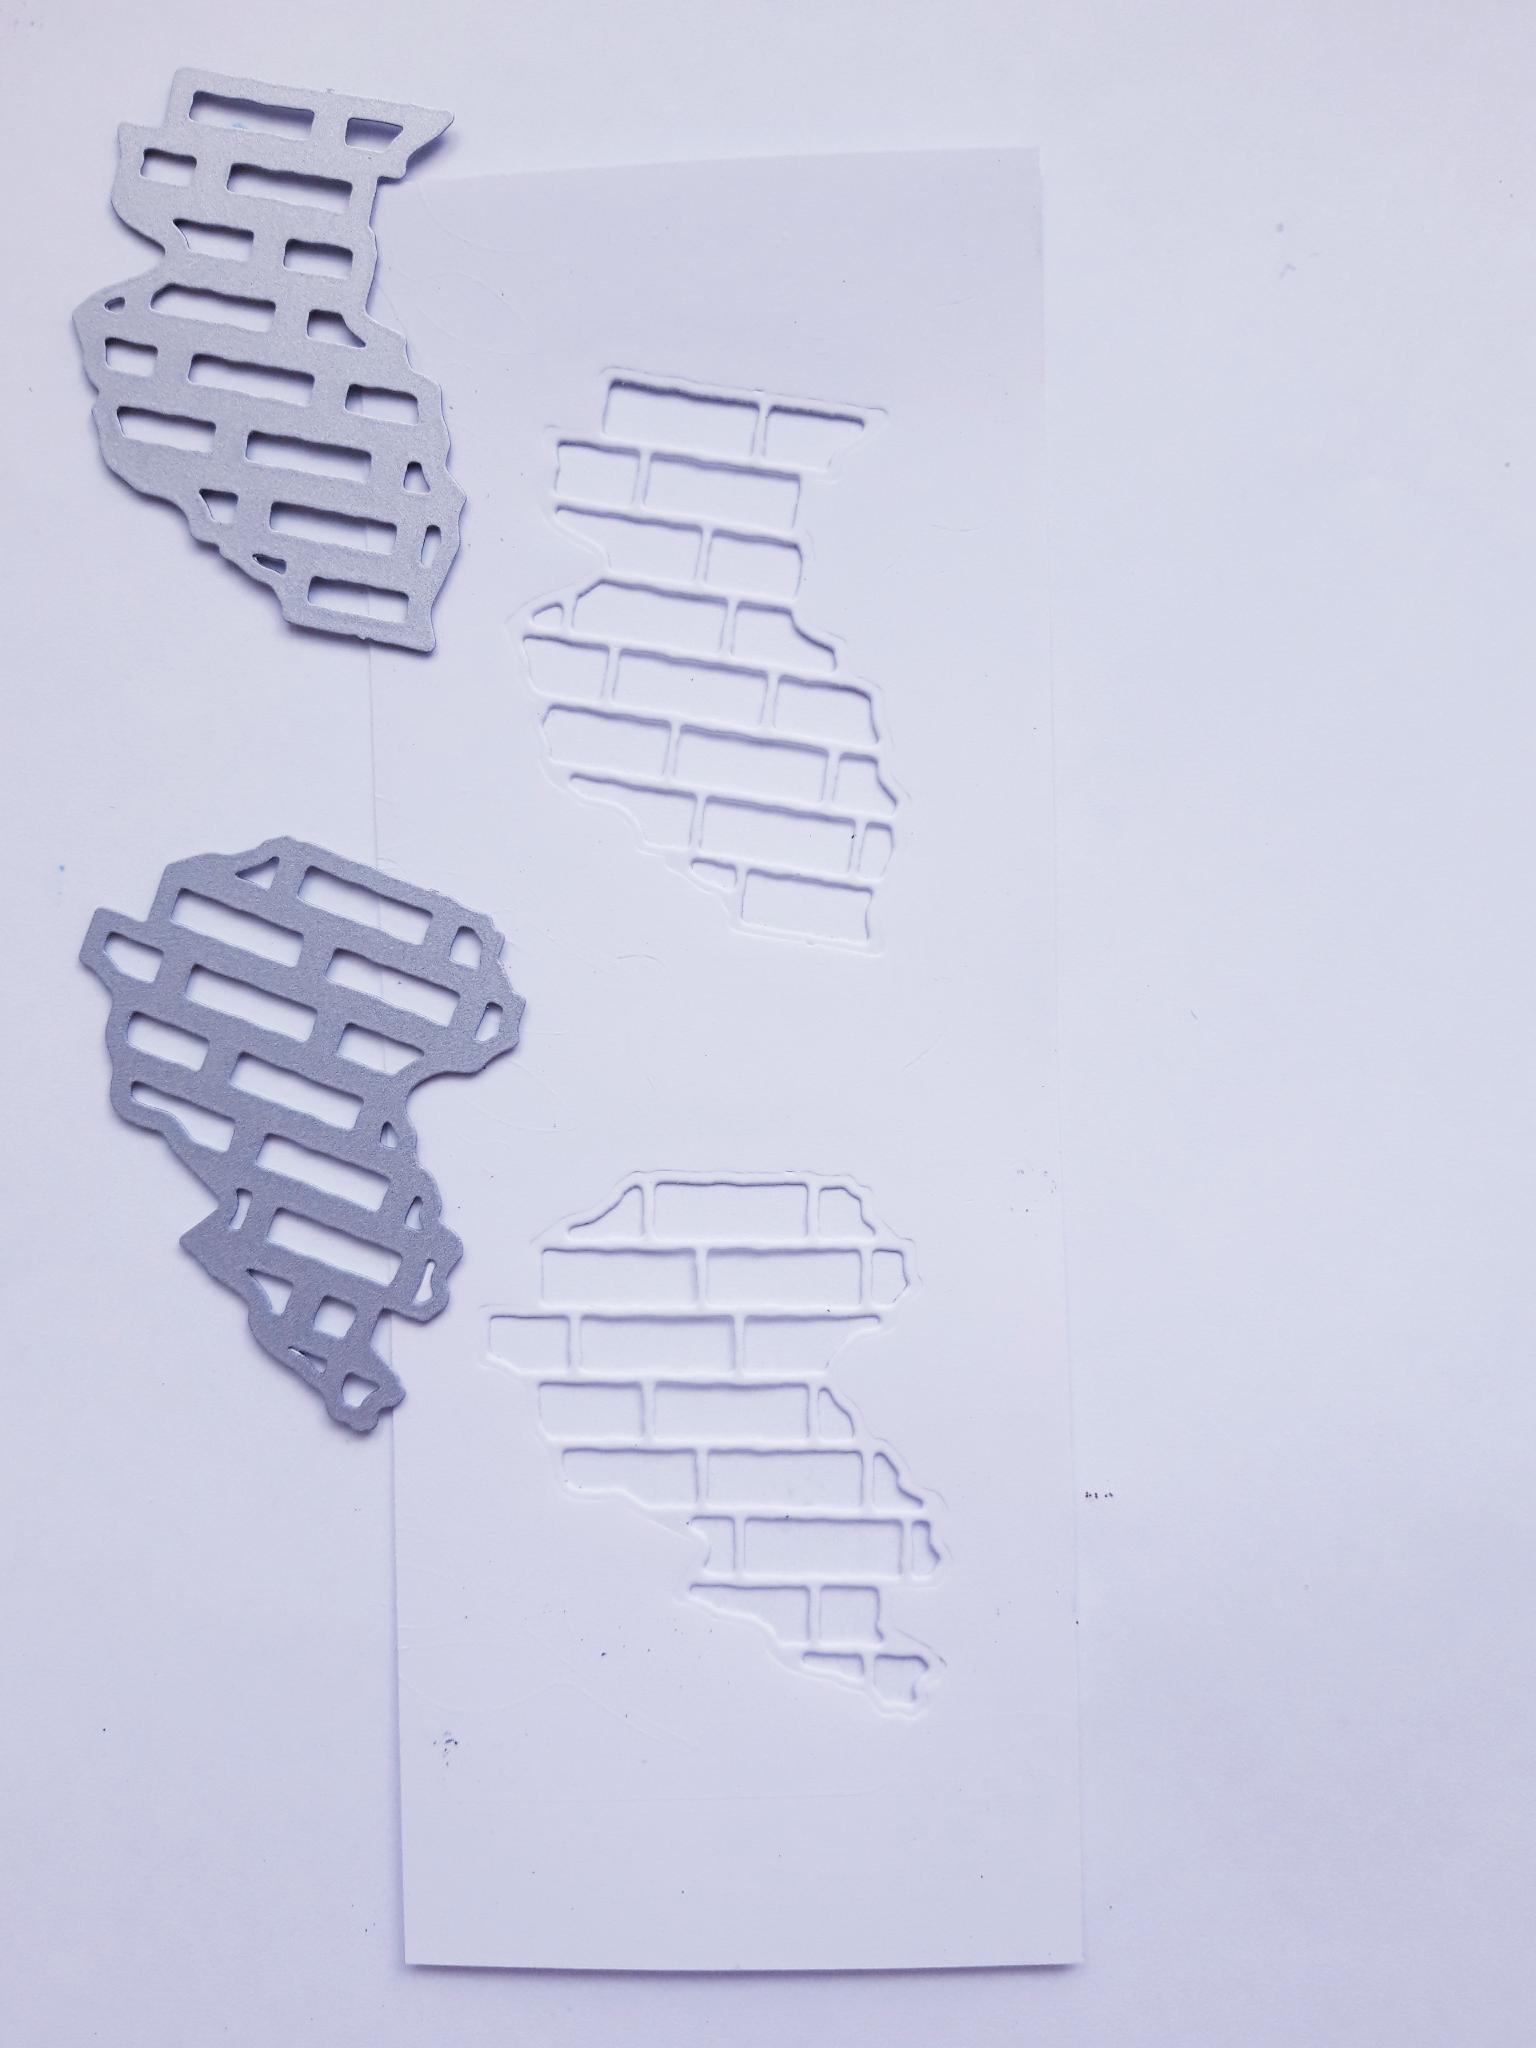
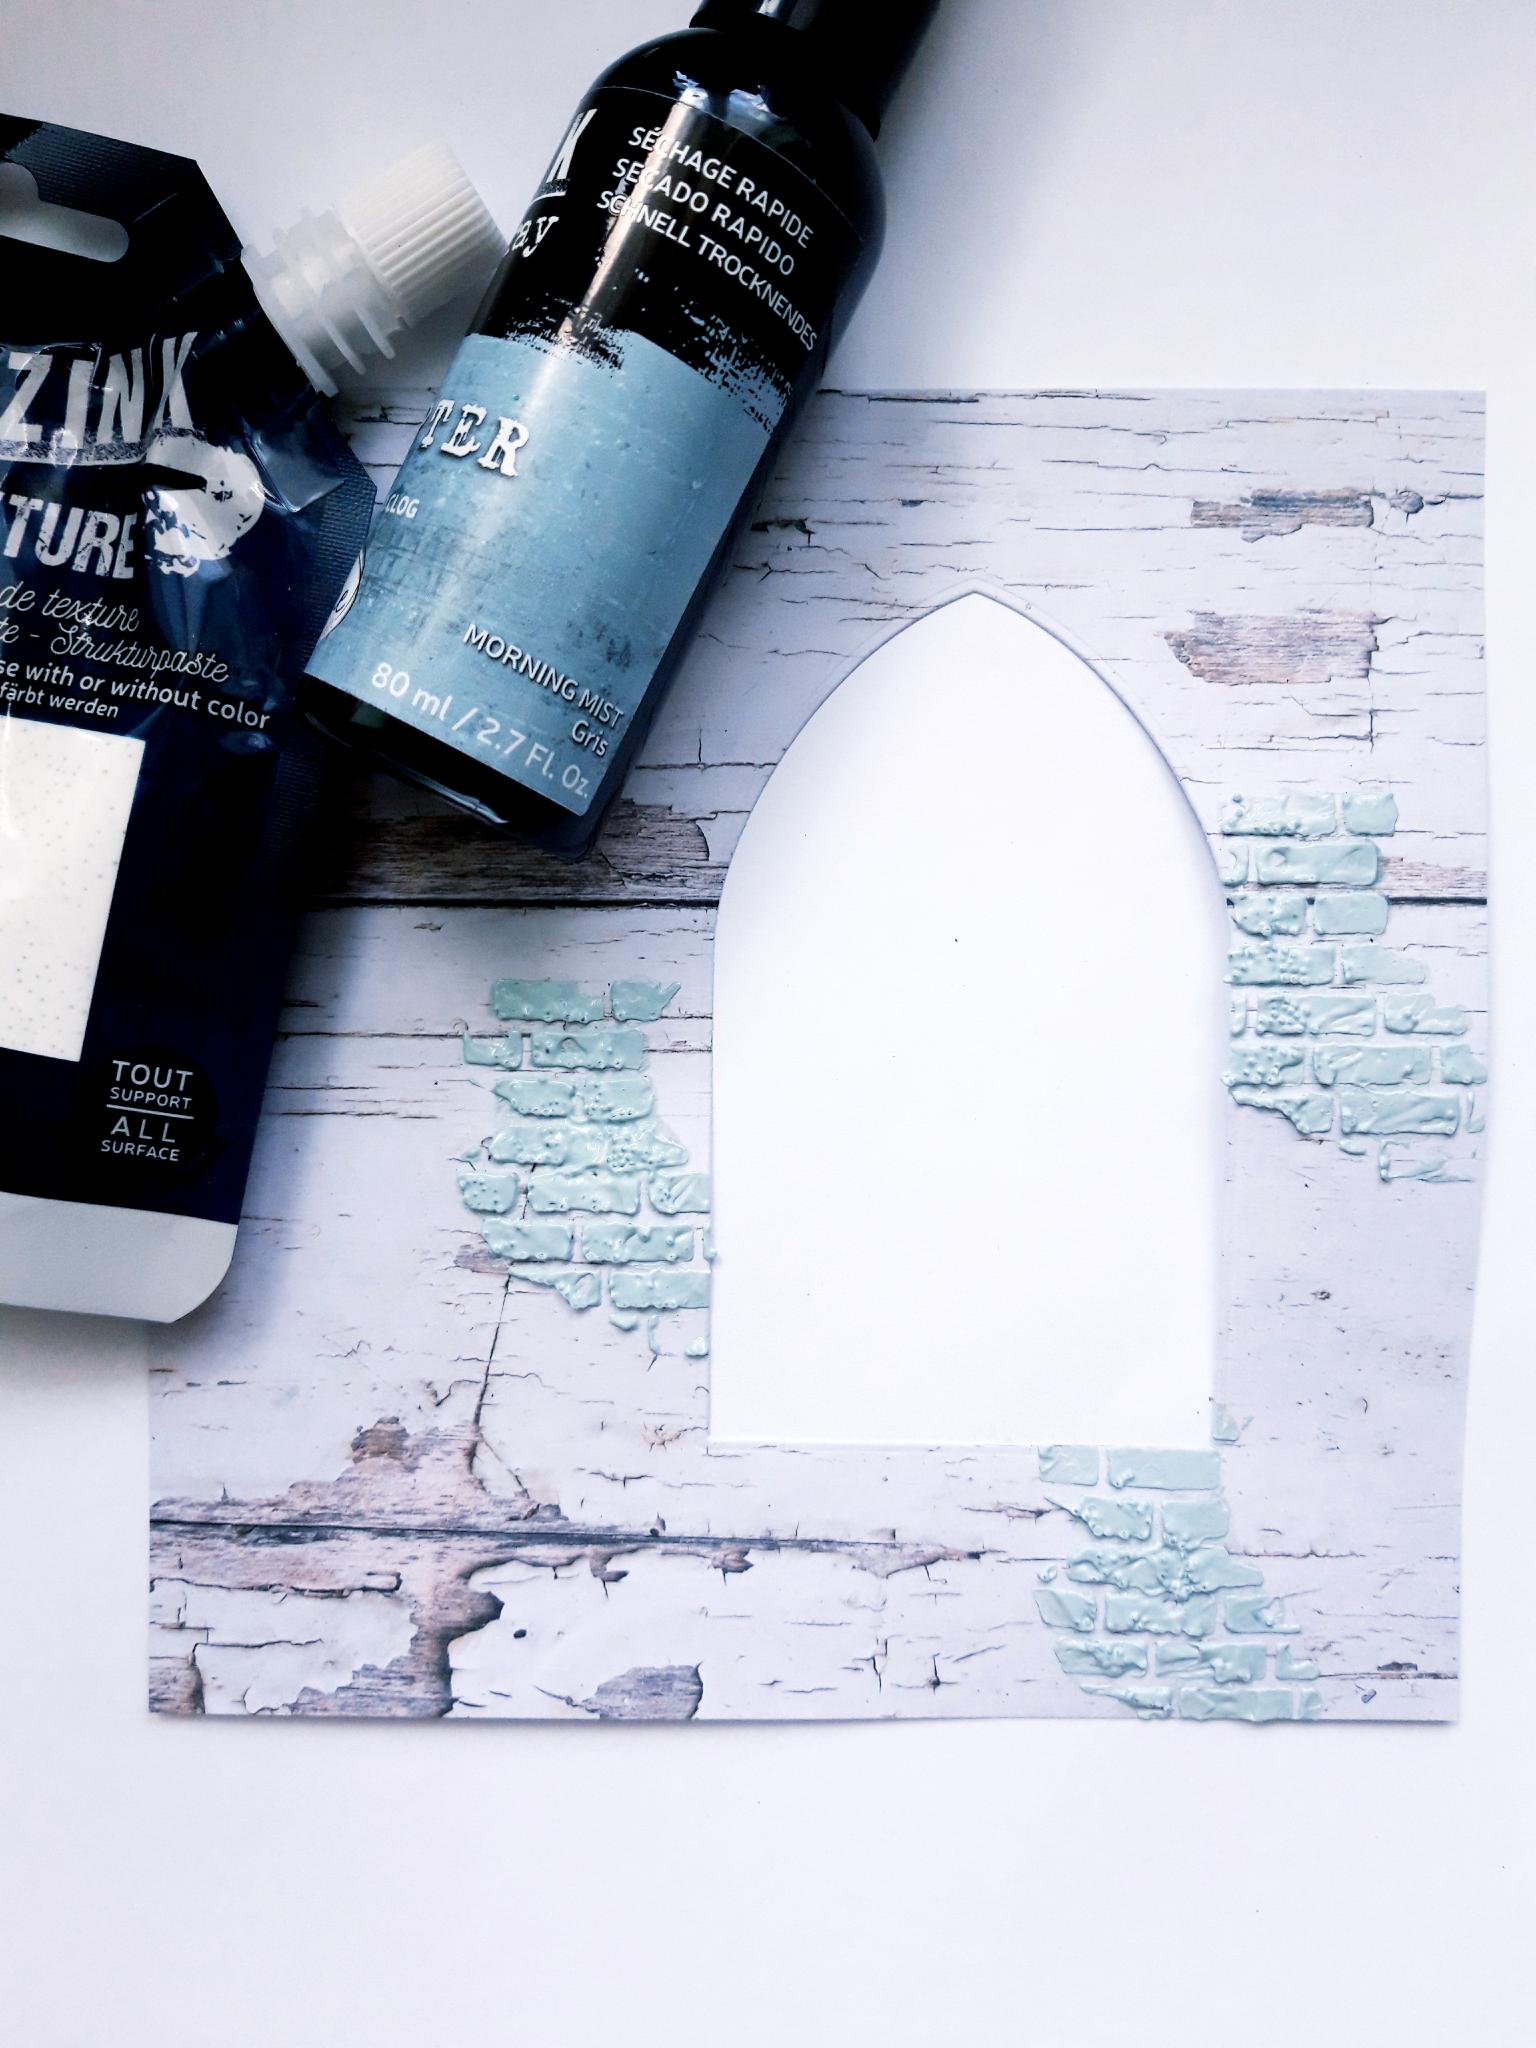
Place these brickwork dies from the same set, on to the white card (4 x 4"), and run it through your die cutting machine. NB: You will be using the "waste" as a stencil, so think about the placement of the dies, before die cutting them, to allow easy blending. |
|
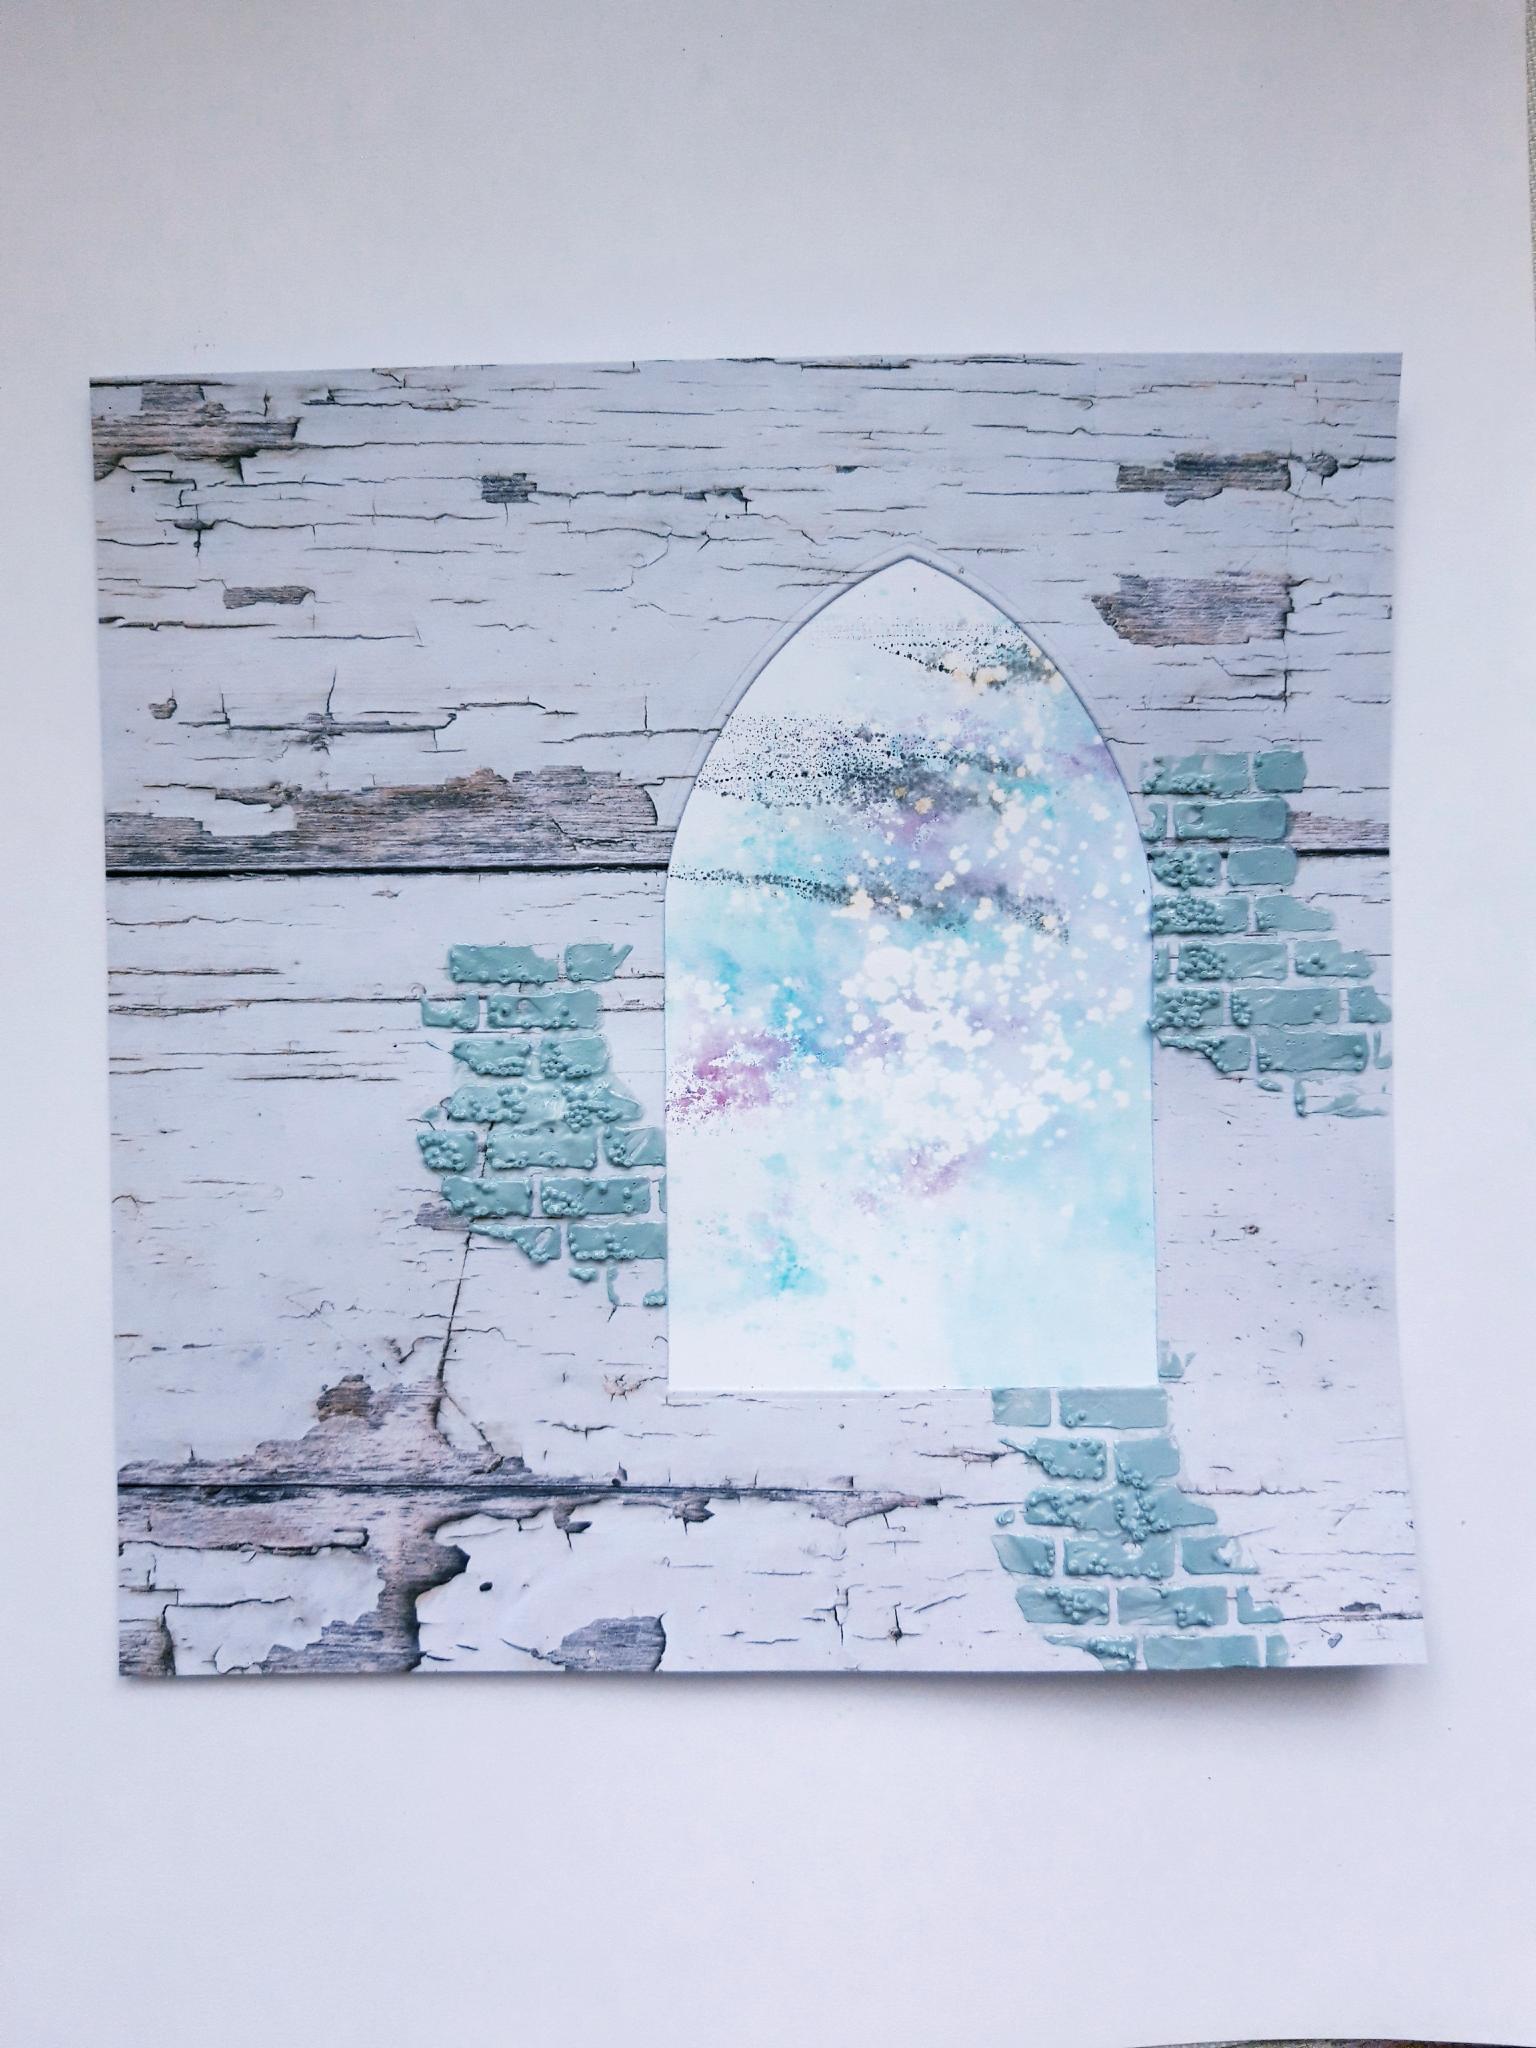
Mix some of the Izink Texture Paste, with the Izink Morning Mist Spray, on to a craft or glass mat. Use a palette knife to blend the coloured paste through your brickwork stencil, around your arch window aperture. Set to one side to dry. |
|
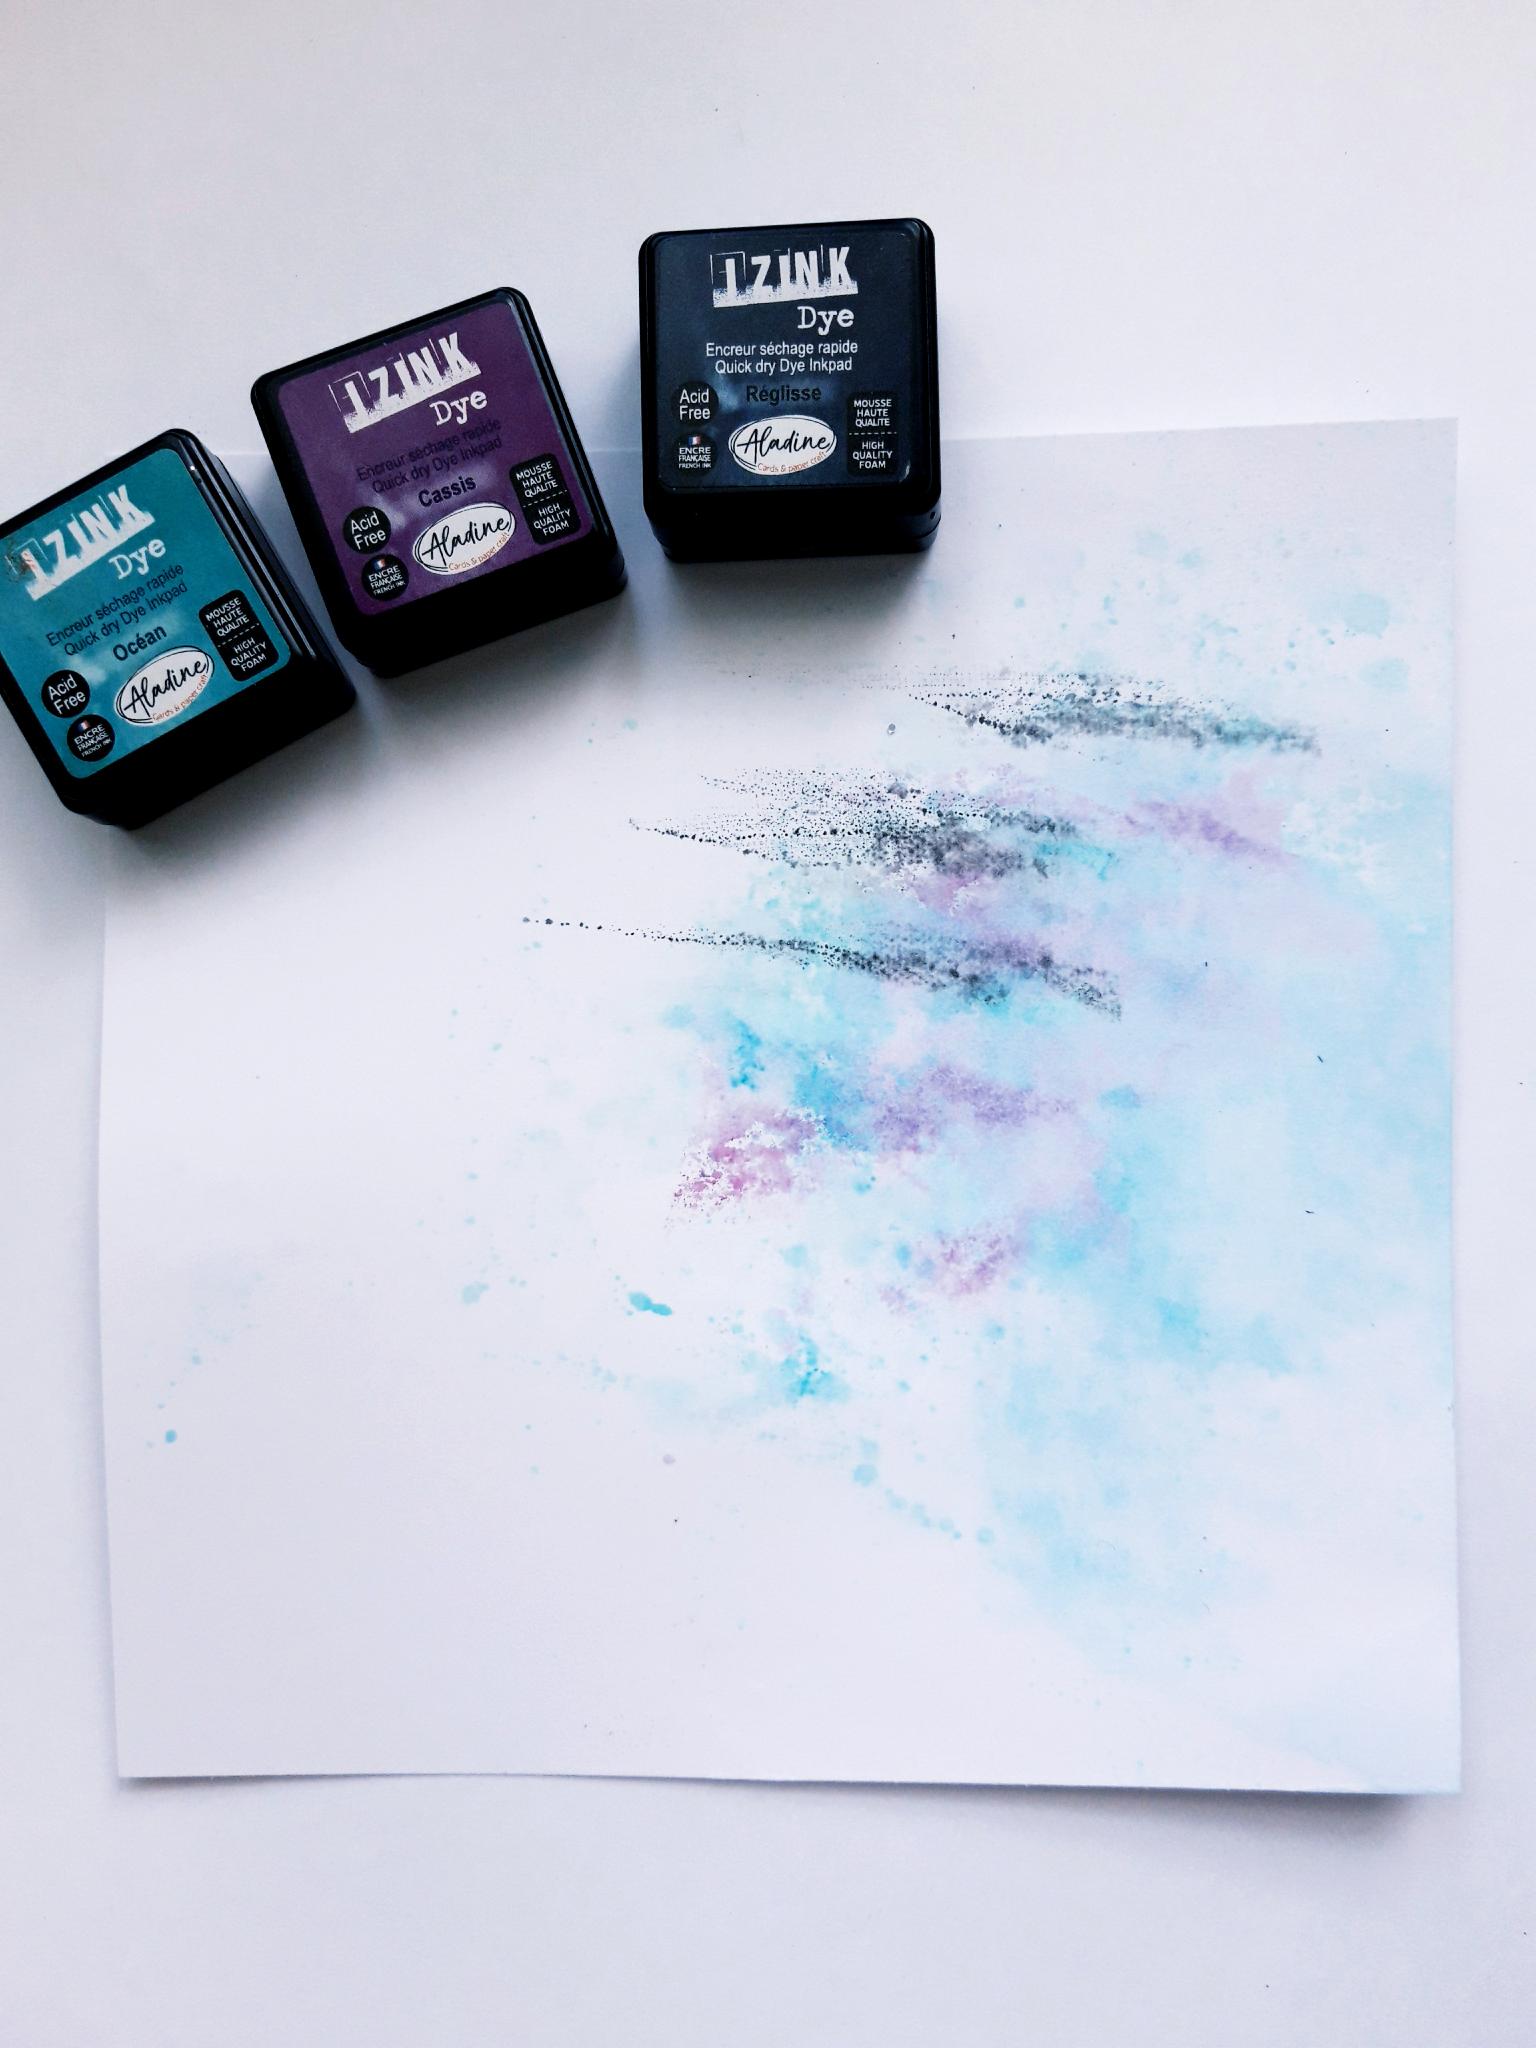
Apply some ink from the Izink Dye ink pads, on to your craft mat, and add a little water. Pick up the ink with the white card (5 3/4 x 5 3/4"), focusing on getting most of the ink on to the right half of the card. This will be the area visible through the arch window aperture. |
|
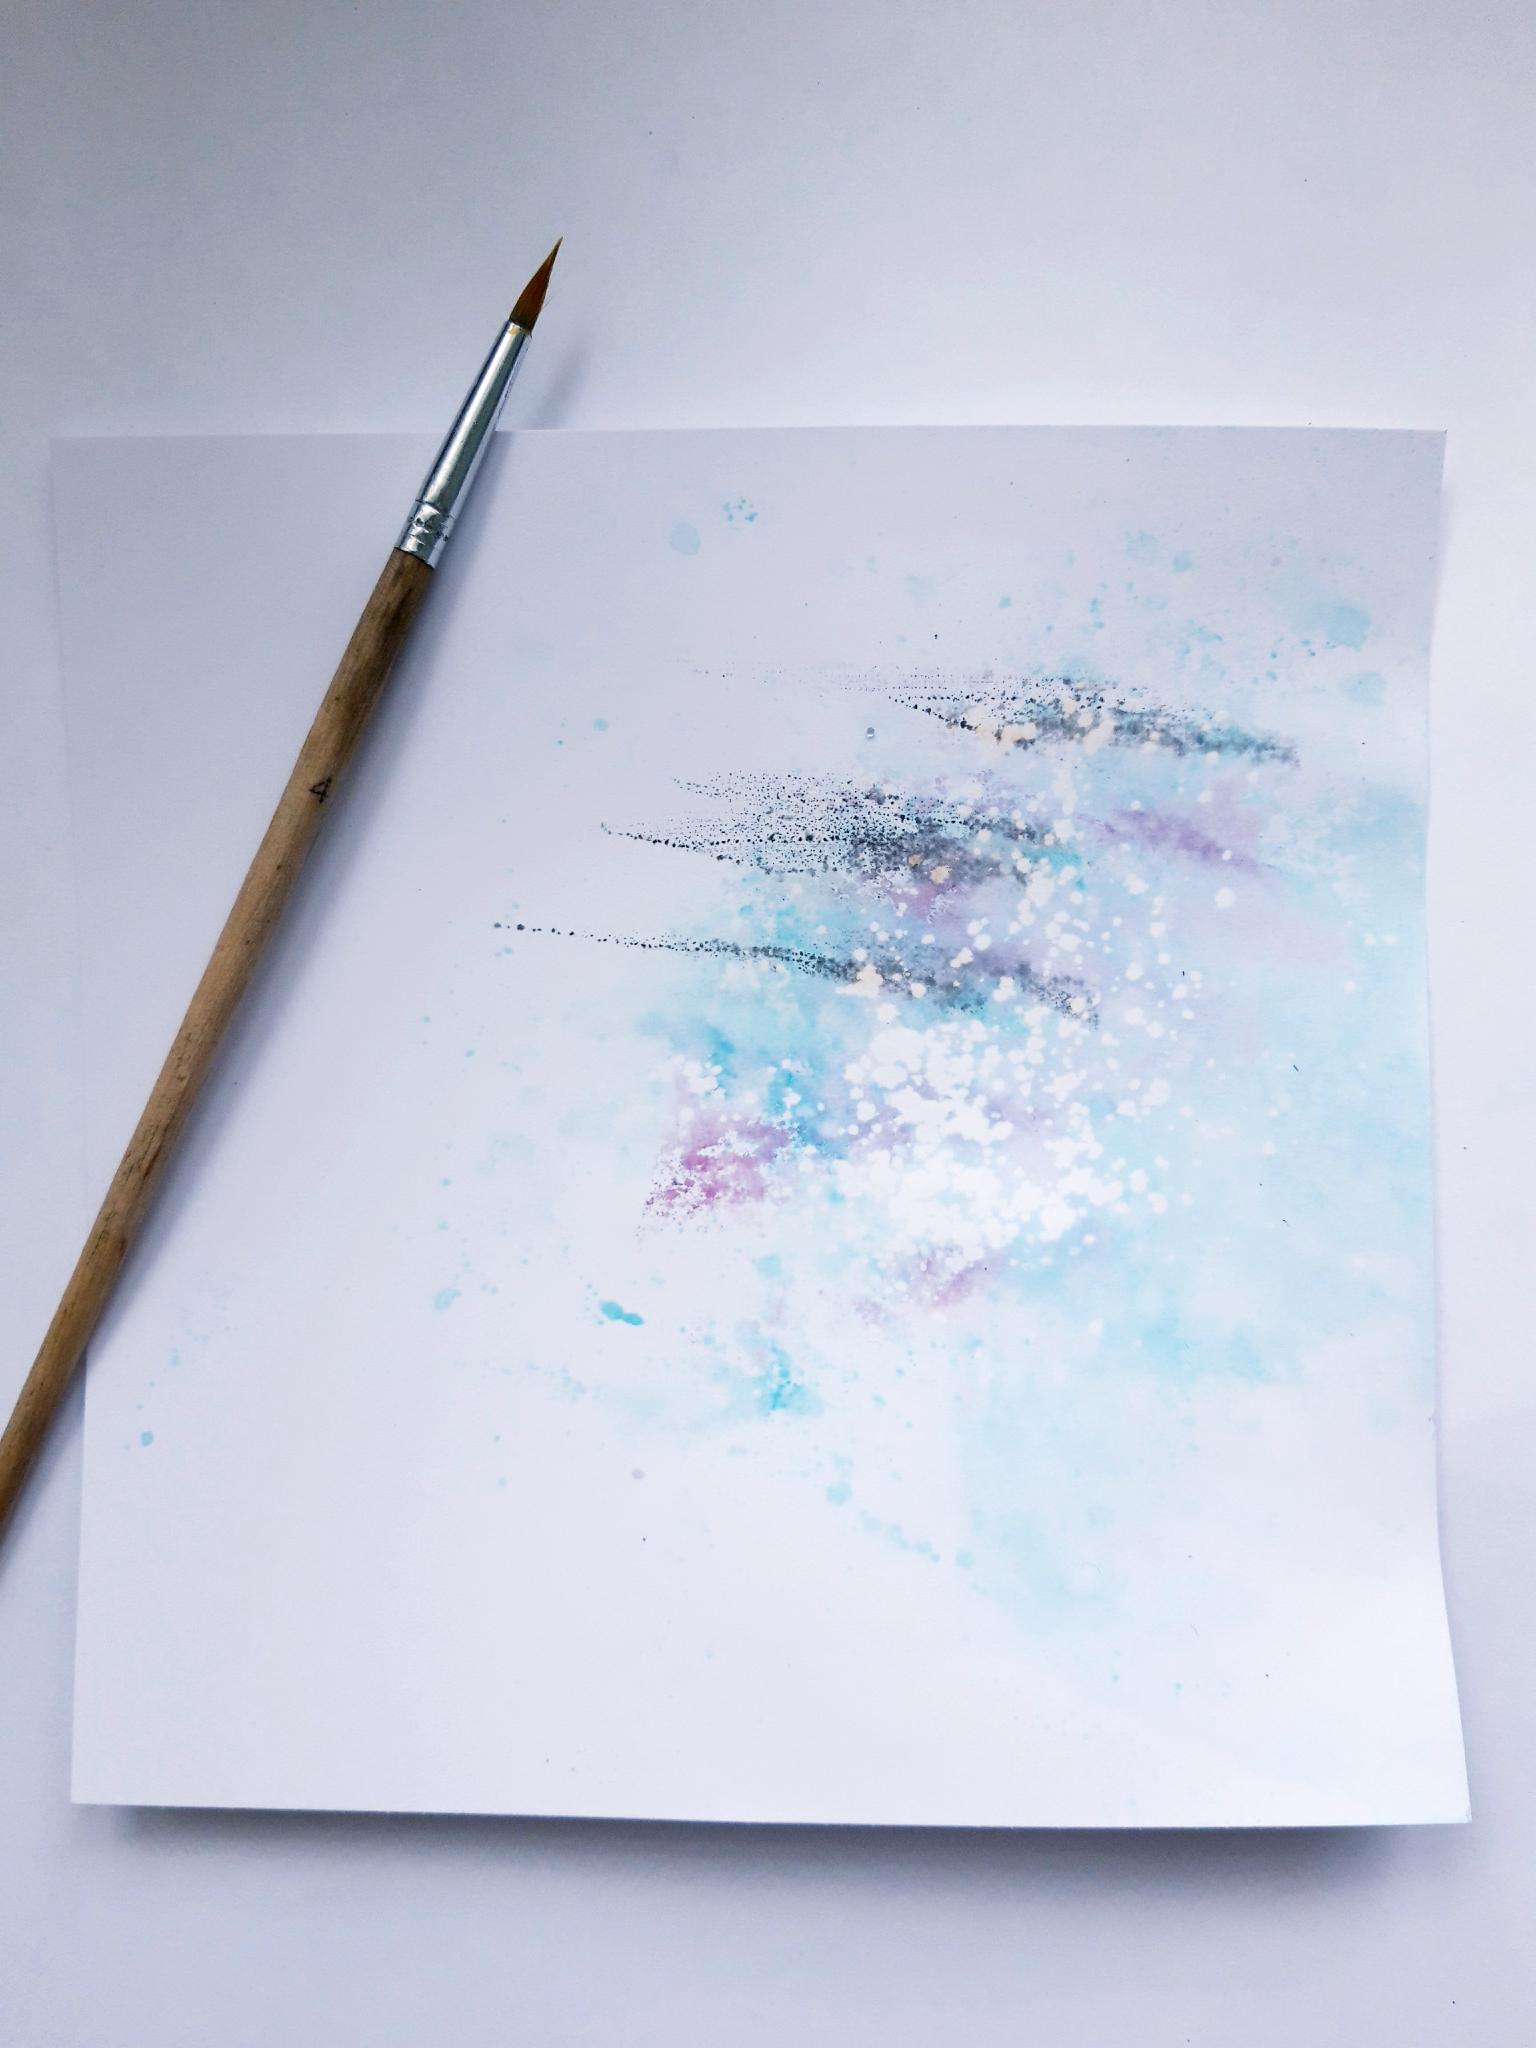
Splatter water over your ink, wait a few seconds, then mop up any excess with a paper towel. Set to one side to dry. |
|
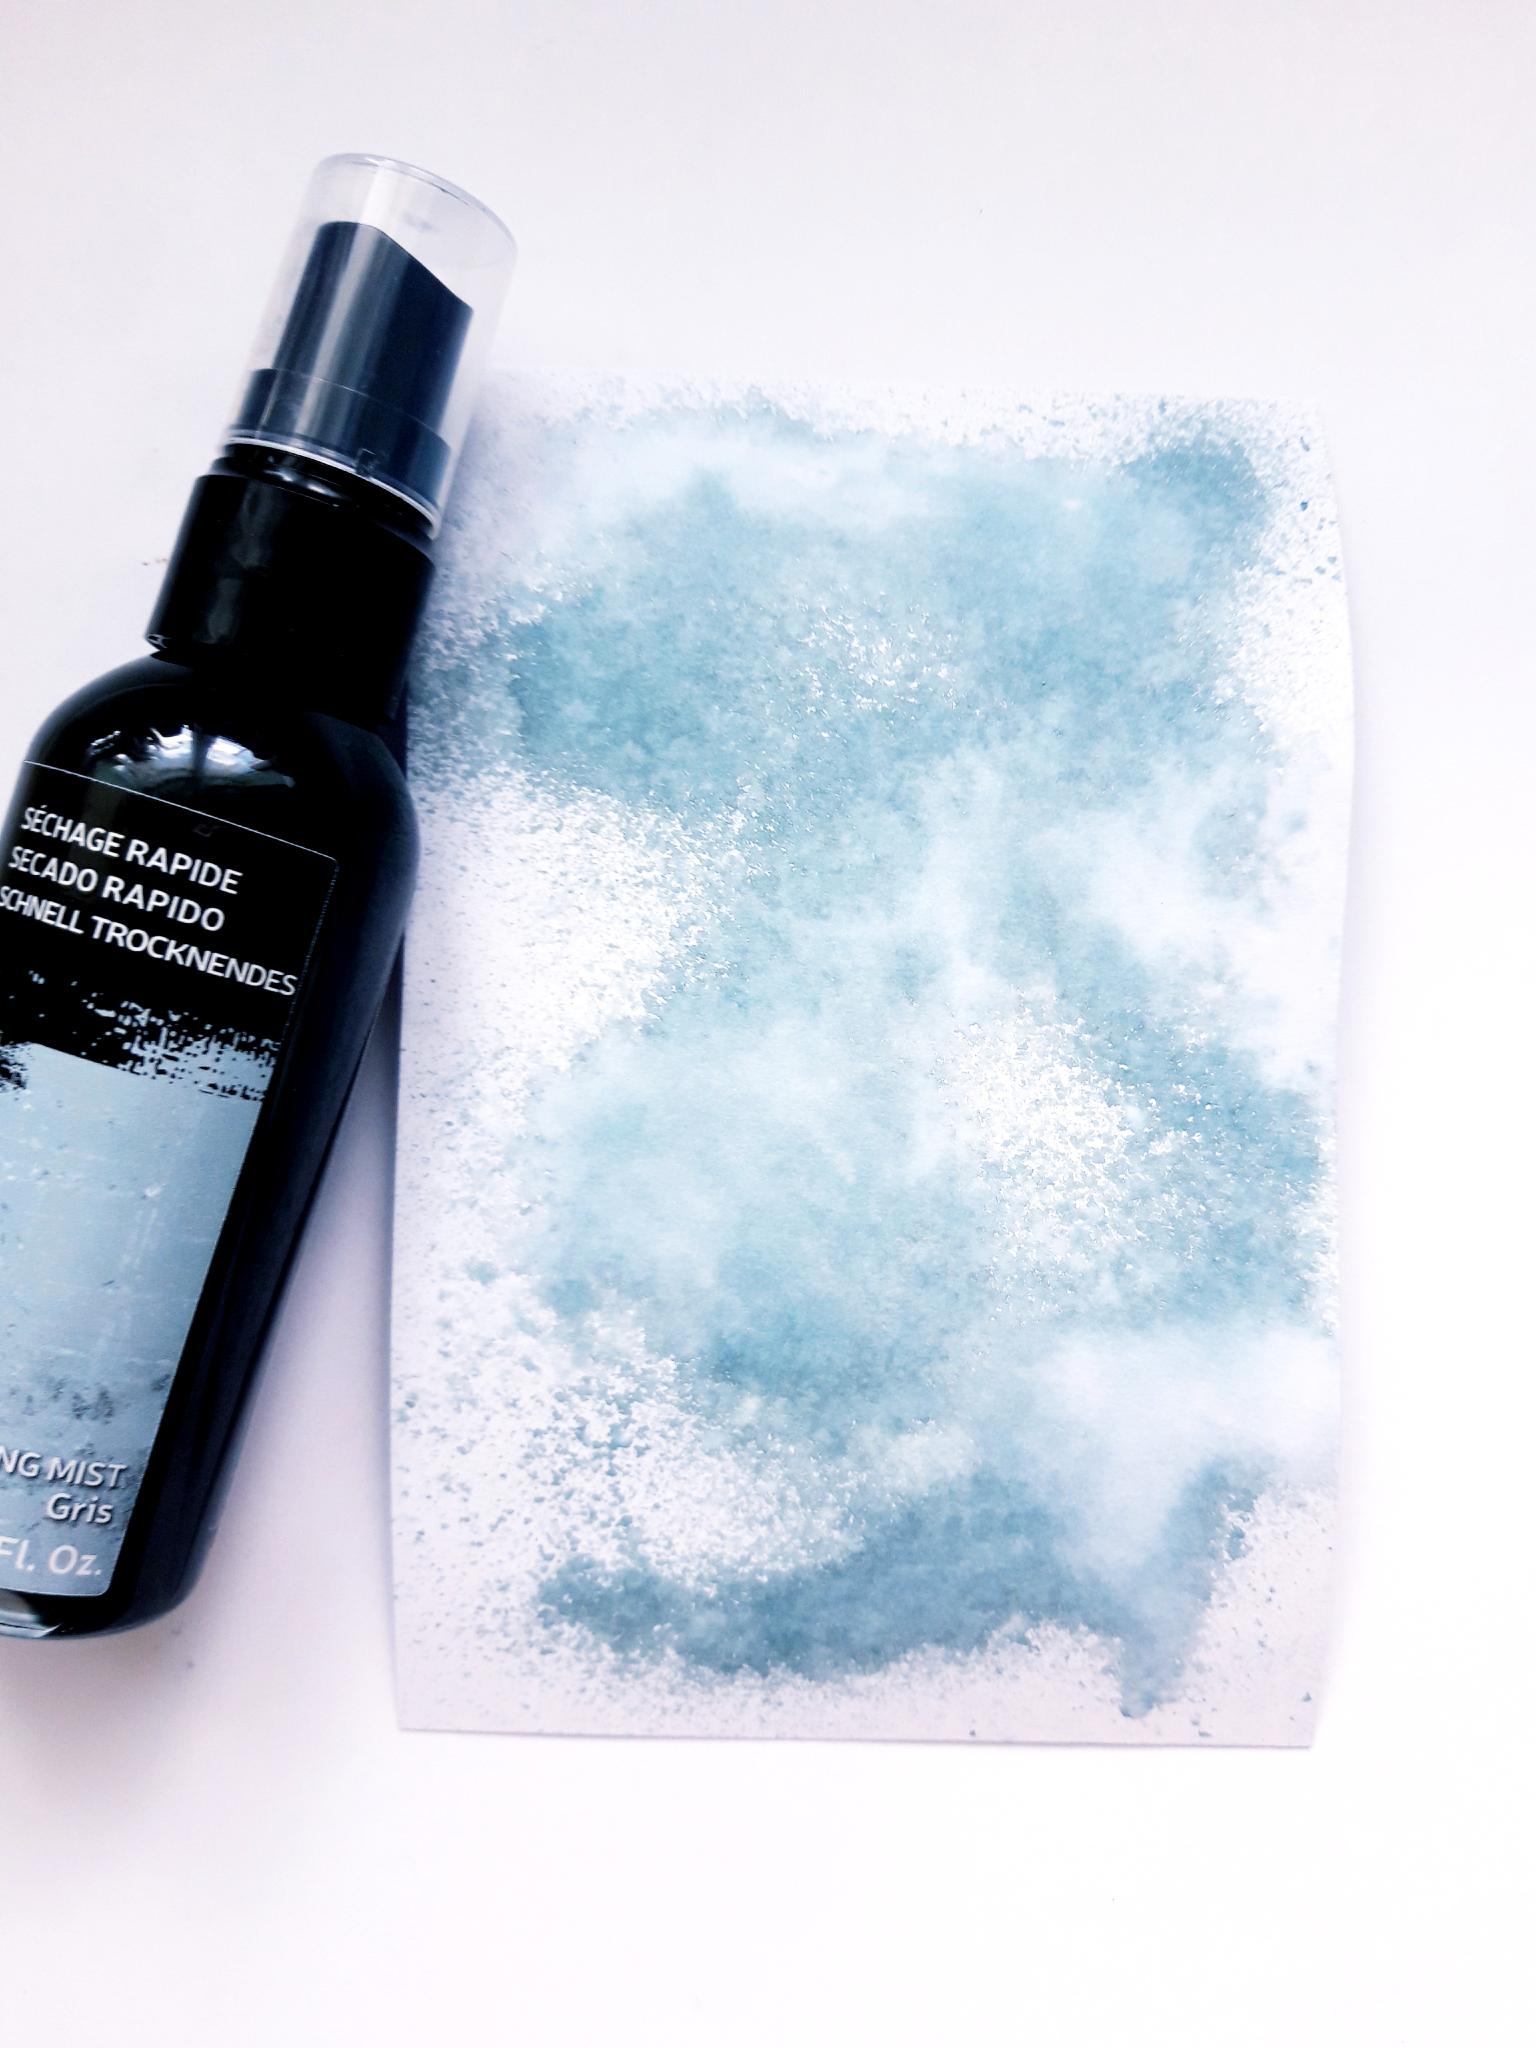
Spray the white card (5 x 5") with water, then spray with the Izink Morning Mist. Dry the ink thoroughly. |
|
Once the ink is dry, place both the detailed and ouline arch window dies, on to the inky card, and run through your die cutting machine. TIP: Secure the dies in place with low tack tape, so they do not move when they go through the die cutting machine. |
|
Adhere your dried woodgrain paper on to the inky background paper, allowing the ink to be visible through the aperture window. |
|
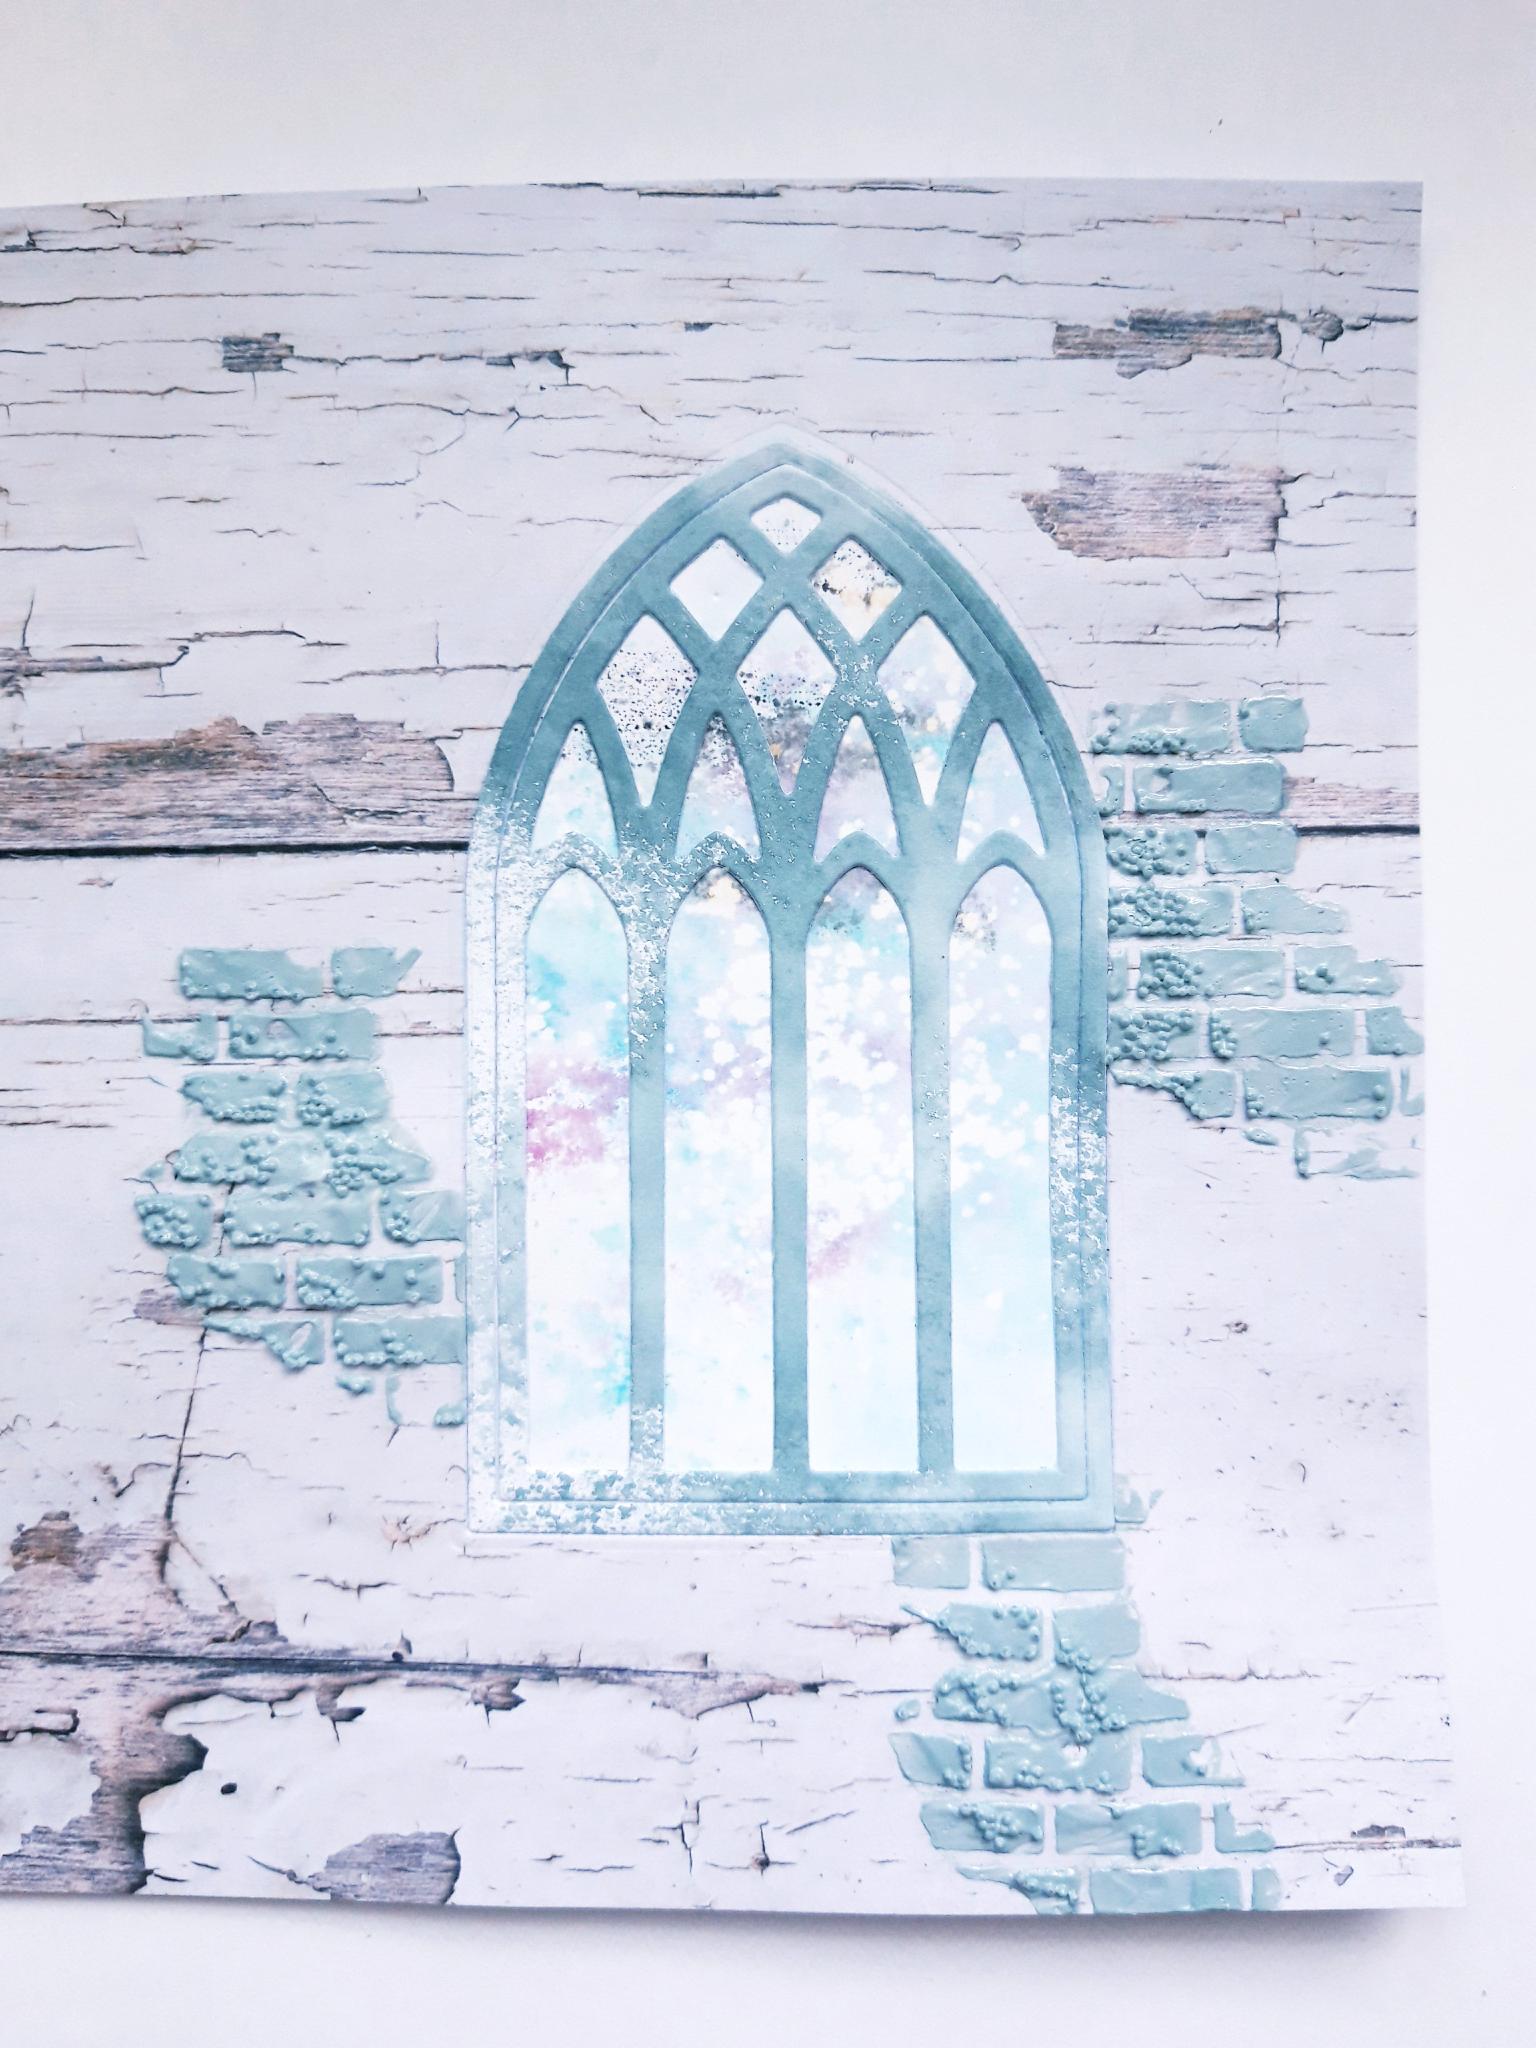
Adhere your die cut window frame in place, over the aperture, as shown here. Set to one side. |
|
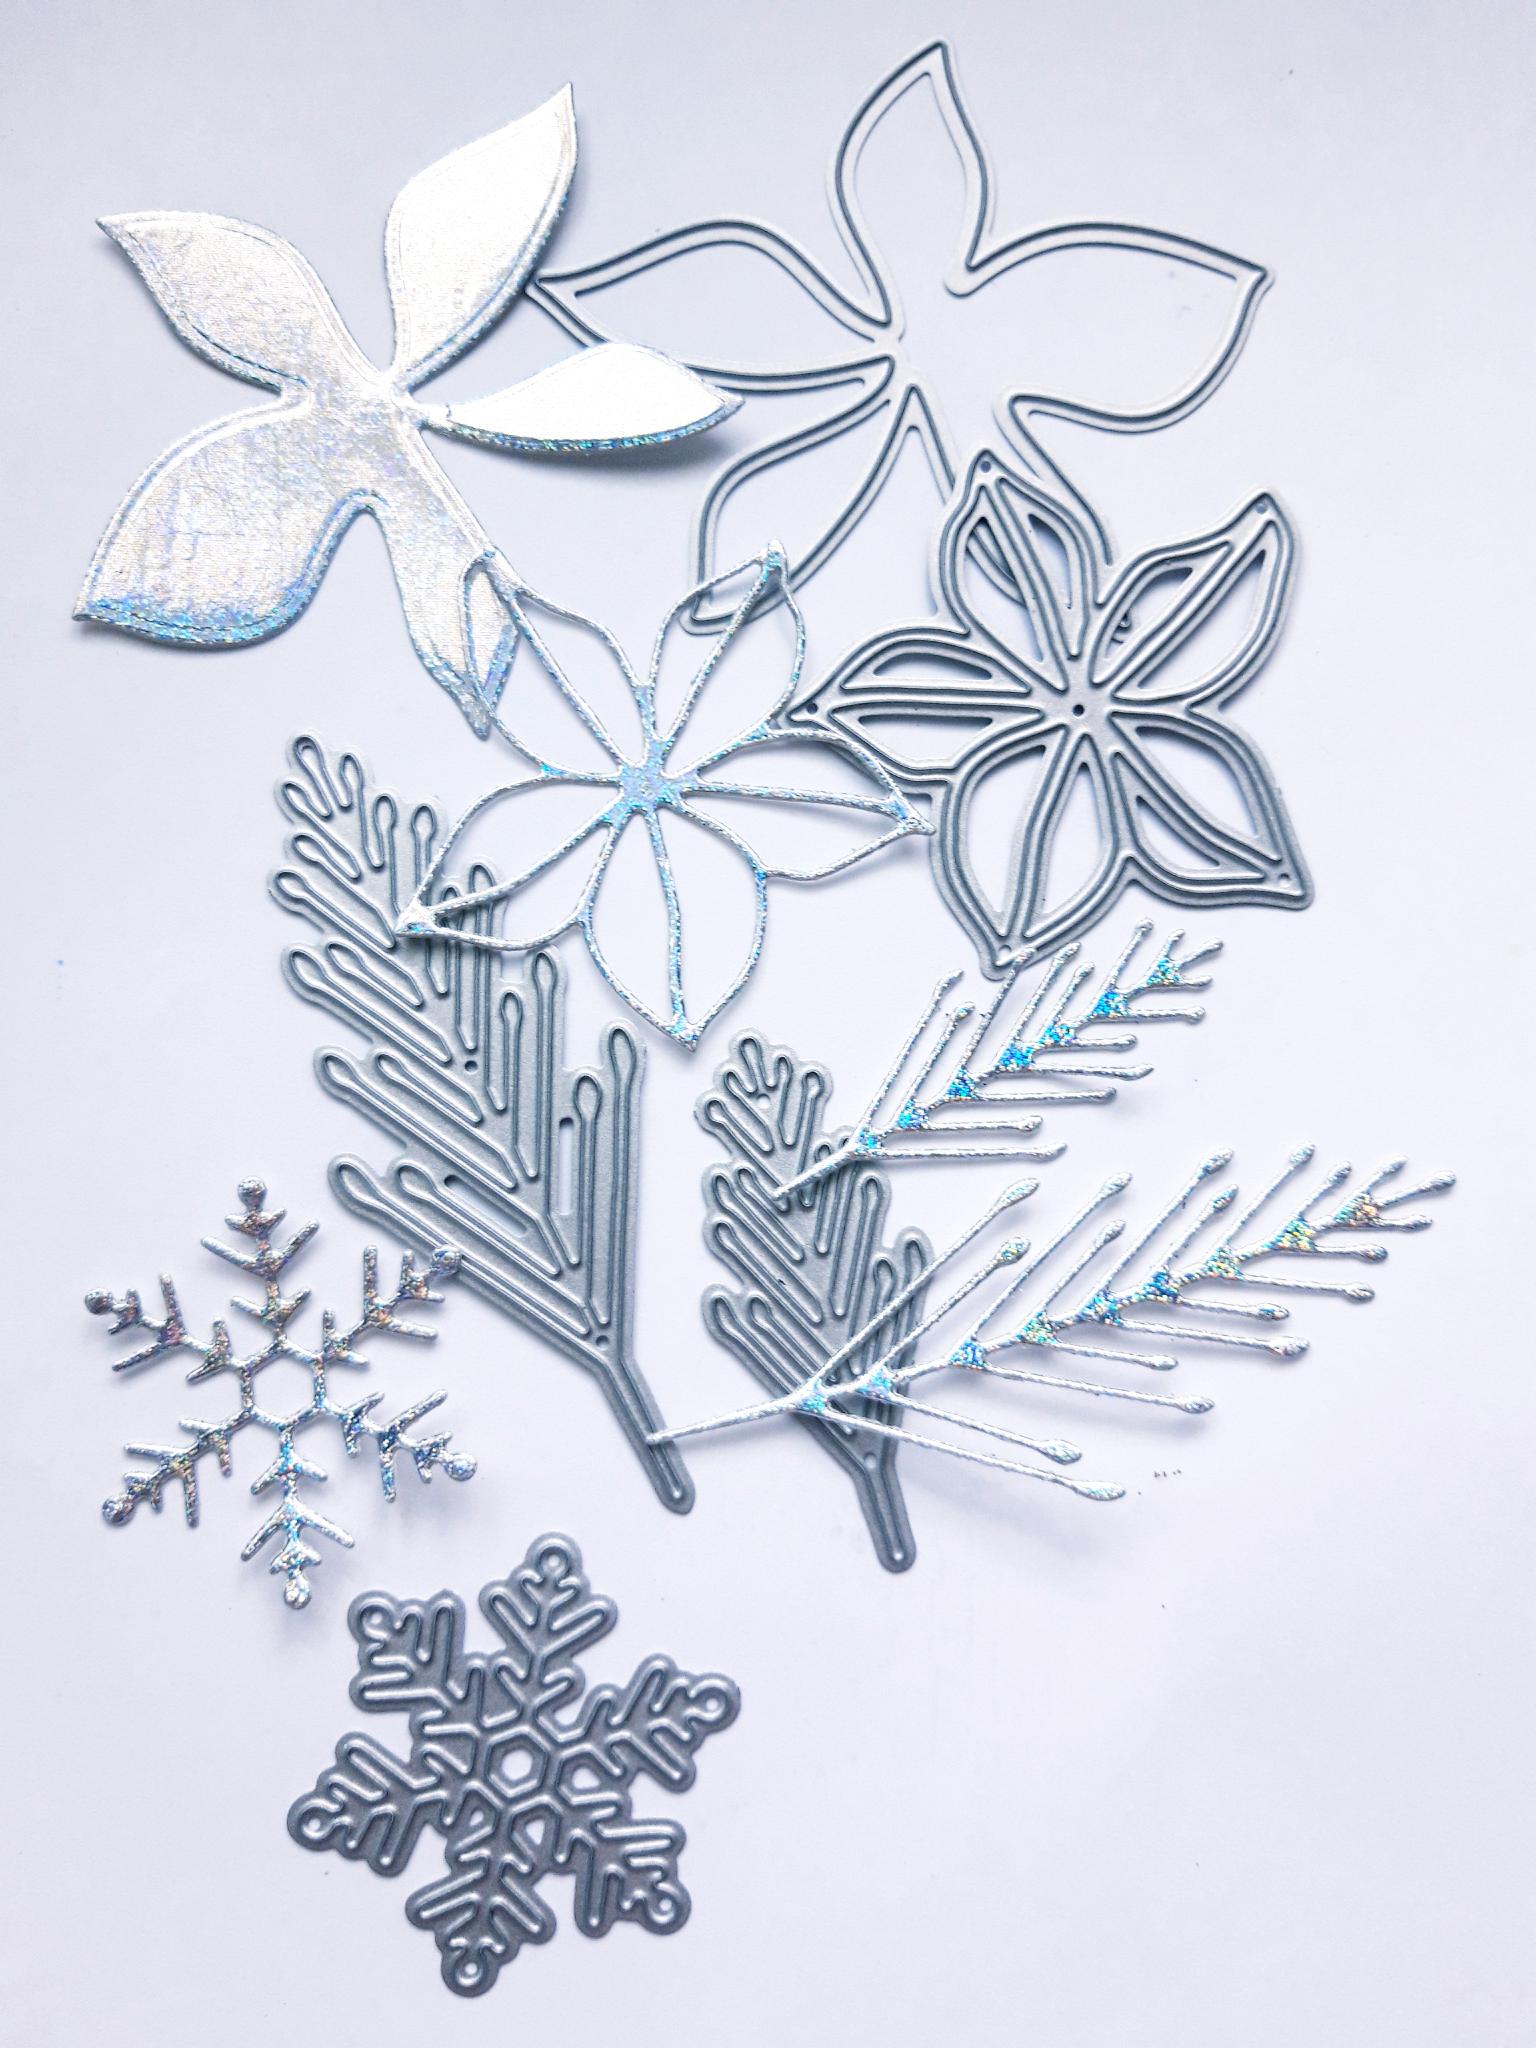
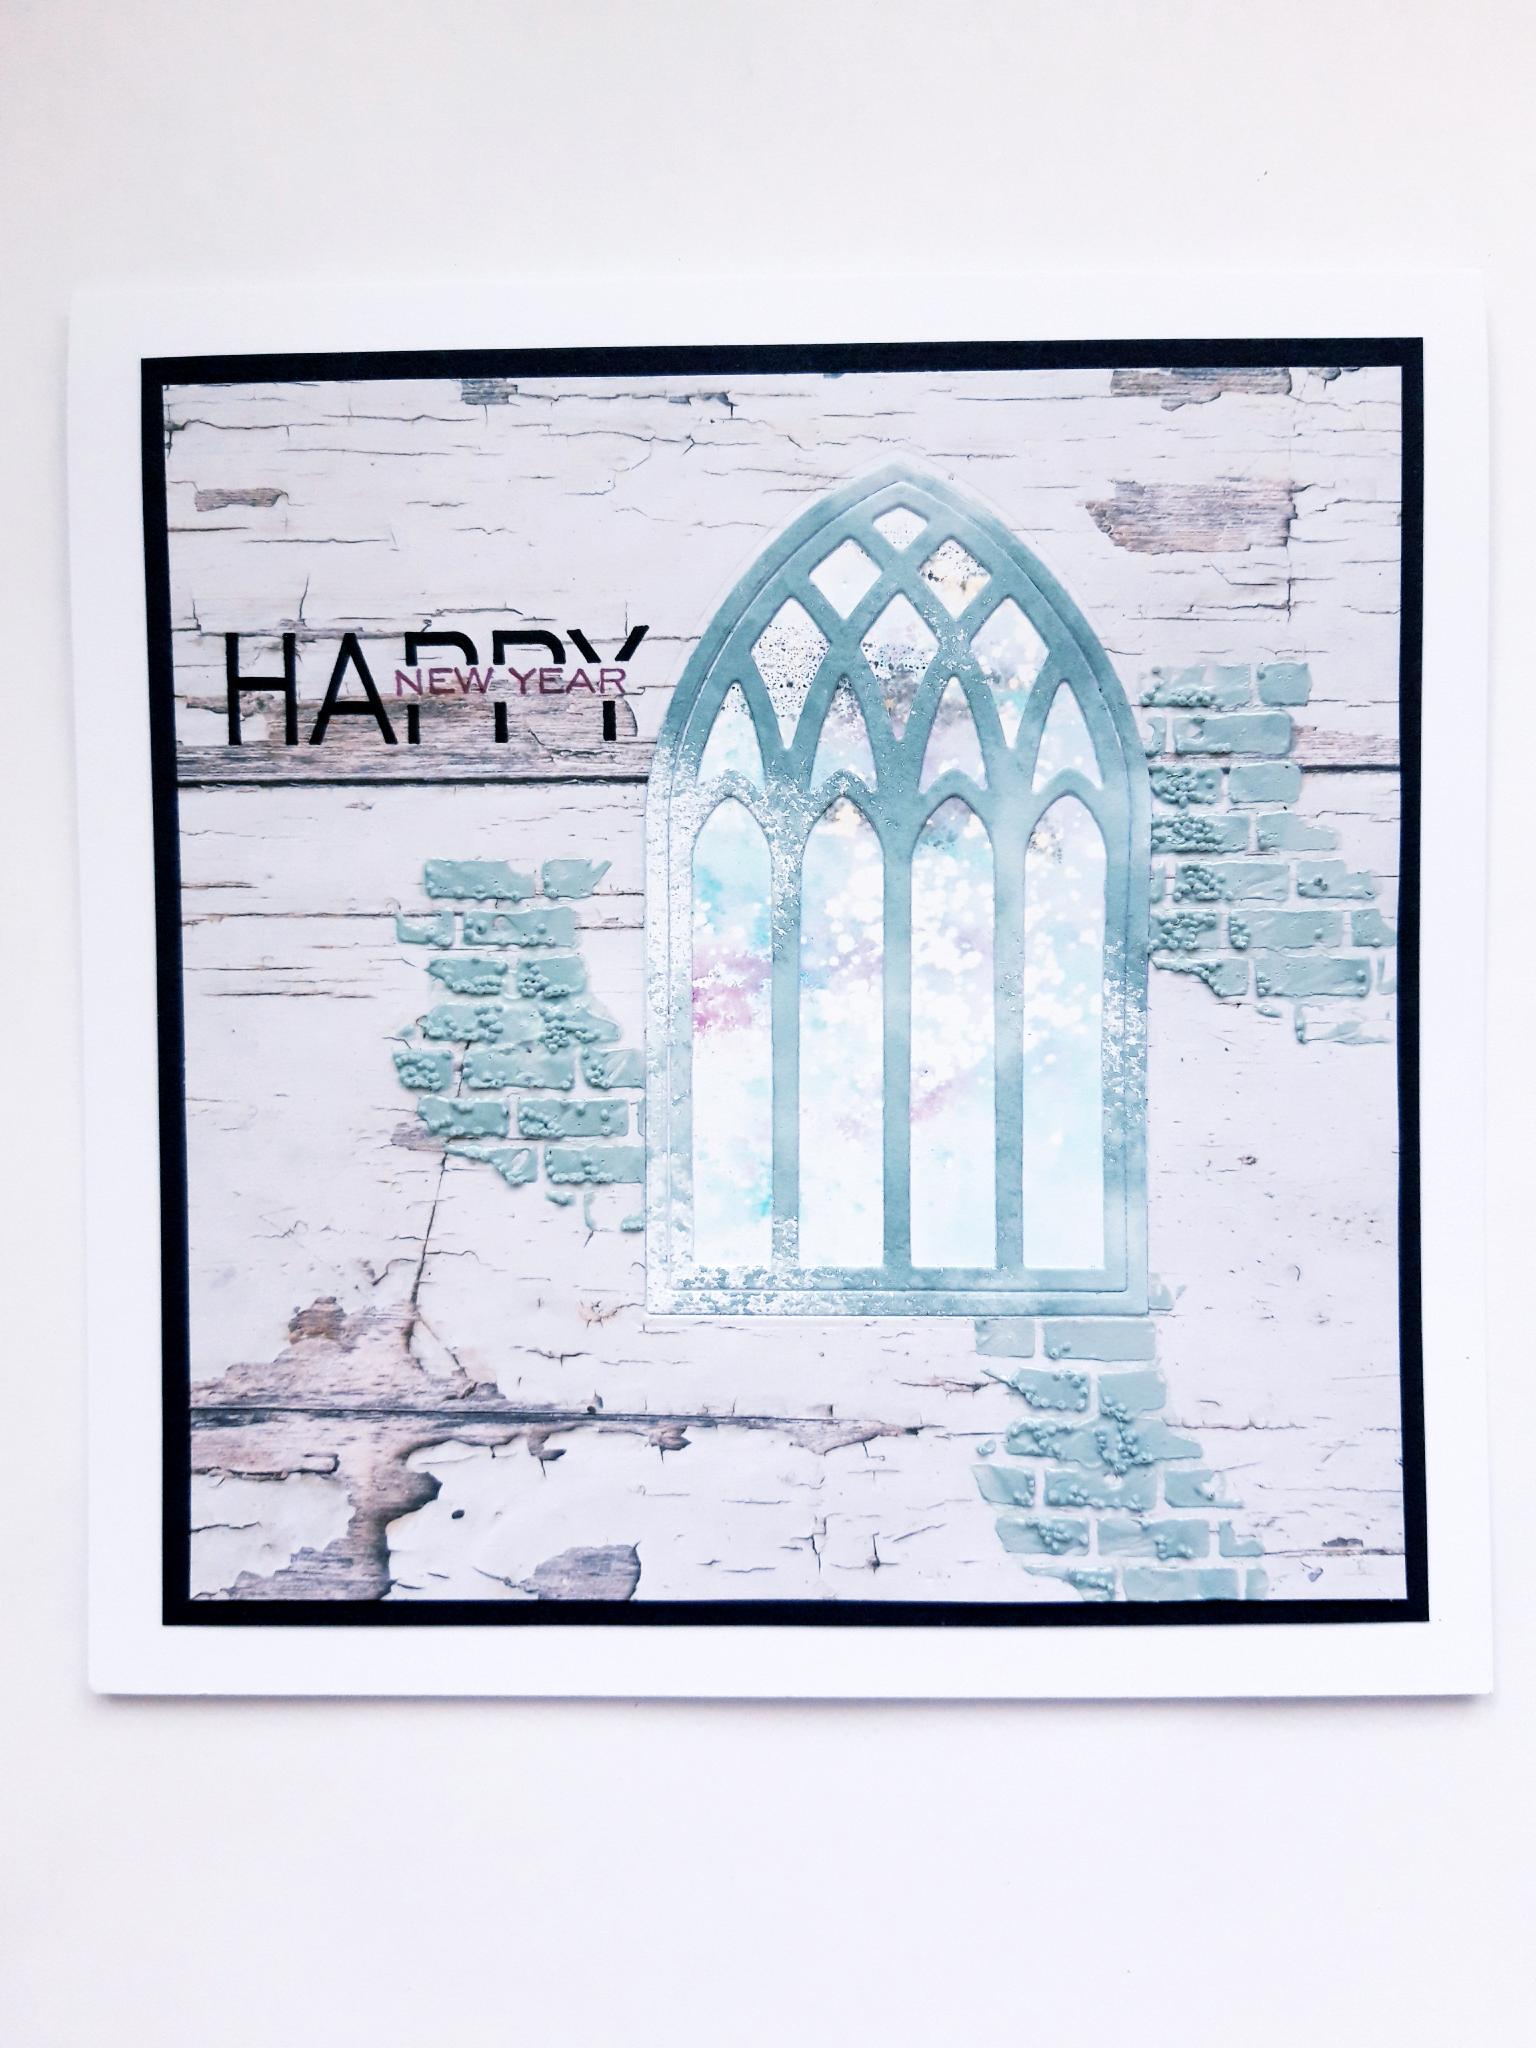
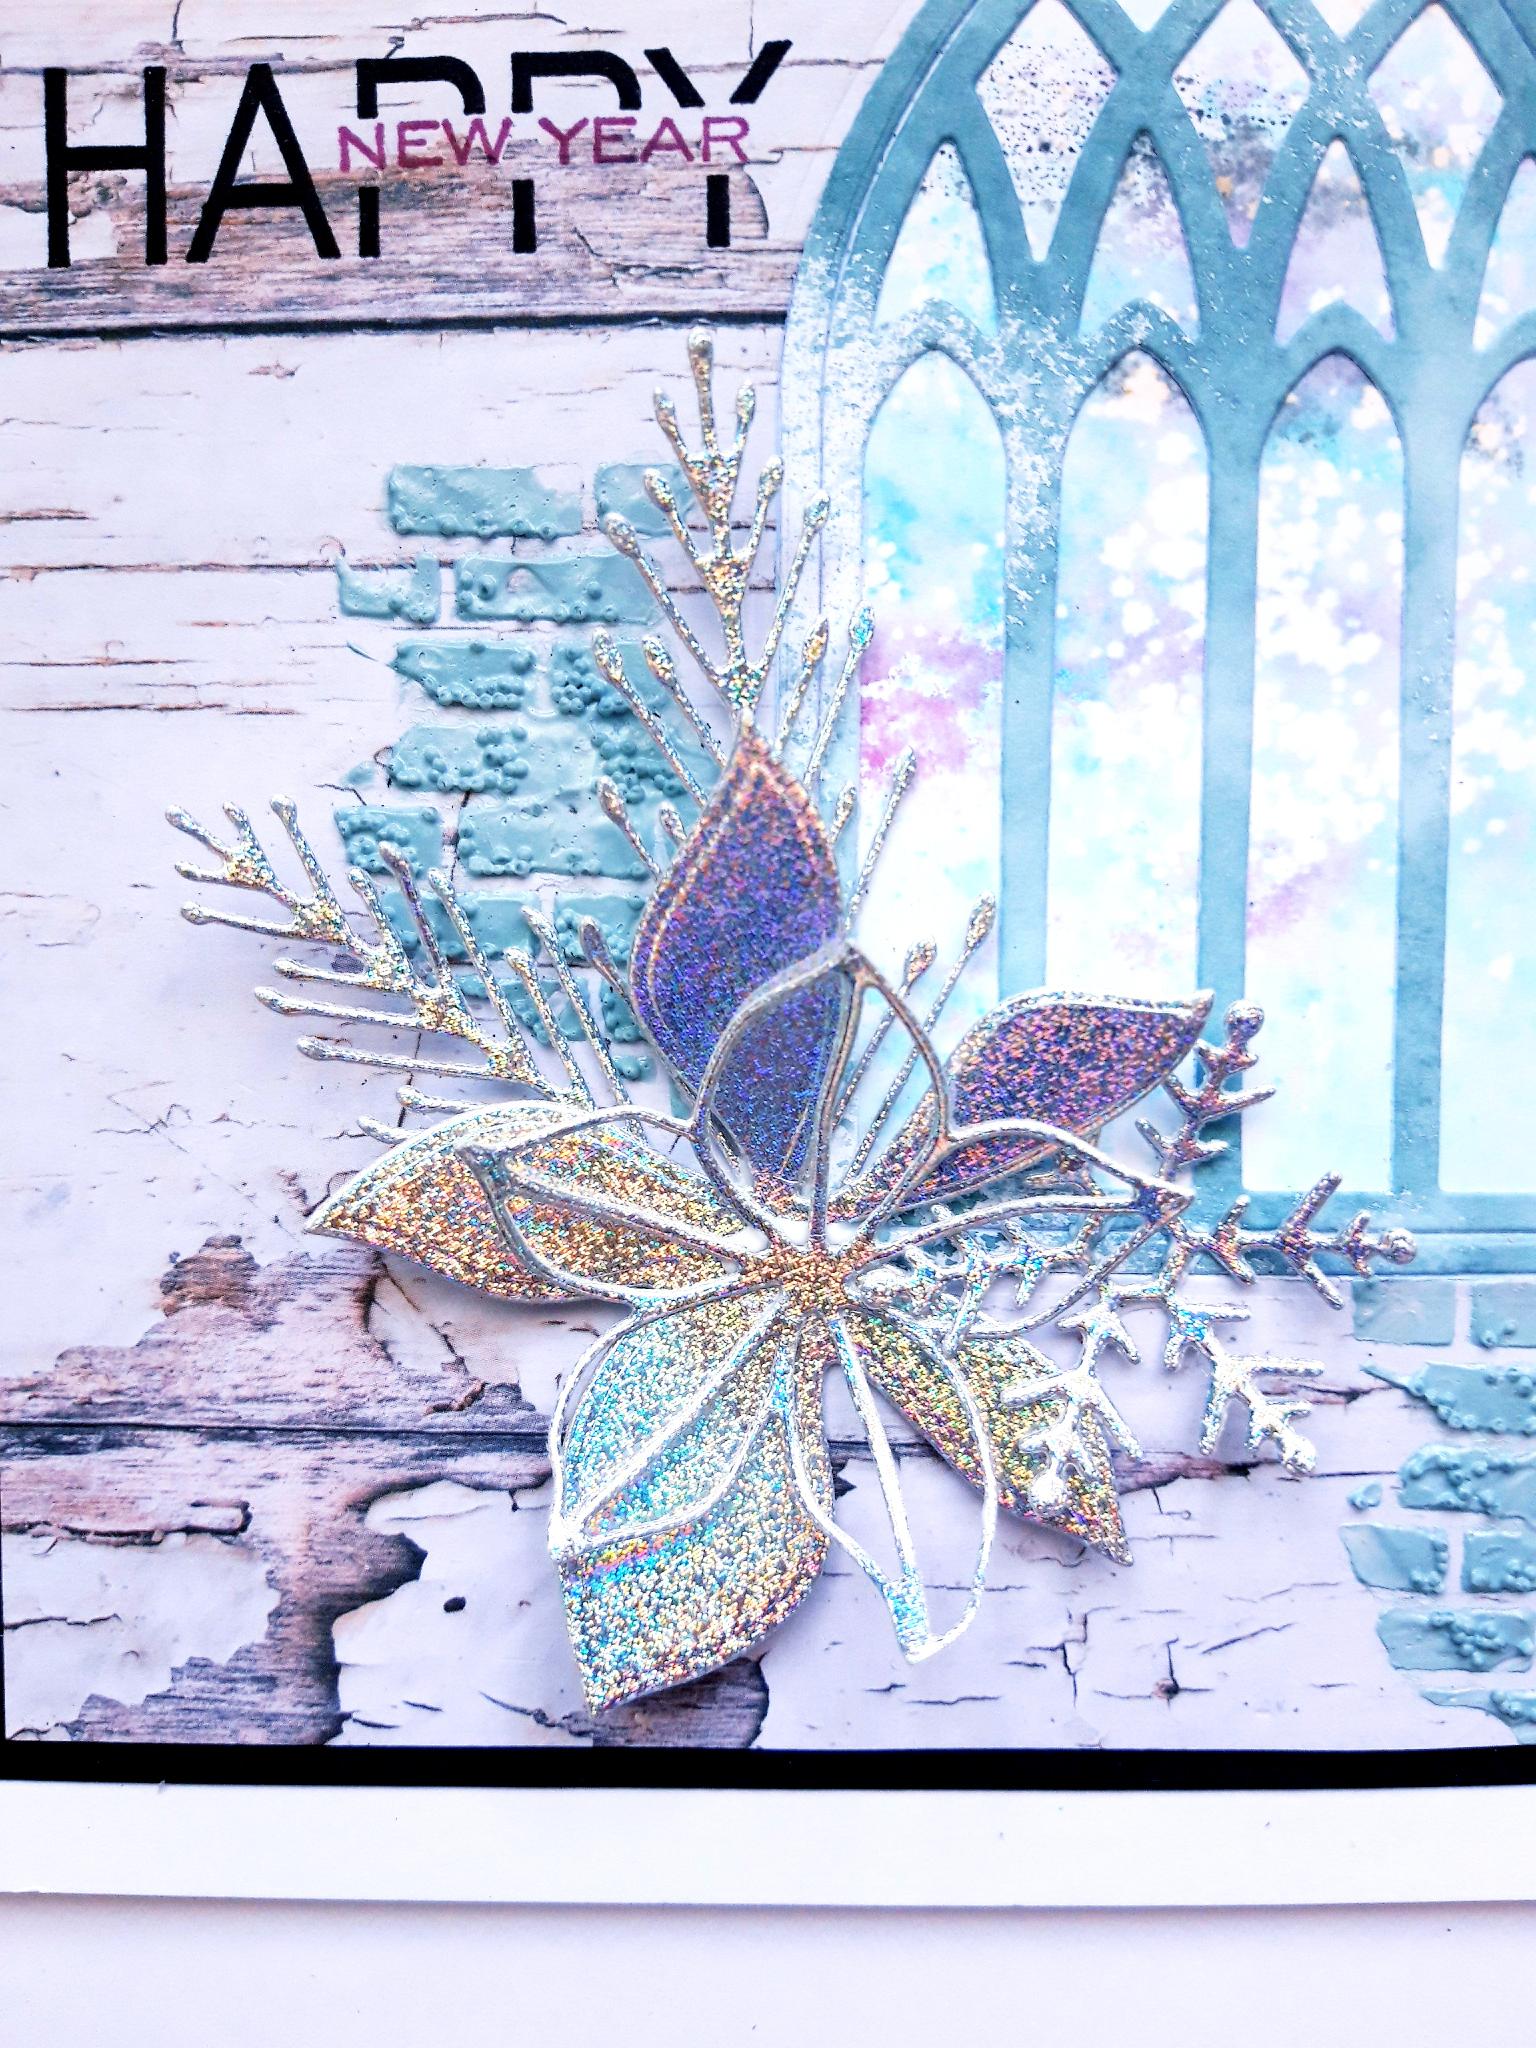
Place a selection of die elements, from the Winter Sparkles and Festive Sparkles Die Collections, on to your chosen glitter card. You don't have to use them all, but die cut enough to create a beautiful 3D layout. Run them through your die cutting machine. |
|
Adhere your artwork on to the black card. |
|
Adhere this on to your white card blank. Ink up the HAPPY stamp, from the Sending Christmas Cheer Stamp Collection, with Onyx Black Versafine, and stamp to the top left of your arch window, Ink up the NEW YEAR stamp, with the Izink Cassis ink, and stamp on the panel on the HAPPY. |
|
Work out your floral layout, using your glitter die cut elements, and once happy, adhere them all in place, in the bottom left corner of the arch window. |

|
To finish, adhere the sequins on, and around, your floral display. |