Give your friends $10 off their first order!
Refer a FRIEND


WHAT YOU WILL NEED:
Grey top folding card blank (8 1/4 x 5 3/4")
White card (8 x 5 1/2")
White card (7 1/2 x 6")
White card (4 x 4")
Green (Tourmaline) Gossip Glitter card (7 1/2 x 6")
Dies from Night Before Christmas Die Collection
Stamps from Imala Cabin In The Snow Stamp Collection
Stamps from Christmas Blessings Stamp Collection
Floral Trimmings Stencil
Thirsty Brush Northern Lights 8 x 8" paper pad
Versafine Ink Pad: Smoky Gray
Izink Dye ink pad: Ocean, Emeraude
Izink Diamond Glitter paint: Nacre
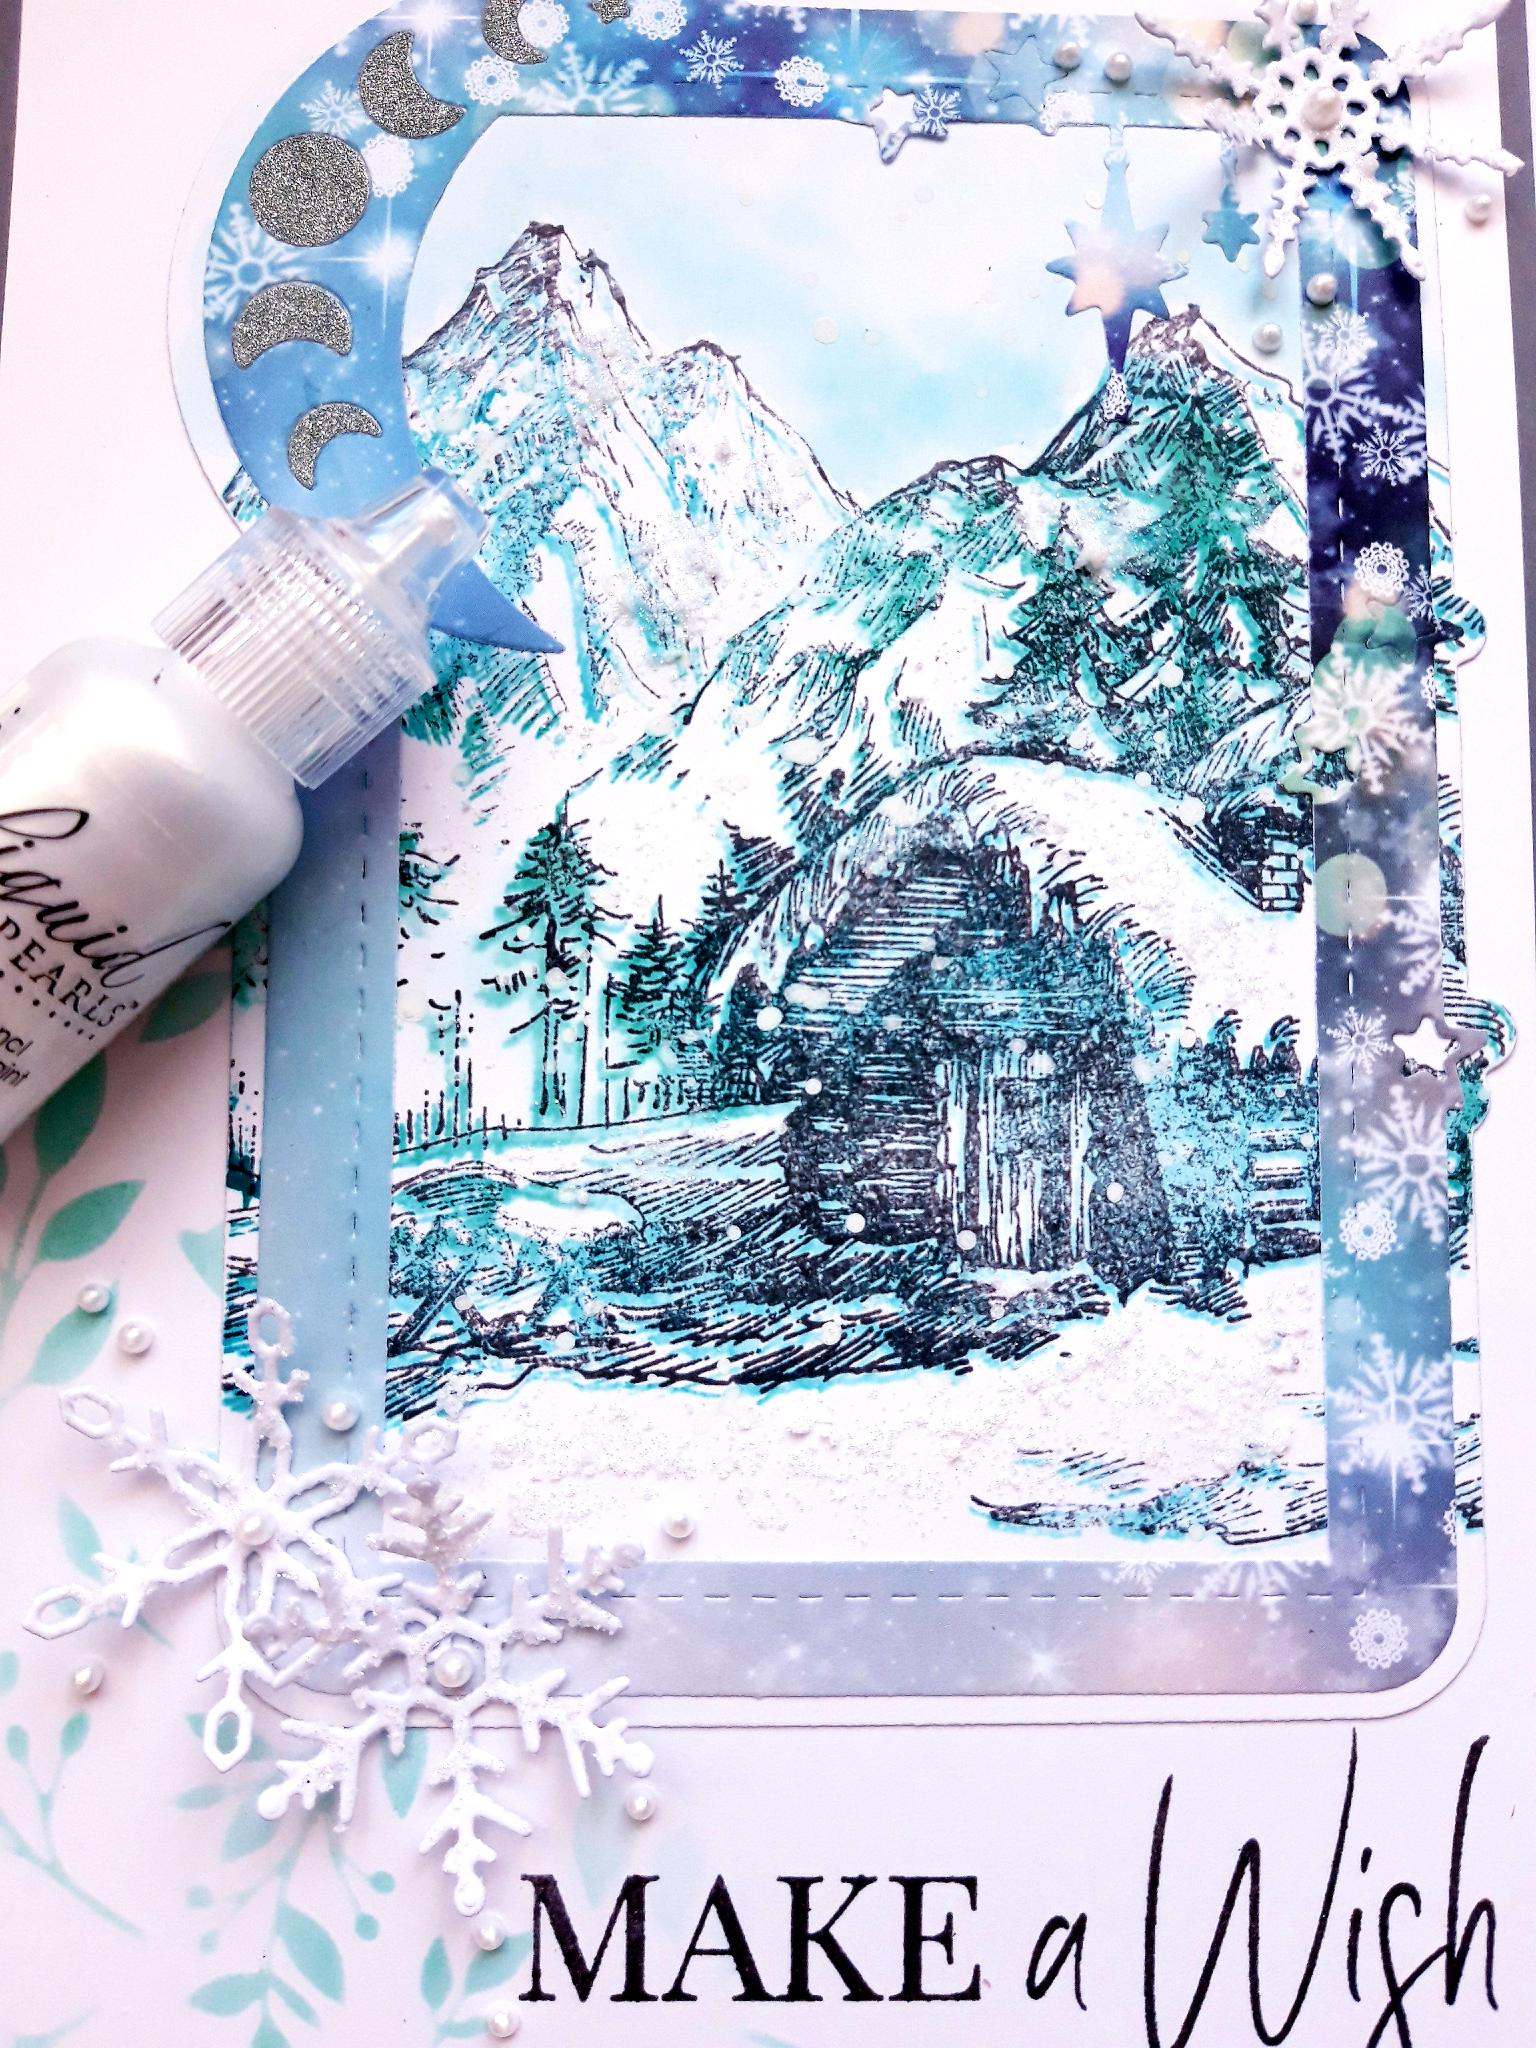
Liquid Pearl Drops: White Opal
Thirsty Brush Confetti Ink Paint: White Lace
Paint brush
Palette knife
Water spray bottle
Blending tool
Eureka 101
Paper Trimmer
Perfect Together Glue
Foam pads (optional)
Die Cutting machine
[click image to enlarge] 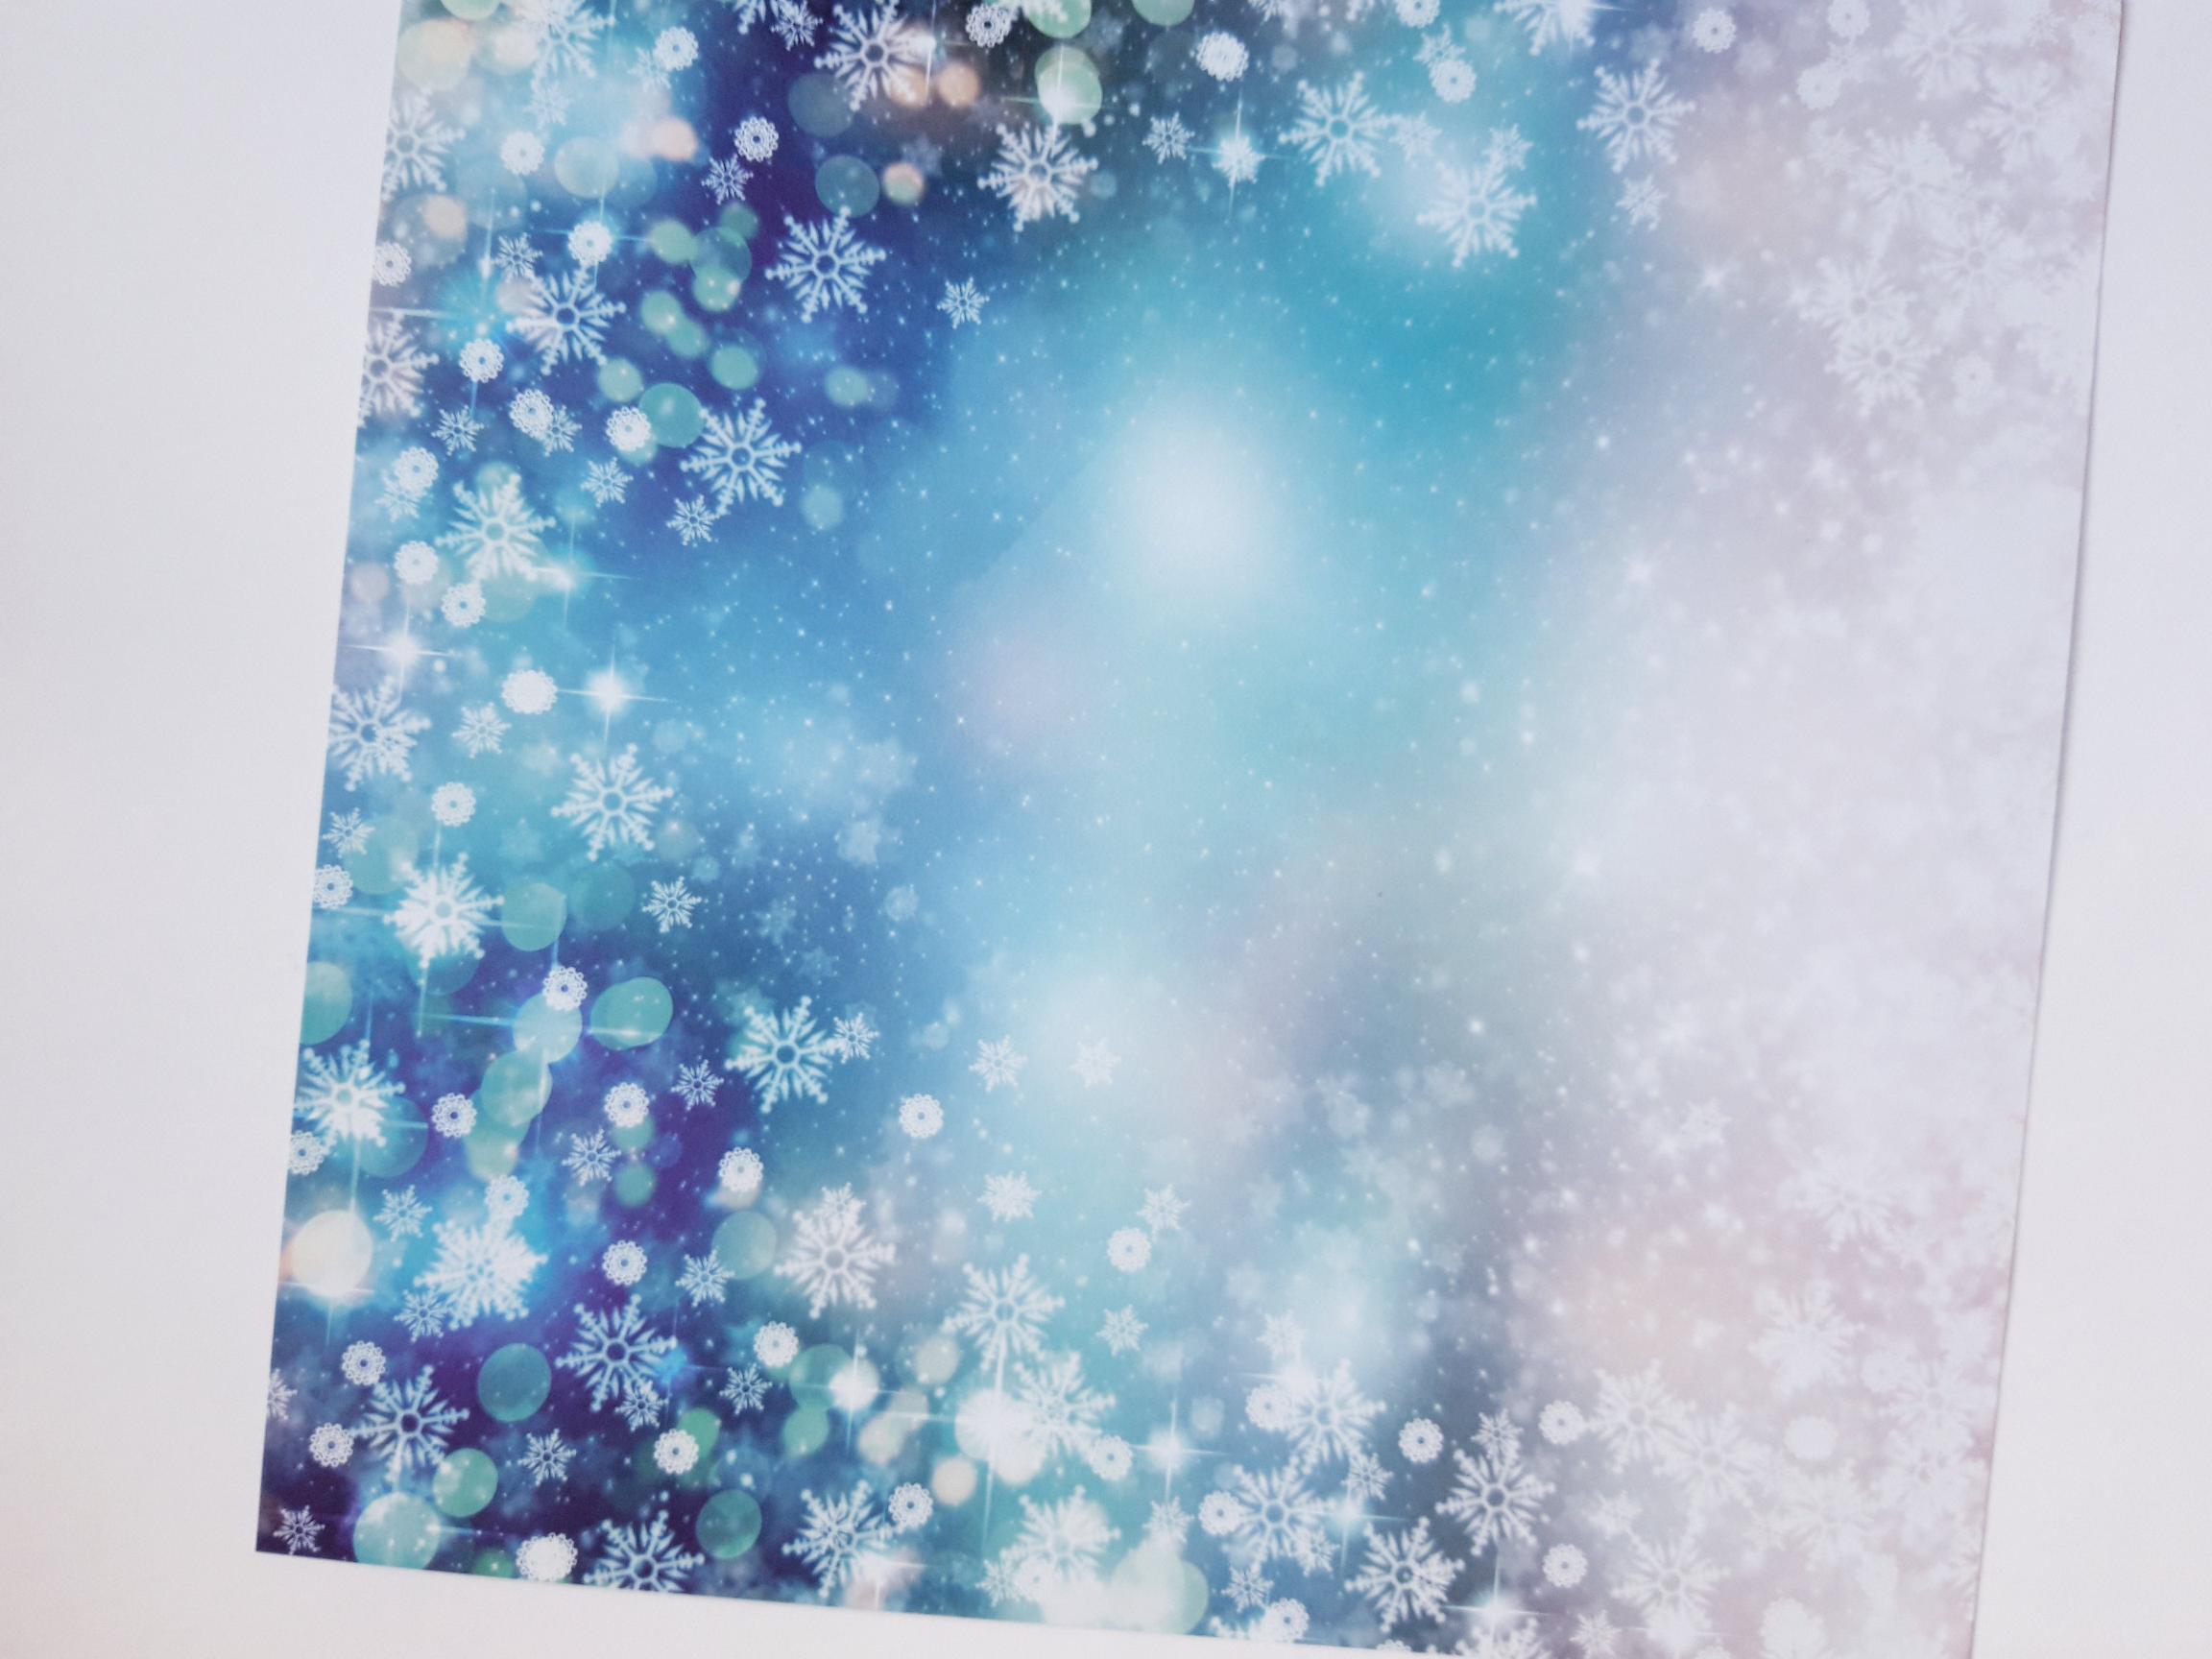
|
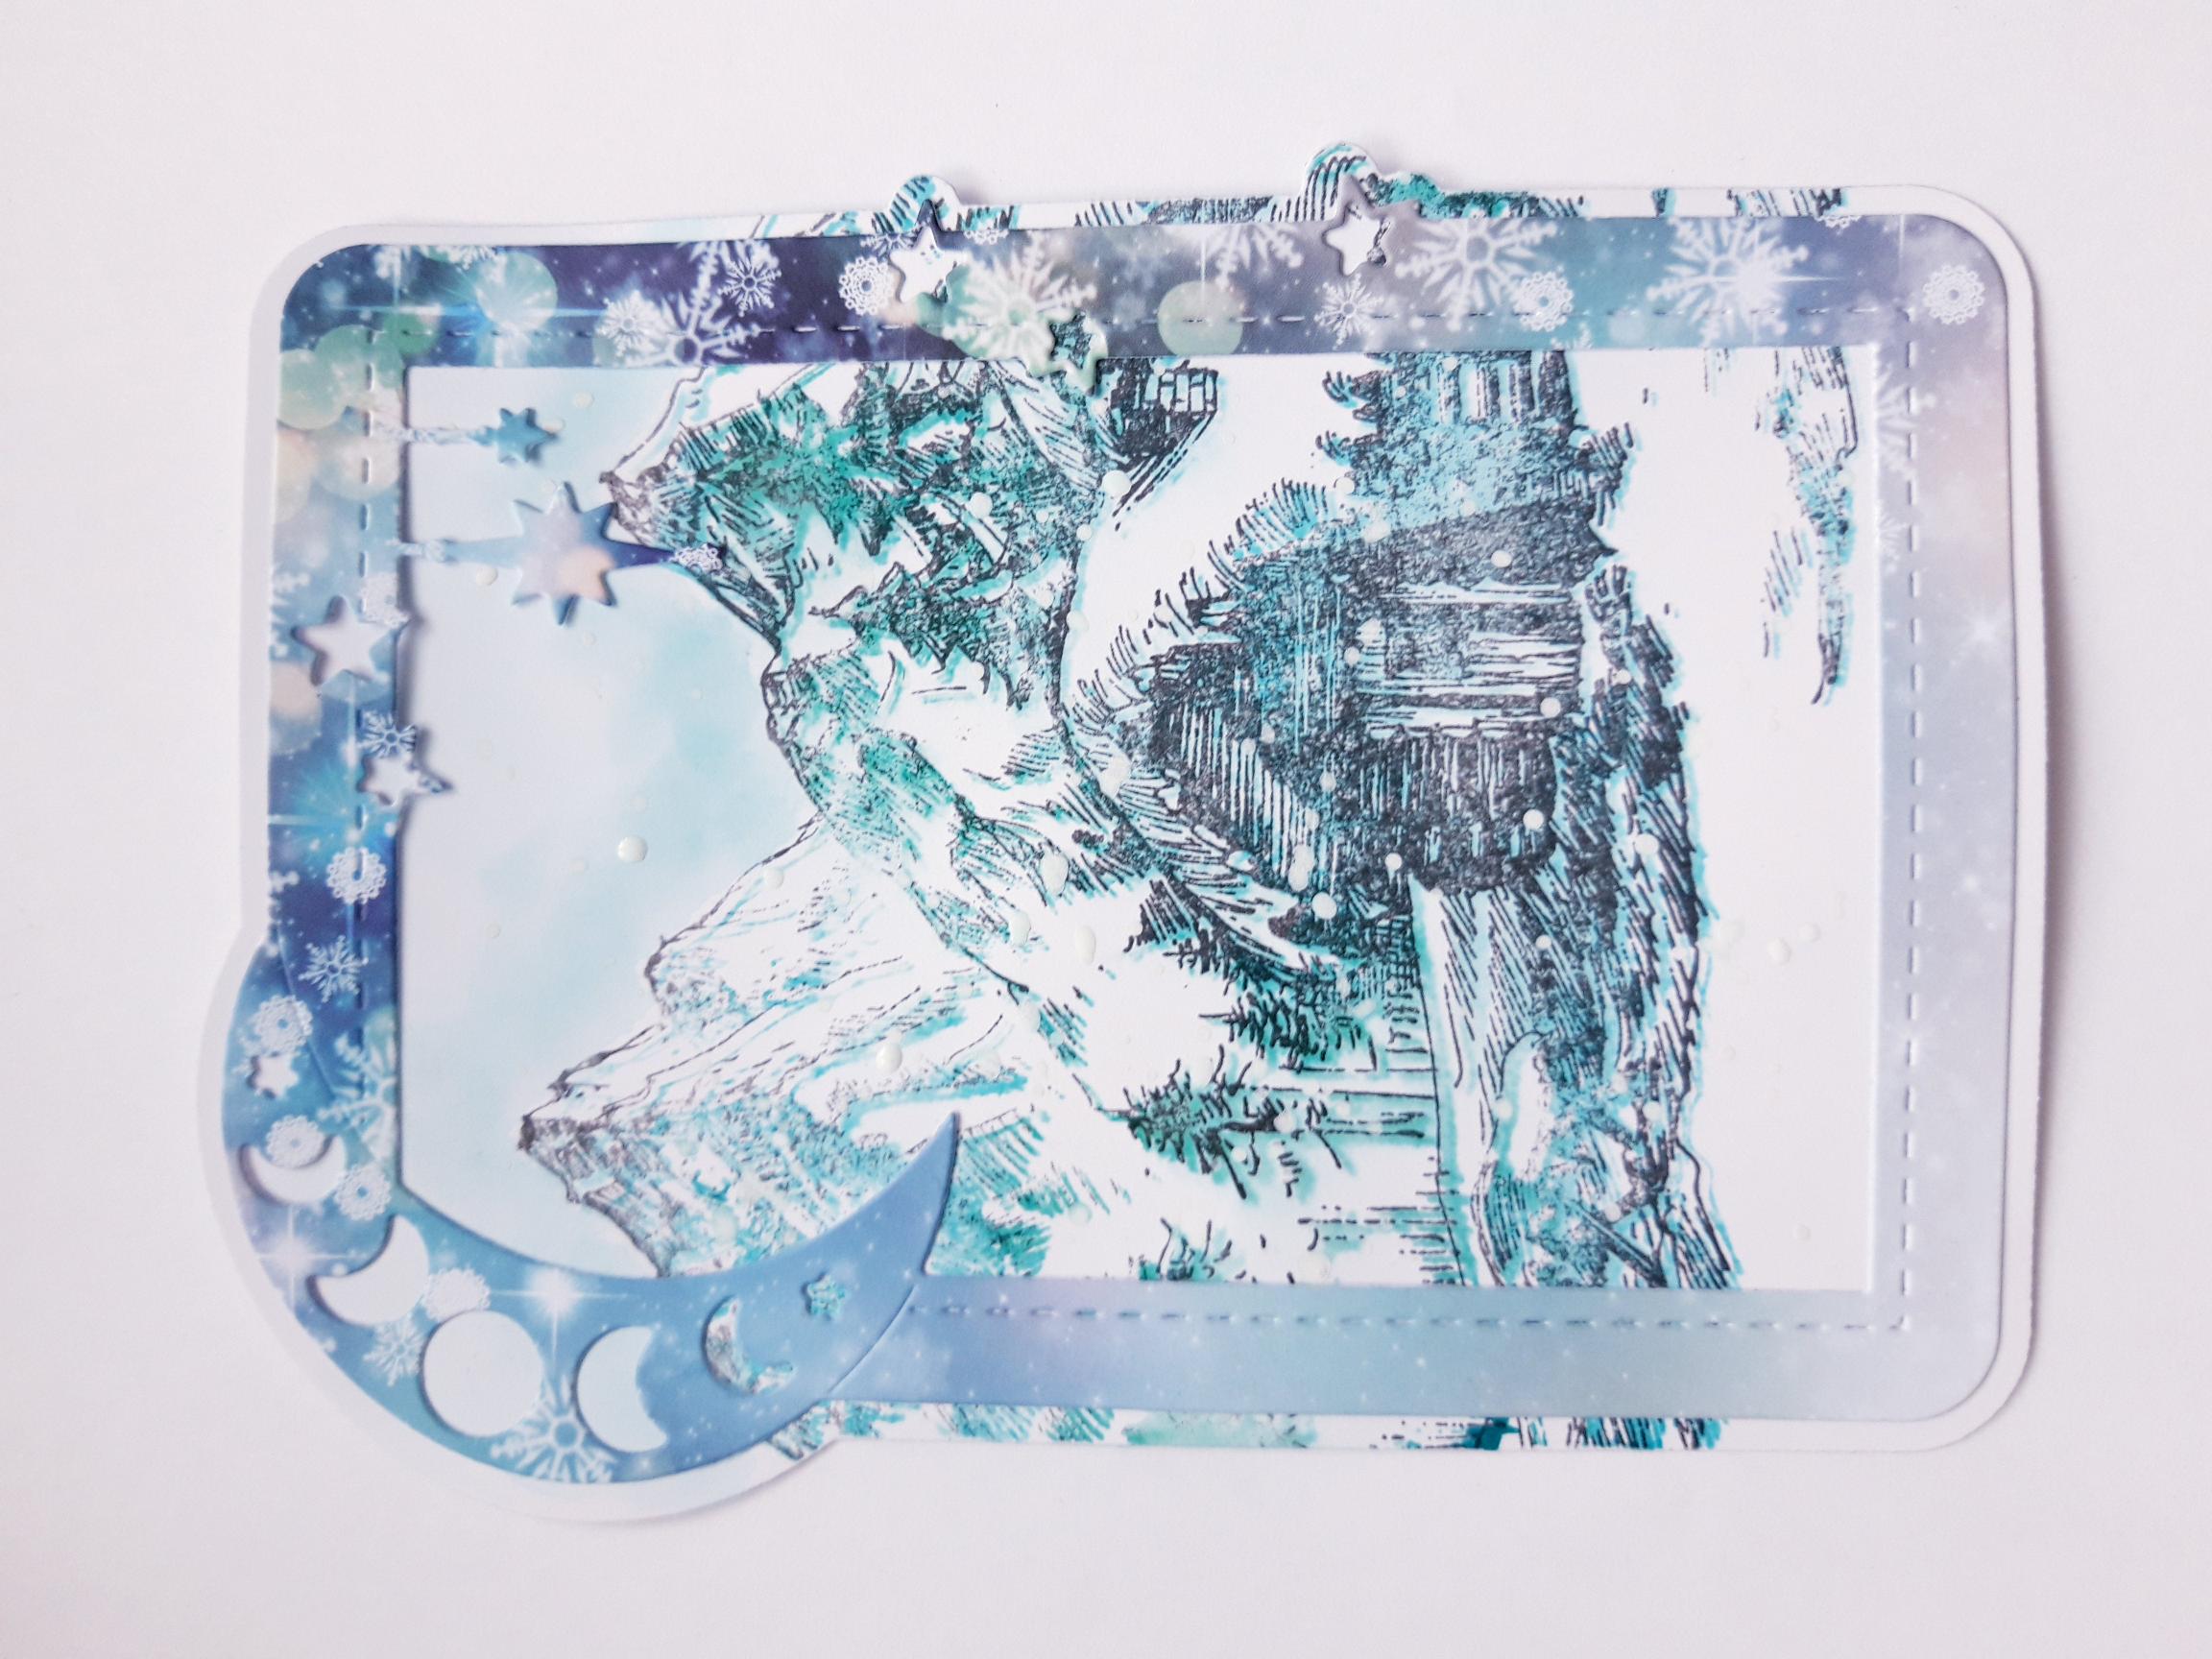
Tear out this decorative sheet, from the Thirsty Brush Northern Lights paper pad. |
|
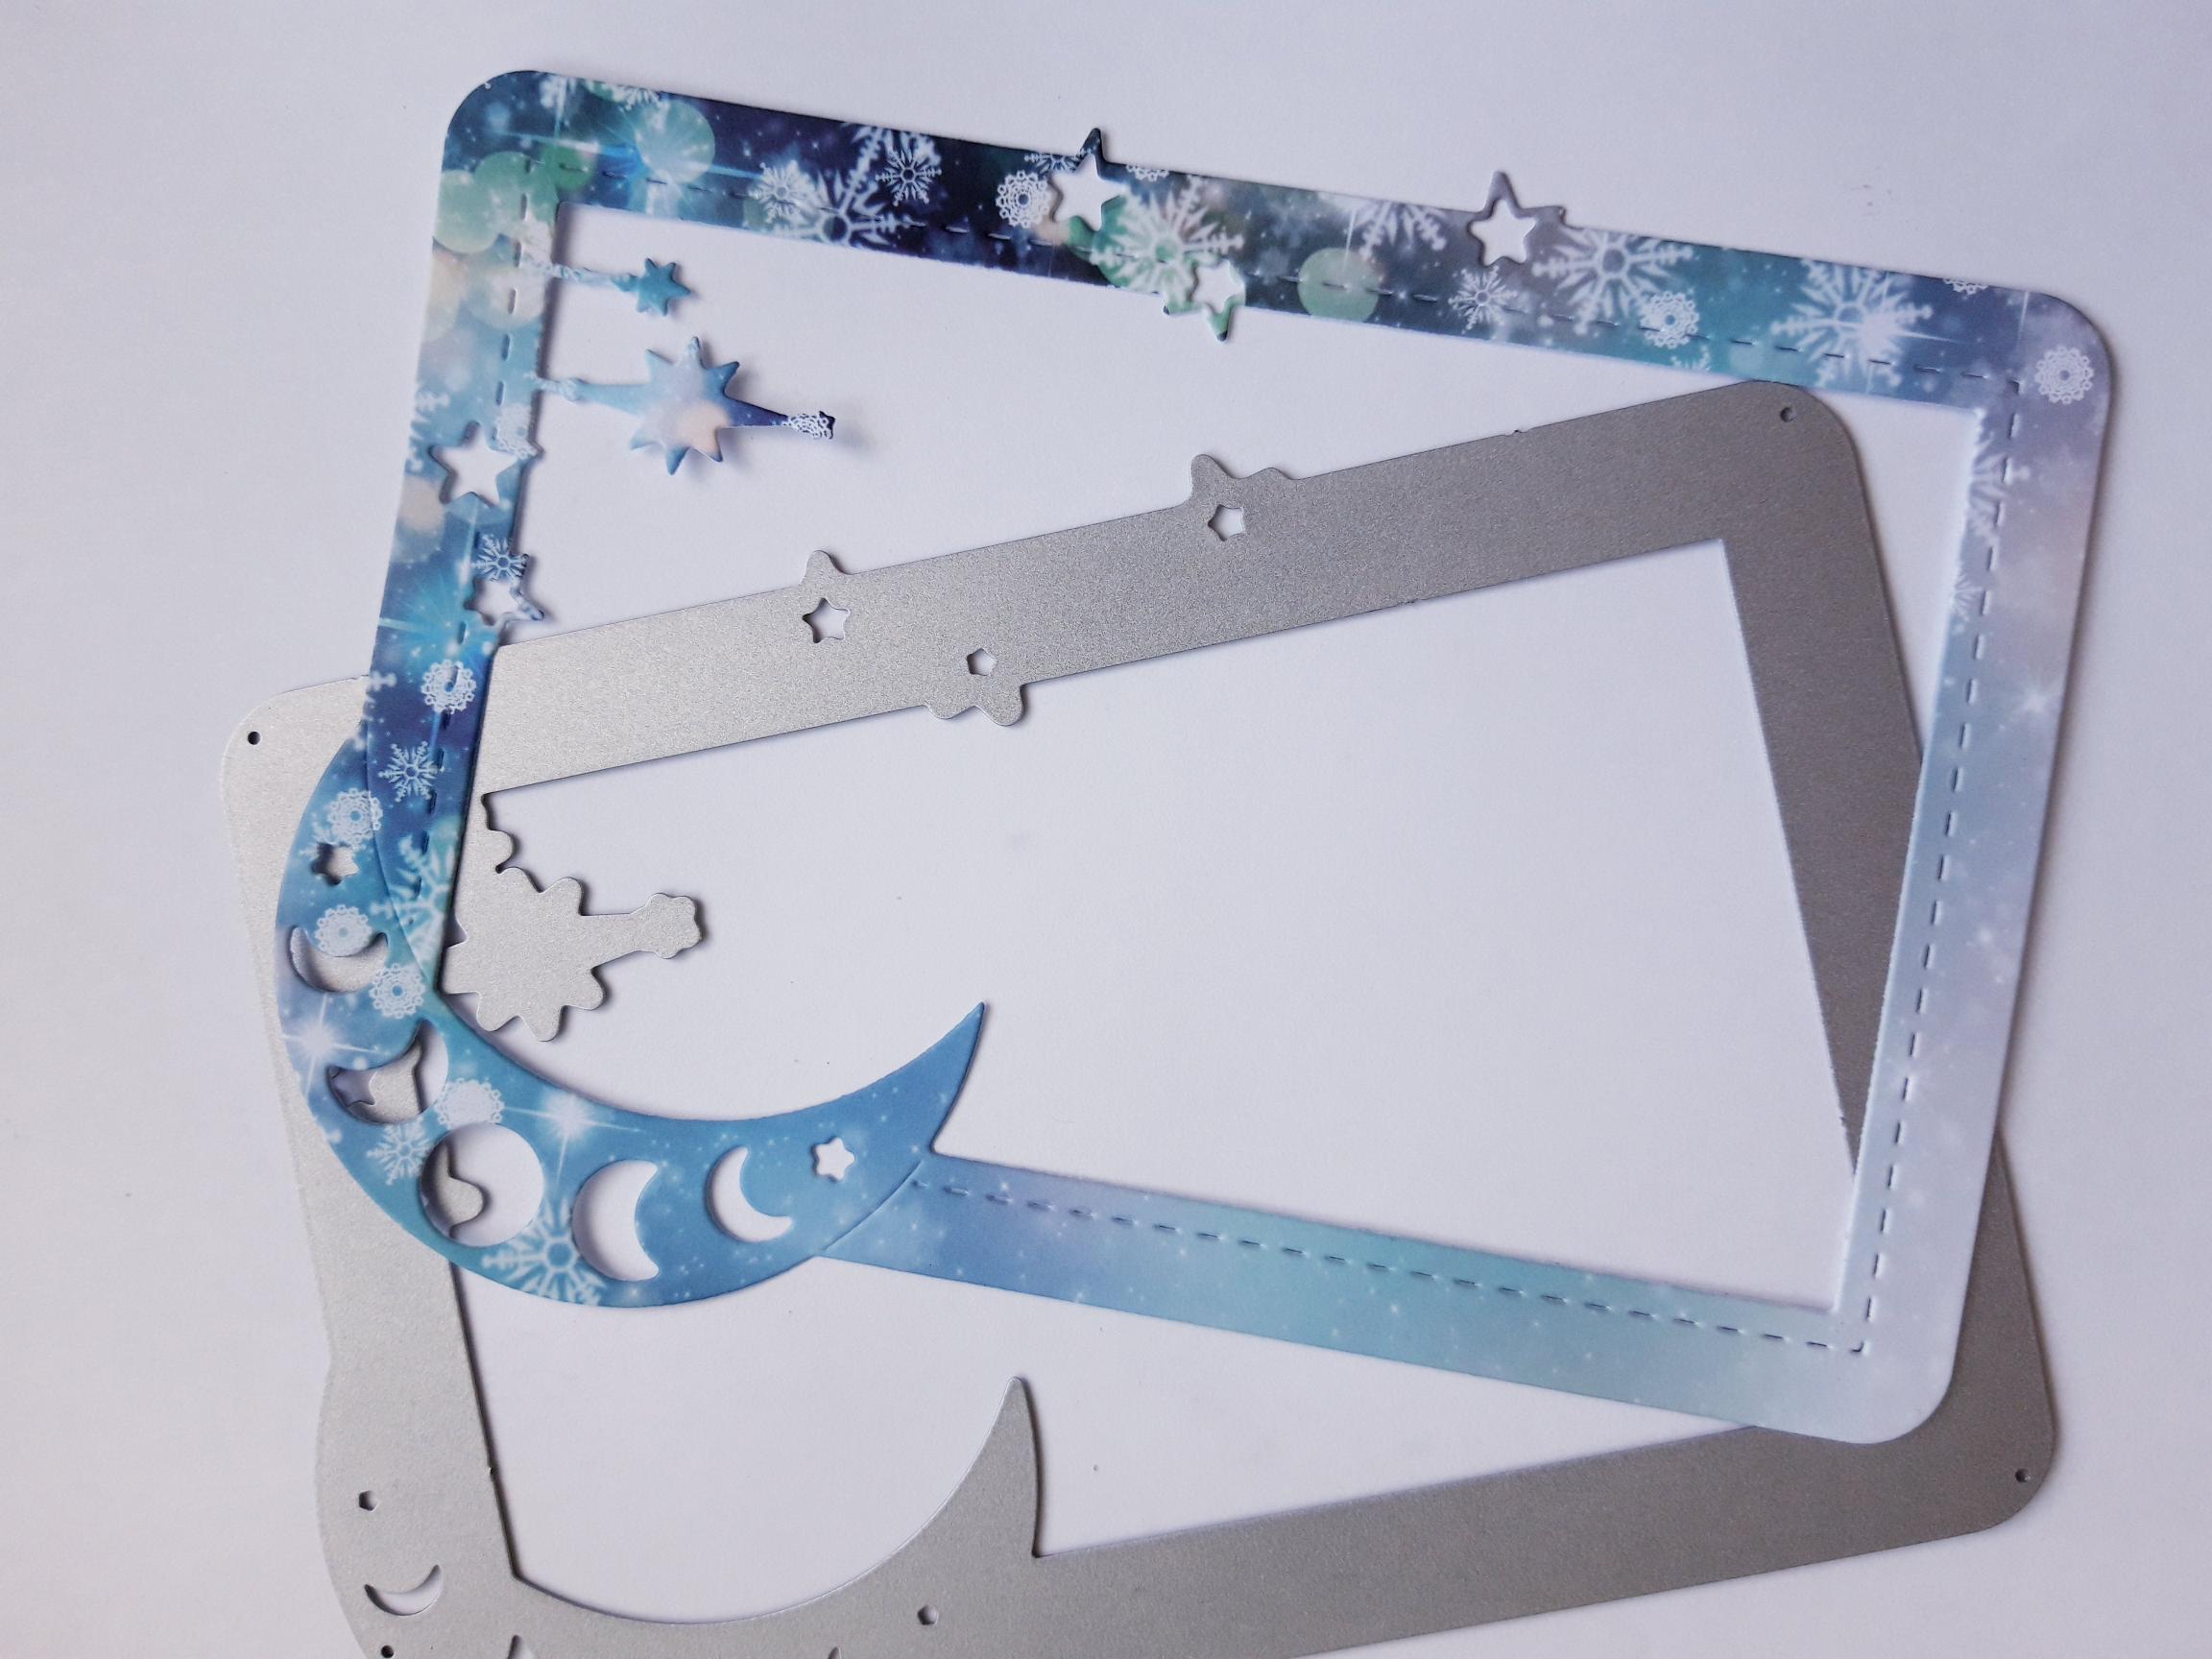
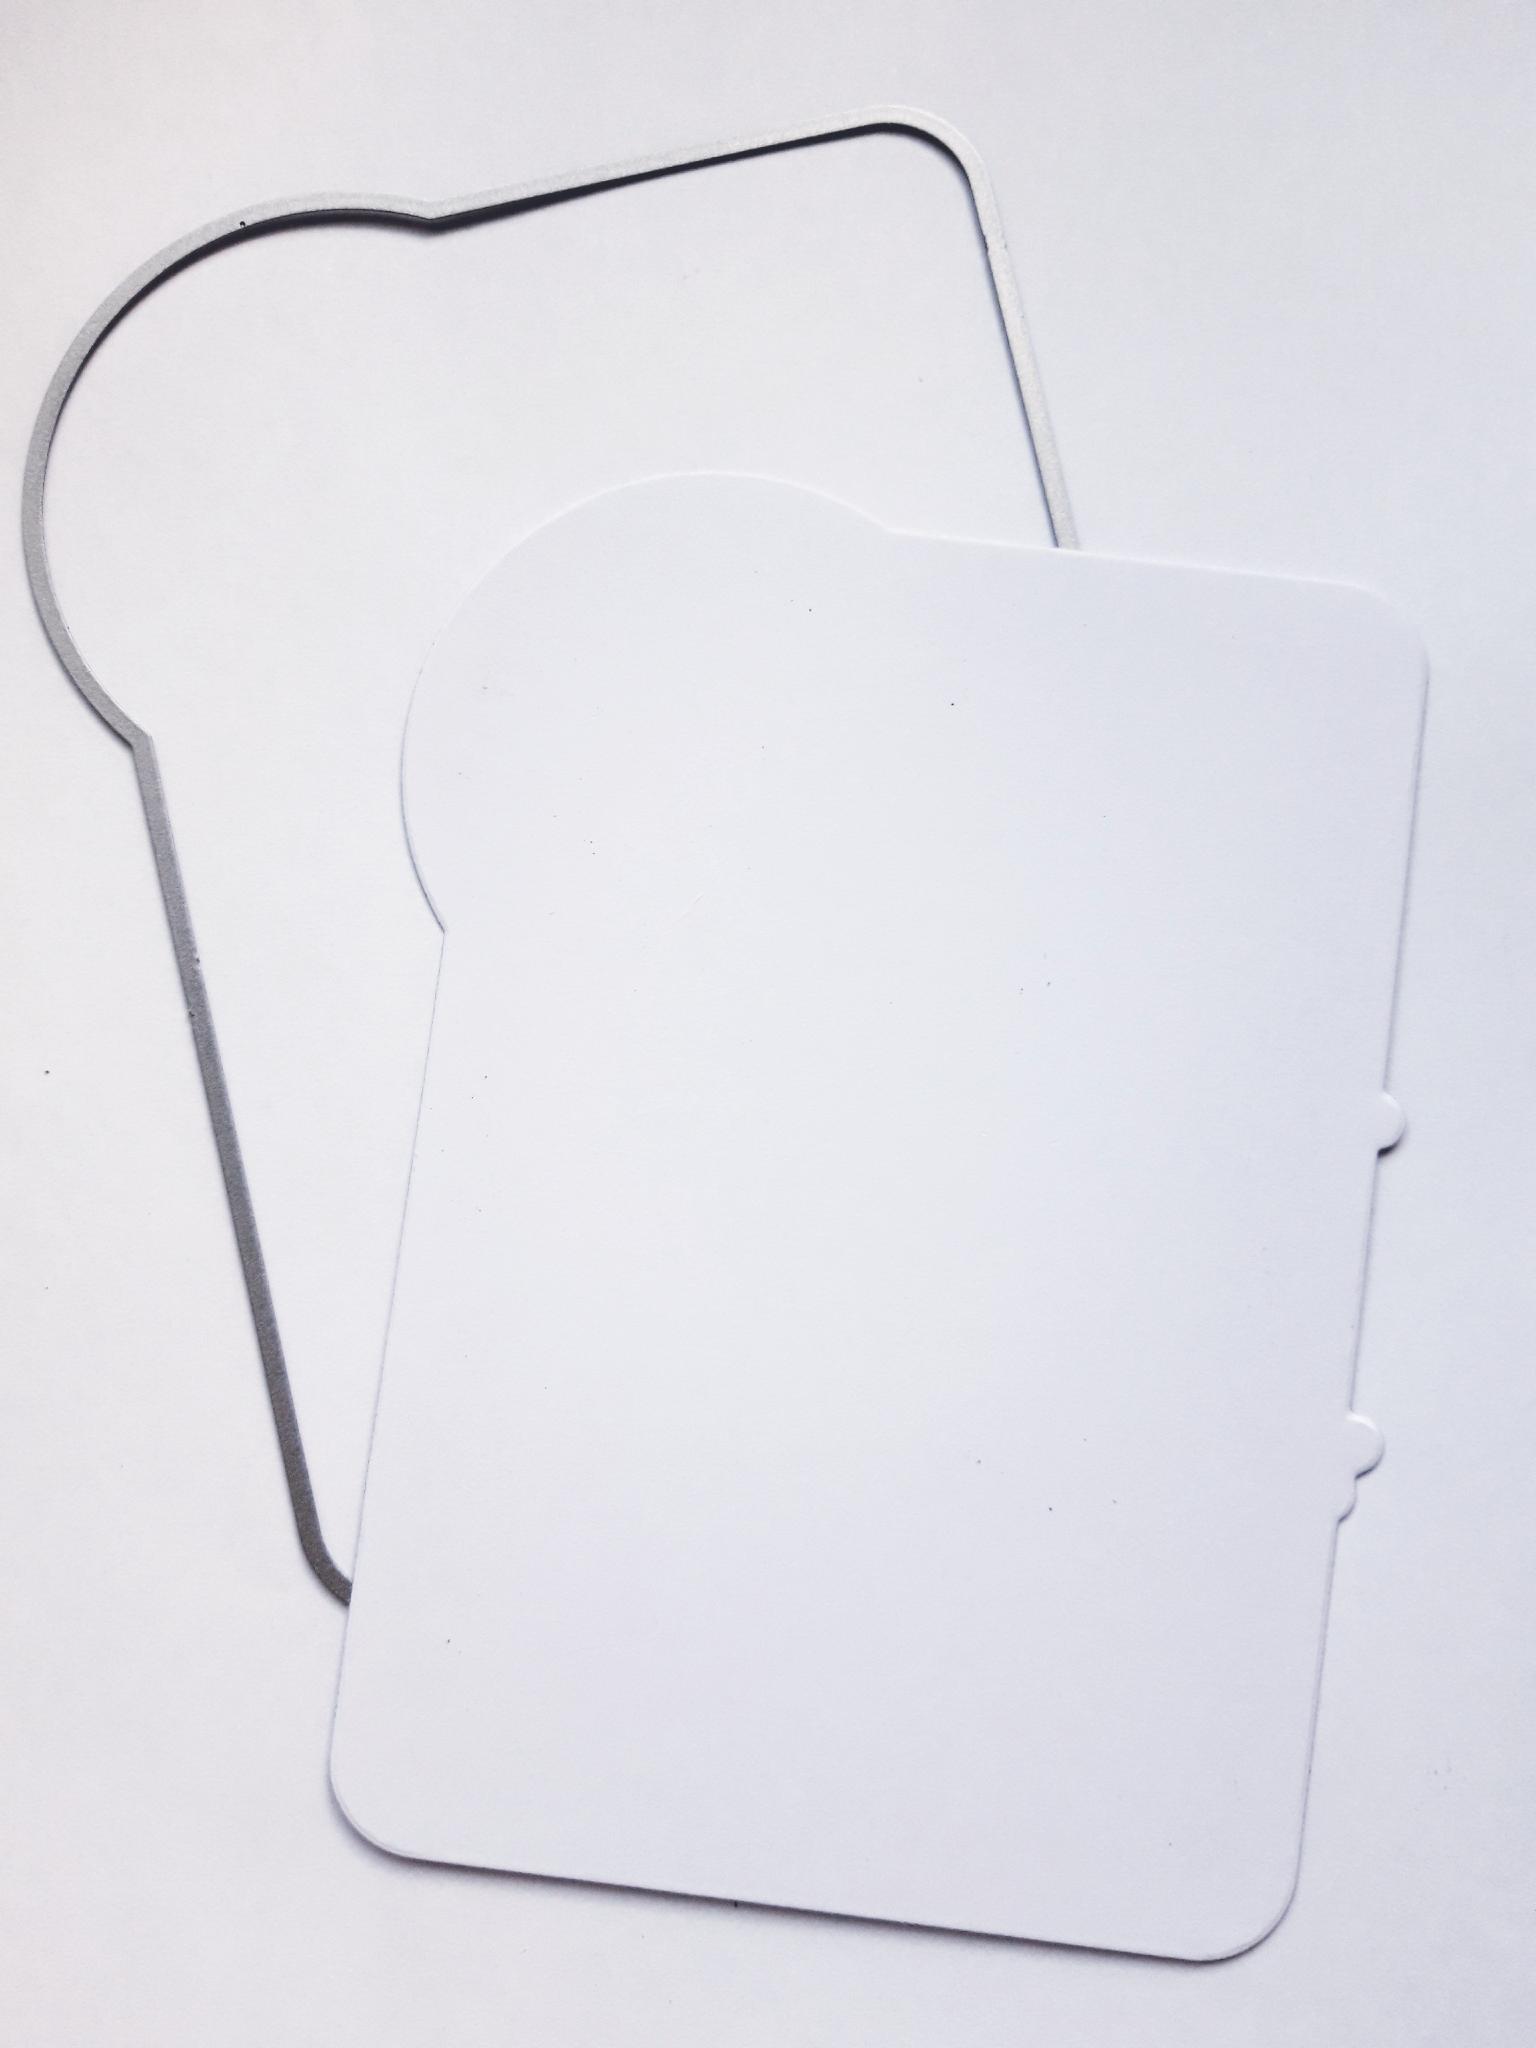
Place the frame die, from Night Before Christmas Die Collection, on to the decorative paper and run it through your die cutting machine. NB: KEEP ALL THE BITS THAT FALL OUT OF THE DIE CUT FRAME, FOR PAPER PIECING BACK IN LATER. |
|
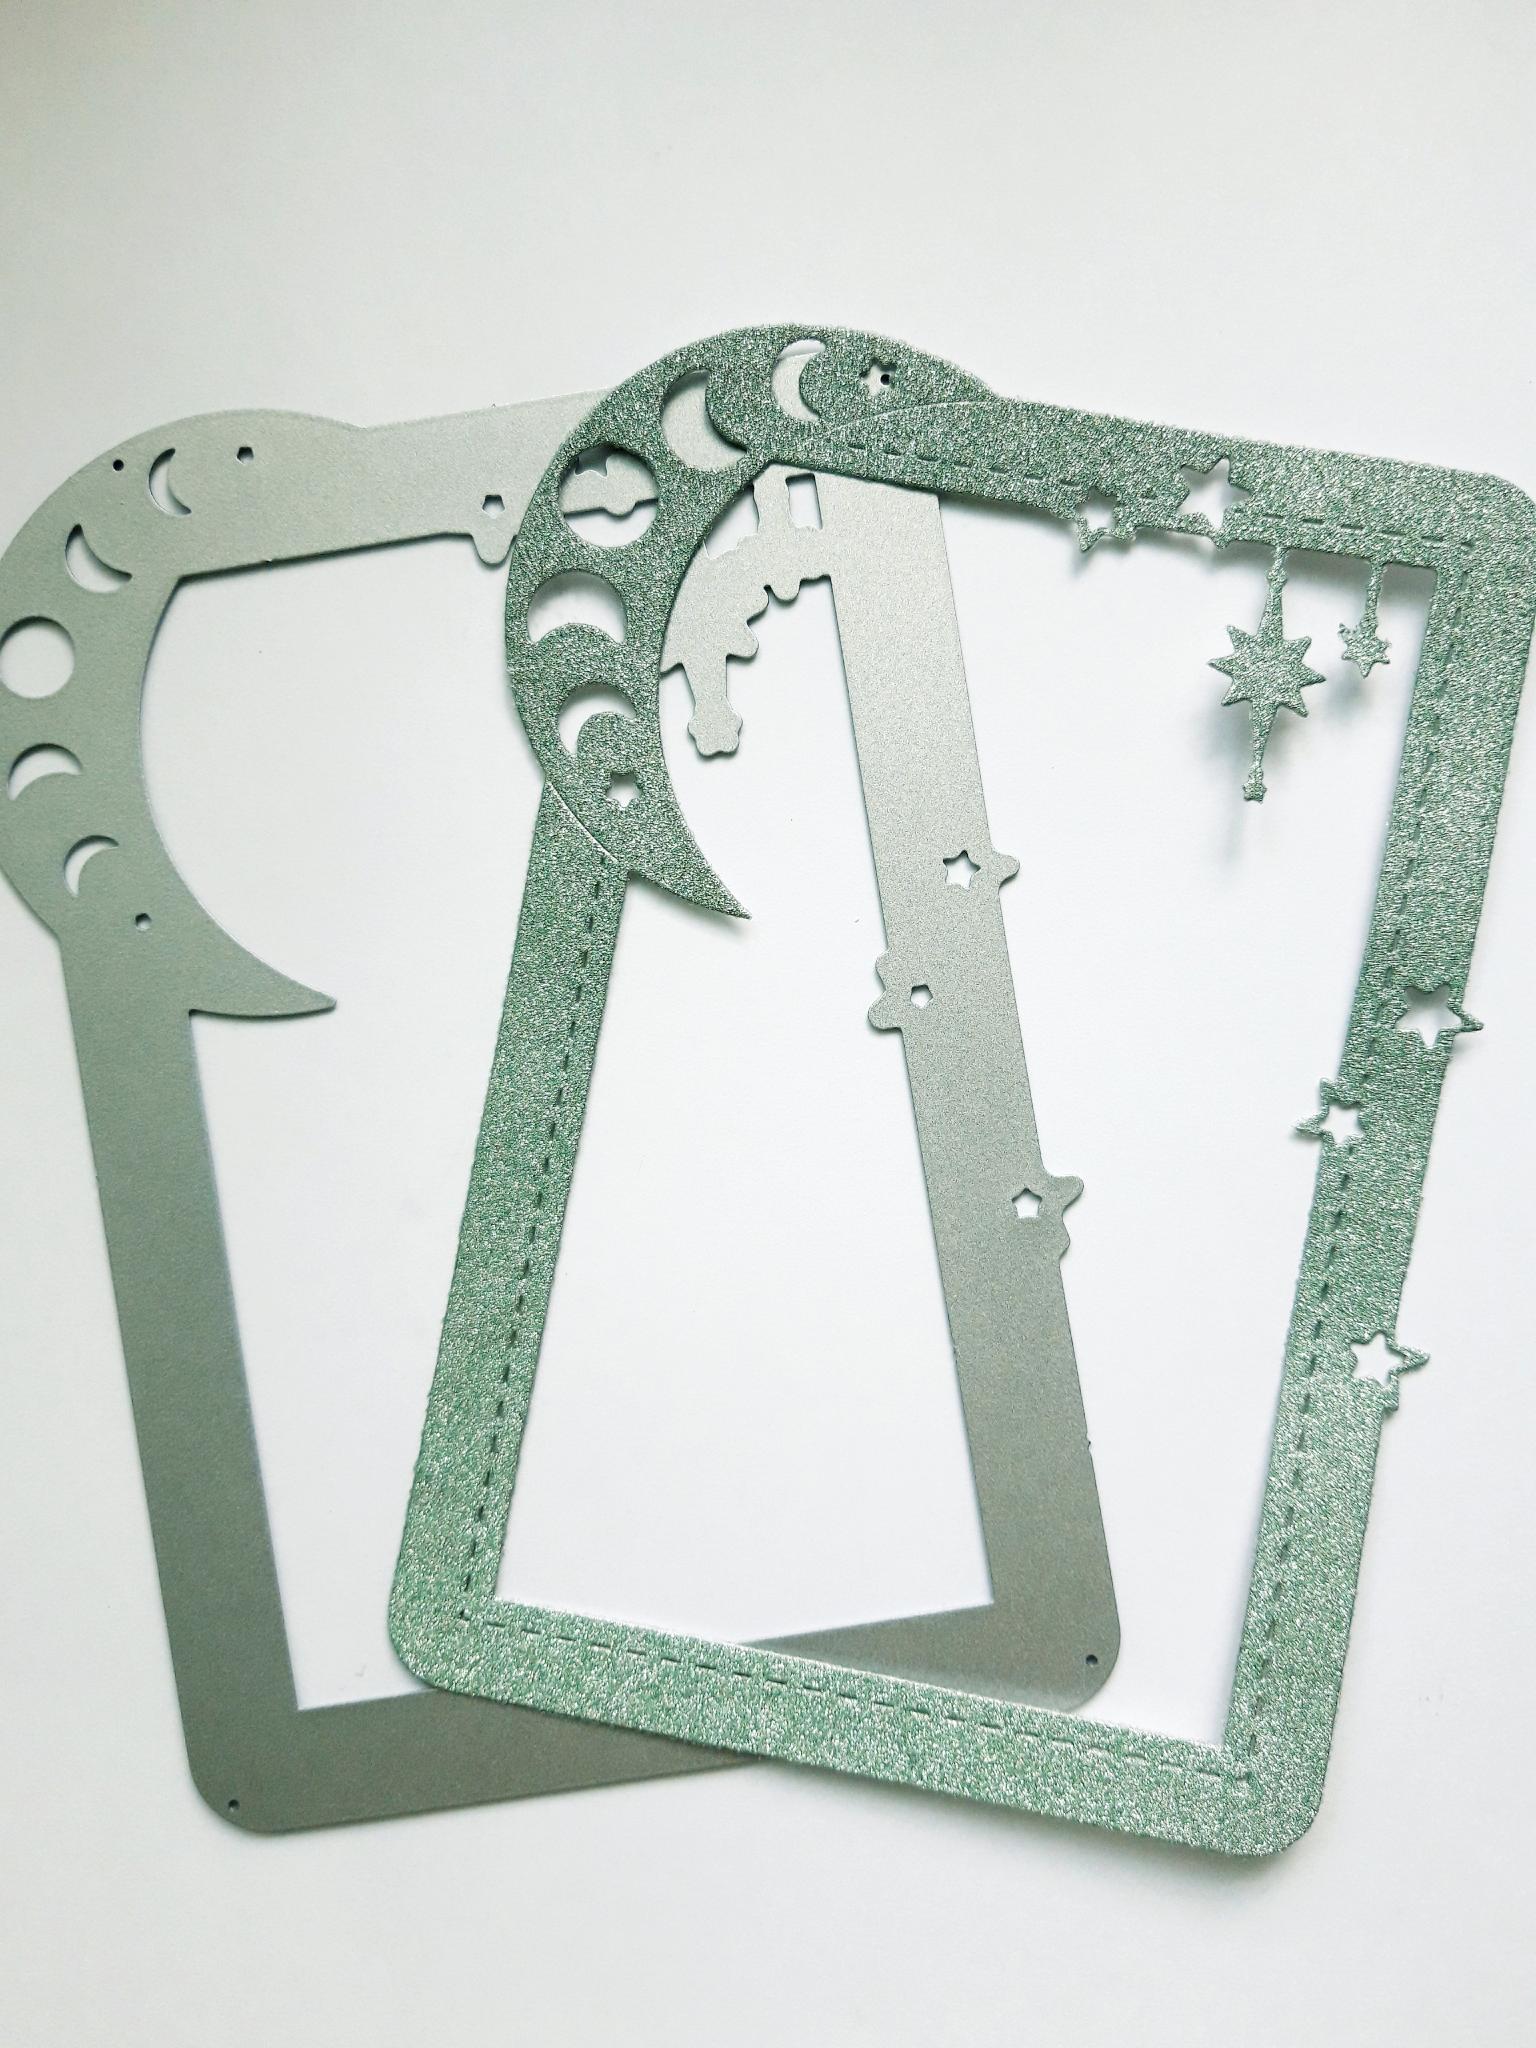
Place the same frame die on to the glitter card, and run it through your die cutting machine. NB: KEEP ALL THE BITS THAT FALL OUT OF THE DIE CUT FRAME, FOR PAPER PIECING BACK IN LATER. Set your die cut frames to one side.
|
|
Place the coordinating mat die, on to the white card (7 1/2 x 6"), and run it through your die cutting machine.
|
|
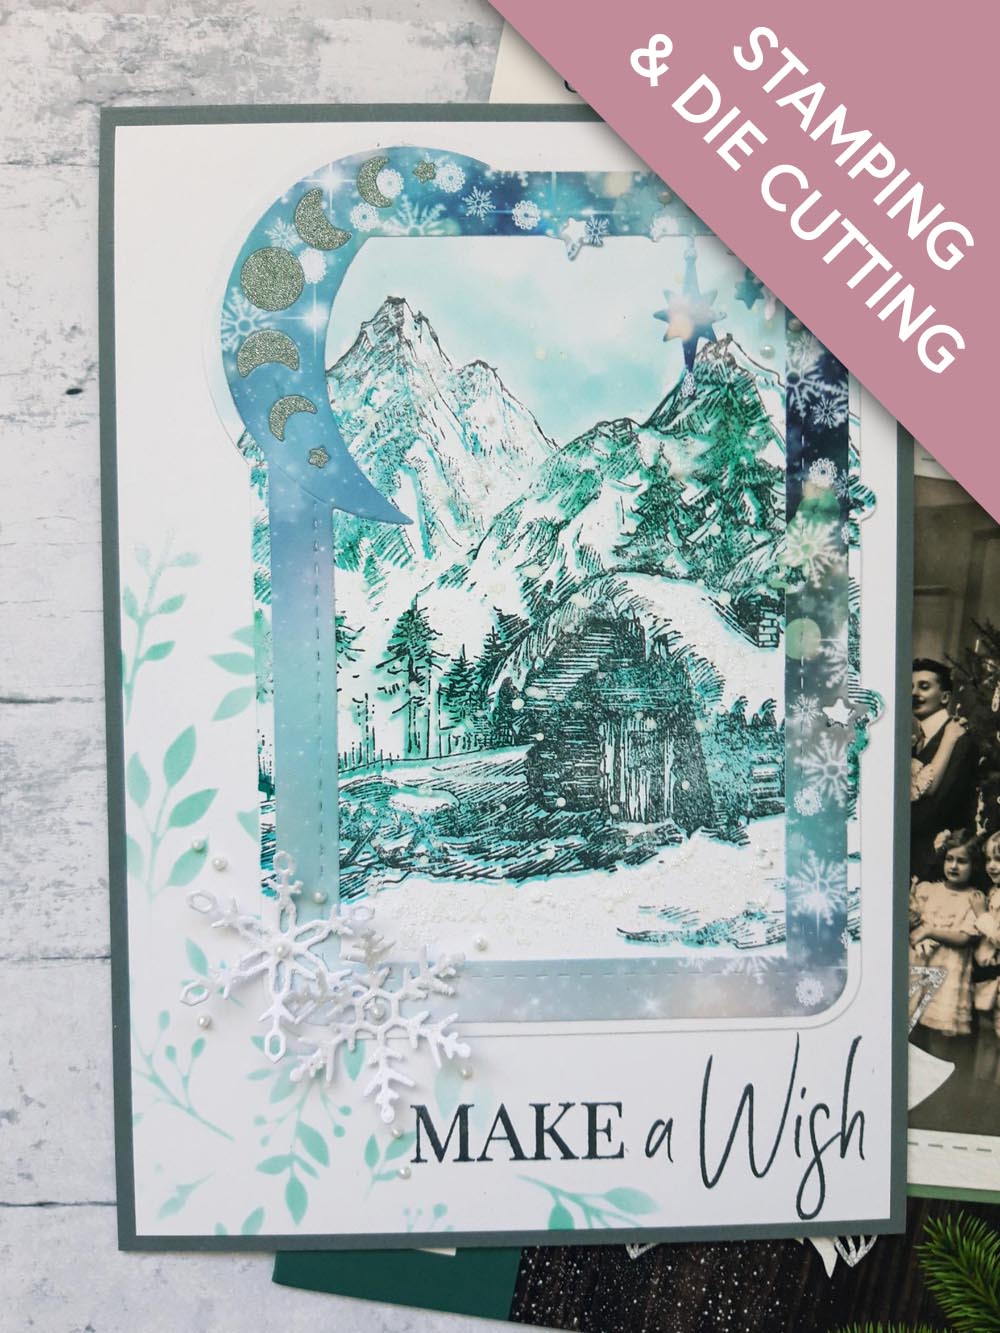
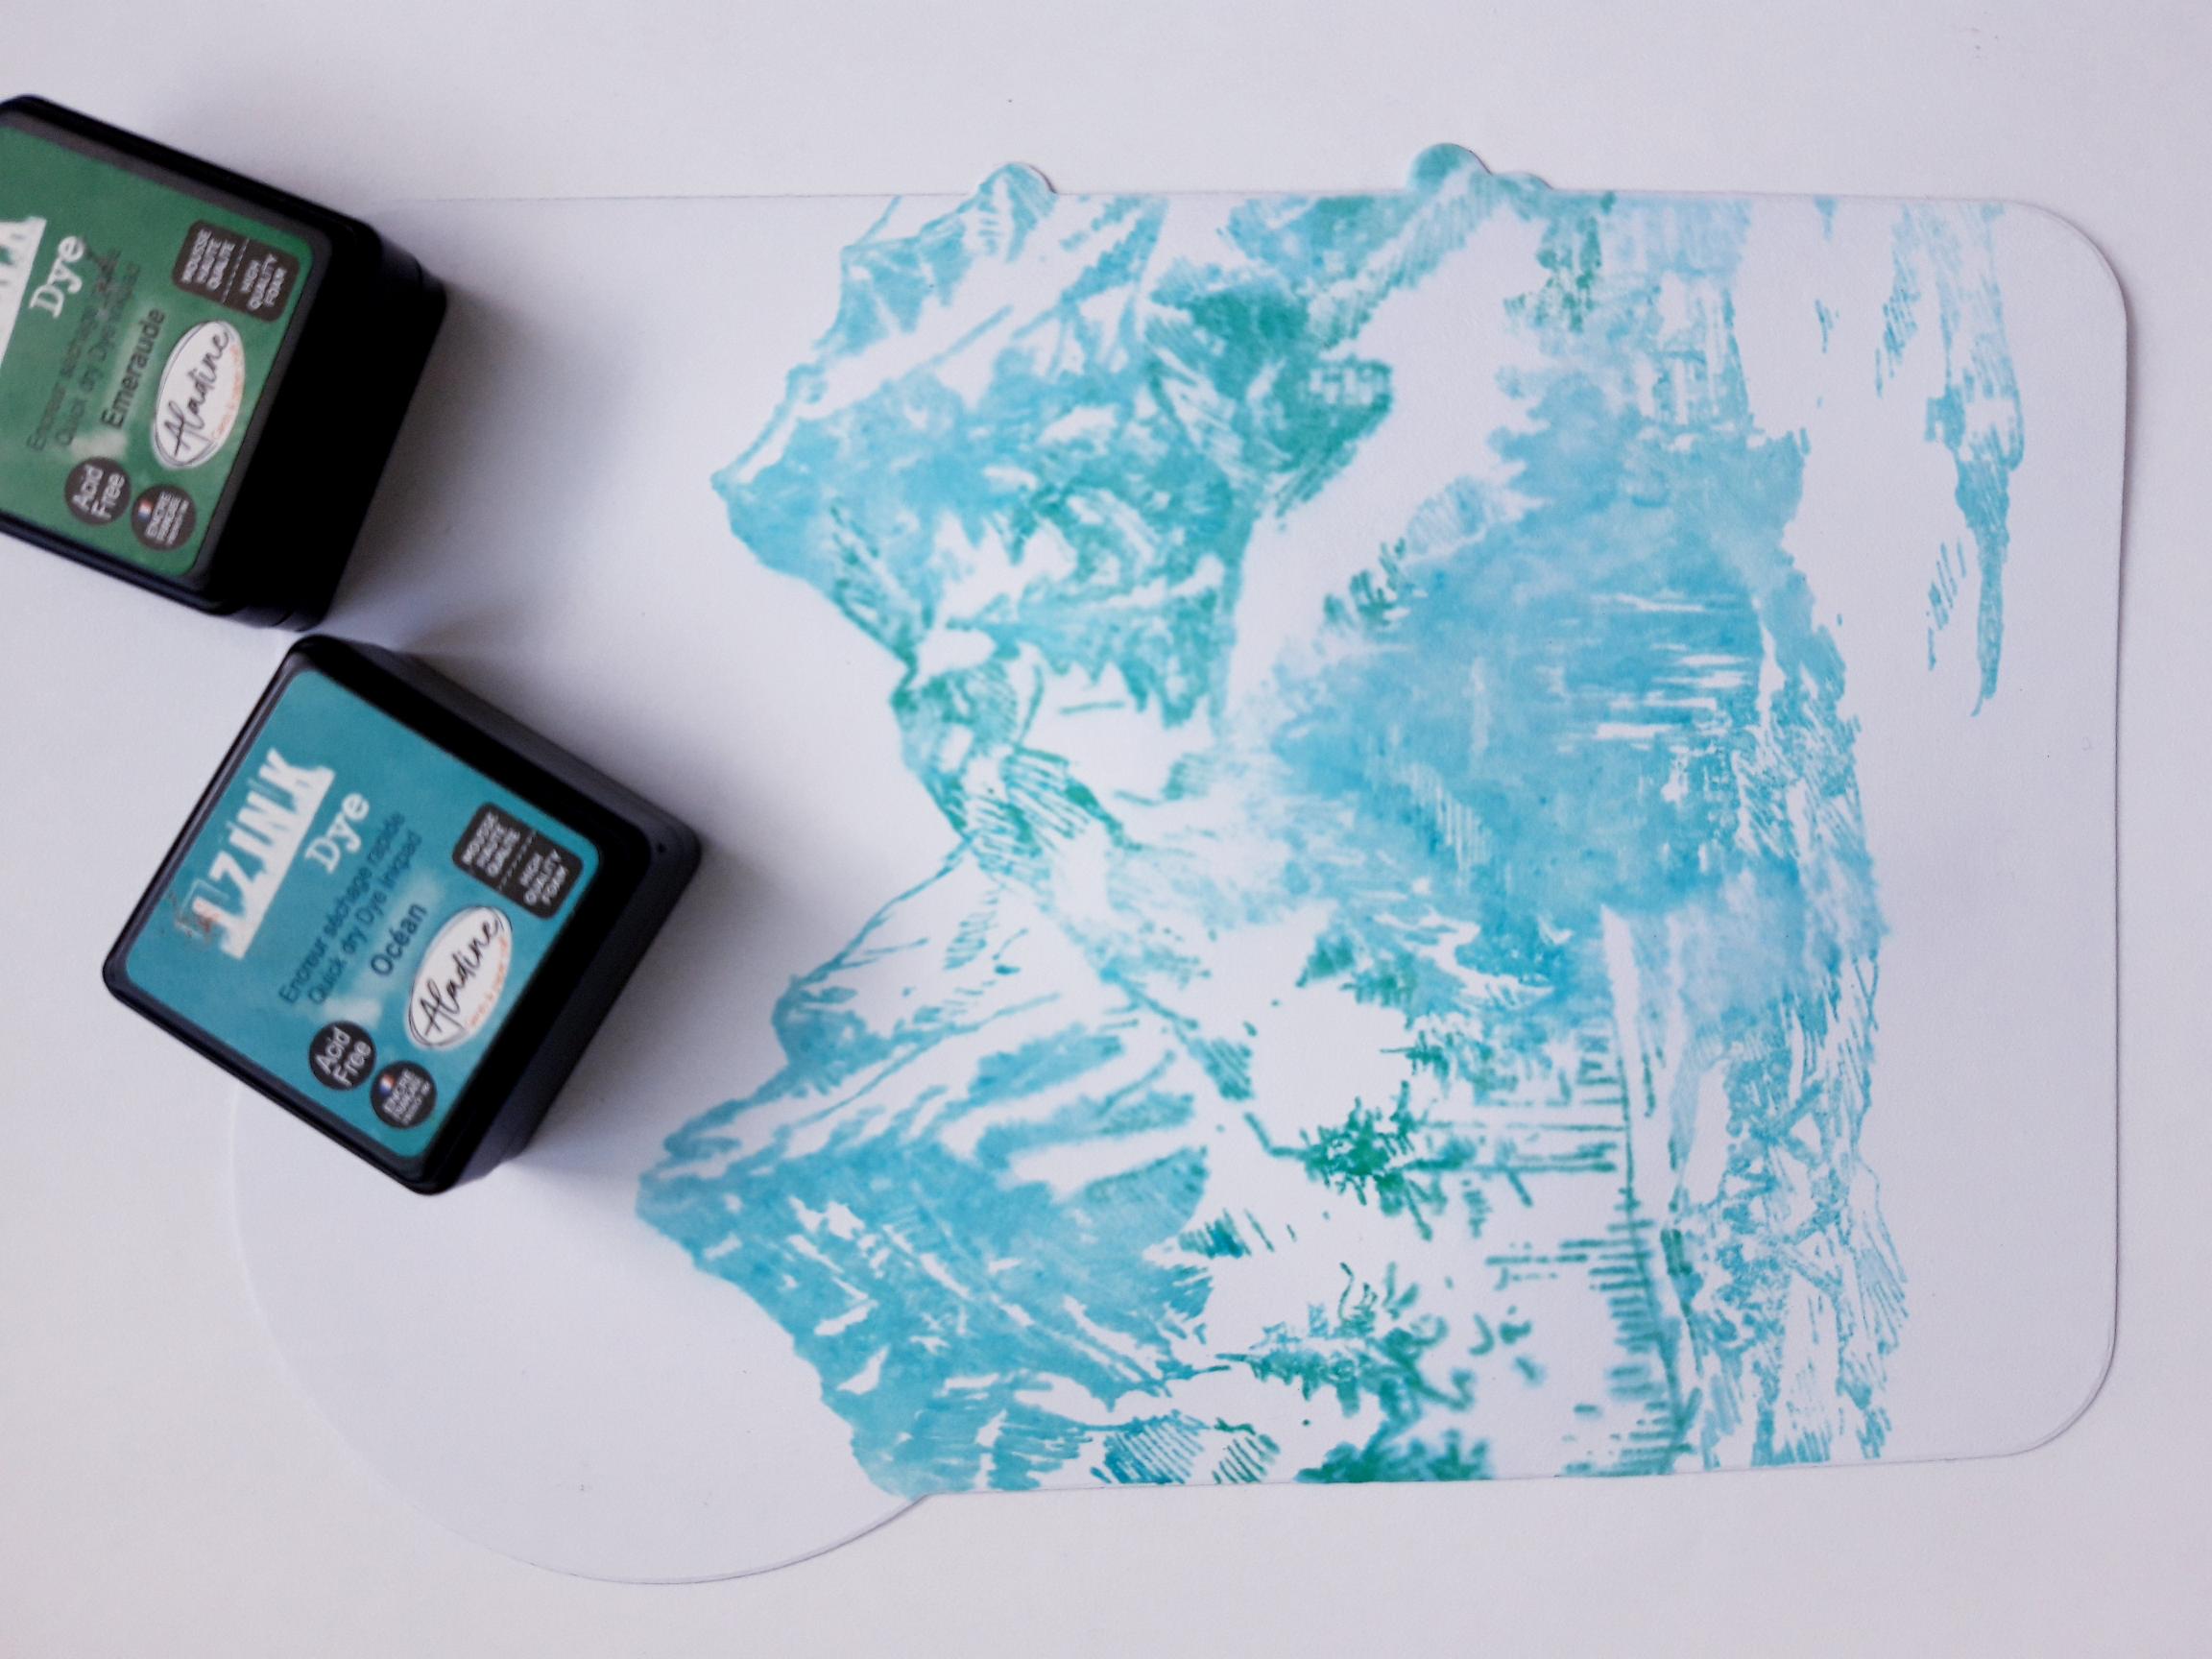
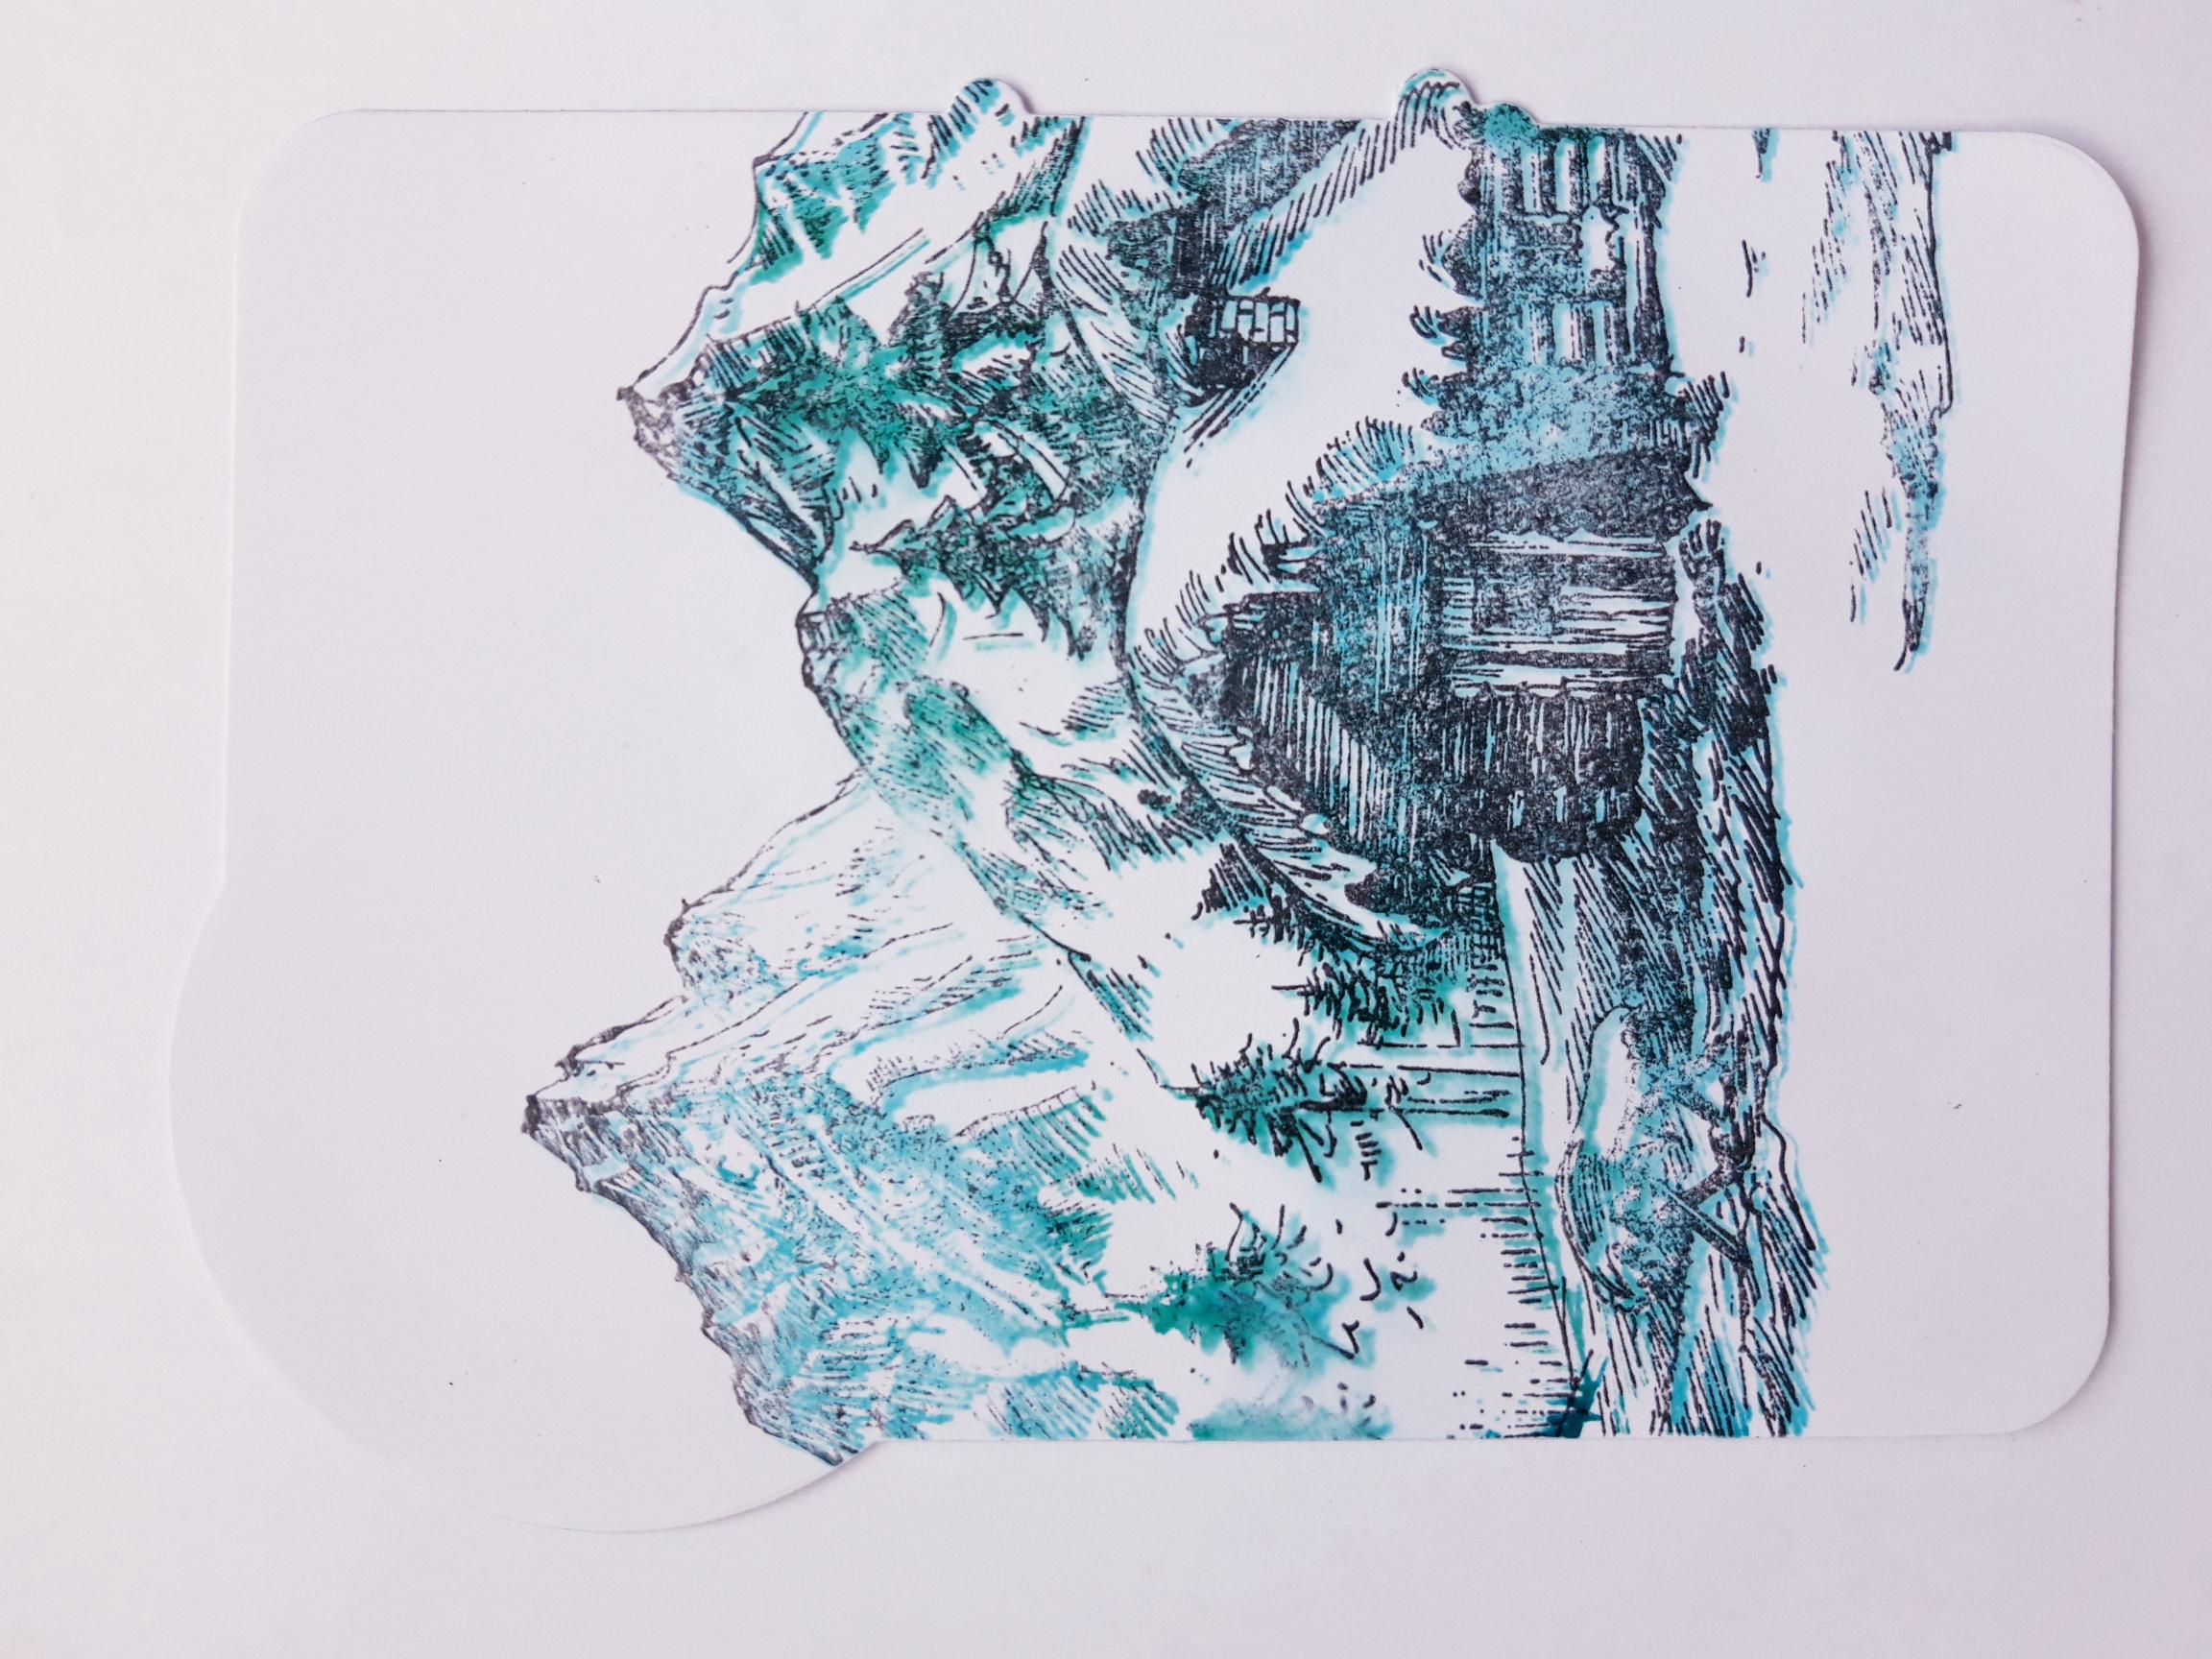
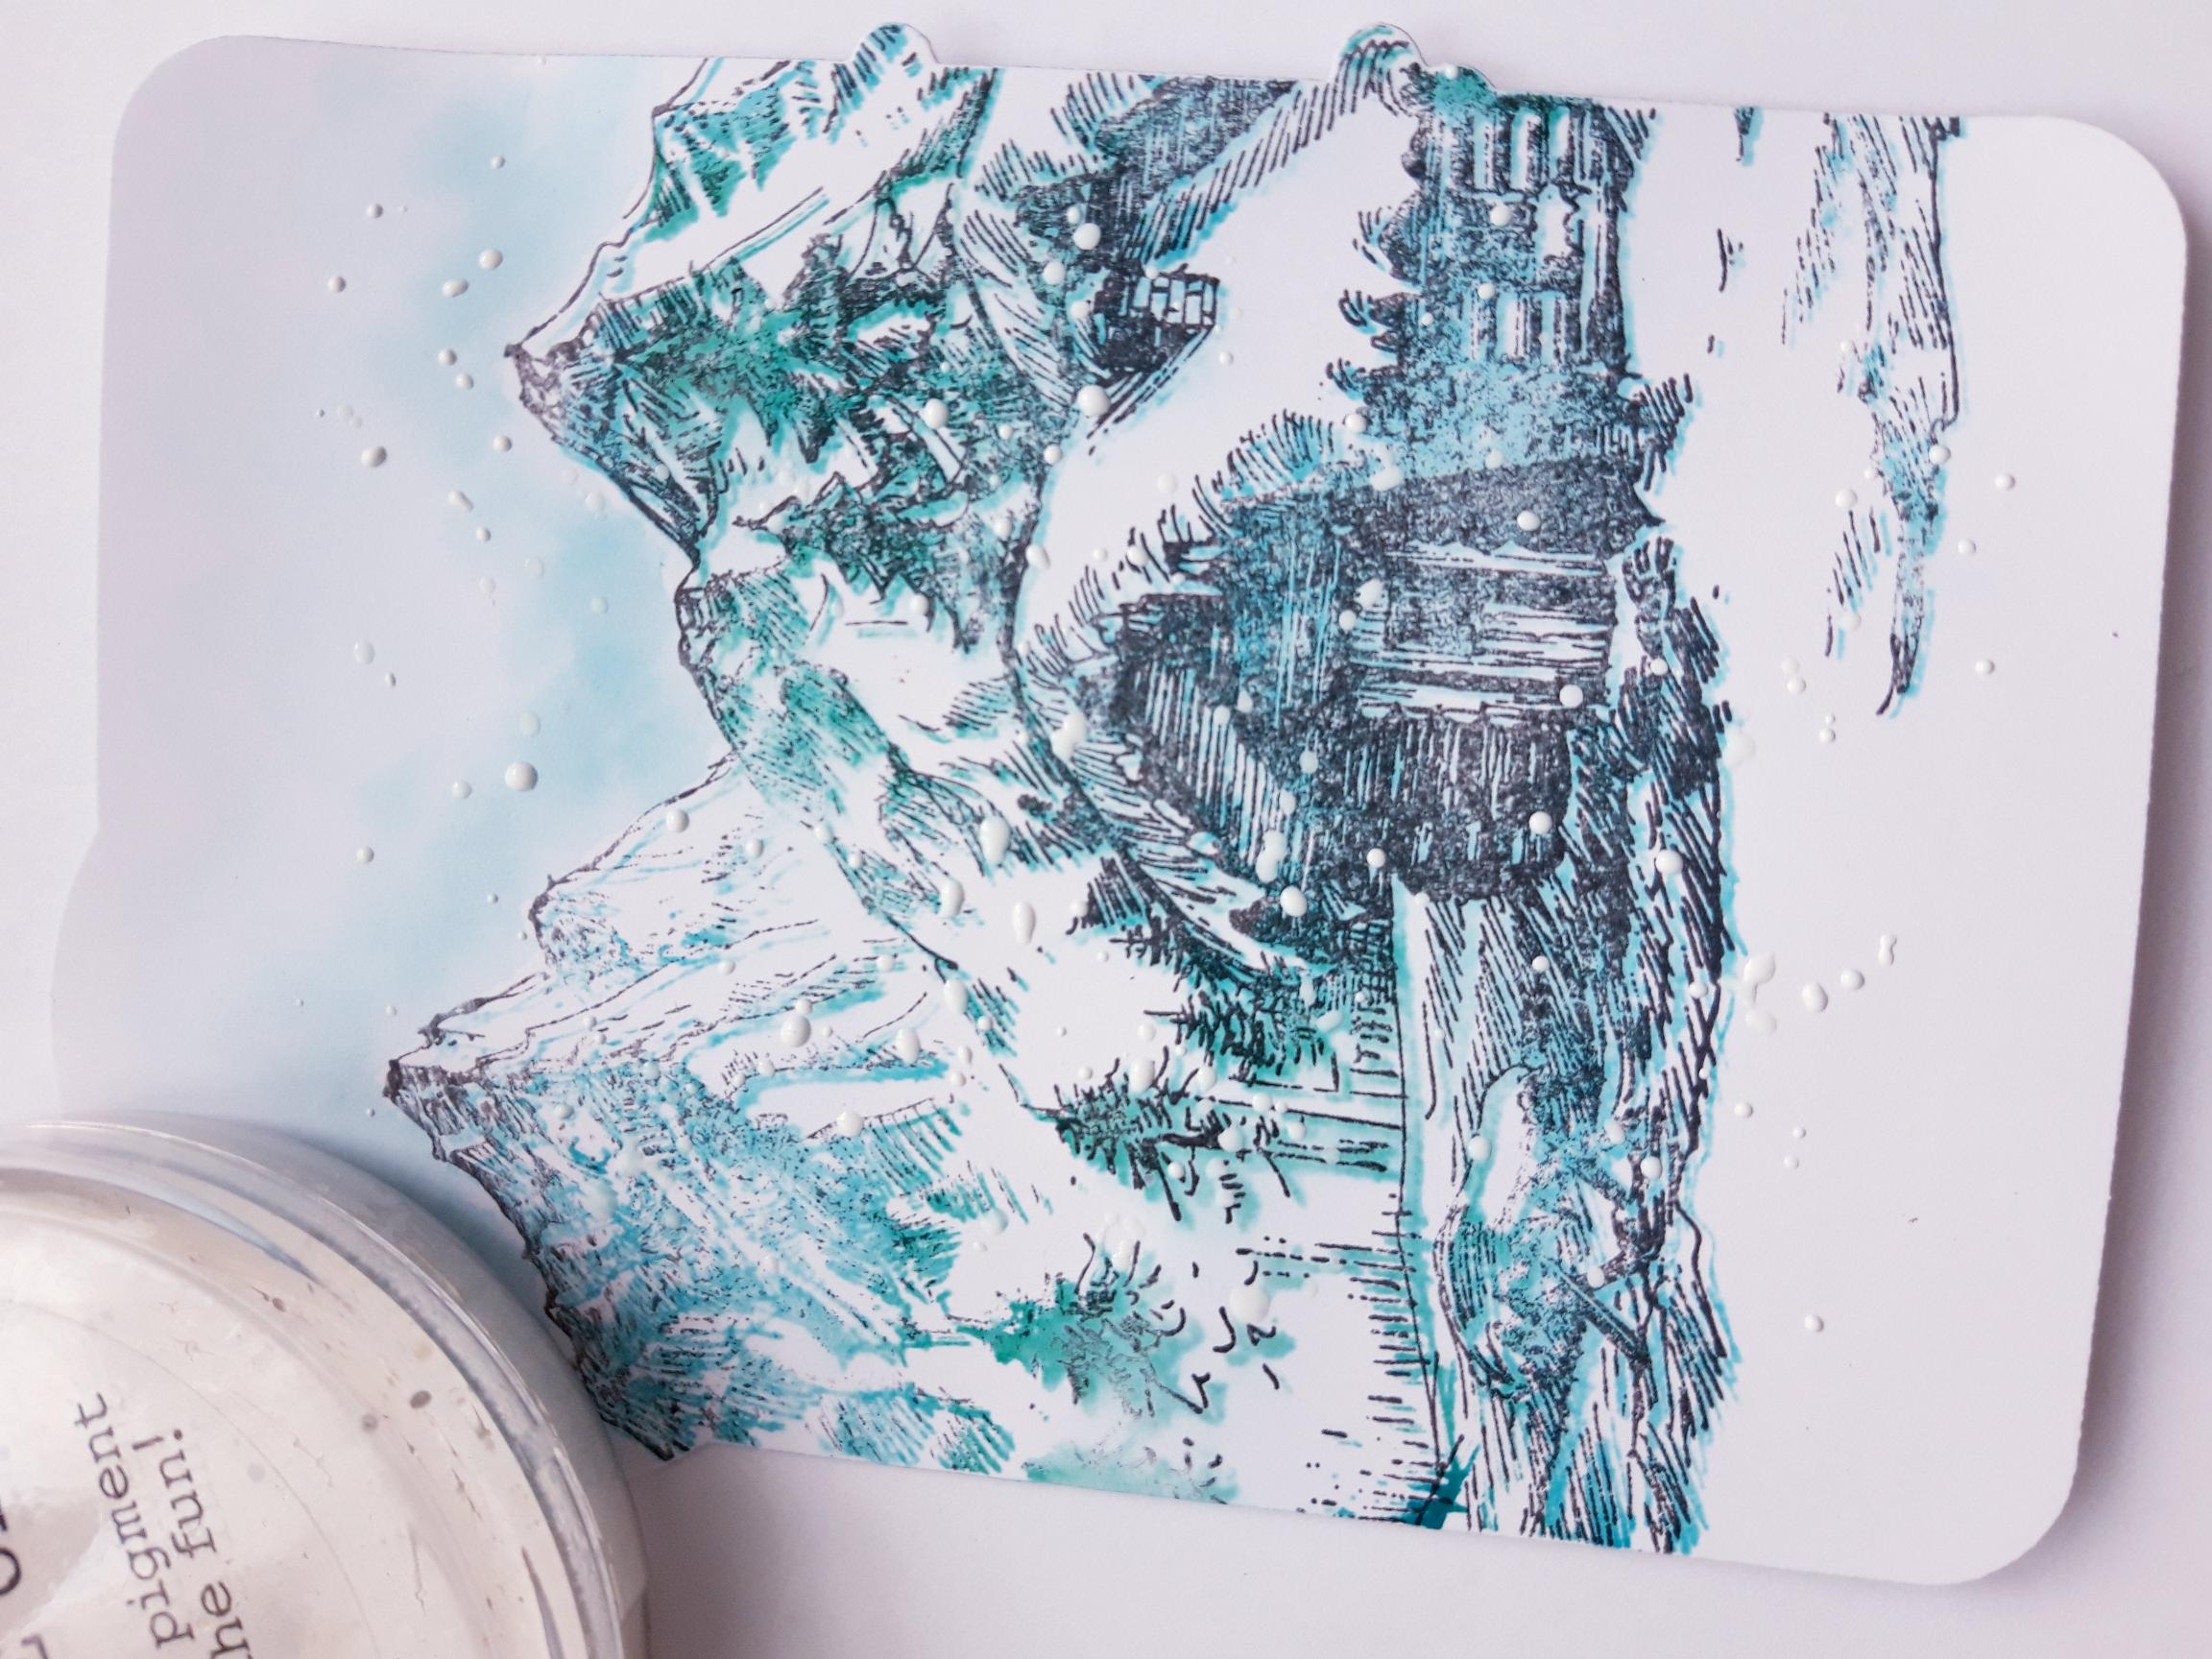
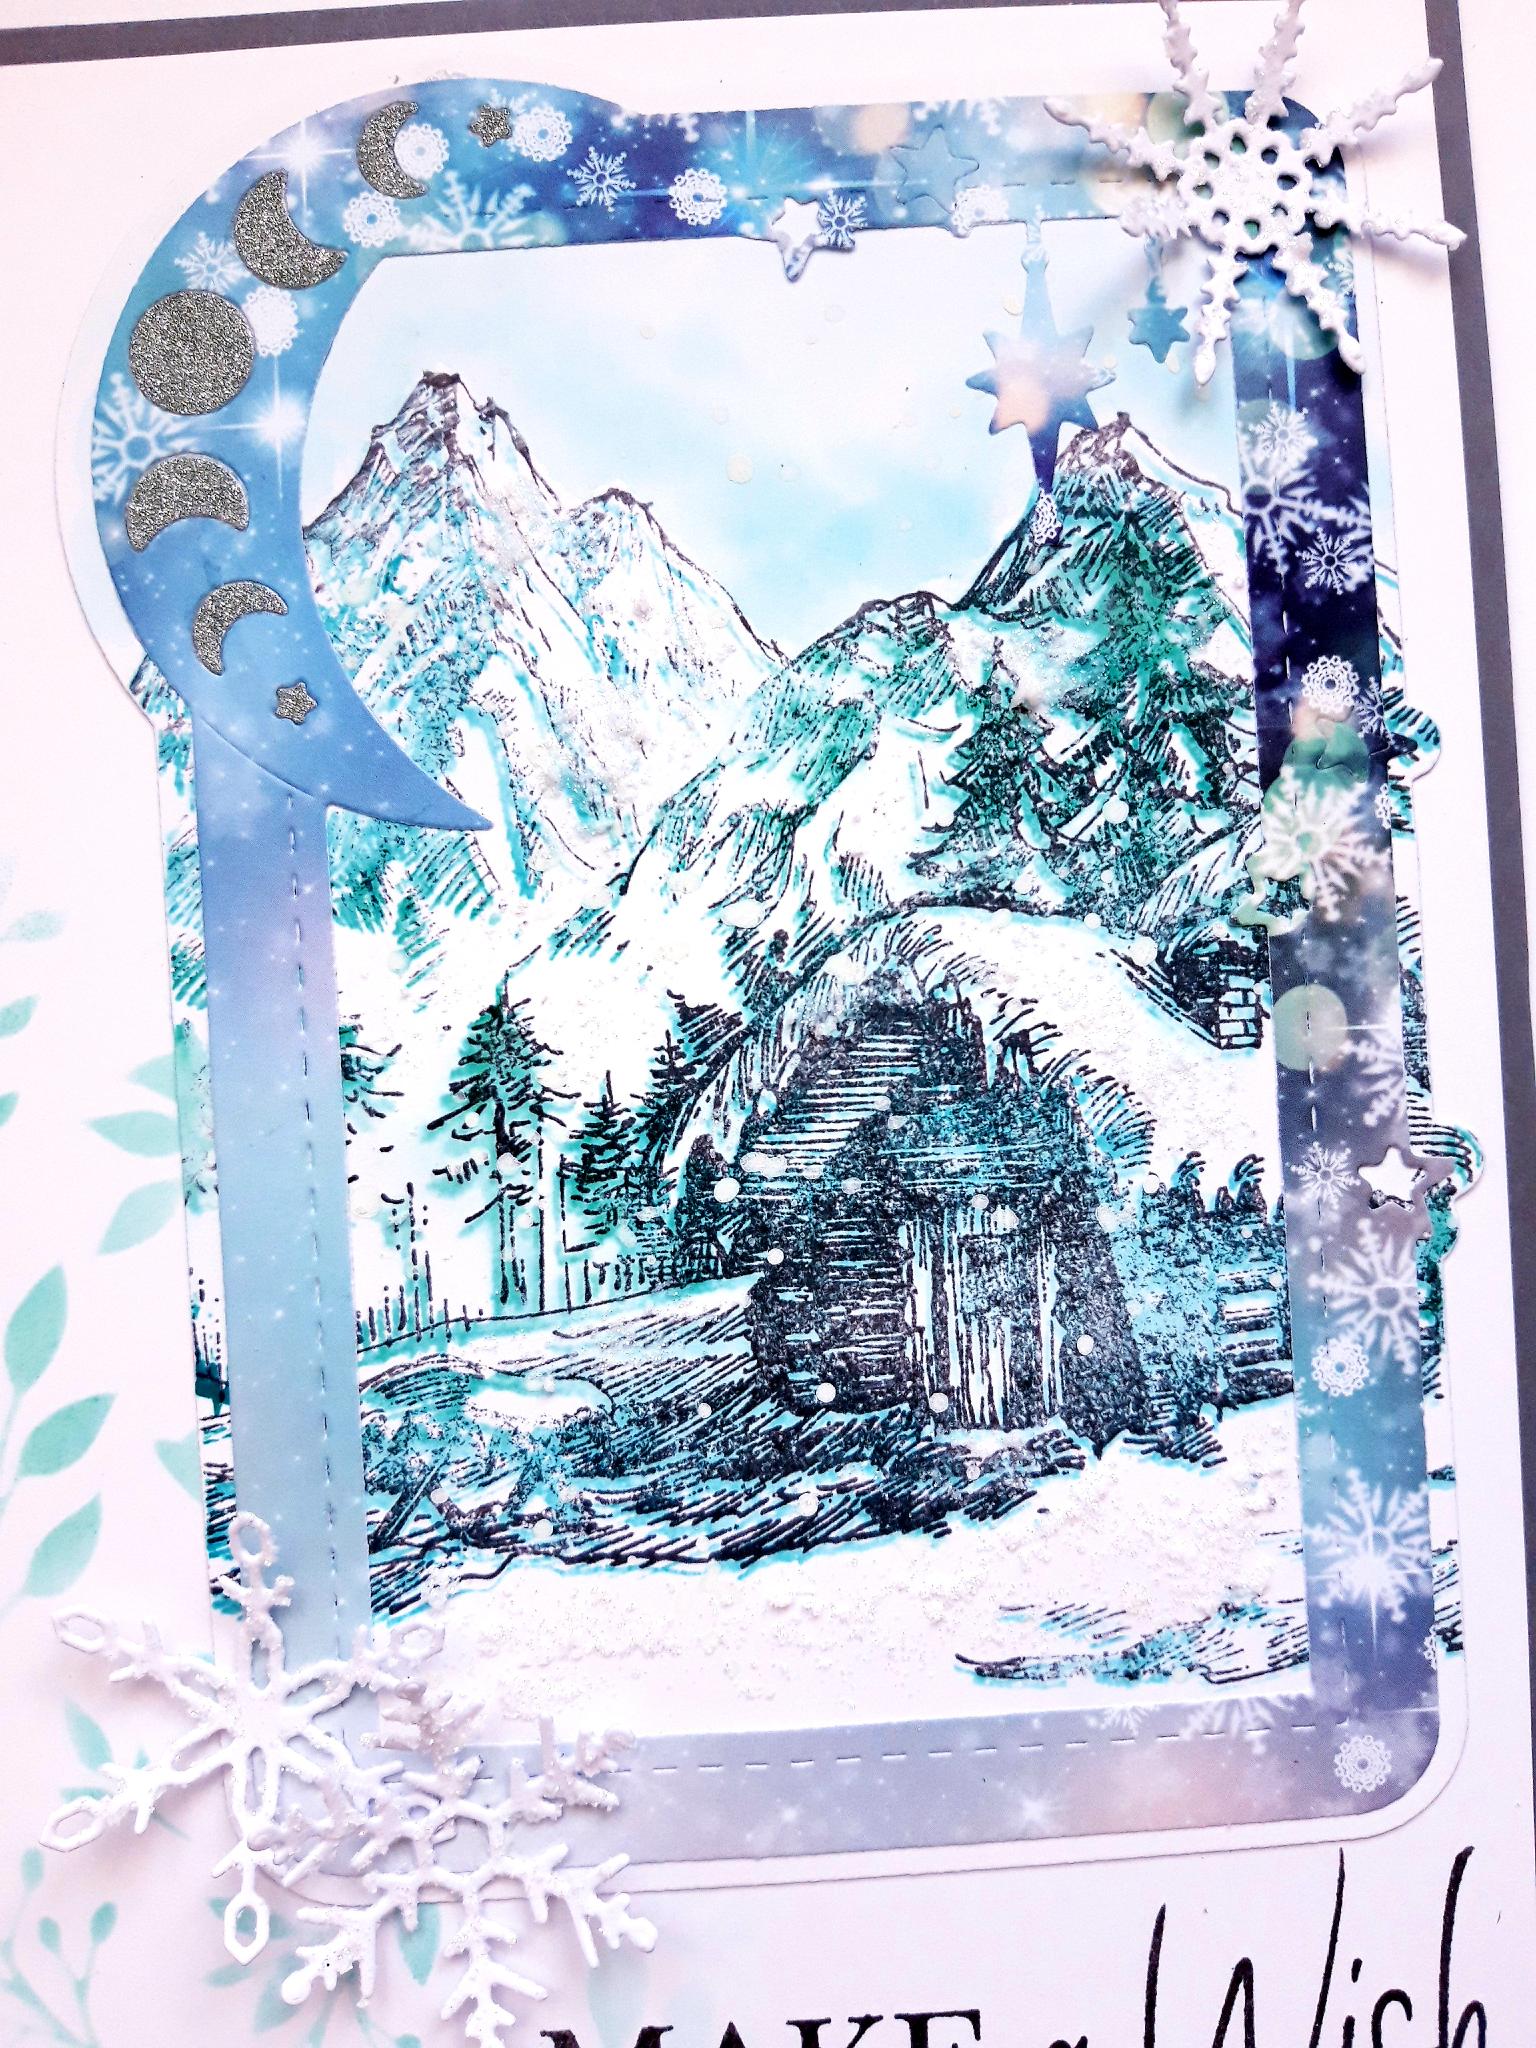
Ink up the cabin, from the Imala Cabin In the Snow Stamp collection, with the Izink Dye ink pads. Stamp on to the white die cut frame mat. You can reink and stamp again, until you are happy with the depth of colour. You can also spray the stamp, after inking it up, and before stamping it, to achieve a loose, bleed effect. DO NOT move the stamp, or your card, at this stage..... but if you used water, dry off your stamped image in situ. |
|
Ink up the stamp again, with the Smoky Gray Versafine, and stamp back over your image. This adds definition and depth to your artwork, especially if you used the bleed technique in the previous step. |
|
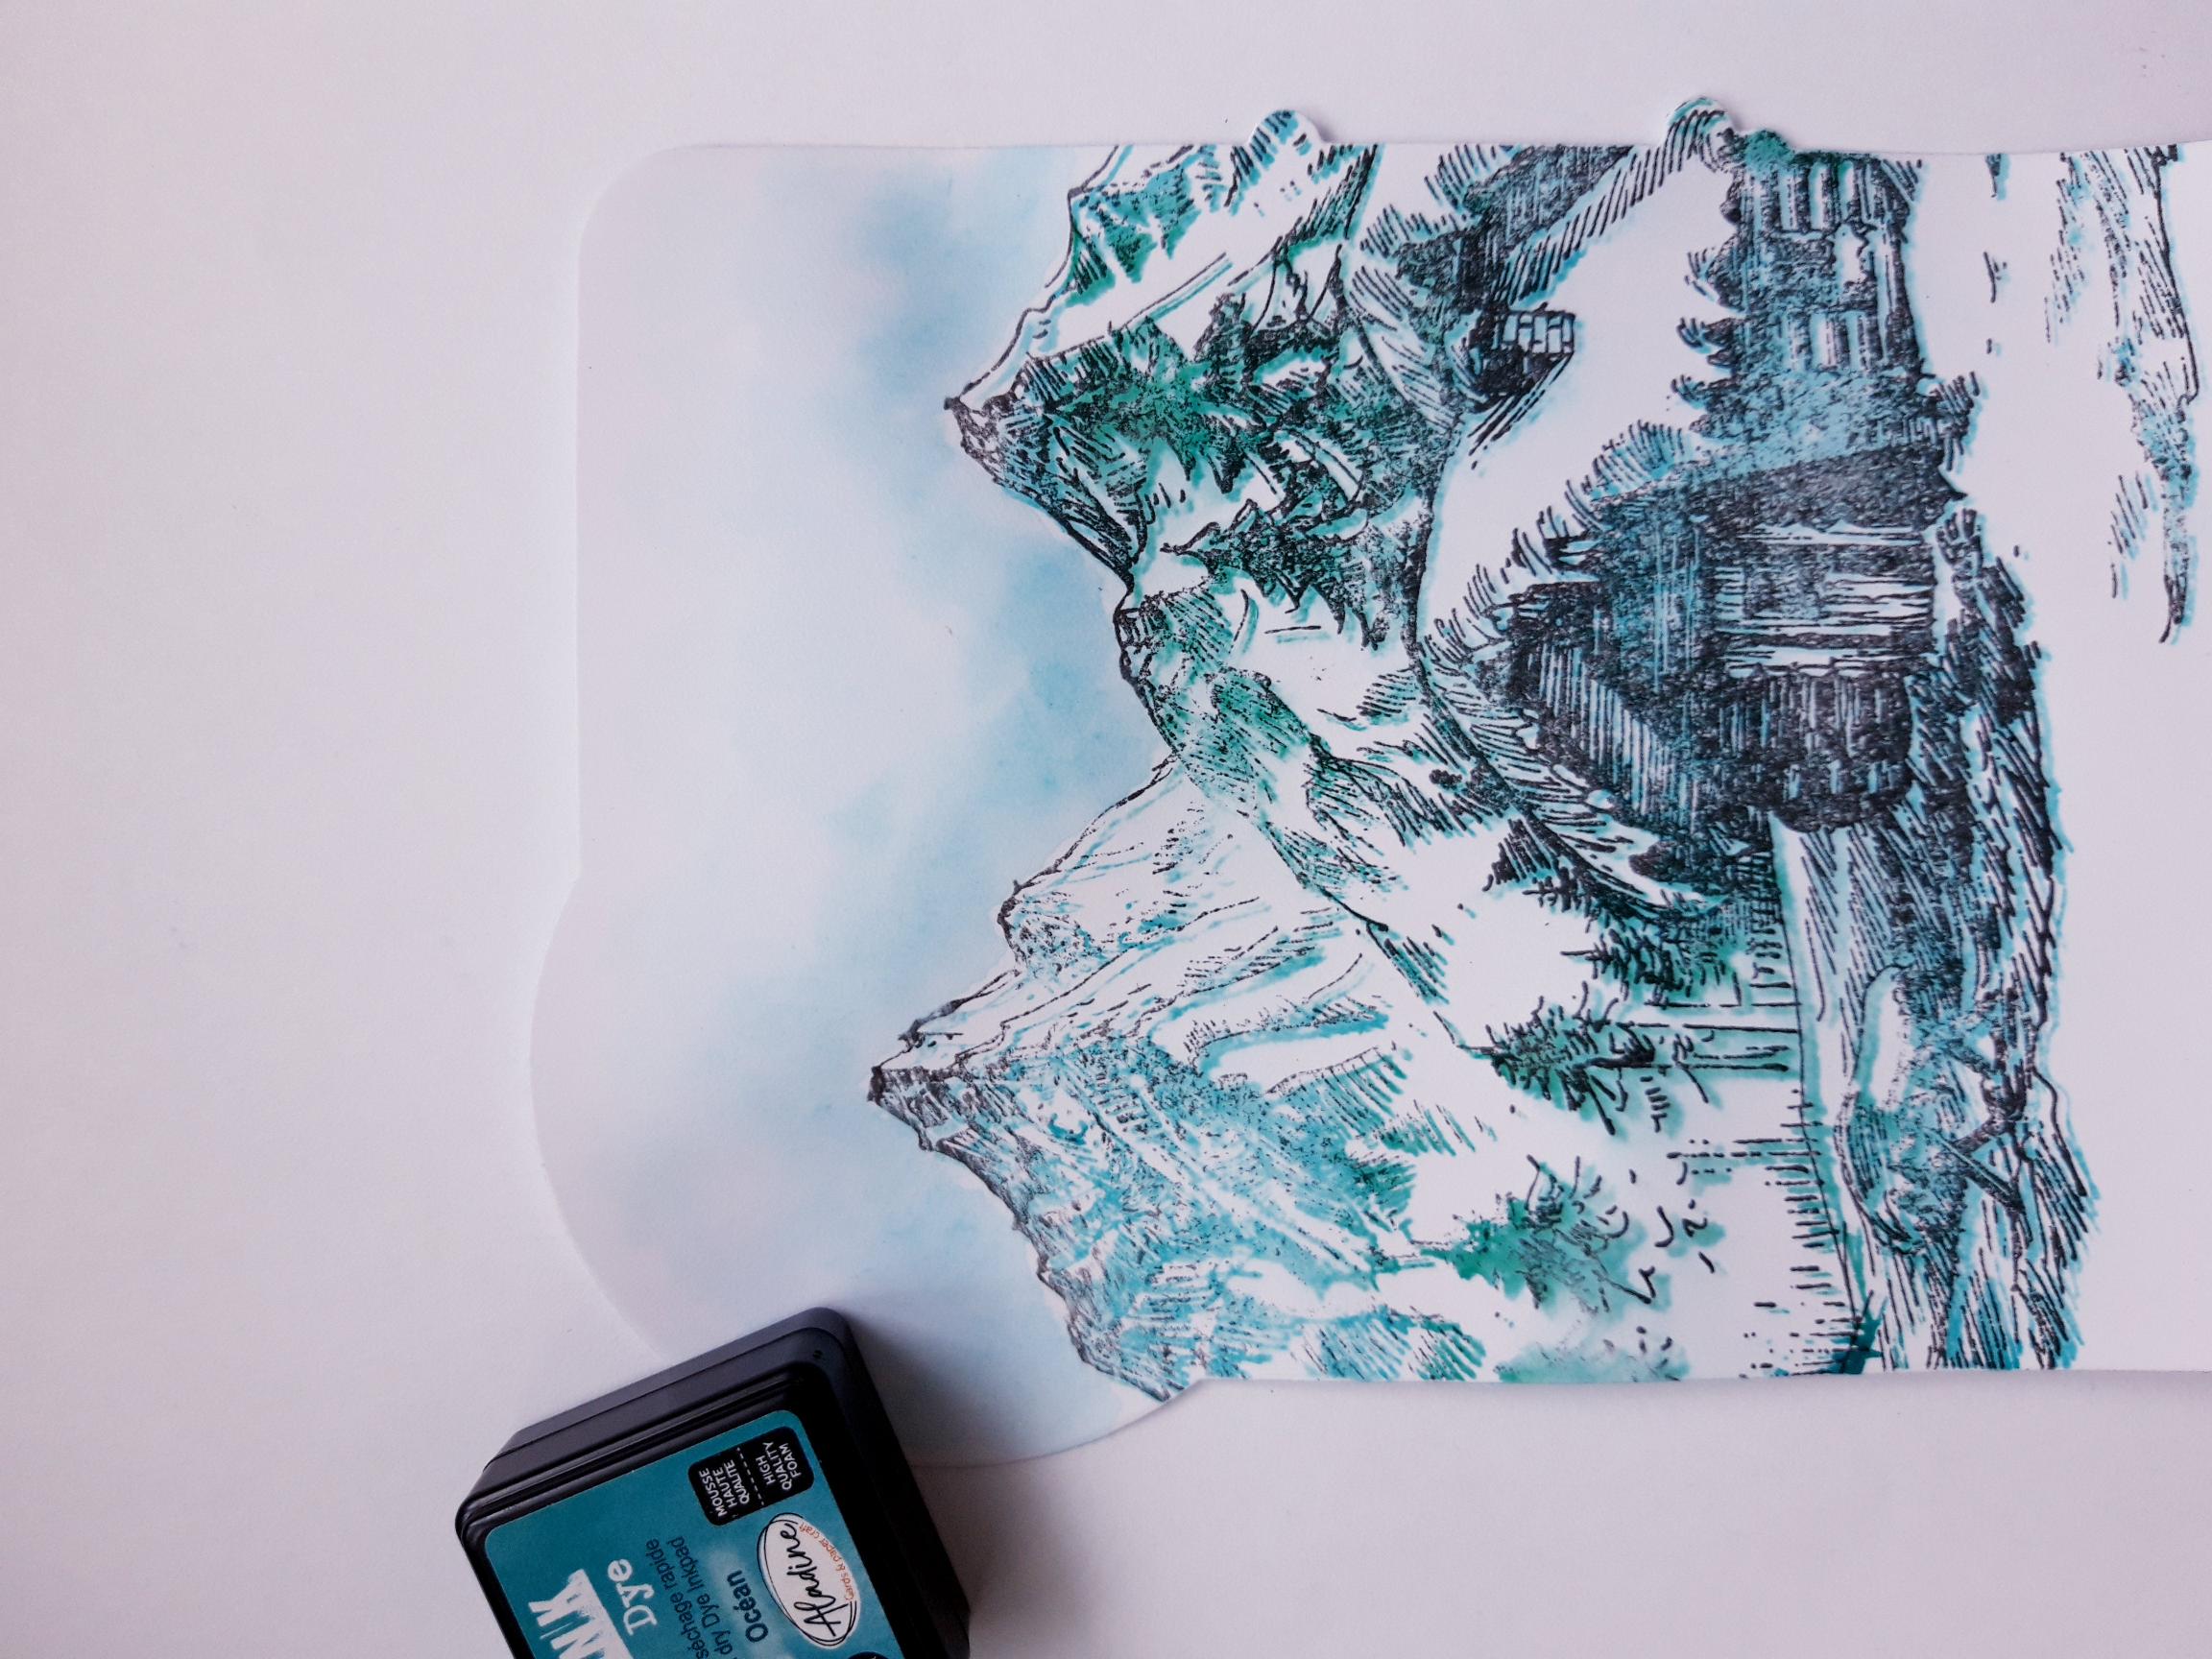
Apply the Izink Ocean ink to your craft or glass mat. Add water and paint in the sky. |
|
Spray water on to your Confetti Paint, and add splats to your artwork. As few, or as many, as you like. I added lots!!!! Allow to dry naturally, if possible, as this allows the Confetti Ink to have a more raised, textured effect. |
|
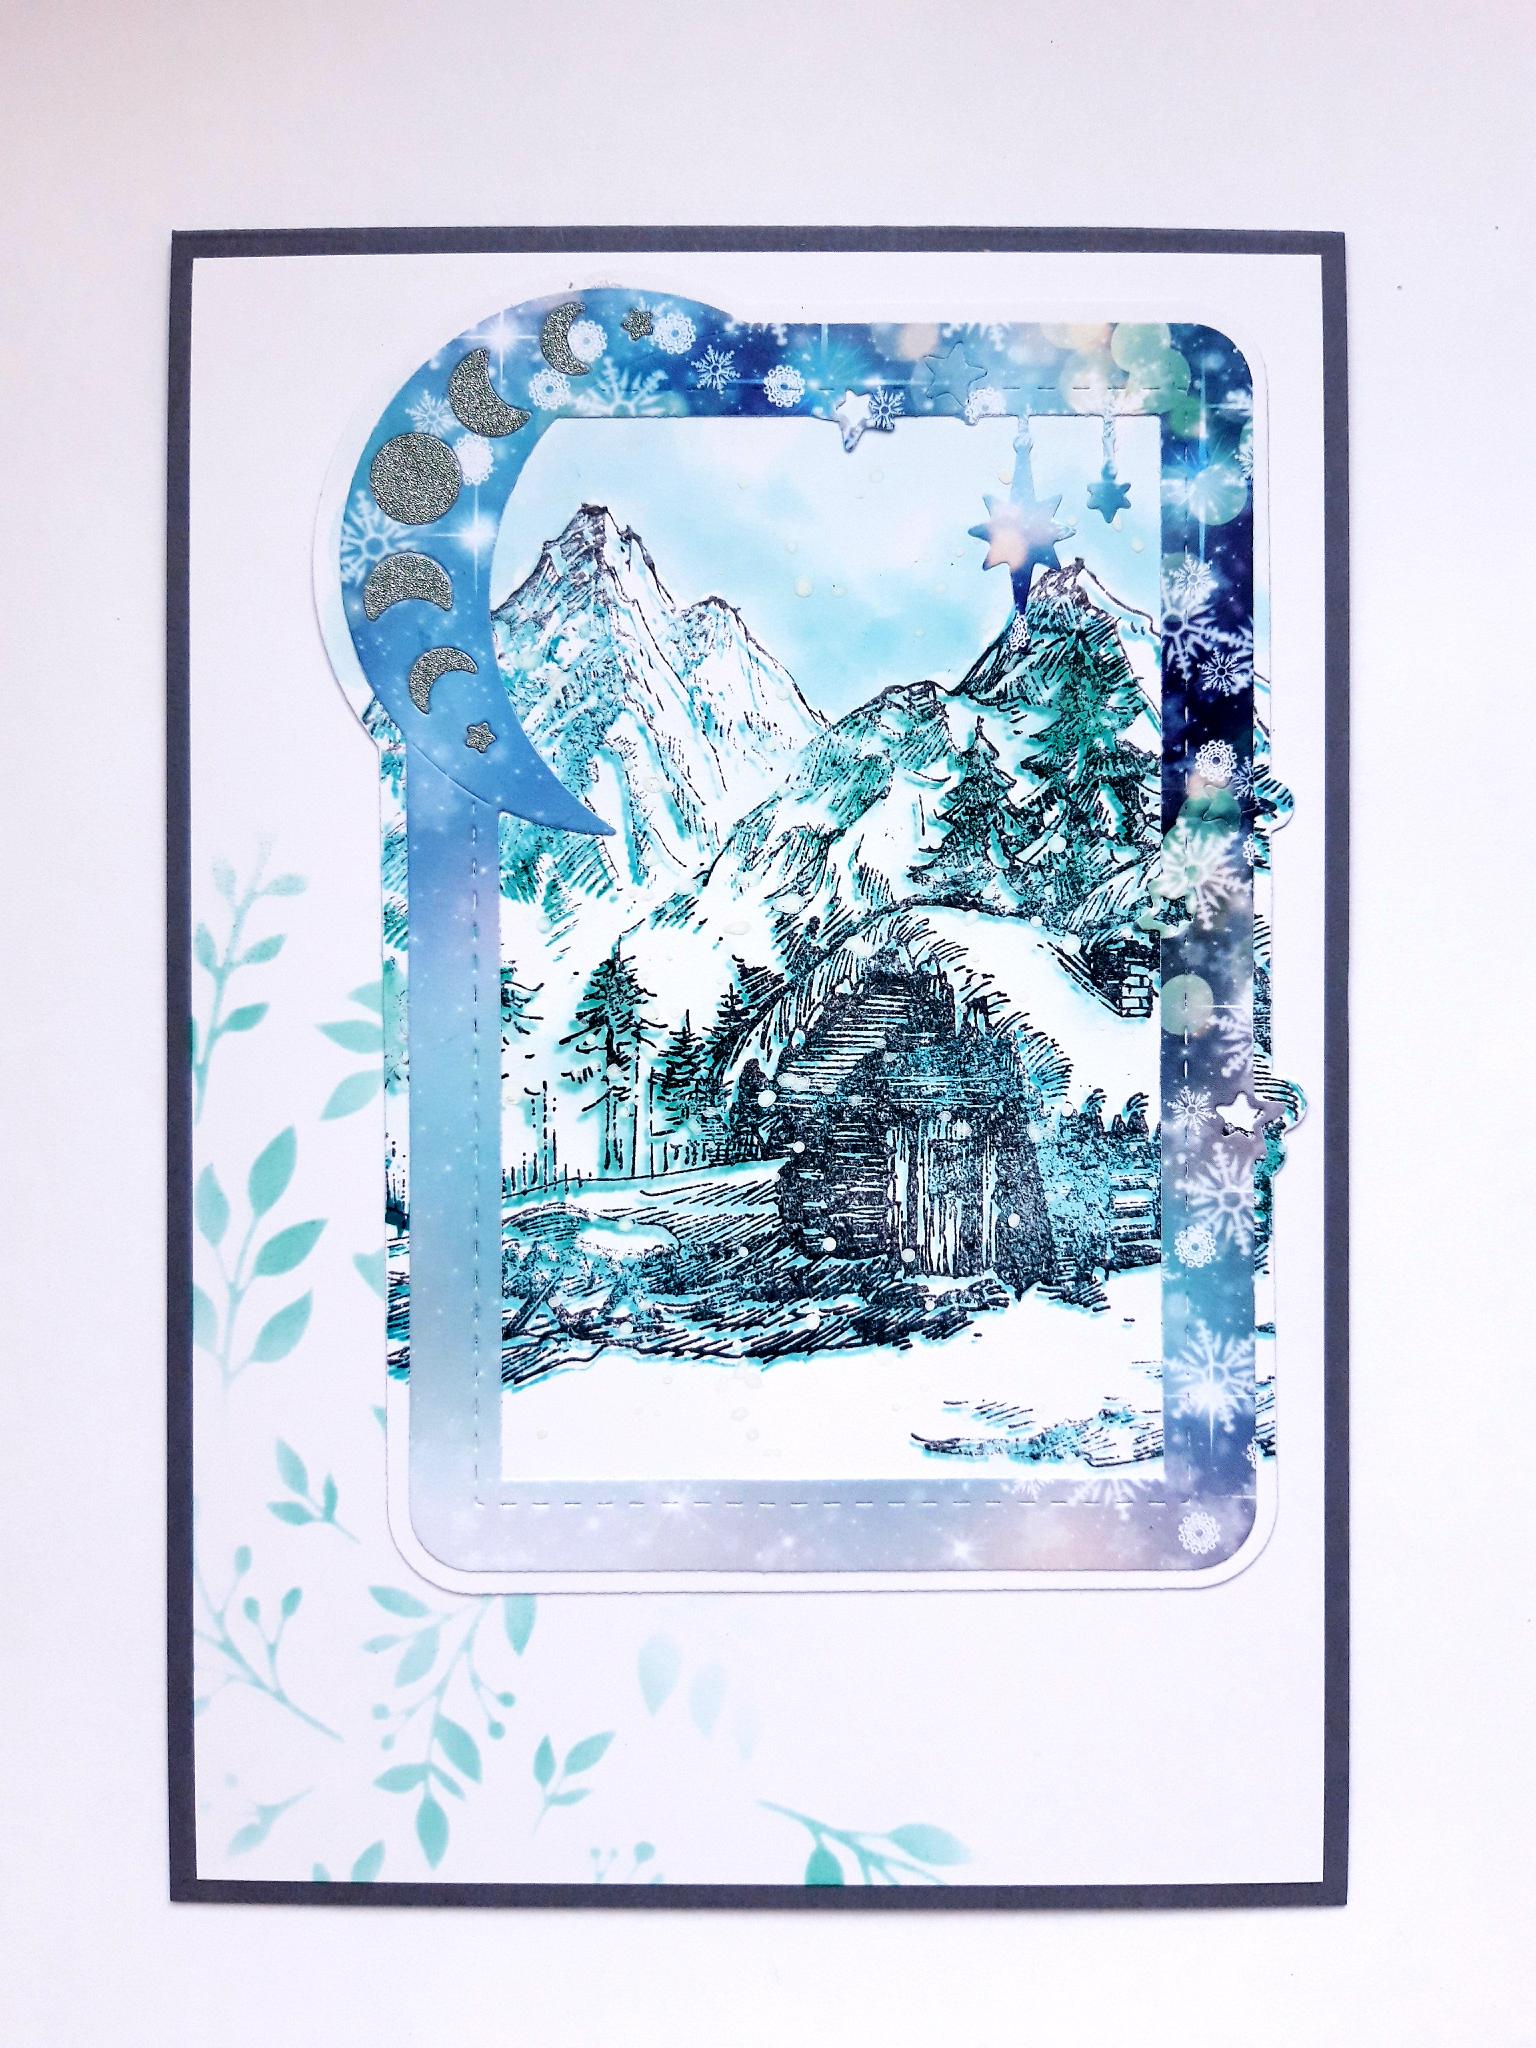
Once your artwork is completely dry, adhere your decorative paper, die cut frame, on to your painted artwork. |

|
Using the "bits" that you set aside earlier, you can now paper piece back in as required, using either the decorative paper and/or the glitter elements. I chose to use a combination of both. Set this to one side. |
|
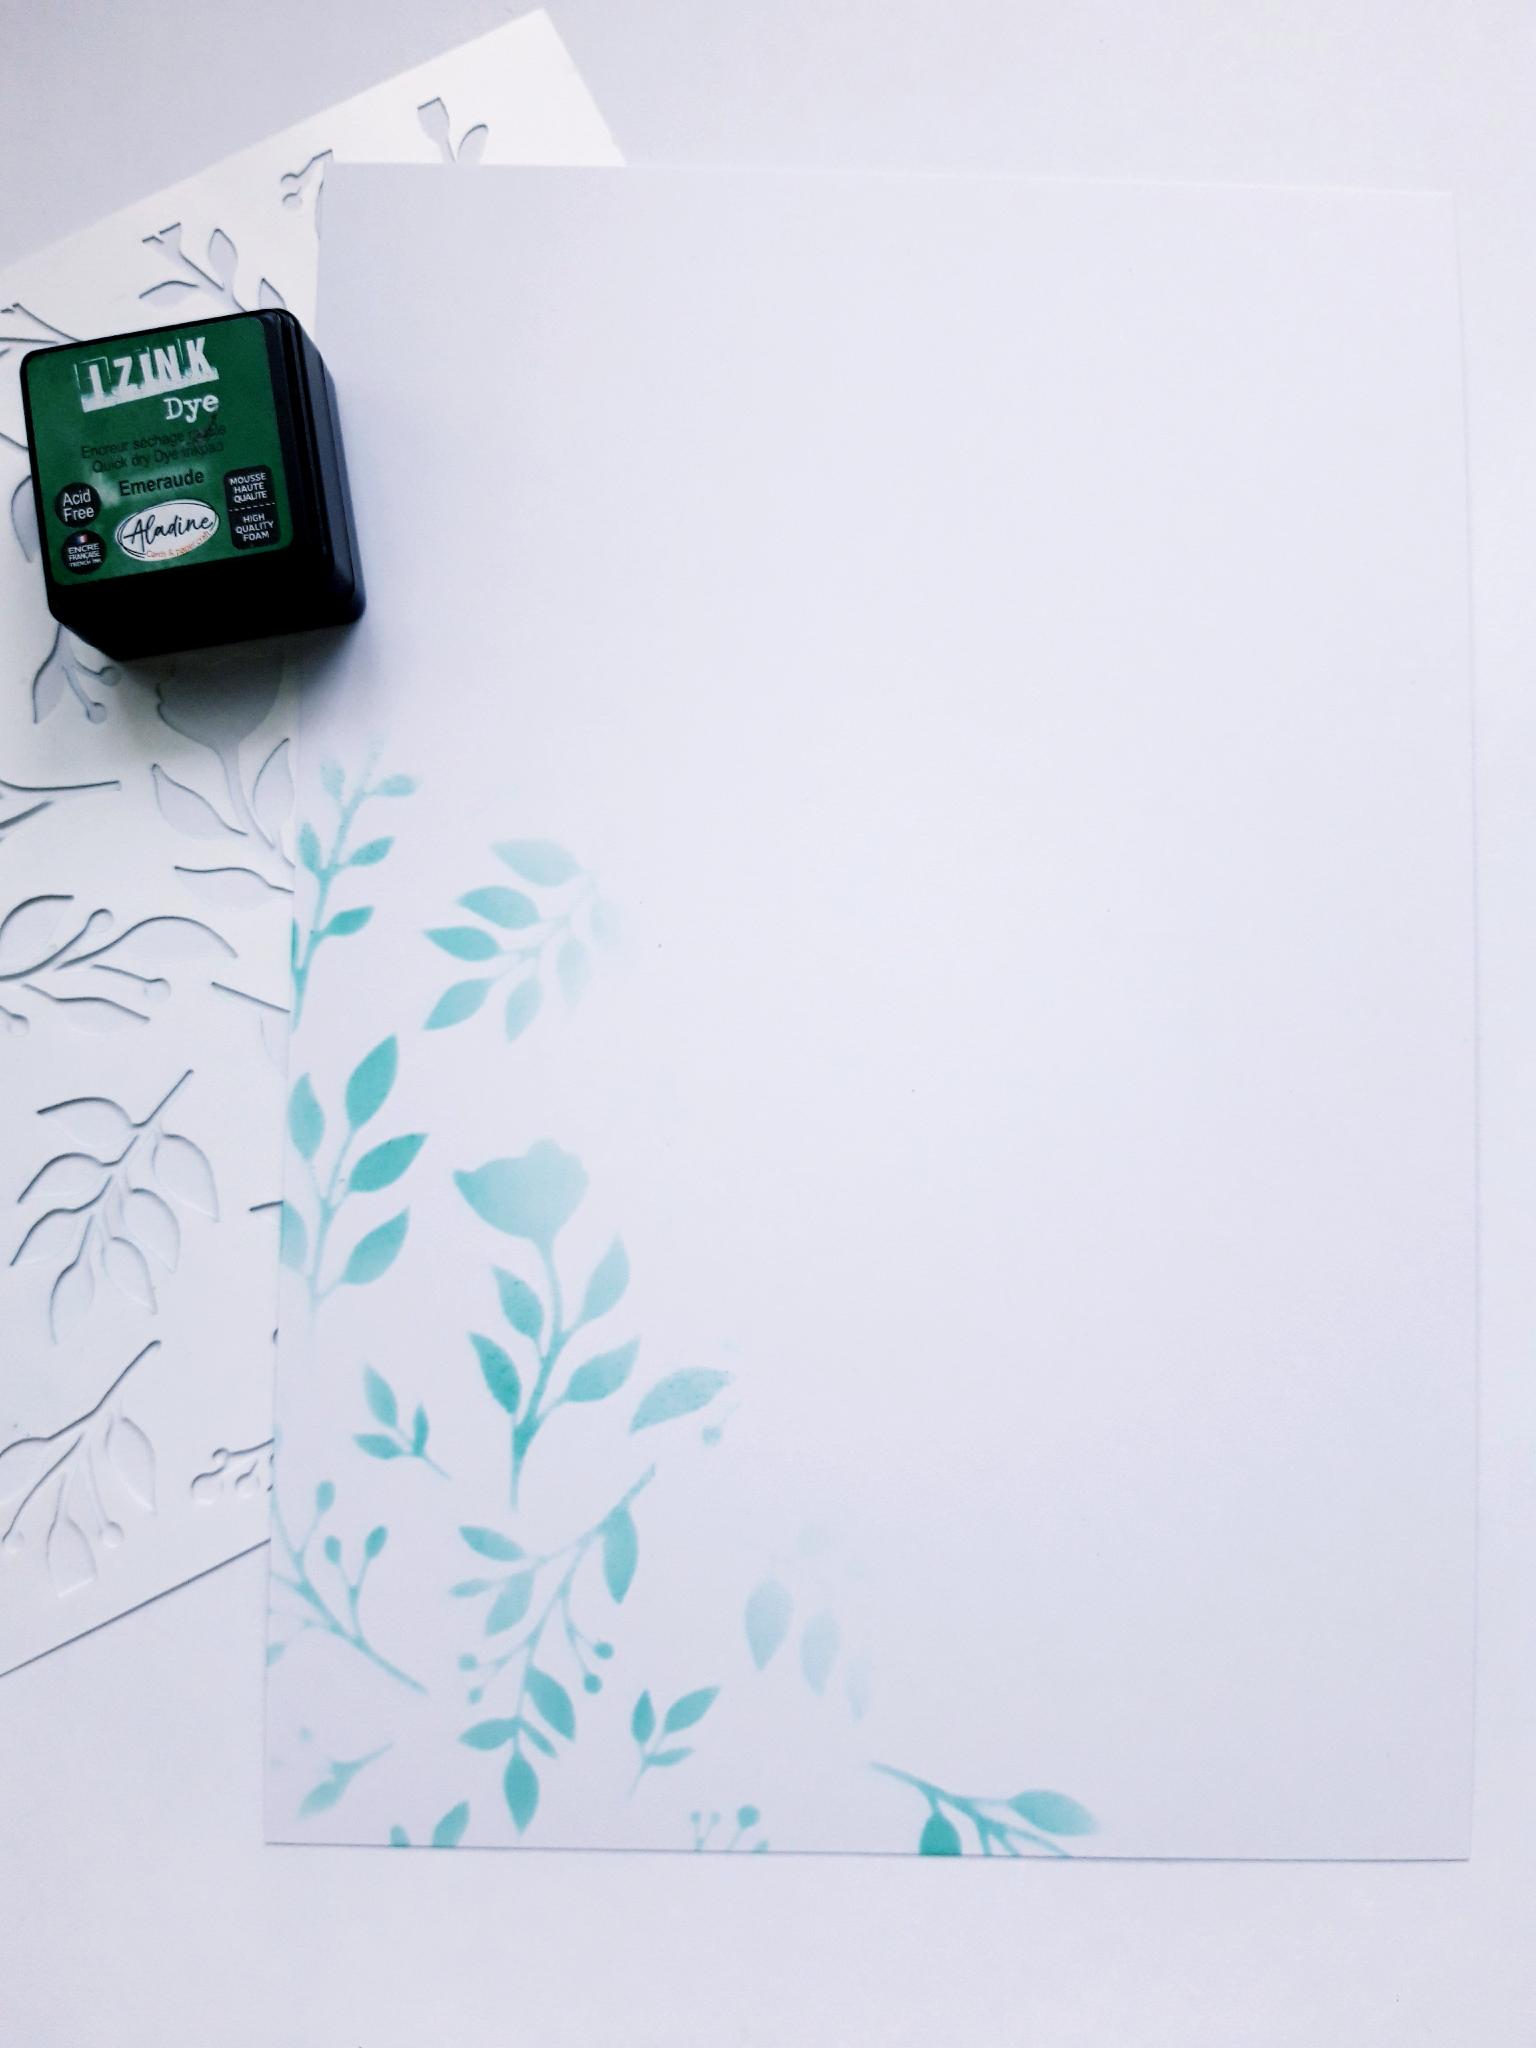
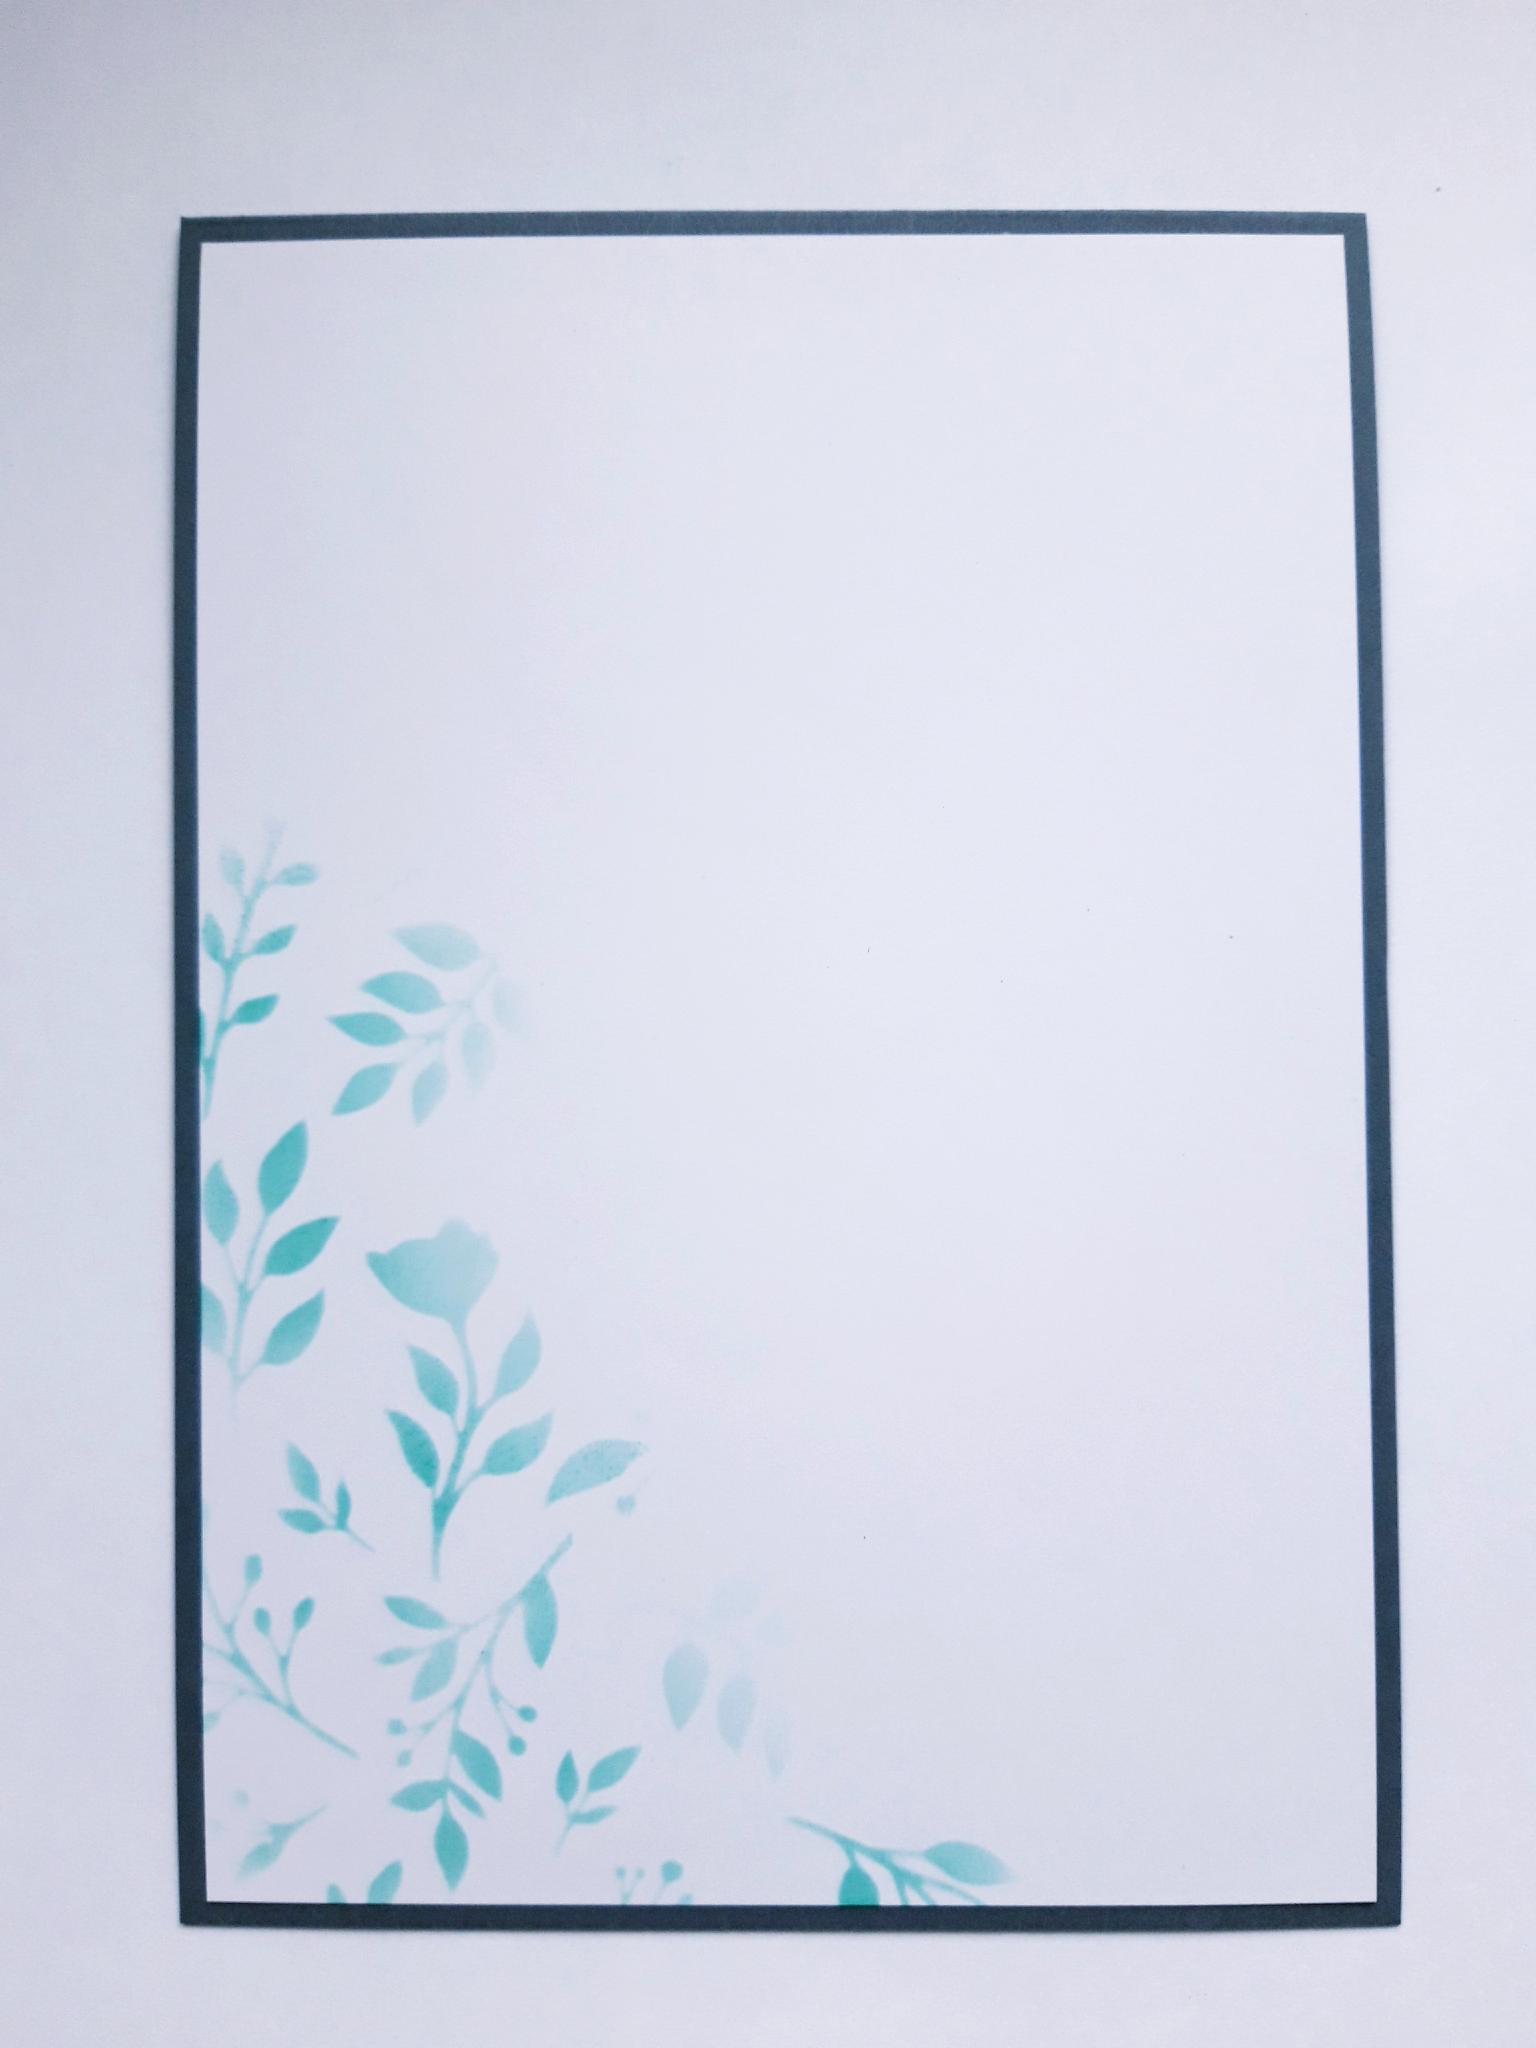
Place the Floral Trimmings stencil over the white card (8 x 5 1/2"), so it covers the bottom, left hand corner. Blend the Izink Emeraude through the stencil, to create a beautiful stencilled corner. |
|
Adhere this on to the front of your top folding, grey card blank. |
|
Adhere your framed artwork in the top right corner of your card. You can use wet glue, or foam pads, for added dimension. |
|
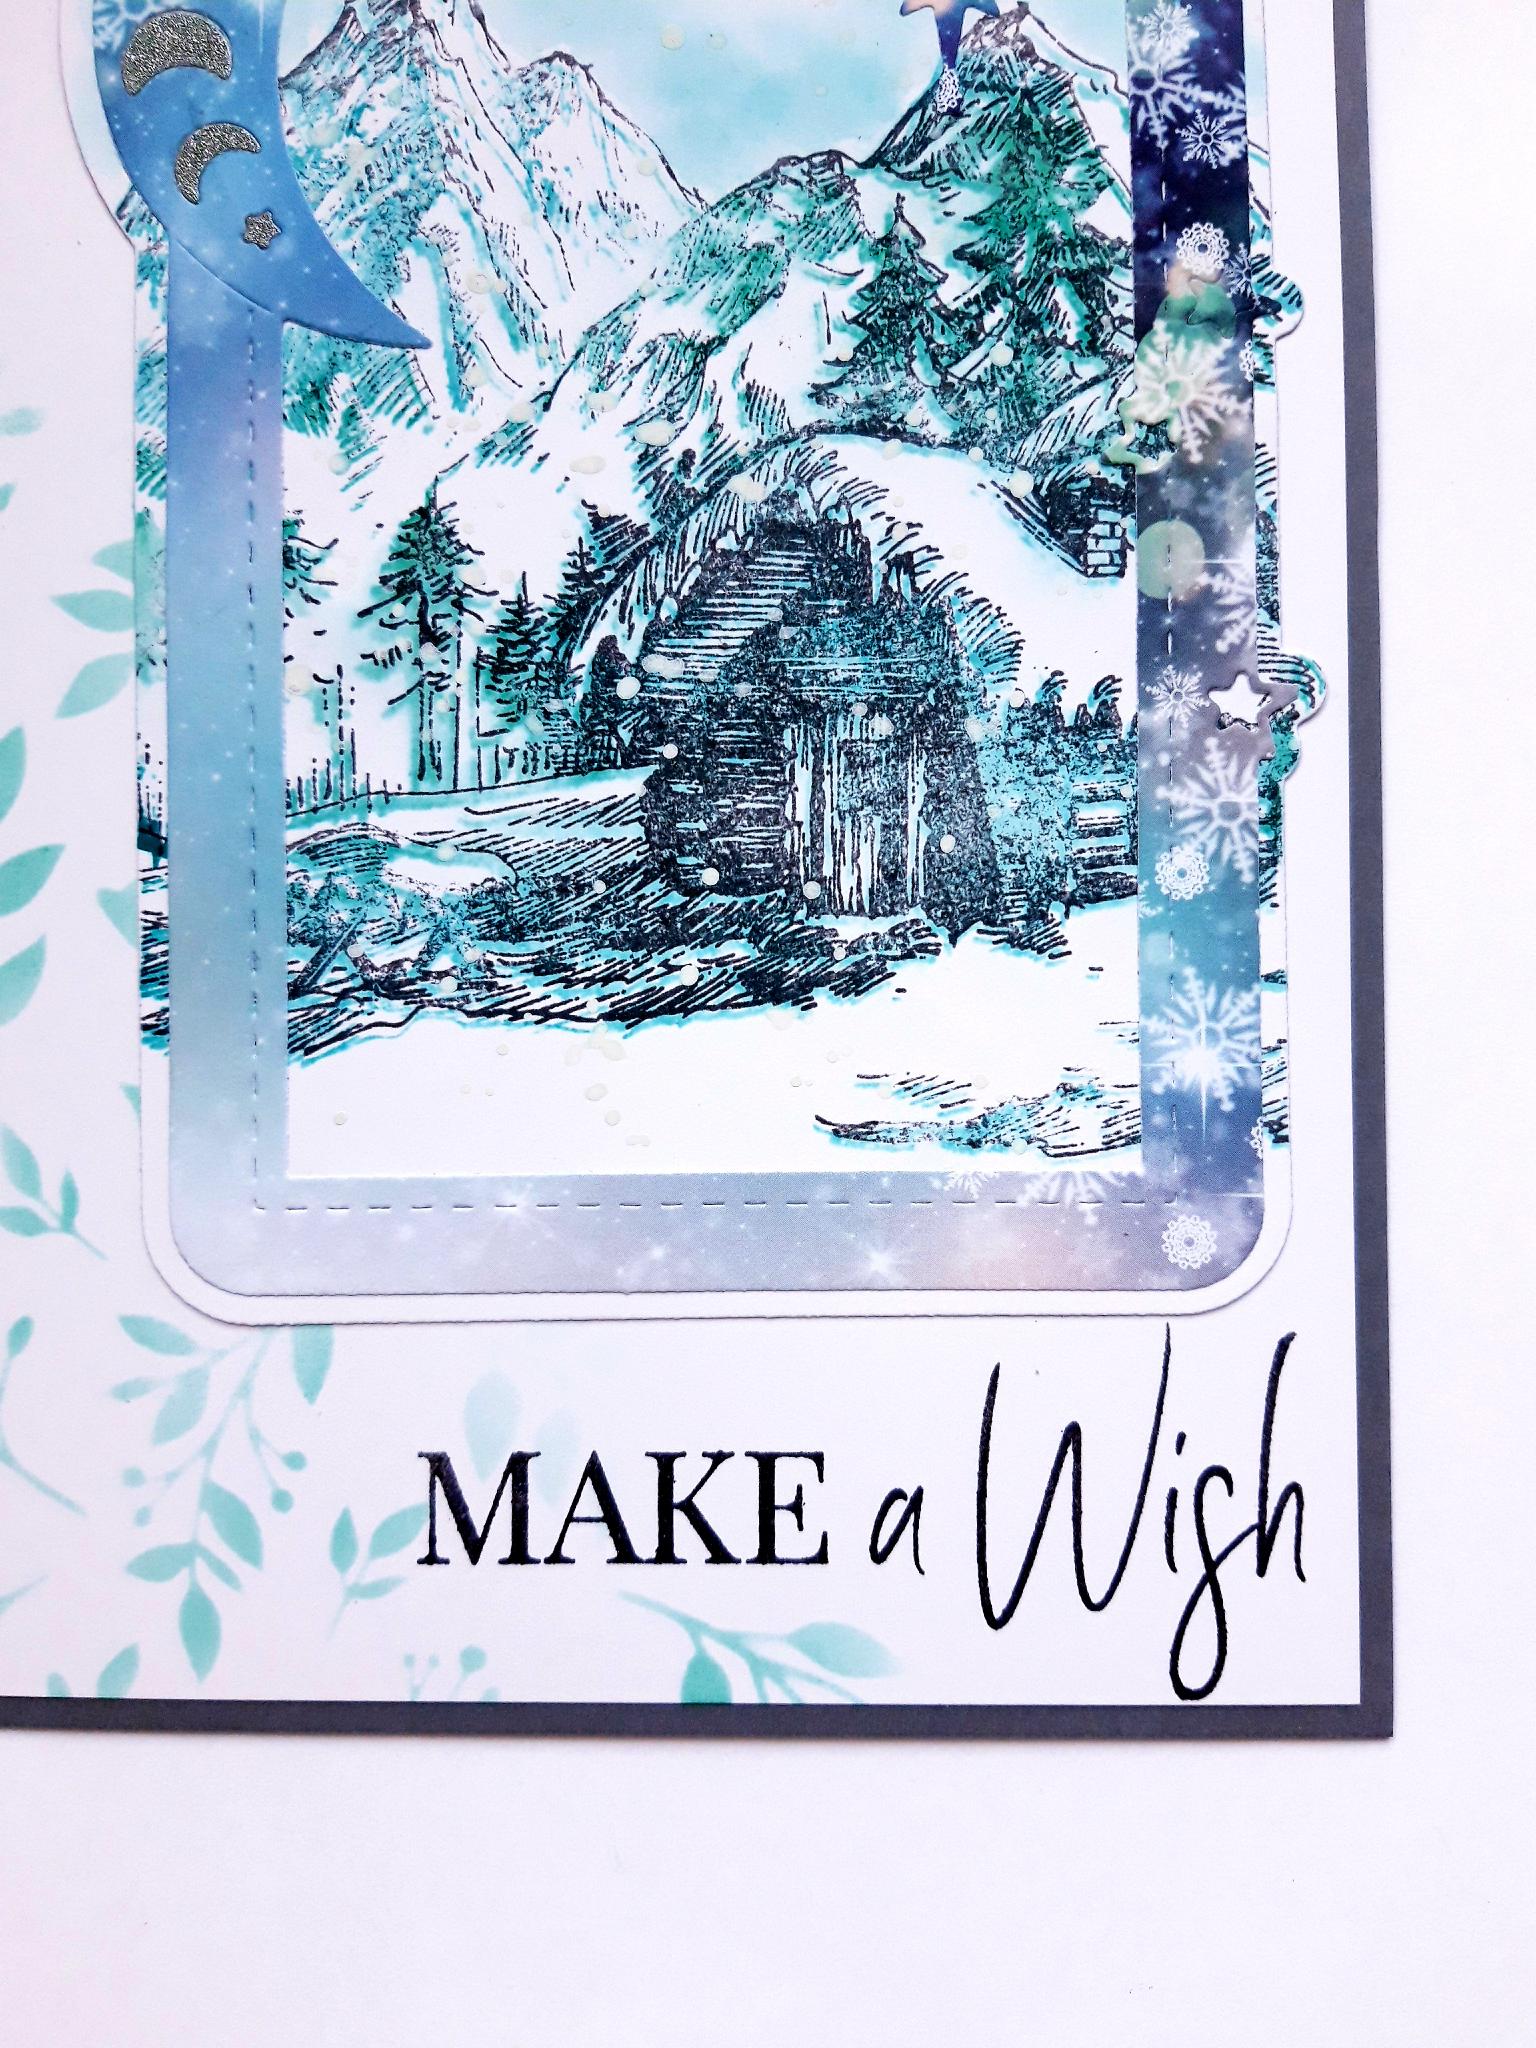
Ink up the sentiment, from the Christmas Blessings Stamp Collection, with the Smoky Gray Versafine, and stamp on the bottom right of the card, under your framed artwork. |
|
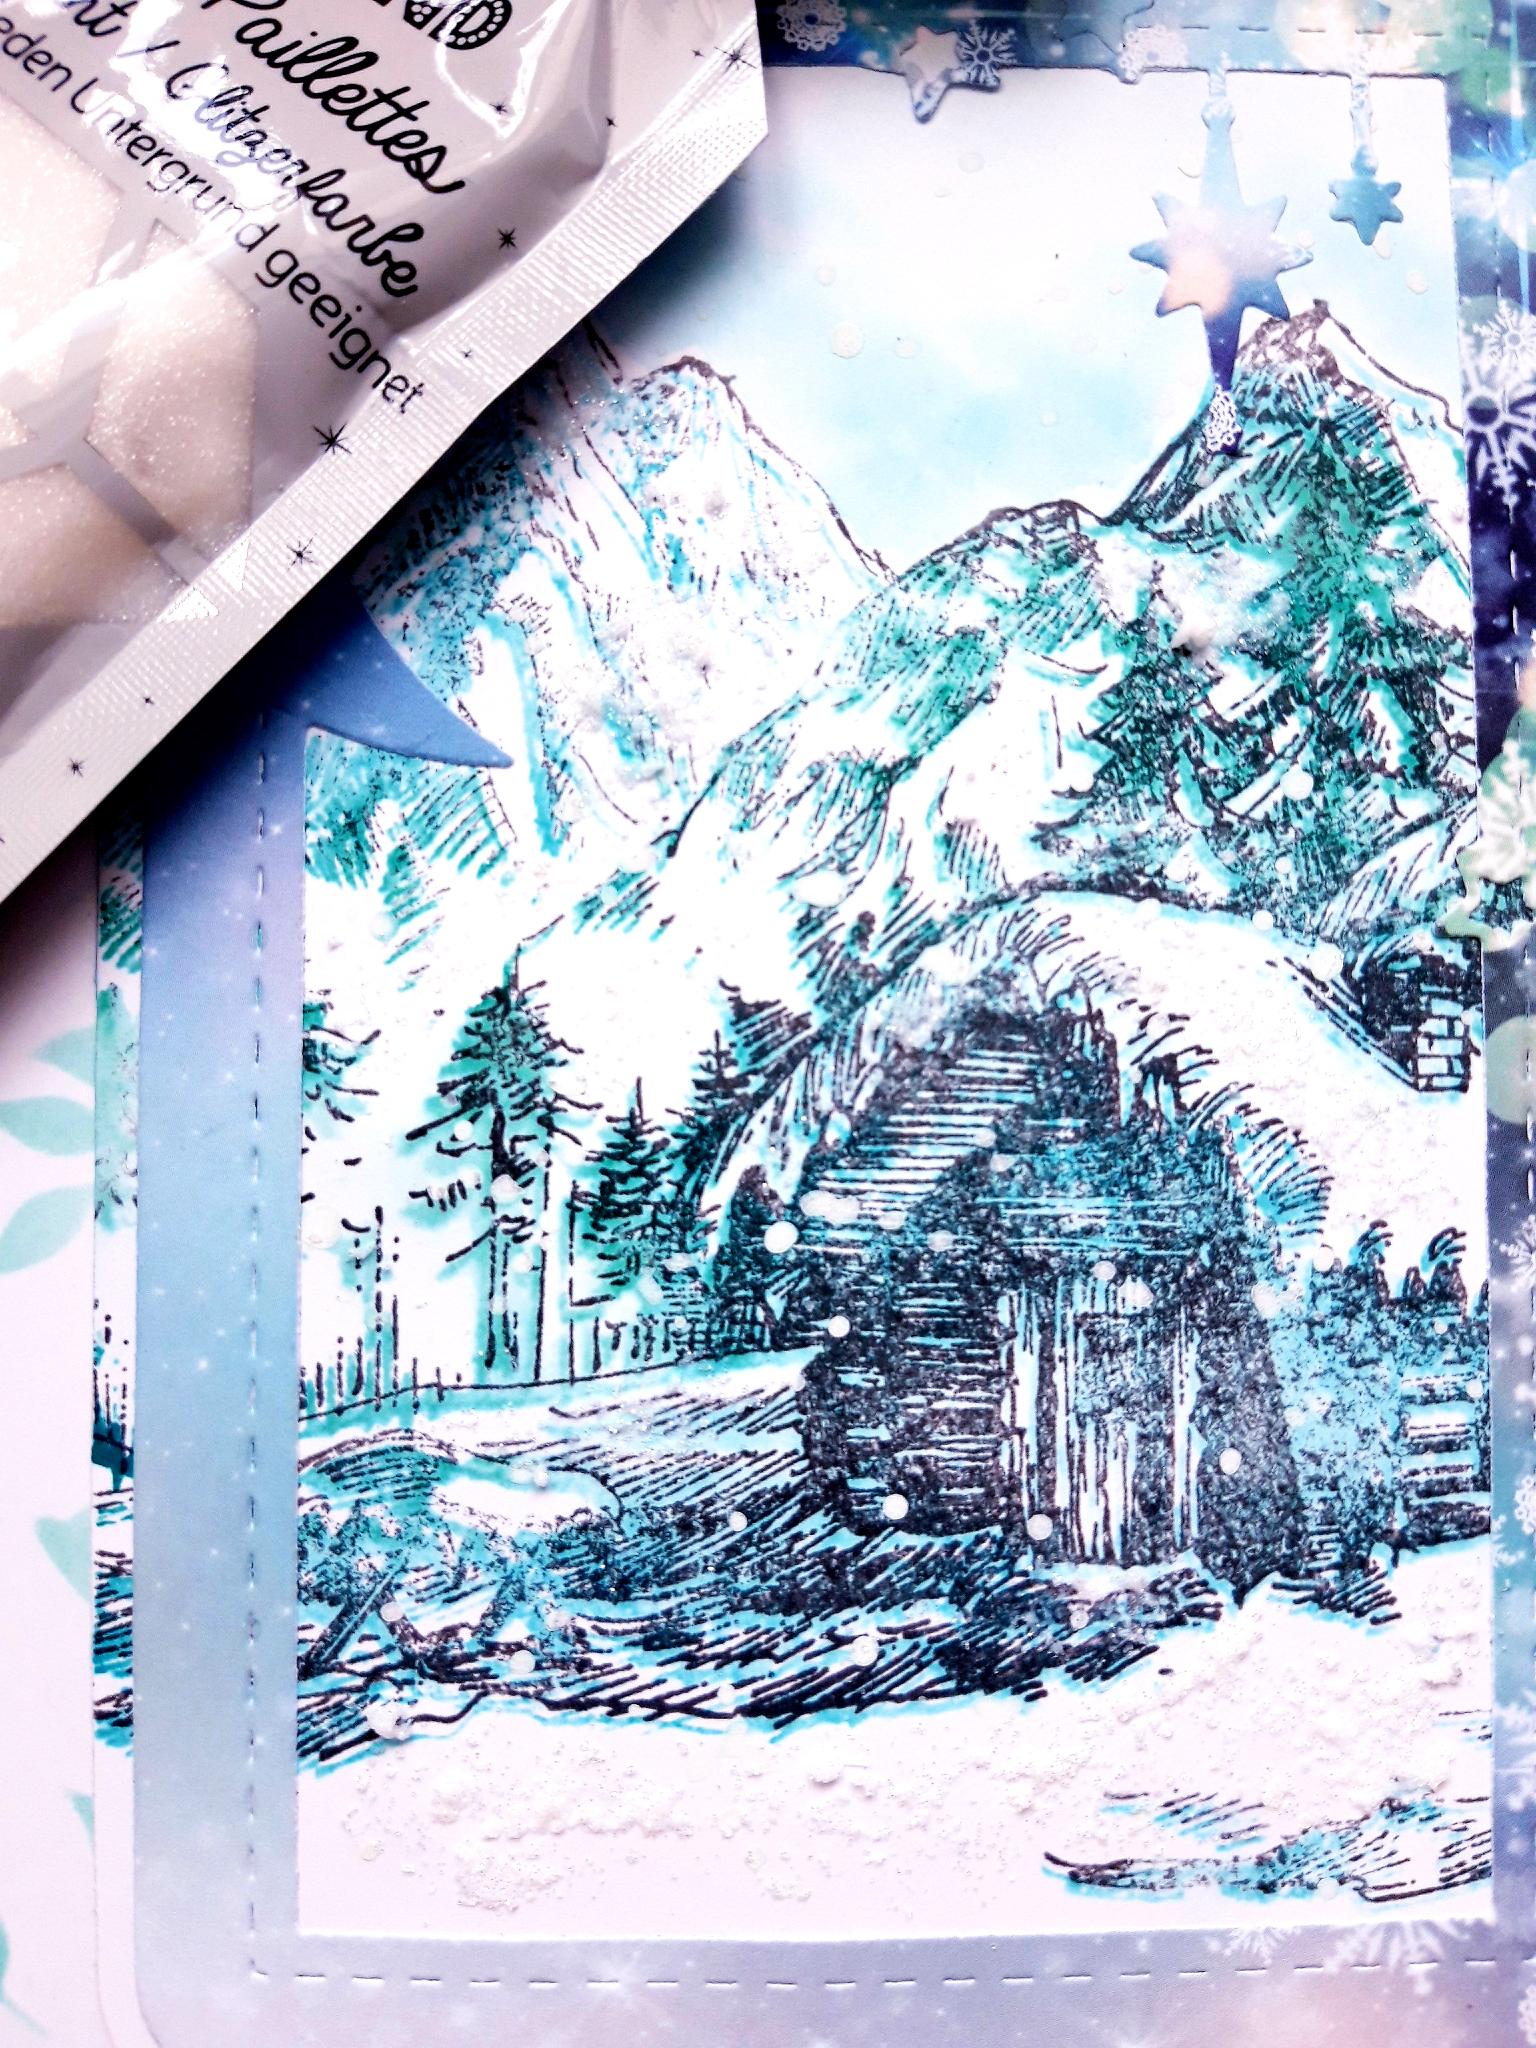
Apply and spread the Izink Nacre Glitter paint, with a palette knife, on to your artwork, where desired. I added mine to the mountains, cabin roof and along the ground. TIP: The glitter paint does dry very quickly, but if you're impatient, you can speed it up with a heat tool. |
|
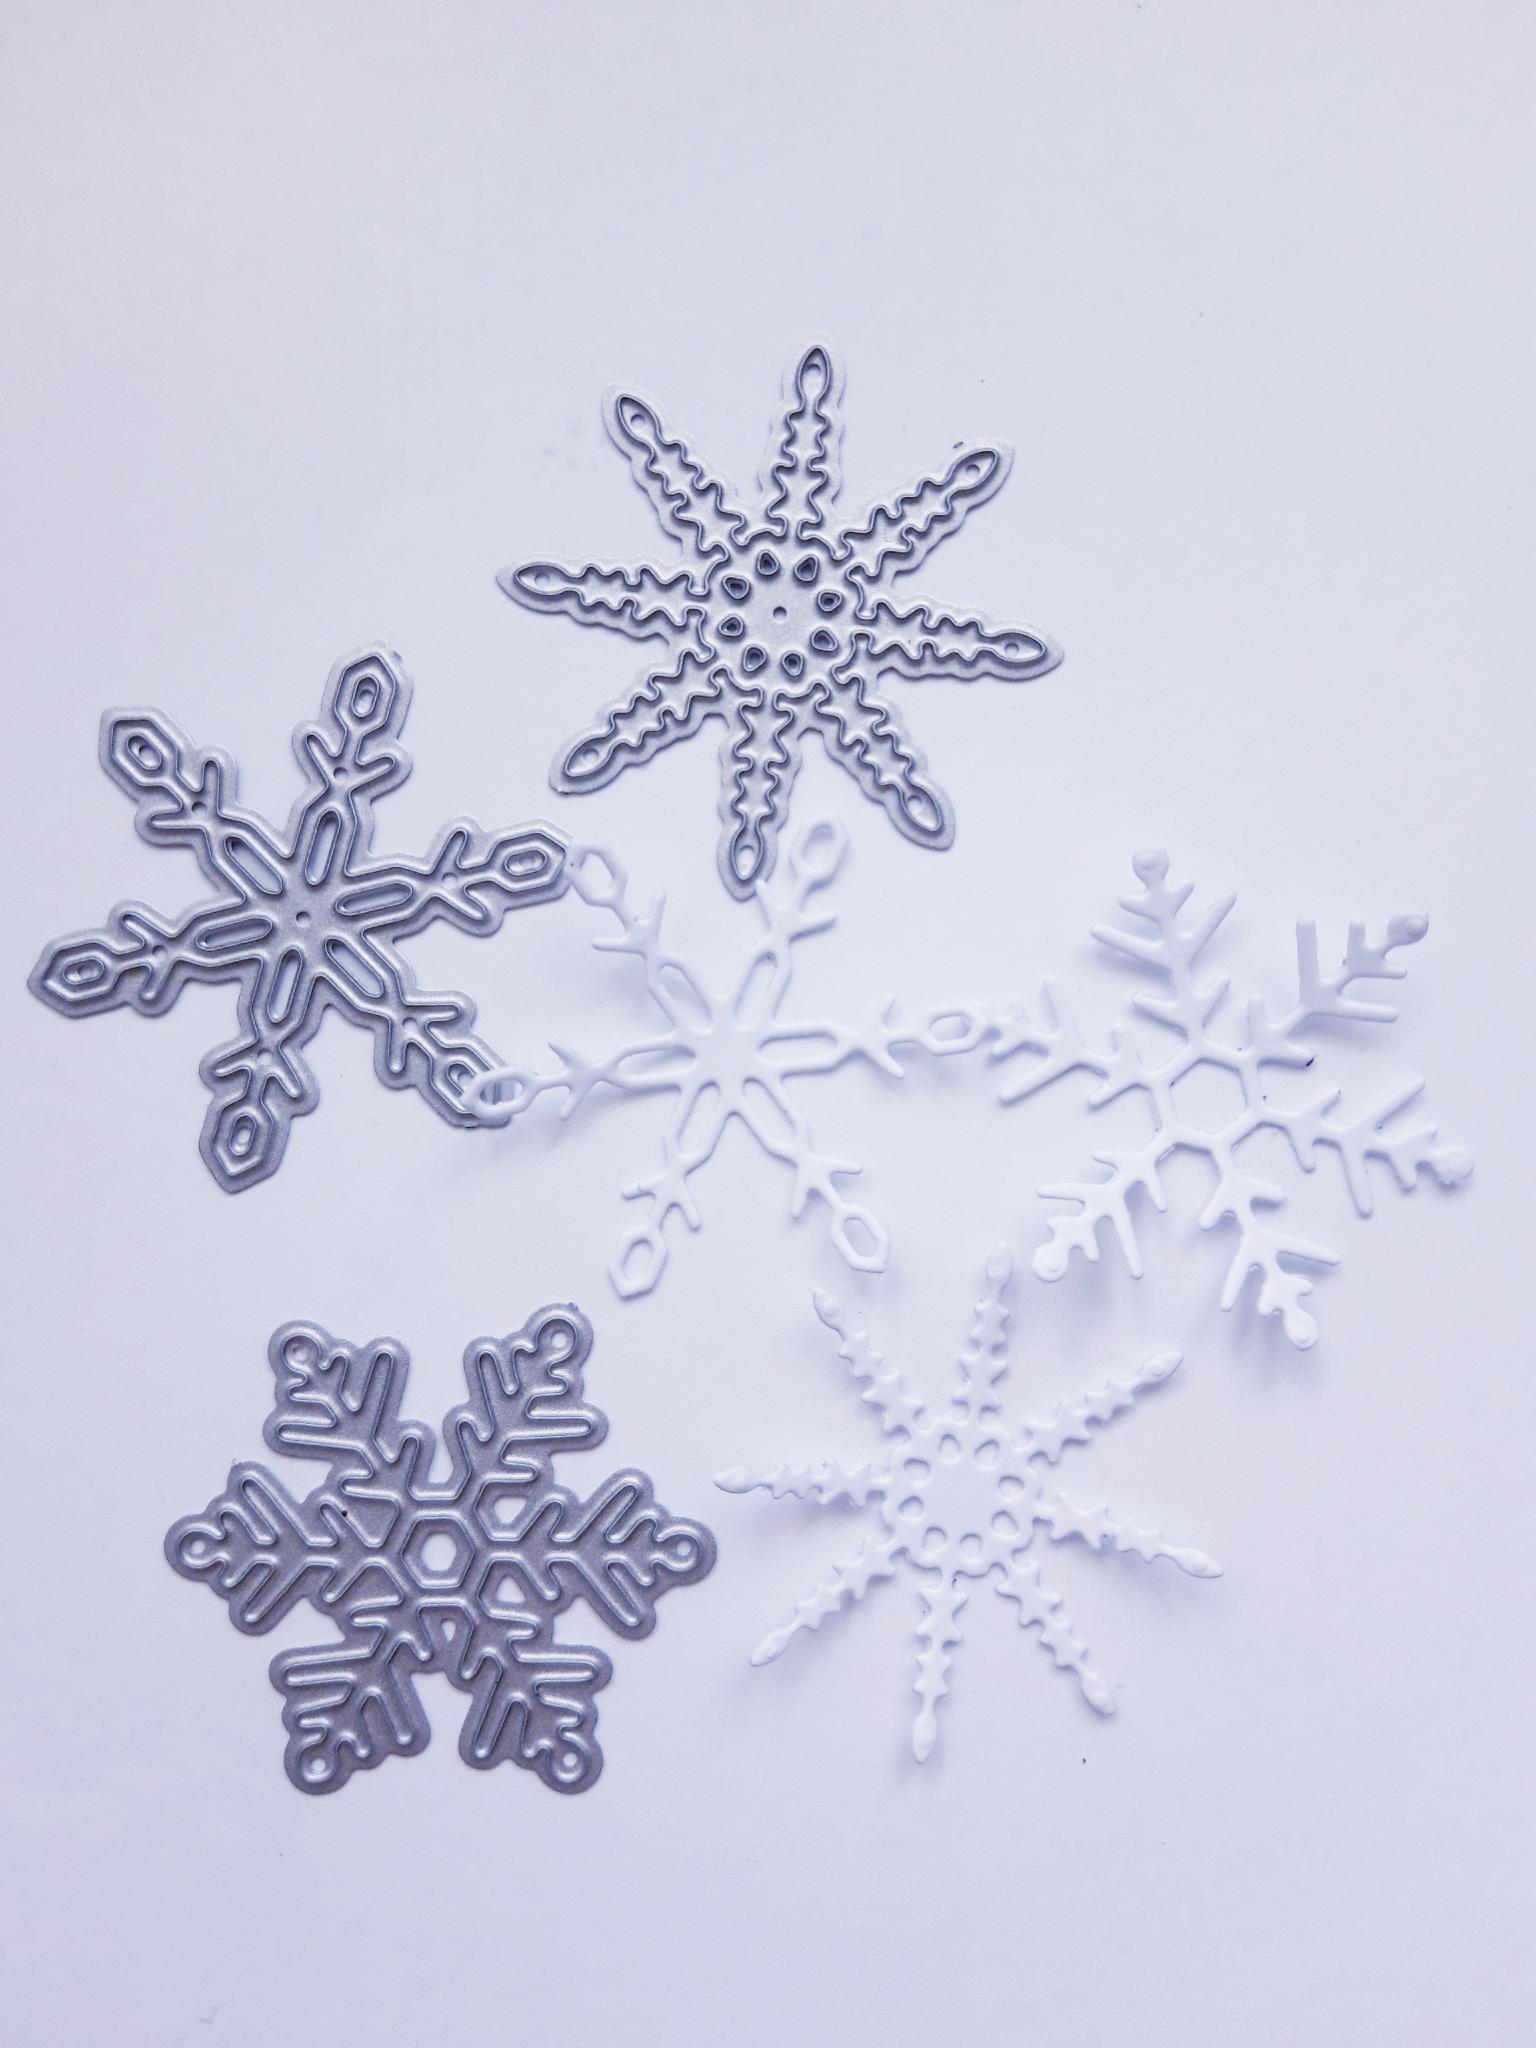
Using the snowflake die, from the Night Before Christmas Die Collection, cut THREE snowflakes, from the white card (4 x 4"). NB: If you have the other frame die sets, then you can cut three different snowflakes. |
|
Apply the Izink Nacre Glitter paint to the three snowflakes. TIP: You can pop a bit of the glitter paint on to your craft mat, mix with a little bit of water and either paint it on the snowflakes, or smoosh the snowflakes in to the paint. Whichever method suits you. |
|
Adhere the snowflakes where required, around your framed artwork. I popped two in the bottom left hand corner, and one in the top right, but again, the choice is yours. |
|
To finish, add Liquid Pearl Drops to the centres of the snowflakes, and in and around them, as required. |