Give your friends $10 off their first order!
Refer a FRIEND


WHAT YOU WILL NEED:
Grey top folding card blank (8 1/4 x 5 3/4")
Stamps from Stronger Lamination Stamp Collection
Stamps from Create Together Club Beautiful Notes Stamp Collection
Time To Grow 8 x 8" paper pad
Versafine Ink Pad: Onyx Black, Smoky Gray
Izink Pigment ink pad collection: Vintage: Dark green, light blue, dark blue
Izink Pigment ink pad collection: Classic: Dark green
Clear adhesive gems
Eureka 101
Paper Trimmer
Perfect Together Glue
[click image to enlarge] 
|
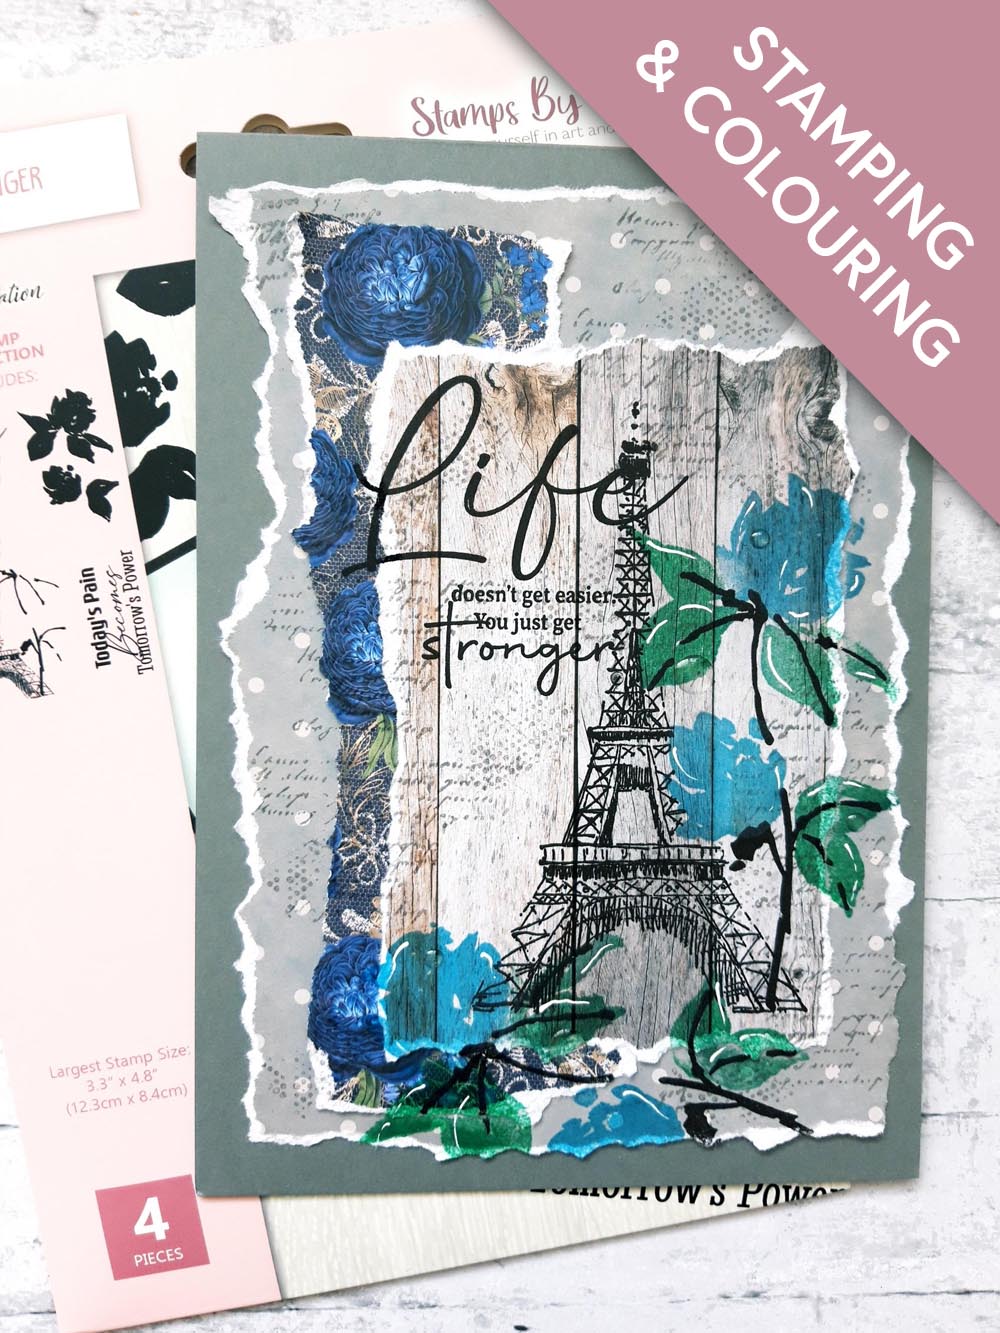
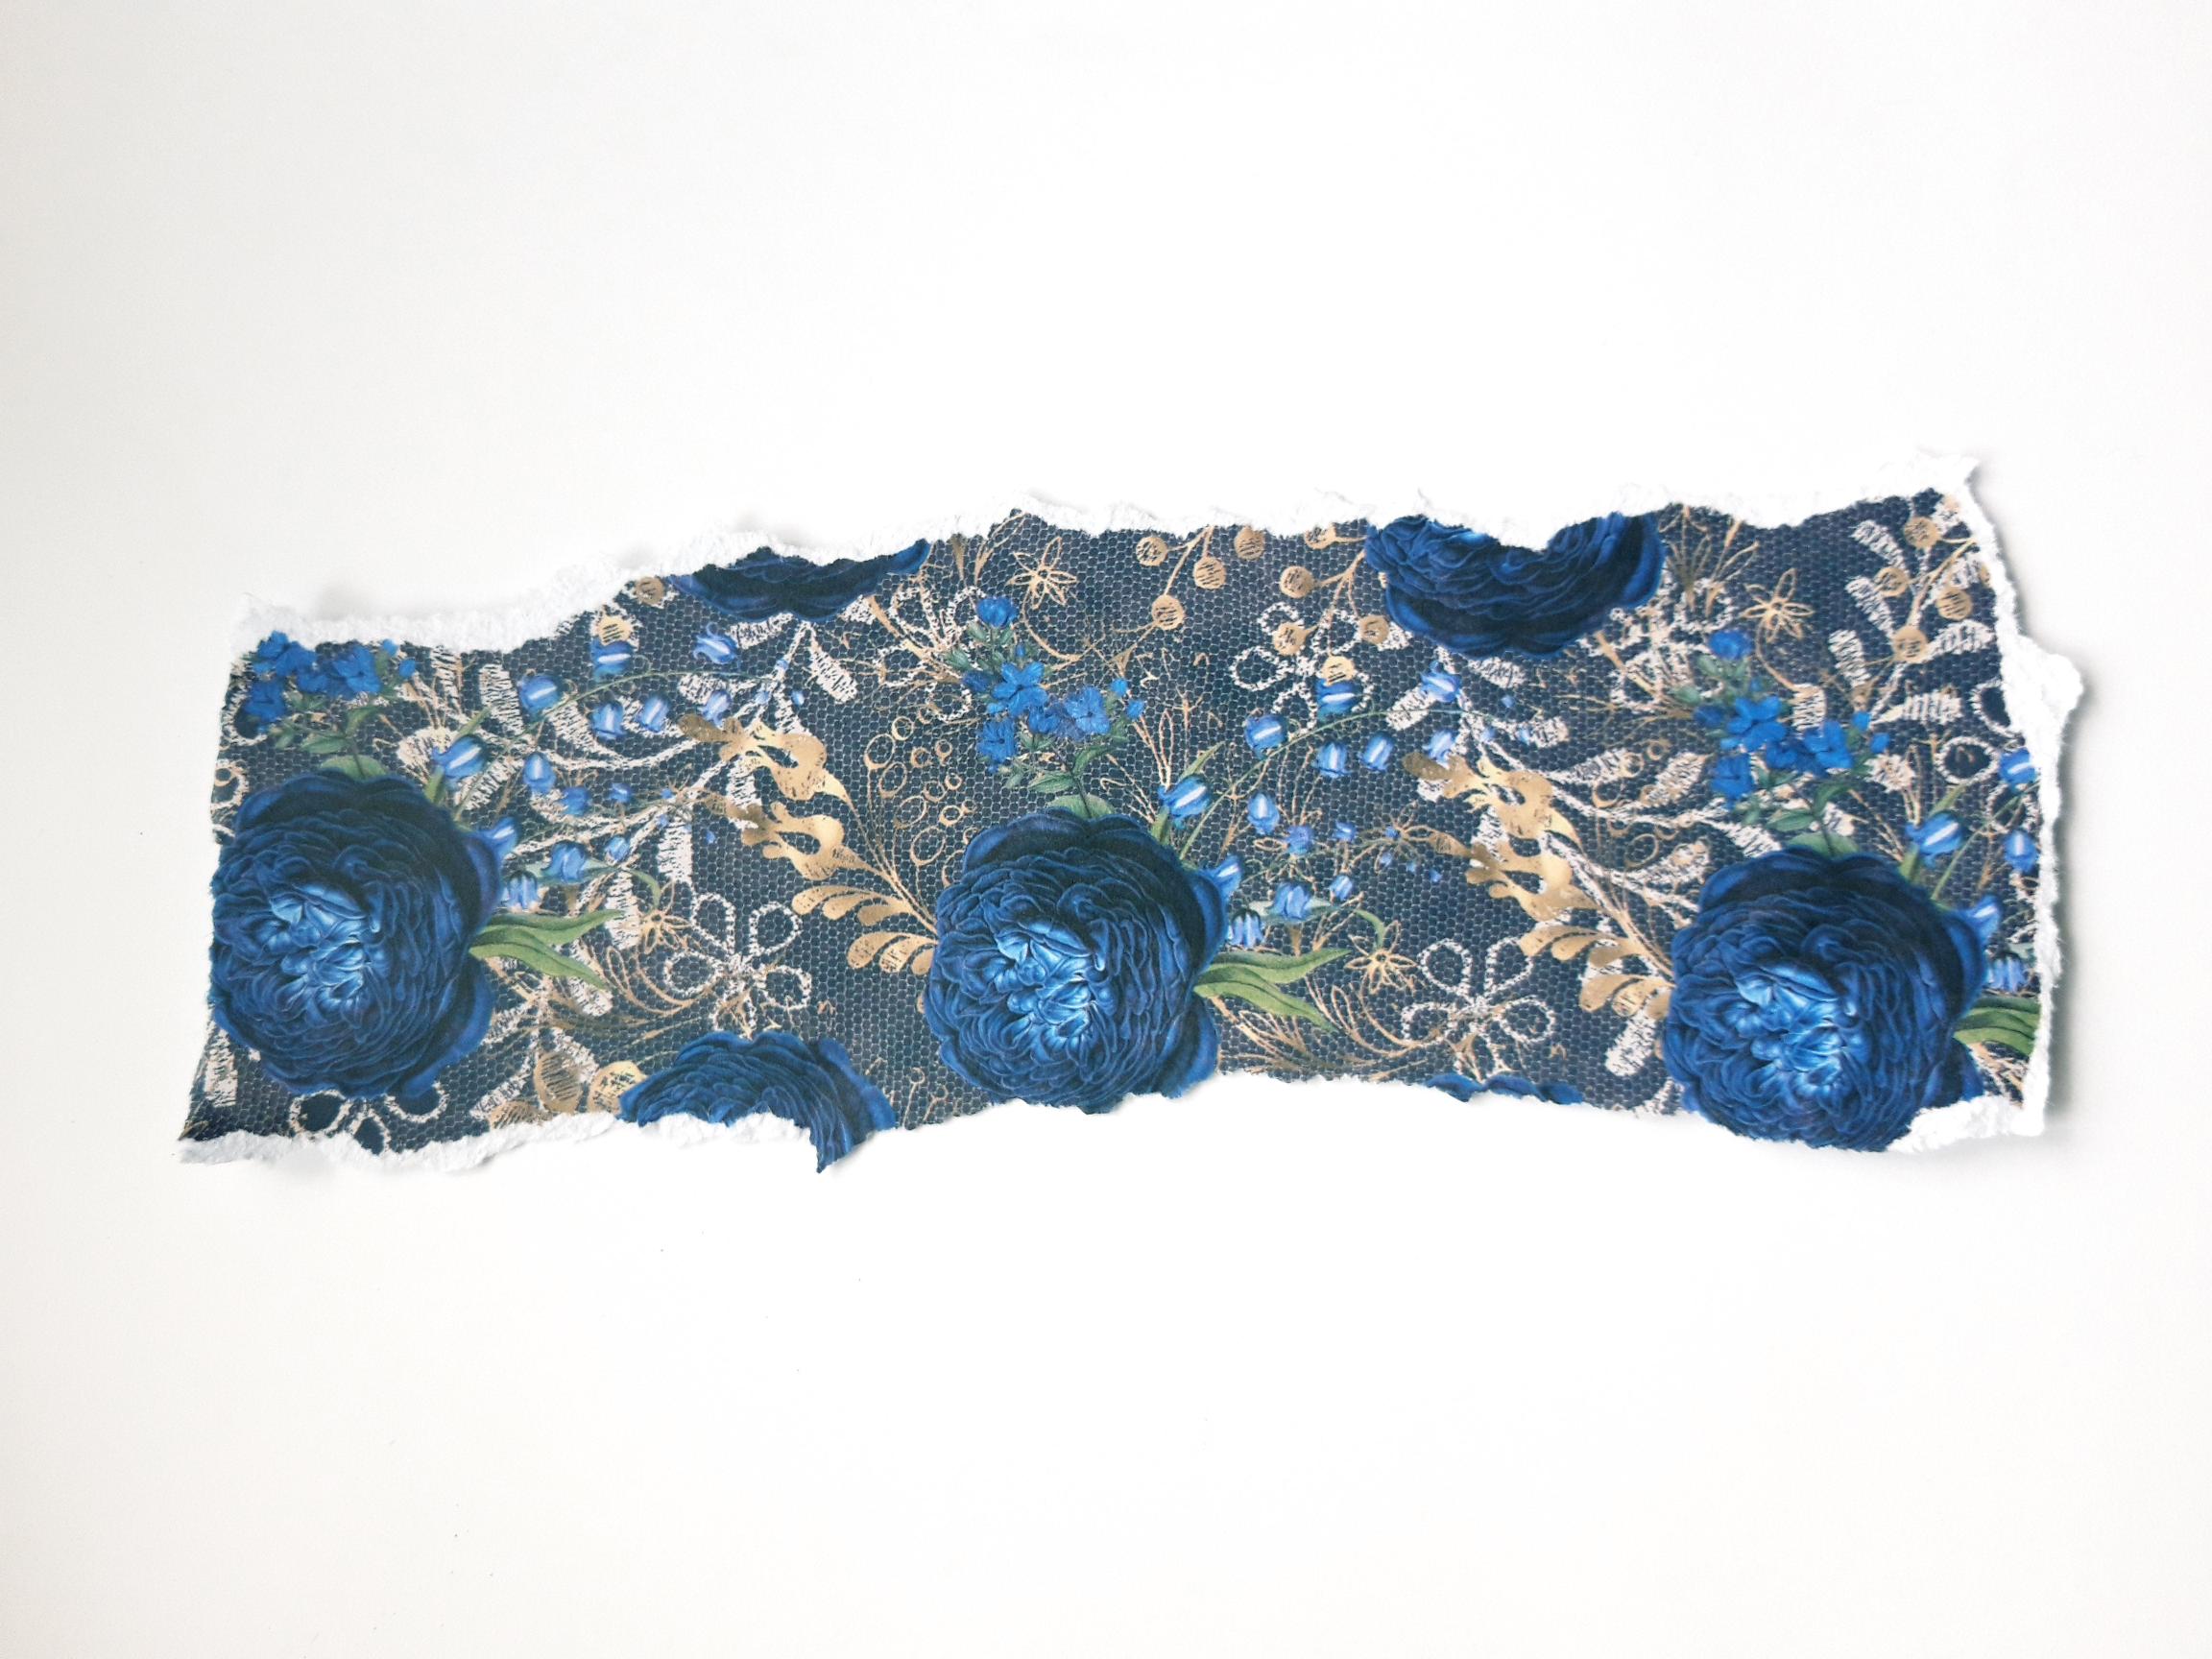
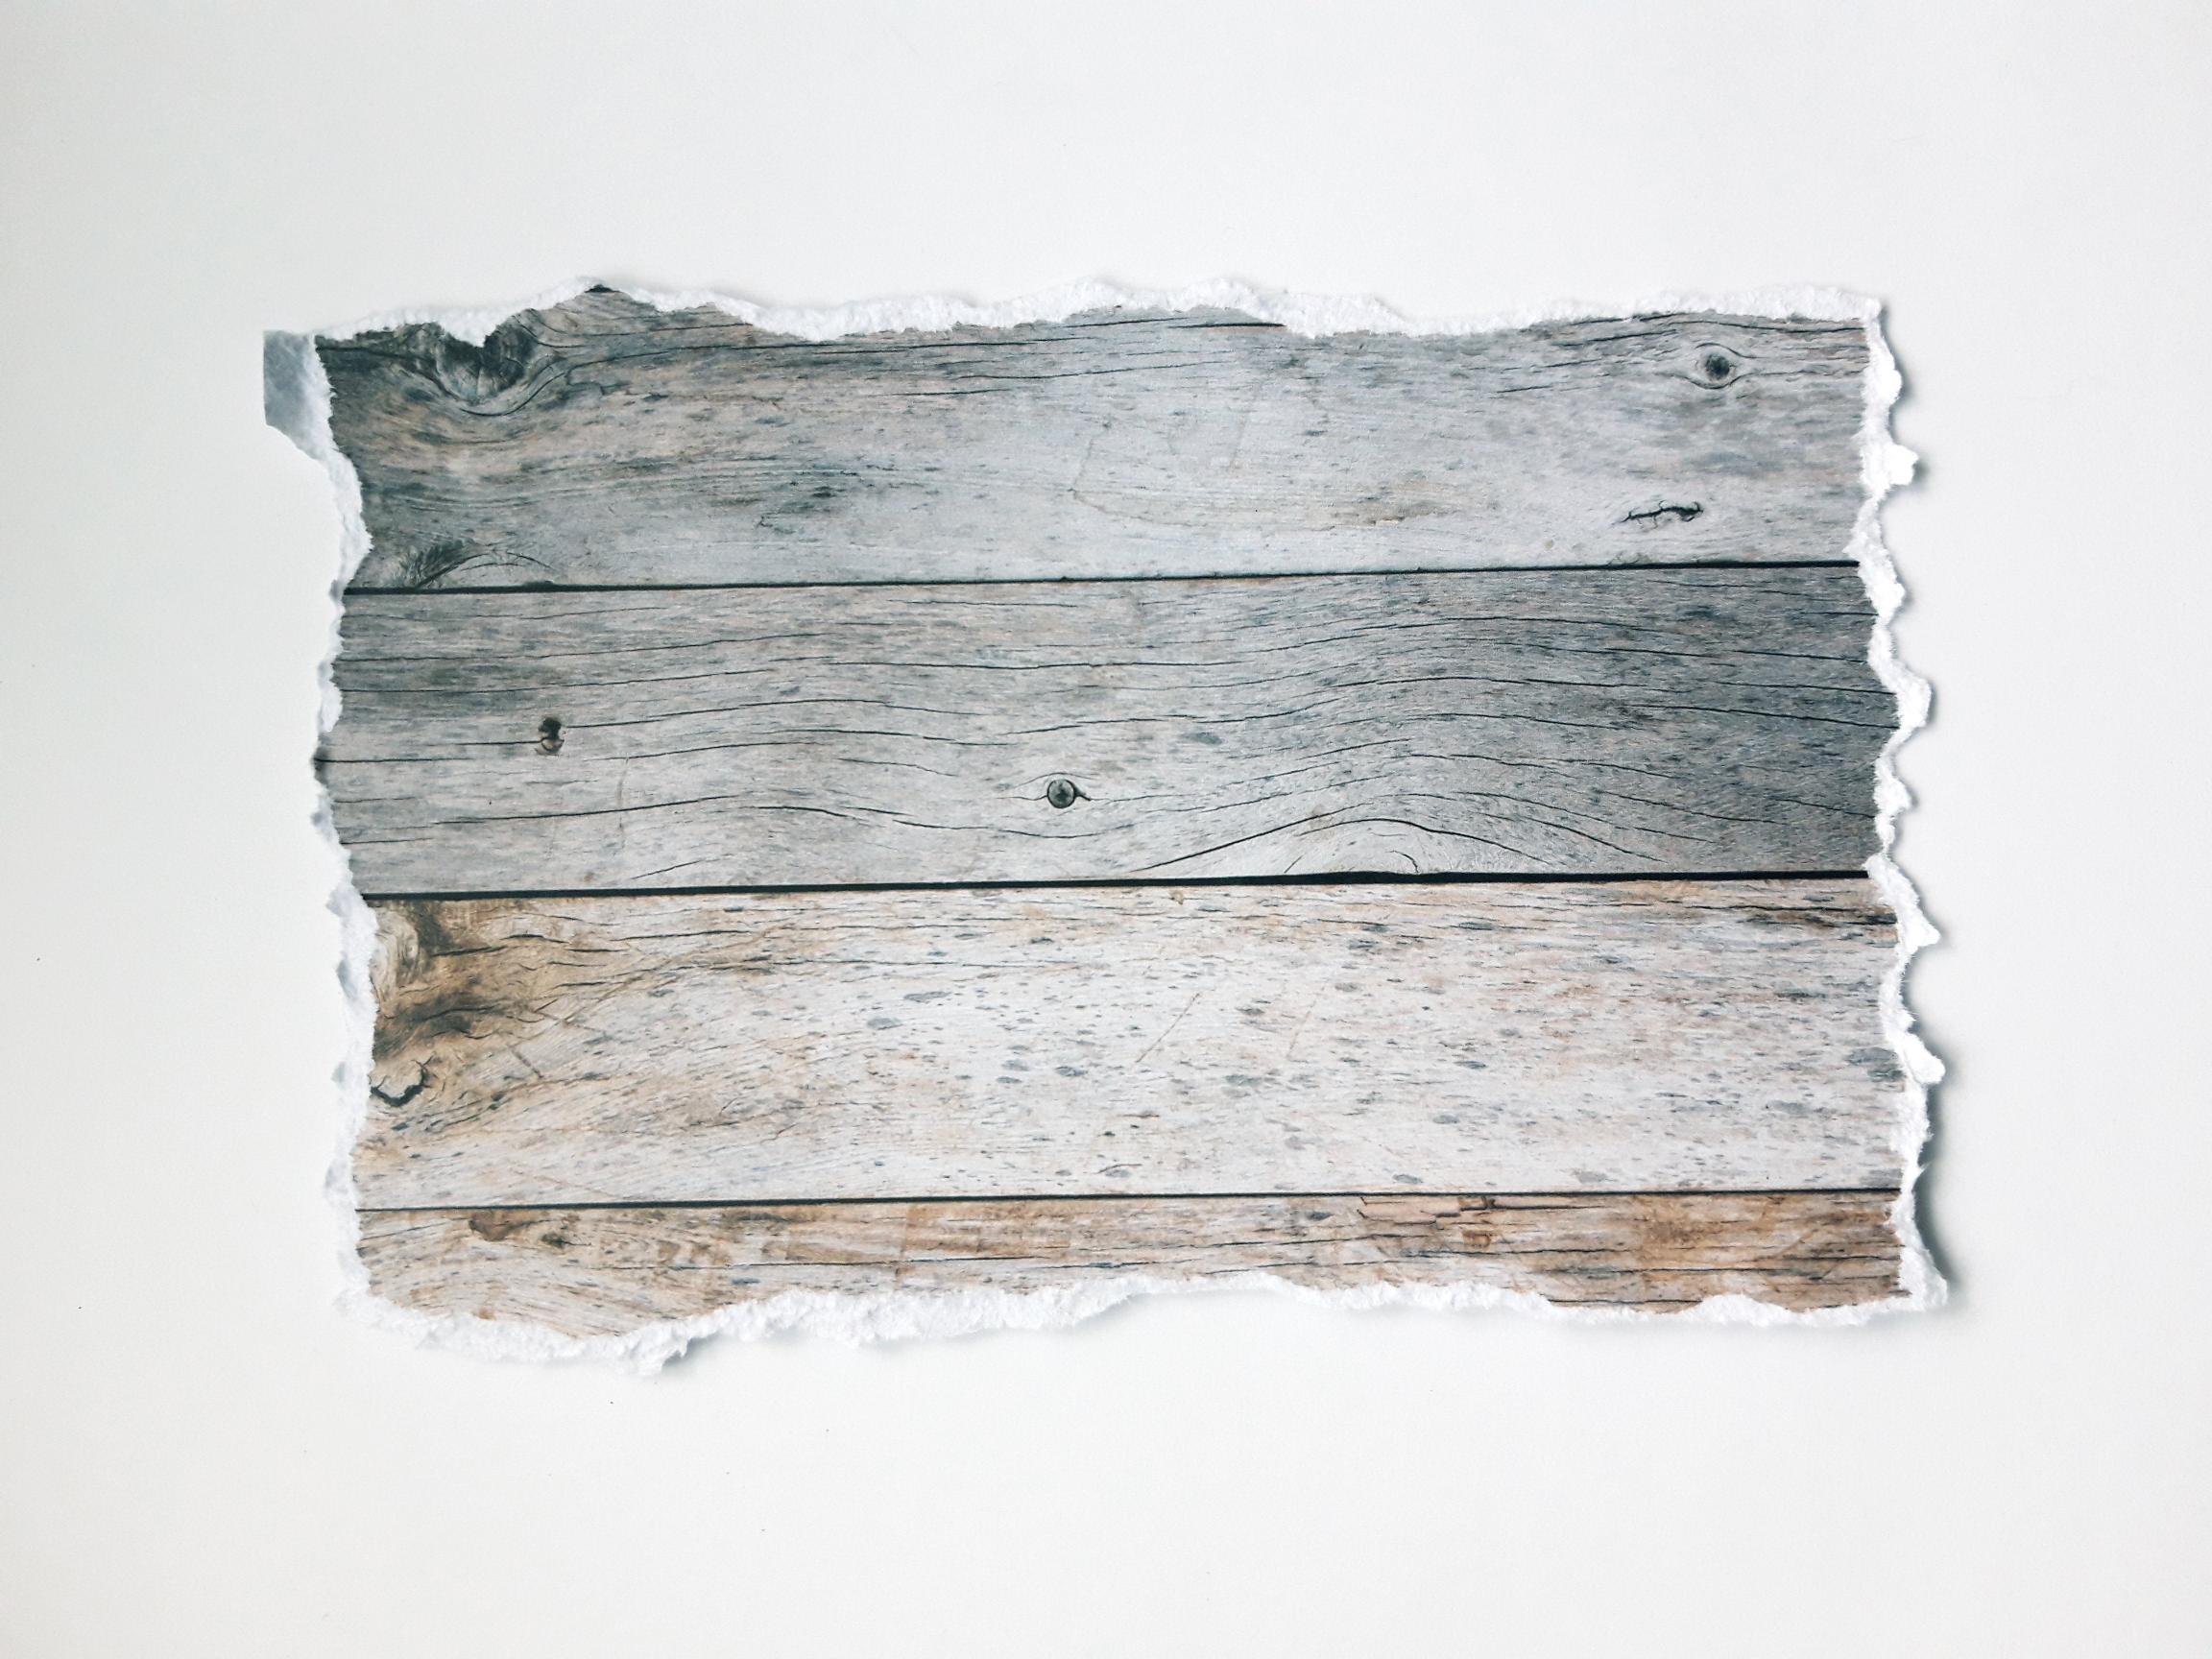
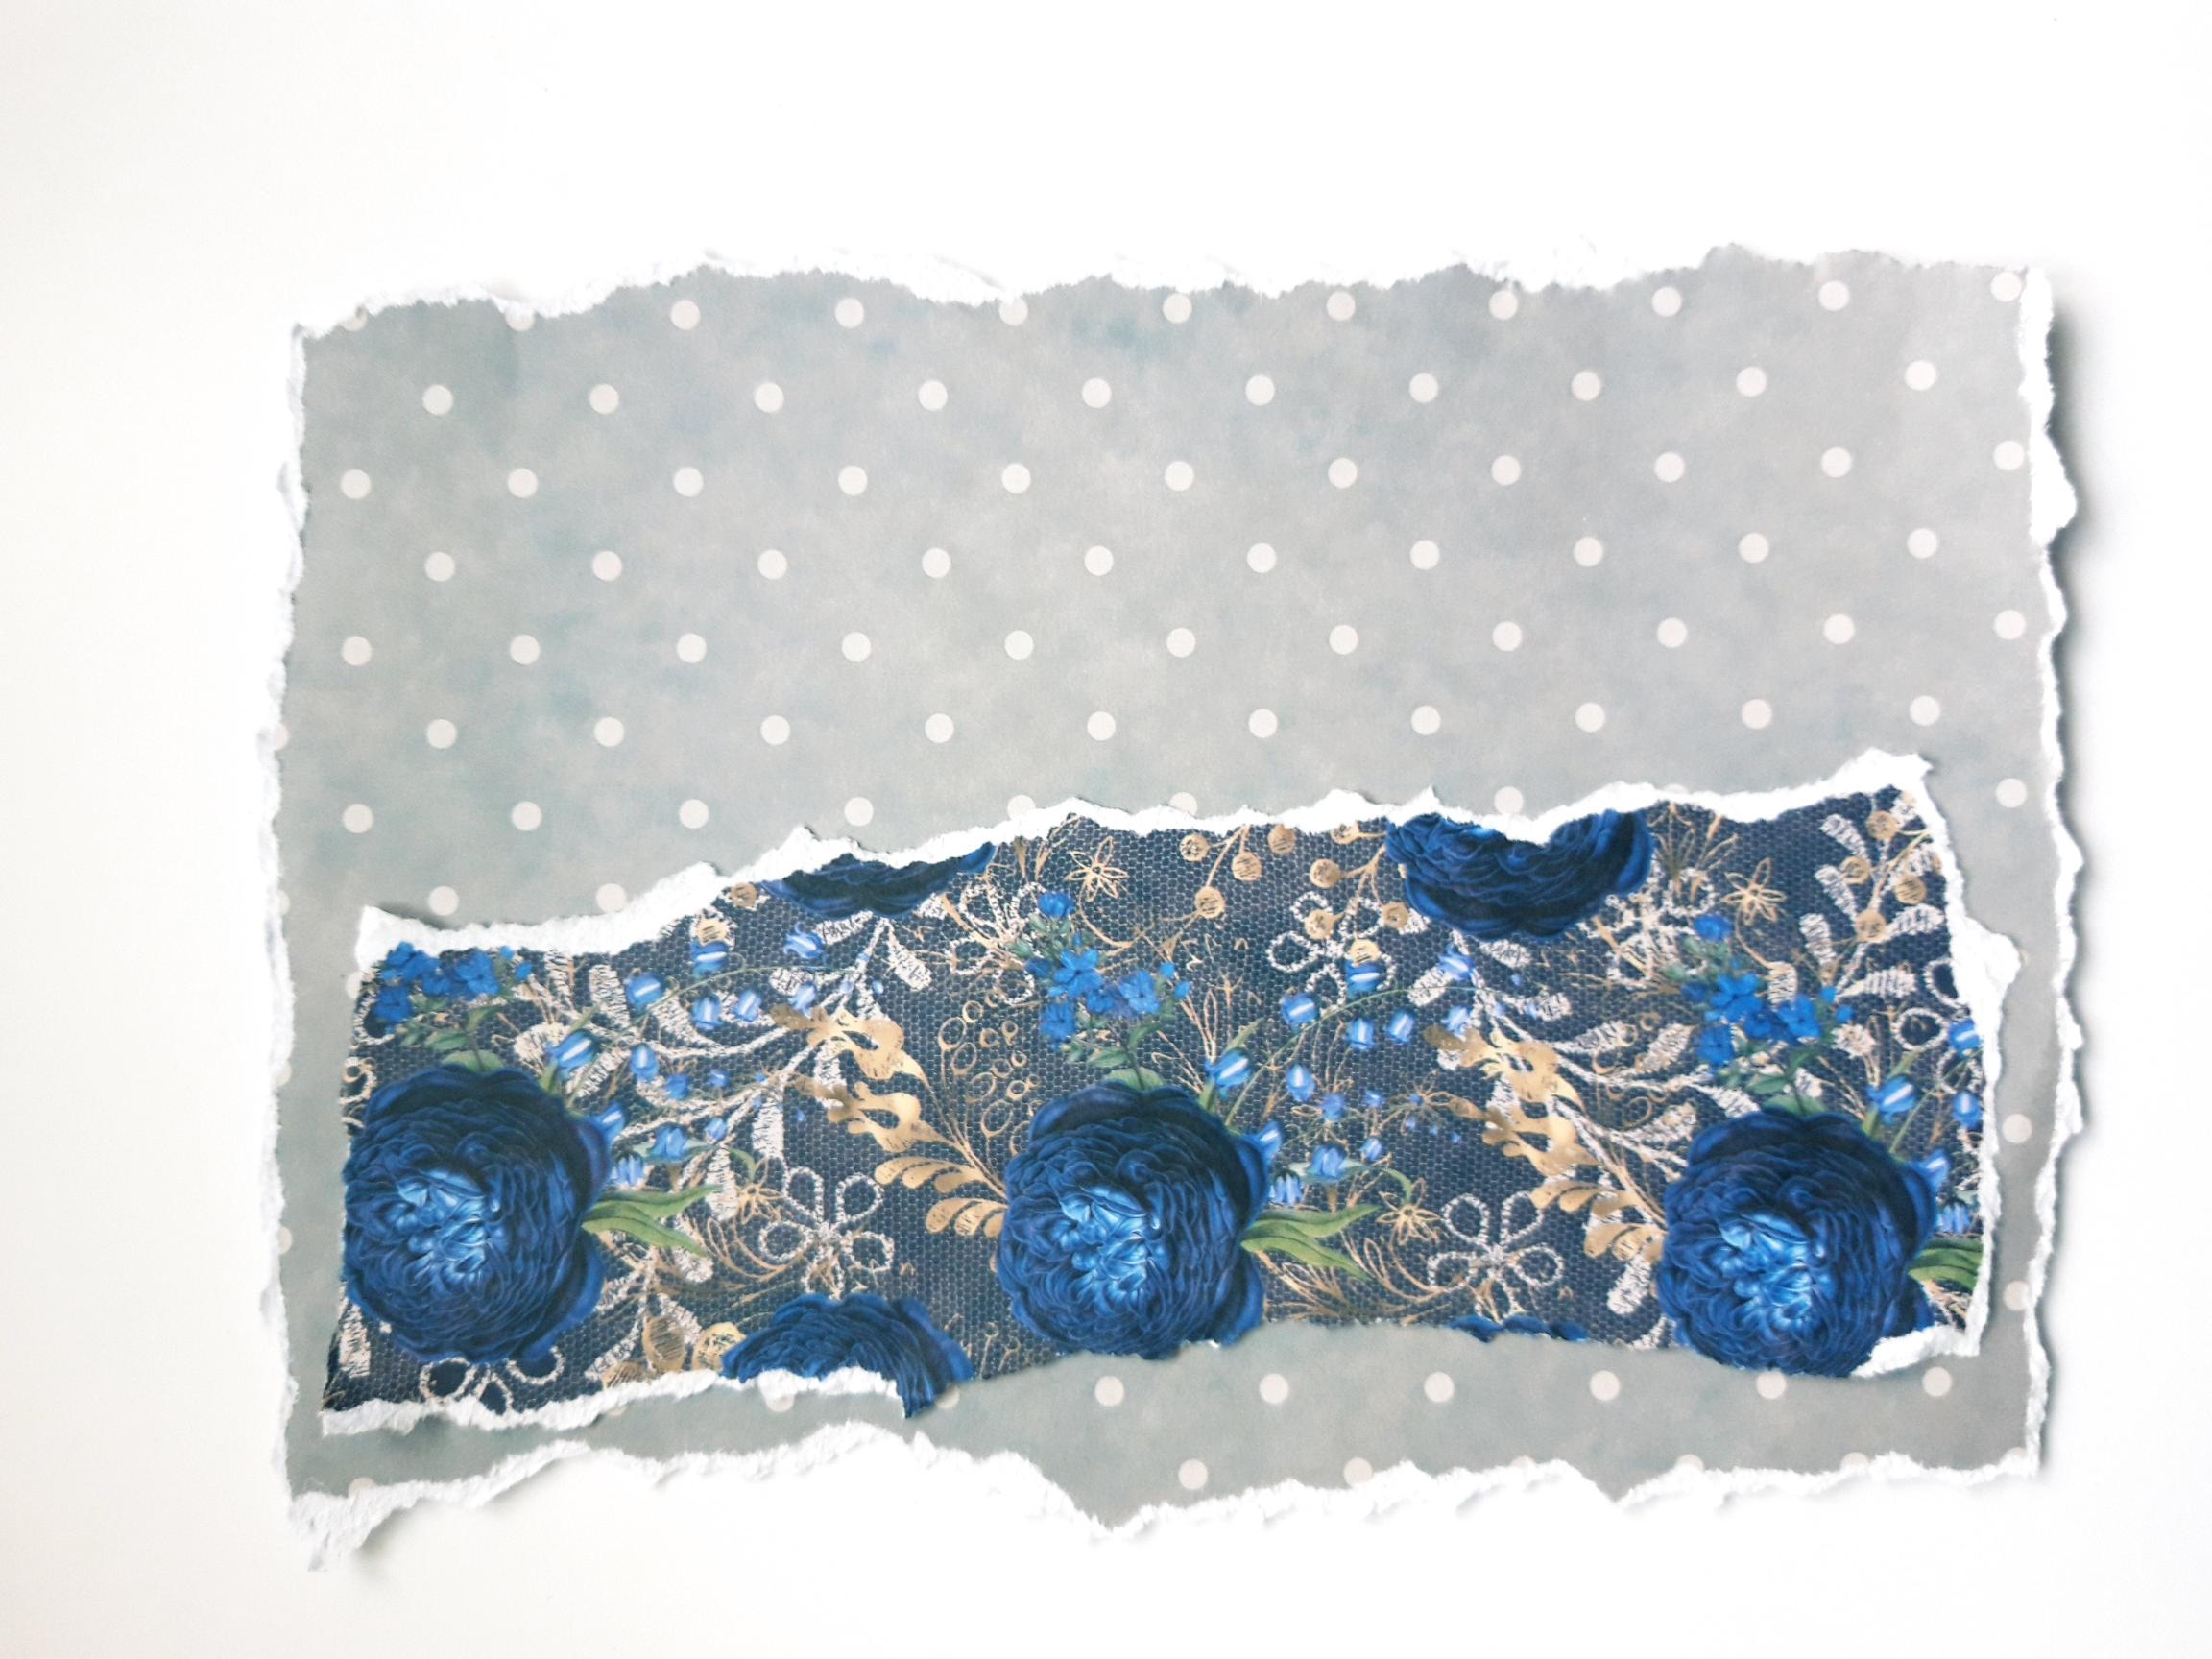
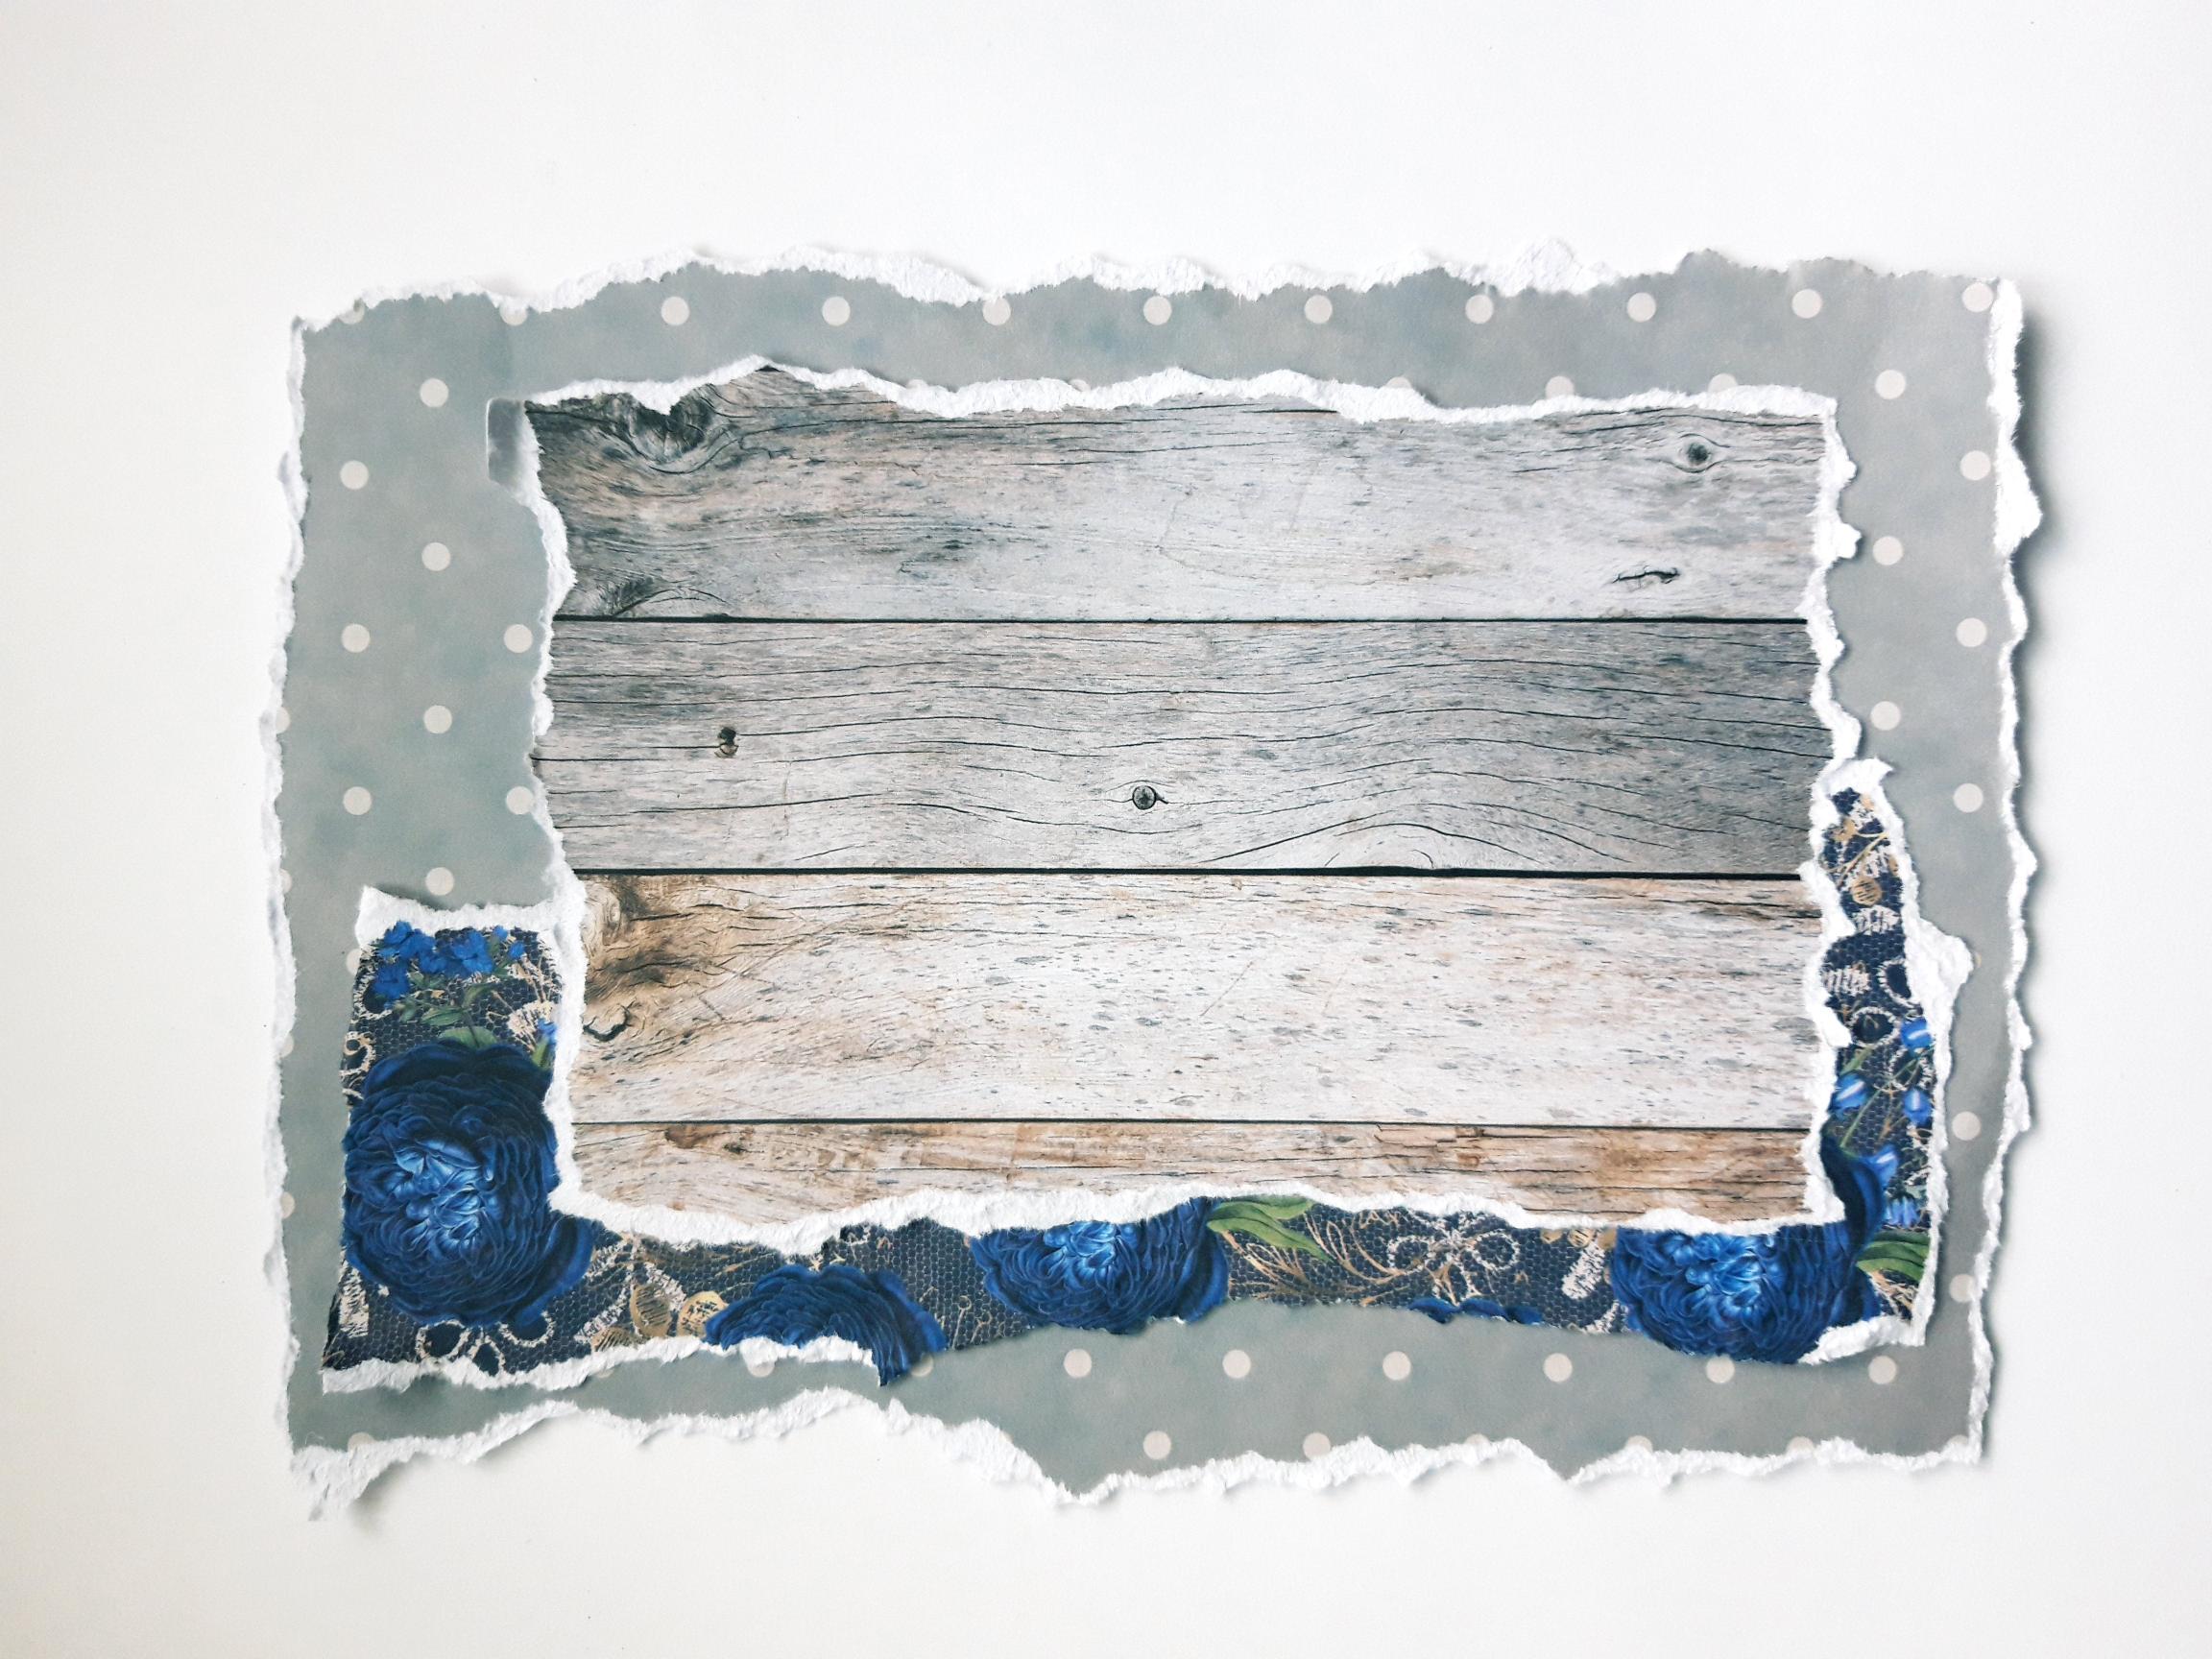
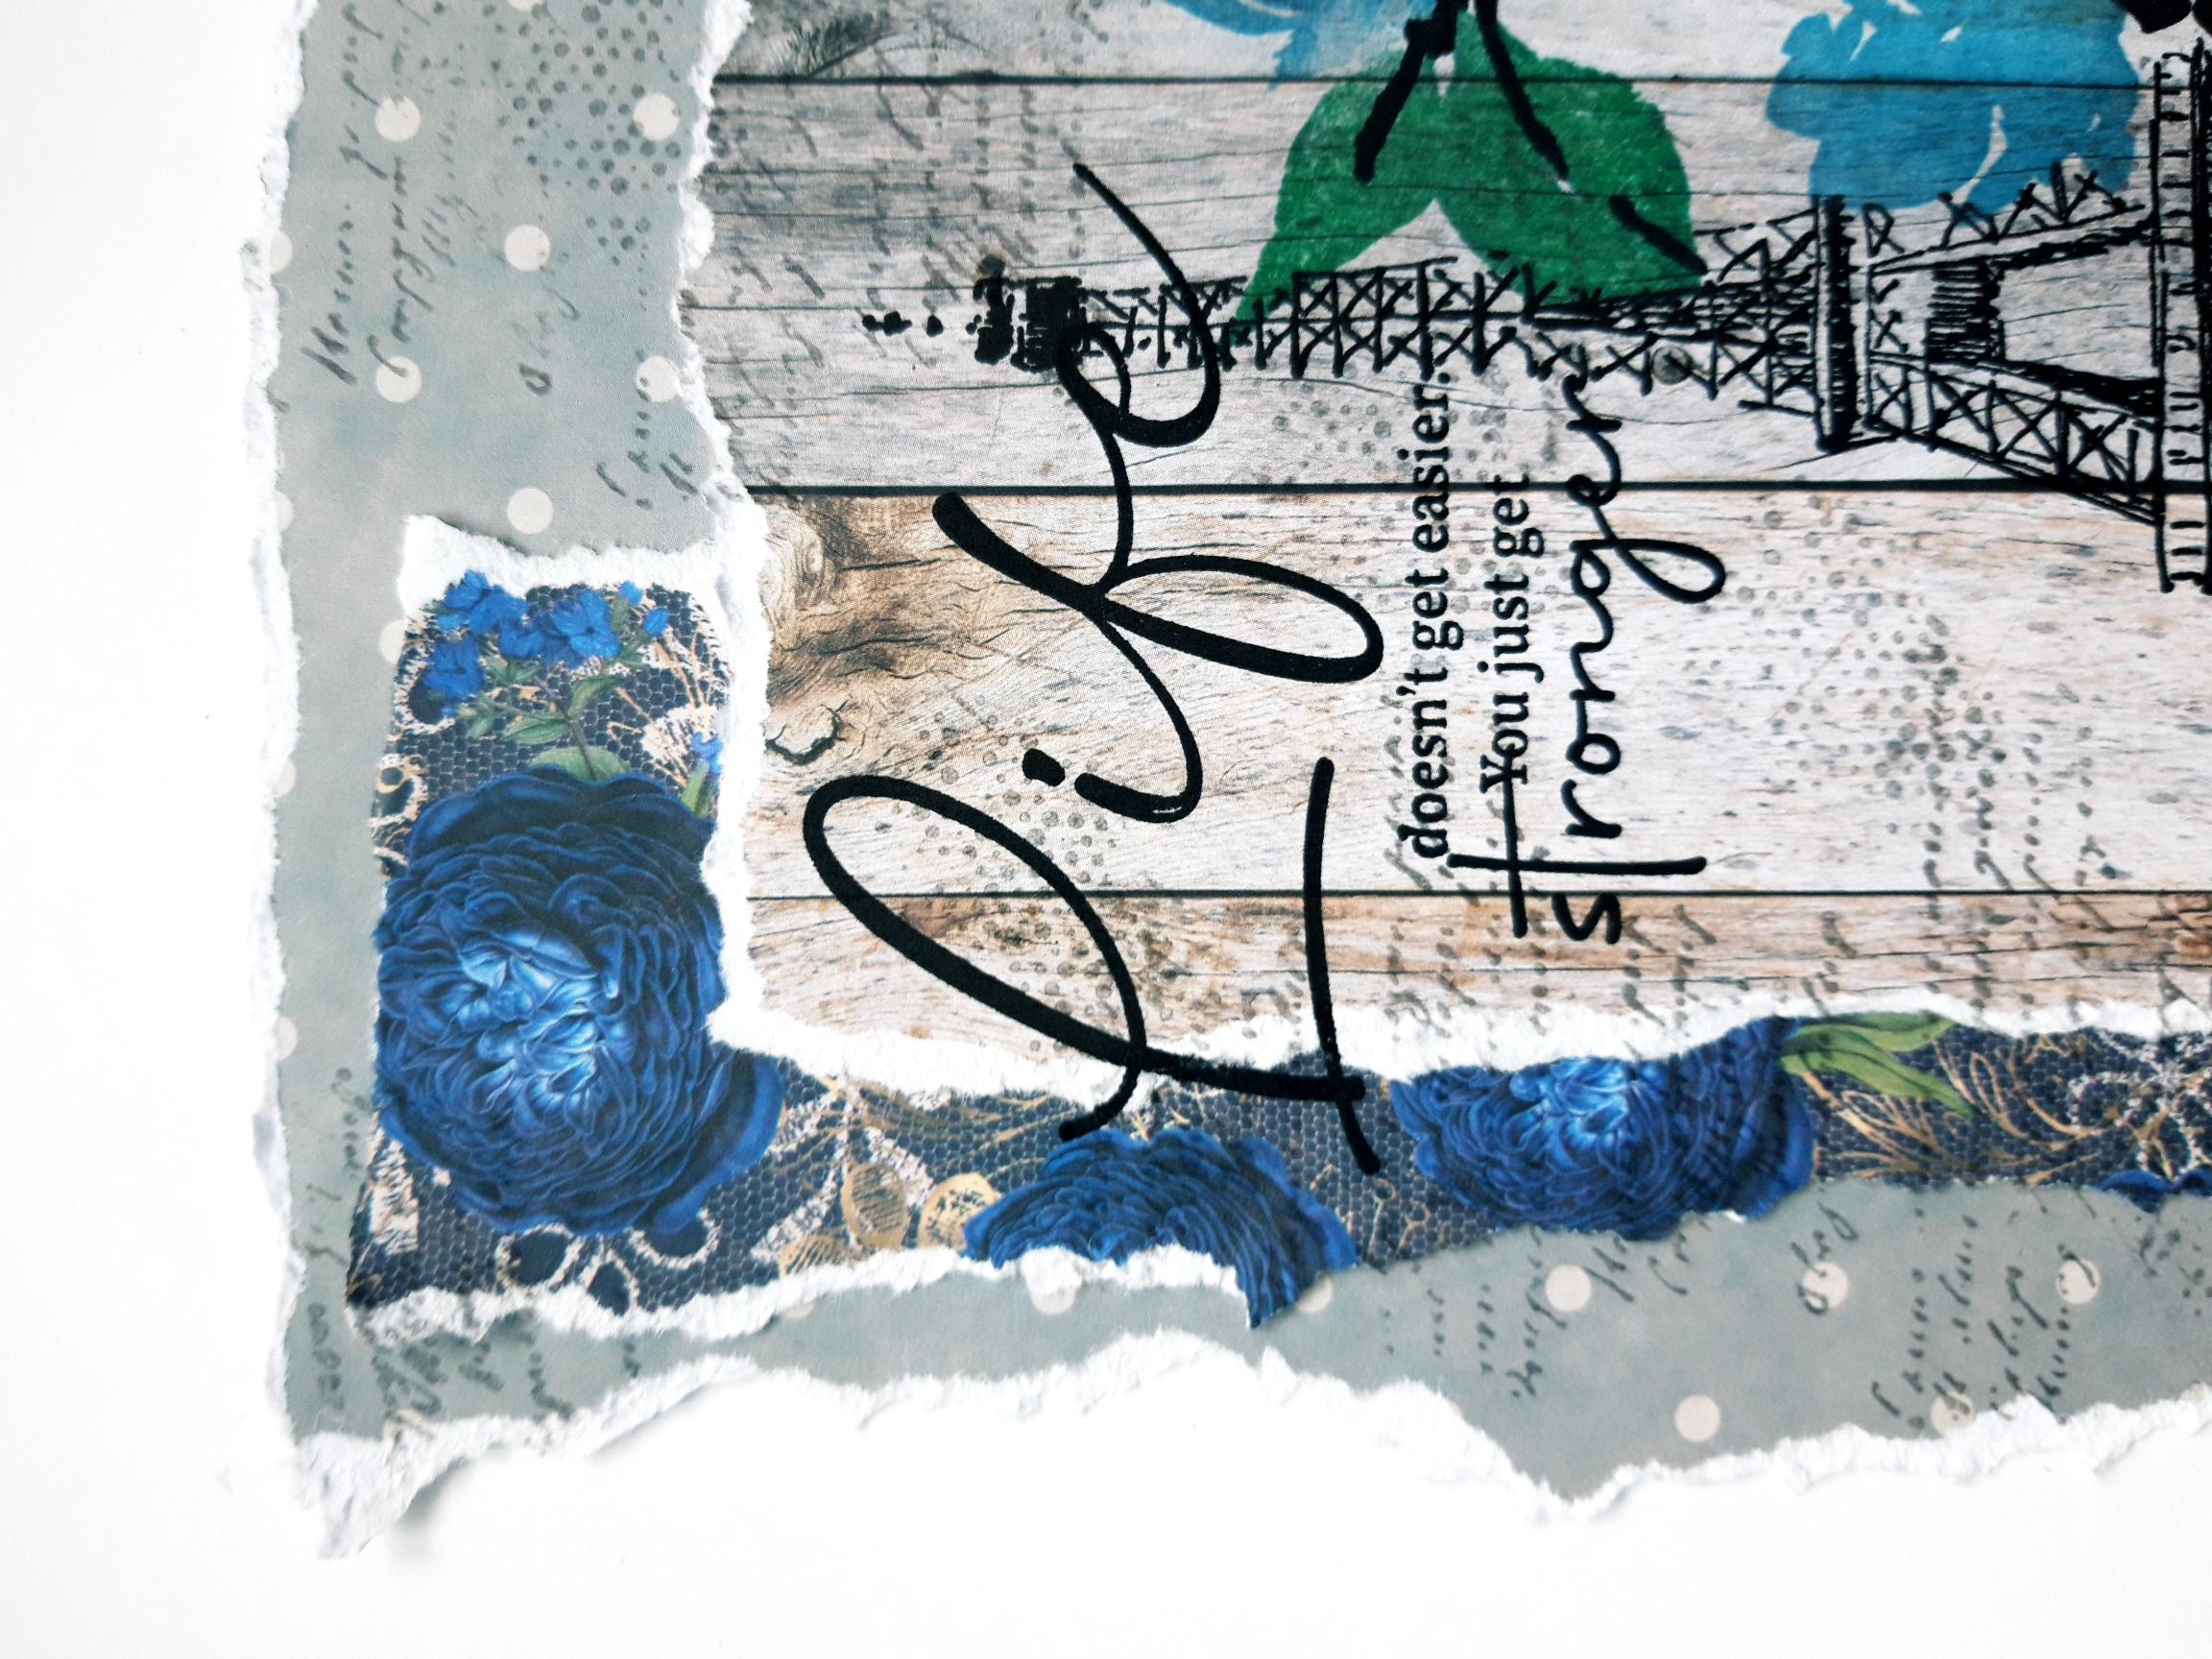
Remove the dotty paper, from the Time To Grow 8 x 8" paper pad, and tear to approx 7 1/2 x 5 1/2". |
|
Remove this paper from the pad, and tear to approx 6 3/4 x 2 1/2". |
|
Remove this sheet from the pad, and tear to approx 5 3/4 x 3 1/2". |
|
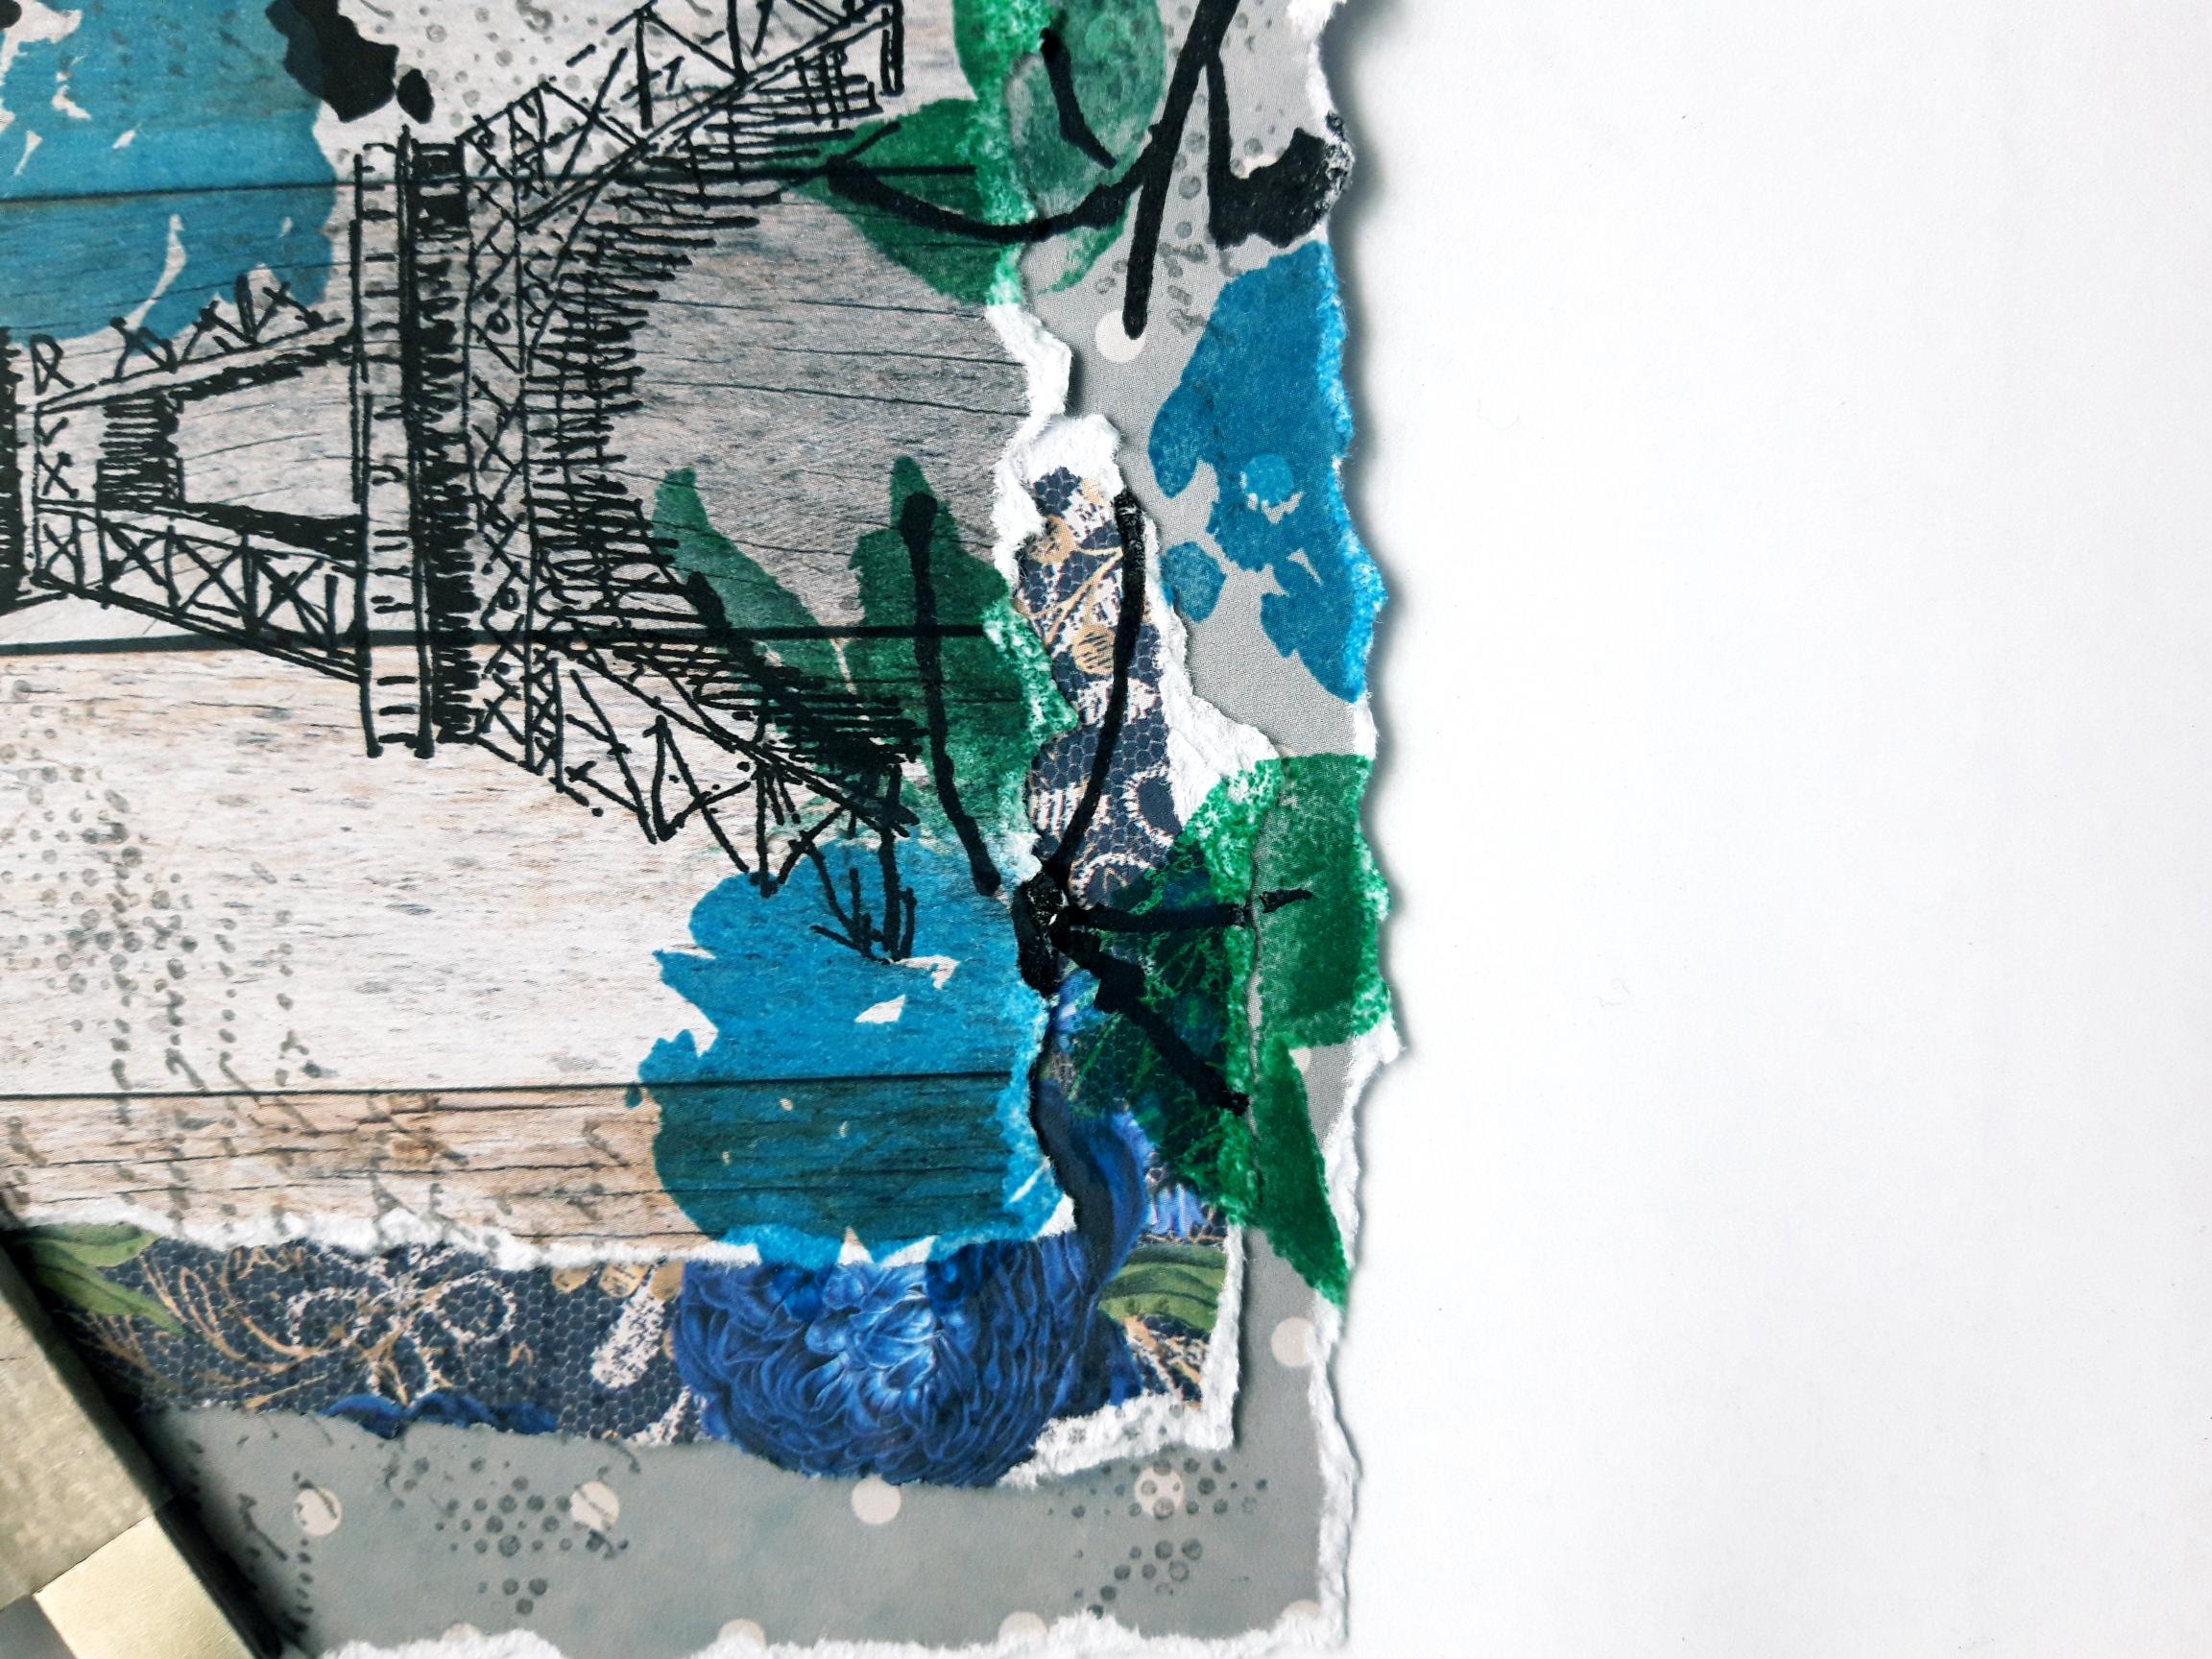
Adhere the blue floral paper down the left side, of the grey dotty paper. I like to apply glue down the centre of the paper only, as it allows movement, and enables you to curl or mould paper edges, as required. |
|
Adhere the woodgrain paper as shown here. |
|
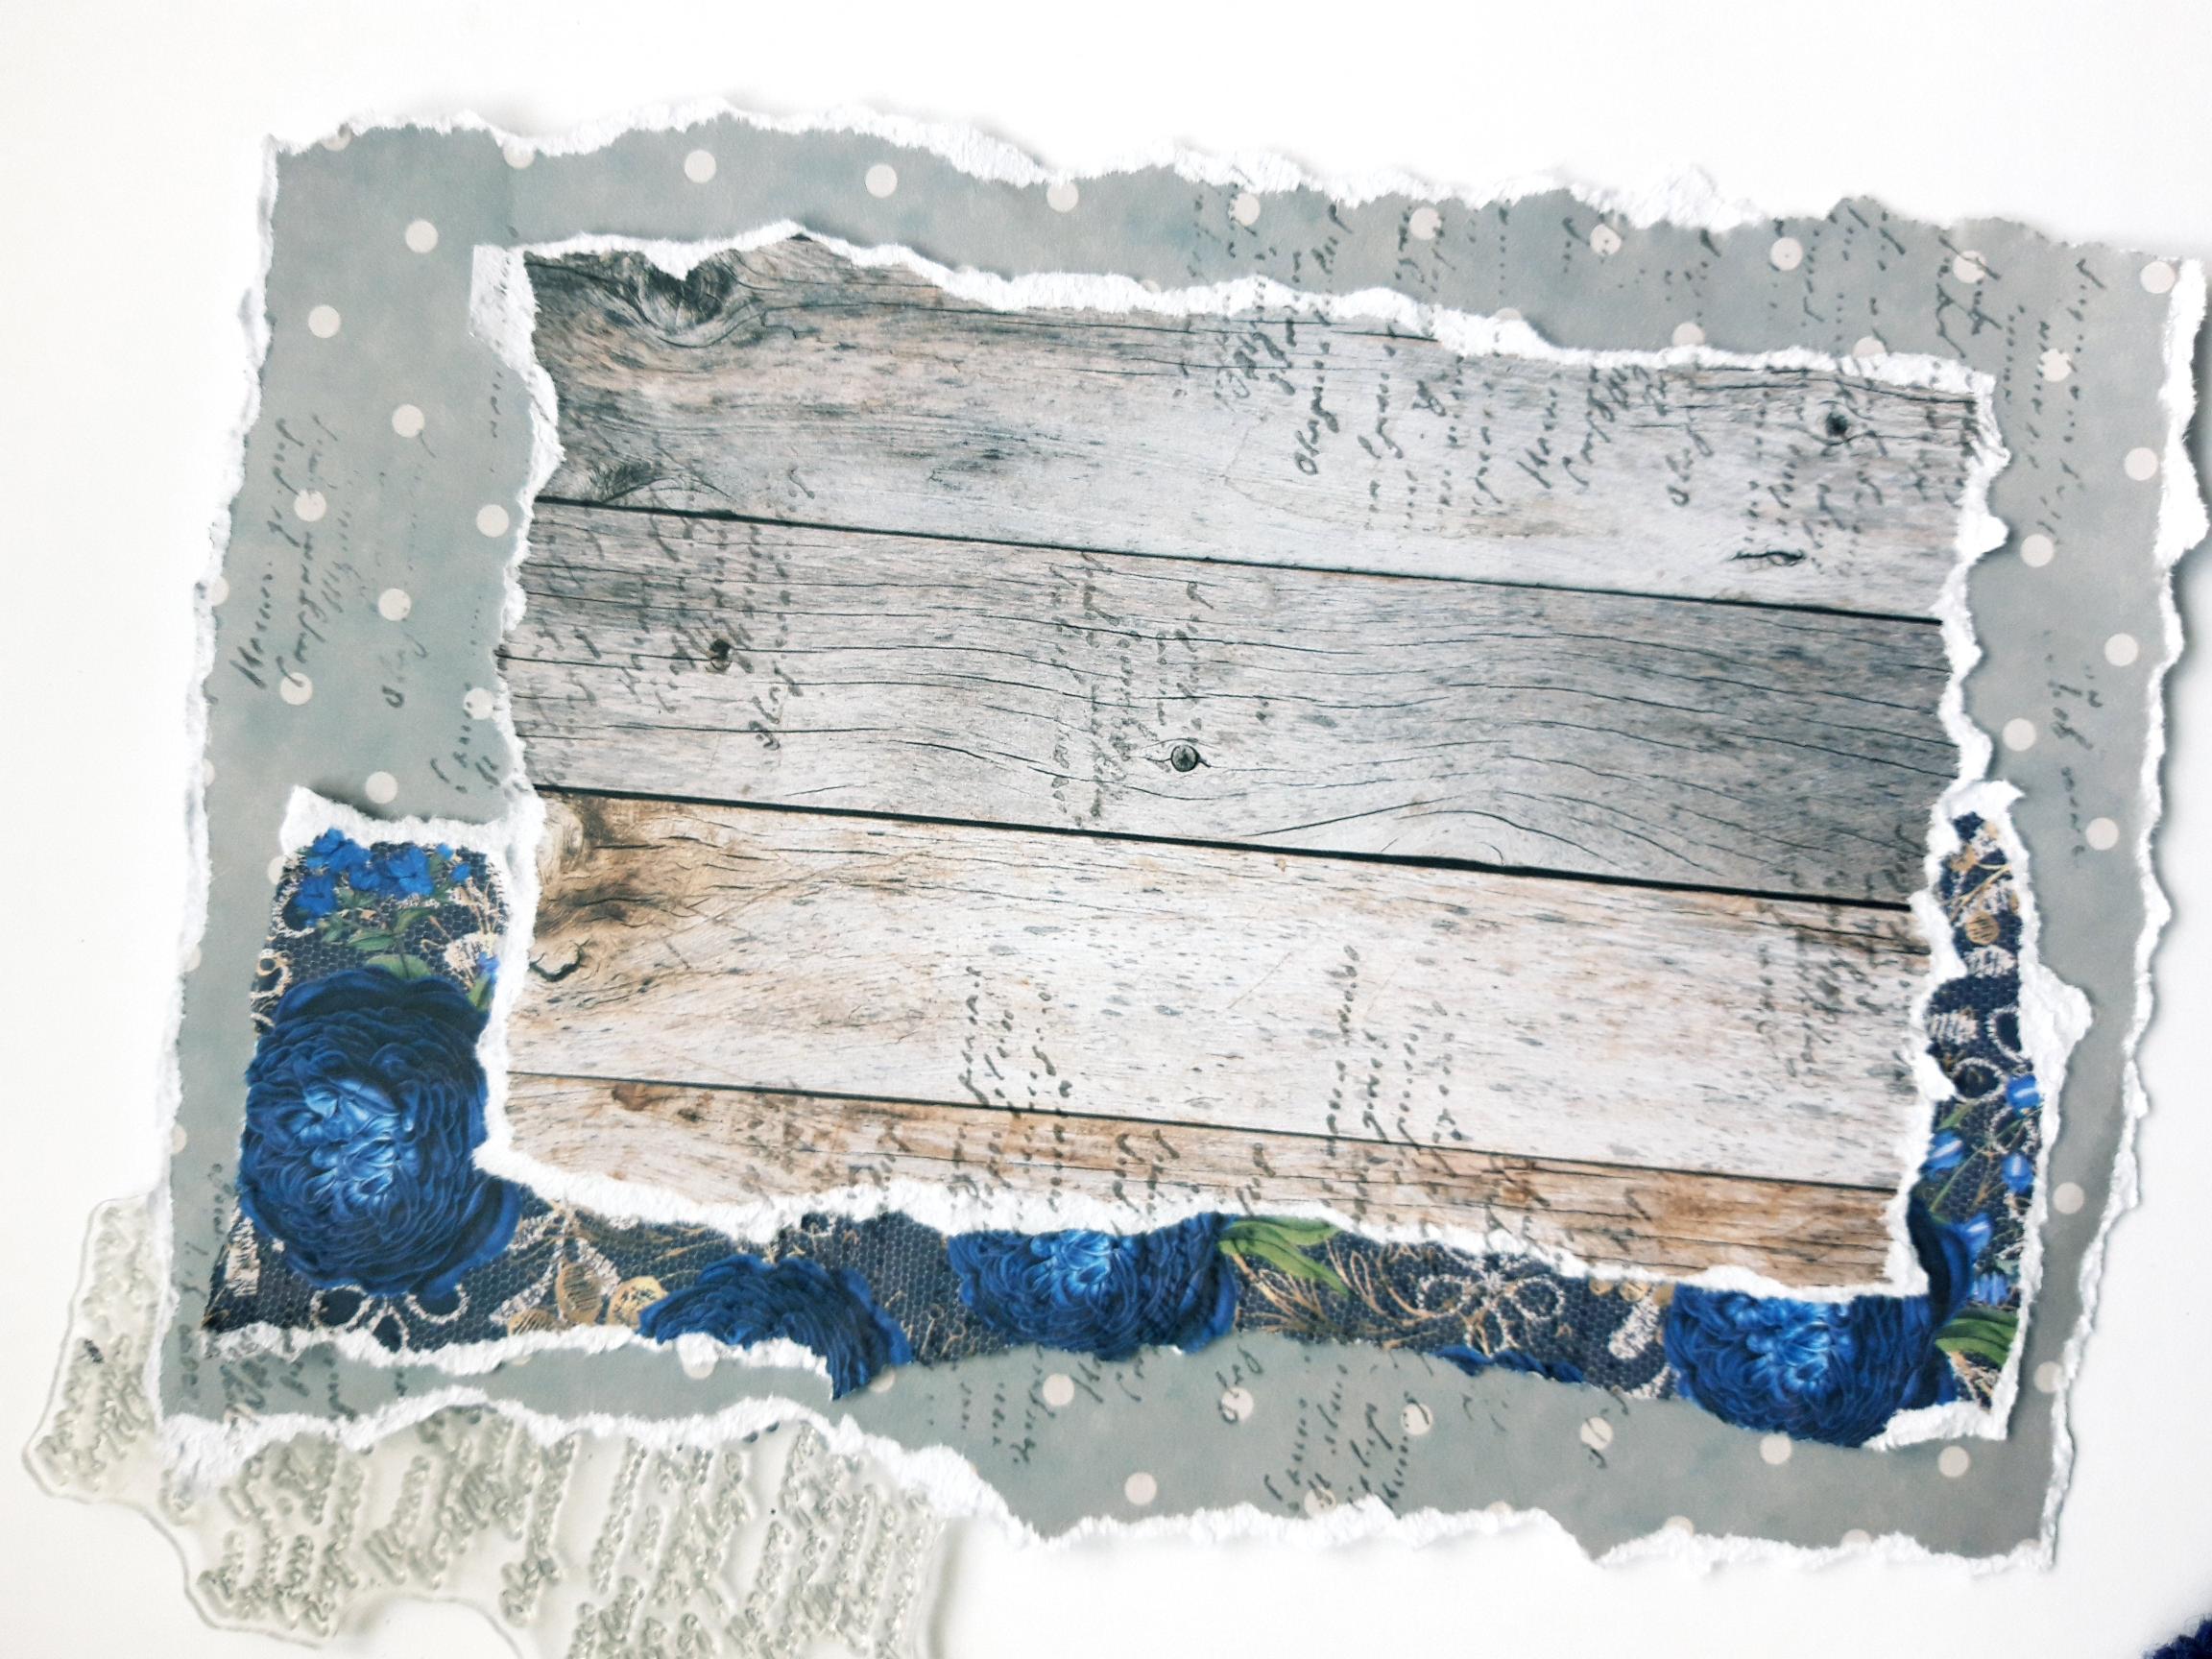
Ink up the script stamp, from the Beautiful Notes Stamp Collection, with the Smoky Gray Versafine, and stamp randomly over your papers. Ensure you take some stamped images off the edges. |
|
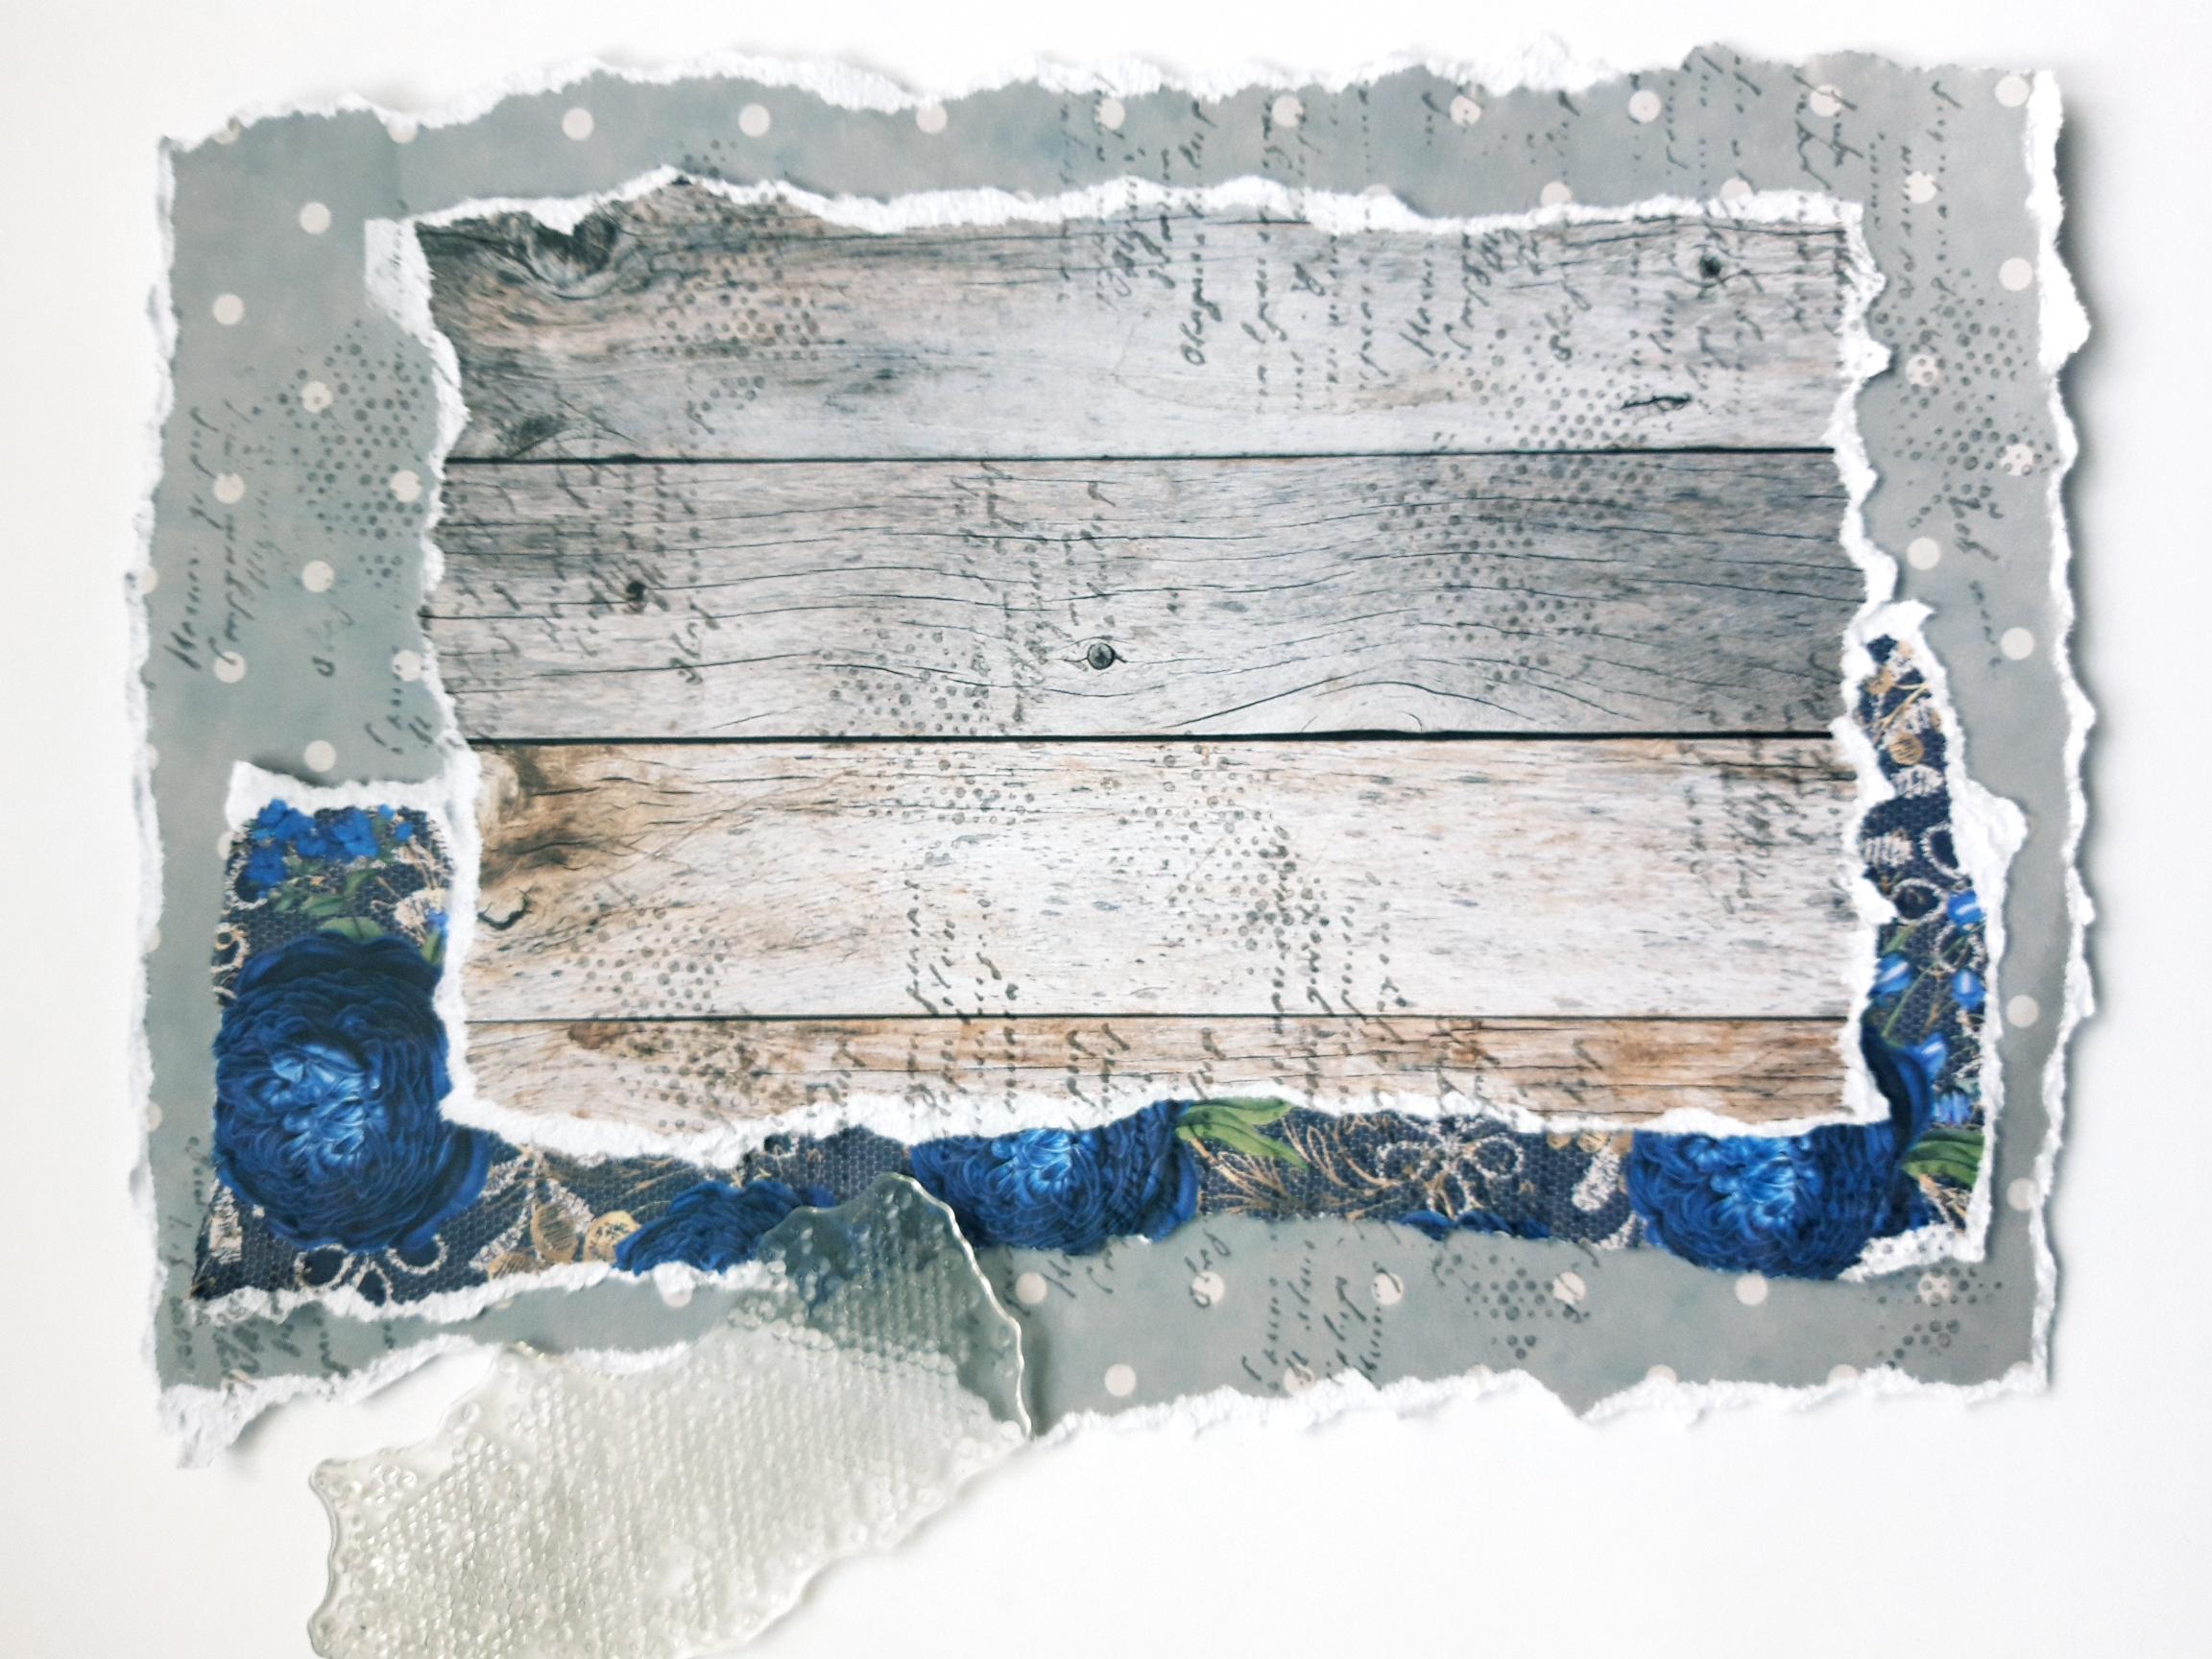
Ink up the textured dots stamp, from the same stamp set, with the Gray Versafine, and stamp randomly over the papers. |
|
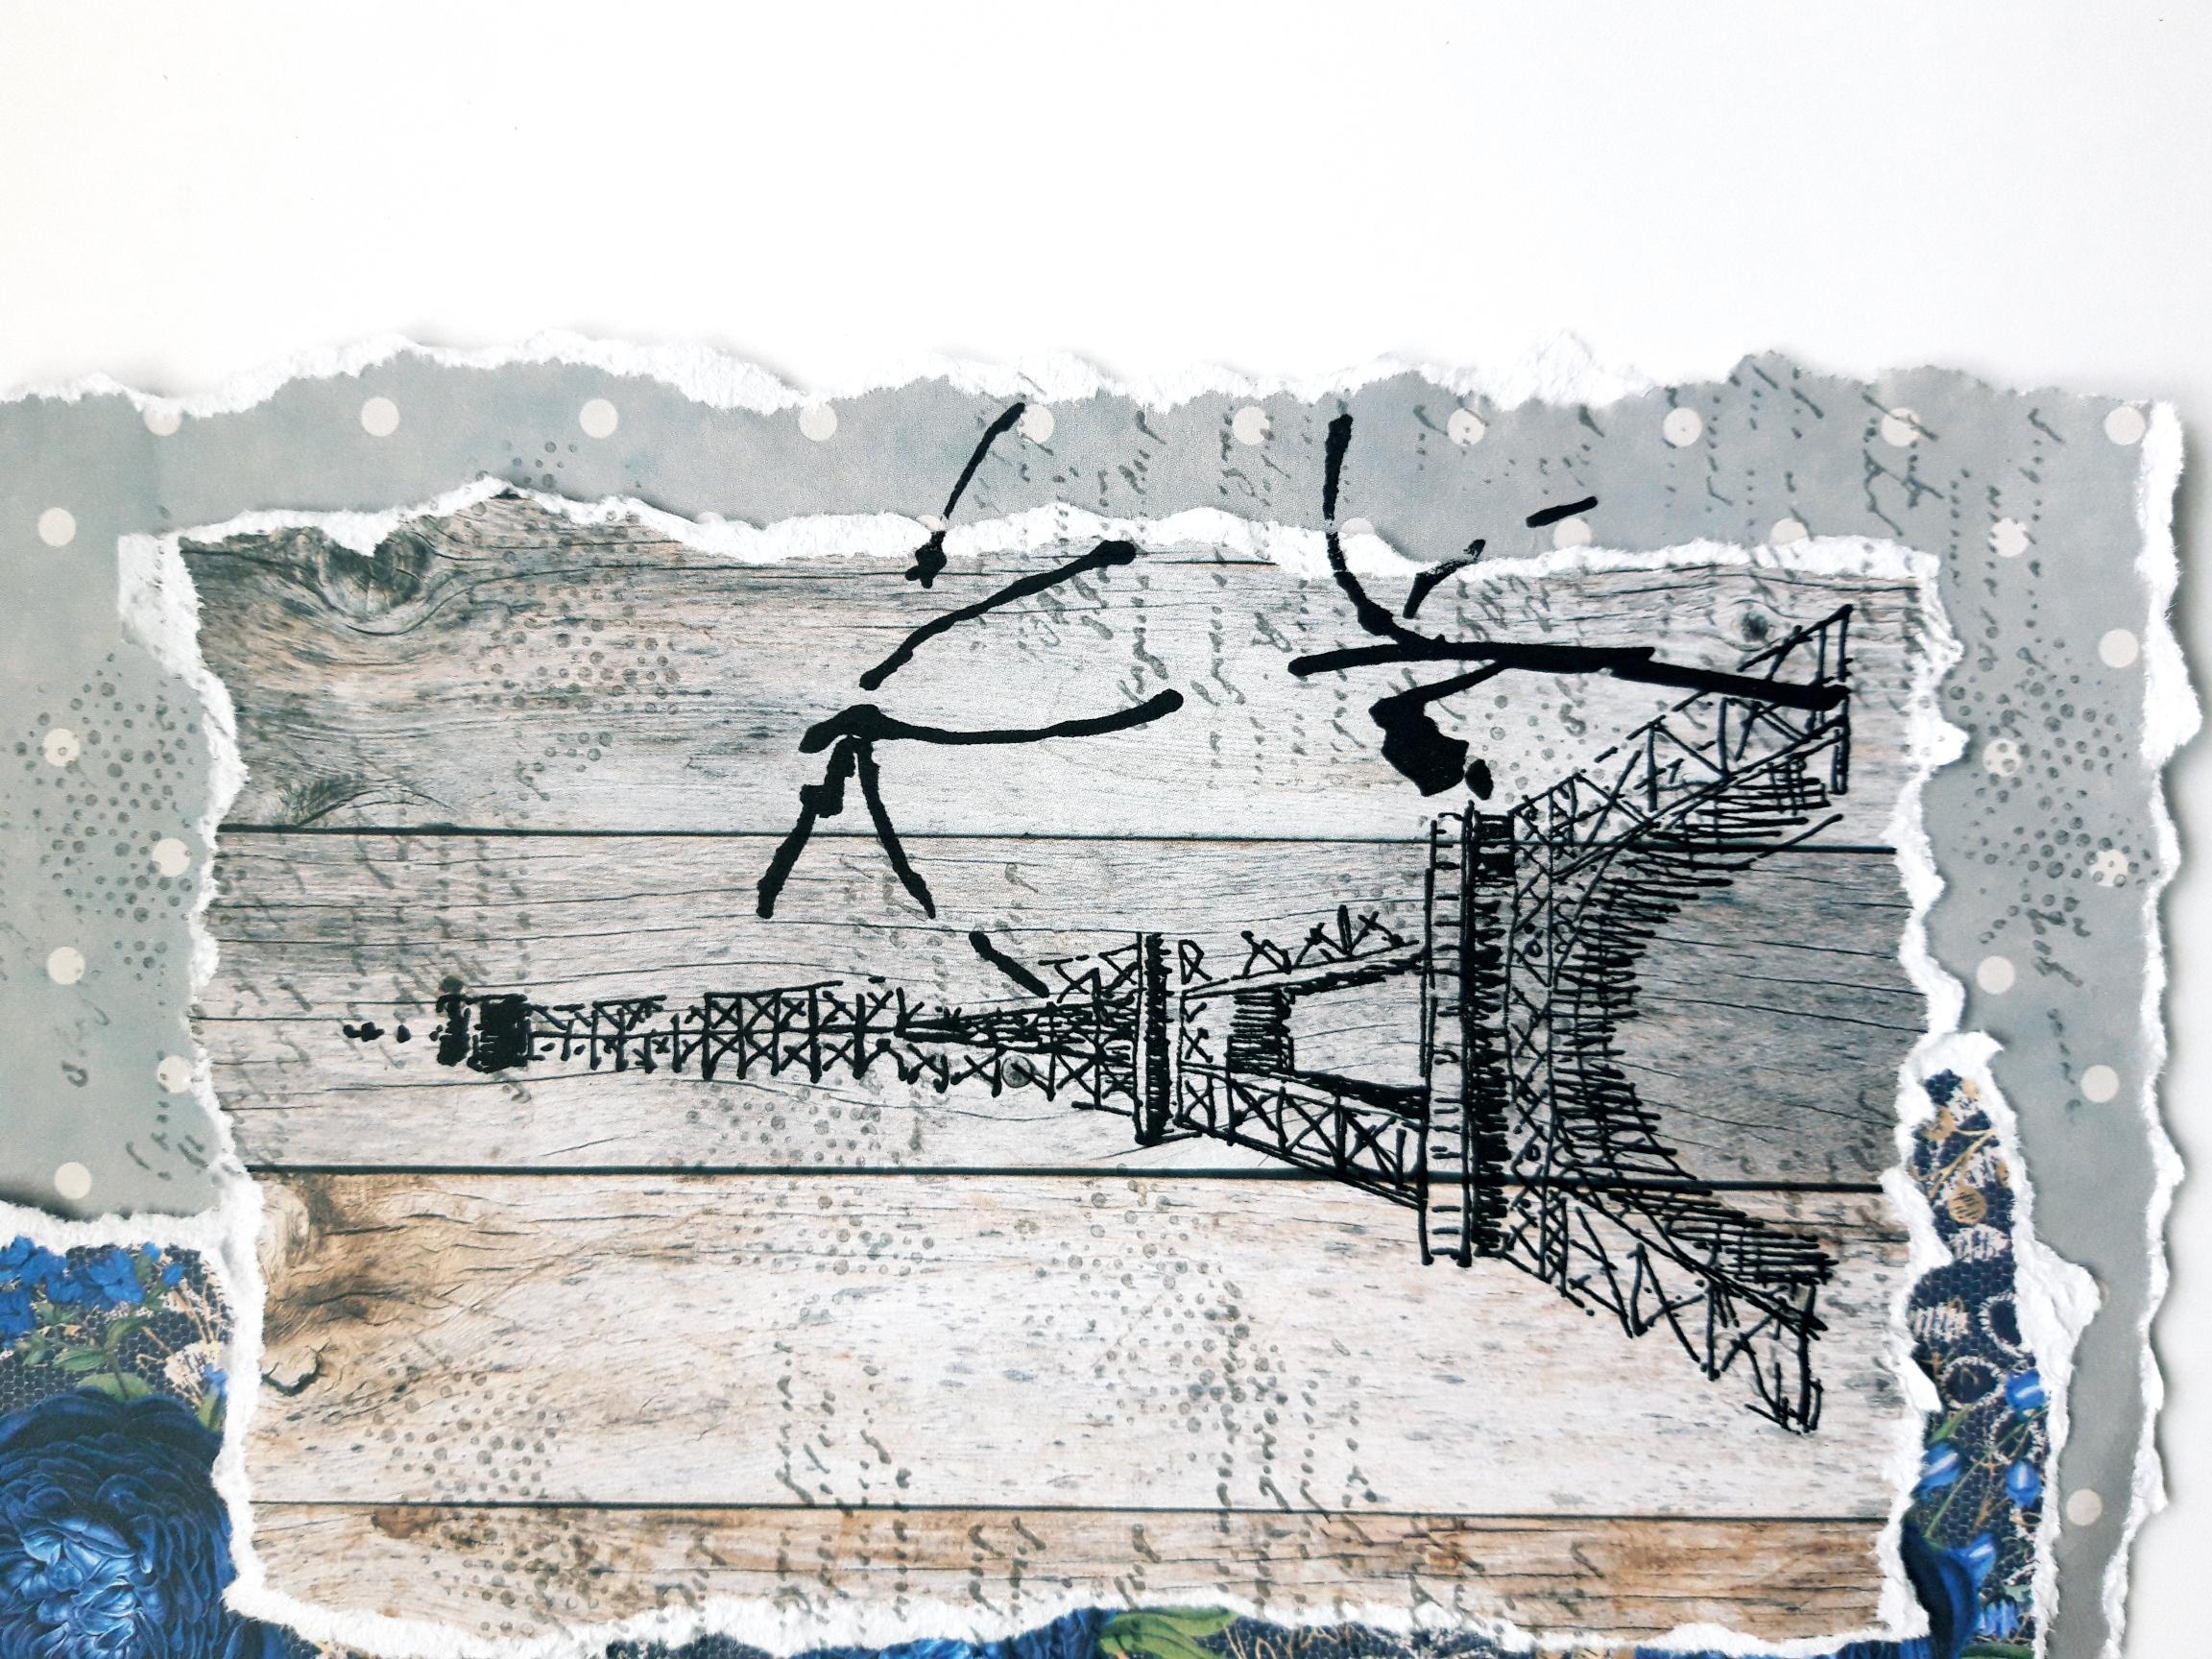
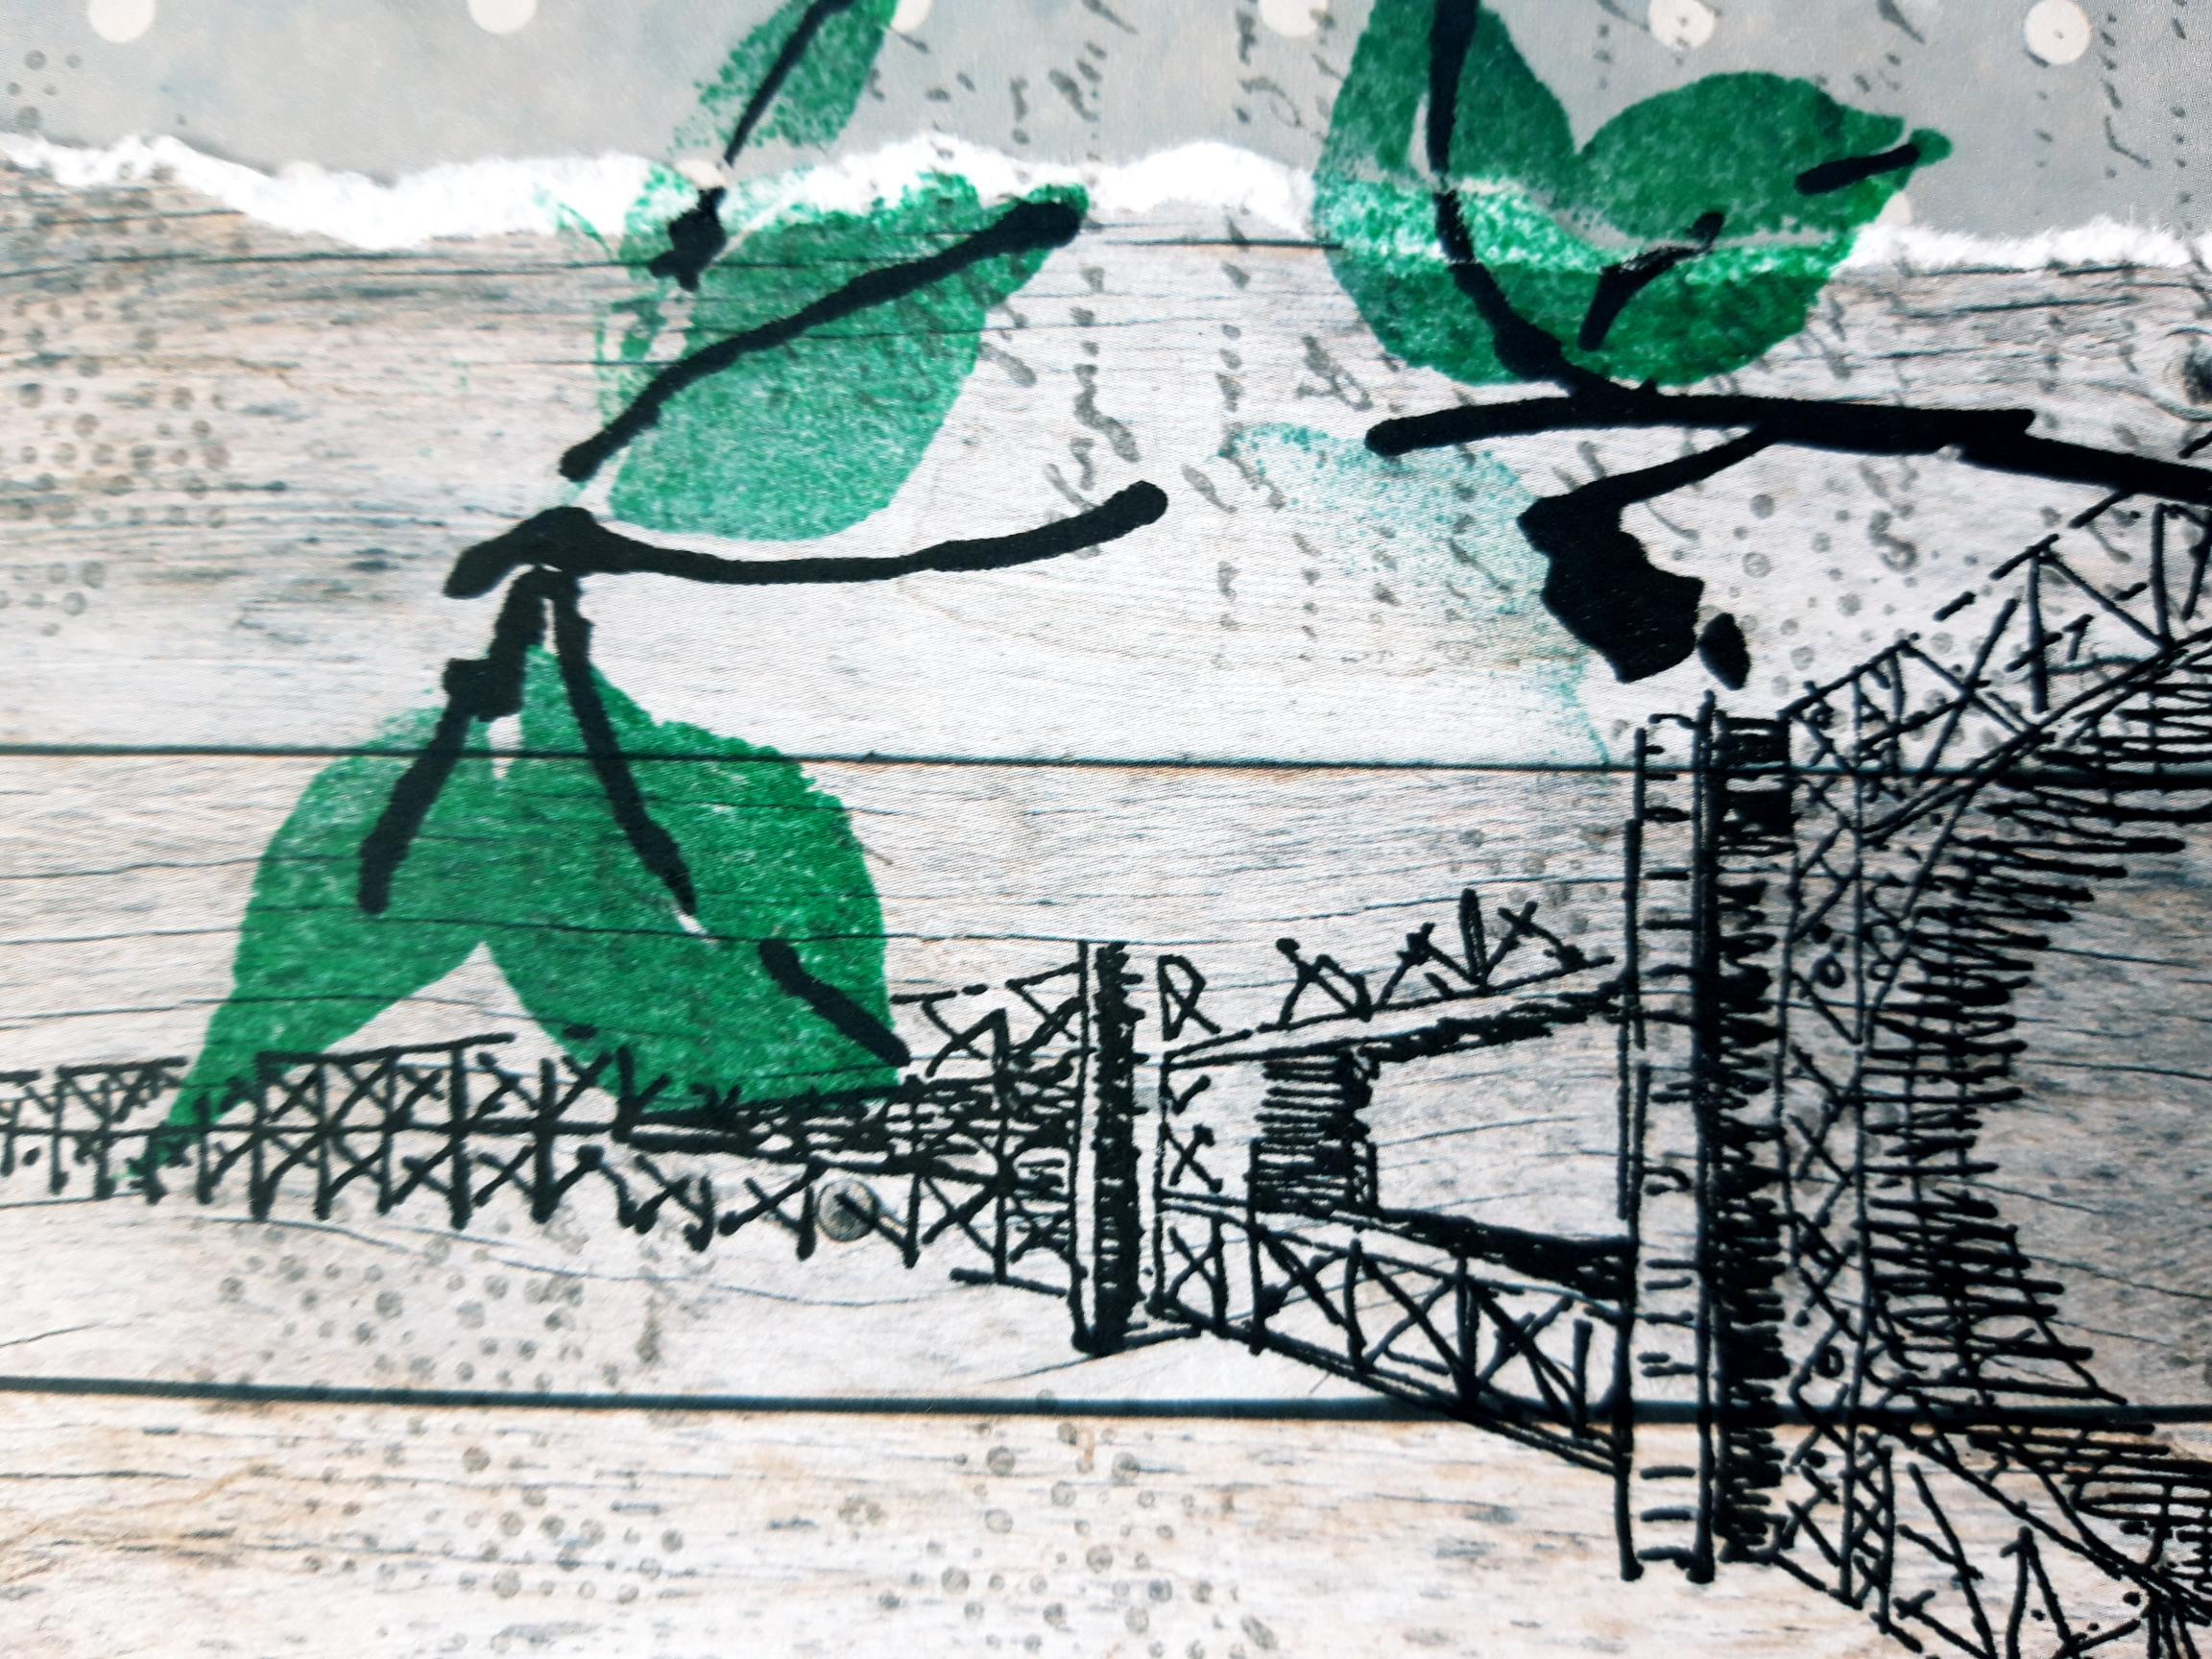
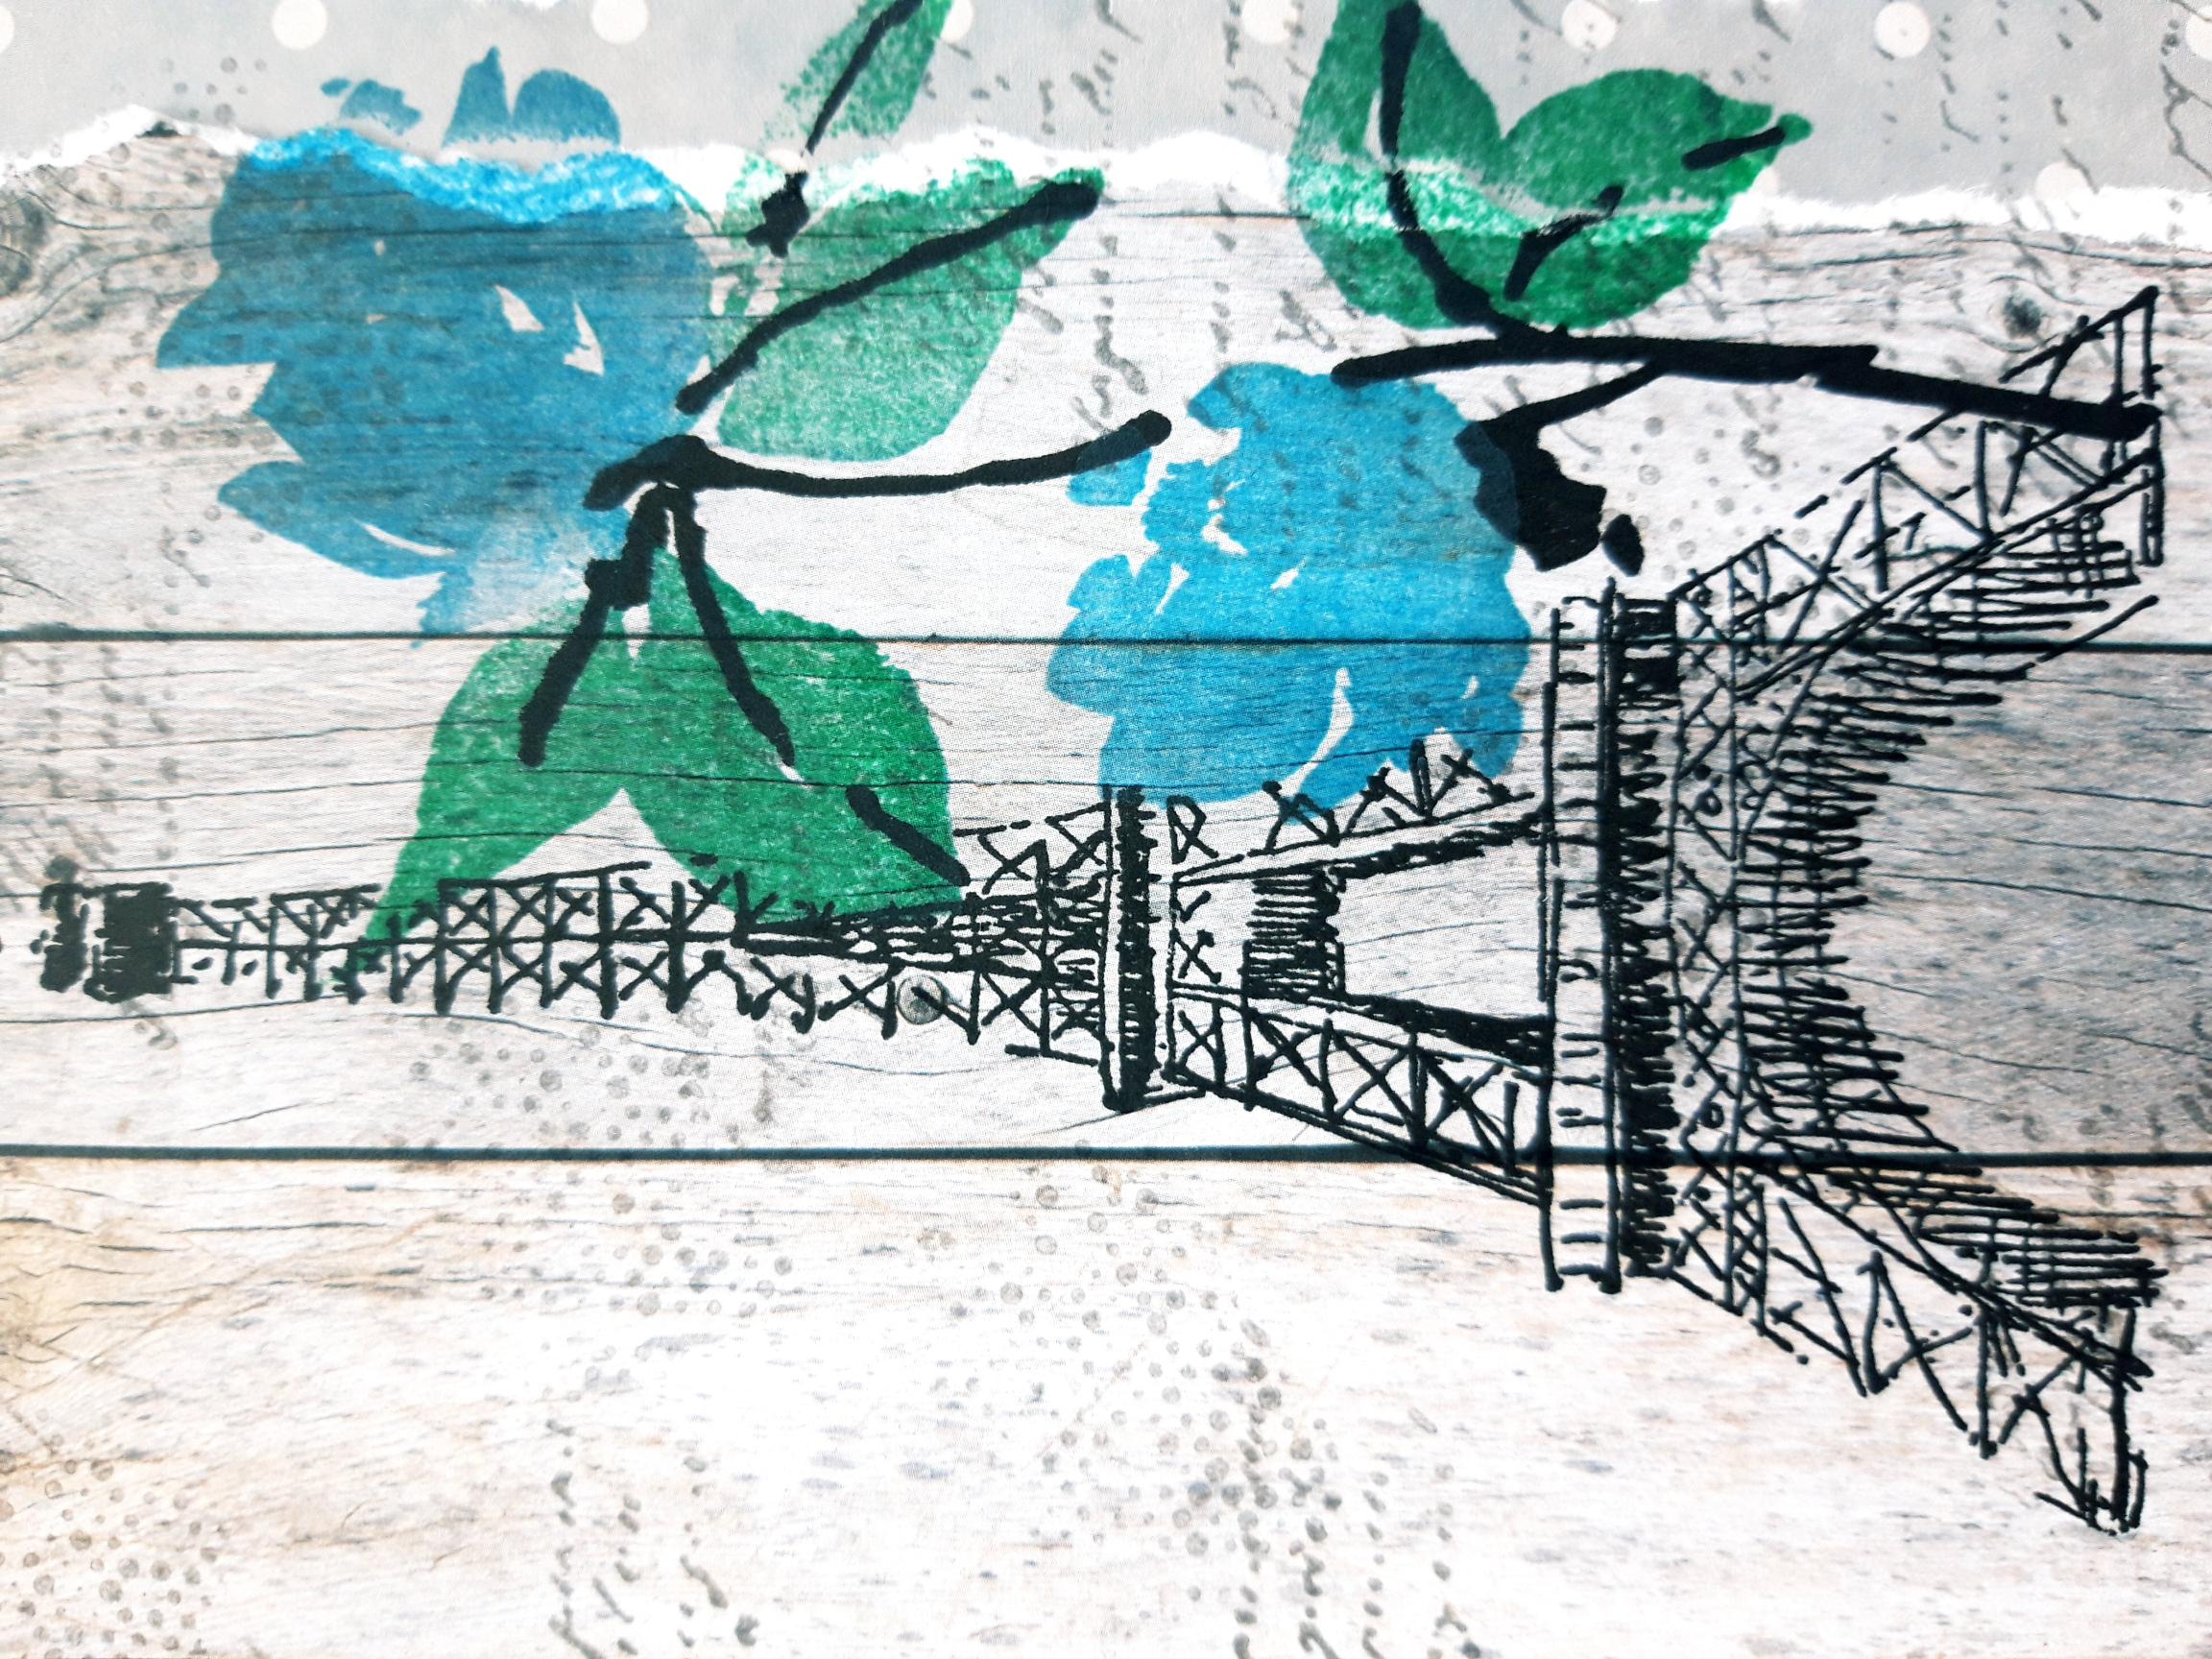
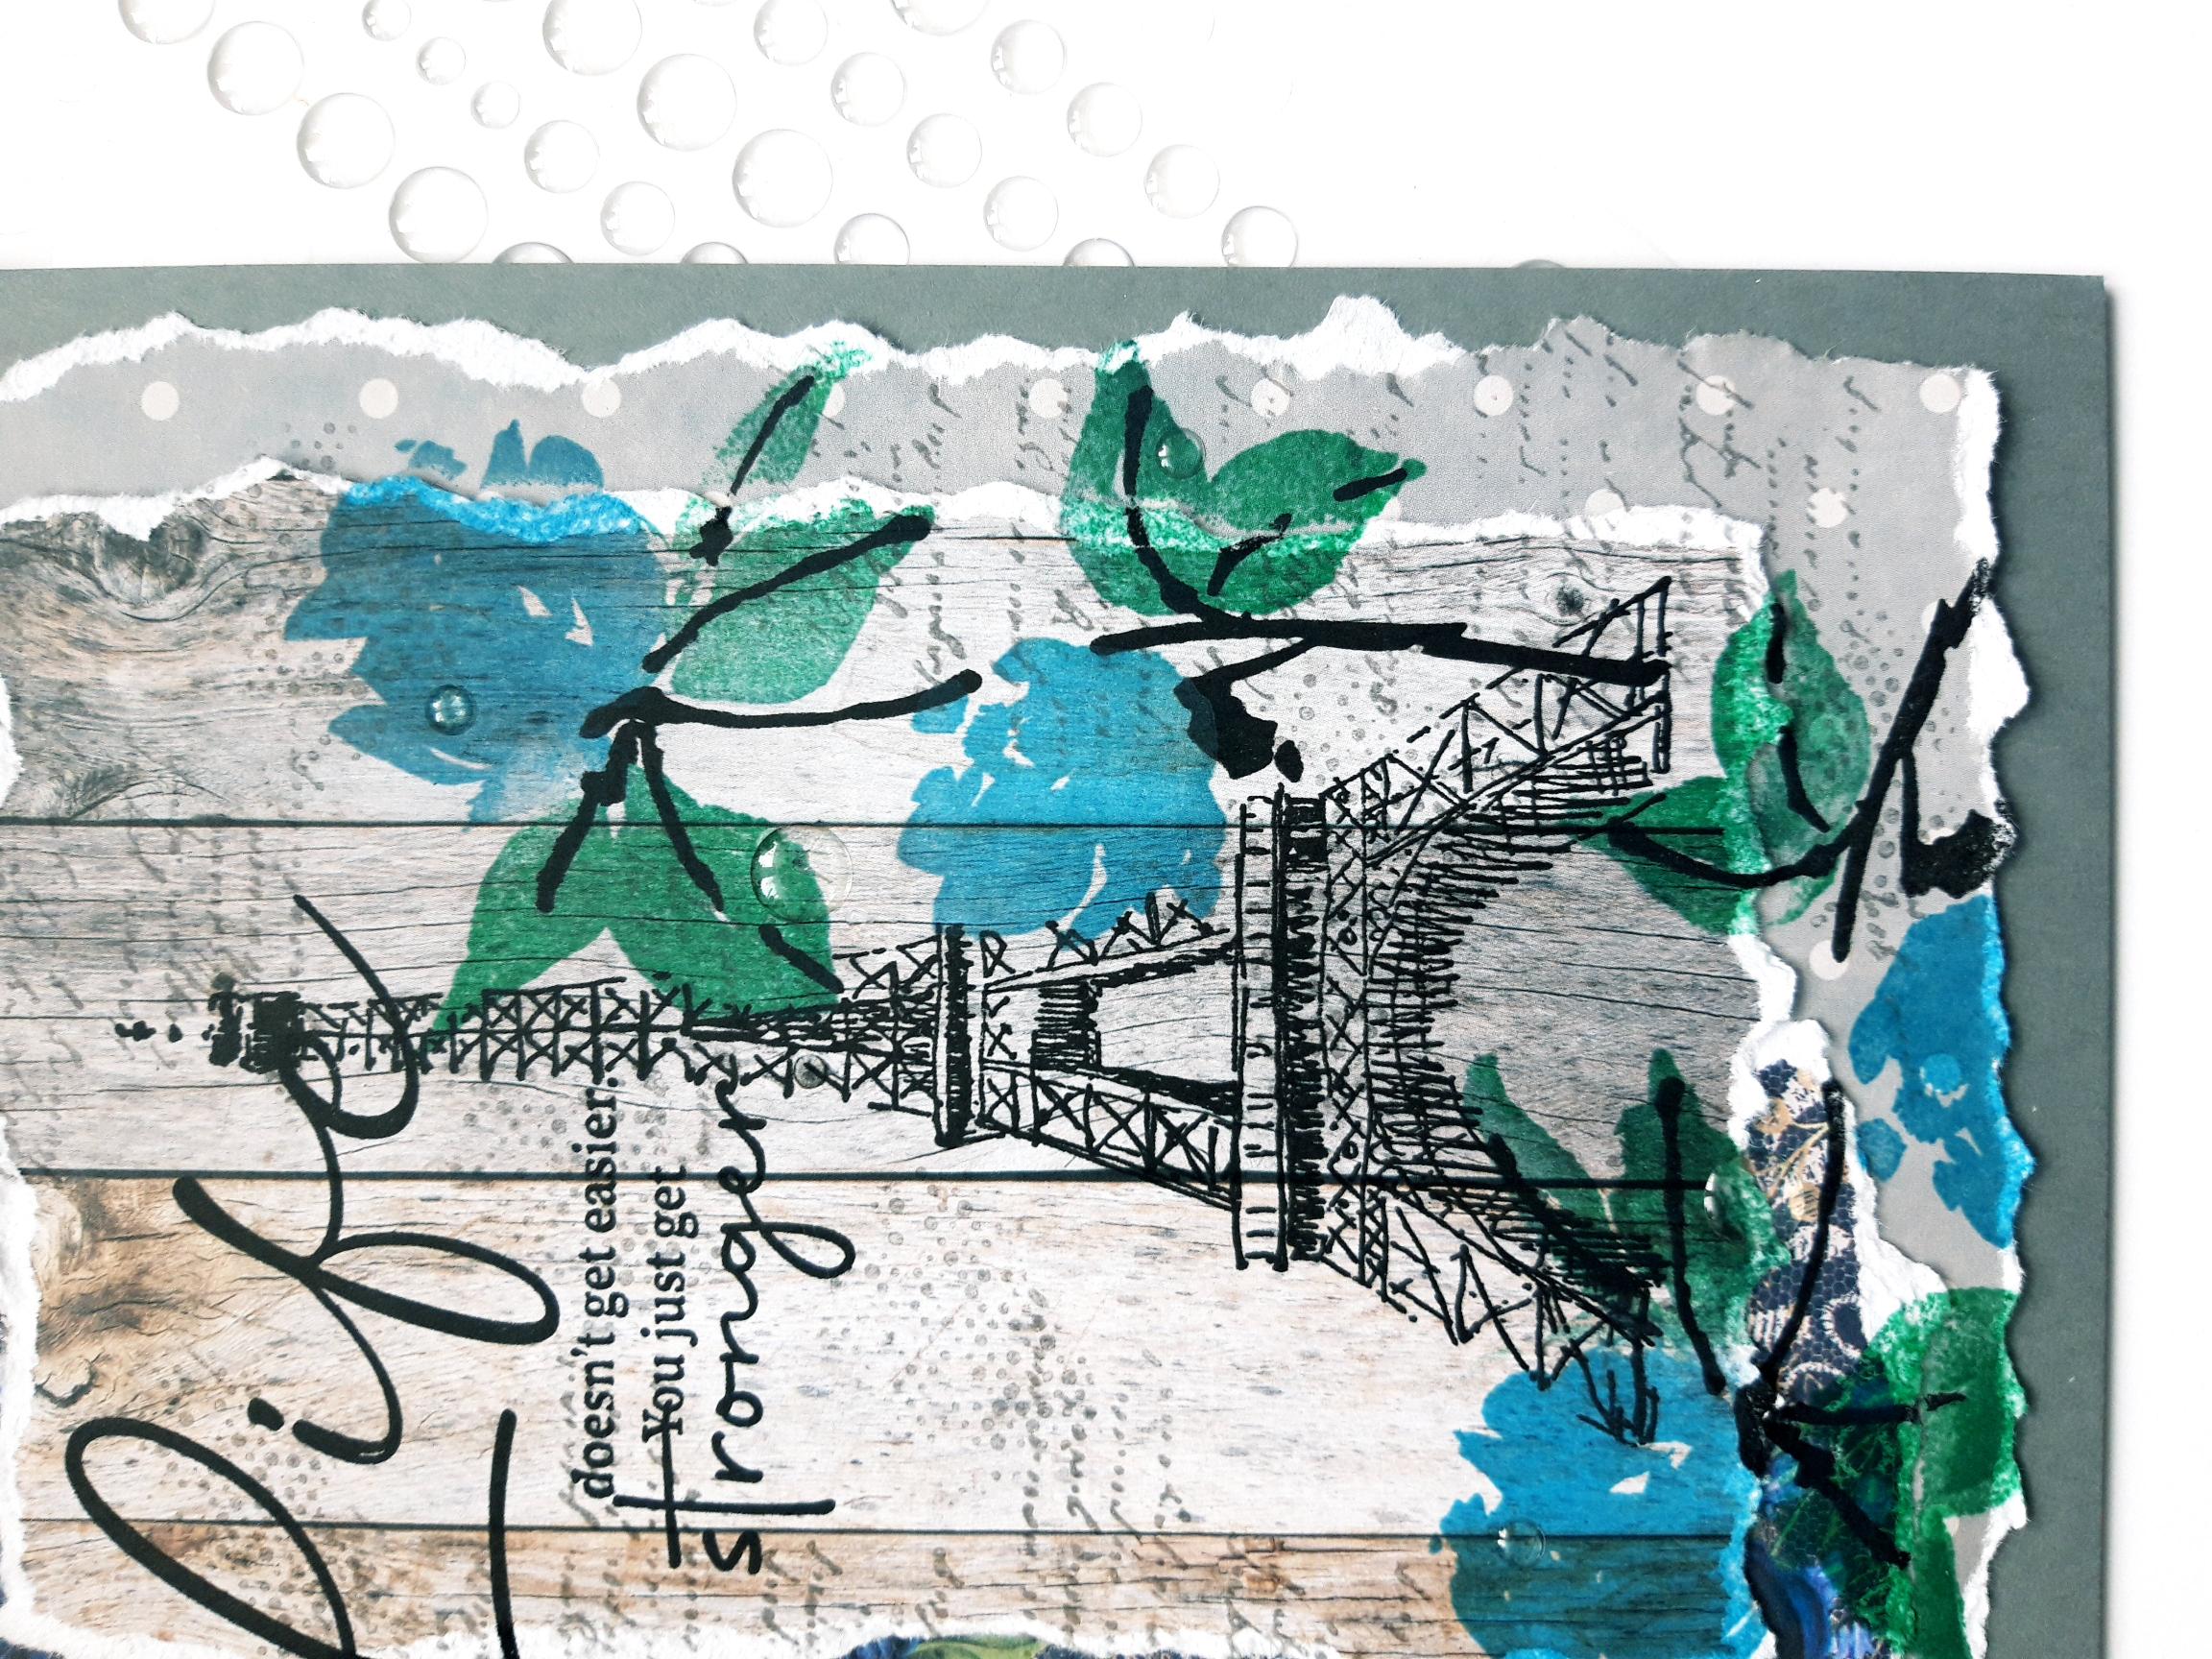
Ink up the detailed stamp, from the Stronger Lamination Stamp Collection, with the Onyx Black Versafine, and stamp on the right hand side of the papers. |
|
Ink up the solid leaves part of the stamp, with the Izink green Pigment inks. and stamp in place, over your detailed stamped image. If you are unsure how to line the lamination stamps up, the images on the packaging will help. You can reink, and stamp the leaves, until you are happy with the colour achieved. |
|
Ink up the petals of the same stamp, with the blue Izink Pigment inks. Line it up, and stamp on to your artwork. Again you can reink and stamp, until the desired colours are achieved. |
|
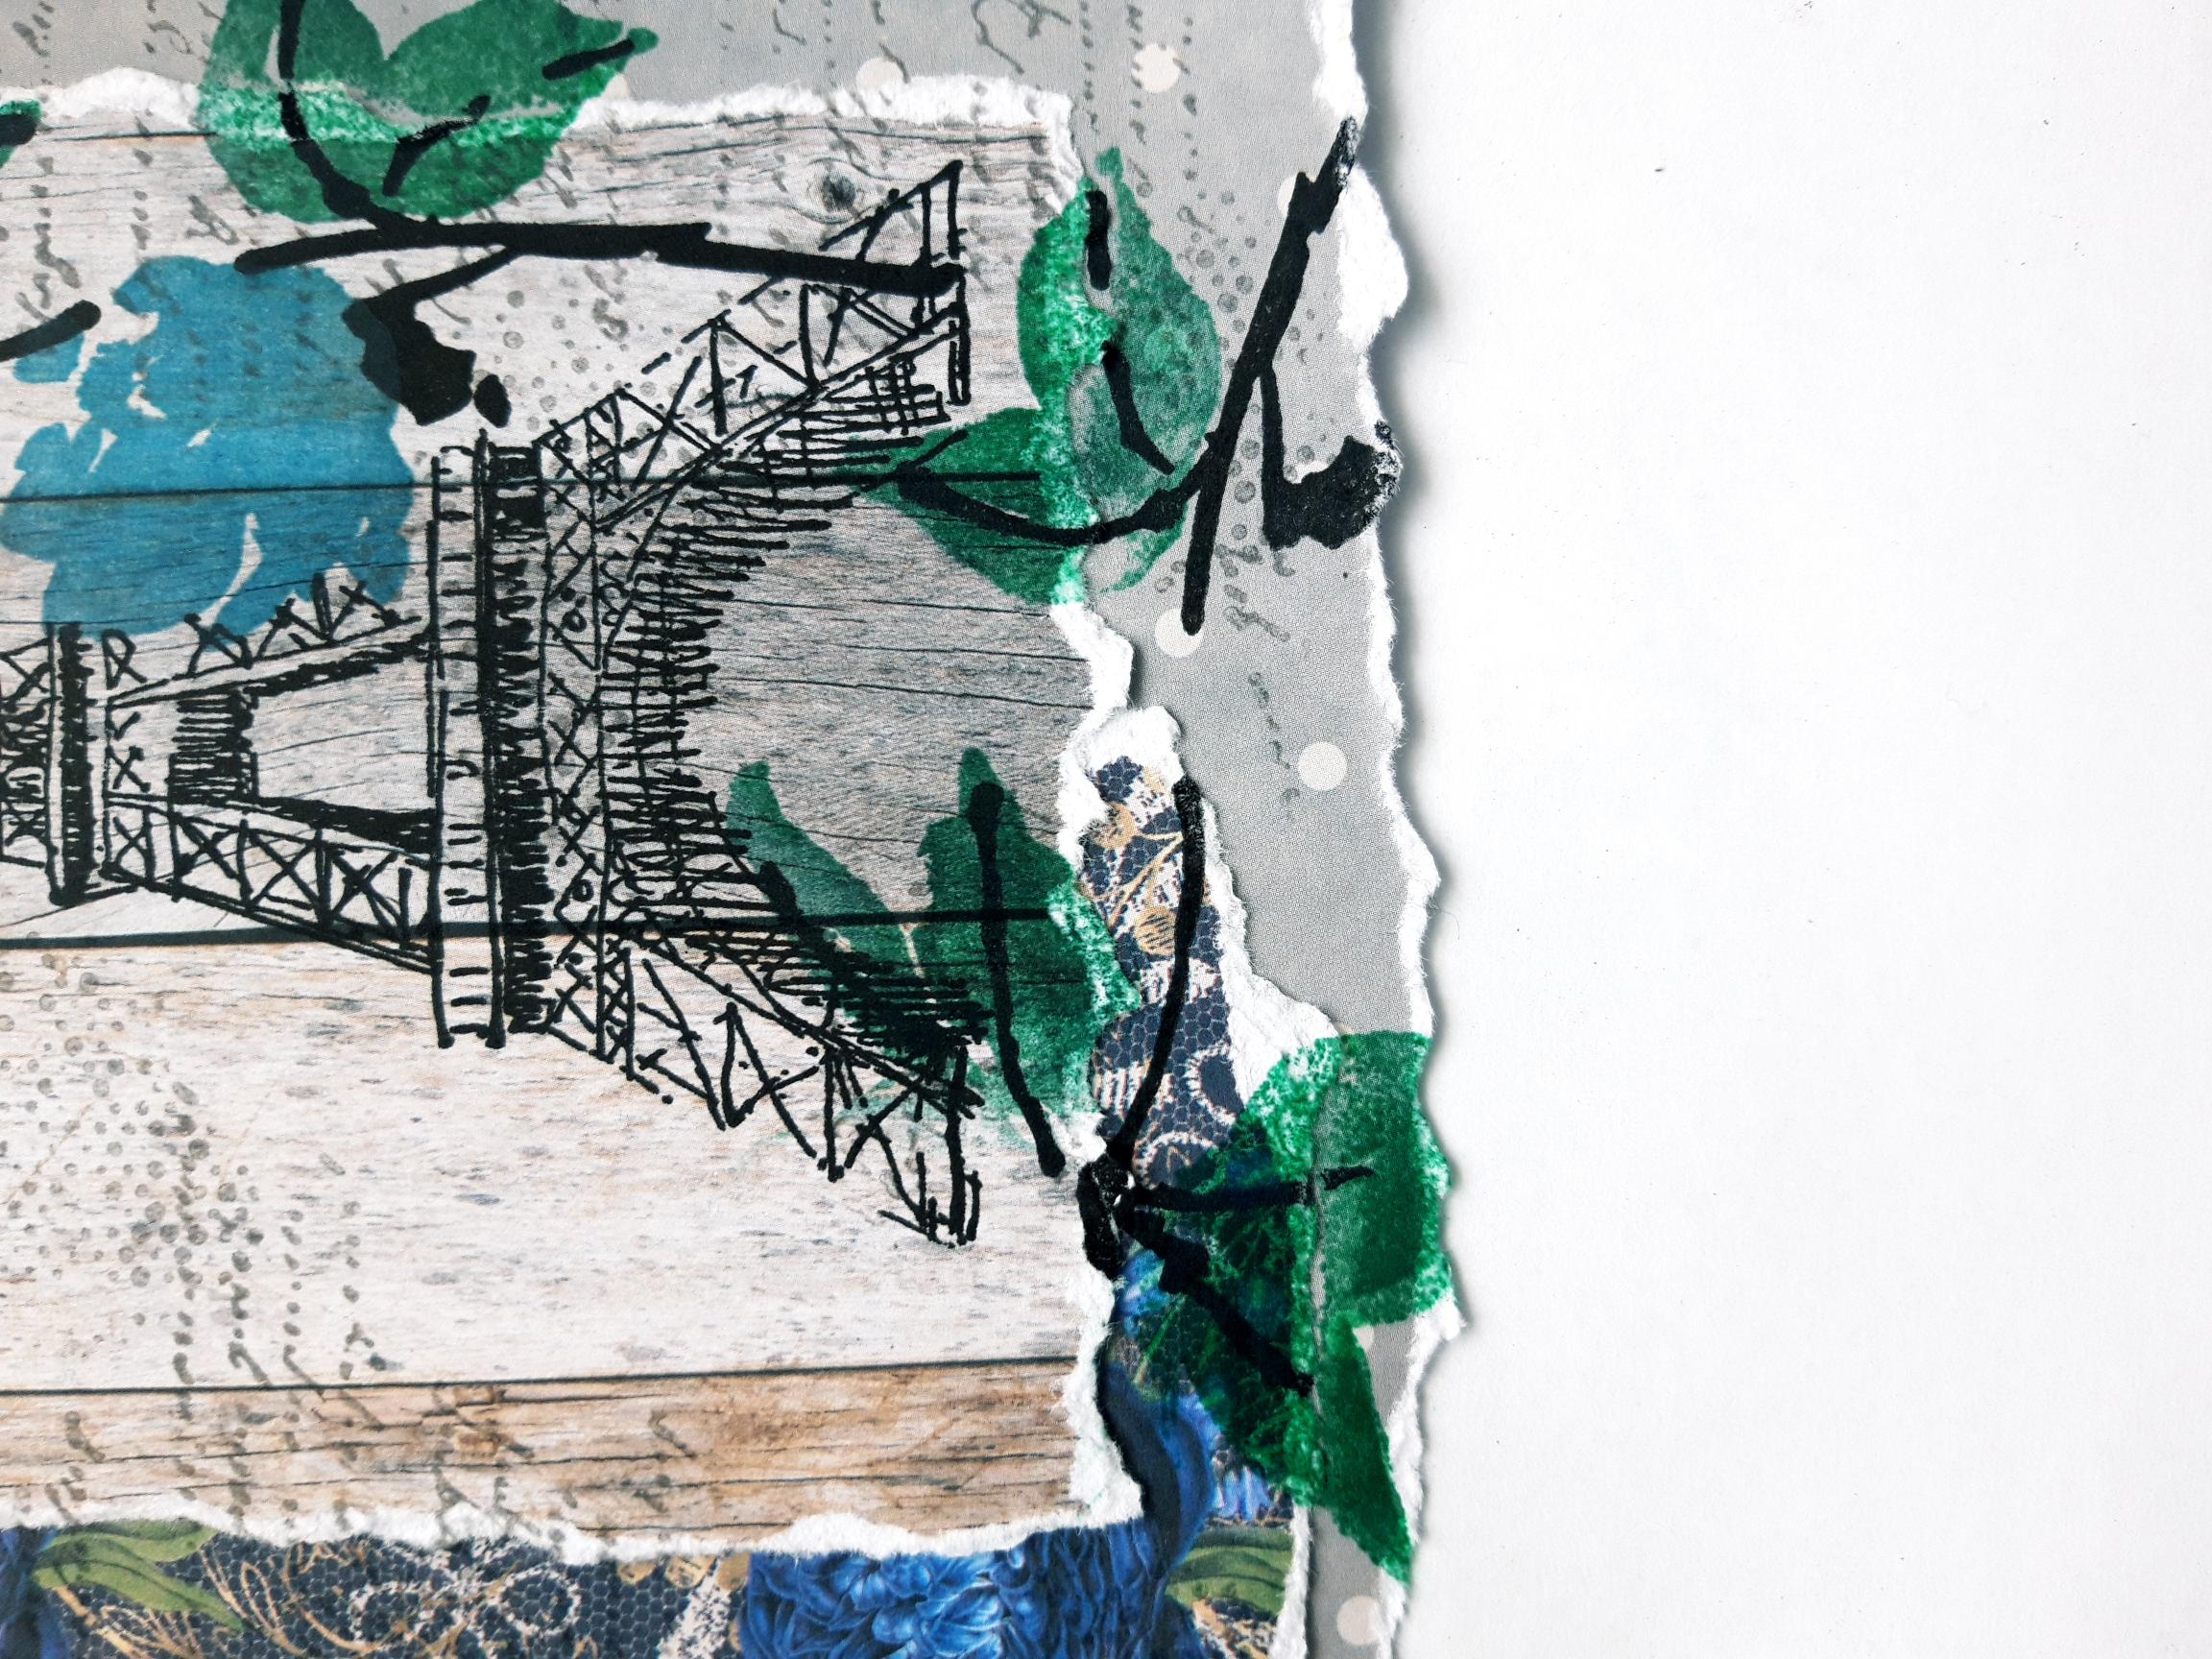
Ink up the detailed stamp again, in the Onyx Black Versafine, and stamp just the floral element, so it's coming up, on to the bottom edges of your paper. As before, ink up the leaves on the solid stamp, with the green Izinks, and stamp them over your stamped image. |
|
Inkk up the petals, in the blue Izinks, and stamp in place on your artwork. |
|
Ink up the sentiment from the Stronger stamp set, with the Onyx Black Versafine, and stamp to the top left of your artwork. |
|
Add clear adhesive gems on to your artwork, as required. |
|
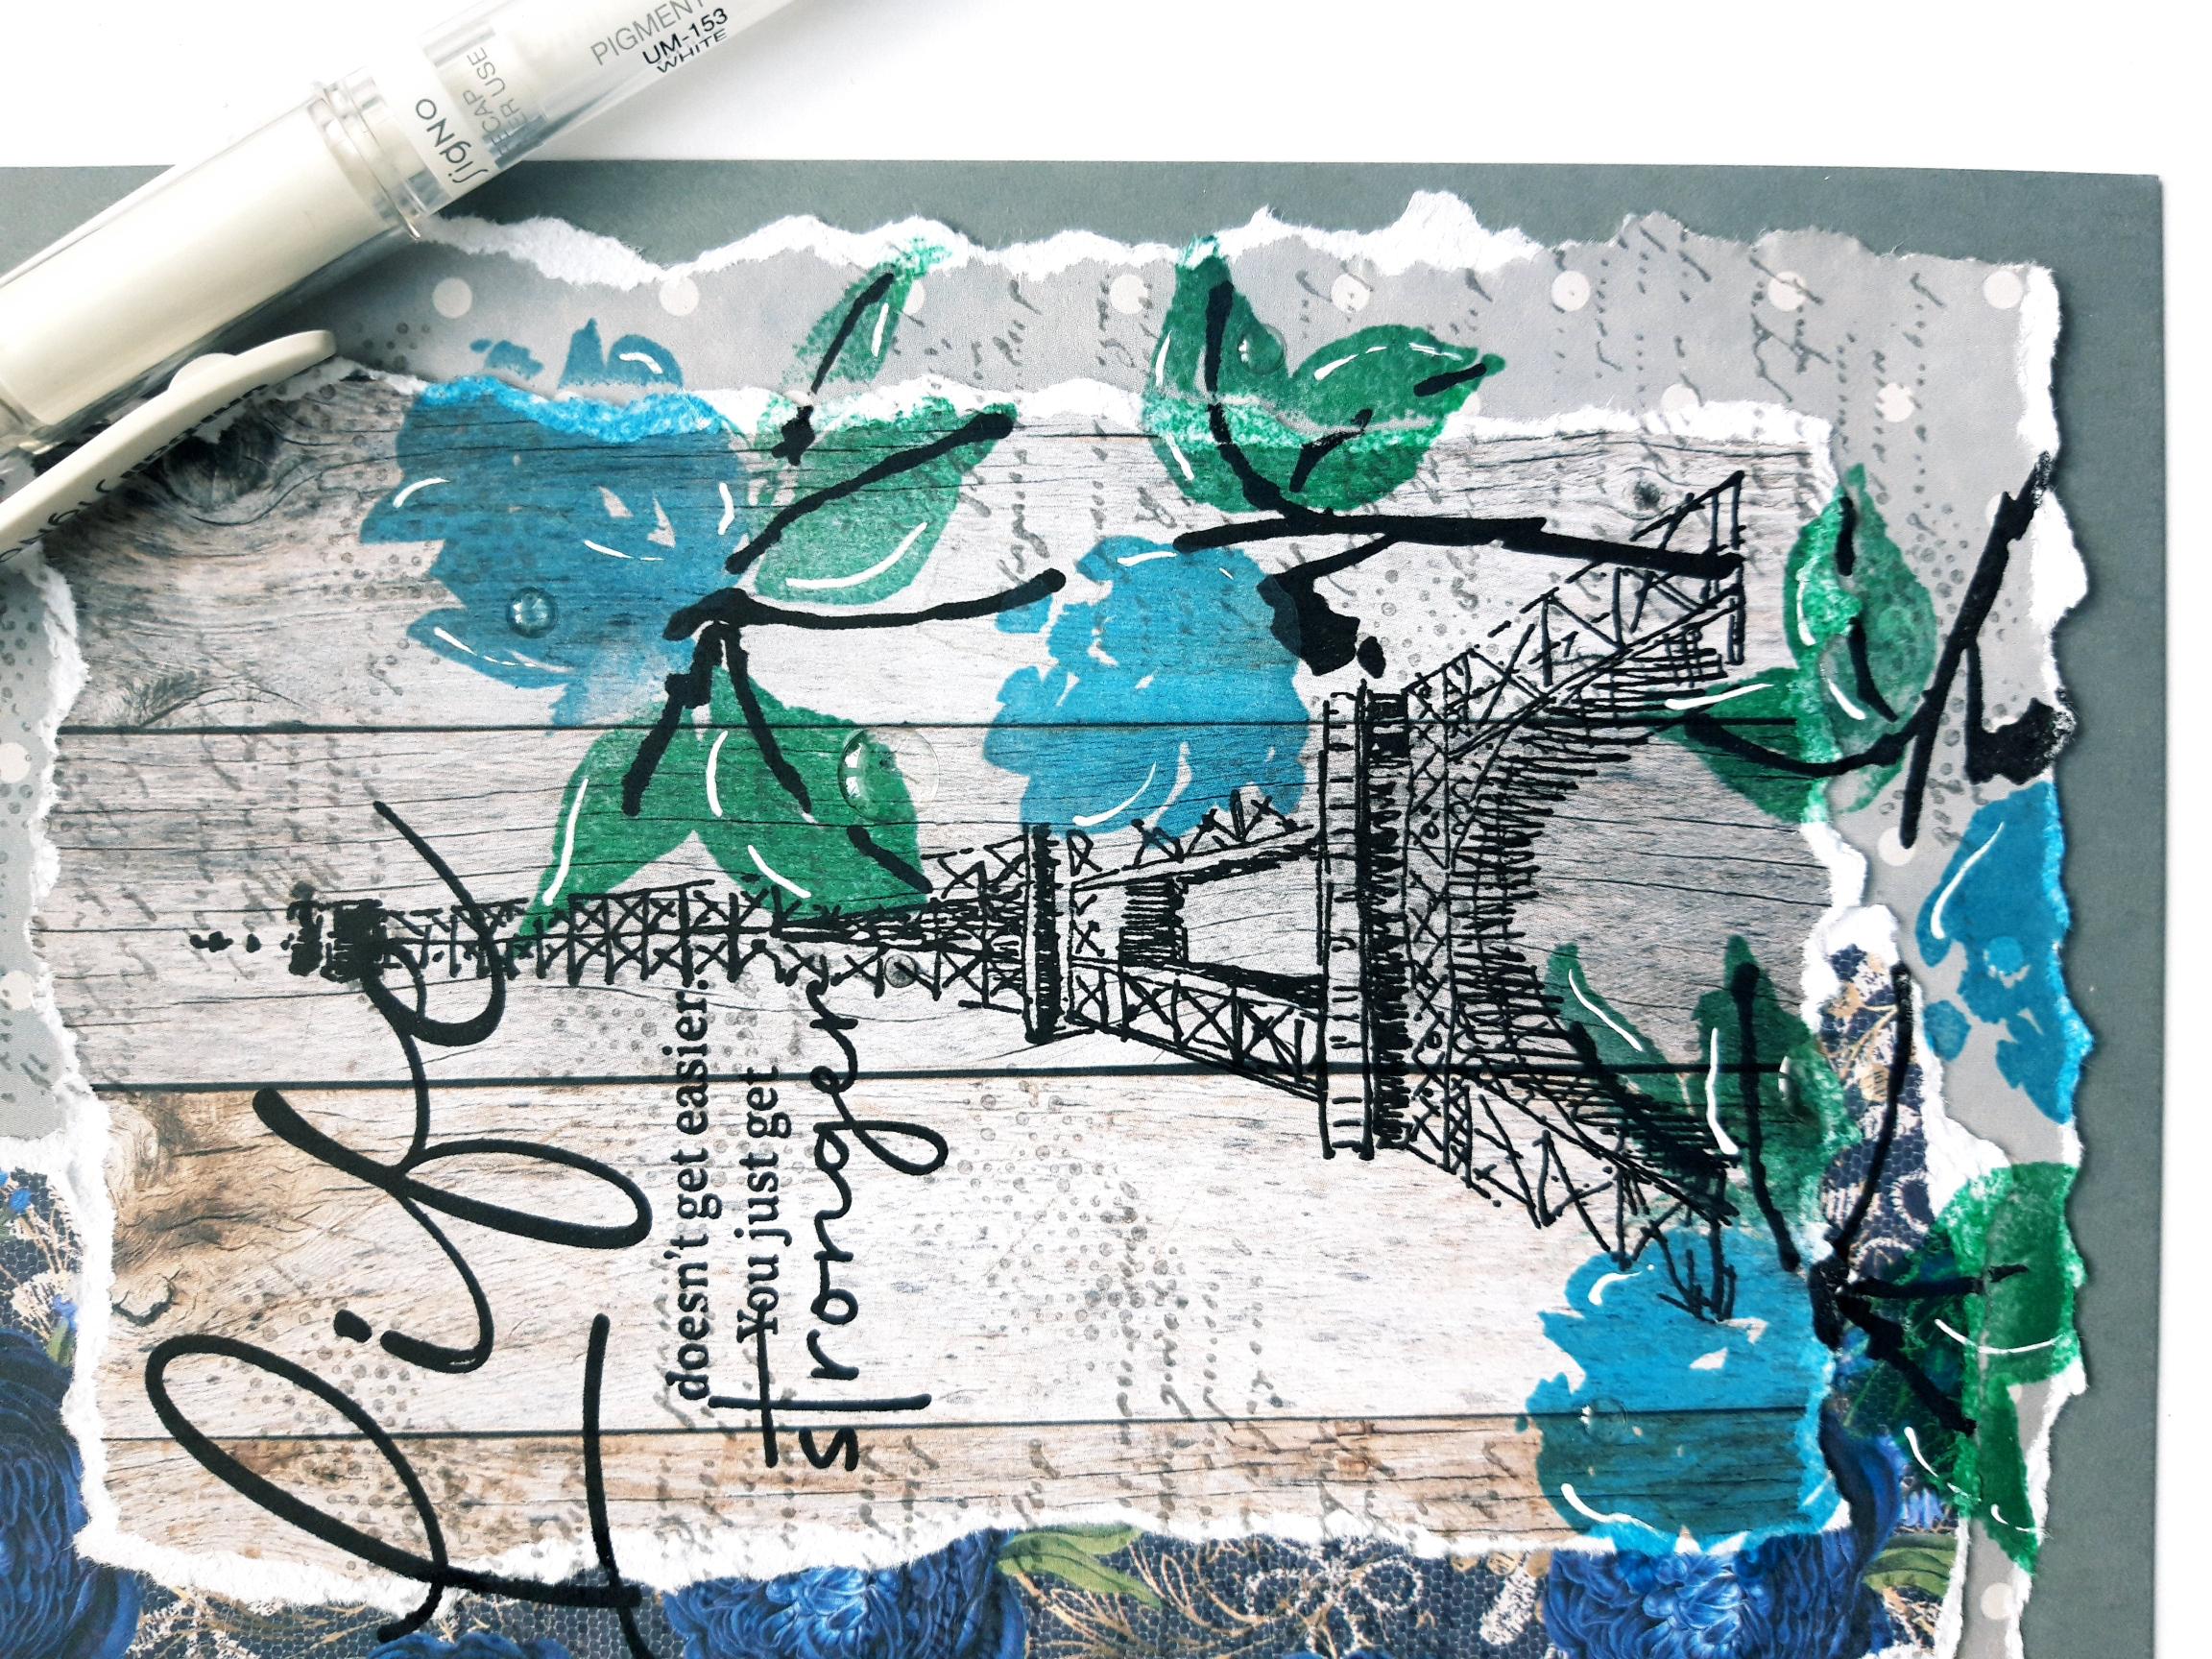
To finish, add accents and highlights, with a white gel pen. |