Give your friends $10 off their first order!
Refer a FRIEND


WHAT YOU WILL NEED:
Black top folding card blank (8 1/4 x 5 3/4") - Landscape view
Black card (8 x 6")
Black card (2 x 4")
Dies from Enchanted Collection
Dies from Kind Friends Die Collection
It's All About You Unique Paper Collection 8 x 8" paper pad
Black fine line pen
Paper Trimmer
Perfect Together Glue
Foam Pads
Die Cutting machine
[click image to enlarge] 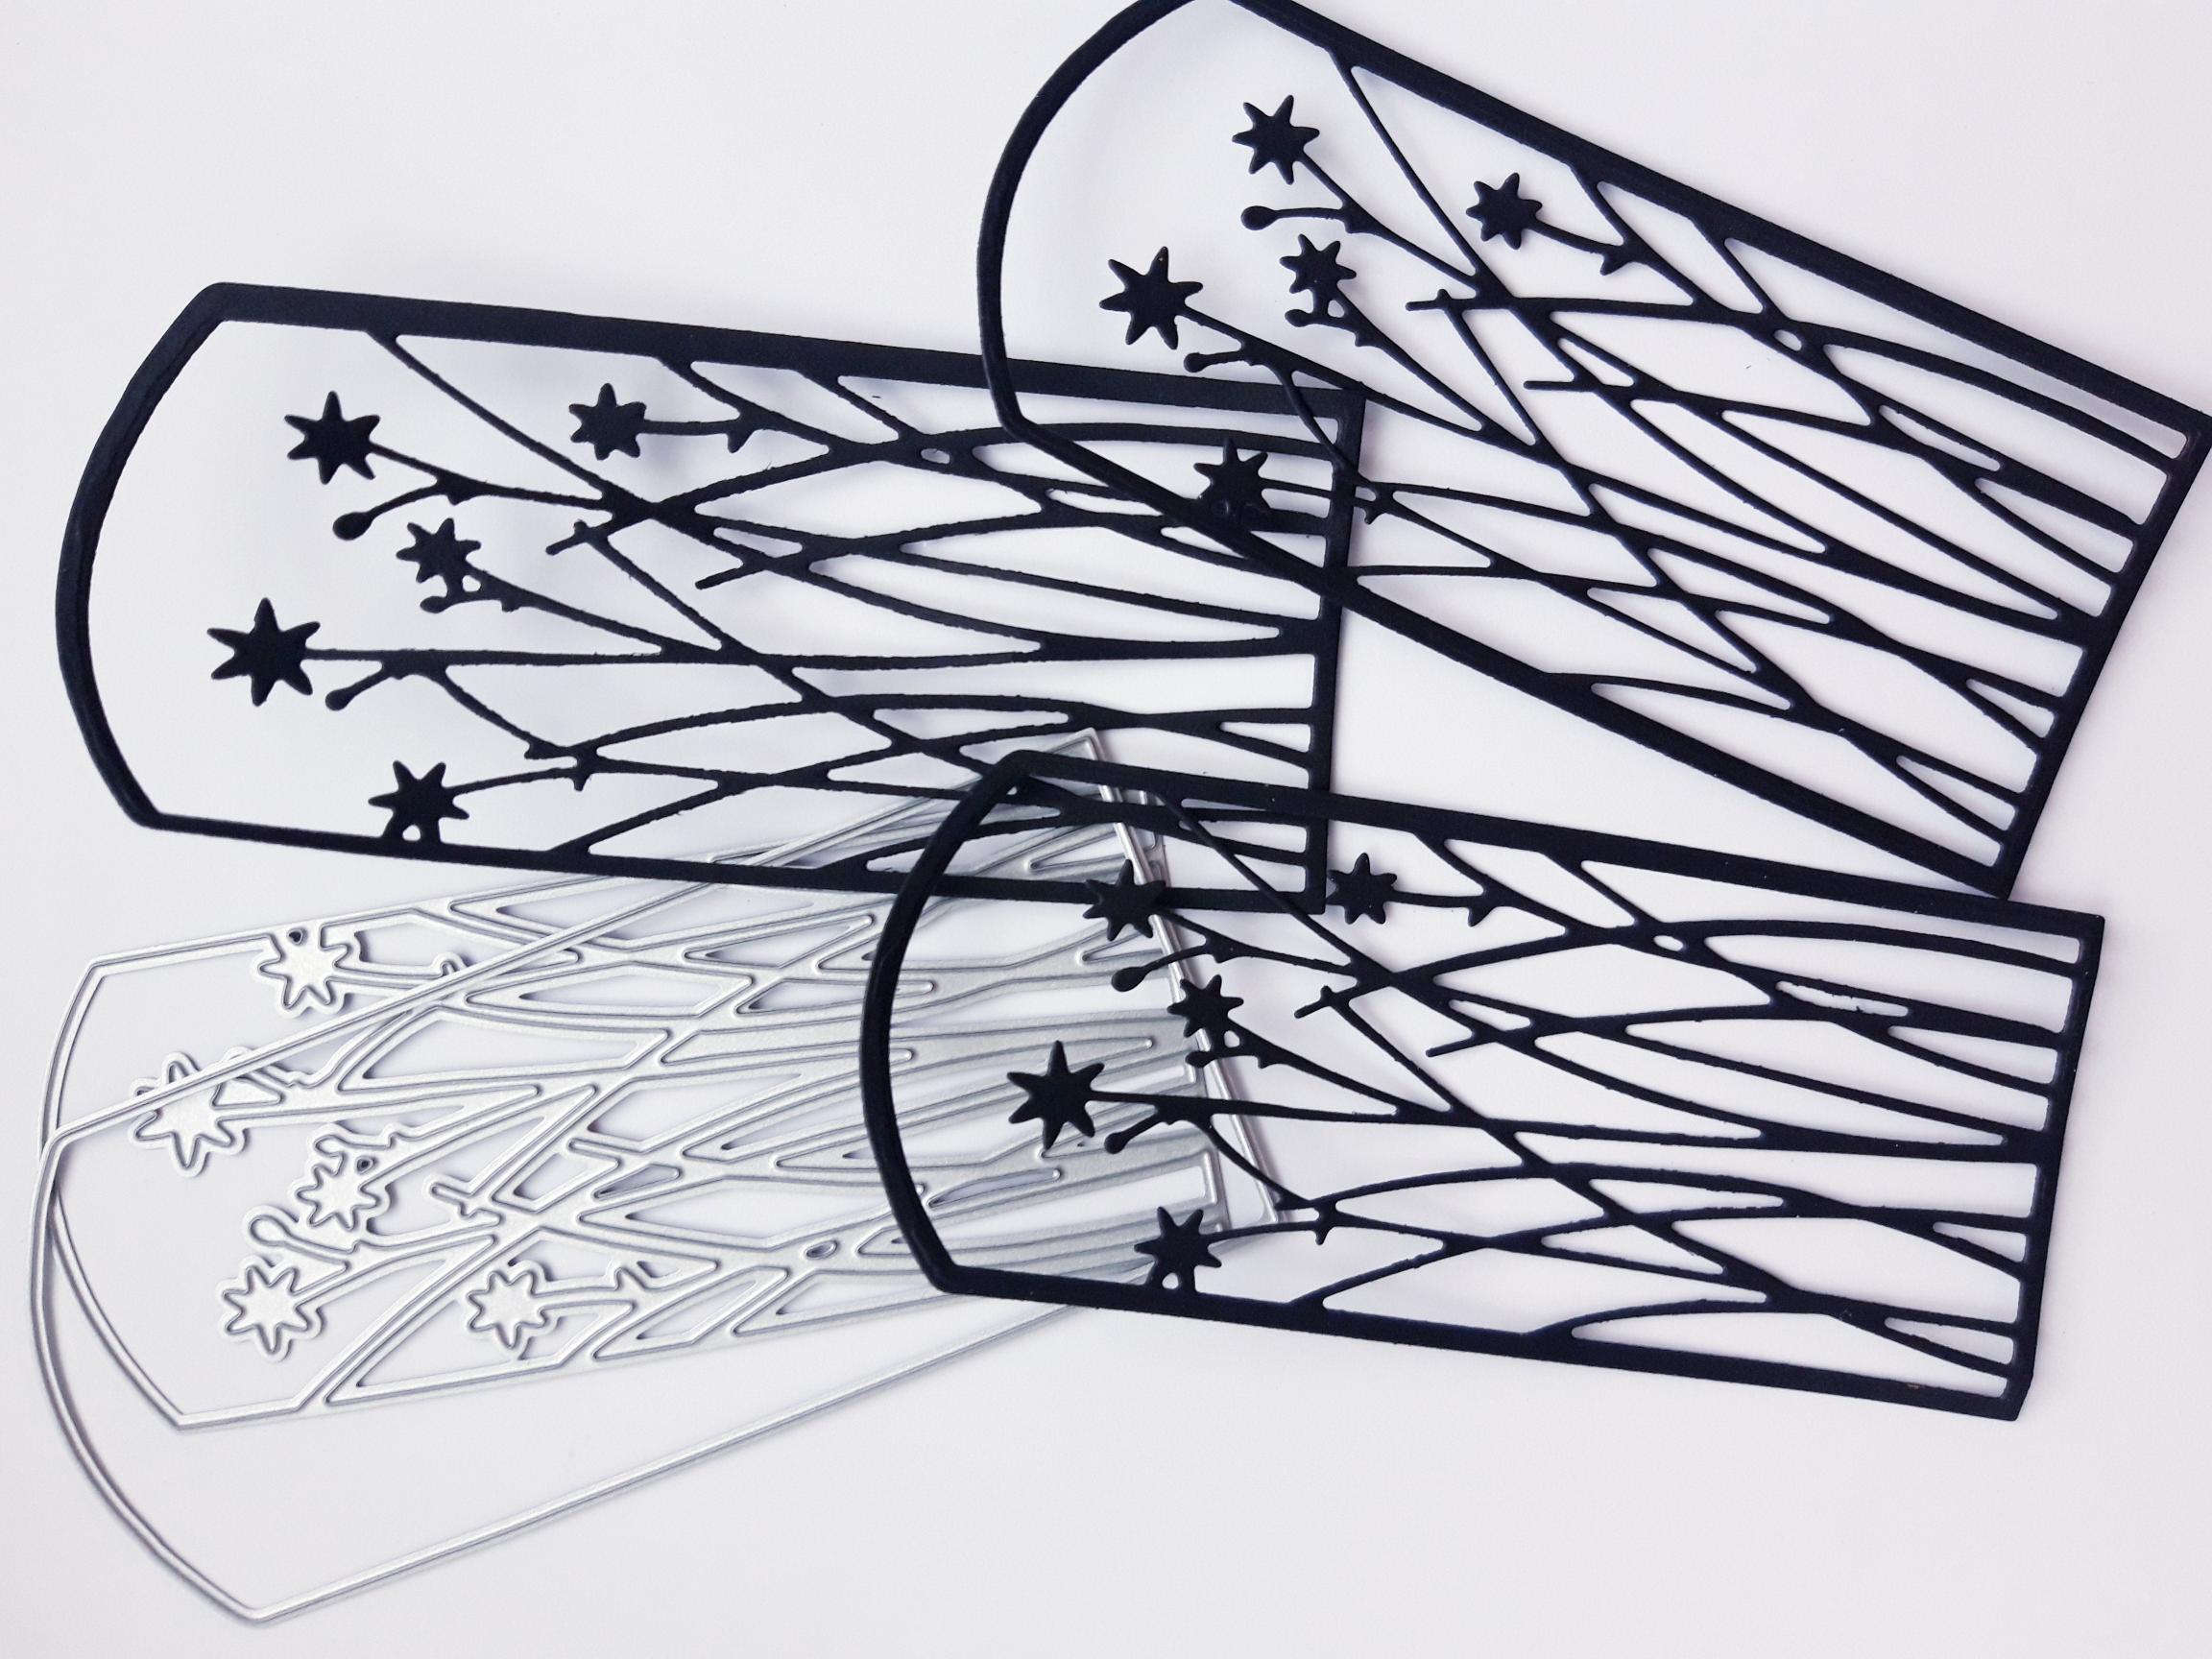
|
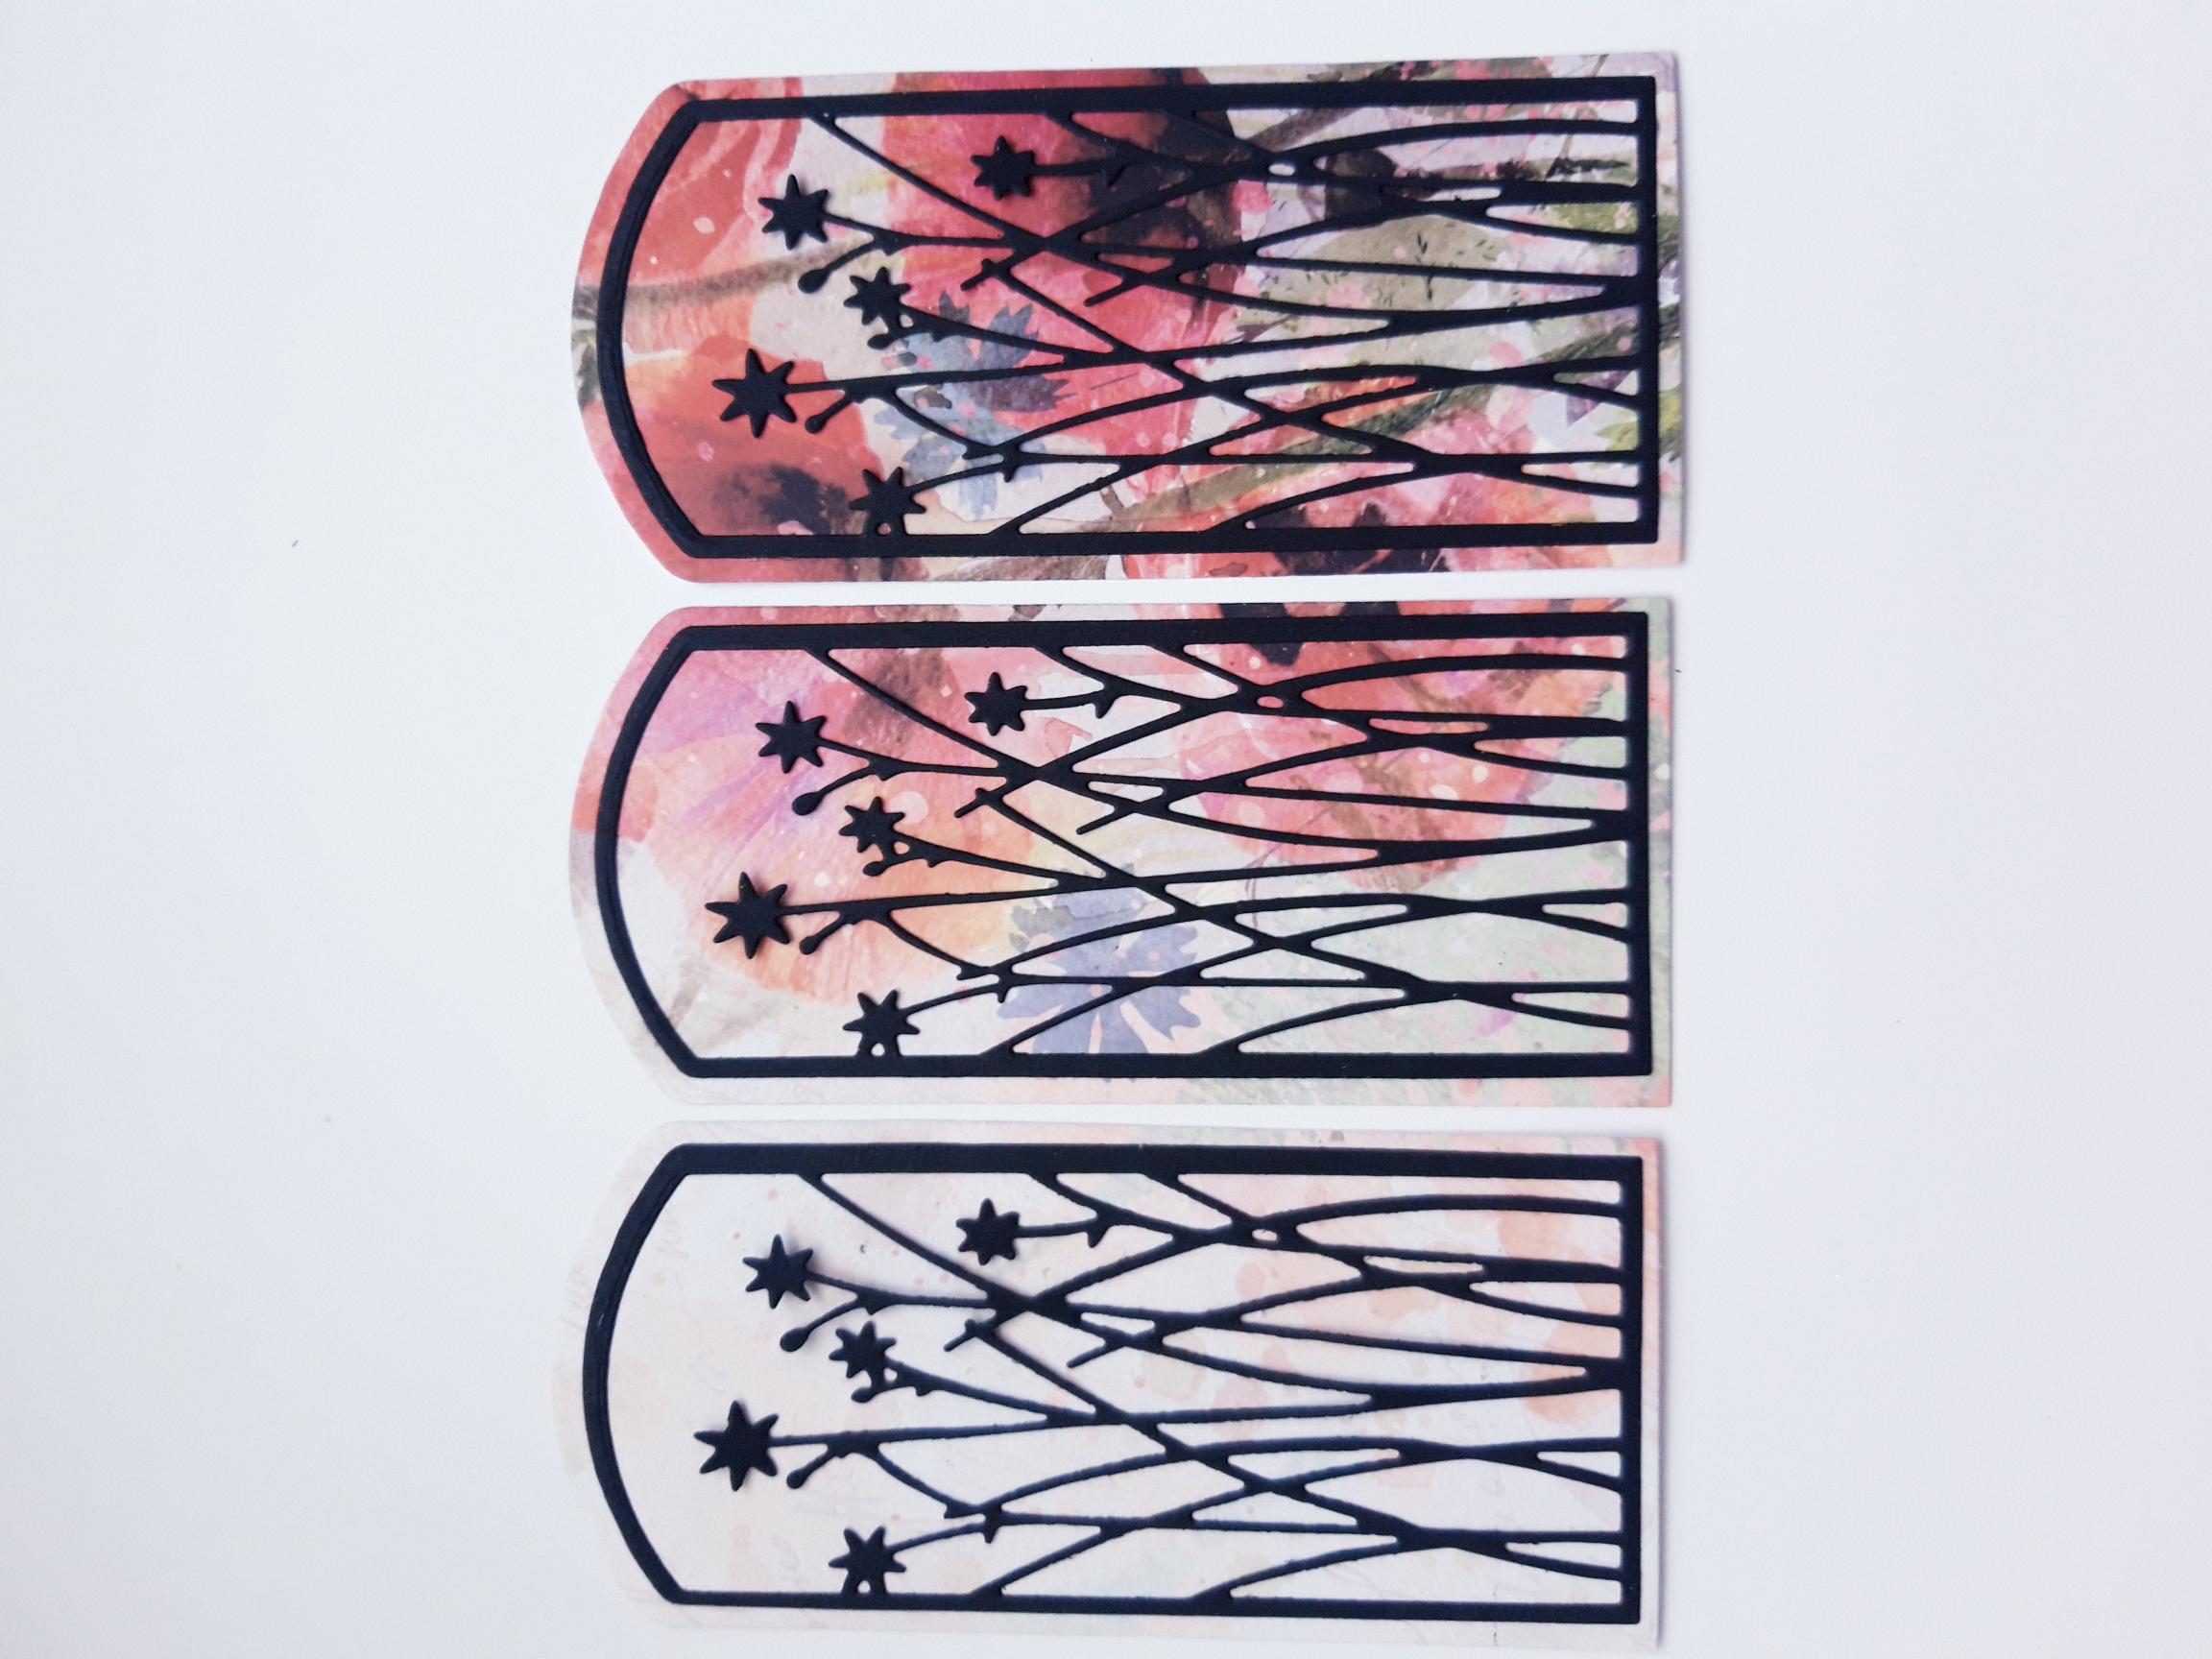
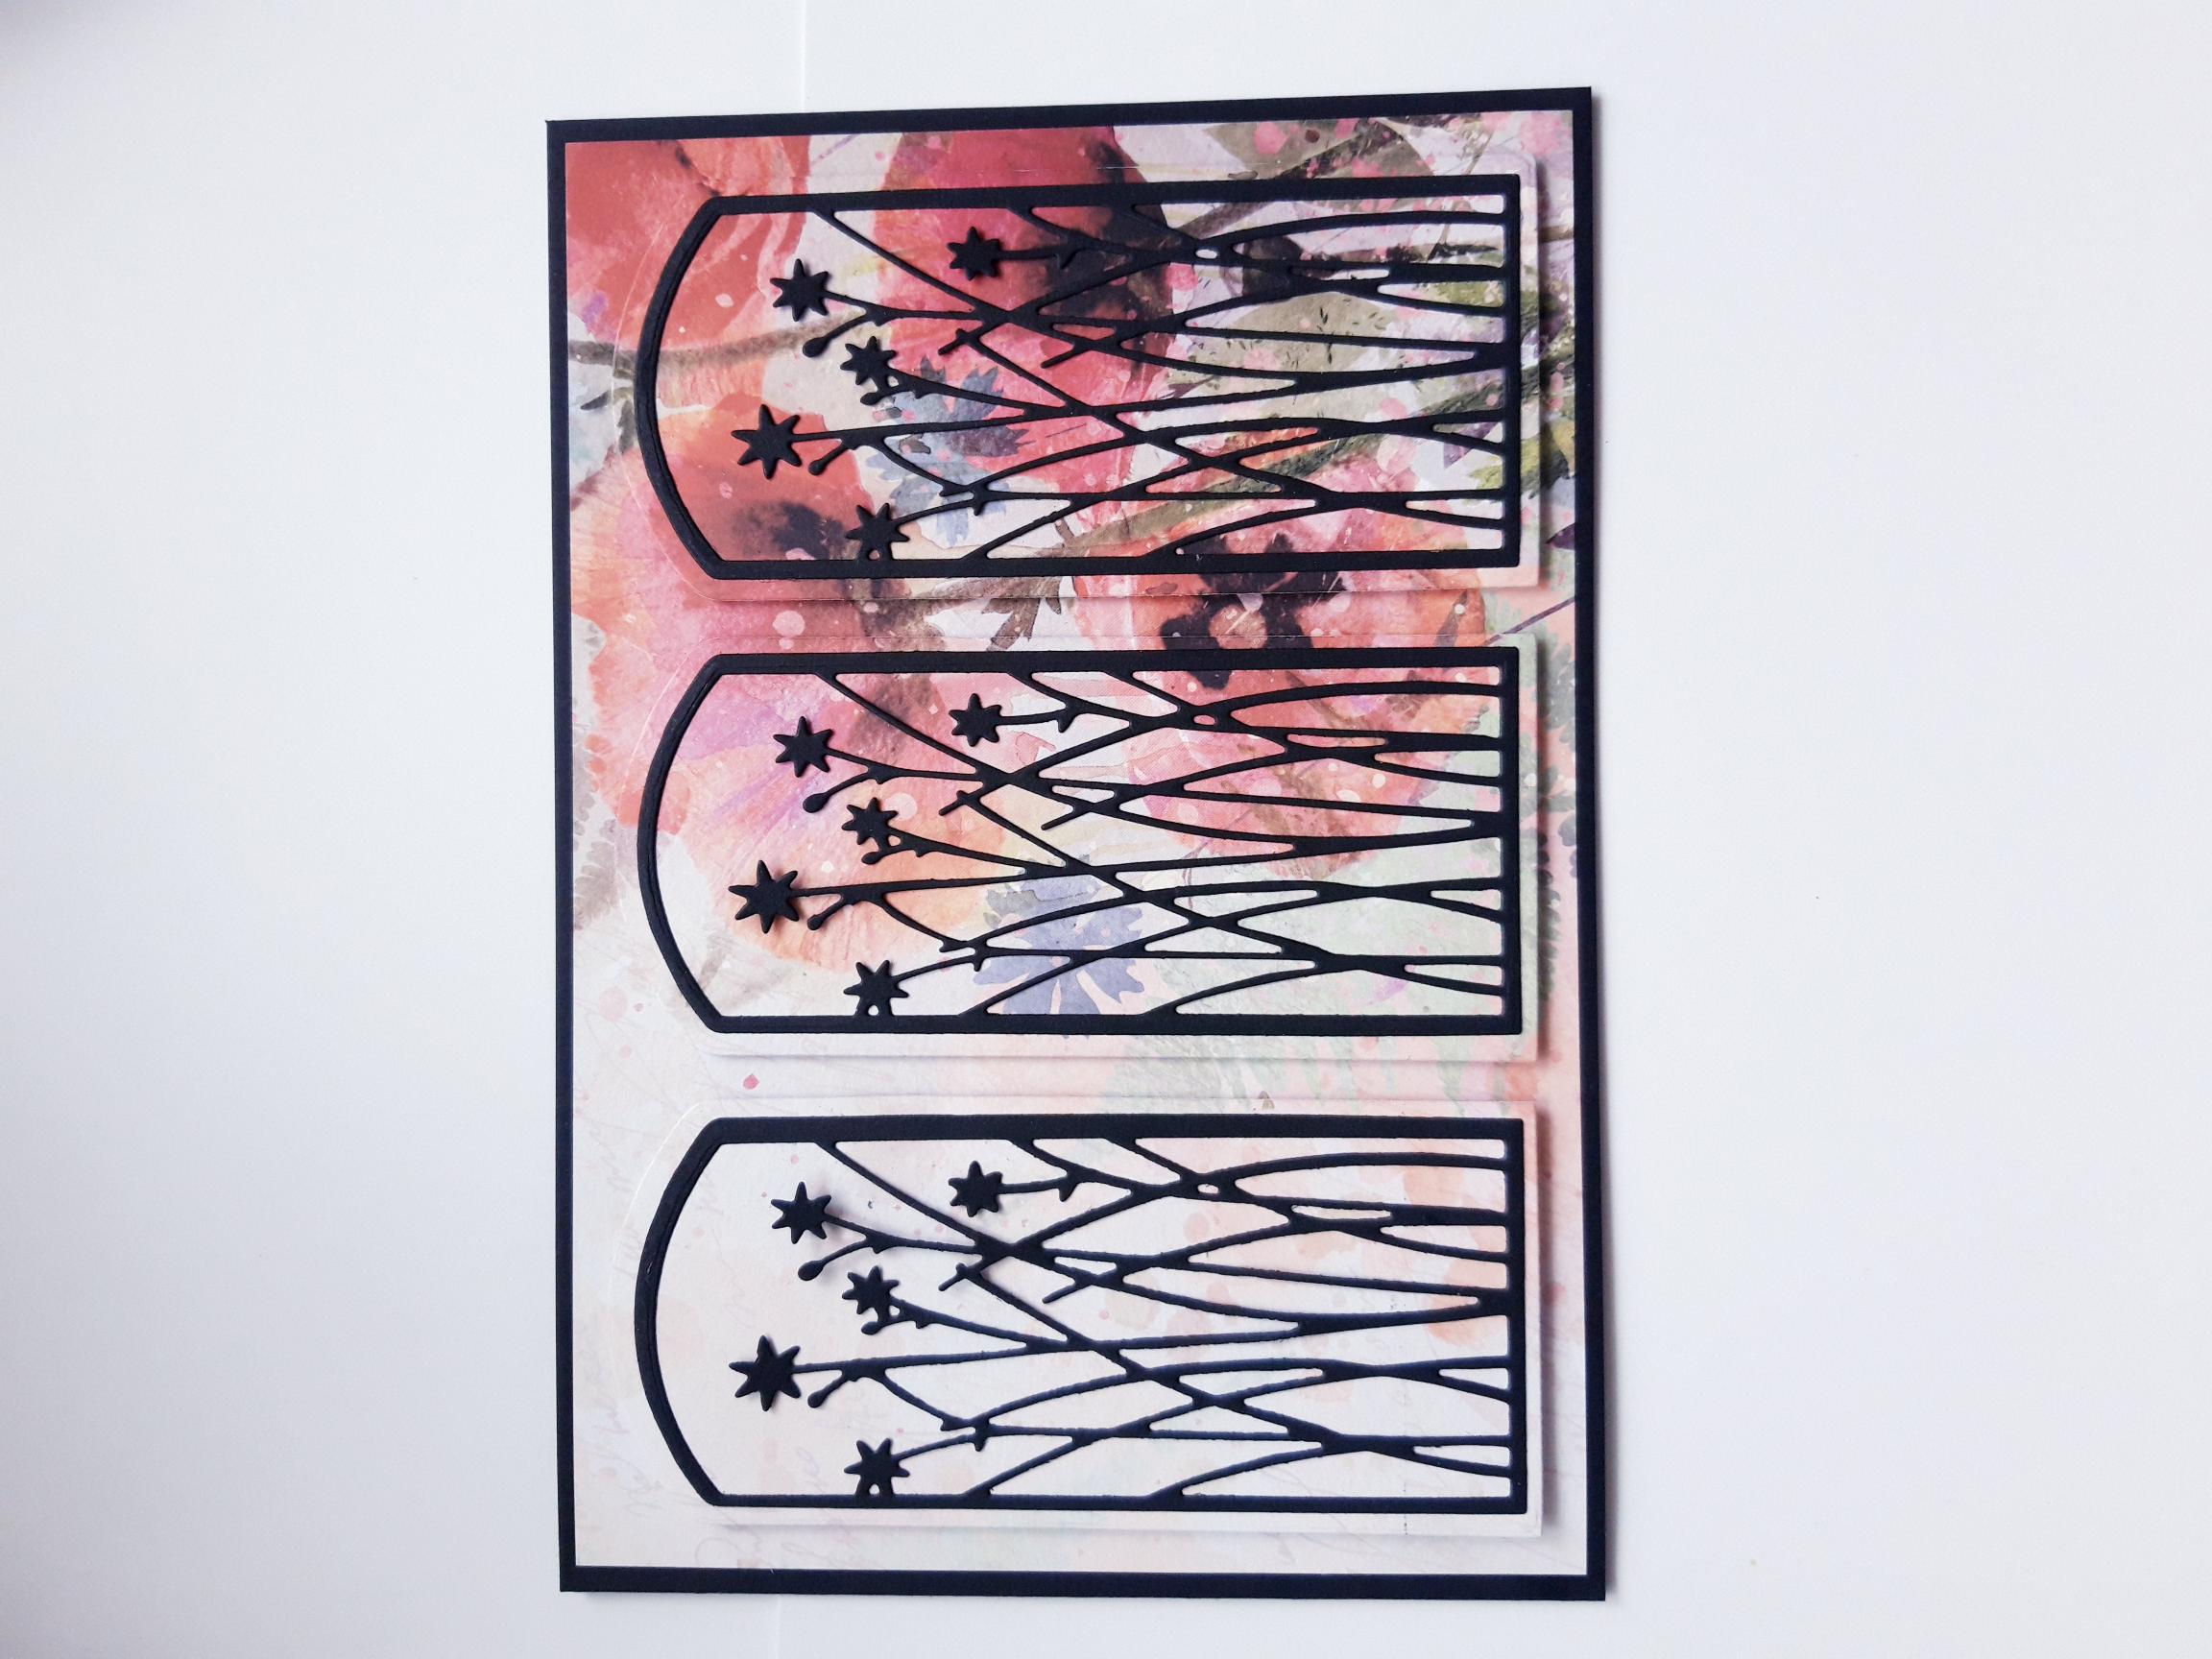
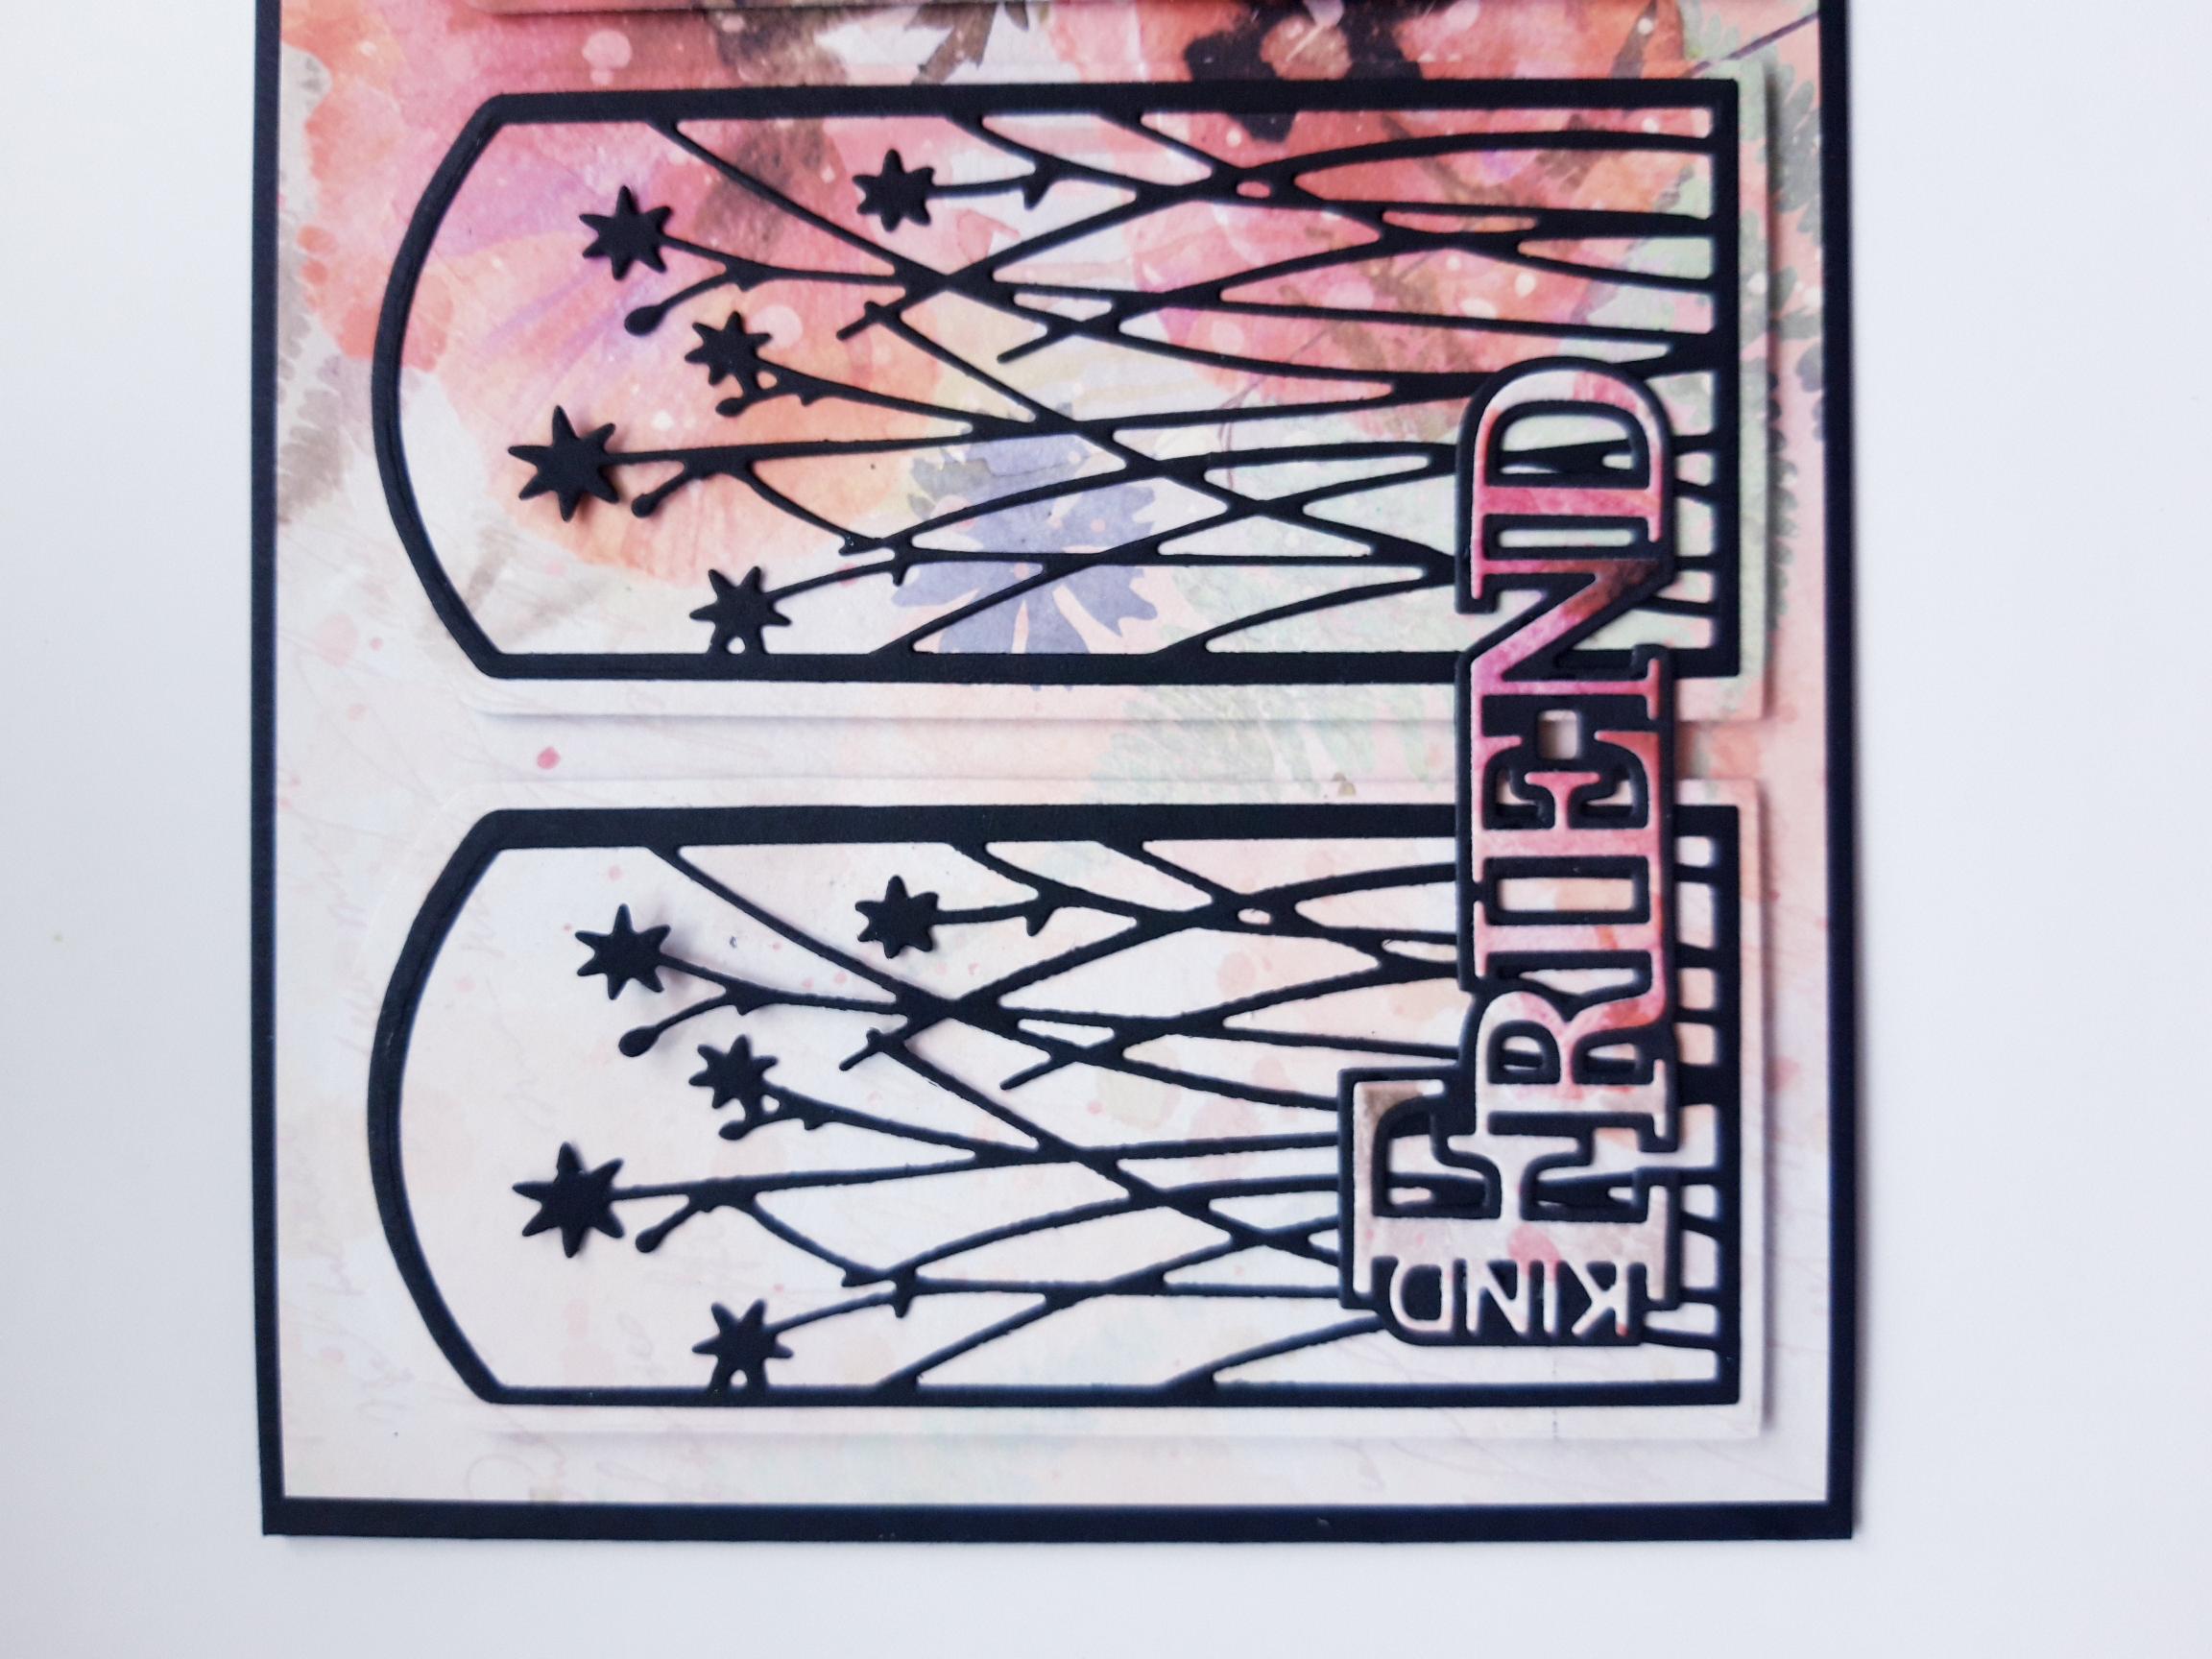
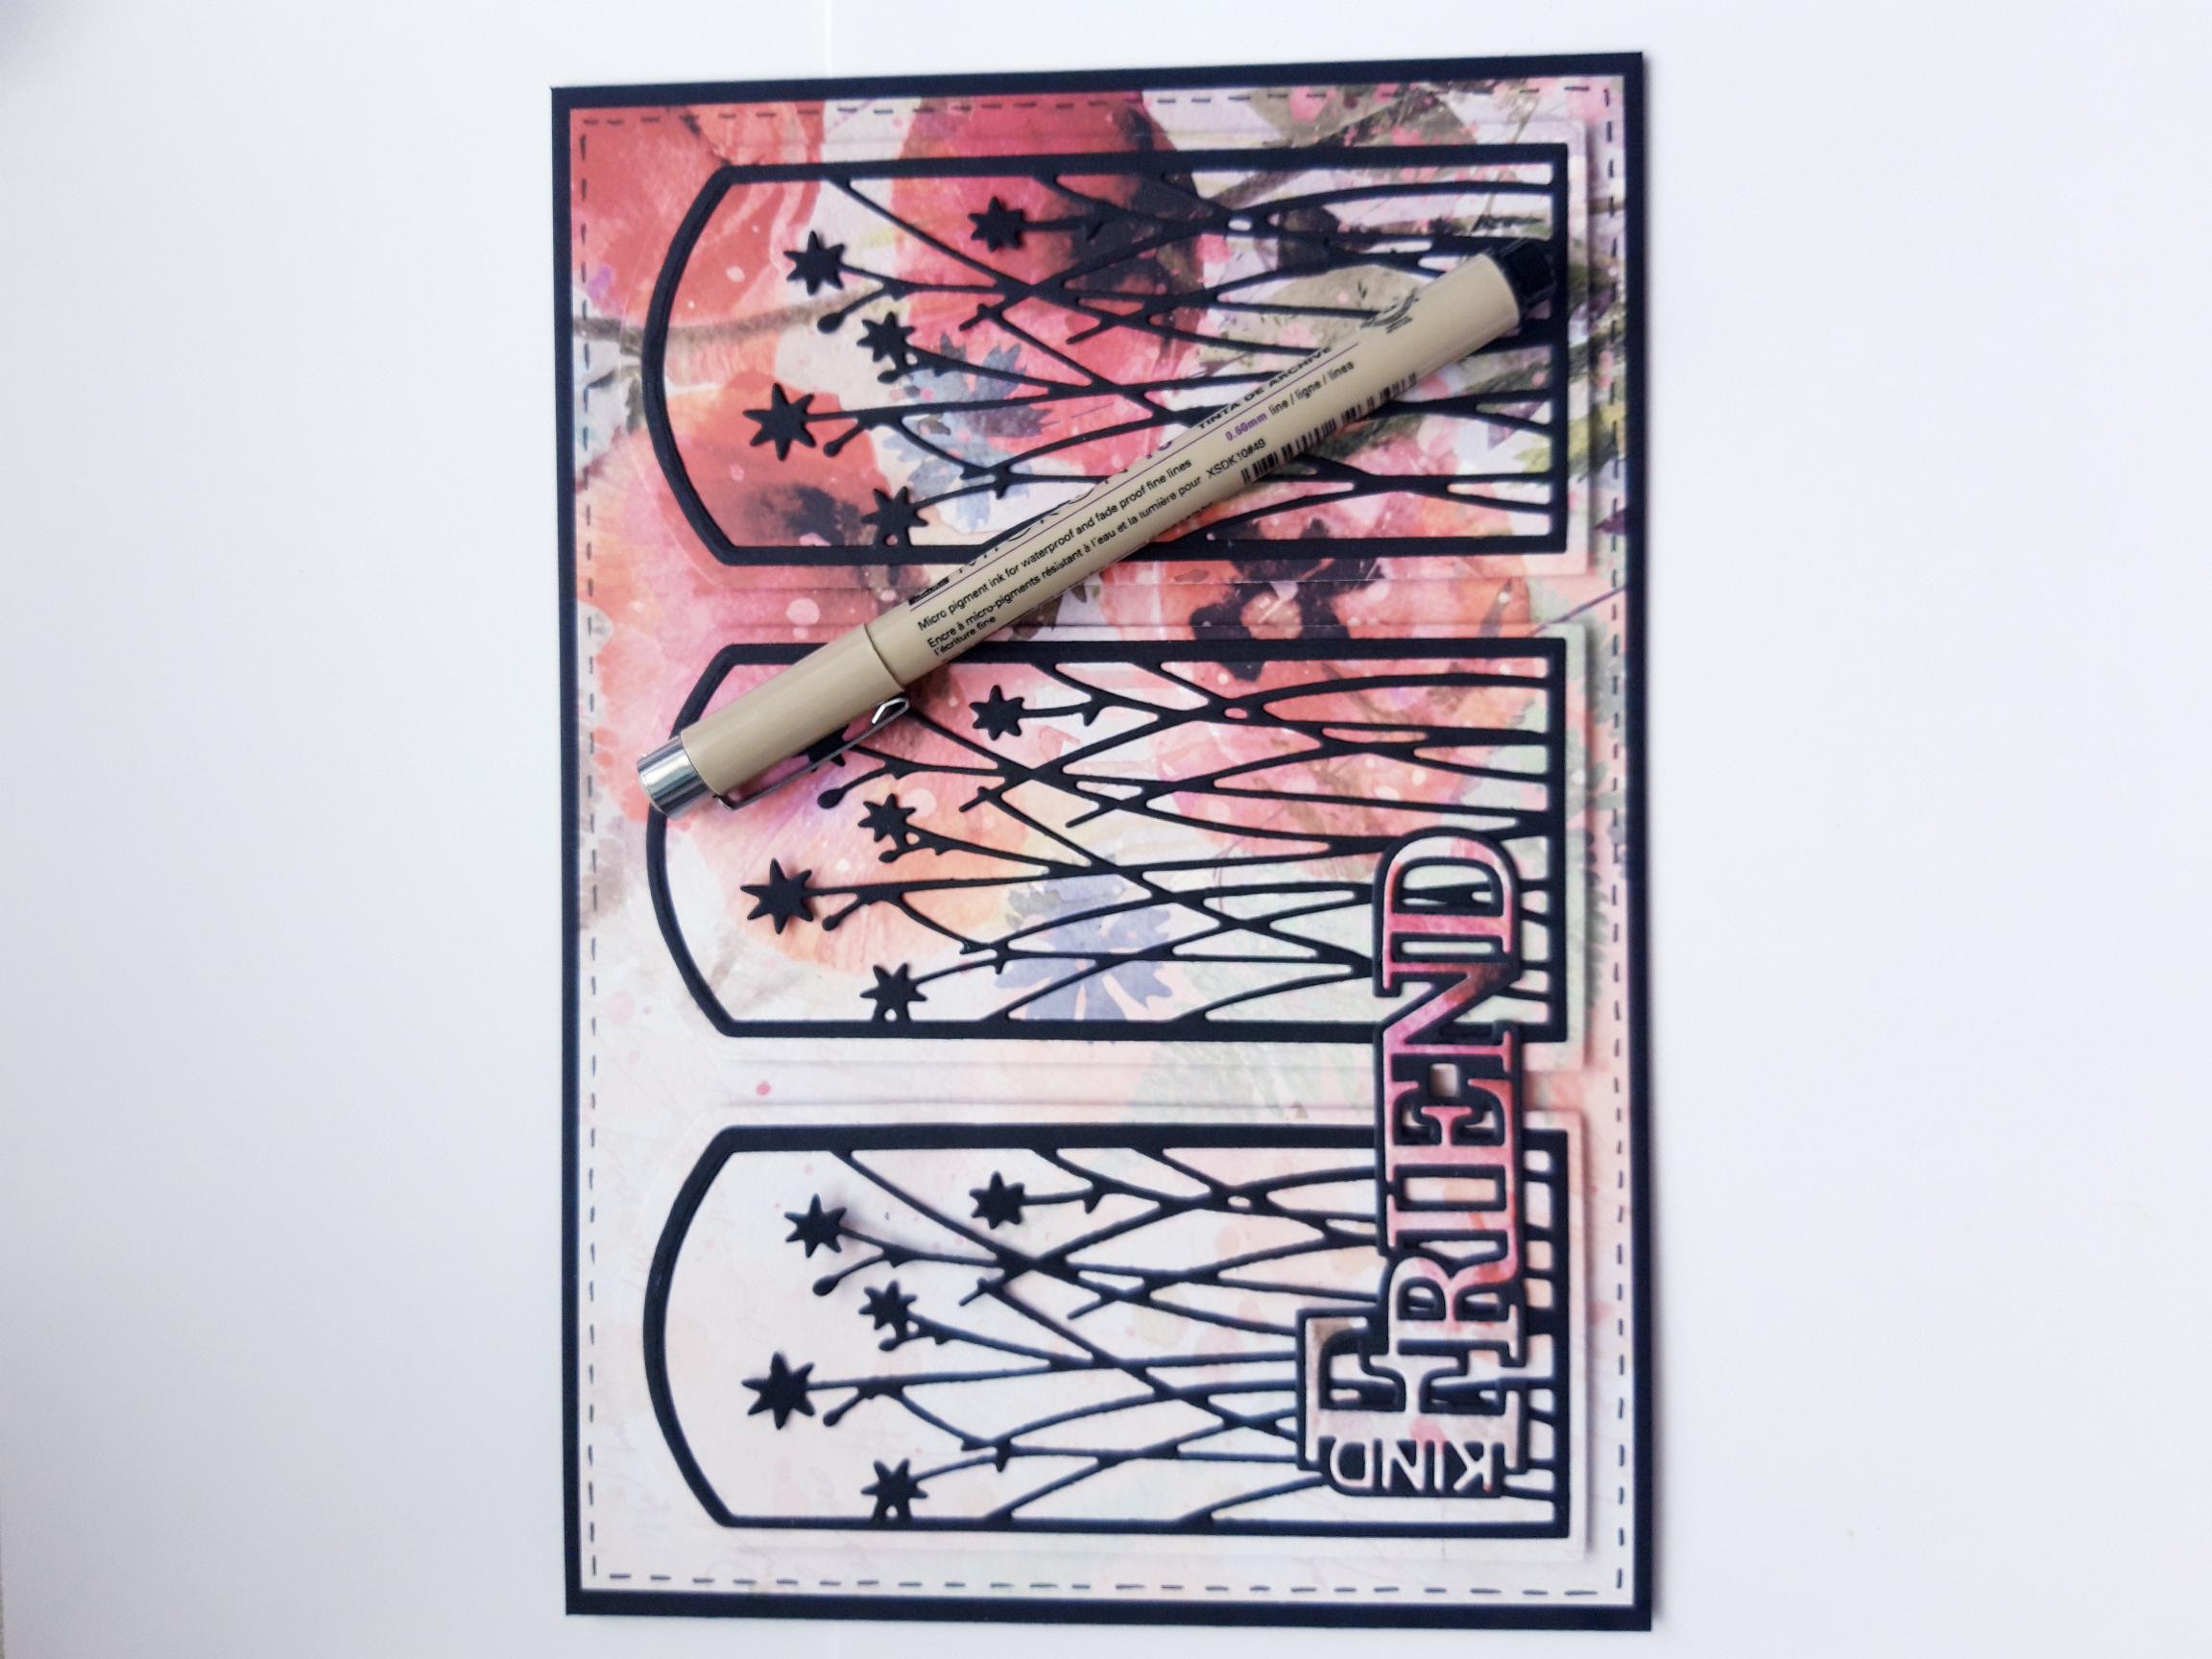
Place the floral die, and the smallest outline die, from the Enchanted Collection, on to the black card 8 x 6". Use a piece of low tack tape to hold the 2 dies in place, so they don't move, then run through your die cutting machine. You need to die cut THREE of these, from the black card. Alternative: You can cut one or more, of the Bird die frames instead, mixing them up. It's your choice. Pop them to one side. |
|
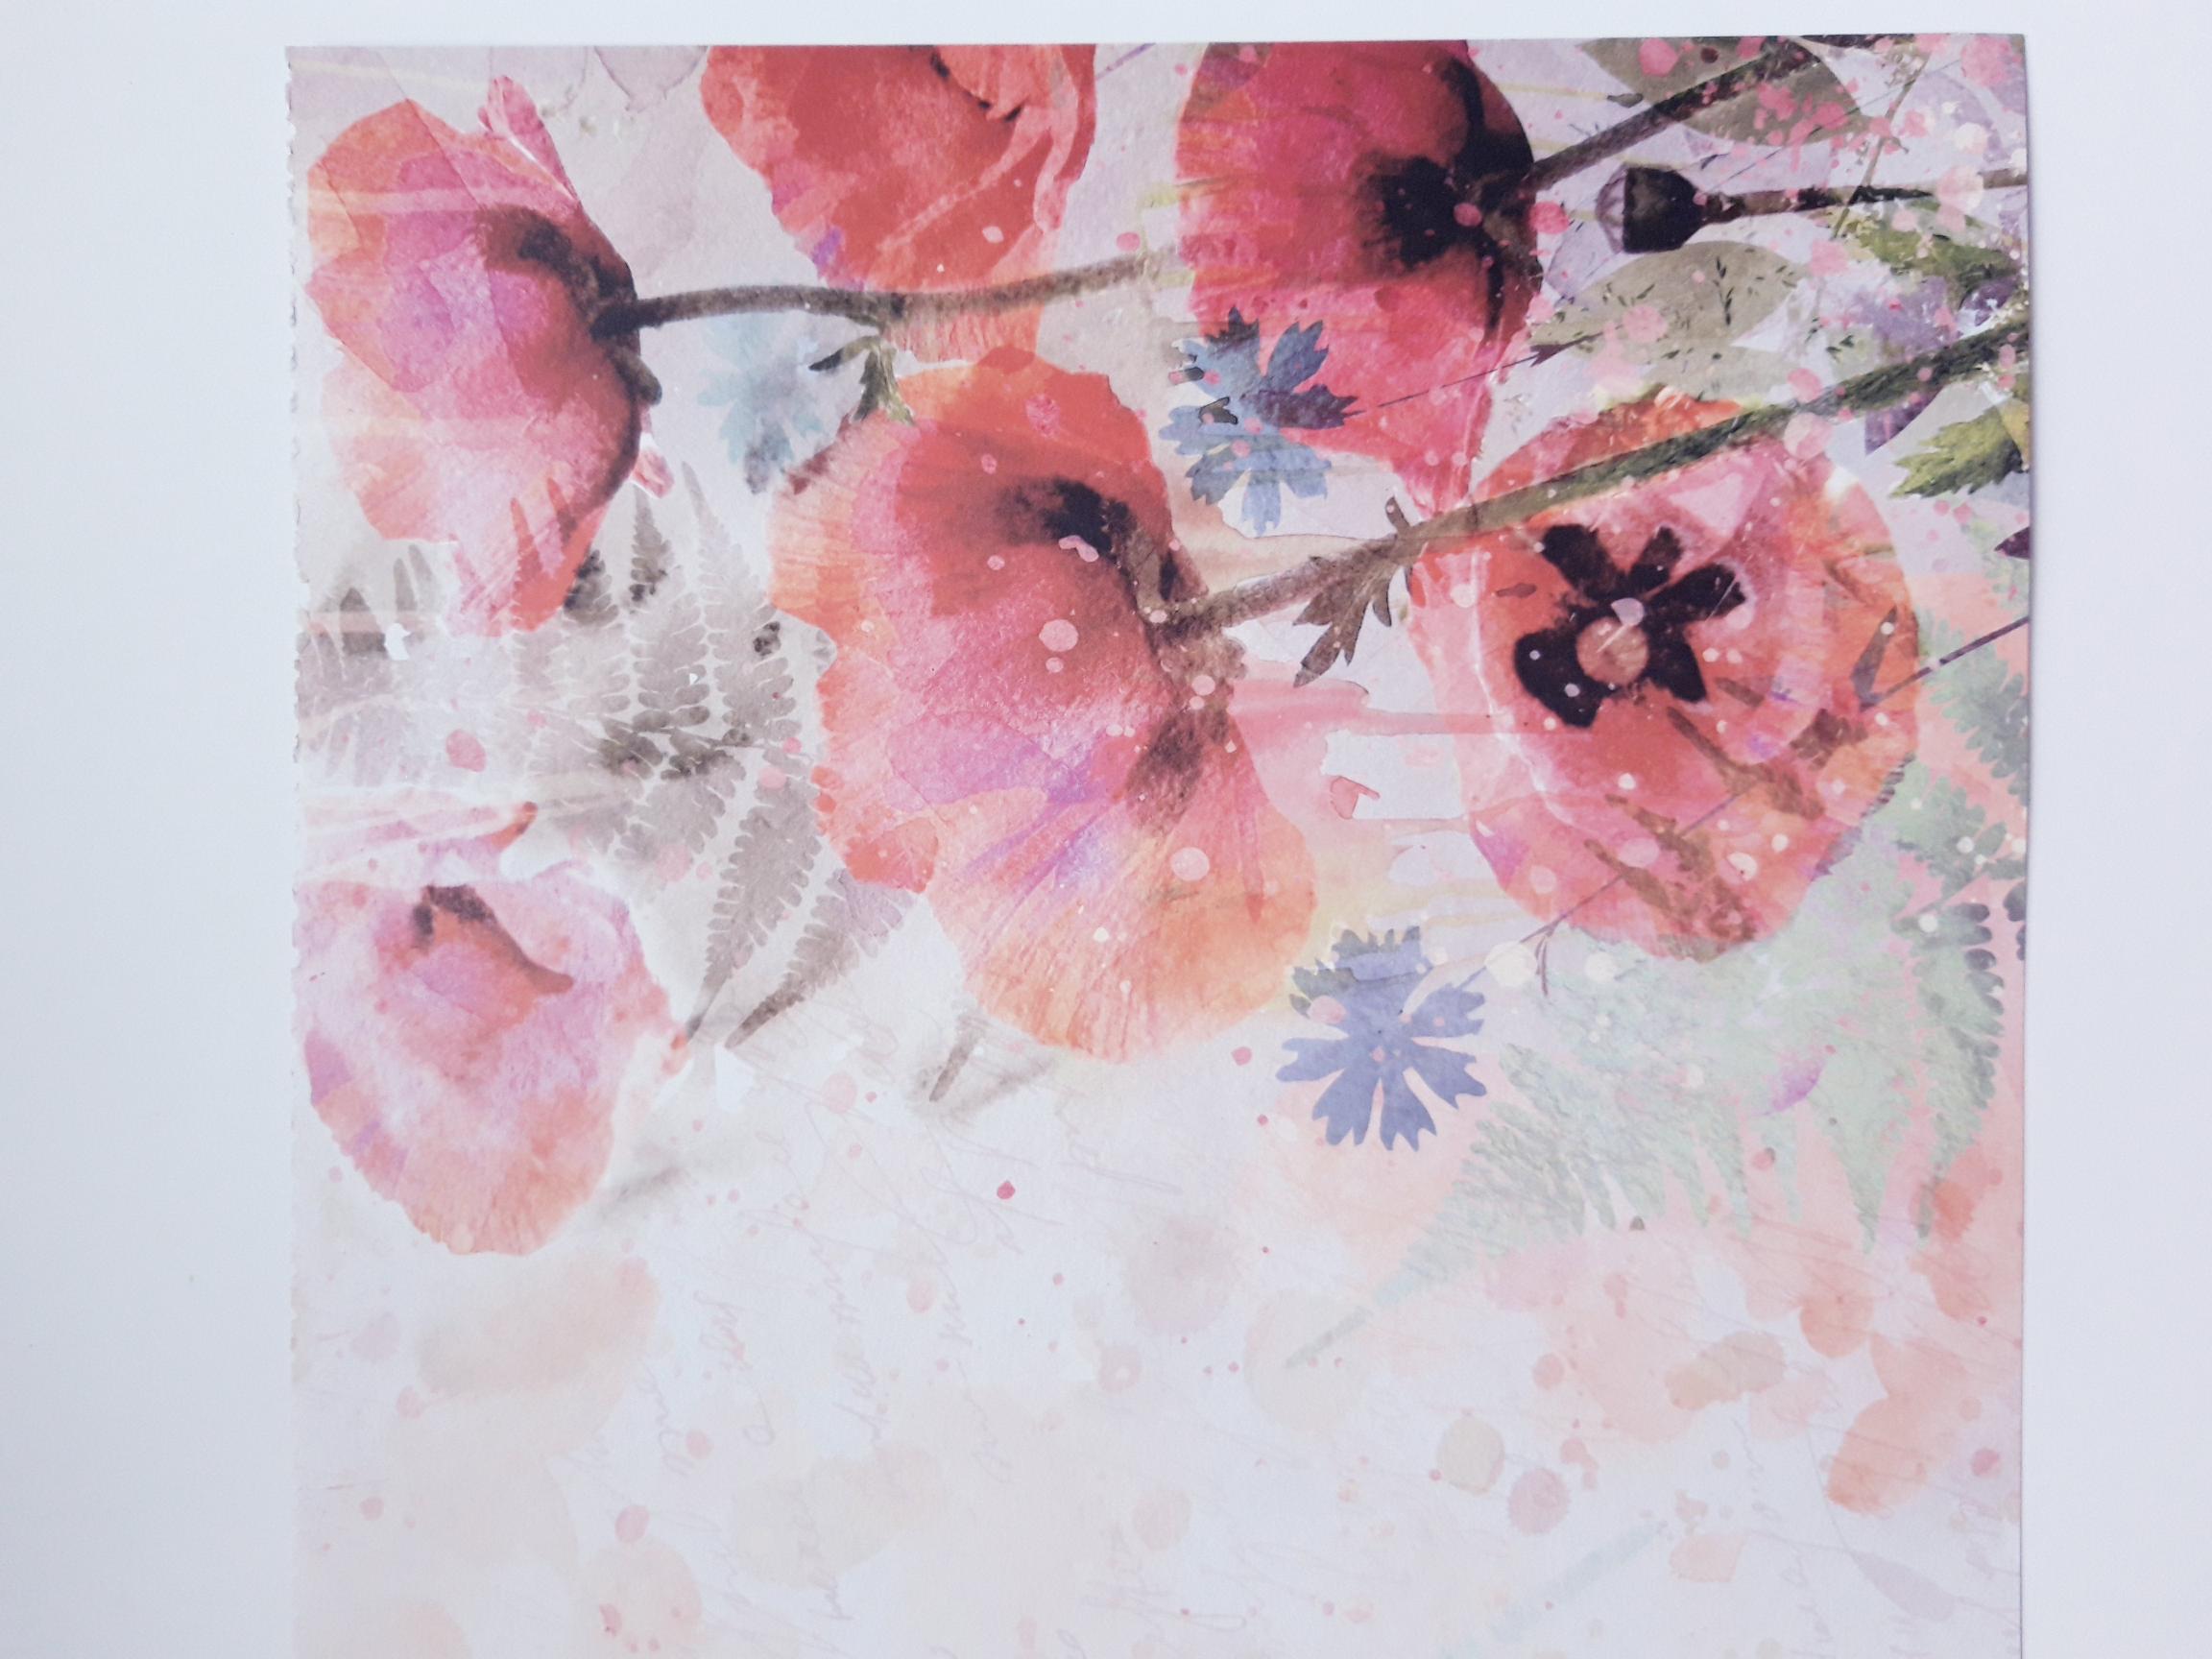
Tear TWO sheets of the SAME decorative paper, from the It's All About You paper pad. Pop ONE sheet to the side. |
|
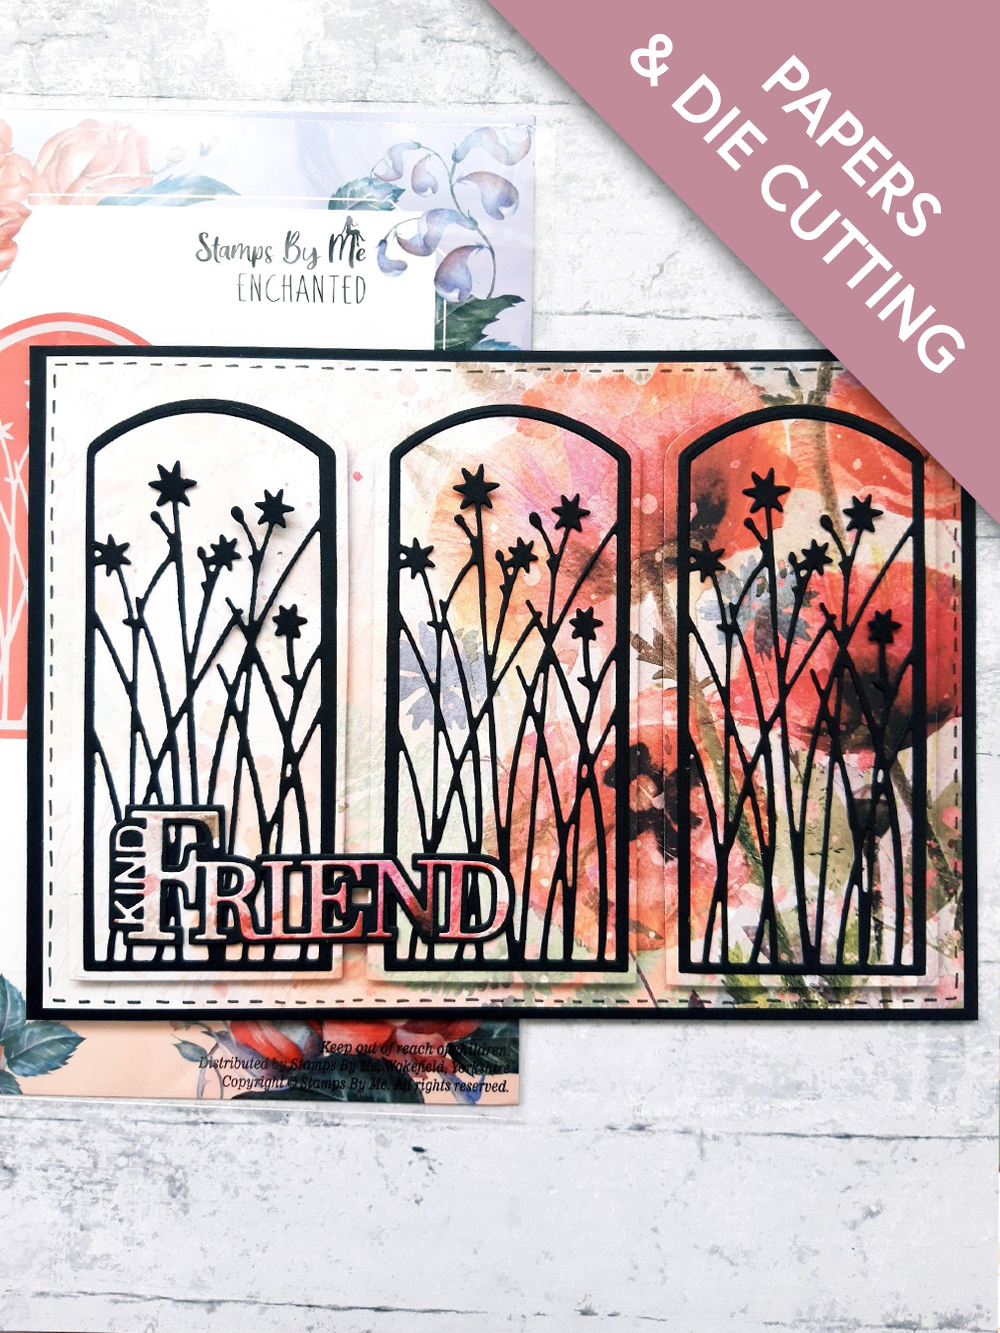
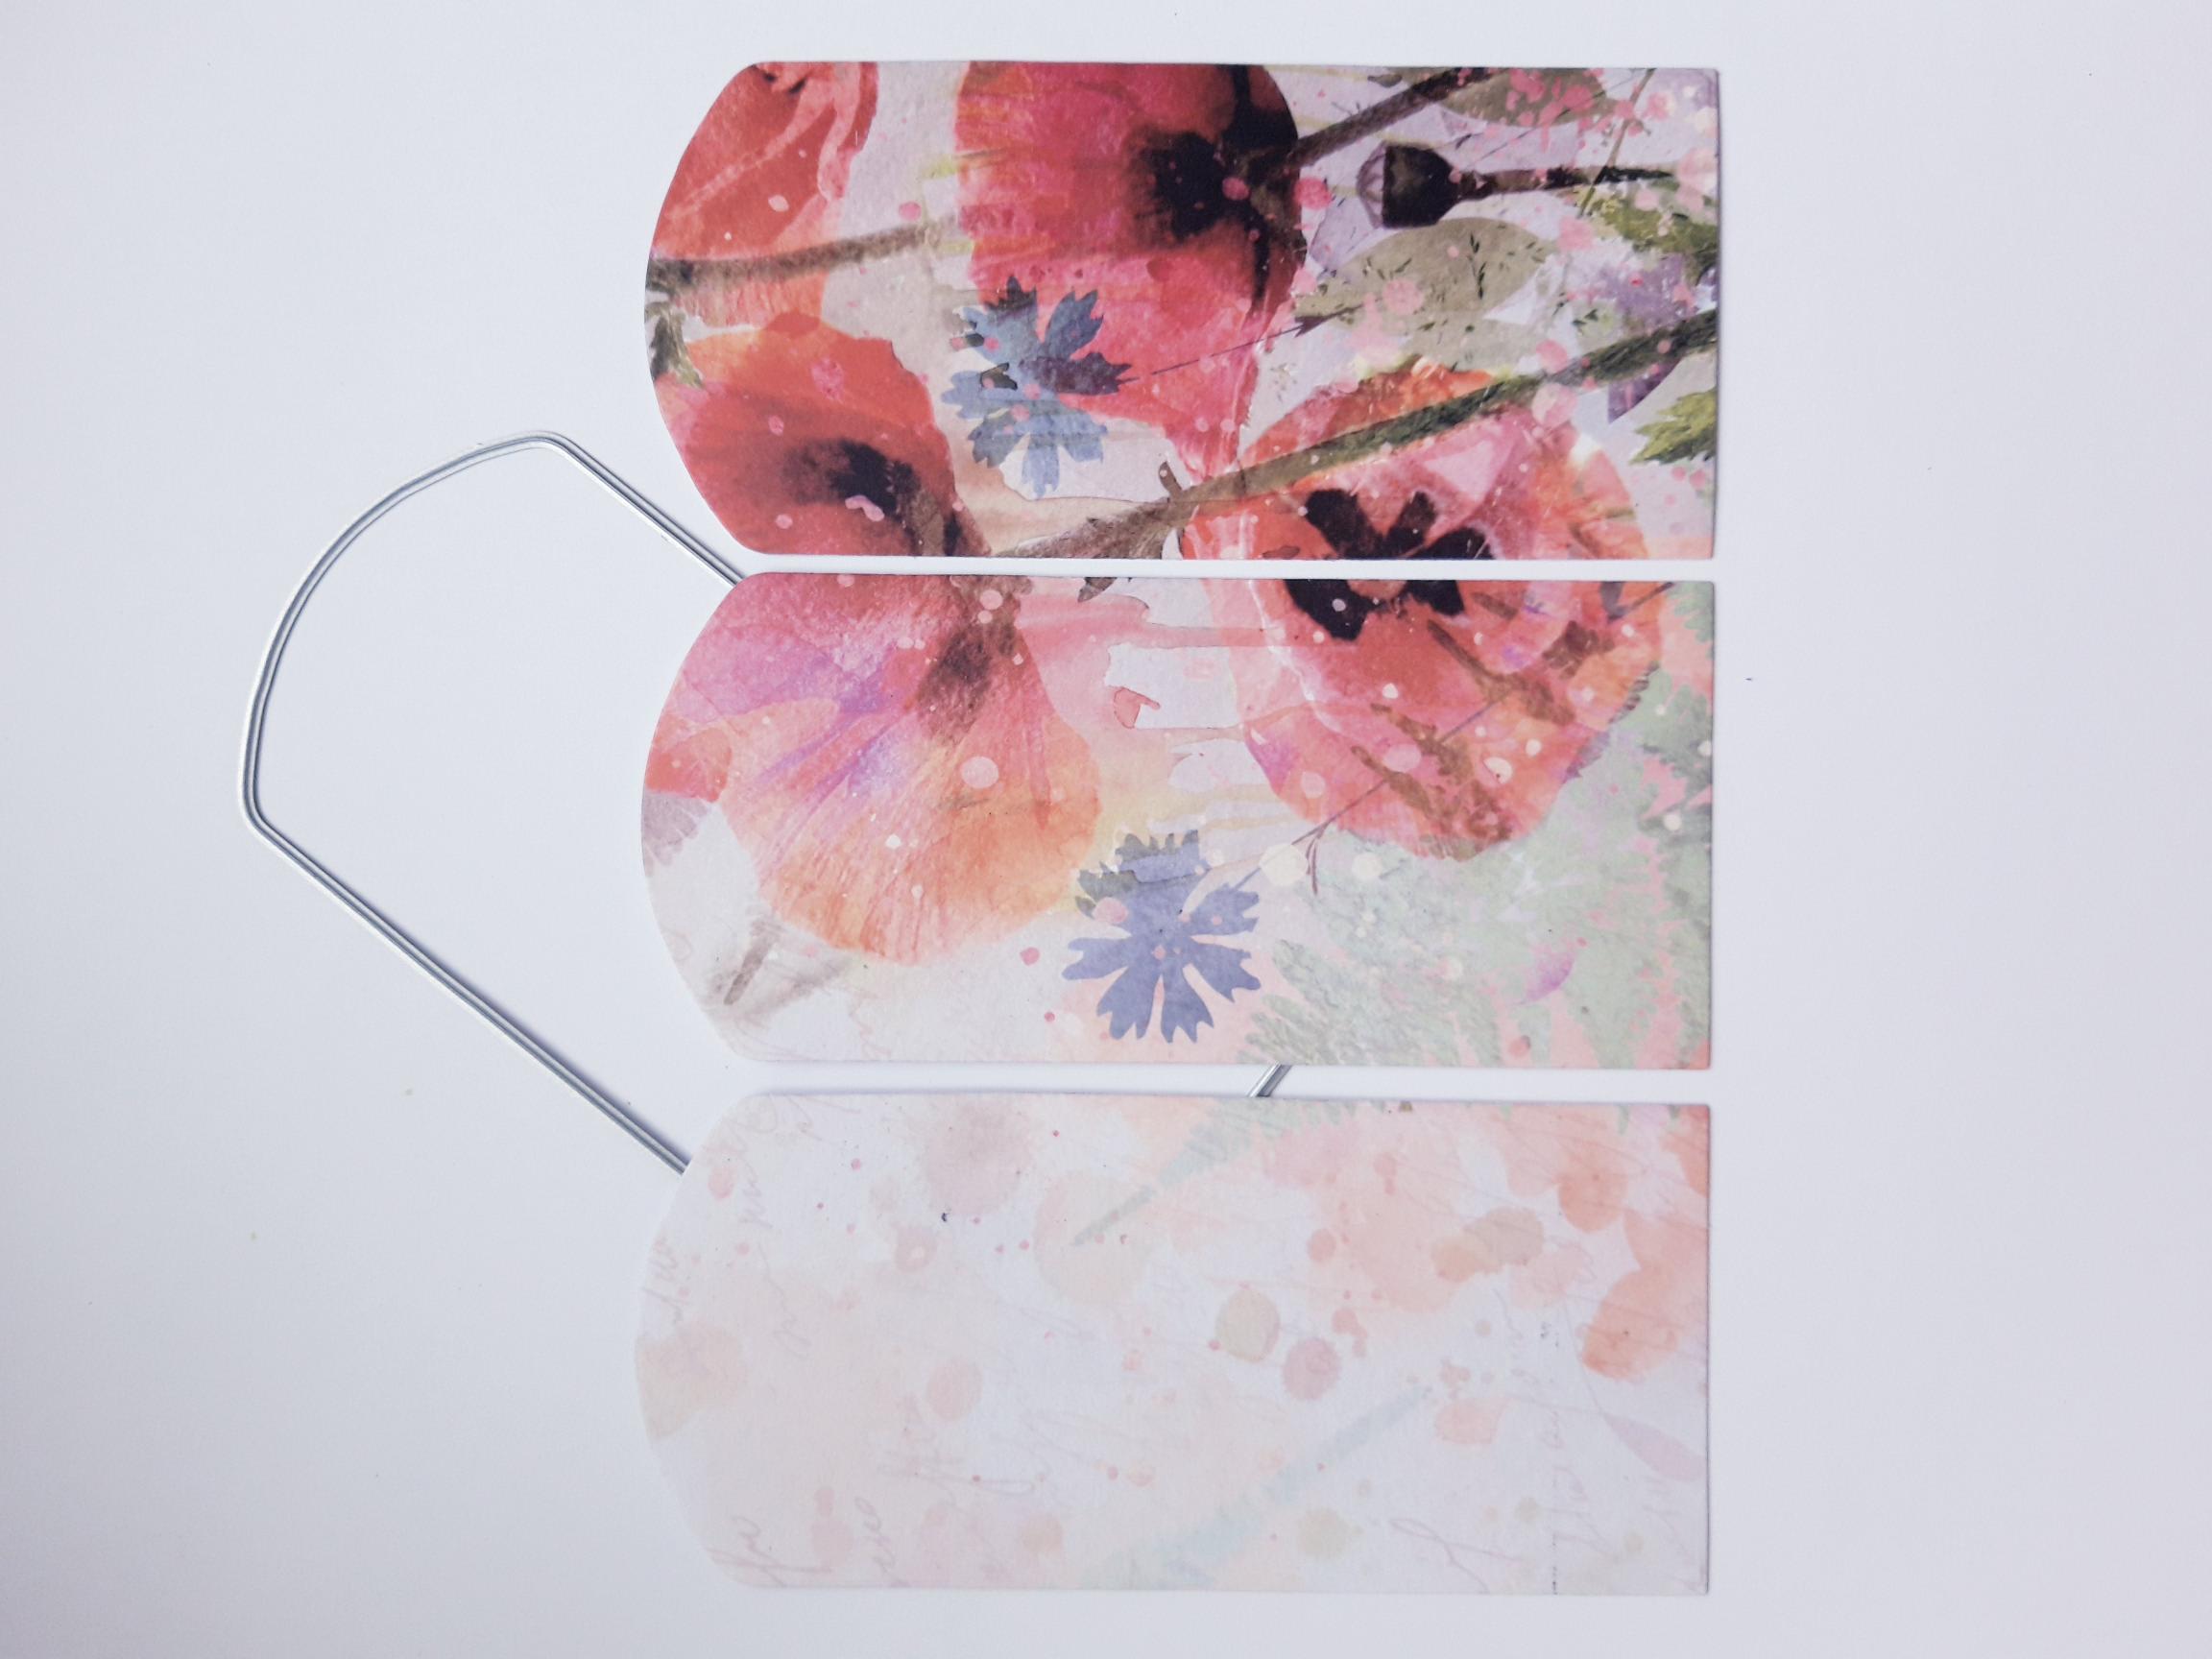
From ONE sheet of the paper, you will need to use the biggest, coordinating frame die, to die cut THREE die cut mats....NOTE... You want the area of the "images" your are cutting from, to be as close together as possible, so they look like one piece of artwork, as seen here. So when die cutting the THREE frames, do each one as close, and as level to the preceeding one, as you can. TIP: Use your card blank as a guide, holding the sheet of paper on it first, to decide which part of the paper/artwork you wish to use. I wanted these group of poppies to be the focal artwork on my card. Have a look at the photo of the finished card, to see what you are aiming for. Keep any leftover paper to one side, to use as a sentiment die cut mat, in a later step. |
|
Adhere your black, die cut elements, on to the THREE, die cut panels. |
|
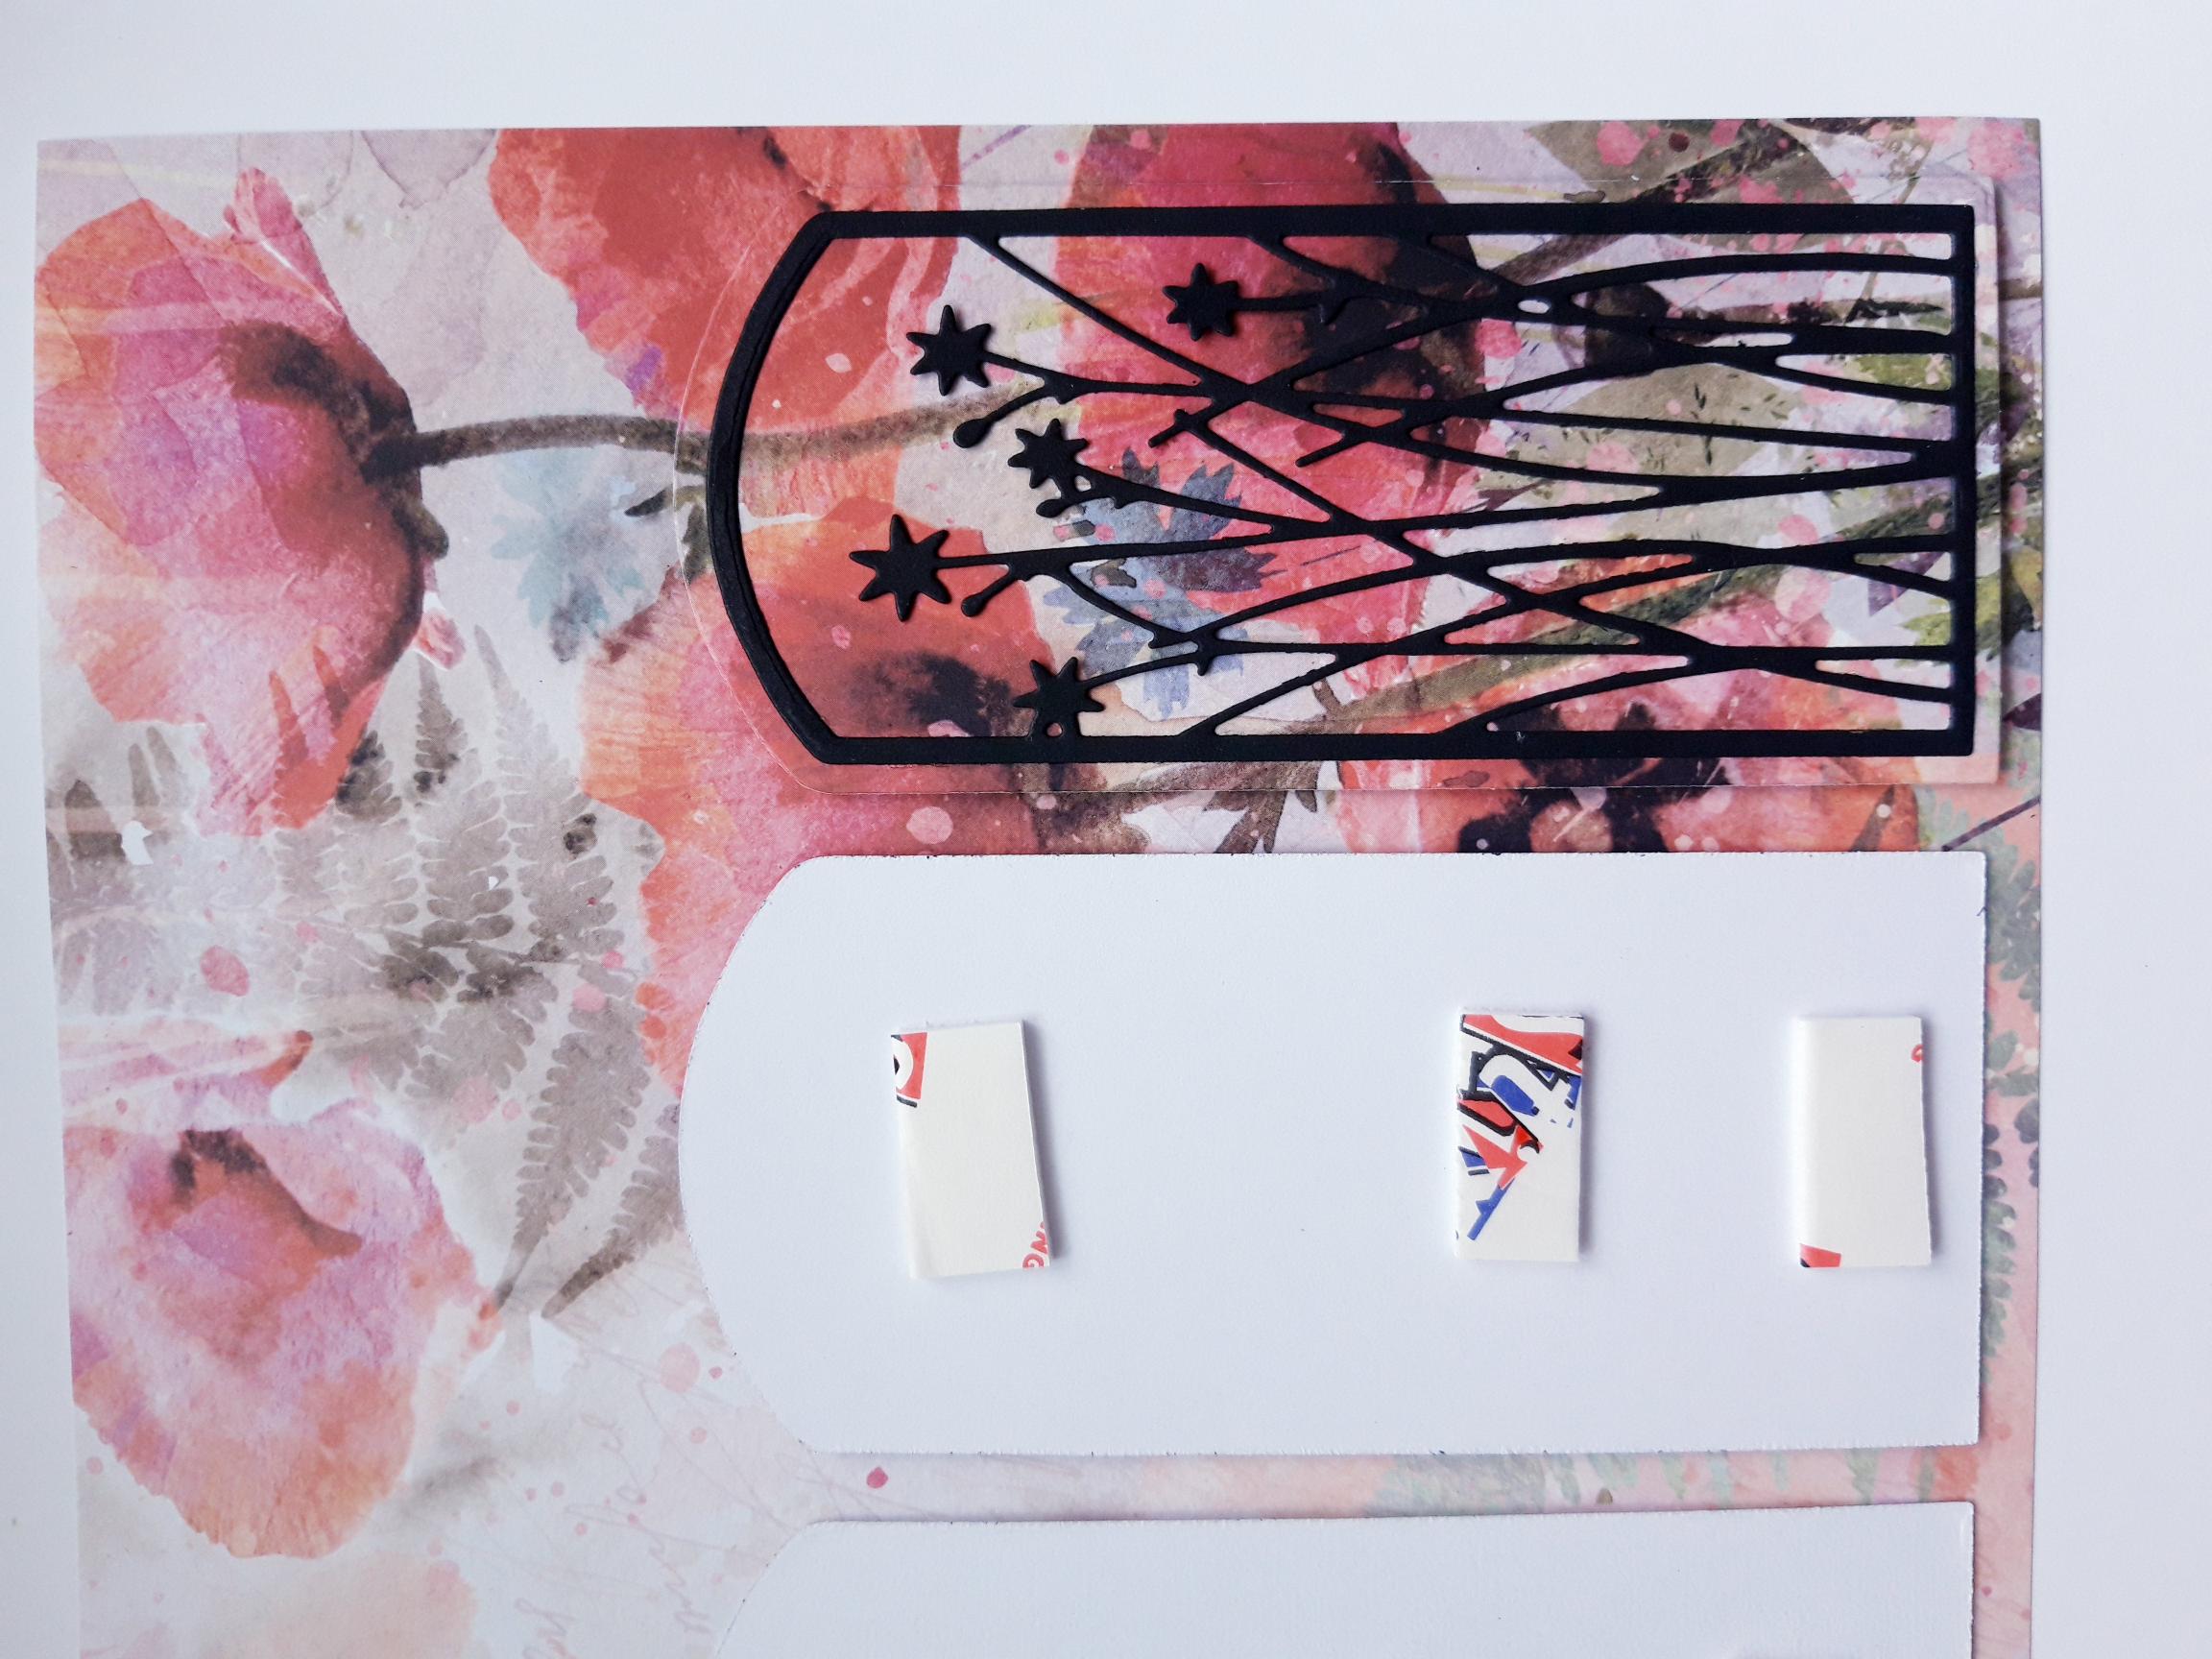
Pop foam pads on the reverse of each of the panels. WITHOUT removing any backing tape at this stage, position each of the panels on top of the SECOND matching sheet of 8 x 8" paper you tore out earlier. The idea is each of the panels should line up, and perfectly match up, to the artwork on the SECOND sheet below. Make sure you correctly line up and postion each panel in place first. Once you are happy with the placements, peel off the foam pad backing tape, on the right hand panel, line it back up with the artwork below, and in line with the other 2 panels, and adhere in place. NB: For the purposes of this Guide, and to make it easier for you to see, I turned my other panels over, but still kept them in position. Your panels will be decorative paper side, face up. |
|
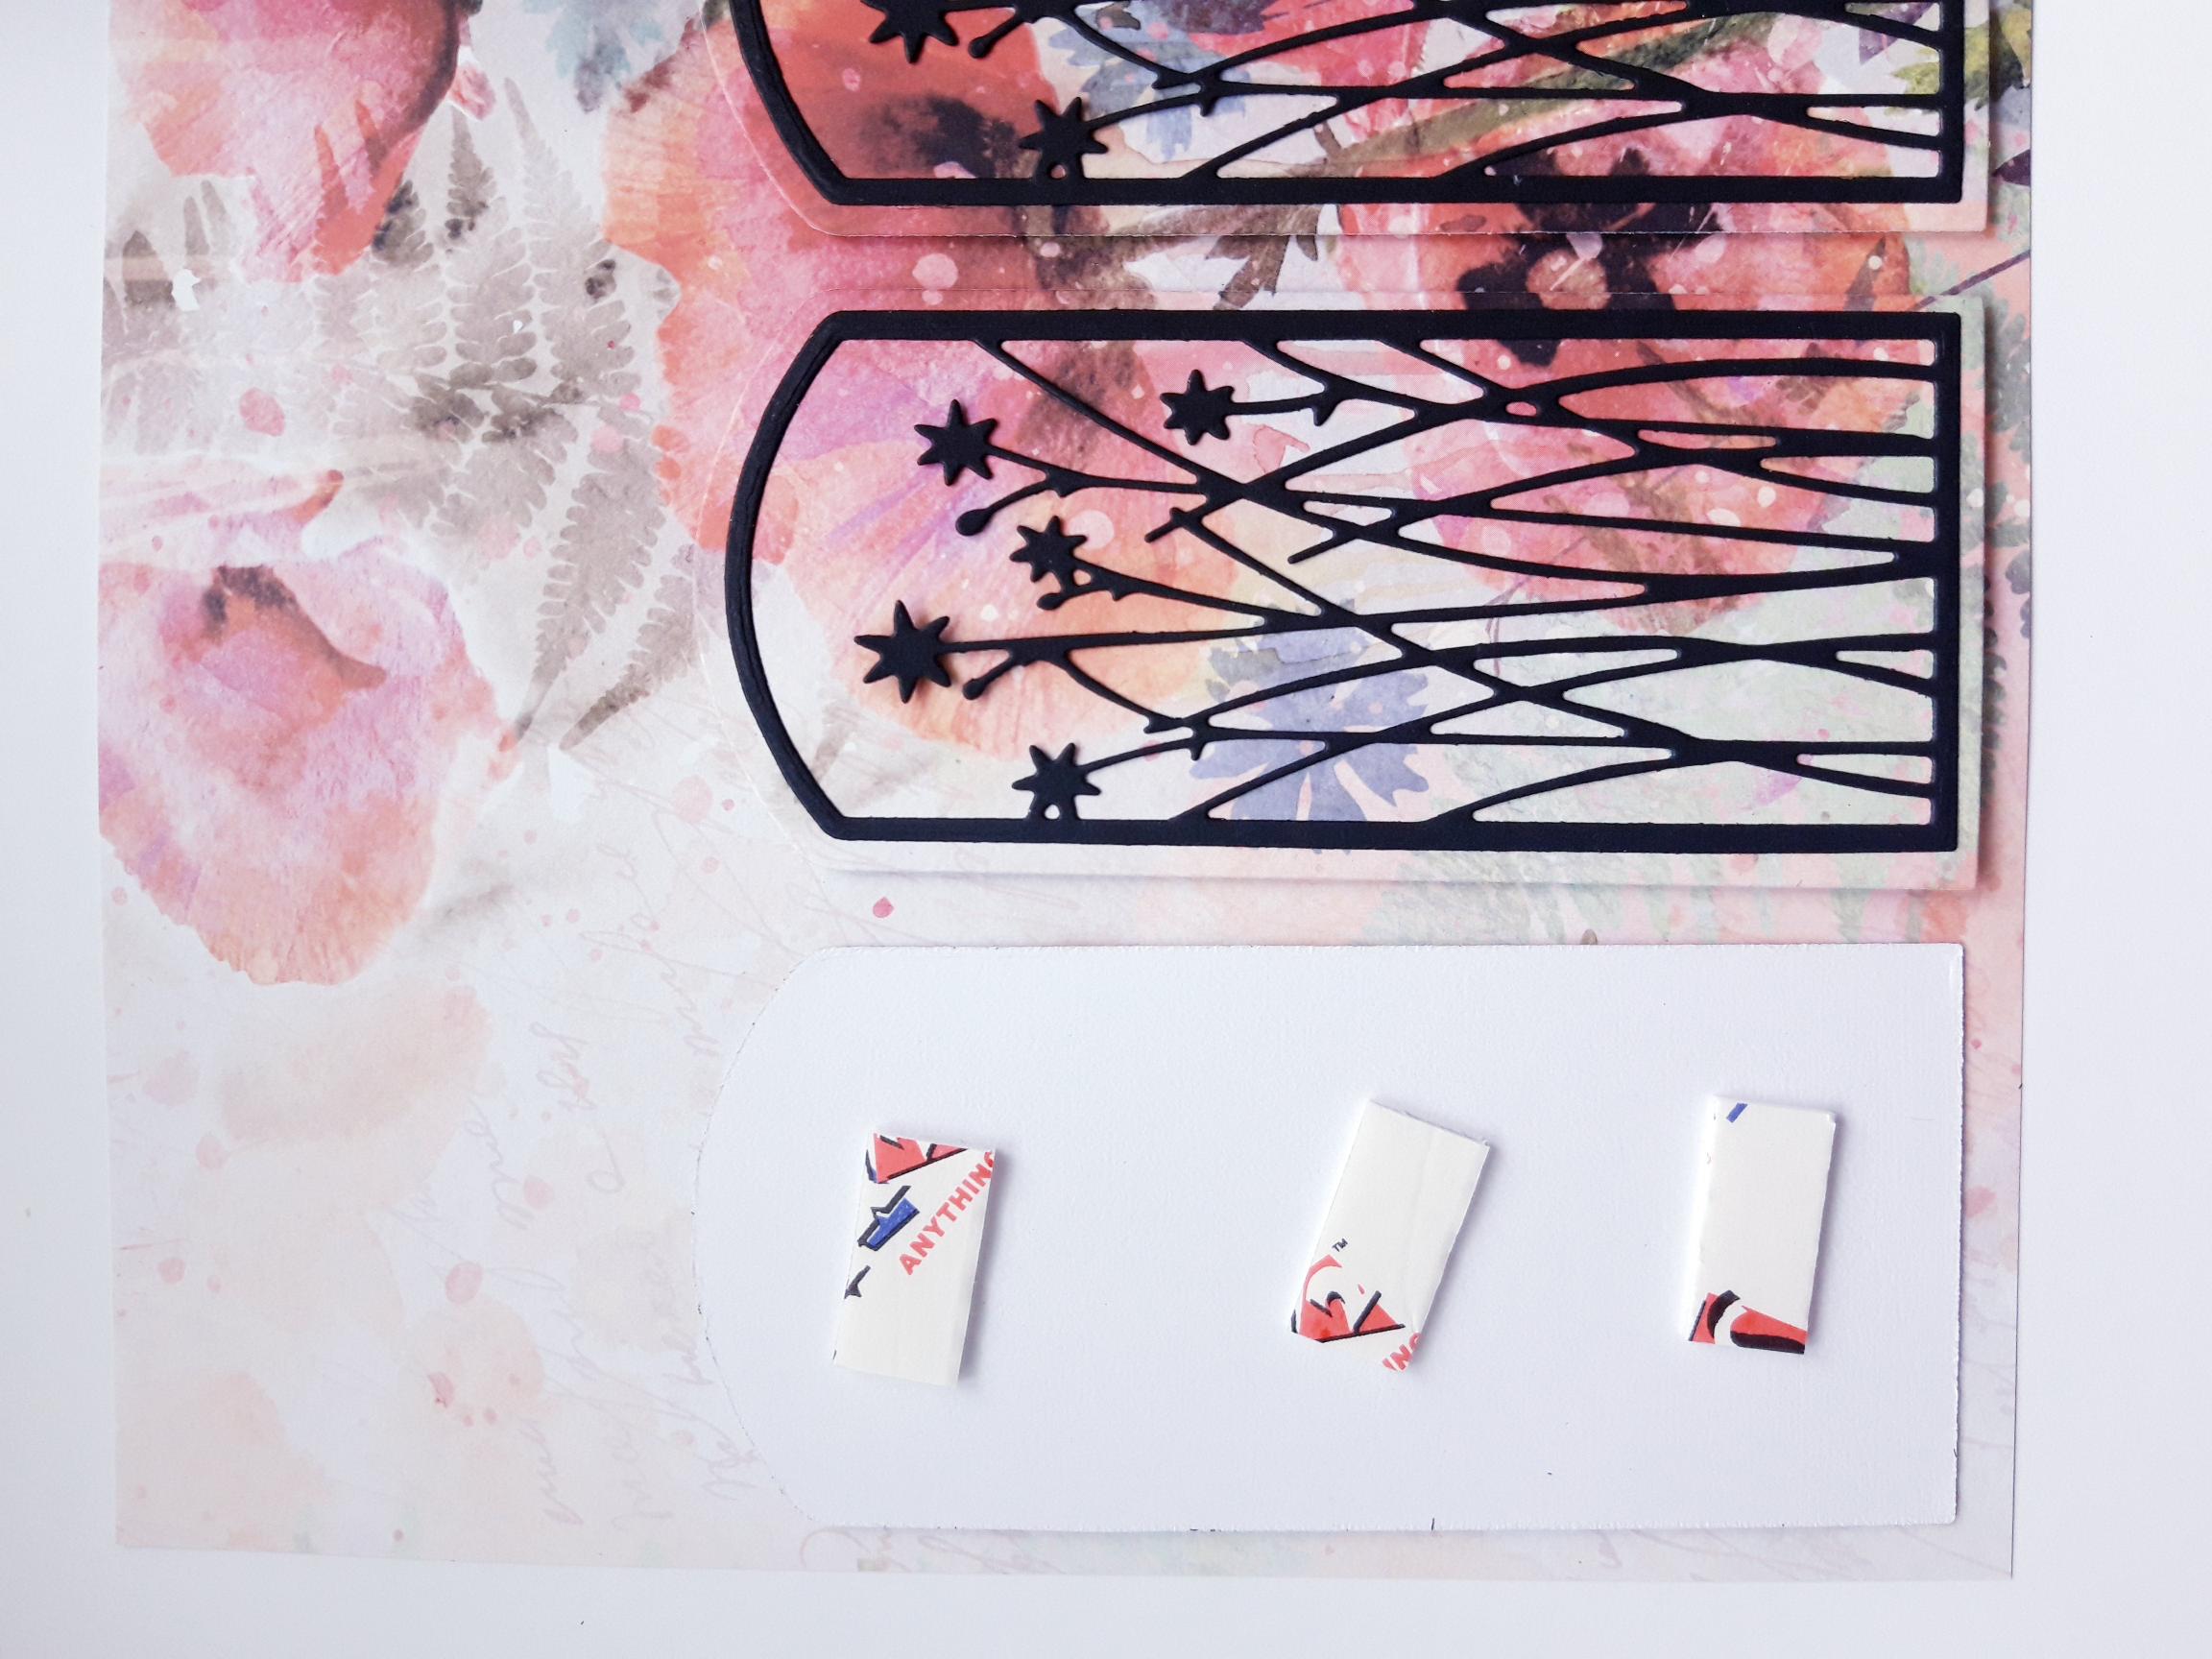
Turn over the middle panel and remove the foam pad backing tape. Carefully line it up, with the artwork below, and ensuring it's in line with the other 2 panels, adhere it in place. |
|
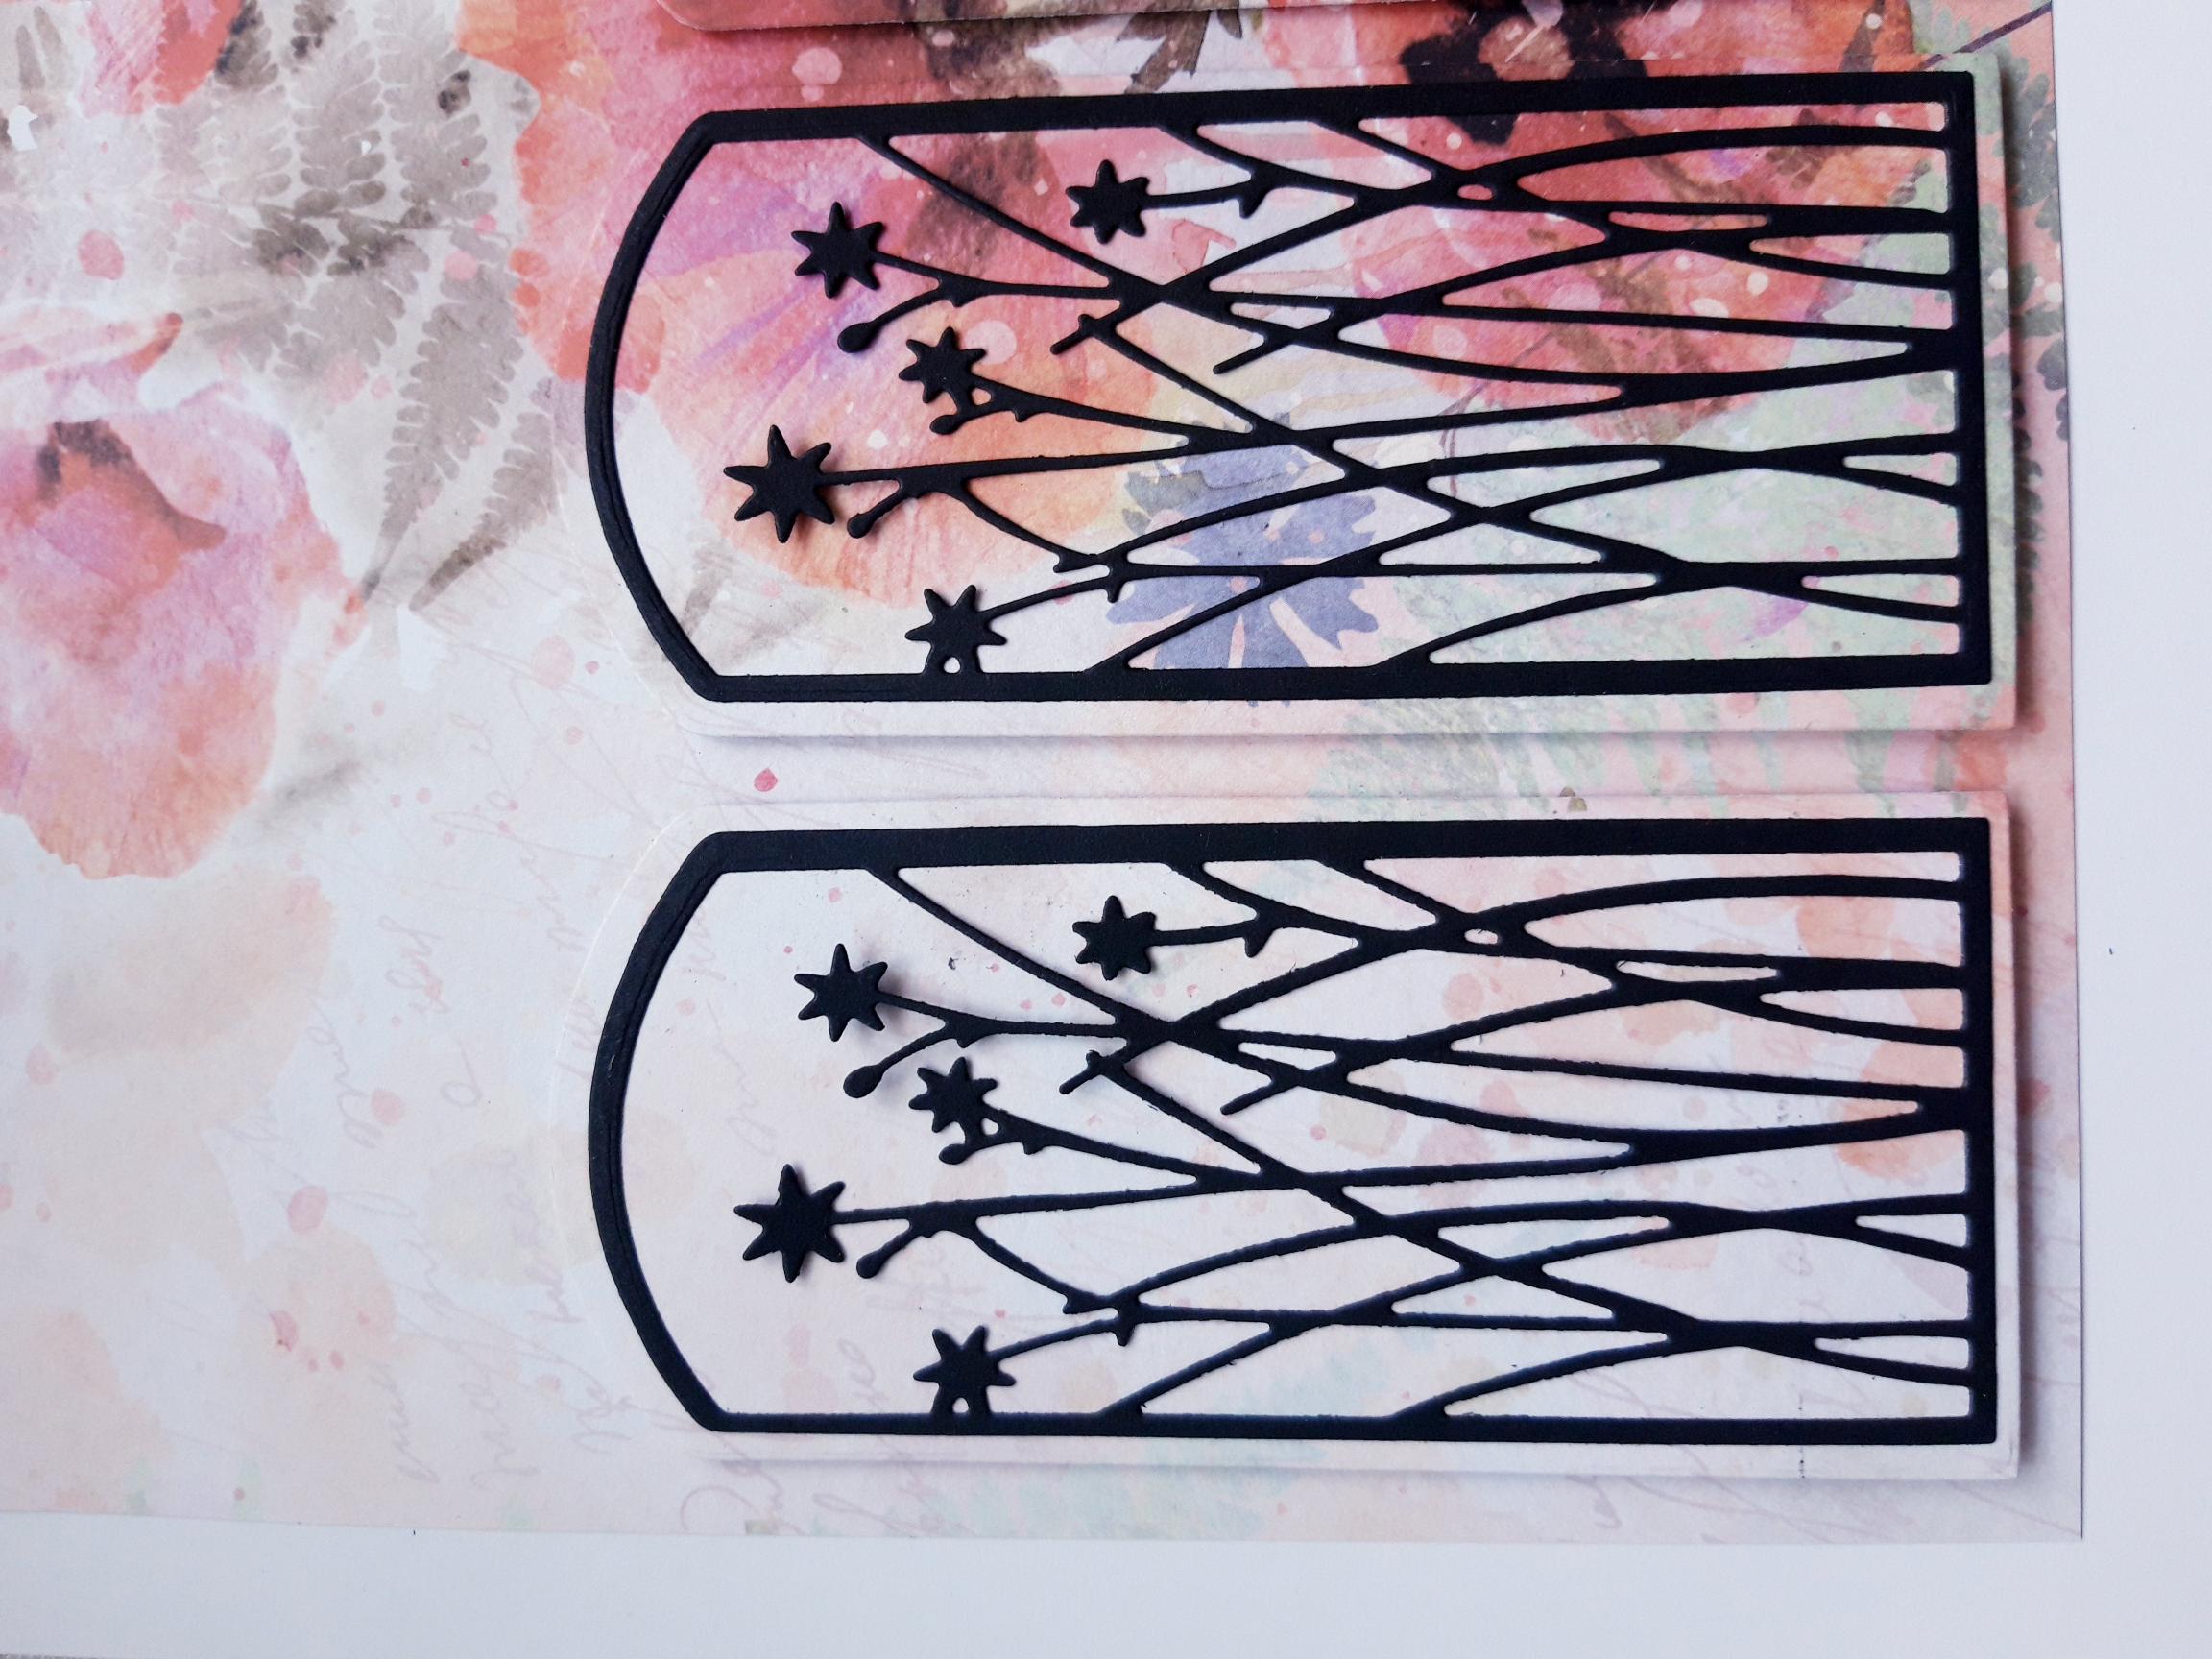
Turn over the left panel and remove the foam pad backing tape. Carefully line it up, with the artwork below, and ensuring it's in line with the other panels, adhere it in place. |
|
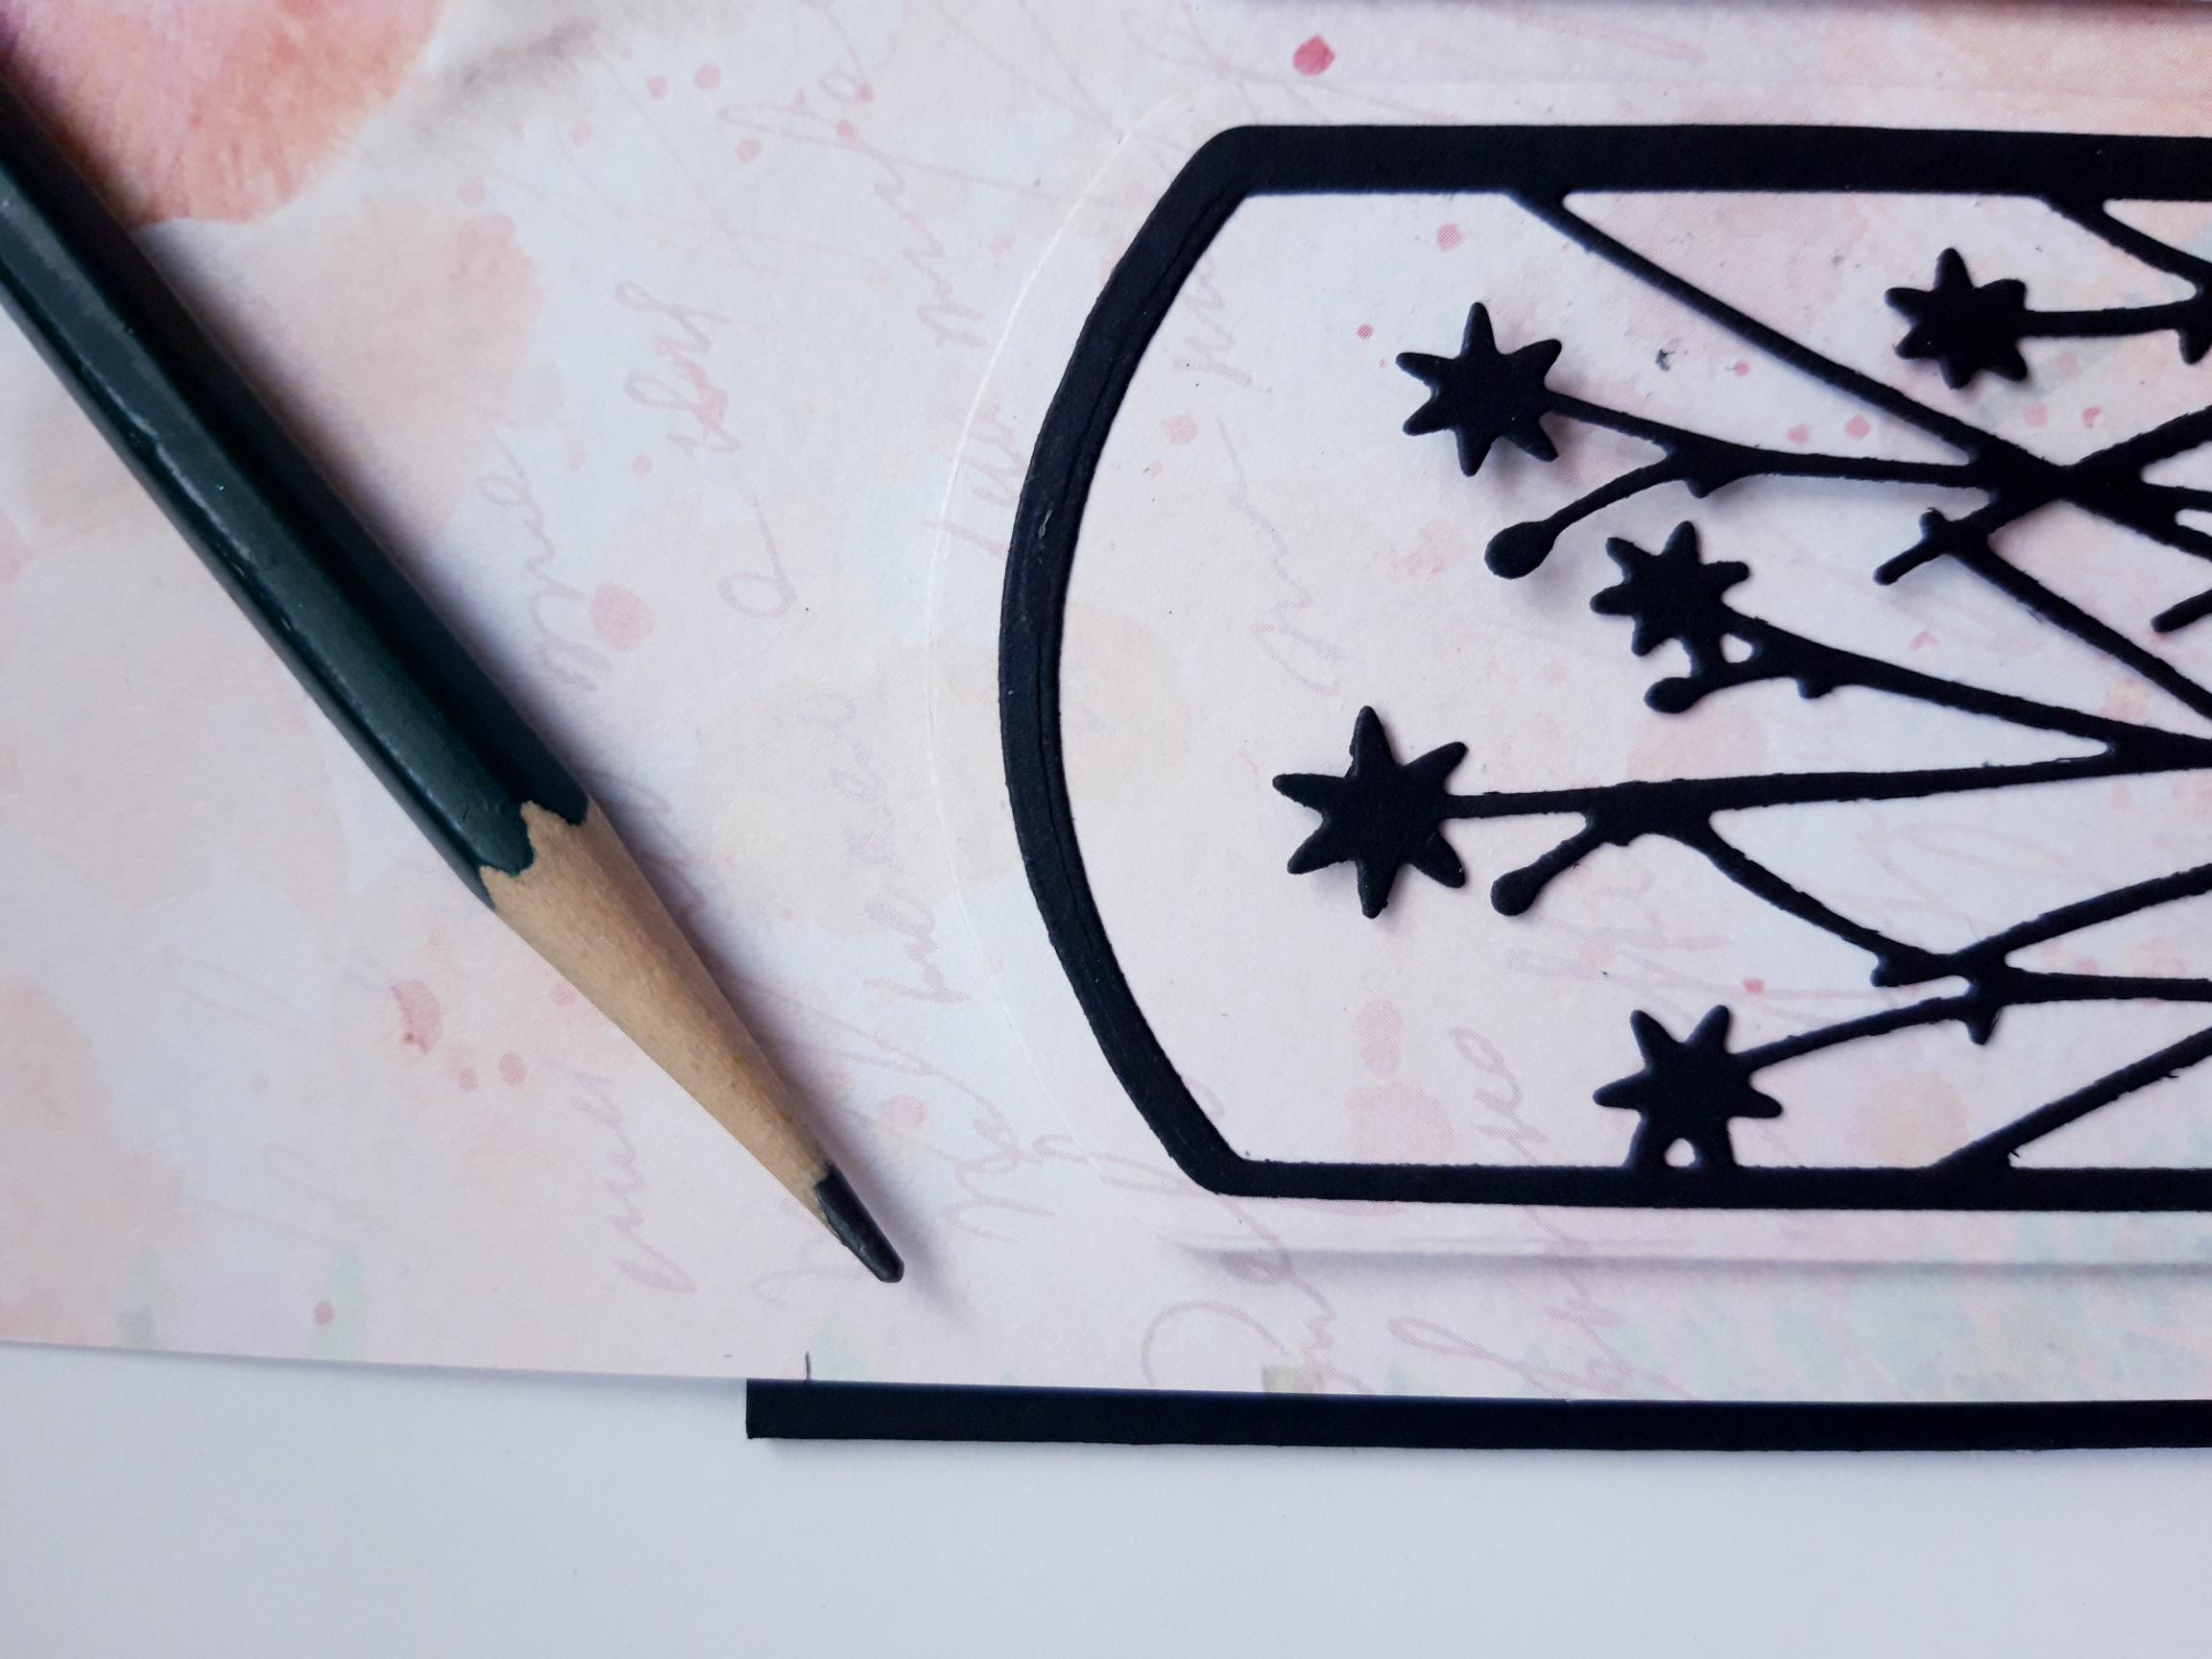
Lay your artwork on to your black, landscape view, card blank. Leave an equal gap down the two sides, and along the bottom edge of the card blank. Mark with a pencil where you need to cut along the top of your artwork, to create the same equal gap between paper and the edge of your card blank. |
|
Adhere your trimmed artwork on to the front of your card blank, and set it to one side. |
|
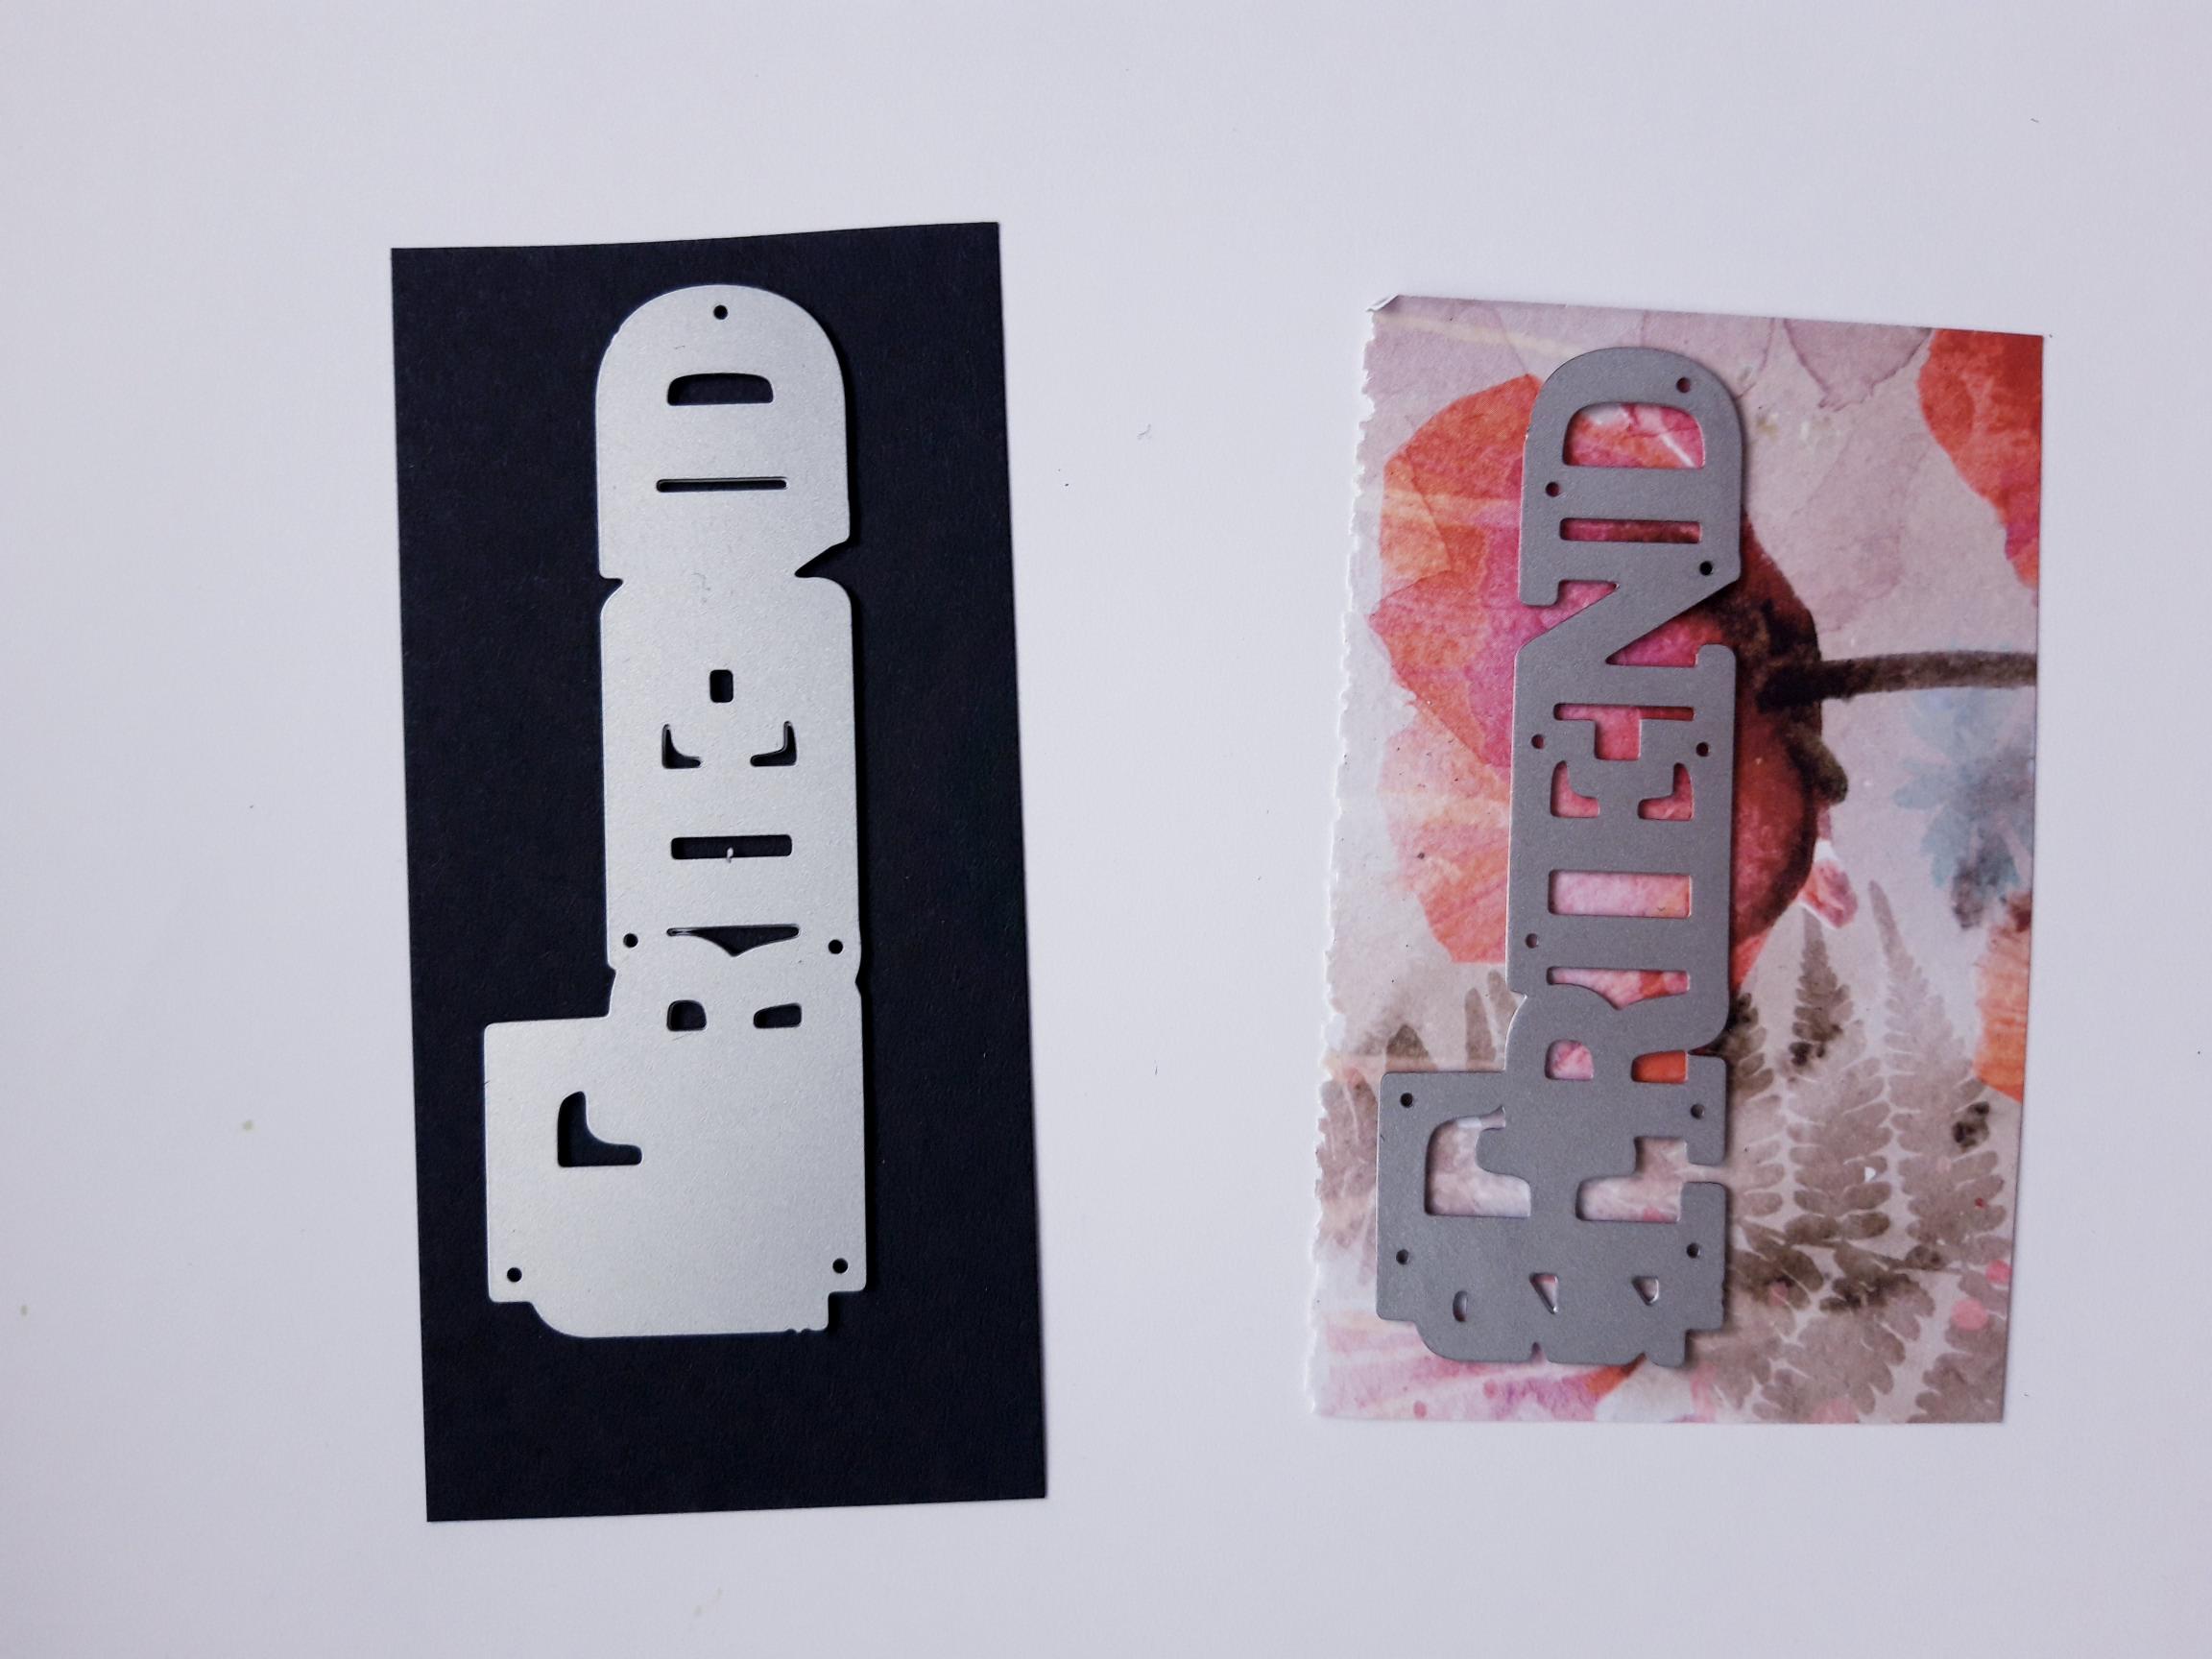
Place the Kind Friend solid sentiment die, from the set of the same name, on to the black card (2 x 4"). Place the detailed, coordinating die, on to the leftover, decorative paper you set aside earlier. Run both through your die cutting machine. |
|
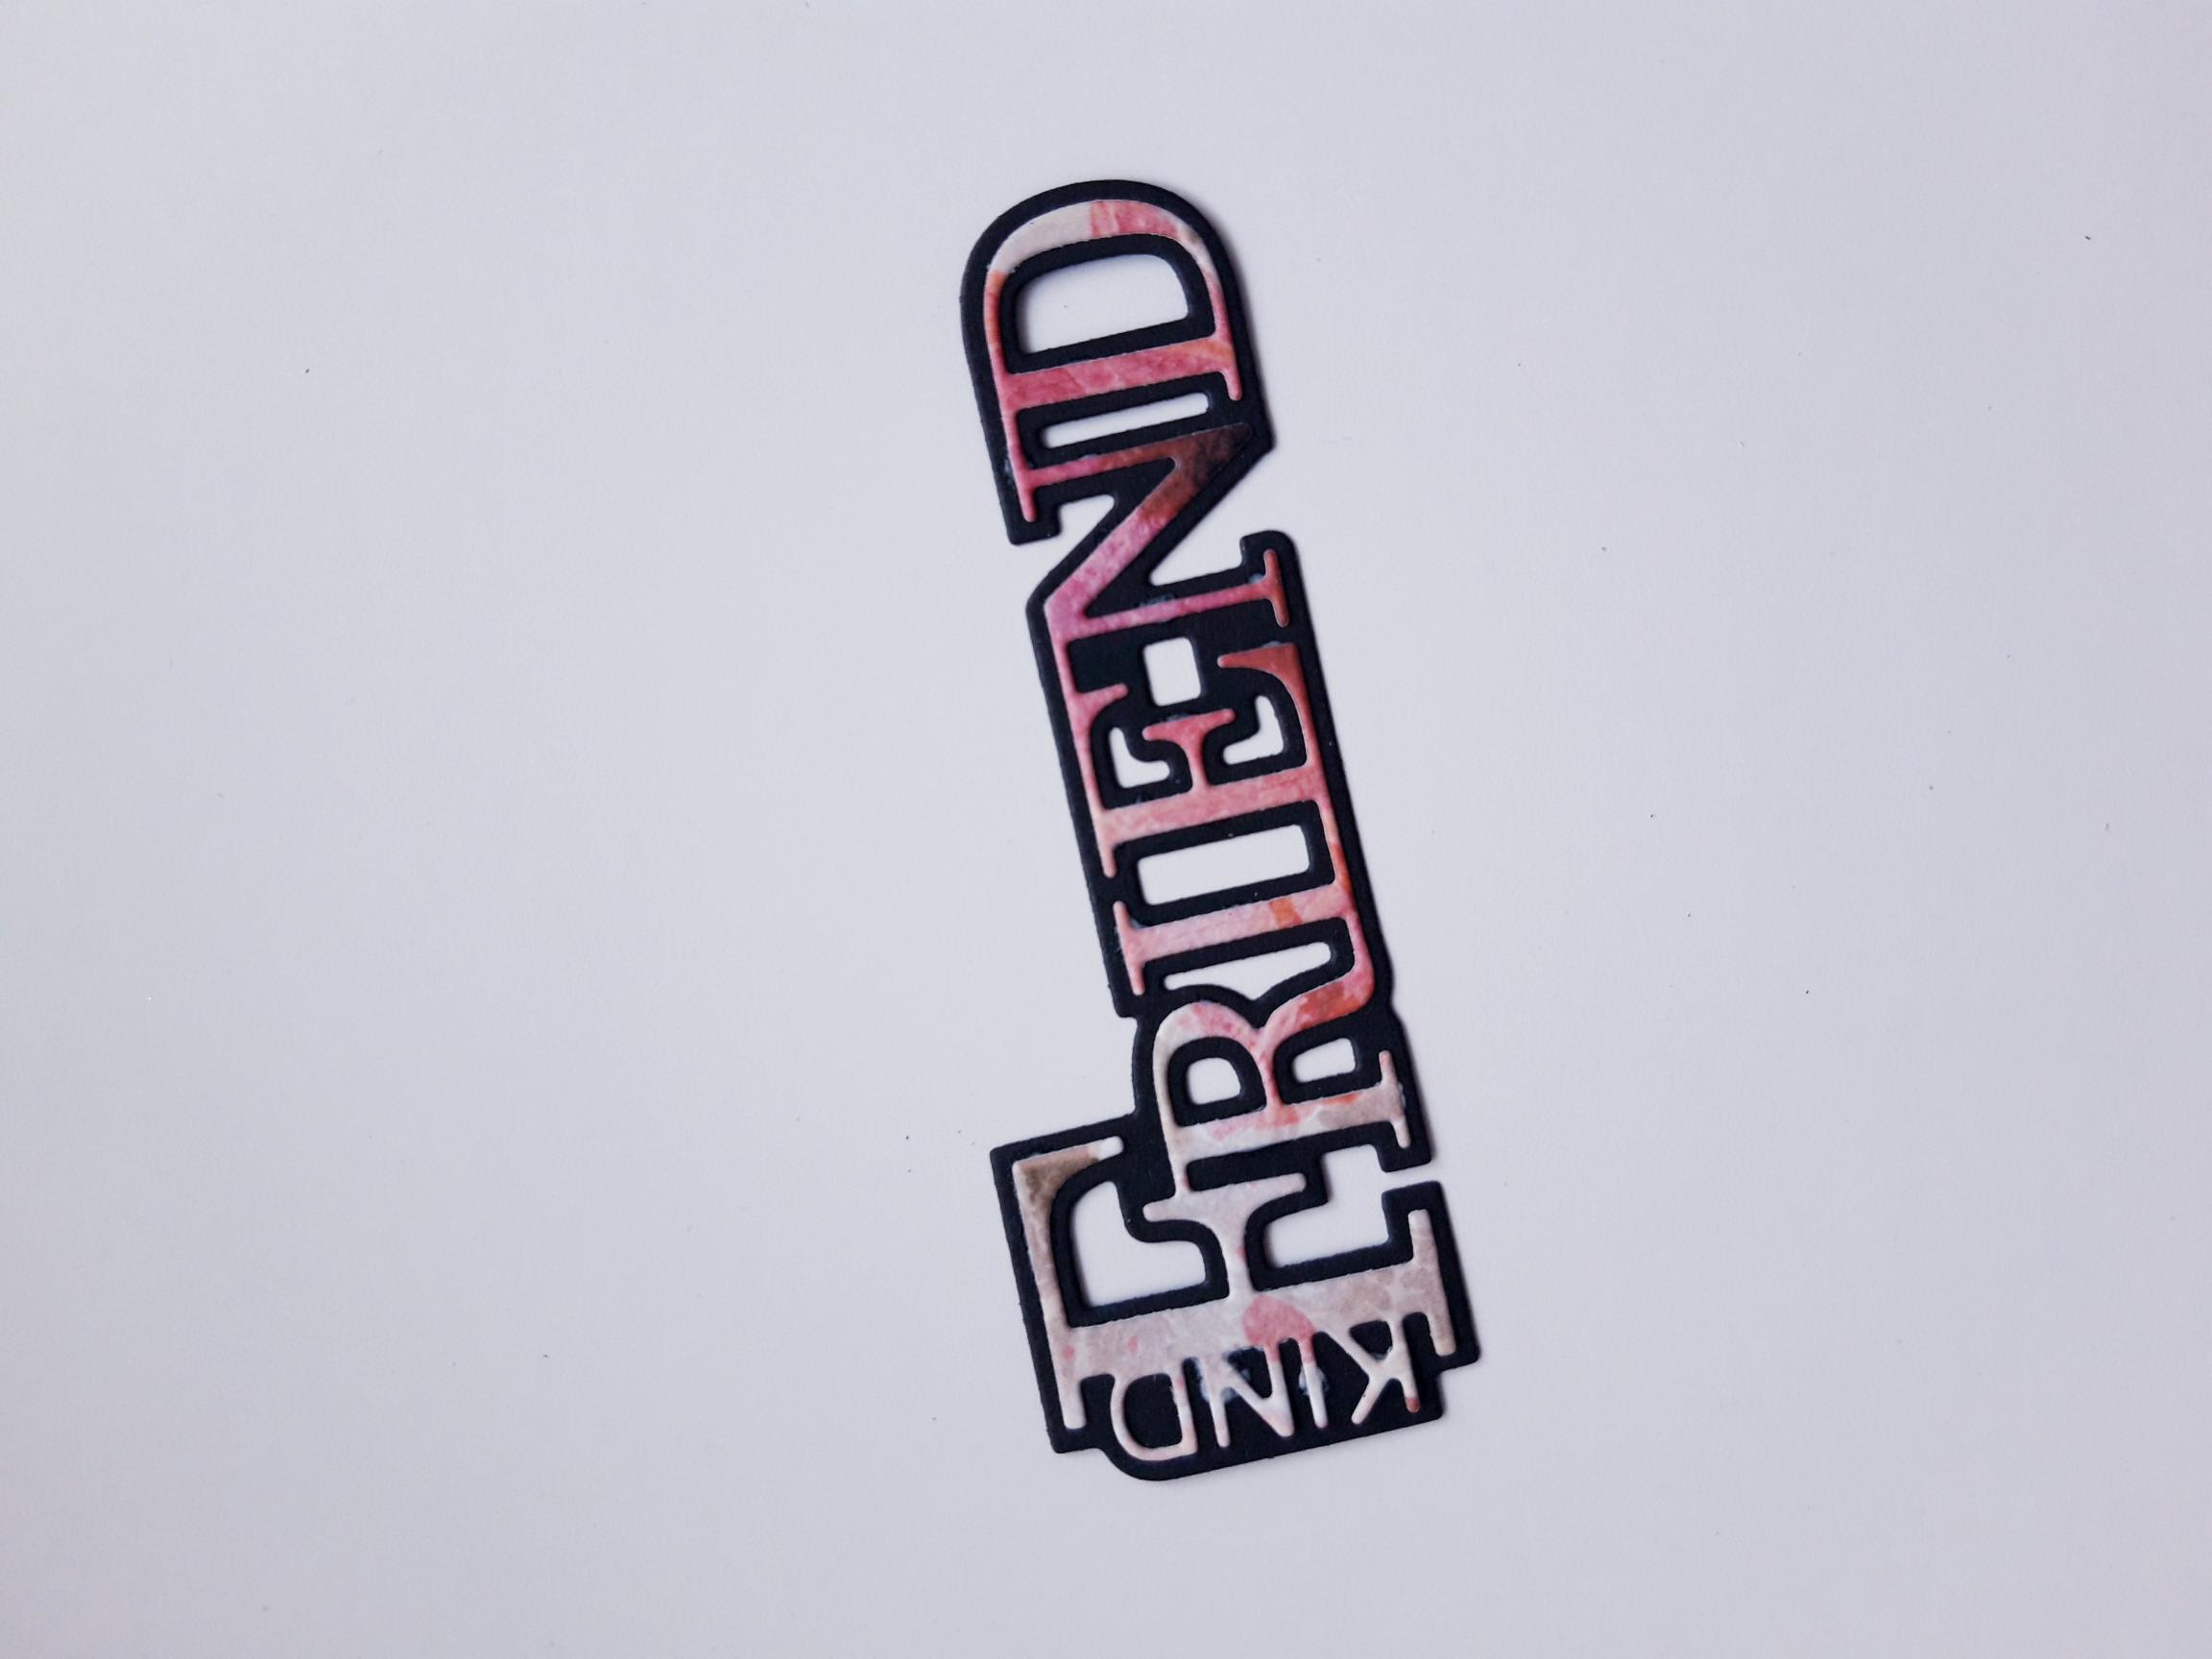
Adhere them together, as shown here. |
|
Adhere your sentiment on the bottom, left hand side, of your artwork. |
|
To finish, use a black fine line pen, to add a decorative, stitched frame, around your artwork. |