Give your friends $10 off their first order!
Refer a FRIEND


WHAT YOU WILL NEED:
Grey top folding card blank (cut to 7 x 5")
White card (6 3/4 x 4 3/4")
Vellum - tear to 7 1/4 x 1 3/4"
Stamps from Beautiful Soul Stamp Collection
WOW Melt It Powder
WOW Embossing Ink pad
Anti static bag
WOW Duel speed heat tool
WOW Bright White embossing powder
Distress Oxide/Ink: Kitsch Flamingo, Faded Jeans, Peacock Feathers
Izink Dye ink pad: Reglisse
Blending brush/tool
Clear adhesive gems - Creative Box
White gel pen
Eureka 101
Paper Trimmer
Perfect Together Glue
Red liner tape
[click image to enlarge] 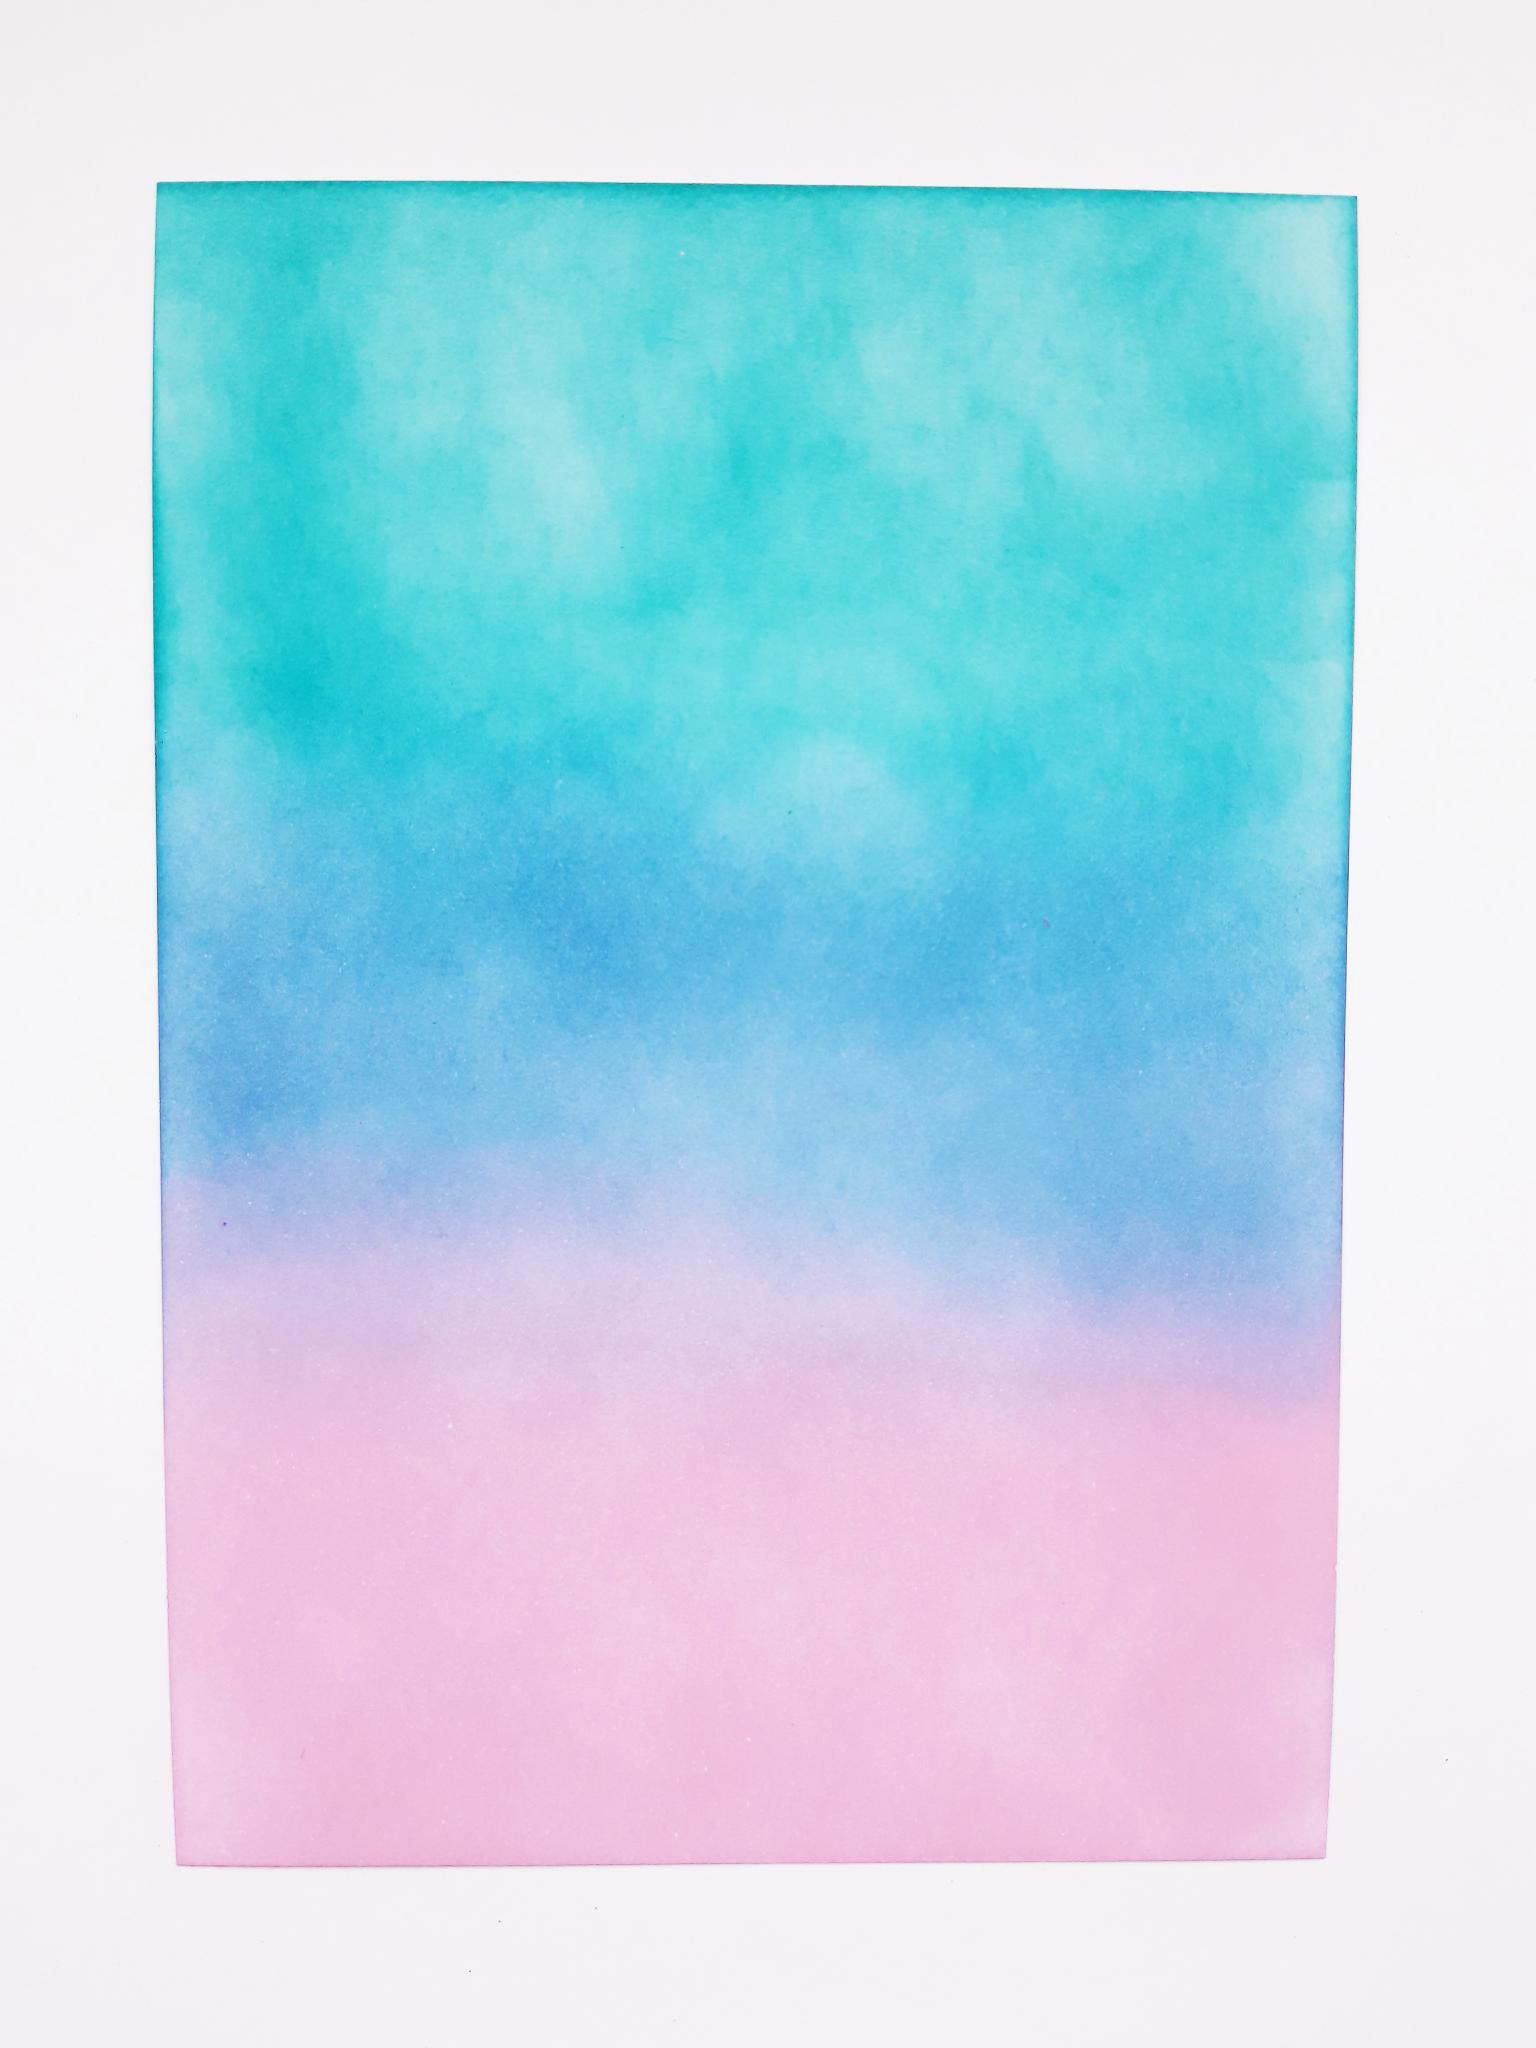
|
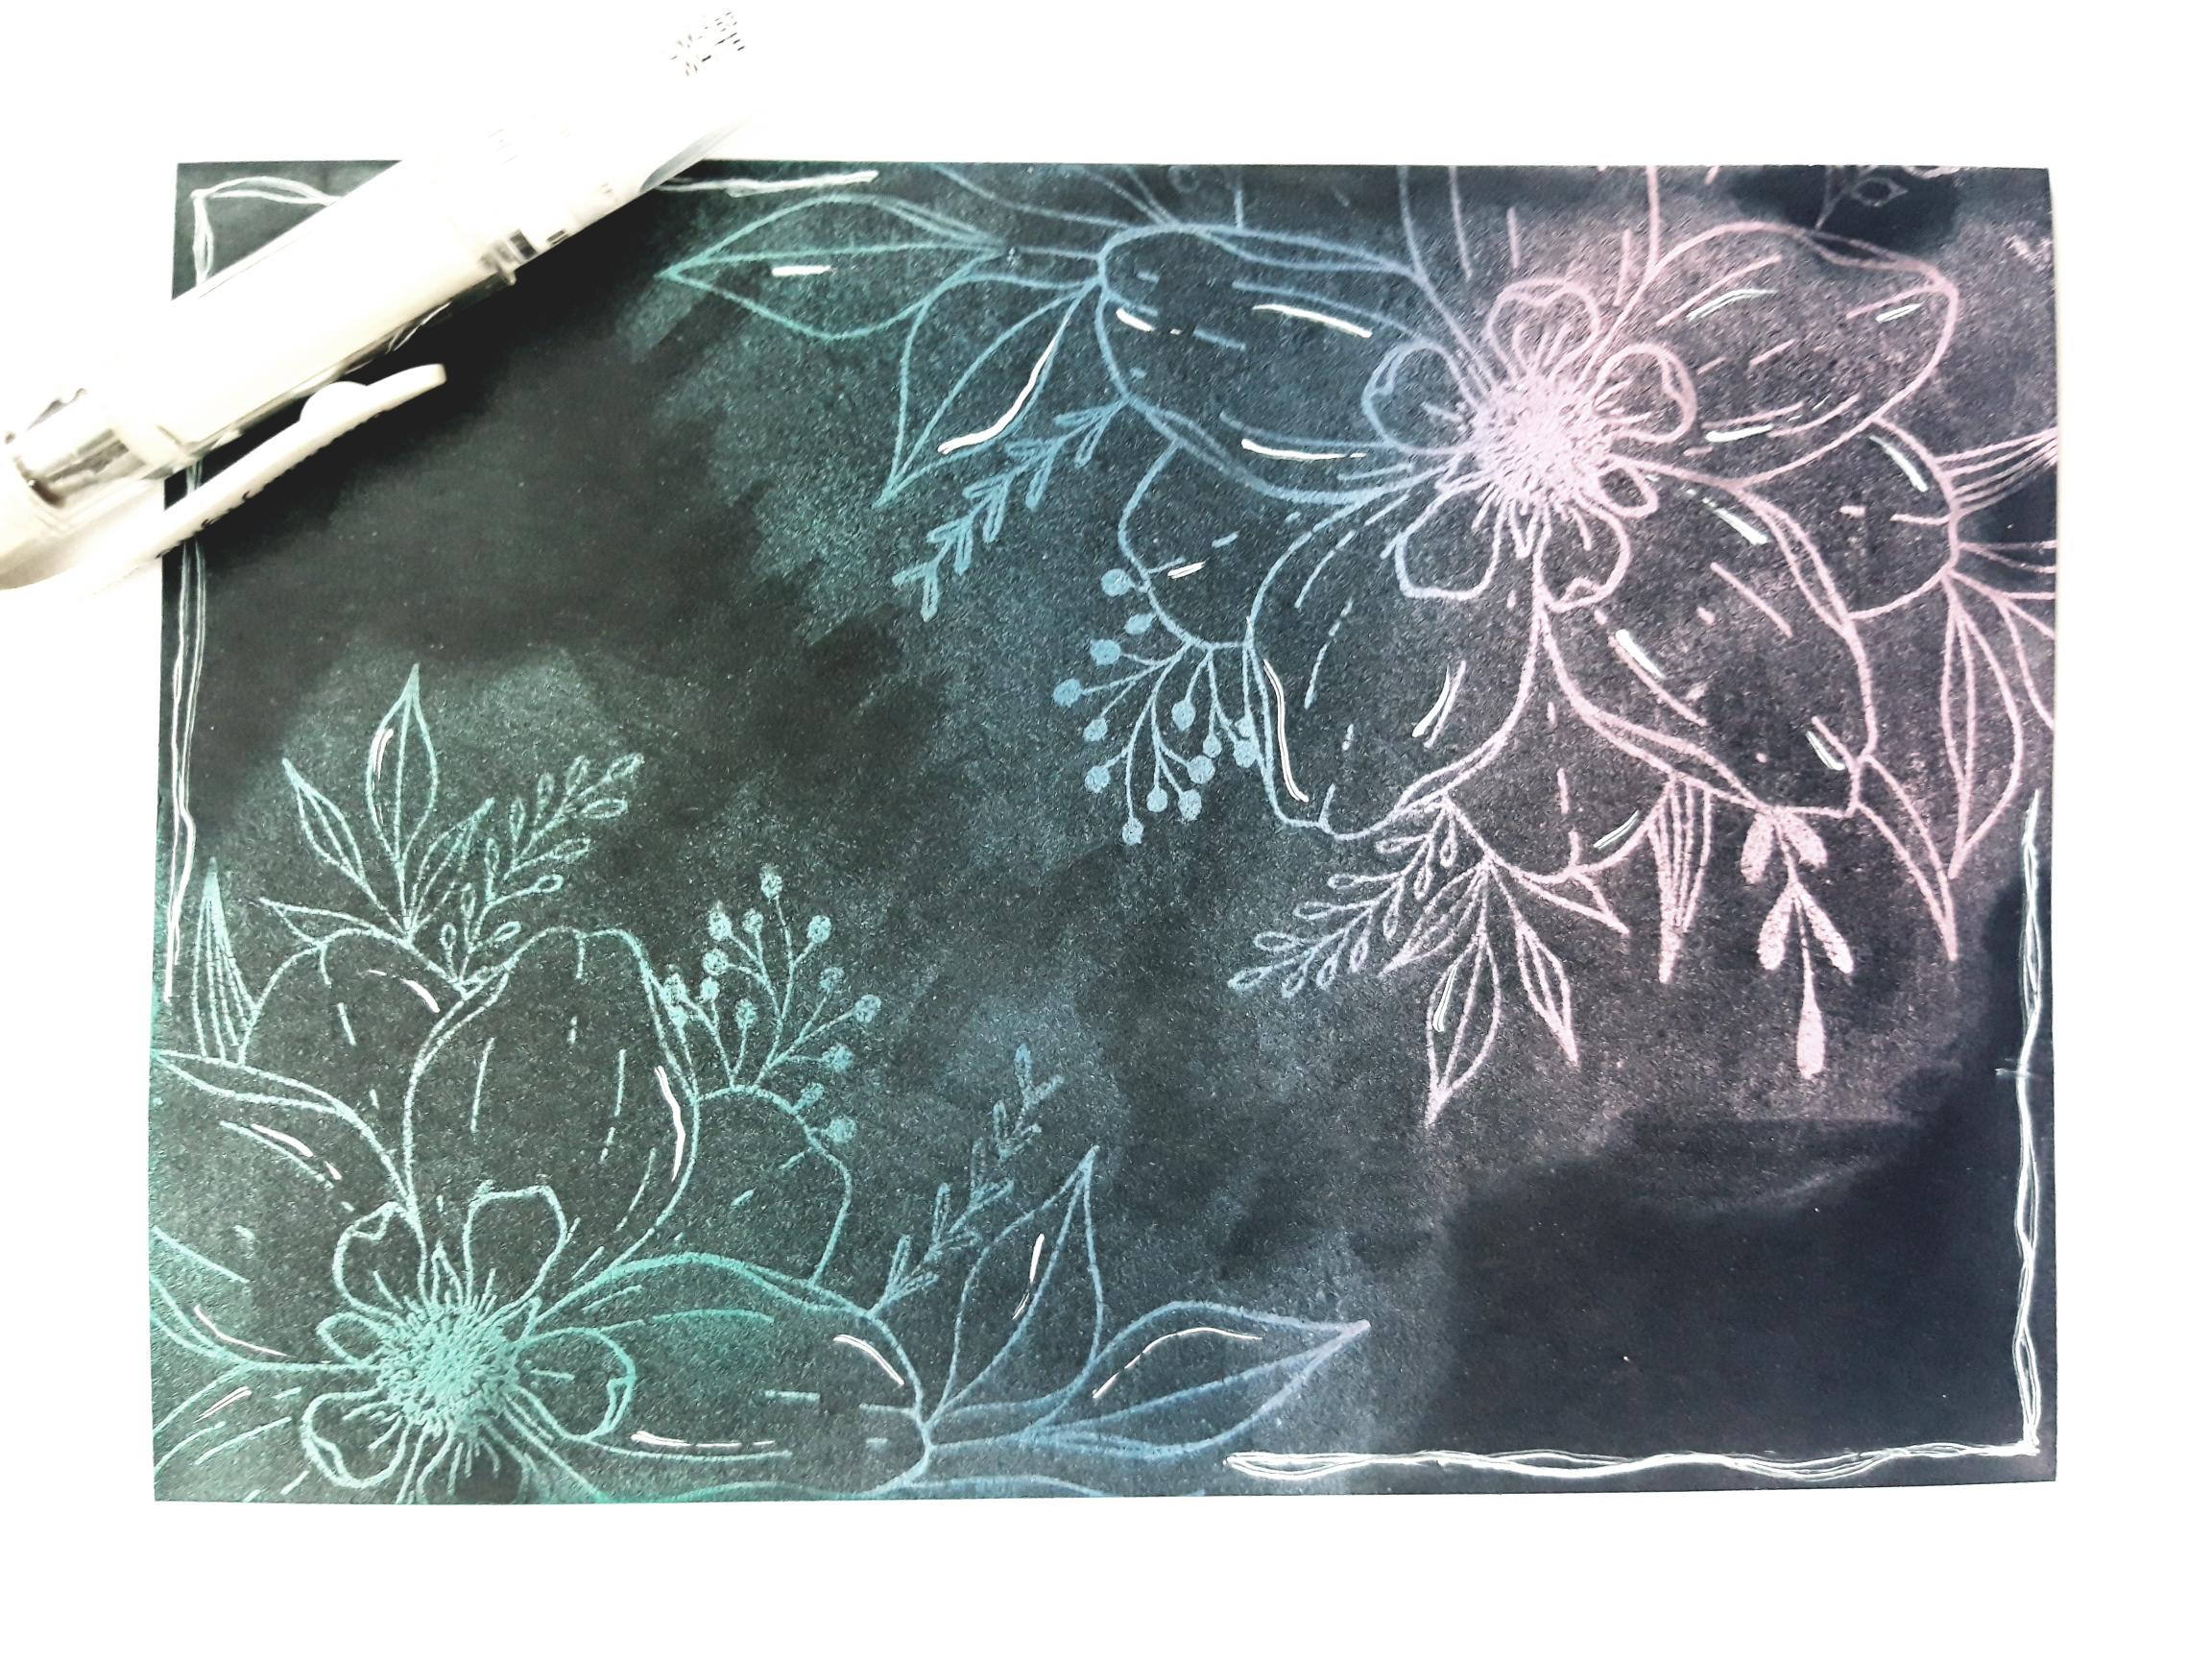
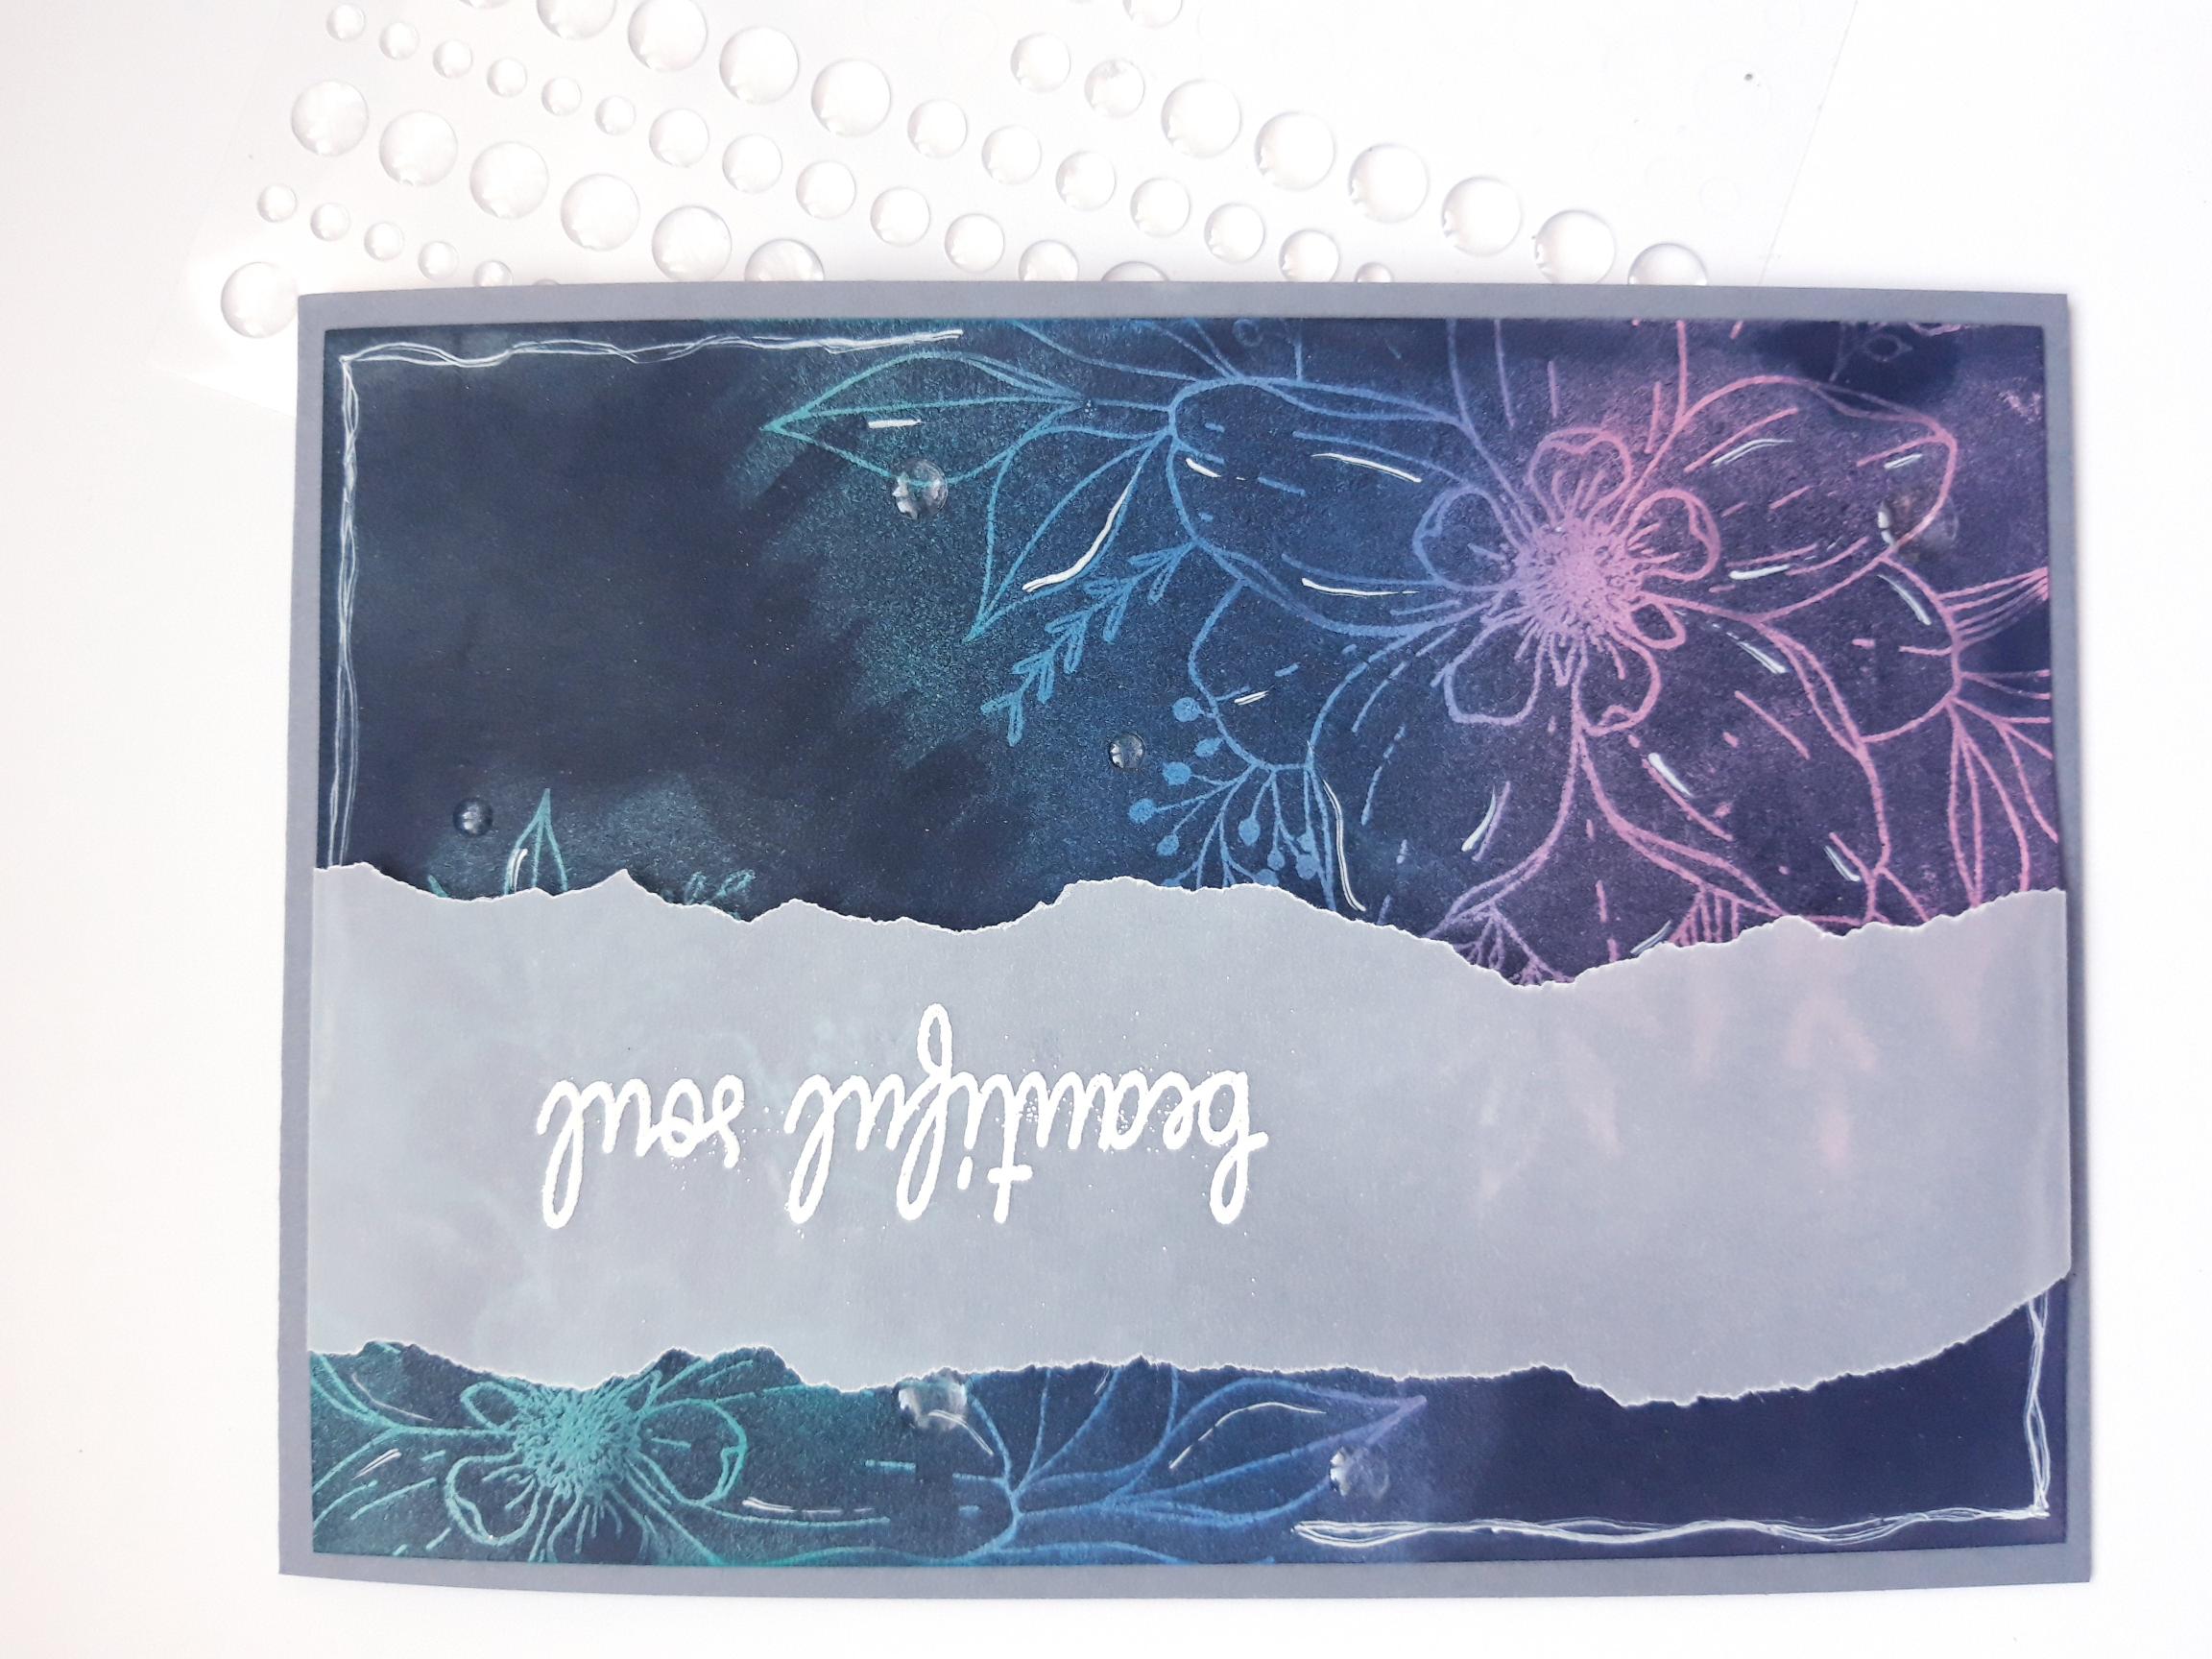
Use your blending brushes/tools, to apply the Distress Oxides, or Inks, across the white cardstock. You need the colours to be vibrant, so add a few layers if necessary, to get a good result. |
|
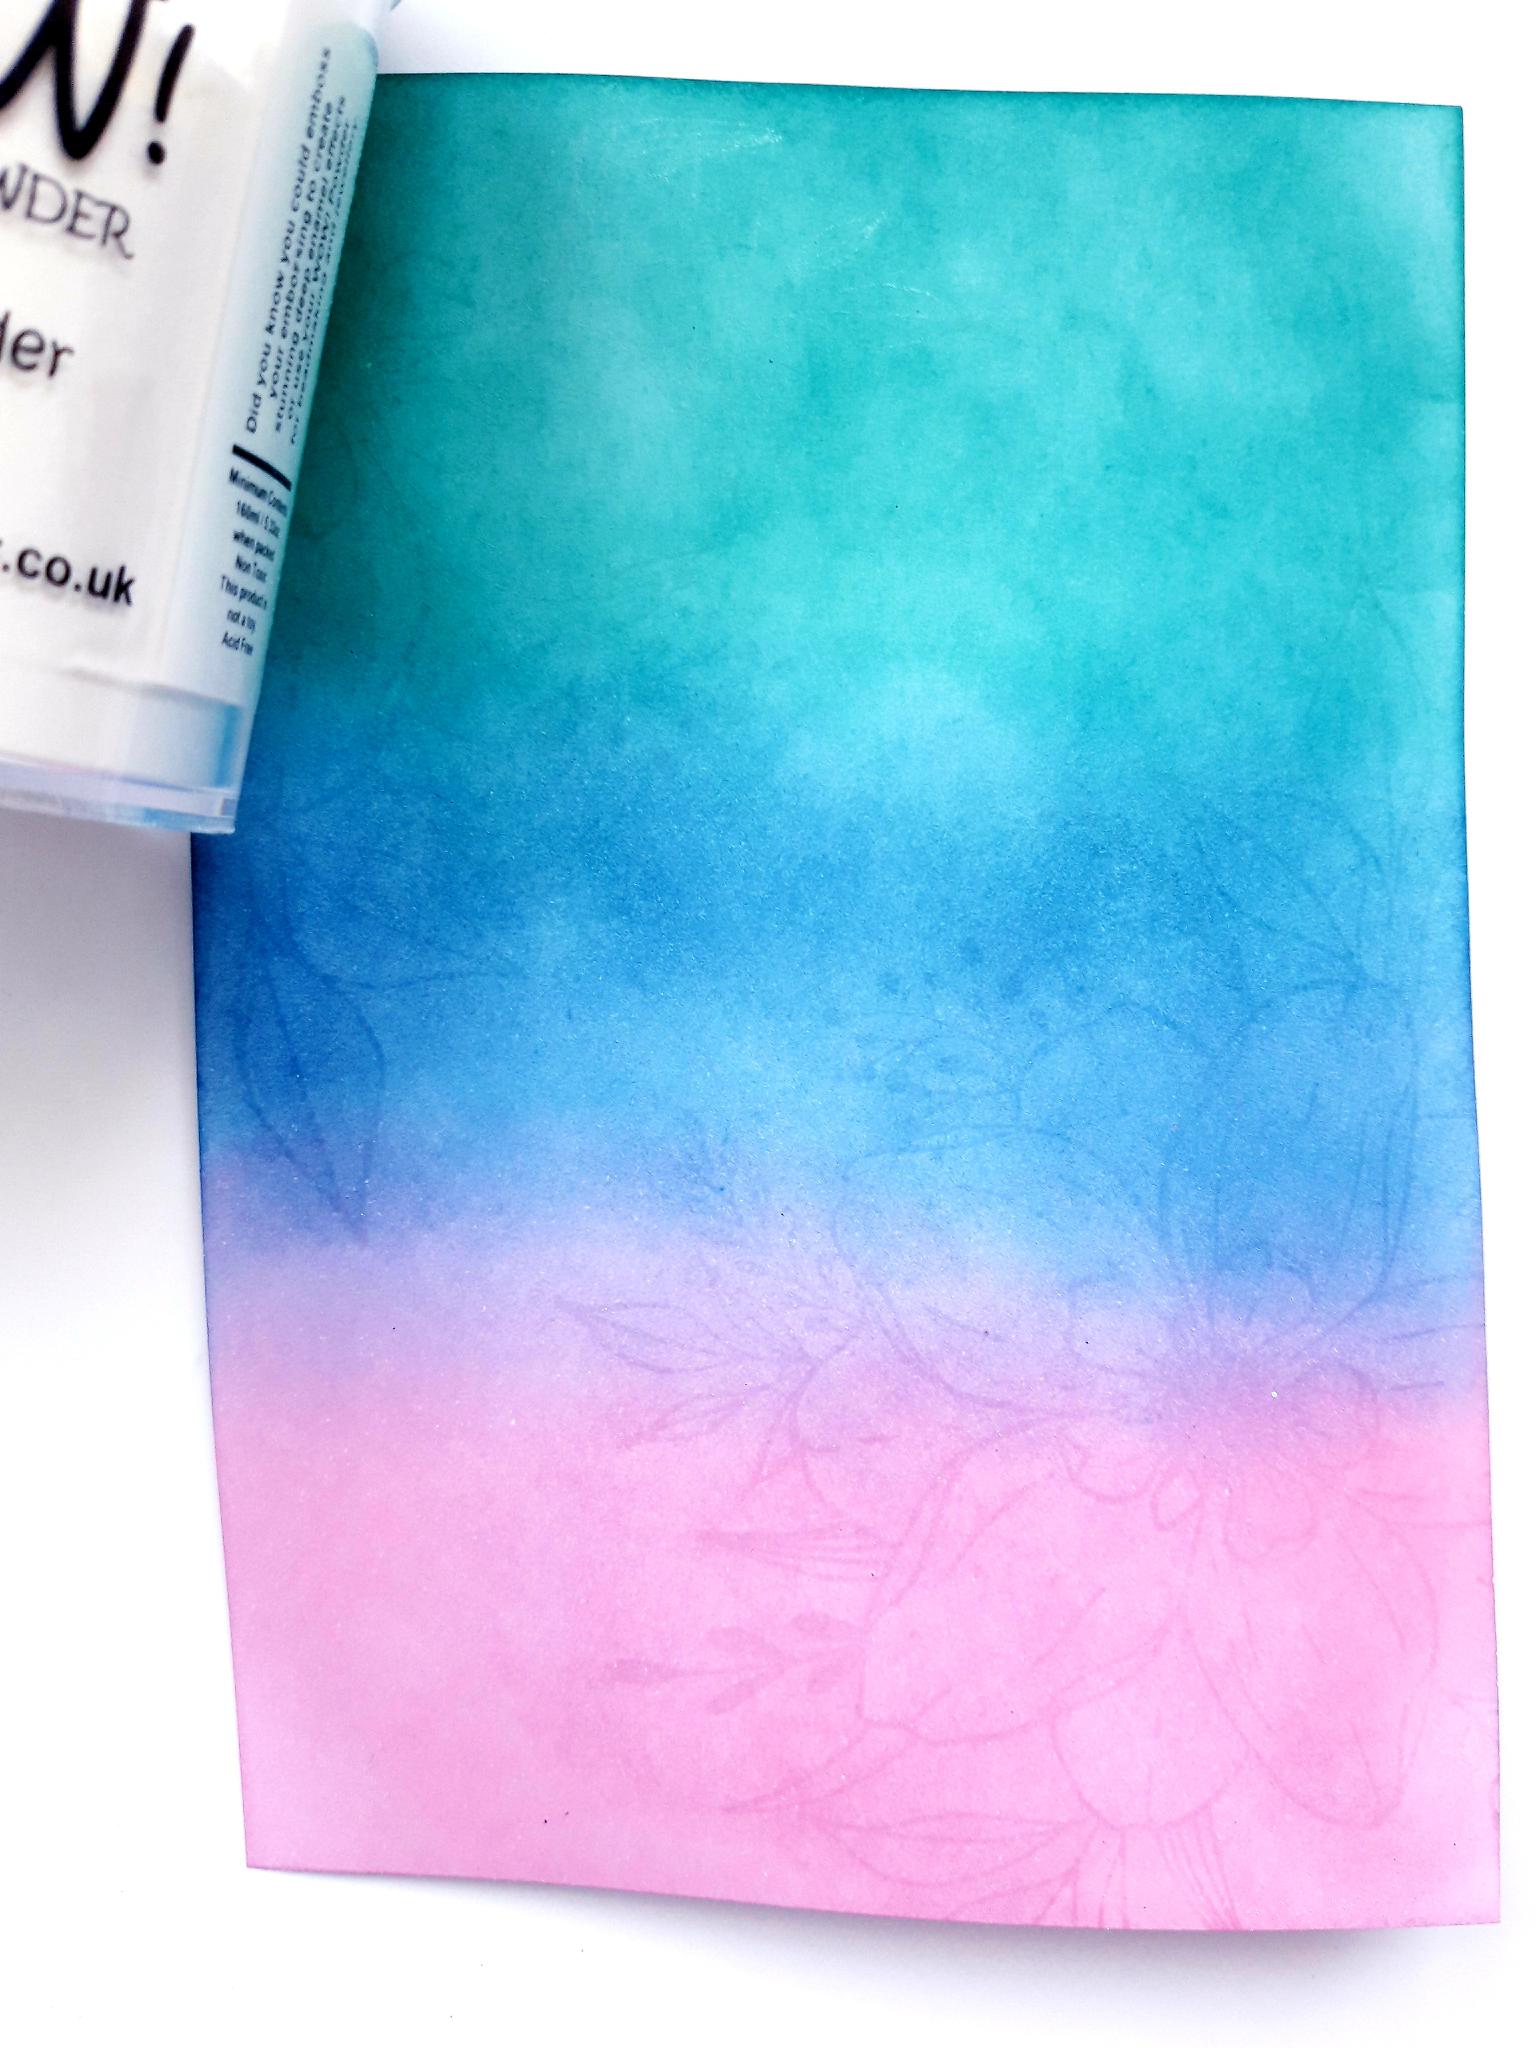
Wipe over your DRY, inked background with your anti static bag. Ink up the large floral stamp, from the Beautiful Soul Stamp Collection, with the WOW Embossing ink pad, and stamp off the bottom right of your background. Reink the stamp, and stamp it off the top left corner. Apply the WOW Melt It Powder over your stamped image. Brush off any loose powder elsewhere on your background. Make sure the heat gun is nice and hot, before heat setting the stamped image. NB: The Melt It Powder will turn very quickly, and be clear in nature, so move your heat tool on as soon as it starts to turn. |
|
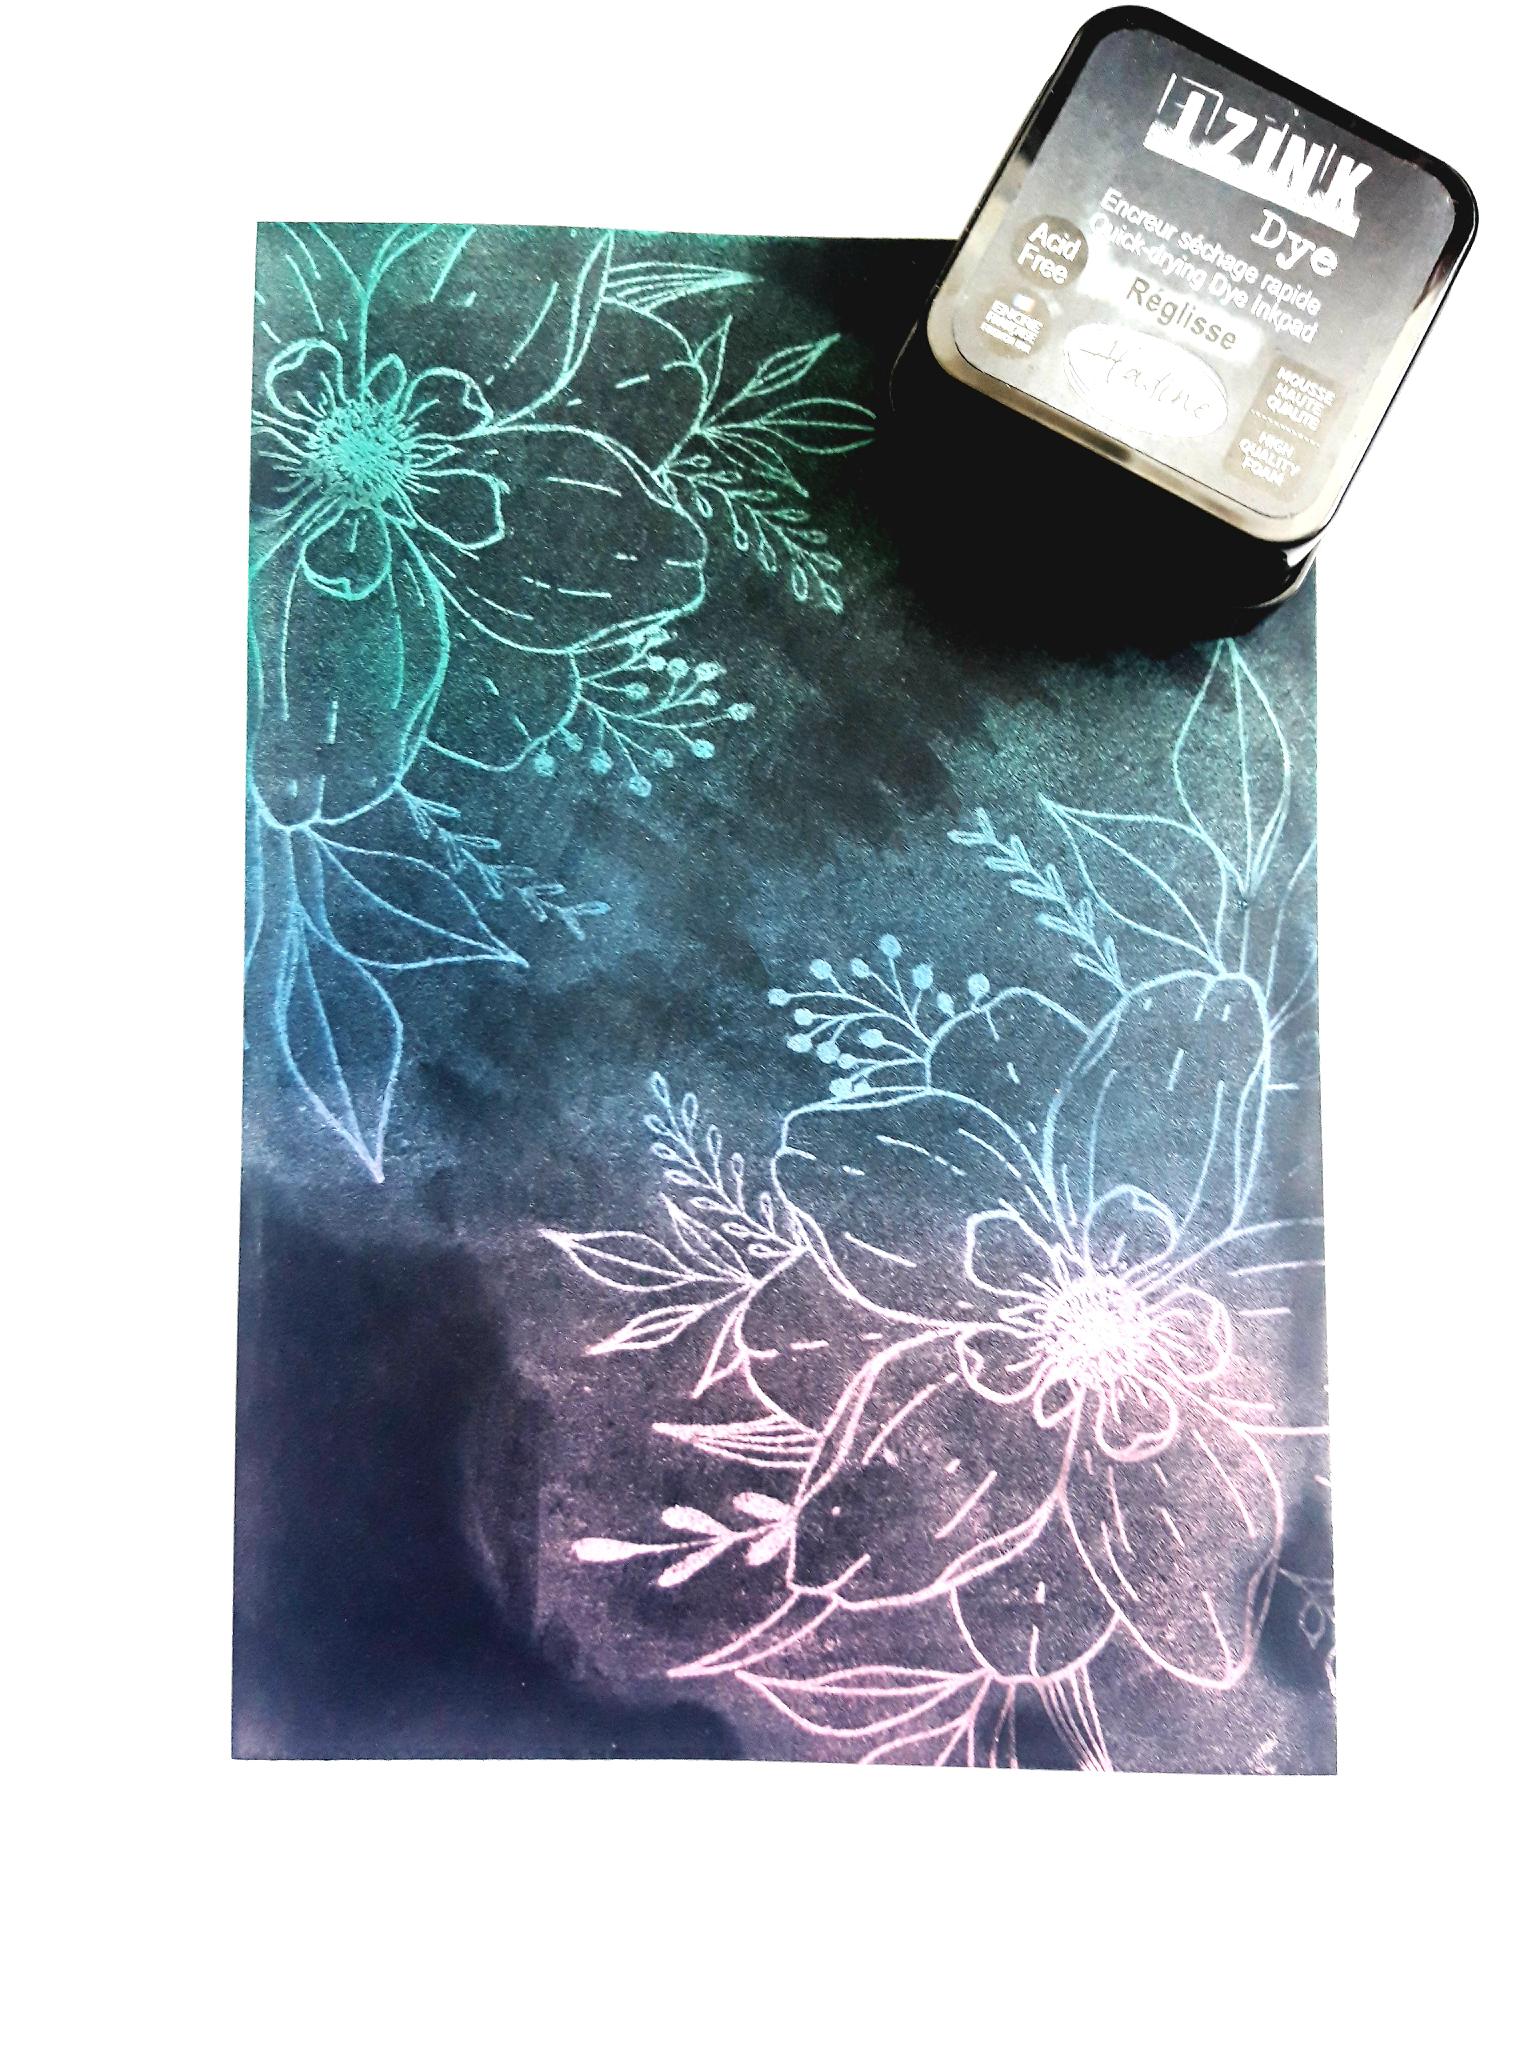
Once the powder is set and has cooled, blend the Izink Reglisse all over your artwork. The idea is to apply it as dark as possible. The Melt It embossing powder will act as a resist, so the darker you can get your black, the more the Distress Oxide colours will "pop" through. You can also buff over your embossed images, with a soft cloth, to lift any excess black ink from the stamped image. |
|
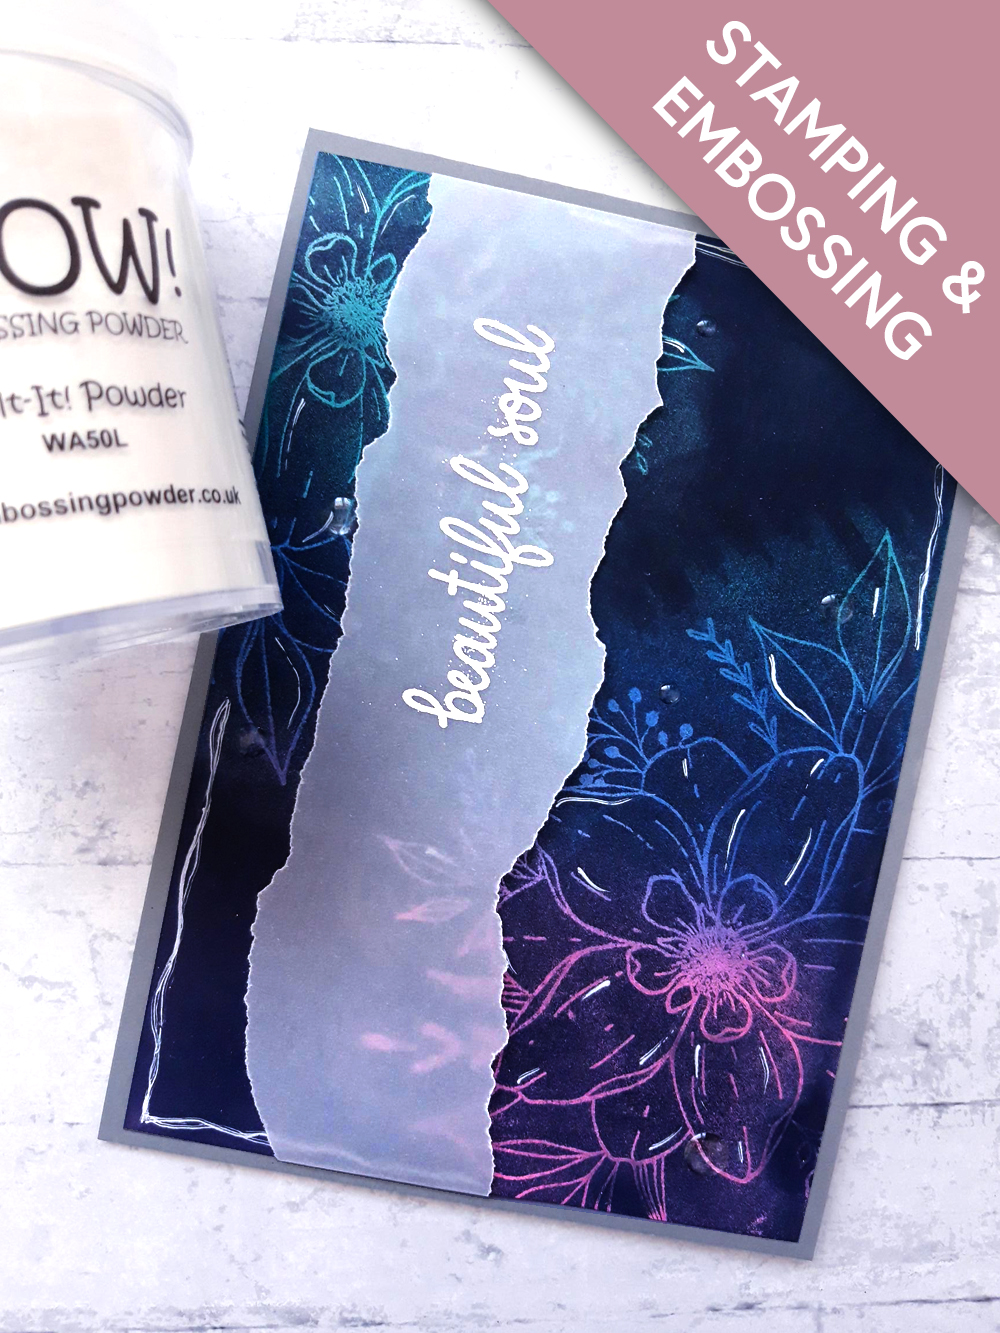
Once all your artwork is dry, use a white gel pen to add a wiggly, decorative frame, and accents and highlights, as required. Set this to one side. |
|
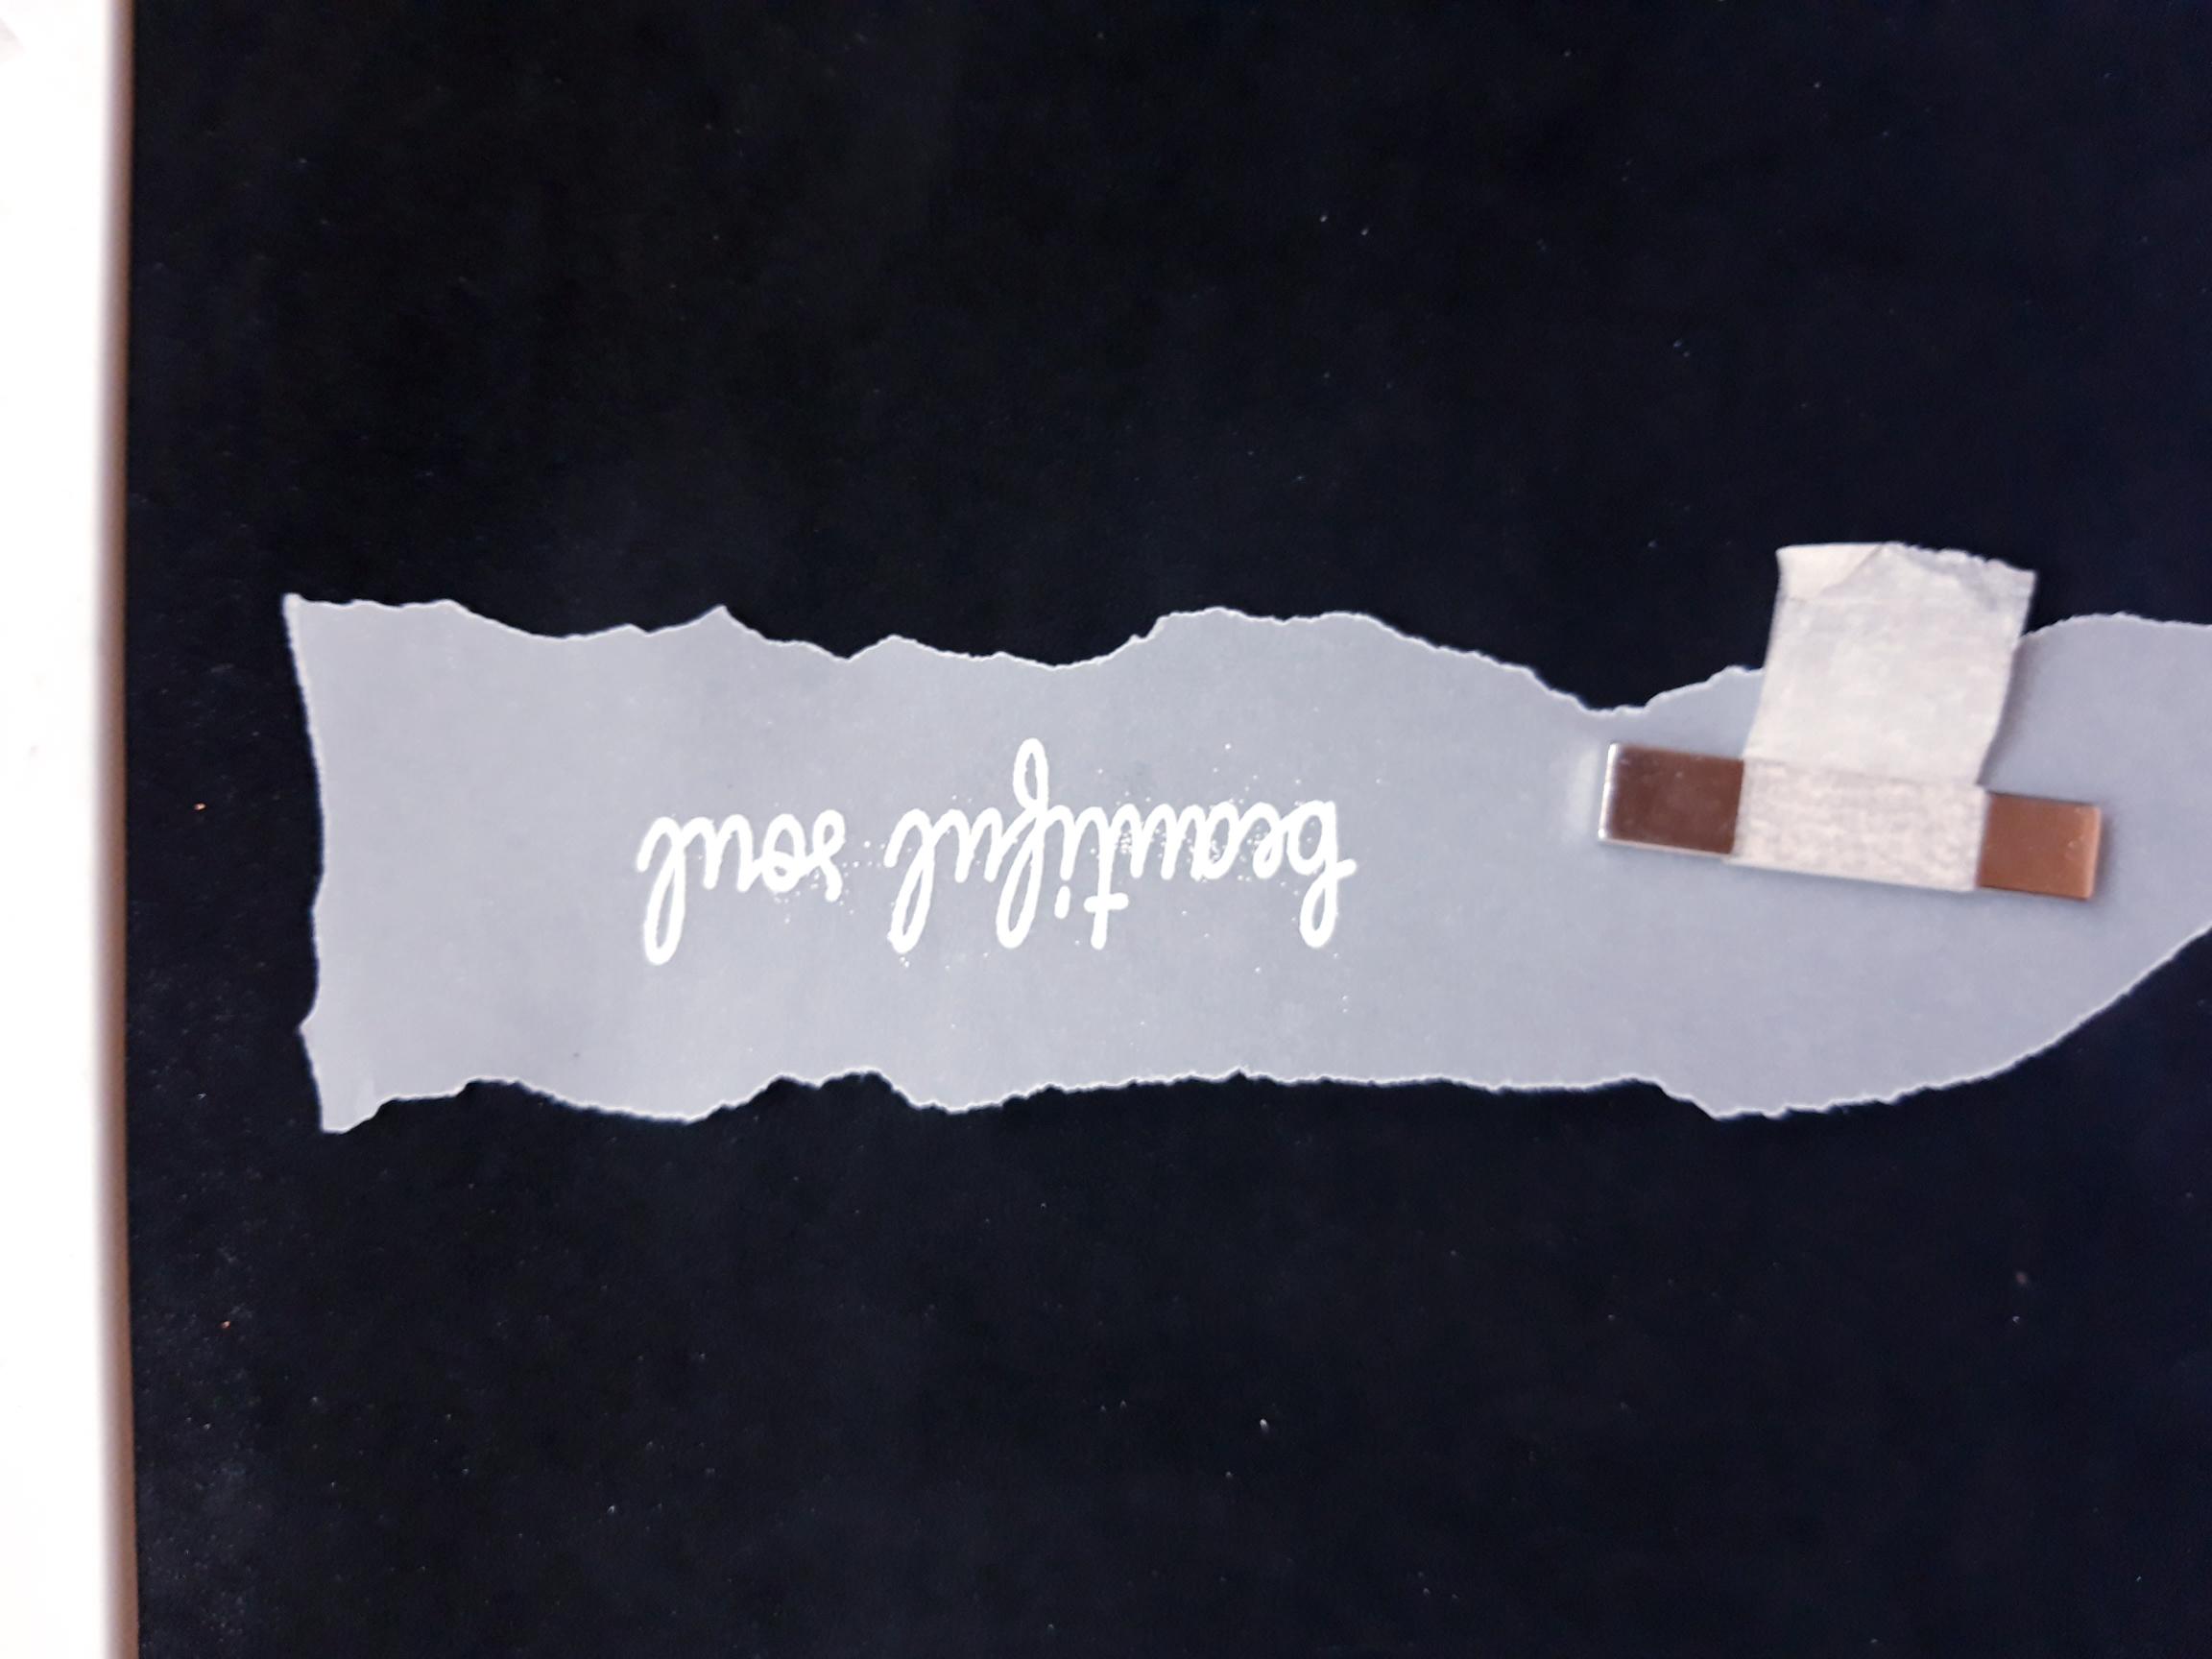
Wipe over your torn vellum strip with the anti static bag. Ink up your sentiment stamp, from the same stamp collection, with the WOW Embossing ink. Stamp it on to the vellum (leaving a gap top and bottom, which will be tucked over your background, in the next step). Apply the WOW Bright White embossing powder over your stamped sentiment, and having got your heat tool nice and hot, heat set the powder. Move your heat tool as soon as the powder turns, to avoid burning the vellum. |
|
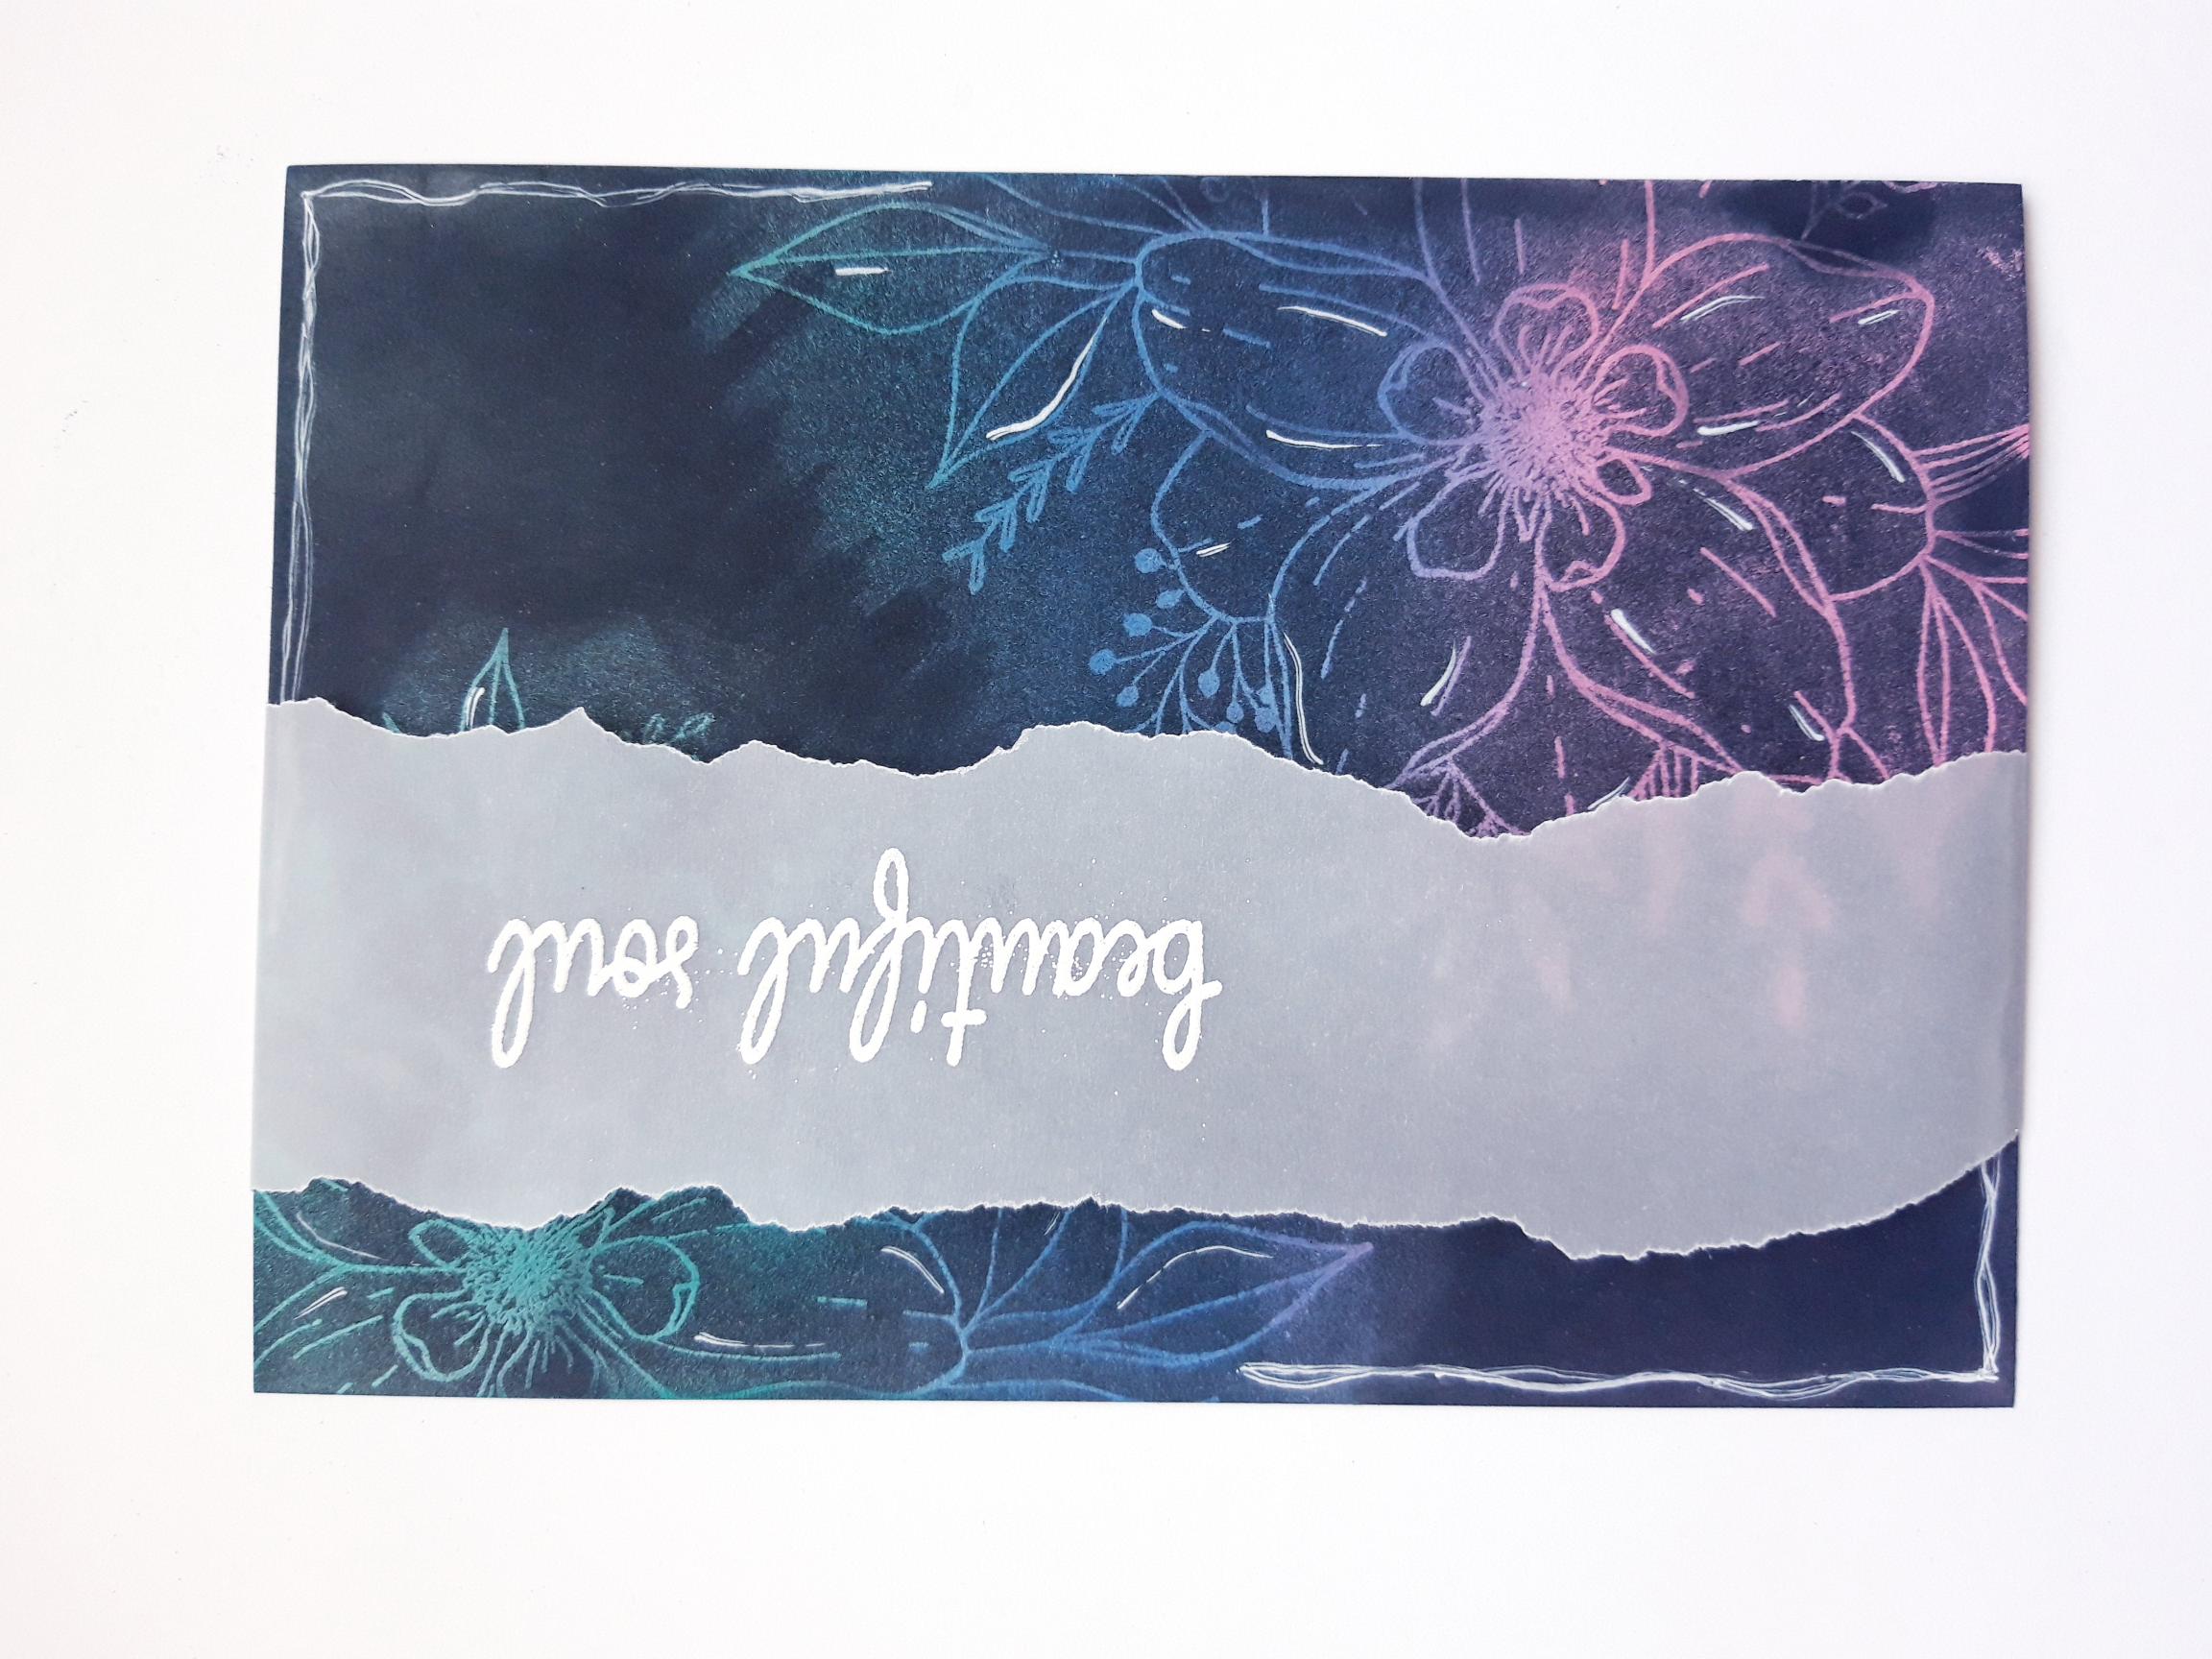
Tuck the end of the vellum over the top and bottom of the inked artwork, securing it on the reverse with red liner tape. |
|
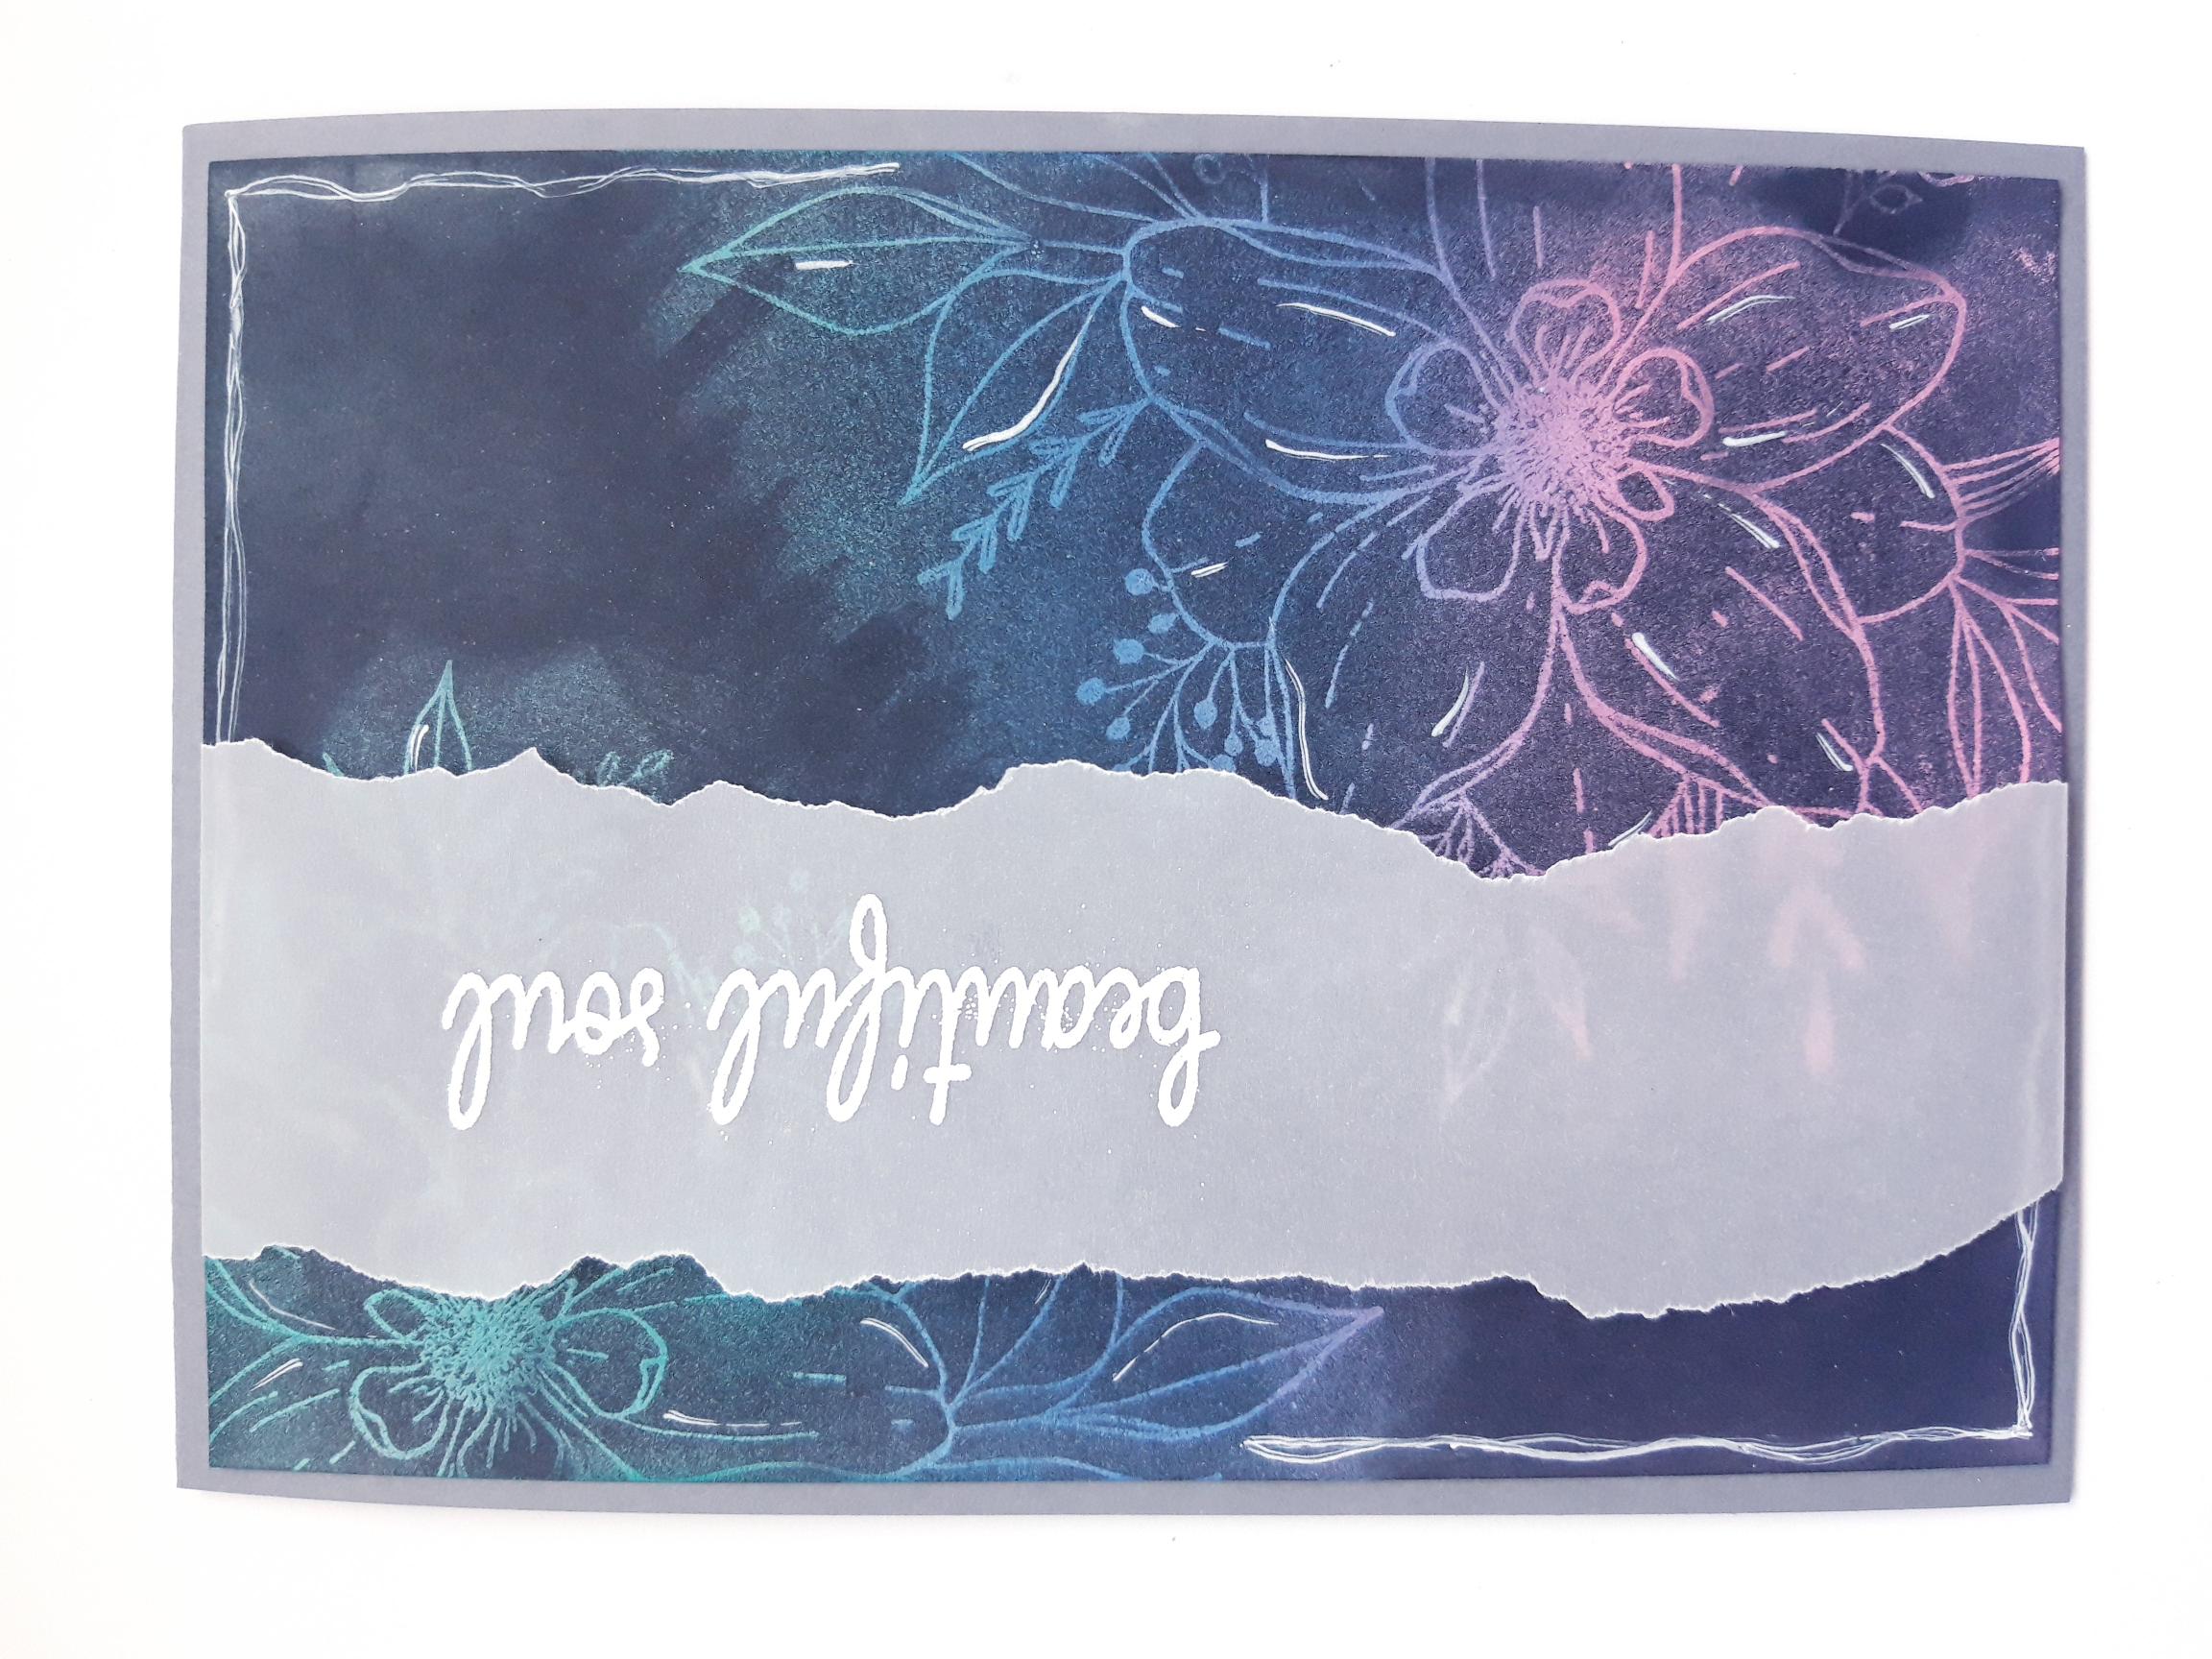
Adhere this on to the front of your grey, top folding card blank. |
|
To finish, add a few clear adhesive gems where required. |