Give your friends $10 off their first order!
Refer a FRIEND


WHAT YOU WILL NEED:
White card blank (7 x7")
White card (8 x 5 1/2")
White card (6 3/4 x 5")
Black card (6 3/4 x 5 1/2")
Black card (3 1/2 x 3 1/2")
White card (3 1/2 x 3 1/2")
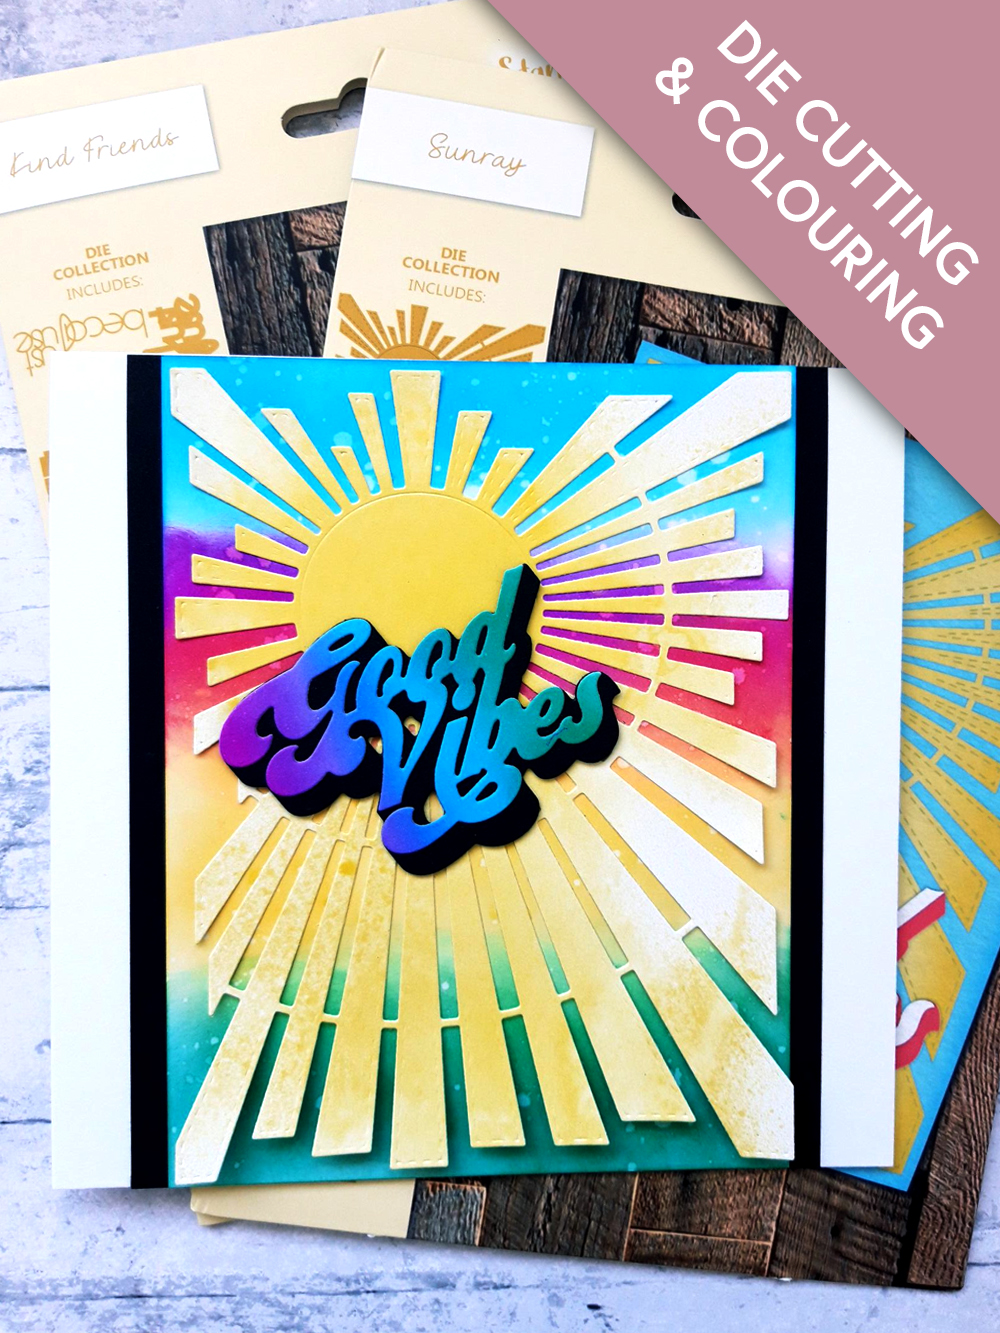
Dies from Sunray Die Collection
Dies from Kind Friends Die Collection
Izink Pearly Spray: Yellow Pastel
Izink Dye Ink pads: Aurore, Cire, Cerise, Mer Du Sud, Emeraude
Paint brush
Water spray bottle
Blending brush/tool
Paper Trimmer
Perfect Together Glue
Die Cutting machine
[click image to enlarge] 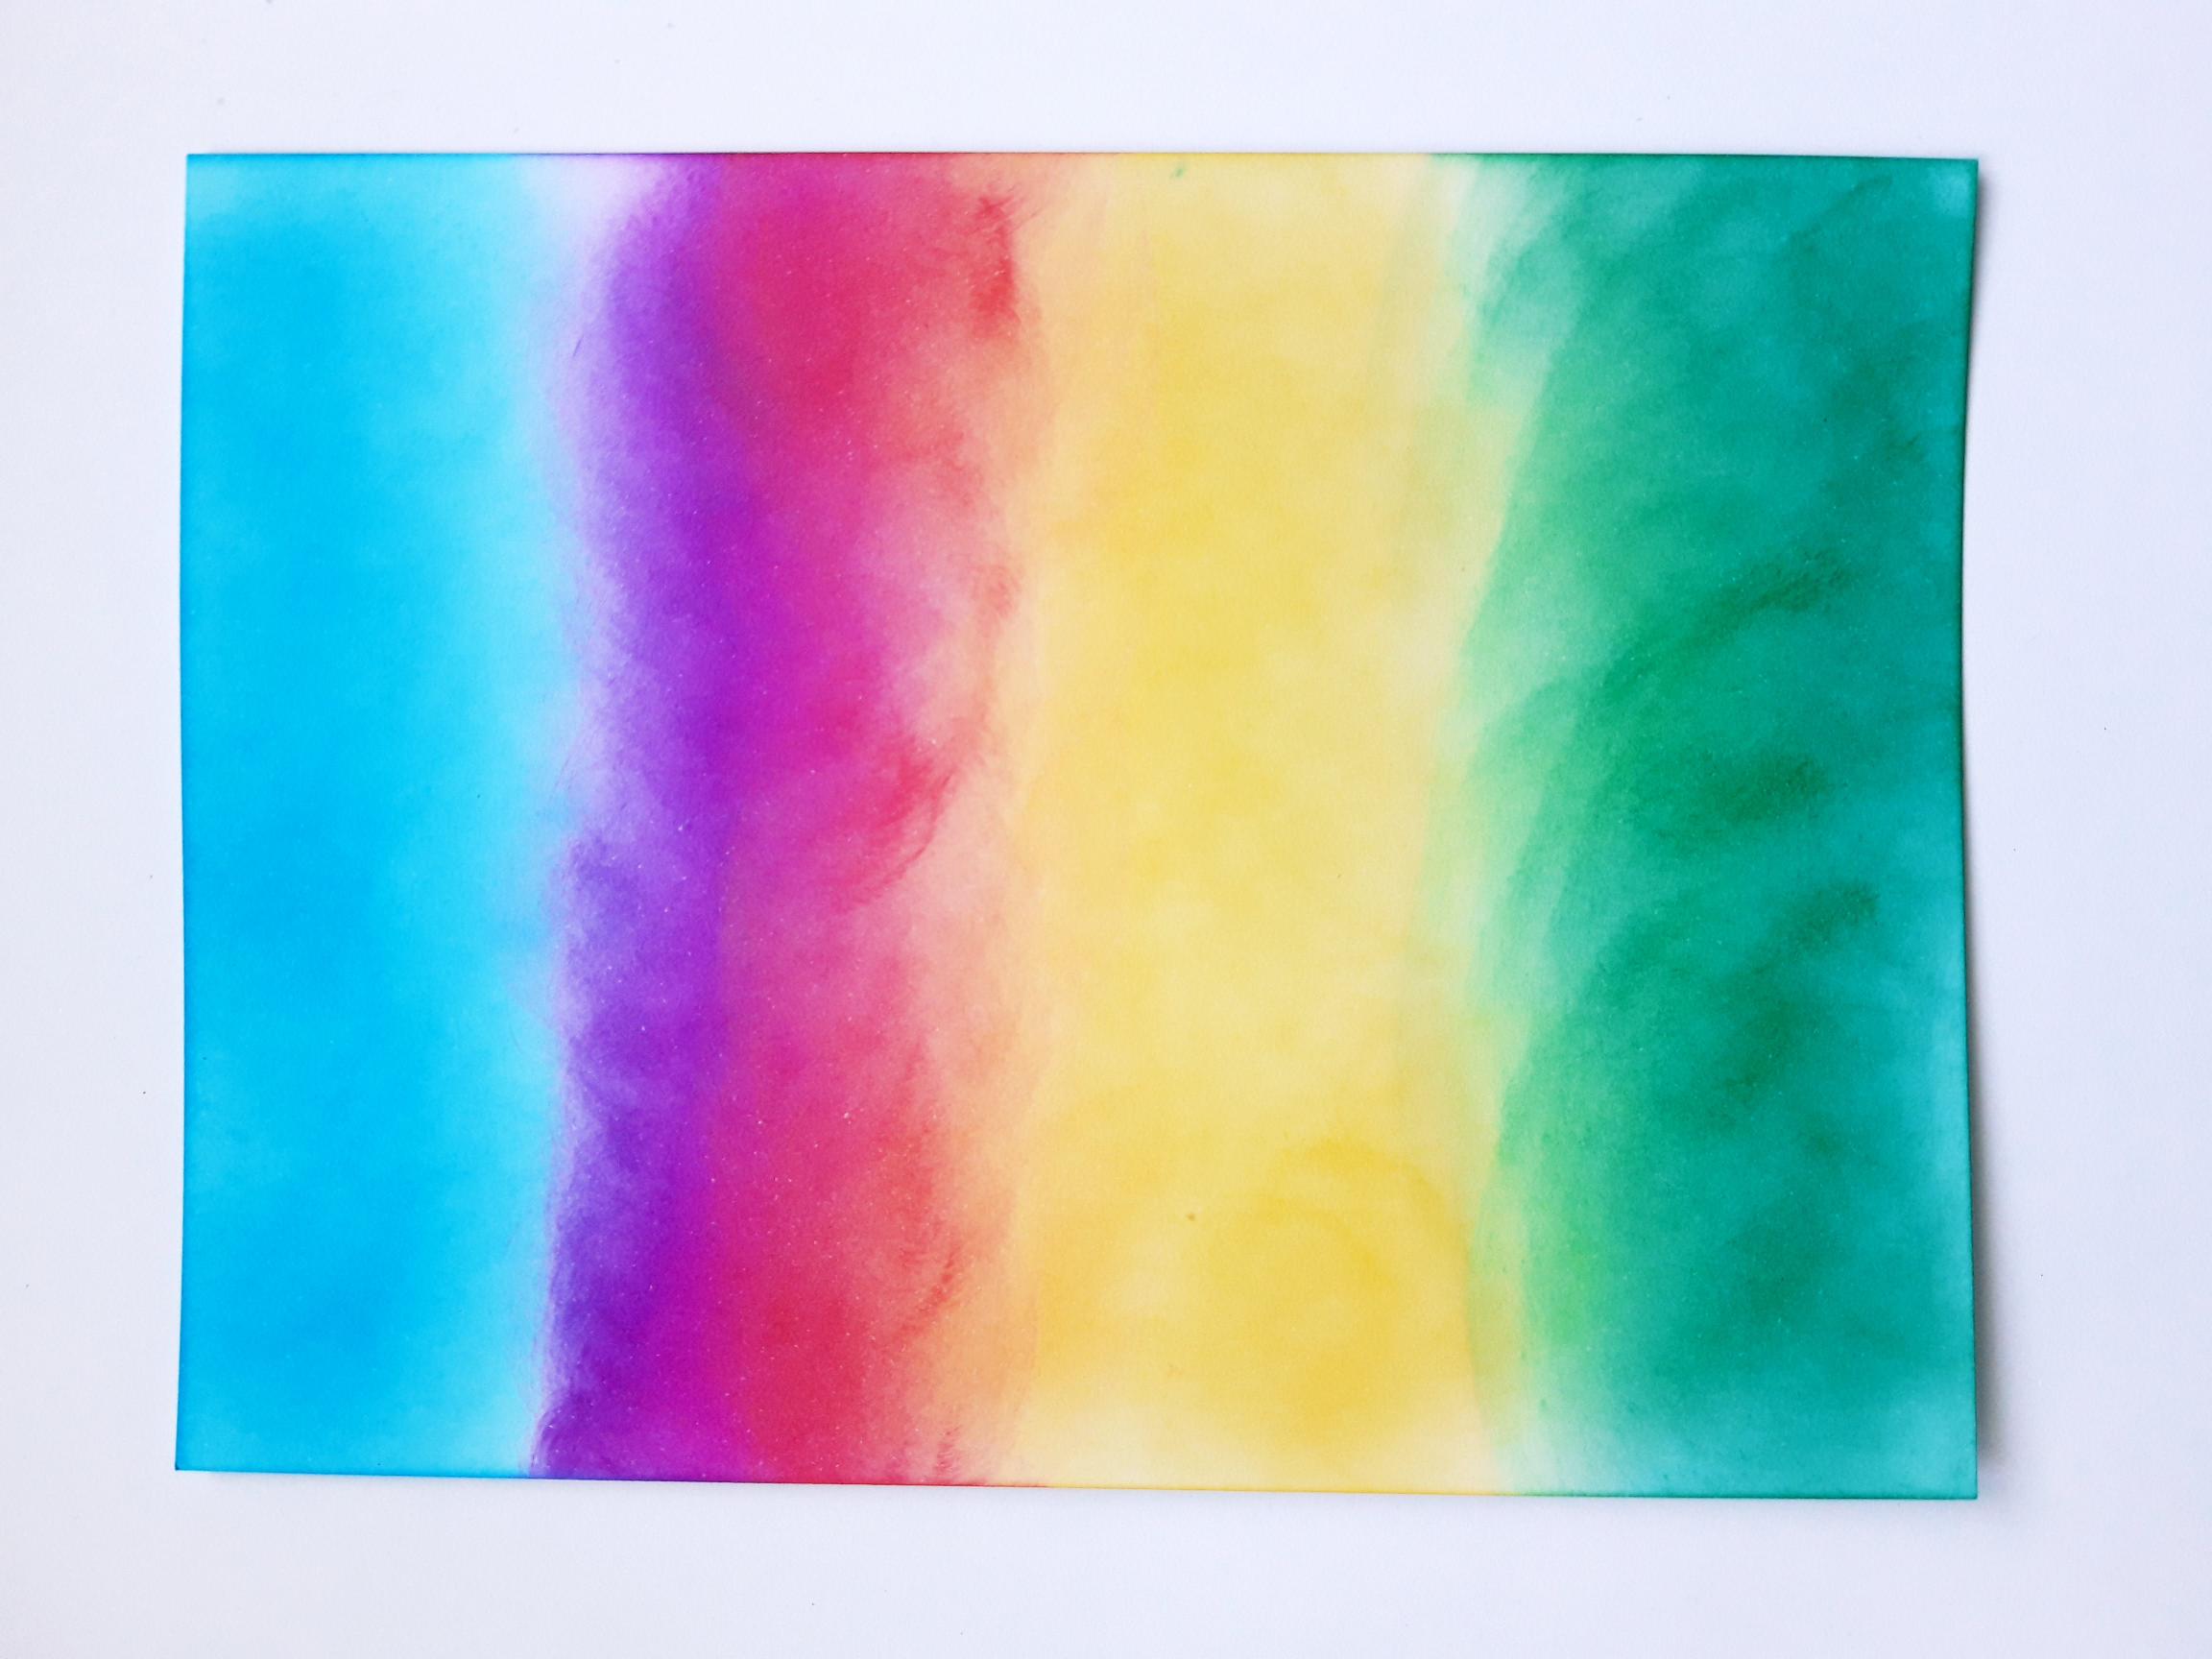
|
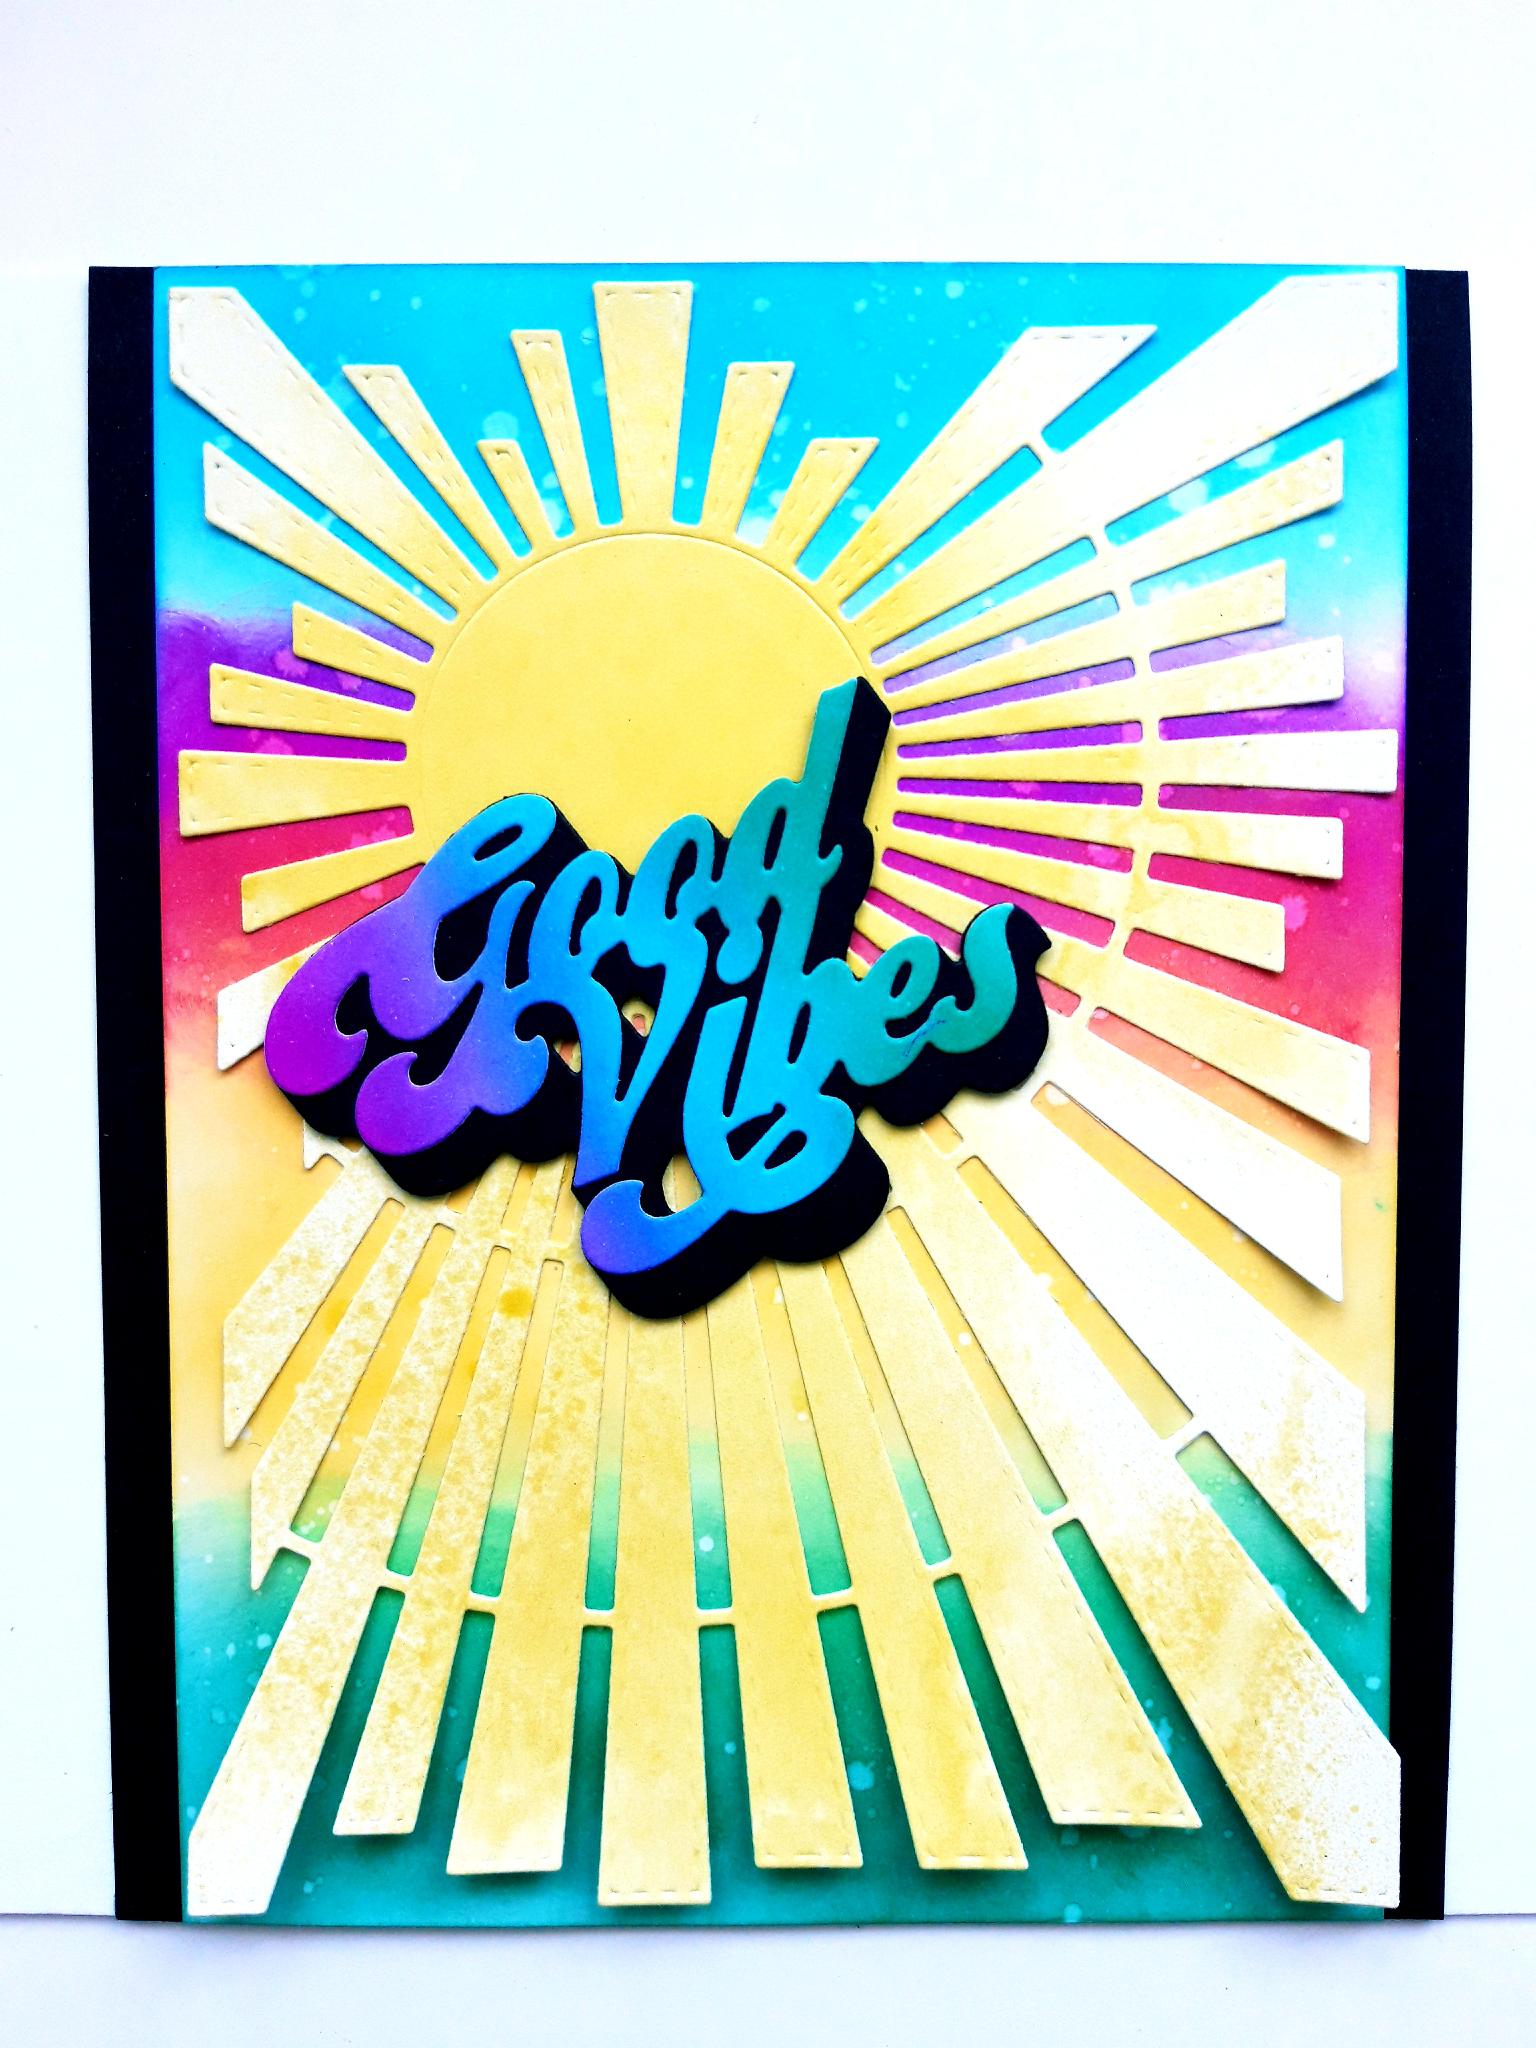
Blend the Izink Emeraude, Aurore, Cerise and Mer Du Sud inks, across the white card (6 3/4 x 5"), with your blending brush/tool. You can also spritz the card first, or spritz the inks once you've laid them down, depending on the effect you want to achieve. |
|
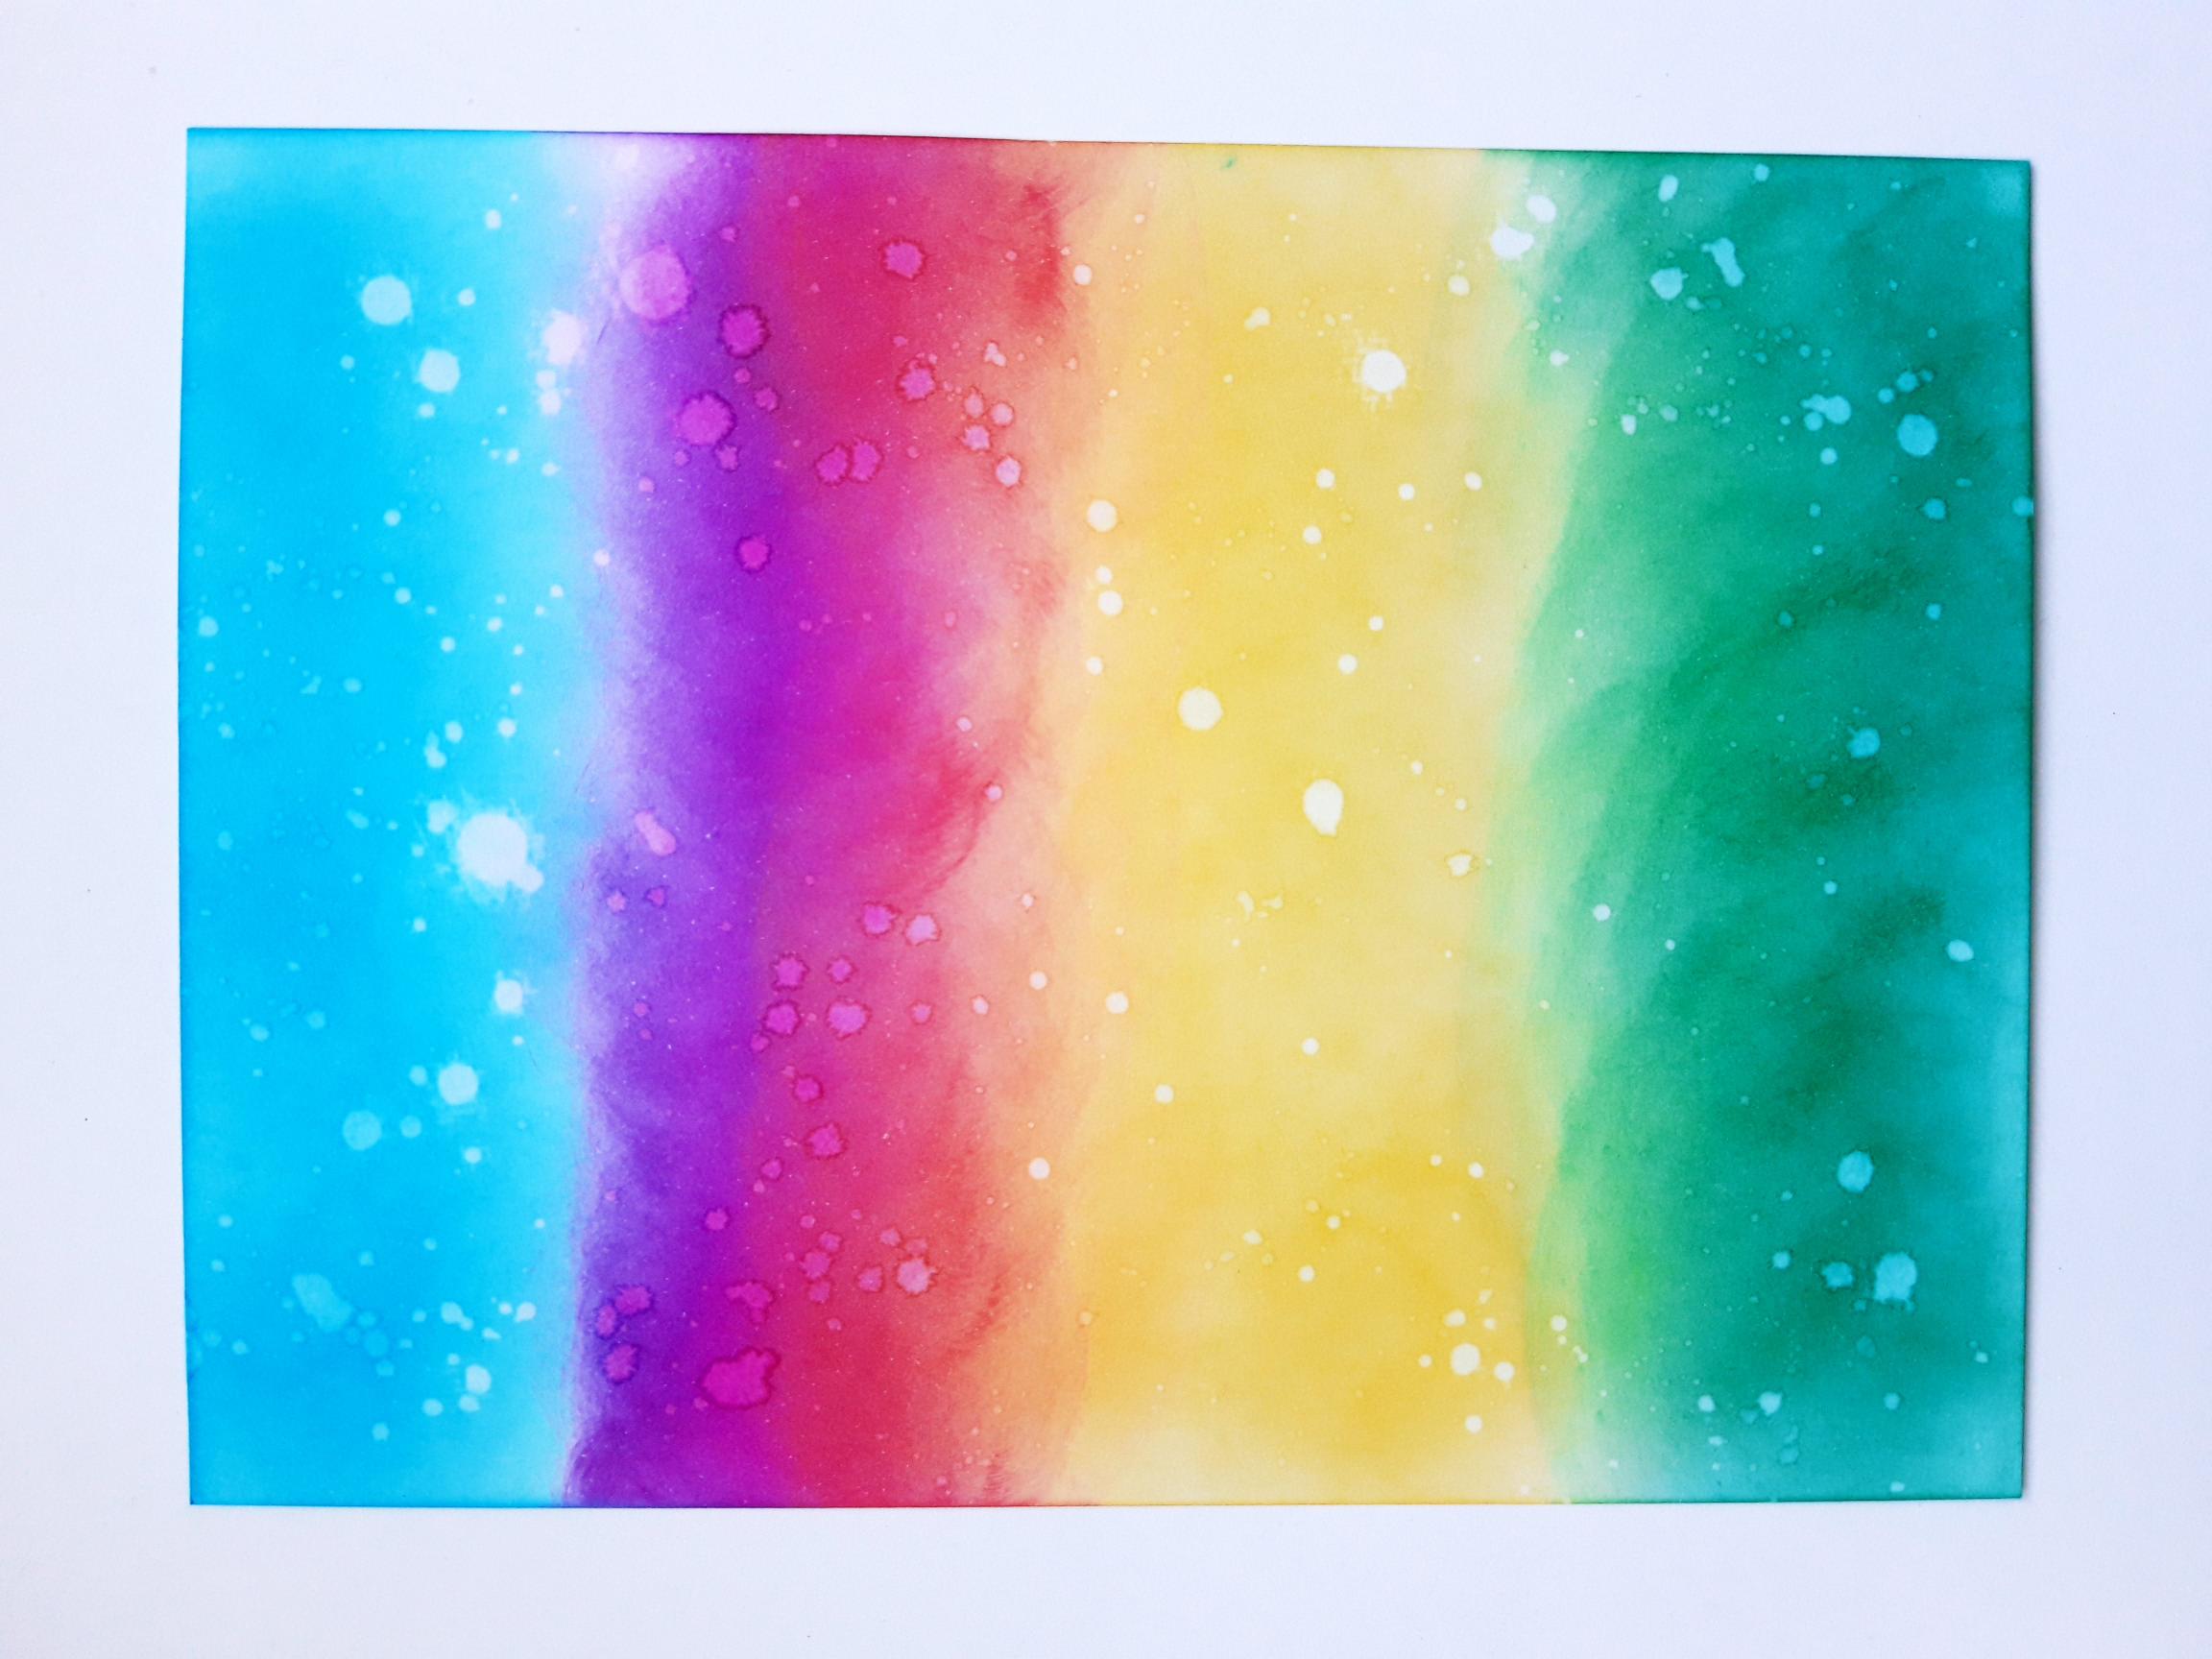
Whilst your ink is still wet, splatter droplets of water all over your background. Wait a few seconds for the ink to lift, before mopping up any excess water. You can set this aside to dry naturally, or speed it up with a heat gun. |
|
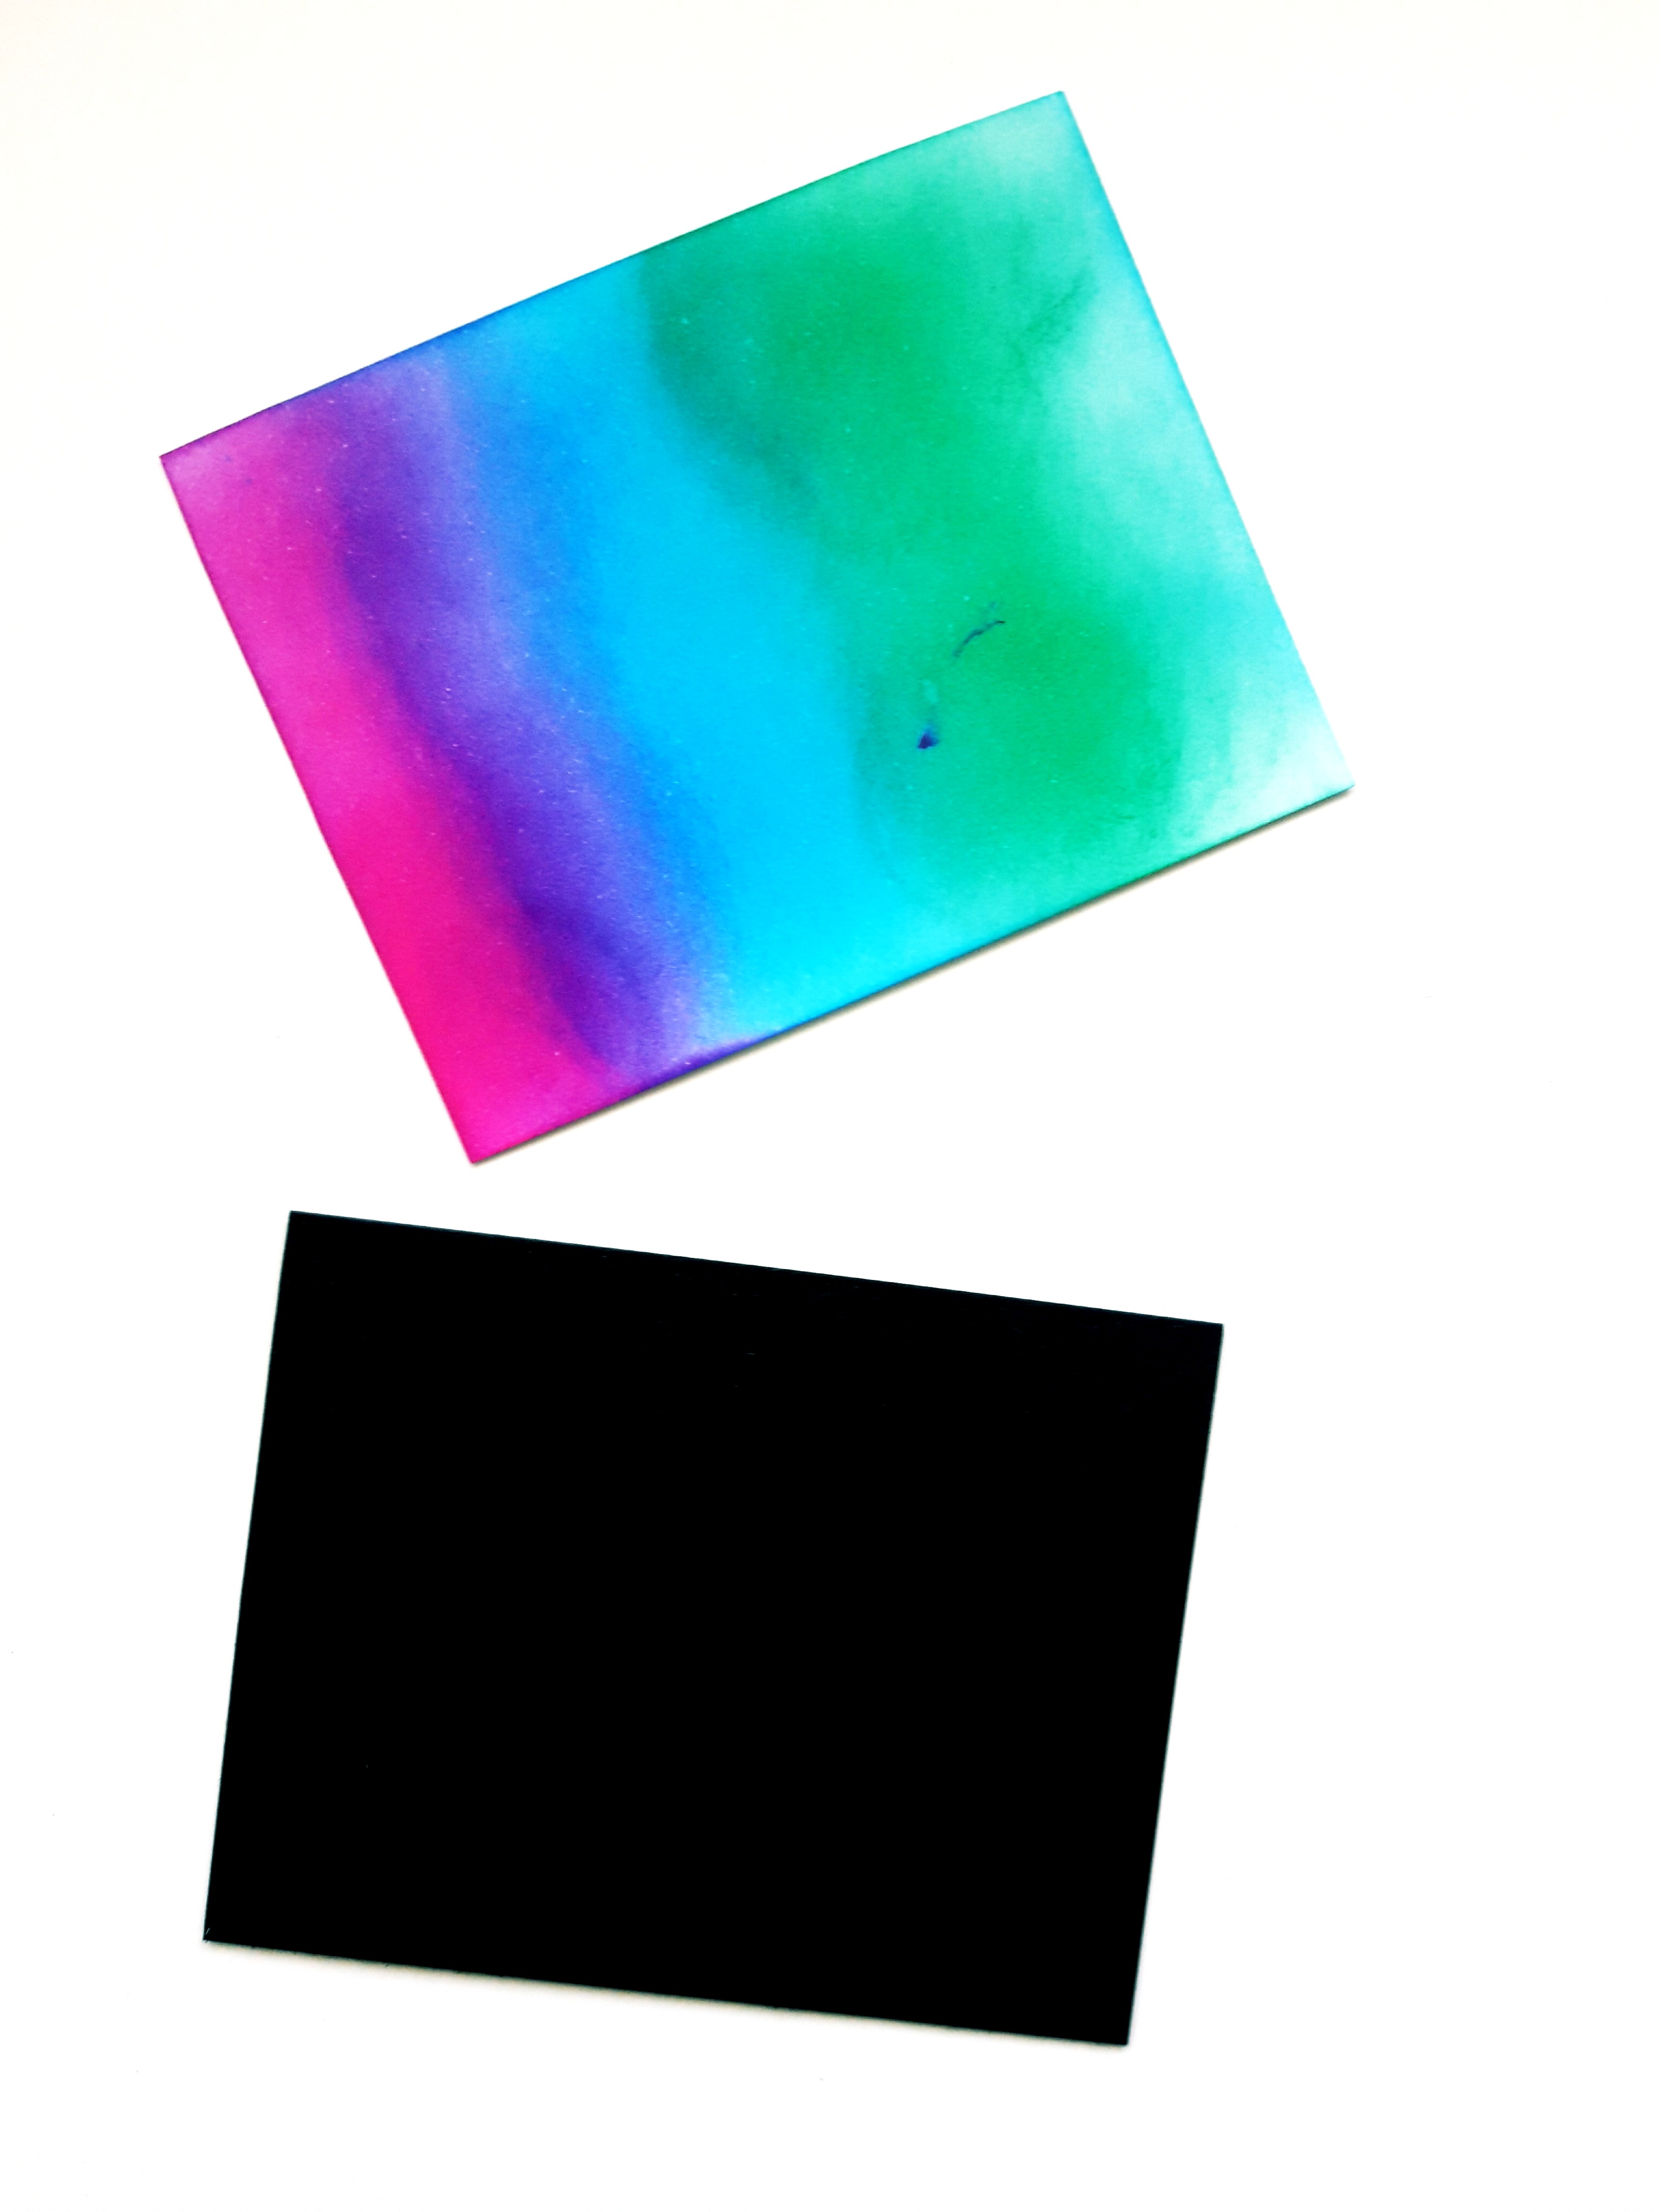
Use the same inks, and technique, on to the white card (3 1/2 x 3 1/2"), as seen here. You don't need to splatter this one with water. Dry the ink off thoroughly. |
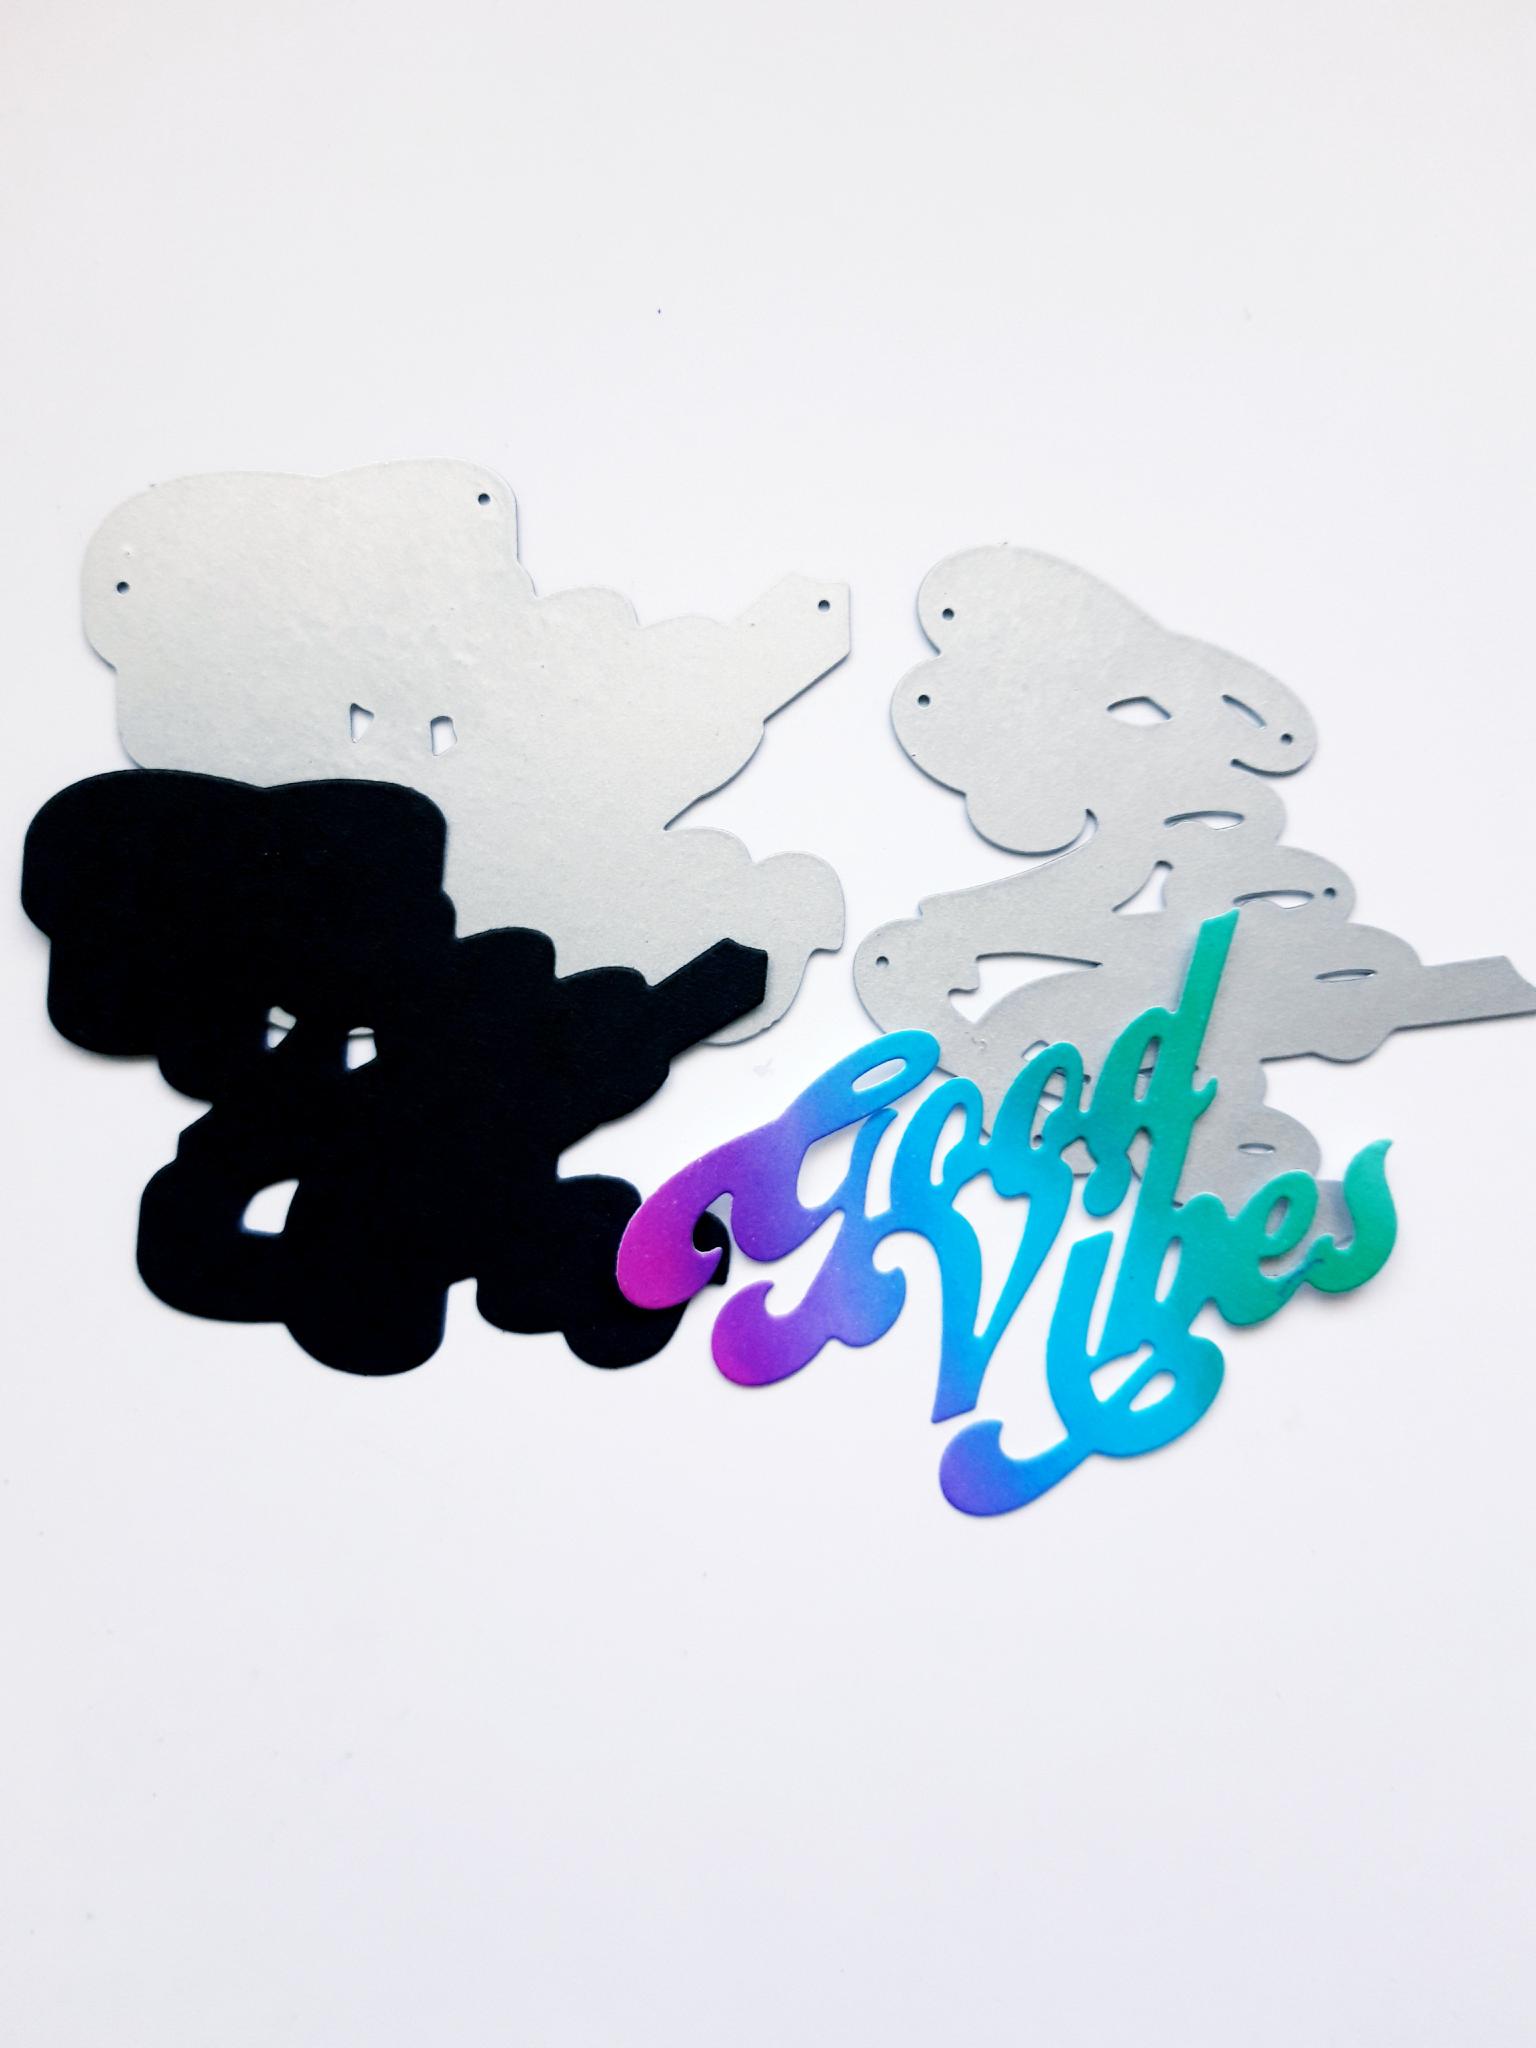
|
Place the detailed Good Vibes die, from the Kind Friends Die Collection, on to your inked card. Place the solid coordinating mat die, on to the black card (of the same size). Pass both through your die cutting machine. |

|
Adhere the inked, die cut sentiment, on to the black, die cut mat. Set this to one side. |
|
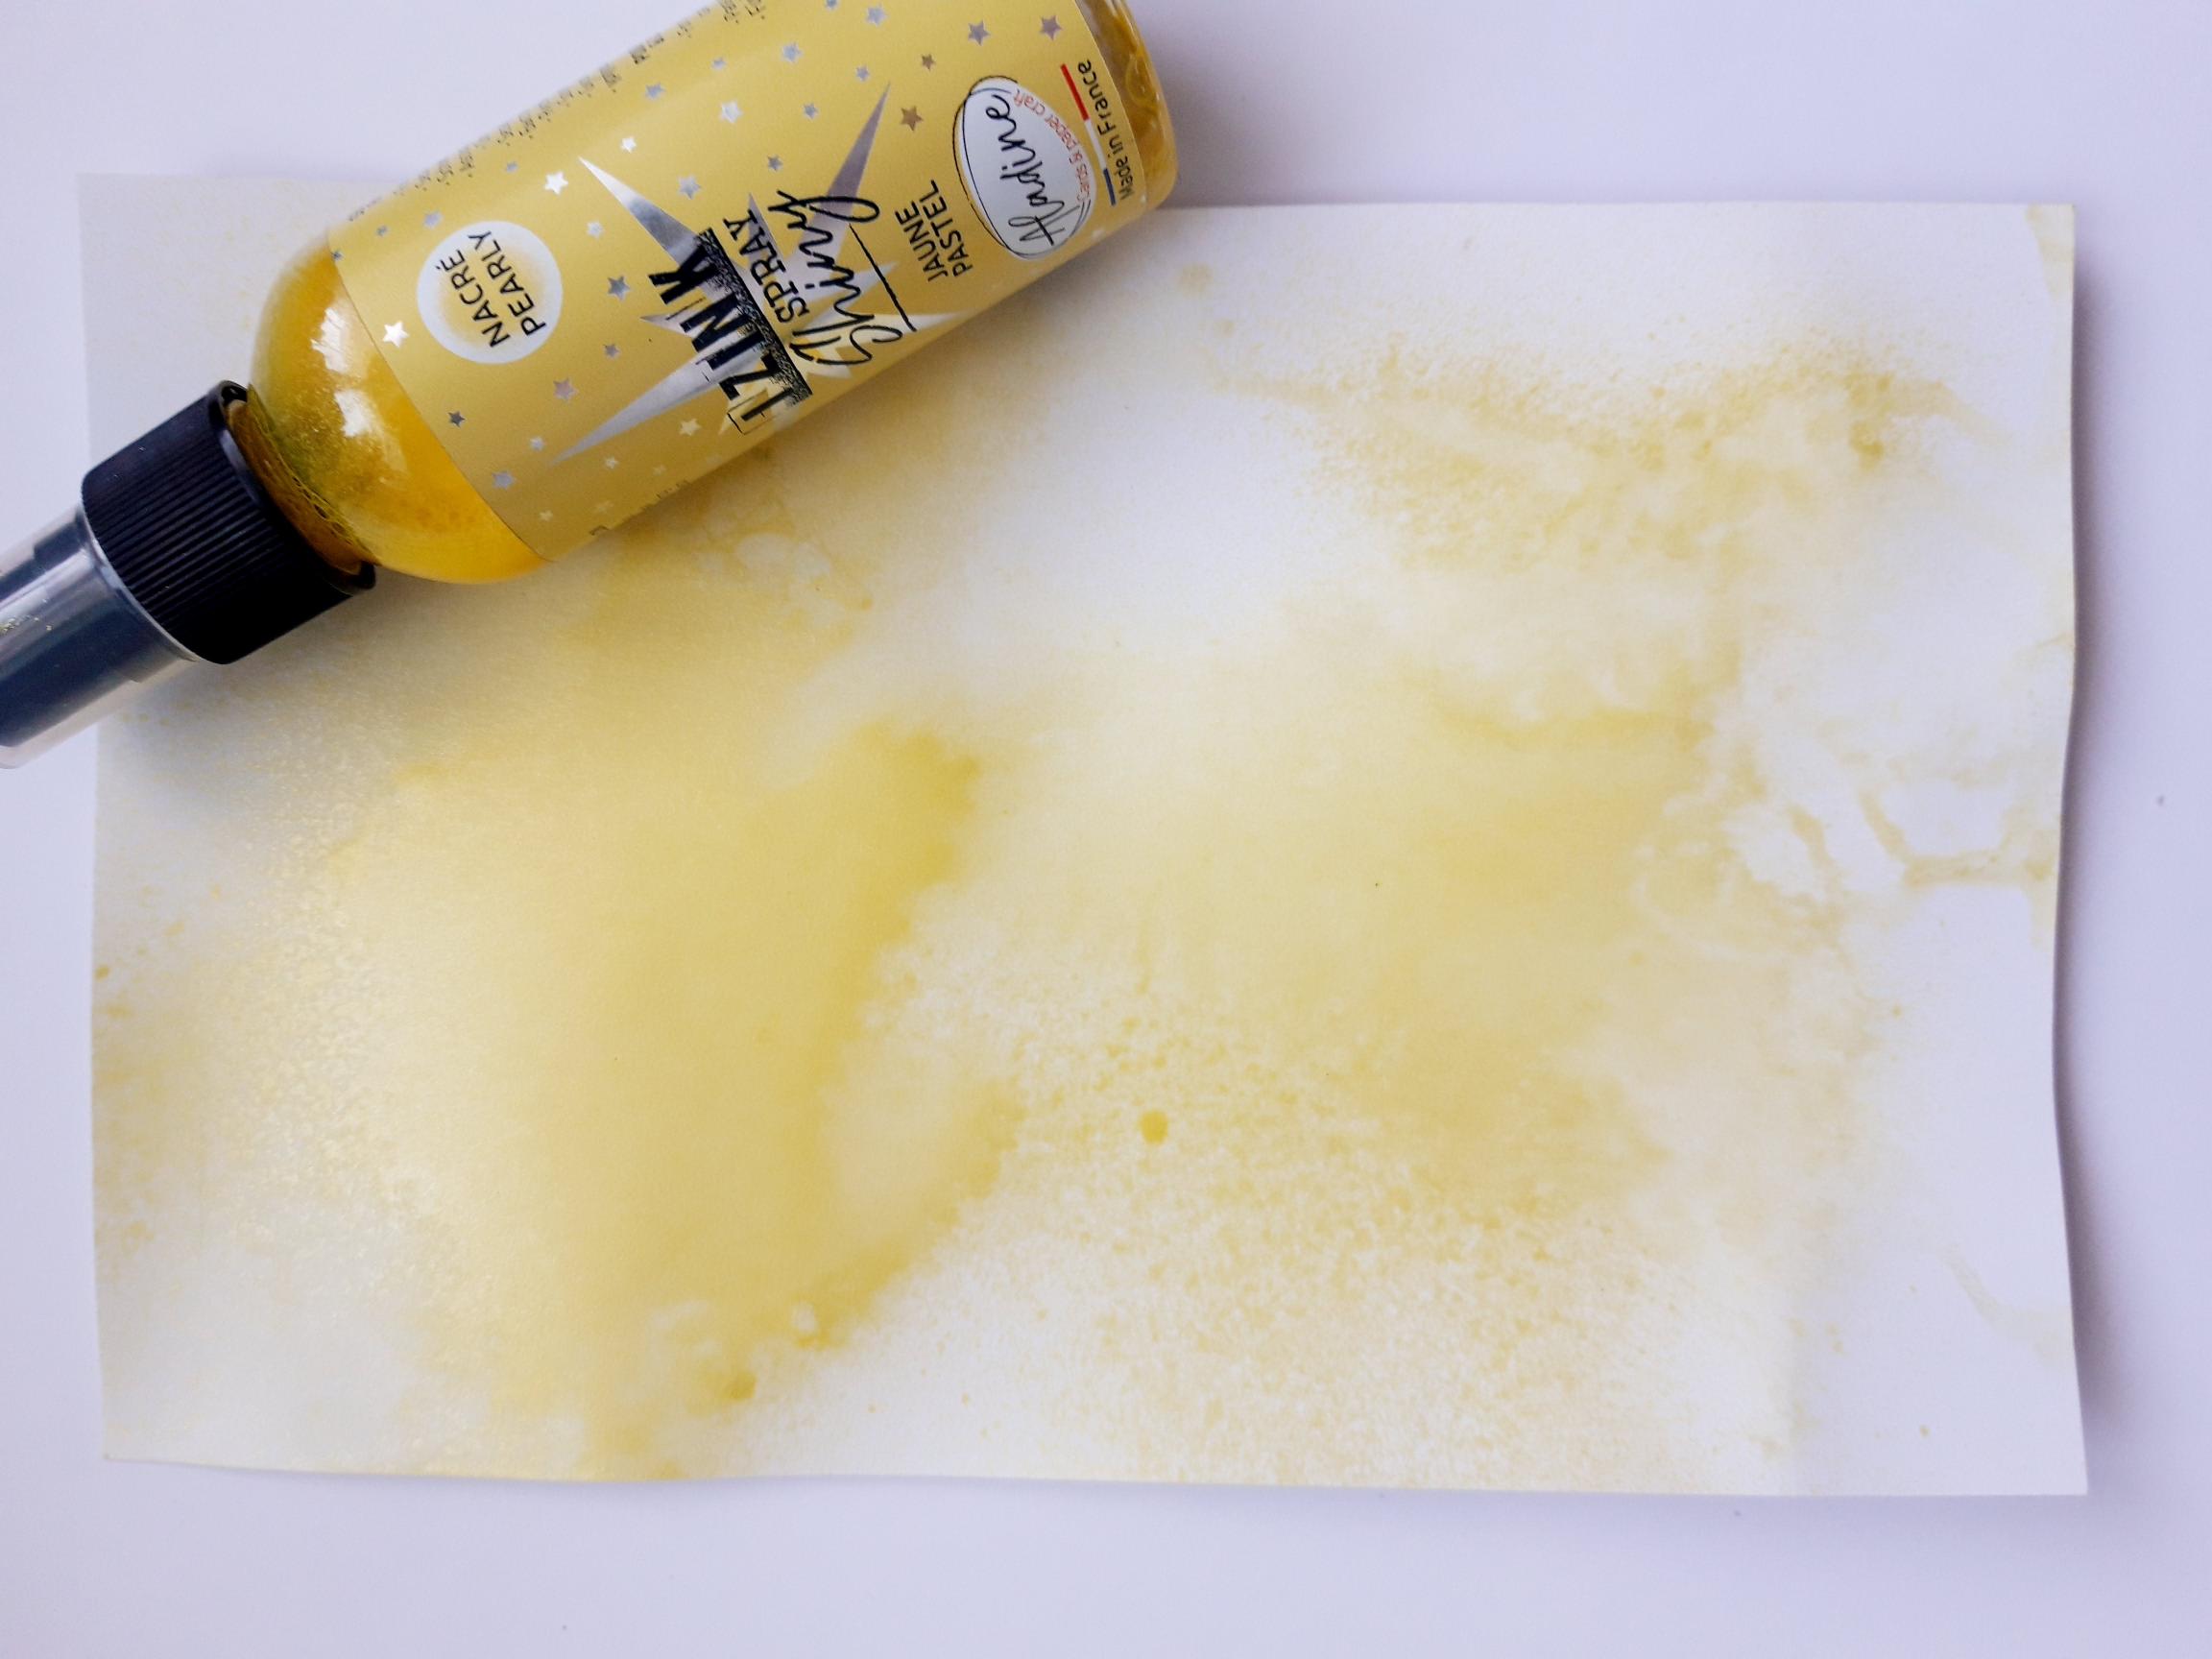
Spray the white card (8 x 5 1/2"), with the Izink Yellow Pastel. Dry off the ink thoroughly. |
|
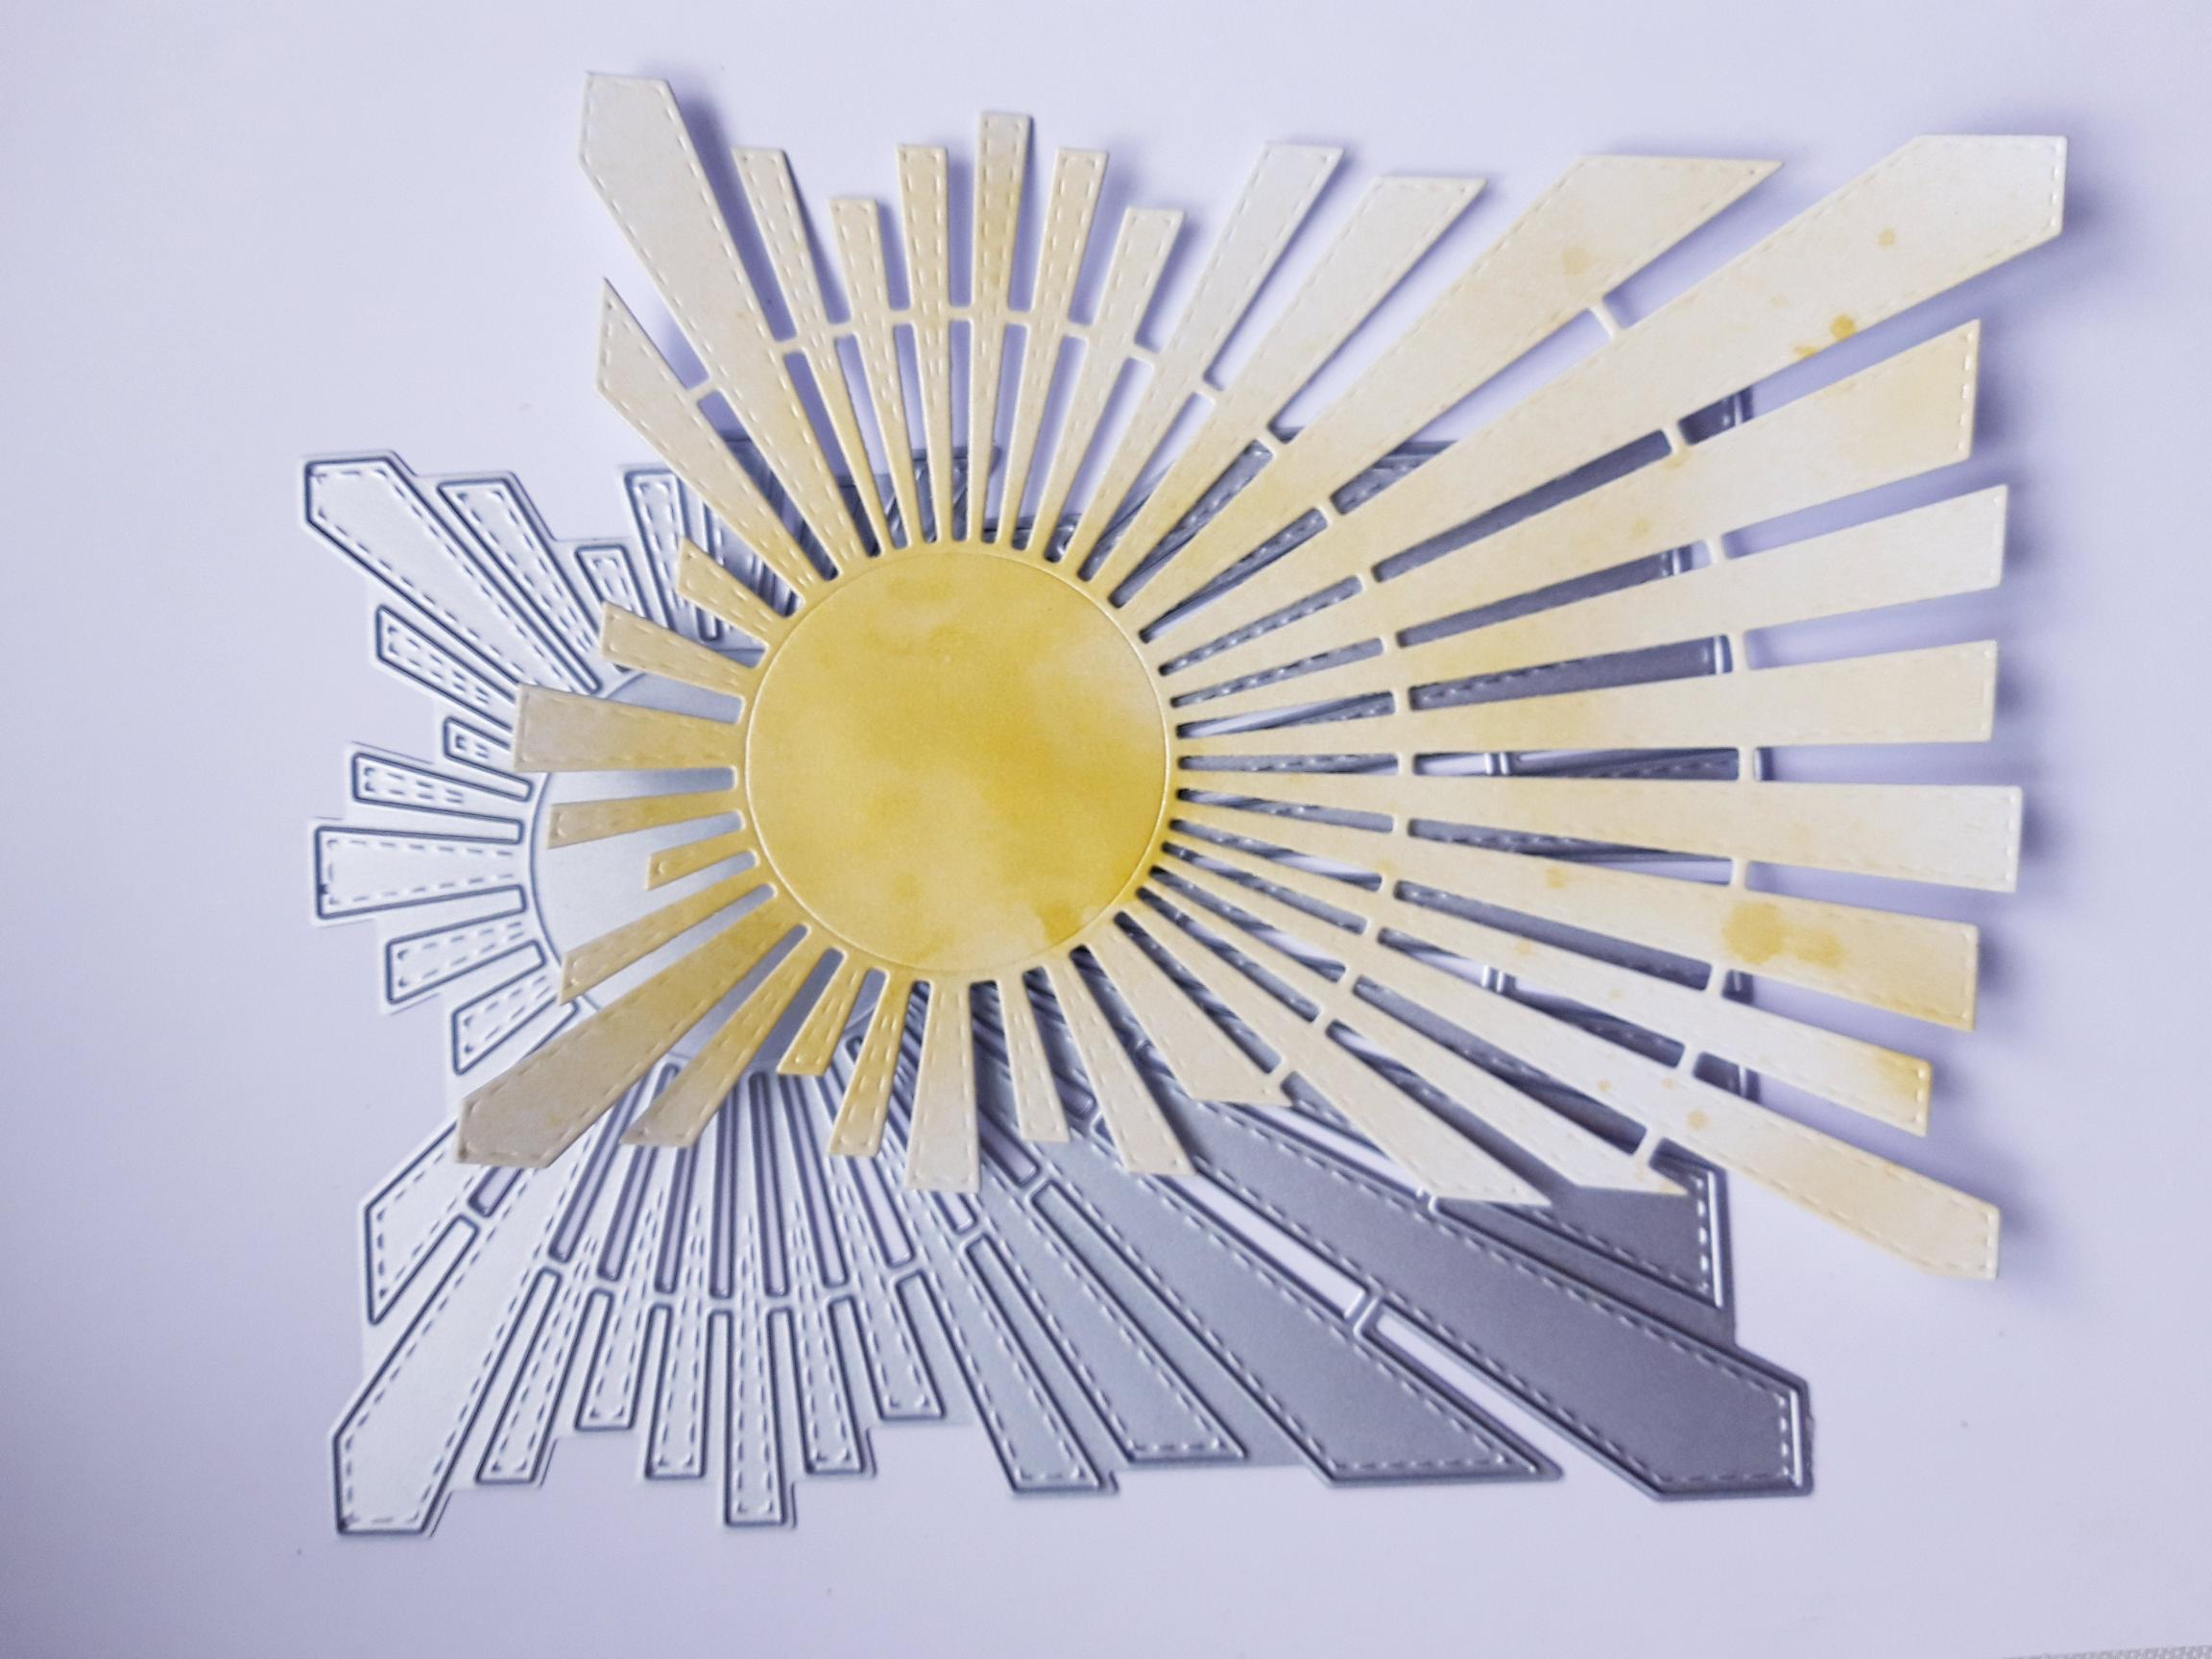
Place the die, from the Sunray Die Collection, on to the sprayed cardstock, and run it through your die cutting machine. |

|
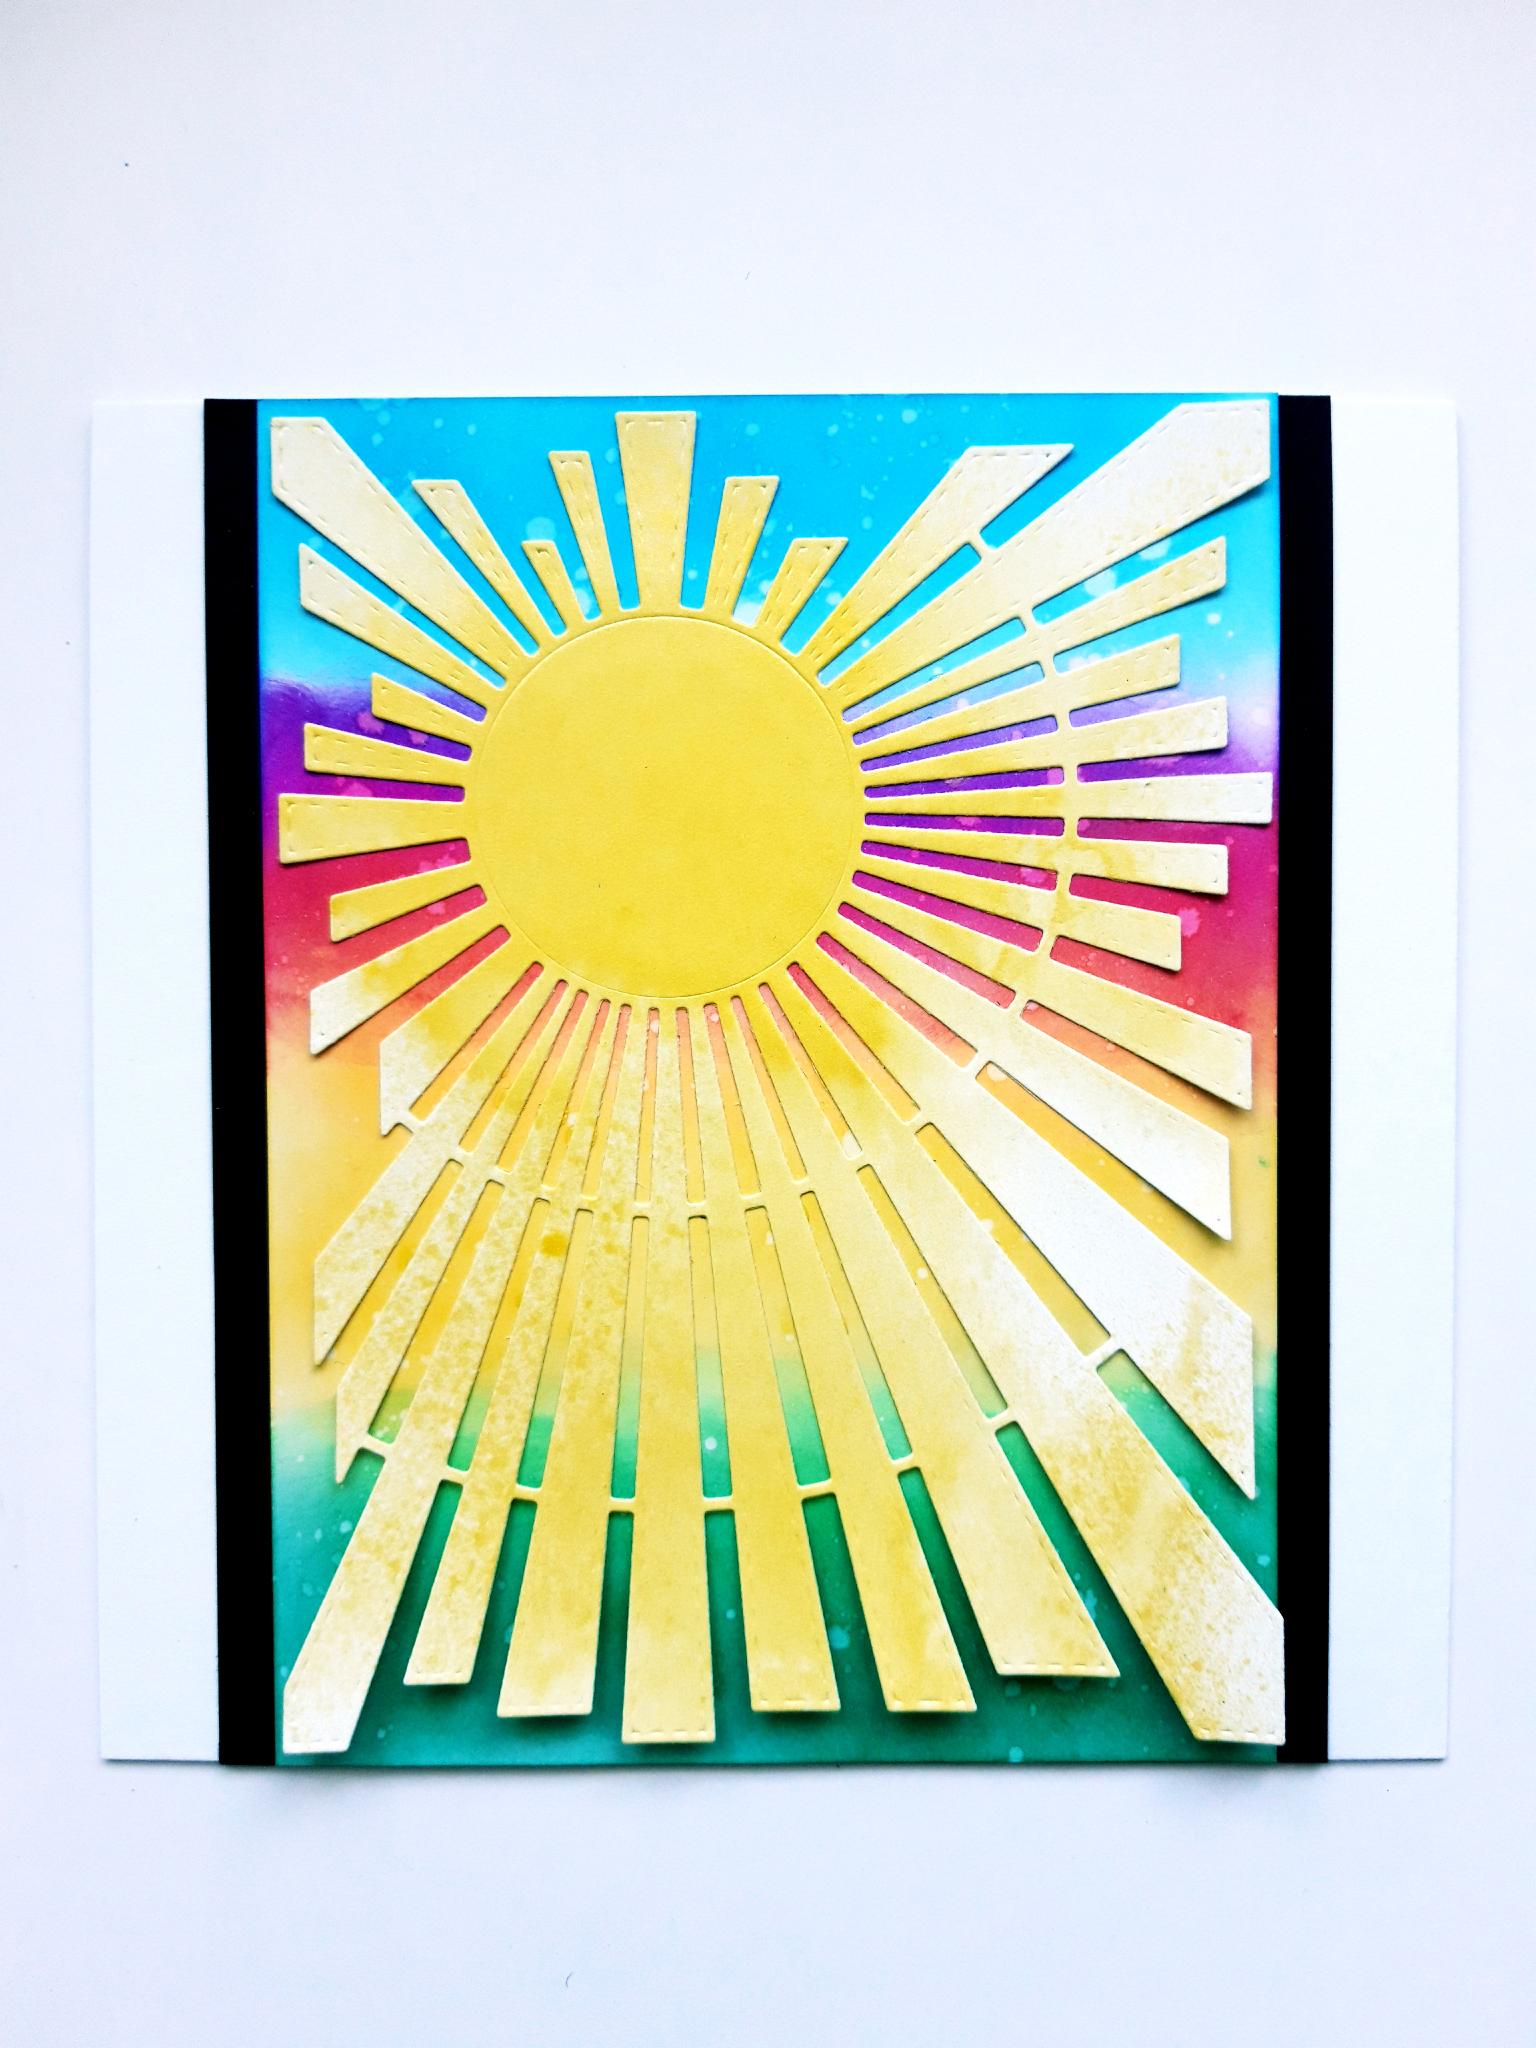
To construct your card, adhere the inked background on to the black cardstock (6 3/4 x 5 1/2"), so the top and bottom edges are flush, and the gap of black cardstock on either side, is equal. Adhere the sunray die cut element on top of your background. You can either apply glue just on the circle element, with wet glue, or foam pads to add extra dimension. This will allow movement of the "rays". Alternatively, you can apply the wet glue to the complete die cut. I went with the former. |
|
Adhere your artwork on to the front of your card blank, again ensuring the top and bottom edges are flush, and there is equal distance on the left, and right, of the card blank. |
|
To finish, adhere your die cut sentiment where required, using either wet glue, or foam pads for added dimension. |