Give your friends $10 off their first order!
Refer a FRIEND


WHAT YOU WILL NEED:
White card blank (7 x 7")
A4 white card
Black card (4 x 2 1/2")
Dies from Botanical Wings Die Collection
Dies from Kind Friends Die Collection
Stamps from Stand Tall Stamp Collection
Versafine Ink Pad: Onyx Black
Izink Shiny spray: Bleu Clair
Izink Dye spray: Blue Moon, Violet Cassis
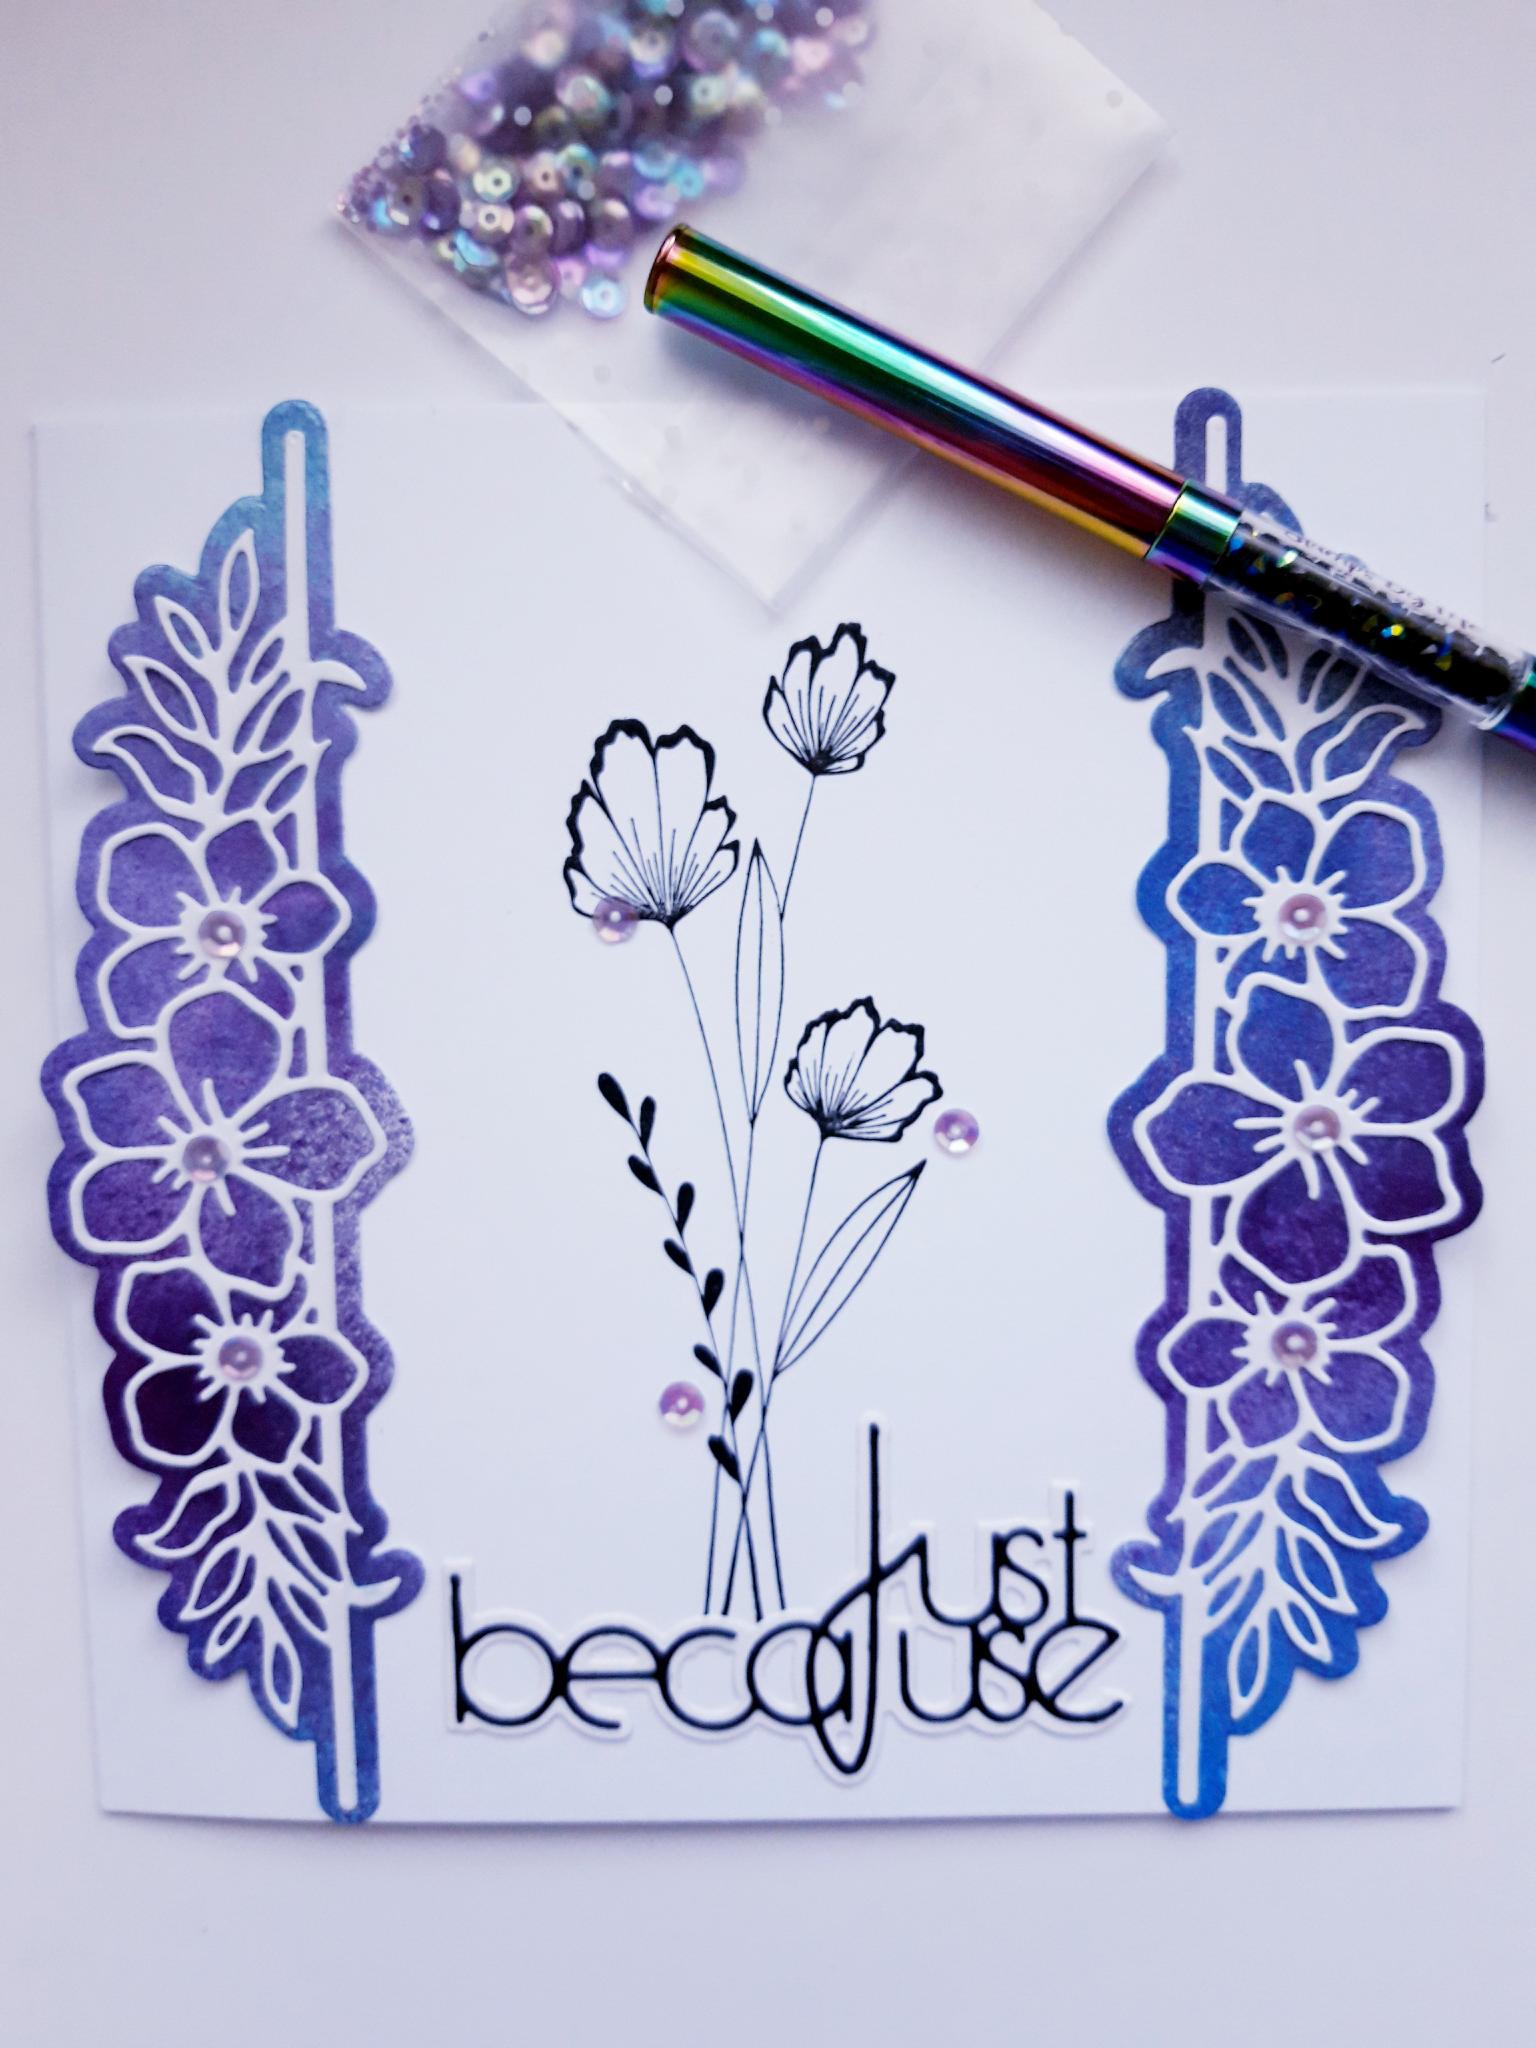
Sequins: Amethyst
Gem pick up and pokey tool
Eureka 101
Paper Trimmer
Perfect Together Glue
Die Cutting machine
[click image to enlarge] 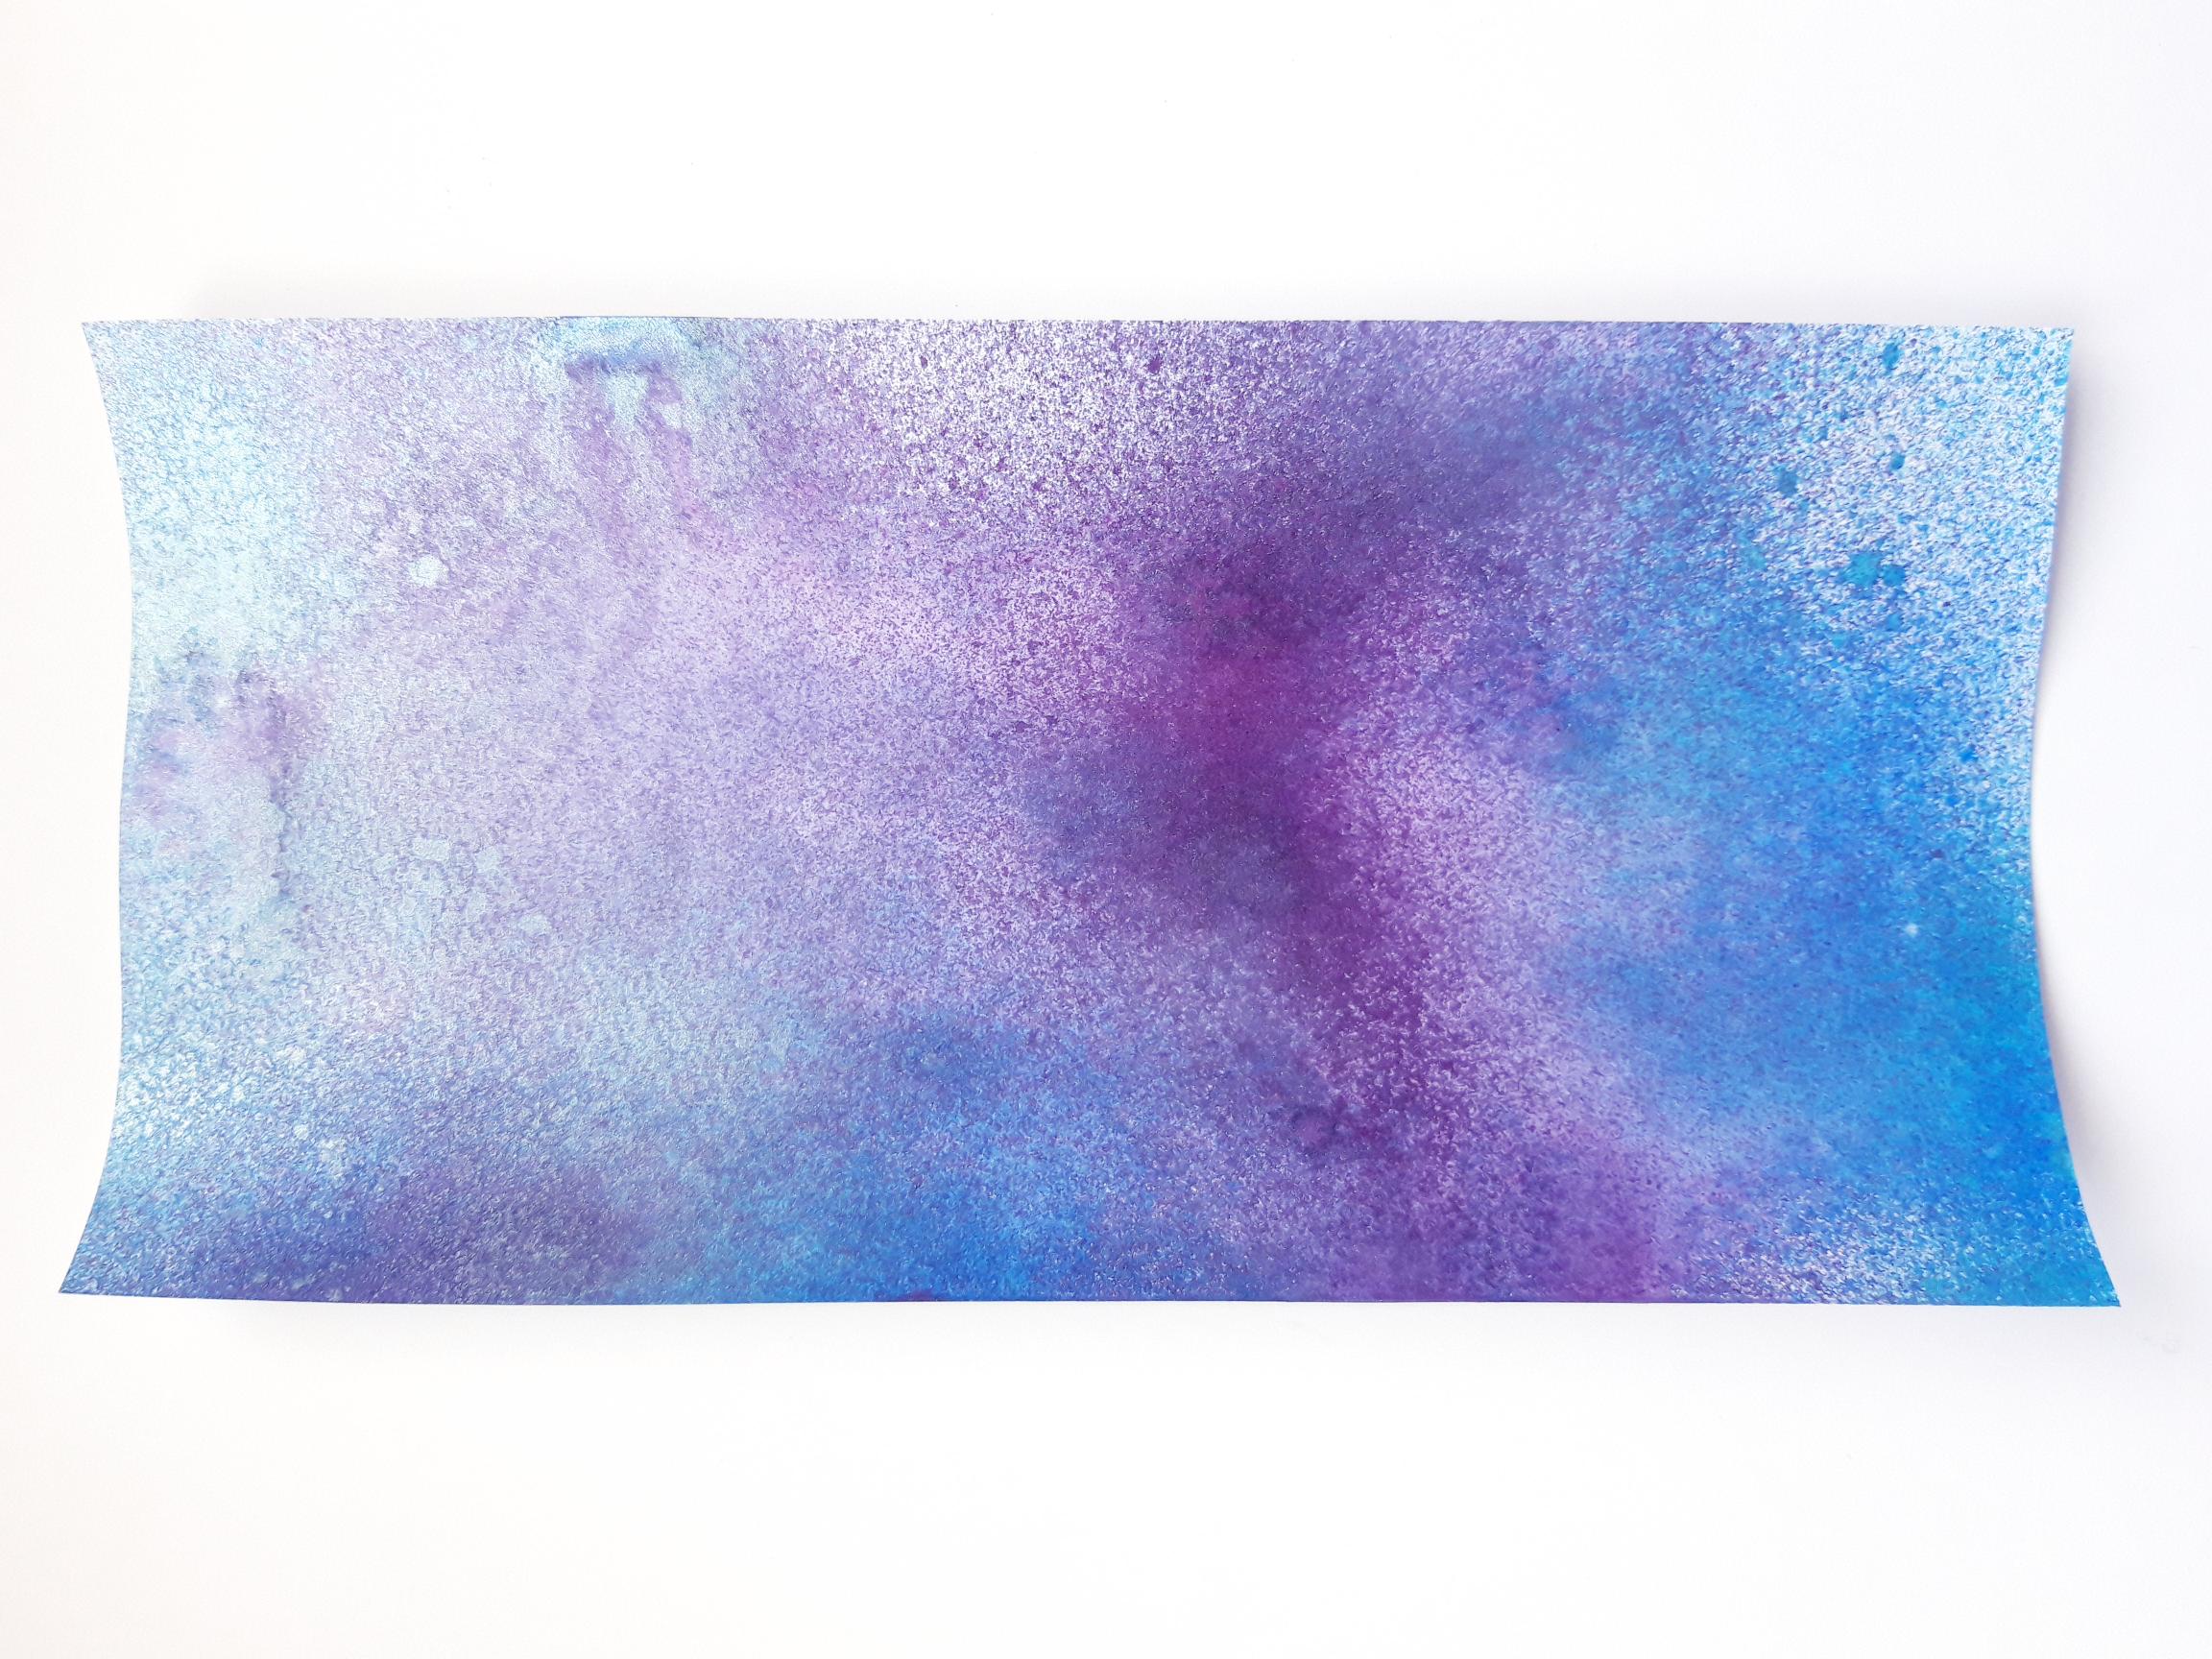
|
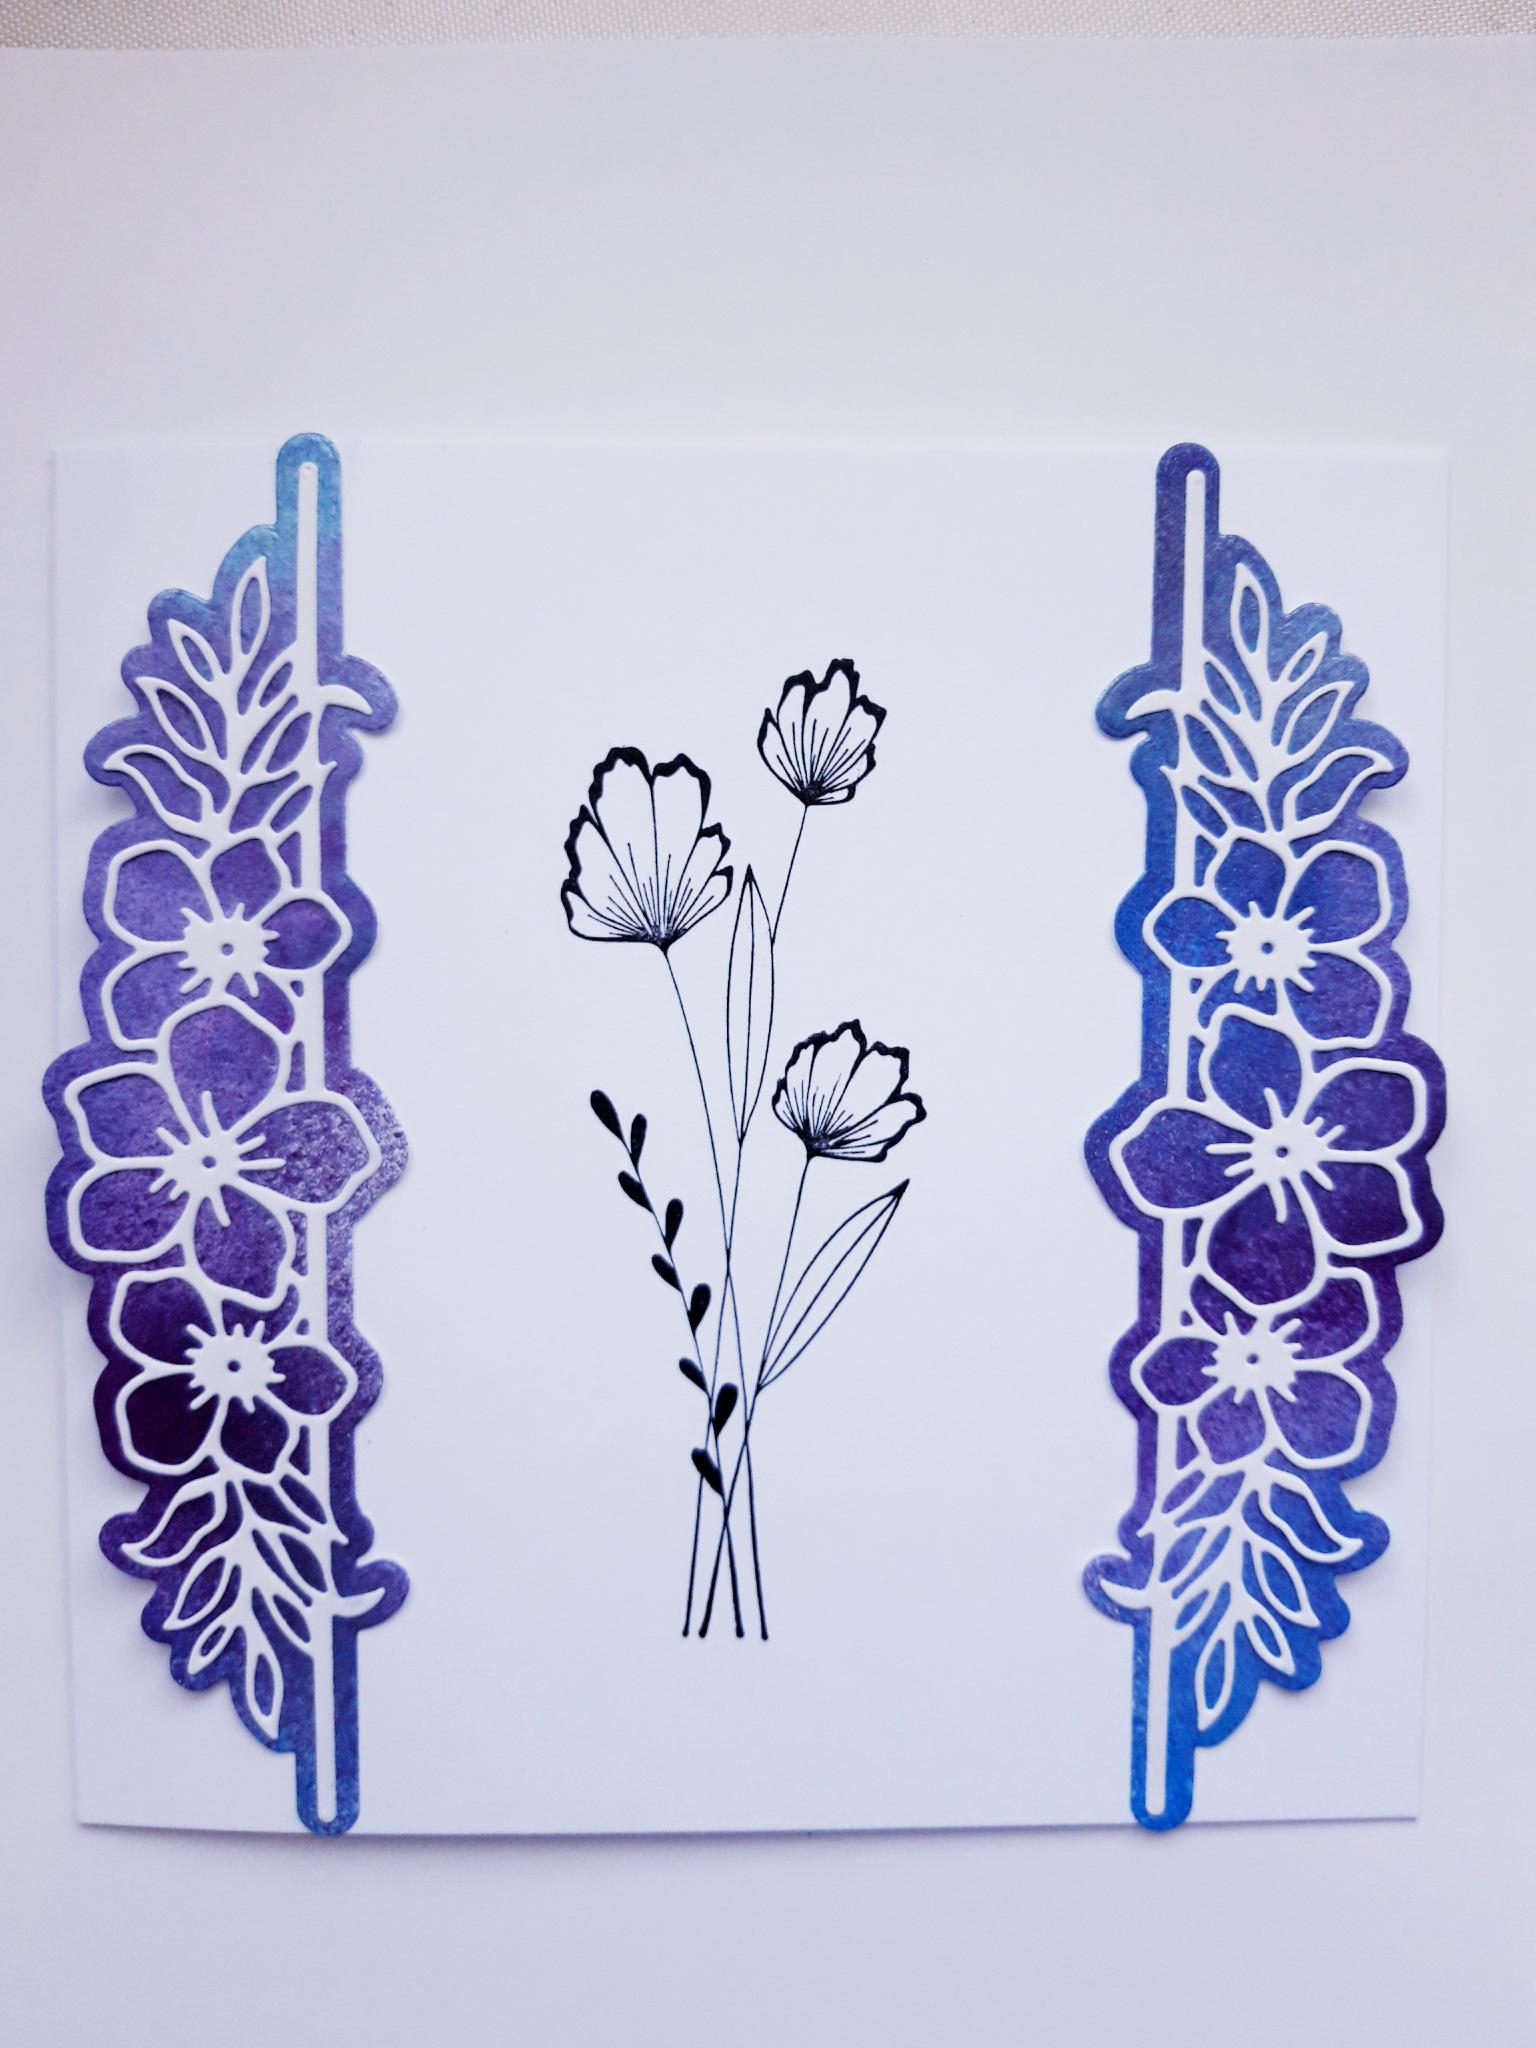
From the A4 white card, cut a piece off, approx 7 1/4 x 4 1/2". Set the rest to one side. Spray the Izink sprays on to the cut off cardstock, and dry thoroughly. |
|
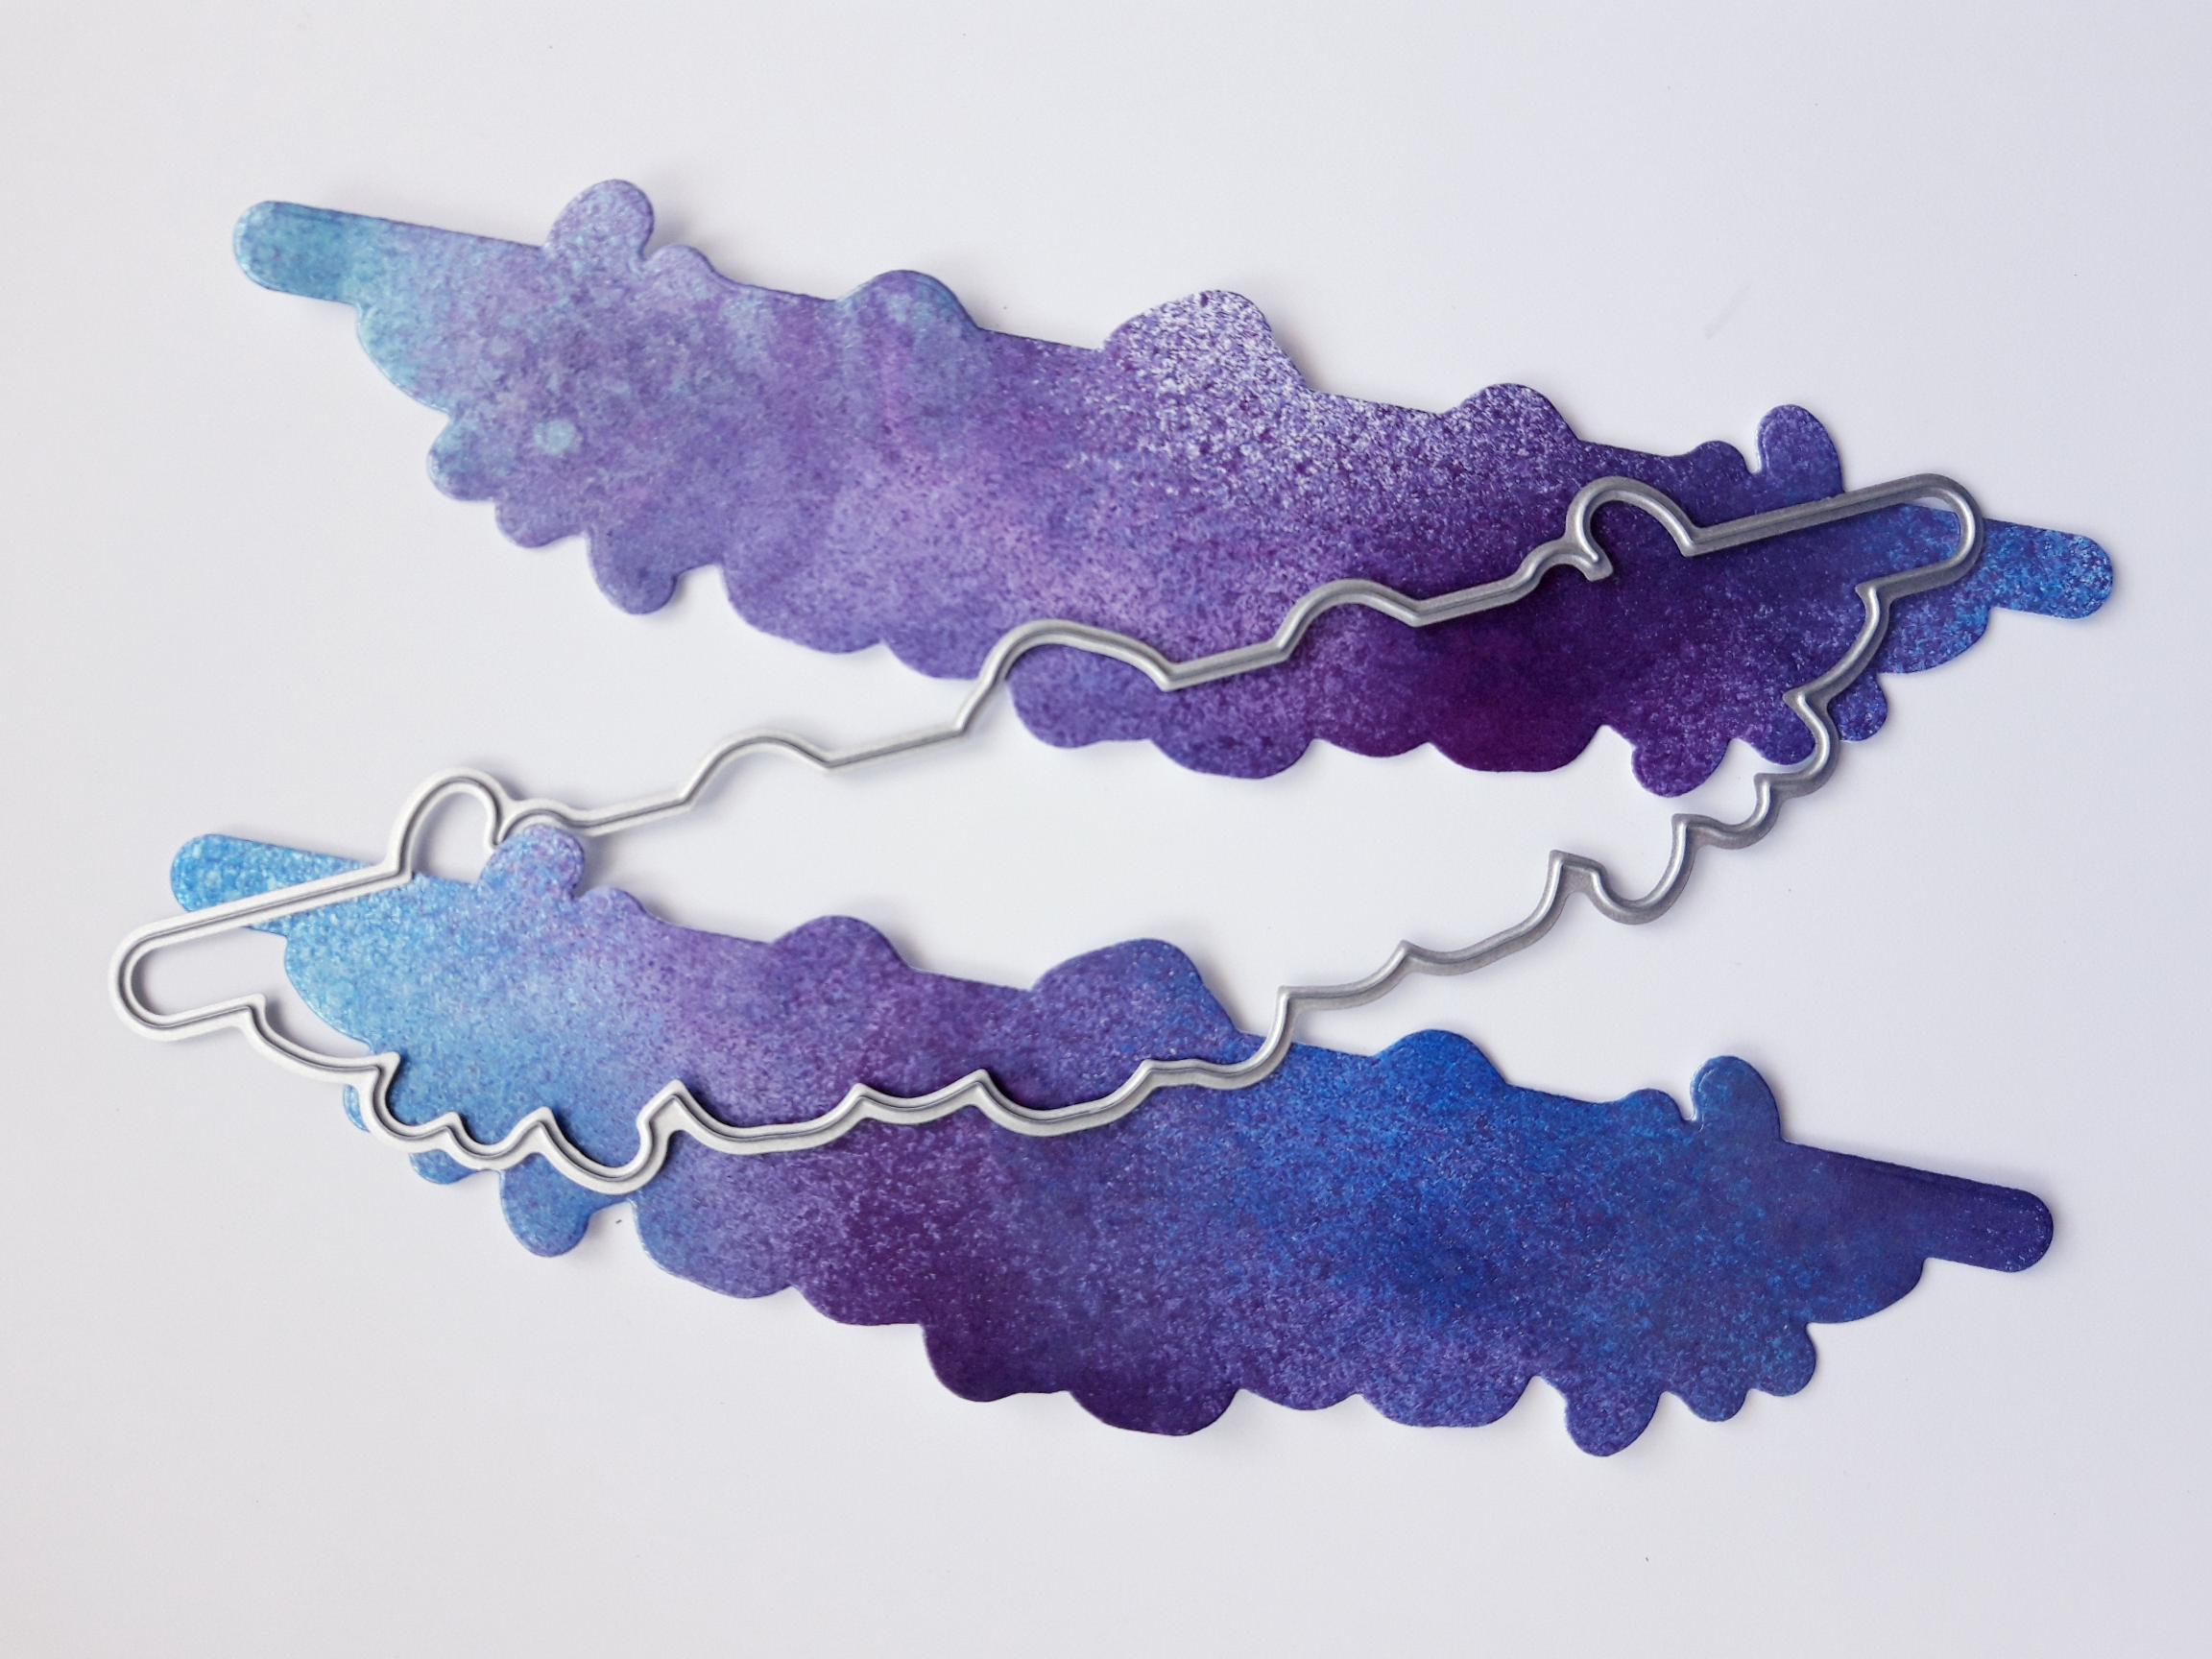
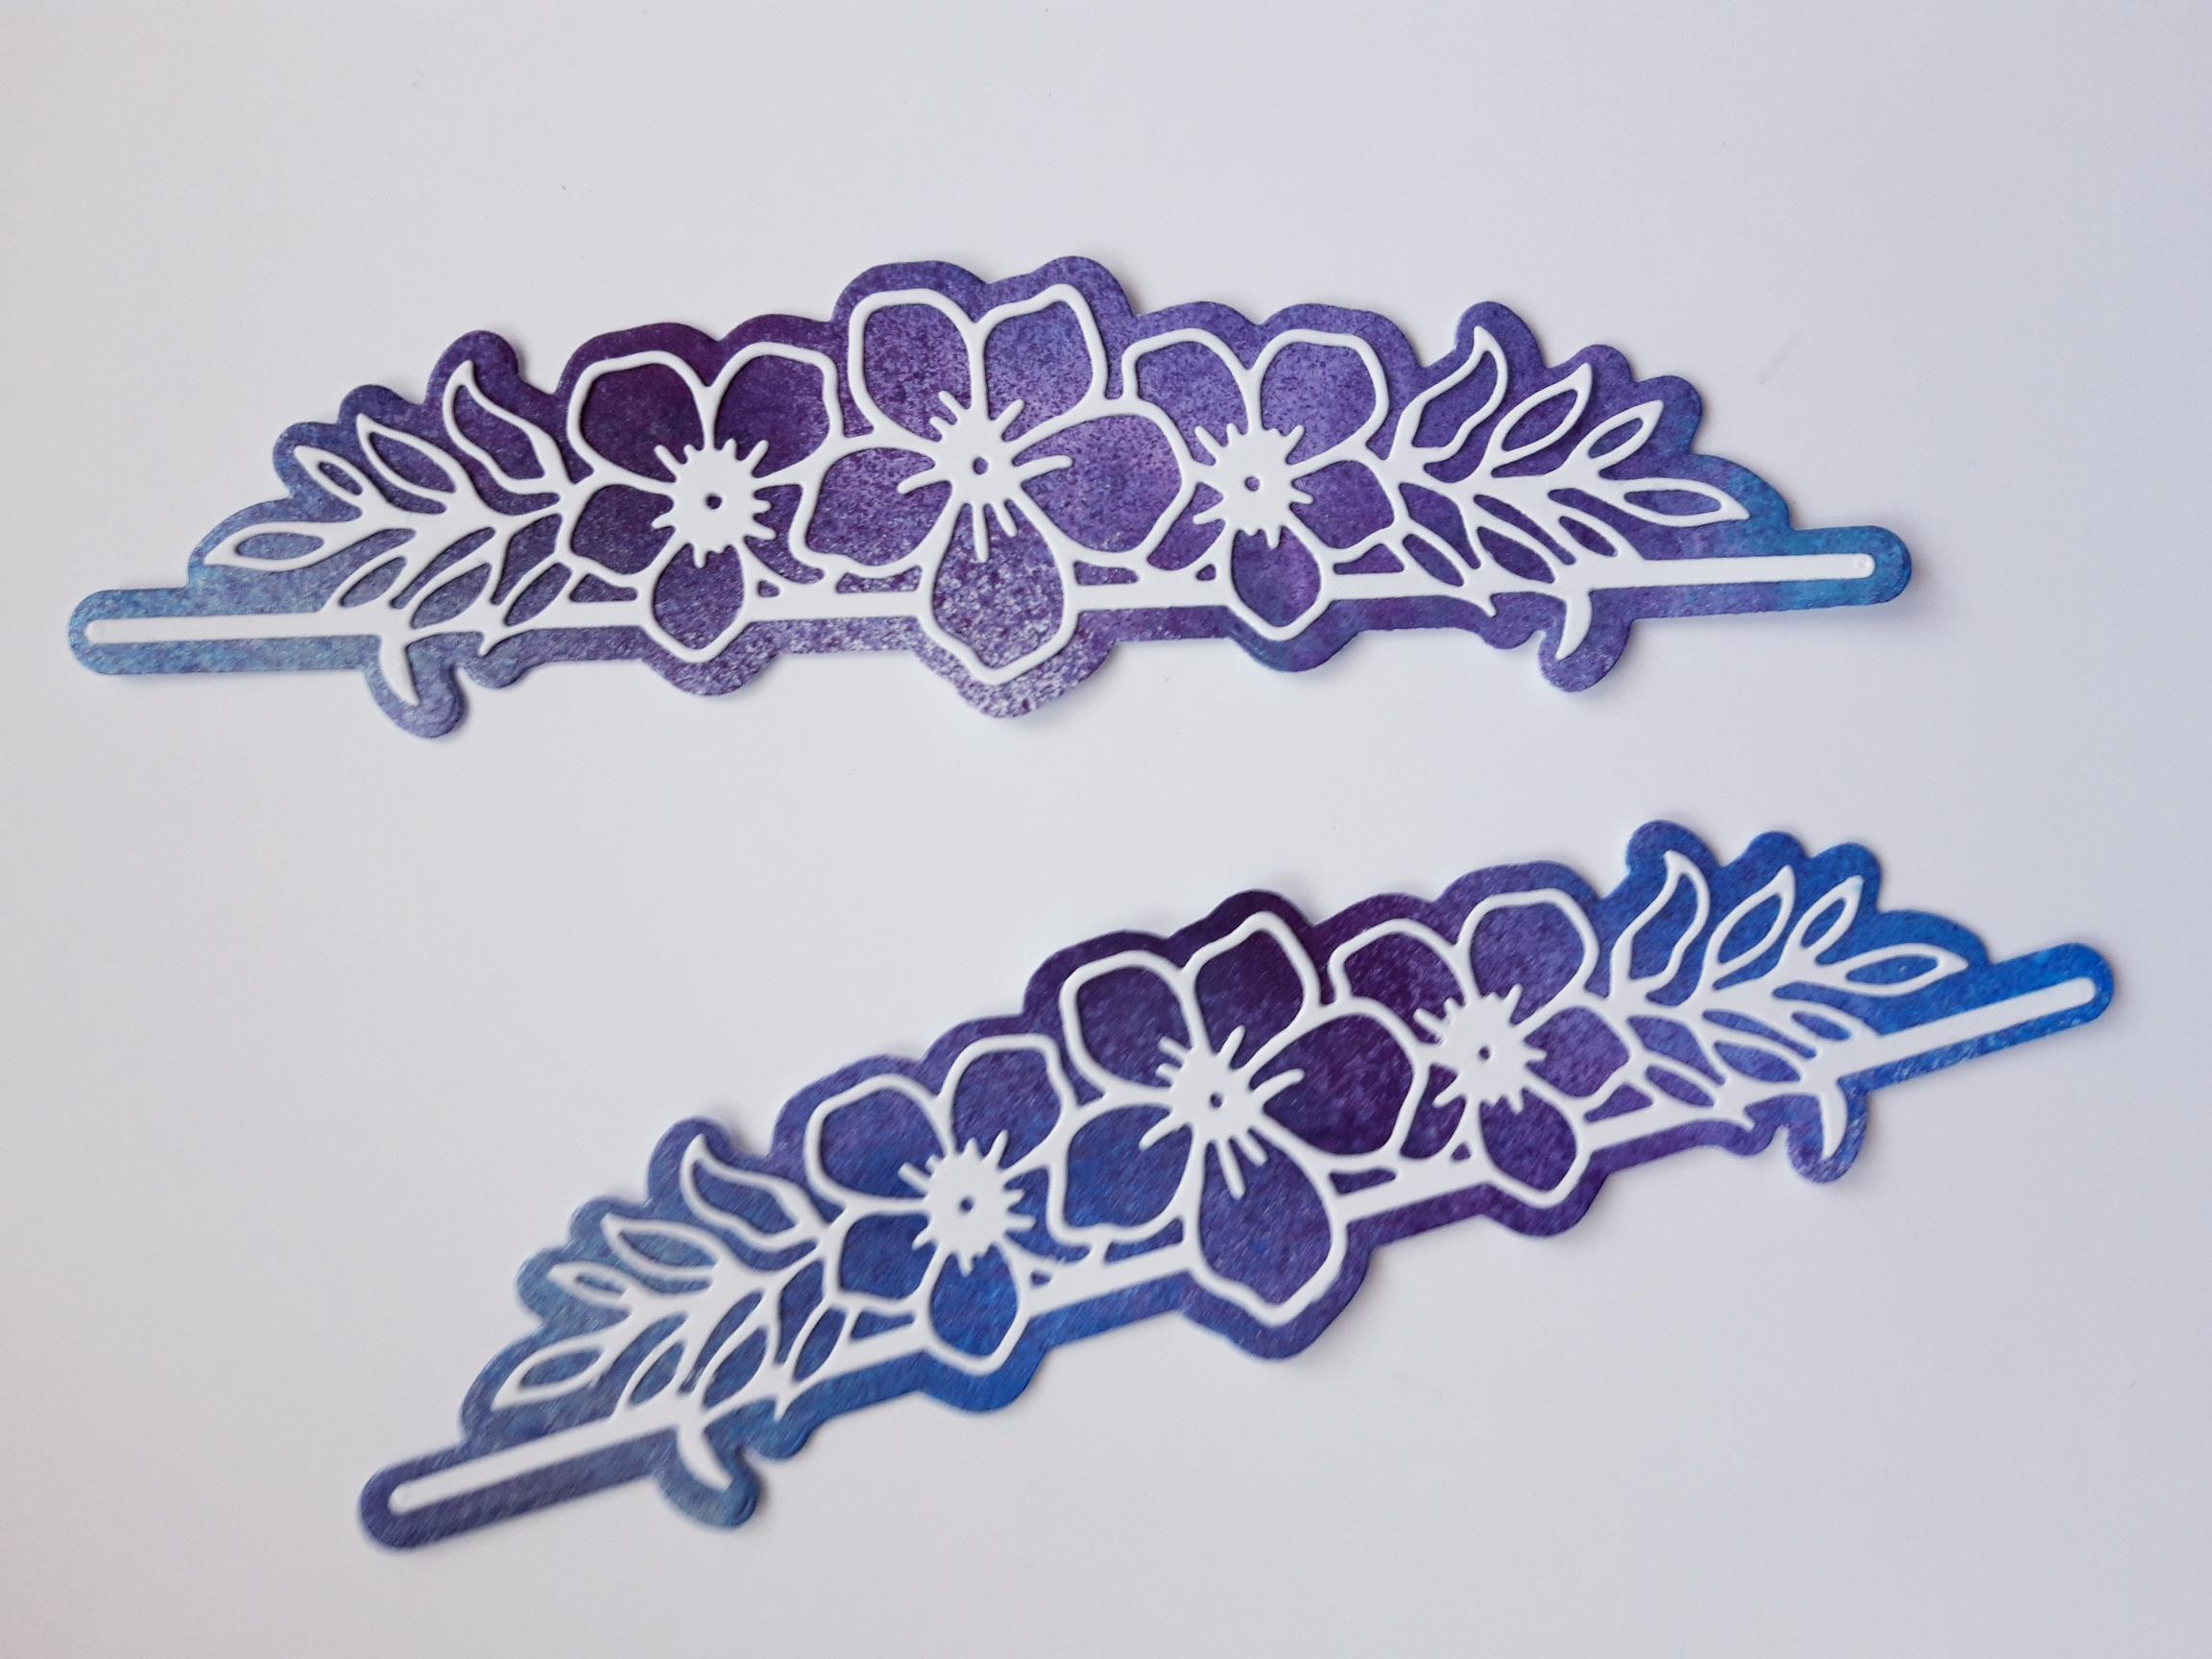
Use the die shown here, from the Botanical Wings Die Collection, to cut out TWO inky die cut mats, using your die cutting machine. |
|
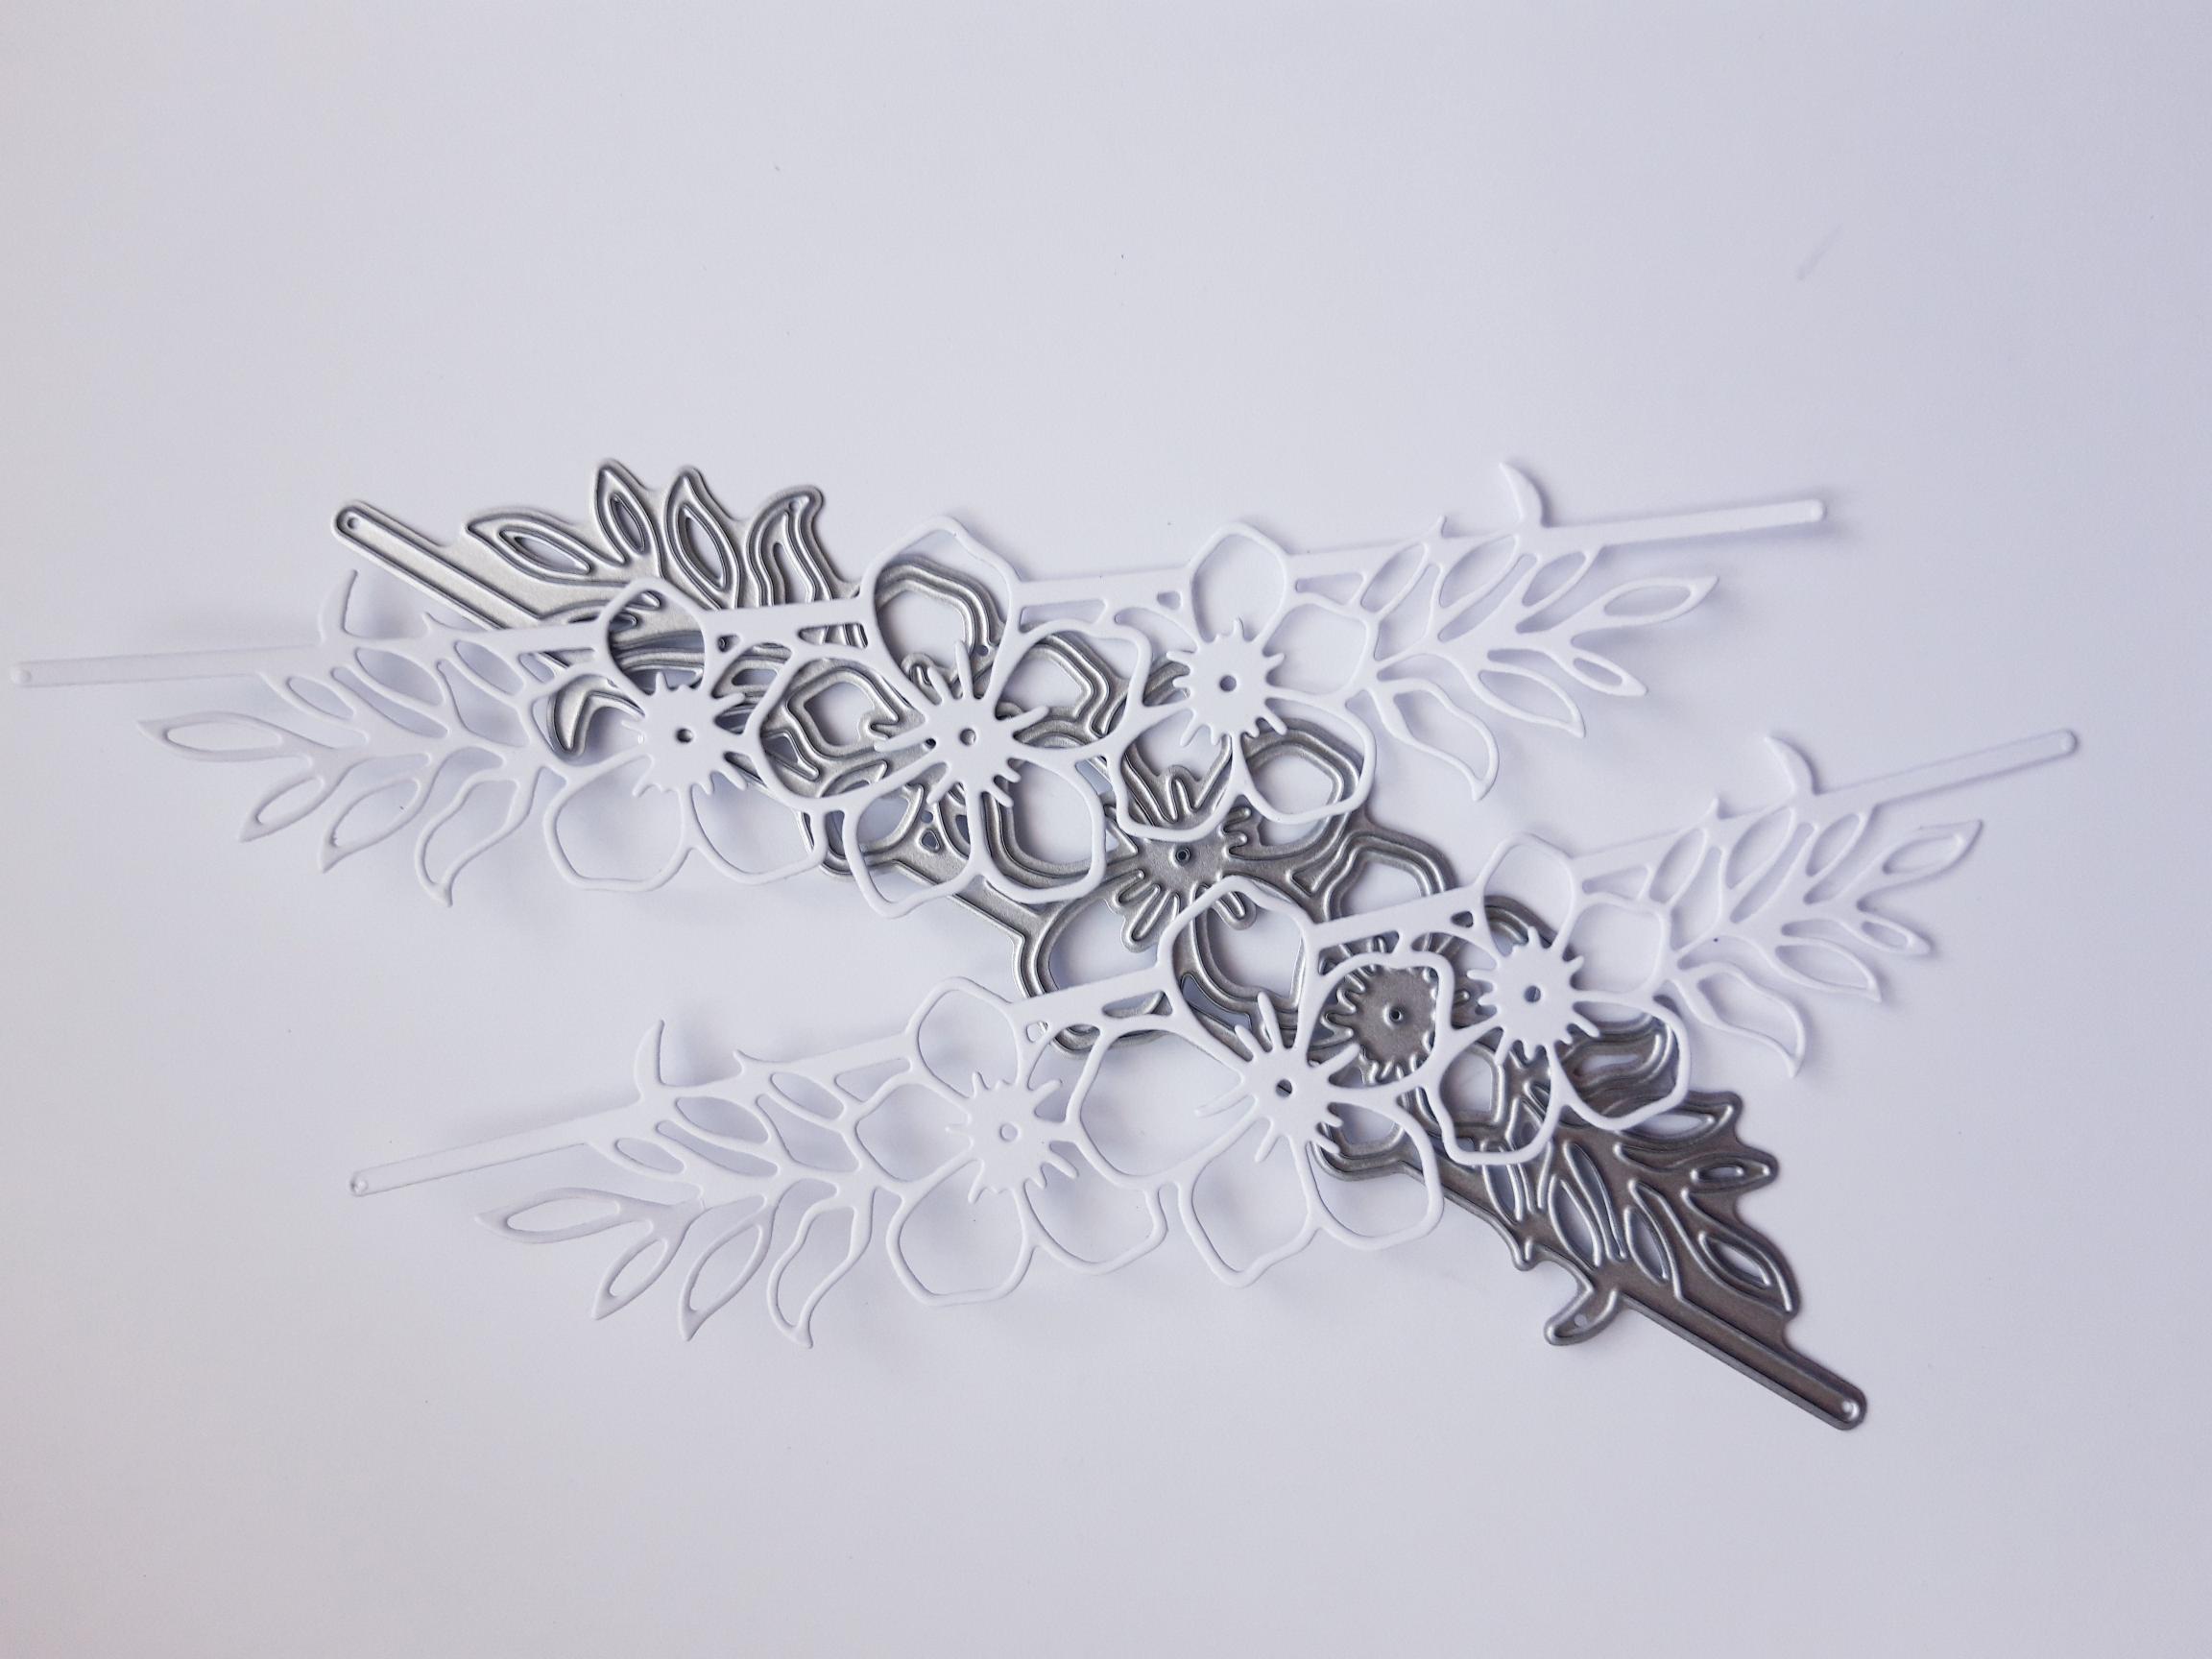
Use this coordinating detailed die, to cut out TWO die cut embellishments, from the white card set aside earlier. Set the remainder of the white card to one side. |
|
Adhere the detailed, die cut embellishments, on to the inky die cut mats. |
|
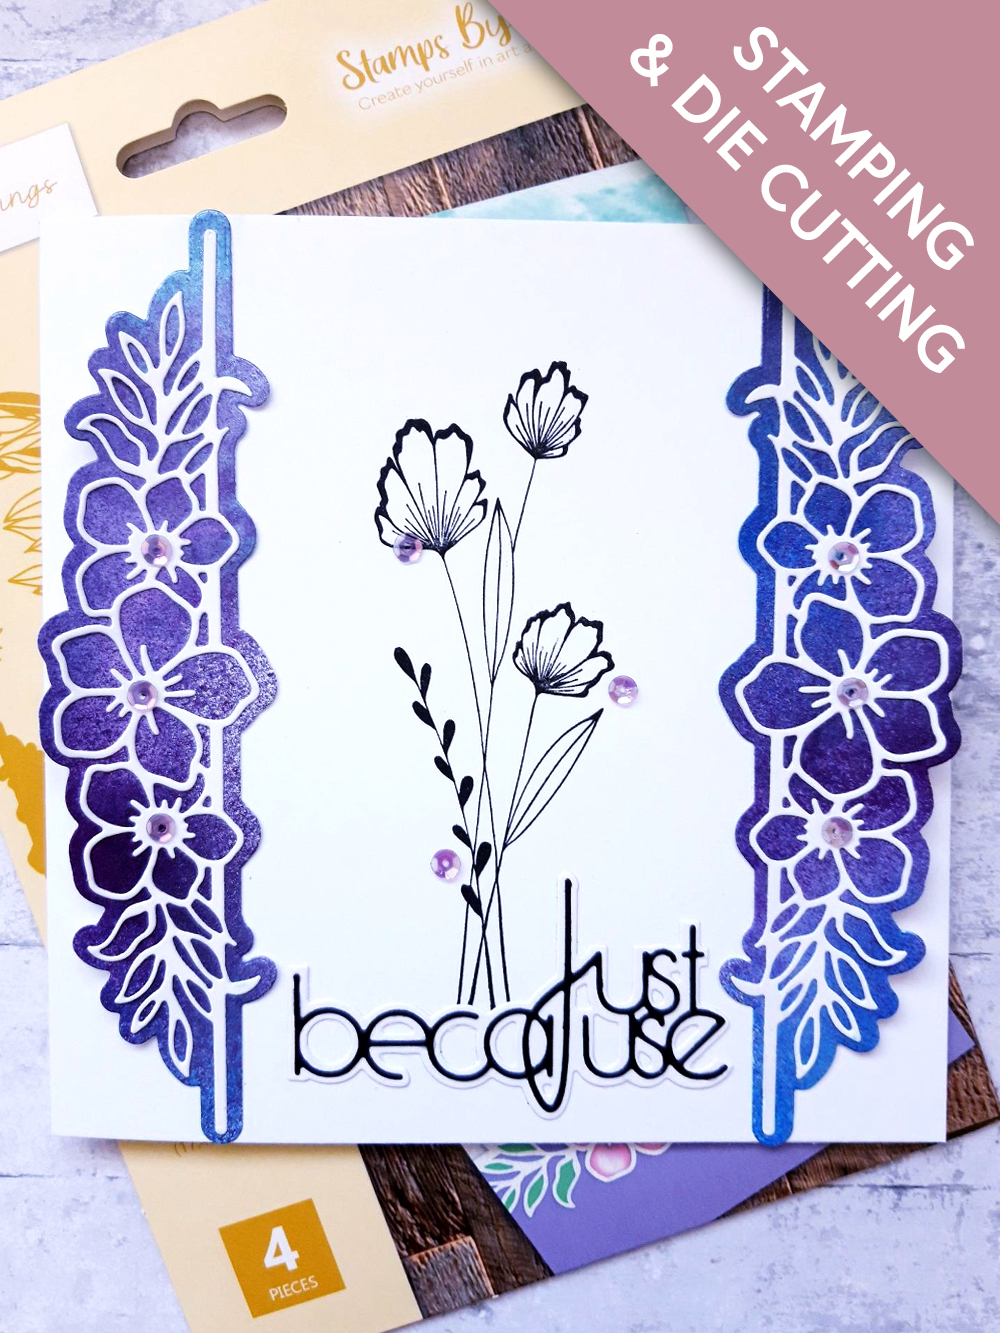
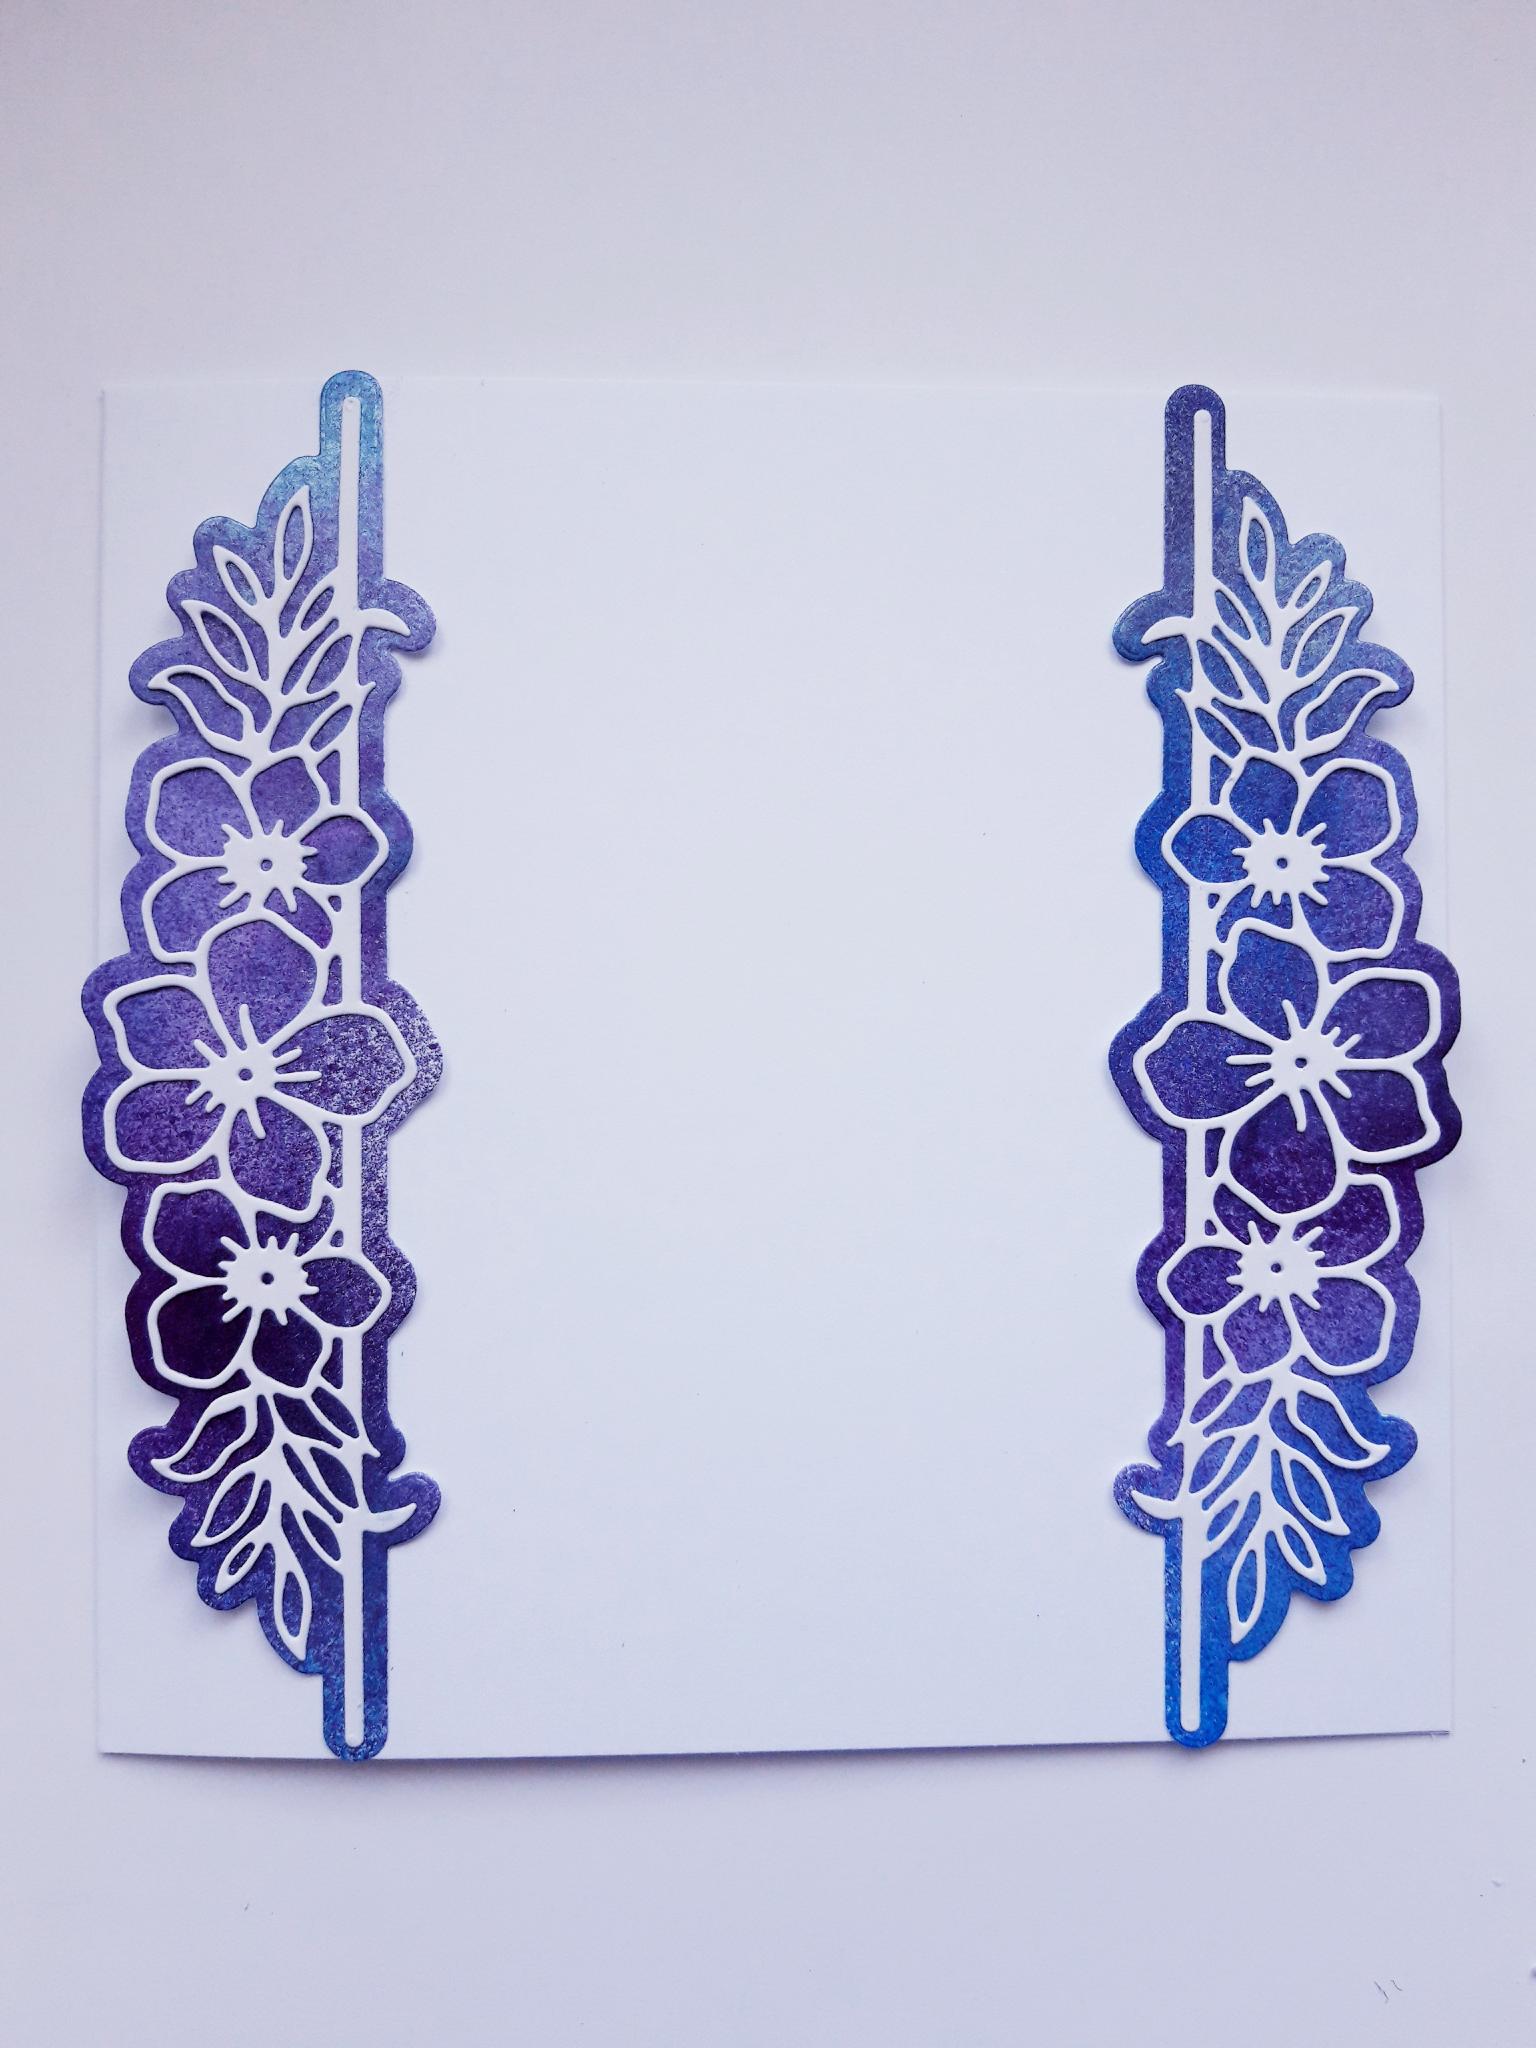
Adhere these on to the left and right hand edges of your white card blank, as seen here. I decided to trim my card blank to the same length as my die cuts (6 3/4 x 6 3/4"), but this is personal preference. Set card to one side. |
|
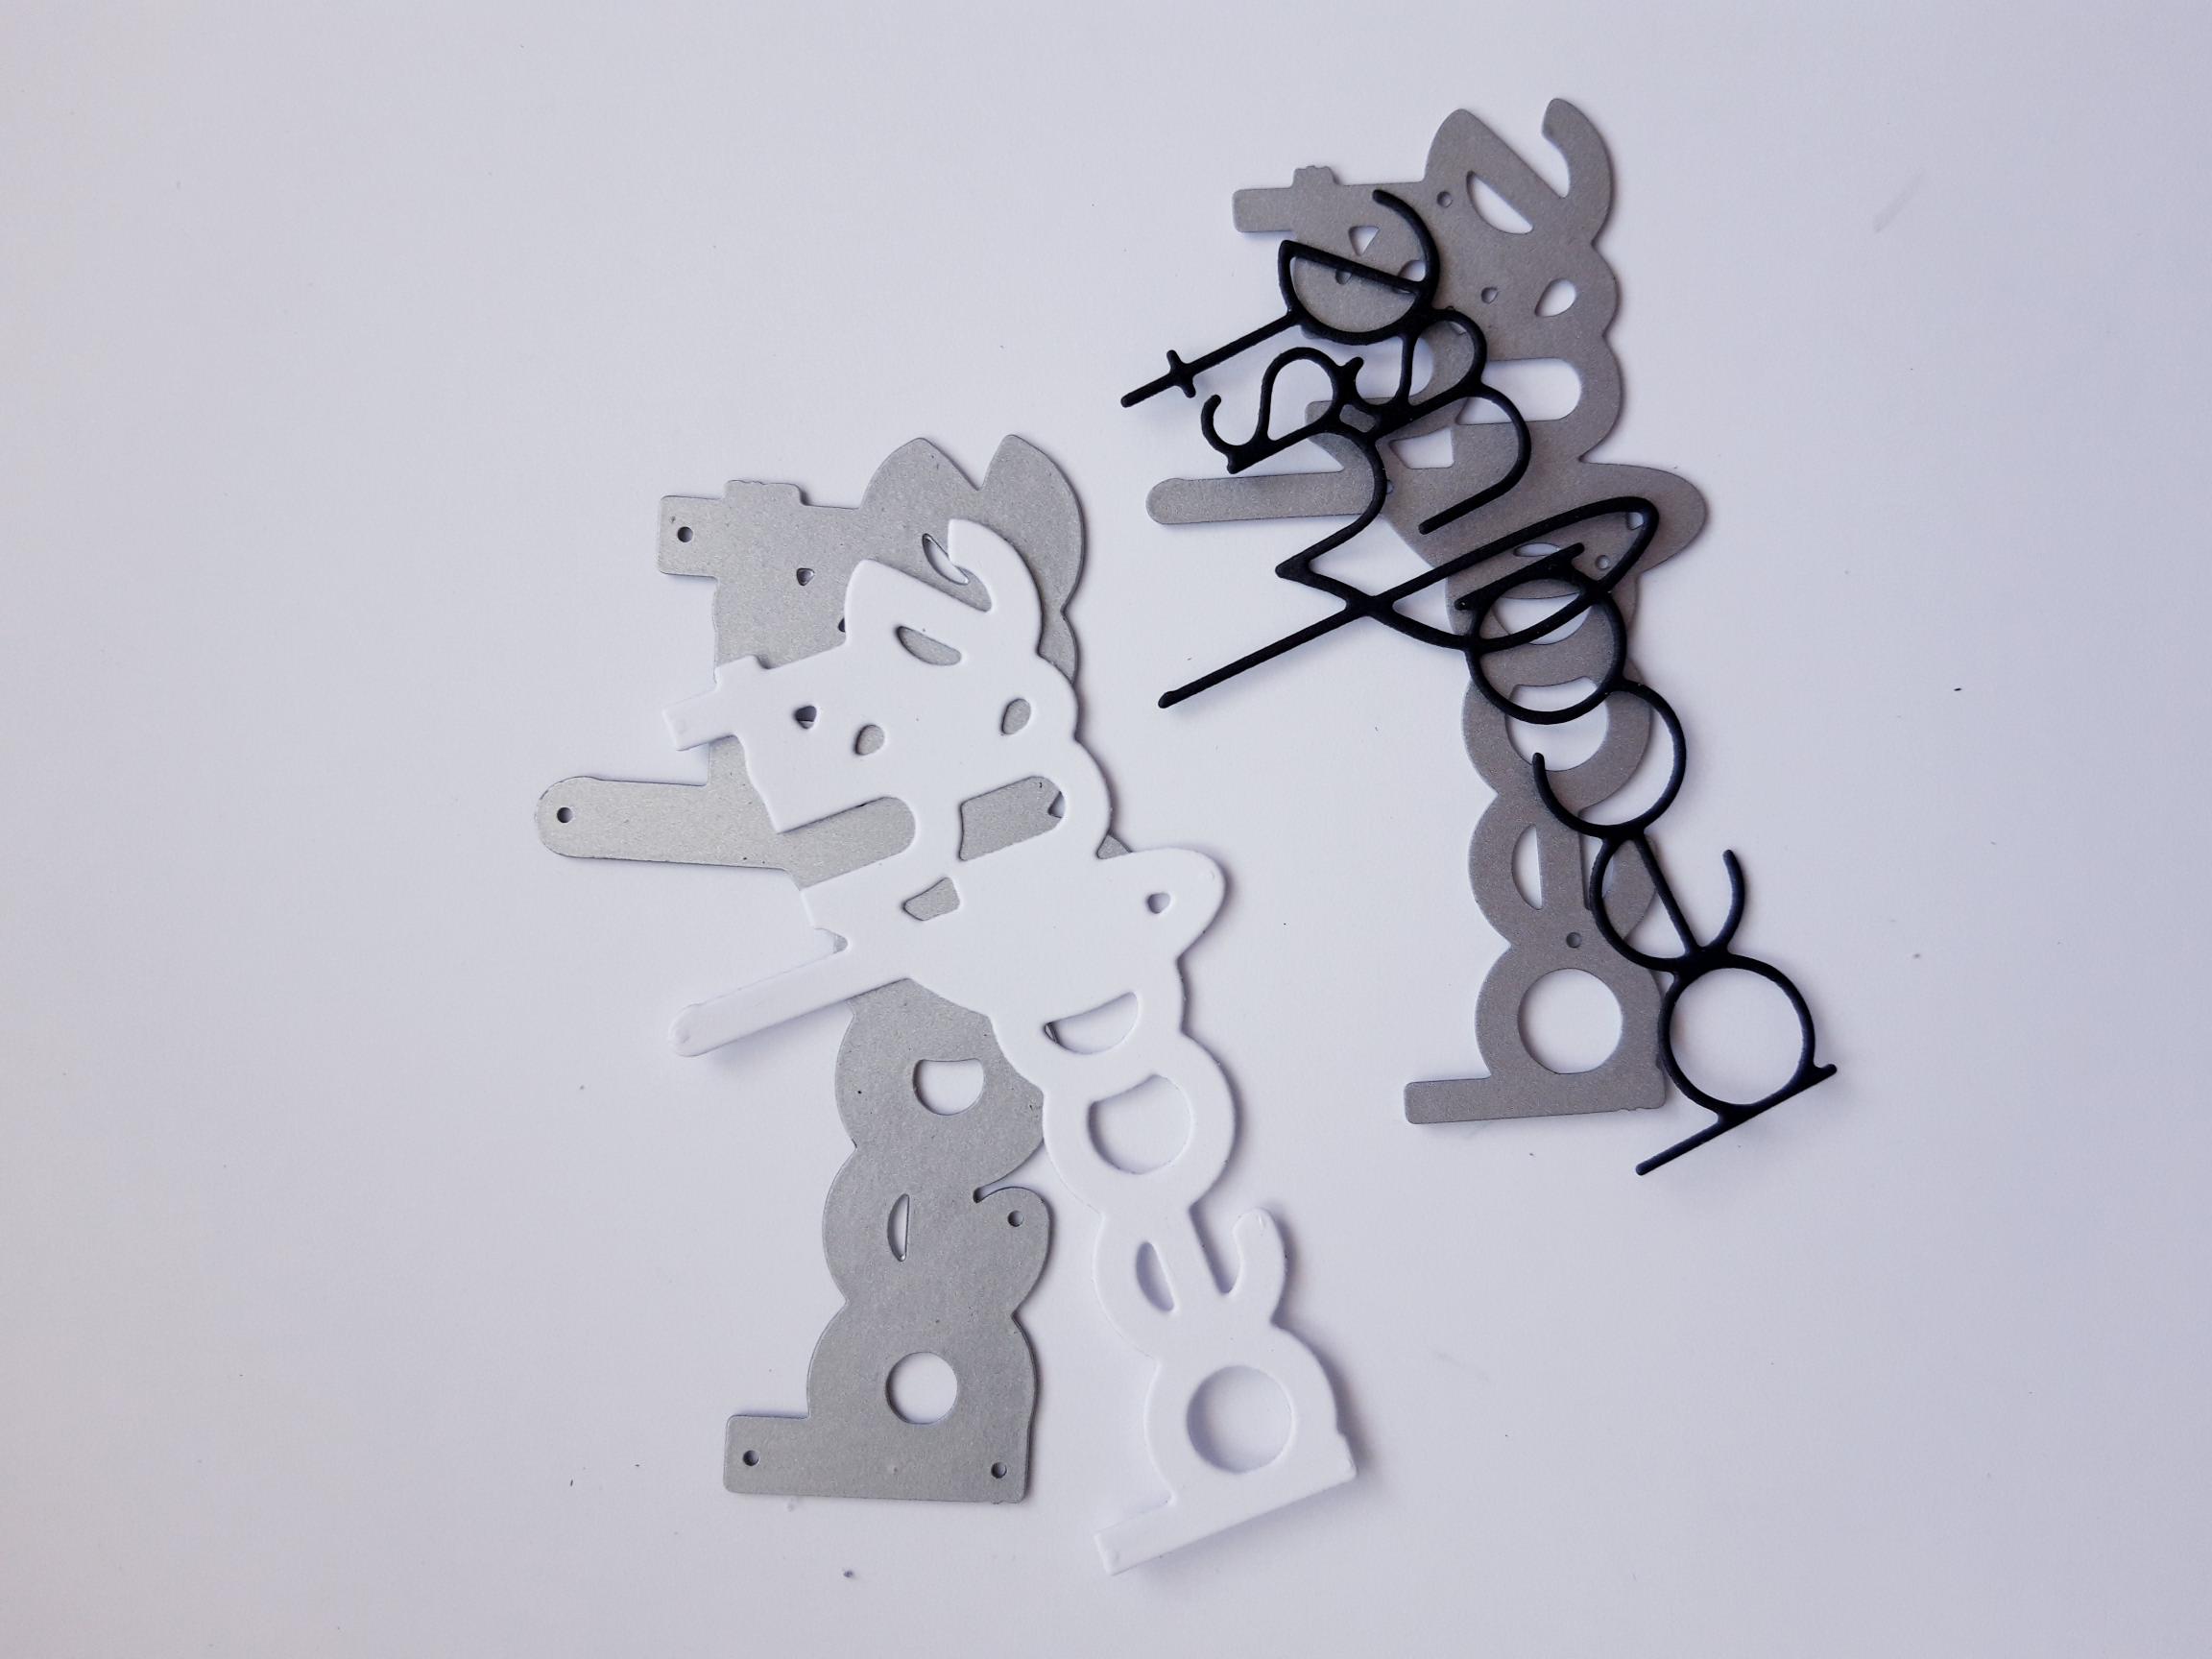
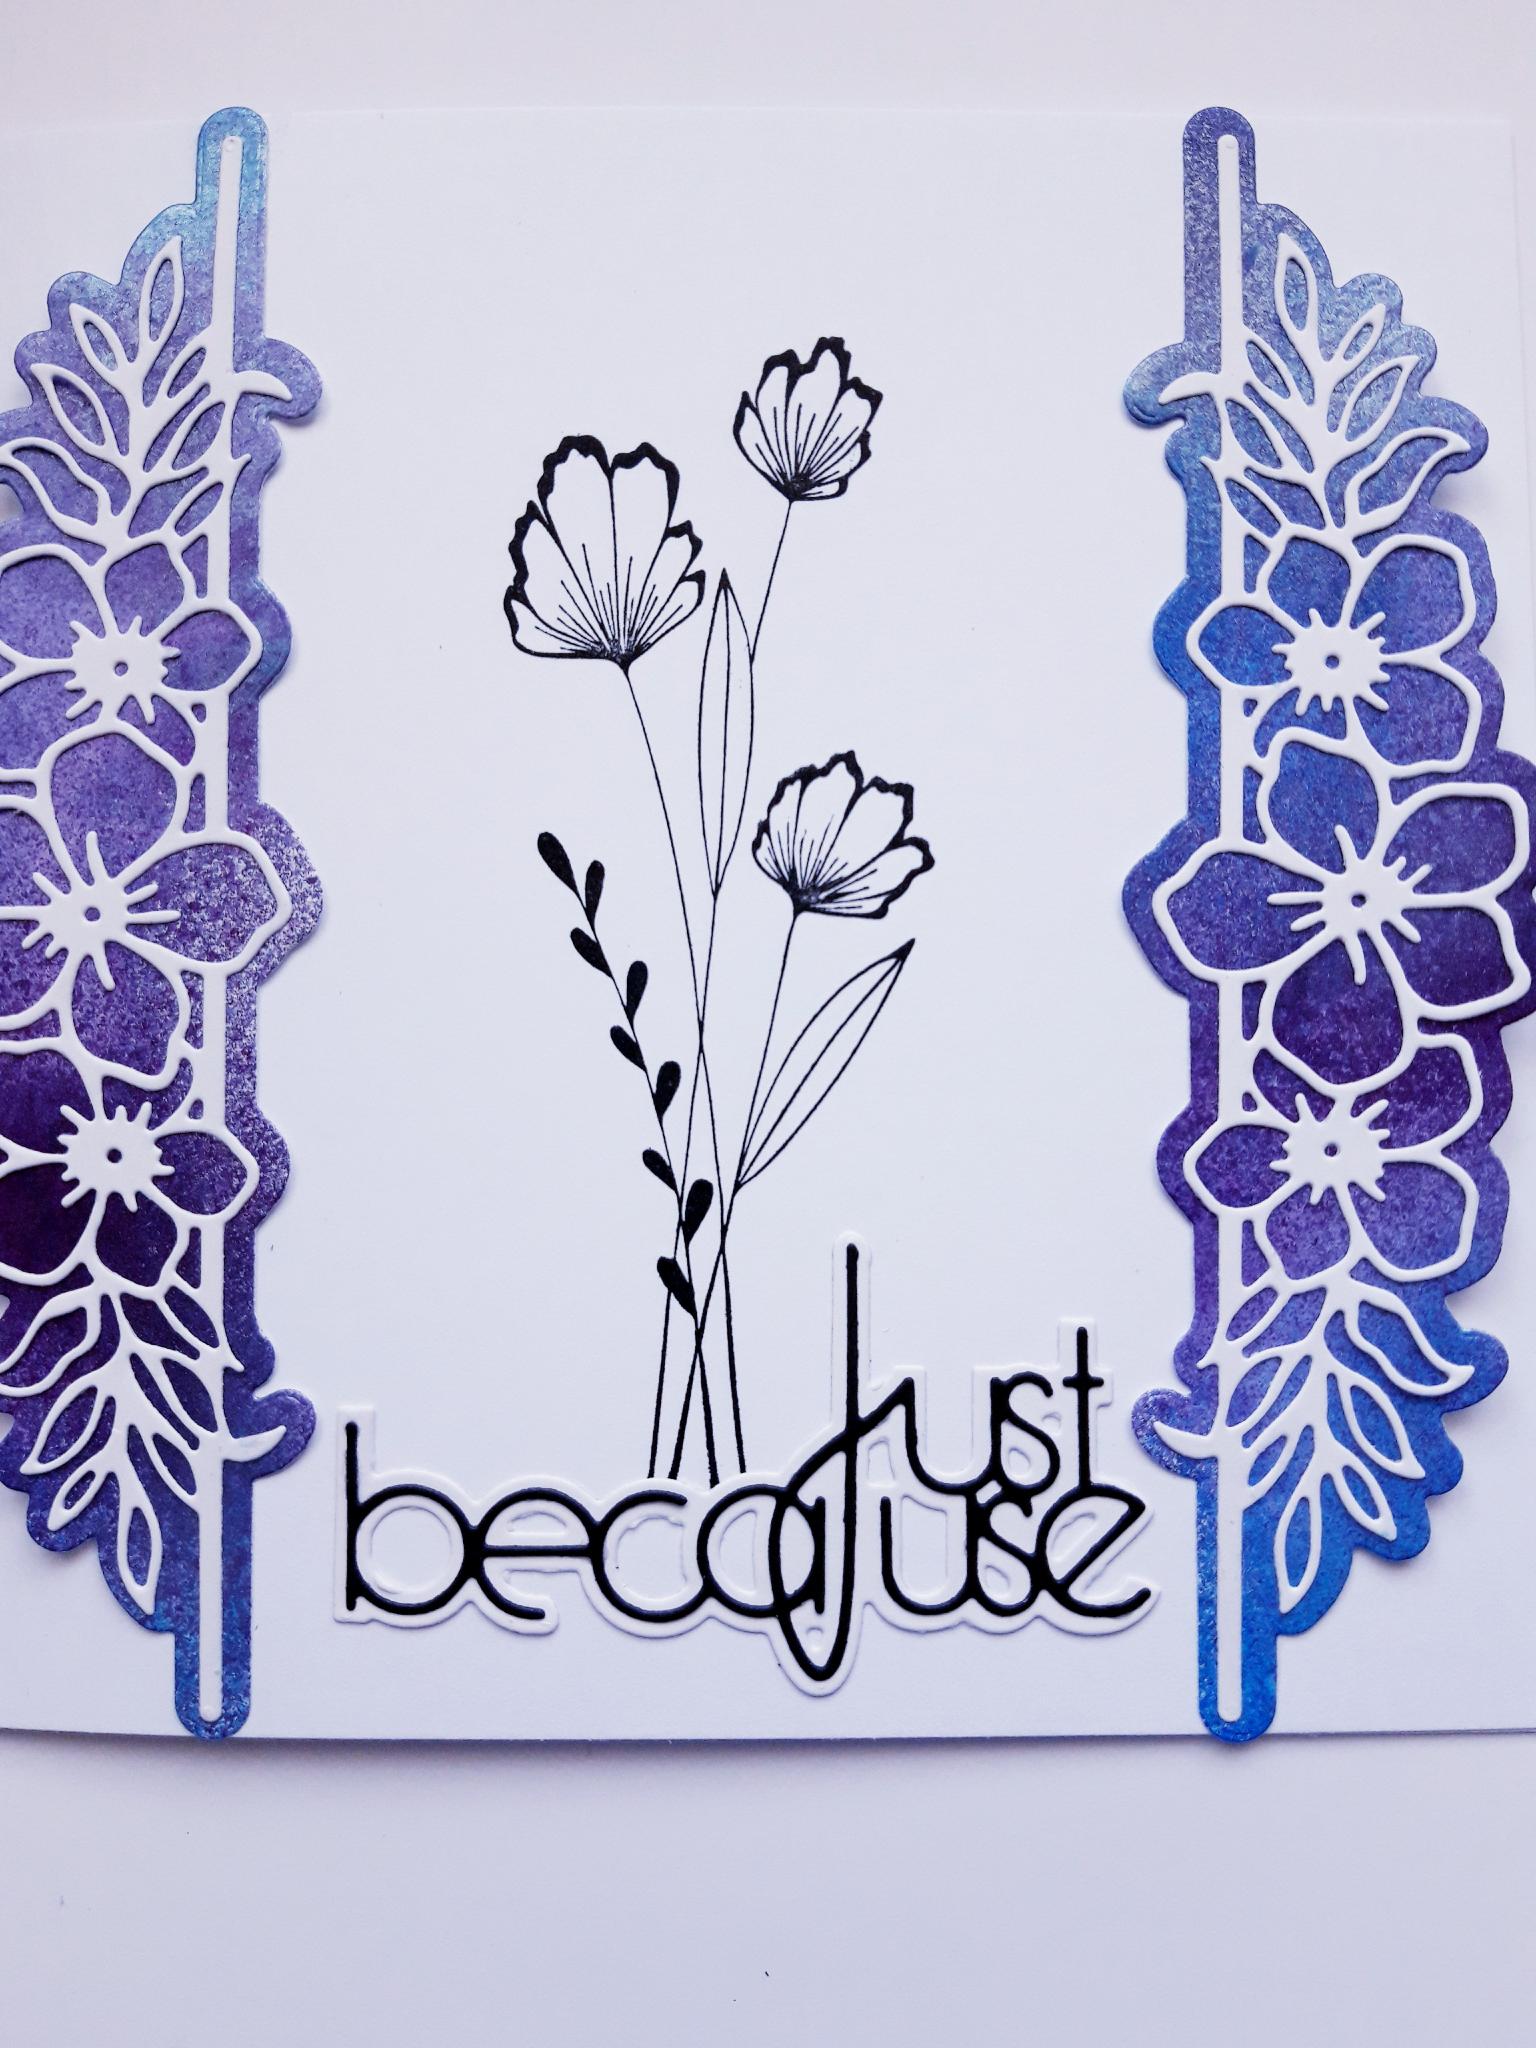
Lay the Just Because solid die, from the Kind Friends Die Collection, on to the white card set aside, and the detailed die on to the black cardstock, and run these through your die cutting machine |
|
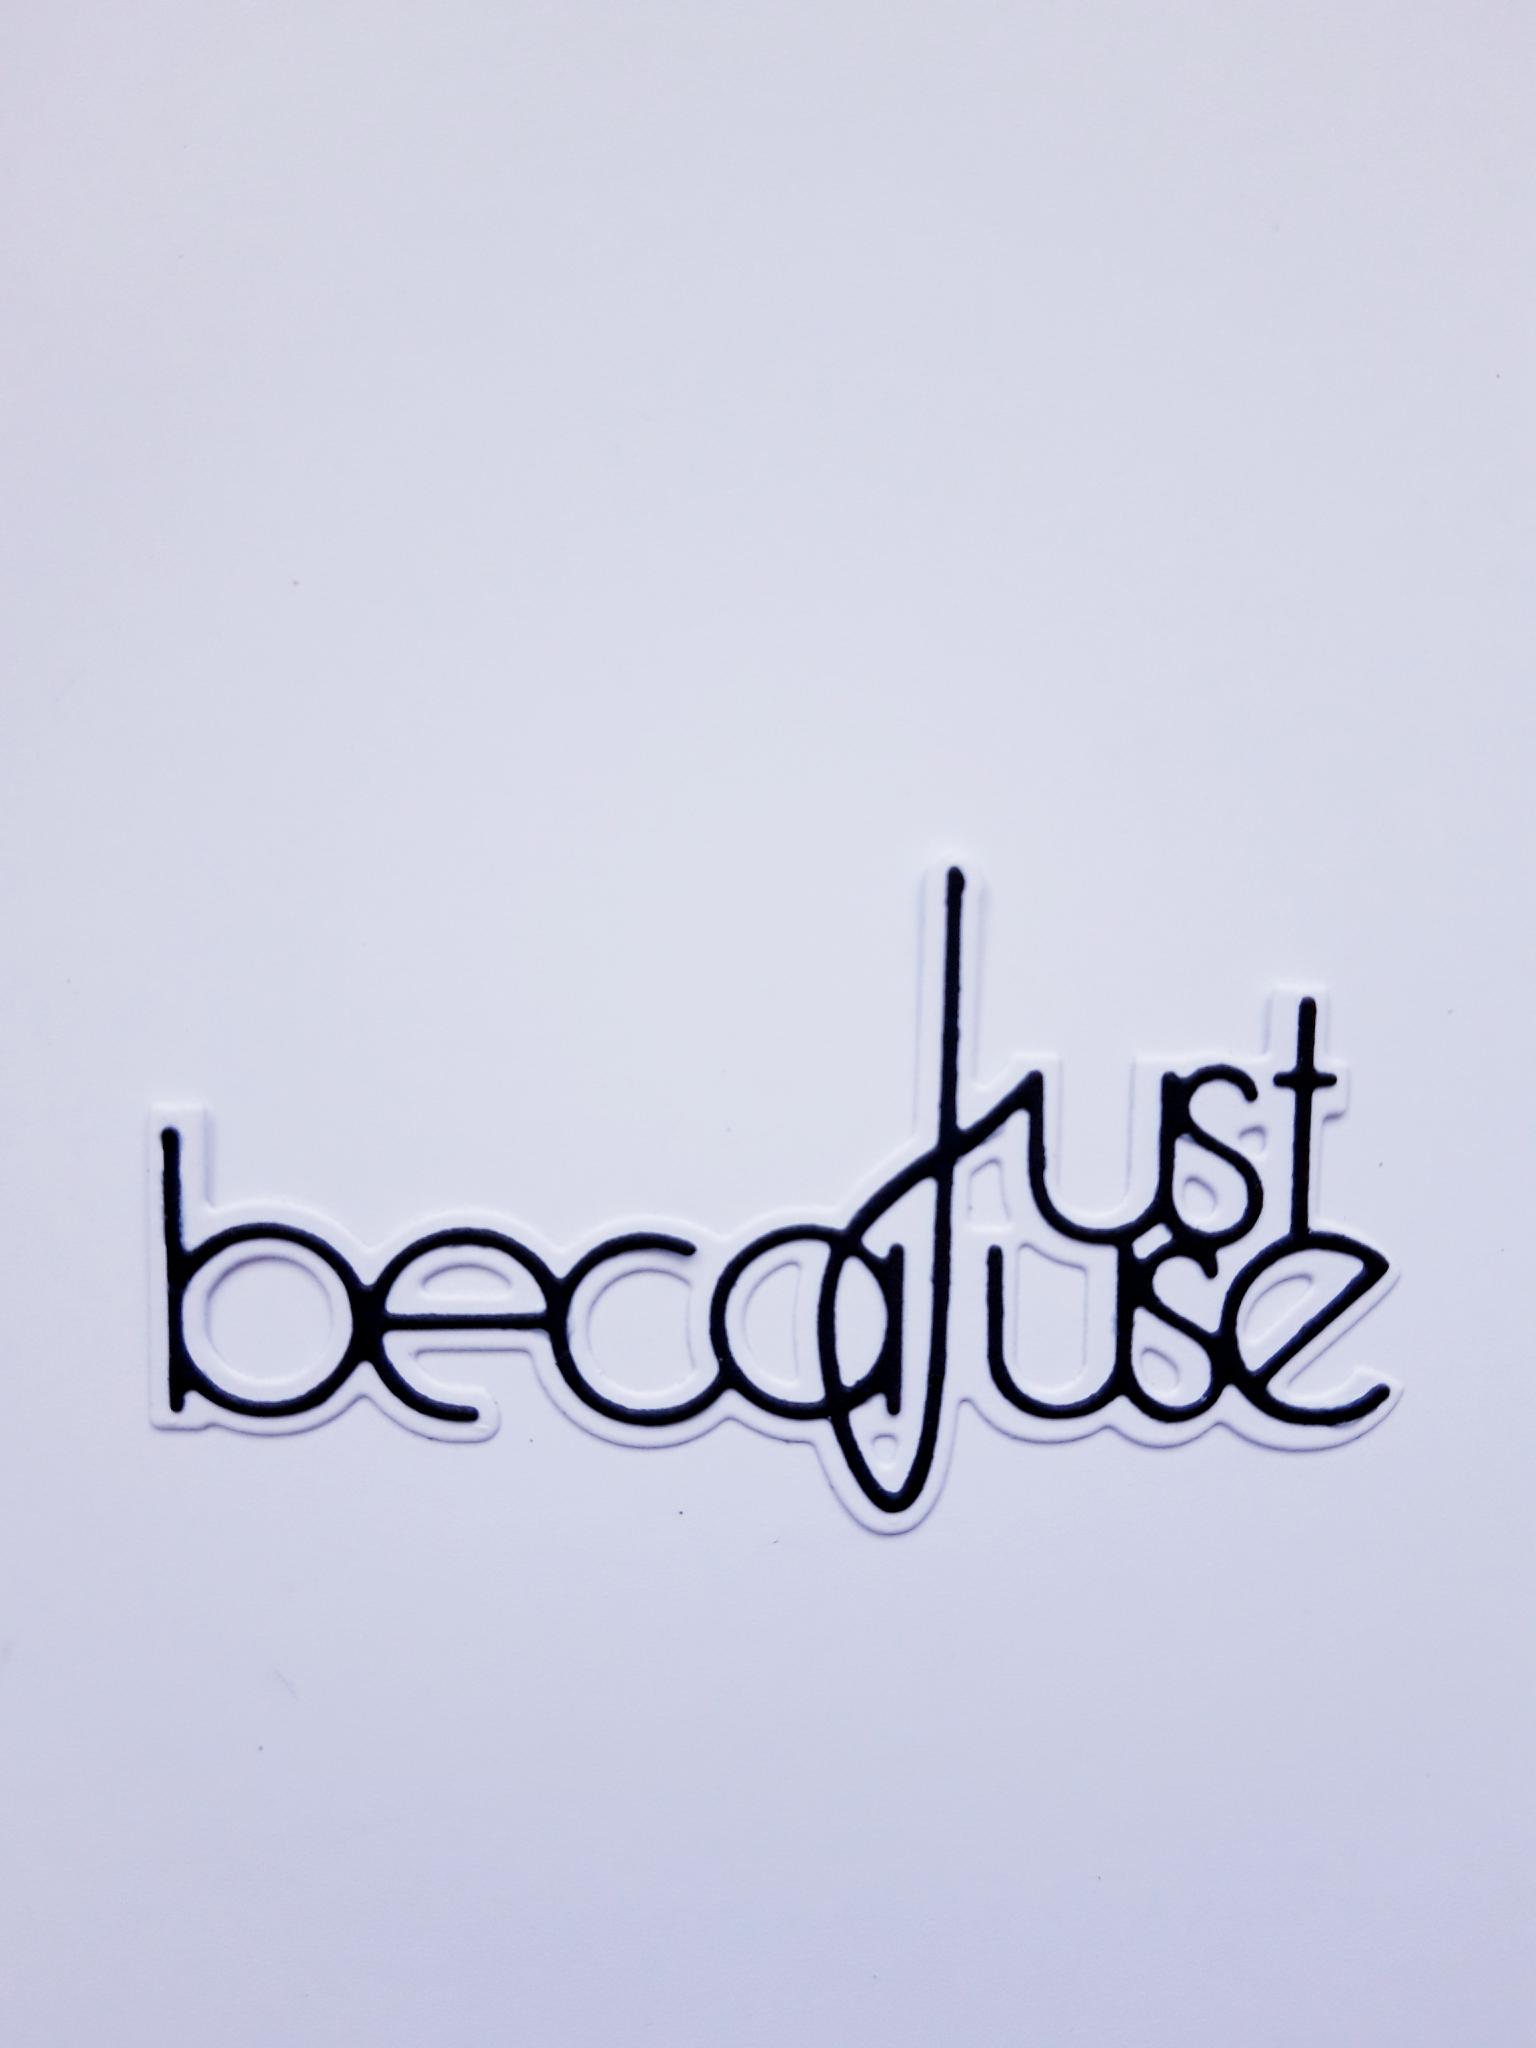
Adhere the black die cut sentiment, on to the white die cut sentiment. Set to one side. |
|
Ink up this floral stamp from the Stand Tall Stamp Collection, with the Onyx Black Versafine. Stamp it in the centre of your card, but leaving sufficient space at the bottom to add your sentiment die cut (in the next step). |
|
Adhere your die cut sentiment in place, so that the base of the floral stems just kiss the top of the sentiment. |
|
To finish, add sequins to the centres of your die cut flowers, and on/around your stamped image. |