Give your friends $10 off their first order!
Refer a FRIEND


WHAT YOU WILL NEED:
DL white card blank (8 x 3 3/4")
Black top folding card blank (trim to 8" in length)
Stamps from Beautiful Buttercup Stamp Collection
Stamps from Adventure Begins Stamp Collection
Versafine Ink Pad: Onyx Black
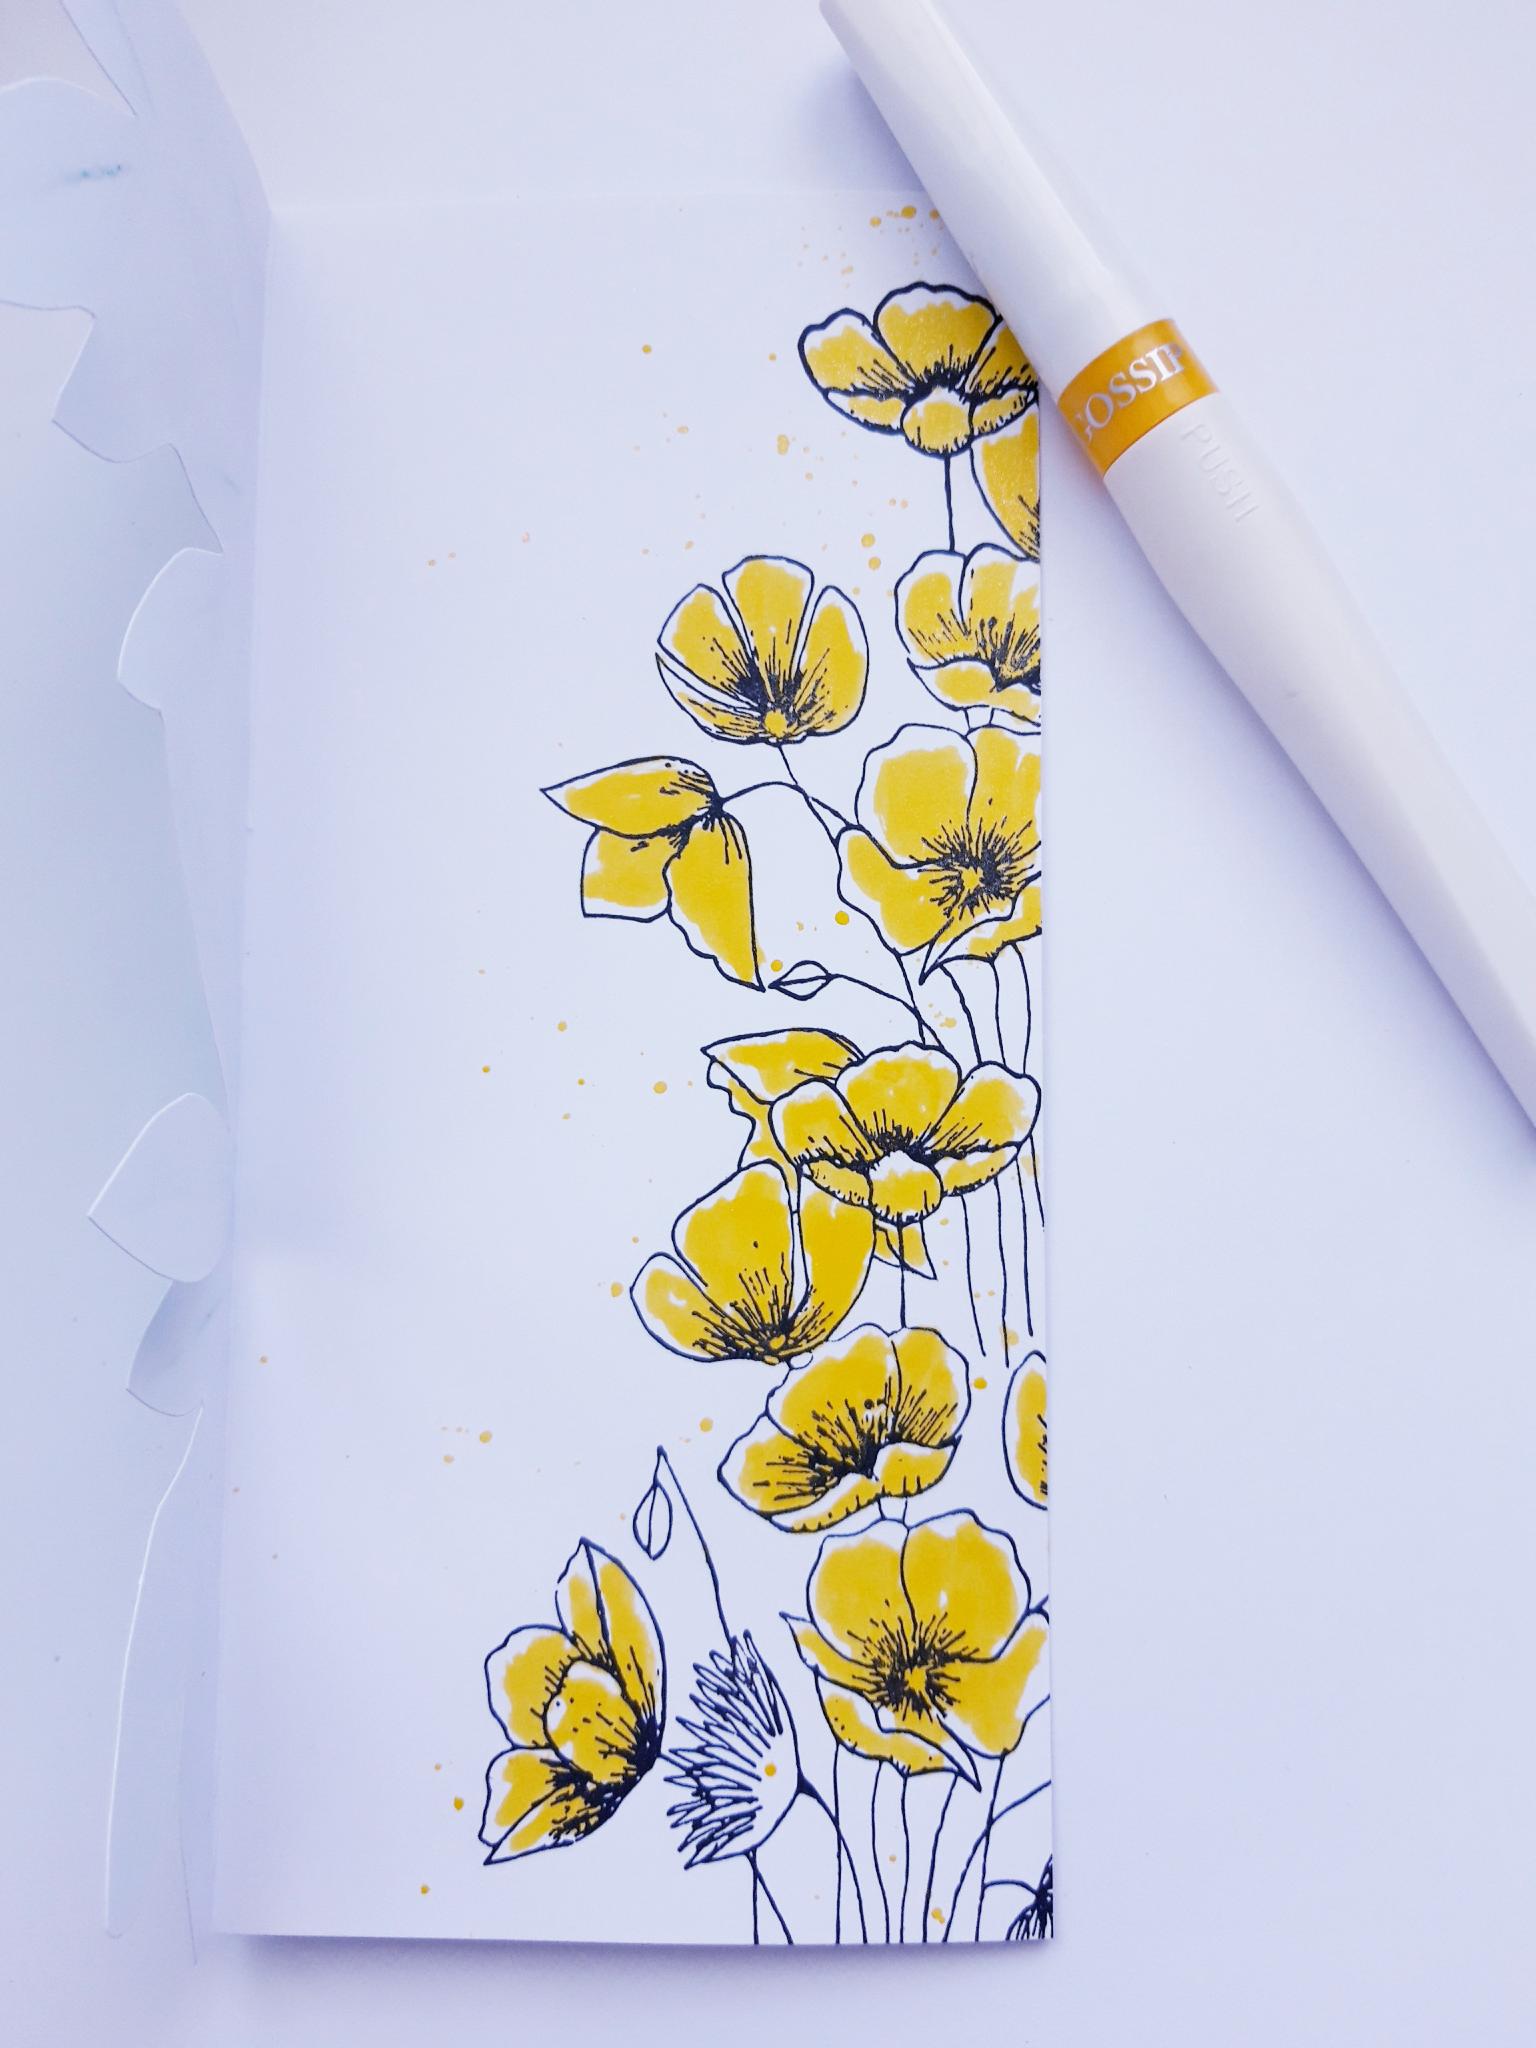
Gossip Glitter Pens: Yellow, Aqua
White gel pen
Eureka 101
Paper Trimmer
Scissors (for fussy cutting)
[click image to enlarge] 
|
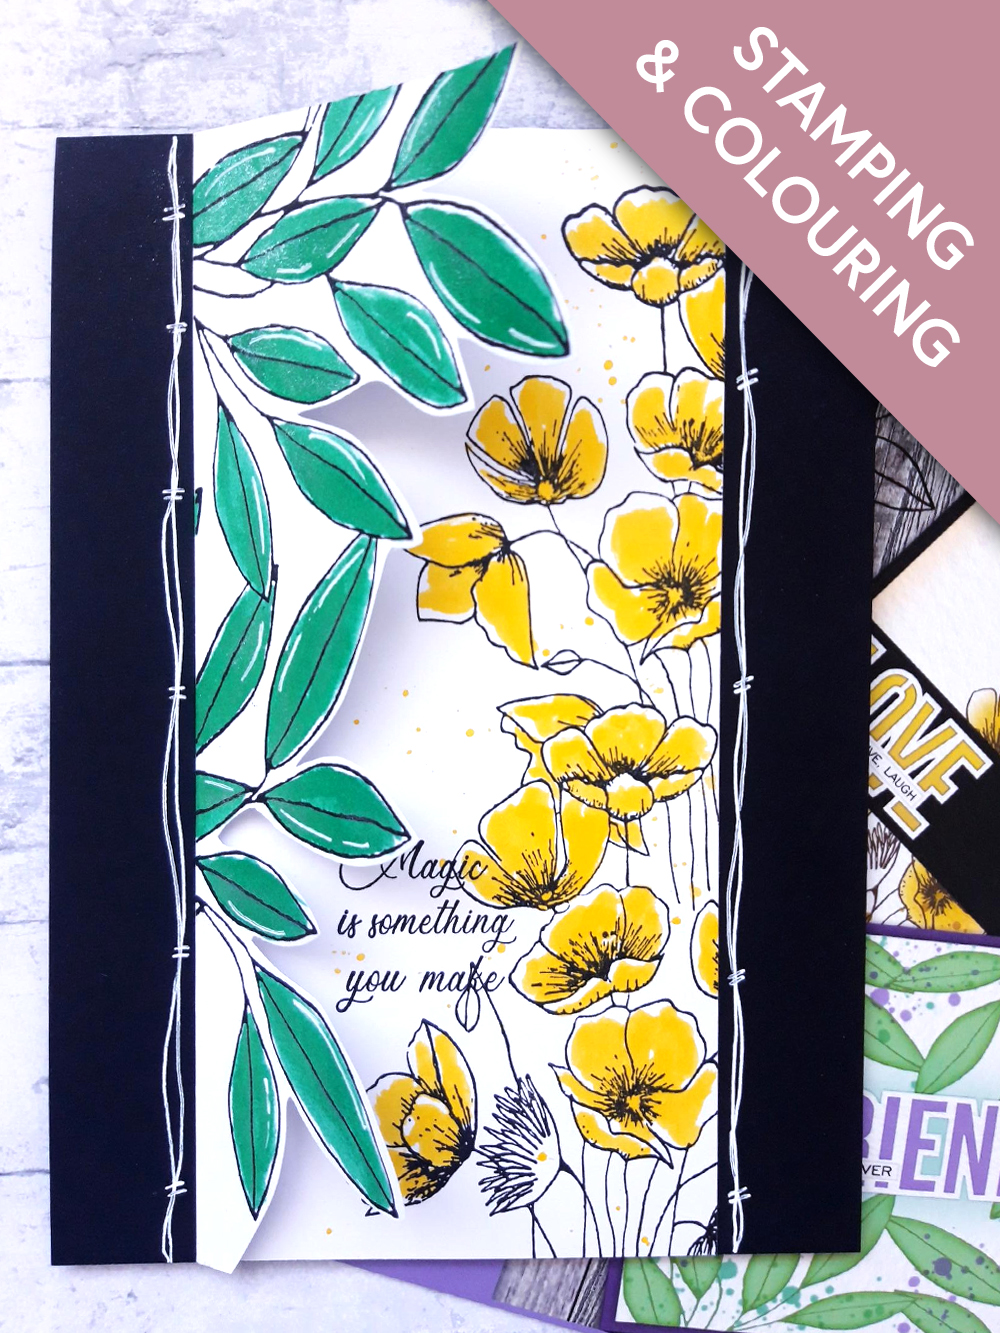
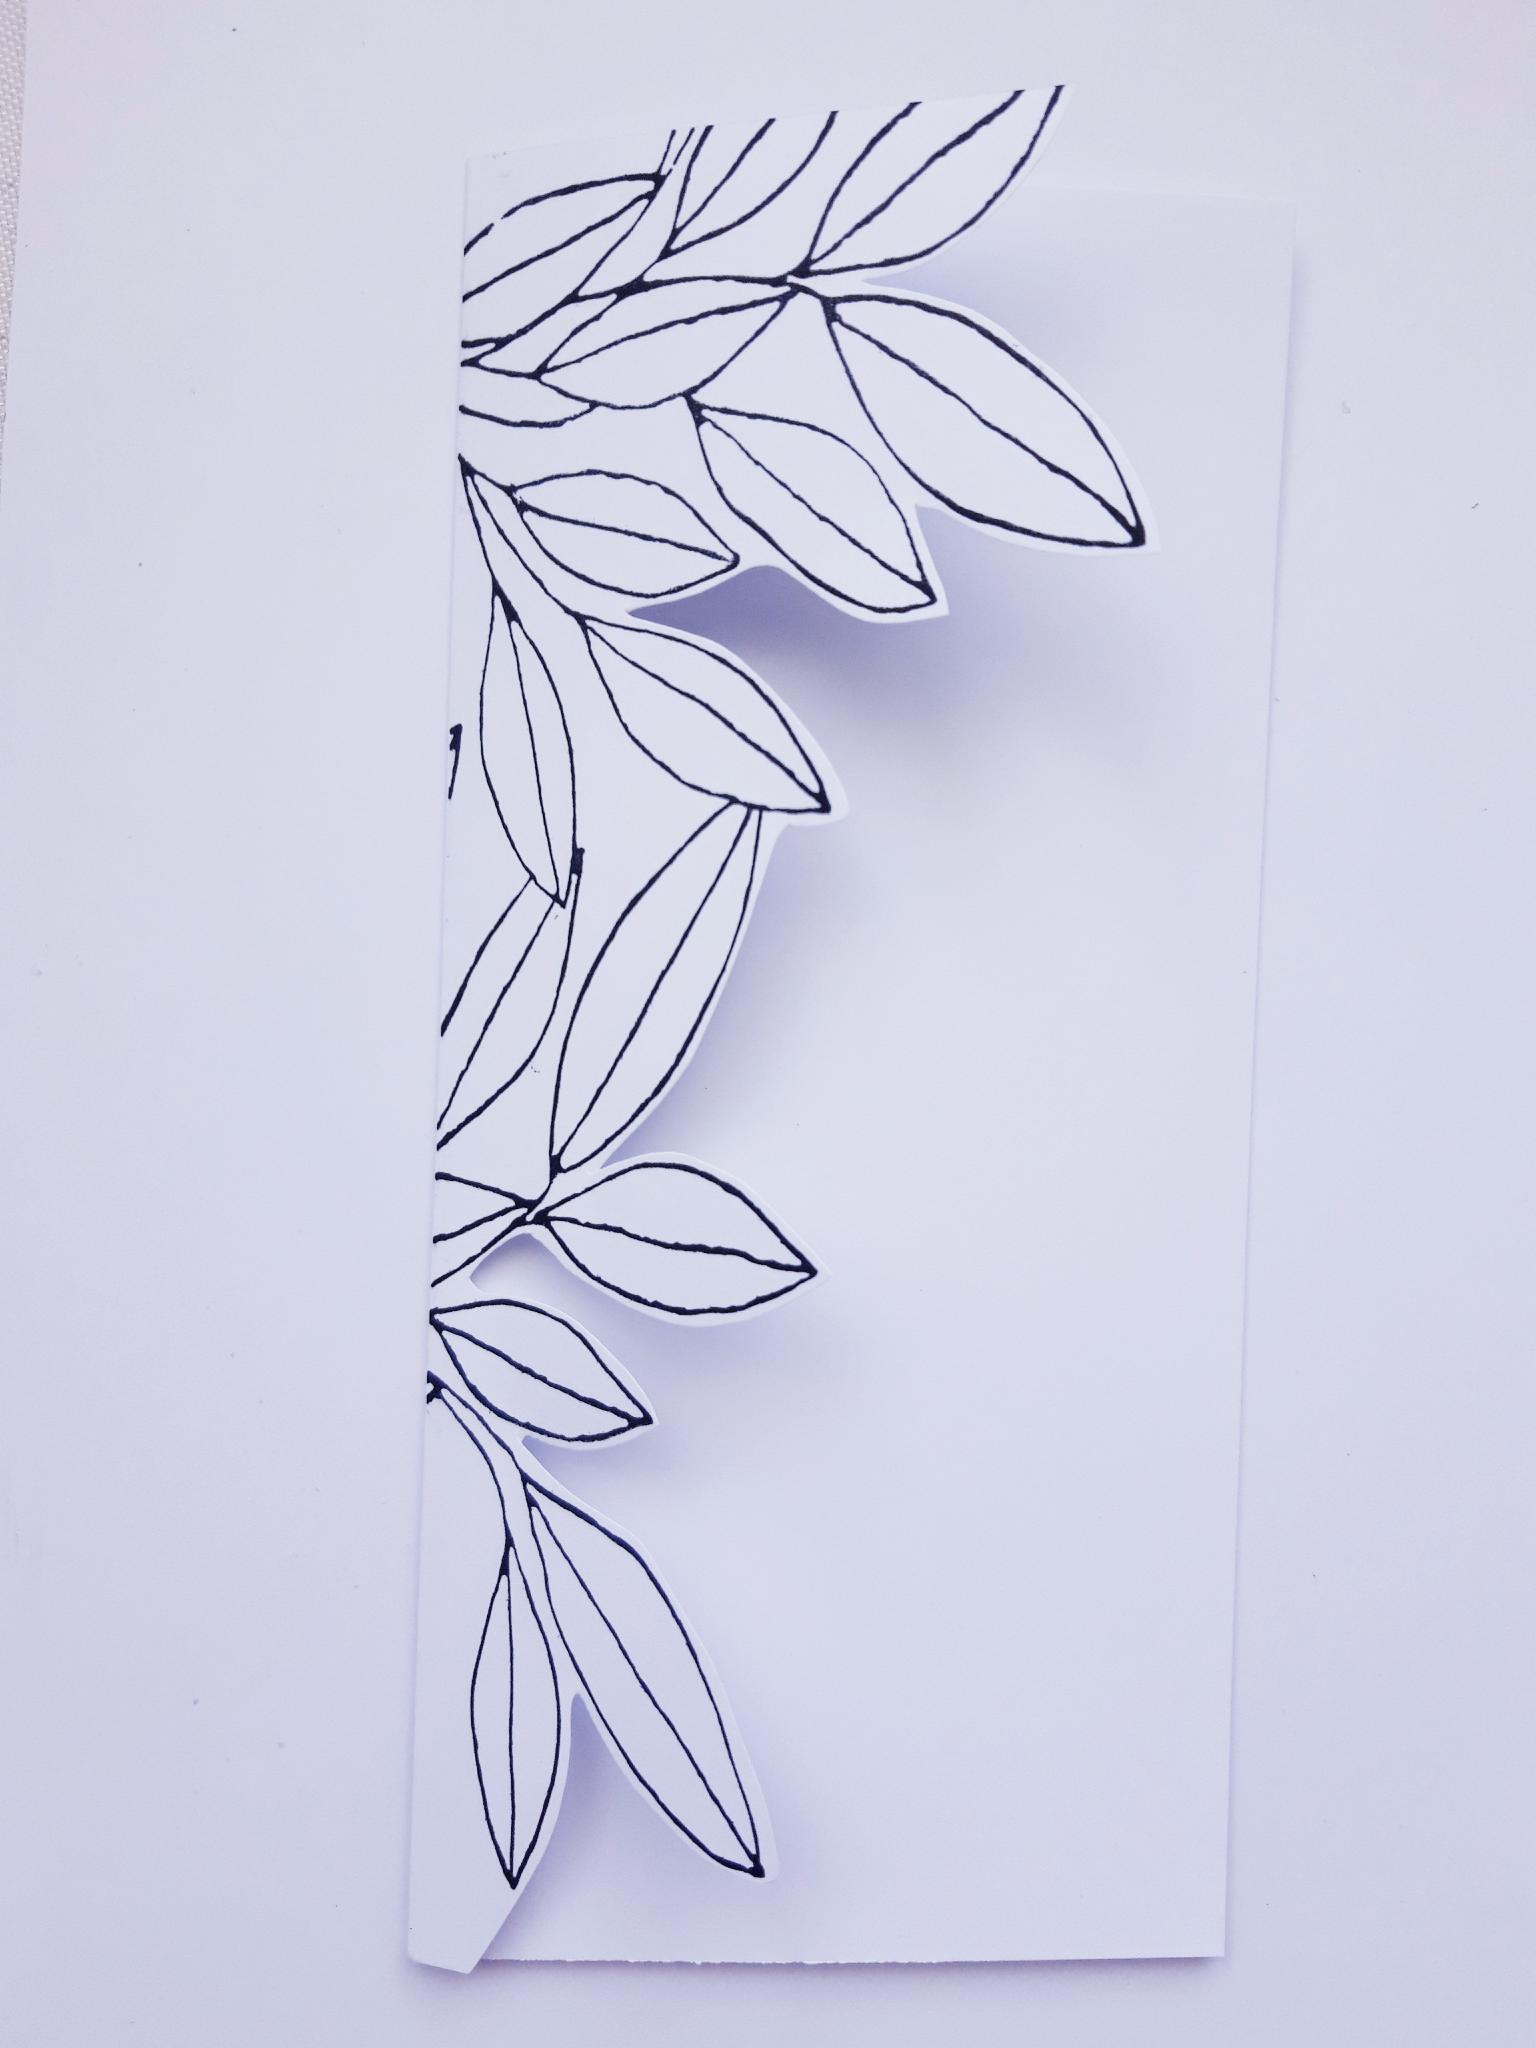
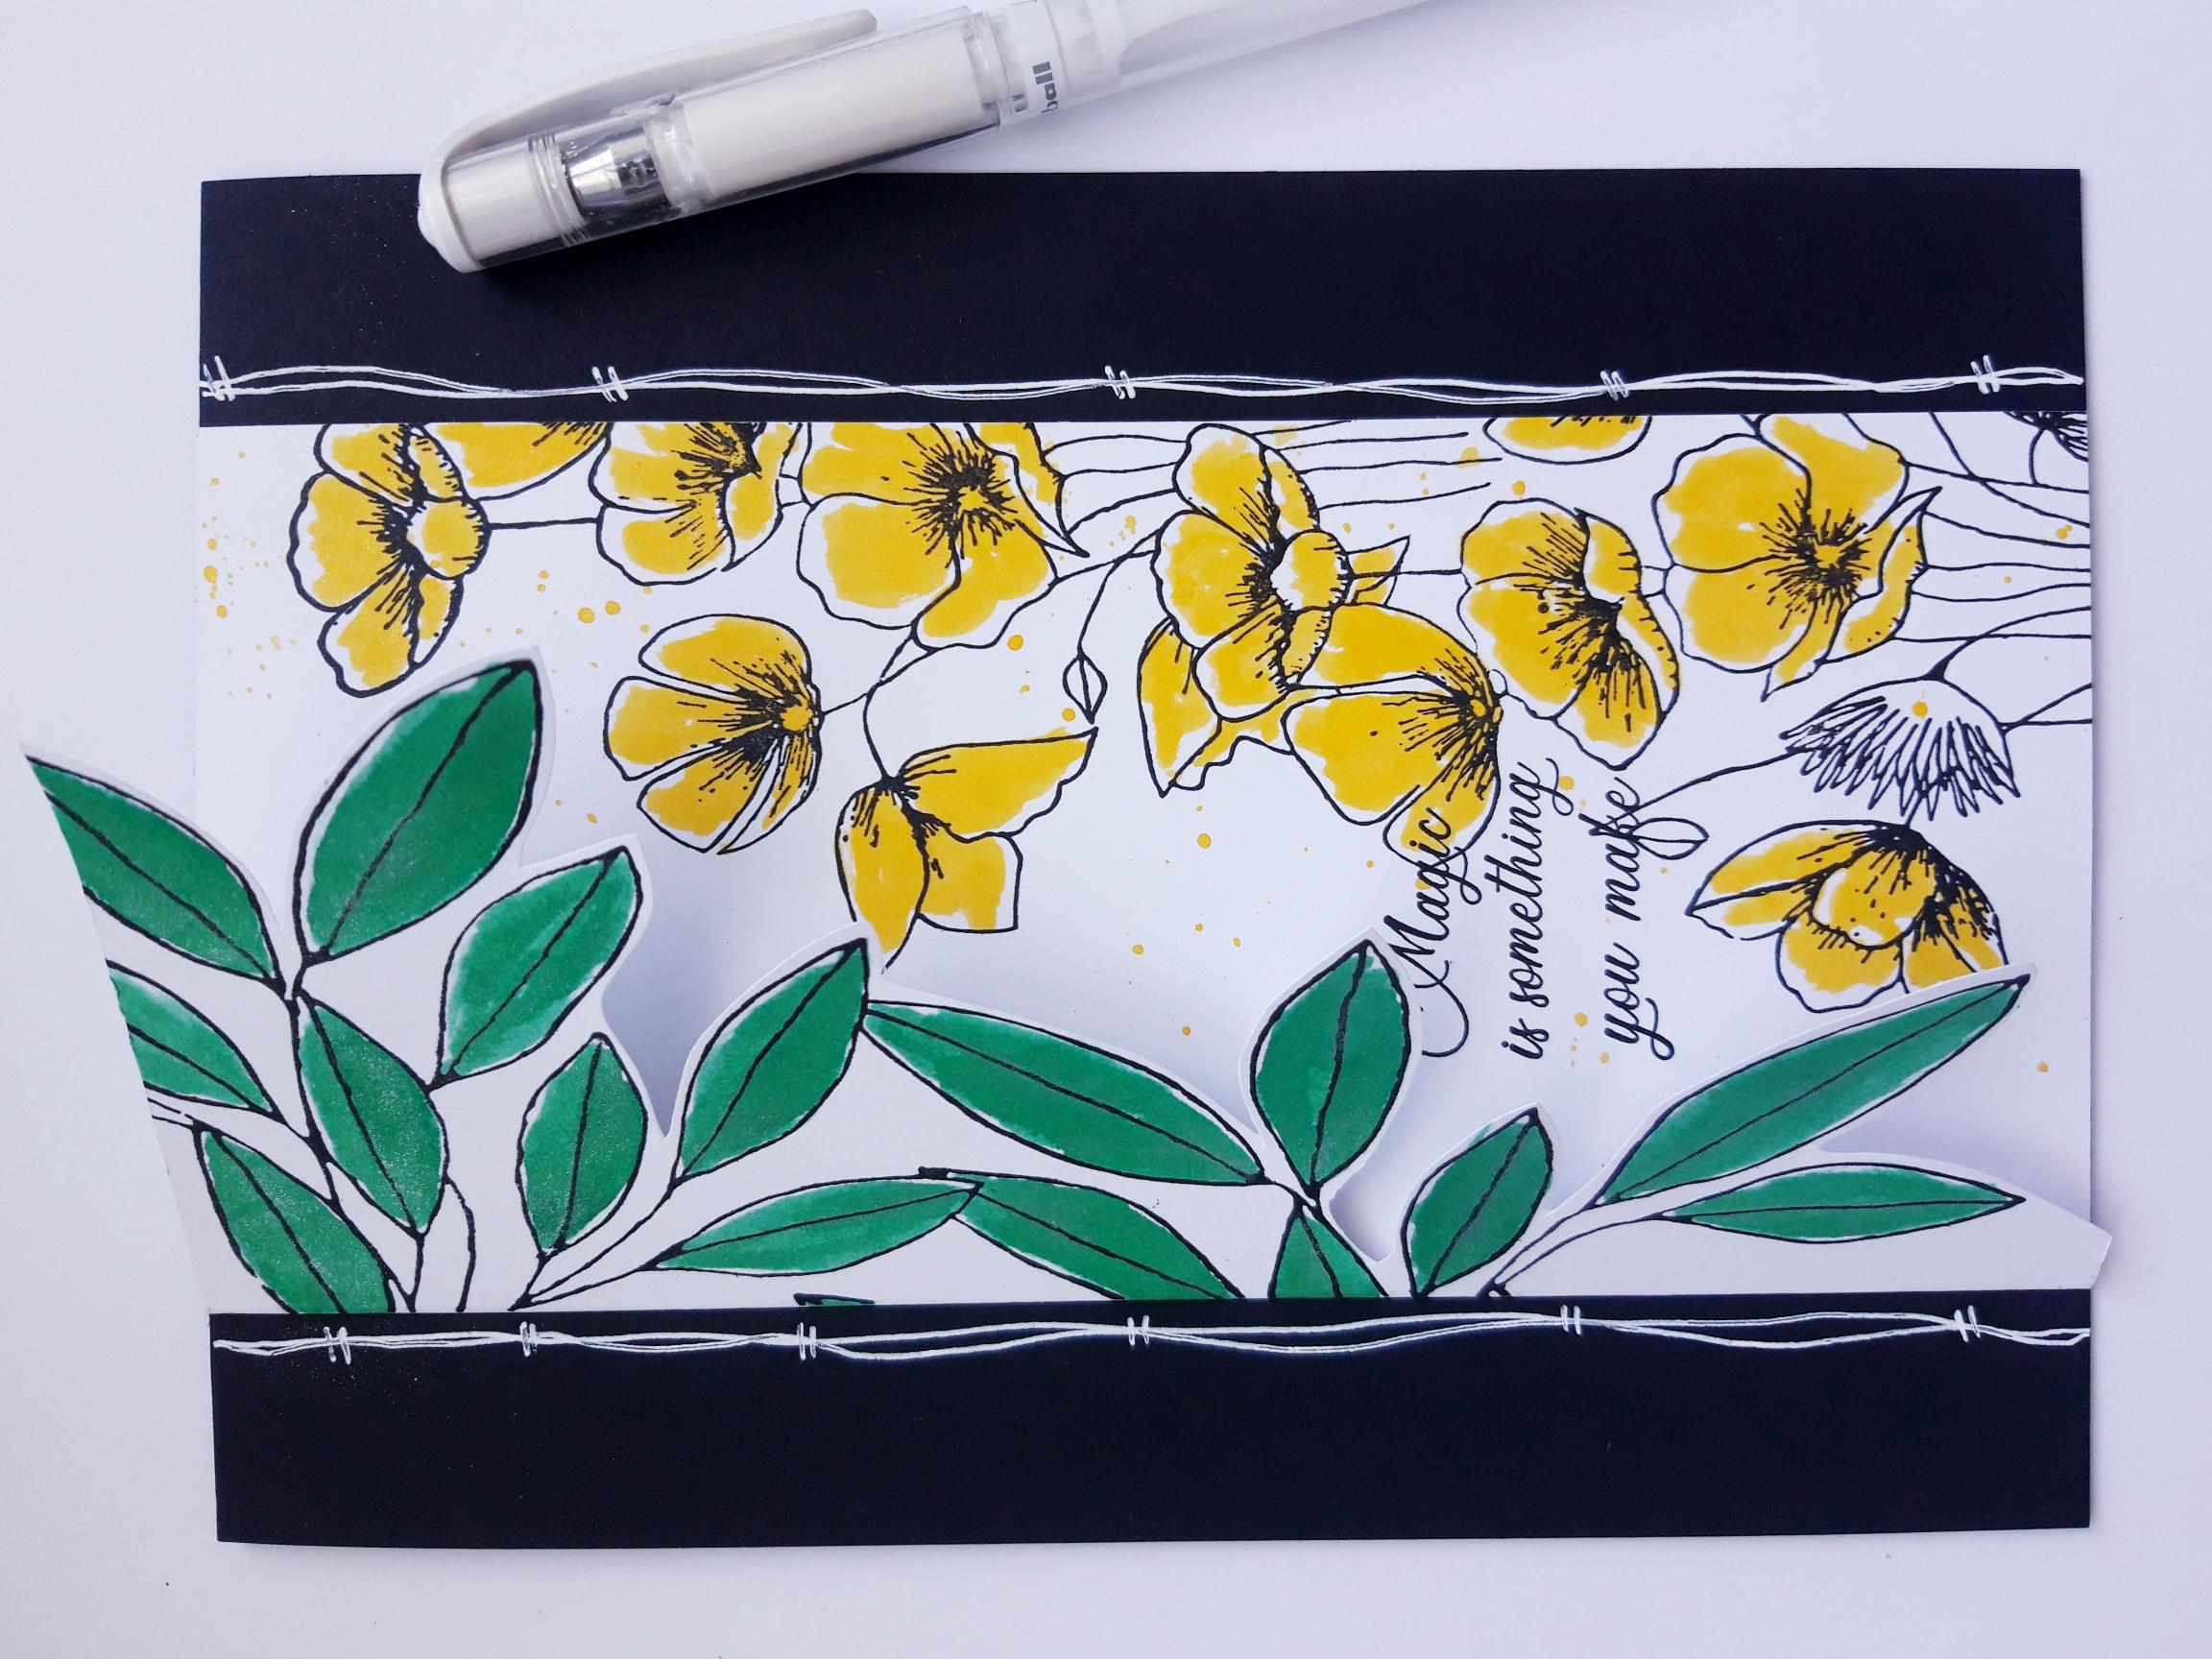
Ink up this foliage stamp, from the Beautiful Buttercup Stamp Collection, with the Onyx Black Versafine. Stamp coming on to the left hand edge of the DL card blank. |
|
Cut along the right hand edge of your stamped design, as shown here, to create a shaped, decorative edge to the front of your card blank. |
|
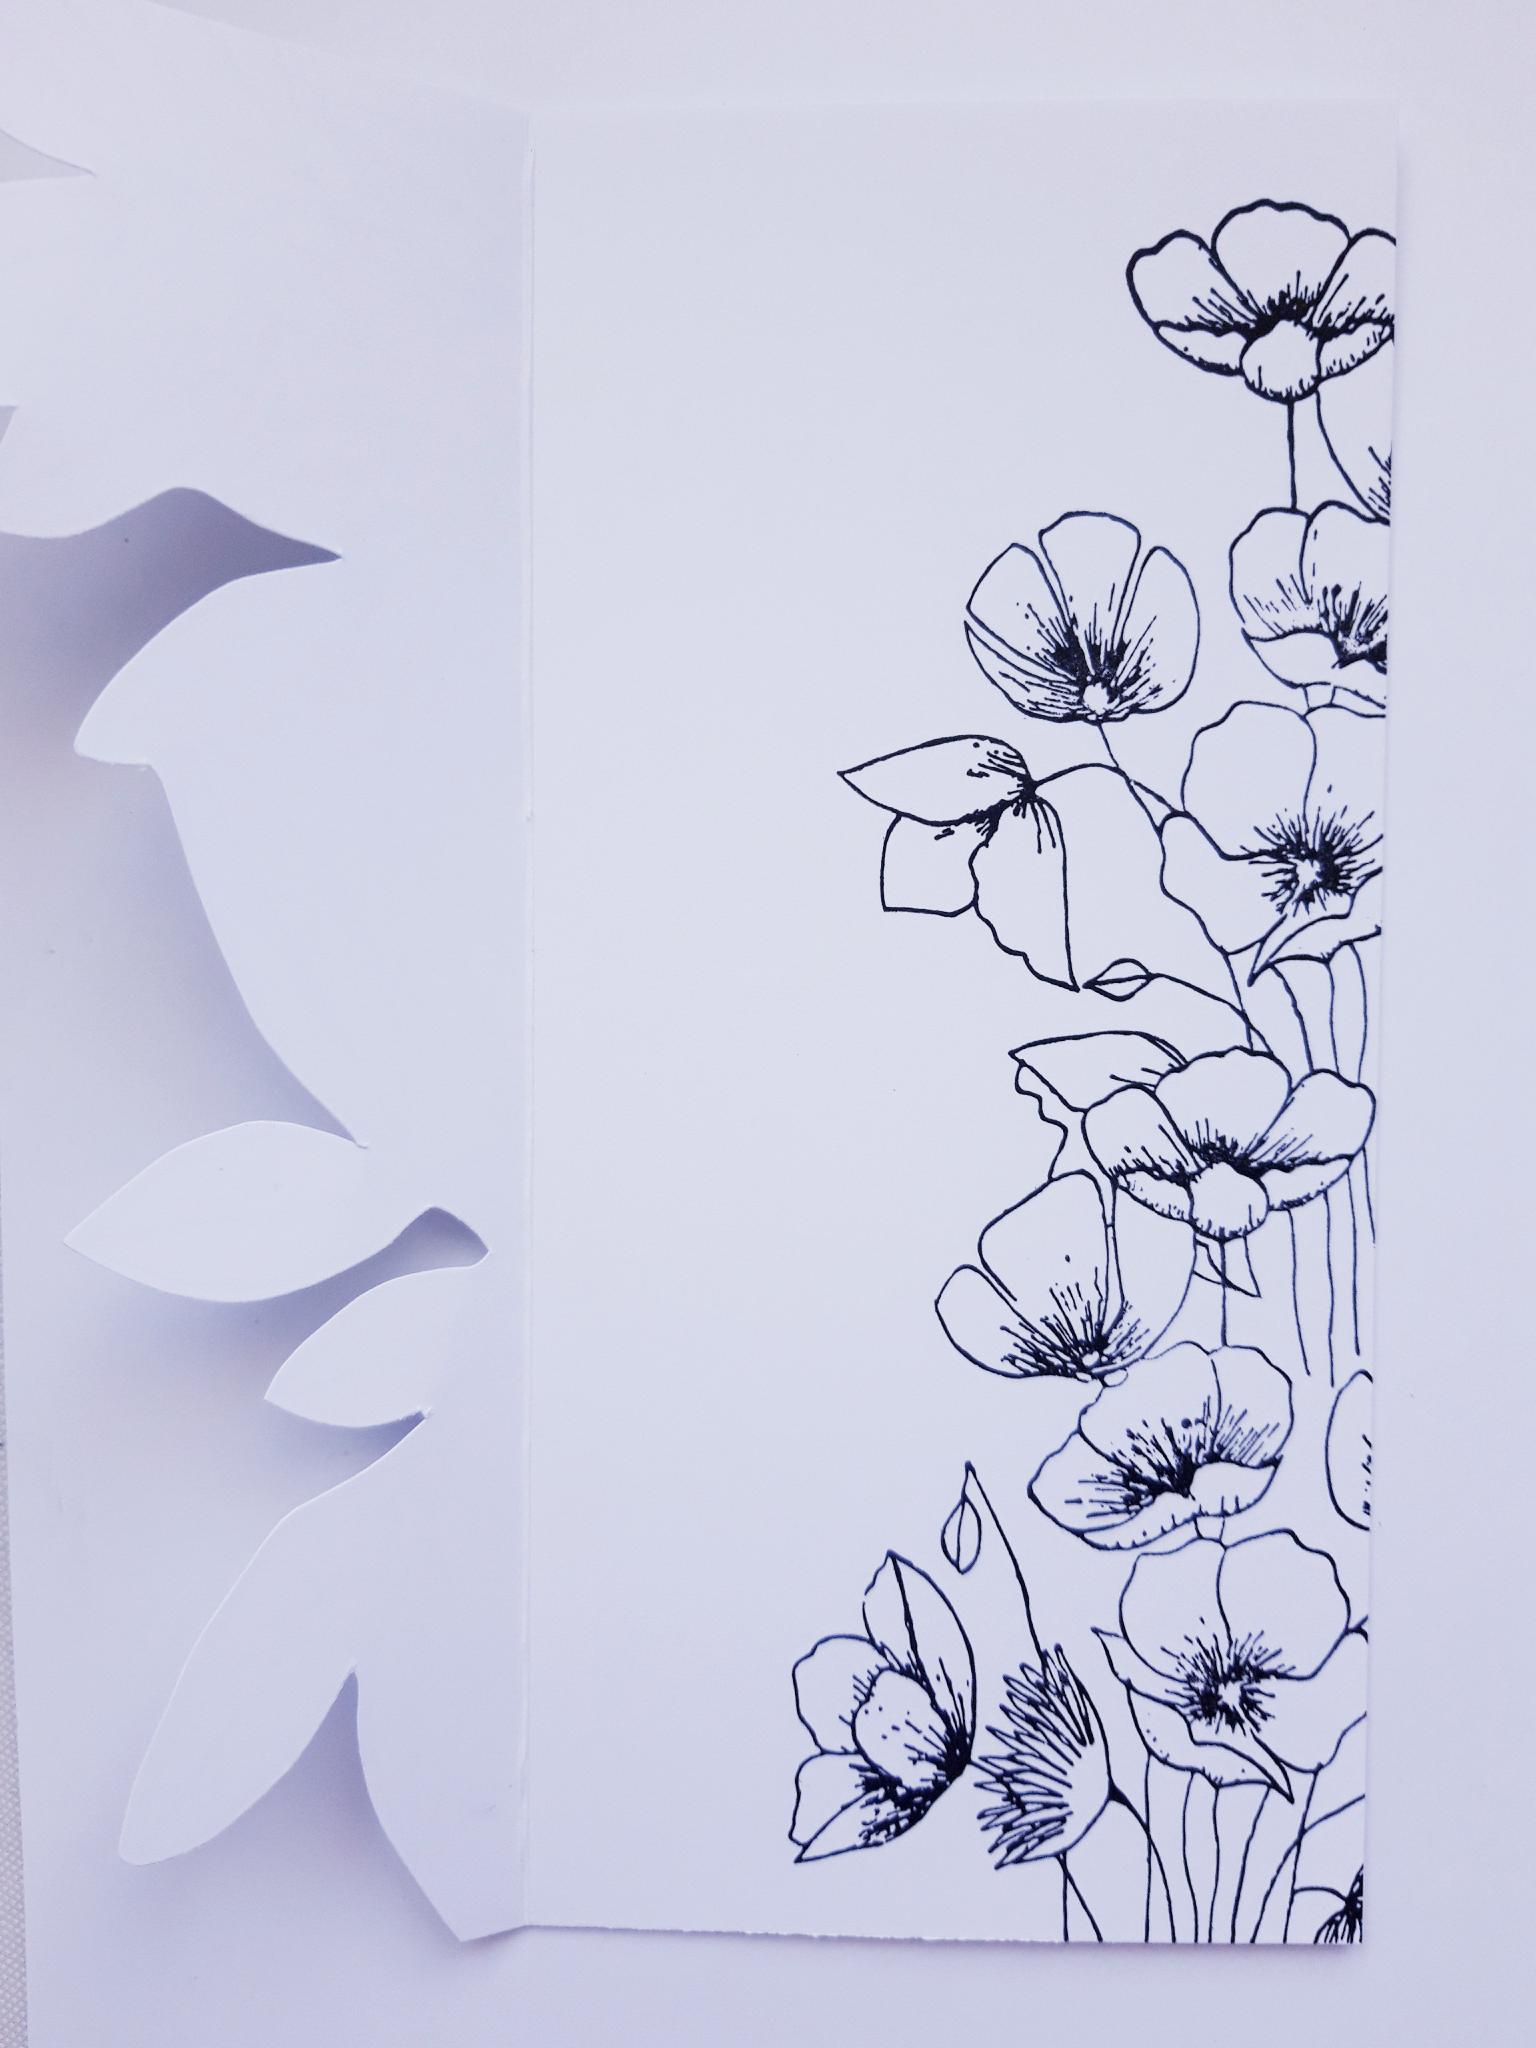
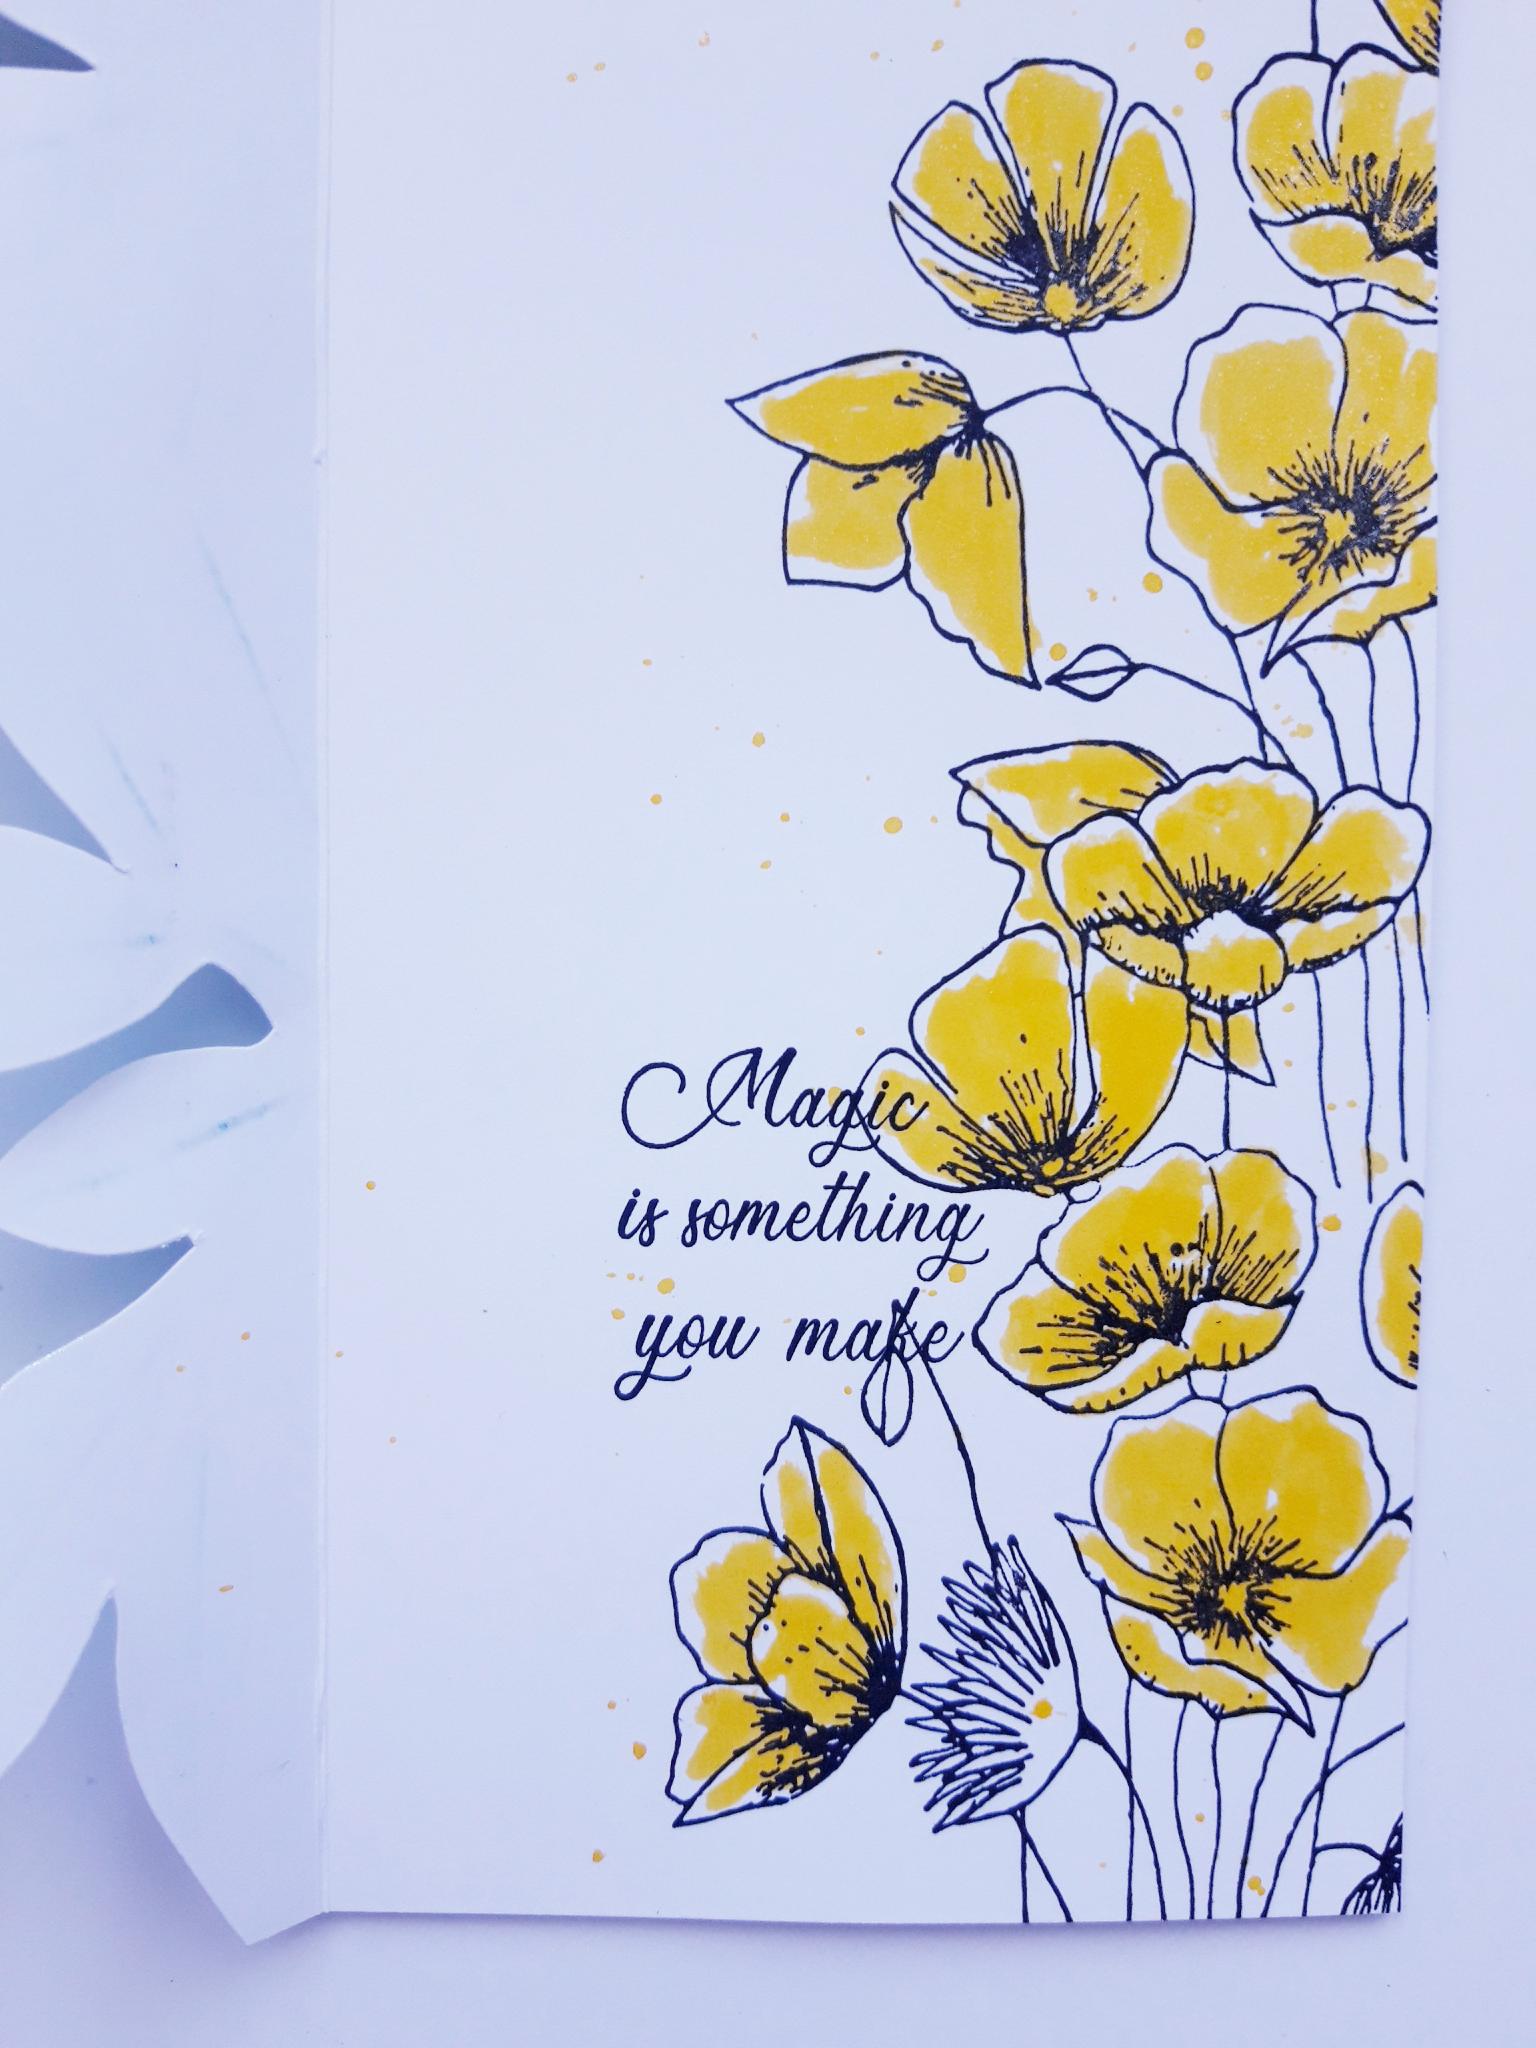
Ink up this Buttercup floral stamp, from the same set, with the Versafine. Stamp off the right hand edge of the INSIDE, of the card blank. |

|
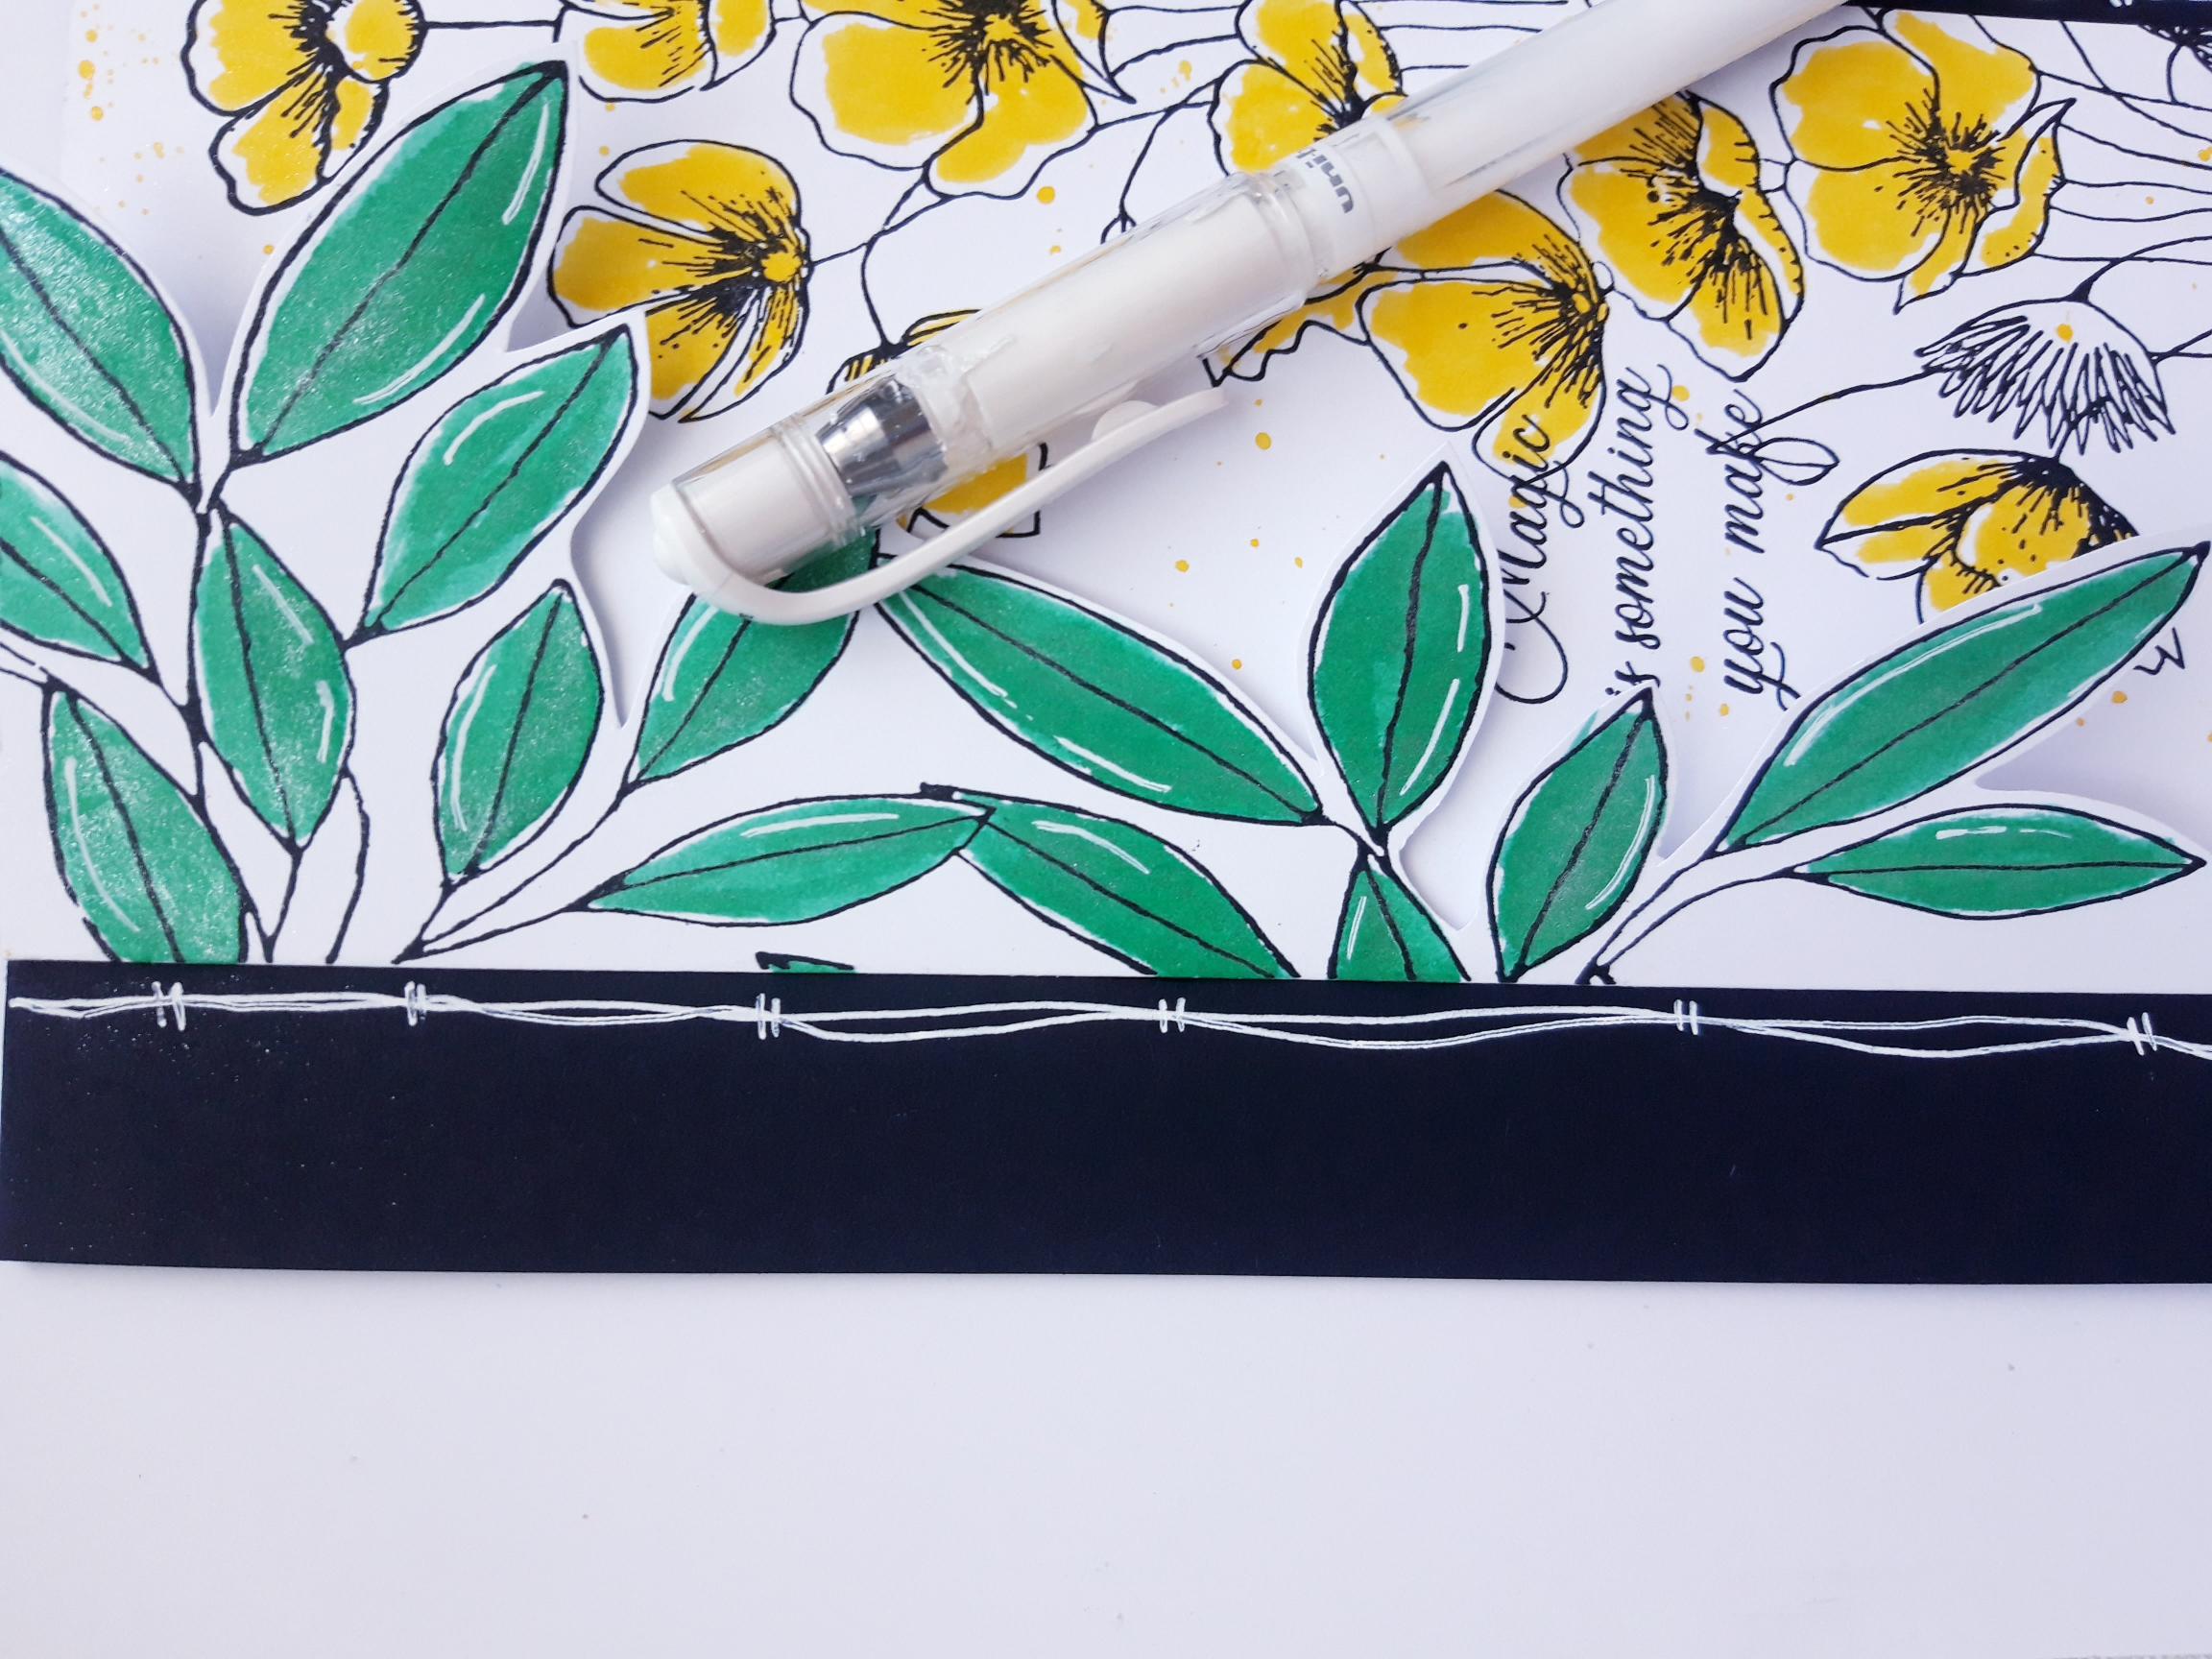
Colour in the stamped foliage with the Aqua Gossip Glitter pen. |
|
Colour in the stamped Buttercup image, with the Yellow Gossip Glitter pen. |
|
Ink up the sentiment stamp, from the Adventure Begins Stamp Collection, with the Versafine, and stamp on the inside of your card blank, where desired. |

|
Adhere the DL card blank centrally, on to the front of the black top folding card blank, so the top and bottom edges are flush, as shown here. |
|
Use your white gel pen to draw decorative, wiggly lines, down the black card blank, alongside the edges of the DL card blank. |
|
To finish, use the gel pen to add accents, and highlights, to your artwork. |