Give your friends $10 off their first order!
Refer a FRIEND


YOU WILL NEED
Top folding note card: Soft Grey 8 1/4 x 5 3/4"
Orange cardstock 8 1/4 x 5"
White cardstock 8 1/4 x 4 1/2" (THREE needed)
Signature Embossing Folder: Fluttering Butterflies
Creative Card Die: Set 6
Happiness Stamp set
Versafine: Smoky Grey
Distress Oxide: Iced Spruce
Stamping Platform: Eureka 101
Glue
Die cutting/Embossing Machine
[click image to enlarge] 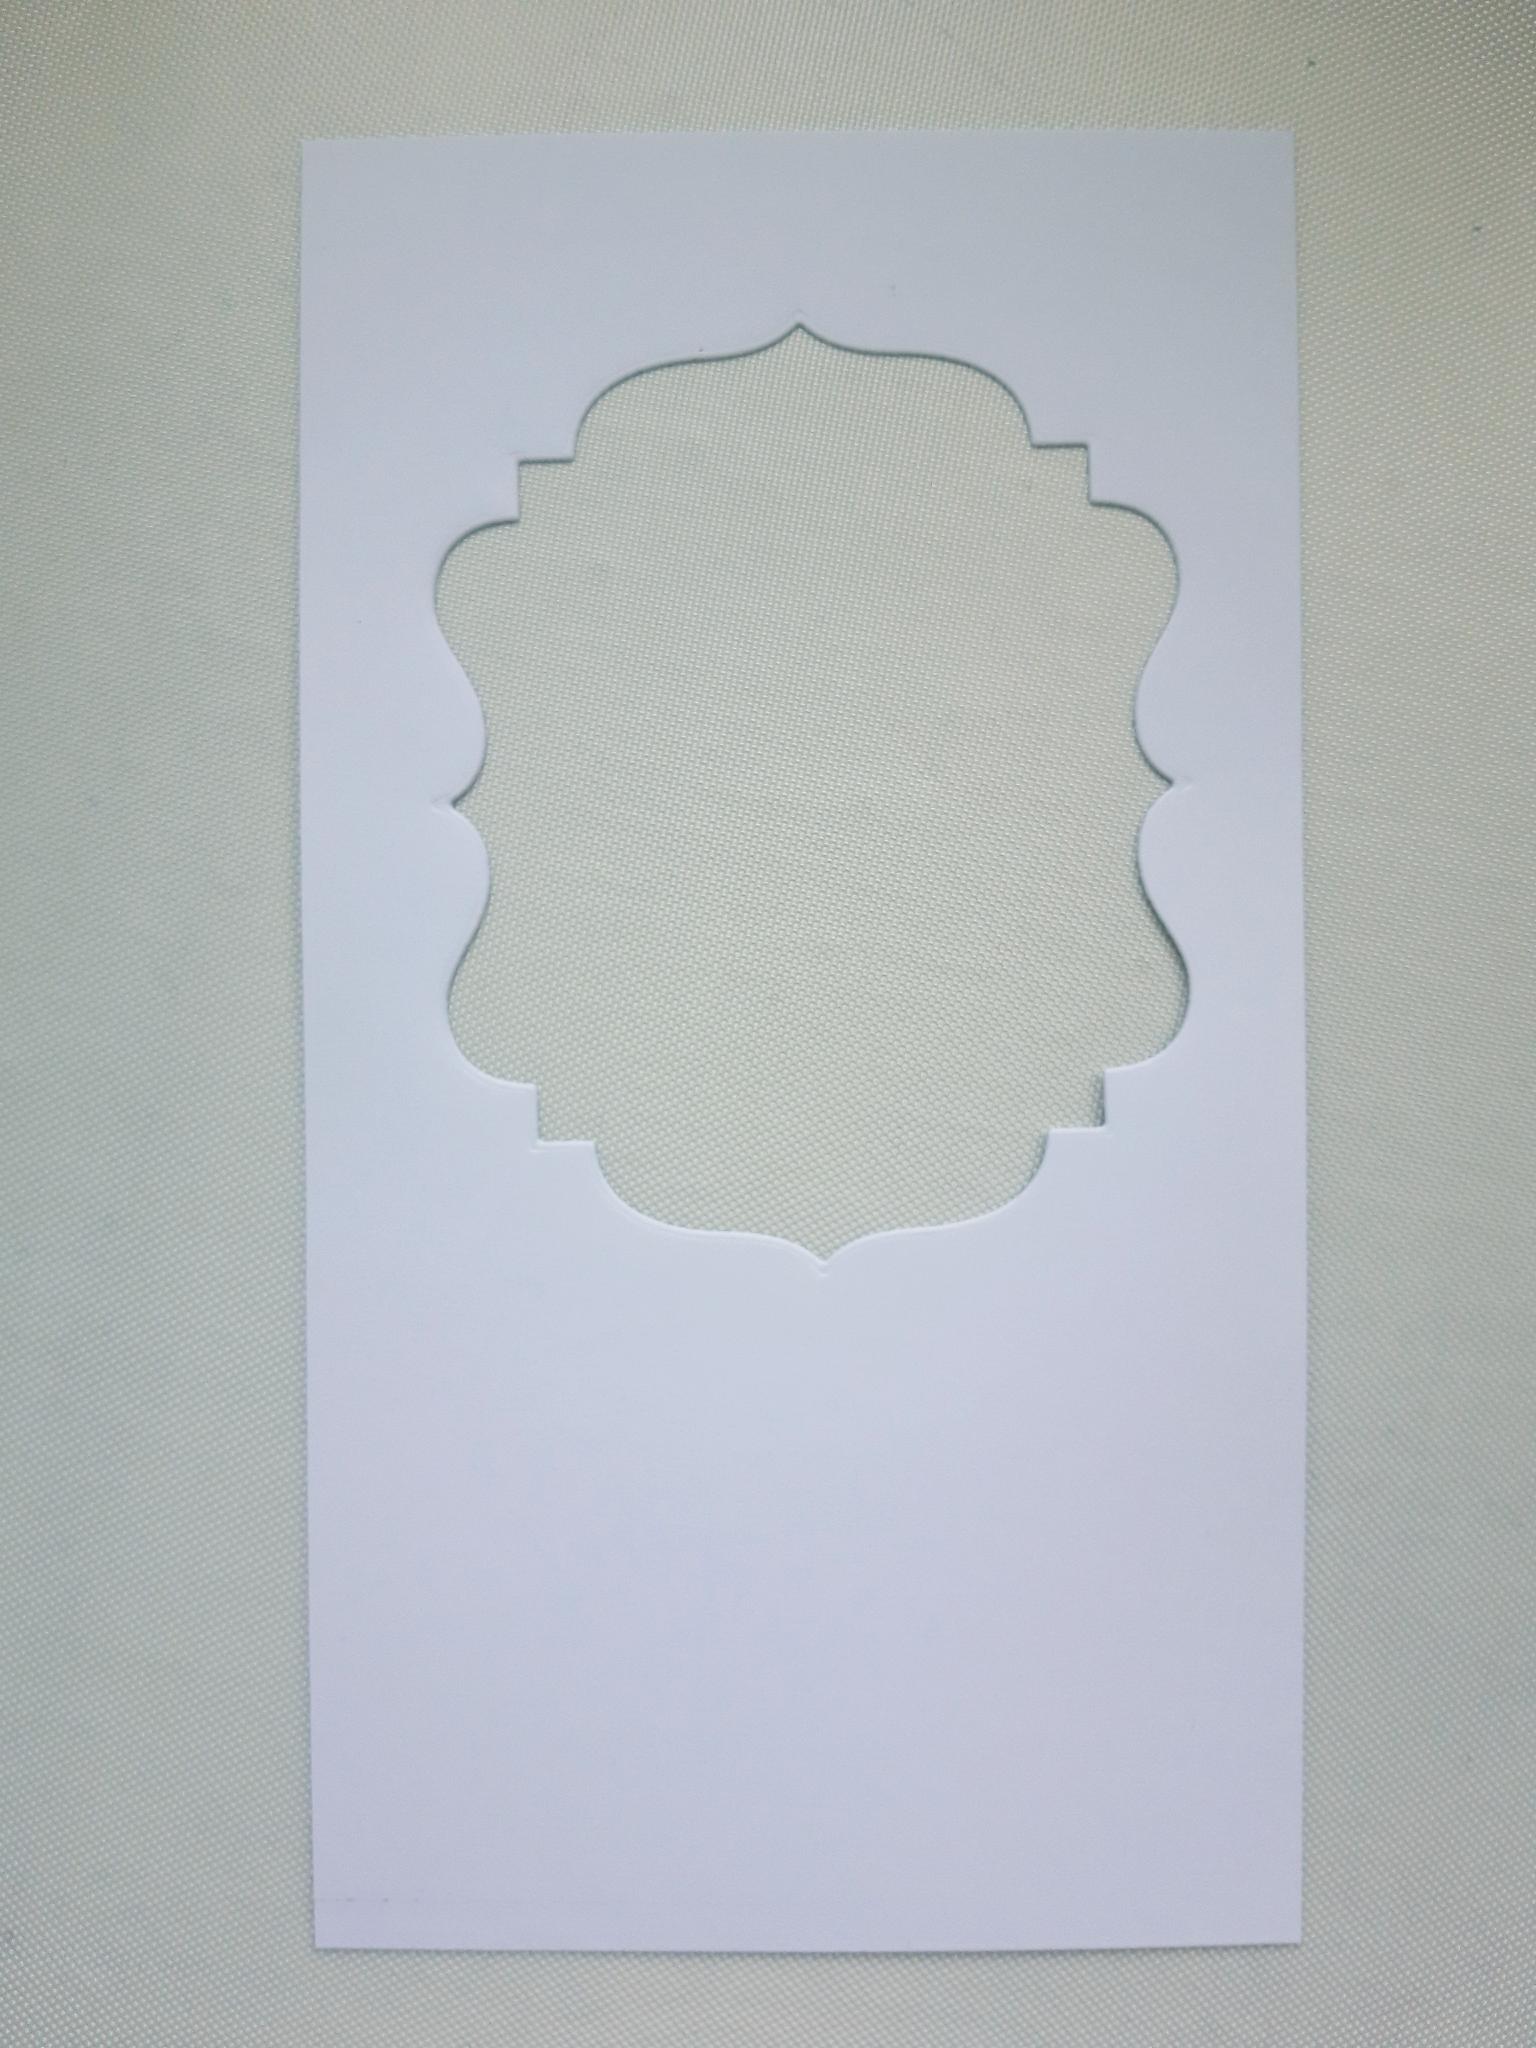
|
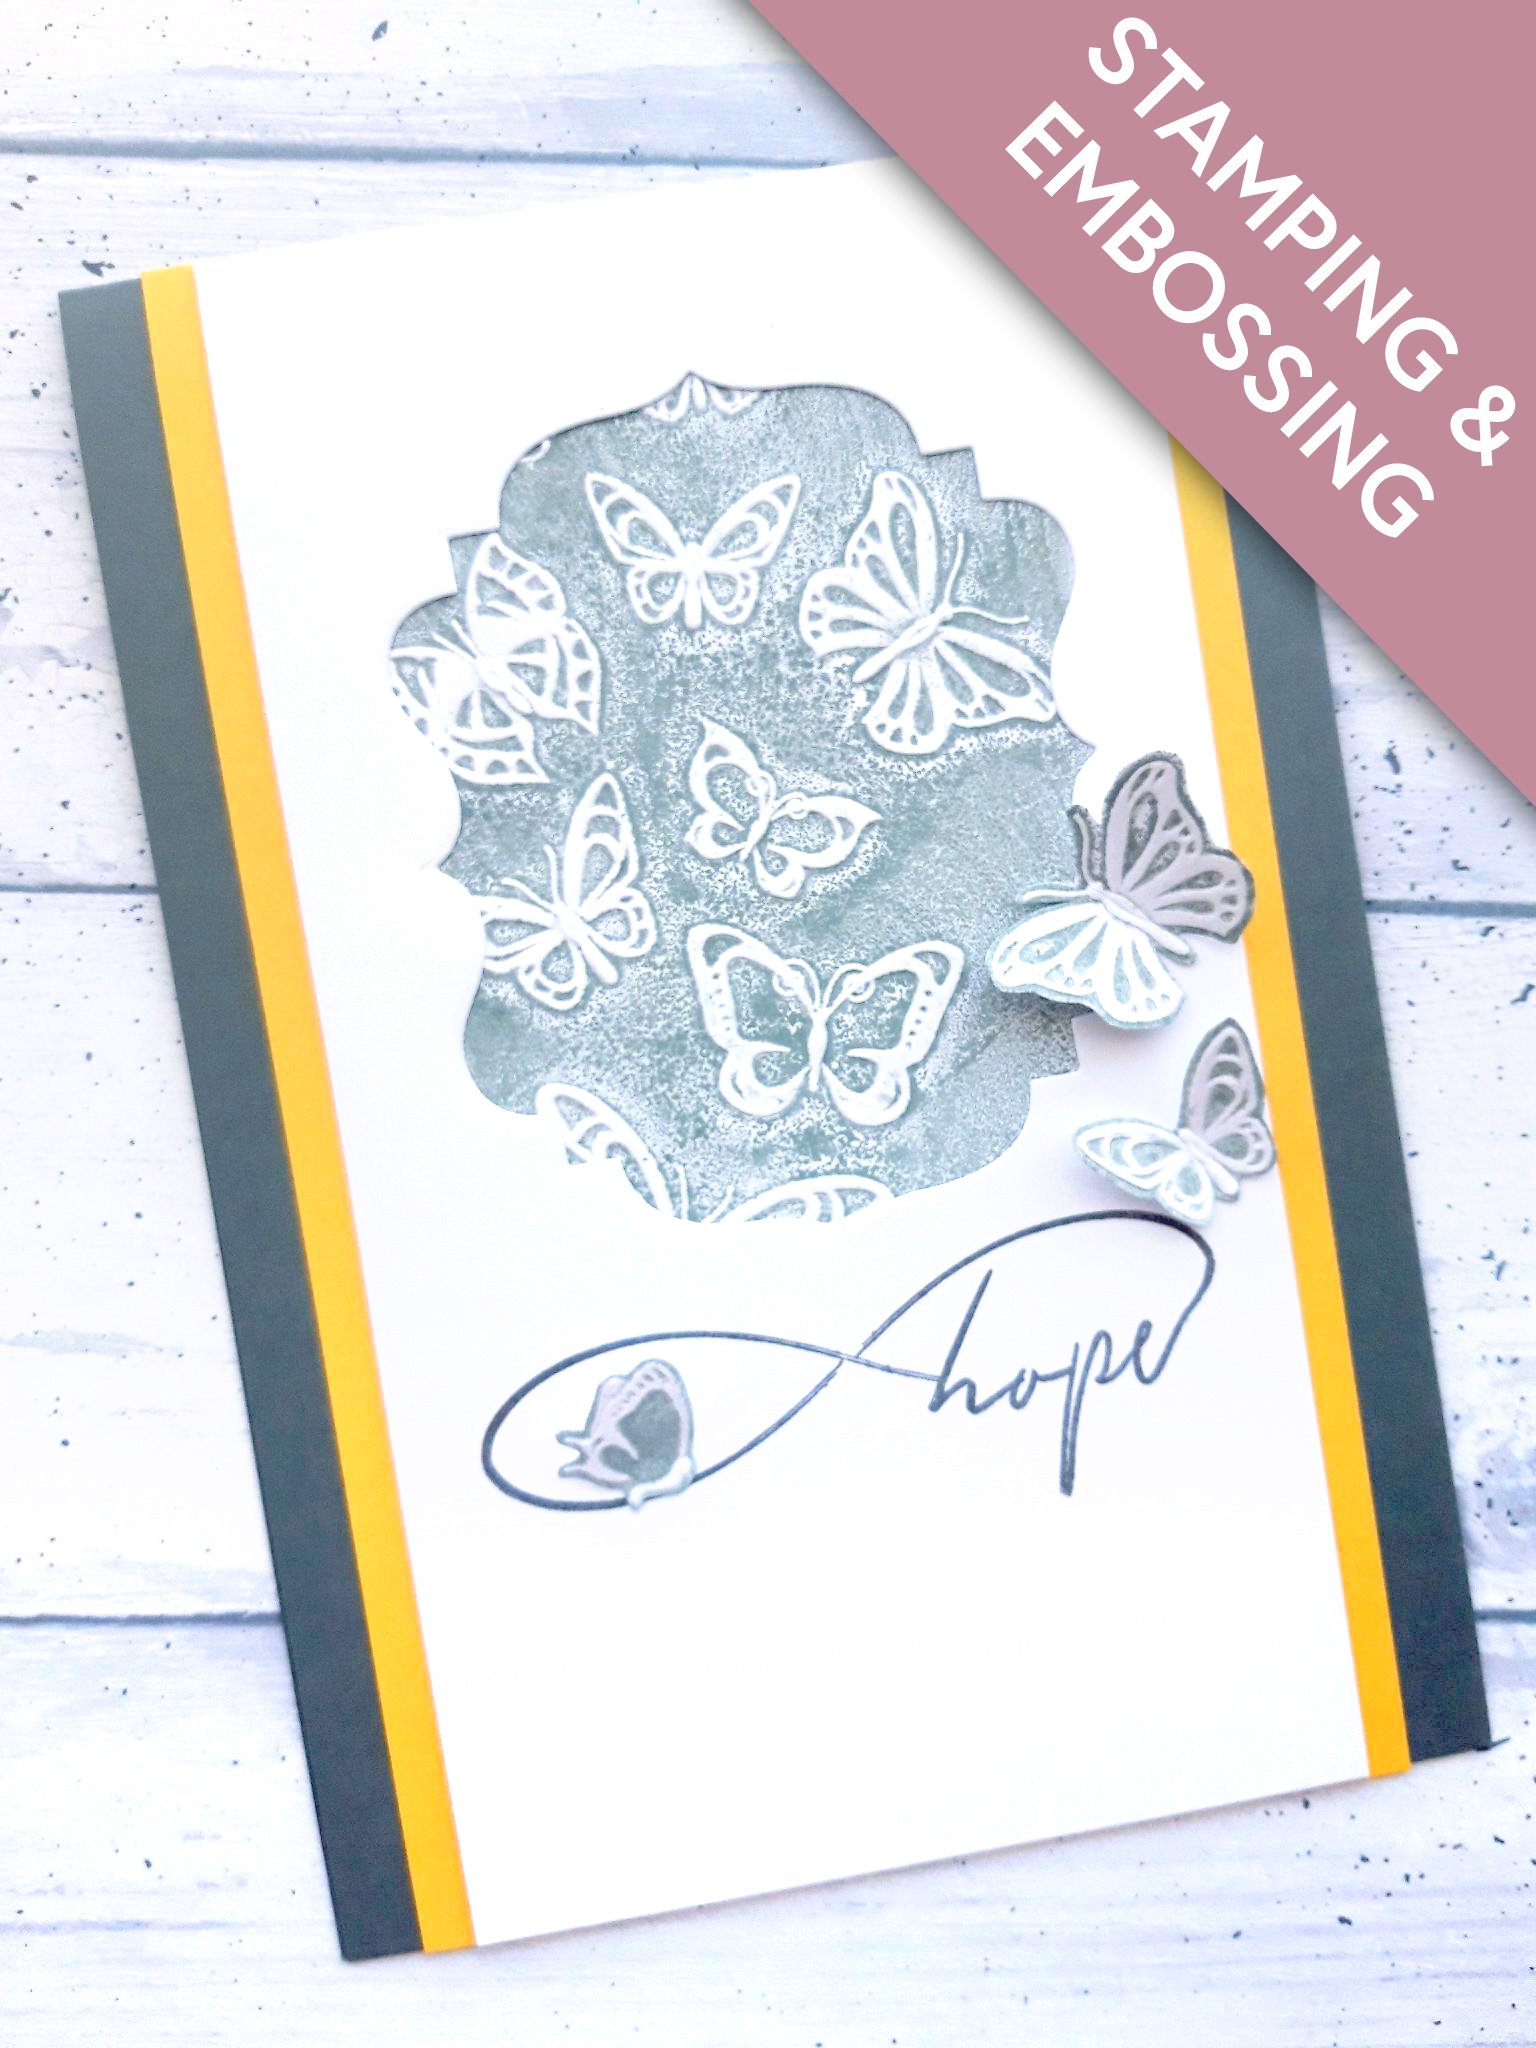
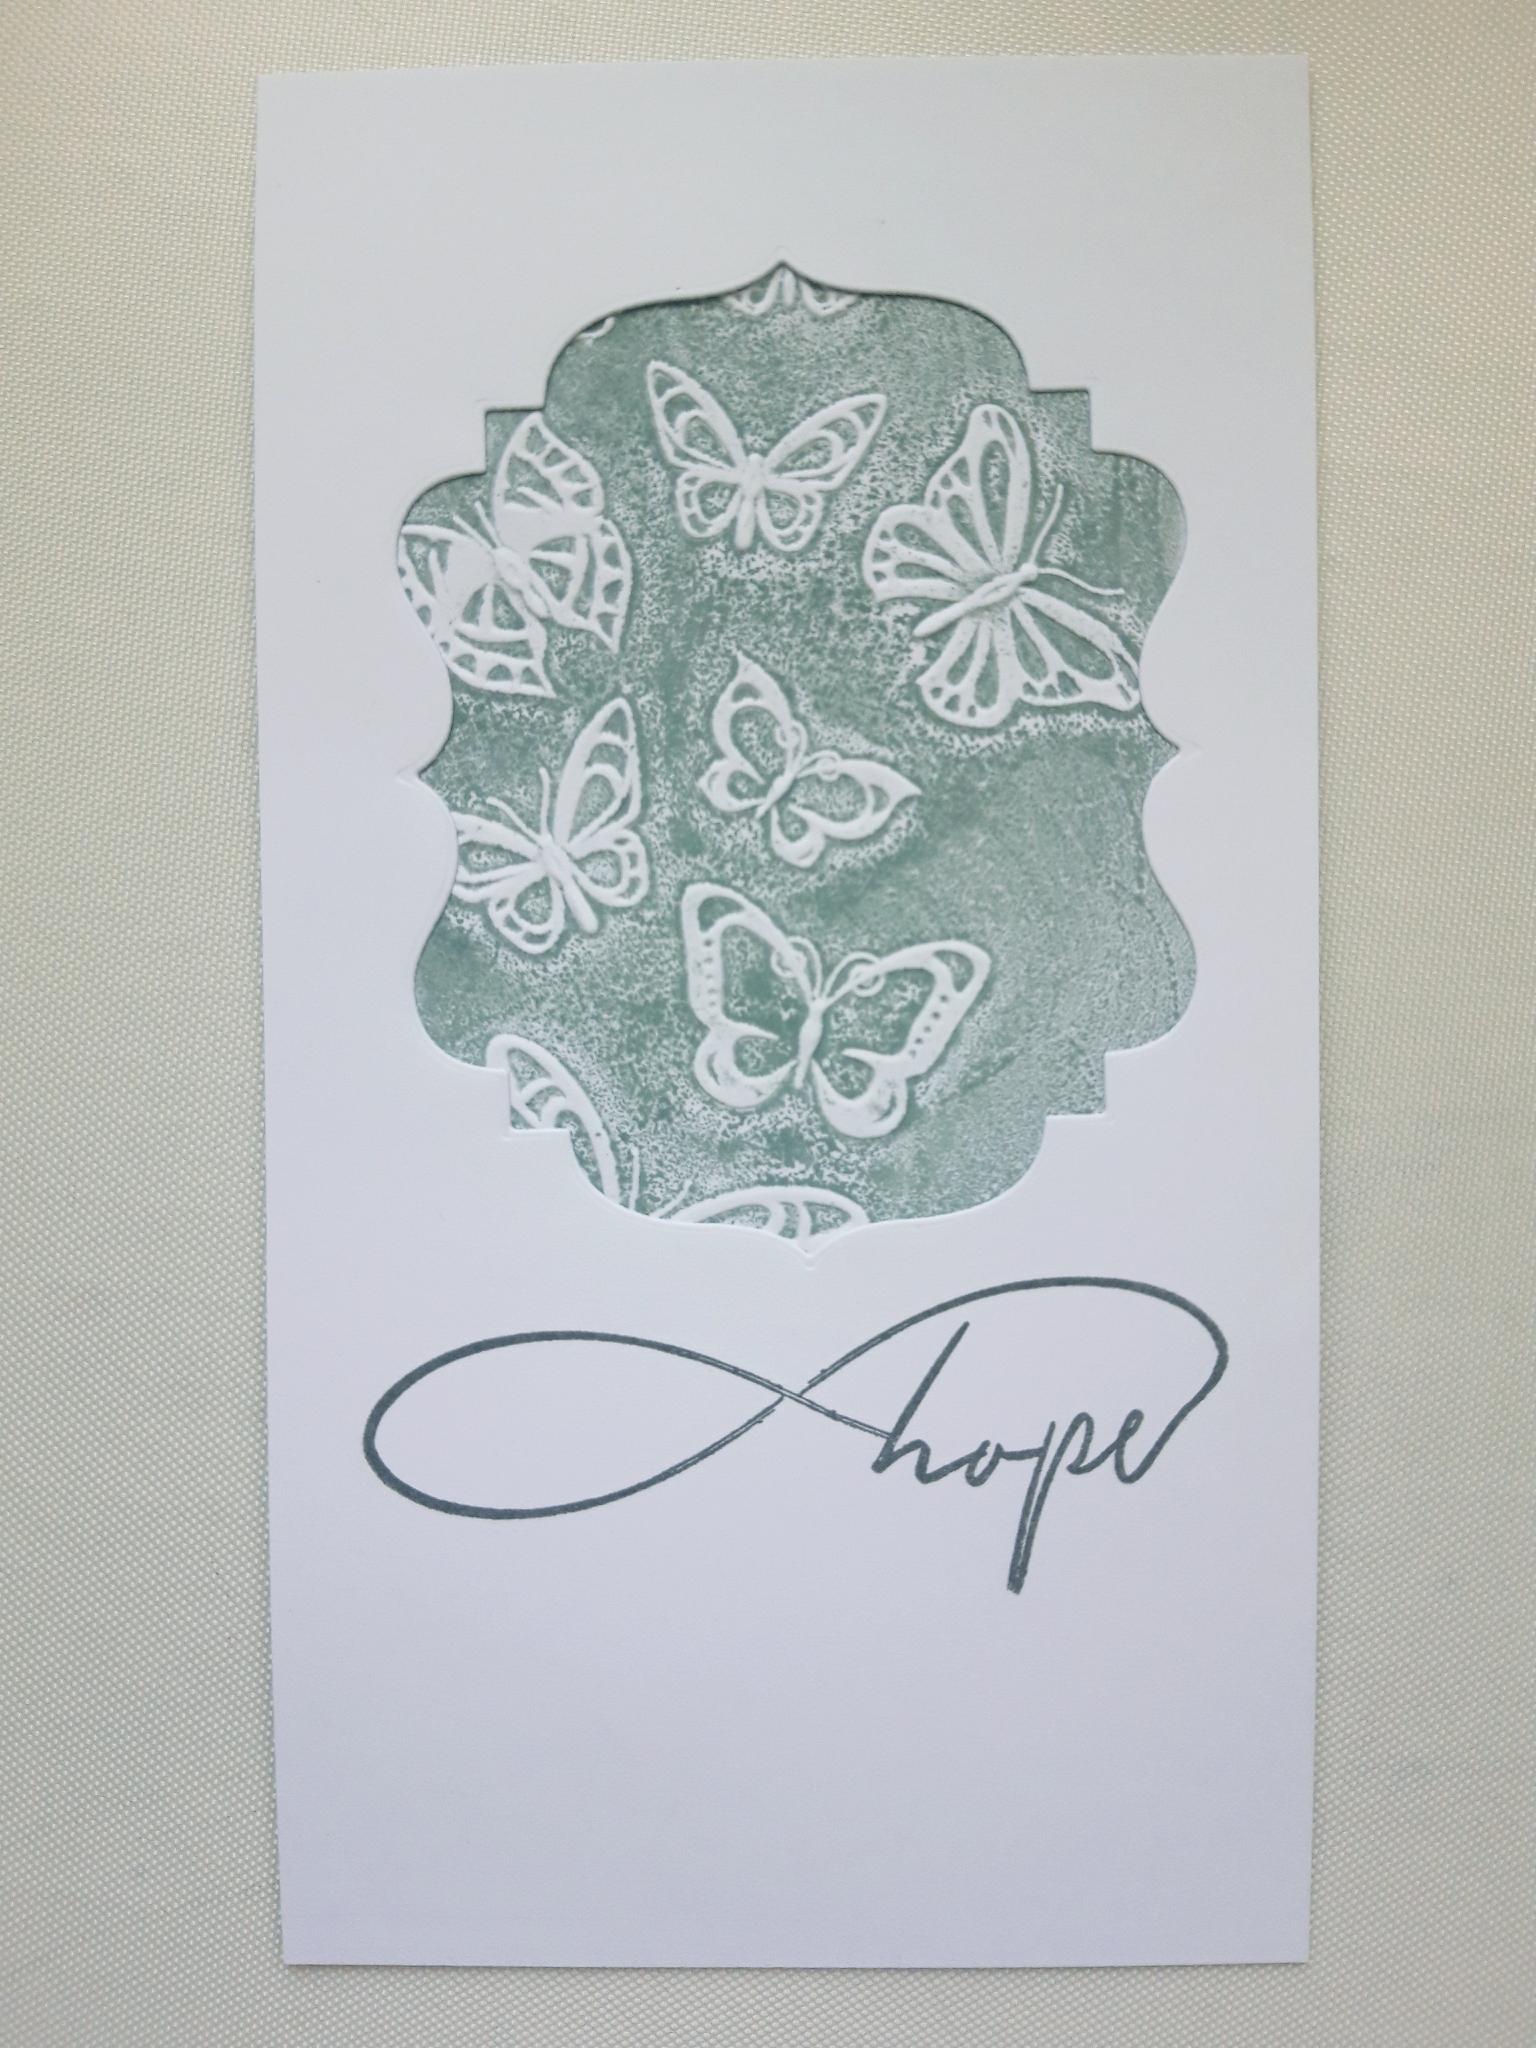
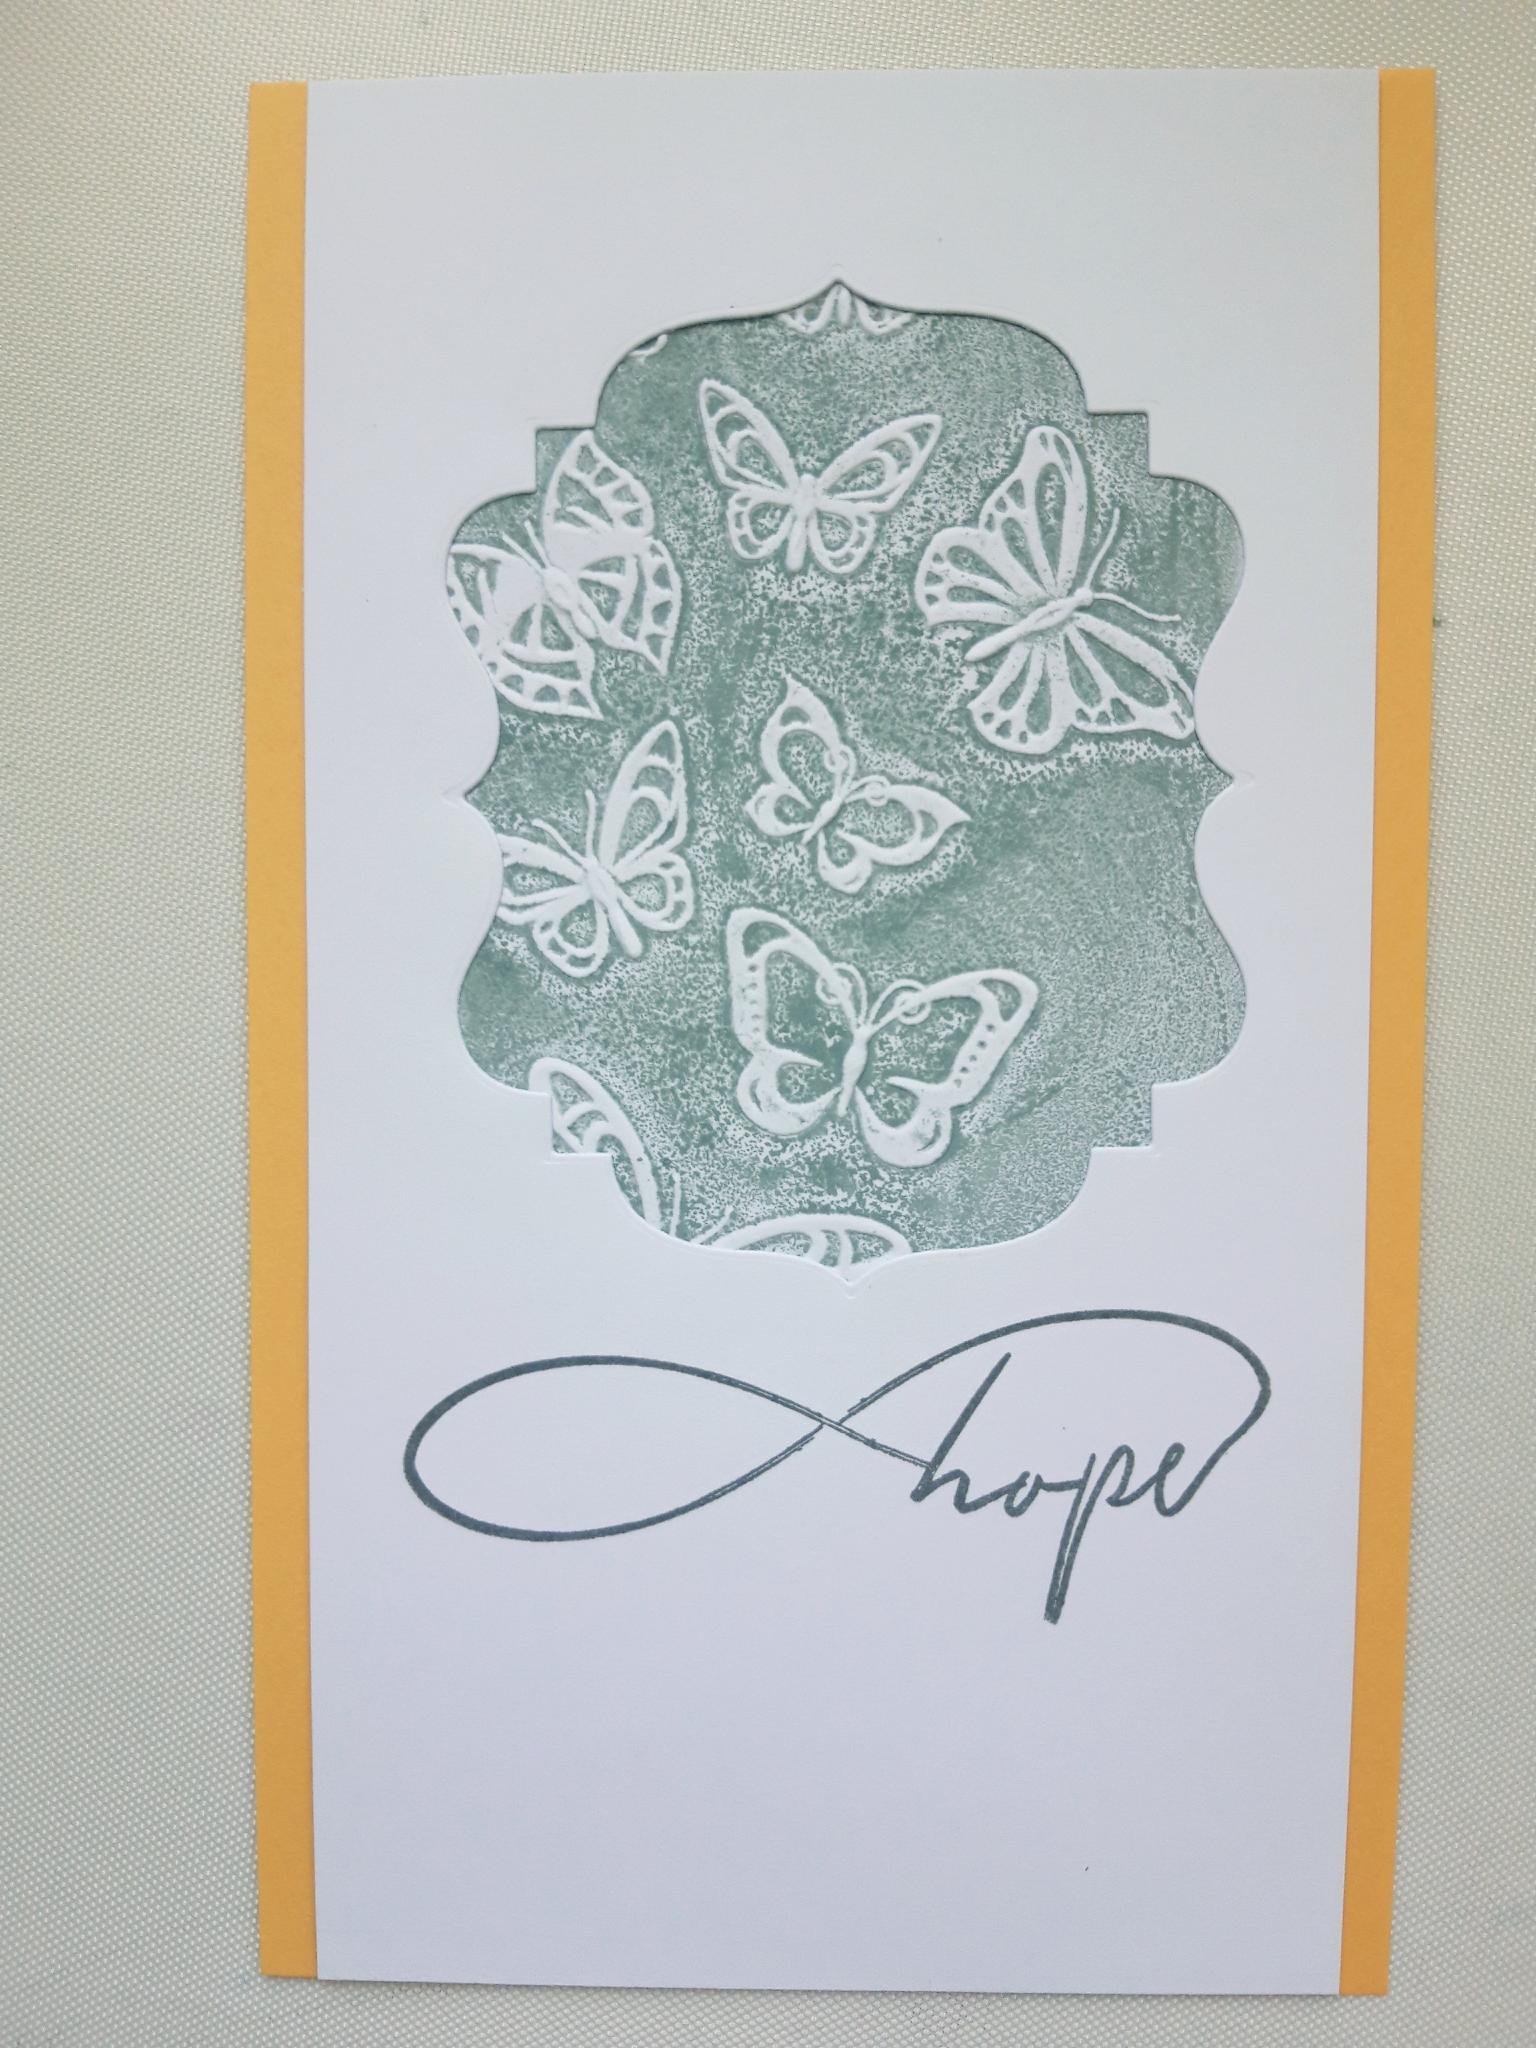
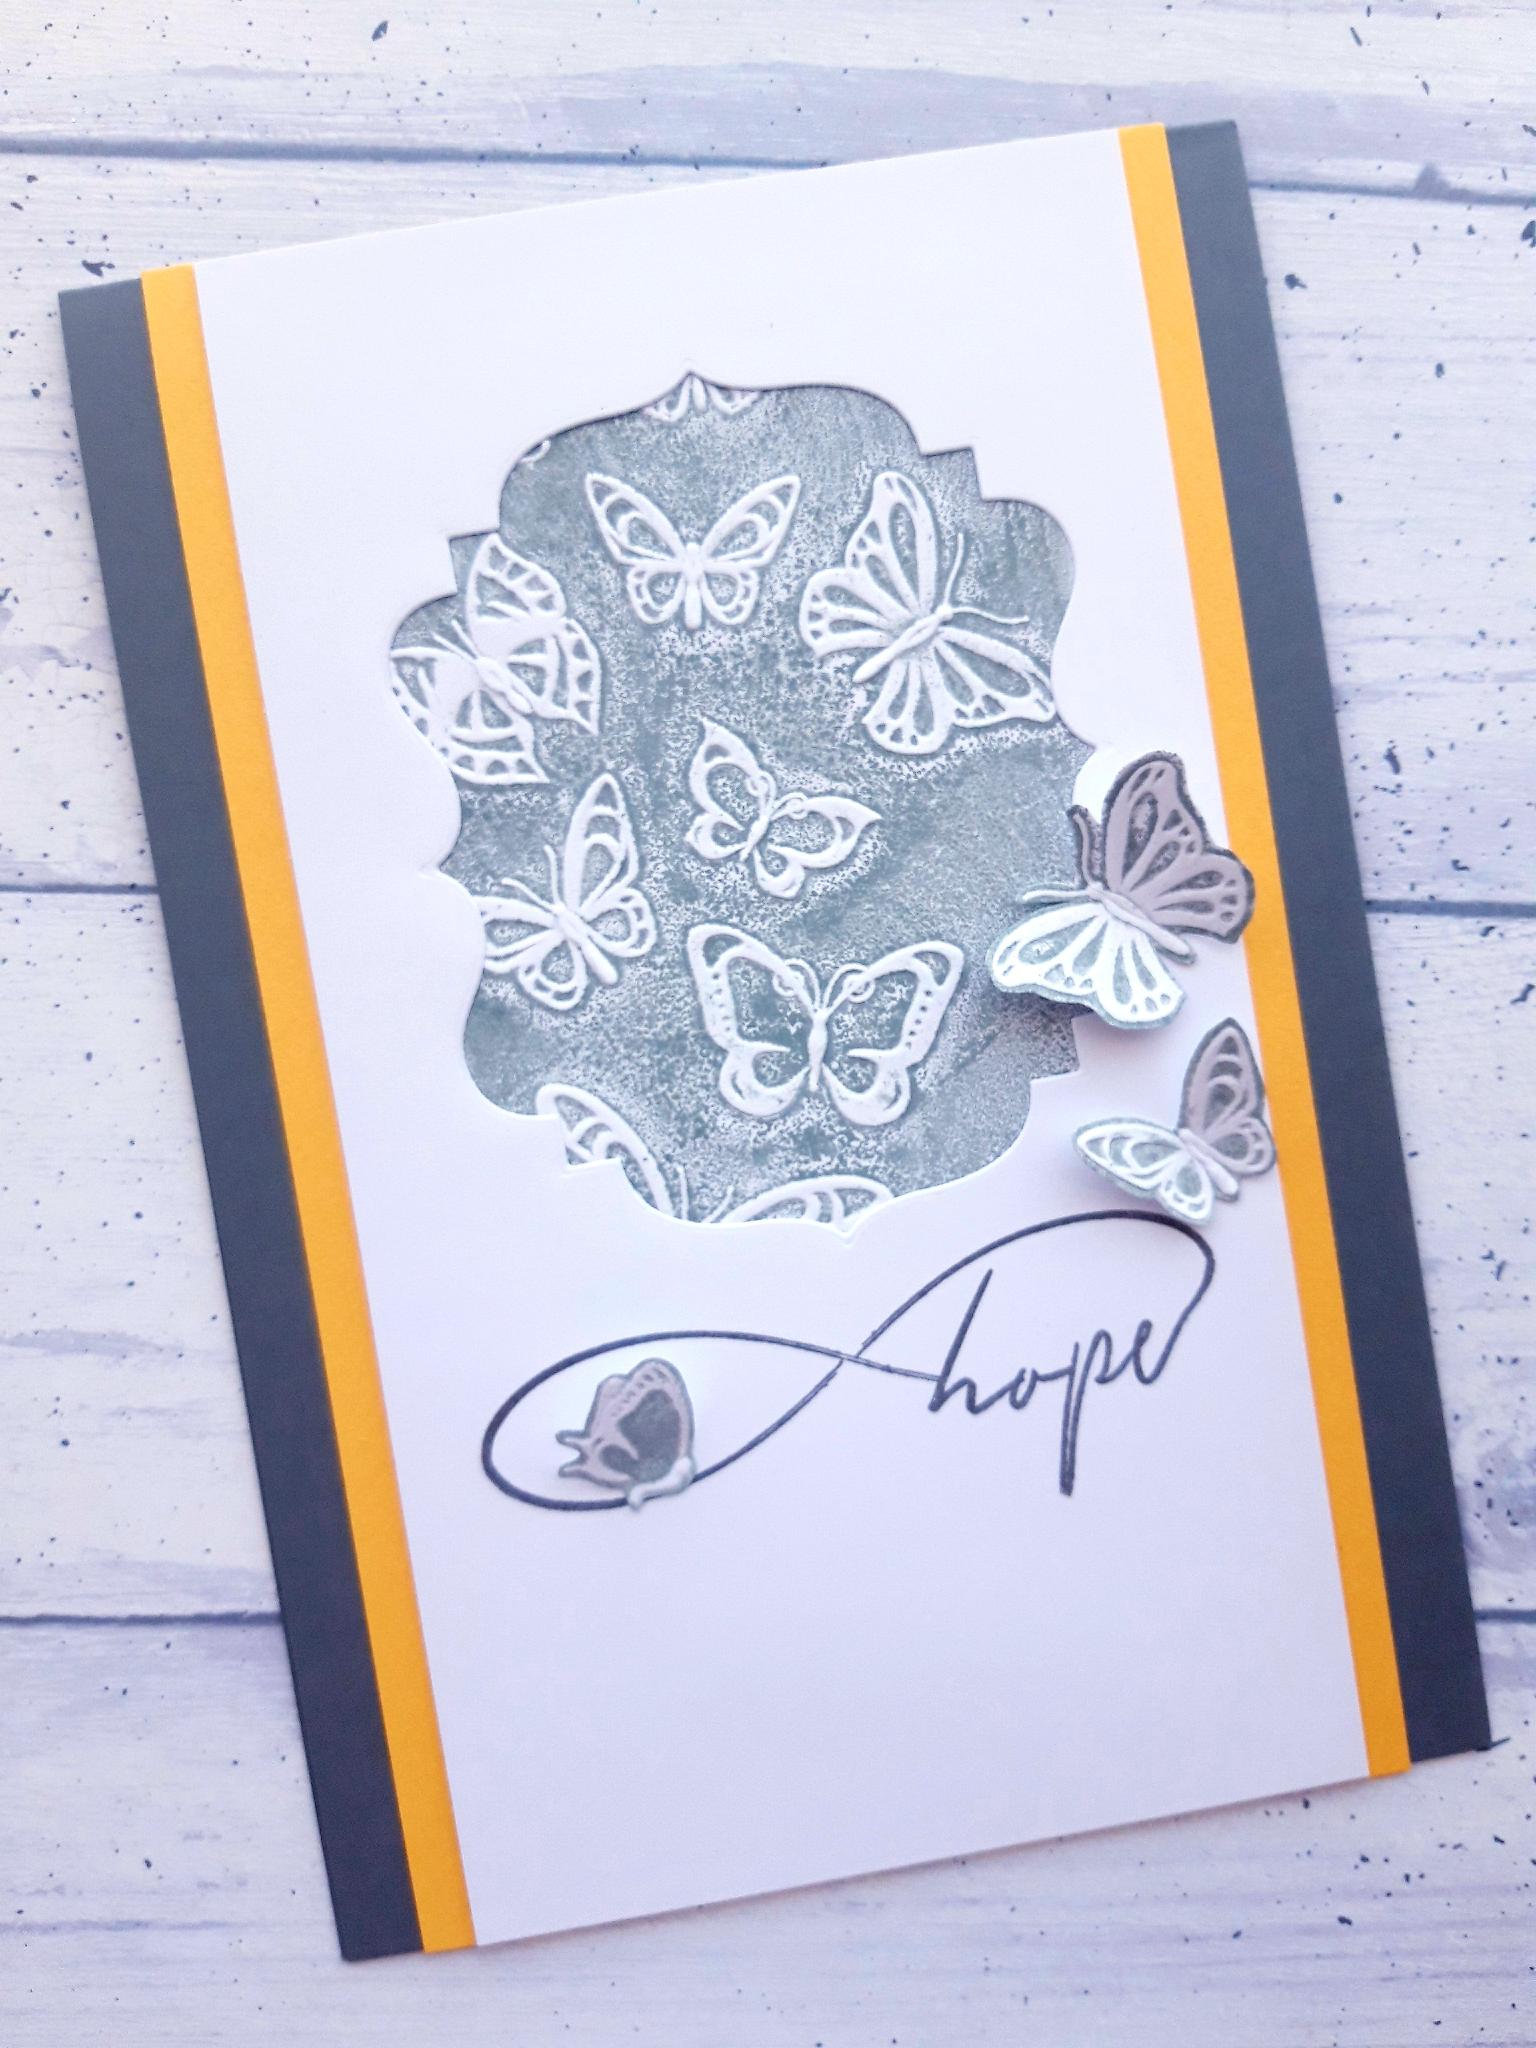
Using one of the dies from the Creative Cards die set, cut out an aperture centre top, in one of the pieces of white card. |
|
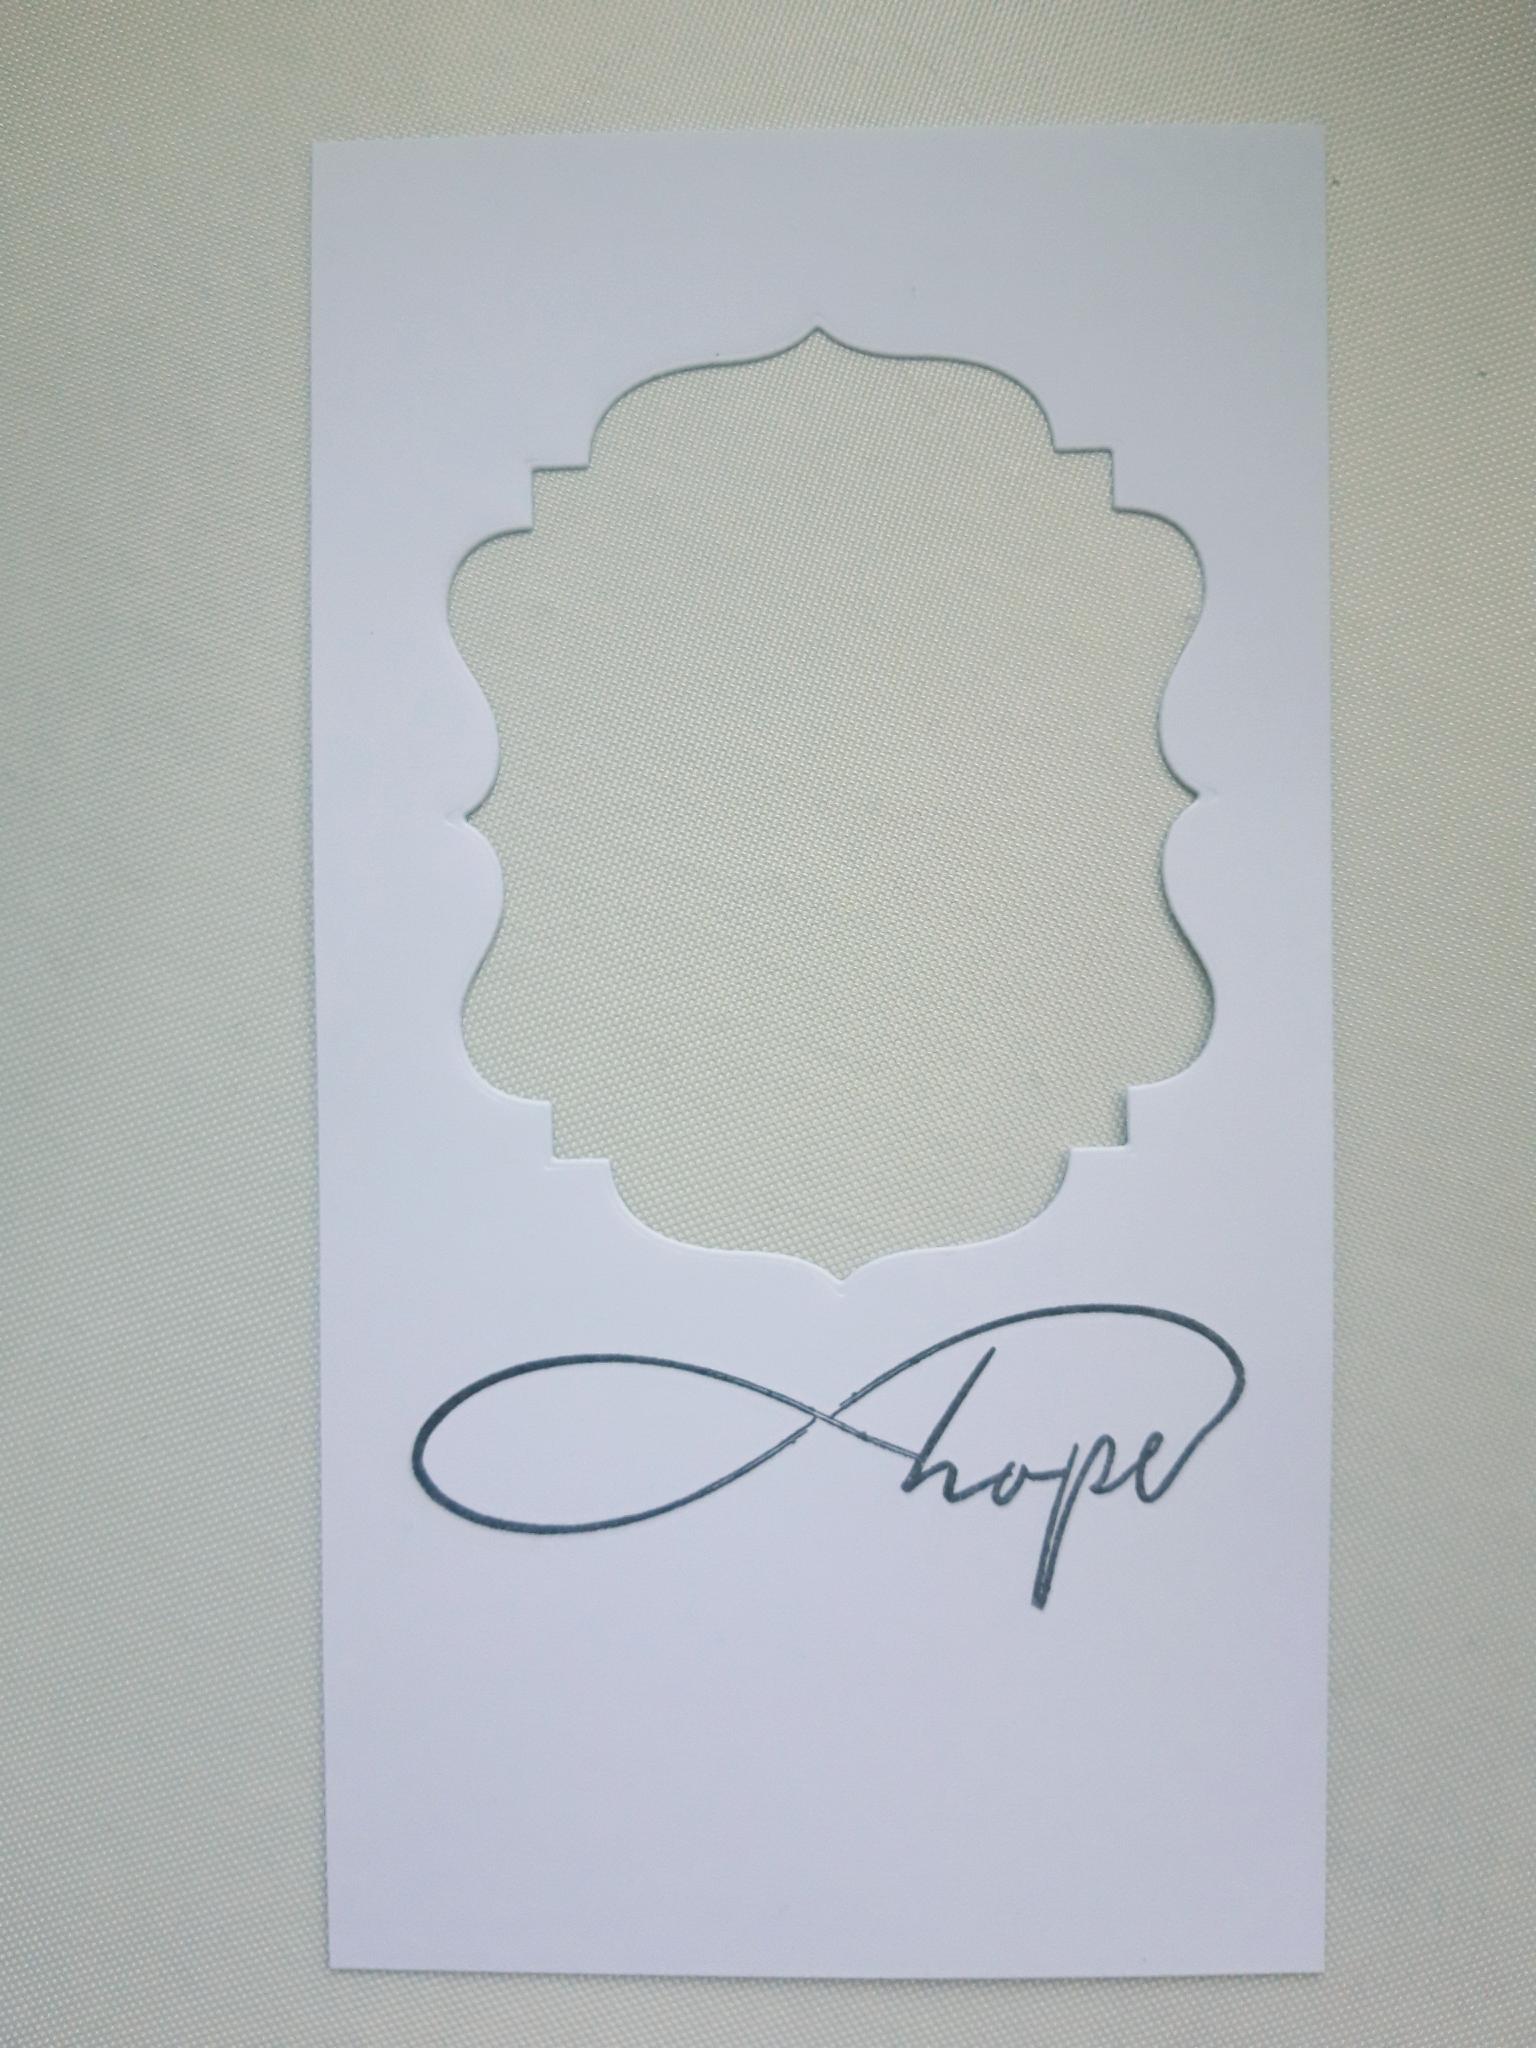
Ink up your chosen sentiment in the versafine ink, and stamp under the aperture. Set to one side. |
|
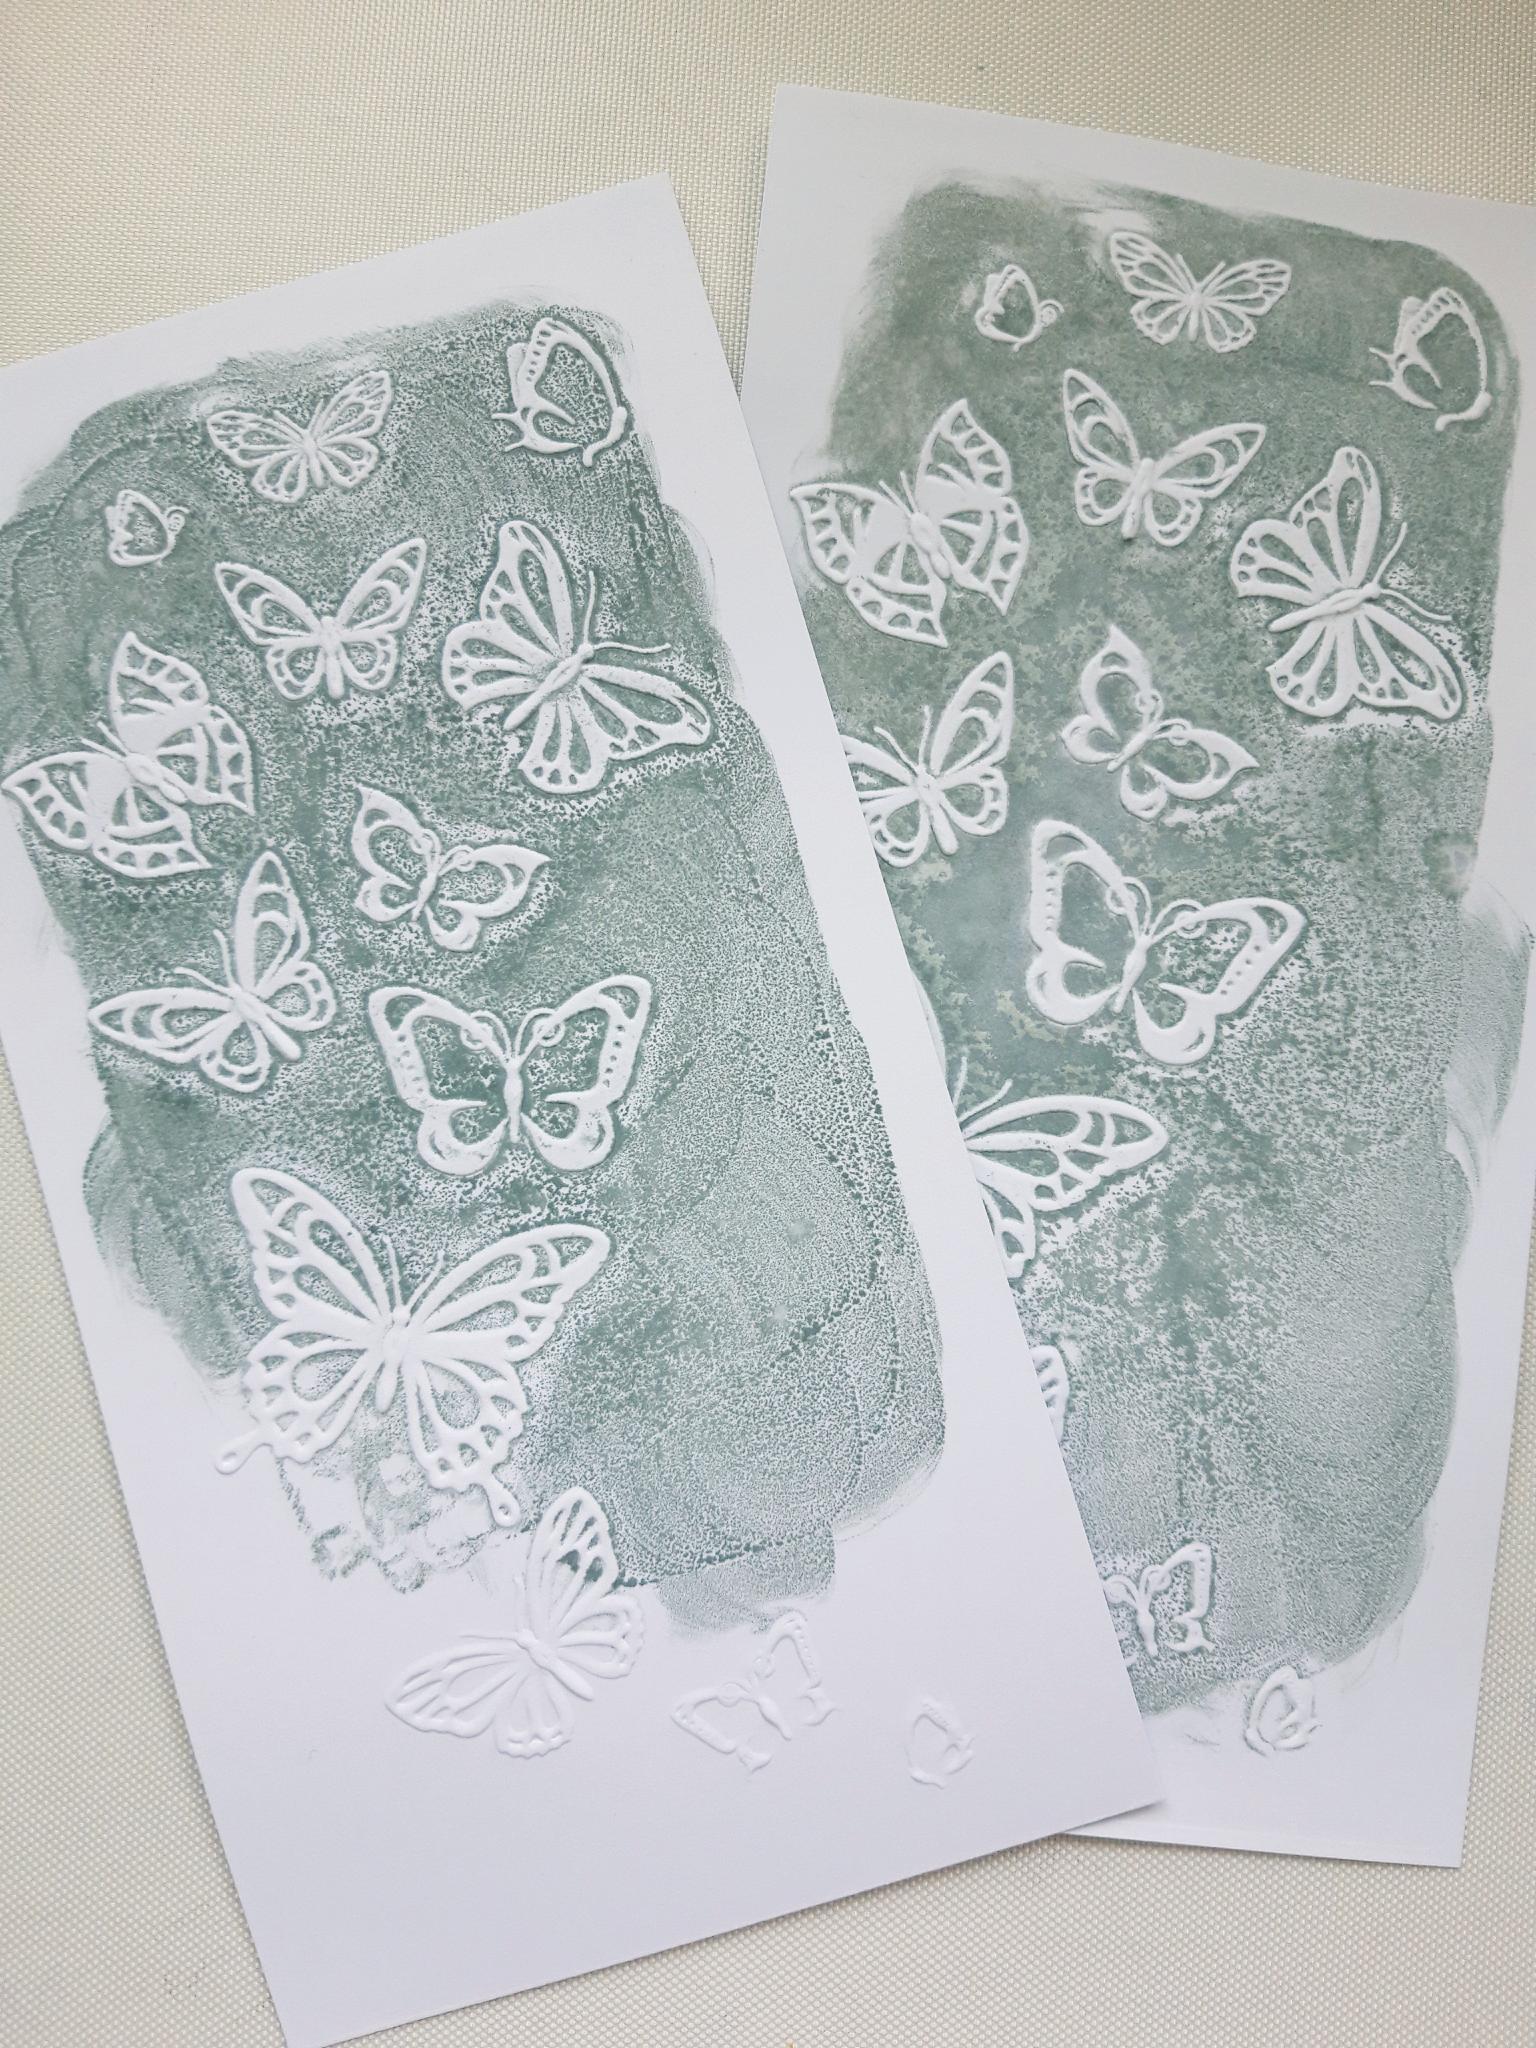
Apply the Iced Spruce Oxide to the debossed side of the Fluttering Butterflies embossing folder. Place the second piece of white cardstock inside the folder and run through your embossing machine. Repeat this step with the 3rd piece of white cardstock. |

|
From one of the inked embossed card pieces, cut out as many of the butterflies as you wish, to use on your card. I used 3 for this sample. |
|
Adhere the other inked, embossed cardstock, behind your aperture with wet glue. |
|
Mat this on top of your pre cut orange cardstock. |
|
Mat this on top of your card blank, so the top and bottom are flush with the card blank edges, and an equal strip of the card blank is visible down each side. Adhere your pre cut out 3D butterflies, where required, to complete your card. |