Give your friends $10 off their first order!
Refer a FRIEND


WHAT YOU WILL NEED:
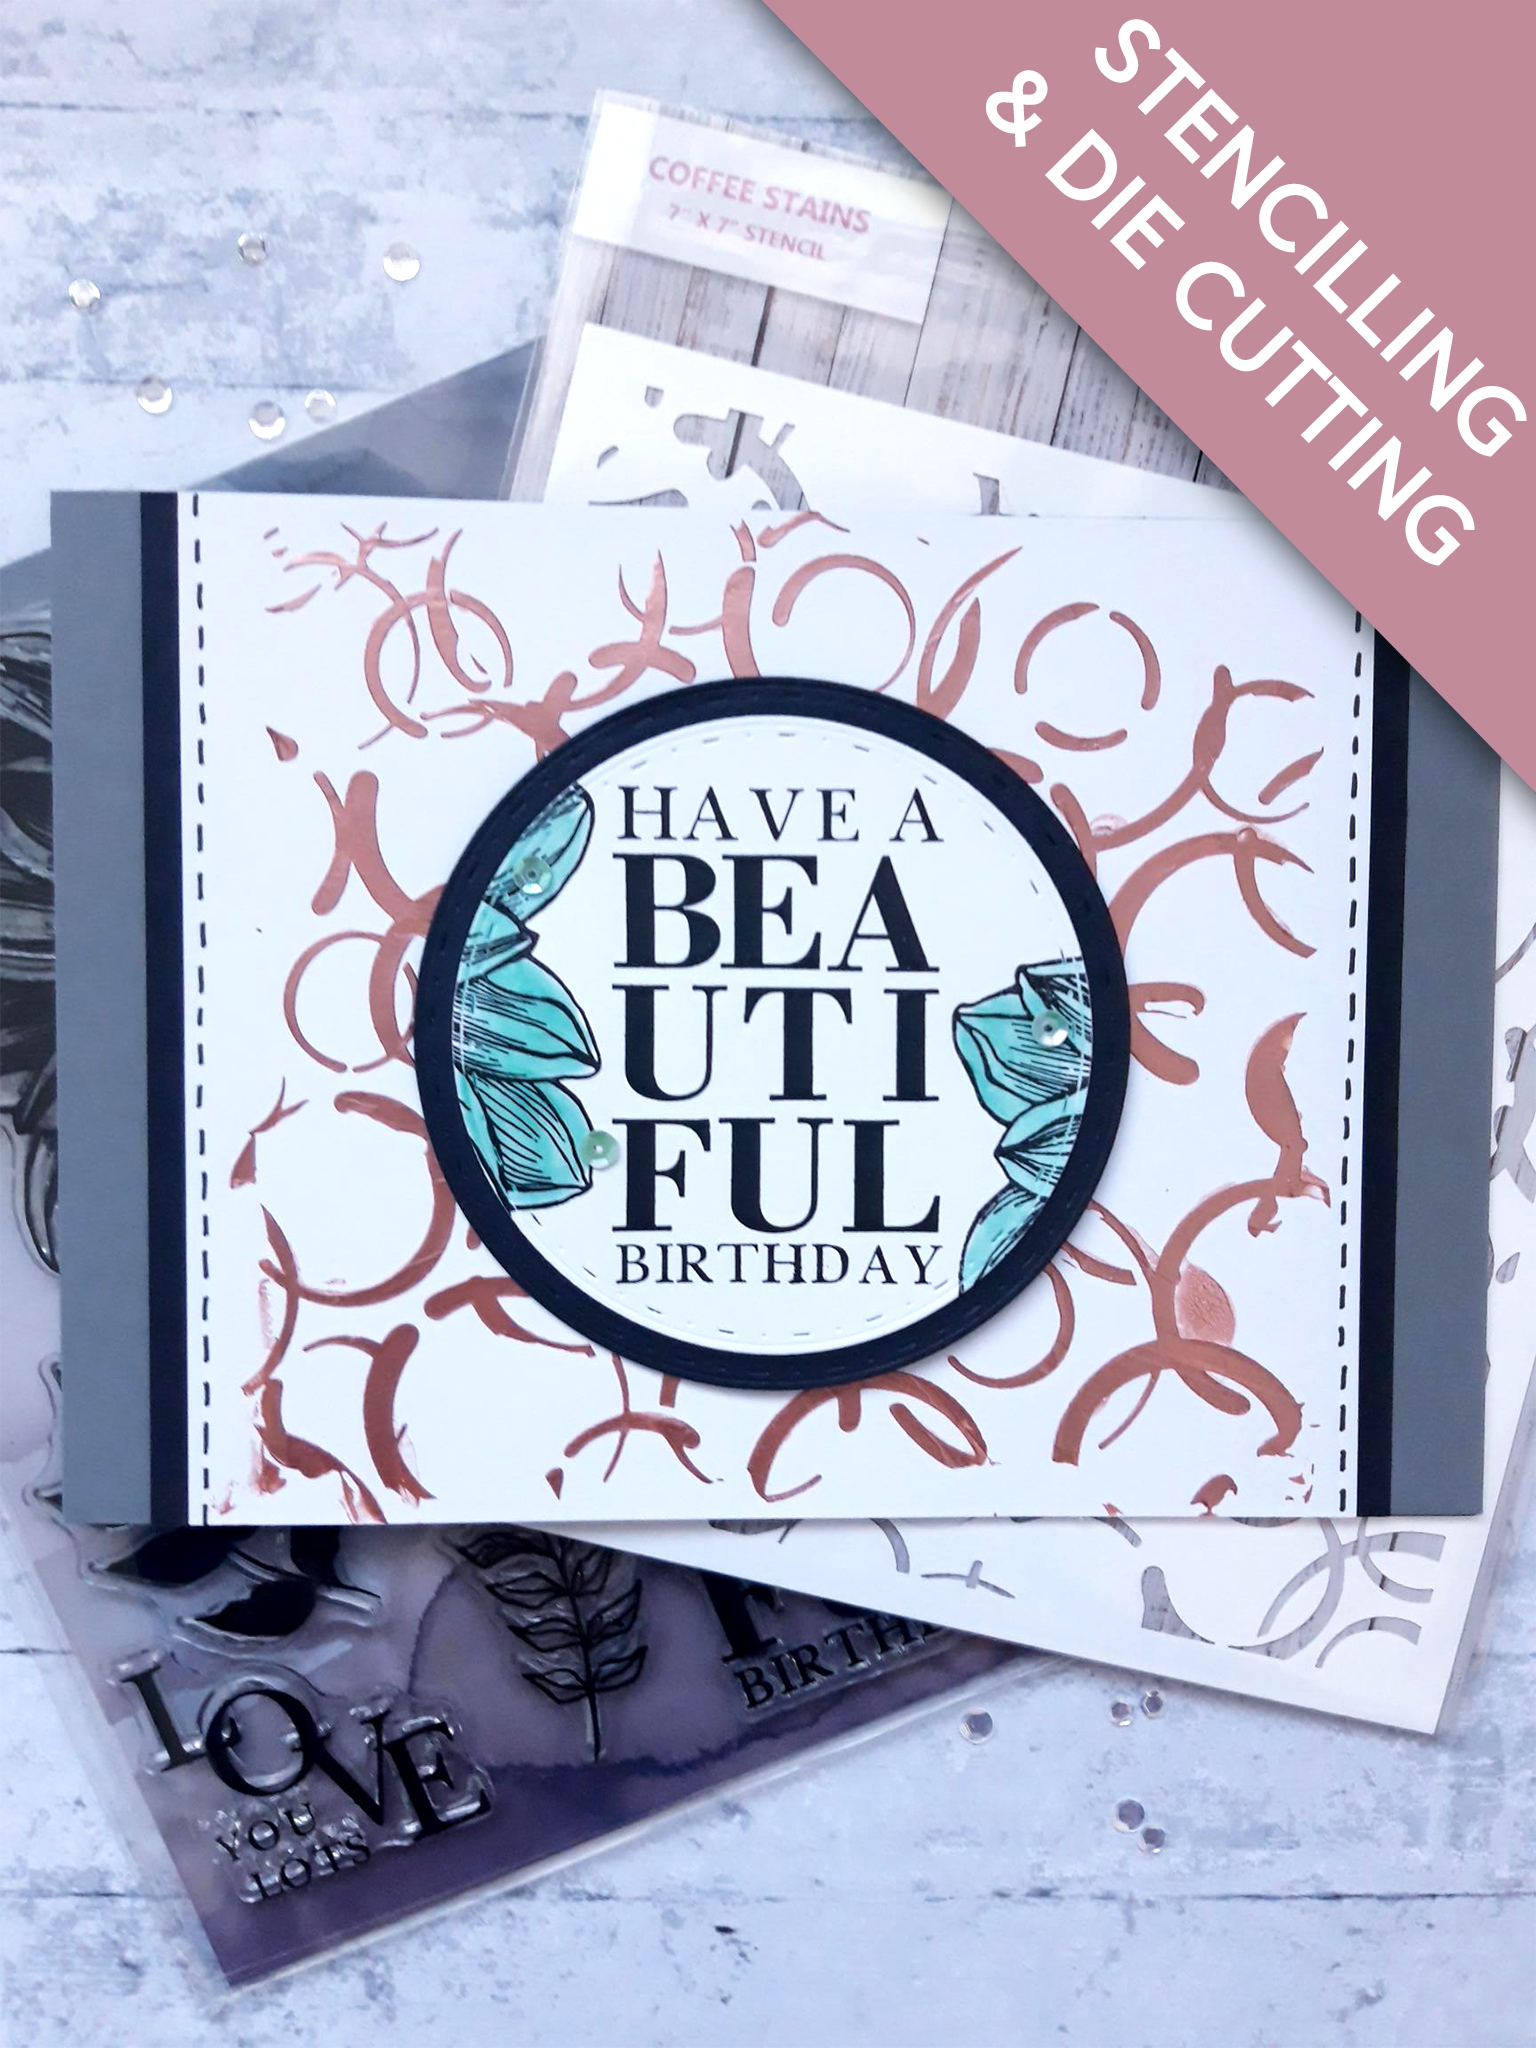
Grey top folding card blank ( 8 1/4 x 5 3/4")
Black Card (5 3/4 x 7 1/4")
White card (5 3/4 x 6 3/4")
Black card (5 x 5")
White card (4 1/2 x 4 1/2")
Stamp from Beautiful Birthday Stamp Collection
Coffee Stains Stencil
Dies from Circles Deboss Nesting Dies Collection
Versafine Ink Pad: Onyx Black
Izink Ice: Cool Copper, Glacier Green
Palette Knife
Paint brush
Black pen
Sequins: Down The Bay
Gem pick up and pokey tool
Eureka 101
Paper Trimmer
Perfect Together Glue
Die Cutting machine
[click image to enlarge] 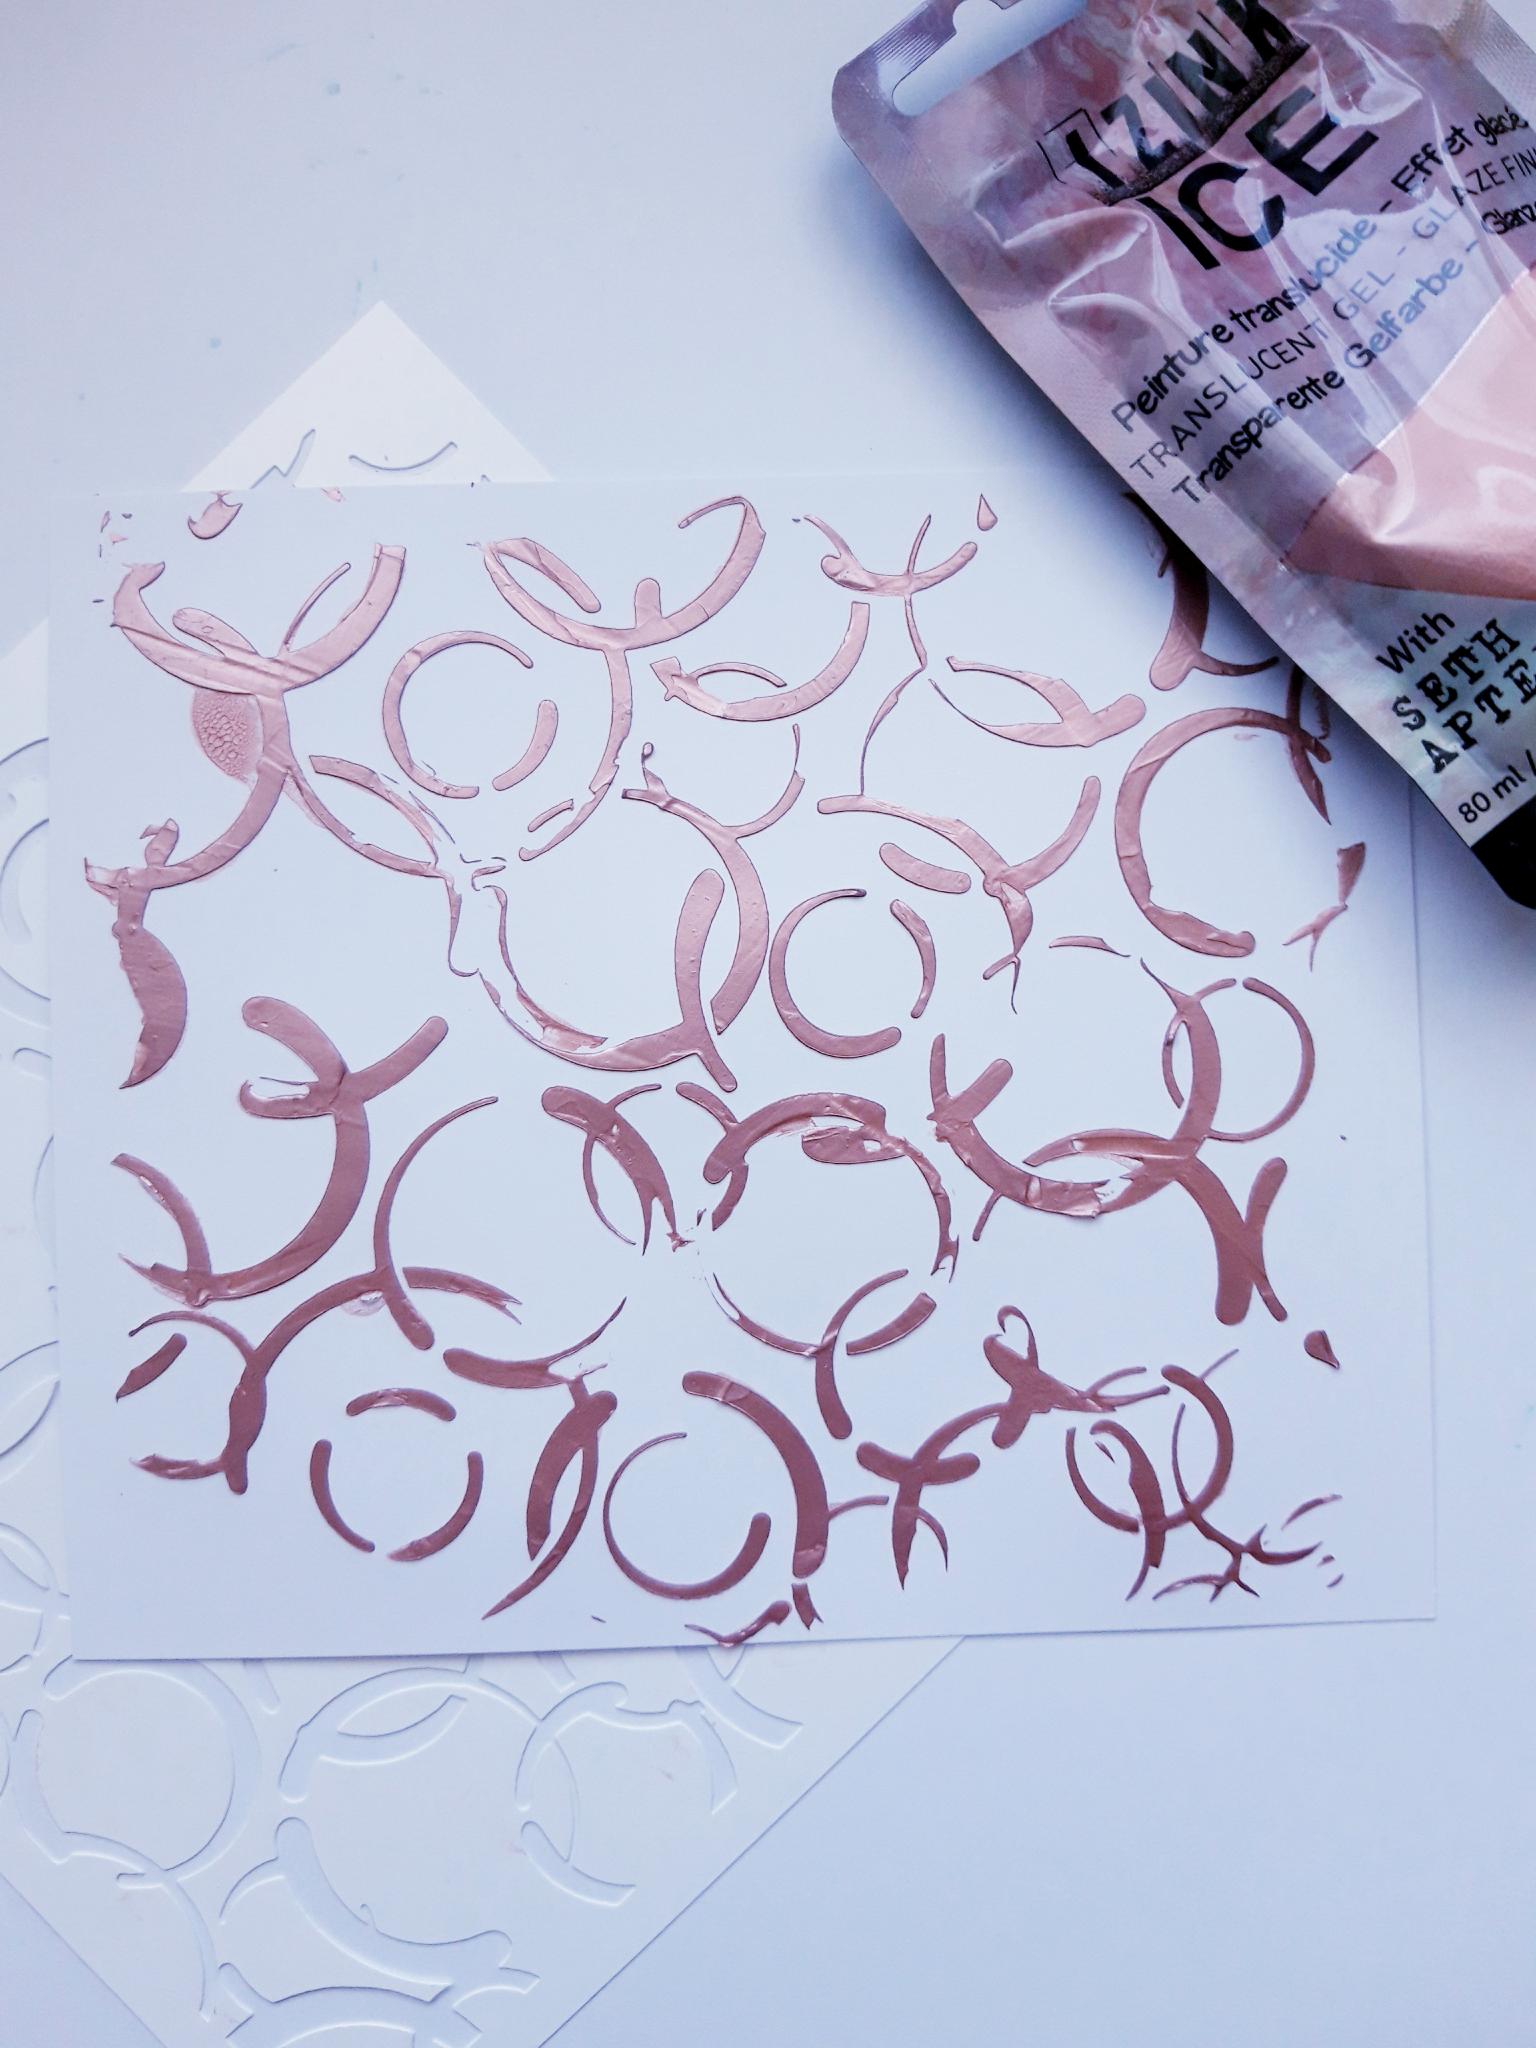
|
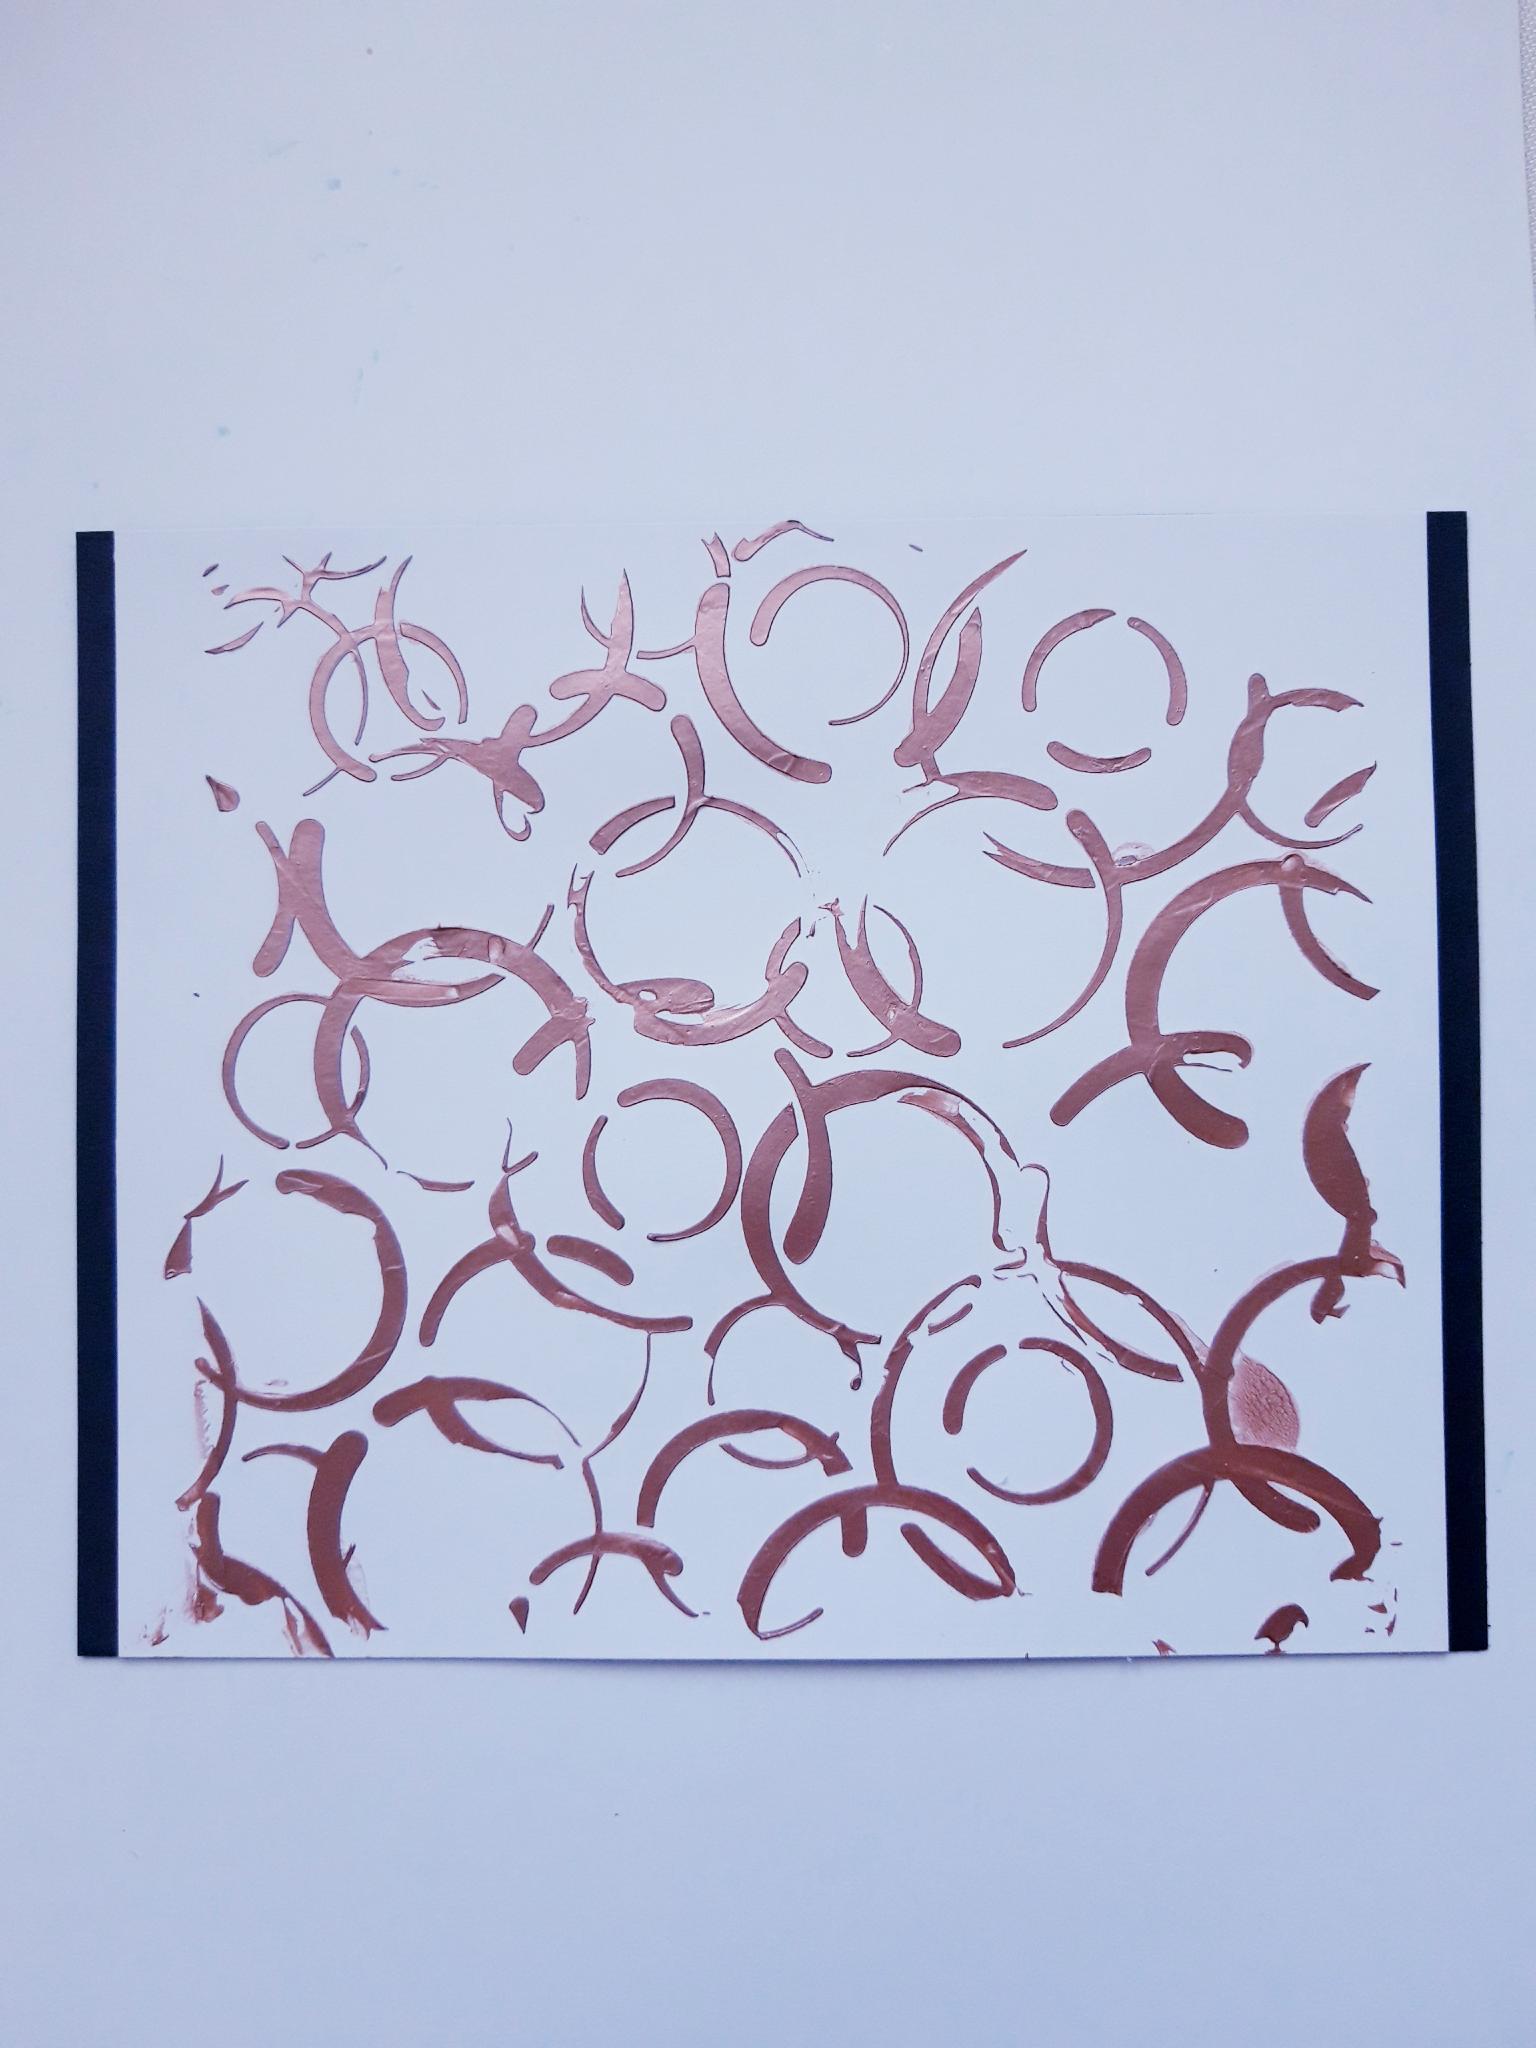
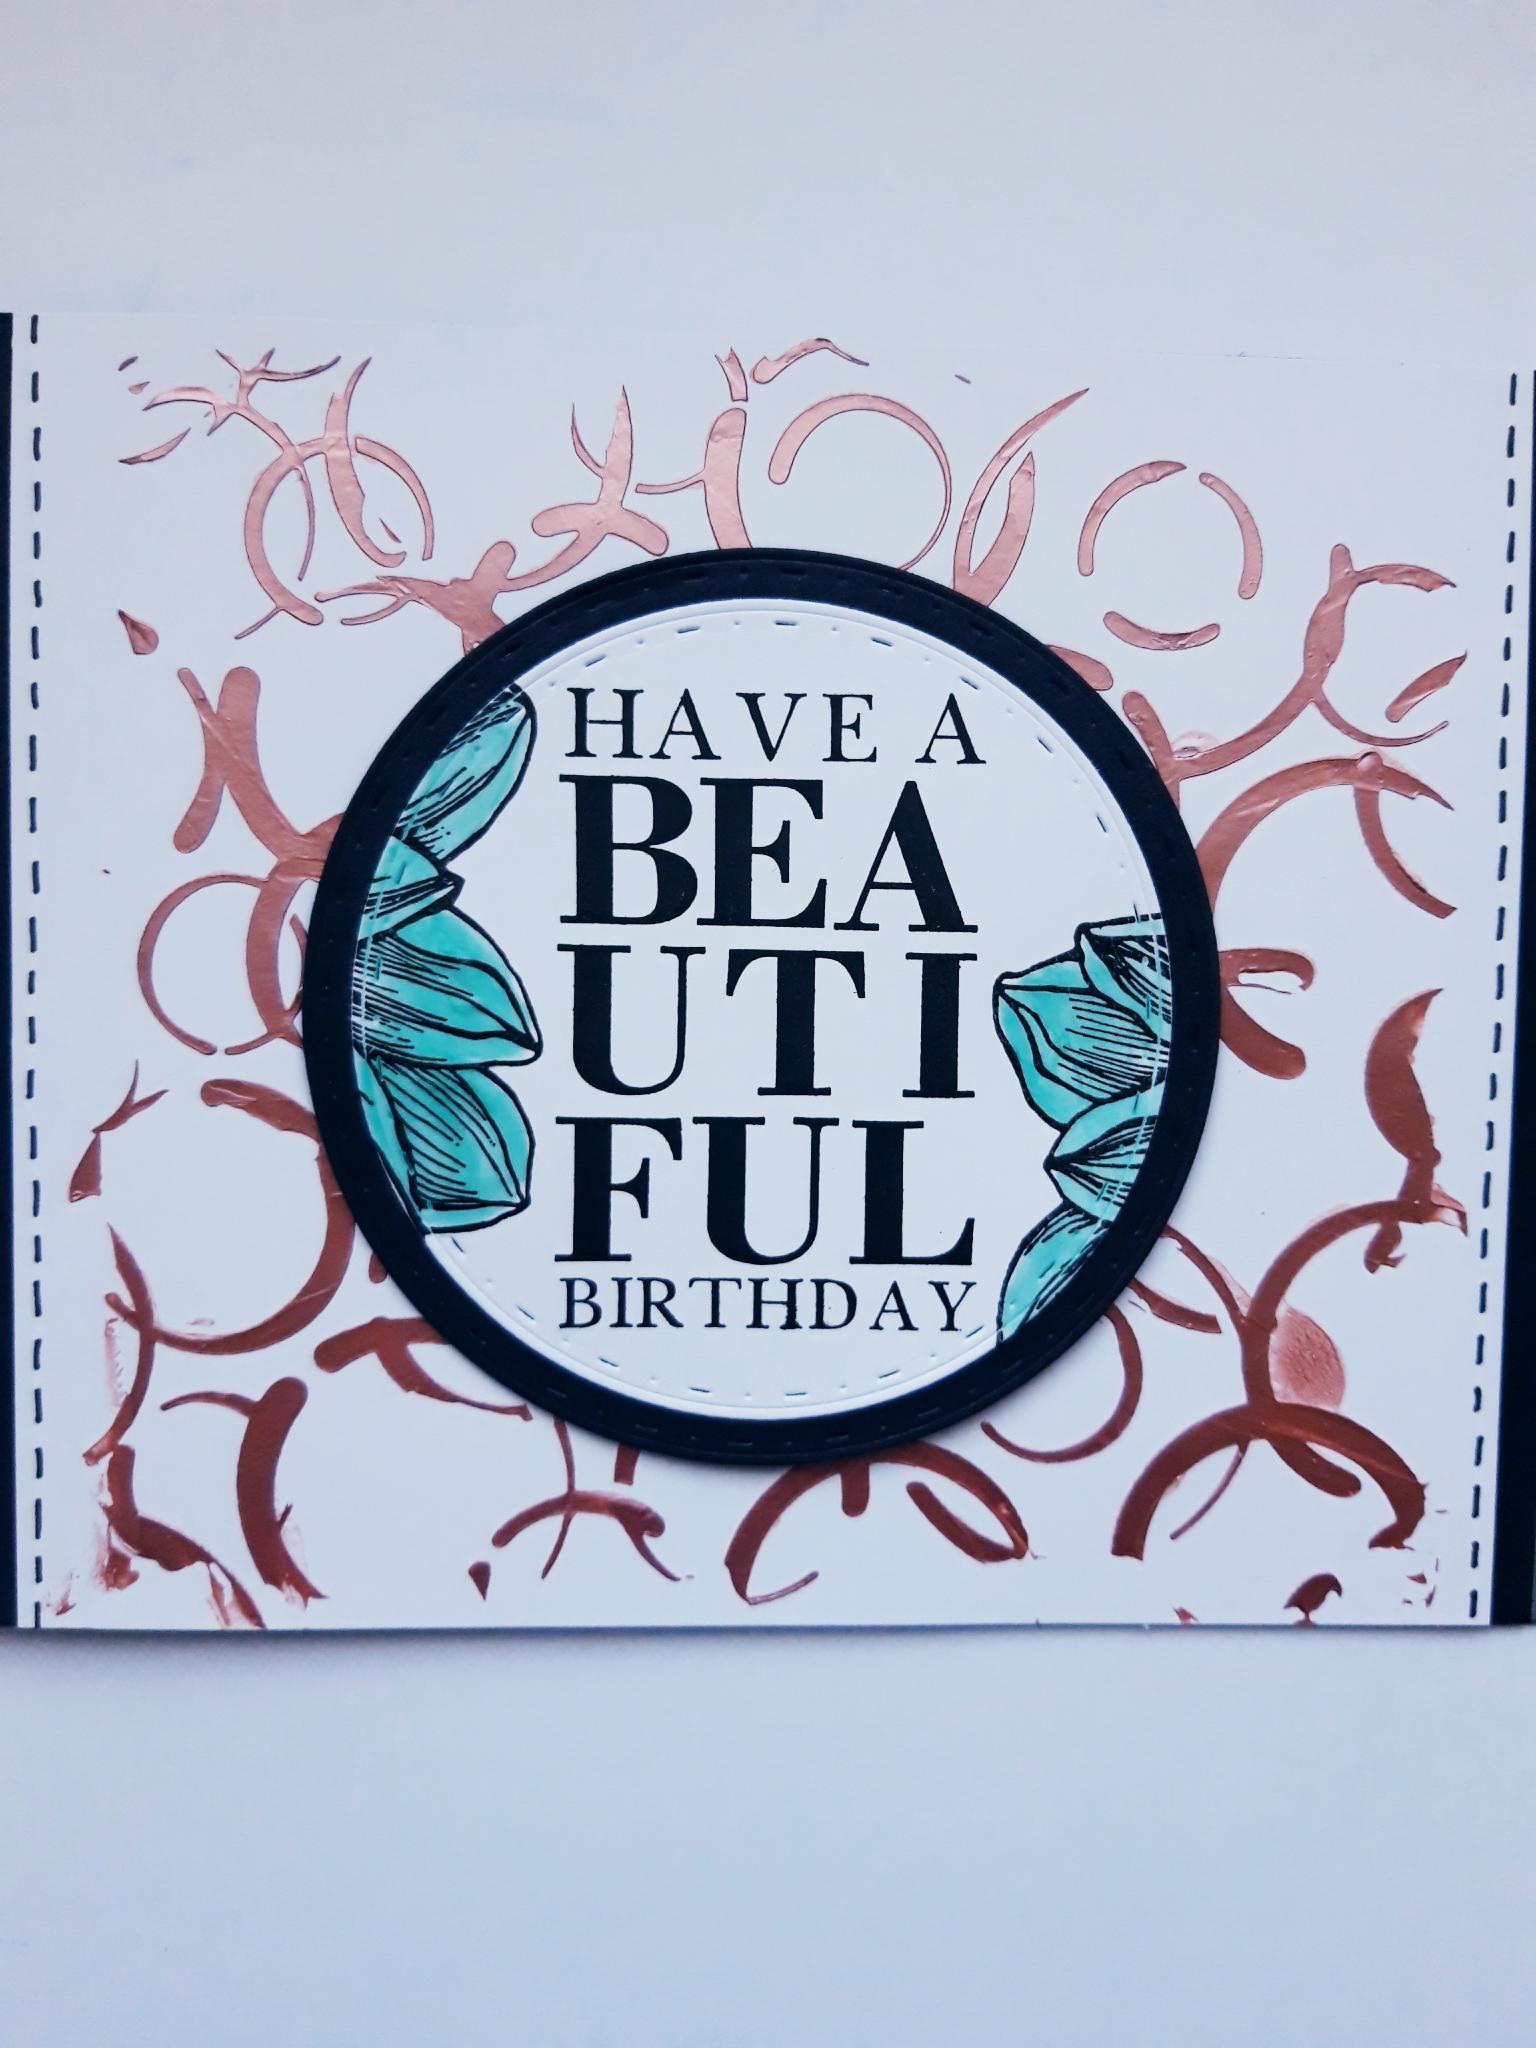
Place the Coffee Stains stencil on top of the white card (5 3/4 x 6 3/4"). Use your palette knife to randomly apply the Izink Cool Copper Ice through areas of the stencil. Carefully lift up your stencil, and put it in a bowl of warm water, until you can clean it off. Dry the Ice background.
|
|
Once dry, adhere this on to the black card (5 3/4 x 7 1/4"), flush with the top and bottom, and leaving an equal gap of the black card visible, left and right. |
|
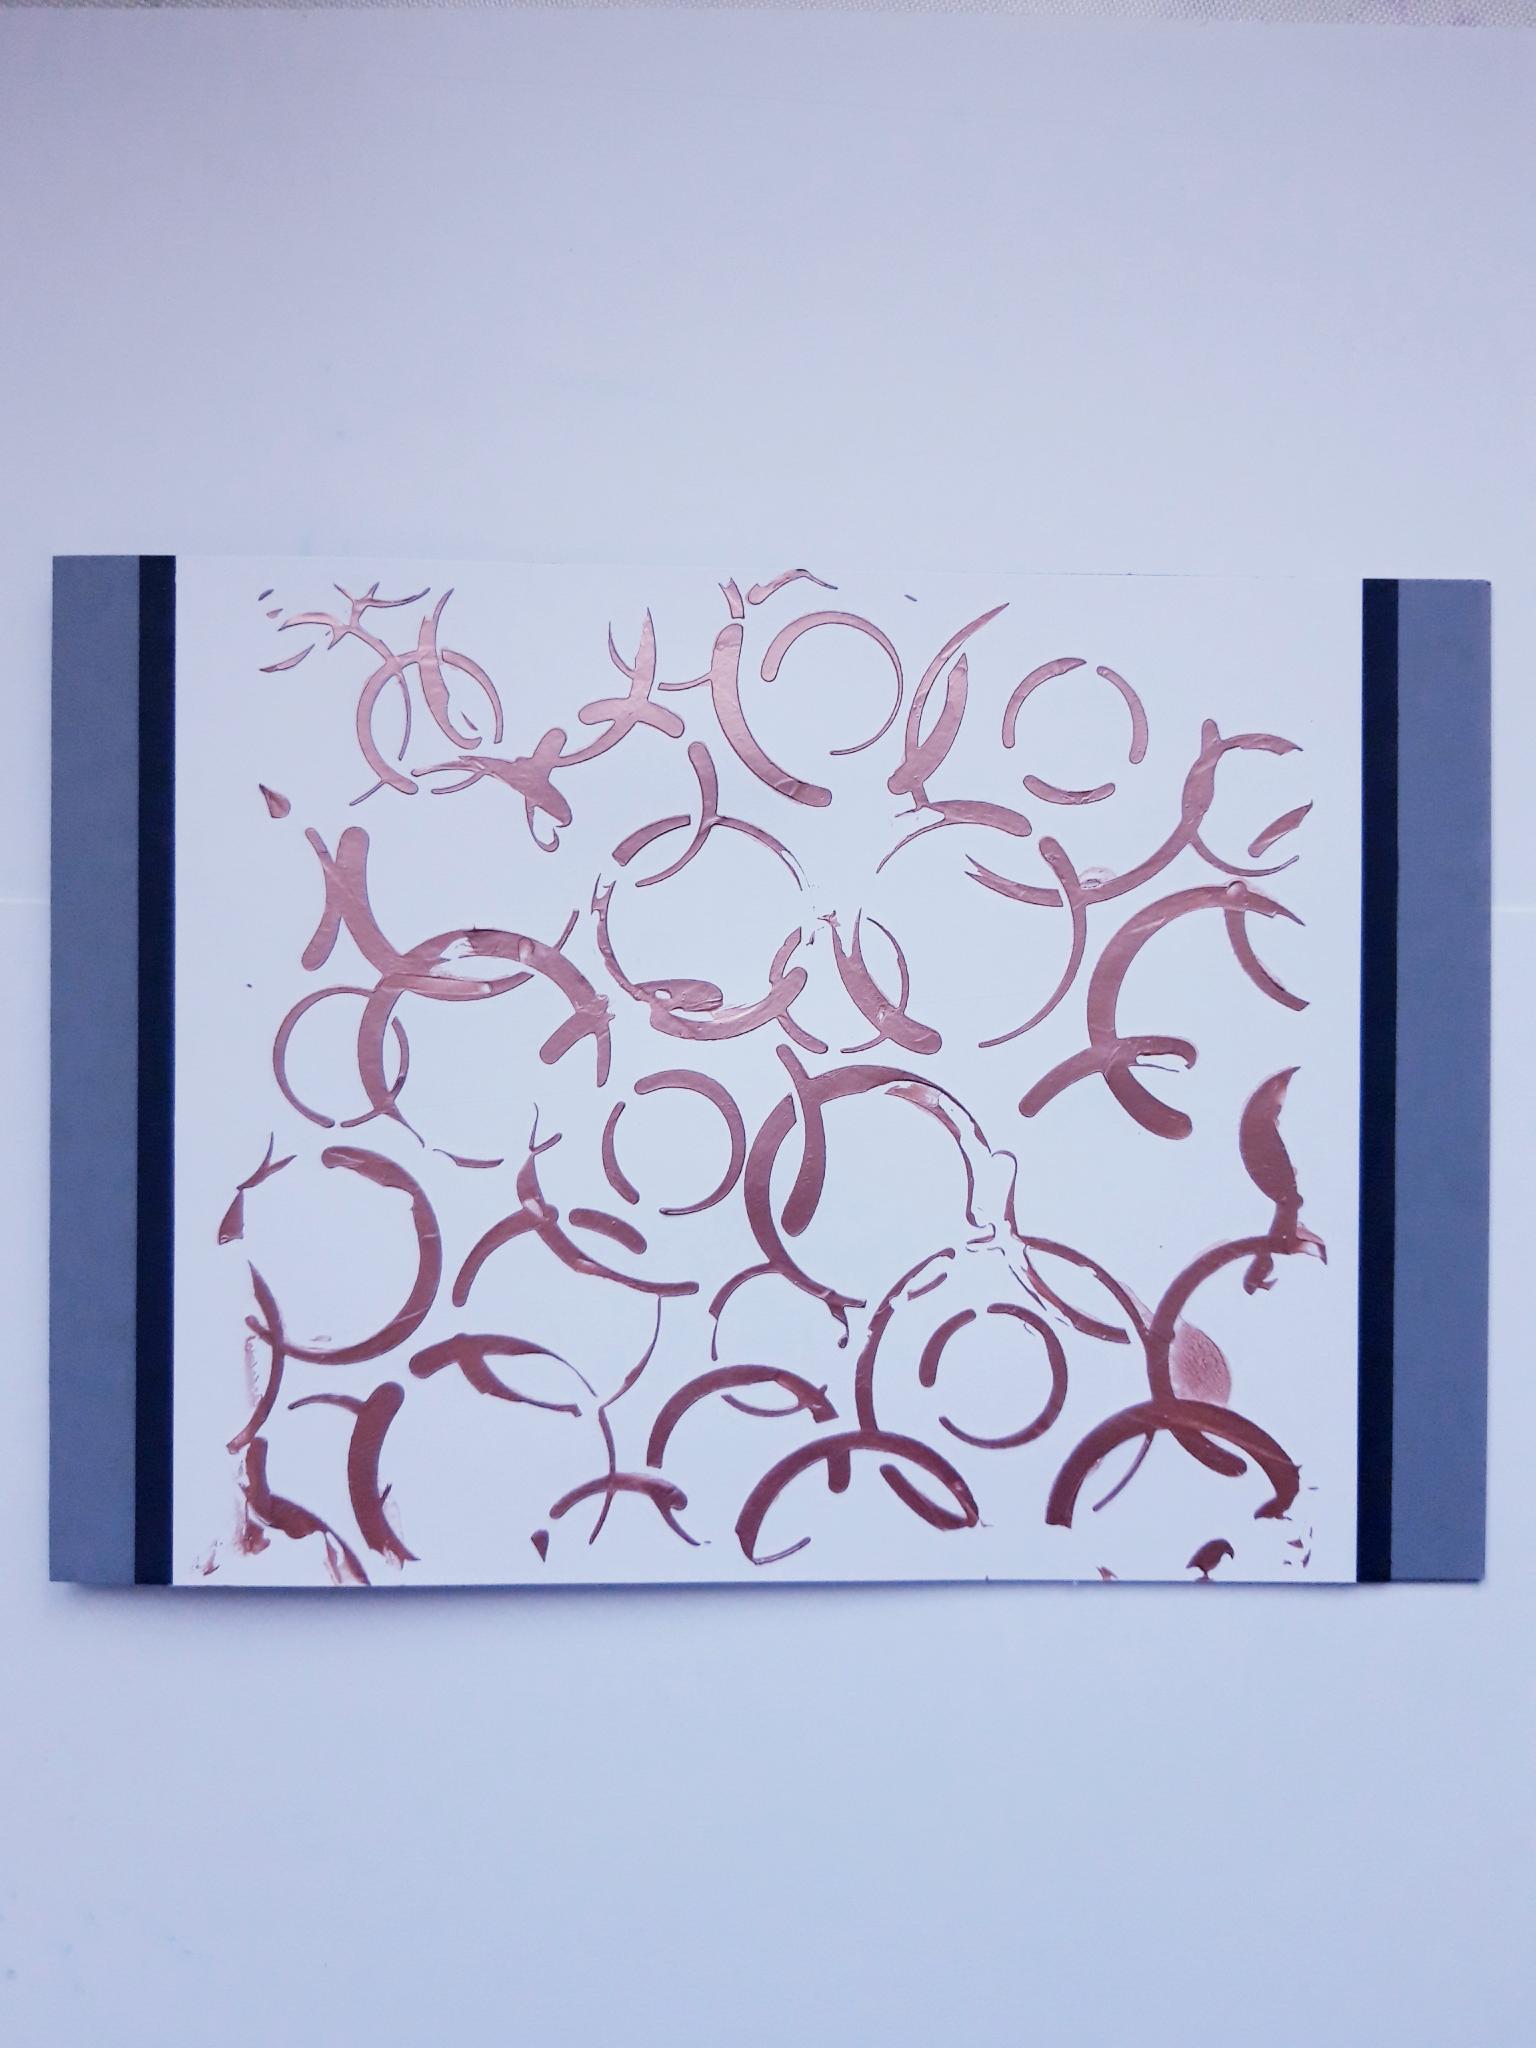
Adhere this in the same way, on to the front of your landscape, grey card blank, as shown here. |

|
Use a black pen to draw a stitched line down the left, and right side edges, of the white card. Set your card to one side. |
|
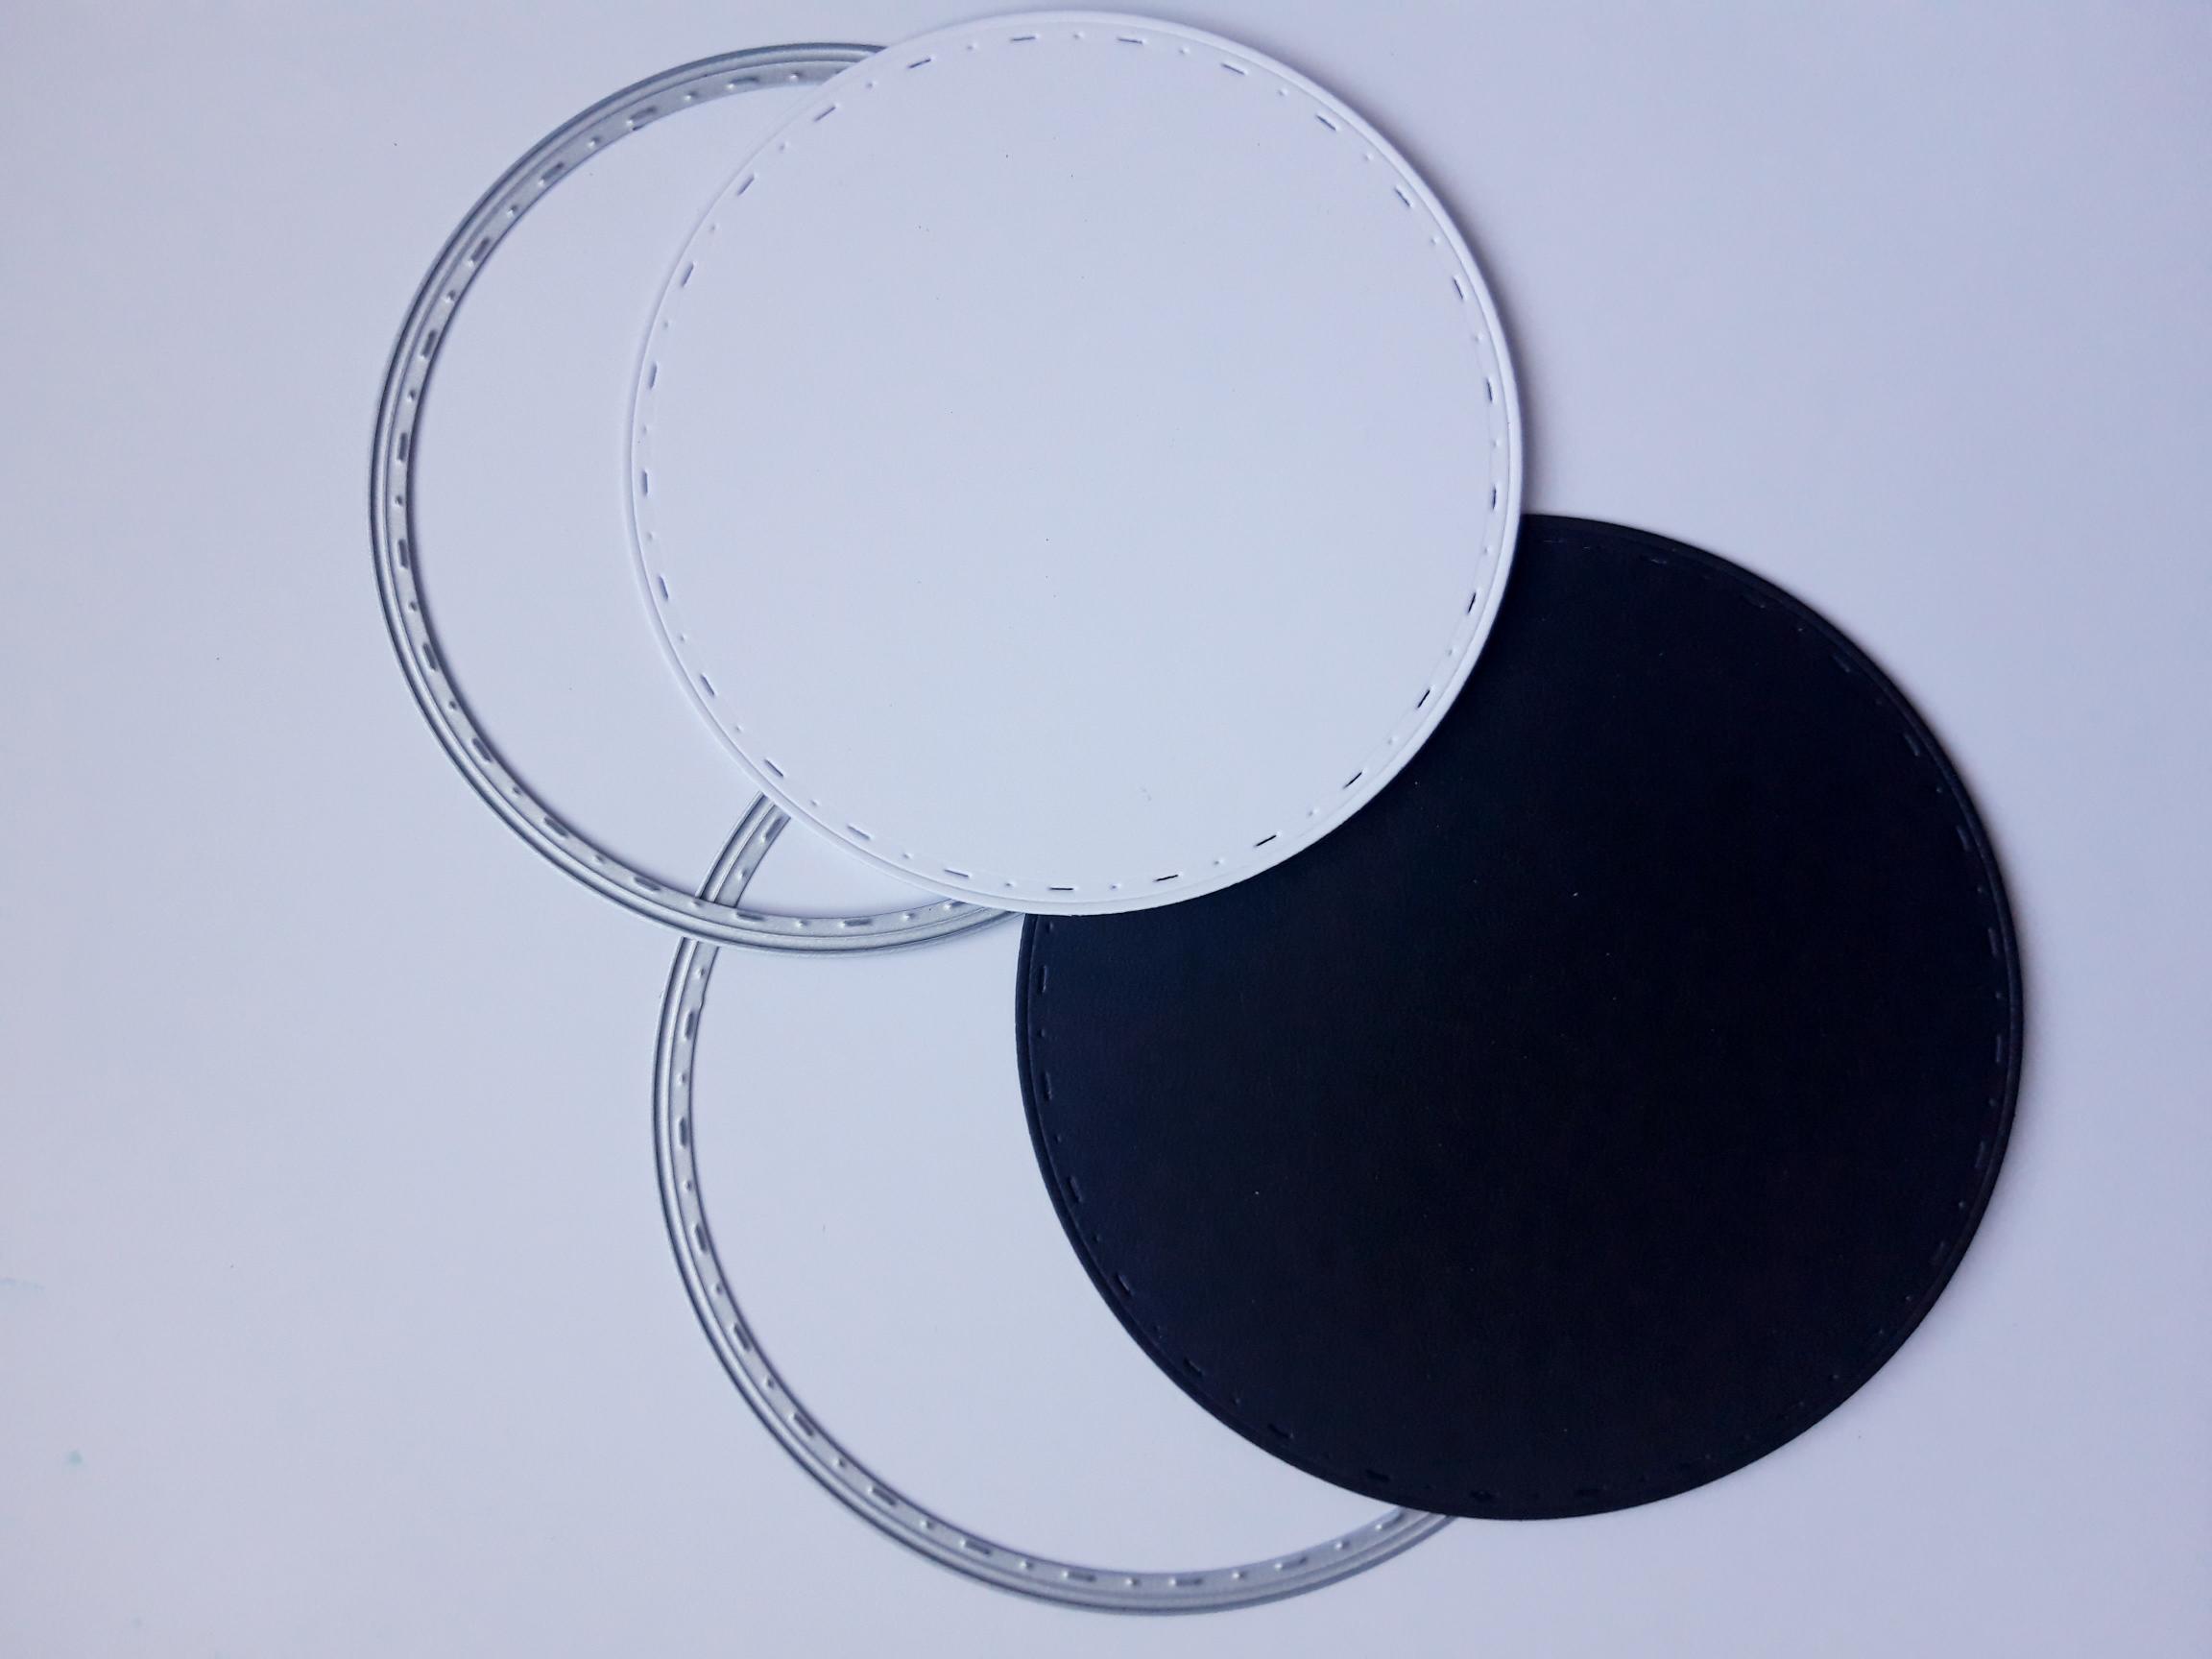
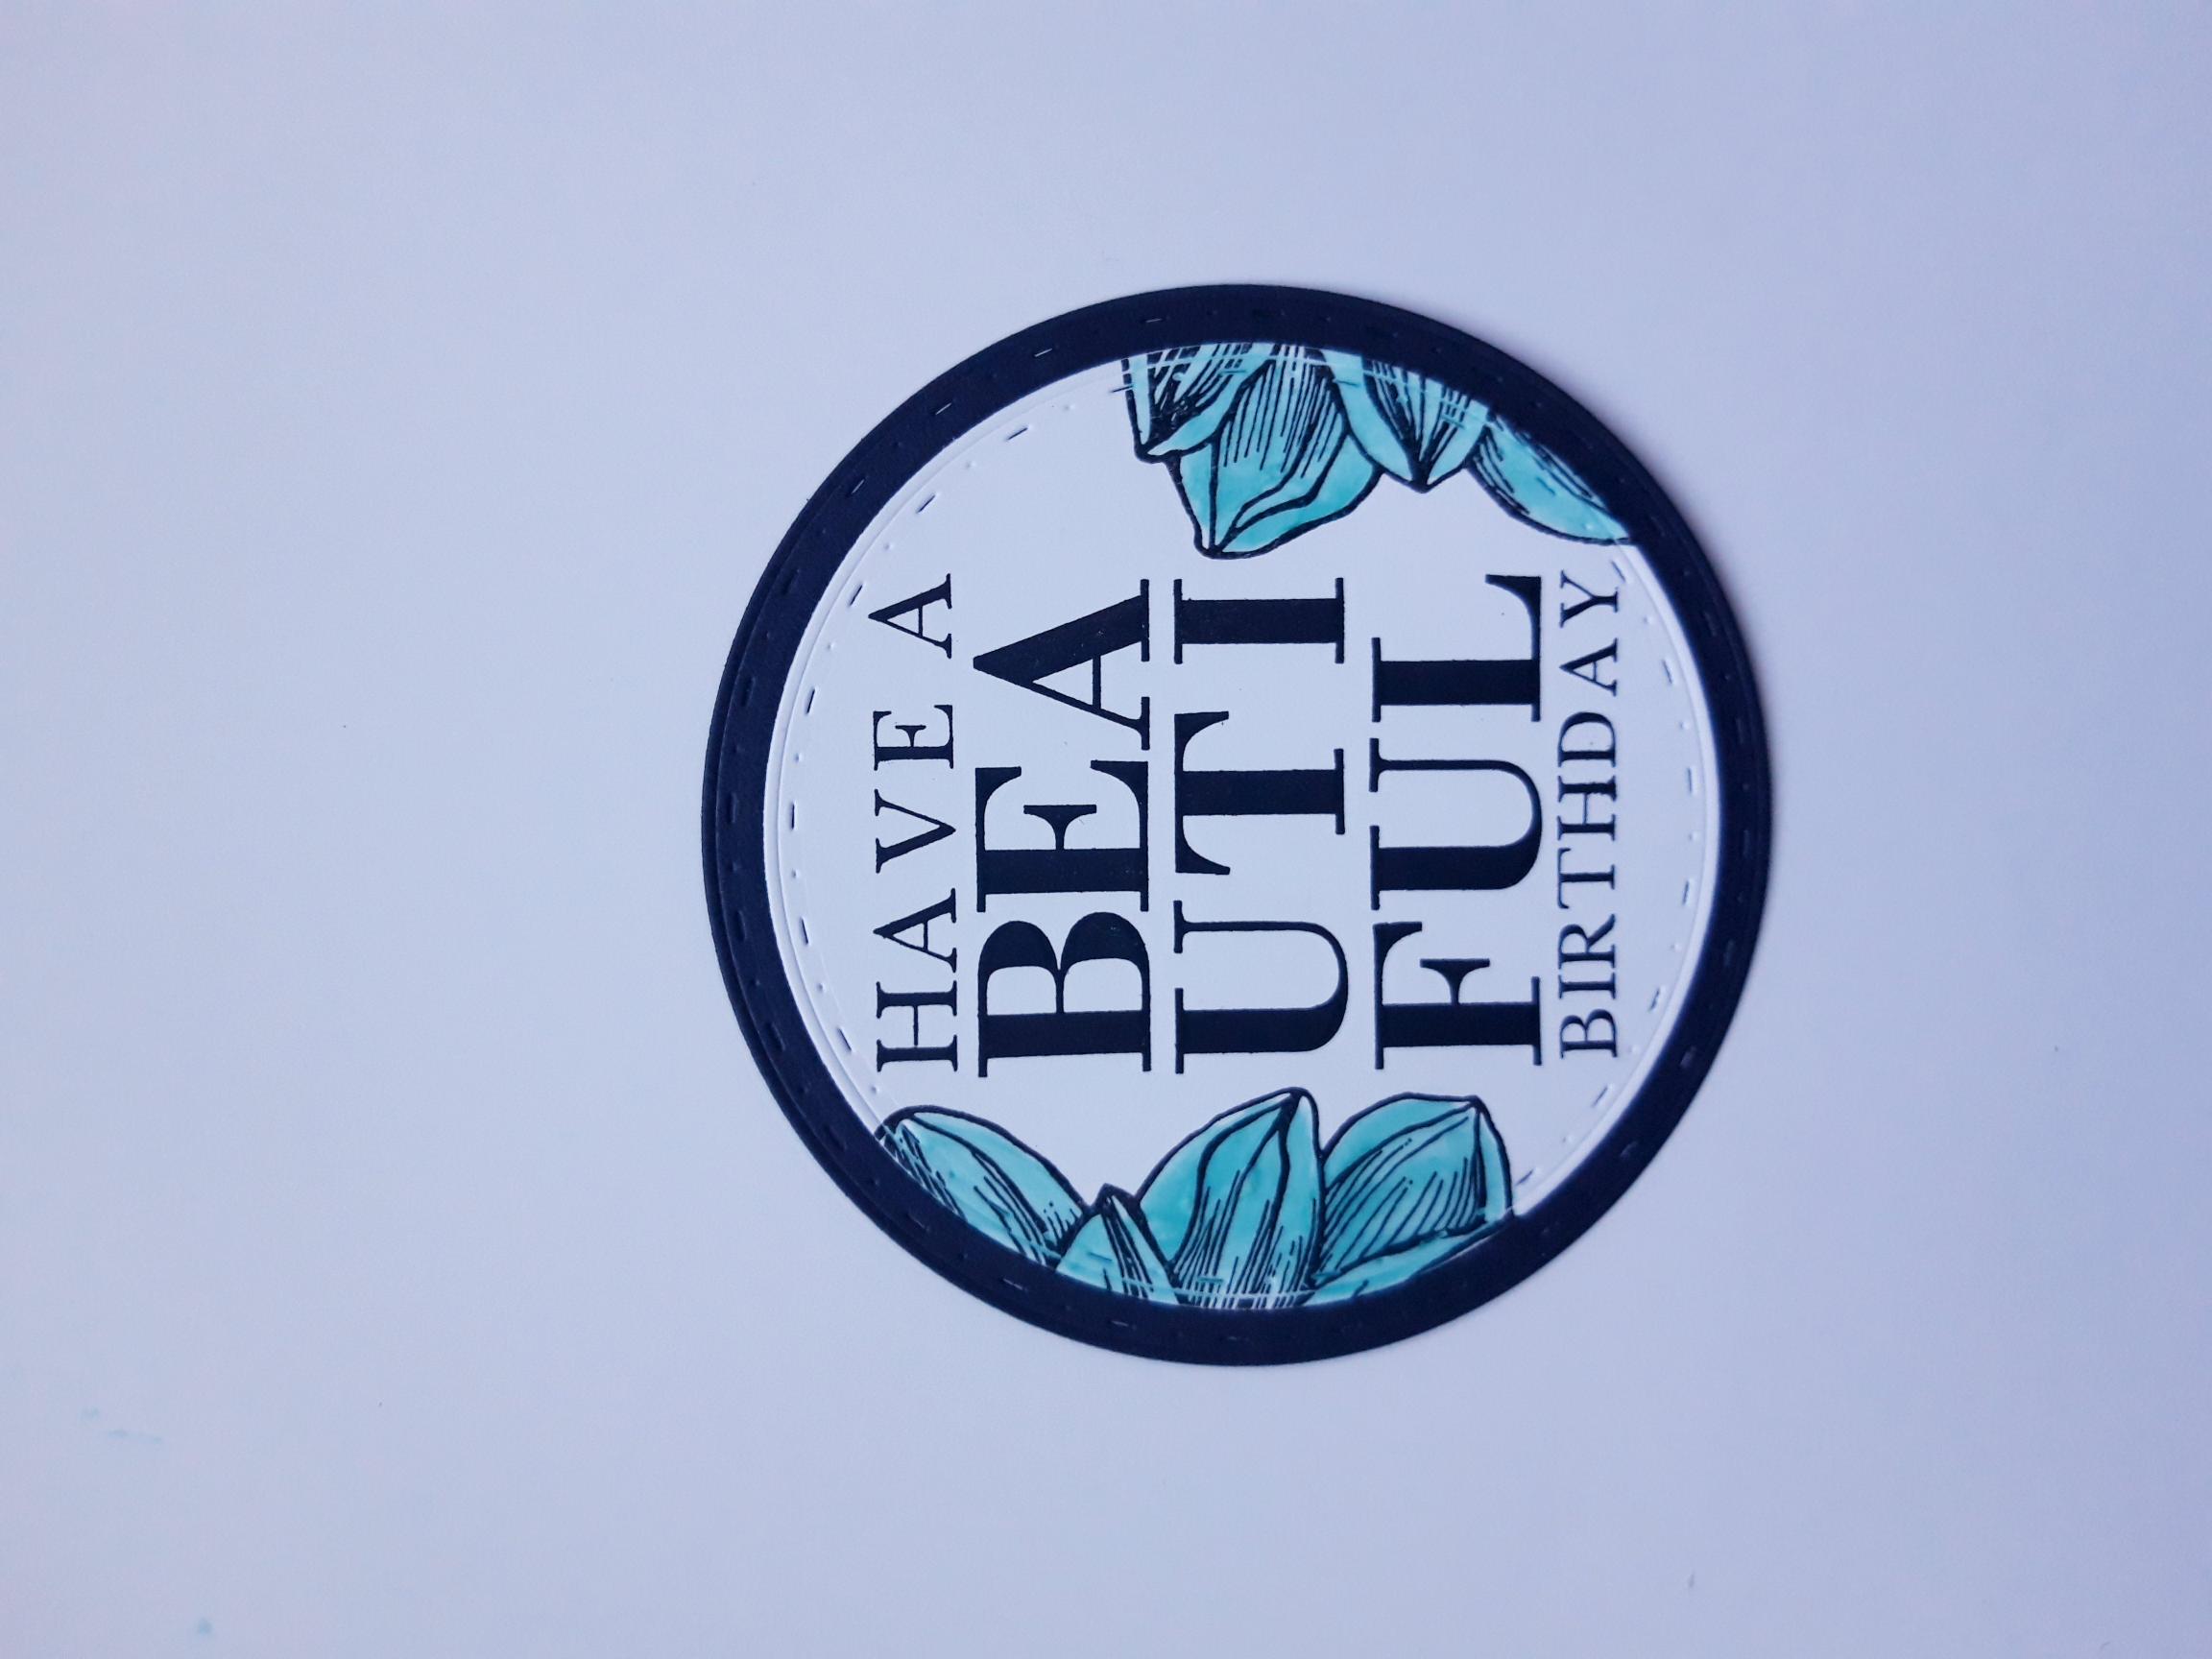
Take the die from the Circles Deboss Nesting Dies Collection, that measures approx 4 1/4" in diameter, and place on to your black card (5 x 5"). Place the die that measures approx 3 3/4" in diameter, on to the white card (4 1/2 x 4 1/2"), and run both through your die cutting machine. |
|
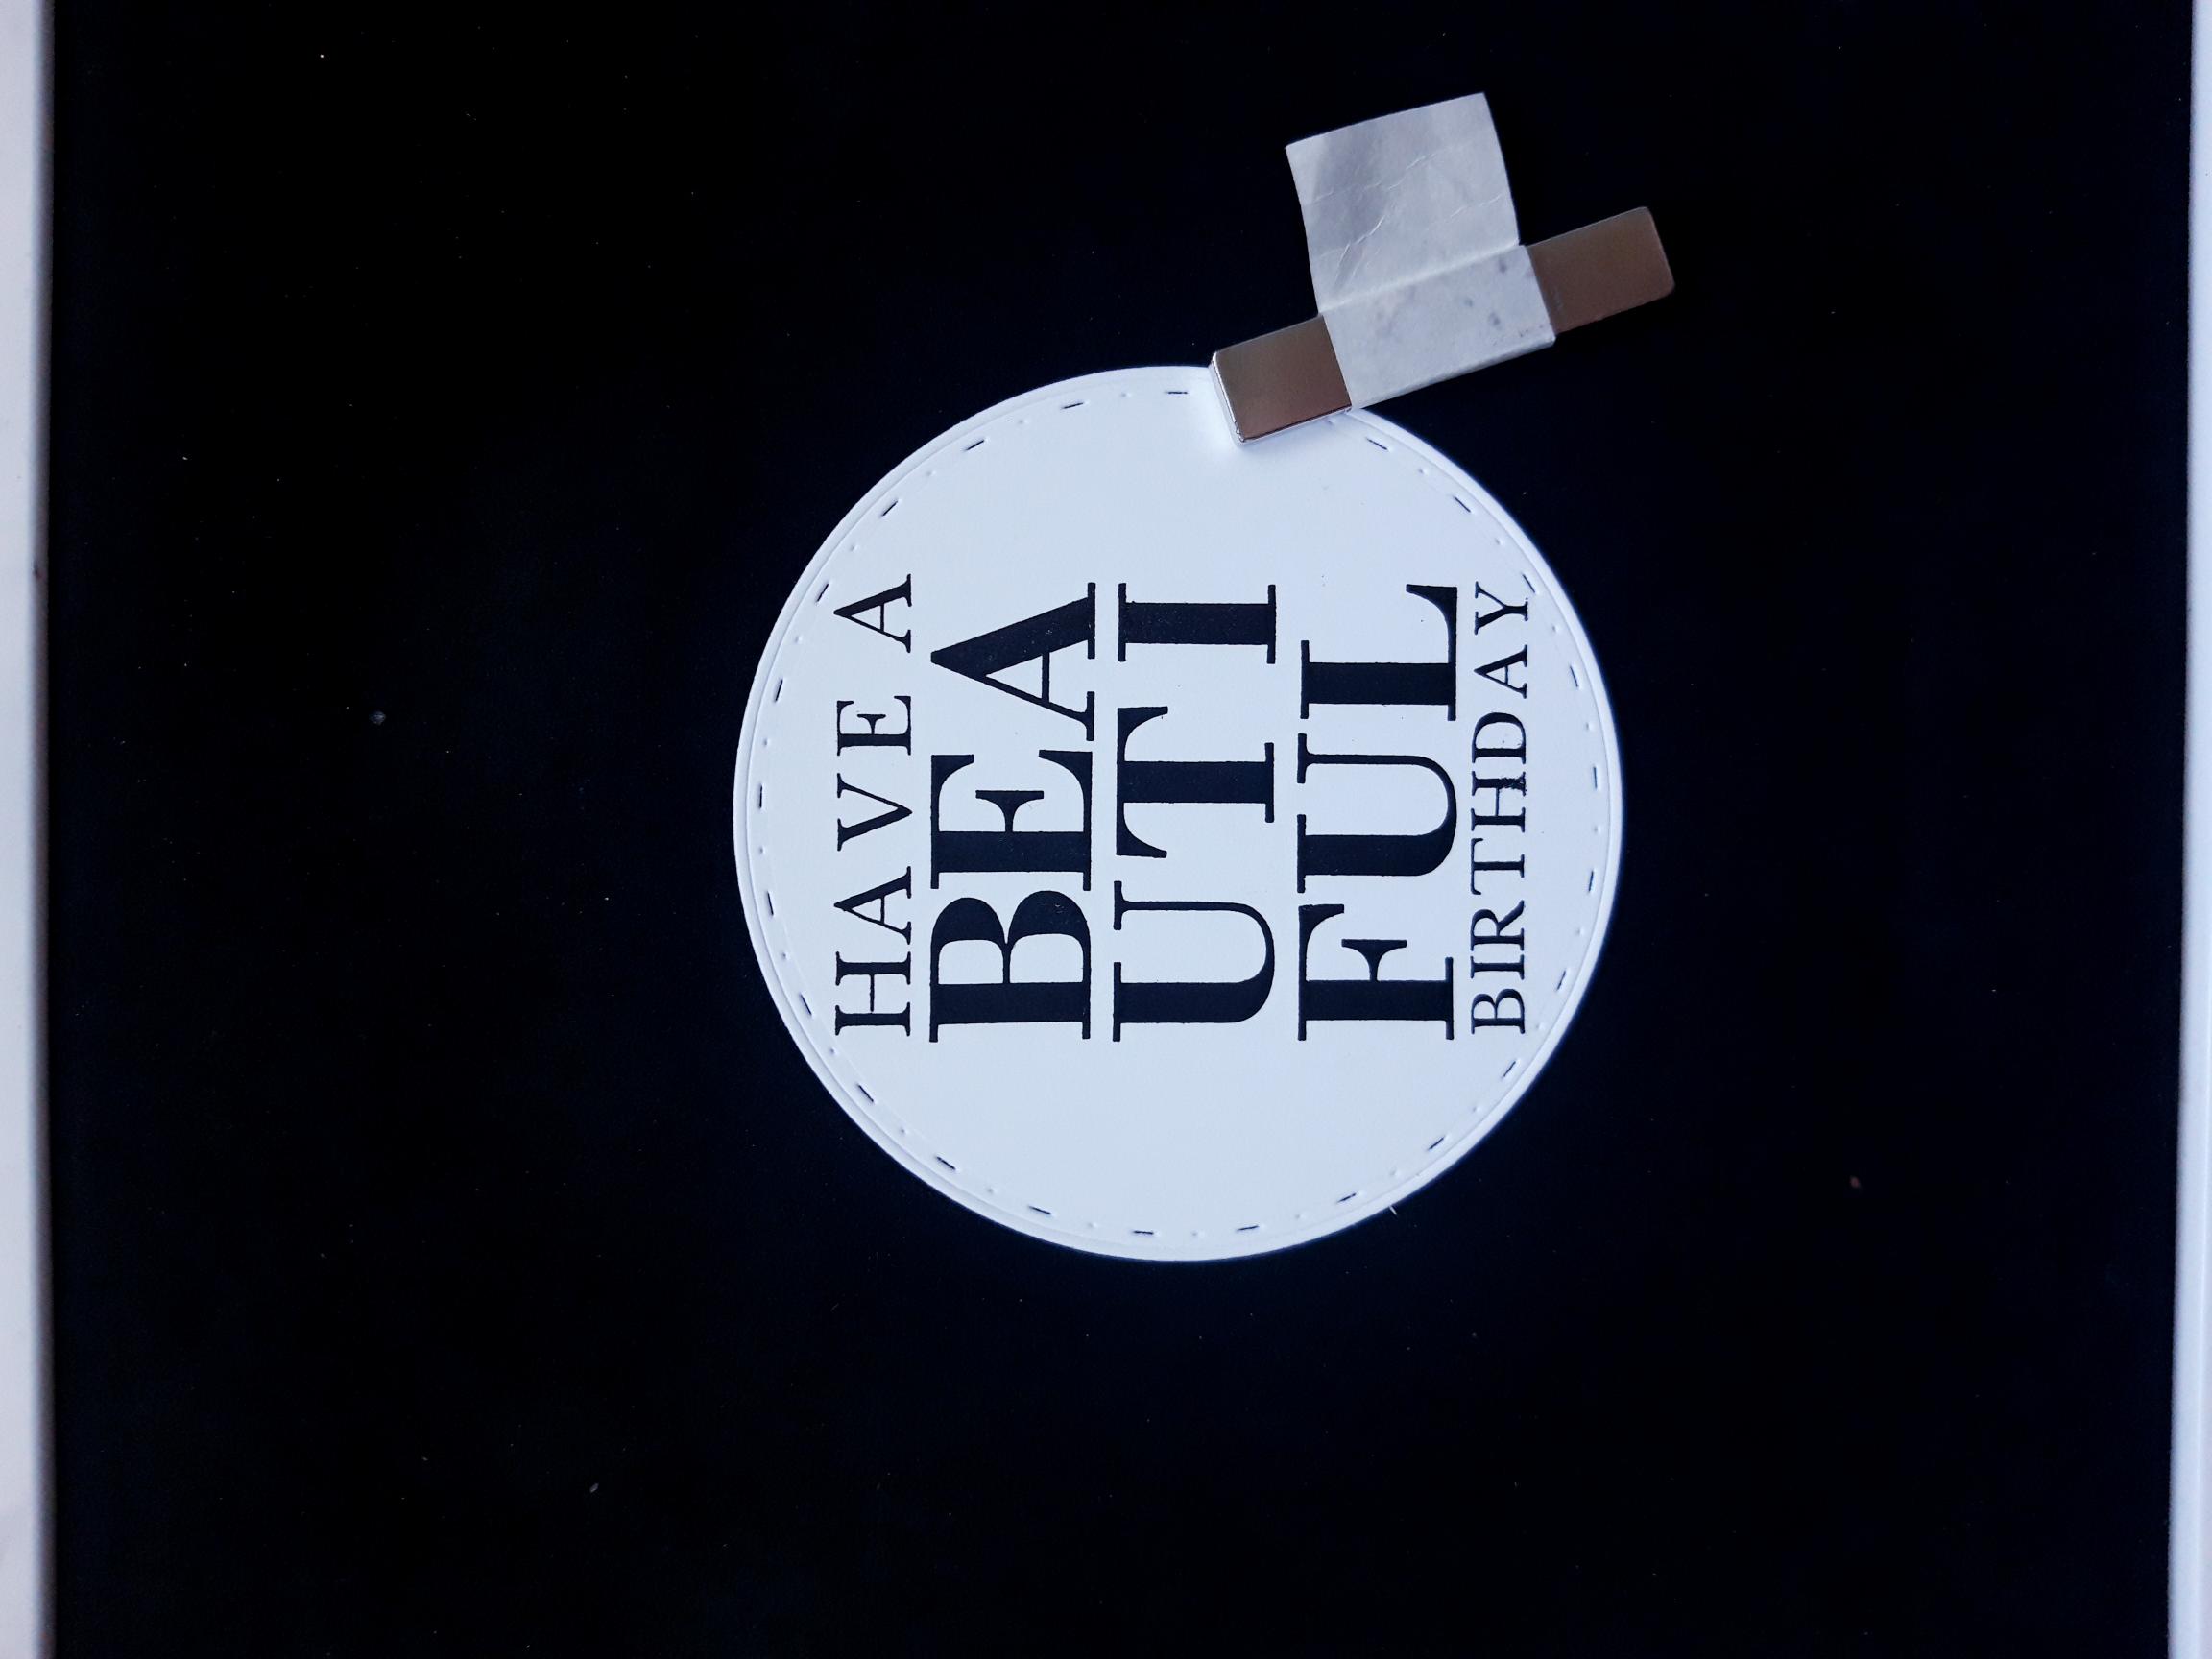
Ink up the sentiment from the Beautiful Birthday Stamp Collection, with the Onyx Black Versafine, and stamp on to the white die cut circle. |
|
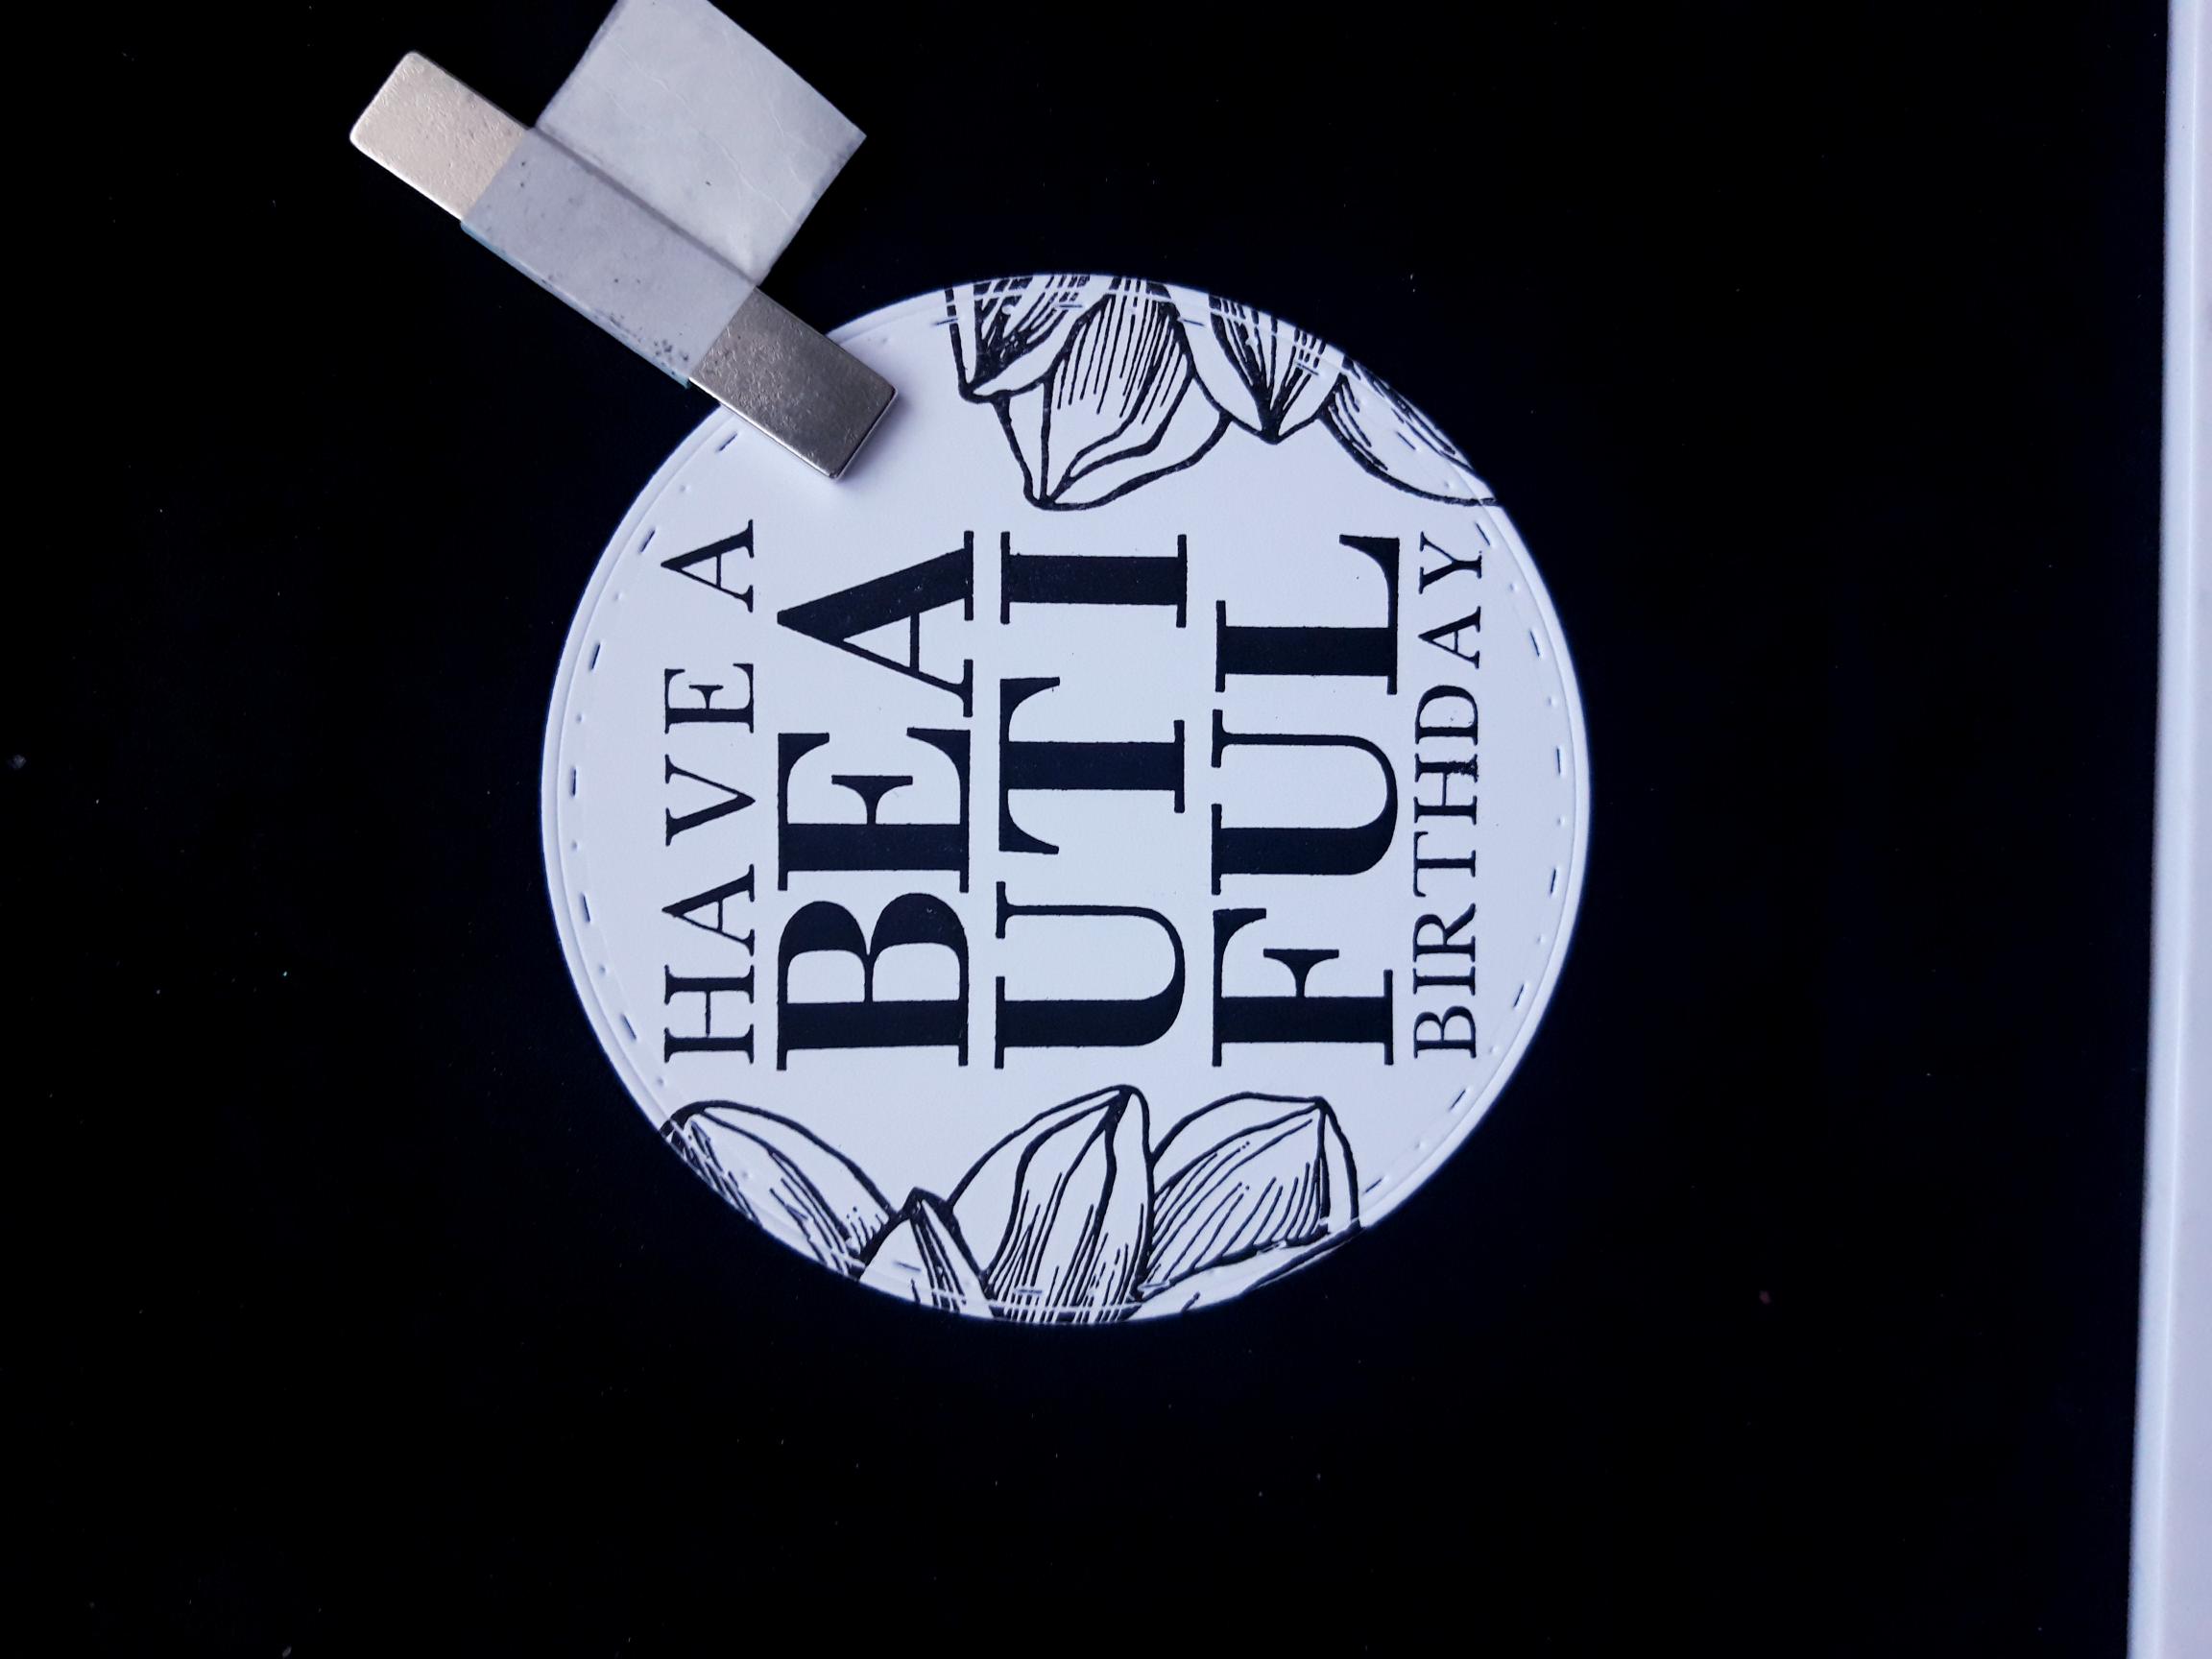
Ink up the floral stamp, from the same set, in the Versafine, and stamp just coming on to the left hand edge of the circle topper. Repeat, stamping it on to the right hand edge of the topper. |
|
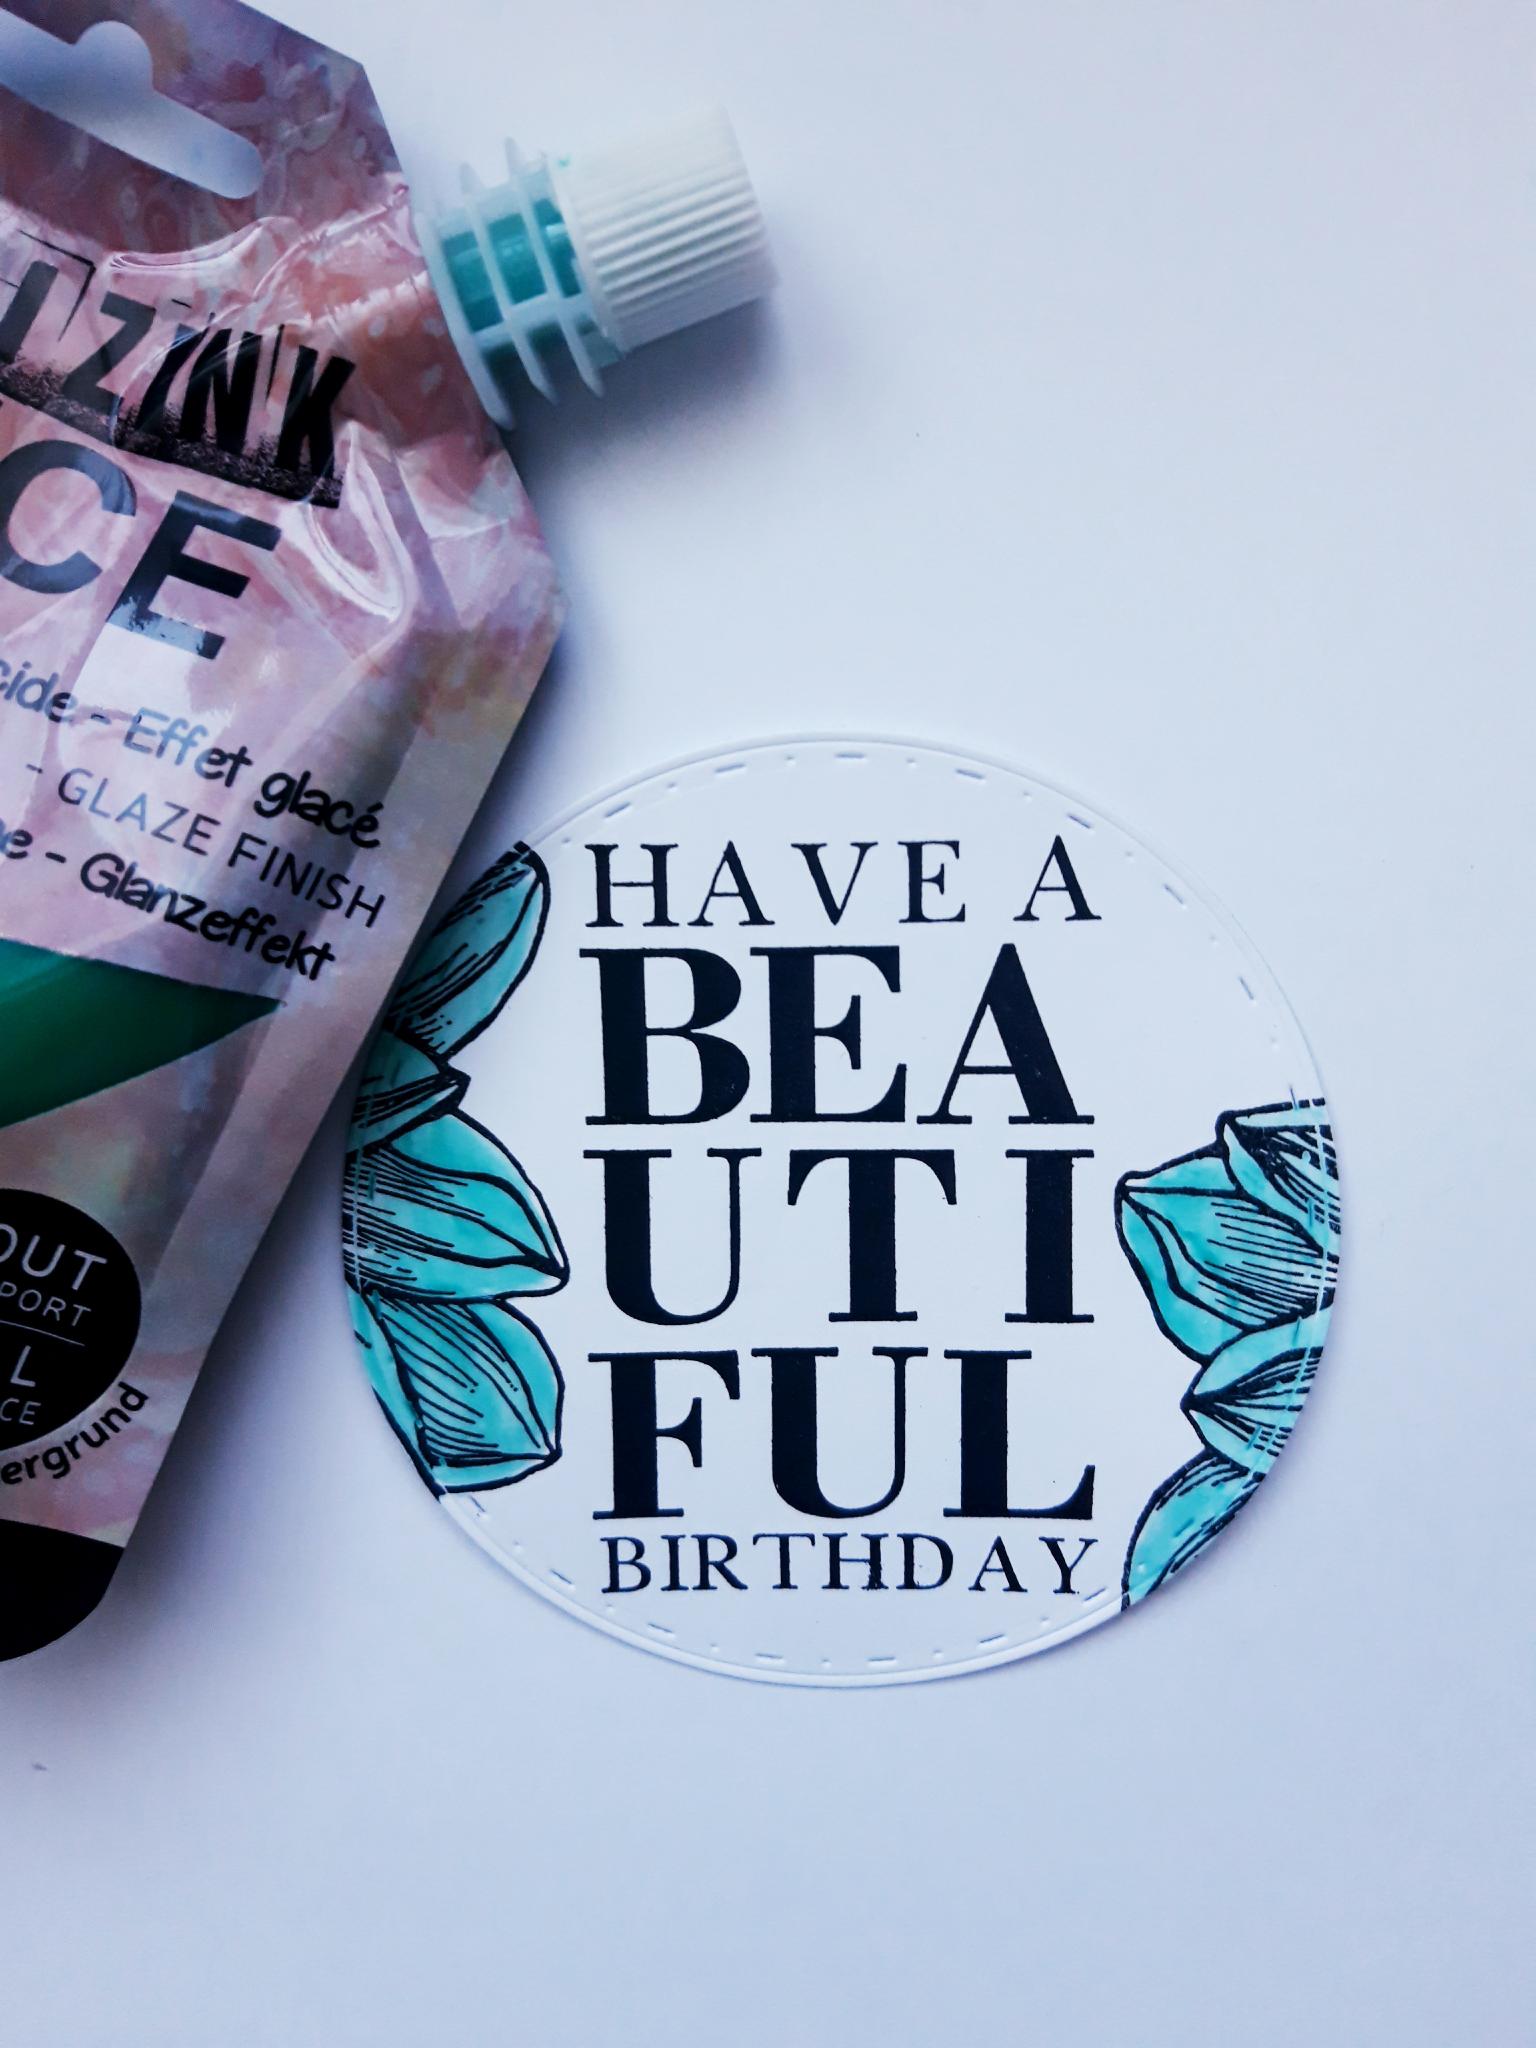
Pop a little of the Izink Glacier Green Ice on to your craft or glass mat. Mix with a little water, and use your paint brush to paint your 2 stamped, floral images. |
|
Once your artwork is dry, adhere on to the die cut black circle. |
|
Adhere your topper centrally, on to the front of your card. |
|
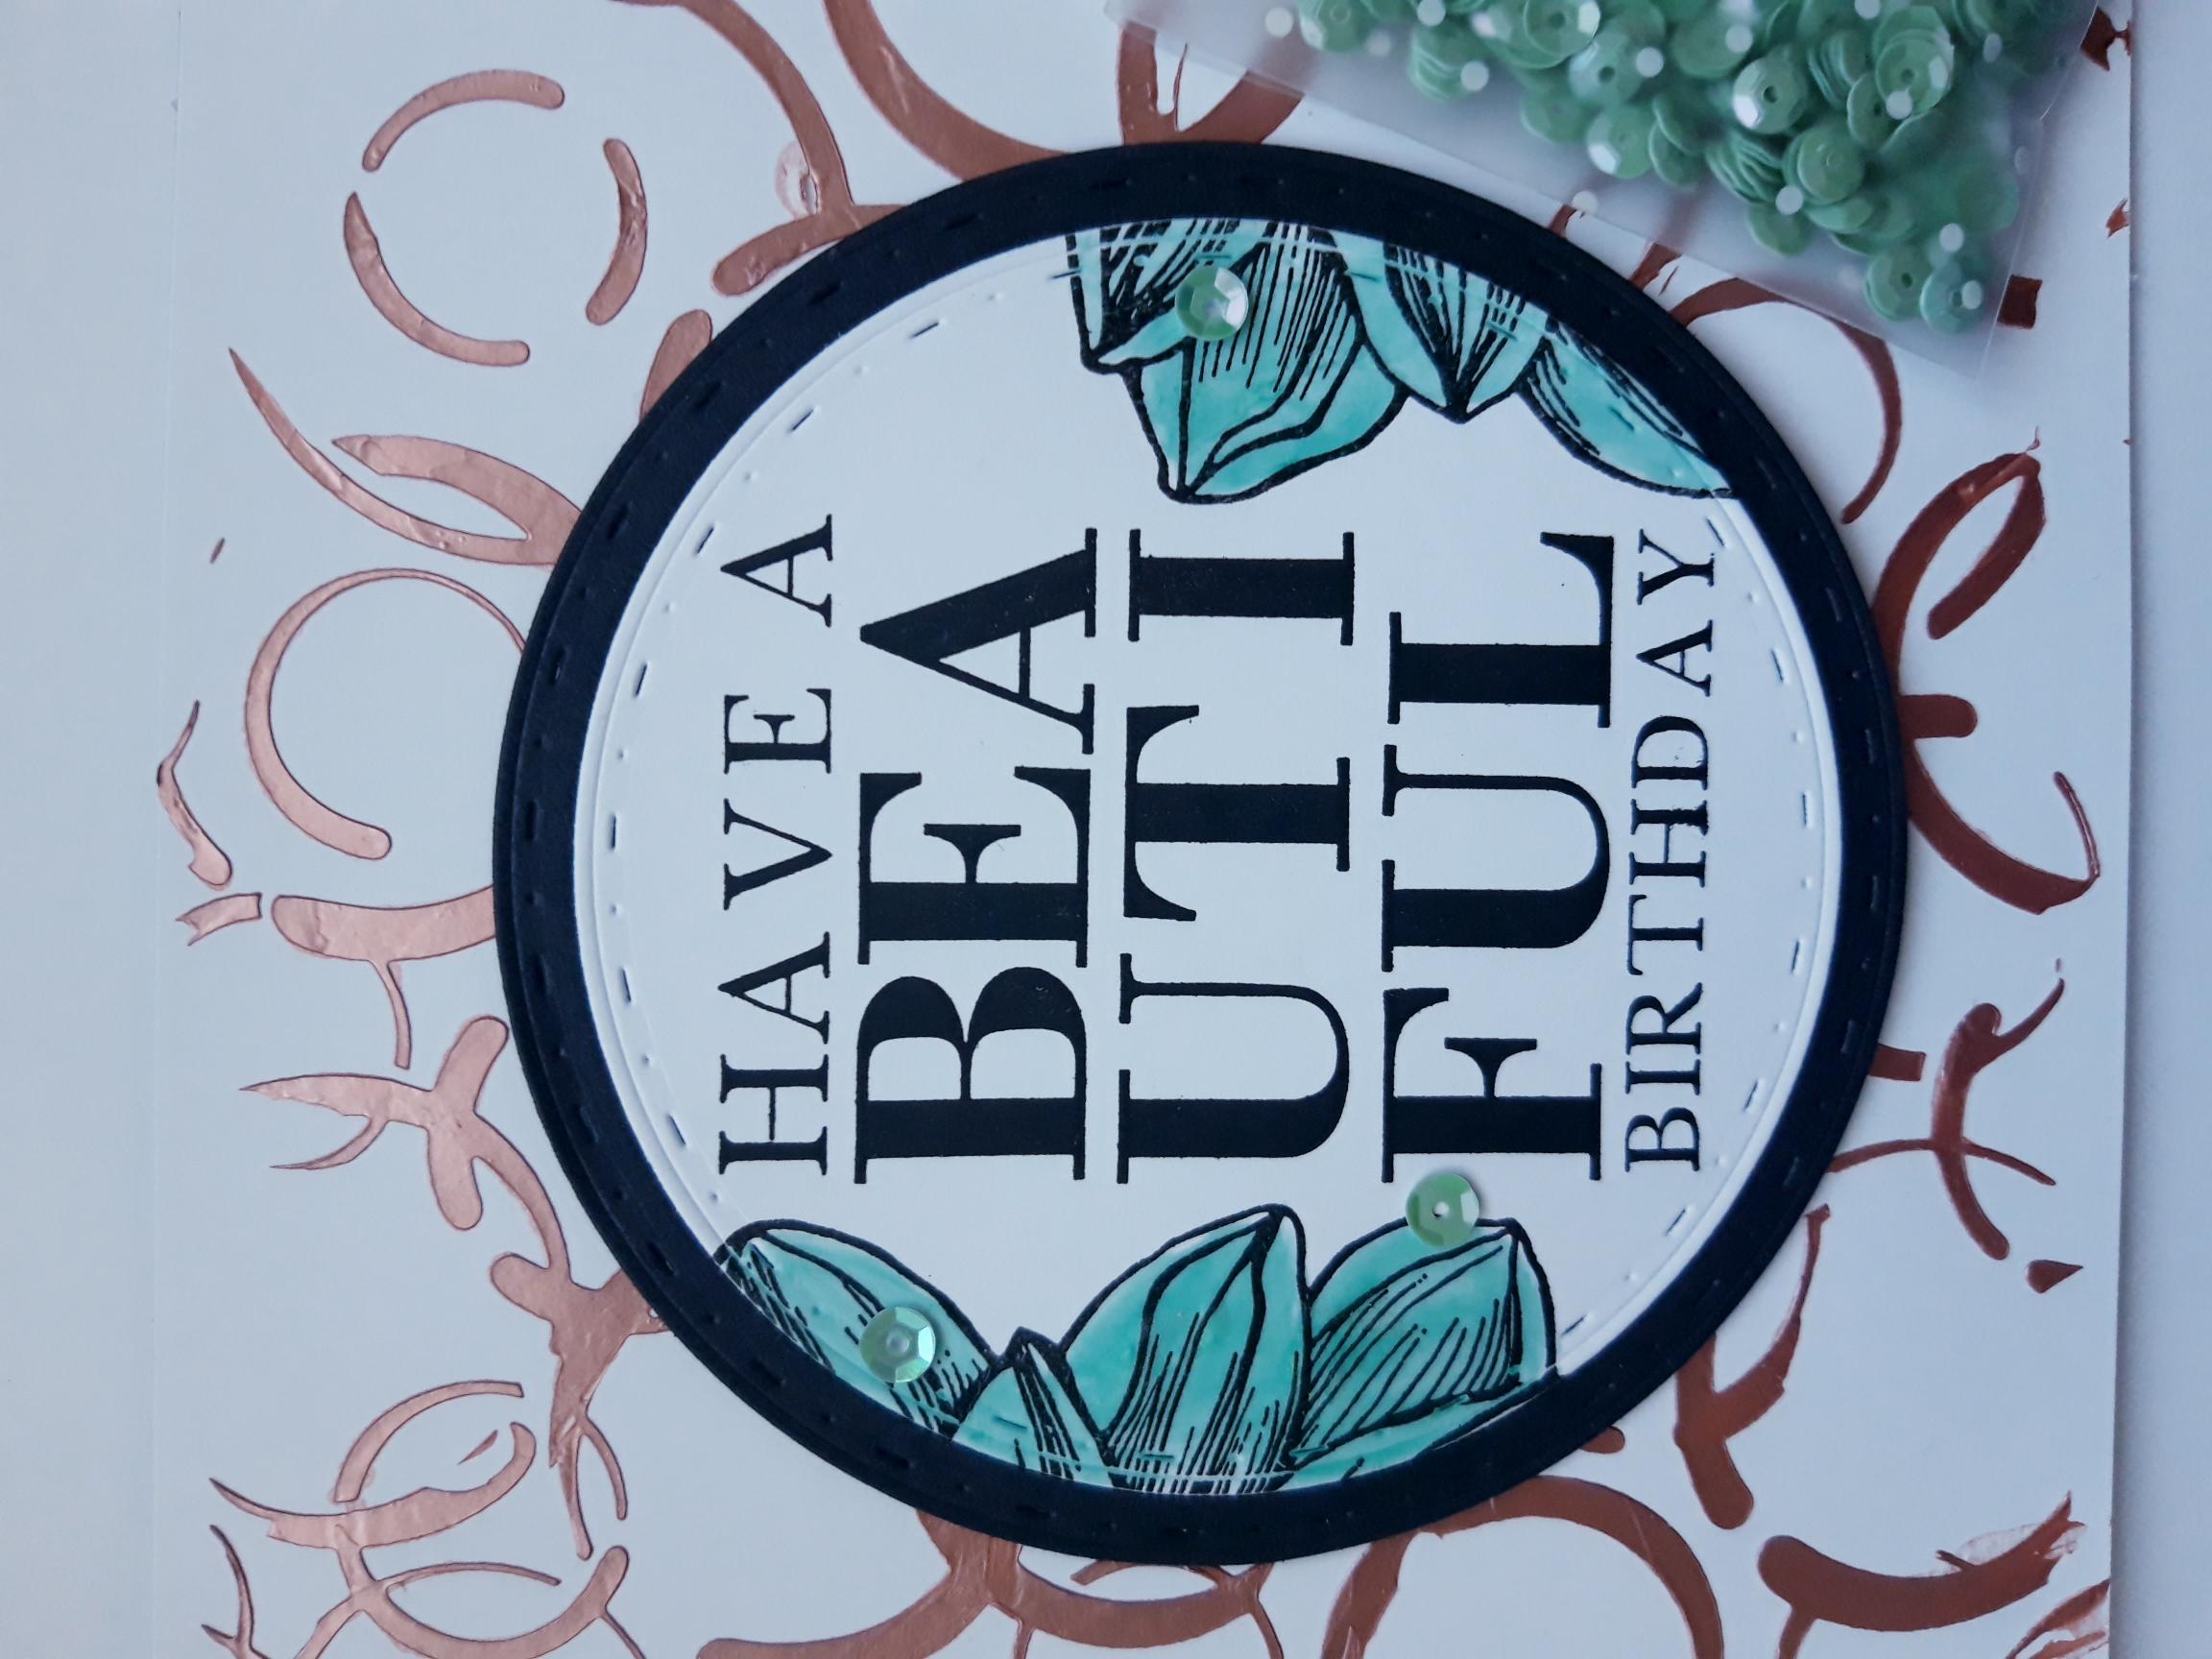
To finish, add a few sequins around your stamped, floral images. |