Cochez ce que vous avez - cet appareil s’en souvient.
Étape par étape
touchez une image pour l’agrandir · touchez TERMINÉ au fur et à mesure - cet appareil s’en souvient
Étape 1 sur 8
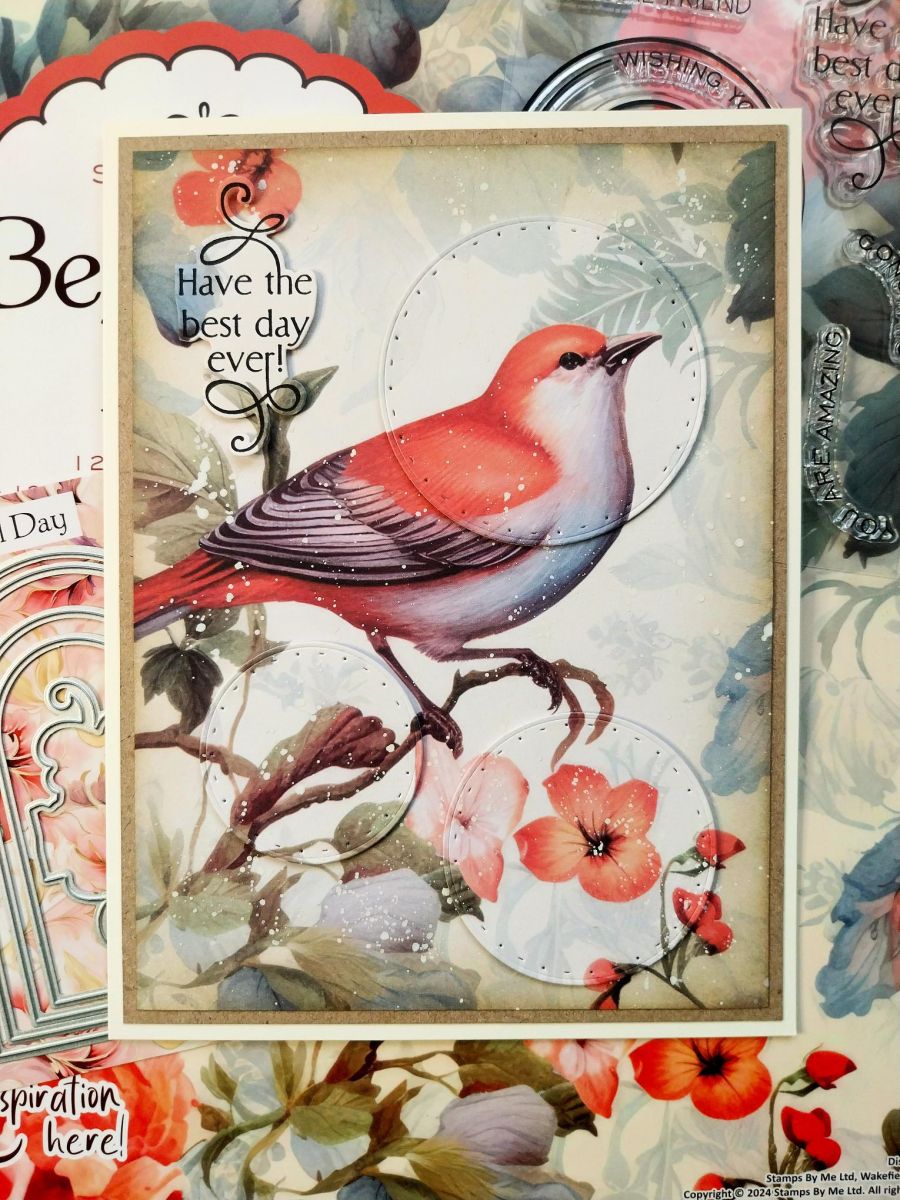
You will need a cream 6 x 8" card blank, kraft card trimmed to 5 3/4 x 7 3/4" and this decorative sheet trimmed to 5 1/2 x 7 1/2" with the bird, branck and flowers as your focal areas (you will need a second sheet of the SAME design for the next step).
Étape 2 sur 8
From the second sheet you will need to die-cut 3 circles. These must incorporate focal areas of the design that are also on the first sheet you trimmed down. I chose the birds head, part of the branch and flower heads. KEEP the leftover paper as you will need this later!
Étape 3 sur 8
Ink around the edges of your printed paper with Frayed Burlap.
Étape 4 sur 8
Line up the designs and adhere your three die-cut circles on to the inked paper. This is known as the "spotlight technique" or an "eclipse" card.
Étape 5 sur 8
Splatter the White Lace Confetti paint over your artwork and allow to dry (or dry with a heat tool if you are impatient like me!).
Étape 6 sur 8
Using the leftover paper that you popped aside earlier, pick an area of the design that is on your original paper, stamp the sentiment with the Midnight ink and die-cut. Check out the next step first, if you are unsure of what result you are trying to achieve.
Étape 7 sur 8
Line it up with your artwork and adhere in place, thus creating a "spotlight" sentiment.
Étape 8 sur 8
Mat your finished artwork onto the kraft card and then onto your cream card blank.
Bravo, c’est fait !
Partagez votre création avec la communauté Stamps By Me - et gardez ce tutoriel pour la prochaine fois.
Bonjour ! Je suis l'assistante créative IA de Toni : je connais les projets des émissions de Toni, nos tutoriels et tout ce qui se trouve dans la boutique. Posez-moi toutes vos questions, par exemple « Quelles matrices de découpe vont avec ce set de tampons ? » ou « De quoi ai-je besoin pour débuter le mélange d'encres ? »
Un assistant IA (et non Toni en personne), qui répond à partir des émissions de Toni et de notre boutique – merci de vérifier la fiche produit avant d'acheter.