Cochez ce que vous avez - cet appareil s’en souvient.
Étape par étape
touchez une image pour l’agrandir · touchez TERMINÉ au fur et à mesure - cet appareil s’en souvient
Étape 1 sur 12
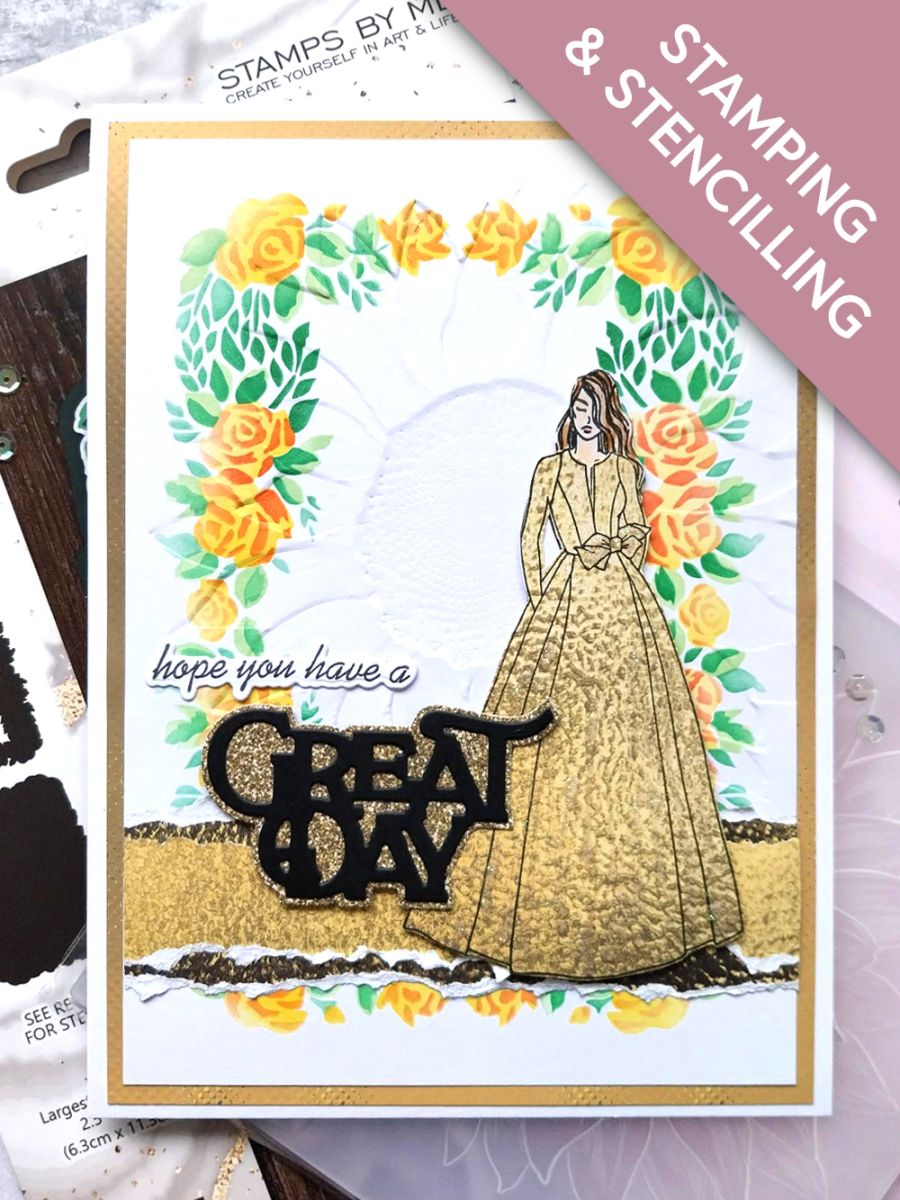
Place stencil 1, from your Sadie Collection on to the white card cut to 7 x 5".
Use your blending tool to apply Sherbet through the stencil. Line up stencil 2 and blend through with Bittersweet. Having lined up stencil 3, blend with Limeade and finally, apply Hedgerow through stencil 4.
Étape 2 sur 12
Place your stencilled card inside the Sunflower embossing folder, so the Sunflower is positioned just off the right edge of the card.
Position the long edge of the folder, where it sits directly on to the card, just over the edge of your embossing plates and run it through your machine. By hanging this over the edge, you wont get an imprinted line, from the folder, down your artwork.
Pop this to one side.
Étape 3 sur 12
Stamp our lovely Sadie in Midnight, on to the white card cut to 7 x 5" and fussy cut.
Choose one of the metallic textured sheets, from the Sunshine In My Pocket Textured paper pack and stamp Sadie on to one corner. Fussy cut her gown only. With this design you can have the gown with, or without sleeves. I chose to create a gown with long sleeves but the choice is yours.
Set the remaining paper to one side.
Étape 4 sur 12
Use the HIMI oil pencils to colour in her hair and face, then adhere the paper gown in place. Set Sadie to one side.
Étape 5 sur 12
Tear a panel from the paper you set aside earlier, trimming it to 5" (the same width as your stencilled background). Tear a wider panel, from one of the coordinating papers, then adhere the first panel on top, as seen here. Scrunch the edges of the paper, to add effect.
Étape 6 sur 12
Adhere across the bottom third of your background.
Étape 7 sur 12
Adhere Sadie, with foam pads, to the right of your artwork.
Étape 8 sur 12
Choose another coordinating paper, cut to 7 1/4 x 5 1/4" and adhere your artwork on top.
Étape 9 sur 12
Adhere this to the front of your white card blank and set to one side.
Étape 10 sur 12
Place the detailed GREAT DAY die, from the Saying Hello Collection, on to a piece of black card and the solid mat die, on to a scrap from one of the coordinating papers you used in your card and run both through your die cutting machine. Adhere the black die cut sentiment on top of the paper mat.
Stamp the "hope you have a " in Midnight, on to a piece of white scrap card and use the coordinating die to cut it out.
Étape 11 sur 12
Adhere to the left of Sadie, using wet glue and/or foam pads.
Étape 12 sur 12
To finish your card, add a touch of Stickles sparkle to the centres of the flowers and down the folds of Sadie's gown.
Bravo, c’est fait !
Partagez votre création avec la communauté Stamps By Me - et gardez ce tutoriel pour la prochaine fois.
Bonjour ! Je suis l'assistante créative IA de Toni : je connais les projets des émissions de Toni, nos tutoriels et tout ce qui se trouve dans la boutique. Posez-moi toutes vos questions, par exemple « Quelles matrices de découpe vont avec ce set de tampons ? » ou « De quoi ai-je besoin pour débuter le mélange d'encres ? »
Un assistant IA (et non Toni en personne), qui répond à partir des émissions de Toni et de notre boutique – merci de vérifier la fiche produit avant d'acheter.